

Page 1

MultiMix USB Multi-Track Recording Setup
Part I: Connect the MultiMix USB and Configure Windows XP
Part II: Configure your MultiMix USB Mixer
Part III: Configure Cubase LE in Windows XP
Part IV: Compatible Third Party ASIO Drivers for Windows XP
Welcome! Congratulations on your purchase of the MultiMix USB mixer from Alesis.
This product allows you to record whatever you have plugged into your mixer into
your computer. We have created this document as a guide in the configuration and
setup with your PC. Before we begin, please note a few things that may help you
better understand some of the basics with Multi-Track recording on a PC.
The MultiMix USB mixers utilize USB as the connection to the computer. USB is the
physical connection between your mixer and the computer with the recording
software of your choice. In the case of the Alesis MultiMix USB, we ship a fully
functional version of Cubase LE from Steinberg.
Audio latency is a common issue with recording using computer audio interfaces. In
the case of the MultiMix USB mixers, it is the time it takes for the signal to travel
through the mixer, out of the mixer, into the computer, through the computer CPU,
into the computer software and then back again. Latency is often described in
milliseconds, (1000ths of seconds). This delay is a by product of recording into a
computer through windows and not a fault of the audio devices connected to the
computer. We have considered this, and offer a solution for Zero Latency Monitoring
with the MultiMix USB.
Part I: Connect the MultiMix USB and Configure Windows XP
Installing and Configuring the MultiMix in Windows XP:
Setting up the MultiMix USB is very easy—all you have to do is power up the mixer,
then connect the USB cable from the mixer to the PC. Upon power up, your computer
will automatically install the drivers needed for the MultiMix USB to be an audio
choice. No software installation is necessary under Windows XP.
Maximizing Stability and Performance in Windows XP:
For better performance we recommend you set up Windows to route non-Cubase
sounds to another sound output on your computer (most computers have built-in
sound nowadays and you can route non-Cubase sounds to that output). You can do
this by following these instructions:
Page 2
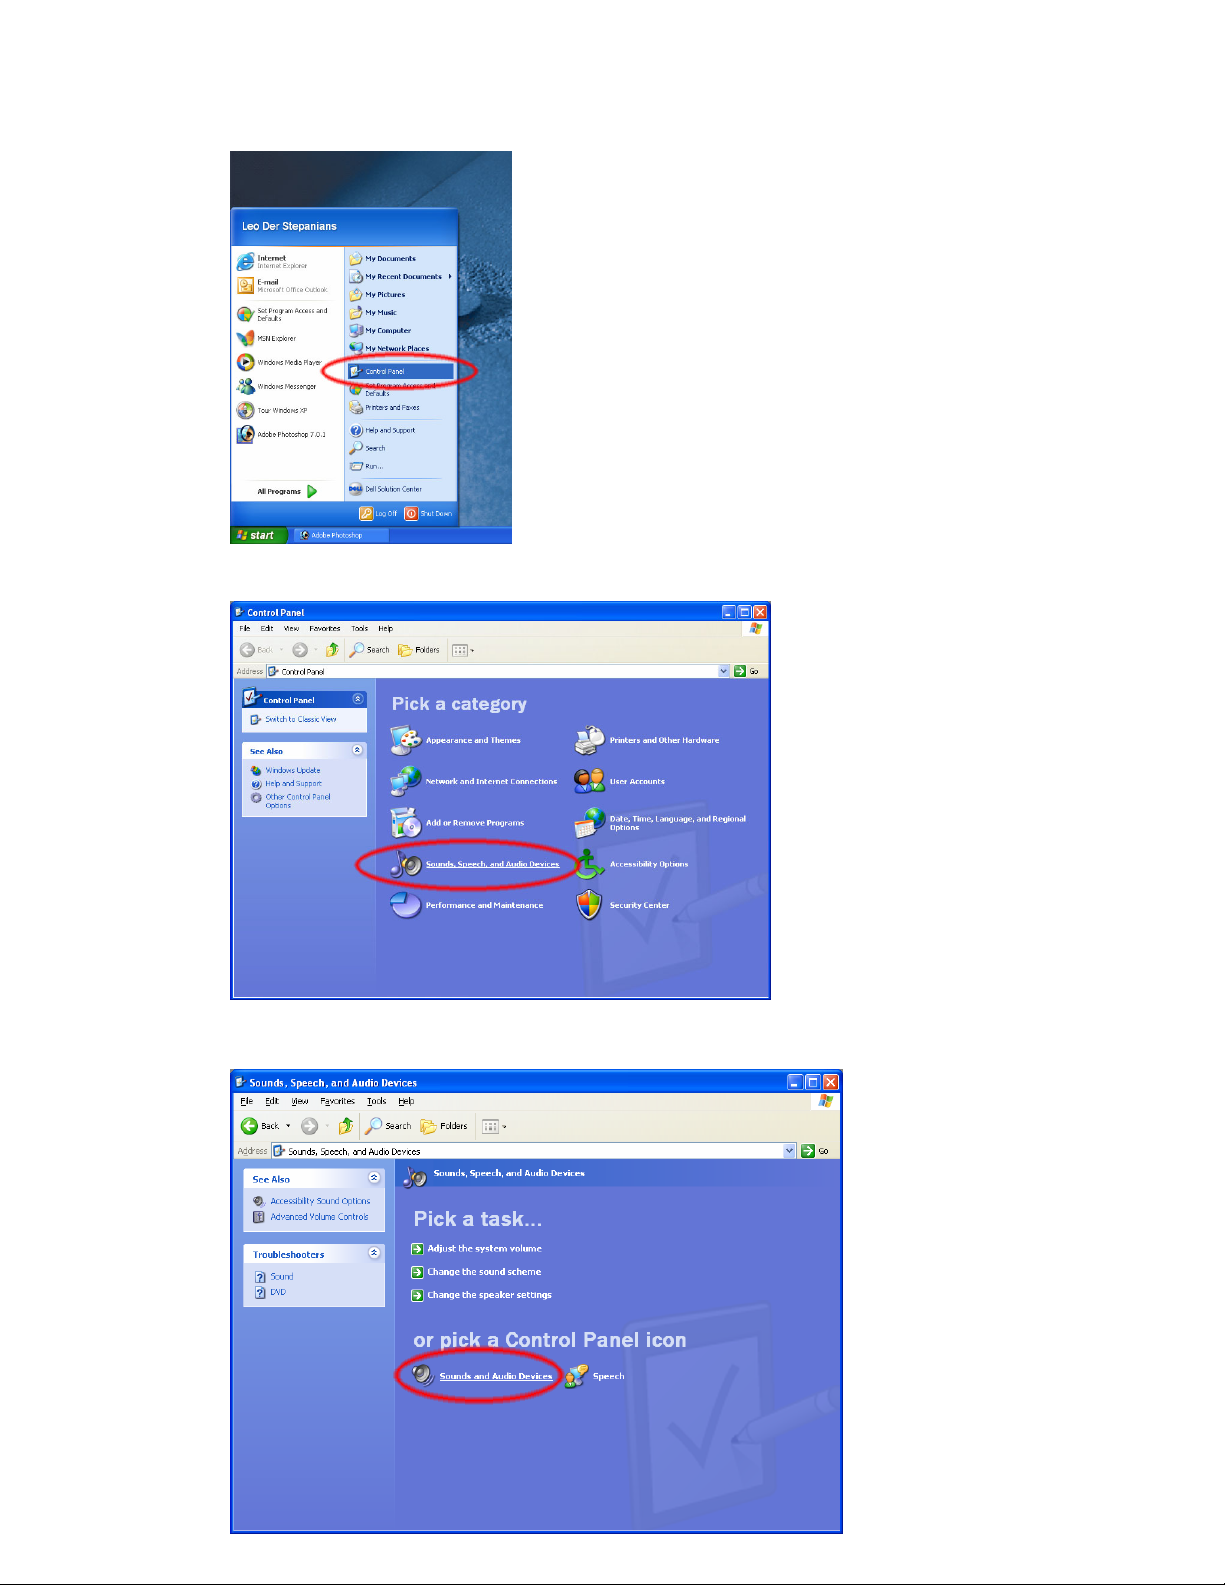
1. Open the Windows Control Panel.
2. Click Sounds, Speech, and Audio Devices.
3. Next, click Sound and Audio Devices.
Page 3

4. Click the Audio tab.
5. Under Sound Playback, select anything OTHER than “USB Audio CODEC.” The
“USB Audio CODEC” is your MultiMix Mixer and you don’t want to have your
regular Windows sounds (i.e., the Windows BING! and other sounds from
messaging, email, and other programs) being routed to the MultiMix. By selecting
anything other than “USB Audio CODEC,” you’re having Windows route all non
pro-audio sounds elsewhere and freeing up your MultiMix for recording purposes
only. Doing this will increase stability and potentially improve sound quality.
Page 4

Part II: Configure your MultiMix Mixer
You can set up your MultiMix USB mixer to monitor yourself without any latency.
Please note that there is a slight difference on how to do this on the MultiMix 8USB
than the MultiMix 12/16USB. This Zero Latency Monitoring is extremely useful
because it allows you to hear yourself while you’re recording without any irritating
delayed echoes. To set up zero-latency monitoring, follow these instructions:
MultiMix 8USB:
1. Turn down the LEVEL, MAIN MIX, and HDPH/CTRL RM knobs.
2. Make sure that the 2 TK TO CTRL ROOM button is DOWN and the 2 TK TO MIX
button is UP, otherwise you’ll hear feedback when you turn up the MAIN MIX
knob later.
3. Connect the 2 TRACK OUT of the mixer to the 2 TRACK IN with a stereo RCA
cable.
4. Set each channel’s GAIN and LEVEL knobs so that you’re getting good level
without lighting the PEAK indicator on the mixer.
The MAIN MIX knob now acts like a mastervolume knob for all your mic/line
inputs. Adjust this knob until you’re getting good levels into Cubase.
The HDPH/CTRL RM knob now controls the loudness of your headphones (or
studio monitors), but does not affect recording levels in Cubase. You can set this
level to a comfortable setting (or even off) without affecting what gets recorded
into Cubase.
MultiMix 12/16USB:
1. Turn down the HDPH/CTRL RM knob along with the LEVEL and MAIN MIX
faders.
2. Make sure that the 2 TK TO HDPH/CTRL RM and MIX TO HDPH/CTRL RM
buttons are IN.
3. Set each channel’s GAIN knob and FADER so that you’re getting good level
without lighting the CLIP indicator on the mixer.
The MAIN MIX fader on the lower right now acts like a mastervolume control for
all your mic/line inputs. Adjust this fader until you’re getting good levels into
Cubase.
The HDPH/CTRL RM knob controls the levels of your headphones (or studio
monitors), but does not affect recording levels in Cubase. You can set this level
to a comfortable setting (or even off) without affecting what gets recorded into
Cubase.
Page 5

Part III: Configure Cubase LE in Windows XP
1. Open Device Setup under the Devices menu.
2. Under the Devices column, click VST Multitrack. Then open the ASIO Driver
drop down menu.
Page 6
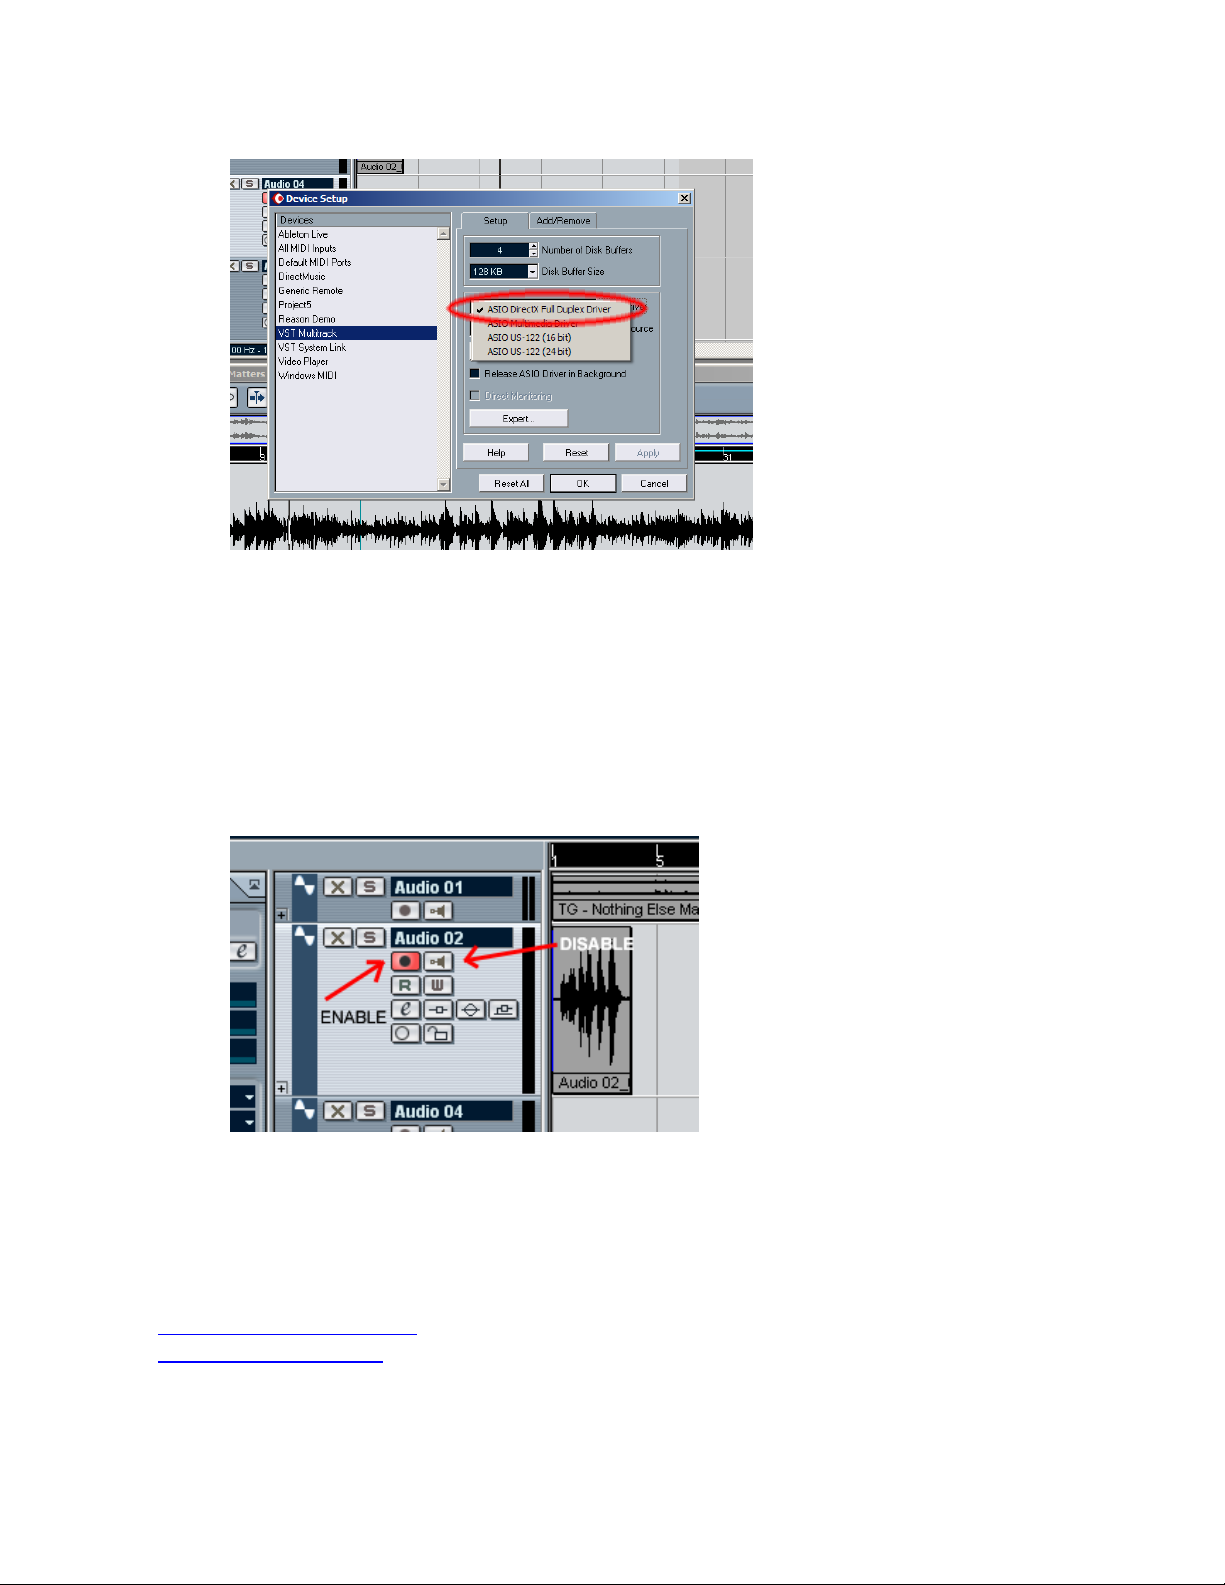
3. Select “ASIO DirectX Full Duplex Driver.”
4. Click OK to exit. Cubase is now routing audio to your MultiMix mixer.
When recording, please remember the following to avoid a delay when using Zero
Latency Monitoring with the MultiMix USB mixers.
5. Record-Enable a track in Cubase LE and make sure input monitoring is turned off
in the program (if input monitoring is on, you’ll hear a delayed echo of your voice
or instrument because of computer latency.)
Part IV: Compatible Third Party ASIO Drivers for Windows XP
In some cases, the regular built-in driver for audio in Windows XP may still have
some latency issues. In these cases you may want to try using 3rd party ASIO drivers.
Some examples of tested ASIO you can download are available on these websites.
http://www.asio4all.com/
http://usb-audio.com/
These companies are not affiliated with Alesis, but do offer Windows XP ASIO drivers
that work with the MultiMix Mixers with USB. Please contact them for specific
questions relating to their software and your computer.
 Loading...