

Alesis DM6 User manual [ml]
Wichtiger Hinweis!
Sehr geehrte Kundin, sehr geehrter Kunde,
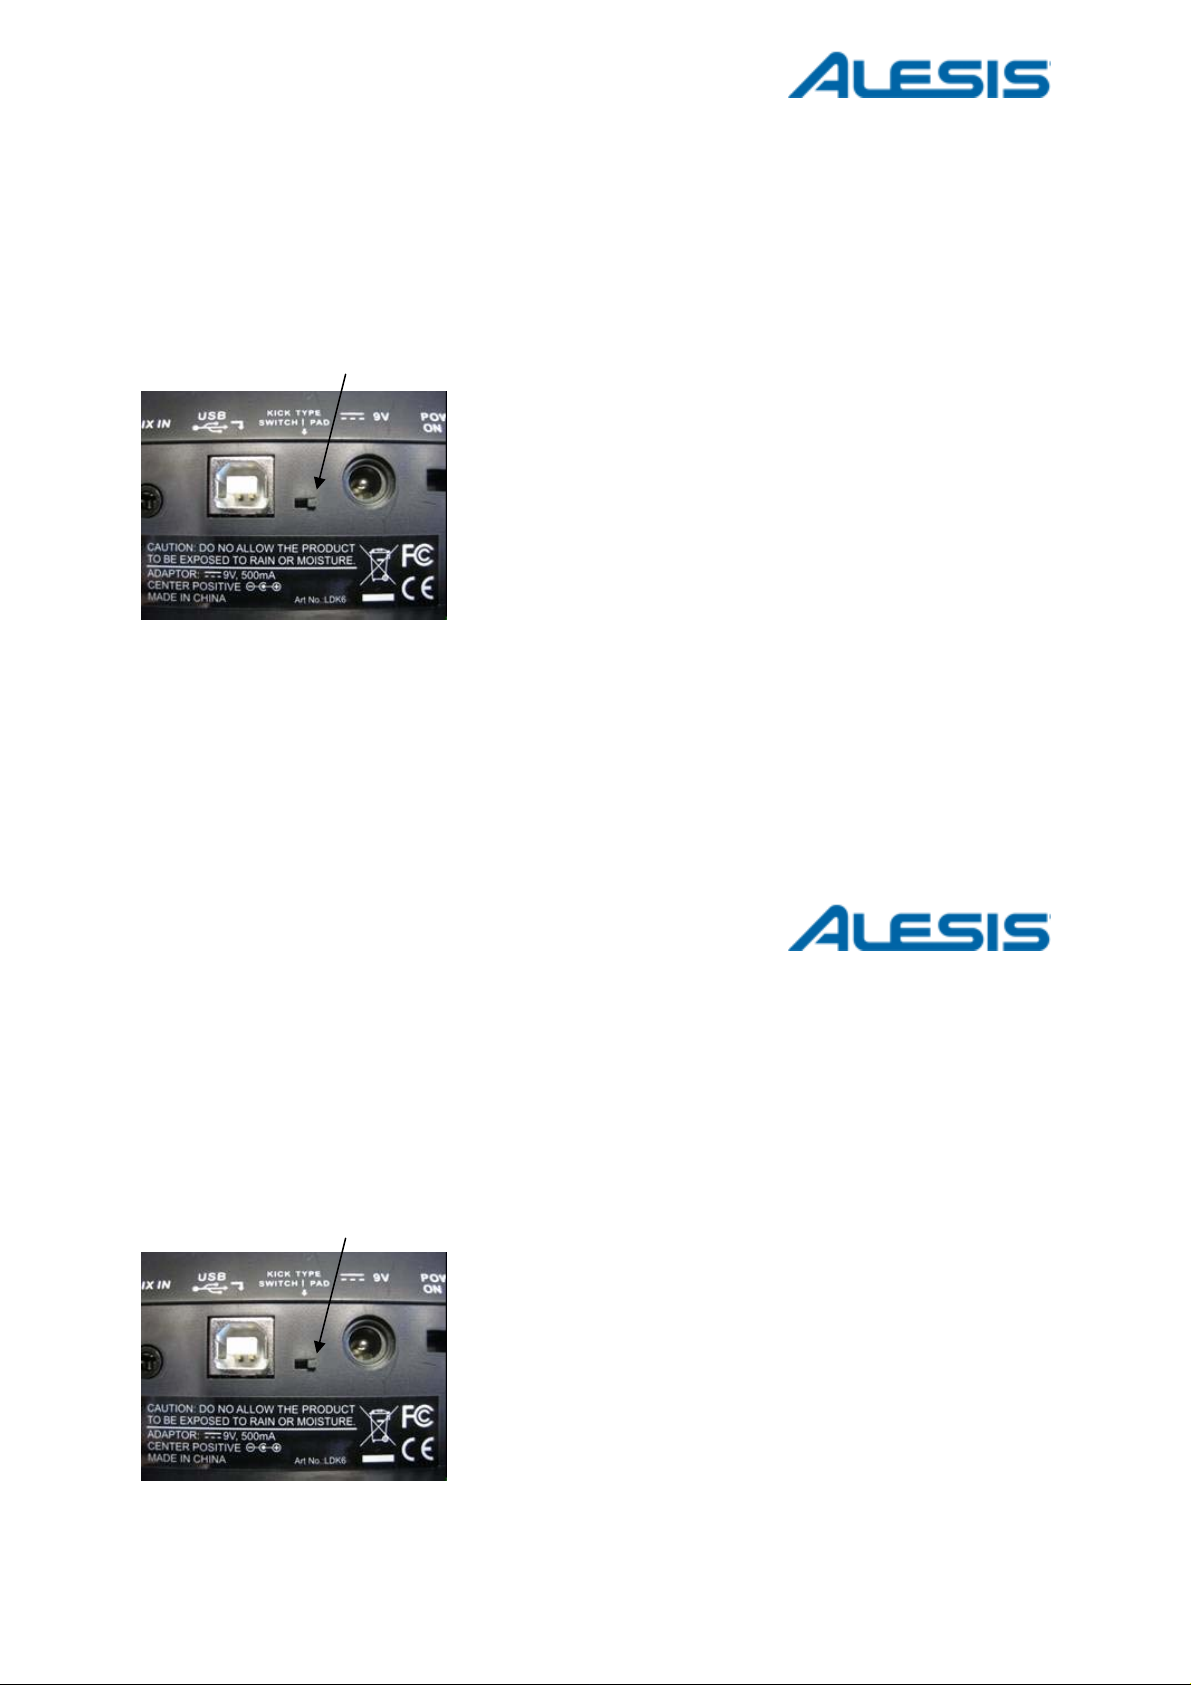
um die Triggereigenschaften des Kick Pedals vollständig zu aktivieren, überprüfen
Sie bitte die Position des „Kick Type“-Schalters auf der Rückseite des DM6Soundmoduls.
Je nach Stellung (s. Abb.) kann entweder ein Fußschalter oder ein Kick Pedal zum
Triggern von Sounds verwendet werden.
In Verbindung mit dem DM6-Kick-Pedal muss die rechte Schalterstellung, also „Pad“
gewählt werden.
Wir bitten um Beachtung
Ihr ALESIS-Team
Wichtiger Hinweis!
Sehr geehrte Kundin, sehr geehrter Kunde,
um die Triggereigenschaften des Kick Pedals vollständig zu aktivieren, überprüfen
Sie bitte die Position des „Kick Type“-Schalters auf der Rückseite des DM6Soundmoduls.
Je nach Stellung (s. Abb.) kann entweder ein Fußschalter oder ein Kick Pedal zum
Triggern von Sounds verwendet werden.
In Verbindung mit dem DM6-Kick-Padal muss die rechte Schalterstellung, also „Pad“
gewählt werden.
Wir bitten um Beachtung
Ihr ALESIS-Team
DM6
DRUM MODULE
MODULE OVERVIEW
::: ENGLISH ( 1-5 ) :::
VISTA DEL MÓDULO
::: ESPAÑOL ( 6 ) :::
CARACTERISTIQUES DU MODULE
::: FRANÇAIS ( 7 ) :::
OBERSEITE DER MODUL
::: DEUTSCH ( 8 ) :::
PANORAMICA DI MODULO
::: ITALIANO ( 9 ) :::


FRONT PANEL FEATURES
1. VOLUME – Adjusts the module's master volume
level.
2. VALUE +/- – Decreases or increases the value of
each parameter.
3. TEMPO / TAP – Enters Tempo Adjustment
Mode.
4. PAD INDICATORS – Displays the pads currently
being played.
5. CLICK – Turns the metronome on or off.
6. DRUM OFF – Mutes or unmutes the drum part of
the song (Pattern) being played.
7. START / STOP – Starts or stops the current
Pattern.
8. PATTERN – Enters Pattern Select Mode where
you can select the Pattern and the MIDI output
format.
9. VOICE – Enters Voice Select Mode.
10. KIT – Enters Kit Select Mode.
11. LCD – Displays the current parameter values and indicator lights for Kit, Voice, and Pattern.
12. VOLUME – Enters Volume Adjustment Mode to adjust the volumes of Kits, Voices, Patterns, and the
metronome separately.
13. SAVE / REC – Press once to save the current Kit to a User Kit. Press and hold to enter Record Mode.
REAR PANEL FEATURES
1. POWER IN – Connect the power adapter here,
then connect the adapter to wall power.
2. POWER SWITCH – Turns the module on or off.
3. HEADPHONES – You can connect a set of 1/8"
headphones to this output.
4. STEREO OUTPUT – You can connect an
optional speaker system, recording input, etc. to
this 1/8" output.
5. MIX INPUT – Connect the output of an external
audio source, such as a CD player, to this stereo
1/8" input.
6. USB PORT – Connect this port to a computer or
other USB device with the included standard USB
cable.
7. TRIGGER INPUT CONNECTION – Connect the
included cable snake to this connector, then
connect the cables to their respective triggers.
See the included separate Assembly Guide for
setup instructions.
1
MIDI / USB
The DM6 module has its own internal sounds, but you can also use it as a trigger-to-MIDI interface with drum
module software by connecting its USB port to that of a computer. In this case, triggering the pads and
pedals of the kit will send MIDI messages to your computer, so you can trigger drum sounds from your
software's sound library. You will need to select the proper MIDI output format to use the DM6 module this
way (see below).
MIDI OUTPUT FORMATS
The DM6 module can send MIDI information in two different formats: the internal format (default) or the GM
format. (Note: If you record a performance using one format, it will only be playable on other devices that
support that format.)
The internal format is used for the module to function as a sound source. "Program
change" and "Note on/off" messages will be transmitted in this mode. This is the default
mode
The GM format is used when the module is connected to a computer. In this format,
you can use DM6 as a trigger-to-MIDI interface, triggering sounds from your favorite
drum module software. Only "Note on/off" messages will be transmitted in this mode.
(Also, the metronome and music that accompanies Patterns will not be sent, since it is
not MIDI information.)
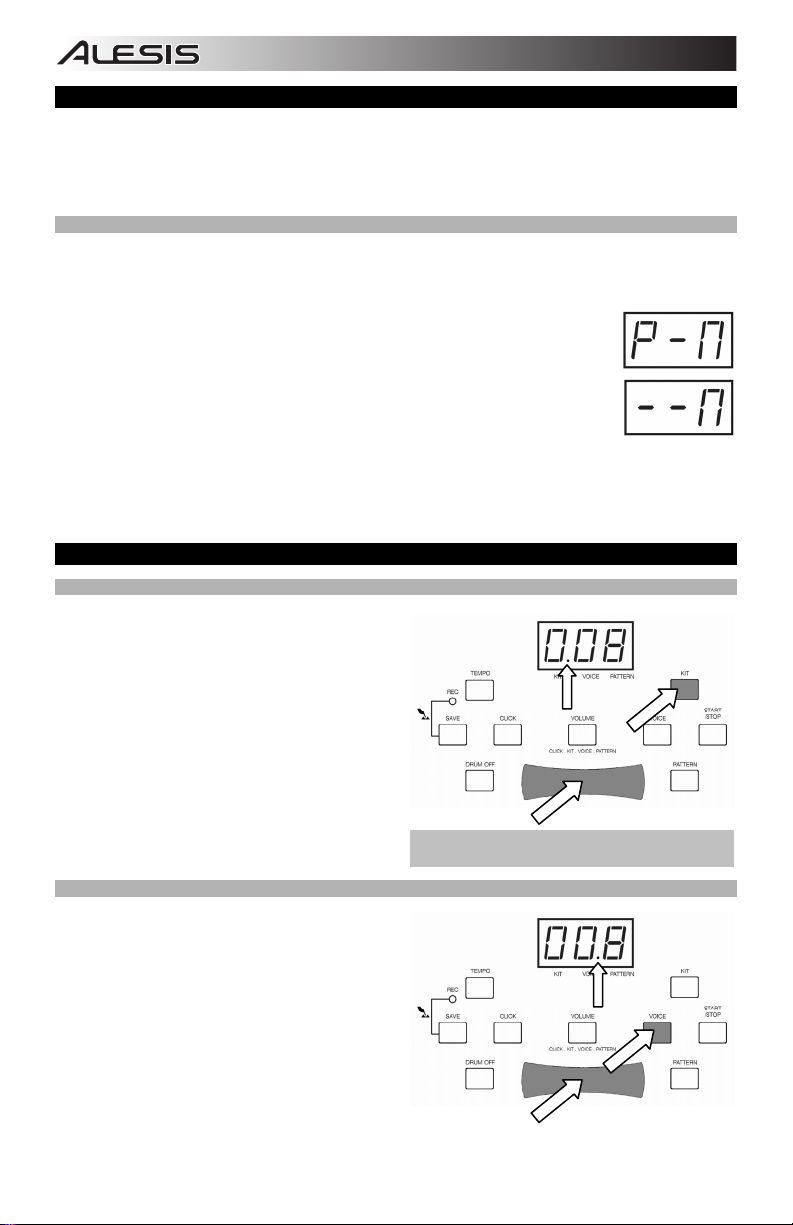
To select the MIDI output format:
1. Press PATTERN to enter Pattern Select Mode.
2. Press VALUE +/- to select "P–N" (internal format, the default setting) or "––N" (GM format).
KITS
SELECTING A KIT
The DM6 module comes with 10 Preset Kits (001 –
010) and 5 User Kits (011 – 015). To select a kit:
1. Press KIT to enter Kit Select Mode. The LCD
will display the current Kit number and the Kit
Indicator will light up.
2. Use VALUE +/- to select a Kit.
3. To adjust the Kit's volume (which is different
from the module's master volume level), press
VOLUME to enter Volume Adjustment Mode.
The Volume Indicator will light up and the LCD
will display the Kit's current volume. Use
VALUE +/- to adjust it.
When you are finished, press KIT to re-enter Kit
Selection Mode or press another button.
SELECTING TRIGGER VOICES
There are 108 built-in Voices that you can assign to
each trigger. To select a voice:
1. Press VOICE to enter Voice Select Mode. The
LCD will display the current Voice number and
the Voice Indicator will light up.
2. Use VALUE +/- to select a Voice.
3. To adjust a trigger's volume (which is different
from the Master or Kit volume levels), press
VOLUME to enter Volume Adjustment Mode.
The Volume Indicator will light up and the LCD
will display the trigger's current volume. Use
VALUE +/- to adjust it.
When you are finished, press VOICE to re-enter Voice Selection Mode or press another button.
When the module is recording-armed, the LCD will display
the current kit's volume, but you will not be able to adjust it.
2
 Loading...