


 Loading...
User’s Manual
2 -
© 2016. All Rights Reserved. Acer Chromebook 14 for Work Covers: CP5-471
This revision: March 2016
Sign up for an Acer ID and enjoy great benefits
1.Ensure you are connected to the Internet.
2.Open www.acer.com and select your country.
3.Select Support > REGISTER A PRODUCT.
4.Sign up for an Acer ID or sign in if you already have an Acer ID.
Register your Acer product
After we receive your product registration, you will be sent a confirmation email with important data. Keep this email in a safe place.
Manage your registered products
Once you have completed the registration process, you can log onto account.acer.com using your Acer ID and password to see and manage all your registered products.
Note
It may take a few days for your information to be updated to the database.
Important
This manual contains proprietary information that is protected by copyright laws. The information contained in this manual is subject to change without notice. Images provided herein are for reference only and may contain information or features that do not apply to your computer. Acer Group shall not be liable for technical or editorial errors or omissions contained in this manual.
Model number: _________________________________
Serial number: _________________________________
Date of purchase: ______________________________
Place of purchase: ______________________________

Table of contents - 3
TABLE OF CONTENTS
Register your Acer product ......................... |
2 |
Manage your registered products ............... |
2 |
Getting started |
4 |
Turn on your Chromebook....................... |
4 |
Select your language settings ................. |
4 |
Connect to a network............................... |
4 |
Accept the Terms of Service....................... |
4 |
First-time sign-in ...................................... |
4 |
Create a new Google Account .................... |
4 |
Browse as a guest ...................................... |
5 |
Sign in to your Google Account .................. |
5 |
Your Acer Chromebook tour |
6 |
Front view ................................................ |
6 |
Keyboard view ......................................... |
7 |
Function keys.............................................. |
7 |
Touchpad .................................................... |
8 |
Left side view........................................... |
9 |
Right side view ...................................... |
10 |
Bottom view .......................................... |
11 |
The Chrome OS Desktop |
12 |
Window controls ................................... |
12 |
Shelf ...................................................... |
13 |
Launcher ................................................... |
13 |
Pinned apps.............................................. |
13 |
Status area................................................ |
14 |
Apps & extensions |
15 |
Managing apps ...................................... |
15 |
Installing new apps from the Chrome Web |
|
Store ........................................................ |
15 |
Removing apps from Chrome OS............. |
15 |
Pin an app to the shelf .............................. |
16 |
Unpin an app from the shelf...................... |
16 |
Google Drive ......................................... |
16 |
Difference between Drive and Files apps . 16 |
|
Creating a new document ......................... |
17 |
Sync files from Downloads to Google |
|
Drive.......................................................... |
17 |
Enable offline access to Google Drive files 18 |
|
Gmail .................................................... |
19 |
Composing an email ................................. |
19 |
YouTube ............................................... |
19 |
Playing video or audio files .................... |
19 |
Other Supported File Types................... |
19 |
Chrome OS tips and tricks |
20 |
Documents............................................. |
20 |
How to create documents ......................... |
20 |
Finding your documents............................ |
21 |
How to share documents with other users 21 |
|
How to start a video chat ....................... |
22 |
How to listen to music............................ |
22 |
How to watch videos, TV, or movies...... |
23 |
Working with Microsoft Office (Word, |
|
Excel, and Powepoint) documents ........ |
23 |
Open and edit Microsoft Office files using |
|
Google’s office compatibility mode ........... |
23 |
Convert Microsoft Office files to Google |
|
Drive formats............................................. |
24 |
Export Google Drive documents as |
|
Microsoft Office files.................................. |
24 |
Opening Microsoft Office files using |
|
Microsoft’s Office Online apps from the |
|
Chrome Web Store ................................... |
24 |
How to use your Chromebook when |
|
there’s no internet .................................. |
25 |
Gmail Offline ............................................. |
25 |
Google Drive ............................................. |
26 |
Settings |
27 |
Changing the language settings ............ |
27 |
Changing the clock settings................... |
28 |
Customizing appearance ....................... |
28 |
Customizing the wallpaper........................ |
28 |
Customizing the theme ............................. |
28 |
Setting up a printer ................................ |
29 |
Updating Chrome OS ............................ |
29 |
Automatic update ...................................... |
29 |
Manual update .......................................... |
30 |
Reseting your Chromebook ................... |
30 |
Help |
31 |
Online and offline help ........................... |
31 |

4 - Getting started
GETTING STARTED
Turn on your Chromebook
On the Chromebook, the power button is located at the upper-right corner of the keyboard. A "welcome" screen will appear when the Chromebook first boots up.
Select your language settings
Use the "Select your language" drop-down list to choose your default language setting. If there is more than one way to type in your language, you may be prompted to select a keyboard input method as well.
Connect to a network
Select a wireless network from the "Select a network" list to connect to the Internet. If network access is protected, you will need an access password to connect to it.
Accept the Terms of Service
Once connected to a network, accept the Terms of Service. Your Chromebook will then download any available system updates, so you automatically get the latest Chrome OS features.
First-time sign-in
Create a new Google Account
You can create a new Google Account if you don’t already have one. Select Create a Google Account to set up a new account. A Google Account gives you access to useful web services developed by Google, such as Gmail, Google Drive, and Google Calendar.
Getting started - 5
Browse as a guest
You can also use the Chromebook without a Google Account by selecting Browse as a Guest.
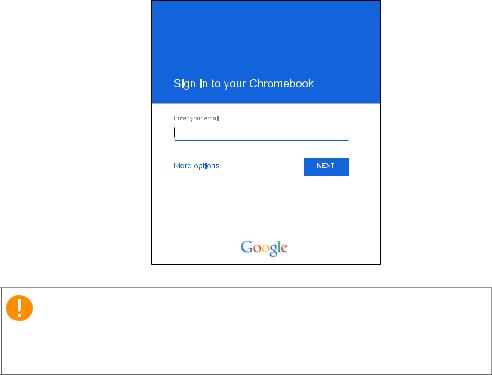
Sign in to your Google Account
If you already have a Google Account, enter your username and password in the sign-in box that appears and select the Sign in button.
Important
Sign in with your primary Google Account. This account will be set as the owner and is the only account that will be able to change certain Chrome settings.
6 - Your Acer Chromebook tour
YOUR ACER CHROMEBOOK TOUR
Now that you are done setting it up, let us show you around your new Acer Chromebook.
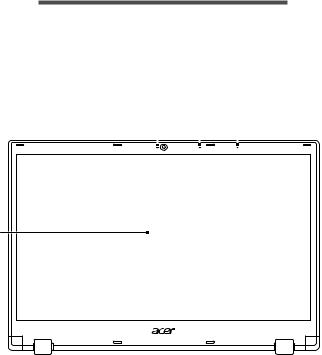
Front view
1 |
|
|
|
|
3 |
|
|
|
|
||
|
|
|
|
|
|
2
|
|
|
|
# |
Icon |
Item |
Description |
|
|
|
Web camera for video |
1 |
|
Webcam |
communication. |
|
A light next to the webcam indicates |
||
|
|
|
|
|
|
|
that the webcam is active. |
|
|
|
|
2 |
|
Screen |
Displays computer output. |
3 |
|
Microphones |
Internal stereo digital microphones |
|
for sound recording. |
||
|
|
|

Your Acer Chromebook tour - 7
Keyboard view
3
1
2
# |
Icon Item |
Description |
1
2
Keyboard |
For entering data into your computer. |
|
|
Touch-sensitive pointing device |
|
|
which functions like a computer |
|
|
mouse. |
|
Touchpad / click |
Pressing down anywhere on the pad |
|
button |
functions like the left button of a |
|
mouse. |
||
|
||
|
Pressing down anywhere with two |
|
|
fingers functions like the right button |
|
|
of a mouse. |
3 |
Power key |
Turns the computer on and off. |
Function keys
The computer uses function keys or key combinations to access some hardware and software controls, such as screen brightness and volume. The dedicated function keys each have a specific function.
|
|
|
Icon |
Function |
Description |
|
Previous |
Go to the previous page. |
|
|
|

8 - Your Acer Chromebook tour |
|
||||
|
|
|
|
|
|
|
Icon |
Function |
Description |
||
|
|
|
|
Next |
Go to the next page. |
|
|
|
|
|
|
|
|
|
|
Reload |
Reload the current page. |
|
|
|
|
||
|
|
|
|
|
|
|
|
|
|
|
|
|
|
|
|
Full-screen |
Open the page in full-screen mode. |
|
|
|
|
||
|
|
|
|
|
|
|
|
|
|
|
|
|
|
|
|
Next window |
Switch to the next window. |
|
|
|
|
|
|
|
|
|
|
Brightness down |
Decreases the screen brightness. |
|
|
|
|
|
|
|
|
|
|
Brightness up |
Increases the screen brightness. |
|
|
|
|
|
|
|
|
|
|
Mute |
Turns off audio output. |
|
|
|
|
|
|
|
|
|
|
Volume down |
Decreases the volume. |
|
|
|
|
|
|
|
|
|
|
Volume up |
Increases the volume. |
|
|
|
|
|
|
Touchpad
The built-in touchpad is a pointing device that senses movement on its surface. This means the cursor responds as you move your fingers across the surface of the touchpad.
|
|
|
Action |
Gesture |
|
Click |
Press down on any part of the touchpad. |
|
|
Tapping the touchpad with two fingers or pressing |
|
Two-finger tap (or |
(and holding) Alt on the keyboard and tapping the |
|
alt-click) |
touchpad with one finger both equal a "right-click" |
|
|
on a computer mouse. |
|
|
Place two fingers on the touchpad and move |
|
Two-finger swipe |
them up and down to scroll vertically, left and right |
|
|
to scroll horizontally. |
|
|
Select the item you want to move with one finger. |
|
Drag and drop |
With a second finger, move the item. Release |
|
both fingers to drop the item. (This gesture works |
||
|
||
|
for files, not windows or icons.) |
|
|
|
Your Acer Chromebook tour - 9
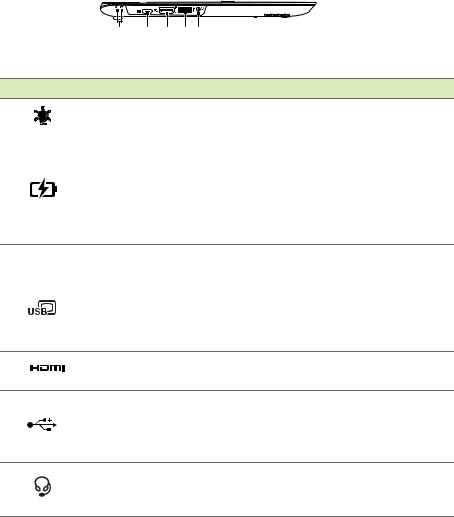
Left side view
1 2 3 4 5
# Icon Item |
Description |
1
2
3
4
5
|
|
|
|
|
|
Power indicator |
Indicates the computer’s power |
|
|
|
|
|
|
status. |
|
|
|
|
|
|
|
|
|
|
|
|
|
|
|
|
|
|
|
|
|
|
|
|
Indicates the computer’s battery |
|
|
|
|
|
|
|
status. |
|
|
|
|
|
|
Battery indicator |
Charging: The light shows amber |
|
|
|
|
|
|
when the battery is charging. |
|
|
|
|
|
|
|
|
|
|
|
|
|
|
|
|
Fully charged: The light shows blue |
|
|
|
|
|
|
|
when in AC mode. |
|
|
|
|
|
|
|
Connects to a USB Type-C AC |
|
|
|
|
|
|
|
adapter or connects to USB devices |
|
|
|
|
|
|
USB Type-C port |
that adopt the USB Type-C |
|
|
|
|
|
|
||
|
|
|
|
|
|
||
|
|
|
|
|
|
connector. Supports USB 3.1 Type- |
|
|
|
|
|
|
|
|
|
|
|
|
|
|
|
|
C, Gen 1 with display and transfer |
|
|
|
|
|
|
|
speeds up to 5 Gb/s. |
|
|
|
|
|
|
HDMI port |
Supports high-definition digital video |
|
|
|
|
|
|
connections. |
|
|
|
|
|
|
|
|
|
|
|
|
|
|
|
|
Connects to USB devices. |
|
|
|
|
|
|
USB port |
If a port is black it is USB 2.0 |
|
|
|
|
|
|
compatible, if it is blue it is also USB |
|
|
|
|
|
|
|
|
|
|
|
|
|
|
|
|
3.0 compatible. |
|
|
|
|
|
|
Headset/speaker |
Connects to audio devices |
|
|
|
|
|
|
(e.g., speakers, headphones), or a |
|
|
|
|
|
|
|
jack |
|
|
|
|
|
|
|
headset with microphone. |
|
|
|
|
|
|
|
|
10 - Your Acer Chromebook tour
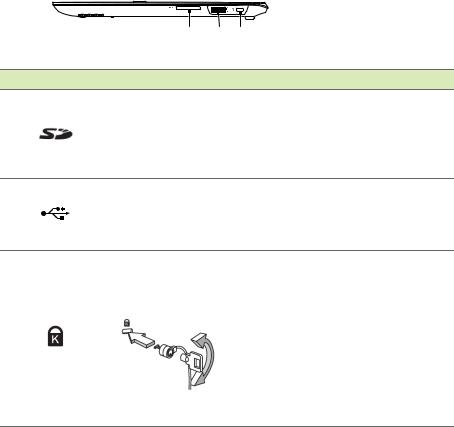
Right side view
1 2 3
# |
Icon |
Item |
Description |
1
2
3
|
Accepts Secure Digital (SD™) |
|
|
cards. |
|
SD™ card reader |
Note: Push to remove/install the |
|
|
card. The card reader uses one |
|
|
card at a time. |
|
|
Connects to USB devices. |
|
USB port |
If a port is black it is USB 2.0 |
|
compatible, if it is blue it is also |
||
|
||
|
USB 3.0 compatible. |
|
|
Connects to a Kensington- |
|
Kensington lock |
compatible computer security |
|
lock. |
||
slot |
Note: Wrap the computer security |
|
|
lock cable around an immovable |
|
|
object such as a table or handle |
|
|
of a locked drawer. Insert the lock |
|
|
into the notch and turn the key to |
|
|
secure the lock. Some keyless |
|
|
models are also available. |
Loading...