

Page 1
USER MANUAL
Document # 626471
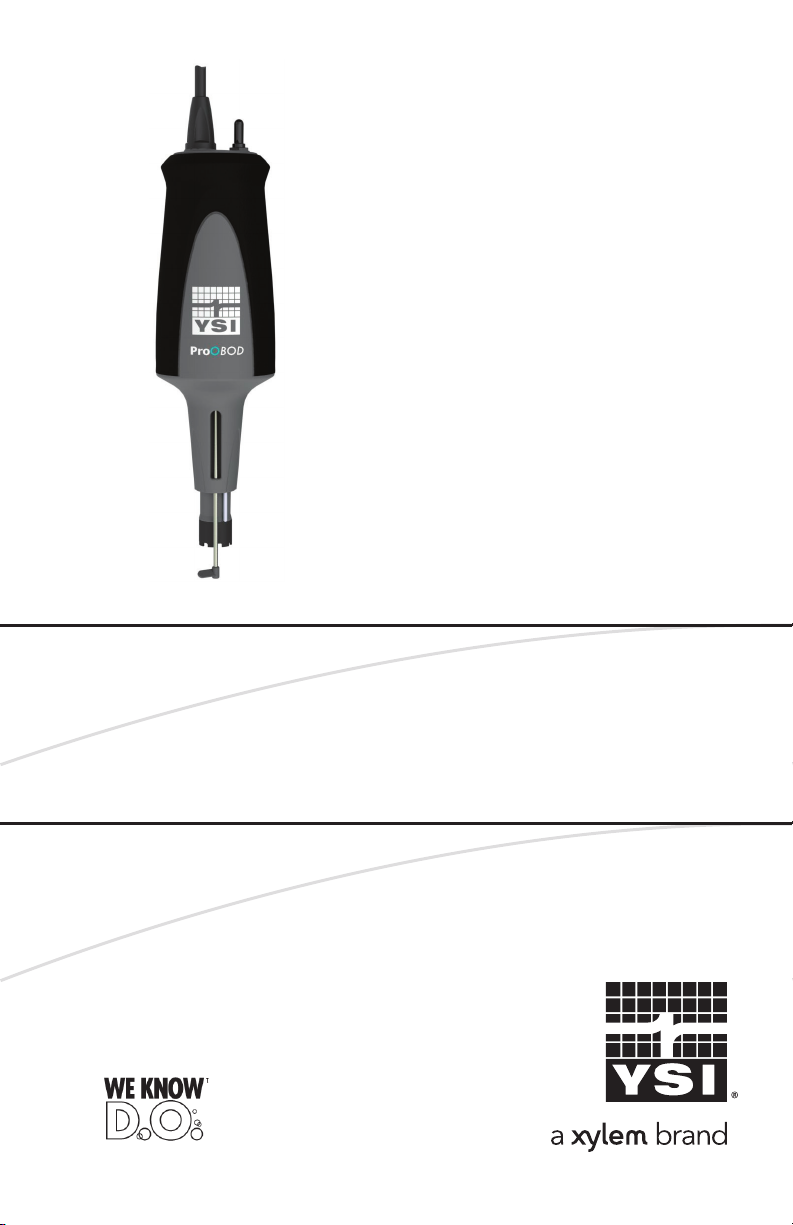
ProOBOD
IDS ProOBOD
Page 2

CONTENTS
Warranty ................................................................................................i
Introduction .........................................................................................1
Getting Started ....................................................................................2
Unpacking the OBOD Probe ................................................3
OBOD Probe Operation .....................................................................4
Powering the Stirrer ...............................................................4
Calibration - Dissolved Oxygen ............................................4
Temperature ...........................................................................5
Taking Measurements ............................................................5
Maintenance and Storage ..................................................................5
Updating Instrument and Probe Firmware ..........................6
Sensor Maintenance - Dissolved Oxygen ............................6
Sensor Maintenance - Temperature .....................................8
Sensor Storage .......................................................................9
Troubleshooting ..................................................................................9
Dissolved Oxygen Readings .................................................9
Error/Status messages ........................................................11
Item #626471
Rev C
Drawing # A626471
April 2013
©2013 YSI Incorporated.
The YSI, ProODO, OBOD and ODO logos are registered trademarks of
YSI Incorporated.
Probe Specifications ..........................................................................11
Accessories / Parts List ......................................................................12
Declaration of Conformity ................................................................13
Recycling ............................................................................................14
Contact Information ..........................................................................14
Ordering and Technical Support ........................................14
Service Information ..............................................................15
Appendix A - DO% Calibration Values ............................................16
Page 3

THIS PAGE LEFT INTENTIONALLY BLANK
WARRANTY
The YSI ProOBOD® and IDS ProOBOD probe and cable assemblies are
warranted for two (2) years from date of purchase by the end user against
defec ts in mate rials and work manship, exclusiv e of batter ies and any damage
caused by defective batteries. ProOBOD sensor caps are warranted for one
(1) year from date of purchase by the end user against defects in material
and workmanship. ProOBOD and IDS ProOBOD systems (instrument &
cable/probe assemblies) are warranted for 1 year from date of purchase by
the end user against defects in material and workmanship when purchased
by rental agencies for rental purposes. Within the warranty period, YSI will
repair or replace, at its sole discretion, free of charge, any produc t that YSI
determines to be covered by this warranty.
To exercise this warranty, call your local YSI representative, or contact YSI
Customer Service in Yellow Springs, Ohio at +1 937 767-7241, 800-8974151, environmental@ysi.com or visit www.YSI.com for a Product Return
Form. Send the produc t and proof of purchase, transportation prepaid, to
the Authorized Service Center selected by YSI. Repair or replacement will
be made and the product returned, transpor tation prepaid. Repaired or
replaced products are warranted for the balance of the original warranty
period, or at least 90 days from date of repair or replacement.
LIMITATION OF WARRANTY
This Warranty does not apply to any YSI product damage or failure caused
by:
1. Failure to install, operate or use the product in accordance with YSI’s
written instructions;
2. Abuse or misuse of the product;
3. Failure to maintain the product in accordance with YSI’s written
instructions or standard industry procedure;
4. Any improper repairs to the product;
5. Use by you of defective or improper components or parts in servicing
or repairing the product;
6. Modification of the product in any way not expressly authorized by YSI.
THIS WARRANTY IS IN LIEU OF ALL OTHER WARRANTIES, EXPRESSED OR
IMPLIED, INCLUDING ANY WARRANTY OF MERCHANTABILITY OR FITNESS
FOR A PARTICULAR PURPOSE. YSI’S LIABILITY UNDER THIS WARRANTY
IS LIMITED TO REPAIR OR REPLACEMENT OF THE PRODUCT, AND THIS
SHALL BE YOUR SOLE AND EXCLUSIVE REMEDY FOR ANY DEFECTIVE
PRODUCT COVERED BY THIS WARRANTY. IN NO EVENT SHALL YSI BE
LIABLE FOR ANY SPECIAL, INDIRECT, INCIDENTAL OR CONSEQUENTIAL
DAMAGES RESULTING FROM ANY DEFECTIVE PRODUCT COVERED BY
THIS WARRANTY.
i
Page 4

THIS PAGE LEFT INTENTIONALLY BLANK
INTRODUCTION
Thank you for purchasing a YSI Optical Biochemical Oxygen Demand
probe (ProOBOD® or IDS ProOBOD). The ProOBOD is designed for
use with a YSI ProODO® instrument. The IDS ProOBOD is designed
for use with a YSI MultiLab IDS instrument. This manual provides
information on the ProOBOD and IDS ProOBOD probes only. For more
detailed instructions on how to operate the ProODO or MultiLab IDS
instrument, please refer to the instrument-specific user manual.
The ProOBOD and IDS ProOBOD are designed to fit in a standard 300
ml BOD bottle as well as other international BOD bottles. YSI offers two
ProOBOD probe versions and one IDS ProOBOD version:
• ProOBOD USA (Japan), YSI item number 626400 - This probe
works with the ProODO instrument. It fits in standard USA
BOD bottles, standard Japanese BOD bottles and many
other international BOD bottles. A power supply for USA and
Japanese style AC outlets is included.
• ProOBOD International, YSI item number 626401 - This
probe works with the ProODO instrument. It fits in standard
USA BOD bottles, standard Japanese BOD bottles and many
other international BOD bottles. A funnel adapter for fitting in
standard UK BOD bottles and a switching power supply with
3 international outlet adapters are also included.
• IDS ProOBOD, YSI item number 626500 - This probe works
with a MultiLab IDS instrument. It fits in standard USA BOD
bottles, standard Japanese BOD bottles and many other
international BOD bottles. The MultiLab IDS instrument
powers the probe’s stir motor so an external power supply is
not required. A funnel adapter for fitting in standard UK BOD
bottles is available for purchase (item # 626473).
The OBOD sensors measure dissolved oxygen in water using lifetime
luminescence technology and uses a digital signal to send information
to the instrument. The probe features a stirrer and motor to aid in
sample movement, to keep solids from settling at the bottom of the
bottle and to quicken the response of the sensor. Key advantages of
the OBOD’s optical technology for DO measurement over traditional
electrochemical methods include the elimination of sensor flow
dependence and sensor warm-up time, greater stability, the ability
to zero the sensor for more accurate measurements at low dissolved
ii 1
Page 5

oxygen levels, and the elimination of frequent membrane/electrolyte
changes and electrode servicing.
For more information on the ProODO and MultiLab IDS instruments,
including product specification, please visit ysi.com or contact YSI
Technical Support at 800-897-4151 (+1 937-767-7241), environmental@
ysi.com.
Reading the entire manual before use is recommended for an overall
understanding of the probe’s features.
Important: The OBOD probes are designed for laboratory use,
not field use. They are not waterproof and should never be
immersed in a sample past the taper on the stem of the probe.
GETTING STARTED
Throughout the manual, the term “probe” refers to the end of the cable
where the sensor, stir motor and stirrer are located. The term “sensor”
refers to the Optical Dissolved Oxygen sensing portion of the probe
assembly and the term “sensor cap” refers to the removable sensing
cap that is replaced about once every 12 to 18 months (Figure 1).
Unpacking the OBOD prOBe
Each OBOD probe and replacement OBOD sensor cap
i
Carefully unpack the instrument and accessories and inspect for
damage. Compare received parts with items on the packing list. If
any parts or materials are damaged or missing, contact YSI Customer
Service at 800-897-4151 (+1 937 767-7241) or environmental@ysi.com
or contact the authorized YSI distributor where the instrument was
purchased.
Remove the OBOD probe/cable assembly from the shipping container
and locate the instruction sheet that is included. This instruction sheet
is important because it contains the calibration coefficients for your
sensor cap. A new probe/cable assembly already has a sensor cap
installed and the sensor cap coefficients are preloaded into the probe
at the factory. The coefficients are automatically sent to the instrument
when the probe is connected to the instrument. However, the probe
instruction sheet should be saved in case you need to reference the
coefficients in the future.
Preparing the probe for the first time:
includes an instruction sheet with important information
unique and specific to each individual cap.
1. A new OBOD probe will have a protective cover with a moist
sponge placed over the sensor cap to ensure the cap remains
hydrated during shipment. Carefully remove this cover from the
end of the probe by pulling it straight off the sensor. Save the cover
along with the sponge to use later for long term storage of the
probe. Long term storage is generally considered to be 4 weeks
or longer.
2. Place the probe in a standard BOD bottle that contains a small
amount of clean water (approximately 40 ml). The sensor should
not be immersed in water but rather in the air above the water.
The purpose is to create a 100% water-saturated air environment
for the sensor which is ideal for calibration and storage when not
in use.
It is important to always keep your sensor in a moist
environment so the sensor cap does not dry out. (See
Maintenance and Storage for more information.)
Probe
Stir paddle
Stirrer toggle switch, turns
stir paddle on and off
Temperature sensor
Optical DO sensor
OBOD Sensor Cap,
shown here removed
Figure 1
2 3
from probe
Page 6

OBOD PROBE OPERATION
Connect the OBOD probe to the instrument. If using a ProODO
instrument, align the keys on the cable connector to the slots on the
instrument connector. If using an IDS MultiLab instrument, locate the
sensor connector and stirrer connector on the back of the instrument.
See instrument manual for more information.
The OBOD probe will automatically be recognized by the instrument.
If the sensor cap was installed on the probe at the factory, the sensor
cap coefficients are preloaded into the probe and uploaded to the
instrument when the probe is connected. If installing a new sensor
cap, the new coefficients need to be entered in the instrument. See the
instrument manual for more information.
instrument may hold its calibration for many months. However, for
the highest data accuracy, YSI recommends verifying the instrument’s
calibration on a daily basis. To verify the instrument’s calibration, place
the sensor in a water-saturated air environment (BOD bottle with 40 ml
of water) and check to see that the DO% measurement is reading its
the calibration value based on the current barometric pressure. Refer
to Appendix A for a list of DO% calibration values and corresponding
barometric pressure readings. If DO Local is turned on, the instrument
and probe will read 100% in its calibration environment.
There are several options for calibrating the OBOD sensors. For both
ease of use and accuracy, YSI recommends performing a DO % watersaturated air calibration as described in the instrument’s manual.
temperatUre
On the ProODO instrument, press the Probe
and press enter. Enabled allows you to enable or disable the DO
sensor. Highlight Enabled and press enter to activate or deactivate the
dissolved oxygen sensor. The IDS MultiLab instrument will enable the
probe automatically.
For additional information about the instrument’s menus, settings and
operation, please refer to the instrument’s manual.
key. Highlight DO
pOwering the Stirrer
If using the IDS ProOBOD, the IDS MultiLab instrument will power the
stirrer. Simply connect the IDS ProOBOD connectors to the appropriate
connectors on the back of instrument.
If using the ProOBOD, locate the power supply that was included with
the probe. Connect the power supply to the probe’s power connector
and then plug the power supply into an outlet. The international
ProOBOD is shipped with outlet adapters to connect the power supply
to a variety of outlets.
The stirrer can be turned on and off with the toggle switch located at
the top of the probe (Figure 1).
caliBratiOn - DiSSOlveD Oxygen
The OBOD sensor is an optical luminescent sensor which has greater
stability and is less susceptible to calibration drift than traditional
electrochemical sensors. This increased stability means that the
All OBOD probes have built-in temperature sensors. Temperature
calibration is not required nor is it available.
taking meaSUrementS
The OBOD probes are designed for laboratory use, not field
1. To take readings, insert the probe into the BOD sample bottle. The
DO and temperature sensors should be immersed in the sample.
2. Turn the stirrer on with the toggle switch located on the top of the
probe (Figure 1). The stirrer helps keep solids from settling at the
bottom of the sample bottle and quickens the sensor’s response.
3. Allow the temperature readings to stabilize and wait approximately
20-25 seconds for the DO readings to stabilize.
4. See the instrument manual for information on logging data and
sending data to a computer.
use. They are not waterproof and should never be immersed
in a sample past the taper on the stem of the probe.
MAINTENANCE AND STORAGE
This section describes the proper procedures for care, maintenance
and storage of the OBOD probes.
Important: Do not attempt to access the probe motor
assembly or open the probe body. Doing so will void
any remaining warranty. The probe body should only
be opened by a YSI Authorized Service Center.
4 5
Page 7

UpDating inStrUment anD prOBe Firmware
The instrument and probe firmware can be updated via ysi.com. There
you will find the new firmware files and instructions on how to update
the instrument and/or probe.
SenSOr maintenance - DiSSOlveD Oxygen
CLEANING THE OBOD SENSOR CAP
The sensor cap should be kept clean since some types of fouling may
consume or produce oxygen which could affect the dissolved oxygen
measurements. To clean the sensor cap, gently wipe away any fouling
with a lens cleaning tissue that has been moistened with water. Do not
use a coarse towel or cloth or organic solvents to clean the sensor cap.
Using a coarse towel or organic solvent to clean the sensor cap may
cause permanent damage to the cap. For example, alcohol will dissolve
the outer paint layer and other organic solvents will likely dissolve the
dye in the cap. If the sensor cap is damaged, it must be replaced.
OBOD SENSOR CAP REPLACEMENT
When replacing a sensor cap, the Sensor Cap Coefficients must be
manually updated in the instrument. The instruction sheet shipped
with the replacement OBOD sensor cap includes the coefficients. See
the instrument manual for instructions on updating the Sensor Cap
Coefficients.
humid environment. Therefore, the OBOD sensor should be stored
in either a BOD bottle that contains a small amount of clean water
(approximately 40 ml) or in a BOD bottle that is filled with clean water
so the sensor cap is immersed in water, see Sensor Storage for more
information. If the sensor dries out, refer to the rehydration procedure
in this manual for instructions on how to recondition the sensor cap.
Refer to Figure 2 below when following the instructions for replacing
the cap.
O-ring
OBOD Sensor Cap,
shown here removed
from probe
Figure 2.
Caution: Avoid touching the sensing end of the sensor
cap during the following maintenance procedures.
The frequency of sensor cap replacement is dependent on use. For
example, when the probe is powered on for approximately 4 hours
per day, 5 days a week, the sensor cap will need replaced about once
per year. If the probe is powered on more than this, the sensor cap will
need replaced more often.
To extend the sensor cap’s usable life, turn the instrument off when
not in use. For example, turn the instrument off over night, but not
between readings.
The sensor cap will also need replaced if it is damaged or cracked. See
the Troubleshooting section of this manual for instructions on how to
determine if the sensor cap needs replaced.
The replacement OBOD sensor cap is shipped in a humidified container
and the package should not be opened until the cap is needed for
use. Once the sensor cap has been installed on the OBOD probe as
described in this section, it is important to keep the sensor in a 100%
6 7
1. Remove the stir paddle from the probe by pulling it straight out.
2. Remove the old sensor cap from the probe by grasping the
probe body with one hand and then rotating the sensor cap
counterclockwise until it is completely free. Do not use any tools
for this procedure.
3. Carefully remove the o-ring and discard it. Do not use any tools to
remove the o-ring.
4. Clean the o-ring seat on the probe by first wiping off old o-ring
lubricant with a dry lens cleaning tissue. Next, clean away any
build-up with a water-moistened lens tissue and then dry with
another lens tissue.
5. Locate the o-ring supplied in the Sensor Cap replacement kit and
install it on the probe. Do not use any tools to replace the o-ring.
Be careful not to touch the clear optical DO sensor window. Any
fingerprints on the optical window will have to be cleaned off. After
installing the o-ring, ensure it is clean. If necessary, wipe clean with
a lens tissue.
Page 8

6. Locate the o-ring lubricant included with the new sensor cap.
Apply a thin coat of o-ring lubricant to the installed o-ring. After
application, there should be a thin coat of o-ring lubricant on the
o-ring only. Remove any excess o-ring lubricant from the o-ring
and/or probe with a lens tissue.
7. Clean the clear surface of the optical DO sensor window (figure 1)
with a lens cleaning tissue.
8. Remove the new sensor cap from its hydrated container and dry
the inside cavity of the sensor cap with lens tissue. Make sure that
the cavity is completely dry and clean before proceeding with the
installation. Using a clockwise motion, thread the new sensor cap
onto the probe assembly until it is finger-tight. The o-ring should
be compressed between the sensor cap and probe. Do not overtighten the sensor cap and do not use any tools for the installation
process.
9. Clean the stir paddle and then reinstall it on the probe by pushing
it straight into place.
10. Store the sensor in a BOD bottle with a small amount of water
(approximately 40 ml).
11. Enter the new Sensor Cap’s coefficients into the instrument. See the
instrument’s manual for more information on entering coefficients.
12. After entering the new Sensor Cap coefficients, perform a 1-point
DO calibration.
SenSOr StOrage
SHORT-TERM STORAGE
When the OBOD is not in use, it must be stored in a moist environment,
i.e., the sensor either immersed in water or in water-saturated air. If the
sensor cap is allowed to dry out by exposure to dry air, it is likely to drift
slightly at the beginning of its next use unless it is rehydrated. If this
occurs, follow the rehydrating instructions in this manual.
For short-term storage (<30 days), place the probe in a BOD bottle that
contains a small amount of clean water (approximately 40 ml). This will
provide a 100% water-saturated air environment.
LONG-TERM STORAGE
For long-term storage (>30 days), remove the batteries from the
instrument. Moisten the sponge in the protective plastic cap that was
originally provided with the probe with clean water. Place the clear
cap over the sensor with the sensor cap installed. Inspect the sponge
every 30 days to make sure it is still moist. If you no longer have the
protective cap, place the probe in a BOD bottle that contains a small
amount of clean water (approximately 40 ml). Or, you can place the
sensor with sensor cap installed directly in water in a BOD bottle.
REHYDRATING THE SENSOR CAP
The Sensor Cap must remain in a moist environment for proper
operation; see Sensor Storage for storage recommendations. If you
inadvertently leave your sensor exposed to ambient air for a period
of more than approximately 8 hours it may dry out. If the sensor cap
is allowed to dry out, it is likely to drift slightly at the beginning of
your next study unless it is rehydrated. If the cap dries out, you can
rehydrate it by soaking the probe tip with the sensor cap installed in
warm (room temperature) tap water for 24 hours. After rehydration is
complete, perform a 1-point DO calibration and be sure to store the
probe in a moist environment.
SenSOr maintenance - temperatUre
You must keep the temperature portion of the sensor free of build
up. Other than that, the sensor requires no maintenance. A soft bristle
brush can be used to scrub the temperature sensor if needed. While
cleaning, be sure to only scrub the temperature sensor and not the
sensor cap. The sensor cap will be damaged if cleaned with anything
abrasive.
8 9
Recommended Long-term Storage ambient
temperature: -5 to 50°C (23 to 122°F)
TROUBLESHOOTING
DiSSOlveD Oxygen reaDingS
Erroneous dissolved oxygen readings typically indicate a need to
clean the sensor cap, replace the sensor cap and/or recalibrate the
instrument.
First, verify that the instrument is measuring temperature accurately.
Both the DO % and mg/L measurements are temperature dependent
so if the temperature reading is incorrectly, the DO measurements will
also be erroneous.
If the DO% measurement is accurate but the mg/L value is incorrect,
check the salinity compensation setting in the instrument. The salinity
compensation value should be set to the salinity of the sample you are
testing. Municipal wastewater is typically 0 ppt.
Page 9

If the DO% measurement is incorrect in a water-saturated air
environment (BOD bottle with 40 ml of clean water) after calibration,
ensure the instrument’s barometer reading is correct by comparing it
to the local, true barometric pressure.
If you continue to have erroneous DO readings, verify the sensor is
properly connected to the instrument. If using the ProODO instrument,
be sure DO is enabled in the Probe menu. Next, clean the sensor cap
following the instructions in the Maintenance and Storage section of
this manual and then perform a calibration. If erroneous readings persist,
follow the steps on the following page to inspect the sensor cap for
damage and then attempt to recalibrate the instrument. If the problem
continues, try to rehydrate the sensor cap and then recalibrate. If you
are still getting erroneous dissolved oxygen readings, try replacing the
sensor cap and then recalibrate. If the erroneous readings continue,
contact YSI Technical Support to help determine the next step.
INSPECTING THE SENSOR CAP FOR DAMAGE
After reinstalling the sensor cap, perform a calibration and then
reevaluate the quality of the dissolved oxygen measurements. If
problems persist, try rehydrating or replacing the sensor cap.
errOr/StatUS meSSageS
While using of the ProODO instrument, press the Question key
from any screen to view helpful messages directly on the display.
Refer to the instrument manual for information on error and status
messages.
PROBE SPECIFICATIONS
The specifications listed below are system specifications for the
ProOBOD probe when used with a ProODO instrument. These
specifications are subject to change without notice. For the most
recent specifications and for specifications on the ProODO instrument,
please visit ysi.com.
Caution: Avoid touching the sensing end of the sensor
If DO measurements seem to be in error or are jumpy, remove the
sensor cap from the sensor by grasping the probe body with one hand
and then rotating the sensor cap counterclockwise until it is completely
free. Do not use any tools for the removal of the cap.
Inspect the sensor cap assembly for any cracks or damage. If damage
has occurred, contact YSI Customer Service to order a replacement
sensor cap (YSI item number 626482).
Inspect the o-ring on the probe for damage. If there is any indication of
damage, carefully remove the o-ring and contact YSI Technical Support
to obtain a new o-ring and/or gasket. Avoid using tools to remove the
o-ring as damage to the sealing surfaces could result.
Before reinstalling the sensor cap, make sure that the cavity is
completely clean and dry before proceeding with the installation. If
water is found, dry the cavity with lens tissue. Finally, clean and dry the
clear optical DO sensor window on the end of the sensor with a lens
tissue.
cap during the following maintenance procedures.
Probe (ProOBOD probe and cable Assembly)
Temperature
Operating Range
Water Resistance IP-65
Cable Length 2 meters (6.56 feet)
Dissolved Oxygen
Sensor Type Optical, Life-time Luminescent sensor
Range 0-50 mg/L
Accuracy (mg/L) • 0 to 20 mg/L: ± 0.1 mg/L or ± 1%
Accuracy
(% Saturation)
Resolution
(mg/L)
Resolution (%
Saturation)
Response Time T95 = 20-25 seconds with stirring;
10 - 40°C
0-500 % Saturation
of reading, whichever is greater.
• 20 to 50 mg/L: ± 15% of the reading
• 0 to 200% air saturation: ± 1% of the reading
or ± 1% air saturation, whichever is greater.
• 200 to 500% air saturation: ± 15% of the reading
0.01 or 0.1 mg/L (auto-scaling)
0.1% air saturation
T95 = 40 seconds without stirring.
10 11
Page 10

Temperature
Range -5 to 50°C
Accuracy ± 0.2°C
Resolution 0.1°C
DECLARATION OF CONFORMITY
We declare under our sole responsibility that the listed product conforms
to the requirements for the listed European Council Directive(s) and carries
the CE mark accordingly. It conforms to Australian and New Zealand EMC
requirements for C-Tick and RCM marks. It conforms to unintentional radiator
requirements under FCC Part 15 and ICES-003 Class B.
ACCESSORIES / PARTS LIST
Part Number Description
626281 ProODO Instrument
626400 ProOBOD USA/Japan BOD lab probe*
for use with ProODO instrument
626401 ProOBOD International BOD lab probe*
for use with ProODO instrument
626500 IDS ProOBOD* for use with
MultiLab instruments
626482 Replacement sensor cap for ProOBOD
and IDS ProOBOD lab probe
626600 6260 power supply for use with 626400
ProOBOD USA/Japan BOD probe
626601 6261 power supply for use with 626401
ProOBOD International probe
626415 Stir Shaft
626473 K Funnel, for use in UK standard BOD bottles
*All probe/cable assemblies include a temperature and dissolved
oxygen sensor.
Manufacturer: YSI Incorporated
1725 Brannum Lane
Yellow Springs, OH 45387
USA
Product Name: Professional ODO Water Quality Instrument
and Professional OBOD probe
Model Numbers
Instrument/Accessory: ProODO (626281) / ProComm Saddle
manufactured after September 1, 2010
(Lot code 10J and later) (605404)
Probe/Cable
Assemblies:
Conforms to the following:
Directives: EMC 2004/108/EC
Harmonized
Standards:
Supplementary
Information:
Authorized EU
Representative
ProOBOD (626400, 626401)
IDS ProOBOD (626500)
RoHS 2011/65/EU
WEEE 2002/96/EC
•EN61326-1:2006.
•EN61326-2-3:2006.
•EN61000-3-2:2006.
•EN61000-3-3:2008.
•CAN/CSA-CEI/IECCISPR22:02
All performance met the continuous
unmonitored operation criteria as follows:
EN61000-4-2:2009
EN61000-4-3: 2006
EN61000-4-4:2004
EN61000-4-5: 2006
EN61000-4-6: 2009
EN61000-4-11:2004
YSI Hydrodata Ltd
2 Focal Point, Lacerta Court, Works Road
Letchworth, Hertfordshire, SG6 IFJ UK
Signed: Lisa M. Abel Date: 24 April 2013
12 13
Title: Director of Quality
Page 11

RECYCLING
YSI is committed to reducing the environmental footprint in the course
of doing business. YSI’s recycling program ensures that old equipment
is processed in an environmentally friendly way, reducing the amount
of materials going to landfills. When the time comes for you to recycle,
follow the easy steps outlined at ysi.com.
CONTACT INFORMATION
OrDering anD technical SUppOrt
YSI has offices located throughout the world. For a listing of office
locations along with contact information, please visit ysi.com or contact
YSI Customer Service:
Telephone: 800-897-4151 (US)
+1 937-767-7241
Monday through Friday, 8:00 AM to 5:00 ET
Fax: +1 937-767-9353 (orders)
+1 937-767-1058 (technical support)
Email: environmental@ysi.com
Service inFOrmatiOn
YSI has authorized service centers throughout the United States and
Internationally. For the nearest service center information, please visit
www.ysi.com and click ‘Support’ or contact YSI Technical Support at
800-897-4151 (+1 937-767-7241).
When returning a product for service, include the Product Return form
with cleaning certification. The form must be completely filled out for a
YSI Service Center to accept the instrument for service. The form may
be downloaded from the ‘Support’ page at www.ysi.com.
Mail: YSI Incorporated
1725 Brannum Lane
Yellow Springs, OH 45387 USA
Internet: ysi.com
When placing an order please have the following available:
1.) YSI account number (if available)
2.) Name and phone number
3.) Purchase Order or Credit Card
4.) Model Number or brief description
5.) Billing and shipping addresses
6.) Quantity
14 15
Page 12

APPENDIX A-DO% CALIBRATION
VALUES
Pressure Altitude Calibration
value
Inches Hg mm Hg kPA mbar Feet Meters % Saturation
30.2 767.6 102.3 1023 -276 -84 101
29.92 760 101.3 1013 0 0 100
29.62 752.4 100.3 1003 278 85 99
29.32 744.8 99.3 993 558 170 98
29.02 737.2 98.3 983 841 256 97
28.72 729.6 97.3 973 1126 343 96
28.43 722 96.3 963 1413 431 95
28.13 714.4 95.2 952 1703 519 94
27.83 706.8 94.2 942 1995 608 93
27.53 699.2 93.2 932 2290 698 92
27.23 691.6 92.2 922 2587 789 91
26.93 684 91.2 912 2887 880 90
26.63 676.4 90.2 902 3190 972 89
26.33 668.8 89.2 892 3496 1066 88
26.03 661.2 88.1 881 3804 1106 87
25.73 653.6 87.2 871 4115 1254 86
25.43 646 86.1 861 4430 1350 85
25.13 638.4 85.1 851 4747 1447 84
24.84 630.8 84.1 841 5067 1544 83
24.54 623.2 83.1 831 5391 1643 82
24.24 615.6 82.1 821 5717 1743 81
23.94 608 81.06 811 6047 1843 80
23.64 600.4 80.05 800 6381 1945 79
23.34 592.8 79.03 790 6717 2047 78
23.04 585.2 78.02 780 7058 2151 77
22.74 577.6 77.01 770 7401 2256 76
22.44 570.0 75.99 760 7749 2362 75
Pressure Altitude Calibration
value
Inches Hg mm Hg kPA mbar Feet Meters % Saturation
22.14 562.4 74.98 749 8100 2469 74
21.84 554.8 73.97 739 8455 2577 73
21.54 547.2 72.95 729 8815 2687 72
21.26 539.6 71.94 720 9178 2797 71
20.94 532 70.93 709 9545 2909 70
20.64 524 69.92 699 9917 3023 69
20.35 517 68.91 689 10293 3137 68
20.05 509 67.9 679 10673 3371 67
19.75 502 66.89 669 11058 3371 66
16 17
Page 13

Item # 626471
Rev C
Drawing # 626471
April 2013
©2013 YSI Incorporated
 Loading...