

www.yealink.com
English | 简体中文
Quick Start Guide(V1.2)
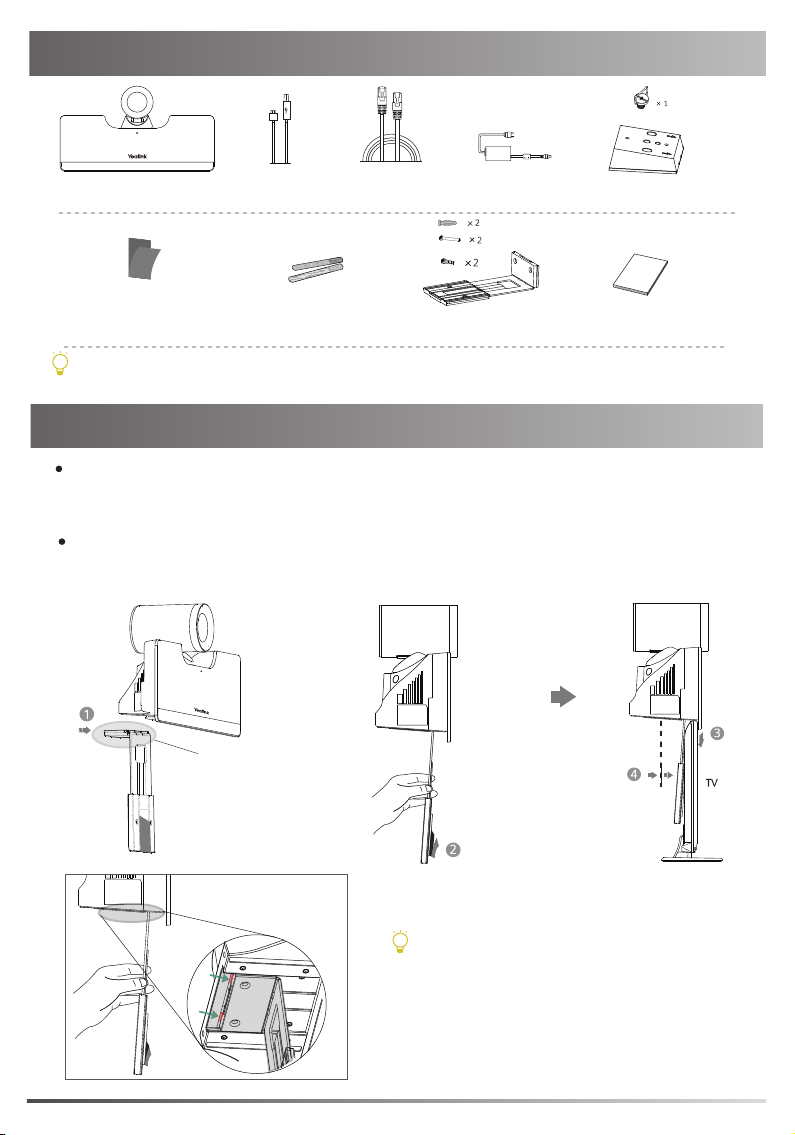
Package Contents
(1/4”-20 UNC screw)
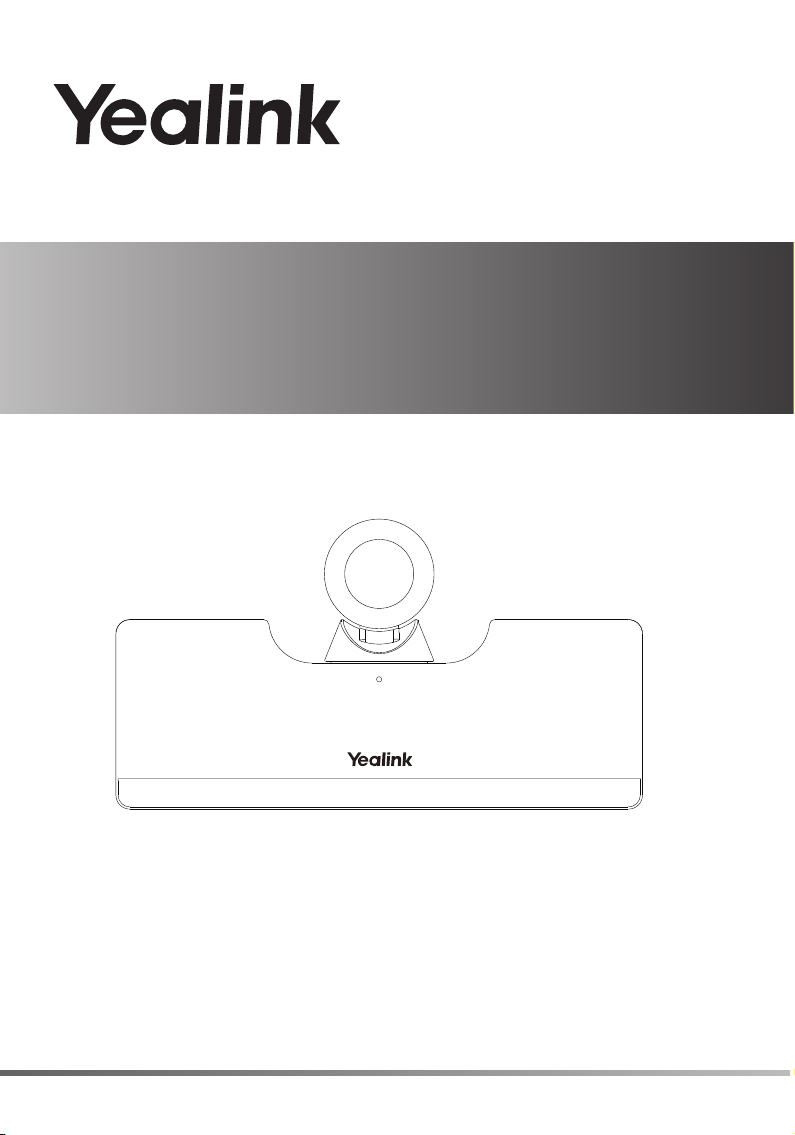
UVC50
Velcro×2
(One Velcro is on the bracket)
2.5m
USB Cable
Cable Tie×5
7.5m
Ethernet Cable
Power Adapter
48V/0.7A
(T4×30 screw)
(M3×8 screw)
Mounting Bracket
and Accessories
VESA Accessory
UVC50
Quick Start Guide
We recommend that you use the accessories provided or approved by Yealink. The use of
unapproved third-party accessories may result in poor performance.
UVC50 Installation
Put on a Flat Surface
You can put the UVC50 on the conference table, and make sure that the angle of inclination of the
UVC50 is not more than 5 degrees to ensure proper operation.
Mount on the top of the TV
Choose the following installation method when the thickness of the TV is between 1mm
and 36mm.
Pay attention to the direction of the bracket
If your UVC50 cannot be mounted on the top of the TV
when the bracket has reached the given location, remove
the bracket, and then convert the direction of the bracket.
Refer to the following section for more information.
1
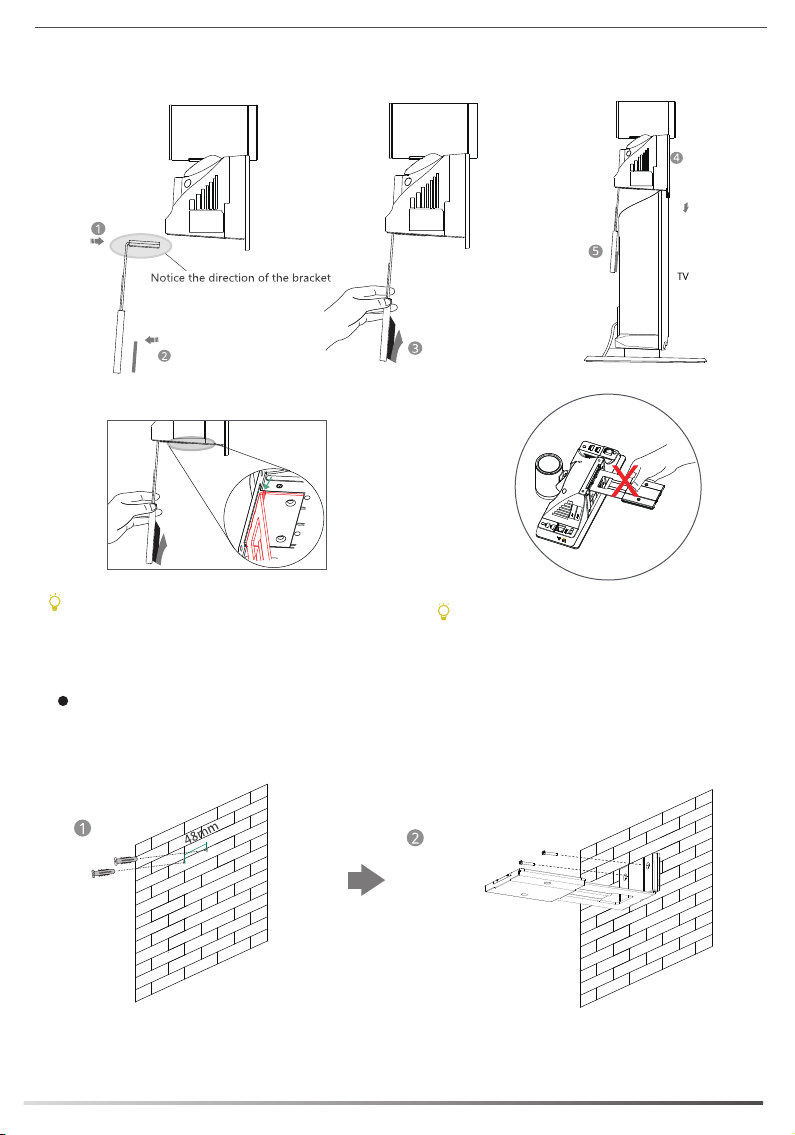
Choose the following installation method when the thickness of the TV is between 37mm and
77mm.
If your UVC50 cannot be mounted on the top of
the TV when the bracket has reached the edge of
the UVC50, choose another installation method.
Do not pick up the bracket which is connected with
a UVC50, the UVC50 may fall down in this situation.
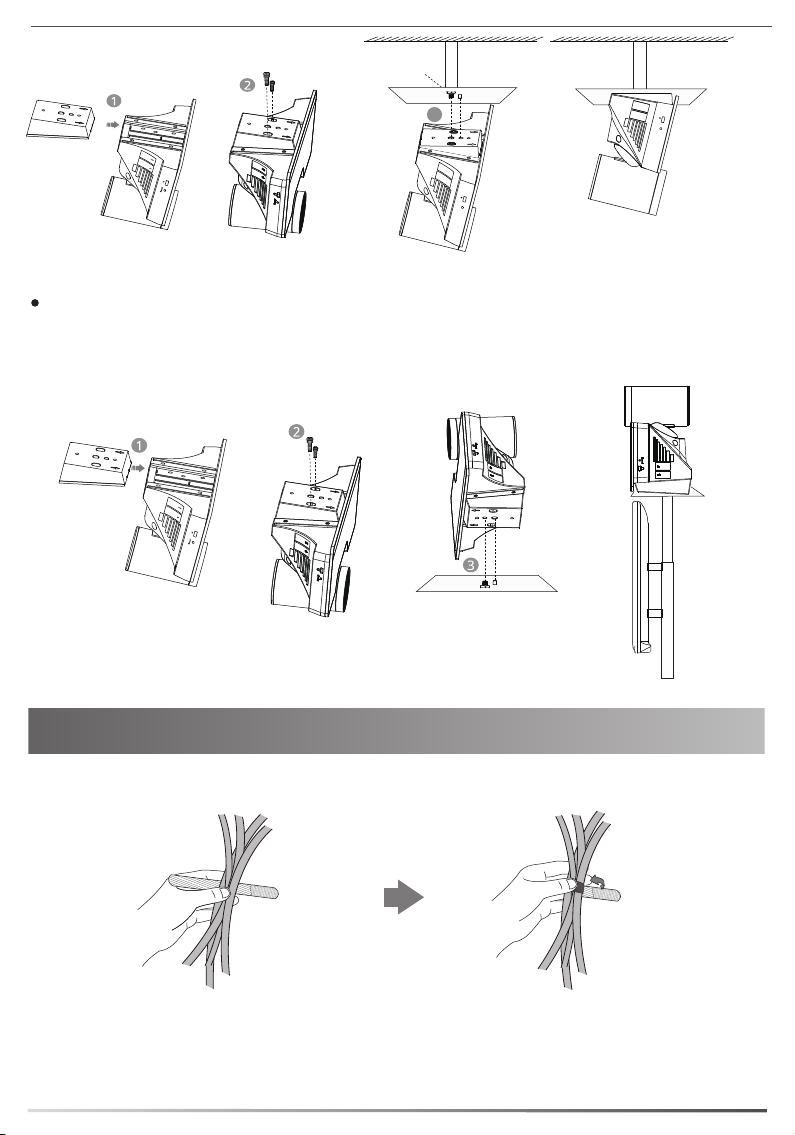
Mount on the Wall
The recommended height is 1.55m-1.85m above the ground.
Screw specification: T4×30
Hole depth: 30mm
Hole diameter: 6mm
2

Screw specification: M3×8
Mount on the Ceiling
If you choose the ceiling-mounted installation, you need to purchase a bracket separately.
The bracket must meet the following requirements:
.
Bear the weight of at least 10.5kg (23.15 lb.) and the thickness must be between 2mm
(0.08 in.) and 3 mm (0.12 in.).
.
Comes with a location pillar, which can be inserted into the location hole of the VESA accessory.
.
The distance between the screw on the bracket and the location pillar must be 14 mm (0.55 in.).
3
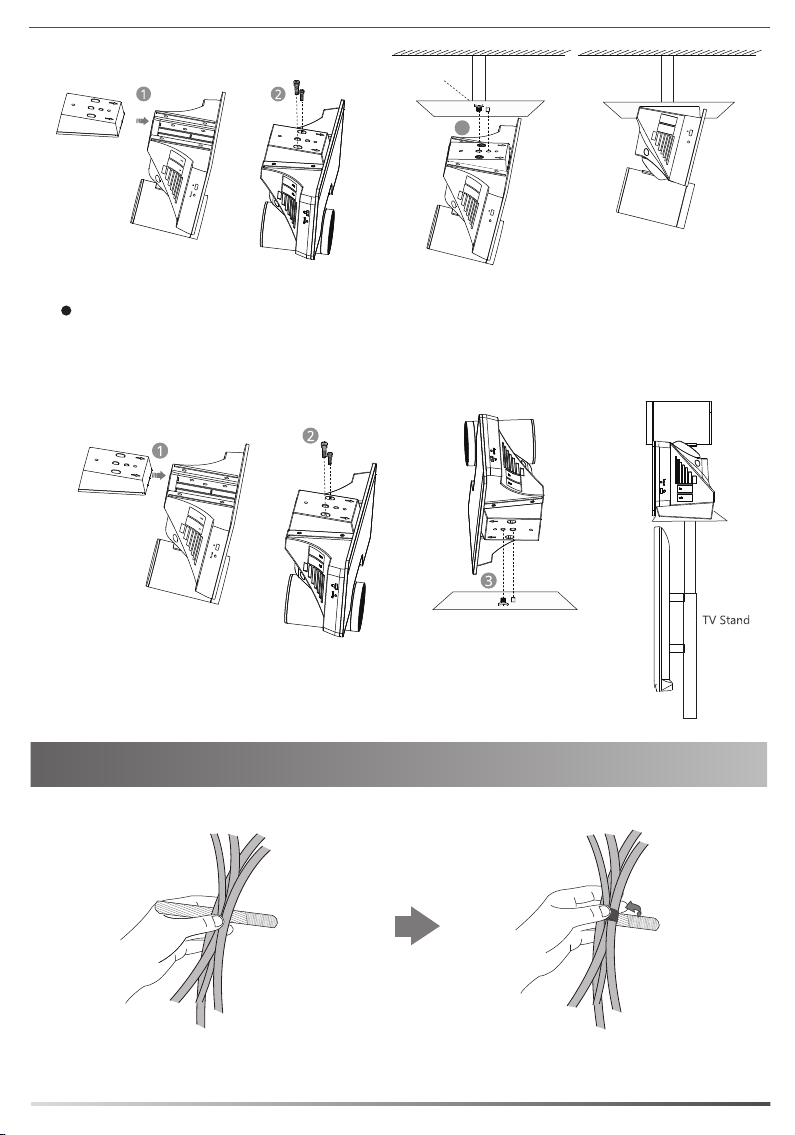
Screw specification: M3×8
Screw specification:
1/4*-20 UNC
MAC
3
MAC
SN
Reset
SN
Reset
Mount onto a TV Stand or a Tripod
You need to purchase a TV stand or a tripod separately. The TV stand or the tripod has the same
requirements as the bracket used when mounting the UVC50 on the ceiling.
The installation steps are the same as the steps of mounting on the ceiling.
Screw specification: M3×8
Screw specification:
1/4*-20 UNC
Cable Ties Installation
3
4
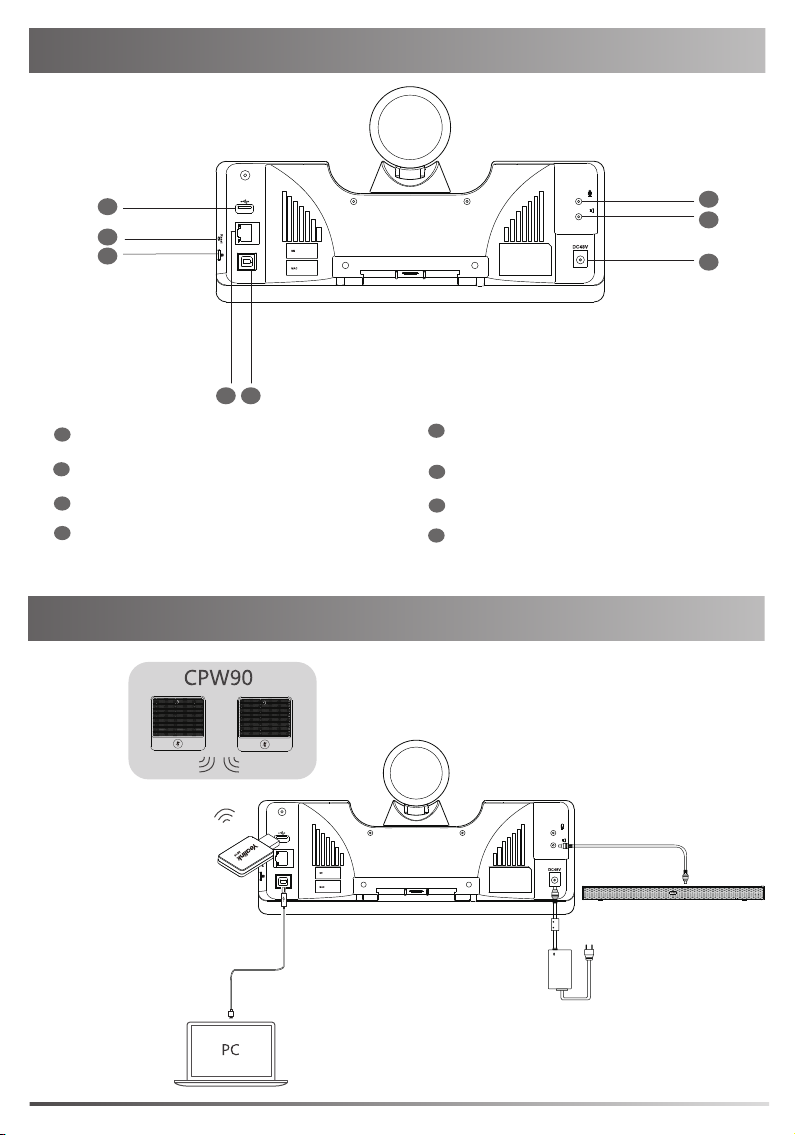
Hardware Interface Instructions
1
7
8
1
USB: insert DD10 to connect to CPW90
2
3
Microphone(optional): connect to VCM34
3
Video Out: connect to a PC as video output
4
Line In: connect to an audio input device using
Microphone
Video Out
3
2
an audio cable (3.5mm)
UVC50 Connection
Line In
Line Out
4
5
6
Line Out: connect to an audio output device
5
using an audio cable (3.5mm)
6
DC48V: connect to the power adapter
7
Reset: reset the UVC50 to factory defaults
8
Security slot: connect a universal security
cable to the UVC50 so that you can lock the
UVC50 down.
DD10
Microphone
Video Out
UVC50
Line In
Line Out
3.5mm
Sounbar
Power Adapter
5
The priority of audio input channel is:Microphone(VCM34) >USB(CPW90)>line-in.
The cable should be replaced at once if its skin is broken.
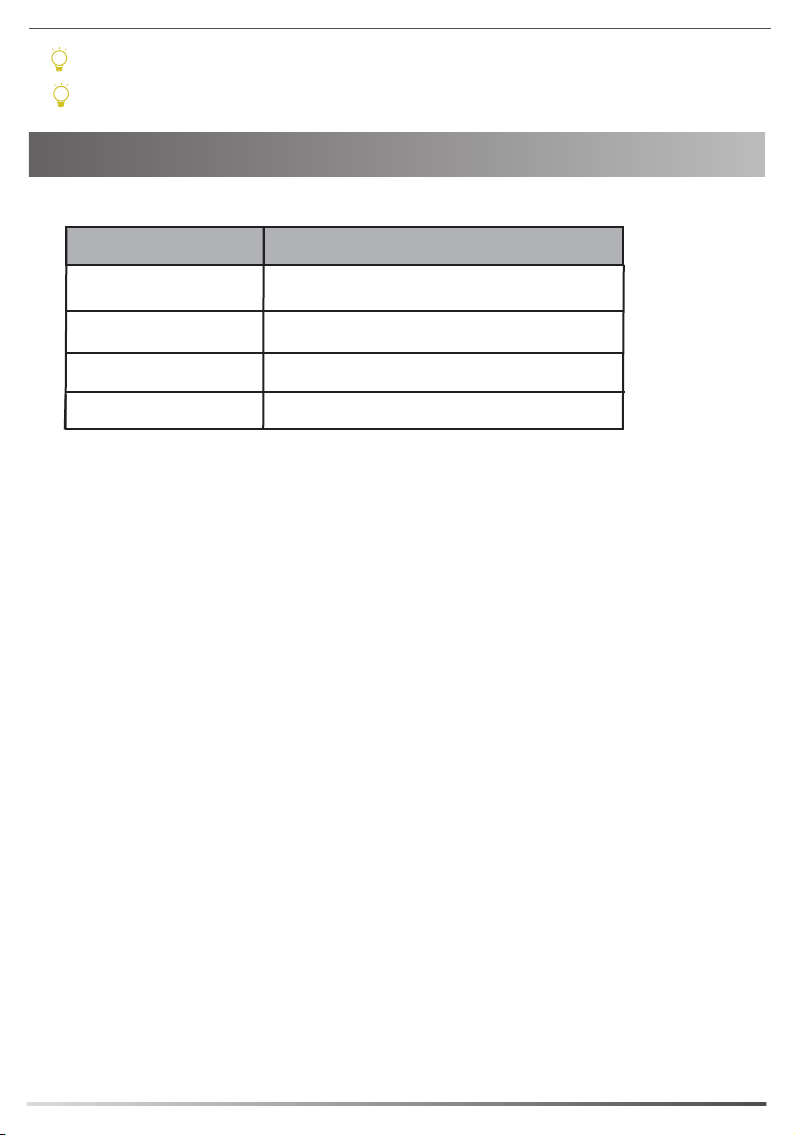
LED Indicator Instructions
LED indicators on the UVC50:
LED Status
Solid green
Solid red The UVC50 is in sleep mode.
Solid orange
Flashing orange The UVC50 is upgrading firmware.
The UVC50 is active.
The UVC50 is initializing.
Description
6

包装清单
中
文
UVC50
2.5m
USB 线
7.5m 网线
电源适配器
48V/0.7A
(1/4”-20 UNC screw)
VESA 配件
魔术贴x2
(一套已贴在支架上)
我们推荐使用由Yealink提供或经Yealink认可的配件和线缆,使用未经认可的第三方配件和线缆可能会导致性能
的下降。
束线带x 5
支架配件
(用于安装主机)
UVC50
快速入门指南
安装UVC50
平放安装
将终端摆放在水平桌面。如果桌面略有倾斜,请保证倾斜角小于5°,以保证终端的摄像机
云台正常运转。
挂装
当电视厚度范围为1mm-36mm时,进行以下步骤:
1
注意支架的方向
2
4
3
电视
当支架接触到限位点,还不能放置在电视顶上
时,请取出支架反向装配。请参阅下文了解更
多信息。
7

当电视厚度范围为37mm-77mm时,进行以下步骤:
注意支架的方向
当支架与底壳边缘位置齐平,还不能放置在电视顶
请勿手持支架拿起机器,有掉落风险。
上时,请使用其他安装方式。
墙装
你可以用支架将终端安装在墙上,终端安装高度建议范围为1.55-1.85m。
螺丝规格:T4x30
电视
打孔直径: 6mm
打孔深度: 30mm
8

螺丝规格:M3x8
吊装
用户可以自行选购支架来将终端倒挂在天花板上,选购的支架必须满足以下条件:
.
承重至少为10.5kg,厚度建议为2mm-3mm。
.
支架配套一个定位柱,定位柱用来插入VESA配件的定位孔中。
.
支架上的英制螺钉和定位柱的直线距离必须为14mm。
螺丝孔
深度:6.0mm
9
定位孔
直径:5.0mm
螺丝规格:M3x8 螺丝规格:
1/4-20UNC英制螺钉
MAC
3
MAC
SN
Reset
SN
Reset
电视架或三脚架安装
用户可以自行选购电视架或三脚架来固定终端,电视架或三脚架的选购要求与使用吊装方式时
的支架要求相同。电视架或三脚架安装步骤与吊装步骤相同。
安装束线带
螺丝规格:
1/4-20UNC英制螺钉
电视架
10

硬件接口介绍
1
7
8
1
USB: 插入DD10连接CPW90无线麦克风
Microphone
Video Out
3
3
2
(仅适用海外)
2
3
麦克风: 连接VCM34
3
视频输出: 连接电脑作为视频输出
4
音频线性输入: 使用3.5mm音频接头线连接
音频输出设备
连接UVC50
Microphone
Video Out
Cat5e
Microphone
UVC50
Line in
Line out
4
5
6
音频线性输出: 使用3.5mm音频接头线连接
5
音频输出设备
6
电源接口: 连接电源适配器
7
重置键:重置UVC50到出厂设置
8
安全锁孔 : 将主机锁在固定位置
Line in
Line out
3.5mm
Soundbar
音频输入通道优先级顺序:麦克风(VCM34)>Line-in。
如果使用过程中发现线缆破皮,请立即更换。
11
电源适配器

指示灯介绍
UVC50 指示灯介绍如下:
指示灯状态
绿灯常亮
红灯常亮 UVC50处于休眠状态
橙色灯常亮
橙色灯闪烁
UVC50处于正常工作状态
UVC50处于启动/等待中状态
UVC50固件更新中
说明
12

Regulatory Notices
Operating Ambient Temperatures
Operating temperature: +32 to 104°F (0 to 40°C)
Relative humidity: 5% to 90%, noncondensing
Storage temperature: -22 to +160°F (-30 to +70°C)
Warranty
Our product warranty is limited only to the unit itself, when used normally
in accordance with the operating instructions and the system environment.
We are not liable for damage or loss resulting from the use of this product,
or for any claim from a third party. We are not liable for problems with
Yealink device arising from the use of this product; we are not liable for
financial damages, lost profits, claims from third parties, etc., arising from
the use of this product.
Explanation of the symbols
DC symbol
is the DC voltage symbol.
WEEE Warning symbol
To avoid the potential effects on the environment and human health
as a result of the presence of hazardous substances in electrical and
electronic equipment, end users of electrical and electronic
equipment should understand the meaning of the crossed-out wheeled bin
symbol. Do not dispose of WEEE as unsorted municipal waste and have to
collect such WEEE separately.
Restriction of Hazardous Substances Directive (RoHS)
All adapter devices comply with the requirements of the EU RoHS Directive.
Statements of compliance can be obtained by contacting support@yealink.com.
Safety Instructions
Save these instructions. Read these safety instructions before use!
General Requirements
Before you install and use the device, read the safety instructions
carefully and observe the situation during operation.
During the process of storage, transportation, and operation, please
always keep the device dry and clean, avoid collision and crash.
Please attempt not to dismantle the device by yourself. In case of any
discrepancy, please contact the appointed maintenance center for repair.
Please refer to the relevant laws and statutes while using the device.
Legal rights of others should be respected as well.
Environmental Requirements
Place the device at a well-ventilated place. Do not expose the device
under direct sunlight.
Keep the device dry and free of dusts.
Do not place the device on or near any inflammable or fire-vulnerable
object, such as rubber-made materials.
Keep the device away from any heat source or bare fire, such as a candle
or an electric heater.
Operating Requirements
Do not let a child operate the device without guidance.
Do not let a child play with the device or any accessory in case of
accidental swallowing.
Please use the accessories provided or authorized by the manufacturer
only.
The power supply of the device shall meet the requirements of the input
voltage of the device. Please use the provided surge protection power
socket only.
Before plugging or unplugging any cable, make sure that your hands are
completely dry.
Do not spill liquid of any kind on the product or use the equipment near
water, for example, near a bathtub, washbowl, kitchen sink, wet
basement or near a swimming pool.
During a thunderstorm, stop using the device and disconnect it from the
power supply. Unplug the power plug and the Asymmetric Digital
Subscriber Line (ADSL) twisted pair (the radio frequency cable) to avoid
lightning strike.
If the device is left unused for a rather long time, disconnect it from the
power supply and unplug the power plug.
When there is smoke emitted from the device, or some abnormal noise
or smell, disconnect the device from the power supply, and unplug the
power plug immediately.
Contact the specified maintenance center for repair.
Do not insert any object into equipment slots that is not part of the
product or auxiliary product.
Before connecting a cable, connect the grounding cable of the device
first. Do not disconnect the grounding cable until you disconnect all other
cables.
Cleaning Requirements
Before cleaning the device, disconnect it from the power supply.
Use a piece of soft, dry and anti-static cloth to clean the device.
Keep the power plug clean and dry.
Troubleshooting
The unit cannot supply power to device other than Yealink device.
There is a bad connection with the plug.
1. Clean the plug with a dry cloth.
2. Connect it to another wall outlet.
The usage environment is out of operating temperature range.
1. Use in the operating temperature range.
The cable between the unit and the Yealink device is connected incorrectly.
1. Connect the cable correctly.
You cannot connect the cable properly.
1. You may have connected a wrong Yealink device.
2. Use the correct power supply.
Some dust, etc., may be in the port.
1. Clean the port.
Contact your dealer or authorized service facility for any further questions.
FCC Statement
This device complies with part 15 of the FCC Rules. Operation is subject to the
following
two conditions: (1) this device may not cause harmful interference, and (2) this
device must accept any interference received, including interference that may
cause undesired operation.
Any Changes or modifications not expressly approved by the party responsible
for compliance could void the user's authority to operate the equipment.
IC Statement
This device complies with Industry Canada’s licence-exempt RSSs. Operation is
subject to the following two conditions:
(1) this device may not cause interference; and
(2) this device must accept any interference, including interference that may
cause undesired operation of the device. CAN ICES-3(B)
Le présent appareil est conforme aux CNR d’Industrie Canada applicables aux
appareils radio exempts de licence. L’exploitation est autorisée aux deux
conditions suivantes :
(1) l’appareil ne doit pas produire de brouillage;
(2) l’utilisateur de l’appareil doit accepter tout brouillage radioélectrique subi,
même si le brouillage est susceptible d’en compromettre le
fonctionnement.NMB-3(B)
Contact Information
YEALINK NETWORK TECHNOLOGY CO.,LTD.
309, 3rd Floor, No.16, Yun Ding North Road, Huli District, Xiamen City, Fujian, P.R. China
YEALINK (EUROPE) NETWORK TECHNOLOGY B.V.
Strawinskylaan 3127, Atrium Building, 8th floor, 1077ZX Amsterdam, The Netherlands
YEALINK (USA) NETWORK TECHNOLOGY CO., LTD.
999 Peachtree Street Suite 2300, Fulton, Atlanta, GA, 30309, USA
Made in China


About Yealink
Yealink is a global leading provider of enterprise communication and collaboration solutions, offering video conferencing service to
worldwide enterprises. Focusing on research and development, Yealink also insists on innovation and creation. With the outstanding
technical patents of cloud computing , audio, video and image processing technology, Yealink has built up a panoramic collaboration
solution of audio and video conferencing by merging its cloud services with a series of endpoints products. As one of the best providers
in more than 140 countries and regions including the US, the UK and Australia, Yealink ranks No.1 in the global market share of SIP
phones shipments.
Technical Support
Visit Yealink WIKI (http://support.yealink.com/) for the latest firmware, guides, FAQ, Product documents, and more. For better service, we
sincerely recommend you to use Yealink Ticketing system (https://ticket.yealink.com) to submit all your technical issues.
UVC50-EN+CN
Web: www.yealink.com
Copyright
©2019
TECHNOLOGY CO.,LTD
YEALINK(XIAMEN) NETWORK
.All rights reserved.
 Loading...