

Page 1

TSX-100
DESKTOP AUDIO SYSTEM
B
OWNER’S MANUAL
Page 2

Caution: Read this before operating your unit.
1 To assure the finest performance, please read this manual
carefully. Keep it in a safe place for future reference.
2 Install this unit in a well ventilated, cool, dry, clean place
with at least 10 cm on the top, 10 cm on the left and right,
—
and 10 cm at the back of this unit
away from direct
sunlight, heat sources, vibration, dust, moisture, and/or cold.
3 Locate this unit away from other electrical appliances,
motors, or transformers to avoid humming sounds.
4 Do not expose this unit to sudden temperature changes from
cold to hot, and do not locate this unit in an environment
with high humidity (i.e. a room with a humidifier) to prevent
condensation inside this unit, which may cause an electrical
shock, fire, damage to this unit, and/or personal injury.
5 Avoid installing this unit where foreign object may fall
onto this unit and/or this unit may be exposed to liquid
dripping or splashing. On the top of this unit, do not place:
– Other components, as they may cause damage and/or
discoloration on the surface of this unit.
– Burning objects (i.e. candles), as they may cause fire,
damage to this unit, and/or personal injury.
– Containers with liquid in them, as they may fall and
liquid may cause electrical shock to the user and/or
damage to this unit.
6 Do not cover this unit with a newspaper, tablecloth,
curtain, etc. in order not to obstruct heat radiation. If the
temperature inside this unit rises, it may cause fire,
damage to this unit, and/or personal injury.
7 Do not plug in this unit to a wall outlet until all
connections are complete.
8 Do not operate this unit upside-down. It may overheat,
possibly causing damage.
9 Do not use force on switches, knobs and/or cords.
10 When disconnecting the power cable from the wall outlet,
grasp the plug; do not pull the cable.
11 Do not clean this unit with chemical solvents; this might
damage the finish.
12 Only voltage specified on this unit must be used. Using this
unit with a higher voltage than specified is dangerous and
may cause fire, damage to this unit, and/or personal injury.
Yamaha will not be held responsible for any damage resulting
from use of this unit with a voltage other than specified.
13 To prevent damage by lightning, keep the power cord and
outdoor antennas disconnected from a wall outlet or this
unit during a lightning storm.
14 Do not attempt to modify or fix this unit. Contact qualified
Yamaha service personnel when any service is needed. The
cabinet should never be opened for any reasons.
15 When not planning to use this unit for long periods of
time (i.e. vacation), disconnect the AC power plug from
the wall outlet.
16 Be sure to read the “Troubleshooting” section on
common operating errors before concluding that this unit
is faulty.
17 Before moving this unit, press POWER OFF to set this
unit to the standby mode, and disconnect the AC power
plug from the wall outlet.
18 Condensation will form when the surrounding
temperature changes suddenly. Disconnect the power
cable from the outlet, then leave this unit alone.
19 When using this unit for a long time, this unit may
become warm. Turn the power off, then leave this unit
alone for cooling.
20 Install this unit near the AC outlet and where the AC
power plug can be reached easily.
21 The batteries shall not be exposed to excessive heat such
as sunshine, fire or the like.
22 Excessive sound pressure from earphones and
headphones can cause hearing loss.
This unit is not disconnected from the AC power source as
long as it is connected to the wall outlet, even if this unit itself
is turned off by POWER OFF. This state is called the standby
mode. In this state, this unit is designed to consume a very
small quantity of power.
WARNING
TO REDUCE THE RISK OF FIRE OR ELECTRIC SHOCK, DO
NOT EXPOSE THIS UNIT TO RAIN OR MOISTURE.
LASER SAFETY
This unit employs a laser. Due to possible eye injury, only a qualified
service person should remove the cover or attempt to service this device.
DANGER
This unit emits visible laser radiation when open. Avoid direct
eye exposure to beam. When this unit is plugged into the wall
outlet, do not place your eyes close to the opening of the disc tray
and other openings to look into inside.
The laser component in this product is capable of emitting
radiation exceeding the limit for Class 1.
■ For U.K. customers
If the socket outlets in the home are not suitable for the plug
supplied with this appliance, it should be cut off and an appropriate 3
pin plug fitted. For details, refer to the instructions described below.
Note
The plug severed from the mains lead must be destroyed, as a
plug with bared flexible cord is hazardous if engaged in a live
socket outlet.
■ Special Instructions for U.K. Model
IMPORTANT
THE WIRES IN MAINS LEAD ARE COLOURED IN
ACCORDANCE WITH THE FOLLOWING CODE:
Blue: NEUTRAL
Brown: LIVE
As the colours of the wires in the mains lead of this
apparatus may not correspond with the coloured markings
identifying the terminals in your plug, proceed as follows:
The wire which is coloured BLUE must be connected to
the terminal which is marked with the letter N or coloured
BLACK. The wire which is coloured BROWN must be
connected to the terminal which is marked with the letter L
or coloured RED.
Make sure that neither core is connected to the earth
terminal of the three pin plug.
i
Page 3

Contents
INTRODUCTION
Features ................................................................... 2
Controls and functions ........................................... 3
Front/top view............................................................ 3
Remote control........................................................... 4
PREPARATION
Preparation before using this unit ........................ 6
Turning on the power................................................. 6
Adjusting the clock .................................................... 7
OPERATION
Basic operation........................................................ 8
Selecting the input source .......................................... 8
Adjusting the volume level ........................................ 8
Adjusting sounds ....................................................... 9
Useful operations for the display ............................. 10
Listening to CDs, MP3/WMA files,
and external sources ......................................... 11
Listening to CDs ...................................................... 11
Listening to MP3/WMA files stored
on your USB device ............................................ 12
Switching the playback information display ........... 14
Repeat and random playback................................... 15
Playing back external sources.................................. 15
Listening to FM and AM radio stations ............. 16
Connecting antennas ................................................ 16
Tuning radio stations ............................................... 16
Presetting radio stations automatically
(Auto preset)........................................................ 17
Presetting radio stations manually
(Manual preset).................................................... 17
Selecting preset radio stations (Preset tuning)......... 18
Receiving Radio Data System stations .................... 18
Listening to DAB
(Digital Audio Broadcasting)........................... 20
About DAB.............................................................. 20
Connecting the DAB antenna .................................. 20
Preparing the DAB turning ...................................... 21
DAB tuning.............................................................. 21
Function mode ......................................................... 22
Auto tuning .............................................................. 23
Preset memory ......................................................... 23
Changing DAB service information ........................ 24
Using the timer functions ..................................... 25
ADDITIONAL INFORMATION
Troubleshooting.....................................................27
General..................................................................... 27
Disc playback .......................................................... 27
MP3/WMA file playback ........................................ 28
Radio reception........................................................ 28
Remote control ........................................................ 29
Notes on discs.........................................................30
Disc information ...................................................... 30
Handling a disc ........................................................ 30
Glossary..................................................................31
Specifications .........................................................31
DAB frequency information .................................32
PREPARATIONINTRODUCTION
OPERATION
INFORMATION
ADDITIONAL
1 En
English
Page 4
FEATURES
Features
• Stylish compact all-in-one design
• Audio CDs, MP3 CDs, and WMA CDs playable
• USB supported
• Sophisticated FM/AM/DAB tuner
• Simple but functional remote control
• Timer and clock function
■ About this manual
• In this manual, operations that can be performed with either this unit or its remote control are explained using the
remote control.
• The symbol “☞ ” with page number(s) indicates the corresponding reference page(s).
• y indicates a tip for your operation.
• Notes contain important information about safety and operating instructions.
• This manual is printed prior to production. Design and specifications are subject to change in part as a result of
improvements, etc.
In case of differences between the manual and the product, the product has priority.
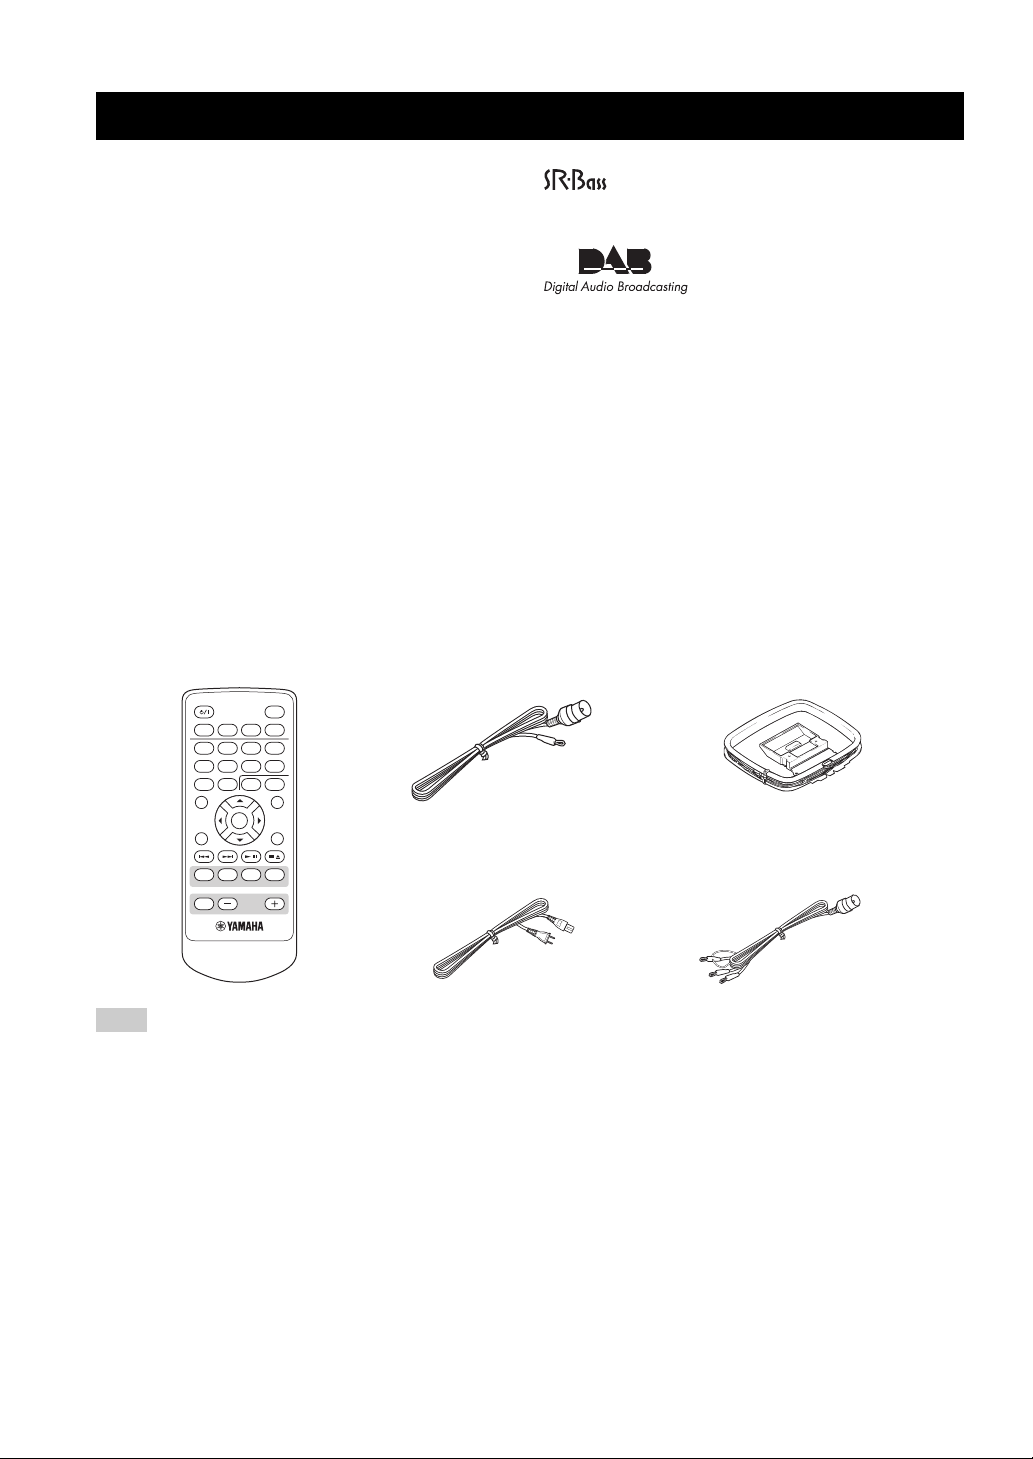
■ Supplied accessories
This product includes the following accessories. Make sure you have all of the following parts.
“Swing Radiator Bass™” is a trademark of YAMAHA
CORPORATION.
This receiver supports DAB tuning.
Remote control
STANDBY/ON
TIME/INFO
TUNE
RANDOM REPEAT
MODE-PTY SEEK-START FREQ/TEXT
PORTABLE
MUTE
ALARM
ON/OFF
TIMER
SLEEPDIMMER
TIME ADJ
2134
6578
09
TONE EQ
PRESET
DISPLAY
ENTER
FUNCTION
/ /
CDUSB
TUNER
INPUT
VOLUME
Indoor FM antenna AM loop antenna
Power cabl e
Note
The form of the supplied accessories varies depending on the models.
Indoor DAB antenna
2 En
Page 5
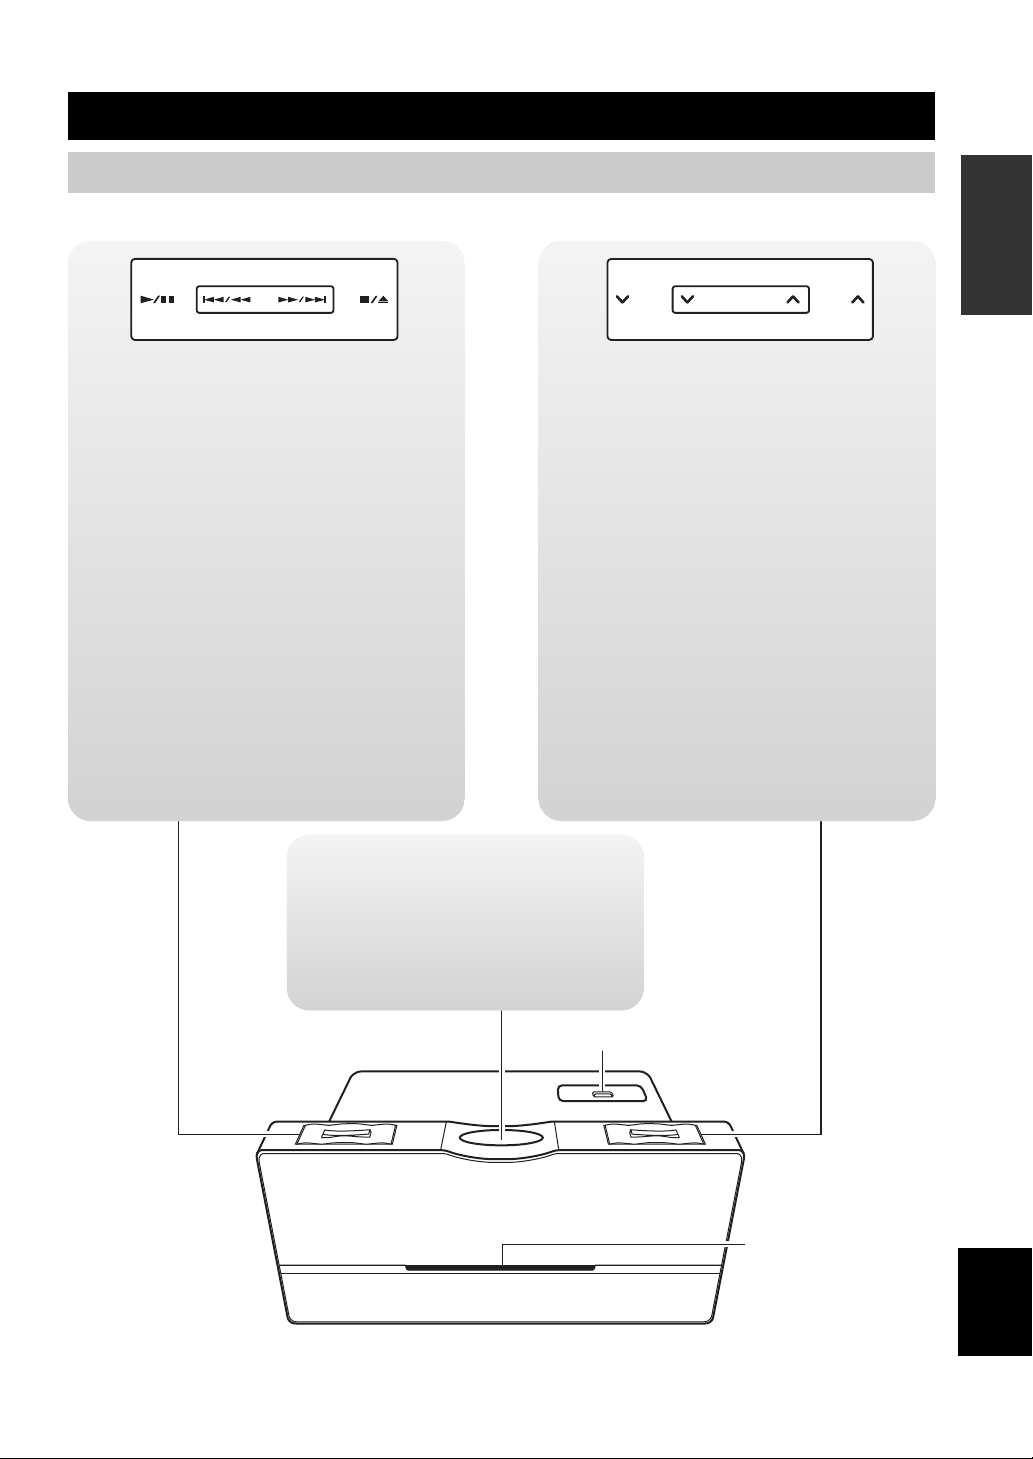
Controls and functions
Front/top view
SLEEP
POWER OFF
6
Starts and pauses playback. (☞ P. 11)
7/0
Stops playback or ejects a disc when
playback is stopped. (☞ P. 11)
,
4/1¡/¢
Skips to the beginning of the current or next
track.
Press and hold the key to search backward/
forward. (☞ P. 11)
POWER OFF
Sets this unit to the standby mode. (☞ P. 6)
ALARM
PRESET
MUTE
VOL u, d
Adjusts volume level. (☞ P. 8)
MUTE
Turns off the volume. (☞ P. 8)
PRESET u, d
Selects the preset stations. (☞ P. 17)
ALARM
Sets the alarm function. (☞ P. 25)
INTRODUCTION
VOLVOL
SLEEP
Sets the sleep timer. (☞ P. 26)
INPUT/SNOOZE
Turns on this unit and selects an input
source (☞ P. 6, 8), or enables the
snooze function when alarm is
activated. (☞ P. 25)
USB port (☞ P. 12)
Display
Disc slot (☞ P. 11)
English
Speaker
3 En
Page 6
Controls and functions
Remote control
STANDBY/ON
Turns on this unit or sets it to the standby
mode. (☞ P. 6)
DIMMER
Changes the brightness of the display.
(☞ P. 10)
TIME/INFO
Displays the disc/USB information.
(☞ P. 14)
Infrared signal
transmitter
STANDBY/ON
TIME ADJ
213
657
09
TIME/INFO
PRESET
ALARM
SLEEPDIMMER
TONE EQ
ON/OFF
TIMER
4
8
DISPLAY
Cursor (S/T/W/X) and ENTER
RANDOM
Sets this unit to the random playback mode.
(☞ P. 15)
CDUSB
PORTABLE
TUNER
INPUT
Select the source you want to listen to.
Press PORTABLE to listen to the source played back on the
component which is connected to the PORTABLE jack on
the rear panel of this unit. (☞ P. 15)
Press USB to listen to the source stored in the connected
USB memory. (☞ P. 12)
Press TUNER to listen to FM/AM and DAB radio
broadcast. Each time you press TUNER, the source switches
between FM, AM and DAB. (☞ P. 16)
Press CD to listen to a disc inserted into the disc slot.
(☞ P. 11)
TUNE
RANDOM REPEA
MODE-PTY SEEK-START FREQ/TEXT
PORTABLE
MUTE
ENTER
TUNER
INPUT
VOLUME
T
FUNCTION
//
CDUSB
Remove the insulation sheet
before using the remote control.
y
Remove the transparent sheet before using the remote
control.
MUTE
VOLUME
Adjust volume. (☞ P. 8)
4 En
Page 7
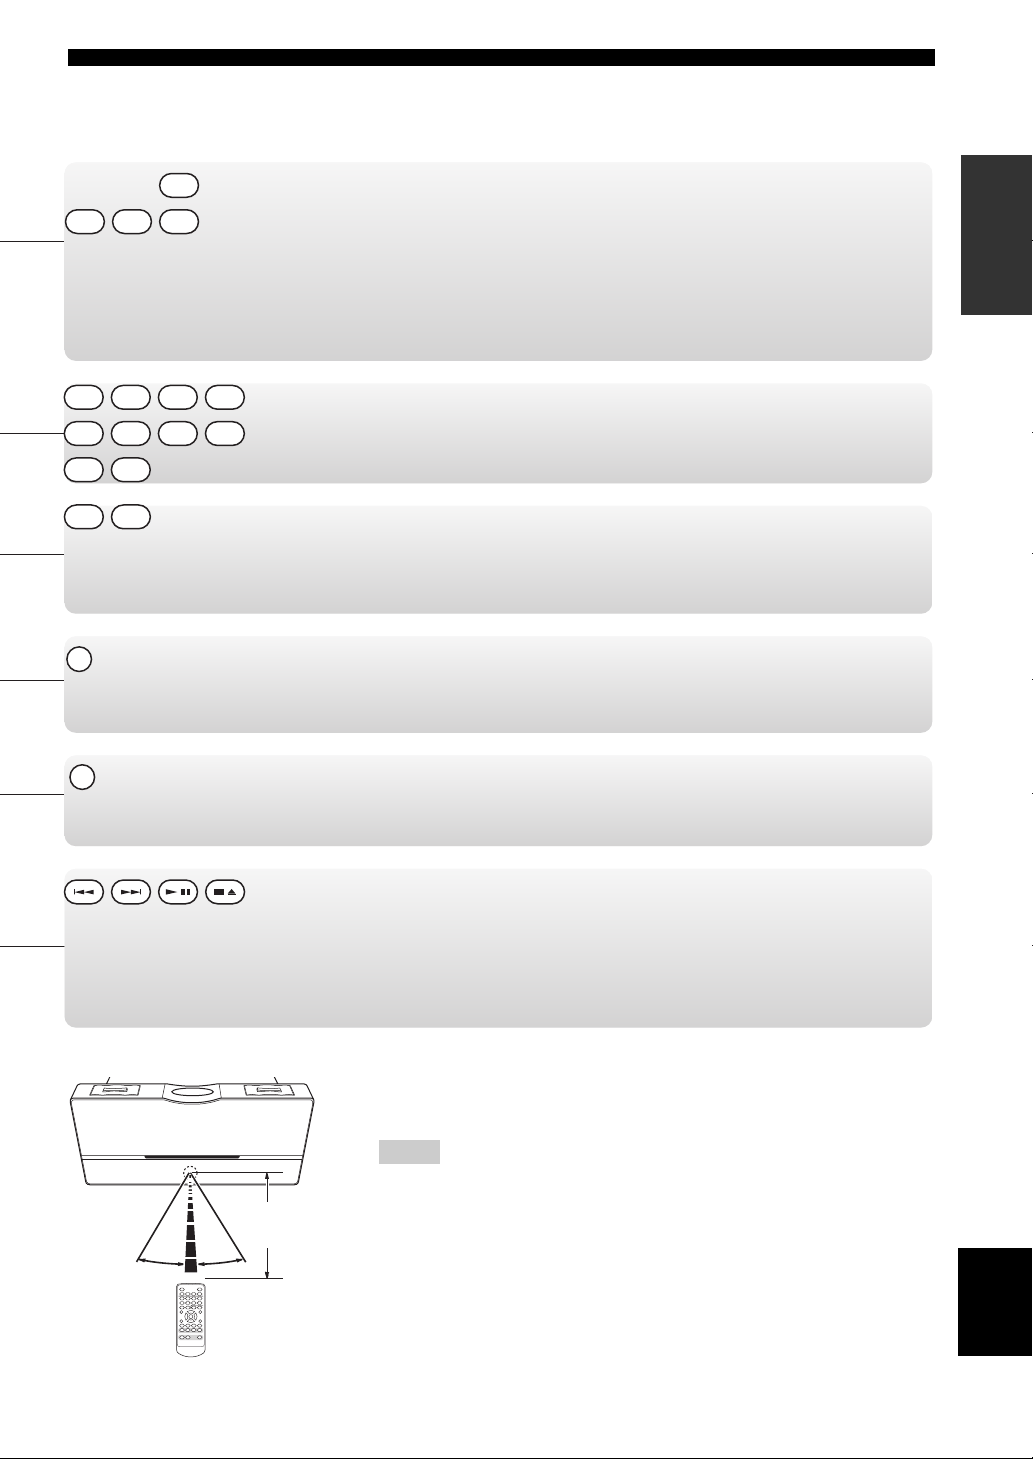
Controls and functions
TIME ADJ
1
TONE EQ
DISPLAY
ALARM
ON/OFF
TIMERSLEEP
Set various timer and clock function.
ALARM ON/OFF: Activates or cancels the alarm function. (☞ P. 25)
INTRODUCTION
TIME ADJ: Adjusts the clock of this unit. (☞ P. 7)
SLEEP: Sets the sleep timer. (☞ P. 26)
TIMER: Sets the countdown timer. (☞ P. 26)
3
2
65
09
4
Select the desired track or preset station directly.
7
(☞ P. 11, 13, 17, 18)
8
Adjust the sound.
TONE: Adjusts the bass and treble balance. (☞ P. 9)
EQ: Selects the equalizer mode. (☞ P. 9)
Changes the displayed information. (☞ P. 10)
REPEA
T
FUNCTION
Sets this unit to the repeat playback mode. (☞ P. 15)
Also activates the DAB function-setting mode when this unit is in the DAB tuning
mode. (☞ P. 22)
MODE-PTY SEEK-START PREQ/TEXT
/ /
Control playback.
4¢
6
7/0
■ Using the remote control
Within 6 m
(20 feet)
30˚ 30˚
, : Skips to the beginning of the current or next track.
Press and hold the key to search backward/forward. (☞ P. 11, 12)
: Starts and pauses playback. (☞ P. 11, 12)
: Stops playback or ejects a disc when playback is stopped. (☞ P. 11, 12)
Use the remote control within 6 m (20 feet) of this unit and point
it toward the remote control sensor.
Notes
• Do not put obstacles between the sensor of this unit and the remote control. Doing
so, you cannot operate this unit by the remote control.
• Do not spill liquid on the remote control.
• Do not drop the remote control.
• Do not leave the remote control in the following places:
– hot or humid places such as bathroom or near a heater
– extremely cold places
– dusty places
For replacement of the battery ☞ P. 29.
English
5 En
Page 8

PREPARATION BEFORE USING THIS UNIT
Preparation before using this unit
Turning on the power
Connect the power cable to the AC inlet of this unit
1 To AC inlet
and an AC wall outlet.
2 To an AC wall outlet
STANDBY/ON
STANDBY/ON
Turn on this unit.
Press again to set this unit to the standby mode.
On the top panel
You can also perform the above operations on the top panel.
SLEEP
INPUT/SNOOZE
Turn on this unit.
y
• During the standby mode, the power consumption is reduced.
• In the standby mode, you can select whether to display the date and time (in the ECO OFF
mode) or not to display them (in the ECO ON mode).
1 While in the standby mode, press and hold the MUTE on the top panel.
J The “ECO ON” or “ECO OFF” flashes.
2 While the indicator is flashing, press the MUTE to select “ECO ON” or “ECO OFF”.
3 Wait several seconds.
J The mode is set to ECO ON or ECO OFF.
ECO ON mode
Display in
the
standby
mode
(Not displayed)
POWER OFF
Set this unit to
the standby mode.
ECO OFF mode
11:22PM
12 Oct Fri
(Date and time displayed)
6 En
• The memory back-up circuit prevents the stored data from being lost even if this unit is in
the standby mode. However, the stored data will be lost if the power cable is disconnected
from the AC wall outlet or if the power supply is cut off for more than one week.
Page 9
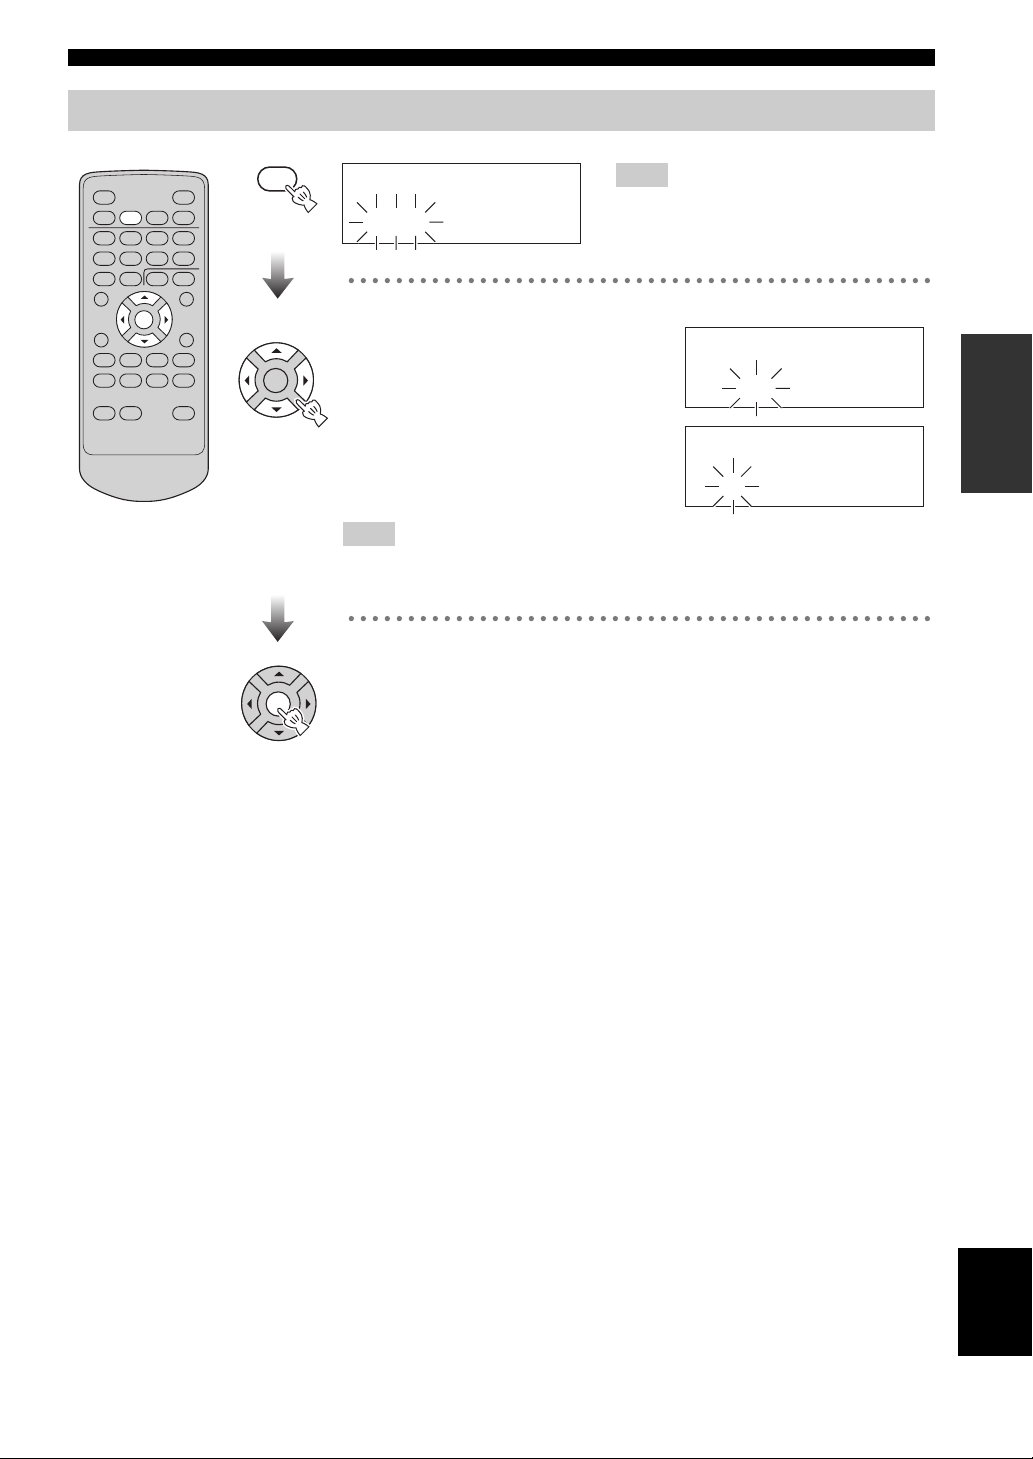
Adjusting the clock
Preparation before using this unit
TIME ADJ
PRESET
TUNE ENTER
TIME ADJ
PRESET
TUNE ENTER
PRESET
TUNE ENTER
Note
Year
2007
When the display is off, turn on the power
before making this setting.
Examples
Adjust date and time.
W/X
Selects year/date/hour/minute.
S/T
Increases or decreases the date or time.
Date
12 Oct Fri
Time
1:23
Note
Time appears in 12-hour notation (AM/PM) depending on the model. For example,
“4:00PM”.
Confirm.
PREPARATION
7 En
English
Page 10

Basic operation
Basic operation
Selecting the input source
To listen to music played on a
portable audio device
PORTABLE
To listen to MP3/WMA files
stored on your USB device
USB
CDUSB
TUNER
PORTABLE
INPUT
To listen to radio stations
(FM/AM/DAB)
TUNER
To listen to a CD
CD
On the top panel
Adjusting the volume level
To increase or decrease
the volume level
VOLUME
y
If the power is turned off with the
volume set to a level of 41 or more, the
volume level is automatically set to 20
when the power is turned back on.
VOLUME
MUTE
Volume 41 20
To turn off the sound
MUTE
y
Press again to resume the volume level.
On the top panel
Decreases the
volume level.
Turns off the sound.
Increases the
volume level.
ALARM
PRESET
MUTE
VOLVOL
8 En
INPUT/SNOOZE
Press repeatedly.
■ Using the headphones
To PHONES
TUNER
75
UNBAL.
FM
ANT
y
Even when you connect your headphones, the alarm sound is
output through the speaker.
PHONES
PORTABLE
Page 11
Adjusting sounds
■ Adjusting the total sound balance
Basic operation
ENTER
TONE EQ
EQ
Press repeatedly.
■ Adjusting bass/treble balance
TONE
Press repeatedly.
PRESET
BASS 0
Select “BASS” (low frequency range)
or “TREBLE” (high frequency range).
ROCK
POP
JAZZ
CLASSIC
STRAIGHT
For rock music
For popular music
For jazz
For classical music
For various music
OPERATION
TUNE ENTER
PRESET
TUNE ENTER
BASS +02
Adjust the level (–10 to +10 dB).
Confirm.
English
9 En
Page 12
Basic operation
Useful operations for the display
■ Switching the display information
DISPLAY
Press repeatedly.
DISPLAY
■ Dimming the display
DIMMER
DIMMER
Press repeatedly.
Time and playback status
Input
Date
Alarm 1 setting (☞ P. 25)
Alarm 2 setting (☞ P. 25)
Sleep timer setting (☞ P. 26)
Countdown timer (only when activated) (☞ P. 26)
AUTO CONTROL
100%
50%
Adjusts the brightness automatically
according to the ambient brightness.
Bright
Mid dim
10 En
30%
Dim
Page 13

Listening to CDs, MP3/WMA files, and external sources
Listening to CDs, MP3/WMA files, and external sources
Listening to CDs
Insert your disc.
y
You can also play back MP3/WMA files recorded on a disc. For operation instruction,
refer to “Listening to MP3/WMA files stored on your USB device” (☞ P. 12).
2134
6578
09
MODE-PTY SEEK-START PREQ/TEXT
/ /
CD
CD
On the top panel
Skip forward/
Search forward*
Playback/Pause
SLEEP
POWER OFF
Stop/Eject*
Skip backward/
Search backward*
* Press and hold while in playback
or pause.
Playback starts.
When the playback is
stopped
1:23
T001 00:01
/
Elapsed
time
6
Forward
PTY SEEK-START
Status
indicator
■ To specify a track
y
Enter the track number you want to listen
to.
■ To stop playback
Status
indicator
Current
track
y
• You can switch the playback information display (☞ P. 14).
• You can also play back MP3/WMA files recorded on a disc. Refer to “Listening to
MP3/WMA files stored on your USB device” (☞ P. 12).
■ To pause playback
FREQ/TEXT
y
To cancel pause, press again.
■ To skip tracks
Backward
MODE-PTY SEEK
1:23
T014 60:59
Tot al
tracks
2134
6578
0
9
/
Tota l t im e of
the disc
OPERATION
■ To search backward/
forward
Backward
MODE-PTY SEEK
Press and hold
Note
No sound is heard when you search
during pause.
Forward
PTY SEEK-START
■ To eject a disc
While playback
is stopped
/
Press
While in playback
or pause
/
Press and
hold
11 En
English
Page 14

Listening to CDs, MP3/WMA files, and external sources
Listening to MP3/WMA files stored on your USB device
Connect a USB device.
This unit supports USB mass storage class devices (e.g., flash memories or
portable audio players) using FAT16 or FAT32 format.
Notes
• Some devices may not work properly even if they meet the requirements.
• Do not connect devices other than USB mass storage class devices (such as USB
chargers or USB hubs), PCs, card readers, external HDD, etc.
• Yamaha will not be held responsible for any damage to or data loss on the USB device
occurring while the device is connected to this unit.
• Playability of and power supply to all kind of USB devices are not guaranteed.
2134
6578
09
PRESET
TUNE/ENTER
USB
On the top panel
Playback/Pause
POWER OFF
Skip backward/
Search backward*
* Press and hold
USB
Skip forward/
Search forward*
SLEEP
Stop
Playback starts.
1:23
Road to Ind
Song title/artist name/album name
y
You can switch the playback information display (☞ P. 14).
Notes
• The reading time may exceed 30 seconds depending on the number of files/
folders.
• This unit can only shows alphanumeric characters.
■ To stop playback
/
■ To pause playback
FREQ/TEXT
/
y
To cancel pause, press again.
6
■ To skip tracks
Backward
MODE-PTY SEEK
Forward
PTY SEEK-START
■ To search backward/
forward
Backward
MODE-PTY SEEK
Press and hold
Forward
PTY SEEK-START
12 En
Note
Pause will be canceled when you start
searching.
Page 15

Listening to CDs, MP3/WMA files, and external sources
■ To specify a track for playback
2134
6578
0
9
y
Enter the track number you want to listen to.
Notes
• Depending on the conditions of recording such as software
recording setting, this unit may not be able to play a disc or
USB device in the order of recording.
• For an MP3 or WMA disc/USB device, the number assigned to
each file corresponds to the file sequence in the disc/USB
device, not in the individual folders.
■ To select a folder/file for an MP3 or WMA
format file
PRESET
TUNE ENTER
Only when MP3/WMA disc playback
PRESET
Select a folder.
About MP3 or WMA files
You can play back MP3 or WMA files recorded on your CDR, CD-RW, or USB device. This unit regards folders in a disc/
USB device as albums, and files as tracks as shown below.
Folder hierarchy is disregarded.
Root
Folder (Album)
File (Track)
Notes
• This unit can display up to 255 files and 255 folders. However,
less than 255 files/folders may be displayed if some files/folders
are not playable on this unit.
• If the USB device is partitioned, only the first partition is
displayed.
• Some files may not work properly depending on the USB
device specification.
• Copyright-protected files cannot be played back.
• This unit can play back files of 4 GB in size or less.
OPERATION
TUNE ENTER
PRESET
TUNE ENTER
PRESET
TUNE ENTER
Select a file.
Start playback.
English
13 En
Page 16

Listening to CDs, MP3/WMA files, and external sources
Switching the playback information display
■ MP3/WMA files
DIMMER
Scrolling display* (Default)
TIME/INFO
Each time you press the key, the information display
changes.
Note
Some special characters may not be shown properly.
TIME/INFO
Press repeatedly
■ Audio CDs
Elapsed time of the current track (Default)
1:23
T014 02:21
Remaining time of the current track
T014-03:41
Total time of the disc
TTL 54:41
Remaining time of the disc
TTL -12:28
1:23
to order-Fr
Elapsed time of the current file
T014 02:21
Remaining time of the current file
T014-03:41
File name
Road-to-ind
Song title
Road to Ind
Artist name
Frankie Zip
Album name
Made to ord
Year
2007
Comment
Live at KCE
Back to the default display
*
Scrolling display shows the song title, artist name, and album
name of the selected item in sequence.
Back to the default display
14 En
Page 17

Listening to CDs, MP3/WMA files, and external sources
Repeat and random playback
■ Random playback
RANDOM
Press repeatedly
RANDOM REPEAT
FUNCTION
Normal playback
(Single repeat)
R1
(Folder repeat, MP3/WMA disc/USB only)
Rf
Normal playback
(Random playback)
Rd
■ Repeat playback
REPEAT
FUNCTION
Press repeatedly
Playing back external sources
Note
Turn down the volume of this unit and your portable audio device
before connection.
Connect your portable audio device.
TUNER
FM
75
UNBAL.
ANT
GND
DAB ANT
AM
ANT
PHONES
PORTABLE
3.5 mm mini plug
Portable audio
device
OPERATION
(Full repeat)
Ra
Note
Repeat and random play modes are canceled when the playback
is stopped or the disc/USB device is removed.
PORTABLE
PORTABLE
PORTABLE
Start playback on the
connected portable
audio device.
y
For operations of the portable audio device, refer to the
instruction manual of the device.
English
15 En
Page 18

Listening to FM and AM radio stations
Listening to FM and AM radio stations
Connecting antennas
AM loop antenna (supplied)
12 3
The cable of AM loop
antenna
Indoor FM
antenna
(supplied)
1
TUNER
FM
75
UNBAL.
ANT
GND
DAB ANT
AM
ANT
2
3
Tuning radio stations
TUNER
Select FM or AM.
FM
87.50MHz
RANDOM
TUNE
TUNER
PRESET
TUNE ENTER
Press and hold
FM
89.70MHz
y
• While listening to the AM radio station, rotate the antenna head
to find the best angle for reception.
• You can also tune radio stations manually by pressing TUNE
W/X repeatedly.
• To increase the quality of the FM sound under the weak radio
wave, press and hold RANDOM on the remote control to
change the FM radio wave reception mode of this unit to the
monaural mode.
Ground
(GND terminal)
Note
The wire of the AM loop antenna is shield type. Connect the
white wire to AM ANT terminal and connect the black wire to
GND terminal.
About grounding
For the maximum safety and minimum interference, connect
the antenna GND terminal to a good earth ground. A good
earth ground is a metal stake driven into the moist earth.
16 En
Page 19

Listening to FM and AM radio stations
Presetting radio stations automatically (Auto preset)
After switching to the preset setting display (while part of
the display is flashing), perform this operation while it is
still flashing.
TUNER
Select FM or AM.
FM
87.50MHz
ENTER
FREQ/TEXT
/
TUNER
PRESET
TUNE ENTER
Press and hold
Enter the
preset mode.
FM
01 87.50MHz
Presetting radio stations manually (Manual preset)
After switching to the preset setting display (while part of
the display is flashing), perform this operation while it is
still flashing.
Tune into a favorite
radio station (☞ P.
FM
PRESET
ENTER
PRESET
TUNE ENTER
Press and hold
89.70MHz
Enter the
preset mode.
FM
01 89.70MHz
OPERATION
FREQ/TEXT
/
Press and hold
When finished
FM
COMPLETE
y
• You can delete a preset station by pressing .
• You can delete all the preset stations by pressing and holding
for 3 seconds or longer.
7/0
7/0
PRESET
TUNE ENTER
Select the
desired preset
number.
y
You can also use the
numeric buttons to select
the preset number.
FM
04 89.70MHz
PRESET
TUNE ENTER
y
• You can preset up to 30 FM stations and 20 AM stations.
• You can delete a preset station by pressing .
• You can delete all the preset stations by pressing and holding
for 3 seconds or longer.
7/0
Confirm.
7/0
English
17 En
Page 20

Listening to FM and AM radio stations
Selecting preset radio stations (Preset tuning)
TUNER
Select FM or AM.
FM
PRESET
TUNER
TUNE ENTER
87.50MHz01
PRESET
Select the
preset radio
station.
y
You can also use the
numeric buttons to
select the station.
FM
30 108.00MHz
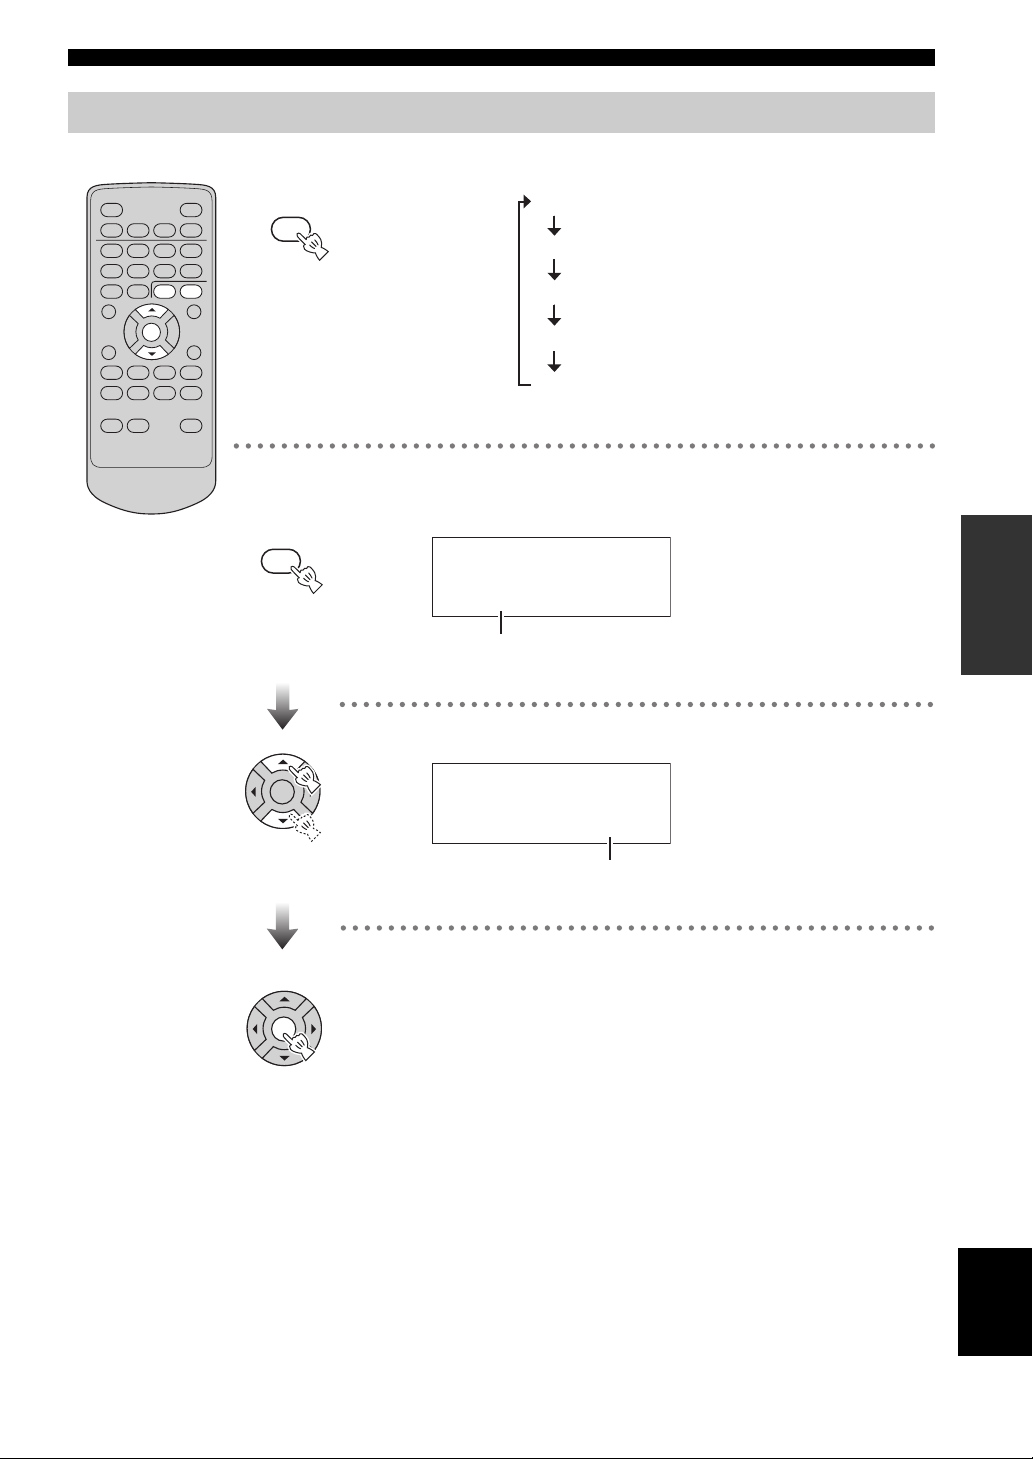
Receiving Radio Data System stations
■ Selecting stations by program type
While receiving
FREQ/TEXT
Press repeatedly
PRESET
an FM, select
/
“PRG TYPE”.
FM
PRG TYPE
FREQ/TEXT
MODE-PTY SEEK-START
/
MODE-PTY SEEK
FM
SEARCH >
On the top panel
ALARM
PRESET
MUTE
PRESET
VOLVOL
TUNE ENTER
Select a program
type (☞ P. 19).
FM
NEWS
PTY SEEK-START
y
To cancel program type seek, press PTY SEEK START again.
Initiate scan.
18 En
Page 21

Listening to FM and AM radio stations
■ Available program types ■ Switching the information display of
Radio Data System
Program type Descriptions
NEWS
AFFAIRS
INFO
SPORT
EDUCATE
DRAMA
CULTURE
SCIENCE
VARIED
POP M
ROCK M
EASY M
LIGHT M
CLASSICS
OTHER M
WEATHER
FINANCE
CHILDREN
SOCIAL
RELIGION
PHONE IN
TRAVEL
LEISURE
JAZZ
COUNTRY
NATION M
OLDIES
FOLK M
DOCUMENT
TEST
ALARM
News
Current affairs
General information
Sports
Education
Drama
Cultures
Science
Varied Speech
Pop Music
Rock Music
Easy Listening
Light Classical
Serious Classical
Other Music
Weather & Meteorology
Finance
Children’s Program
Social Affairs
Religion
Phone In
Travel & Touring
Leisure & Hobby
Jazz Music
Country Music
National Music
Other Music
Folk Music
Documentary
Alarm Test
Alarm-Alarm!
FREQ/TEXT
/
Press repeatedly
FREQ/TEXT
/
Station name
FM
PRG SERVICE
Program type
FM
PRG TYPE
Text information related to the station
FM
RADIO TEXT
Current time
FM
CLOCK TIME
Original display
Note
If the signal transmission of the Radio Data System station is too
weak, this unit may not be able to receive Radio Data System
information completely. In particular, RT (Radio Text)
information uses a lot of bandwidth, so it may be less available
compared to other types of information.
OPERATION
19 En
English
Page 22

Listening to DAB (Digital Audio Broadcasting)
Listening to DAB (Digital Audio Broadcasting)
About DAB
DAB (Digital Audio Broadcasting), also known as digital
radio, is a new way of radio broadcasting. DAB is broadcast
using digital signals instead of analog signals, resulting in
near CD-quality sound. Analog signals (i.e. AM/FM) are
susceptible to interference (i.e. distortion and noise) caused by
electrical equipment, weather conditions, tall buildings,
mountains, etc.; digital signals are not. Thus, with DAB, there
is virtually interference-free reception and no hiss or crackle.
Another advantage of DAB is that a large amount of
information can be carried within the digital signal. DAB
is broadcast in blocks of data called ensembles (also
known as multiplexes). Several radio programs (called
services) can be broadcast simultaneously in each
ensemble. This means that you can choose between
several radio programs within one frequency.
In addition to the audio signal, service information is also
broadcast and displayed in the front panel display of this
unit. Part of the service information is text data
information called DLS (Dynamic Label Segment). For
more information, see page 24.
Ensemble
Connecting the DAB antenna
Connect the supplied indoor DAB antenna to the DAB
ANT. terminal on the rear panel of this unit and attach it
vertically on a wall.
Indoor DAB antenna
(supplied)
TUNER
FM
75
UNBAL.
ANT
GND
DAB ANT
AM
ANT
Primary
service
Audio signal and
secondary service
information
With DAB, there is no need to remember channel
frequencies, either. All broadcasts are selected by simply
selecting the service name.
Notes
• Be sure to check the DAB coverage in your area – not all areas
are presently covered. For a list of country DAB statuses and
worldwide DAB frequencies, visit WorldDAB online at
“http://www.worlddab.org”.
• The sound quality and service information are controlled by the
DAB broadcaster, not this unit. Not all DAB broadcasters
transmit PAD/SI information.
• DAB signals are broadcast in Band-III (174 – 240 MHz).
20 En
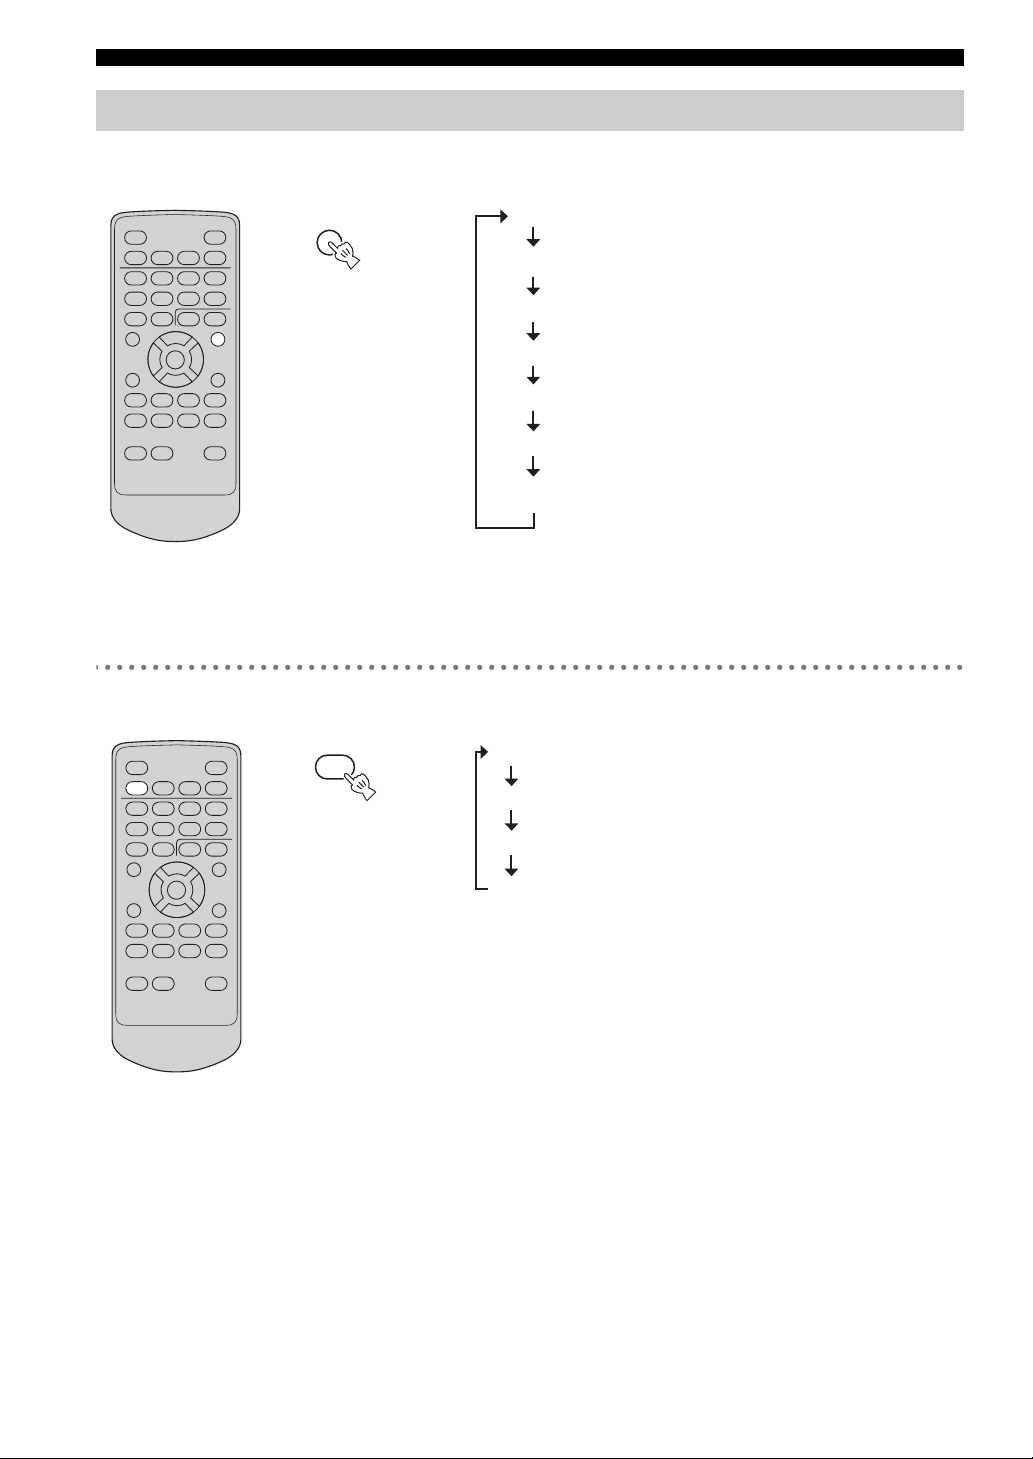
Page 23

Listening to DAB (Digital Audio Broadcasting)
Preparing the DAB tuning
Before tuning into DAB services, you must perform the
initial scan. This unit creates a channel list during the
initial scan.
TUNER
Press repeatedly.
Select DAB.
DAB Init
Please wait
This unit starts to scan for DAB
TUNER
services in the area.
y
When you have already performed
the initial scan, “Tuning” appears.
Proceed with the DAB tuning
operation in the right column.
Scan 0
>>>>>>>>
DAB tuning
Follow procedures below to tune into the channels found
by this unit.
TUNER
Press repeatedly.
Select DAB.
Classic
ENTER
TUNER
Classic FM
PRESET
TUNE ENTER
Select a
channel you
want to listen
to.
Classic
BBC CAMB
PRESET
OPERATION
The total channel numbers
Scan 12
>>>>>>>>
Once the initial scan is completed and DAB channel list
created, the channels are listed in alphanumeric order.
Notes
• If the initial scan operation is not successful, “No stations”
appears.
• When you select “Tune aid” instead of “Auto scan”, you can
select channel and frequency by pressing W/X (☞ P. 22).
TUNE ENTER
Confirm.
BBC CAMB
PIANO CONCER
Notes
• When the selected DAB service has a secondary service, the
2nd
indicator flashes in the front panel for 5 seconds, and the
selected DAB service is a secondary DAB service, the
indicator lights up. This unit returns to the corresponding
primary service when the secondary service becomes timed
out.
• “Off air” appears when this unit can not receive specified
DAB s ervice.
Display information (Example)
Current DAB service
2nd
Classic
BBC CAMBBBC CAMB< >
Primary
service
Selected DAB service
Secondary
service
English
21 En
Page 24

Listening to DAB (Digital Audio Broadcasting)
Function mode
Use this feature to set the DAB functions.
ENTER
TUNER
Press repeatedly.
REPEAT
FUNCTION
TUNE ENTER
Press W / X to move as , , or .
Press ENTER to move as or to confirm the value in each function.
TUNER
REPEAT
FUNCTION
PRESET
Select DAB.
P-set tune
(Preset tune)
Preset DAB station
● ● ●
(up to the number of preset channels) (up to the number of channels)
Preset DAB station
Stat order
(Station order)
Alpha
(default)
● ● ●
Ensemble
Tune aid
(Manual tune)
11C 220.36
12D 229.08
D-Range0
D-Range
(DRC value)
D-Range1
D-Range1/2
■ Preset tune
Use this option to select preset DAB stations.
To preset DAB stations, See “Preset memory” on
page 23.
■ Station order
To set the order in which stations are listed, use
station order. There are 2 items:
• Alpha (Default)
Channels are listed in alphanumeric order (0-9, AZ) by the first letter of the station name.
• Ensemble
This option will list active stations (stations that
can be received by this unit) at the top of the
channel list. Channels that are in the list but have
no service in your area are listed at the bottom of
the channel list.
22 En
■ Tun e aid
Use this feature to adjust the positioning of the DAB
antenna and this unit. It is effective at maximizing the
DAB reception capability.
■ DRC (Dynamic range control) value
Dynamic range is the decibel (dB) range between the
highest and lowest sounds in a broadcast. Some DAB
broadcasters transmit a wide dynamic range
(enabling high quality sound), accompanied by
Dynamic Range Control (DRC) data. The DRC can
be used to compress the dynamic range of the
broadcast, making softer sounds easier to hear. This is
especially useful when listening to a DAB service in a
noisy environment or at a low volume (such as at
night).
There are 3 items:
• D-Range1 (Maximum)
• D-Range1/2 (Medium)
• D-Range0 (None)
Page 25

Listening to DAB (Digital Audio Broadcasting)
Auto tuning
If the unit is moved to a new area or you want to check if
there are new DAB channels available in your area, you
can perform a scan.
• Local scan: Use it to scan specified ranges in
band III.
• Full scan: Use it to scan all ranges in band III.
•
TUNER
Press repeatedly.
Select DAB.
Classic
ENTER
/
TUNER
More than
2 seconds
Classic FM
FREQ/TEXT
/
DAB
Local scan
PRESET
TUNE ENTER
Select Local scan
or Full scan.
Preset memory
This mode is used to assign up to 99 preset numbers to
DAB service.
TUNER
Press repeatedly.
Select DAB.
Classic
ENTER
TUNER
TUNE ENTER
Classic FM
PRESET
Press and hold.
DAB 10
P-set memory
PRESET
TUNE ENTER
Select the preset
channels.
y
You can also select the preset
channel number using numeric
buttons.
OPERATION
PRESET
TUNE ENTER
When finished
DAB
Full scan
Confirm.
Scan 0
>
Classic
Classic FM
DAB 30
P-set memory
PRESET
TUNE ENTER
Confirm.
When finished
14:26
Classic FM
y
• When you want to delete the desired preset station, follow the
steps below (with the remote control only).
1. Select the preset stations and then press .
2. Press during the preset channel number is flashing.
7/0
The preset station is deleted.
• You can delete all the preset stations by pressing and holding
for 3 seconds or longer after you select certain preset
7/0
station.
7/0
23 En
English
Page 26

Listening to DAB (Digital Audio Broadcasting)
Changing DAB service information
Use this feature to display various information about the
DAB service currently being received.
TIME/INFO
Press repeatedly.
TIME/INFO
The information are displayed as
follows:
DLS
Program type
Ensemble label
Date and time
Channel and frequency
Signal Q
■ DLS
The Dynamic Label Segment (DLS) is the scrolling
text label supplied by the radio station. It may be
information about the song or program being
broadcasted.
■ Program type
Displays the type of broadcast supplied by the DAB
station, such as Pop, Rock or Classical music.
■ Ensemble label
Displays the name of the current ensemble that is
broadcasting the program.
■ Date and time
Displays the current date and time.
The clock setting is automatically adjusted to the
clock time data being broadcast by the DAB station.
■ Channel and frequency
Displays the channel and frequency of the currently
playing broadcast.
■ Signal Q (Signal quality)
Displays the digital signal reception quality rate
(0-100, i.e. Q:100) of the currently playing broadcast.
This is for information only; no adjustment is
available. The higher the figure, the better the quality
of the received broadcast.
24 En
Page 27

Using the timer functions
Use this feature to wake up with your favorite CD or radio program, etc. Also use this feature to automatically set this
unit to the standby mode after a certain amount of time.
■ Setting the wake-up timer
ALARM
ON/OFF
2134
6578
09
PRESET
TUNE ENTER
ALARM
ON/OFF
ALM1 OFF
M-F 8:00
Adjust the alarm settings.
PRESET
TUNE ENTER
3 Select the repetition.
5 Select alarm sound from CD, FM,
AM, USB, DAB, SOUND1 (beep),
and SOUND2 (beep).
W/X
Moves through the alarm parameters.
S/T
Changes the alarm parameters.
1 Select alarm 1/2.
M-F: Monday to Friday
Daily: Every day
Once: Only once
y
You can also use the numeric buttons to enter time.
Note
When the display is off, turn on the power
before making this setting.
2 Select on/off.
ALM1 ON
M-F 8:00
4 Set the alarm time.
SOUND1VOL 12
1
Shows the active alarm.
2
1
2
6 Adjust the volume.
OPERATION
PRESET
TUNE ENTER
■ To stop the alarm
ALARM
ON/OFF
or
On the top panel
y
Once you have set the alarm, you can turn on/off the alarm using ALARM ON/OFF.
■ Using the snooze function
On the top panel
ALARM
PRESET
MUTE
VOLVOL
INPUT/SNOOZE
Playback resumes
after 5 minutes.
English
25 En
Page 28

Using the timer functions
■ Setting the sleep timer
ENTER
TIMERSLEEP
SLEEP
Press repeatedly.
SLEEP 60
SLEEP OFF
SLEEP 30
SLEEP 60
SLEEP 90
SLEEP 120
■ Setting the countdown timer
An easy to use countdown timer. Let simple timer remind you of timely matters,
such as cooking or hundreds of other uses.
TIMER
TIMER
OFF
PRESET
Note
When the display is off, turn on the power
before making this setting.
Adjust the countdown timer setting.
TUNE ENTER
Normal display
(sleep off)
TIMER
01 min
Set the countdown time
(1 to 60 minutes).
PRESET
Confirm.
1:23
TUNE ENTER
Short beeps are sounded once the countdown is over.
y
• The beeps gets louder every 10 seconds.
• The volume of the beeps depends on the volume of this unit (☞ P. 8).
■ To stop the alarm
TIMER
or
On the top panel
02min 59sec
Countdown starts.
y
To cancel the countdown timer, press TIMER twice to select “OFF”.
26 En
INPUT/SNOOZE
Page 29

Troubleshooting
In case of a problem with this unit, check the following list first. If you cannot solve your problem with the suggested
solutions or if your problem is not listed below, turn off and unplug this unit, and consult the nearest authorized Yamaha
dealer or service center.
General
Problem Cause Solution
Power turns on but
immediately shuts off.
The speakers make no
sound.
Sound suddenly turns off. The sleep timer (☞ P. 26) may be
This unit does not operate
properly.
A digital or high-frequency
equipment produces noises.
The clock setting has been
cleared.
The power cable may be connected
improperly.
This unit may have received a strong
electrical shock such as lightning or
excessive static electricity.
The volume may be set to minimum
level.
The mute function may be on. Cancel the mute function (☞ P. 8).
The input source may be incorrect. Select the correct input source (☞ P.
The disc loaded into this unit may not
be compatible.
set.
This unit may have received a strong
electrical shock such as lightning or
excessive static electricity, or power
supply may have dropped.
This unit may be placed close to the
digital or high-frequency equipment.
The power to this unit may have been
lost for more than a week.
Make sure the power cable is plugged
into the outlet firmly (☞ P. 6).
Set this unit to the standby mode, and
disconnect the power cable. Wait about
30 seconds, reconnect the power cable,
and turn on this unit.
Adjust the volume level (☞ P. 8).
8).
Use a disc supported by this unit
(☞ P. 30).
Turn on this unit and play the source
again.
Set this unit to the standby mode, and
disconnect the power cable. Wait about
30 seconds, connect the power cable,
and turn on this unit.
Place this unit away from the
equipment.
Plug the power cable into the outlet
firmly, and set the clock again (☞ P.
7).
INFORMATION
ADDITIONAL
Disc playback
Problem Cause Solution
Some button operations do
not work.
Playback does not start
immediately after pressing
.
6
The disc loaded into this unit may not
be compatible.
The disc may be dirty. Wipe the disc clean.
The disc loaded into this unit may not
be compatible.
When this unit was moved from a
cold to warm place, condensation
may have formed on the disc reading
lens.
Remove the disc and then check whether
this unit supports the disc or not
(☞ P. 30).
Use a disc supported by this unit
(☞ P. 30).
Wait for an hour or two, and try again.
English
27 En
Page 30

Troubleshooting
“No Disc” appears in the
display even though a disc is
in the disc slot, or “Disc
Error” appears in the display.
The disc loaded into this unit may not
be compatible.
The disc may be dirty or foreign
substance is stuck on it.
Disc is loaded upside-down. Remove the disc and then load the disc
Use a disc supported by this unit
(☞ P. 30).
Remove the disc and then wipe the disc
clean or remove the foreign substance.
with the labeled side facing up.
28 En
Page 31

MP3/WMA file playback
Problem Cause Solution
MP3/WMA file in the USB
device is not played.
Radio reception
■ FM/AM
Problem Cause Solution
The preset selecting
function (☞ P. 16) does not
work.
The preset station settings
have been cleared.
The USB device is not recognized.
If the solutions above do not resolve
the problem, the USB device is not
playable on this unit.
The preset (memory) may have been
erased.
The power to this unit may have been
lost more than a week.
Troubleshooting
Set this unit to the standby mode, and turn it
on again
(☞ P. 6).
Disconnect the device while this unit is in
the standby mode. Then connect the device
again and turn on this unit
Connect an AC adapter if supplied with
the device.
Try another USB device.
Preset radio stations again (☞ P. 17).
Plug the power cable into the outlet
firmly, and preset the stations again
(☞ P. 6).
(☞ P. 6).
■ FM
Problem Cause Solution
Too much noise during
stereo broadcast.
Even with an outdoor
antenna, radio wave
reception is weak. (Sound is
distorted.)
■ AM
Problem Cause Solution
Too much noise during
broadcast.
The auto tuning function
(☞ P. 18) does not work.
The FM antenna may be connected
improperly.
The radio station you selected may
be far from your area, or the radio
wave reception is weak in your area.
Multipath reflection or other radio
interferences may have occurred.
The noise may be caused by
atmospheric electricity, lightning,
fluorescent lights, motors, or
thermostat electric devices.
If this unit is placed near a TV, the
noise may be generated especially in
the evening.
The AM loop antenna may be
connected improperly.
Make sure the FM antenna is connected
properly (☞ P. 16).
Try manual tuning to improve the
signal quality (☞ P. 17) or use a multi-
channel outdoor antenna.
Change the height, direction, or
placement of the antenna.
Connect an outdoor antenna and
establish a better grounding to decrease
the noise. However, it is difficult to
eliminate these types of noise.
Place this unit away from a TV.
Make sure the AM loop antenna is
connected properly (☞ P. 16).
INFORMATION
English
ADDITIONAL
29 En
Page 32

TROUBLESHOOTING
■ DAB
Problem Cause Solution
Cannot tune into any DAB
stations.
The service reception is
weak.
Remote control
Problem Cause Solution
The remote control does not
work properly.
There is no DAB coverage in your
area.
The positioning of the indoor DAB
antenna and/or this unit is not
Use “Tune aid” (☞ P. 22) to locate the
best position of DAB antenna.
optimal for DAB reception.
The DAB signals are too weak. Use a high-quality outdoor DAB
antenna.
The remote control may be operated
outside its operation range.
For information on the remote control
operation range, refer to “Using the
remote control” (☞ P. 5).
The remote control sensor on this
unit may be exposed to direct
Change the lighting or orientation of
this unit.
sunlight or lighting (inverted
fluorescent lamps).
The battery may be worn out. Replace the battery with new one (see
below).
There are obstacles between the
Remove the obstacles.
sensor of this unit and the remote
control.
■ Replacing the battery in the remote control
Change the battery when the operation range of the remote control decreases.
Use a straight pin to remove
the cover.
Notes
• Insert the battery according to the polarity markings (+ and –).
• If the battery runs out, immediately remove them from the remote control to prevent an explosion or acid leak.
• If a battery starts leaking, dispose of it immediately. Be careful not to let the leaking battery acid touch your skin or clothing.
• Before inserting a new battery, wipe the compartment clean.
• Dispose of a battery according to your regional regulations.
Replace the battery with
a new CR2025 battery.
Close the cover.
30 En
Page 33

Notes on discs
Disc information
This unit is designed for use with audio CD, CD-R, and
CD-RW. Also, this unit can play back 8 cm (3 inch)
compact discs.
y
This unit can play back discs bearing any of the logo marks
above. A disc logo mark is printed on the disc and the disc jacket.
Note
Do not load any other type of disc into this unit. Doing so may
damage this unit.
This unit can play back the following data discs
(For MP3 and WMA files, the parenthetic words
represent the compatible sampling rate and bit
rate):
– MP3 files, recorded on CD-R/RW (fs 44.1, 48 kHz/
32, 64, 96, 128, 192, 256, or 320 kbps and variable
bit encoded MP3 files (CBR and VBR))
– WMA files, recorded on CD-R/RW (fs 44.1 kHz/
192 kbps or less and variable bit encoded WMA
files (CBR and VBR))
– ISO 9660 for CD-R/RW
Notes
• CD-R/RW cannot be played back unless finalized.
• Some discs cannot be played back depending on the disc
characteristics or recording conditions.
• Do not use any non-standard shaped discs such as a heartshaped disc.
• Do not use discs with many scratches on their surface.
• Copyright-protected WMA files cannot be played back on this
unit.
• The sampling rate 48 kHz is downsampled to 44.1 kHz for
playback.
Handling a disc
• Do not touch the surface of the
disc. Hold a disc by its edge (and
the center hole).
• Do not leave a disc in the disc tray
when not playing.
• Do not use a pencil or pointed
marker to write on the disc.
• Do not put a tape, seal, glue, or other attachments on a disc.
• Do not use a protective cover to prevent scratches.
• Do not use a disc that has a printable surface using a
commercially available label printer.
• Do not expose a disc under direct
sunlight, high temperature, high
humidity, or a lot of dust.
• If a disc becomes dirty, wipe it
with a clean, dry cloth from the
center out to the edge. Do not use
record cleaner or paint thinner.
• To avoid malfunction, do not use
a commercially available lens
cleaner.
• Do not insert more than one disc
into the disc slot at one time. This can cause damages to both
this unit and the discs.
• When you listen to 8 cm disc, insert the disc without 8-cm
adapter.
• Do not insert any foreign objects into the disc slot.
• Do not insert a cracked, warped, or glued disc.
Caution
INFORMATION
ADDITIONAL
31 En
English
Page 34

DAB FREQUENCY INFORMATION
DAB frequency information
■ Band III
Note
When you perform the local range scanning, this unit scans only within the frequencies marked with an asterisk (*) in the following
table (see page 21).
Frequency Channel label
174.928 MHz 5A
176.640 MHz 5B
178.352 MHz 5C
180.064 MHz 5D
181.936 MHz 6A
183.648 MHz 6B
185.360 MHz 6C
187.072 MHz 6D
188.928 MHz 7A
190.640 MHz 7B
192.352 MHz 7C
194.064 MHz 7D
195.936 MHz 8A
197.648 MHz 8B
199.360 MHz 8C
201.072 MHz 8D
202.928 MHz 9A
204.640 MHz 9B
209.936 MHz 10A
211.648 MHz 10B
213.360 MHz 10C
215.072 MHz 10D
216.928 MHz 11A
* 218.640 MHz 11B
* 220.352 MHz 11C
* 222.064 MHz 11D
* 223.936 MHz 12A
* 225.648 MHz 12B
* 227.360 MHz 12C
* 229.072 MHz 12D
230.784 MHz 13A
232.496 MHz 13B
234.208 MHz 13C
235.776 MHz 13D
237.488 MHz 13E
239.200 MHz 13F
32 En
206.352 MHz 9C
208.064 MHz 9D
Page 35

Glossary
■ MP3 (MPEG-1 Audio Layer-3)
One of the audio compression methods used by MPEG.
It employs the irreversible compression method, which
achieves a high compression rate by thinning out the data
of hardly audible part to human ears. It is said to be
capable of compressing the data quantity by about 1/11
(128 kbps) while maintaining a similar audio quality to
music CD.
■ WMA (Windows Media Audio)
An audio compression method developed by Microsoft
Corporation. It employs the irreversible compression
method, which achieves a high compression rate by
thinning out the data of hardly audible part to human ears.
It is said to be capable of compressing the data quantity by
about 1/22 (64 kbps) while maintaining a similar audio
quality to music CD.
Specifications
■ PLAYER SECTION
Playback system
• CD, CD-R/RW
Laser
• Type....................................................................................... GaAlAs
• Wave length ............................................................................ 780 nm
• Emission duration..............................................................continuous
• Laser output............................................................... max. 44.6 µW*
*This output is the value measured at a distance of about 200 mm
(7.9 in) from the objective lens surface on the Optical Pick-up Block.
■ AMPLIFIER SECTION
• Minimum RMS output power per channel................... 10 W + 10 W
• Input sensitivity/Impedance
PORTABLE ............................................................ 300 mV/47 kΩ
• Output level/Impedance
PHONES (volume max)............................................ 470 mV/32 Ω
■ Sampling frequency
The number of sampling (process for digitalizing analog
signals) per second. In principle, the higher the sampling
rate, the wider the frequency range that can be played
back, and the higher the quantized bit rate, the finer the
sound that can be reproduced.
■ PCM (Pulse Code Modulation)
A signal that is changed to digital format without
compression. A CD is recorded with 16-bit sound at
44.1 kHz.
■ Tra ck
A CD can be divided into a number of segments (tracks).
Each division is called a track number.
■ TUNER SECTION
FM
• Tuning range
U.S.A. and Canada models ............................... 87.5 to 108.0 MHz
Other models ................................................ 87.50 to 108.00 MHz
AM
• Tuning Range
U.S.A. and Canada models ................................... 530 to 1700 kHz
Other models ........................................................ 522 to 1629 kHz
DAB
• Tuning Range (BAND III).............................. 174 MHz to 240 MHz
Sensitivity ............................................................................ –95 dB
Selectivity (for adjacent channel) .......................................... 40 dB
Antenna input (unbalanced).....................................................50 Ω
■ GENERAL
• Power Supply
U.S.A. and Canada models .................................. AC 120 V, 60 Hz
Other models ....................................... AC 100 to 240 V, 50/60 Hz
• Power consumption ................................................................... 20 W
• Standby Power consumption .........................................1.0 W or less
• Dimensions (W x H x D) ................................300 x 141.5 x 200 mm
(11-13/16 x 5-9/16 x 7-7/8 in)
• Weight...................................................................... 2.7 kg (5.95 lbs)
Taking care of the unit
When you wipe this unit, use a clean dry cloth. For heavy dirt,
dampen a soft cloth in the water, wring it out, and then clean
this unit up with the cloth.
Specifications are subject to change without notice.
This symbol mark is according to the EU directive
2002/96/EC.
This symbol mark means that electrical and
electronic equipment, at their end-of-life, should be
disposed of separately from your household waste.
Please act according to your local rules and do not
dispose of your old products with your normal
household waste.
Page 36

Specifications
CAUTION
Use of controls or adjustments or performance of procedures
other than those specified herein may result in hazardous
radiation exposure.
CAUTION INVISIBLE LASER RADIATION WHEN OPEN
AND INTERLOCKS DEFEATED. AVOID EXPOSURE TO
BEAM.
CLASS 1 LASER PRODUCT
LASER KLASSE 1 PRODUKT
LUOKAN 1 LASERLAITE
KLASS 1 LASER APPARAT
PRODUIT LASER DE CLASSE 1
Limited Guarantee for European Economic Area (EEA) and Switzerland
Thank you for having chosen a Yamaha product. In the unlikely event that your Yamaha product needs guarantee service, please contact the dealer from
whom it was purchased. If you experience any difficulty, please contact Yamaha representative office in your country. You can find full details on our
website (http://www.yamaha-hifi.com/ or http://www.yamaha-uk.com/ for U.K. resident).
The product is guaranteed to be free from defects in workmanship or materials for a period of two years from the date of the original purchase. Yamaha
undertakes, subject to the conditions listed below, to have the faulty product or any part(s) repaired, or replaced at Yamaha’s discretion, without any charge
for parts or labour. Yamaha reserves the right to replace a product with that of a similar kind and/or value and condition, where a model has been
discontinued or is considered uneconomic to repair.
Conditions
1. The original invoice or sales receipt (showing date of purchase, product code and dealer’s name) MUST accompany the defective product, along with a
statement detailing the fault. In the absence of this clear proof of purchase, Yamaha reserves the right to refuse to provide free of charge service and the
product may be returned at the customer’s expense.
2. The product MUST have been purchased from an AUTHORISED Yamaha dealer within the European Economic Area (EEA) or Switzerland.
3. The product must not have been the subject of any modifications or alterations, unless authorised in writing by Yamaha.
4. The following are excluded from this guarantee:
a. Periodic maintenance and repair or replacement of parts due to normal wear and tear.
b. Damage resulting from:
(1) Repairs performed by the customer himself or by an unauthorised third party.
(2) Inadequate packaging or mishandling, when the product is in transit from the customer. Please note that it is the customer’s responsibility to
ensure the product is adequately packaged when returning the product for repair.
(3) Misuse, including but not limited to (a) failure to use the product for its normal purpose or in accordance with Yamaha’s instructions on the proper
use, maintenance and storage, and (b) installation or use of the product in a manner inconsistent with the technical or safety standards in force in
the country where it is used.
(4) Accidents, lightning, water, fire, improper ventilation, battery leakage or any cause beyond Yamaha’s control.
(5) Defects of the system into which this product is incorporated and/or incompatibility with third party products.
(6) Use of a product imported into the EEA and/or Switzerland, not by Yamaha, where that product does not conform to the technical or safety
standards of the country of use and/or to the standard specification of a product sold by Yamaha in the EEA and/or Switzerland.
(7) Non AV (Audio Visual) related products.
(Products subject to “Yamaha AV Guarantee Statement” are defined in our website at http://www.yamaha-hifi.com/ or
http://www.yamaha-uk.com/ for U.K. resident.)
5. Where the guarantee differs between the country of purchase and the country of use of the product, the guarantee of the country of use shall apply.
6. Yamaha may not be held responsible for any losses or damages, whether direct, consequential or otherwise, save for the repair or replacement of the
product.
7. Please backup any custom settings or data, as Yamaha may not be held responsible for any alteration or loss to such settings or data.
8. This guarantee does not affect the consumer’s statutory rights under applicable national laws in force or the consumer’s rights against the dealer arising
from their sales/purchase contract.
34 En
Page 37

YAMAHA ELECTRONICS CORPORATION, USA
©
YAMAHA CANADA MUSIC LTD.
YAMAHA ELECTRONIK EUROPA G.m.b.H.
YAMAHA ELECTRONIQUE FRANCE S.A.
YAMAHA ELECTRONICS (UK) LTD.
YAMAHA SCANDINAVIA A.B.
YAMAHA MUSIC AUSTRALIA PTY. LTD.
135 MILNER AVE., SCARBOROUGH, ONTARIO M1S 3R1, CANADA
J A WETTERGRENS GATA 1, BOX 30053, 400 43 VÄSTRA FRÖLUNDA, SWEDEN
6660 ORANGETHORPE AVE., BUENA PARK, CALIF. 90620, U.S.A.
SIEMENSSTR. 22-34, 25462 RELLINGEN BEI HAMBURG, GERMANY
RUE AMBROISE CROIZAT BP70 CROISSY-BEAUBOURG 77312 MARNE-LA-VALLEE CEDEX02, FRANCE
YAMAHA HOUSE, 200 RICKMANSWORTH ROAD WATFORD, HERTS WD18 7GQ, ENGLAND
LEVEL 1, 99 QUEENSBRIDGE STREET, SOUTHBANK, VIC 3006, AUSTRALIA
2008 All rights reserved.
Printed in China
CQX1A1287Y
 Loading...