

Page 1

Stereo Keyboard
Stereo-Keyboard
Clavier stéréophonique
Teclado estéreo
YAM A HA [R i ií í te S ím í dl
Page 2

Thank you for purchasing a Yamaha
Wir bedanken uns für den Kauf des
Nous vous remercions d'avoir
Gracias por haber adquirido un
PortaSound PSS-450.
To be sure you get maximum satis
faction, we suggest you follow the
steps in this manual carefully while
actually playing the instrument.
Yamaha PortaSound PSS-450.
Um alle gebotenen Möglichkeiten
voll ausschöpfen zu können, gehen
Sie zunächst diese Anleitung sorg
fältig durch. Probieren Sie dabei
gleich alle Punkte direkt am PortaSound aus, um sich mit ihm ver
traut zu machen.
sélectionné le nouveau PortaSound
PSS-450 de Yamaha.
Afin de tirer de ce nouvel instru
ment des satisfactions optimales,
nous vous suggérons de lire atten
tivement ce manuel en procédant
par étapes et en faisant connais
sance avec le PSS-450 de manière
pratique.
PortaSound PSS-450 de Yamaha.
Para asegurarse el máximo de
satisfacción, le sugerimos que siga
cuidadosamente los pasos de este
manual mientras toca al mismo
tiempo el instrumenta
Page 3

Before Playing
The 3-way power system
The PSS-450 operates on internal bat
teries or, with optional power adaptors,
on household current or a car battery.
Inserting batteries
Remove the battery compartment cover
on the bottom of the instrument and in
sert six 1.5V SUM-2, "C" size, R-14, or
equivalent alkaline batteries (sold
separately), making sure that the
polarities are correct as indicated inside
the compartment. Replace the cover,
ensuring that it locks securely in place.
When the internal batteries are weak
and need replacing, the Power-on light
flashes on and off; when this occurs, it
is recommended that all the batteries be
replaced at the same time since this is
more economical in the long term.
Optional power adaptors
Household current: Power Adaptor PA-1
is available for household current.
Car battery: Car Battery Adaptor CA-1
plugs into a car cigarette lighter socket.
Vor dem Spielen
3-Weg-Stromversorgung
Das PortaSound PSS-450 kann ent
weder über die eingesetzten Batterien,
über Netzstrom oder über eine
Autobatterie betrieben werden. In den
beiden letzten Fällen sind als Sonder
zubehör erhältliche Adapter
erforderlich.
Einsetzen der Batterien
Nehmen Sie den Batteriefachdeckel am
Boden des Instrumentes ab, und legen Sie
sechs 1,5 V-Babyzellen (nicht mitgeliefert)
unter Beachtung der auf der Unterseite ange
gebenen Polarität ein. Bringen Sie den Deckel
wieder an, und achten Sie darauf, daß er
eimastet. Sind die Batterien erschöpft
und müssen ersetzt werden, so blinkt die
Einschaltanzeige.
Als Sonderzubehör erfaältlkbe Adapter
Für Netzstrom: Verwenden Sie zum Anschluß
an eine Netzsteckdose den Netzadapter
PA-1.
Für Betrieb über Autobatterie: Verwenden
Sie zum Anschluß an die Zigarettenan
zünderbuchse Ihres Wagens den Autobat
terieadapter CA-1.
Avant de jouer
Trois possibilités d’alimentation électrique
Le PSS-450 peut fonctionner sur piles,
ou bien, à l'aide d'adaptateurs
disponibles en option, il peut être bran
ché sur le courant secteur ou sur une
batterie automobile.
Insertion des piles
Retirer la trappe du compartiment des
piles situé sous l'appareil et mettre en
place six piles 1,5V SUM-2, de format
"C", R-14 ou d'autres piles alcalines de
qualité identique (vendues séparément),
en s'assurant de bien respecter l'ordre
des polarités tel qu'il figure à l'intérieur
du logement. Remettre la trappe en
place, et la verrouiller correctement. Lor
sque la puissance des piles s'affaiblit et
qu'il s'avère nécessaire de les remplacer,
un témoin d'alimentation se met à
clignoter; en cette circonstance, il est
recommandé de procéder au remplace
ment simultané de toutes les piles, cette
précaution s'avérant en effet plus
économique à long terme.
Adaptateurs électriques disponibles en
option.
Pour le courant secteur; Employer
l'adaptateur PA-1. Pour l'utilisation sur
batterie automobile: Connecter à
l'allume-cigare de l'automobile, la prise
de l'adaptateur CA-1.
Antes de tocar
El sistema de potencia de 3 vías
El PSS-450 funciona con baterías inter
nas o, con adaptadores de potencia op
cionales, con corriente doméstica o una
batería de automóvil.
Inserción de las baterías
Extraiga la cubierta del compartimiento de
las baterías bajo el instrumento e inserte seis
baterías alcalinas de 1,5V SUM-2, de tamaño
**C”, R-14, o equivalentes (vendidas sep^damente), asegurándose de que las polari
dades sean correctas como se indica dentro del
compartimiento. Coloque la cubierta,
asegurándose de que se bloquee en su posición.
Cuando las baterías internas se debiliten y
requieran recambio, la luz de conexión
parpadeará; cuando ocurra esto, se recomi
enda cambiar todas las baterías a la vez ya
que resulta más económico a largo plazo.
Adaptadores de potencia opcionales
Corriente doméstica: está (üsponible el
Adaptador de Potencia PA-1 para corriente
doméstica.
Batería de automóvil: el Adaptador para
Batería de Automóvil CA-1 se conecta a la
clavija del encendedor de cigarrillos de un
automóvil.
Contents
1. Nomenclature ................................ 2
2. Starting to play
(Orchestra section)
3. Rhythm section .............................. 5
4. Auto Bass Chord section
5. External jacks
6. Optional accessories
7. Taking care of your
PortaSound
8. Specifications
........................
...............
..............................
...................
.................................
..............................
10
10
11
12
Inhalt
1. Bezeichnung der
Bedienungselemente.............................. 2
3
7
2. Spielbeginn............................................ 3
3. Rhythmus-Teil ...................................... 5
4. Baß-Akkord-Automatik-Teil
5. Anschlußmöglichkeiten
6. Sonderzubehör .....................................10
7. Nützliche Hinweise
8. Technische Daten
.............................
................................
.................
........................
Table des matières
7
10
11
12
1. Nomenclature ................................ 2
2. Première exécution
(section orchestrale)
3. Section rhthmique .......................... 5
4. Section basses/accords auto
matiques (Auto Bass Chord)
5. Prises extérieures ........................ 10
6. Accessoires disponibles en
option
7. Entretien du PortaSound
8. Spécifications
...........................................
..............................
................
..........
............
10
11
12
Indice
1. Nomenclatura ........................................ 2
2. Comenzando a tocar
3
7
(Sección de Orquestra)
3. Sección de Ritmo................................... 5
4. Sección de Acorde y
Bajo Automático
5. Contactos externos ...............................10
6. Accesorios opcionales
7. Cuidados de su PortaSound
8. Especificaciones
.........................
..................................
.........................
..................
...................................
3
7
10
11
12
Page 4

1
Nomenclature
HEADPi ONES
Bezeichnung der Bedienungselemente
Speaker
Lautsprecher
Haut-parleur
Altavoz
E F G C D E F J
0)@ CD ®
@ CD
[XSCO nou. №AT №UMSA SW»4G
I
1&
SHUfFLE BOSSA- SAMBA SLOW WALTZ U
BEAT
E BBSBBS
I
-----
SYNCHRO
B
----
SLOW START START 'STOP
Nomenclature
YAMAHA PartaSouixd
□FtOAN Ti:tUMPET PHONE PIANO CHOHD
I I I I I
PICCOLO VIOUN OeOE MUSIC GUITAR SVNTHE
HHHSHHl
SUSTAIN SYMPHONIC CMJET
B B
ROCA
r X
111
Nomenclatura
Speaker
Lautsprecher
Haut-parleur
Altavoz
SAXO- HARPS- SVMTkC
!.. S
I II
® (i © ® ®
0 Power Switch
0 Master Volume
0 Auto Bass Chord Volume
@ Auto Bass Chord Selector
® Variation
© Auto Bass Chord Key Section © Variationsschalter
0 Rhythm Volume © Baß-Akkord Automatik-Bereich
© Tempo © Rhythmus-Lautstärkeregler
© Rhythm Selectors
® Rhythm Start & Synchro Start @ Rhythmus-Wahlschalter
© Instrument Voice Selectors
© Sustain O Instrumentenstimmen-Wahlschalter
® Stereo Symphonic
® Duet ® Stereo-Symphonic-Schalter
® Fill-in Bar
0 Ein/Aus-Schalter
© Hauptlautstärkeregier
© Baßakkord-Automatik-Lautstärke-
regler @ Sélecteur de basses/accords
0 Baß-Akkord-Automatik-Wahlschalter automatiques
® Tfemporegler
® Rhythmus-Start-ZSynchro-Start-Schalter
© Sustainschalter
O Duett
(© Schlagzeugsolo-Tkste
0 Interrupteur d'alimentation électrique
© Volume principal
© Volume basses/accords automatiques
© Variation
© Section touches de basses/accords
automatiques
© Volume du rythme
® Tempo
© Sélecteurs de rythmes
® Départ du rythme et départ synchro
© Sélecteurs de voix instrumentales
© Prolongement © Sostenido
© Stéréo symphonique
© Duo
© Touche Fill In
0 Interruptor de Conexión
© Volumen Principal
© Volumen de Acorde y Bajo Automatico
0 Selector de Acorde y Bajo Automatico
® Variación
® Sección de Tbclas de Acorde y Bajo
Automatico
© Volumen del Ritmo
® Tfempo
® Selectores de Ritmo
® Arranque y Arranque Sincronizado del
Ritmo
© Selectores de Voces Instrumentales
© Sinfonico Estéreo
© Dúo
© Barra de Relleno
Page 5
2
Starting to play
(Orchestra section)
If you are going to use battery power,
first insert the batteries in the compart
ment as described earlier. Before using
with household current or a car battery,
ensure that the optional adaptor Is safe
ly connected.
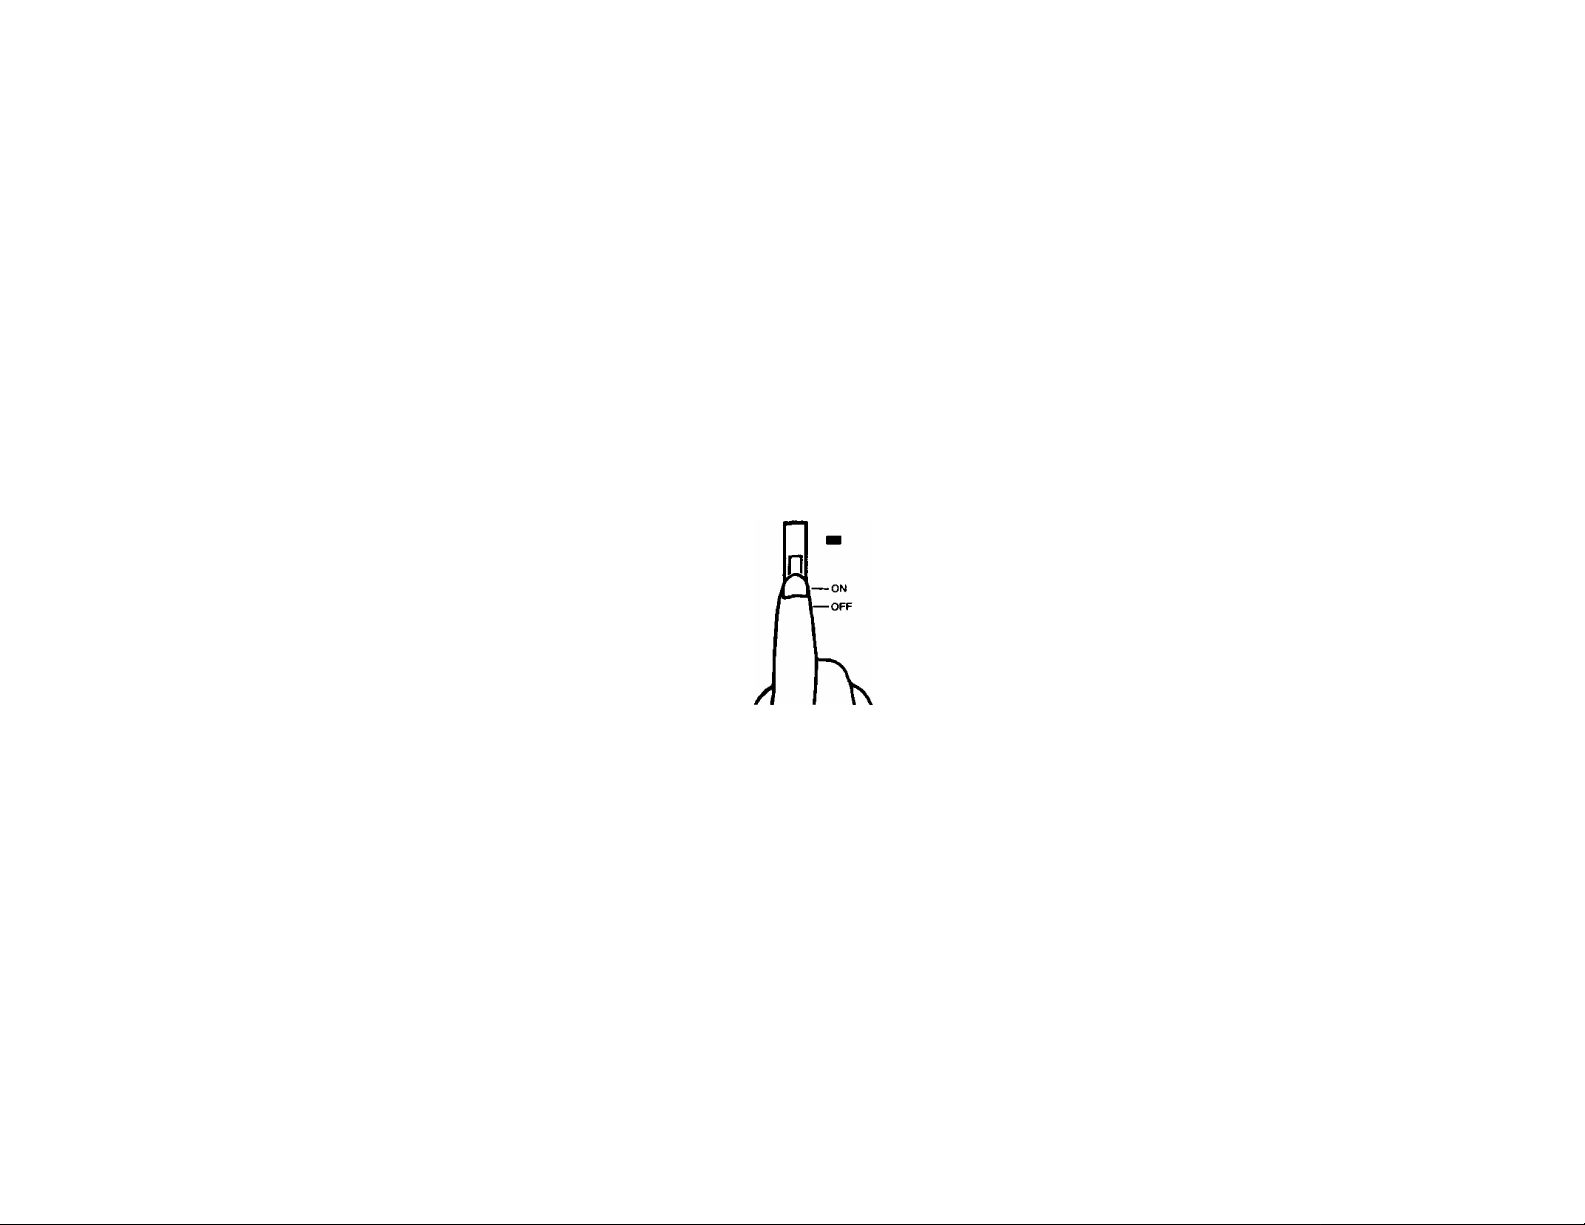
1. Switch on
Slide the POWER switch (D to the "ON"
position. The Power-on light will then
illuminate. If the light flickers when
you're using batteries, this indicates that
the batteries need replacing.
Spielbeginn
(Orchester-Teil)
Für Batteriebetrieb legen Sie die Batterien
wie zuvor beschrieben ein. Vor dem Betrieb
am Netz oder an einer Autobatterie ver
gewissern Sie sich noch einmal, daß der als
Sonderzubehör heferbare Adapter richtig
angeschlossen ist.
1. Einschalten.
Schieben Sie den POWER-Schalter © auf
die Stellung „ON”. Die Einschaltanzeige
leuchtet dan auf. Wenn diese Anzeige bei
Batteriebetrieb blinkt, so müssen die Bat
terien ausgewechselt werden.
Première exécution
(Section orchestrale)
Pour l'utilisation de l'instrument en
alimentation autonome à l'aide des piles,
commencer par insérer celles-ci dans le
compartiment des piles de la manière
décrite plus avant. Pour le cas d'une
alimentation sur courant secteur ou à
partir d'une batterie automobile, vérifier
au préalable le branchement correct des
adaptateurs adéquats.
1. Mise sous tension
Faire glisser l'interrupteur d'alimentation
(POWER) ® vers la position "ON". Le
témoin d'alimentation s'allume. Lorsque
ce témoin clignote pendant le fonc
tionnement sur piles, cela signifier qu'il
est temps de procéder à leur
remplacement.
POWER
Comenzando а tocar
(Sección de Orquesta)
Si va a utilizar alimentación por baterías,
inserte primero las baterías en el comparti
miento como se ha descrito anteriormente.
Antes de usar el instrumento con corriente
doméstica o batería de automóvil, asegúrese
de que el adaptador opcional esté bien
conectado.
1. Conexión
Deslice el interruptor POWER © a la
posición de “ON’*. Entonces se encenderá la
luz de conexión. Si la luz p^adea cuando
esté utilizando baterías, indicará que las
baterías necesitan recambiarse.
2. Choose the voice you want.
After POWER ON, ORGAN is selected.
Depress the selector corresponding to
the voice you want to hear.
When the selected selector is
depressed again, switching is made
to the second voice of this selector.
For example, when ORGAN is selected
and the selector at the very left is
depressed, the voice will be switched
to PICCOLO.
• Lamp indication is used to indicate
selection of the upper or the lower
voice.
2. Wählen Sie die gewünschte
Instrumentenstimme.
Nach dem Einschalten der Stromversor^ng ist Orgel (ORGAN)
gewählt.
Drücken Sie die Thste, die der
gewünschten Stimme entspricht.
Wenn die g^ählte Thste noch einmal
getockt wird, so wird zu der zweiten
Stimme dieser Thste umgeschaltet.
Wenn z.B. Orgel (ORGAN) gewählt
ist und die Instrumentenwahltaste
ganz links gedrückt wird, so wird zu
Pikkolo (PICCOLO) umgeschaltet.
• Durch Lampenanzeige wird angezeigt,
ob die obere oder die untere Stimme
gewählt ist.
2. Sélection de la voix instrumentale
Lorsque vous mettez l'appareil en
marche, la voix instrumentale est
présélectionnée sur "ORGUE".
En appuyant une première fois sur
un sélecteur de votre choix, vous
obtiendrez la voix instrumentale
indiquée en premier, en haut au
dessus du sélecteur. Appuyez une
seconde fois sur ce même sélecteur,
vous obtiendrez, la seconde voix
instrumentale correspondante à ce
sélecteur.
Exemple: Vous avez sélectionné la
voix "ORGUE", en appuyant une
seconde fois sur ce même sélecteur
d'extrême gauche, vous obtiendrez
"PICCOLO".
• Grâce à un témoin lumineux vous
pouvez vérifier sur quelle voix
instrumentale vous avez sélectionné
votre appareil.
2. Escoja la voz que usted desea
En la posición de “ON” del inter
ruptor POWER, la voz instrumental
se fija en el ORGAN.
Presione el selector correspondiente
a la voz instrumental que usted
desea escuchar.
Si usted empuja otra vez el selector
correspondiente a la voz instru
mental ahora escogida, se cambia
en otra voz instrumental corres
pondiente a ese selector. Por ejemplo,
si usted presiona el selector de la
voz instrumental a la izquierda
más extrema cuando la voz instru
mental de ORGAN está escogida,
se cambia en PICCOLO.
• En este caso, la lámpara ilumina cuál
de las voces instrumentales en la fila
superior o inferior está seleccionada.
Page 6

ORCHESTRA____________________
ORGAN TRUlWIPET PHONE PIA»« CHORO
lililí
PICCOLO V»OUN OBOE MUStC GU»TAR SYMTHE
SUSTA»N SYMPHON»C OUET
B n
SAXO- HARPS»- SYNTHE
BOX
HISBIMIS
STEREO
n
• Delayed vibrato is built-in for the
Piccolo, Trumpet, Violin, Saxophone
and Oboe voices.
3. Adjust the overall volume using the
MASTER VOLUME control <D.
Adding Sustain
The Sustain effect, which makes notes
linger after you lift your fingers off the
keys, can be added to each of the
voices. With the PIANO voice, the
Sustain effect functions like a damper
pedal.
Stereo Symphonic
Stereo Symphonic produces a stereo
phonic effect, providing an orchestra-Iike
presence.
If you press the STEREO SYMPHONIC
selector , you will hear a more ex
pansive sound.
• Für Piccolo-, TVompete-, Violine-,
Saxophon- und Oboe-Stimme ist ein
verzögertes Vibrato eingebaut.
3. Stellen Sie die Gesamtlautstärke am
MASTER VOLUME-Regler (D ein.
Hinzuschalen von Sustain
Durch den Sustain-Effekt können Sie
die Töne nachklingen lassen, nachdem
Sie Ihre Finger von den Tasten
nommen haben. Dieser Effekt läßt sich
allen Stimmen hinzufügen. Bei einer
PIANO-Stimme hat der Sustain-Effekt
die gleiche Wirkung wie das Pedal eines
Klaviers.
Stereo Symphonie
Mit dieser Funktion kann man einen
Stereo-Effekt erzielen, der einen
Konzertsaalähnlichen Klangeindruck
vermittelt.
Durch Drücken des STEREO SYM-
PHONIC Schalters © erhält man
einen räumlicheren Klang.
• Un effet de vibrato à retard est in
corporé aux voix instrumentales
suivantes: piccolo, trompette, violon,
saxophone et hautbois.
3. Régler le volume général en agissant
sur la commande de volume principal
® {MASTER VOLUME).
MASTER VOL.
Effet de prolongement
L'effet de prolongement (SUSTAIN)
permet de prolonger la sonorité d'une
note après que le doigt ait quitté la
toucha Cet effet qui peut être employé
pour toutes les voix instrumentales.
Utilisé avec la voix PIANO, il a un effet
analogue à celui de la grande pédale de
piano.
Stéréo symphonique
Ce dispositif permet la création d'un
effet stéréophonique recréant l'at
mosphère d'un orchestre réel.
En àppuyant sur le sélecteur STEREO
SYMPHONIC ©, vous obtenez une
sonorité plus riche
• E1 vibrato retardado está incorpo
rado en las voces de Pícolo,
TVompeta, Violín, Saxofón y Oboe.
3. Ajuste el volumen general utilizando
el control MASTER VOLUME ®.
Añadiendo Sostenido
El efecto de Sostenido, que hace que
las notas se prolon^en después de
separar sus dedos de las teclas, puede
añadirse a cada una de las voces. Con
la voz de PIANO, el efecto de
Sostenido funciona como un pedal de
sordina.
Sinfónico Estéreo
El Sinfónico Estéreo produce un efecto
estereofónico^ proporcionando una im
presión orquestal.
Si pulsa el selector STEREO SYM
PHONIC ©, escuchará un sonido más
expansivo.
Page 7

3
Rhythm Section
1. Choose a rhythm.
After POWER ON, DISCO is selected.
Pick the rhythm that best suits the
music you are going to play and depress
the selector.
When the selected selector is depressed
again, switching is made to the second
rhythm of this selector. For example,
when DISCO is selected and the selector
at the very left is depressed, the rhythm
will be switched to 16 BEAT.
• Lamp indication is used to indicate
selection of the upper or the lower
rhythm.
2. Start the rhythm
After selecting a rhythm, press the
START/STOP selector ®.
Rhythmus-Teil
RHYTHM
-------
MAX W
--------------
FAST \
FAST ■ I I f I I
16 SHUFFLE eOSSA- SAMBA SLOW WALTZ
BEAT NOVA ROCK
n n a n n a
=
VOLUME
TEMPO
L Wählen Sie einen Rh^hmus.
Nach dem Einschalten der Stromversor^ng ist der Disco-Rhythmus
gewählt.
Wählen Sie den Rhythmus, der am
besten zu der von Ihnen zu spielenden
Musik paßt, und drücken Sie die ent
sprechende Taste.
Wenn die gewählte Ihste noch einmal
gedrückt wird, so wird zu dem zweiten
Rhythmus dieser Thste umgeschaltet.
Wenn z.B. der Disco-Rhythmus gewählt
ist und die Rhythmuswahltaste ganz
links gedrückt wird, so wird zu
16-Beat-Rh3 rthmus umgeschaltet.
• Durch Lampenanzeige wird an
gezeigt, ob der obere oder der
untere Rhythmus gewählt ist.
2. Starten des Rhythmus
Drücken Sie nach Wahl eines
Rhythmus den STARTSTOP Schalter
SYNCHRO
----------
SLOW START START/STOP
Section rythmique Sección de Ritmo
ROCK'N' 8
TOLL BEAT RHUMBA SWING MARCH
1. Sélection du rythme
Lorsque vous mettez l'appareil en marche
le rythme est présélectionné sur
"DISCO".
Appuyez sur le sélecteur de rythme qui
convient pour la musique que vous
désirez jouer. En appuyant sur le même
sélecteur une autre fois vous obtiendrez
le second rythme correspondant à ce
sélecteur.
Exemple; Vous avez sélectionné le
rythme "DISCO", en appuyant une
seconde fois sur ce même sélecteur
vous obtiendrez "16 BEAT".
• Grâce à un témoin lumineux vous
pouvez vérifier sur quel rythme
instrumental vous avez sélectionné
votre appareil.
2. Lancement du rythme
Après la sélection du rythme désiré,
presser la touche de départ ®
(START/STOP).
1. Escoja un Ritmo
En la posición de “ON” del interruptor
POWER, la voz instrumental se coloca
en el DISCO.
Seleccione el ritmo más apropiado para
la música que usted va a tocar y
empuje el selector.
Si usted empuja otra vez el selector
correspondiente al ritmo ahora selec
cionado, se cambia en otra voz instru
mental correspondiente a ese selector.
Por ejemplo, si usted presiona el
selector del ritmo a la izquierda más
extrema cuando el ritmo de DISCO
está seleccionado, se cambia en 16
BEAT.
• En este caso, la lámpara ilumina
cuál de los ritmos en la fila superior
o inferior está seleccionada
2. Inicie el ritmo
Después de seleccionar un ritmo, pulse
el selector STARTSTOP ®.
3. Adjustments
• Volume
The RHYTHM VOLUME control ©
lets you adjust the rhythm volume
in relation to the melody volume.
• Tempo
Use the TEMPO control ® to adjust
the speed of the rhythm.
4. Stopping the rhythm
Press the START/STOP selector to stop
the rhythm.
3. Einstellungen
• Lautstärke
Am THYTHM VOLUME-Regler ©
kann das Verhältnis zwischen
Rhythmus- und Melodie-Lautstärke
eingestellt werden.
• Tfempo
Stellen Sie die Geschwindigkeit des
Rhythmus am TEMPO-Regler ©ein.
4. Stoppen des Rhythmus
Drücken Sie zum Stoppen des Rhy
thmus den STARiySTOP-Schalter.
3. Réglages
• Volume sonore
La commande de volume du rythme
© (RHYTHM VOLUME), permet le
réglage du volume du rythme adéquat
en fonction du volume de la mélodie.
• Tempo
La commande de TEMPO © permet
d'agir sur la vitesse du rythme choisi.
4. Arrêt du rythme
Pour mettre fin au rythme, presser la
touche d'arrêt (START/STOP).
3. Ajustes
• Volumen
El control RHYTHM VOLUME © le
permite ajustar el volumen del ritmo
en relación al volumen de la melodía.
• Tfempo
Utilice el control TEMPO © para
ajustar la velocidad del ritmo.
4. Deteniendo el ritmo
Pulse el selector STARTSTOP para
detener el ritmo.
Page 8

• Synchro Start
The SYNCHRO START selector ® is
used when it is desired to have the
rhythm begin the moment a key is
pressed. The 19 keys beginning at
the left of the keyboard will activate
the rhythm sounds. When a key has
been depressed in this section (Auto
Bass Chord key section ®), the
rhythm will continue until shut off,
which is achieved by pressing the
START/STOP button.
• Synchroner Start
Wird der SYNCHRO START-Schalter
® gedrückt, so beginnt automatisch
der gewählte Rhythmus, sobald eine
der 19 links auf der Thstatur be
findlichen Tasten (Baß-AkkordAutomatik-Bereich (D) angeschlagen
wird. Der Rhythmus ist dann so
lange fortlaufend zu hören, bis er
durch Drücken des STARTSTOPSchalters ausgeschaltet wird.
• Départ synchro
Le sélecteur de départ synchro ®
(SYNCHRO START) est employé lors
que l'on désire lancer le rythme
simultanément à la pression de la
touche d'une note. Les 19 touches à
partir de la gauche du clavier activent
les sonorités rythmiques. Quand l'une
des touches de cette section est
pressée (section Touches de Basses/
Accords Automatiques ® ), le rythme
est conserve jusqu'à ce qu'il soit an
nulé par l'action de la touche d'arrêt
(START/STOP).
• Arranque Sincronizado
El selector SYNCHRO START ® se
usa cuando se desea que el ritmo
comience en el momento en que se
pxilse una tecla. Las 19 teclas comen
zando por la izquierda del teclado
activarán los sonidos del ritma
Cuando se haya pulsado una tecla
de está sección (sección de teclas
de Acorde y Bajo Automático ®),
el ritmo continuará hasta que se
apague, lo que se consigue pulsando
el botón SmR'iySTOR
5. Making use of the Tempo Light
The Tempo Light functions as a visual
metronome, making it simple for you to
confirm the rhythm tempo when playing
the melody. When the SYNCHRO START
selector ® is engaged but you have
not yet started the rhythm by pressing
a key, the Tempo Light flashes at every
quarter note.
6. Getting more realism with drum
fill-ins
If you tap the FILL IN bar ® , the
rhythm being played will be interrupted
by a short drum solo.
5. Verwendung der Ibmpoanzeige
Die Ibmpoanzei^ dient als optisches
Metronom zur einfachen Kontrolle des
Rhythmus-tempos beim Spielen einer
Melodie. Ist der SYNCHRO STARTSchalter ® gedrückt, der Rhythmus
durch Anschlägen einer Thste aber noch
nicht eingeschmtet, so blinkt die
Tfempoanzeige bei jeder Viertelnote.
6. Realistischere Rhythmusbegleitung
durch Schlagzeu^soli
Durch Drücken des FILL IN-Schalters
® kann der Rhythmus unterbrochen
und ein Schlagzeugsolo ausgelöst
werden.
-SLOW START START/STOP
TEMPO
5. Utilisation de la Lampe de Tempo
La Lampe de Tempo tient lieu de métro
nome, ponctuant ainsi le tempo du
rythme durant l'exécution de la mélodie.
Lorsque le sélecteur Départ Synchro
(SYNCHRO START) ® à été engagé
mais que le rythme n'a pas été encore
déclenché sur la pression d'une touche,
la Lampe de Tempo s'allume à chaque
noire.
DISCO
I
16
BEAT
SYNCHRO
Ч t ^
S IB
6. Encore du "réalisme" avec les solos
de batterie
Si vous frappez légèrement le sélecteur
Départ/Insertion (FILL IN) ®, le rythme
joué sera interrompu par un bref solo de
batterie.
' I ^
5. Utilizando la Luz de Témpo
La Luz de Tèmpo actúa como un
metrónomo visual, simplificando la con
firmación del tempo del ritmo al tocar
la melodía.
Cuando el selector SYNCHRO START
® está conectado pero todavía Ud. no
ha comenzado el ritmo pulsando una
tecla, la Luz de Tfempo se ilumina cada
cuarto de nota.
6. Obteniendo más realismo con
rellenos de batería
Si golpea ligeramente el selector FILL
IN ®, el ritmo que está tocando se
verá interrumpido por un solo de
betería corta
К
Page 9
4
Auto Bass Chord
Section
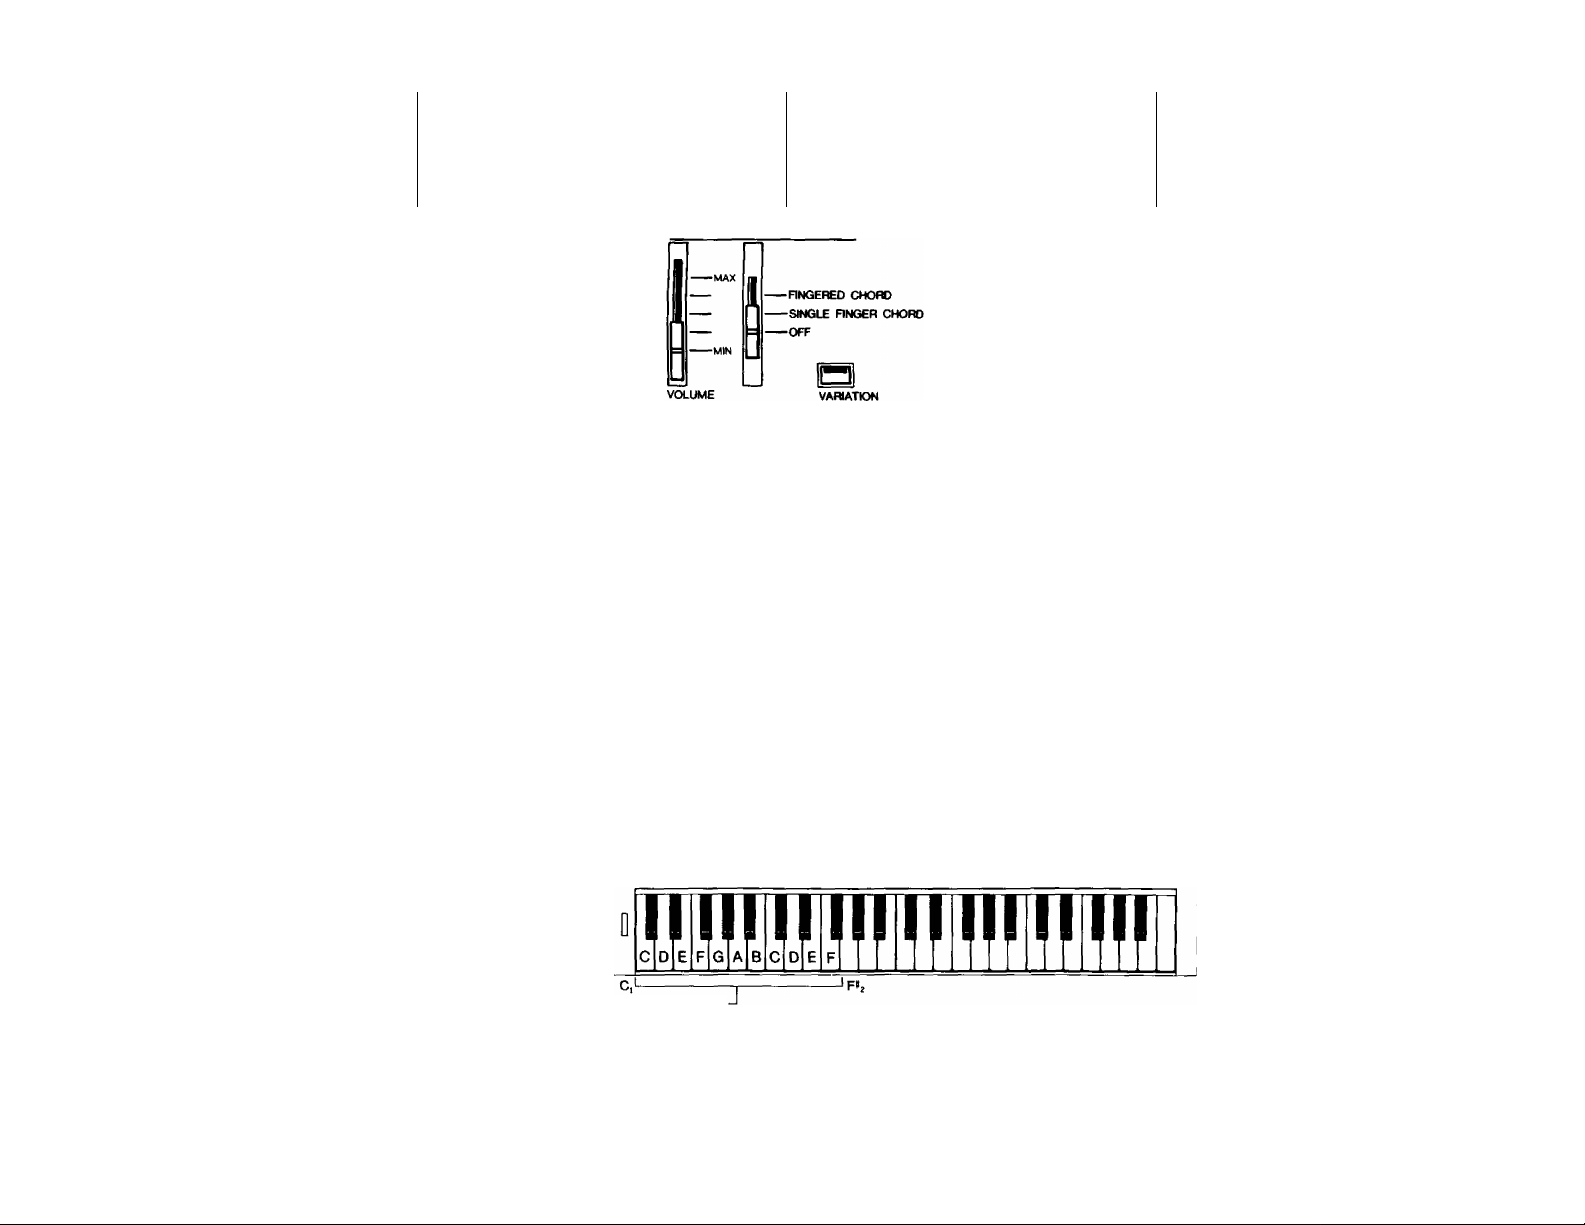
The AUTO BASS CHORD section is an
automatic accompaniment feature. If the
control is in the OFF position, the Auto
Bass Chord system does not function. In
this case, the entire keyboard can be
used to play the Orchestra voice you
have selected.
At the Single Finger Chord position,
you can play three-note chords and bass
notes using a single finger if you press
any of the 19 keys in the Auto Bass
Chord key section © .
FINGERED CHORD mode allows more
experienced players to play their own
chords and continue getting the bass
and rhythm backup.
Baß-Akkord- Section
Automatik-Teil
AUTO BASS CHORD
Der Baß-Akkord-Automatik-Teil ermöglicht
eine automatische Begleitung. Steht der
AUTO BASS CHORD-Schalter auf OFF.
so ist das Baß-Akkord-Automatik-System
ausgeschaltet.
Die Einfingerakkord-Funktion efmoglicht, durch Anschlägen einer der 19 im
Baß-Akkord-Automatik-Bereich © liegenden
Tasten Dreiklänge ertönen zu lassen.
Erfeihrene Spieler können mit der
FINGERED CHORD-Funktion ihre
eigenen Akkorde spielen und erhalten
gleichzeitig noch eine Baß- und
Rhythmusbegleitung.
basses/accords
automatiques
La section basses/accords automatiques
{AUTO BASS CHORD) consiste en un
dispositif d'accompagnement automati
que. Avec cette commande positionnée
sur "OFF", le dispositif n'est pas activé.
Dans ce cas, la totalité du clavier est
disponible pour l'exécution de la voix or
chestrale préalablement sélectionnée.
Avec la position d'accords à un seul
doigt (Single Finger Chord), il est possi
ble d'obtenir des accords de trois notes
à l'aide d'un seul doigt en pressant l'une
des 19 touches de la section touches
basses/accords automatiques (Auto
Bass Chord) ® .
En utilisant le mode d'accords à
plusieurs doigts (FINGERED CHORD), les
musiciens plus expérimentés ont la
possibilité d'exécuter leurs propres ac
cords tout en conservant un rythme et
une basse d'accompagnement.
Sección de Acorde y Bajo Automático
La sección AUTO BASS CHORD es una
función de acompañamiento automático. Si
el control está en la posición OFF, el sistema
de Acorde y Bajo Automático no funciona.
En este caso, todo el teclado puede utilizarse
para tocar la voz de Orquesta que haya
seleccionado.
En la posición de Acorde de Un Solo Dedo,
Ud. puede tocar acordes de tres notas utili
zando un solo dedo si pulsa cualquiera de las
19 teclas de la sección de teclas de Acorde y
Bajo Automático ©.
La modaUdad FINGERED CHORD
permite que los intérpretes más avanzados
toquen sus propios acordes y continúen
obteniendo el respaldo del bajo y del ritmo.
Auto Bass Chord Key Section
Baß-Akkord-Automatik Tastatur-Teil
Section de touches de basses/accords automatiques
Section de teclas de Acorde y Bajo Automático
Page 10

For one-finger accompaniment
1. Select a rhythm
Choose the rhythm you want then
press the SYNCHRO START or START
selector ® . (Don't forget to do this
whenever you use the Auto Bass
Chord feature)
2. Set the control to the SINGLE FINGER
CHORD position.
3. Press a key
Press one of the 19 keys in the Auto
Bass Chord key section © on the left
side of the keyboard. You will hear
the corresponding chord with bass
and rhythm accompaniment. For in
stance, when you press "C", youMI
obtain a C major chord that strums
along with the bass and rhythm.
Example
Einfinger-Begleitung
1. Einen Rh^hmus wählen.
Wählen Sie den gewünschten Rhyth
mus, und drücken Sie dann den
SYNCHRO START- oder STARTSchalter ®. (Vergessen Sie dies
niemals, wenn Sie die Baß-AkkordAutomatik-Funktion verwenden.)
2. Stellen Sie den Schalter in die
SINGLE FINGER CHORD-Stellung.
3. Eine Ihste anschlagen.
Schlagen Sie eine der 19 im BaßAkkoni-Automatik-Bereich © auf der
linken Seite des Keyboards liegenden
'Ihsten an. Es ist dann der ent
brechende Akkord mit Baß- und
Rhythmusbegleitung zu hören. Wird
zum Beispiel die Thste „C“ ange
schlagen, so ertönt ein C-Dur-Akkord
mit Baß- und Rhythmusbegleitung.
Beispiel
Accompagnement à un seul doigt
1. Sélection d'un rythme
Choisir le rythme désiré, puis presser
le sélecteur de départ ou de départ
synchro ® (SYNCHRO START ou
START). (Veiller à exécuter cette
opération toutes les fois où la fonc
tion d'accords de basses automatiques
est employée.)
2. Positionner la commande sur la
position d'accord à un seul doigt
(SIGLE FINGER CHORD)
3. Presser une touche
N'importe laquelle des 19 touches de
la section Touches Basses/Accords
Automatiques © de la section gauche
du clavier peut être actionnéa
L'accord correspondant avec l'accom
pagnement de basse et rythmique est
alors entendu. Par exemple, lorsque
la touche Do (C) est pressée l'on
obtient un accord en do majeur ac
compagné de la basse et du rythme
appropriés.
Para acompañamiento de un solo dedo
1. Seleccione un ritmo
Escoja el ritmo que desee y luego
pulse el selector SYNCHRO START
o START ®. (No se olvide de hacer
esto siempre que use la función de
Acorde y Bajo Automático).
2. Coloque el control en la posición
SINGLE FINGER CHORD
3. Pulse una tecla
Pulse una de las 19 teclas de la
sección de teclas de Acorde y Bajo
Automático © de la parte izquieraa
del teclada Escuchará el acoAie cor
respondiente con acompañamiento
de bajo y ritmo. Por ejemplo, cuando
pulse “C”, obtendrá un acorde de C
mayor que sonará junto con el bajo
y el ritma
Ejemplo
4. Set the volume
Adjust the volume to suit the overall
level using the Auto Bass Chord's
independent VOLUME control ©.
5. Set the tempo
Select the tempo you want using the
rhythm section's TEMPO control ©.
Obtaining minor, seventh and minor
seventh chords.
• 1b get a C minor chord depress the C
key together with the next black key
to the left.
• To get a C seventh chord depress the
C key together with the next white
key to the left.
• To get a C minor seventh chord, simply
press the C key together with the
next black key and white key to the
left.
4. Stellen Sie die Lautstärke ein.
Passen Sie die Lautstärke durch
entsprechendes Einstellen des
VOLUME-Reglers © im Baß-AkkordAutomatik-'feu an die Gesamtlaut
stärke an.
5. Stellen Sie das Tfempo ein.
Stellen Sie das gewünschte Ibmpo
am TEMPO-Regler © im RhythmusTfeU ein.
Moll-Septimen- und Moll-Septimen
akkorde.
• Für einen C-Moll-Akkord schlagen
Sie die Taste C zusammen mit der
links daneben liegenden schwarzen
Thste an.
• Für einen Septimenakkord auf C
schlagen Sie die Thste C zusammen
mit der links danebenliegenden
weißen 'Taste an.
• Für einen C-Moll-Septimenakkord
schlagen Sie einfach die Taste C
zusammen mit den links danebenliegenden schwarzen und weißen
'Ihsten an.
4. Réglage du volume
Régler le volume de manière adé
quate en utilisant le contrôle de
VOLUME © indépendant du dispositif
Basses/Accords Automatiques.
5. Réglage du tempo
Pour obtenir le tempo désiré, utilisez
le contrôle de TEMPO © de la
section rythmique.
Accords mineurs, de septième et de
septième mineure
• Pour obtenir un accord en Do (C)
mineur, appuyez simultanément sur la
touche Do (C) et sur la touche noire
voisine de gauche.
• Pour obtenir un accord de Do (C)
septième, appuyez simultanément sur
la touche Do (C) et sur la touche
blanche voisine de gauche.
• Pour obtenir un accord de Do (C)
septième mineure, appuyez simultané
ment sur la touche Do (C) et sur les
touches noire et blanche voisines de
gauche.
4. Fije el volumen
Ajuste el volumen para acoplarse al
nivel general utilizando el control in
dependiente de Volumen (VOLUME)
del Acorde y Bajo Automático.
5. Fije el tempo
Seleccione el tempo que desee utili
zando el control de 'Ifempo (TEMPO)
de la sección de ritma
Obtención de acorde de menor, séptima
y séptima menor
• Para obtener un acorde de C menor,
pulse la tecla C junto con la sigui
ente tecla negra a su izquierda.
• Para obtener un acorde de C sép
tima. pulse la tecla C junto con la
siguiente tecla blanca a su izquierda
• Para obtener un acorde de C séptima
menor, simplemente pulse la tecla C
junto con la siguiente tecla negra y
tecla blanca a su izquierda.
Page 11

Example
Beispiel
Cm
Exemple
Ejemplo
For automatic accompaniment based
on three-note or four-note chords
1. Set the control to the FINGERED
CHORD position.
2. When a combination of keys located
in the Auto Bass Chord key section ©
is pressed, the resulting chord will be
played together with the automatic
accompaniment consisting of the
bass line and the selected rhythm.
Example
Variation
Press the VARIATION selector © if you
want different bass and rhythmic chord
patterns. Alternative patterns are pro
vided for each of the rhythms.
Duet
This function works together with the
Auto Bass Chord feature. Press the DUET
selector ® then play a melody with your
right hand and chords with your left; a
harmonizing note will be added to every
melody note you play.
Automatische Begleitung mit
Akkorden aus drei oder vier Tönen
1. Stellen Sie den Schalter auf die
FINGERED CHORD-Position.
2. Werden mehrere Thsten im BaßAkkord-Automatik-Bereich ®
angeschlagen, so ertönt der ent
sprechende Akkord zusammen mit
einer automatischen Begleitung aus
Baßlinie und gewähltem Rhythmus.
Beispiel
AUTO BASS CHORD
Variation
Durch Drücken des VARIATION-
Schalters © erhalten Sie
unterschiedliche Baßlinie und
Rhythmus begleitung. Alle vor
handenen Rhythmustiguren können
geändert werden.
Duett-Funktion
Diese Funktion kann zusammen mit
der Baß-Akkord-Automatik eingesetzt
werden. Drücken Sie den DUET-Schalter
®. Spielen Sie dann die Melodie mit
Ihrer rechten und die Akkorde mit
Ihrer linken Hand. Zu jedem gespielten
Melodieton erhält man dann auto
matisch einen harmonisierenden Tbn.
Accompagnement automatique
fondé sur accords à trois ou quatre
notes
1. Placer la commande sur la position
d'accords à plusieurs doigts {FINGERED
CHORD).
2. Lorsqu'on appuie sur plusieurs touches
de la section Touches Basses/Accords
Automatiques ®, l'accord qui en
résulte sera joué avec l'accompagne
ment automatique comprenant basse
et rythme choisis.
Exemple
AUTO BASS CHORD
Variation
Appuyez sur le sélecteur VARIATION ©
si vous désirez une basse et un accom
pagnement rythmé différents. Diverses
structures peuvent être obtenues pour
chacun des rythmes.
Duo
Cette fonction s'utilise avec celle des
Accords/Basses Automatiques. Appuyez
sur le sélecteur de Duo (DUET) ©, et
jouez une mélodie de la main droite, et
des accords de la main gauche; une note
d'harmonisation est ajoutée à chaque
note de mélodie que vous jouez.
AUTO BASS CHORD
I
------------------------ -- -- -- -- -- -- -
Fara obtener acompañamiento
automático basado en acordes de
tres o cuatro notas
1. Coloque el control en la posición
FINGERED CHORO,
2. Cuando se pulsa una combinación de
teclas localizadas en la sección de
teclas de Acorde y Bajo Automático
®, el acorde resultante será tocado
junto con el acompañamiento
automático consistente en la línea de
bajo y ritmo seleccionada
Ejemplo
Variación
Pulse el selector de Variación (VARIA
TION) © si desea una línea de bajo y
un acompañamiento diferentes. Existen
>atrones diferentes para cada uno de
Í
os patrones de ritma
Dúo
Esta función actúa juntamente con la
función de Acorde y Bajo Automático.
Pulse el selector DUET @, y toque una
melodía con su mano derecha y los
acordes con la izquierda; se añadirá una
nota armonizante a cada nota de
melodía que Ud. toque.
Page 12

External jacks
5
Anschlußmöglichkeiten I Prises extérieures | Contactos extemos
Several jacks are provided at the back of
the keyboard for connecting a variety of
optional accessories. There is aiso a head
phone jack at the front.
A. External power source jack
(DC 9-12V IN)
• AC Power
Connect the optional AC Po\wer
Adaptor PA-1 to the DC 9-12V IN jack.
• Car battery
The Car Battery Adaptor CA-1 plugs into
the DC 9-12V IN jack and a cigarette
iighter socket.
B. Aux Out Jacks (L & R)
You can channel sound through your
stereo system using these jacks. Use
the optional conhecting cord PSC-3.
C. Headphone jack
Connect a set of headphones to this jack
and you can practice without disturbing
others.
Optional accessories
AC Power Adaptor (PA1)
Transforms AC voltage to DC voltage.
Car Battery Adaptor (CA1)
Enables you to provide power to the
instrument from a car battery using the
cigarette lighter socket.
Headphories (YH-35)
Specially designed lightweight dynamic
headphones with extra-soft ear ^ds.
Connecting Cord (PSC-3)
For connecting the keyboard to a stereo
hi-fi system.
Soft Carrying Case (S-7)
Some optional accessories may not be
available in every region.
10
Zum Anschluß von Sonderzubehörgeräten
sind auf der Rückseite des Keyboards ver
schiedene Buchsen vorgesehen. Außerdem
befindet sich eine Kopinörerbuchse an
der Vorderseite.
A. Buchse für externe Stromversorgung
(DC 9-12V IN)
• Netzstrom
Schließen Sie den als Sonderzubehör erhält
lichen Netzadapter PA-1 au die DC 9-12V
IN-Buchse an.
• Autobatterie
Schließen Sie den als Sonderzubehör
erhältlichen Autobatterieadapter CA-1
an die DC 9-12V IN-Buchse und an die
Zigarettenanzünderbuchse an,
B. Ausgangsbucbsen (L u. R)
Bei Verwendung dieser Buchsen ist auch
eine Klangwiedergabe über die Lautsprecher
Ihrer Stereoanlage möglich. Verwenden Sie
dazu das als Sonderzubehör lieferbare
Verbindungskabel PSC-3.
C. Kophförerbuchse
An diese Buchse kann ein Kopfhörer
angeschlossen werden, um ohne die Nach
barn zu stören üben zu können.
6
Sonderzubehör
Netzadapter (PA-1)
Dieser Adapter wandelt Netzspannung in
Gleichspannung um.
Autobatterieadapter (CA-1)
Dieser Adapter kann an die Zigarettenan
zünderbuchse Ihres Wagens angeschlossen
werden, um das Instrument von der Auto
batterie zu versorgen.
Kopfhörer (YH-35)
Speziell entwickelter, leichter, dynamischer
Kopfhörer mit besonders weichen Ohrpolstem.
Anschlußkabel (PSC-3)
Dieses Kabel dient zum Anschließen des
Instrumentes an eine Stereoanlage.
Tragetasche (S-7)
Einige Sonderzubehörteile sind möglicherweise
in einigen Ländern nicht erhältlich.
Au dos du clavier, diverses prises sont
prévues afin de permettre le raccordement
de l’instrument à des accessoires option
nels. A l’avant, il y a également une prise
pour casque d’écoute.
A. Prise d’alimentation électrique
externe (CC 9-12V IN)
• Alimentation secteur
Raccorder la fiche de l’adaptateur secteur
PA-1 à la prise CC 9-12 V IN.
e Alimentation sur batterie automobile
La fiche de l’adaptateur pour batterie
automobile CA-1 doit être raccordé à
l’allume-cigare de la voiture.
B. Prises de sorties auxiliaires
[gauche (L) et droite (R)]
En employant le cordon de liaison PSC-3
(en option), le son de l’instrument peut
être écouté sur une chaîne stéréophonique.
C. Prise de casque d’écoute
Pour l’écoute individuelle et la pratique
discrète de l’instrument, raccorder à cette
prise un casque d’écoute.
Accessoires
disponibles en option
Adaptateur d’alimentation secteur (PA-1)
Pour la transformation du courant
alternatif en courant continu.
Permet l’utilisation du clavier grâce à
l’alimentation obtenue à partir de l’allumecigare du véhicule.
Casque d’écoute individuelle (YH-3^
Un jeu d’écouteurs légers et dynamiques,
spécialement conçu pour un confort
exceptionnel.
Cordon de branchement (PSC-3)
Pour le raccordement du clavier à une
chaîne hi-fi.
Etui de transport souple (S-7)
Certains des accessoires en option peuvent
ne pas être dispordbies dans tous les pays.
Se proveen varios contactos en la parte
posterior del teclado, para conectar una
variedad de accesorios opcionales. También
hay un contacto para amiculares en la parte
delantera.
A. Contacto para fuente de potencia
externa (CC 9-12V IN)
• Potencia CA
Conecte el Adaptador de Potencia CA PA-1
al contacto de CC 9-12V IN.
O Batería de automóvil
El Adaptador para Batería de AutomóvU
CA-1 se conecta al contacto CC 9-12V IN y
a la entrada para el encendedor de cigarrillos.
B. Contactos Aux Out (Iz. y Der.)
Ud. puede canalizar el sonido a través de su
equipo estereofónico utilizando estos con
tactos. Utilice el cable de conexión opcional
PSC-3.
C. Contacto para auriculares
Conecte un juego de auriculares a este
contacto y pod^ practicar sin molestar a los
demás.
Accesorios opcionales
Adaptador de Potencia CA (PA-1)
Ttansforma la corriente CA en corriente CC,
Adaptador para Batería de Automóvil (CA-1)
Le permite suministrar potencia al instru
mento d^e la batería de un automóvü
utilizando la entrada del encendedor de
cigarrillos.
Auriculares (YH-35)
Auriculares dinámicos leeros, especialmente
diseñados con almohadiUas extrasuaves.
Cable de Conexión (PSC-3)
Para conectar el teclado a un sistema estéreo
hi-fi.
Estuche de transporte blando ($-7)
Puede que alpinos de los accesorios opcionales no
estén disponibles en todas las áreas.
Page 13

7
Taking саге of your
PortaSound
Your PortaSound will remain in excellent
playing condition if care is taken con
cerning the foHowing.
1. When you use AC power, be sure to
use the optional PA-1 adaptor. Before
use, read the adaptor instructions
carefully.
2. The optional Car Battery Adaptor CA-1
is only for use with a negative ground
12V battery. Ensure that this is the
case before connecting the adaptor.
3. Connections made between the Porta
Sound and any other device should
be made with both units turned off.
4. Do not set the MASTER VOLUME at
MAX when you connect PortaSound
to a stereo system. Use the stereo
system's volume control to adjust the
sound level.
5. Avoid placing the instrument in ex
cessively humid areas.
6. Do not subject the unit to physical
shock, and avoid placing anything
heavy on it.
7. The PortaSound should not be placed
in direct sunlight for a long time.
8. Do not place the instrument near any
heating appliance, or leave it inside a
car in direct sunlight for any length of
time. Direct sunshine can raise the
interior temperature of a car with
closed doors and windows to as high
as 80°C (176°F). Temperatures in
excess of 60°C (140°F) can cause
physical and/or electrical damage not
covered by warranty.
9. Use a dry or damp cloth for cleaning.
Nützliche Hinweise
Damit Sie immer Freude an Ihrem
PortaSound haben, beachten Sie bitte
die folgenden Punkte.
1. Verwenden Sie für Netzbetrieb aus
schließlich den als Sonderzubehör
lieferbaren Adapter PA-1. Lesen Sie
vor der Inbetriebnahme die Anleitung
des Adapters sorrfältig durch.
2. Der als ^nderzubehör erhältliche
Autobatterieadapter CA-1 ist nur für
eine negativ geerdete 12V-Batterie
geeingnet. Vergewissern Sie sich vor
dem Anschließen des Adapters, ob
dies bei Ihrer Wagenbatterie der Fall
ist.
3. Während des Anschließens des Porta
Sound an andere Geräte schalten Sie
beide Geräte aus.
4. Stellen Sie den MATER VOLUMERegler nicht auf MAX, wenn das
an eine Stereoanlage angeschlossen
ist. Verwenden Sie zur Lautstärke-
einstellung den Lautstärkeregler der
Stereoanlage.
5. Halten sie das Instrument von ex
trem feuchten Plätzen fern.
6. Schützen Sie das PortaSound vor
mechanischen Stößen, und stellen
Sie keine schweren Gegenstände
darauf.
7. Setzen Sie das PortaSound nicht
längere Zeit direktem Sonnenlicht
aus.
8. Halten Sie das PortaSound von Hei-
zim^n fern, und lassen Sie es nicht
in einem Auto, das direkt in der
Sonne geparkt ist. Bei einem mit ge
schlossenen Türen und Fenstern in
der prallen Sonne geparkten Wagen
kann die Innentemperatur bis auf
80 °C ansteigen. Bei extrem hohen
Tfemperaturen (60 °C oder höher)
kann es zur Beschädigung der
mechanischen und/oder elektrischen
'Ifeile kommen, für die keine Garantie
übernommen wird.
9. Verwenden Sie zur Reinigung ein
trockenes oder leicht angefeuchtetes
TUch.
Entretien du
PortaSound
Pour assurer à votre Instrument un
rendement excellent et de longue durée,
veillez à observer les précautions
suivantes:
1. Pour le fonctionnement sur alimenta
tion secteur, n'utiliser que l'adapta
teur PA-1 (en option). Avant l'utili
sation, lire attentivement la notice
d'emploi.
2. L'adaptateur pour batterie automobile
CA-1 est prévu pour être branché à la
borne négative d'une batterie 12V.
Vérifier cette condition avant de rac
corder l'adaptateur.
3. Lors des connections entre le clavier
et les autres dispositifs, tous les
appareils doivent être placés hors
tension.
4. La commande de volume principal du
ne doit pas être réglée sur la position
MAX lors du raccordement à une
chaîne hi-fi. Le niveau sonore de
l'écoute est réglé à partir de
l'amplificateur de la chaîne.
5. L'instrument ne doit pas être utilisé ou
entreposé en des lieux excessivement
humides.
6. Eviter les chocs et ne jamais poser
d'objet pesant sur le clavier.
7. Le PortaSound ne doit pas rester
exposé au rayonnement direct du
soleil.
8. Ne jamais disposer l'instrument près
d'un appareil de chauffage, ou à l'in
térieur d'un véhicule exposé au soleil.
La température intérieure d'un
véhicule dans cette situation, avec
les portières et les fenêtres fermées,
peut s'élever jusqu'à 80°C. Une
température excédant 60°C entraîne
rait des dommages physiques et/ou
électriques à l'appareil; lesquels ne
sont pas couverts par la garantie.
9. Pour le nettoyage, employer un tissu
sec ou légèrement humide.
Cuidados de su PortaSound
Su PortaSound permanecerá en exce
lentes condiciones si se tiene en cuenta
lo siguiente.
1. Cuando utilice corriente alterna,
asedíese de utilizar el adaptador
opcional PA-1. Antes de usarlo, lea
detenidamente las instrucciones del
adaptador.
2. El Adaptador para batería de auto
móvil opcional CA-1 es sólo para
utilizar con una batería de tierra
negativa de 12V. Asegúrese de que
este sea el caso antes de conectar
el adaptador.
3. Las conexiones entre el PortaSound
y cualquier otro dispositivo deberán
nacerse con ambas unidades apa-
4. No coloque el MASTER VOLUME
en MAX cuando conecte el Porta
Sound un equipo estéreo. Utilice
el control de volumen del equipo
estéreo para ajustar el nivel del
sonido.
5. Evite colocar el instrumento en
sitios excesivamente húmedos.
6. No de golpes a la unidad, y evite
colocar nada pesado sobre ella.
7. El PortaSound no deberá colocarse
durante largo tiempo bajo la luz
solar directa.
8. No coloque el instrumento cerca de
cualquier fuente de calor, ni lo deje
dentro del automóvil durante un
periodo de tiempo directamente al
sol. La luz solar directa puede elevar
la temperatura del interior de un
automóvil con las puertas y ven
tanas cerradas hasta 80*^0. Las tem
peraturas superiores a 60°C pueden
causar daños físicos yfo eléctricos no
cubiertos por la garantía
9. Utilice un paño seco o humedecido
para la limpieza.
11
Page 14

8
Specifications
Keyboard
49 keys (C1-C5)
Preset sounds
Organ, Piccolo, Trumpet, Violin,
Saxophone, Oboe, Piano, Music Box,
Harpsichord, Guitar, Synthe 1, Synthe 2
Effects
Sustain, Stereo Symphonic, Duet
Rhythms
Disco, 16 Beat, Rock'n'roll, Shuffle,
8 Beat, Bossanova, Rhumba, Samba,
Swing, Slow Rock, March, Waltz
Controls: Synchro Start, Start/Stop, Tempo,
Tempo Light, Volume, Fill-in
Auto Bass Chord
Single Finger Chord, Fingered Chord,
Variation, Volume
Other Controls
Power Switch, Power-On Light,
Master Volume
Auxiliary Jacks
Headphones, DC 9-12V IN, Aux Out {L&R)
Amplifiers
1.4W {8ii)x2
Speakers
9cm (3-1/2") (8fi)x2
Rated Vbltage
DC 9V (six 1.5V SUM-2, "C" size, R-14 or
equivalent batteries, AC Power Adaptor,
Car Battery Adaptor)
Dimensions
62.2cm (W) x 21.3cm (D) x 6.9cm (H)
(24-1/2" X 8-3/8" X 2-3/4")
Weight
2.5 kg (5.5 lbs.)
Technische Daten
'Kistatur
49 Tbsten (Cl - C5)
Voreingestellte Stimmen
Orgel, Piccolo, TVompete, Violine,
Siixophon, Oboe, Piano, Music-Box,
Cembalo, Gitarre, Synthesizer 1,
Synthesizer 2
Effekte
Sustain, Stereo-Symphonie, Duett
Rhythmen
Disco, 16-Beat, Rock and Roll, Schleifer,
8-Beat, Bossanova, Rumba, Samba, Swing,
Slow-Rock, Marsch, Walzer
Bedienungselemente: Synchro-Start,
Start/Stopp, Tfempo, Tfempoanzeige,
Lautstärke, Schlagzeugsolo
Baß-Akkord-Automatik
Einfin^rakkord, Fingerakkord, Variation,
Lautstärke
Weitere Bedienungselemente
Ein/Aus-Sachalter, Einschaltanzeige,
Hauptlautstärkeregler
Anschlußbuchsen
Kopfhöher, 9-12V Gleichspannung,
Ibnausgang (L u. R)
Verstärker
1,4W (8ß) X 2
Lautsprecher
9cm (8Q) X 2
Nennspannung
9V Gleichspannung aus sechs 1,5V
Babyzellen (SUM-2, R-14 oder ent
sprechende Typen), Netzadapter,
Autobatterieadapter
Abmessungen
62,2cm (B) X 21,3cm (T) x 6,9cm (H)
Gewicht
2,5 kg
Spécifications
Clavier
49 touches (Ci - C5)
Sonorités programmées
Orgue, piccolo, trompette, violon, saxo
phone, hautbois, piano, boîte à musique,
clavecin, guitare, synthé 1 et synthé 2.
Effets
Maintien stéréo symphonique, duo.
Rythmes
Disco, 16 temps, rock'n'roll, shuffle,
bossanova, rumba, samba, swing,
slow rock, marche, valse.
Commandes: Départ synchro, départ/arrêt,
tempo, lampe tempo, volume, fill-in.
Accords de basses automatiques
Accord à un seul doigt, accord à plusieurs
doigts, variation, volume.
Autres commandes
Interrupteur d'alimentation électrique,
témoin d'alimentation, volume principal.
Prises auxiliaires
Casque d'écoute, entrée CC 9-12V, sorties
auxiliaires (D & G), magnétophone.
Amplificateurs
1,4W (8 ohms)x2
Haut-parleurs
9cm (8 ohms)x2
Tensions d'alimentation
CC 9V (six piles 1,5V SUM-2, format "C",
R-14 ou équivalent), adaptateur secteur,
adaptateur pour batterie automobile.
Dimensions
LxPxH: 62,2 x 21,3 x 6,9cm
Poids
2,5 kgs
Especificaciones
Ibclado
49 teclas (Ci - C5)
Sonidos preseleccìonados
Organo, PÍC0I0, TVompeta, Violín, Saxofón,
Oboe, Piano, Caja de Mùsica, Clavicordio,
Guitarra, Sintetizador 1, Sintetizador 2
Efectos
Sostenido, Sinfónico Estéreo, Dúo
Ritmos
Disco, Ritmo 16, Rock’n’roll, Shuffle,
Ritmo 8, Bosanova, Rumba, Samba,
Swing, Rock Lento, Marcha, Vals
Controles: Arranque Sincronizado,
Arranque/Parada,Tfempo, Luz de Tfempo,
Volumen, Relleno
Acorde y Bajo Automático
Acorde de Un Solo Dedo, Acorde
Digitado, Variación, Volumen
Otros Controles
Interruptor de Conexión, Luz de
Conexión, Volumen Principal
Contactos Auxiliares
Auriculares, CC 9-12V IN, Aux Out (I y D)
Amplificadores
1.4W (8Í2) X 2
Altavoces
9cm (8Í1) X 2
Voltee Nominal
CC 9V (seis baterías de 1,5V SUM-2,
tamaño “C”, R-14 o equivalentes, Adap
tador de Potencia CA, Adaptador para
Batería de Automóvil)
Dimensiones
62,2cm (An) X 21,3cm (Fondo) x
6,9cm (Al)
Peso
2,5 kg
Specifications subject to change without notice.
12
Änderungen Vorbehalten.
Ces spécifications sont sujettes à modification sans
préavis.
Las especificaciones están sujetas a cambio sin
previo aviso.
Page 15

"PortaSound Playtime" Teach-Yourself Book
Shows you the basic techniques for playing the PortaSound
portable keyboard. Available in English.
"PortaSound Playtime" may not be available in every region.
FCC INFORMATION
Attention users in the U.S.A.
PortaSound PSS-450 prepared in
accordance with FCC rules.
The PortaSound PSS-450 uses frequencies that appear in the
radio frequency range, and if installed in the immediate proximity
(within three meters) of some types of audio or video devices
interference may occur.
The PortaSound PSS-450 has been type tested and found to
comply with the specifications set for a Class B computing device
in accordance with those specifications listed in Subpart J of Part
15 of the FCC rules. These rules are designed to provide a
reasonable measure of protection against such interference.
However, this does not guarantee that interference will not occur.
If your PortaSound PSS-450 should be suspected of causing
interference with other electronic devices, verification can be
made by turning your PortaSound PSS-450 off and on. If the
interference continues when your PortaSound PSS-450 is off, the
PortaSound PSS-450 is not the source of the interference.
If your PortaSound PSS-450 does appear to be the source of the
interference, you should try to correct the situation by using one
or more of the following measures:
Relocate either the PortaSound PSS-450 or the electronic device
that is being affected by the interference.
Utilize power outlets for the PortaSound PSS-450 and the
device being affected that are on different branch (circuit breaker
or fuse) circuits, or install A/C line filters.
In the case of radio-TV interference, relocate the antenna or, if
the antenna lead-in is a 300 ohm ribbon lead, change the lead-in
to a co-axial type cable.
If these corrective measures do not produce satisfactory results,
please contact your Authorized Yamaha Specialty Products dealer
for suggestions and/or corrective measures. If you cannot locate
an Authorized Yamaha Specialty Products dealer in your general
area, contact the Specialty Products Service Center, Yamaha
International, 6600 Orangethorpe Ave., Buena Park, CA 90620.
If for any reason you should need additional information relating
to radio or TV interference, you may find a booklet prepared by
the Federal Communications Commission helpful; "How to Identify
and Resolve Radio-TV Interference Problems". This booklet is
available from the U.S. Government Printing Office, Washington
DC. 20402 - Stock # 004-000-345-4.
13
Page 16

NIPPON GAKKI CO.. LTD. HAMAMATSU. JAPAN
^YAMAHA
The serial number of this product may be found on
the bottom of the unit. You should note this serial
number in the space provided below and retain this
manual as a permanent record of your purchase to
aid identification in the event of theft.
Morifti Nn PSS-4-50
Serial No.
Concerning Warranty
This product was made for international distribution,
and since the warranty for this type of product varies
from marketing area to marketing area, please
contact the selling agency for information concern
ing the applicable warranty and/or service policies.
Die Seriennummer befindet sich an der Unterseite des
Instrumentes. Wir empfehlen, diese Nummer sicherheit
shalber an der unten vorgesehenen Stelle einzutragen, um
sie auch im Falle eines Diebstahls jederzeit zur Hand zu
haben.
Mndell-Nr. PSS-450
^rii*n-Nr No_ de s/^rie;
Le numéro de série de ce produit figure au bas du
bloc. Il conviendra de noter ce numéro de série dans
l’espace réservé au-dessous et de conserver ce
manuel: celui-ci constitue le document permanent de
votre achat et permet l’identification en cas de vol.
Modèle No. PSS-450
Remarque relative à la garantie
Hinweis zur Garantie
Dieses Produkt wird international vertrieben, und
die Garantiebedingungen sind von Vertriebsland zu
Vertriebsland verschieden. Ihr Händler gibt Ihnen
gerne genauere Informationen zu den in Ihrem Land
gültigen Garantie und/oder Servicebedingungen.
Ce modèle est destiné à être distribué à l'échelle
internationale. Etant donné que les conditions de
garantie pour ce type de produit varient en fonction
des zones de commercialisation, prière de prendre
contact avec l’agence chargée des ventes pour tous
renseignements relatifs aux conditions de garantie
et de service après-vente.
E1 número de sene de este producto se encuentra en la parte
inferior de la unidad. Sírvase anotar este número de serie en
el espacio proporcionado debajo y guarde este manual
como comprobante de compra para ayudar a la identifica
ción en caso de robo.
N“ de modelo PSS-450
N® de serie
Concerniente a la garantía
Este producto ha sido fabricado para ser distribuido internacíonalmente y, como la garantía para este tipo de
producto varia en relación a su área de comercialización,
sírvase consultar con el agente de ventas sobre la informa
ción en tomo a la garantía aplicable y/o políticas de
servicio.
® i^60) Printed in Japan
 Loading...