

Yaesu MLS-310 User Manual
MLS-310
External Speaker with 10 Watt Amplier
The
MLS-310
mum of 4 watts output power. The
The volume control on the front of the speaker allows the audio level to be adjusted or to be turned off. Supplied with 6.5 feet
of speaker wire for connection of a Marine VHF, 6.5 feet of power cable to connect to 12 VDC, bracket and ush mounting
hardware.
high quality waterproof amplied communications speaker designed to operate with Marine VHF’s with maxi-
MLS-310
amplies the audio from the marine VHF to 10W providing loud and clear audio.
Red
Sheild
Black
Fuse
Sheild
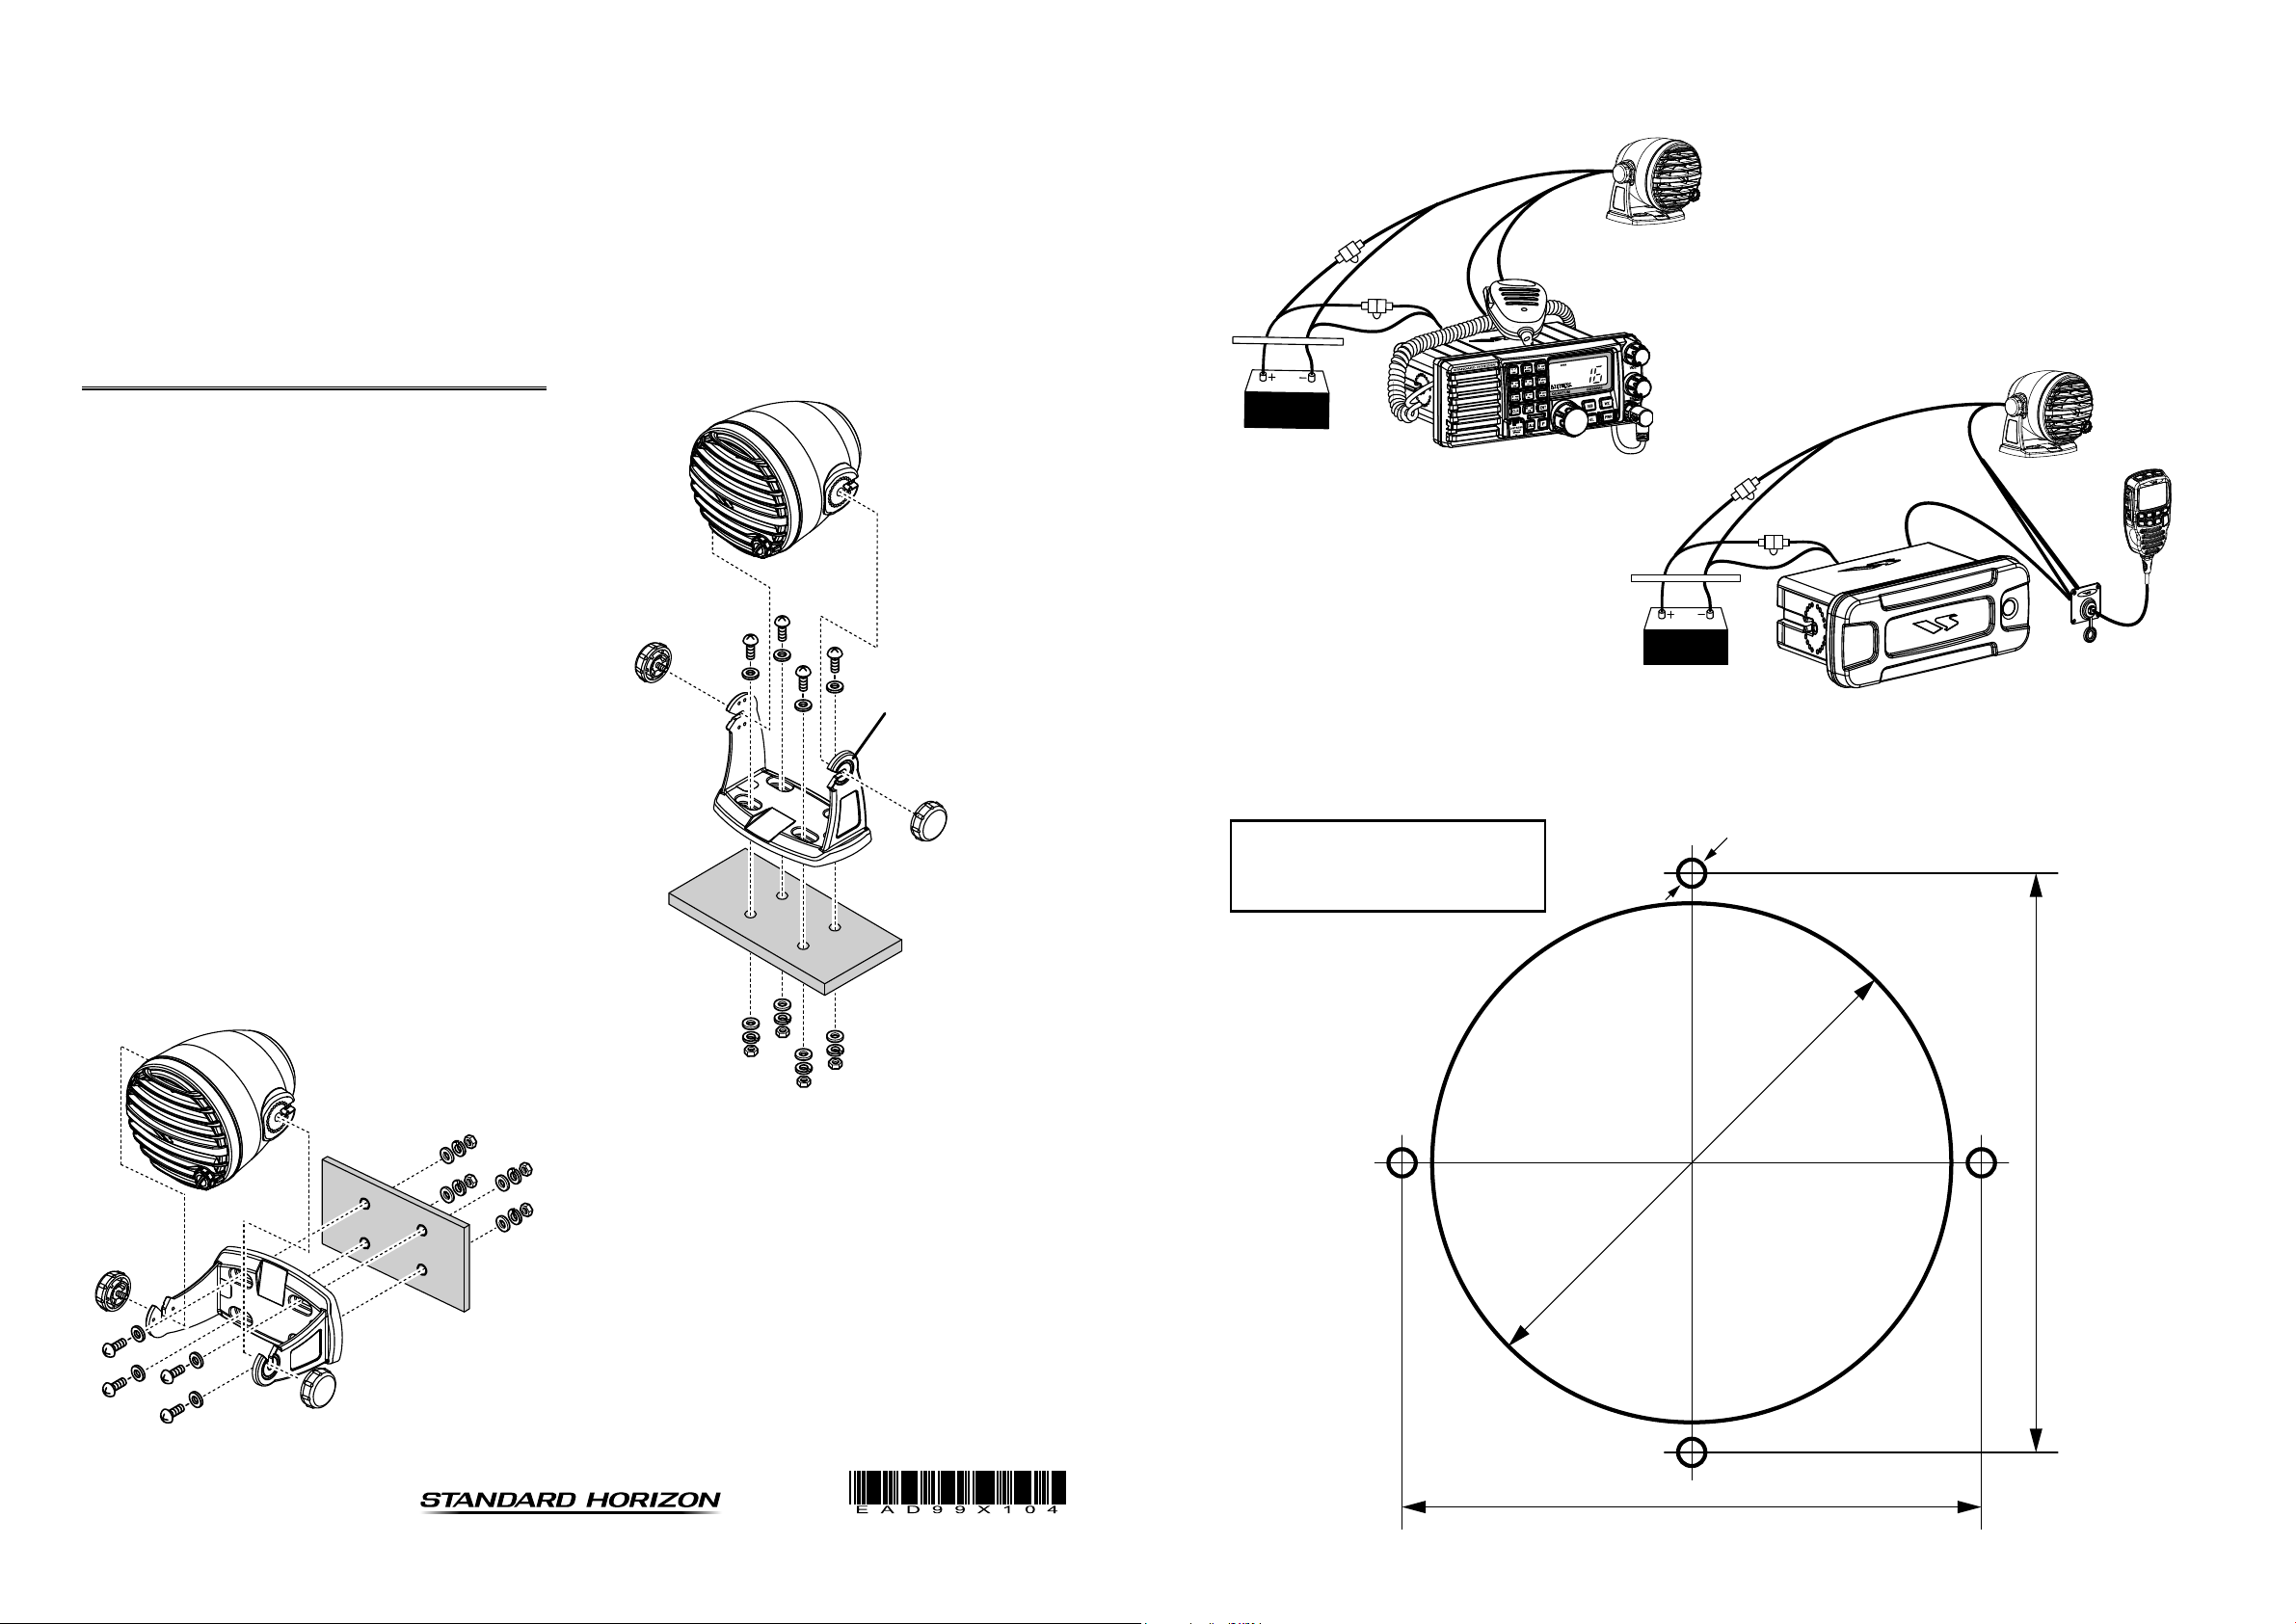
MLS-310 External Speaker
White
InstallatIon
1) MountIng Bracket InstallatIon
1. Remove the
MLS-310
the two Mounting Bracket Knobs.
2. Choose a place to mount the
3. Use the bracket as a template to mark the locations of
the mounting holes.
4. Use a 5.2-mm (17/64”) bit to drill the holes, and secure
the bracket with the supplied screws, spring washers,
at washers, and nuts (Figure 1 & 2).
5. Insert the
MLS-310
Bracket Knobs which were removed in step 1.
6. Set the
MLS-310
Mounting Bracket Knobs to fasten the
bracket.
7. Route and secure the connection cable from the
to the Marine VHF. Connect the WHITE wire of
310
the connection cable to the marine VHF’s positive (+)
external speaker output and the shield of the connection
cable to the negative (–) external speaker connection.
8. Connect the RED wire of the connection cable from
the
MLS-310
to a Positive (+) 12 VDC positive source
(capable of supplying 1.5 A of current) and the BLACK
wire of the connection cable to Negative (–) 12 VDC
source.
from the bracket by removing
MLS-310
.
into the bracket with the Mounting
to the preferred angle, then tighten the
MLS-310
to the
MLS-
You may reverse the
position of the
bracket.
Red
Power Source
Black
Typical Radio Connections
Use this template to mark the
location where the round hole for
the ush mount is to be cut.
Sheild
Red
Red
Power Source
Black
Fuse
Black
Phantom Series Connections
TEMPLATE for the MLS-310
5 Φ
MLS-310 External Speaker
CMP25 RAM+ MIC
Sheild
White
Figure 2 (Wall Mount)
YAESU USA
6125 Phyllis Drive, Cypress, CA 90630
95 Φ
Figure 1 (Desktop Mount)
106 mm
1511h-IO
106 mm
2) Flush Mount InstallatIon
Type of Equipment
Mar
ne Loudspeaker with 10W Amplifier
Brand Name
YAESU
Model Number
MLS
-
310
Manufacturer
YAESU MUSEN CO. LTD.
Address of Manufactur
er
Tennozu Parkside Building, 2
-5-
8 Higashi
-
Shinagawa,
EN61000
-6-
1:2007
EN61000
-6-
3:2007+A1:2011
EN 505
81:2012
Company
Yaesu UK Ltd
Address
Unit 12, Sun Valley Business Park, Winnall Close
Technical Construction file
Winchester, Ha
mpshire UK SO23 0LB
Issued by:
Yaesu Musen Co. Ltd, Tokyo Japan
File No
:
YETA00
256
Drawn up in:
Winchester, Hampshire UK
Date:
24th
February 2014
Signed for and on behalf of Yaesu UK Ltd
Name and
position:
PCJ Bigwood
Technical Sales Manager
1. Remove the
the two Mounting Bracket Knobs, then remove the rear
case of the
the four screws (Figure 3.).
2. Assemble the supplied M4x50 Screw, Nut, and Washer
as the Figure 4.
3. Use the supplied template to mark the location where
the round hole is to be cut. Conrm the space behind the
dash or panel is deep enough to accommodate the
(at least 4.3 inch (110 mm) deep). There should be
310
at least 1 inch (2.5 cm) between the
sink.
4. Cut out the round hole (one large hole and four small
mounting holes) and inset the
side.
5. Referring to Figure 5, pass through the four M4x50
Screws (with Nut and Washer) into the mounting holes
on the panel from the back side and turn the M4x50
Screws ve times.
6. Turn the four Nuts to adjust the tension so that the
is tight against the mounting surface.
310
7. Route and secure the connection cable from the
to the Marine VHF. Connect the WHITE wire of
310
the connection cable to the marine VHF’s positive (+)
external speaker output and the shield of the connection
cable to the negative (–) external speaker connection.
8. Connect the RED wire of the connection cable from
the
MLS-310
(capable of supplying 1.5A of current) and the BLACK
wire of the connection cable to Negative (–) 12VDC
source.
MLS-310
MLS-310
to a Positive (+) 12VDC positive source
from the bracket by removing
from the main body by removing
MLS-
MLS-310
MLS-310
from the front
’s heat-
MLS-
MLS-
Figure 3
Washer
Wall thickness + 1 inch (25 mm)
Figure 4
Nut
M4 x 50 Screw
Yaesu UK Ltd
Unit 12, Sun Valley Business Park
Winnall Close
Winchester SO23 OLB
United Kingdom
Tel: +44 (0)1962 866667
Fax: +44 (0)1962 856801
Email: sales@yaesu.co.uk
Declaration of Conformity
Nr. YUK-DOC-0203-14
We, Yaesu UK Ltd. certify and declare under our sole responsibility that the following equipment
complies with the essential requirements of the Directive 1999/5/EC and 2011/65/EU.
Shinagawa-ku, Tokyo, 140-0002 Japan
Applicable Standards:
This equipment is tested to and conforms to the essential requirements of directive, as included
in following standards:
EMC
1999/5/EC Art. 3 (1) (b)
ROHS2
2011/65/EU Art. 7 (b)
The technical documentation as required by the Conformity Assessment procedures is kept at
the following address:
operatIon
1. Before connecting the
the radio and set the AF VOL level to minimum.
2. Turn the radio off then connect the
dio.
3. Rotate the
tion.
4. Turn the radio on and adjust the
to a comfortable listing level
5. After adjusting the volume on the radio, you may adjust
the
volume knob.
MLS-310
MLS-310
volume or turn off the speaker using the
MLS-310
volume knob to “12 o’clock” posi-
to the radio, turn on
MLS-310
knob on the radio
VOL
to the ra-
replaceMent parts
Mounting Bracket (Black): RA0636400
Mounting Bracket (White): RA0636500
Mounting bracket Knobs (Black): RA0978600
Mounting bracket Knobs (White): RA0978500
Volume knob (Black): RA0652800
Volume knob (White): RA0635600
Mounting bracket mounting hardware: U9900147
Figure 5
specIFIcatIons
Supply Voltage: 13.8 VDC ±15 %
Current Drain: 1.5 A @13.8 VDC,
VOL Knob MAX,
Audio Input Level: 700mVrms
Audio Input Level: 700mVrms (Nominal)
1Vrms (Maximum)
Input Impedance: 1.8 k (Approx.)
Speaker Impedance: 8
Audio Output: 8 W @13.8 VDC, 10% THD
Audio Input Level: 700mVrms
Maximum Audio Output: 10 W @13.8 VDC,
Audio Input Level: 700mVrms
Operating Temperature: –4 °F to +140 °F
(–20 °C to +60 °C)
Connection Cable Length: 6.5 feet (2 m)
Disposal of your Electronic and Electric Equipment
Products with the symbol (crossed-out wheeled bin) cannot be disposed as household waste.
Electronic and Electric Equipment should be recycled at a facility capable of handling these items
and their waste byproducts.
In EU countries, please contact your local equipment supplier representative or service center for
information about the waste collection system in your country.
 Loading...