

Page 1

11
Installing user software in a
Windows NT 4.0 environment
Use the following instructions to install software and set up printing
from Windows NT 4.0. Ensure that your printer is properly connect and
configured for your network. For details, refer to the chapters
Connecting to the network and Performing the setup from the Printer
Control Panel
Use the contents of this chapter as follows:
• Depending on your configuration, use one of the following sections
to install printer drivers and set up appropriate connections:
• Parallel port printing
• TCP/IP and LPR printing
• IPX printing
• SMB printing
• Specify printer options with the section Setting the printer options.
• If necessary, refer to the section Installing additional software for
Windows NT 4.0.
All necessary files are included on the User Software CD.
In addition to using the User Software CD, you can download printer
drivers from the printer to your workstation with the Installer WebTool
(if the system administrator has enabled Internet access to the printer).
You can then install the drivers from your workstation. For instructions,
refer to the section Using the Installer WebTool in the chapter Using
the Fiery WebTools. After you download the printer files, the
installation process is identical to installing from the User Software CD.
Xerox DocuColor 2006 1
11–1
Page 2

11. Installing user software in a Windows NT 4.0 environment
Overview of installation
Installing the DocuColor 2006 user software includes the following:
• Installing the PostScript or PCL printer driver and corresponding
printer description files and setting up the printer driver to
communicate with the printer through the Add Printer Wizard
• Setting the printer options
• Copying additional files from the User Software CD as needed
To print from over the network from a Windows NT 4.0 workstation,
ensure the following tasks have been completed:
• Set up network servers, if any.
• Set up the printer to accept print jobs from the workstation.
• Configure a port on each Windows NT 4.0 workstation for the
network type.
Before you begin
1. If your system administrator has not already done so, connect the
printer to the desired port on the workstation. For details, refer to
the chapters Connecting to the network and Performing the setup
from the Printer Control Panel.
If you are uncertain what type of network you have, contact your
system administrator.
2. Print a configuration sheet at the printer to obtain the name of the
printer and settings that will be used in the following procedures.
11–2
Xerox DocuColor 2006
Page 3

11. Installing user software in a Windows NT 4.0 environment
Installing the user software for parallel port printing (Windows NT 4.0)
Use this procedure to install the printer. It prepares your system for
local printing through the parallel port.
Before you begin, print a Configuration Page for the printer. For
specific procedures, refer to the chapter Performing the setup from the
Printer Control Panel.
If you have previously installed a print driver for the DocuColor 2006,
perform the uninstall procedure before installing the new driver. For more
information, refer to your Windows documentation.
1. Insert the User Software CD in your CD-ROM drive.
2. Select Start, Settings, and Printers.
3. Double-click Add Printer to display the Add Printer wizard.
Select Next.
4. To install a printer locally, select My Computer and select Next.
My Computer is available if you logged in to a workstation on
which you have Administrator privileges. If it is not available, add
a network printer and follow the procedure for adding a port.
Refer to the section Installing the user software for TCP/IP and
LPR printing for Windows NT 4.0 in this chapter.
Xerox DocuColor 2006
11–3
Page 4
11. Installing user software in a Windows NT 4.0 environment
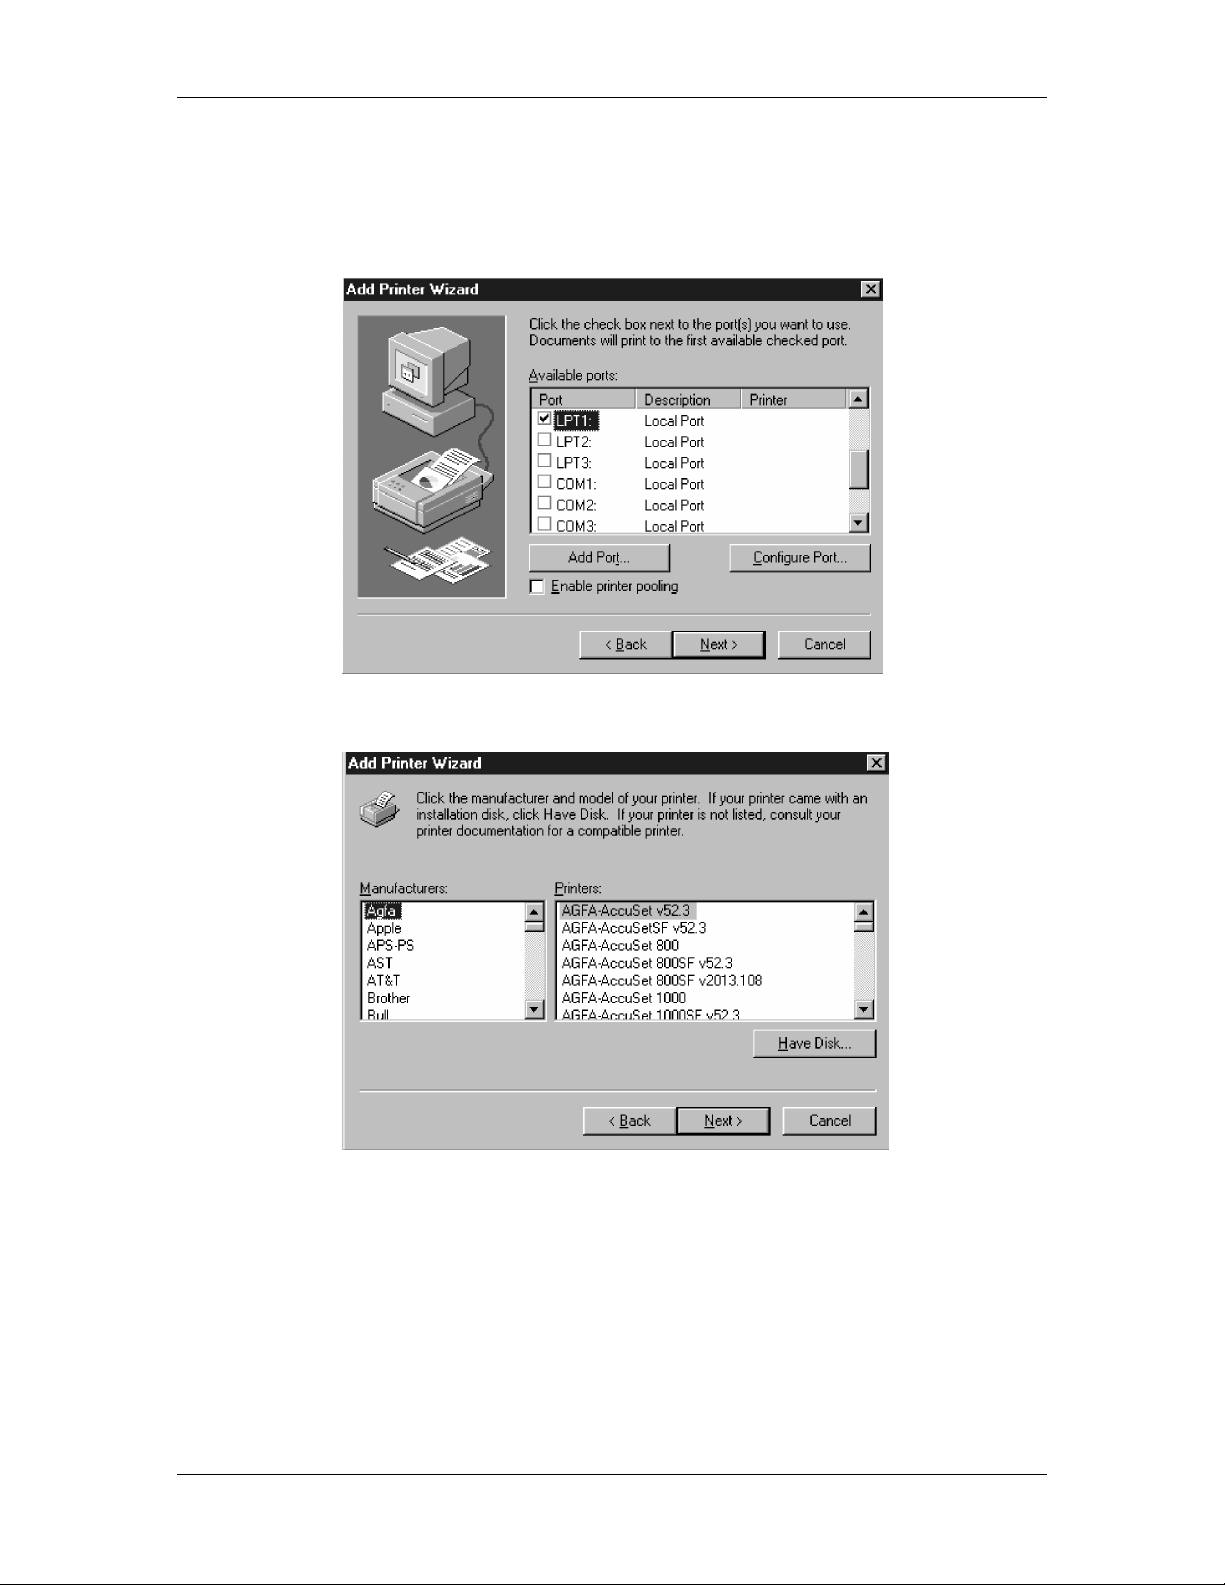
5. Select LPT1 and Next.
This is a general installation that works for the parallel port
connection. You can add a network port later, according to your
network type.
6. In the dialog box displaying lists of manufacturers and printers,
select Have Disk.
11–4
Xerox DocuColor 2006
Page 5
11. Installing user software in a Windows NT 4.0 environment
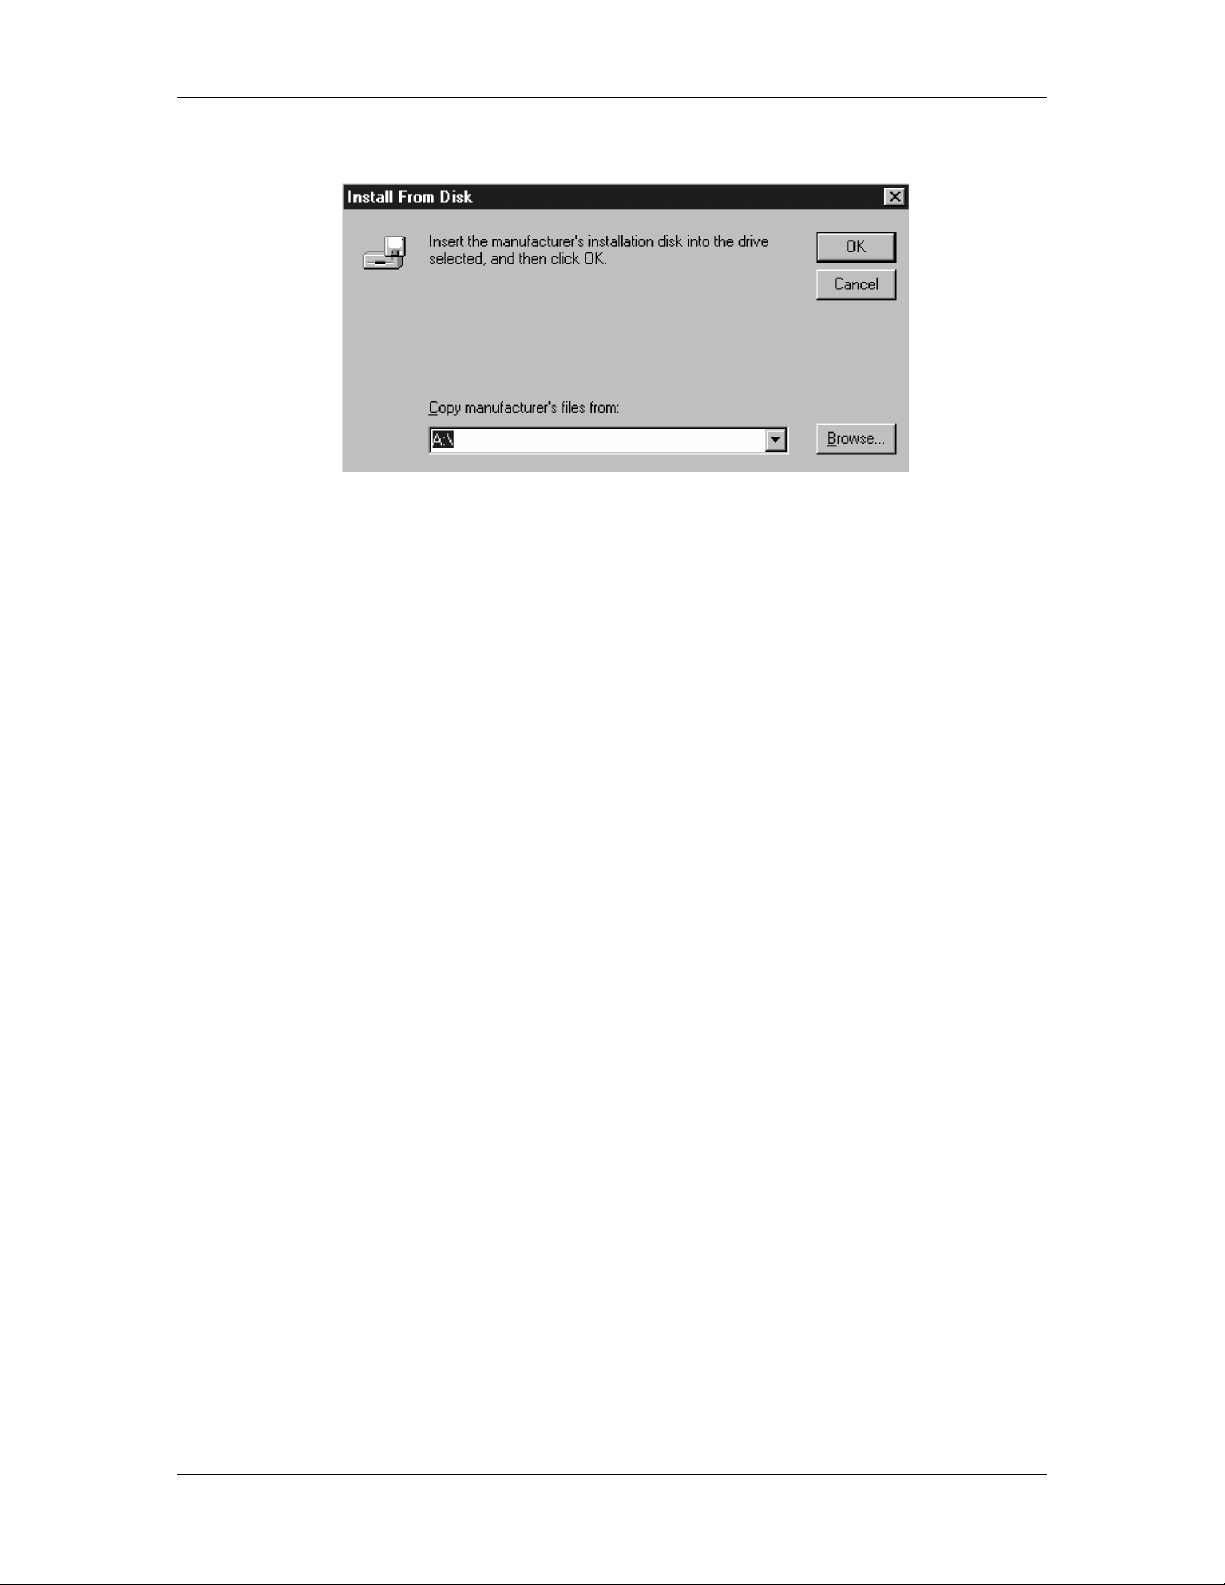
The Install from Disk dialog box prompts you for the disk.
7. Perform one of the following:
• If you are installing from the CD, select the CD-ROM drive
(for example, D:\) from the drop-down box and select the
Browse button.
• If you are installing from files you downloaded using the
Installer WebTool, type the name of your hard disk drive (for
example, C:\) and select Browse.
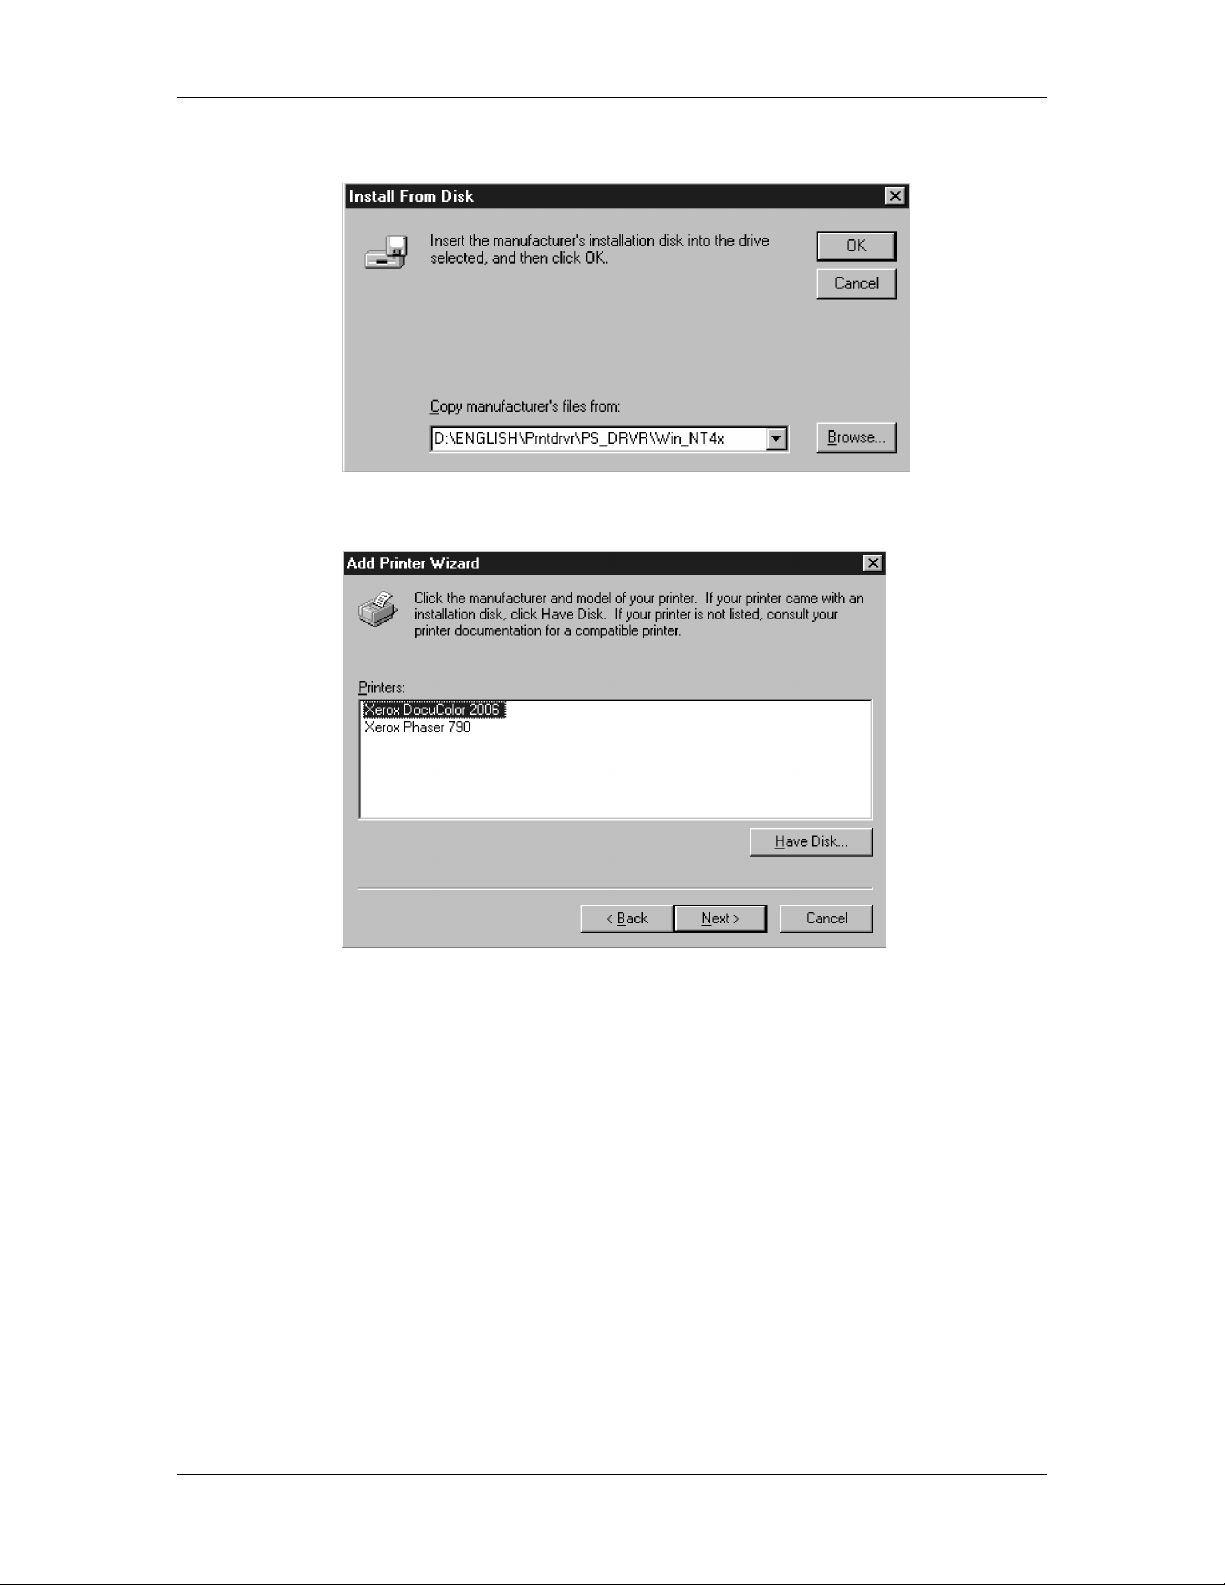
8. Perform one of the following:
• If you are installing from the CD, browse to one of the
following folders:
• For PostScript printing:
English\Prntdrvr\PS_drvr\Win_NT4.x folder
• For PCL printing:
English\Prntdrvr\PCL_drvr\Win_NT4.x folder
• If you are installing from files you downloaded using the
Installer WebTool, browse to the Prntdrvr folder.
Select OK and ensure that oemsetup.inf or oemsetup is
selected.
The path is copied to the Install from Disk dialog box.
Xerox DocuColor 2006
11–5
Page 6
11. Installing user software in a Windows NT 4.0 environment
9. Verify the path is correct and select OK.
10. In the Printers box, select the Xerox DocuColor 2006 printer.
Select Next.
11–6
Xerox DocuColor 2006
Page 7

11. Installing user software in a Windows NT 4.0 environment
11. Using a maximum of 31 characters, enter a name for the printer
or leave the default name in the Printer Name box.
This name will be used in the Printers and queue windows.
Entering more than 31 characters may cause printing problems with some
network applications.
12. If you want the DocuColor 2006 to be the default printer, select
Yes; if not, select No. Select Next.
Xerox DocuColor 2006
11–7
Page 8
11. Installing user software in a Windows NT 4.0 environment
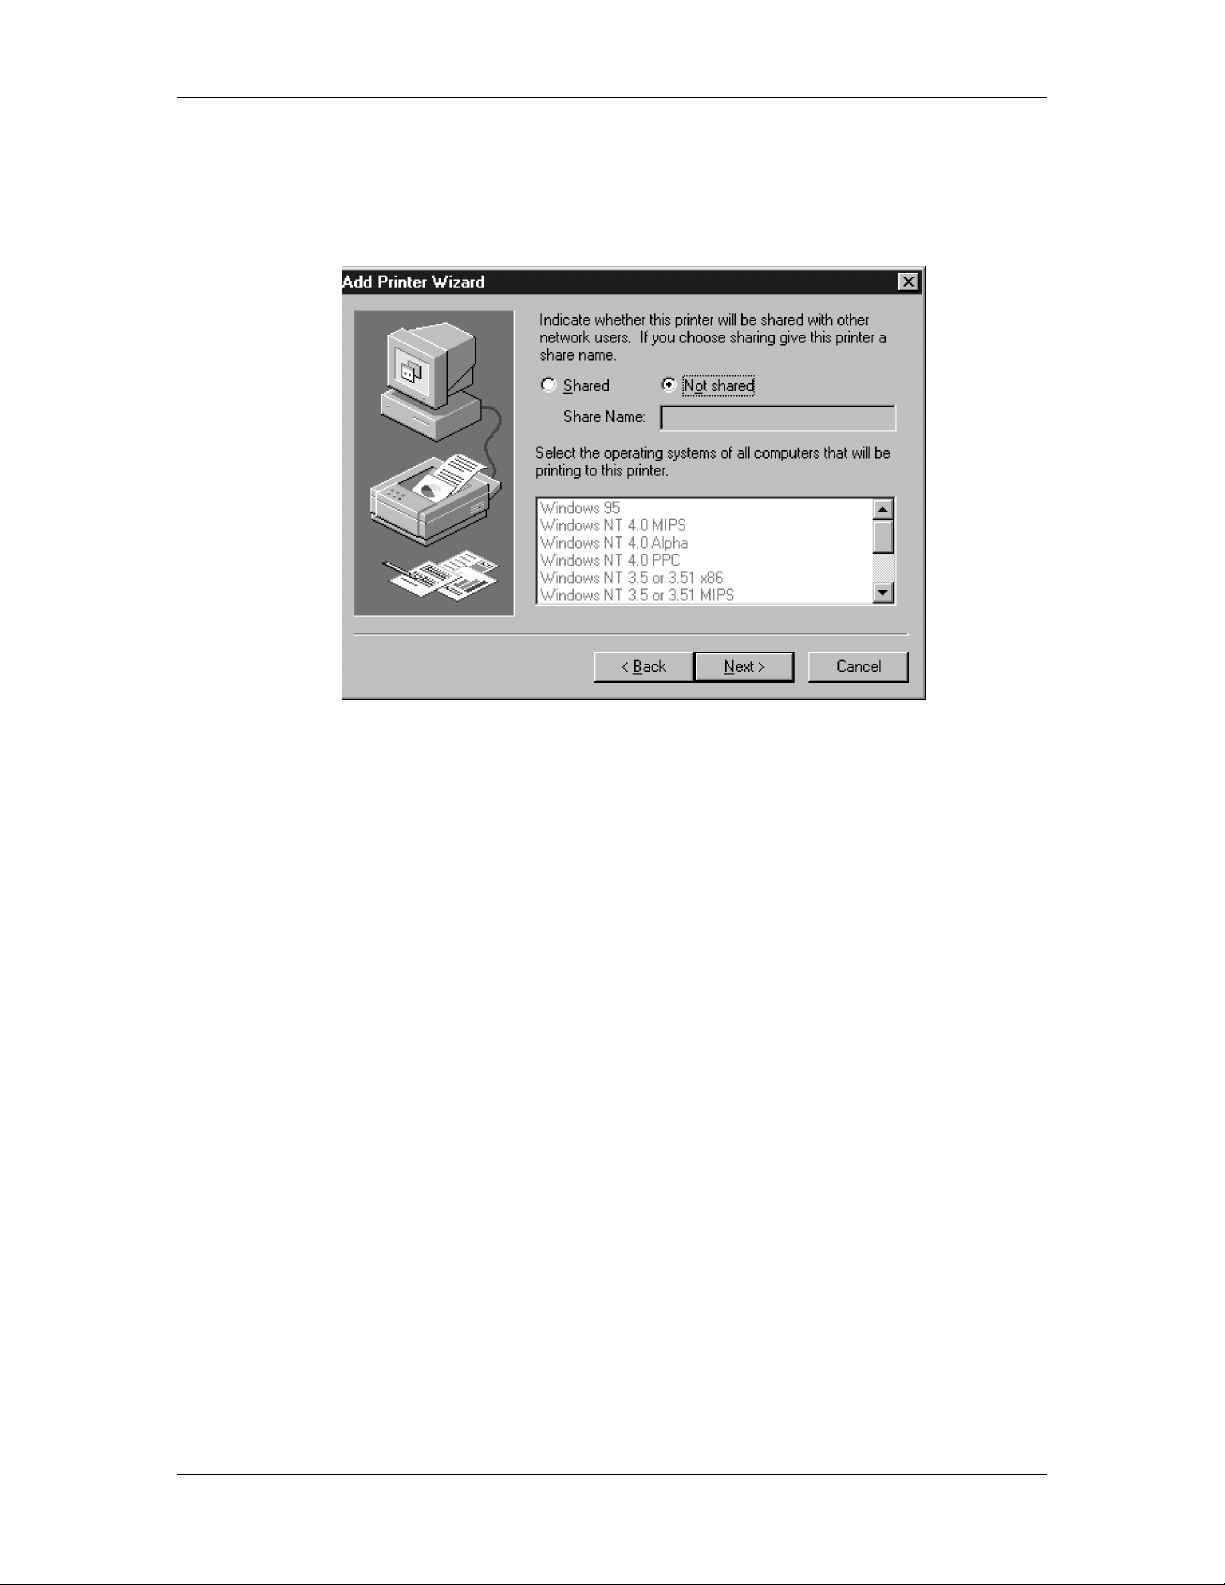
13. Indicate whether you want the printer installed as a shared
printer. If you select Shared, enter a Share Name for the printer
(or leave the printer default name) and make selections from the
list of operating systems used by client workstations. Select Next.
14. Select Yes in the next dialog box to postpone printing a test page
and select Finish.
When installation is complete, the Printers window is displayed
with an icon for the newly installed printer. When you select print,
your files are transmitted over the parallel port connection to the
printer.
11–8
Xerox DocuColor 2006
Page 9
11. Installing user software in a Windows NT 4.0 environment
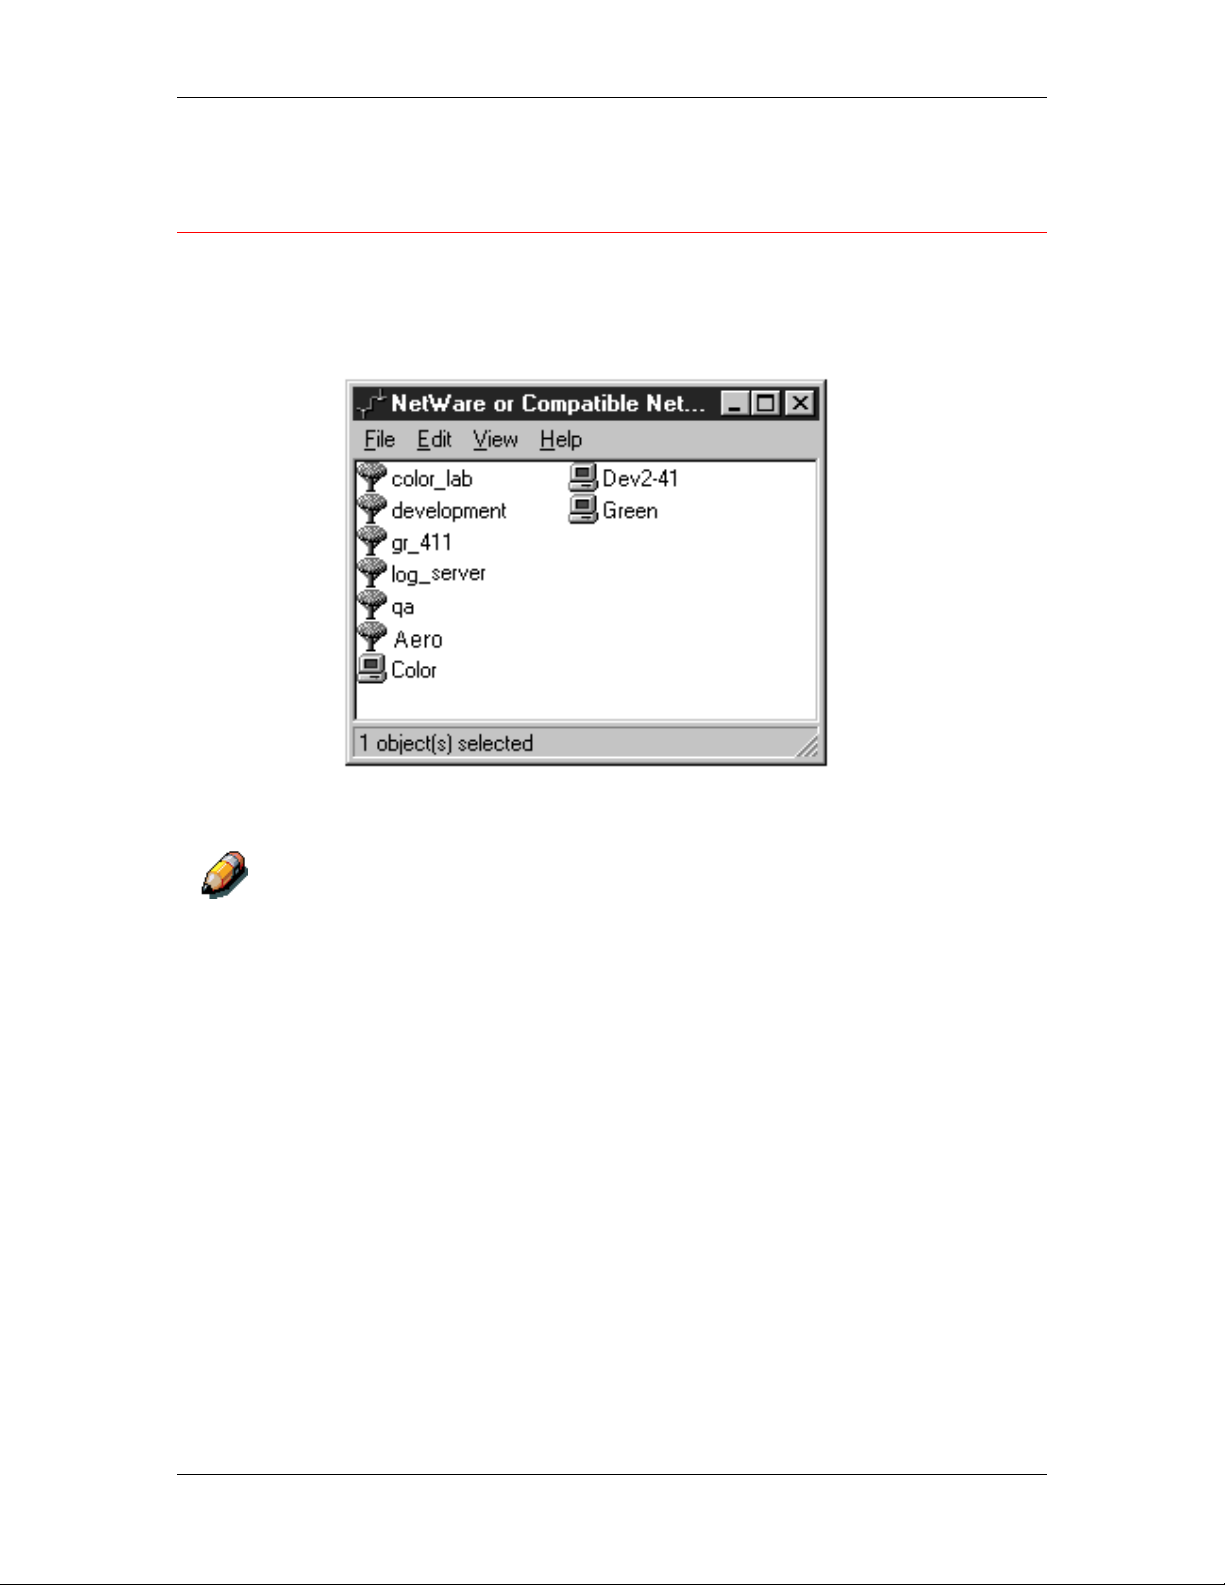
Installing the user software for IPX printing (Windows NT 4.0)
1. Open the Windows NT Network Neighborhood.
2. Browse for your NetWare compatible network.
A list of NetWare servers is displayed.
3. Double-click the File Server or NetWare Tree that provides a
print connection for the DocuColor 2006.
Check with your system administrator to ensure the printer is set up to
accept this type of printing.
You may have to log in to the file server to view the print
connections.
4. Double-click the print connection defined for the DocuColor
2006.
Xerox DocuColor 2006
11–9
Page 10

11. Installing user software in a Windows NT 4.0 environment
5. If the NetWare server does not have a suitable driver for the
DocuColor 2006, you may be asked if you want to set up the
printer on your workstation.
Select Yes.
Select OK.
The Add Printer Wizard displays.
6. In the dialog box displaying lists of manufacturers and printers,
select Have Disk.
11–10
Xerox DocuColor 2006
Page 11

11. Installing user software in a Windows NT 4.0 environment
The Install from Disk dialog box prompts you for the disk.
7. Perform one of the following:
• If you are installing from the CD, select the CD-ROM drive
(for example, D:\) from the drop-down box and select the
Browse button.
• If you are installing from files you downloaded using the
Installer WebTool, type the name of your hard disk drive (for
example, C:\) and select Browse.
8. Perform one of the following:
• If you are installing from the CD, browse to one of the
following folders:
• For PostScript printing:
English\Prntdrvr\PS_drvr\Win_NT4.x folder
• For PCL printing:
English\Prntdrvr\PCL_drvr\Win_NT4.x folder
• If you are installing from files you downloaded using the
Installer WebTool, browse to the Prntdrvr folder.
Select OK and ensure that Oemsetup.inf or Oemsetup is
selected.
The path is copied to the Install from Disk dialog box.
Xerox DocuColor 2006
11–11
Page 12

11. Installing user software in a Windows NT 4.0 environment
9. Verify the path is correct and select OK.
10. In the Printers box, select the Xerox DocuColor 2006 printer.
Select Next.
11–12
Xerox DocuColor 2006
Page 13

11. Installing user software in a Windows NT 4.0 environment
11. Using a maximum of 31 characters, enter a name for the printer
or leave the default name in the Printer Name box.
This name will be used in the Printers and queue windows.
Entering more than 31 characters may cause printing problems with some
network applications.
12. If you want the DocuColor 2006 to be the default printer, select
Yes; if not, select No. Select Next.
Xerox DocuColor 2006
11–13
Page 14

11. Installing user software in a Windows NT 4.0 environment
13. Indicate whether you want the printer installed as a shared
printer. If you select Shared, enter a Share Name for the printer
(or leave the printer default name) and make selections from the
list of operating systems used by client workstations. Select Next.
14. Select Yes in the next dialog box to postpone printing a test page
and select Finish.
When installation is complete, the Printers window is displayed
with an icon for the newly installed printer. When you select print,
your files are transmitted over the IPX connection to the printer.
11–14
Xerox DocuColor 2006
Page 15

11. Installing user software in a Windows NT 4.0 environment
Installing the user software for TCP/IP and LPR printing for Windows NT 4.0
Before you continue, print a configuration sheet at the printer to obtain
the IP address assigned to the DocuColor 2006, as well as the subnet
mask and gateway address, if they are used.
1. Perform steps 1-14 of the procedure Installing the user software
for parallel port printing to install the printer driver.
When installation is complete, the Printers window is displayed
with an icon for the newly installed printer.
2. Right-click the DocuColor 2006 icon and select Properties to
open the ppd window. Select the Ports tab to display the Ports
properties.
Xerox DocuColor 2006
11–15
Page 16

11. Installing user software in a Windows NT 4.0 environment
3. Ensure that you are connected to LPT1 and select the Add Port
option to display a list of available ports.
4. Select the LPR Port option and select the New Port button.
If the LPR port is not listed, install the TCP/IP network protocol and Microsoft
TCP/IP printing software. (Access the software through My Computer/
Control Panels/Network/Services. Select the Microsoft TCP/IP printing
icon.). Refer to your Windows NT documentation for details.
5. Perform one of the following:
• If your network uses IP addresses, enter the Ethernet
TCP/IP IP address of the DocuColor 2006 in the Add LPR
compatible printer dialog box.
• If your network uses Domain Name Services (DNS), enter
the DNS name assigned to the printer.
11–16
Xerox DocuColor 2006
Page 17

11. Installing user software in a Windows NT 4.0 environment
6. Press Tab and type one of the names listed below in lowercase
letters. These names must be typed exactly as shown.
• print (generally used)
• hold
• direct
7. Select OK. The workstation checks the address or DNS name
that you entered and notifies you if it cannot resolve the address.
8. Select Close in the Printer Ports dialog box. The Ports property
tab shows the new port configuration.
9. To confirm the connection, print a Windows NT 4.0 test page.
Select the General tab and select the Print Test Page option.
When you print, your PostScript or PCL files are transmitted over
the LPR Port connection to the printer. With setup complete, you
are ready to print your jobs on the DocuColor 2006.
10. Select OK to close the Printer Properties dialog box.
Xerox DocuColor 2006
11–17
Page 18

11. Installing user software in a Windows NT 4.0 environment
Installing user software for SMB printing
Use SMB or WINS printing if you do not have a Novell network.
Printing by this method enables printing from a workstation to a
particular print connection (Hold, Print, or Direct) on the DocuColor
2006. The following procedure assumes you have the TCP/IP protocol
and Microsoft TCP/IP Printing software installed on the Windows NT
workstation.
You must install a new printer for each additional connection. Repeat
this procedure for each and assign each printer a descriptive name
during the printer driver installation for easy identification later.
In WebSetup and on the Configuration Page, SMB printing is referred to as
Windows Printing Service.
Before you continue, print a configuration sheet at the printer to obtain
the IP address assigned to the DocuColor 2006, as well as the Subnet
mask and gateway address, if they are used.
1. Ensure the printer is configured for SMB printing. For more
information, refer to the chapter Performing the setup from the
Printer Control Panel.
2. At your workstation, double-click the Network Neighborhood
icon to display your network environment.
11–18
Xerox DocuColor 2006
Page 19

11. Installing user software in a Windows NT 4.0 environment
3. Browse for the DocuColor 2006 printer.
If you cannot locate the printer, see your system administrator.
4. Double-click the name of the printer to display enabled print
connections.
5. Double-click the name of the print connection.
6. In the Printers dialog box, select Yes to install the PostScript or
PCL printer driver and printer description file for the selected
connection.
A message is displayed, indicating that the correct printer driver is
not available.
Xerox DocuColor 2006
11–19
Page 20

11. Installing user software in a Windows NT 4.0 environment
7. Select OK.
8. In the dialog box displaying lists of manufacturers and printers,
select Have Disk.
The Install from Disk dialog box prompts you for the disk.
9. Perform one of the following:
• If you are installing from the CD, select the CD-ROM drive
(for example, D:\) from the drop-down box and select the
Browse button.
• If you are installing from files you downloaded using the
Installer WebTool, type the name of your hard disk drive (for
example, C:\) and select Browse.
11–20
Xerox DocuColor 2006
Page 21

11. Installing user software in a Windows NT 4.0 environment
10. Perform one of the following:
• If you are installing from the CD, browse to one of the
following folders:
• For PostScript printing:
English\Prntdrvr\PS_drvr\Win_NT4.x folder
• For PCL printing:
English\Prntdrvr\PCL_drvr\Win_NT4.x folder
• If you are installing from files you downloaded using the
Installer WebTool, browse to the Prntdrvr folder.
Select OK and ensure that Oemsetup.inf or Oemsetup is
selected.
The path is copied to the Install from Disk dialog box.
11. Verify the path is correct and select OK.
Xerox DocuColor 2006
11–21
Page 22

11. Installing user software in a Windows NT 4.0 environment
12. In the Printers box, select the Xerox DocuColor 2006 printer.
Select Next.
13. Using a maximum of 31 characters, enter a name for the printer
or leave the default name in the Printer Name box.
This name will be used in the Printers and queue windows.
Entering more than 31 characters may cause printing problems with some
network applications.
11–22
Xerox DocuColor 2006
Page 23

11. Installing user software in a Windows NT 4.0 environment
14. If you want the DocuColor 2006 to be the default printer, select
Yes; if not, select No. Select Next.
15. Indicate whether you want the printer installed as a shared
printer. If you select Shared, enter a Share Name for the printer
(or leave the printer default name) and make selections from the
list of operating systems used by client workstations. Select Next.
16. To confirm the connection, right-click the printer icon and select
Properties. Select the General tab and Print Test Page. If the
test page prints successfully, you are ready to print from your
workstation.
17. Select OK to close the Printer Properties dialogue box.
Xerox DocuColor 2006
11–23
Page 24

11. Installing user software in a Windows NT 4.0 environment
Setting printer options
1. Select Start, Settings, and Printers.
2. Select the DocuColor 2006 icon and select Properties from the
File menu.
3. Select the Configuration tab, and scroll down to Installable
Options.
4. Specify the options installed on the printer. Select an installable
option and select the setting of Installed or Not Installed.
• 64 (default), 128, 192, 256, 320, 384 or 512 MB
• A3 Oversize Tray
• Optional 2-Tray Module
• Duplex Unit
5. Select Apply to activate the current settings, and then select OK.
11–24
Xerox DocuColor 2006
Page 25

11. Installing user software in a Windows NT 4.0 environment
Installing additional software for Windows NT 4.0
You can copy additional color files from the User Software CD to your
hard disk. Many of the files are PostScript files that you can download
and print using WebDownloader.
• ICM folder—ICM monitor setting file and device profiles specially
designed for use with the printer.
• Clrfiles folder (inside English folder)—Cmyk.ps, an 11-page, letter-
size PostScript file to use for reference when defining CMYK colors
in applications. Pantone.ps, a 19-page, letter-size PostScript file
that indicates the closest equivalent of PANTONE coated colors
that the printer can produce. The method used to print the
Pantone.ps file differs depending on the Spot Color Matching
setting.
You can print Rgb_01.doc from Microsoft Word 97 or later to view
RGB colors. You can print Rgb_02.ppt from PowerPoint 6.0 or
later to view available RGB colors.
• Calibrat folder (inside English/Clrfiles folder)—Four PostScript
measurements files of color patches: Custom21.ps, Custom34.ps,
Stand21.ps, and Stand34.ps. The numbers in the file names refer
to the number of patches on the page. The Custom files are
provided to enable you to download measurement patches that
incorporate the current calibration set of the printer. The Standard
files are provided to enable you to download standard
measurement patches that ignore the current calibration set for the
printer.
These files are provided for expert users and should not be used for day-today calibration.
Xerox DocuColor 2006
11–25
Page 26

11. Installing user software in a Windows NT 4.0 environment
Copying printer description files
The User Software CD contains printer description files for popular
Windows applications. Pagemaker 5.0, 6.0,and 6.5 do not support
automatic installation of printer description files from the Printer Control
Panel. To make the DocuColor 2006 available in the Print and Page
Setup dialog boxes of this application, copy printer description files to
the appropriate location.
1. Insert the User Software CD in your CD-ROM drive. Open the
English\Prntdrvr folder.
2. Copy the printer description file for your printer to the appropriate
location. For PageMaker 5.0 or later, copy the EF3x1D10.ppd to
one of the following locations:
• For PageMaker 5.0--\ALDUS\USENGLSH\PPD4
• For PageMaker 6.0--\PM6\RSRC\USENGLSH\PPD4
• For PageMaker 6.5--\ PM65\RSRC \USENGLSH\PPD4
Installing the ICM profile
The Image Color Matching (ICM) profiles included in the Icm folder on
the User Software CD are for use with ColorWise ProTools. They can
also be used with applications that support ICC standards. For most
ICC aware applications, the files must be installed into a folder named
Color in the System folder. For use with ColorWise Pro Tools, the files
can be copied to a folder of your choice.
Installing the ICM profile on Windows NT 4.0
1. On the User Software CD, open the Icm folder.
2. Copy the profiles to the Windows NT\System32\Color folder.
If a folder named Color does not exist in the System32 folder, create one
and install the profiles into it.
11–26
Xerox DocuColor 2006
Page 27

11. Installing user software in a Windows NT 4.0 environment
Loading the working space profile using Photoshop 5.0
1. Launch Photoshop.
2. From the File menu, select Color Settings and RGB Setup.
3. In the RGB Setup dialog box, select Load.
4. Browse to the Windows NT\System32\Color folder. Select the
Efirgb v1f file and Open.
5. Select OK.
For more information about ICM profiles, refer to the application
documentation.
Xerox DocuColor 2006
11–27
Page 28

11. Installing user software in a Windows NT 4.0 environment
Loading the ICM profile
The ICM printer profile enables RGB-to-CMYK conversions that are
specific to the printer you are using. The following procedure assumes
that you have installed the ICM profiles included on the User Software
CD.
The internal name of an ICM profile may vary slightly from its file name.
1. Launch Photoshop.
2. From the File menu, select Color Settings and CMYK Setup.
3. In the CMYK Setup dialog box, select ICC as the CMYK color
model.
4. Select the profile that corresponds to the printer or the device you
would like to simulate from the Profile drop-down box.
11–28
5. Select OK.
Xerox DocuColor 2006
 Loading...