

Page 1

Quick Use Guide
WorkCentre 7232/7242
701P46461
Page 2

Microsoft, MS-DOS, Windows, Windows NT, Microsoft Network, and Windows Server are
The data saved in the hard disk of the m achine may be lost if there is any problem in the hard
Important(1) This manual is copyrighted with all rights reserved. Under the copyright laws, this
Xerox is not liable for any problems resulting from unaut hor ised operation of the equipment.
Xerox and Ethernet are registered trademarks.
either trademarks or r egistered trademarks of Microsof t Corporation in the United States
and/or other countries.
Novell, NetW ar e, IntranetWare and NDS are registered tradem ar ks of Novell, Inc. in the
United States and other countries.
Adobe, Acrobat, PostScript, PostScript 3, and Post Scr ipt Logo ar e trademarks of Adobe
Systems Incorporated.
Apple, AppleTalk, EtherTalk, LocalTalk, Macintosh, MacOS and TrueType are trademarks of
Apple Computer, Inc., r egist er ed in the U.S. and other countries.
HP, HPGL, HPGL/2, and HP-UX are registered trademarks of Hewlett-Packard Corporation.
All product/brand names are trademarks or registered tr ademarks of the respective holders.
disk. Xerox is not responsible for any direct and indirect damages arising from or caused by
such data loss.Xerox is not responsible for any breakdown of machines due t o inf ect ion of
computer virus or computer hacking.
manual may not be copied or modified in whole or part , without the written consent of the
publisher.(2) Parts of this manual are subject to change without prior notice. ( 3 ) We welcome
any comments on ambiguities, error s, omissions, or missing pages.(4) Never at t empt any
procedure on the machine that is not specifi cally described in this m anual. Unauthorised
operation can cause faults or accidents.
An export of this product is strictly controlled in accordance with Laws concerning For eign
Exchange and Foreign Trade of Japan and/or the export control regulations of t he United
States.
NOTE: BLUE title is for IT administrator t ype per sonnel, GREEN for end users and RED
means machine needs attention. Depending on the configuration of the machine, some User
Interface screens may vary.
Page 3

Table of Contents
Control Panel
Paper Tray Settings
Booklet Creation
ID Card Copying
Simple LAN Faxing
Simple Scan to Mailbox
Setting the Fax Country Code
3
5
7
9
13
15
17
Auditron Setup 19
Banner Sheets
Billing Meters
Replacing the Toner Cartridges
WorkCentre 7232/7242
Quick Use Guide
23
25
27
WorkCentre 7232/7242
Page 4

Control Panel
*
WorkCentre 7242
Copy
Fax
Scan to Mailbox
Touch Screen
1.
The touch screen allows you to select all the available programming features. It
E-Mail
Network Scanning
Send from Mailbox
Internet Fax
Scan to PC
3
1
2
5
6
4
9
87
#-0
C
also displays fault clearance procedures and general machine information.
All Services Button
2.
Displays the All Services screen on the touch screen.
Features Button
3.
Returns the touch screen to the previous copy, fax, or scan feature screen.
4.
5.
WorkCentre 7232/7242
Job Status Button
Displays job progress information on the touch screen.
Machine Status Button
Displays the current status of the machine on the touch screen.
Quick Use Guide
WorkCentre 7232/7242
Page 5

Control Panel
job.
Dial Pause
6.
Enters a pause in a telephone number when transmitting a fax.
Clear
7.
Deletes numeric values or the last digit entered.
# (Pound)
8.
Indicates the dialing character or designates a group dial number.
Start
9.
Starts the job.
Stop
10.
Temporarily stops the current job. Follow the message to cancel or resume your
Interrupt
11.
Temporarily stops the current copy job to allow a priority job to be run.
12.
13.
14.
WorkCentre 7232/7242
Clear All
If pressed once, resets the default sett i ngs and displays the first screen for the
current pathway. If pressed twice, resets all the features to their machine default
settings.
Language
Changes text to an alternative language (when available).
Log In/Out
Provides password protected access to the Tools used to adjust the defaults
of the machine.
Quick Use Guide
WorkCentre 7232/7242
Page 6
Paper Tray Settings
Administrator.
Group
Features
Your machine uses a system of programmable settings to manage
the trays and stock. These settings are established by your Machine
Depending on which setting the tray is set to determines whether a
user can change the programmed stock attributes of size, type, and
colo
ur.
Machine Information
System Settings
Setup and Calibration
Accounting
Authentication and Security
Settings
Billing Information
Supplies
Touch Common Service Settings.
Scan Mode Settings
Copy Mode Settings
Faults
Paper Tray Settings
Image Quality Adjustment
Reports
Tools
WorkCentre 7232/7242
Quick Use Guide
WorkCentre 7232/7242
Page 7
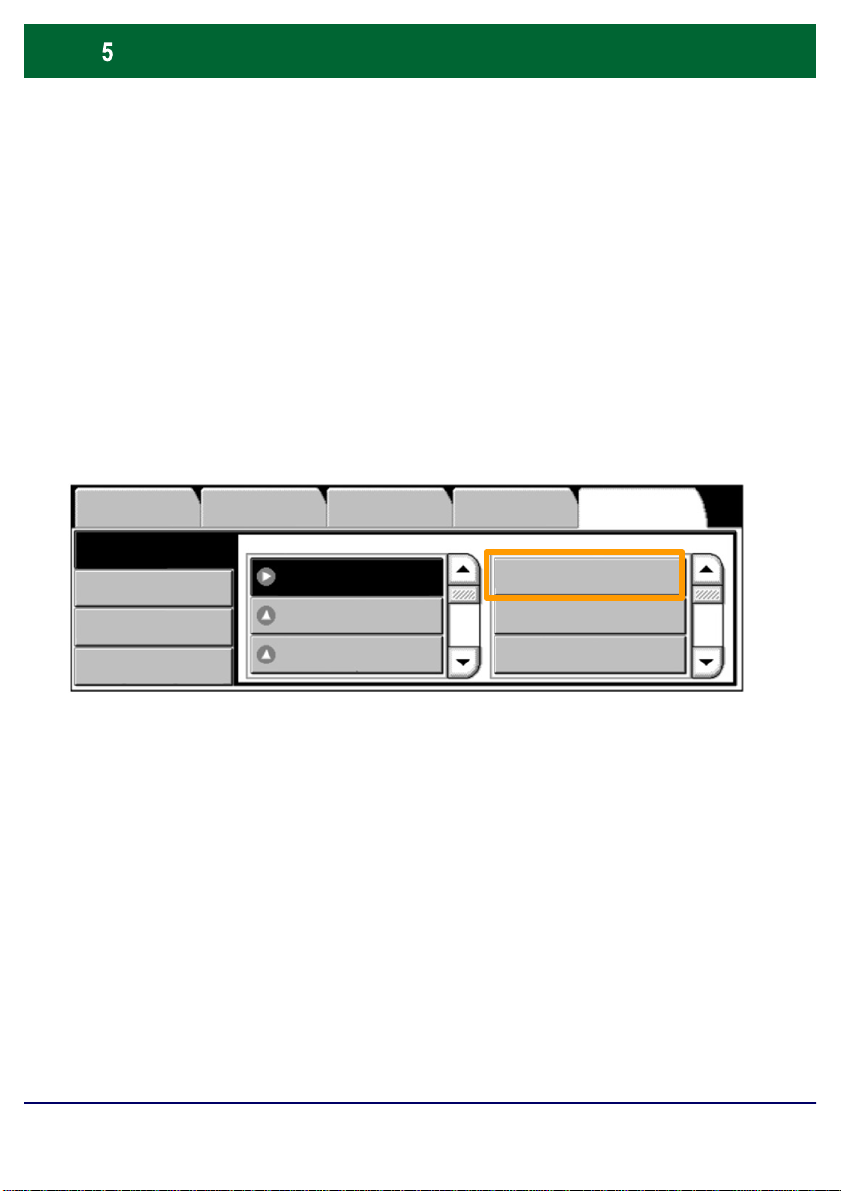
Paper Tray Settings
The tray information screen will be displayed on the touch screen. If
the tray information is correct, select the Confirm
change the paper size, paper type, or paper colour by selecting the
corresponding button on the touch screen.
That completes the procedure for loading the paper tray.
button. Alternatively
Tray 1
WorkCentre 7232/7242
Cancel
Paper Size/
Auto Paper Select
A4
Quick Use Guide
Paper Type/
Color
Confirm
WorkCentre 7232/7242
Page 8
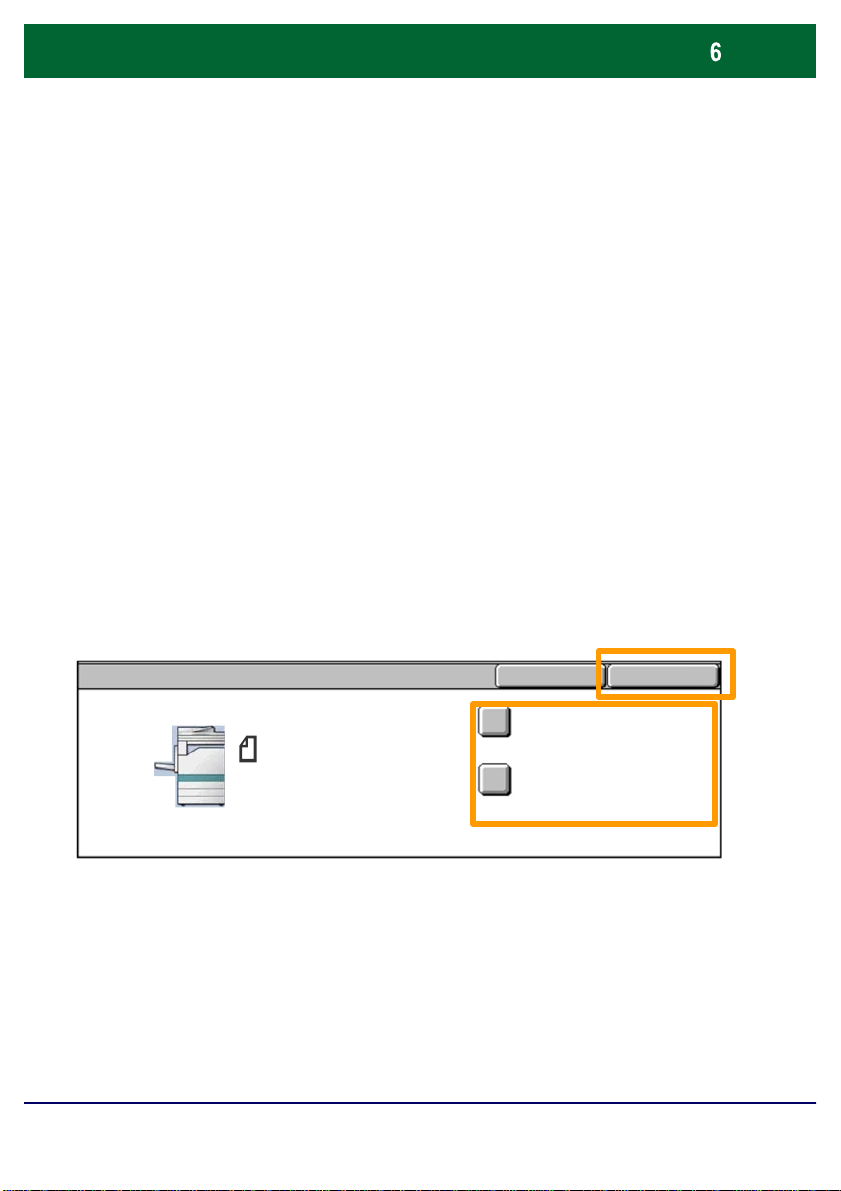
Booklet Creation
Poster
Booklet creation enables the production of booklets or multipage copies from 1 or 2-sided originals. The machine will
scan your originals and automatically reduce and arrange
the images in the correct sequence on your selected copy
paper so that a booklet is created when the copy set is
folded in half.
The Booklet creation feature is switched on from a button
on the Output Format tab.
When Booklet creation is switched on, you need to tell the
machine that your originals are 1-sided or 2-sided. When
you have made your selection you must select Save so
that you can programme any other features you may
require from the control panel.
Switch on Booklet creation by selecting the Output
Format tab, the Booklet Creation button and the Create
Left/Top Bound Booklet button.
Copy
WorkCentre 7232/7242
Booklet Creation
Off
Page Layout
Off
Image Quality
Layout Adjustment
Covers Transparency Options
Off
Off
Quick Use Guide
Output Format
Annotations
Off
Off
Job Assembly
WorkCentre 7232/7242
Page 9

Booklet Creation
There are 2 simple rules that must be followed when making
Always load your documents with the long edge to the left.
Booklet Creation
Cancel Save
Binding Shift
Off
Create Left/Top Bound
Booklet
Covers
Divide Output
Output Destination
Last Page on Back Cover
booklets:
First select the tray that contains the paper you want to use.
1.
2.
WorkCentre 7232/7242
Quick Use Guide
WorkCentre 7232/7242
Page 10
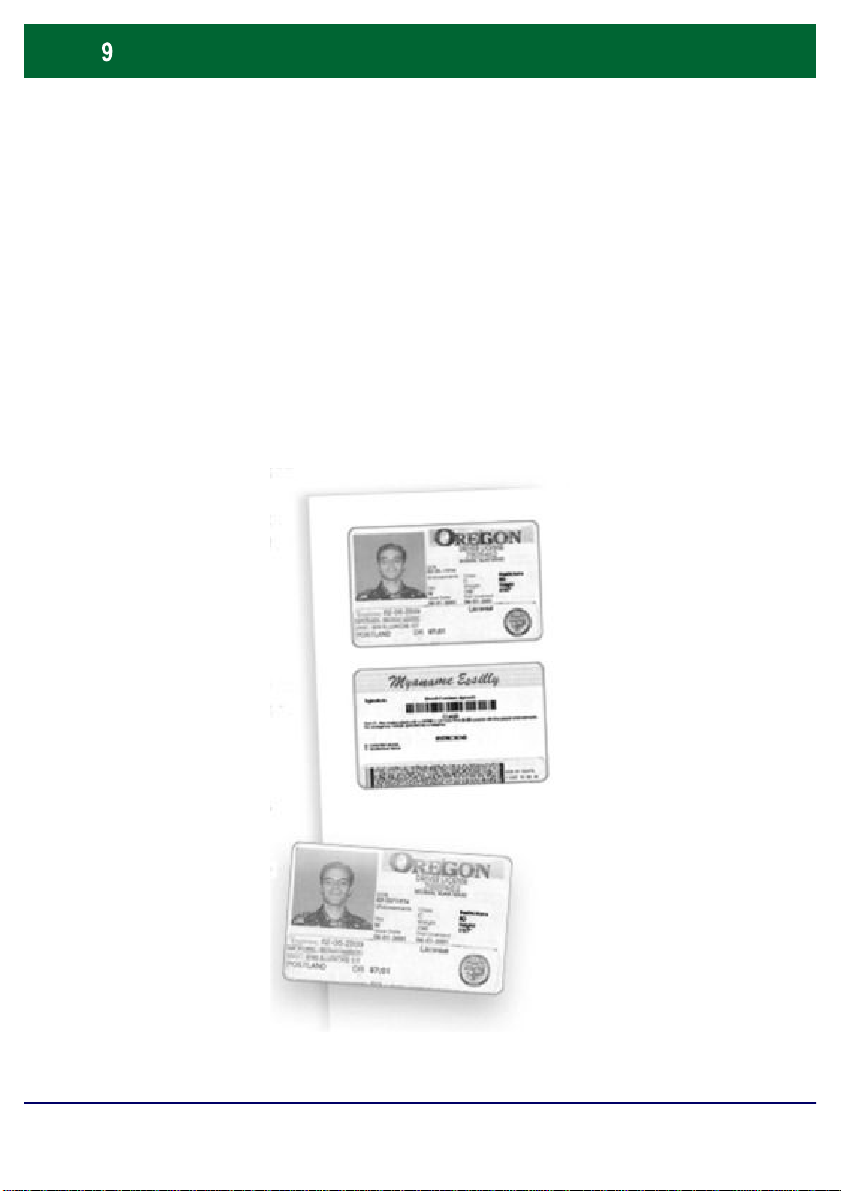
ID Card Copying
Whether needing to copy insurance cards, a driver's license, or
any other form of identification, the ID Card Copying feature
offers a simple and efficient way to save time.
Information on both sides of the ID Card can be copied onto
one side of one sheet of paper, without the need to reload the
paper into the paper or bypass tray.
WorkCentre 7232/7242
Quick Use Guide
WorkCentre 7232/7242
Page 11
ID Card Copying
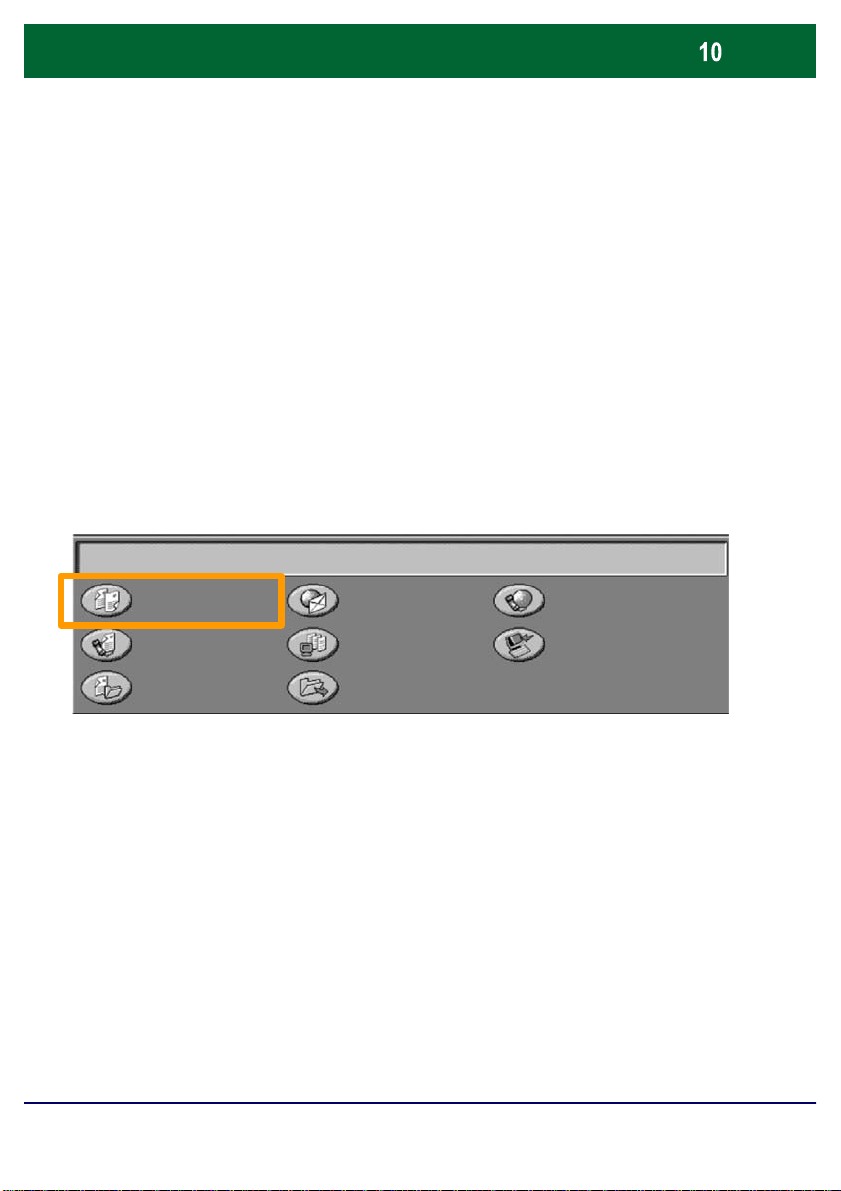
1.
Pressing the Clear All (AC) button once will cancel any
previous screen programming selections.
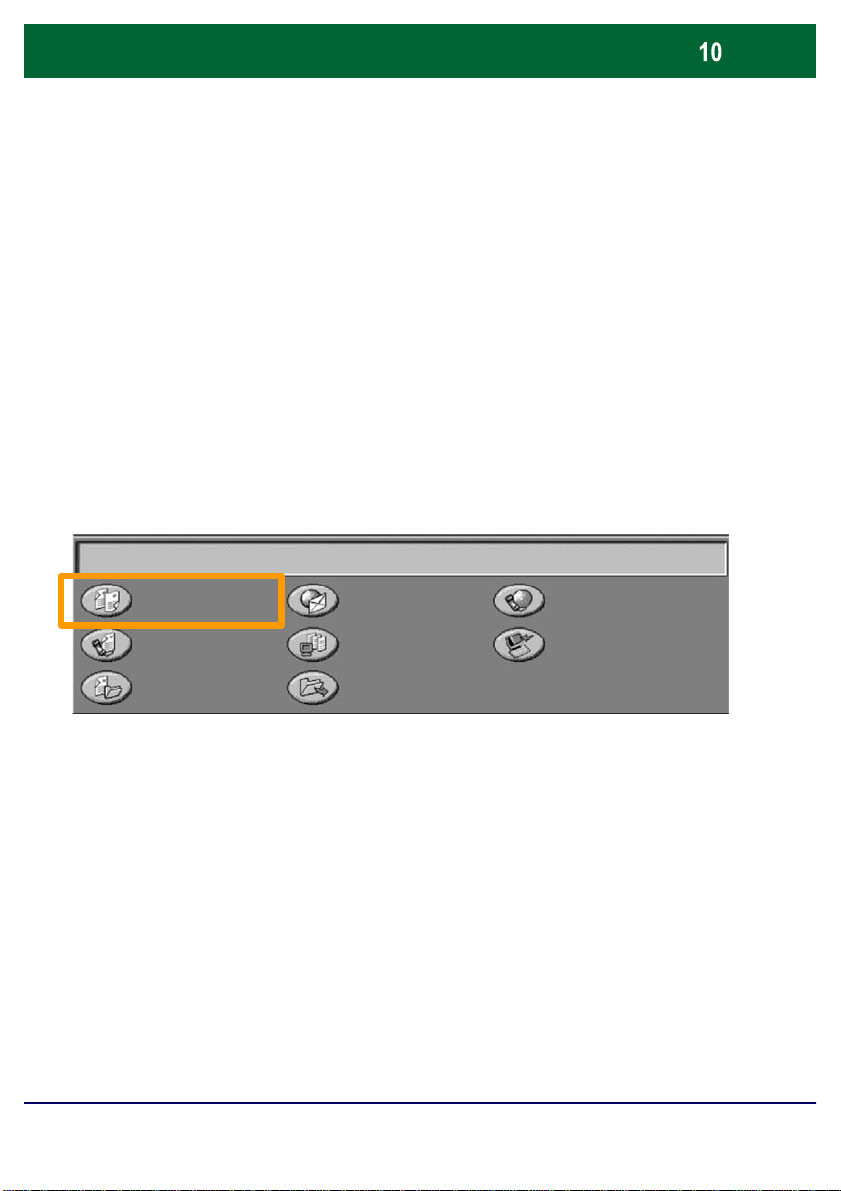
Select the All Services icon, then select the Copy icon.
WorkCentre 7242
WorkCentre 7232/7242
Copy
Fax
Scan to Mailbox
E-Mail
Network Scanning
Send from Mailbox
Quick Use Guide
Internet Fax
Scan to PC
WorkCentre 7232/7242
Page 12
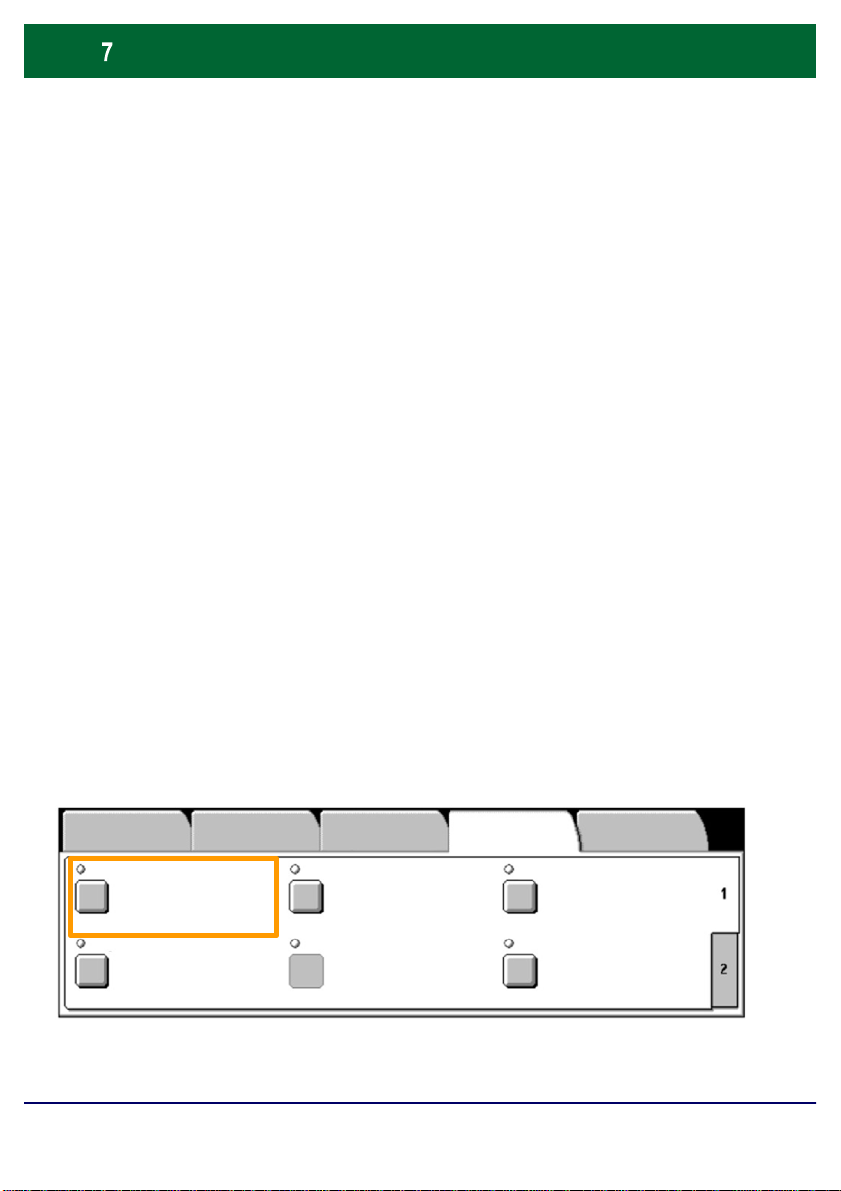
ID Card Copying
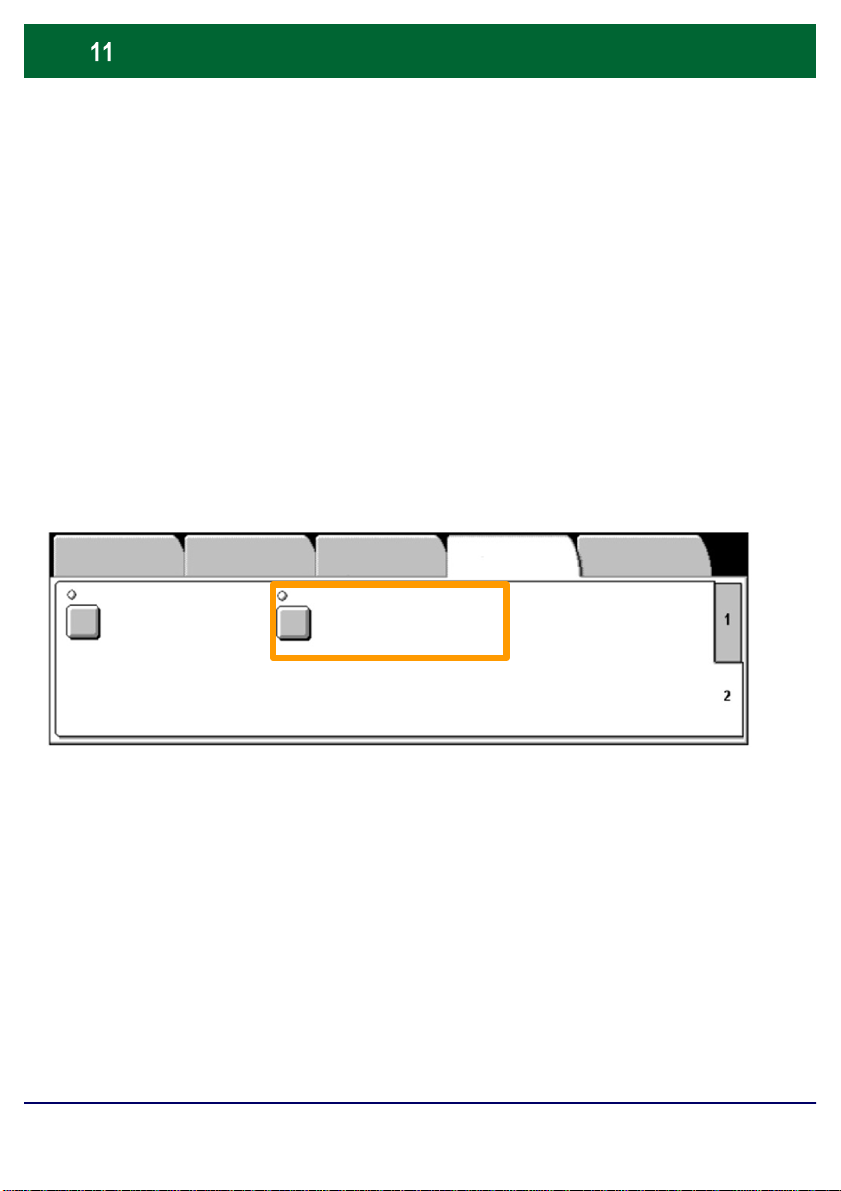
Access the ID Card Copying feature by selecting the
2.
The ID Card Copying option is accessed from a button on the
Output Format tab.
Format tab, then the ID Card Copying button.
Output
Copy
Watermark
Off
WorkCentre 7232/7242
Image Quality Layout Adjustment
ID Card Copying
Off
Quick Use Guide
Output Format
Job Assembly
WorkCentre 7232/7242
Page 13

ID Card Copying
Follow the instructions below to complete the ID Card Copy
3.
process:
Step 1.
Lift the Document Feeder and place the ID Card on the top left
corner of the document glass. Gently lower the Document
Feeder.
Step 2.
Use the number keypad to enter the number of copies you
require.
Step 3.
Press Start to begin scanning side 1.
Step 4.
Lift the Document Feeder and turn the ID Card over to copy
side 2. Gently lower the Document Feeder.
Step 5.
Press Start to begin scanning side 2.
Printing begins and copies are delivered into the Output Tray.
WorkCentre 7232/7242
Quick Use Guide
WorkCentre 7232/7242
Page 14

Simple LAN Faxing
1.
Open the Print Driver
2.
Select Fax as Job Type
Xerox WorkCentre 7345
Paper/Output Image Option sLayout/Watermark Advanced
3.
Enter the Recipient Details
Job Type
Fax
Paper
8.5x11", White, Pr inter Default Type
2 Sided Pri nting
1 Sided
Stapling
1 Staple
Output Color
Color
Output Destination
Auto
Retrieve Saved Settings
Retrieve Saved Settings
OK Defaults
OK Cancel
WorkCentre 7232/7242
Fax
Recipients
Preferences OK Cancel
Cover Page
Fax Number Name
Options:
Group
Quick Use Guide
Help
WorkCentre 7232/7242
Page 15
Simple LAN Faxing
I
ns
OK
CancelOKDefaults
Background Supp ression:
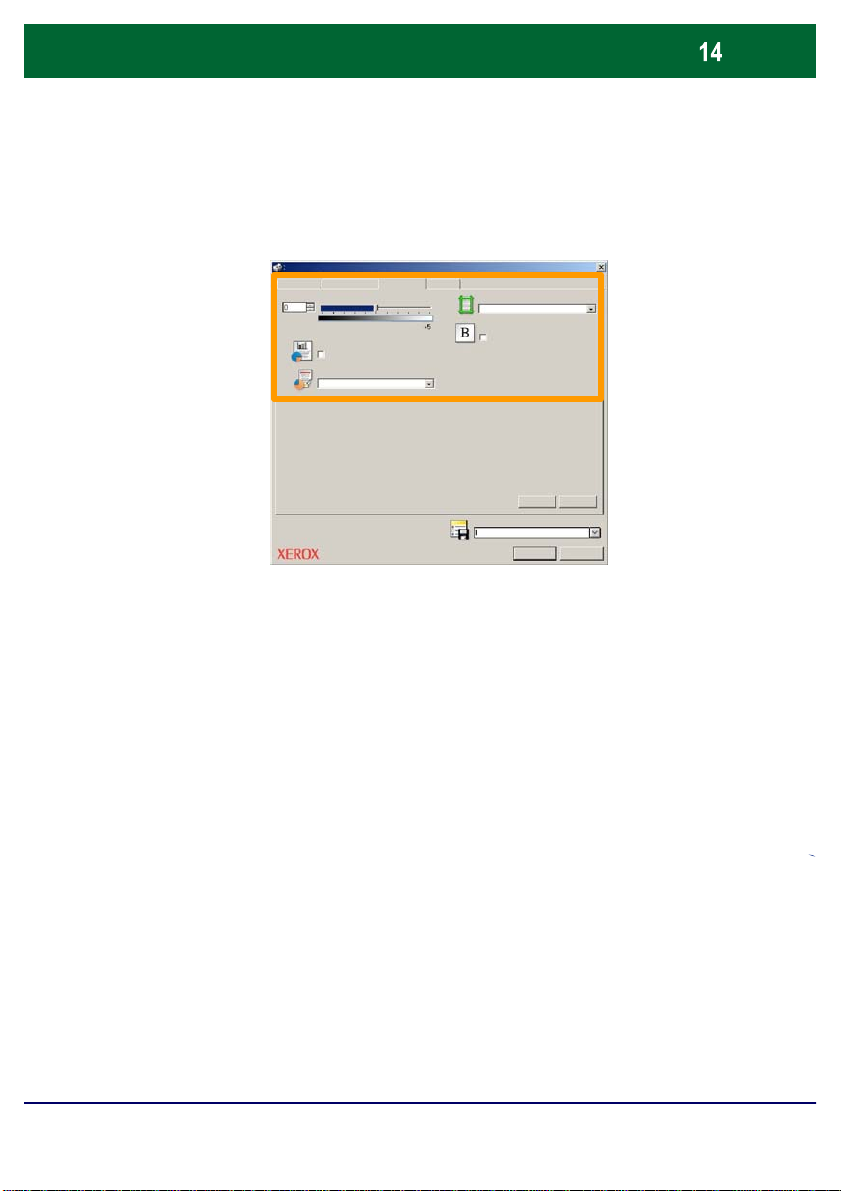
4.
Set the Fax Options
Xerox WorkCentre 7345
Paper/Output
5.
Send the Fax
mage Optio
Layout/Watermark Advanced
Lighten / Darken
Auto Suppress ion
Image Quali ty
Normal
Margin Erase
Off
Invert Image
Mirror Image
Retrieve Saved Settings
Retrieve Saved Settings
WorkCentre 7232/7242
When you have selected all the options you require, select OK.
Select OK on the print driver screen and OK on the Print Screen.
The Fax Confirmation screen will appear with the list of
recipients you have chosen. If you wish to make any changes,
select Edit. If the details are correct, select the OK button and
your fax will be submitted to the machine fax queue ready to be
transmitted.
Quick Use Guide
WorkCentre 7232/7242
Page 16

Simple Scan to Mailbox
Scan to Mailbox is an optional feature and may not be
available on your machine. Contact your system
administrator to set up this feature on your machine.
1. Load the documents
2. Select the Scan to Mailbox icon
3. Select the appropriate Mailbox
WorkCentre 7232/7242
Quick Use Guide
WorkCentre 7232/7242
Page 17

Simple Scan to Mailbox
Access the electronic version of the document at the
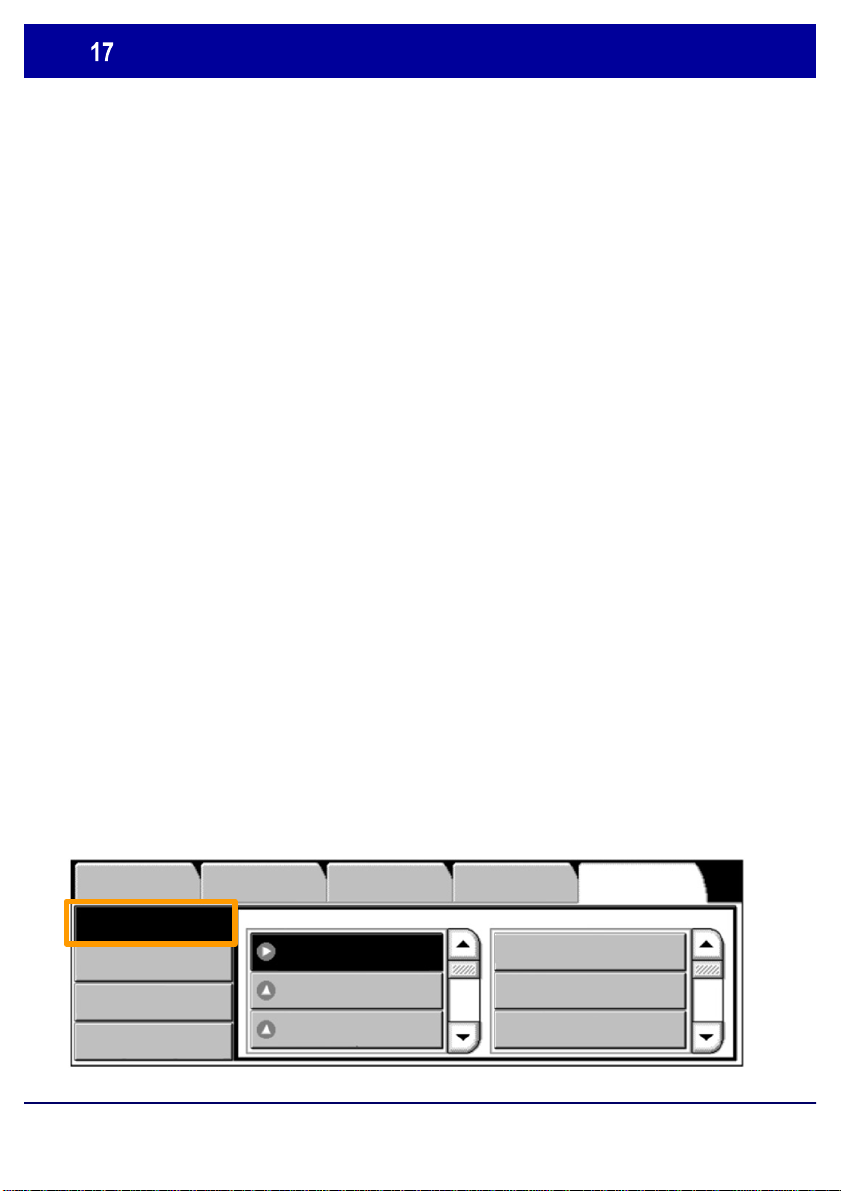
4. Select the Features
If you need to change the scan settings, select the General
Settings, Advanced Settings, Layout Adjustment, or
Filing Options tabs, then select the desired settings.
5. Press Start
Once you have pressed Start, each document is scanned
once.
6. Access the scanned document in the Mailbox
machine in the specified Mailbox.
WorkCentre 7232/7242
Quick Use Guide
WorkCentre 7232/7242
Page 18
Setting the Fax Country Code
Group
Features
Follow the steps below to set the Country Code for the Fax
option.
Press the Log In/Out button on the Control Panel.
1.
2.
Enter the System Administrator Login ID, then touch
Enter.
Press the Machine Status button on the Control Panel.
3.
Touch the Tools tab.
4.
5.
WorkCentre 7232/7242
Touch System Settings.
Machine Information
System Settings
Setup and Calibration
Accounting
Authentication and Security
Settings
Billing Information
Touch Common Service Settings.
Scan Mode Settings
Copy Mode Settings
Quick Use Guide
FaultsSupplies
Tools
Maintenance
Watermark
Other Settings
WorkCentre 7232/7242
Page 19

Setting the Fax Country Code
Touch Common Service Settings.
6.
Touch Other Settings.
7.
Scroll down, then touch Country.
8.
Select the appropriate Country from the list provided.
9.
Touch Save.
10.
The machine will reboot after you touch Save.
WorkCentre 7232/7242
Quick Use Guide
WorkCentre 7232/7242
Page 20

Auditron Setup
All user accounts must have the following defined:
To setup Auditron you must first create user accounts and
then enable Auditron. Users will then be required to enter
the User ID setup with their account to perform certain
machine functions. You can create up to 1000 accounts.
• User ID
• User Name
• Feature Access
• Account Limit
Once accounts are defined and created, enable the desired
accounts to begin Auditron usage. User IDs and User
Names must be unique from other User IDs and User
Names.
WorkCentre 7232/7242
Quick Use Guide
WorkCentre 7232/7242
Page 21

Auditron Setup
*
You can enable Auditron Mode for copy, scan, fax, or print.
When Auditron Mode is enabled, the user must select the
Log In/Out button and enter the appropriate User ID to start
using the machine.
WorkCentre 7232/7242
WorkCentre 7242
Copy
Fax
Scan to Mailbox
E-Mail
Network Scanning
Send from Mailbox
Internet Fax
Scan to PC
Quick Use Guide
3
1
2
5
6
4
9
87
#-0
C
WorkCentre 7232/7242
Page 22
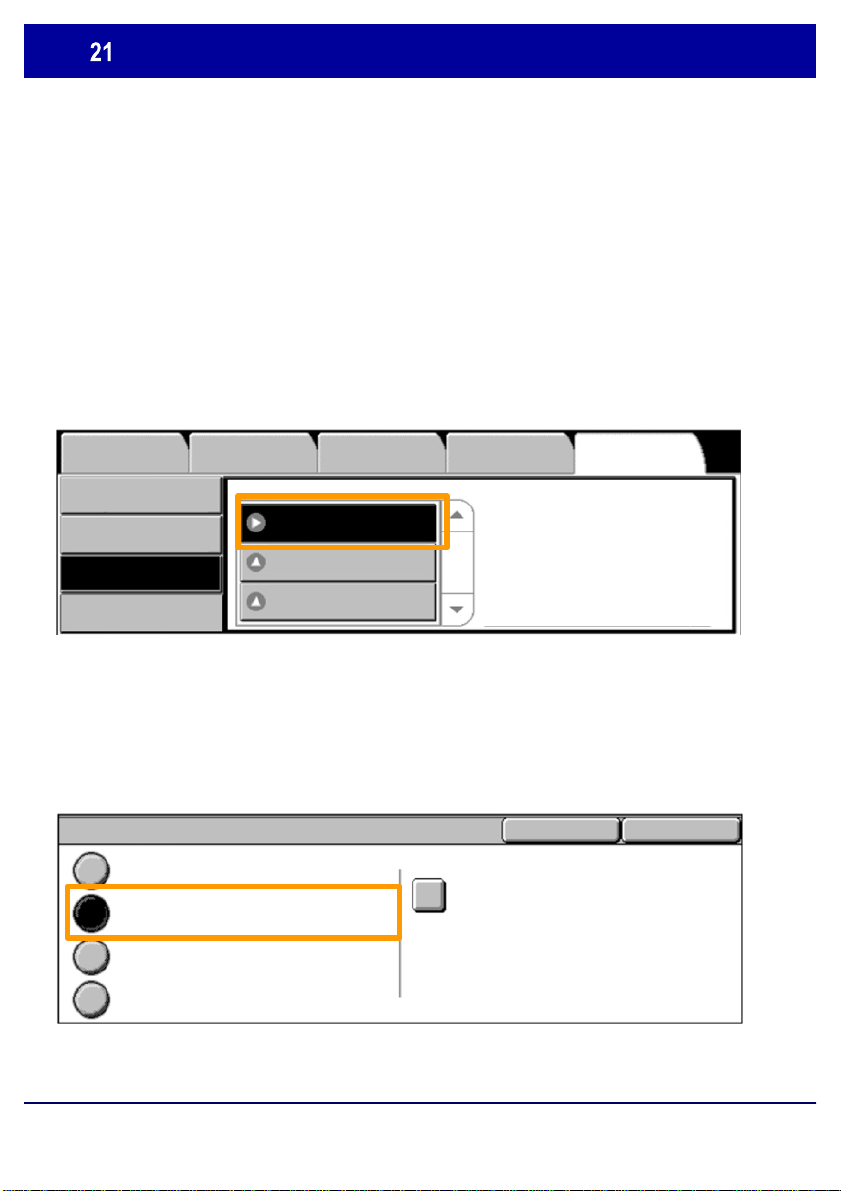
Auditron Setup
After logging in and selecting the
Save
Cancel
1.
Accounting button.
Touch the Accounting Type button.
2.
Supplies Faults
System Settings
Setup and Calibration
Accounting
Authentication and Security
3.
Touch the Local Accounting button.
Group
Accounting Type
Auto Reset of User Billing
Copy Activity Report
Tools tab, touch the
ToolsMachine Information Billing Information
Accounting Type
Accounting Disabled
Local Accounting
Network Accounting
Xerox Standard Accounting
WorkCentre 7232/7242
Auditron Mode
Quick Use Guide
WorkCentre 7232/7242
Page 23

Auditron Setup
Auditron Mode
Auditron Mode
4.
Auditron Mode:
Select the services for which you want to enable the
administration feature.
Copy Service: Administration relating to copy operations.
Print Service: Administration relating to the printer
operations.
Scan Service: Administration relating to scanner operations.
Fax Service: Administration relating to the fax operations.
Copy Service Fax Service Scan Service Print Service
Off
On
5.
Touch the Save button.
Copy Service Fax Service Scan Service Print Service
Off
On
WorkCentre 7232/7242
Off
On
Off
On
Quick Use Guide
Off
On
Off
On
Cancel
Cancel
Save
Off
On
Save
Off
On
WorkCentre 7232/7242
Page 24
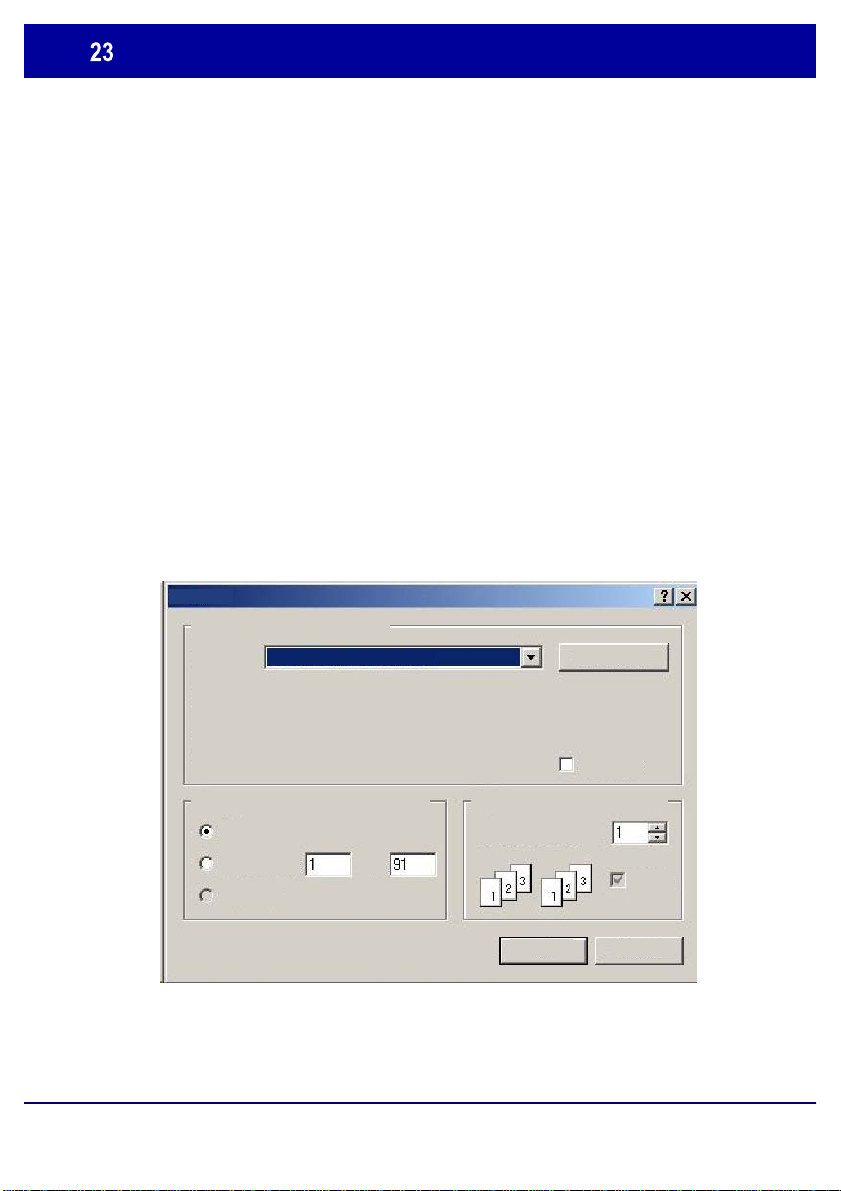
Banner Sheets
Print
1.
Open the Print Driver
2.
Select the Properties button to open the printer properties
dialogue box.
NOTE: The printer properties dialogue window will vary
according to the driver you are using and the user interface
selected. This is the WorkCentre 7242 PS version in
Enhanced UI mode which will be used here for
demonstration purposes. The major features and options
will be available on all drivers but there are some
differences.
Printer
Name
Status:
Type:
Where:
Comment:
Xerox WorkCentre 7242
Properties
Print to file
WorkCentre 7232/7242
Print
All
Pages
Selection
To:
Quick Use Guide
Copies
Number of copies:
Collate
OK Cancel
WorkCentre 7232/7242
Page 25
Banner Sheets
Image Options
Help
Image Options
Help
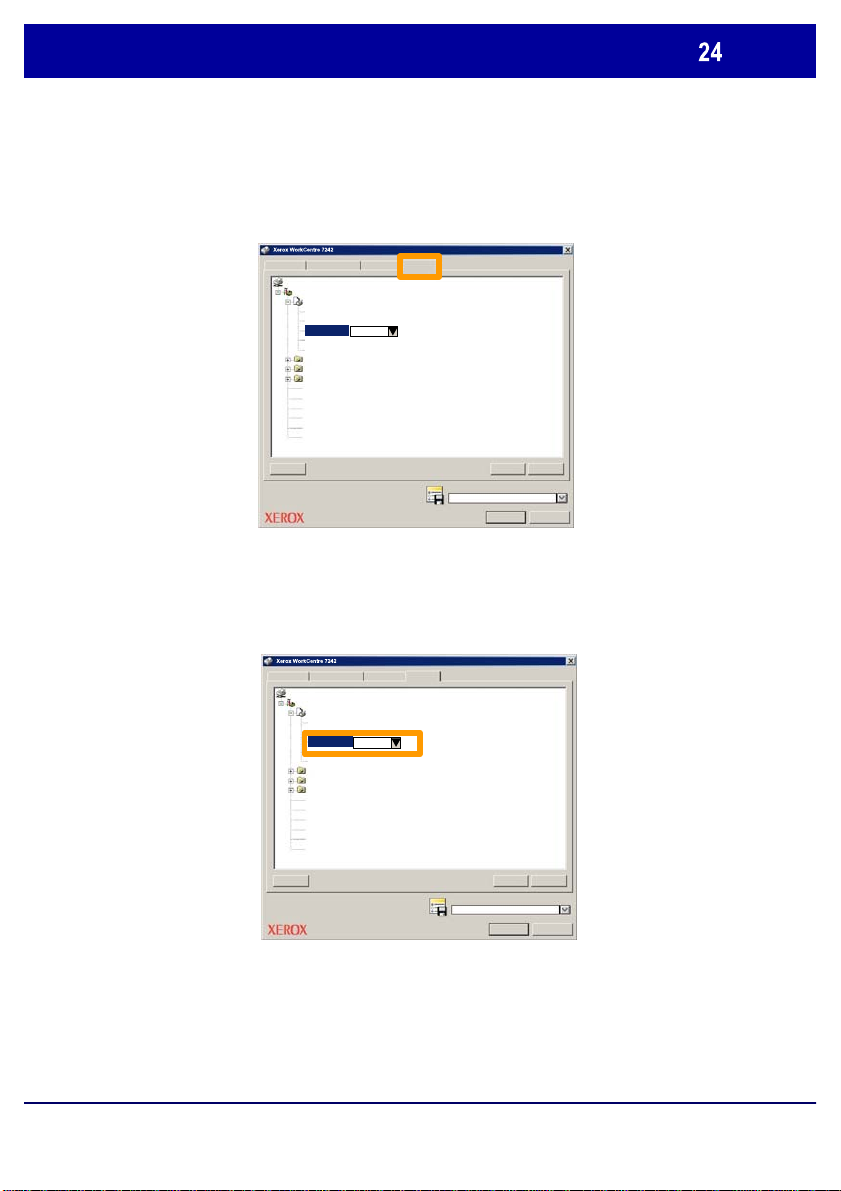
3.
Select the Advanced tab.
Paper/Output Layout/Watermark
Advanced Settings
Document Options
Paper/Output
Copies
Collate
Banner Sheet
Request Set Offset: [Offset Each Set]
Feed Orientation:
Image Options
Booklet Layout
Feature Defaults
Include Level 2 Features
Use Only Level 1 Features
Compress Bitmaps
Enable PostScript Pass-through
Page Independence
Print Postscript Erro r Information
About
4.
Choose Enabled if you want a Banner Sheet to be
Advanced
Enabled
Defaults
Retrieve Saved Settings
OK Cancel
provided with each print job.
Paper/Output Layout/Watermark
Advanced Settings
Document Options
Paper/Output
Copies
Collate
Banner Sheet
Request Set Offset: [Offset Each Set]
Feed Orientation:
Image Options
Booklet Layout
Feature Defaults
Include Level 2 Features
Use Only Level 1 Features
Compress Bitmaps
Enable PostScript Pass-through
Page Independence
Print Postscript Erro r Information
About
Advanced
Enabled
Defaults
Retrieve Saved Settings
OK Cancel
WorkCentre 7232/7242
5.
Click the OK button. The template is deleted from the
list.
Quick Use Guide
WorkCentre 7232/7242
Page 26
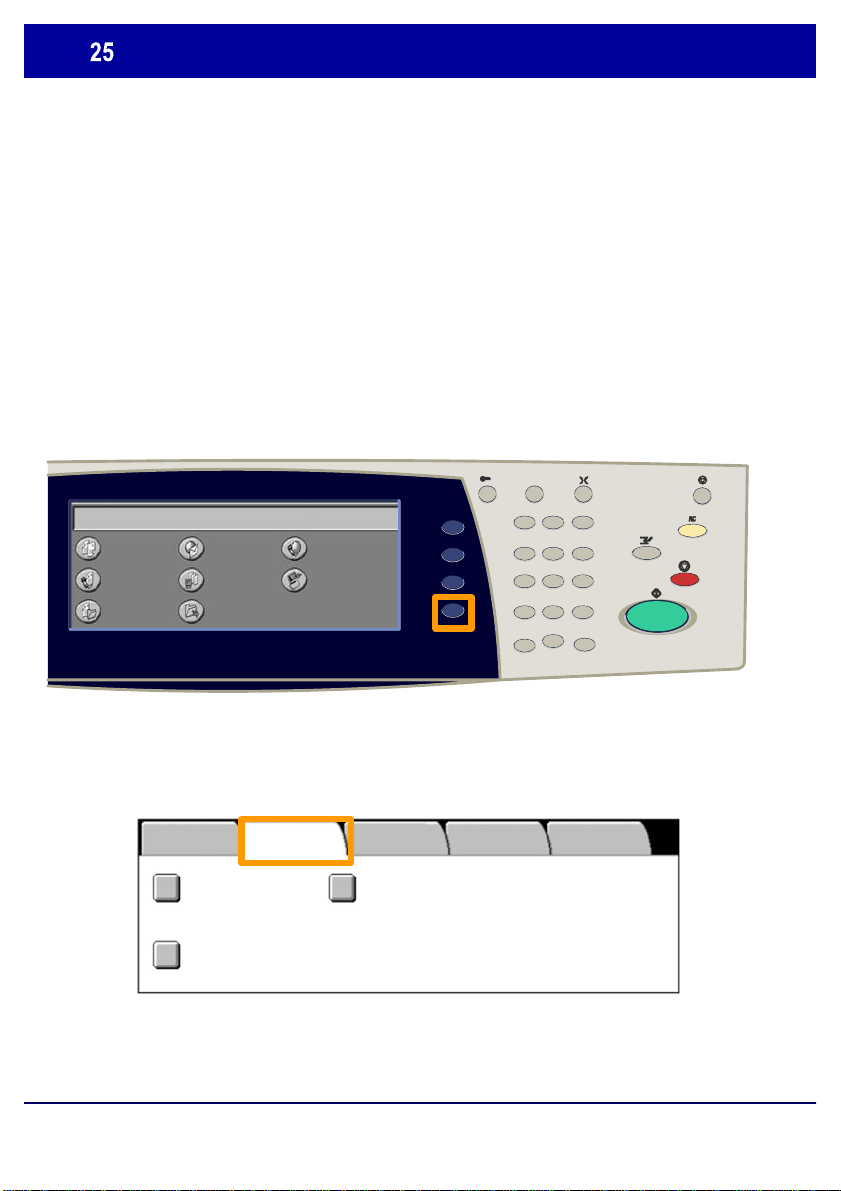
Billing Meters
screen provides access to machine
*
The Billing Information
usage and billing meters. The meters vary depending on
your machine configuration and setup.
To access the Billing Meters:
1. Select the Machine Status button.
WorkCentre 7242
Copy
Fax
Scan to Mailbox
E-Mail
Network Scanning
Send from Mailbox
Internet Fax
Scan to PC
2. Select the Billing Information tab.
Machine
Information
Billing Information
Print Reports
Information
User Account Billing Information
3
1
2
65
4
9
87
#-0
C
FaultsSuppliesBilling
Tools
WorkCentre 7232/7242
Quick Use Guide
WorkCentre 7232/7242
Page 27

Billing Meters
Current Meter Reading
Black Impressi ons
Color Impressions
Total Impres s ions
3. Select the Billing Information button.
Machine
Information
Billing Information
Print Reports
Information
User Account Billing Information
FaultsSuppliesBilling
4. The Billing Meters are displayed.
Billing Information
Machine Serial Number
Tools
Close
WorkCentre 7232/7242
Quick Use Guide
WorkCentre 7232/7242
Page 28

Replacing the Toner Cartridges
and replace it with a new toner cartridge. The toner cartidges are
This procedure shows you how to remove a used toner cartridge
replaced with the machine turned ON. The cartridges are loaded
into a cartridge rotor that rotates to the required position for the
toner cartridge to be replaced. The machine will tell you when
you will need to order a new cartridge and when to install it.
Follow the disposal instructions for the old cartridge when you
receive with the new cartridge.
1.
Press the Machine Status button on the control panel and
select the Supplies tab on the Machine Information screen.
Note: The machine automatically displays the Consumables
Status window when a consumable requires immediate
replacement.
2.
Select the toner cartridges marked with a cross, indicating a
replacement is required.
Note: If multiple cartridges are marked with a cross, the toner
cartridges are replaced in the order KYMC.
3.
Select Replace Cartridge.
Note: The toner cartridge replacement procedure is repeated
for each toner cartridge being replaced.
4.
Wait until the rotor turns to the correct position and the prompt
is shown on the screen. Then, confirm the screen indicates
the correct toner.
WorkCentre 7232/7242
Quick Use Guide
WorkCentre 7232/7242
Page 29
Replacing the Toner Cartridges
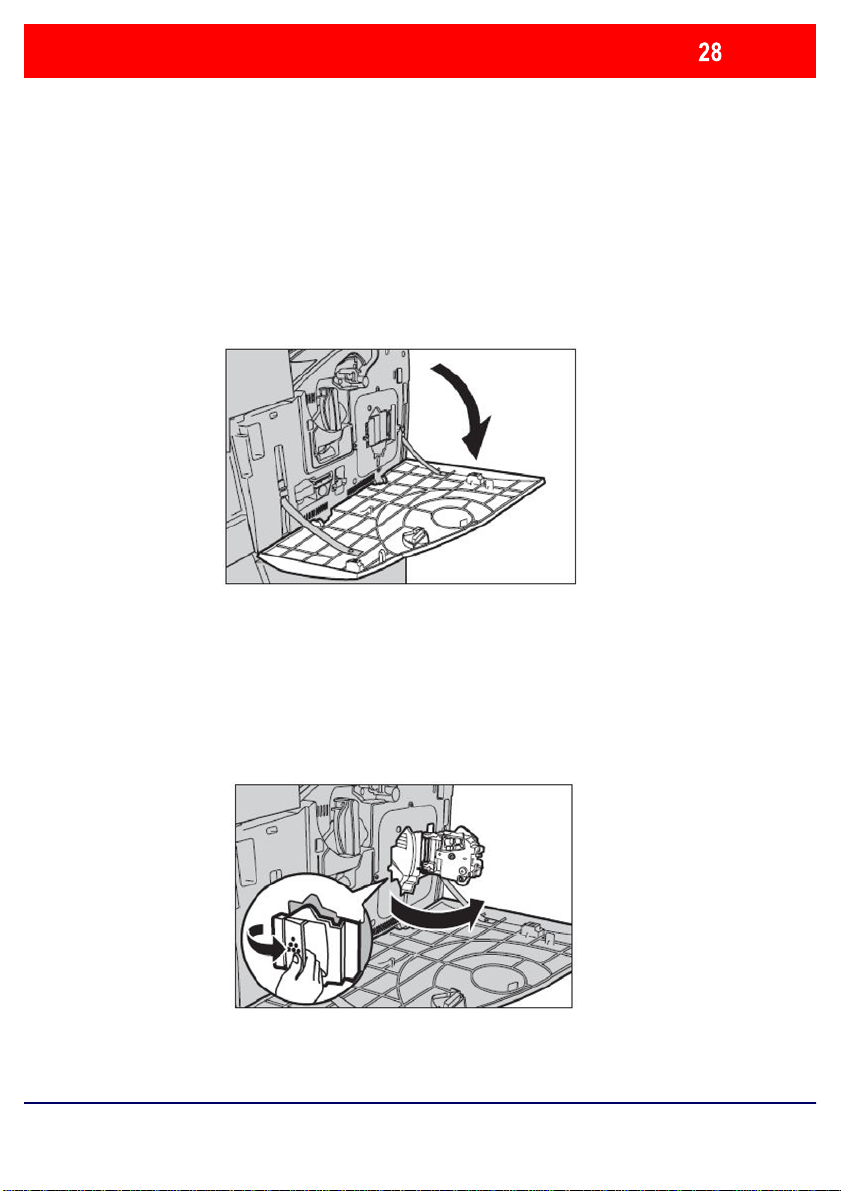
Pull the front cover open.
5.
Open the toner cartridge door.
6.
WorkCentre 7232/7242
Quick Use Guide
WorkCentre 7232/7242
Page 30
Replacing the Toner Cartridges
the original packaging using return labels included with each
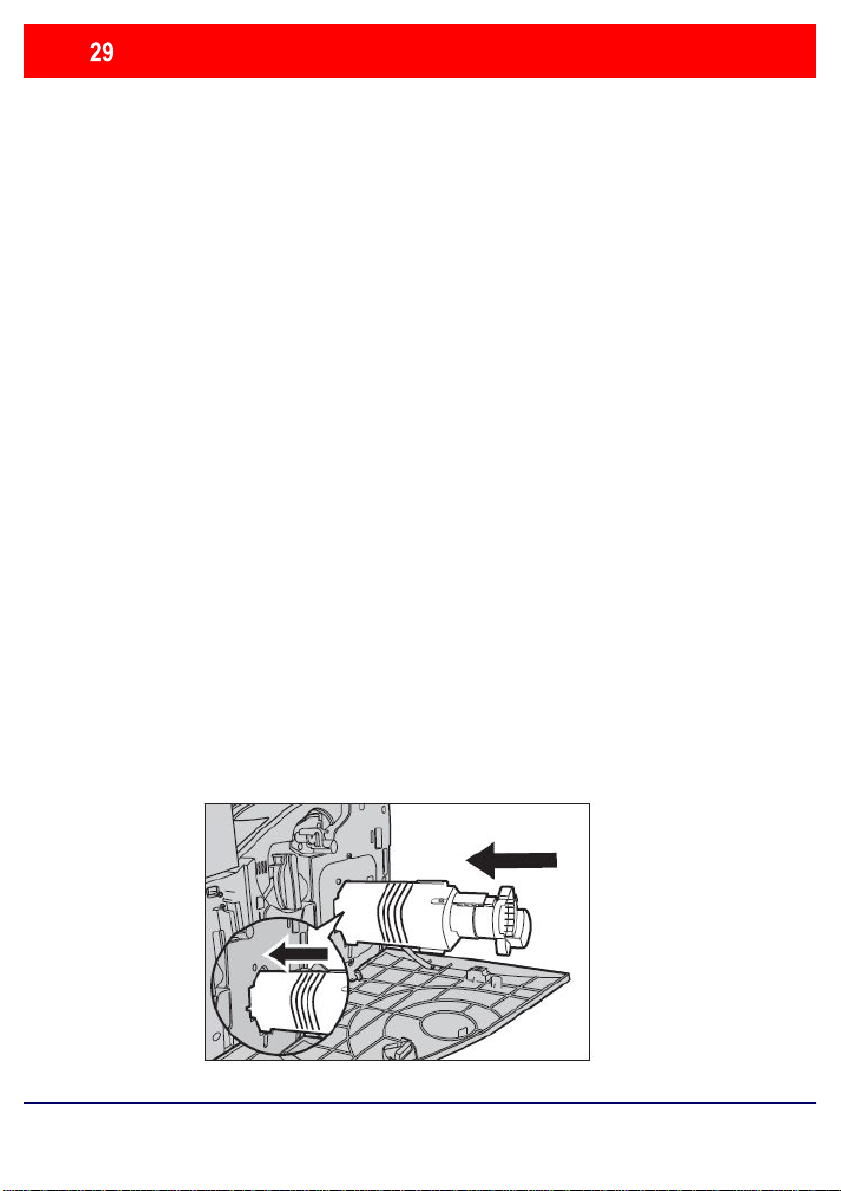
7.
Remove the toner cartridge from the machine.
Note: Be careful when handling the empty cartridge to
avoid spilling any residue toner. The toner cartridges are
designed to be recycled. Return the cartridge to Xerox in
new cartridge.
Remove the new toner cartridge from its box. Rotate the
8.
cartridge from side to side approximately 10 times to evenly
distribute the toner within the cartridge.
9.
Insert the cartridge, aligning the arrow on the cartridge with
the arrow on the machine, and push until it locks into position.
WorkCentre 7232/7242
Quick Use Guide
WorkCentre 7232/7242
Page 31

Replacing the Toner Cartridges
Press firmly in the top center when closing the cover.
10.
Close the toner cartridge door.
11.
Close the front cover.
Note:
If an error message appears on the display, press the cover
on the right-hand side to close the cover completely.
12.
Repeat this procedure to replace multiple toner cartridges.
WorkCentre 7232/7242
Quick Use Guide
WorkCentre 7232/7242
Page 32

Page 33
Prise en main rapide
WorkCentre 7232/7242
701P46461
Page 34

Microsoft, MS-DOS, Windows, Windows NT, Microsoft Network
et Windows Server sont des
marques ou des marques déposées de Microsoft Corpor ation aux États-Unis et/ou dans
d'autres pays.
Novell, NetWare, IntranetWare et NDS sont des marques déposées de Novell, I nc. aux ÉtatsUnis et dans d'autres pays.
Adobe, Acrobat, PostScript, PostScript 3
et le logo PostScript sont des marques d'Adobe
Systems Incorporated.
Apple, AppleTalk, EtherTalk, LocalTalk, Macintosh, MacOS et TrueType sont des marques
d'Apple Computer, Inc., déposées aux États- Unis et dans d'autres pays.
HP, HPGL, HPGL/2 et HP-UX sont des marques déposées de Hewlett-Packard Corporat ion.
Tous les autres noms de produits sont des marques ou des marques déposées de leurs
propriétaires respectifs.
Les données enregistrées sur le disque dur de la machine risquent d'être perdues si le disque
présente un problème. Xerox ne saurait être tenue responsable de dommages directs ou
indirects
causés par la perte de ces données. Xerox ne saurait être tenue responsable des
pannes de machines dues à une infection par virus ou dues à une action de piratage.
Important (1) Le présent guide fait l'objet de droits d'auteur. Tous dr oits réservés. Aux termes
des lois et règlements internationaux sur les droit s d'auteur, le présent guide ne saurait être
copié ni modifié, en tout ou partie, sans l'aut or isation écrite préalable de l'éditeur. (2)
Certaines parties du présent guide sont susceptibles d'être modifiées sans préavis. (3) Nous
encourageons les lecteurs à nous faire parvenir leurs com mentaires sur les ambiguïtés, les
erreurs, les omissions ou les pages manquant es évent uelles. (4) Ne jamais tenter de lancer
une procédure quelle qu'elle soit sur cette machine, à moins qu'elle ne soit spécifiquement
décrite dans le présent guide. Le fonctionnement non autorisé de cette machine peut
entraîner des pannes ou des accidents.
Xerox ne saurait être tenue responsable de problèmes r ésult ant de l'utilisation non autorisée
de cette machine.
Toute exportation de ce produit tombe sous le contrôle strict des lois et règlements du Japon
sur les échanges commerciaux et le commerce international et/ou des lois et règlements des
États-Unis sur le contrôle des exportations.
Xerox et Ethernet sont des marques déposées.
REMARQUE : Le codage couleur est le suivant - BLEU : personnel d'administration
informatique - VERT : utilisateurs finaux - ROUGE : la machine requiert l'attention d'un
opérateur. Selon la configuration de la machine, certains écrans de l'inter f ace utilisateur sont
susceptibles de varier.
Page 35

Sommaire
Panneau de commande
Configuration des magasins
Création cahier
Copie carte d'identité
Procédure de fax LAN
Numérisation boîte aux lettres
Définition du code pays pour la télécopie
3
5
7
9
13
15
17
Réglage Auditron 19
Pages de garde
Compteurs de facturation
Remplacement des cartouches de toner
WorkCentre 7232/7242
Prise en main rapide
23
25
27
WorkCentre 7232/7242
Page 36

Panneau de commande
WorkCentre 7242
Copie
Fax
Numérisation boîte
aux lettres
Écran tactile
1.
Il permet de programmer les fonctions requises. Il indique également les
Courriel
Numérisati on réseau
Envoi depuis boîte
aux lettres
Fax Internet
Numérisation bureau
3
1
2
5
6
4
9
87
#-0
*
C
instructions de résolution des incidents et les informations générales concernant
la machine.
Touche Tous les services
2.
Permet d'afficher les fonctions disponibles.
Touche Fonctions
3.
Permet de retourner à l'écran précédent de la fonction Copie, Fax ou Numér
isation.
Touche État des travaux
4.
Cette touche permet d'afficher les informations relatives au déroulement des
travaux.
Touche État de la machine
5.
Cette touche permet d'afficher l'état actuel de la machine sur l'écran tactile.
WorkCentre 7232/7242
Prise en main rapide
WorkCentre 7232/7242
Page 37

Panneau de commande
Pause numérotation
6.
Cette touche permet d'entrer une pause lors de la composition d'un numéro de
fax.
Annuler (C)
7.
Cette touche permet de supprimer les valeurs numériques ou le dernier chiffre
entré.
# (dièse)
8.
Cette touche permet d'entrer un caractère ou un groupe de composition.
Marche
9.
Cette touche permet d'exécuter un travail.
Touche Arrêt
10.
Cette touche permet d'interrompre momentanément le travail en cours. Suivez
les instructions affichées pour annuler ou poursuivre le travail.
Interruption
11.
Cette touche permet d'interrompre momentanément le travail de copie en cours
pour en effectuer un autre plus urgent.
Annuler tout (AC)
12.
Une seule pression sur cette touche permet de rétablir les valeurs par défaut et
d'afficher l'écran initial du mode en cours. Deux pressions successives
permettent de rétablir les valeurs par défaut pour toutes les fonct ions de la
machine.
Langue
13.
Cette touche permet d'afficher le texte dans une aut re langue (si plusieurs
sont disponibles).
Touche Connexion / Déconnexion
14.
Cette touche permet d'entrer le mot de passe requis pour accéder aux outils
utilisés pour définir le paramétrage par défaut de la machine.
WorkCentre 7232/7242
Prise en main rapide
WorkCentre 7232/7242
Page 38

Configuration des magasins
Votre machine gère les magasins et les supports via un système de
Groupe
Fonctions
réglages programmables. Ces paramètres sont définis par
l'administrateur de votre machine.
Selon le réglage du magasin, l'utilisateur peut ou non modifier les
attributs du support (format, type et couleur).
Informations machine
Réglages système
Configuration et calibrage
Comptabilisation
Authentification et Paramètres
de sécurité
Informations de
facturation
Modules
remplaçables
Sélectionnez Paramètres services
communs.
Paramètres du mode Numérisation
Paramètres du mode Copie
Incidents
Configuration des magasins
Réglage qualité image
Relevés
Outils
WorkCentre 7232/7242
Prise en main rapide
WorkCentre 7232/7242
Page 39

Configuration des maga sins
Vous savez désormais comment remplir le magasin.
Les informations relatives au magasin s'affichent sur l'écran tactile de
la machine. Si elles sont correctes, sélectionnez Confirmer. Dans le
cas contraire, modifiez le format, le type ou la couleur du papier en
sélectionnant la touche correspondante sur l'écran tactile.
Magasin 1
WorkCentre 7232/7242
A4
Prise en main rapide
Annuler
Format papier/
Sélection papier auto
Type de papier/
Couleur
Confirmer
WorkCentre 7232/7242
Page 40

Création cahier
Après l'avoir activée, vous devez indiquer à la machine le
Activez la fonction Création cahier en sélectionnant
Affiche
La fonction Création cahier permet de produire des cahiers
ou des copies composées de plusieurs pages à partir de
documents recto ou recto verso. La machine numérise vos
documents et reproduit les images qu'ils contiennent sur le
support sélectionné de manière à former un cahier une fois
le tirage plié.
La fonction Création cahier est activée dans l'onglet
Présentation spéciale.
mode d'impression de vos documents (recto ou recto
verso). Lorsque vous avez terminé vos sélections,
appuyez sur Enregistrer pour poursuivre la
programmation des autres options requises à partir du
panneau de commande.
l'onglet Présentation spéciale, la touche Création
cahier, puis la touche Créer le cahier relié gauche/haut.
Copie
Création cahier
Désactivé(e)
Mise en page
Désactivé(e)
WorkCentre 7232/7242
Qualité image
Réglage disposition
Couvertures Options transparents
Désactivé(e)
Désactivé(e)
Prise en main rapide
Présentation
spéciale
Annotations
Désactivé(e)
Désactivé(e)
Assemblage
documents
WorkCentre 7232/7242
Page 41

Création cahier
Vous devez respecter les deux règles suivantes lorsque
Création cahier
Annuler Enregistrer
Décalage reliure
Désactivée
Créer le cahier relié
gauche/haut
Couvertures
Division
vous créez un cahier :
Commencez par sélectionner le magasin contenant le
1.
papier que vous voulez utiliser.
Destination
Dernière page sur couv.
de fin
Insérez toujours vos documents en départ grand côté.
2.
WorkCentre 7232/7242
Prise en main rapide
WorkCentre 7232/7242
Page 42

Copie carte d'identité
La fonction Copie carte d'identité simplifie grandement la
copie d'une carte d'identité, d'un permis de conduire ou de tout
autre papier d'identification.
Il est possible de copier la carte d'identité recto verso sur le
recto d'une feuille, sans avoir à recharger le papier ni à
l'introduire manuellement dans le magasin.
WorkCentre 7232/7242
Prise en main rapide
WorkCentre 7232/7242
Page 43
Copie carte d'identité
Si vous souhaitez annuler les sélections effectuées
1.
précédemment, appuyez une fois sur la touche Annuler (AC).
Sélectionnez l'icône Tous les services, puis l'icône Copie.
WorkCentre 7242
WorkCentre 7232/7242
Copie
Fax
Numérisation boîte aux lettres
Courriel
Numérisation réseau
Envoi depuis boîte aux lettres
Prise en main rapide
Fax Internet
Numérisation bureau
WorkCentre 7232/7242
Page 44

Copie carte d'identité
2.
Pour accéder à l'option Copie carte d'identité, utilisez la
touche correspondante sur l'onglet Présentation spéciale.
Pour accéder à la fonction Copie carte d'identité, sélectionnez
l'onglet Présentation spéciale puis la touche Copie carte
d'identité.
Copie
Filigrane
Désactivé(e)
WorkCentre 7232/7242
Qualité image Réglage disposition
Copie carte d'identité
Désactivé(e)
Prise en main rapide
Présentation
spéciale
Assemblage
documents
WorkCentre 7232/7242
Page 45

Copie carte d'identité
Appuyez sur
Appuyez sur
Suivez les instructions ci-dessous pour copier une carte
3.
d'identité :
Étape 1.
Soulevez le chargeur de documents, placez la carte d'identité
sur la glace d'exposition et alignez-la dans l'angle supérieur
gauche. Abaissez doucement le chargeur de documents.
Étape 2.
Entrez le nombre requis de copies à l'aide du pavé numérique.
Étape 3.
Marche pour commencer la numérisation du
recto.
Étape 4.
Soulevez le chargeur de documents et retournez la carte
d'identité pour copier le verso. Abaissez doucement le
chargeur de documents.
Étape 5.
Marche pour commencer la numérisation du
verso.
L'impression démarre et les copies sont envoyées dans le bac
de réception.
WorkCentre 7232/7242
Prise en main rapide
WorkCentre 7232/7242
Page 46

Procédure de fax LAN
Support/Réc ept
Présentation/Filigran
Valeurs par
8,5 x 11, Blanc, Type par défaut de l'impriman
Destinataire
Page de gard
1.
Ouvrez le pilote d'imprimante
2.
Sélectionnez Fax en tant que Type de travail
Xerox WorkCentre 7345
3.
Entrez les informations relatives au destinataire
Type de trav ail
Fax
Papier
Options Image
Fax
Numéro de fax Nom
Avancées
Options :
Mode d'impres sion
Recto
Agrafage
1 agrafe
Mode couleur
Couleur
Destination
Auto
Paramètres enregistrés
Paramètres en registrés
Groupe
OK
OK Annuler
WorkCentre 7232/7242
Aide
Préférences OK Annuler
Prise en main rapide
WorkCentre 7232/7242
Page 47

Procédure de fa x LAN
4.
Définissez les options de fax
Xerox WorkCentre 7345
Support/Récep Options ImagePrésentation/Filigra Avancées
Densité
Suppression de fond :
Suppressi o n auto
Qualité image
Standard
5.
Envoyez le fax
Effacement de m arges
Désactivé(e)
Inversion image
Image miroir
Paramètres enreg i strés
Paramètres enregistrés
OK Valeurs par
OK Annuler
Lorsque vous avez sélectionné toutes les options requises,
cliquez sur OK. Sélectionnez OK dans l'écran du pilote
d'imprimante et OK dans la boîte de dialogue d'impression. Un
écran de confirmation s'affiche, avec la liste des destinataires que
vous avez sélectionnés. Si vous souhaitez effectuer des
modifications, sélectionnez Modifier. Si les informations sont
correctes, sélectionnez OK et votre fa
x sera envoyé à la file de
télécopie de la machine pour être transmis.
WorkCentre 7232/7242
Prise en main rapide
WorkCentre 7232/7242
Page 48

Numérisation boîte aux lettres
La numérisation vers une boîte aux lettres étant une
fonction en option, elle peut ne pas être disponible sur votre
machine. Contactez l'administrateur de votre système pour
configurer cette option sur votre machine.
1. Mettre les documents en place
2. Sélectionner l'icône Numérisation boîte aux lettres
3. Sélectionner la boîte aux lettres désirée
WorkCentre 7232/7242
Prise en main rapide
WorkCentre 7232/7242
Page 49

Numérisation boîte aux lettres
Appuyez sur la touche
Accédez à la version électronique du document sur la
4. Programmer les fonctions
Si vous devez modifier les paramètres de numérisation,
sélectionnez les onglets Paramètres généraux,
Paramètres avancés, Réglage disposition ou Options
d'archivage, puis sélectionnez les paramètres désirés.
5. Appuyer sur Marche
Marche du panneau de commande
pour numériser les documents.
6. Accéder au travail dans la boîte aux lettres spécifiée
machine, dans la boîte aux lettres spécifiée.
WorkCentre 7232/7242
Prise en main rapide
WorkCentre 7232/7242
Page 50

Définition du code pays pour la télécopie
Groupe
Fonctions
Exécutez la procédure suivante pour définir le code pays
pour l'option Fax.
Appuyez sur la touche Accès du panneau de commande.
1.
Entrez l'ID de connexion de l'administrateur système,
2.
puis appuyez sur la touche Entrer.
Appuyez sur la touche État de la machine du panneau de
3.
commande.
Sélectionnez l'onglet Outils.
4.
5.
WorkCentre 7232/7242
Sélectionnez
Informations machine
Réglages système
Configuration et calibrage
Comptabilisation
Authentification et Paramètres
de sécurité
Réglages système.
Informations de
facturation
remplaçables
Sélectionnez Paramètres services
communs.
Paramètres du mode Numérisation
Paramètres du mode Copie
IncidentsModules
Prise en main rapide
Outils
Maintenance
Filigrane
Autres paramètres
WorkCentre 7232/7242
Page 51

Définition du code pays pour la télécopie
Sélectionnez Paramètres services communs.
6.
Sélectionnez Autres paramètres.
7.
Faites défiler la liste, puis sélectionnez Pays.
8.
Sélectionnez le pays voulu dans la liste.
9.
Sélectionnez Enregistrer.
10.
Lorsque vous appuyez sur Enregistrer, la machine
redémarre.
WorkCentre 7232/7242
Prise en main rapide
WorkCentre 7232/7242
Page 52

Réglage Auditron
Pour régler l'Auditron, il vous faut tout d'abord créer les
comptes utilisateurs, puis activer la fonction. Pour accéder
aux fonctions de la machine, les utilisateurs doivent alors
entrer l'ID utilisateur correspondant à leur compte. Vous
pouvez créer un total de 1000 comptes.
Pour chaque compte, les coordonnées suivantes doivent
être définies :
• ID utilisateur
• Nom utilisateur
• Accès aux fonctions
• Crédit du compte
Une fois tous les comptes définis et créés, activez les
comptes
Auditron. Les ID utilisateur et les noms d'utilisateur doivent
être uniques.
souhaités pour lancer l'utilisation de la fonction
WorkCentre 7232/7242
Prise en main rapide
WorkCentre 7232/7242
Page 53

Réglage Auditron
Vous pouvez configurer le mode Auditron pour les
Accès et entrer son ID utilisateur pour utiliser la machine.
*
opérations de copie, numérisation, fax ou impression. Une
fois ce mode activé, l'utilisateur doit appuyer sur la touche
WorkCentre 7242
Copie
Fax
Numérisation boîte
aux lettres
WorkCentre 7232/7242
Courriel
Numérisati on réseau
Envoi depuis boîte
aux lettres
Fax Internet
Numérisation bureau
Prise en main rapide
1
2
5
4
87
C
3
6
9
#-0
WorkCentre 7232/7242
Page 54

Réglage Auditron
Appuyez sur la touche
Enregistrer
Annuler
Appuyez sur la touche
Connectez-vous, sélectionnez l'onglet Outils, puis appuyez
1.
sur la touche Comptabilisation.
2.
Réglages système
Configuration et calibrage
Comptabilisation
Authentification et Paramètres de
3.
Type de comptabilisation
Comptabilisation désactivée
facturation
Modules
remplaçables
Groupe
Type de comptabilisation
Réinitial. auto infos facturation
Copie - Relevé des activités
Type de comptabilisation.
Incidents
OutilsInformations machine Informations de
Comptabilisation locale.
Mode Auditron
Comptabilisation locale
Comptabilisation réseau
Comptabilisation Standard Xerox
WorkCentre 7232/7242
Prise en main rapide
WorkCentre 7232/7242
Page 55

Réglage Auditron
Mode Auditron
Appuyez sur la touche
Mode Auditron
4.
Mode Auditron :
Sélectionnez
les services pour lesquels vous
souhaitez activer la fonction de gestion.
Service Copie : gestion des opérations de copie.
Service Impression : gestion des opérations de l'imprimante.
Service Numérisation : gestion des opérations de
numérisation.
Service Fax : gestion des opérations de télécopie.
Annuler
Service Copie Service Fax Service Numérisation Service Impression
Désactivé(e)
Activé(e)
Désactivé(e)
Activé(e)
Désactivé(e)
Activé(e)
Enregistrer
Désactivé(e)
Activé(e)
5.
Service Copie Service Fax Service Numérisation Service Impression
Désactivé(e)
Activé(e)
WorkCentre 7232/7242
Désactivé(e)
Activé(e)
Enregistrer.
Désactivé(e)
Activé(e)
Prise en main rapide
Annuler
Enregistrer
Désactivé(e)
Activé(e)
WorkCentre 7232/7242
Page 56

Pages de garde
pour la boîte de dialogue
options principales sont proposées par tous les pilotes mais
Impression
1.
Ouvrez le pilote d'imprimante
2.
Sélectionnez la touche Propriétés
des propriétés de l'imprimante.
REMARQUE : Son contenu varie en fonction du pilote
d'imprimante que vous utilisez et de l'interface utilisateur
sélectionnée. Nous utiliserons ici la version WorkCentre
7242 PS en mode d'affichage amélioré. Les fonctions et
il y a quelques différences.
Imprimante
Nom
État :
Type :
Où :
Commentaire :
Xerox WorkCentre 7242
Propriétés
Imprimer dans
Plusieurs
Tout
.
Sélection
WorkCentre 7232/7242
À :
Prise en main rapide
Copies
Nombre de copies :
OK Annuler
Copies
WorkCentre 7232/7242
Page 57

Pages de garde
3.
Cliquez sur l'onglet Avancées.
Support/Récep Présentation/Filigrane Options Image Avancées
Paramètres avancés
Options document
Support/Réception
Copies
Copies assemblées
Page de garde
Activé
Demander le décalage des jeux : [Décaler chaque jeu]
Orientation du support
Options Image
Format cahier
Fonctions par défaut
Inclure les fonctions de niveau 2
Utiliser seulement les fonctions de niveau 1
Compression bitmap
Activer la fonction émulation PostScript
Indépendance page
Imprimer informations d'erreur PostScript
À propos de
Paramètres enregistrés
Valeurs par d
OK A nnuler
Aide
4.
Sélectionner Activé
avec chaque travail d'impression.
5.
Sélectionnez OK. Le modèle est supprimé de la liste.
WorkCentre 7232/7242
pour imprimer une page de garde
Support/Récep Présentation/Filigrane Options Image Avancées
Paramètres avancés
Options document
Support/Réception
Copies
Copies assemblées
Page de garde
Activé
Demander le décalage des jeux : [Décaler chaque jeu]
Orientation du s upport
Options Image
Format cahier
Fonctions par défaut
Inclure les fonctions de niveau 2
Utiliser seulement les fonctions de niveau 1
Compression bitmap
Activer la fonction émulation PostScript
Indépendance page
Imprimer informations d'erreur PostScript
À propos de
Prise en main rapide
Paramètres enregistrés
Valeurs par d
OK A nnuler
Aide
WorkCentre 7232/7242
Page 58

Compteurs de facturation
*
L'écran Informations de facturation permet d'accéder aux
données d'utilisation et aux informations de facturation de la
machine. Les compteurs disponibles varient selon la
configuration et le paramétrage de la machine.
Pour accéder aux compteurs de facturation :
1. Sélectionnez la touche État de la machine.
WorkCentre 7242
Copie
Fax
Numérisation boîte
aux lettres
Courriel
Numérisati on réseau
Envoi depuis boîte
aux lettres
Fax Internet
Numérisation bureau
1
2
4
87
C
2. Sélectionnez l'onglet Informations de facturation.
Informations
machine
Informations de facturation
Imprimer des relevés
Informations de
facturation
remplaçables
Informations de facturation utilisateur
IncidentsModules
Outils
3
65
9
#-0
WorkCentre 7232/7242
Prise en main rapide
WorkCentre 7232/7242
Page 59

Compteurs de facturation
Relevé compteur
Impressions noir
Impressions couleur
Total impressions
3. Sélectionnez la touche Informations de facturation.
Informations
machine
Informations de facturation
Imprimer des relevés
Informations de
facturation
remplaçables
Informations de facturation utilisateur
IncidentsModules
4. Les compteurs de facturation s'affichent.
Informations de facturation
Numéro de série
Outils
Fermer
WorkCentre 7232/7242
Prise en main rapide
WorkCentre 7232/7242
Page 60

Remplacement des cartouches de toner
Attendez que le rotor revienne en position et que l'invite
Cette procédure illustre le retrait et le remplacement d'une
cartouche de toner vide. Le remplacement des cartouches de
toner doit être effectué pendant que la machine est sous tension.
Les cartouches sont chargées dans un rotor qui se place
automatiquement dans la position appropriée pour permettre le
remplacement de la cartouche usagée. Des messages s'affichent
sur l'écran tactile de la machine lorsqu'il est temps d'en
commander et d'en installer une autre.
1.
Sélectionnez la touche État de la machine sur le panneau de
commande, puis sélectionnez l'onglet Consommables dans
l'écran Informations machine.
Remarque : La fenêtre État des consommables s'affiche
automatiquement lorsqu'un consommable doit être remplacé
immédiatement.
2.
Sélectionnez les cartouches de toner désignées par une croix ;
celle-ci indique que ces cartouches doivent être remplacées.
Remarque : Si plusieurs cartouches sont marquées d'une
croix, leur remplacement doit s'effectuer dans l'ordre KJMC.
3.
Sélectionnez Remplacer la cartouche.
Remarque : La procédure de remplacement doit être répétée
pour chaque cartouche à remplacer.
4.
apparaisse sur l'écran. Vérifiez que l'écran indique le toner
correct.
WorkCentre 7232/7242
Prise en main rapide
WorkCentre 7232/7242
Page 61

Remplacement des cartouches de toner
Ouvrez le panneau avant.
5.
Ouvrez le panneau d'accès aux cartouches de toner.
6.
WorkCentre 7232/7242
Prise en main rapide
WorkCentre 7232/7242
Page 62

Remplacement des cartouches de toner
7.
Retirez la cartouche de toner de la machine.
Remarque : Manipulez les cartouches de toner avec soin
pour éviter de répandre du toner. Les cartouches de toner
sont conçues pour être recyclées. Renvoyez-les à Xerox
dans leur emballage d'origine en utilisant l'étiquette de
retour fournie avec chaque cartouche neuve.
Déballez la cartouche de toner neuve. Secouez la
8.
cartouche latéralement une dizaine de fois pour bien répartir
le toner dans la cartouche.
9.
Insérez la cartouche dans le rotor en alignant la flèche
figurant sur la cartouche avec celle figurant sur la machine,
et poussez la cartouche jusqu'à ce qu'elle se bloque.
WorkCentre 7232/7242
Prise en main rapide
WorkCentre 7232/7242
Page 63

Remplacement des cartouches de toner
Refermez le panneau d'accès aux cartouches de toner.
10.
Refermez le panneau avant.
11.
Remarque : Appuyez fermement sur le haut du panneau,
au centre, lors de sa fermeture. Si un message d'erreur
s'affiche, appuyez sur le côté droit du panneau pour
l'enclencher à fond.
12.
Reprenez cette procédure pour chaque cartouche de toner à
remplacer.
WorkCentre 7232/7242
Prise en main rapide
WorkCentre 7232/7242
Page 64

Page 65

Guía rápida de uso
WorkCentre 7232/7242
701P46461
Page 66

Microsoft, MS-DOS, Windows, Windows NT, Microsoft Network y Windows Server son
Xerox no se hace responsable de los problemas que puedan resultar de un manejo no
Xerox y Ethernet son marcas comerciales registradas.
marcas comerciales o m ar c as r egist r adas de Microsof t Corporation en Estados Unidos o en
otros países.
Novell, NetW ar e, IntranetWare y NDS son marcas comerciales registradas de Novell, I nc. en
Estados Unidos o en otros países.
Adobe, Acrobat, PostScript, PostScript 3 y el logotipo de PostScript son marcas comerciales
de Adobe Systems Incorporated.
Apple, AppleTalk, EtherTalk, LocalTalk, Macintosh, MacOS y TrueType son marcas
comerciales de Apple Computer, I nc., registradas en Estados Unidos y en otros países.
HP, HPGL, HPGL/2 y HP-UX son marcas com er c iales r egistradas de Hewlett-Packard
Corporation.
Todas las otras marcas y nombres de productos son m ar cas comerciales o marcas
registradas de sus respectivos propietarios.
Los datos guardados en el disco duro de la máquina pueden perderse si se produce algún
problema en el disco duro. Xerox no se hace responsable de los daños directos o indirectos
que surjan o estén causados por la pérdida de datos. Xerox no se hace responsable de la
interrupción de las máquinas debido a virus o ataques informáticos.
Importante(1) Este manual tiene derechos de autor y reservados todos los derechos. Según
la normativa sobre derechos de autor, este manual no puede copiarse no modificarse en su
totalidad o en parte, sin el consentimient o escr it o del editor.(2) Algunas partes de este
manual están sujetas a cambios sin previo aviso.(3) Aceptamos cualquier comentario sobre
datos ambiguos, errores, omisiones o ausencia de páginas.(4) No intente nunca ningún tipo
de operación en la máquina que no esté específicament e descr it a en est e manual. Las
operaciones no autorizadas pueden ocasionar fallos o accidentes.
autorizado de este equipo.
La exportación de este producto está estrictamente controlado según la normativa sobre
intercambio y comercio internacional de Japón y/o la normat iva de cont r ol de export ación de
Estados Unidos.
NOTA: el título AZUL es para el personal administrativo de TI, el VERDE es para usuarios
finales y el ROJO significa que la máquina necesita atención. En función de la configuración
de la máquina, es posible que algunas pantallas de la interfaz del usuario varíen.
Page 67

Índice
Panel de control
Opciones de bandejas de papel
Creación de folletos
Copia
de tarjeta de ID
Fax de LAN
Escaneado sencillo a buzón
Configuración del código de país del fax
3
5
7
9
13
15
17
Configuración del auditrón 19
Portadas
Contadores de facturación
Sustitución de los cartuchos de tóner
WorkCentre 7232/7242
Guía rápida de uso
23
25
27
WorkCentre 7232/7242
Page 68

Panel de control
*
WorkCentre 7242
Copia
Fax
Escanear a buzón
Pantalla táctil
1.
La pantalla táctil permite seleccionar todas las funciones de programación
E-mail
Escaneado de red
Enviar del buzón
Fax de Internet
Escanear a PC
3
1
2
5
6
4
9
87
#-0
C
disponibles. También muestra procedimientos para solucionar los posibles
problemas e información general sobre la máquina.
Botón Todos los servicios
2.
Muestra la pantalla Todos los servicios en la pantalla táctil.
Botón Funciones
3.
Vuelve a la anterior pantalla de función de copia, fax o escaneado de la pantalla
táctil.
4.
5.
WorkCentre 7232/7242
Botón Estado del trabajo
Muestra en la pantalla táctil los datos sobre el progreso de los trabajos.
Botón Estado de la máquina
Muestra el estado actual de la máquina en la pantalla táctil.
Guía rápida de uso
WorkCentre 7232/7242
Page 69

Panel de control
Pausa de marcación
6.
Introduce una pausa en el número de teléfono al transmitir un fax.
Cancelar
7.
Borra valores numéricos o el último dígito introducido.
# (almohadilla)
8.
Indica el carácter de marcación o designa un número de marcación de grupo.
Comenzar
9.
Inicia el trabajo.
Parar
10.
Detiene momentáneamente el trabajo actual. Siga las indicaciones del mensaje
para cancelar o reanudar el trabajo.
Interrumpir
11.
Detiene provisionalmente el trabajo de copia actual para ejecutar un trabajo con
mayor prioridad.
Cancelar todo
12.
Si se pulsa una vez, restaura los valores prefijados y muestra la primera pantalla
de la función principal actual. Si se pulsa dos veces, restaura los valores
prefijados de todas las funciones de la máquina.
Idioma
13.
Muestra el texto en otro idioma (cuando está disponible).
Iniciar/Cerrar sesión
14.
Permite acceder, mediante una clave, a las Herramientas utilizadas para
configurar los valores prefijados de la máquina.
WorkCentre 7232/7242
Guía rápida de uso
WorkCentre 7232/7242
Page 70

Opciones de bandeja s de papel
Grupo
Funciones
La máquina utiliza un sistema de ajustes programables para
administrar las bandejas y el papel. Es el administrador de la
máquina quien establece estas opciones.
Según la opción configurada para cada bandeja, el usuario podrá
cambiar los atributos de tamaño, tipo y color del papel programados.
Información de la
máquina
Opciones del sistema
Configuración y calibración
Contabilidad
Opciones de autenticación y
seguridad
Información de
facturación
Suministros
Pulse Opciones serv. comunes.
Opciones del modo de escaneado
Opciones del modo de copia
Errores
Opciones de bandejas de papel
Ajuste de calidad de imagen
Informes
Herramientas
WorkCentre 7232/7242
Guía rápida de uso
WorkCentre 7232/7242
Page 71

Opciones de bandeja s de papel
Aquí termina el procedimiento de colocación de papel en la bandeja
La pantalla de información de la bandeja se muestra en la pantalla
táctil. Si la información de la bandeja es correcta, pulse el botón
Confirmar. También puede cambiar el tamaño o el tipo de papel
seleccionando el botón correspondiente en la pantalla táctil.
del papel.
Bandeja 1
WorkCentre 7232/7242
Cancelar
Tamaño del papel/
A4
Guía rápida de uso
Tipo de papel/
Confirmar
WorkCentre 7232/7242
Page 72

Creación de folletos
Póster
Creación de folletos permite producir folletos o copias de
varias páginas a partir de originales de 1 ó 2 caras. La
máquina escanea los originales y automáticamente reduce
u organiza las imágenes en el orden adecuado para el
papel seleccionado, de forma que se cree un folleto al
plegar el juego de la copia por la mitad.
La función Creación de folletos se activa con un botón de
la ficha Formato de salida.
Una vez activada, hay que indicarle a la máquina si los
originales son a 1 o 2 caras. Una vez realizada la
selección, debe elegir Guardar para poder programar
otras funciones que necesite en el panel de control.
Para activar Creación de folletos, seleccione la ficha
Formato de salida, el botón Creación de folletos y el
botón Crear folleto encuadernado por borde
izquierdo/superior.
Copia
WorkCentre 7232/7242
Creación de folletos
No
Diseño de página
No
Calidad de imagen
Ajuste de formato
Cubiertas Opciones de transparencias
No
No
Guía rápida de uso
Formato de salida
Anotaciones
No
No
Preparación de
trabajo
WorkCentre 7232/7242
Page 73

Creación de folletos
En primer lugar, seleccione la bandeja que contiene el papel
Creación de folletos
Cancelar Guardar
Desplaz. encuadernación
No
Crear folleto
encuadernado por
borde
izquierdo/superior
Cubiertas
Dividir impresiones
Destino de salida
Hay 2 normas sencillas que deben seguirse a la hora de
crear folletos:
1.
que desee utilizar.
Última página en cubierta
posterior
Coloque los documentos siempre con el borde largo a la
2.
izquierda.
WorkCentre 7232/7242
Guía rápida de uso
WorkCentre 7232/7242
Page 74

Copia de tarjeta de ID
Si necesita copiar tarjetas de seguros, carnés de conducir u
otro tipo de identificación, la función Copia
le permite hacerlo de forma rápida, sencilla y eficiente.
Con esta función puede copiar la información de ambas caras
del carné en una sola cara de papel, sin necesidad de volver a
cargar el papel en la bandeja.
de tarjeta de ID
WorkCentre 7232/7242
Guía rápida de uso
WorkCentre 7232/7242
Page 75

Copia de tarjeta de ID
1.
Si pulsa el botón Cancelar todo (AC) una vez, cancelará las
selecciones de programación de cualquier pantalla anterior.
Seleccione el icono Todos los servicios y luego el icono
Copia.
WorkCentre 7242
WorkCentre 7232/7242
Copia
Fax
Escanear a buzón
E-mail
Escaneado de red
Enviar del buzón
Guía rápida de uso
Fax de Internet
Escanear a PC
WorkCentre 7232/7242
Page 76

Copia de tarjeta de ID
2.
Se accede a ella mediante un botón situado en la pantalla
Formato de salida.
Copia
Marca de agua
Seleccione la ficha Formato de salida y el botón Copia
tarjeta de ID.
Calidad de imagen Ajuste de formato
Copiado de tarjeta de ID
No
No
Formato de salida
Preparación de
trabajo
de
WorkCentre 7232/7242
Guía rápida de uso
WorkCentre 7232/7242
Page 77

Copia de tarjeta de ID
Siga las instrucciones situadas bajo estas líneas para
3.
completar el proceso:
Paso 1.
Levante el alimentador de documentos y coloque el carné en
la esquina superior izquierda del cristal de exposición. Baje el
alimentador de documentos.
Paso 2.
Introduzca el número de copias que desea con el teclado
numérico.
Paso 3.
Pulse Comenzar para empezar el escaneado de la cara 1.
Paso 4
Levante el alimentador de documentos y dele la vuelta a la
tarjeta para copiar la cara 2. Baje el alimentador de
documentos.
Paso 5.
Pulse Comenzar para empezar el escaneado de la cara 2.
Las copias salen a la bandeja de salida.
WorkCentre 7232/7242
Guía rápida de uso
WorkCentre 7232/7242
Page 78

Fax de LAN
Papel/Salida de
Opciones de im
Formato/Marca de a
Avanzadas
Valores pre
8.5x11", Blanco, Tipo prefijado de la i m presor
Destinatario
1.
Abra el controlador de impresión.
2.
Seleccione Fax como tipo de trabajo.
Xerox WorkCentre 7345
Tipo de traba jo
Fax
Papel
3. Introduzca la información del destinatario.
Impresión a dos cara s
A 1 cara
Grapado
1 grapa
Color de sa lida
Color
Destino de salida
Centrado
Recuperar valores guardados
Recuperar va lores guardados
Aceptar
Aceptar Cancelar
WorkCentre 7232/7242
Fax
Número de fax Nombre
Preferencias Aceptar Cancelar
Cubierta
Opciones:
Grupo
Guía rápida de uso
Ayuda
WorkCentre 7232/7242
Page 79

Fax de LAN
Cuando haya elegido todas las opciones que necesite, seleccione
con la lista de destinatarios que
P
de
O
im
F
e a
A
as
Aceptar
Cancelar
Aceptar
Valores pre
Supresión del fond o:
4.
Defina las opciones de fax.
5.
Envíe el fax.
Xerox WorkCentre 7345
apel/Salida
ormato/Marca d
Más claro/Más oscuro
Supresión a utomática
Calidad de i magen
Normal
pciones de
vanzad
Borrado de márgenes
No
Invertir ima gen
Imagen de espejo
Recuperar valores guardados
Recuperar valores guardados
Aceptar. Seleccione Aceptar en la pantalla del controlador de
impresión y Aceptar en la pantalla de impresión. Aparecerá una
pantalla de Confirmación de fax
ha elegido. Si desea realizar otros cambios, seleccione Editar. Si
los datos son correctos, seleccione el botón Aceptar tras lo cual
el fax se enviará a la cola de faxes de la máquina que está
preparada para la transmisión.
WorkCentre 7232/7242
Guía rápida de uso
WorkCentre 7232/7242
Page 80

Escaneado sencillo a buzón
Escanear a buzón es una función opcional y, por lo tanto,
es posible que no esté disponible en la máquina. Póngase
en contacto con el administrador del sistema para configurar
esta función en su máquina.
1. Colocar los documentos.
2. Seleccionar el icono Escanear a buzón.
3. Seleccionar el buzón apropiado.
WorkCentre 7232/7242
Guía rápida de uso
WorkCentre 7232/7242
Page 81

Escaneado sencillo a buzón
Acceda a la versión electrónica del documento de la
4. Seleccionar las funciones.
Si precisa modificar las opciones de escaneado, seleccione
las fichas Opciones generales, Opciones avanzadas,
Ajuste de formato u Opciones de archivado y luego elija
las opciones deseadas.
5. Pulsar Comenzar.
Cuando se pulsa Comenzar, cada documento se escanea
una vez.
6. Acceda al documento escaneado que se encuentra
en el buzón.
máquina en el buzón especificado.
WorkCentre 7232/7242
Guía rápida de uso
WorkCentre 7232/7242
Page 82

Configuración del código de país del fax
Siga estos pasos para establecer el Código del país para la
opción Fax.
Pulse el botón Iniciar/Cerrar sesión del panel de control.
1.
Introduzca la ID de inicio de sesión del administrador y
2.
a continuación pulse Intro.
Seleccione el botón Estado de la máquina en el panel de
3.
control.
Pulse la ficha Herramientas.
4.
Pulse Opciones del sistema.
5.
Información de la
máquina
Opciones del sistema
Configuración y calibración
Contabilidad
Opciones de autenticación y
seguridad
WorkCentre 7232/7242
Información de
facturación
Grupo
Opciones serv. comunes.
Opciones del modo de escaneado
Opciones del modo de copia
Guía rápida de uso
ErroresSuministros
Herramientas
Funciones
Mantenimiento
Marca de agua
Otras opciones
WorkCentre 7232/7242
Page 83

Configuración del código de pa ís del fax
Pulse Opciones serv. comunes.
6.
Pulse Otras opciones.
7.
Desplace hacia abajo y pulse País.
8.
Seleccione el país que corresponda de la lista
9.
proporcionada.
Pulse Guardar.
10.
La máquina se reiniciará después de pulsar Guardar.
WorkCentre 7232/7242
Guía rápida de uso
WorkCentre 7232/7242
Page 84

Configuración del auditrón
Para configurar el auditrón, primero debe crear cuentas de
usuario y luego activar Auditrón. A continuación se solicita a
los usuarios que introduzcan su ID de usuario junto con su
cuenta para poder realizar determinadas funciones de la
máquina. Puede crear un total de 1000 cuentas.
Todas las cuentas de usuario deben tener definidos los
elementos siguientes:
• ID de usuario
• Nombre del usuario
• Acceso a funciones
• Límite de la cuenta
Una vez definidas y creadas las cuentas, active las cuentas
que desee para iniciar el uso del auditrón. Las ID y los
nombres de usuario no pueden repetirse, deben ser
distintos los unos de los otros.
WorkCentre 7232/7242
Guía rápida de uso
WorkCentre 7232/7242
Page 85

Configuración del auditr ón
*
Puede activar el modo de Auditrón para copiar, escanear,
enviar por fax o imprimir. Cuando el modo de Auditrón está
activado, el usuario debe seleccionar el botón Iniciar/Cerrar
sesión e introducir la ID de usuario apropiada para empezar
a utilizar la máquina.
WorkCentre 7232/7242
WorkCentre 7242
Copia
Fax
Escanear a buzón
E-mail
Escaneado de red
Enviar del buzón
Fax de Internet
Escanear a PC
Guía rápida de uso
3
1
2
5
6
4
9
87
#-0
C
WorkCentre 7232/7242
Page 86

Configuración del auditr ón
Guardar
Cancelar
Después de conectarse y seleccionar la ficha Herramientas,
1.
pulse el botón Contabilidad.
Seleccione Tipo de contabilidad.
2.
máquina
Opciones del sistema
Configuración y calibr ación
Contabilidad
Opciones de autenticación y
3.
Seleccione Contabilidad local.
Tipo de contabilidad
Contabilidad desactivada
Contabilidad local
Contabilidad de red
Contabilidad estándar de Xerox
Información de
facturación
Grupo
Tipo de contabilidad
Autorecuperación de la
Informe de actividades de
Suministros Errores
Modo de auditrón
HerramientasInformación de la
WorkCentre 7232/7242
Guía rápida de uso
WorkCentre 7232/7242
Page 87

Configuración del auditrón
Modo de auditrón
Modo de auditrón
4.
Modo de auditrón:
Seleccione los servicios para los que desea activar la
función de administración.
Servicio de copia: administración relativa a las operaciones
de copia.
Servicio de impresión: administración relativa a las
operaciones de impresión.
Servicio de escaneado: administración relativa a las
operaciones de escaneado.
Servicio de fax: administración relativa a las operaciones de
fax.
Cancelar
Servicio de copia Servicio de fax Servicio de escaneado Servicio de impresión
No
Sí
5.
Seleccione el botón Guardar.
Servicio de copia Servicio de fax Servicio de escaneado Servicio de impresión
No
Sí
WorkCentre 7232/7242
No
Sí
No
Sí
Guía rápida de uso
No
Sí
Cancelar
No
Sí
Guardar
No
Sí
Guardar
No
Sí
WorkCentre 7232/7242
Page 88

Portadas
Impresión
1.
Abra el controlador de impresión.
2.
Pulse el botón Propiedades para abrir el cuadro de diálogo
de propiedades de la impresora.
NOTA: la ventana de diálogo de propiedades de la
impresora varía en función del controlador que se use y la
interfaz de usuario seleccionada. Ésta es la versión
WorkCentre 7242 PS en modo de interfaz de usuario
mejorada, que utilizaremos en la demostración. A pesar de
que existen algunas diferencias, las opciones y
características principales son comunes a todos los
controladores.
Impresora
Nombre
Estado:
Tipo:
Ubicación:
Comentario:
Xerox WorkCentre 7242
Propiedades
Imprimir a archivo
WorkCentre 7232/7242
Intervalo
Todo
Páginas
Selección
A:
Guía rápida de uso
Copias
Número de copias:
Clasifi
Aceptar Cancelar
WorkCentre 7232/7242
Page 89

Portadas
Papel/Salida de
Formato/Marca de a
Opciones de im
Valores prefi
Ayuda
Papel/Salida de
Formato/Marca de a
Opciones de im
Valores prefi
Ayuda
3.
Seleccione la ficha Avanzadas.
Opciones avanzadas
Opciones de documento
Papel/Salida de copias
Copias
Clasificar
Portada
Desplazar juegos: [Desplazar cada juego]
Orientación de alimentación:
Opciones de imagen
Formato de folleto
Valores prefijados de Funciones
Incluir f uncione s de niv el 2
Solo funcio nes de ni vel 1
Comprimir mapas de bits
Activar PostScript directo
Independencia de página
Imprimir información de errores PostS cript
Acerca de
4.
Seleccione Activada si desea que cada trabajo de
Avanzadas
Activado
Recuperar valores guardados
Aceptar Cancelar
impresión tenga una portada.
Opciones avanzadas
Opciones de documento
Papel/Salida de copias
Copias
Clasificar
Portada
Desplazar juegos: [Desplazar cada juego]
Orientación de alimentación:
Opciones de imagen
Formato de folleto
Valores prefijados de Funciones
Incluir f uncione s de niv el 2
Solo funcio nes de ni vel 1
Comprimir mapas de bits
Activar PostScript directo
Independencia de página
Imprimir información de errores PostS cript
Acerca de
Avanzadas
Activado
Recuperar valores guardados
Aceptar Cancelar
WorkCentre 7232/7242
5.
Haga clic en el botón Aceptar. La plantilla se elimina de
la lista.
Guía rápida de uso
WorkCentre 7232/7242
Page 90

Contadores de facturación
*
La pantalla Información de facturación proporciona
acceso a los contadores de facturación y de uso de la
máquina. Los contadores varían dependiendo del modelo y
configuración de la máquina.
Para acceder a los Contadores de facturación:
1. Seleccione el botón Estado de la máquina.
WorkCentre 7242
Copia
Fax
Escanear a buzón
E-mail
Escaneado de red
Enviar del buzón
Fax de Internet
Escanear a PC
1
2
4
87
C
2. Seleccione la ficha Información de facturación.
Información de
la máquina
Información de facturación
Imprimir informes
facturación
Contador de facturación de cuenta de usuario
ErroresSuministrosInformación de
3
65
9
#-0
Herramientas
WorkCentre 7232/7242
Guía rápida de uso
WorkCentre 7232/7242
Page 91

Contadores de f acturación
Lectura actual contador
Impresiones en negro
Impresiones en color
Total de impresiones
3. Seleccione el botón Información de facturación.
Información de
la máquina
Información de facturación
Imprimir informes
facturación
Contador de facturación de cuenta de usuario
ErroresSuministrosInformación de
Herramientas
4. Se muestran los Contadores de facturación.
Información de facturación
Número serie de
Cerrar
WorkCentre 7232/7242
Guía rápida de uso
WorkCentre 7232/7242
Page 92

Sustitución de los cartuchos de tóner
En este procedimiento se muestra el modo de quitar el cartucho
de tóner gastado y poner un cartucho de tóner nuevo. Los
cartuchos de tóner se sustituyen con la máquina encendida. Los
cartuchos se cargan en un rotor de cartucho que gira hasta la
posición requerida para permitir la sustitución del cartucho de
tóner. La máquina le avisará de cuándo debe pedir un cartucho
nuevo y de cuándo debe instalarlo.
Para deshacerse del cartucho viejo, siga las instrucciones
suministradas con el cartucho nuevo.
1.
Pulse el botón Estado de la máquina en el panel de control y
seleccione la ficha Suministros en la pantalla Información
de la máquina.
Nota: la máquina muestra automáticamente la ventana
Estado de los consumibles cuando es preciso sustituir de
inmediato un consumible.
2.
Seleccione los cartuchos de tóner marcados con una cruz, lo
que indica que es necesario sustituirlos.
Nota: Si hay varios cartuchos marcados con una cruz, los
cartuchos de tóner deben sustituirse siguiendo el orden KYMC.
3.
Seleccione Cambiar el cartucho.
Nota: El procedimiento de sustitución de cartuchos es el
mismo para todos los cartuchos de tóner que sea necesario
4.
Espere a que el rotor gire hasta la posición correcta y
aparezca el indicador en la pantalla. Seguidamente, confirme
que la pantalla indica el tóner correcto.
WorkCentre 7232/7242
Guía rápida de uso
.
WorkCentre 7232/7242
Page 93

Sustitución de los cartuchos de tóner
Abra la puerta de cartuchos de tóner.
Tire para abrir la cubierta anterior.
5.
6.
WorkCentre 7232/7242
Guía rápida de uso
WorkCentre 7232/7242
Page 94

Sustitución de los cartuchos de tóner
Introduzca el cartucho, alineando la flecha del cartucho con la
7.
Extraiga el cartucho de tóner de la máquina.
Nota: Tenga cuidado al manipular el cartucho de tóner
vacío para evitar salpicaduras del tóner residual. Los
cartuchos de tóner están diseñados para ser reciclados.
Devuelva el cartucho a Xerox en el embalaje original
empleando las etiquetas de devolución incluidas con cada
nuevo cartucho.
Saque el nuevo cartucho de tóner de su caja. Gire el
8.
cartucho de un lado a otro aproximadamente 10 veces para
distribuir uniformemente el tóner dentro del cartucho.
9.
de la máquina, y empuje hasta que encaje en su sitio.
WorkCentre 7232/7242
Guía rápida de uso
WorkCentre 7232/7242
Page 95

Sustitución de los cartuchos de tóner
Cierre la puerta de cartuchos de tóner.
10.
Cierre la cubierta anterior.
11.
Nota: Presione firmemente por la parte superior central al
cerrar la cubierta. Si aparece un mensaje de error en la
pantalla, presione la cubierta por la derecha para cerrarla
completamente.
12.
Repita este procedimiento para sustituir varios cartuchos de
tóner.
WorkCentre 7232/7242
Guía rápida de uso
WorkCentre 7232/7242
Page 96

Page 97

Guia de Utilização Rápida
WorkCentre 7232/7242
701P46461
Page 98

finais e VERMELHO indica que a máquina precisa de atenção. Dependendo da configuração
Microsoft, MS-DOS, Windows, Windows NT, Microsoft Network e Windows Server são
reservados. Sob as leis de direitos autorais, este manual não pode ser copiado ou modificado
ambigüidades, erros, omissões ou f alta de páginas.(4) Nunca tente nenhum procedim ent o na
Xerox e Ethernet são marcas registradas.
marcas ou marcas registr adas da Microsof t Cor por at ion nos Estados Unidos e/ou em outros
países.
Novell, NetWare, IntranetWare e NDS são marcas registr adas da Novell, Inc. nos Estados
Unidos e em outros países.
Adobe, Acrobat, PostScript, PostScript 3 e o Logot ipo Post Scr ipt são marcas da Adobe
Systems Incorporated.
Apple, AppleTalk, EtherTalk, LocalTalk, Macintosh, MacOS e TrueType são marcas da Apple
Computer, Inc., regist r adas nos EUA e em outros países.
HP, HPGL, HPGL/2 e HP-UX são mar c as r egistradas da Hewlett-Packard Corporat ion.
Todos os produtos e nomes de marcas são m ar c as ou marcas registradas de suas
respectivas companhias.
Os dados salvos no disco rígido da máquina podem ser per didos caso haj a algum problema
no disco. A Xerox não é responsável por danos diretos ou indiretos provenientes ou
causados por essa perda de dados. A Xerox não é responsável por problemas na m áquina
derivados da infecção por vírus ou da ação de hackers.
Importante(1) Este manual encontra-se protegido por copyright e todos os seus direitos são
em parte ou completamente sem a autorização por escrito do editor. ( 2) Partes deste manual
estão sujeitas à mudanças sem prévio aviso. ( 3) Apreciamos comentários sobre
máquina que não esteja especificament e descr it o neste manual. A operação não-autorizada
pode causar falhas ou acidentes.
A Xerox não é responsável pelos problemas resultantes da operação não autor izada do
equipamento.
A exportação deste produto é estritament e cont r o lada de acor do com as Leis de Câmbio
Estrangeiro e Comércio Exterior do Japão e/ou as regulamentações de controle de
exportação dos Estados Unidos.
NOTA: títulos em AZUL são para o pessoal da administração de TI, VERDE para usuários
da máquina, algumas telas da Interface do Usuário podem variar.
Page 99

Índice
Painel de Controle
Configurações da Bandeja do Papel
Criação de Livretos
Cópia de documento de identidade
Fax LAN Simples
Digitalização Simples para Caixa Postal
Definição do código de país, fax
3
5
7
9
13
15
17
Configuração do Auditron 19
Folhas de Informações
Medidores de Faturamento
Substituição do Cartucho de Toner
WorkCentre 7232/7242
Guia de Utilização Rápida
23
25
27
WorkCentre 7232/7242
Page 100

Painel de Controle
A tela de seleção por toque permite selecionar todas as funções de programação
*
WorkCentre 7242
Copiar
Enviar Fax
Digitalizar para Caixa
postal
Tela de Seleção por Toque
1.
E-Mail
Digital ização em
Rede
Enviar da Caixa postal
Internet Fax
Digitalizar para PC
3
1
2
5
6
4
9
87
#-0
C
disponíveis. Além disso, exibe procedimentos de eliminação de falhas e
informações gerais sobre a máquina.
Botão Todos os Serviços
2.
Exibe a tela Todos os Serviços na tela de seleção por toque.
Botão Recursos
3.
Retorna a tela de seleção por toque para a tela anterior de recurso de cópia, fax
ou digitalização.
Botão Status do Trabalho
4.
Exibe informações sobre o andamento do trabalho na tela de seleção por toque.
Botão Status da Máquina
5.
Exibe o status atual da máquina na tela de seleção por toque.
WorkCentre 7232/7242
Guia de Utilização Rápida
WorkCentre 7232/7242
 Loading...