


GX5SHTXTB00
Whirlpool GX5SHTXTB00, GX5FHTXTQ00, GB2SHDXTS00, GB2SHTXTB00, GX5FHTXTT00 Use & Care Manual
...
TABLEOFCONTENTS
REFRIGERATOR SAFETY ...................................................... 3
Proper Disposal of Your Old Refrigerator .................................. 3
INSTALLATION INSTRUCTIONS ............................................. 4
Unpack the Refrigerator ............................................................ 4
Location Requirements ............................................................ 4
Electrical Requirements ........................................................... 5
Water Supply Requirements .................................................... 5
Connect the Water Supply ......................................................... 5
Base Grille ................................................................................ 6
Refrigerator Door ....................................................................... 7
Refrigerator Doors ..................................................................... 8
Opening and Closing Doors ...................................................... 10
Adjust the Door ........................................................................ 11
Normal Sounds ........................................................................ 11
REFRIGERATOR USE .............................................................. 12
Ensuring proper air circulation .................................................. 12
Using the Controls ................................................................... 12
Water system Preparation ......................................................... 13
REFRIGERATOR FEATURES .................................................. 13
Refrigerator Shelves ................................................................. 13
Meat Drawer and Cover ............................................................ 14
Crisper and Crisper Cover ....................................................... 14
Crisper Humidity Control ........................................................... 14
Utility or Egg Bin ....................................................................... 14
TABLEDESMATII RES
Temperature Controlled Drawer ................................................ 15
Water Dispenser ........................................................................ 16
Water Filtration System ............................................................. 16
Ice Maker ................................................................................... 16
FREEZER FEATURES ............................................................. 17
Freezer Baskets ........................................................................ 17
DOOR FEATURES .................................................................... 17
Door Retainer ........................................................................... 17
Door Bins .................................................................................. 17
Utility Compartment .................................................................. 17
REFRIGERATOR CARE .......................................................... 17
Cleaning .................................................................................... 17
Changing the Light Bulb ............................................................ 18
Power Interruptions .................................................................. 19
Vacation and Moving Care ........................................................ 19
TROUBLESHOOTING ............................................................ 20
ASSISTANCE OR SERVICE .................................................... 22
In the U.S.A ............................................................................. 22
In Canada ................................................................................ 22
Accessories ............................................................................. 22
WATER FILTER CERTIFICATIONS ......................................... 22
PRODUCT DATA SHEETS ....................................................... 23
WARRANTY ............................................................................ 24
SECURITE DU RF:FRIGF:RATEUR ......................................... 25
Mise au rebut de votre vieux refrig6rateur ................................ 25
INSTRUCTIONS D'INSTALLATION ........................................ 26
Deballage du refrig6rateur ....................................................... 26
Emplacement d'installation ....................................................... 26
Specifications electriques ........................................................ 27
Specifications de I'alimentation en eau ..................................... 27
Raccordement de la canalisation d'eau ................................... 28
Grille de la base ........................................................................ 29
Porte de la refrig6rateur ......................................................... 29
Portes du refrig6rateur ............................................................. 30
Ouverture et fermeture des portes ............................................ 33
Ajustement de la porte ............................................................. 34
Sons normaux .......................................................................... 34
UTILISATION DU REFRIGERATEUR ...................................... 35
Pour s'assurer d'une circulation d'air appropriee ..................... 35
Utilisation des commandes ....................................................... 35
Preparation du systeme d'eau .................................................. 36
CARACT_:RISTIQUES DU R_:FRIG_:RATEUR ....................... 36
Tablettes du refrig6rateur .......................................................... 36
Tiroir a viande et couvercle ....................................................... 37
Bac & legumes et couvercle ...................................................... 37
Reglage de I'humidite dans le bac & legumes ........................... 38
Casier utilitaire ou oeufrier ........................................................ 38
Tiroir a temperature contrSlee ................................................... 38
Disttributeur d'eau ..................................................................... 39
Systeme de filtration d'eau interieur ......................................... 39
Machine & gla£ons .................................................................... 39
CARACTERISTIQUES DU CONG_:LATEUR ........................... 40
Paniers de congelateur ............................................................ 40
CARACTERISTIQUES DE LA PORTE ..................................... 41
Dispositif de retenue de la porte ............................................... 41
Balconnets dans la porte .......................................................... 41
Compartiment utilitaire .............................................................. 41
ENTRETIEN DU RF:FRIGERATEUR ........................................ 41
Nettoyage ................................................................................ 41
Remplacement de I'ampoule d'eclairage ................................. 42
Pannes de courant ................................................................... 43
Entretien avant les vacances ou Iors d'un d6menagement ....... 43
DEPANNAGE ........................................................................... 44
ASSISTANCE OU SERVICE .................................................... 47
Accessoires ............................................................................. 47
FEUILLES DE DONN_:ES SUR LE PRODUIT. ........................ 48
GARANTIE ............................................................................... 49
REFRIGERATORSAFETY
Your safety and the safety of others are very important.
We have provided many important safety messages in this manual and on your appliance. Always read and obey all safety
messages.
This is the safety alert symbol.
This symbol alerts you to potential hazards that can kill or hurt you and others.
All safety messages will follow the safety alert symbol and either the word "DANGER" or "WARNING."
These words mean:
You can be killed or seriously injured if you don't immediately
follow instructions.
You can be killed or seriously injured if you don't follow
instructions.
All safety messages will tell you what the potential hazard is, tell you how to reduce the chance of injury, and tell you what can
happen if the instructions are not followed.
UVlPORTANT SAFETY UtSTRUCT(ONS
WARN(NG: To reduce the risk of fire, electric shock, or injury to persons when using the refrigerator, follow basic precautions,
including the following:
m Plug into a grounded 3 prong outlet.
• Do not remove ground prong.
m Do not use an adapter.
m Do not use an extension cord.
m Disconnect power before servicing.
m Replace all parts and panels before operating.
m Remove doors from your old refrigerator.
m Use nonflammable cleaner.
• Keep flammable materials and vapors, such as gasoline,
away from refrigerator.
m Use two or more people to move and install refrigerator.
m Disconnect power before installing ice maker (on ice maker
kit ready models only).
SAVE THESE (IISTRUCTiOHS
ProperDisposal ofYourOldRefrigerator
IMPORTANT: Child entrapment and suffocation are not problems
of the past. Junked or abandoned refrigerators are still dangerous
- even if they will sit for "just a few days." If you are getting rid of
your old refrigerator, please follow these instructions to help
prevent accidents.
Before You Throw Away Your Old Refrigerator or Freezer:.
• Take off the doors.
• Leave the shelves in place so that children may not easily
climb inside.
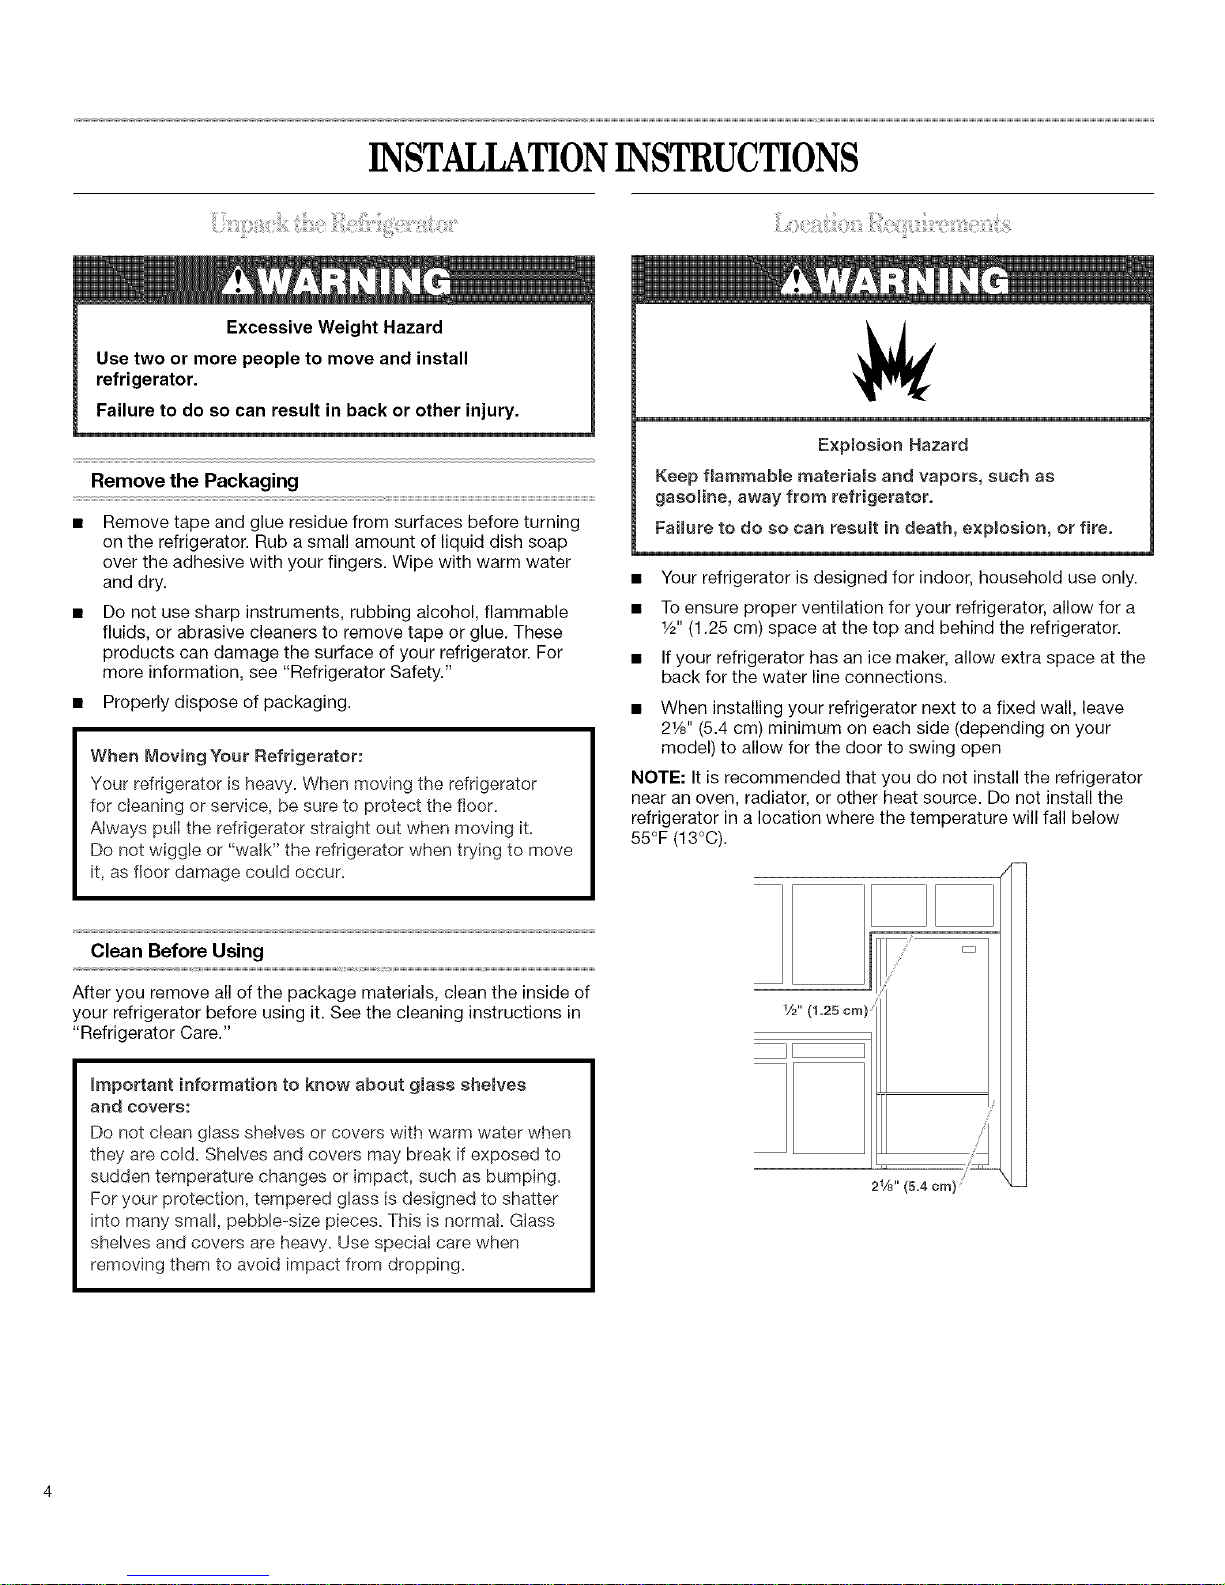
INSTALLATIONINSTRUCTIONS
Excessive Weight Hazard
Use two or more people to move and install
refrigerator.
Failure to do so can result in back or other injury.
Remove the Packaging
Remove tape and glue residue from surfaces before turning
on the refrigerator. Rub a small amount of liquid dish soap
over the adhesive with your fingers. Wipe with warm water
and dry.
Do not use sharp instruments, rubbing alcohol, flammable
fluids, or abrasive cleaners to remove tape or glue. These
products can damage the surface of your refrigerator. For
more information, see "Refrigerator Safety."
• Properly dispose of packaging.
When Moving Your Refrigerator:
Your refrigerator is heavy. When moving the refrigerator
for cleaning or service, be sure to protect the floor.
Always pulI the refrigerator straight out when moving it.
Do not wiggle or "walk" the refrigerator when trying to move
it, as floor damage could occur.
Clean Before Using
After you remove all of the package materials, clean the inside of
your refrigerator before using it. See the cleaning instructions in
"Refrigerator Care."
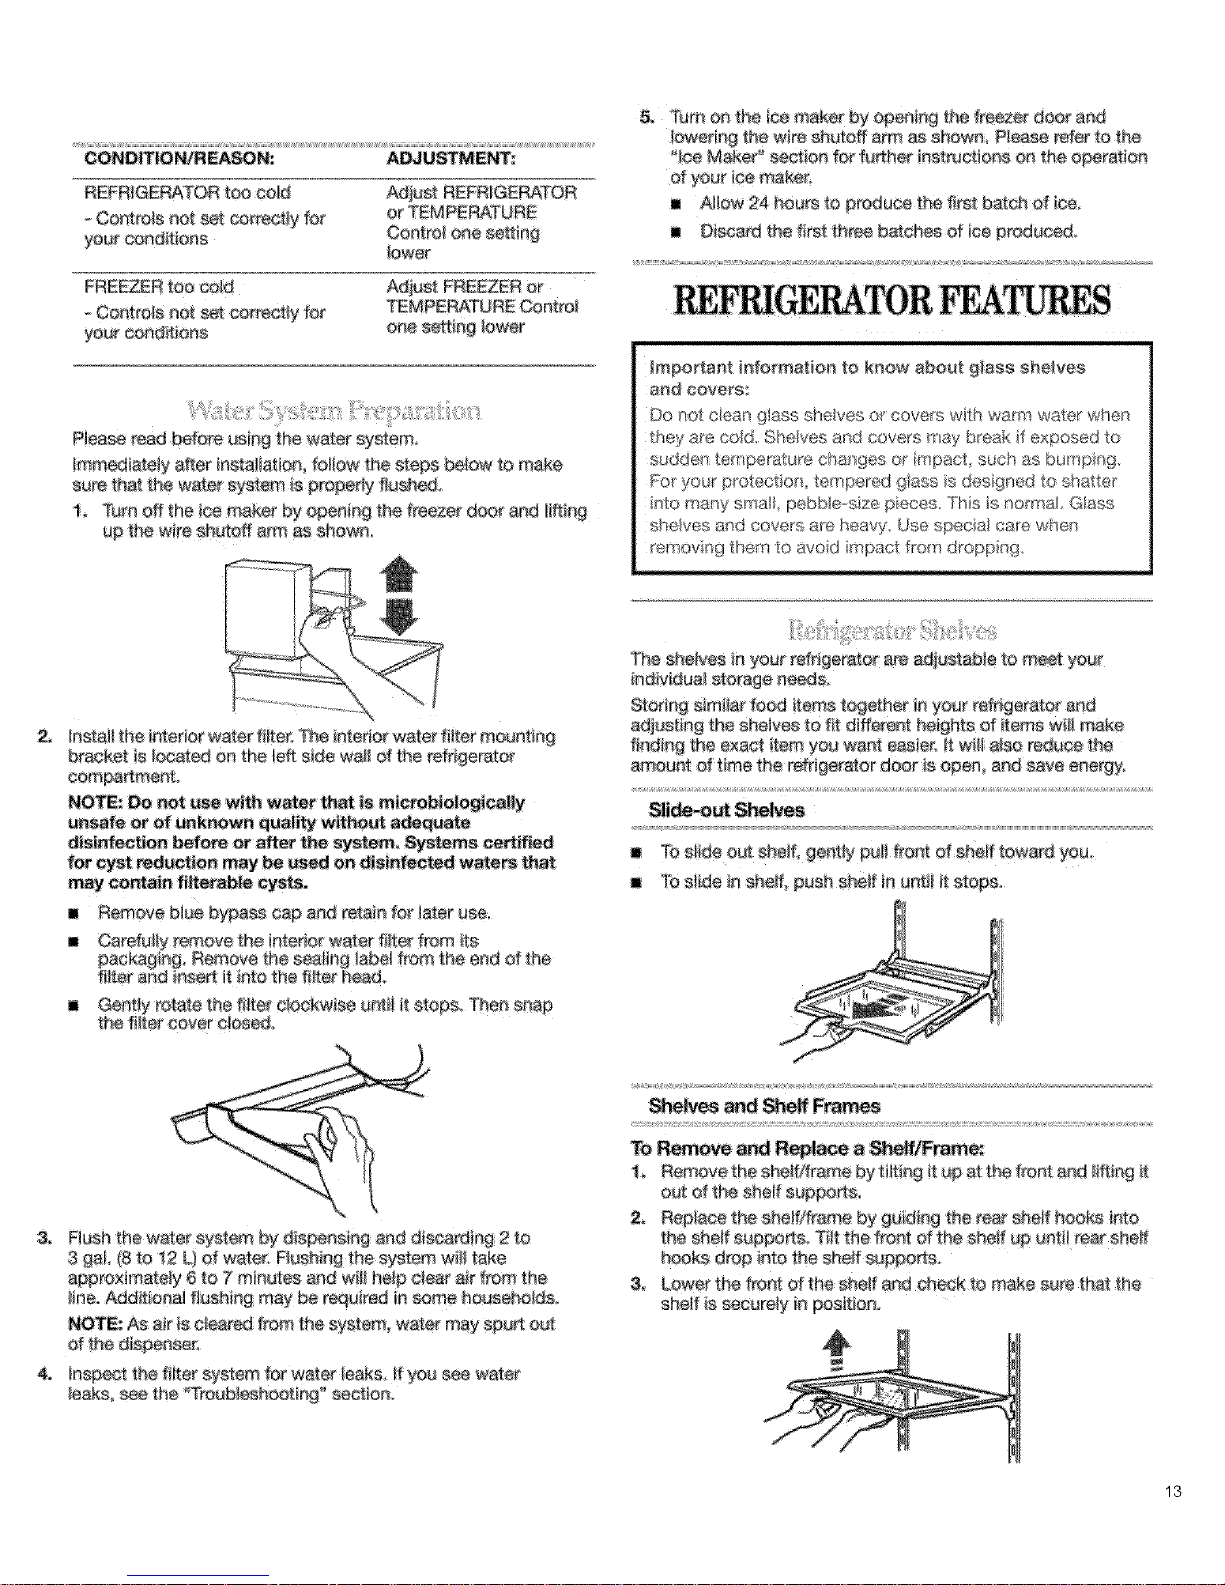
important information to know about glass she_ves
and covera:
Do not clean glass shelves or covers with warm water when
they are cold. Shelves and covers may break if exposed to
sudden temperature changes or impact, such as bumping.
For your protection, tempered glass is designed to shatter
into many small, pebble-size pieces. This is normal. Glass
shelves and covers are heavy. Use specia! care when
removing them to avoid impact from dropping.
Explosion Hazard
Keep flammable materials and vapors, such as
gasoline, away from refrigerator.
Failure to do so can result in death, explosion, or fire.
• Your refrigerator is designed for indoor household use only.
• To ensure proper ventilation for your refrigerator, allow for a
1/2"(1.25 cm) space at the top and behind the refrigerator.
• If your refrigerator has an ice maker, allow extra space at the
back for the water line connections.
• When installing your refrigerator next to a fixed wall, leave
21/s'' (5.4 cm) minimum on each side (depending on your
model) to allow for the door to swing open
NOTE: It is recommended that you do not install the refrigerator
near an oven, radiator, or other heat source. Do not install the
refrigerator in a location where the temperature will fall below
55°F (13°C).
21A_'' (&4 cm)
Emectrical Shock Hazard
Pmuginto a grounded 3 pror_g outlet°
Do not remove ground prong.
Do not use ar_ adapter.
Do not use an extension cord.
Failure to follow these }nstructions can resumt }n death,
fire, or electrical shock.
Before you move your refrigerator into its final location, it is
important to make sure you have the proper electrical
connection.
Recommended Grounding Method
A 115 Volt, 60 Hz., AC only 15- or 20-amp fused, grounded
electrical supply is required. It is recommended that a separate
circuit serving only your refrigerator be provided. Use an outlet
that cannot be turned off by a switch. Do not use an extension
cord.
NOTE: Before performing any type of installation, cleaning, or
removing a light bulb, press the Freezer down arrow touch pad
until a dash (-) appears in both the Freezer and Refrigerator
displays as shown. Disconnect the refrigerator from the electrical
source.
@0® ®0®
col_ FREEZER co_R Recommen@dSetti_gs:4 co_ REFRI6ERATORCOlDeR
Col@stSettlngs:7
When you are finished, reconnect the refrigerator to the electrical
source and reset the temperature controls to the desired setting.
See "Using the Controls."
Read all directions before you begin.
IMPORTANT:
• If you turn the refrigerator on before the water line is
connected, turn the ice maker OFE
• All installations must meet local plumbing code requirements.
• Use copper tubing and check for leaks. Install copper tubing
only in areas where the household temperatures will remain
above freezing.
TOOLS NEEDED: Flat-blade screwdriver, 7/16"and 1/2"open-end
wrenches or two adjustable wrenches, 1/,,,nut driver and drill bit,
hand drill or electric drill (properly grounded).
NOTE: Your refrigerator dealer has a kit available with a 1/,,,
(6.35 mm) saddle-type shutoff valve, a union, and copper tubing.
Before purchasing, make sure a saddle-type valve complies with
your local plumbing codes. Do not use a piercing-type or s/16"
(4.76 mm) saddle valve which reduces water flow and clogs more
easily.
Water Pressure
A cold water supply with water pressure of between 35 and
100 psi (241 - 689 kPa) is required to operate the ice maker. If
you have questions about your water pressure, call a licensed,
qualified plumber.
Reverse Osmosis Water Supply
IMPORTANT: The pressure of the water supply coming out of a
reverse osmosis system going to the water inlet valve of the
refrigerator needs to be between 35 and 100 psi (241 - 689 kPa).
If a reverse osmosis water filtration system is connected to your
cold water supply, the water pressure to the reverse osmosis
system needs to be a minimum of approximately 60 psi
(414 kPa).
If the water pressure to the reverse osmosis system is less than
approximately 60 psi (414 kPa):
• Check to see whether the sediment filter in the reverse
osmosis system is blocked. Replace the filter if necessary.
• Allow the storage tank on the reverse osmosis system to refill
after heavy usage.
If you have questions about your water pressure, call a licensed,
qualified plumber.
Connect to Water Line
1. Unplug refrigerator or disconnect power.
2. Turn OFF main water supply. Turn ON nearest faucet long
enough to clear line of water.
3. Find a 1/2"to 11/,'' (12.7 mm to 3.18 mm) vertical cold water
pipe near the refrigerator.
IMPORTANT:
4.
5.
• Make sure it is a cold water pipe.
• Horizontal pipe will work, but the following procedure
must be followed: Drill on the top side of the pipe, not the
bottom. This will help keep water away from the drill. This
also keeps normal sediment from collecting in the valve.
To determine the length of copper tubing you will need,
measure from connection on lower left rear of refrigerator to
water pipe. Add 7 ft (2.1 m) to allow for moving refrigerator for
cleaning. Use 1/4"(6.35 mm) O.D. (outside diameter) copper
tubing. Be sure both ends of copper tubing are cut square.
Using a grounded drill, drill a 1/,,,hole in the cold water pipe
you have selected.
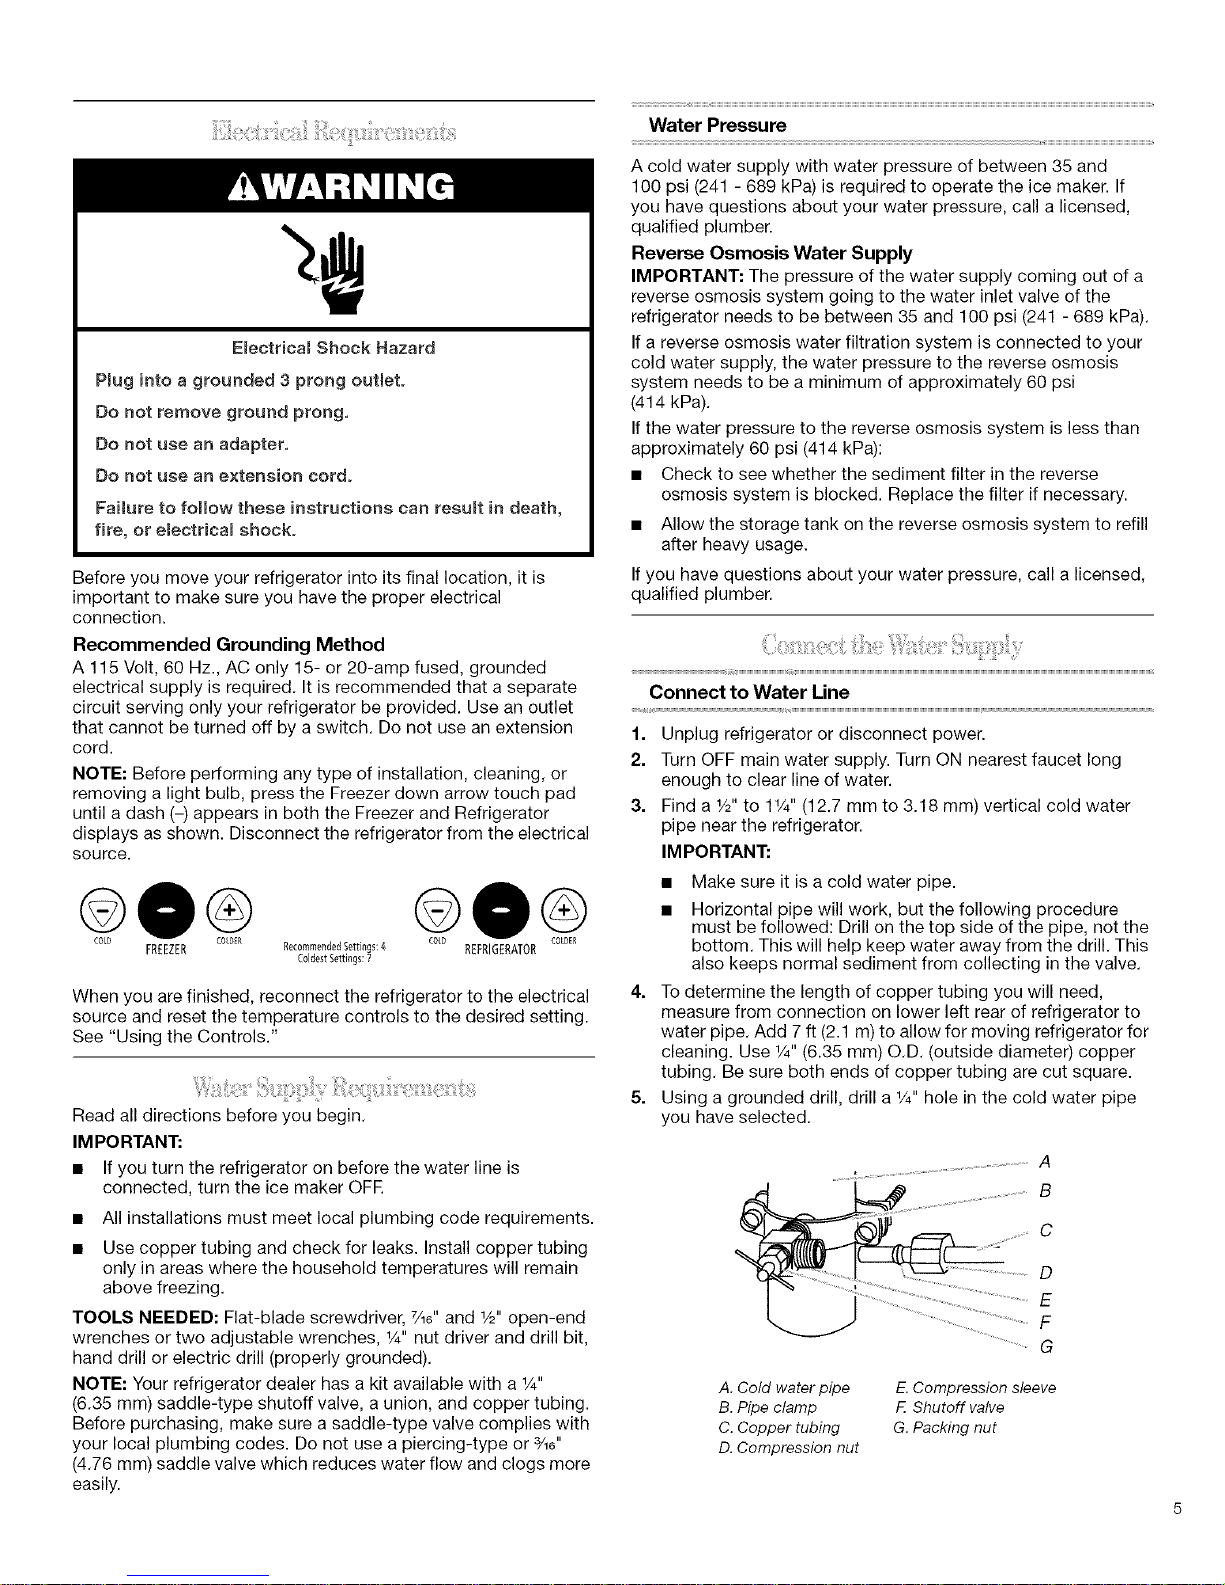
C
D
E
F
G
A. Cold water pipe
B. Pipe clamp
C. Copper tubing
D. Compression nut
E. Compression sleeve
F. Shutoff valve
G. Packing nut
6. Fasten shutoff valve to cold water pipe with pipe clamp. Be
sure outlet end is solidly in the 1/4"drilled hole in the water
pipe and that rubber washer is under the pipe clamp. Tighten
packing nut. Tighten the pipe clamp screws slowly and
evenly so rubber washer makes a watertight seal. Do not
overtighten or you may crush the copper tubing, especially if
soft (coiled) copper tubing is used. Now you are ready to
connect the copper tubing.
7. Slip compression sleeve and compression nut on copper
tubing as shown. Insert end of tubing into outlet end squarely
as far as it will go. Screw compression nut onto outlet end
with adjustable wrench. Do not overtighten.
8. Place the free end of the tubing into a bucket or sink. Turn ON
main water supply and flush out tubing until water is clear.
Turn OFF shutoff valve on the water pipe. Check for leaks.
Coil copper tubing.
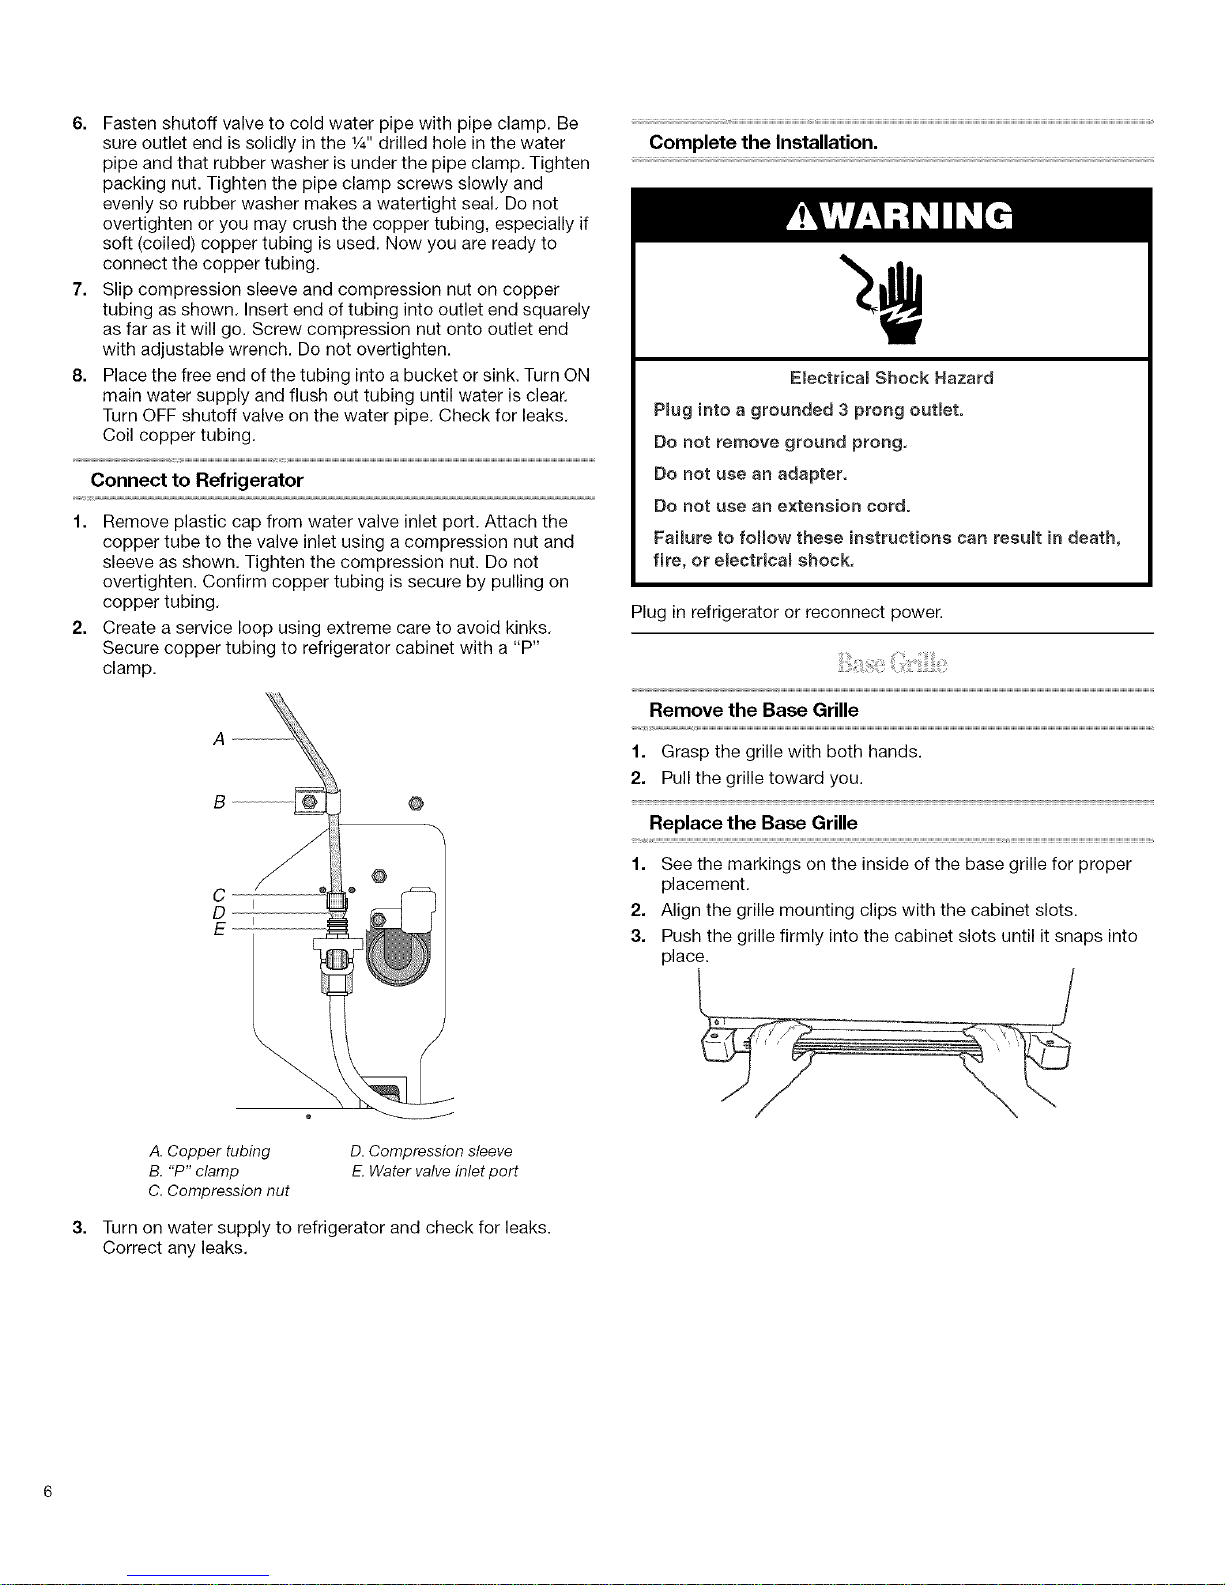
Connect to Refrigerator
1. Remove plastic cap from water valve inlet port. Attach the
copper tube to the valve inlet using a compression nut and
sleeve as shown. Tighten the compression nut. Do not
overtighten. Confirm copper tubing is secure by pulling on
copper tubing.
2. Create a service loop using extreme care to avoid kinks.
Secure copper tubing to refrigerator cabinet with a "P"
clamp.
B @
@
C
D i
E i
Complete the Installation.
Electrical Shock Hazard
Plug into a grounded 3 prong outlet.
Do not remove ground prong.
Do not use an adapter.
Do not use an extension cord.
Failure to follow these instructions can result in death,
fire, or electrica_ shock.
Plug in refrigerator or reconnect power.
Remove the Base Grille
1. Grasp the grille with both hands.
2. Pull the grille toward you.
Replace the Base Grille
1. See the markings on the inside of the base grille for proper
placement.
2. Align the grille mounting clips with the cabinet slots.
3. Push the grille firmly into the cabinet slots until it snaps into
place.
3=
A. Copper tubing
B. "P" clamp
C. Compression nut
D. Compression sleeve
'2 Water valve inlet port
Turn on water supply to refrigerator and check for leaks.
Correct any leaks.
Install and Remove Handles
Graphics are included later in this section.
1. Place handle on the door or drawer as shown.
2. Using a Phillips screwdriver, attach the handle to the door
with the handle screws.
3. Place the handle trim pieces on the handle ends as shown.
4. Using your hand, apply firm pressure on the face of the trim
and slide the trim piece toward the center of the handle.
5. To remove handles, reverse directions.
Remove Freezer Drawer
Graphics are included later in this section.
IMPORTANT: Two people may be required to complete this
procedure.
1. Open the freezer drawer to full extension.
2. Remove all articles from baskets.
3. Pull the upper wire basket out to full extension and lift out to
remove.
4. Lift lower basket straight up and out to remove.
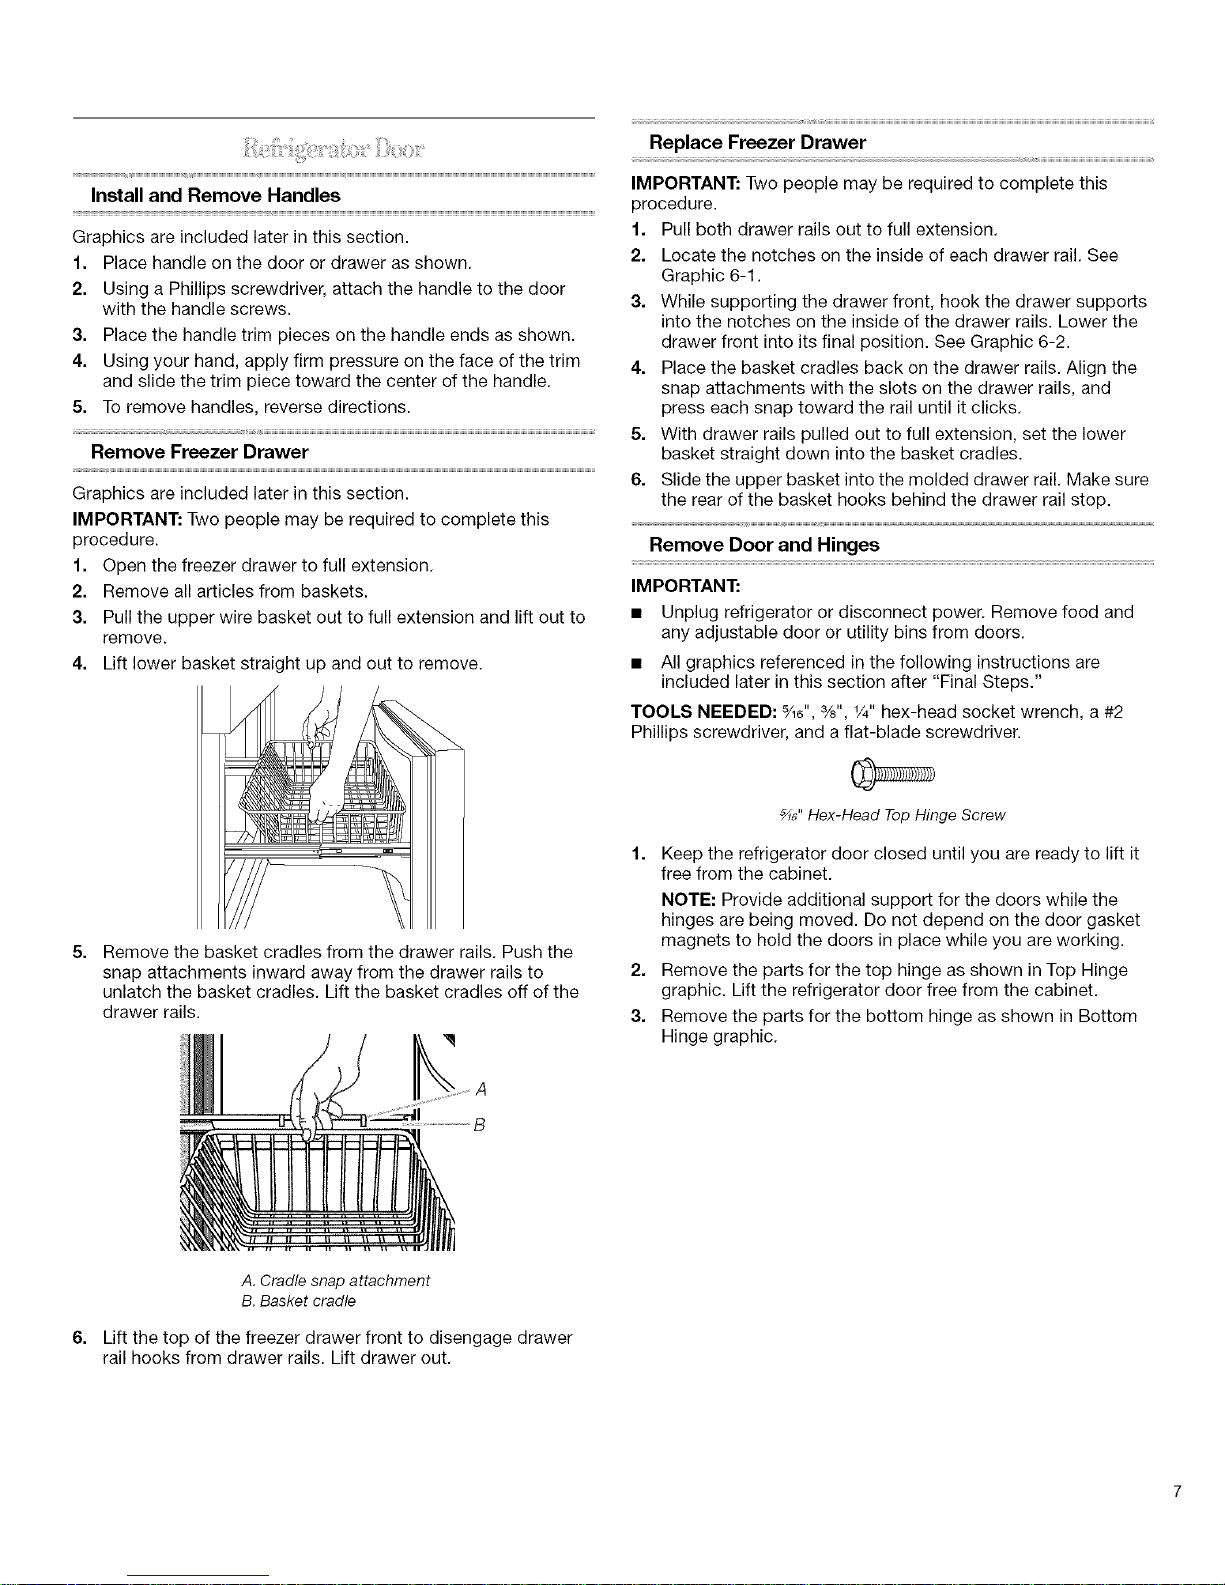
5= Remove the basket cradles from the drawer rails. Push the
snap attachments inward away from the drawer rails to
unlatch the basket cradles. Lift the basket cradles off of the
drawer rails.
A
II
B
Replace Freezer Drawer
IMPORTANT: Two people may be required to complete this
procedure.
1. Pull both drawer rails out to full extension.
2. Locate the notches on the inside of each drawer rail. See
Graphic 6-1.
3. While supporting the drawer front, hook the drawer supports
into the notches on the inside of the drawer rails. Lower the
drawer front into its final position. See Graphic 6-2.
4. Place the basket cradles back on the drawer rails. Align the
snap attachments with the slots on the drawer rails, and
press each snap toward the rail until it clicks.
5. With drawer rails pulled out to full extension, set the lower
basket straight down into the basket cradles.
6. Slide the upper basket into the molded drawer rail. Make sure
the rear of the basket hooks behind the drawer rail stop.
Remove Door and Hinges
IMPORTANT:
• Unplug refrigerator or disconnect power. Remove food and
any adjustable door or utility bins from doors.
• All graphics referenced in the following instructions are
included later in this section after "Final Steps."
TOOLS NEEDED: 5/16",%", 1/4"hex-head socket wrench, a #2
Phillips screwdriver, and a flat-blade screwdriver.
_6" Hex-Head Top Hinge Screw
Keep the refrigerator door closed until you are ready to lift it
free from the cabinet.
NOTE: Provide additional support for the doors while the
hinges are being moved. Do not depend on the door gasket
magnets to hold the doors in place while you are working.
2. Remove the parts for the top hinge as shown in Top Hinge
graphic. Lift the refrigerator door free from the cabinet.
3. Remove the parts for the bottom hinge as shown in Bottom
Hinge graphic.
6=
A. Cradle snap attachment
B. Basket cradle
Lift the top of the freezer drawer front to disengage drawer
rail hooks from drawer rails. Lift drawer out.
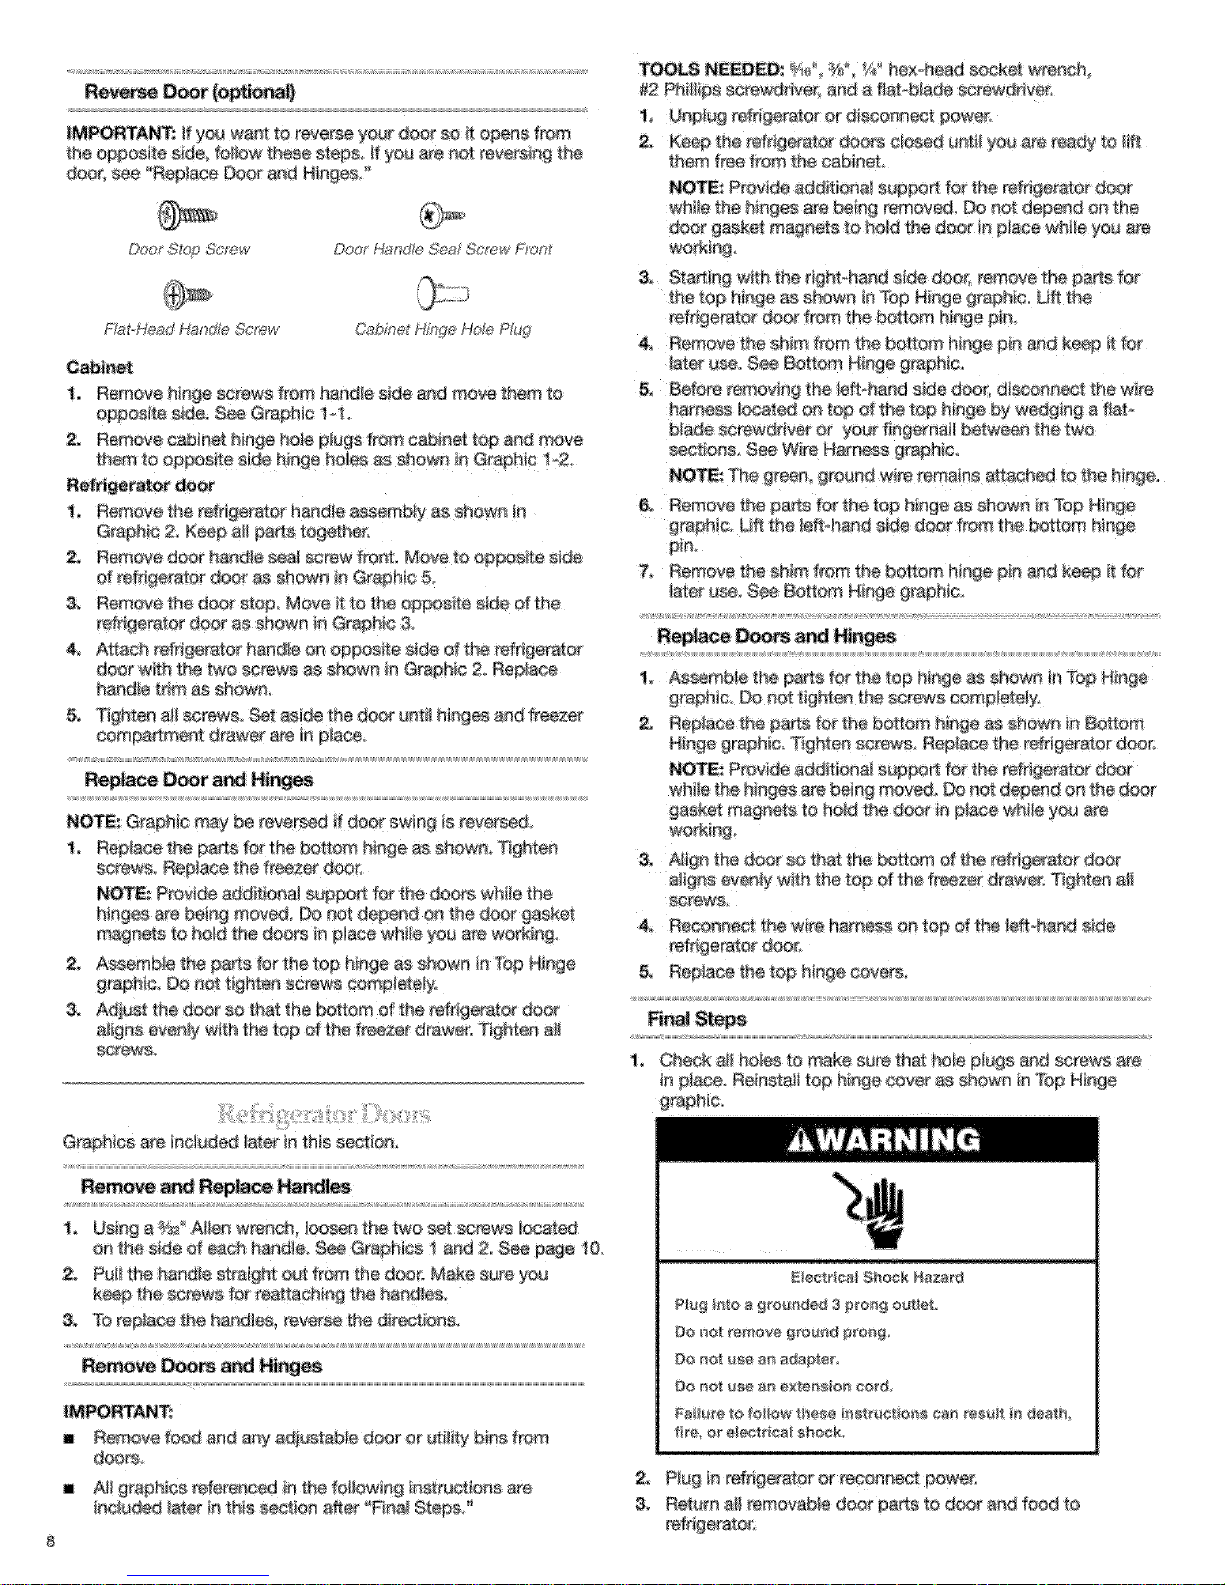
_MF_,,.-RTANT:ifyo#w_q_torever_yourdoorso_1[opensfrom
theopposites_defo{bw_n÷sesteps,gyou&re_of:re_ers[ngthe
dc_35Me_'ReplaceDoora_dHinges'
{_o_ Sto_ Screw
Dos Hand@ Seat Screw Fron_
FtaYHead Ha_0%_'$c_ew Caeir_etHff_gsHeM Peg
Cabinet
. Remove h/n_ screws from handle side ned reeve them 11o
opposite s_e. _e Graphic 14.
2. Remove cabin@ hinge hob plu#s from ca_net top and move
them to opposite s!de hing e horse as shows _eGraph] c !-2,
I, Remove the refrig_ator handIe a_mbly as shows _r_
Graph_ 2 Keep a_ parrs to_her:
2, Remove door ha#d_e sea_screw tro_t Move to opposite si_
d rator _ot as shown In Graphic 5
& Remove Shedoor stop Move it to the _ppoeite s_de of the
refrigerator d_r as show# in GrapNc 3
& Attedn refrigerator handle o_ opposite s_de of the refrigereJ_
d®r with the two screws as _wn #) Graphic 2, Repine
handle tr_m _s shews,
& Tb_hte_ a_iscrews Set aside the door an1_ hinges and fr_er
corn drawer are i_ pine&
D._r and Hi_
NO_: Graphic may be reversed ff deer swieg _sreve_s_
t, Replace the partsfor the bo_on_ hinge as shown_ Tidnten
Re,ace the fr_zer door_
NO_ Prosi_ additional suppo_ f_o the do_s while the
hinges are beln_ moved, Do no_depend o_ the door gasket
ma9nets to ho_d the doors m piece whiIe you are working
2. Assembb the pa_s for the top h!#ge as _how# in _ H_nge
graphic Do #st light_ screws comp_e_y_
3. Adj#_ the d_r so _at _he bottom of the refdgerat_ door
a_igns e_y with the top dttle f_eeze_drawer. Tighfee a}_
_rews_
Graphics are Included _t_ te this section,
s
a_ Har._les
1, Us}he a _ AJbn wrench, bosses the two setscrews
en the s_de d each handle. S_ Gr_@hics ! and 2, 8_ page t&
2. PuI_the b_ndle _raigh_ out from the doer. Make sure you
k_p the earew_ for reattachlng the handles
& _o top}ace the handE_, reverse _he
Remove IC_rs a_ Hinges
IMPORTANT:
= food and any e door or uti#ty bi:nefrom
doors_
• _! graphics referene_ in the fotbrw_ng in_ru_/_oes are
lr_slud_ _ater t_}this _et©n aft_ "Real Steps/_
TOOLS NE_D: -,_ FZ'hex-head socket wrench
#2 Phil! os screwor_ve_ and a flat-blade Screwdriv_
I. Uep_ug reffigere3or or d{sooeeeot _owe_
2. Keeo the r_r_ _era_or ooo_ cbs_d unto you are ready to lift
t_em free from #_e cab_neL
NOT[: Provide additiona_ s_{osxs_ for the refrigerator o_y
while 1theh_R@ee are h_iflq remov_ Do not deeend o_ tr
door gas_te'I maQi lets to hsldthe ttoof _ place while _o_ are
& Sta_e_ w_ththe _ght_haed side door remove me par_s ro_
Teetop _sp_e _ saown a_Top H_ge #raph_C Uf_ the
refr_erator door from the bottom h_ege_{a
4, Remove the shk_ from lee bott_ hlege pie and ka_p # for
_ater use. See Bottom Hiege 9_aphio.
& Before removing the l@fl._hands_e doe_ dk_;oneect the w_re
harness _ocat_ o_ too of the to;3 hinge by wedging a t_ato
blade screwenv_ o¢ your fingernail betweee the two
sections. See W}re graphic.
NOT_: The greee, greunc_ ve_ remains a_taeht_<tto the hinge,
6. Remove lee carts to_ t_e too h_ege as _hO_V_r__eTOp Hinge
grsomc. L_ttthe le_t4_an_ d_e door' fr_ the hot[tom h_h_e
7. Remove the sh{m h'orn the bet;ore n}_e pin and k_ep it for
later use See Be#ore H_nge £_apl'llc
_s a_ Hip_
t A_ereM_ th_ p_ts for the _o_ hinge a_ £nown _nTop Hinge
graphic. Do not t_gbten _e screws como_ete_v_
2. Re,ace the pmls for'tee bottom _nge as shown _e_ttom
H_ege graphic. T_gh_ee _r_s. Replace me remgerator door
NOTF..tProvide mdd#_onsl m_s_ri f_ the refagera_or seer
wh_lethe hinges are being moved. Do not depend Or}the door
gasket to ho_ the dc_r in ol_e while yogaare
wod_ing,
A_ge the door so that the bottom Ot the regenerator d_r
a_gns evenly with the top of the drawer. Tighten m_
S_tews
_. Re¢oh_eeet tee w_e nareess oe to_ of the/eftoha_d side
roe_gerator r_oo_
/5. Replace the t_ h_ngecover&
_1. Check all hoJles to ma_e sere mat bd3_eplL_S and screws a4"e
in o/ace. £einsta_ top hi_ge cover as s_wn in To# Hi_e
far, hie.
2, Plug inrefrigerator or r_enneet power,,
& Ret_m a_ removabb doer pa_s to door a_d food t_
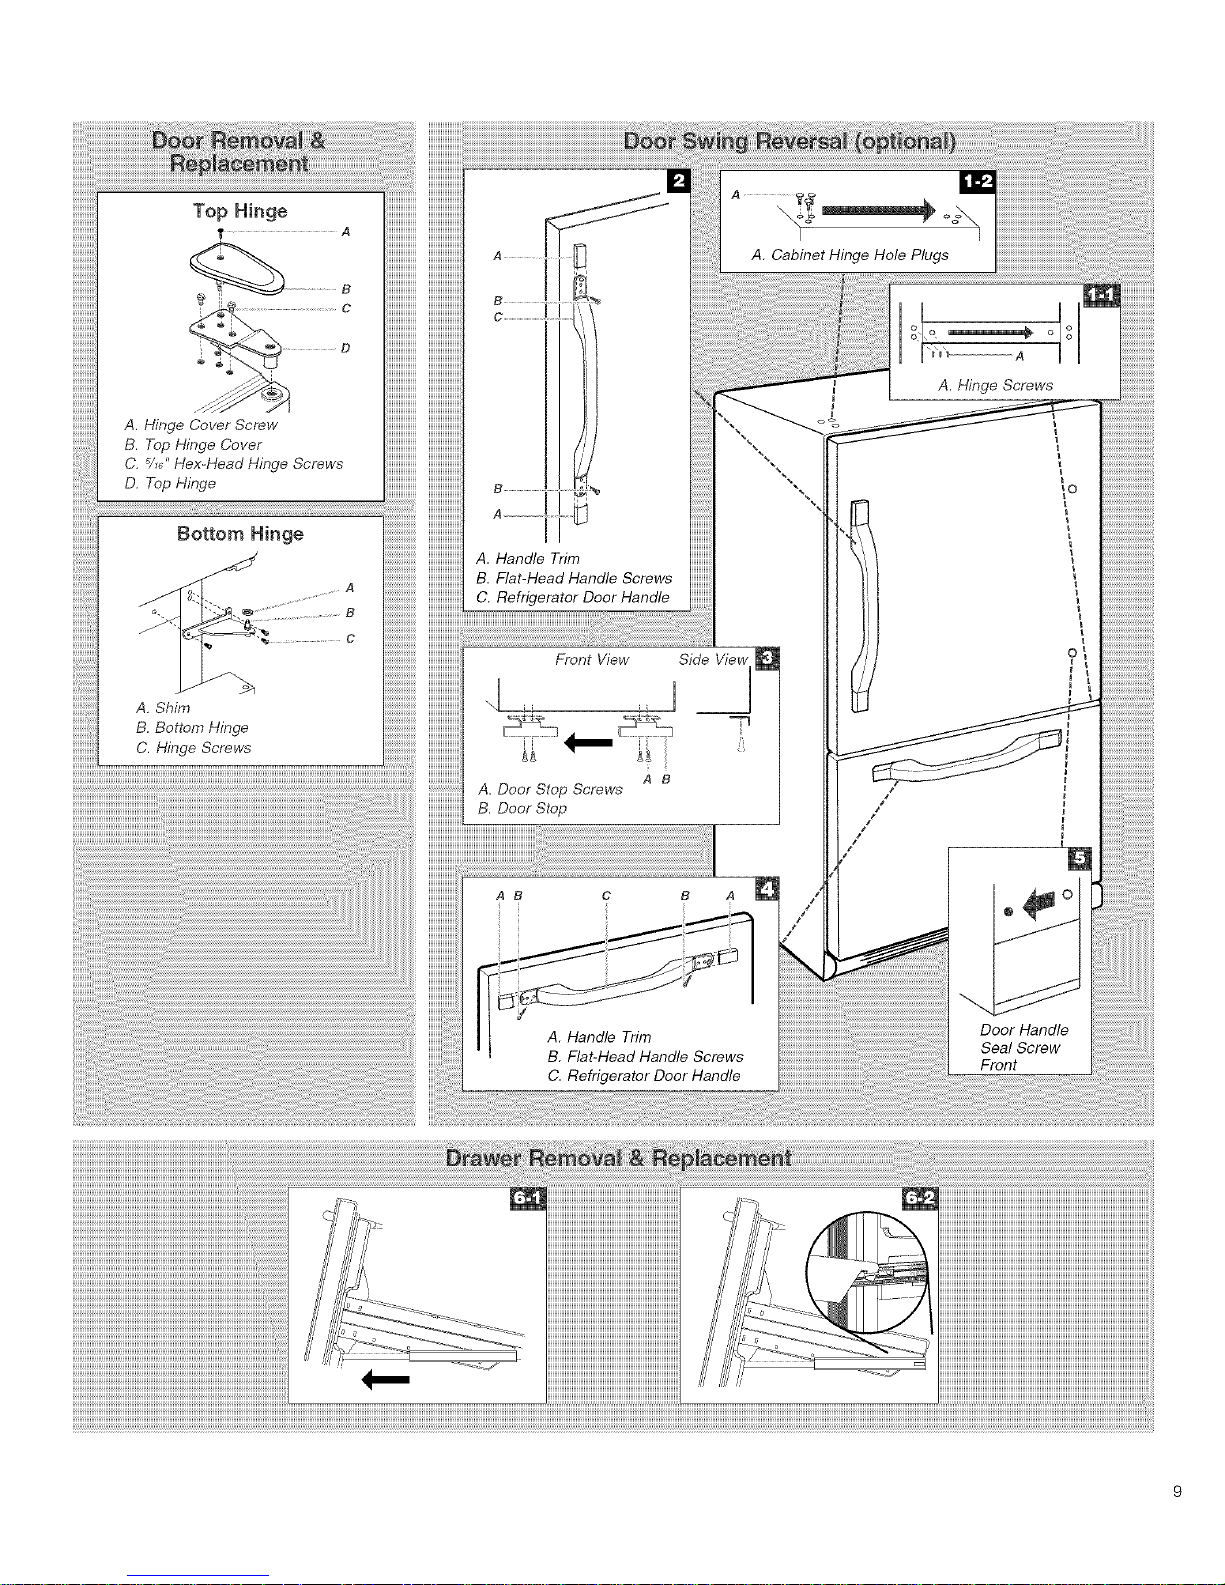
A. Hinge Cover Screw
B. Top Hinge Cover
C. %_"Hex-Head Hinge Screws
O. Top Hinge
Bottom Hinge
• "'2"- . _ ....................... B
c
A. Shim
B. Bottom Hinge
C. Hinge Screws
A. Handle Trim
B. Flat-Head Handle Screws
C. Refrigerator Door Handle
Front View Side
A B
A. Door Stop Screws
B. Door Stop
Seal Screw
Front
Opening and Closing Doors
There ate two refrigerator
compartment doors The doors can De
DPer_ and closed either seoarate_y
Dr[ogether There ts a radically*hinged
_ea_on the _eftrdr!gerator door,
mWhen the l_ft side door is o_ned
t_e hinged sea_automatically folds
inward so that it is out of the way,
lWhen both doors are c_o_d the
n_ngeosea_automaticaJ[y
forms a seal between the two dO0_
\
\
10
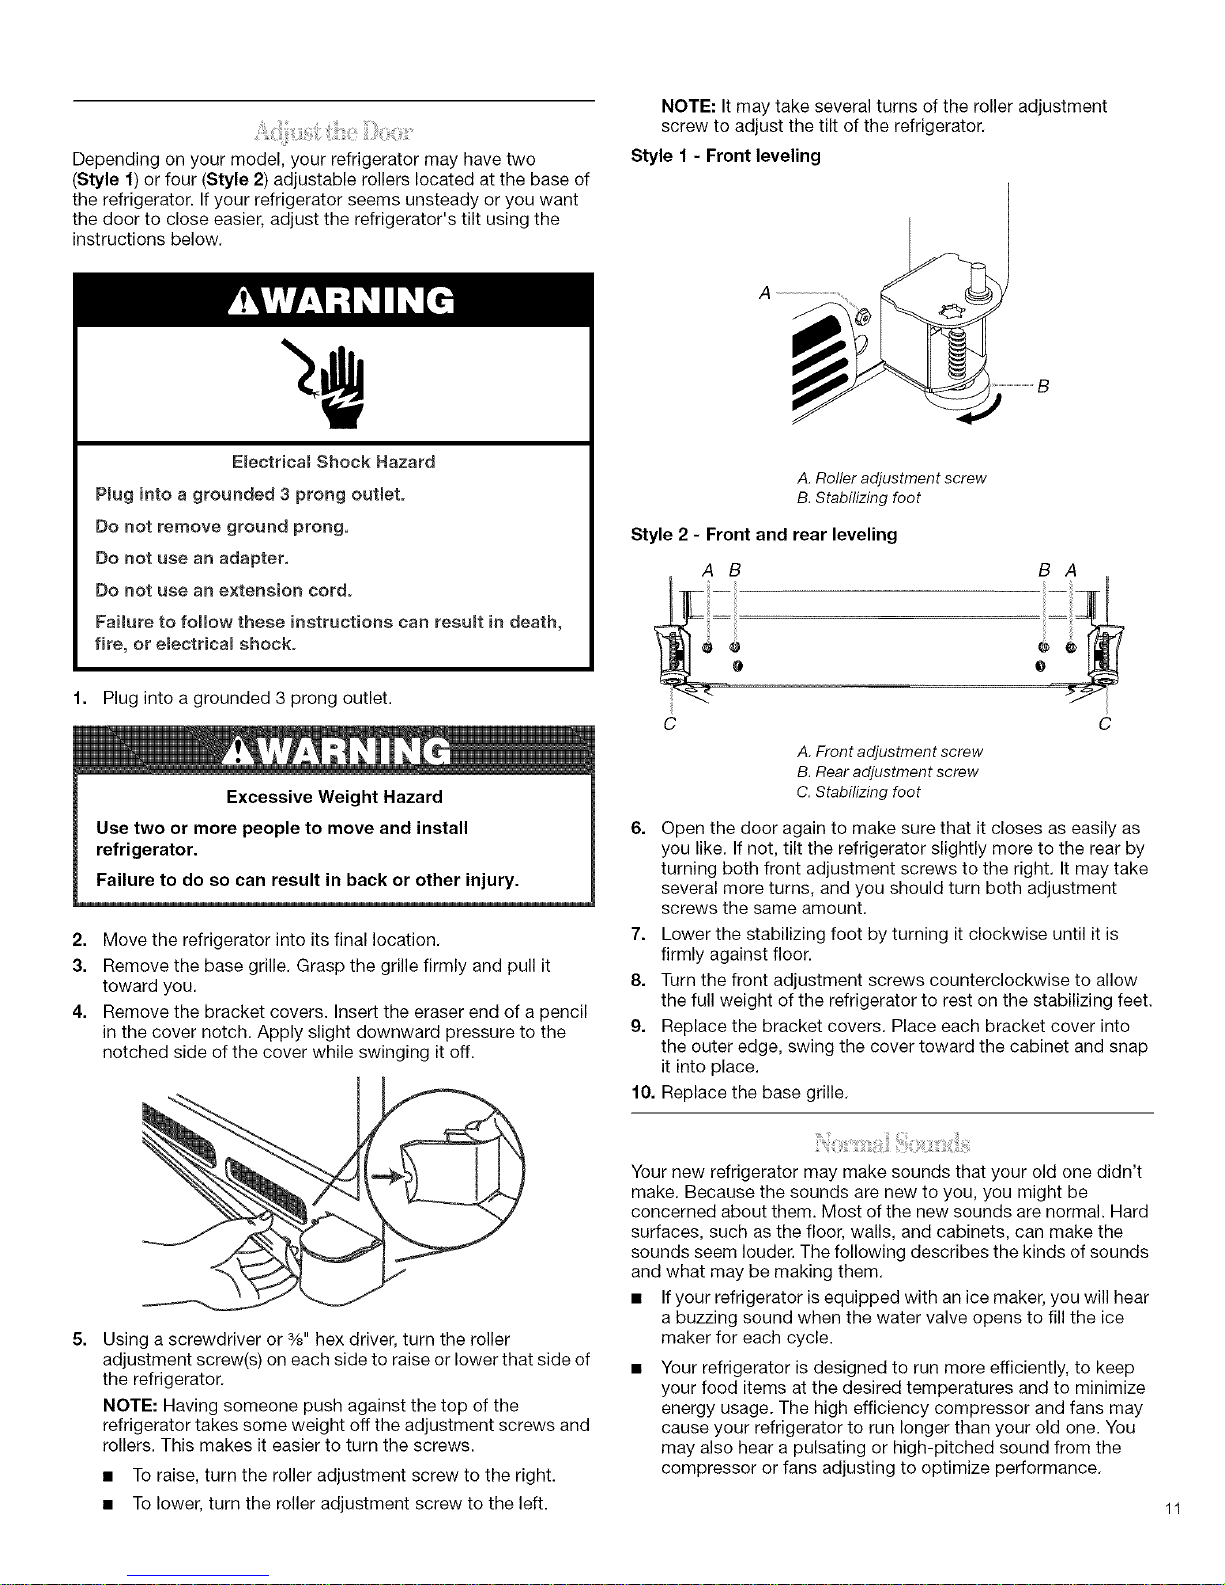
Depending on your model, your refrigerator may have two
(Style 1) or four (Style 2) adjustable rollers located at the base of
the refrigerator. If your refrigerator seems unsteady or you want
the door to close easier, adjust the refrigerator's tilt using the
instructions below.
NOTE: It may take several turns of the roller adjustment
screw to adjust the tilt of the refrigerator.
Style 1 - Front leveling
Emectdcal Shock Hazard
Pmuginto a grounded 3 prong outlet.
Do not remove ground prong.
Do not use an adapter.
Do not use an extension cord.
Failure to follow these instructions can resumt in death,
fire, or eJectdcal shock.
1. Plug into a grounded 3 prong outlet.
Excessive Weight Hazard
Use two or more people to move and install
refrigerator.
Failure to do so can result in back or other injury.
2. Move the refrigerator into its final location.
3. Remove the base grille. Grasp the grille firmly and pull it
toward you.
4. Remove the bracket covers. Insert the eraser end of a pencil
in the cover notch. Apply slight downward pressure to the
notched side of the cover while swinging it off.
5=
S
Using a screwdriver or %" hex driver, turn the roller
adjustment screw(s) on each side to raise or lower that side of
the refrigerator.
NOTE: Having someone push against the top of the
refrigerator takes some weight off the adjustment screws and
rollers. This makes it easier to turn the screws.
• To raise, turn the roller adjustment screw to the right.
• To lower, turn the roller adjustment screw to the left.
A. Roller adjustment screw
B. Stabilizing foot
Style 2 - Front and rear leveling
A B
C
A. Front adjustment screw
B. Rear adjustment screw
C. Stabilizing foot
B A
C
6. Open the door again to make sure that it closes as easily as
you like. If not, tilt the refrigerator slightly more to the rear by
turning both front adjustment screws to the right. It may take
several more turns, and you should turn both adjustment
screws the same amount.
7. Lower the stabilizing foot by turning it clockwise until it is
firmly against floor.
8. Turn the front adjustment screws counterclockwise to allow
the full weight of the refrigerator to rest on the stabilizing feet.
9. Replace the bracket covers. Place each bracket cover into
the outer edge, swing the cover toward the cabinet and snap
it into place.
fg. Replace the base grille.
Your new refrigerator may make sounds that your old one didn't
make. Because the sounds are new to you, you might be
concerned about them. Most of the new sounds are normal. Hard
surfaces, such as the floor, walls, and cabinets, can make the
sounds seem louder. The following describes the kinds of sounds
and what may be making them.
• If your refrigerator is equipped with an ice maker, you will hear
a buzzing sound when the water valve opens to fill the ice
maker for each cycle.
Your refrigerator is designed to run more efficiently, to keep
your food items at the desired temperatures and to minimize
energy usage. The high efficiency compressor and fans may
cause your refrigerator to run longer than your old one. You
may also hear a pulsating or high-pitched sound from the
compressor or fans adjusting to optimize performance.
11
You may hear the evaporator fan motor circulating air through
the refrigerator and freezer compartments. The fan speed
may increase as you open the doors or add warm food.
Rattling noises may come from the flow of refrigerant, the
water line, or items stored on top of the refrigerator.
Water dripping on the defrost heater during a defrost cycle
may cause a sizzling sound.
As each cycle ends, you may hear a gurgling sound due to
the refrigerant flowing in your refrigerator.
Contraction and expansion of the inside walls may cause a
popping noise.
You may hear air being forced over the condenser by the
condenser fan.
You may hear water running into the drain pan during the
defrost cycle.
REFRIGERATORUSE
In order to ensure proper temperatures, you need to permit
airflow between the refrigerator and freezer sections. As shown in
the illustration, cool air enters the freezer section through vents in
the rear and top. The air flows forward through the freezer section
and recirculates under the freezer floor. Cool air enters the
refrigerator section through the top, flows down and across
shelves to the doors and recirculates to return air vents at the
bottom.
Do not block any of these vents with food packages. Ifthe vents
are blocked, airflow will be prevented and temperature and
moisture problems may occur.
IMPORTANT: Because air circulates between both sections, any
odors formed in one section will transfer to the other. You must
thoroughly clean both sections to eliminate odors. To prevent
odor transfer and drying out of food, wrap or cover foods tightly.
)
The temperature controls are located at the top front of the
refrigerator compartment.
For your convenience, your refrigerator and freezer controls are
preset at the factory. When you first install your refrigerator, make
sure that the refrigerator and freezer controls are still preset to the
recommended setting as shown.
Recommended Setting "4"
®0® ®0@
co_, FREEZER CO(D_R Recoll/mel_dedSettings:4 coo REFRIGERATOR COtDE_
ColciestSettlngs: 7
IMPORTANT:
• Toturn your refrigerator off, press the freezer down arrow
touch pad until a dash (-) appears in both the refrigerator and
freezer displays. Neither compartment will cool.
The recommended settings should be correct for normal
household refrigerator use. The controls are set correctly
when milk or juice is as cold as you like and when ice cream
is firm.
The refrigerator control adjusts the refrigerator compartment
temperature. The freezer control adjusts the freezer
compartment temperature. The temperature control range for
each compartment is 1 through 7 (coldest).
• Wait 24 hours for your refrigerator to cool completely before
adding food. If you add food before the refrigerator has
cooled completely, your food may spoil.
NOTE: Adjusting the Refrigerator and Freezer Controls to a
higher (colder) than recommended setting will not cool the
compartments any faster.
• If the temperature is too warm or too cold in the refrigerator or
freezer, first check the air vents to be sure they are not
blocked before adjusting the controls.
Adjusting Controls
If you need to adjust the temperature in either the refrigerator or
freezer compartment, use the settings listed in the chart below as
a guide.
Press the up or down arrow touch pads to adjust the
temperature. Except when starting the refrigerator, do not adjust
either control more than one setting at a time. Wait 24 hours for
the temperature to stabilize between adjustments.
i
CONDITION/REASON: ADJUSTMENT:
REFRIGERATOR too warm Adjust REFRIGERATOR
- Door opened often, large amount or TEMPERATURE
of food added or room Control one setting
temperature very warm higher
FREEZER too warm/ice not made
fast enough
- Door opened often, or large
amount of food added or very cold
room temperature (can't cycle
often enough)
Adjust FREEZER or
TEMPERATURE Control
one setting higher
- Heavy ice usage
12
2_
REFRIGERATOR {co eeld
Co.role no_setcorrectlyfor
Ad_usfREFRIGERATOR:
OrTEM_RATURE
|owe_
FREEZER toe cold
- Contro4a not _f corr_tiy for
your coqditiens
Adiusf FREEZER or
TEMPERATURE Confrot
P!e_e _ead before using the water s:ystem._
lmmediafeiy after tnsta!!atlon, foljow tt_ steps betow to make
esre that the water sysfem _s_opedy flu_,
1. Turn off the ice _ker by epe_l_ the freezer do_r and !#t_ng
up the wire arm as shown,
[nstail the i_edot water fire|: The Interfe_ water _tlterresenting
bracket is !_eted oa the _eft side wa/_ of the refr_geraIo_
compa_meeL
NOTE: Do not; nee with water _at is _ierobiolegica!i'y
unsafe or of _nk_own quarry withO_ adequate
d_siefec_n before _ after _e system, Systems ce_fied
f_ cyst red_tion may be _a_ on d}siafeeted waters _hat
m_ contain Ititerable cyst.
= Remove btue bypass _ap and re_ain for iafer use,
Careful!y r_ove tb_ in,odor water _it_e_from its
packaging, Remove _he sealing label from the end of the
fi_er a_d ineed if into the fiRe_head_
Ge_y rotate the filter sb#kwlse enfl,_it stops, Then s_ap
the fi_ter cover closed
& Turn o_ the ice maker by _peni_g the freez_ _doo__and
!owering the wire shuts# arm as shown, Pt_se ref_ fo the
"ice Maker" section for f_her Instructions e_ the operafien
Allow 24 hours to produce the first batch of ice.
Disc&_ fhe first throe belches of ice p_duc_
t t t t i ..............................
Important i_formatioe to know about g_ass ehe_ves
and covers:
Do r_ot ck_an glass she_ves o_'covers with warm water when
they are co_d. Shetves and covers may brea_ f exposed to
sudden temperature cha_}ges or repast such as bumping
_or your protection, tempered giass s designed to shatter
_sto many sinai pebble_-size p e\ces. This is normal G_ass
she yes and covers are heavy Use specia_ care when
remov ng them to avod impact from @'opp ng
The she_vesinyour refrigerator areadjustable to meet you_
Stork_g sire#at food itemstegeiher in your _e_gePaf_' and
adjus#ng th_ she!yes to fit dlffer&qt heights of Items w;_tmake
f_ding the exact item you want _s_er_ _fwi_ also reduce the
amount of time the refrigerator d_r is op_ and sese energy,
Toa_ide out she}_; ge#f_y pefi _ro_t _ shelf toward you_
Toai_e in sh_ff push eheif in untii if steps°
&
Fi#sh _he wete_ syst_ by dis_esing and discarding 2
3 9aL (8 'to I2 L) ef water. Rushin_the syst_ Wi!_take
a_roximafe_y 6 to 7 mi#utes and will he_pc_ear e}r from the
_lne.Add#Jane] fl_shin9 ma_ be required in some houeeh®Ids,
NOTE: AS air iS from _he _,_em e_f_ may spL._[out
inspe_ the filter s_!stem for wa£ar leaks, If you see wa£e_
leaks, nee the Troubi_hooting section.
_el,_ and S_ Fra_
Te and Re_ce a _helftFrame,,
!, Remove the s by tilti_ _tup ef the front and _ifting it
out of the slqeif supports
2. fhe _e!f/fr_ by guiding the rear shelf hooks _oto
the sheff suppoAs Titt the front d the she!f up _ett! rear' shelf
hooks drop _e'tethe shetf s_pports
& Lower the fr_t of the shetf er_ #_eck to make sure that _he
she_fis _curety' tn positlo_
13
'¸
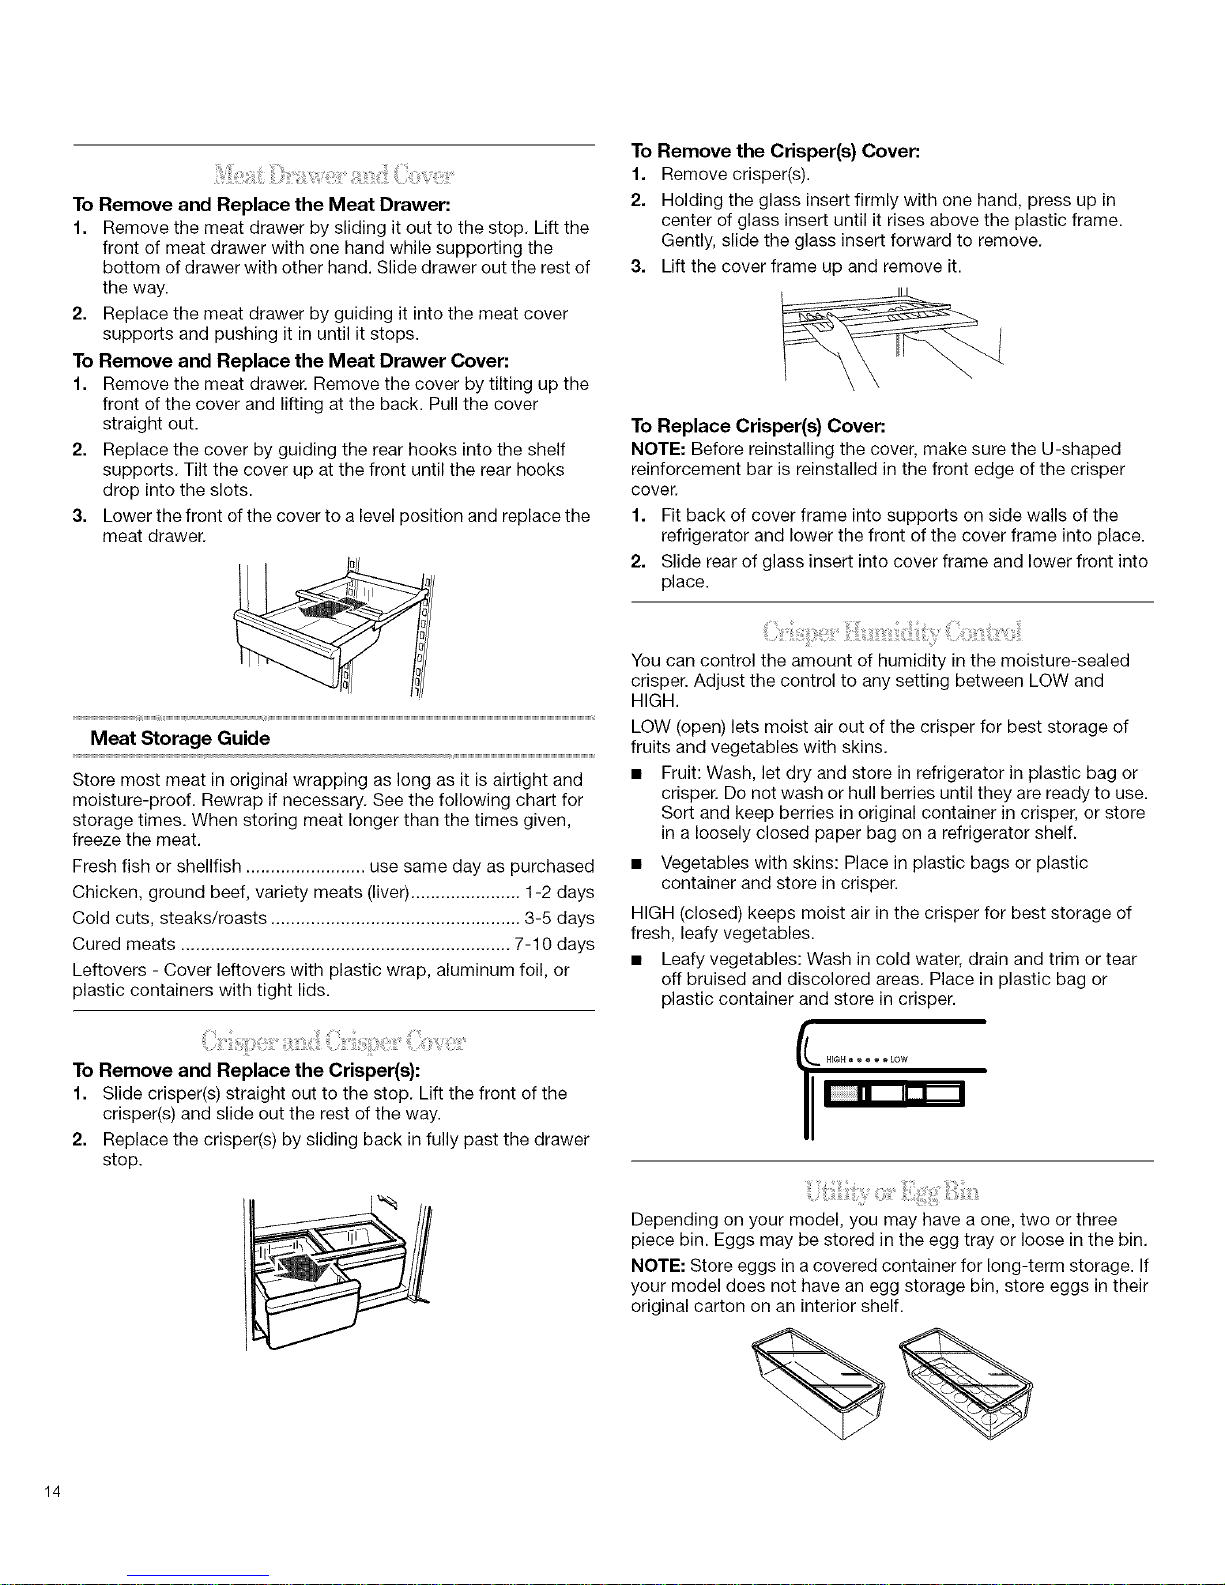
To Remove and Replace the Meat Drawer:
1. Remove the meat drawer by sliding it out to the stop, Lift the
front of meat drawer with one hand while supporting the
bottom of drawer with other hand. Slide drawer out the rest of
the way.
2. Replace the meat drawer by guiding it into the meat cover
supports and pushing it in until it stops.
To Remove and Replace the Meat Drawer Cover:
1. Remove the meat drawer. Remove the cover by tilting up the
front of the cover and lifting at the back. Pull the cover
straight out.
2. Replace the cover by guiding the rear hooks into the shelf
supports. Tilt the cover up at the front until the rear hooks
drop into the slots.
3. Lower the front of the cover to a level position and replace the
meat drawer.
l
i
Meat Storage Guide
Store most meat in original wrapping as long as it is airtight and
moisture-proof. Rewrap if necessary. See the following chart for
storage times. When storing meat longer than the times given,
freeze the meat.
Fresh fish or shellfish ........................ use same day as purchased
Chicken, ground beef, variety meats (liver) ...................... 1-2 days
Cold cuts, steaks/roasts .................................................. 3-5 days
Cured meats .................................................................. 7-10 days
Leftovers - Cover leftovers with plastic wrap, aluminum foil, or
plastic containers with tight lids.
To Remove and Replace the Crisper(s):
1. Slide crisper(s) straight out to the stop. Lift the front of the
crisper(s) and slide out the rest of the way.
2. Replace the crisper(s) by sliding back in fully past the drawer
stop.
To Remove the Crisper(s) Cover:
1. Remove crisper(s).
2. Holding the glass insert firmly with one hand, press up in
center of glass insert until it rises above the plastic frame.
Gently, slide the glass insert forward to remove.
3. Lift the cover frame up and remove it.
To Replace Crisper(s) Cover:
NOTE: Before reinstalling the cover, make sure the U-shaped
reinforcement bar is reinstalled in the front edge of the crisper
cover.
1. Fit back of cover frame into supports on side walls of the
refrigerator and lower the front of the cover frame into place.
2. Slide rear of glass insert into cover frame and lower front into
place.
You can control the amount of humidity in the moisture-sealed
crisper. Adjust the control to any setting between LOW and
HIGH.
LOW (open) lets moist air out of the crisper for best storage of
fruits and vegetables with skins.
• Fruit: Wash, let dry and store in refrigerator in plastic bag or
crisper. Do not wash or hull berries until they are ready to use.
Sort and keep berries in original container in crisper, or store
in a loosely closed paper bag on a refrigerator shelf.
• Vegetables with skins: Place in plastic bags or plastic
container and store in crisper.
HIGH (closed) keeps moist air in the crisper for best storage of
fresh, leafy vegetables.
• Leafy vegetables: Wash in cold water, drain and trim or tear
off bruised and discolored areas. Place in plastic bag or
plastic container and store in crisper.
Depending on your model, you may have a one, two or three
piece bin. Eggs may be stored in the egg tray or loose in the bin.
NOTE: Store eggs in a covered container for long-term storage. If
your model does not have an egg storage bin, store eggs in their
original carton on an interior shelf.
14
The full.width temperatureocontroiled drawer can be used to
st_e !argo paAy trays, de{_items, or be>Jerages_ For stora_
flexibility the drawer _eateres a dMder and an adjustable
NOTE:: _ not place leafy vegetables in the temperatere_
_n_roiled drawe_ Colder temperatures could damage leafy
_w_ R_ova! and
Oe_ on your mod_ your _efdgerator mP;y h_ve one of two
drawer styles Follow th_ instructions for _he appropriate drawer
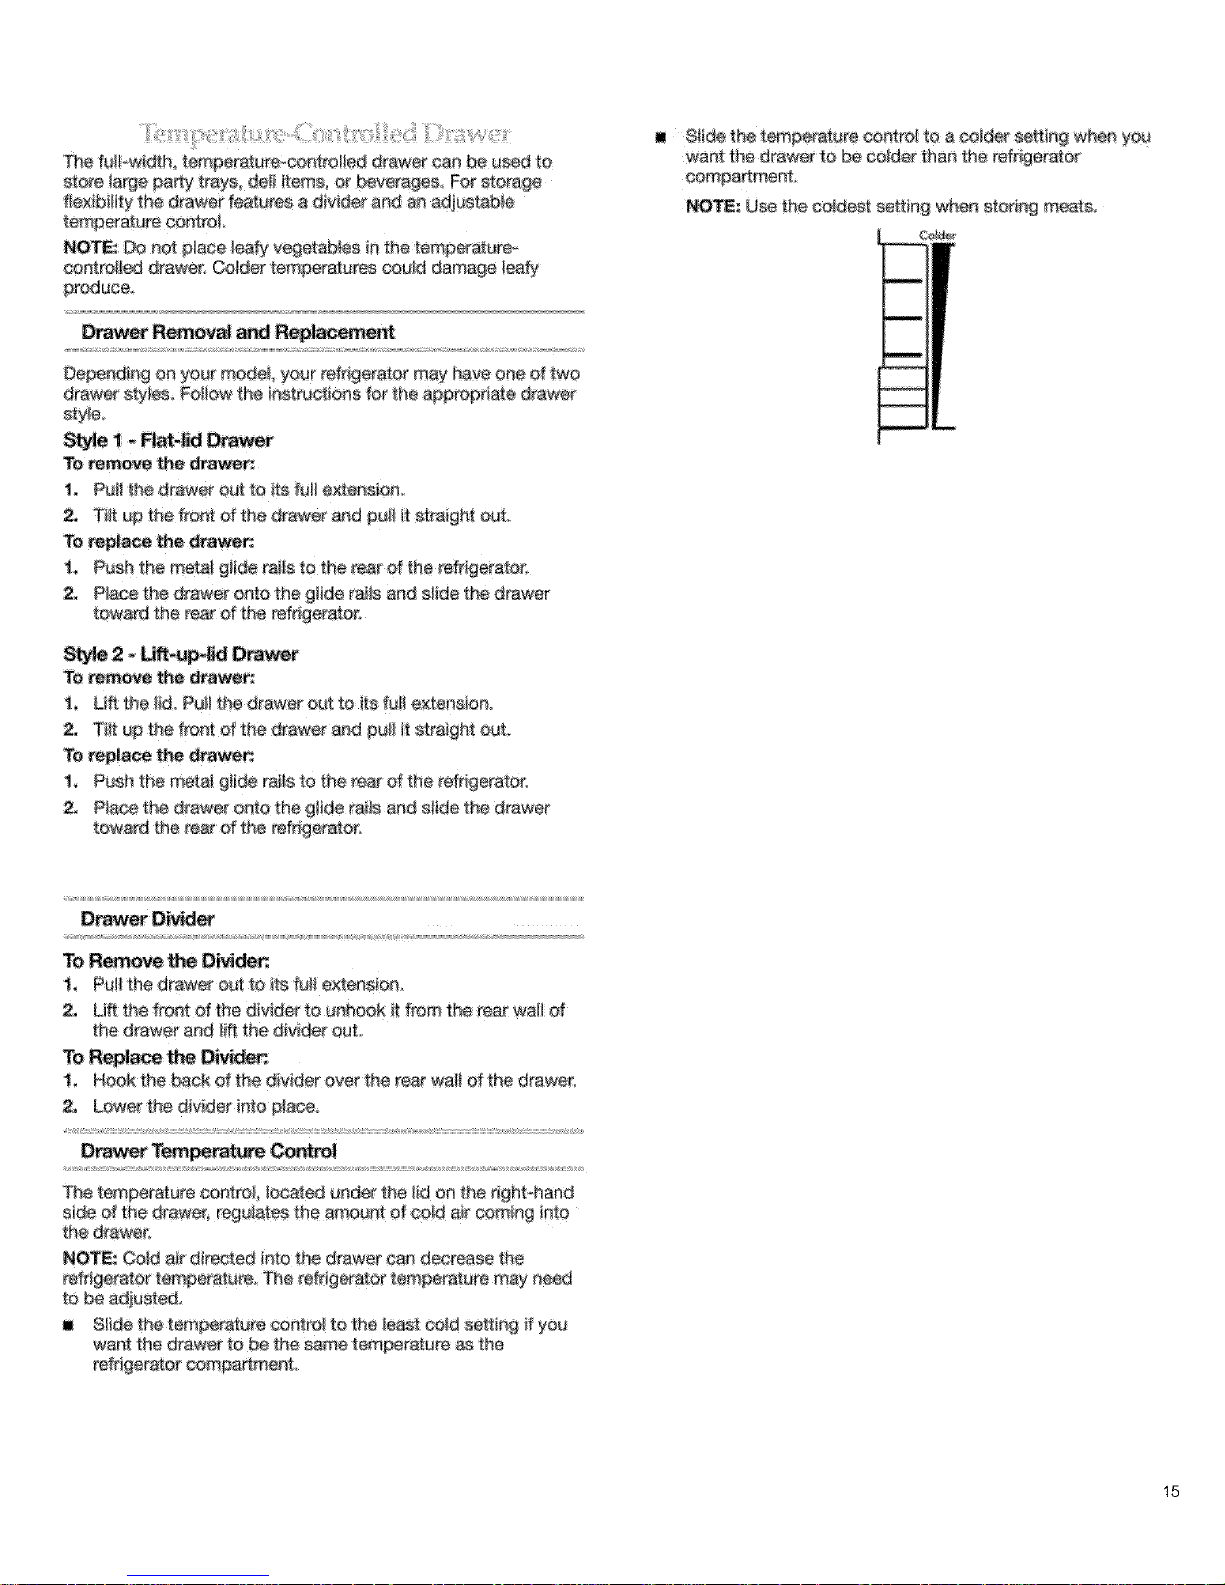
I 8tide th®tem_rature control to a colder setting when y_J
want the draw_ to _ co_der than the refrigerator
oompartment
NO_: Use the coldest setting when stod_g meats.
To remove _e drawn#
1, Pelf _he drawer Out to fts fall
2, Tiff up the front d _he drawer and pu_i _tstraight ou_
To repla_ [_e drawer:
1, Push the m_at gitde rails te the r_r of the rater.
2, P_ce the drawer onto the gli_ rai_sand ewe the drawer
toward £he _se_Of the refrigerator.
St_ 2 _ IM Orav_r
TO the drawer_
,, Uf_ the _id, Pu_ltha drawer eat to its fei_extension°
2. "T#I_p the f_nt of ti_e arid pu_l it straight out,
To _replaeethe _awe_
1_ Push the metal glide rails to t_e _ear of the refrigerator.
2, Pta_ th÷ drawer _qto the g!!de rai_s and s_tdethe drawer
toward the t_r of the refrige_tor:
To _he D_¢ide_
I_ Pu!;_the drawer ob__e its fu_ extension_
2_ U_ _e front d the divider to unhOOk it from the rear wall of
the drawer and dt the dMde_ OUL
I, Hook the beck of the r_vider over th_ rear wali Of the drawer_
2, Lowerthe die_er intop_ace.
Tern
The temp_ature controJ, located un_r fee lld on the nght_hand
side d the drawer, r_b_at_ the amount of co!d a_rcoming into
the drawe_
NOTEs Cord ak directed into t#e drawer can decrease the
refrigerator temperature, _e refrigerator _emperature may ne_
to be adiusted.
Slide the temperature coetroi to the least c_d setting # yo_
went the draw_ to be the same t_pe_atere as the
15
 Loading...