

Page 1

Service Manual
Manuals
Operator Manual
Aneroid Sphygmomanometers
PN 95P504 Rev A
Copyright 2000
Page 2

Welch Allyn Inc. Aneroid Sphygmomanometers Service Manual
Revision A
Revision History
Revision Section Date Author Description
A All 8/31/00 JDB Introduction of Aneroid Service
Manual
Welch Allyn Inc. Page 2 of 40
Page 3

Welch Allyn Inc. Aneroid Sphygmomanometers Service Manual
Revision A
Table of Contents
Section 1: General Information....................................................................................................................... 4
1.1 To Service Personnel ............................................................................................................................ 4
1.2 Tools and Equipment............................................................................................................................5
1.3 Test Specifications................................................................................................................................ 6
1.4 Test Equipment Bench Layout.............................................................................................................. 7
Section 2: Classic Pocket Aneroid Gauges ..................................................................................................... 8
2.1 Opening/Removing and Replacing Parts of the Pocket Gauge* ........................................................... 8
2.2 Calibration of the Pocket Gauge........................................................................................................... 9
2.3 Testing ................................................................................................................................................ 11
Section 3: Classic Hand Aneroid Gauge....................................................................................................... 12
3.1 Opening/Removing and Replacing Parts of the Hand Gauge*............................................................ 12
3.2 Calibration of the Hand Gauge ........................................................................................................... 13
3.3 Testing ................................................................................................................................................ 15
Section 4: Classic Wall and Mobile Aneroid Gauge..................................................................................... 16
4.1 Opening/Removing and Replacing Parts of the Wall and Mobile Gauge.* ........................................ 16
7670 series Wall and Mobile Aneroid. ................................................................................................. 16
Classic Wall and Mobile Aneroid......................................................................................................... 16
4.2 Calibration of the Wall and Mobile Gauge......................................................................................... 17
4.3 Testing ................................................................................................................................................ 19
Section 5: Economy Aneroid Gauge............................................................................................................. 20
5.1 Opening/Removing and Replacing Parts of the Economy Gauge*.....................................................20
5.2 Calibration of the Economy Gauge..................................................................................................... 21
5.3 Testing ................................................................................................................................................ 23
Section 6: Silver Ring Hand Aneroid........................................................................................................... 24
6.1 Opening/Removing and Replacing Parts of the Silver Ring ............................................................... 24
6.2 Calibration of the Silver Ring Hand Aneroid......................................................................................25
6.3 Testing of the Silver Ring Hand Aneroid............................................................................................ 27
Section 7: Pro Check Hand Aneroid............................................................................................................. 28
7.1 Opening/Removing and Replacing Parts of Pro Check Hand Aneroid............................................... 28
7.2 Calibration of the Pro Check Hand Aneroid.......................................................................................29
7.3 Testing of the Pro Check Hand Aneroid.............................................................................................31
Section 8: Pictures and Replacement Parts................................................................................................... 32
Section 8.1: Classic Pocket Aneroid Replacement Parts...........................................................................32
Section 8.2: Classic Hand Aneroid Replacement Parts.............................................................................33
Section 8.3: 767 Wall/Mobile Aneroid Replacement Parts....................................................................... 34
Section 8.4: Classic Wall/Mobile Aneroid Replacement Parts................................................................. 35
Section 8.5: Economy Aneroid Replacement Parts...................................................................................36
Section 8.6: Silver Ring Hand Aneroid Replacement Parts......................................................................37
Section 8.7: Pro Check Hand Aneroid Replacement Parts........................................................................ 38
Section 8.8: Welch Allyn Tycos Movement ............................................................................................. 39
Section 8.9: Welch Allyn S+K Movement................................................................................................40
Welch Allyn Inc. Page 3 of 40
Page 4

Welch Allyn Inc. Aneroid Sphygmomanometers Service Manual
Revision A
Section 1: General Information
1.1 To Service Personnel
The information contained in this manual is subject to change
without notice and should not be construed as commitment by
Welch Allyn Inc.
Welch Allyn Inc. assumes no responsibility for any errors that
may appear in this manual. If the product and/or its operation
varies significantly from any description herein, please contact
the
Welch Allyn Inc. Technical Service Center
800-450-9275
(828) 684-4895
Fax (828) 687-1002
Welch Allyn Inc.
95 Old Shoals Road
Arden, North Carolina 28704
USA
This product has been designed to provide a high degree of
safety and reliability. However, Welch Allyn Inc. can not
guarantee against: deterioration of components due to aging,
normal wear, tampering, and abuse.
Warning:
If in the course performing calibration or repair on the
gauge the device becomes inoperable and must be sent in to
the Welch Allyn Inc. Service Center, The warranty will
not
be
honored and you will be charge for all repairs.
Welch Allyn Inc. Page 4 of 40
Page 5

Welch Allyn Inc. Aneroid Sphygmomanometers Service Manual
Revision A
1.2 Tools and Equipment
The following is a list of the tools and equipment that is required to do
the repair and calibration of the aneroid gauges.
Tool Number Description
T106845A Calibration Tool
T105243A Pointer Removal Tool
T105243B Pointer Removal Tool
T107345 Span Wrench
T110657 Calibration Dial Adapter, Economy
T105721 Calibration Dial, Pocket and Hand Gauge
T112663 Calibration Dial, Walls and Mobiles
T106763 Calibration Stand (Wall Aneroid)
T112592 Calibration Dial (Silver Ring)
T105258 Wrench (Economy)
T108913 3/8” Open End Wrench
T108897 Movement Removal Wrench
T113265 Thumbscrew Wrench
T110543 Pliers to Grip Lure
T105644 Collet
T55804-1 Pocket Screw Cap Assembly
T108212 Economy Fixture
T107569 Hand Fixture
T74555 Pocket Fixture
T112655 Top Plate Wrench
T113249 Screw Cap Removal Tool
T112927 5/16” Open End Wrench
T112765 ¼” Open End Wrench
T34938 Pointer Block
T112511B Tweezers
T112726 Jewelers Screw Driver
T112595 Calibration Tool (Silver Ring)
“Disytest” Calibration Dial for Pro Check (Order From S+K)
T112833 Movement Removal Tool (S+K Movement)
T112653 Torque Wrench (S+K movement)
T112653A Adapter for Torque wrench (S+K Movement)
Test Equipment Description Other Tools Needed but
5088-01 Bulb and Valve
T112854 500cc Volume 1. Small Hammer
9585TPK4 “T” Fitting 2. 5/8” Socket
9586TPK4 “Y” Fitting 3. ½” Socket
97P24 Pneumatic Tubing (4ft.) 4. ¾” Open End Wrench
200-2000IN Netech Digital Pressure Meter 5. 9/16” - 24 Thread Tap
“or”
2270-01 Setra Digital Pressure Meter. 7. 7/16” - 36 Thread Tap
T111962A Tension Set Tool
T112459 Torque Screwdriver
T112459A Torque bit.
Welch Allyn Inc. Page 5 of 40
Not Provided By Welch Allyn
6. ¼” - 40 Thread Tap
Page 6

Welch Allyn Inc. Aneroid Sphygmomanometers Service Manual
Revision A
1.3 Test Specifications
The following are the test specification for the Welch Allyn
Tycos Aneroid Gauge:
1. The gauge will be accurate to within +/- 3 mmHg* at the
following test pressures:
a) 0 mmHg (pointer inside the oval/rectangle)
b) 60 mmHg
c) 150 mmHg
d) 200 mmHg
e) 300 mmHg
* This accuracy is based on the use of a calibrated digital pressure
meter. If using a calibrated aneroid or mercury column for measuring
the accuracy of the aneroid in question the resulting accuracy is +/- 6
mmHg.
Welch Allyn Inc. Page 6 of 40
Page 7
Welch Allyn Inc. Aneroid Sphygmomanometers Service Manual
Revision A
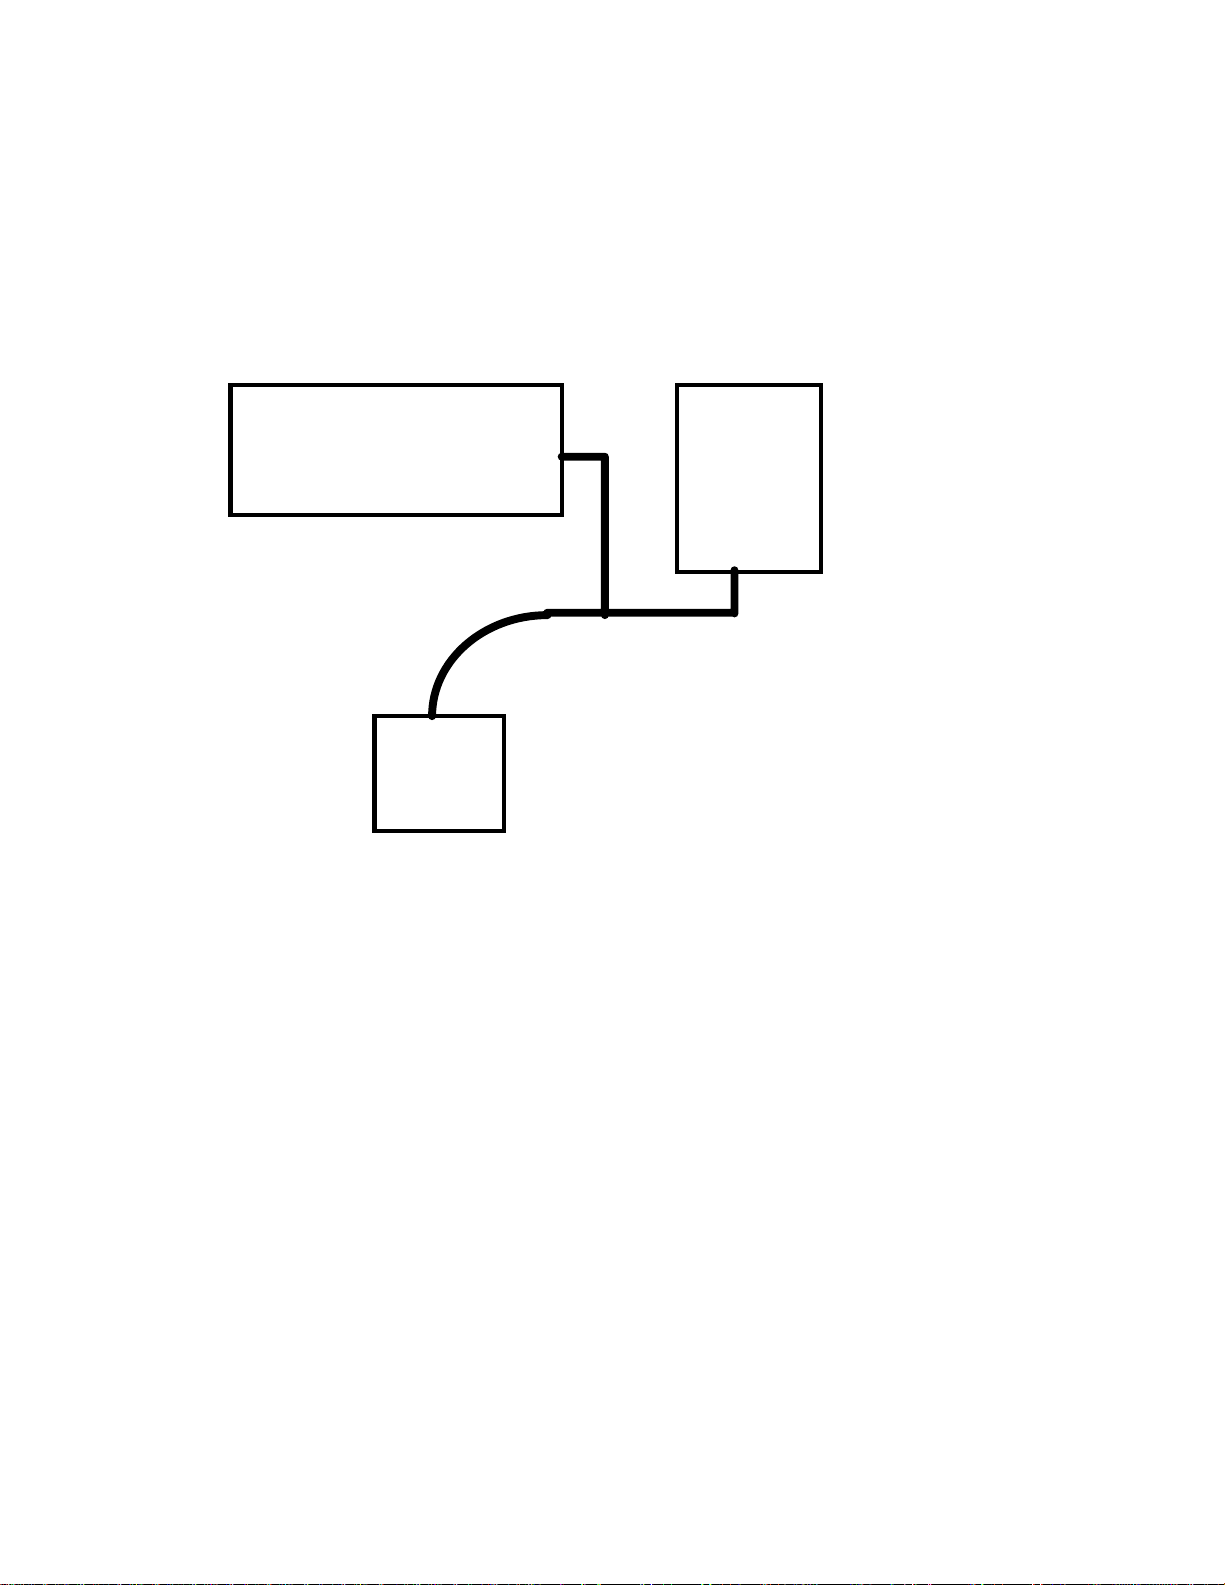
1.4 Test Equipment Bench Layout
500cc Volume Digital
Pressure
Meter
Gauge
Under
Test
Figure 1.5
Welch Allyn Inc. Page 7 of 40
Page 8

Welch Allyn Inc. Aneroid Sphygmomanometers Service Manual
Revision A
Section 2: Classic Pocket Aneroid Gauges
2.1 Opening/Removing and Replacing Parts of the
Pocket Gauge*
1. Place the pocket gauge into the Pocket Gauge Fixture (T74555).
2. Remove the bezel by unscrewing it from the case and aside.
Remove the crystal and aside.
3. Remove the pointer by using the pointer removal tool (T105243A).
4. Pry out the dial by using a small flat head screwdriver.
5. Remove the locking nut using the span wrench (T107345).
6. Remove the screw cap using (T113249) and remove the capsule.
Note:
7. Remove the 2 screws that are holding down the gauge movement
using T108897 and remove the movement.
the arm of the movement fits into the top of the capsule.
Reassemble in reverse order.
* - See section 8.1 for exploded view drawing for the Pocket Gauge.
Welch Allyn Inc. Page 8 of 40
Page 9

Welch Allyn Inc. Aneroid Sphygmomanometers Service Manual
Revision A
2.2 Calibration of the Pocket Gauge
1. Attach the pneumatic tubing of test equipment to the gauge.
2. Place gauge in to fixture (T74555)
3. Remove bezel, crystal, pointer and dial.
To set the tension:
4. Tighten all screws.
5. View sector gear and ensure proper position (i.e. right edge of sector gear
should align with mark on base of movement).
6. If sector gear not aligned properly, loosen the capsule nut using a 3/8”
wrench and adjust the sector gear by turning the capsule until sector gear is
in correct position per step 5. Tighten capsule nut.
7. Loosen sector stop lug and pull toward bottom of gauge.
8. Using your left index finger, push the sector gear all the way to the post and
hold that in position.
9. Place tension setting tool (T119628) onto pinion at the 9 o’clock position.
10. Rotate tool clock wise to the 3 o’clock position.
11. Release sector gear and continue rotation to the 6 o’clock position sector
gear should be moving during this step).
12. Bring lug back to correct position and lock into place.
To set the span:
13. Place Test Dial onto gauge. Place pointer onto pinion. Rotate dial until
pointer is at “0” at the bottom of the gauge.
14. Apply 320 mmHg to the Gauge.
15. Release pressure to 300 mmHg to the gauge.
16. If point is less than 300, Place the calibration tool (T106854A) into the radius
plate in slot above screw. Pull calibration tool toward bottom of gauge moving
the sector gear upward until pointer reached “300.” Release pressure and
check “0” point.
17. If point is greater than 300, Using the calibration tool (T106845A) positioned
between the sector gear and radius plate on the left of the movement, rotate
the tool clock wise until pointer is at “300” (this brings the radius plate down).
Release pressure and check “0” point.
18. If not at “0” upon release of pressure, rotate test dial until pointer is on the “0”
mark of test dial and re-apply 300 mmHg. Repeat steps 14-17 until span is
set.
19. Check for leak by pinching off the tubing from the test equipment while
pressure is on the gauge. There should be no visible leak.
Welch Allyn Inc. Page 9 of 40
Page 10

Welch Allyn Inc. Aneroid Sphygmomanometers Service Manual
Revision A
Check and finish calibration:
20. Remove the pointer and test dial, replace the gauge’s dial.
21. Place pointer onto pinion and resting in center of oval. Tap pointer with small
hammer slightly to secure.
22. Apply 320 mmHg to the gauge.
23. Release pressure to 300 mmHg and take readings here and at given points
(see section 1.3).
24. If pointer is greater than 300, pull pointer until you feel slight resistance
counter-clock wise, tap pointer with small hammer and recheck. Make sure
pointer returns to the oval each time. Repeat until satisfied.
25. If less than 300, rotate pointer 1 complete revolution clockwise until
resistance is felt. Push pointer a little farther and tap pointer with small
hammer and recheck. Make sure pointer returns to the oval each time.
Repeat until satisfied.
26. Place crystal and bezel back onto gauge and check.
Please see Section 8.8 for a drawing of the Welch Allyn Tycos Movement.
Welch Allyn Inc. Page 10 of 40
Page 11

Welch Allyn Inc. Aneroid Sphygmomanometers Service Manual
Revision A
2.3 Testing
1. Hook up the Pocket Gauge that needs to be tested to the
pneumatic tubing of the test equipment.
2. Apply 320 mmHg to the gauges.
3. Release the pressure to 300 mmHg on the digital pressure meter,
or a calibrated aneroid or mercury gauge.
Note:
The aneroid or
mercury gauge must be accurate to +/- 3 mmHg at the stated
target pressures using a calibrated digital pressure meter. If using
a calibrated aneroid or mercury column the accuracy must be +/6 mmHg.
4. Check reading of the pressure meter or gauge to that of the
Pocket Gauge under test. Refer to section 1.3 for specifications.
Welch Allyn Inc. Page 11 of 40
Page 12

Welch Allyn Inc. Aneroid Sphygmomanometers Service Manual
Revision A
Section 3: Classic Hand Aneroid Gauge
3.1 Opening/Removing and Replacing Parts of the Hand
Gauge*
1. Pull bulb off of valve body (48S95).
2. Place the Hand Gauge into the Hand Gauge Fixture (T107569).
3. Remove the bezel by unscrewing it from the case and aside.
Remove the crystal and aside.
4. Remove the pointer by using the pointer removal tool (T105243A).
5. Pry out the dial by using a small flat head screwdriver.
6. Remove the cover of the Hand Gauge by unscrewing the two
screws (9P2651) with a Phillips head screwdriver.
7. Loosen the locking nut (32P527) from the capsule and remove
both from the case.
8. Remove the 9P1799 screws from the case and movement and
remove the movement from the case.
9. Remove the Thumbscrew by using tool # T113265 (Thumbscrew
wrench) and turning the thumbscrew counter-clock wise.
10. Remove the Thumbscrew valve body (42P252) using a 5/8”
socket.
11. Remove the valve body (48S95) from the case using a 1/2”
socket.
Reassemble in reverse order
* - See section 8.2 for an exploded view drawing of the Hand Gauge.
Welch Allyn Inc. Page 12 of 40
Page 13

Welch Allyn Inc. Aneroid Sphygmomanometers Service Manual
Revision A
3.2 Calibration of the Hand Gauge
1. Attach the pneumatic tubing of test equipment to the gauge.
2. Ensure that the valve of the gauge is closed. Place gauge in to fixture
(T107569)
3. Increase pressure on the gauge to 250 mmHg. Allow the pressure to stabilize
for 15 seconds. Check leak and ensure that the leak is no greater than 3
mmHg in 15 seconds.
4. Remove bezel, crystal, pointer and dial.
To set the tension:
5. Tighten all screws.
6. View sector gear and ensure proper position (i.e. right edge of sector gear
should align with mark on base of movement).
7. If sector gear not aligned properly, loosen the capsule nut using a 3/8”
wrench and adjust the sector gear by turning the capsule until sector gear is
in correct position per step 5. Tighten capsule nut.
8. Loosen sector stop lug and pull toward bottom of gauge.
9. Using your left index finger, push the sector gear all the way to the post and
hold that in position.
10. Place tension setting tool (T119628) onto pinion at the 9 o’clock position.
11. Rotate tool clock wise to the 3 o’clock position.
12. Release sector gear and continue rotation to the 6 o’clock position sector
gear should be moving during this step).
13. Bring lug back to correct position and lock into place.
To set the span:
14. Place Test Dial onto gauge. Place pointer onto pinion. Rotate dial until
pointer is at “0” at the bottom of the gauge.
15. Apply 320 mmHg to the Gauge.
16. Release pressure to 300 mmHg to the gauge.
17. If point is less than 300, Place calibration tool (T106845A) into the radius
plate in slot above screw. Pull calibration tool toward bottom of gauge
moving the sector gear upward until pointer reached “300.” Release pressure
and check “0” point.
18. If point is greater than 300, Using the calibration tool (T106845A) positioned
between the sector gear and radius plate on the left of the movement, rotate
the tool clock wise until pointer is at “300” (this brings the radius plate down).
Release pressure and check “0” point.
19. If not at “0” upon release of pressure, rotate test dial until pointer is on the “0”
mark of test dial and re-apply 300 mmHg. Repeat steps 14-17 until span is
set.
Welch Allyn Inc. Page 13 of 40
Page 14

Welch Allyn Inc. Aneroid Sphygmomanometers Service Manual
Revision A
Check and finish calibration:
20. Remove the pointer and test dial, replace the gauge’s dial.
21. Place pointer onto pinion and resting in center of oval. Tap pointer with small
hammer slightly to secure.
22. Apply 320 mmHg to the gauge.
23. Release pressure to 300 mmHg and take readings here and at given points
(see section 1.3)
24. If pointer is greater than 300, pull pointer until you feel slight resistance
counter-clock wise, tap pointer with small hammer and recheck. Make sure
pointer returns to the oval each time. Repeat until satisfied.
25. If less than 300, rotate pointer 1 complete revolution clockwise until
resistance is felt. Push pointer a little farther and tap pointer with small
hammer and recheck. Make sure pointer returns to the oval each time.
Repeat until satisfied.
26. Place crystal and bezel back onto gauge and check.
Please see section 8.8 for drawing of Welch Allyn Tycos movement.
Welch Allyn Inc. Page 14 of 40
Page 15

Welch Allyn Inc. Aneroid Sphygmomanometers Service Manual
Revision A
3.3 Testing
1. Hook up the Hand Gauge that needs to be tested to the
pneumatic tubing of the test equipment.
2. Apply 320 mmHg to the gauge.
3. Release the pressure to 300 mmHg. on the digital pressure meter,
or a calibrated aneroid or mercury gauge.
Note:
The aneroid or
mercury gauge must be accurate to +/- 3 mmHg at the stated
target pressures using a calibrated digital pressure meter. If using
a calibrated aneroid or mercury column the accuracy must be +/6 mmHg.
4. Check reading of the pressure meter or gauge to that of the Hand
Gauge under test. Refer to section 1.3 for specifications.
Welch Allyn Inc. Page 15 of 40
Page 16

Welch Allyn Inc. Aneroid Sphygmomanometers Service Manual
Revision A
Section 4: Classic Wall and Mobile Aneroid Gauge
4.1 Opening/Removing and Replacing Parts of the Wall
and Mobile Gauge.*
7670 series Wall and Mobile Aneroid.
1. Remove the bezel from the case by prying the 4 tabs up and
pulling out on the bezel.
2. Remove the crystal and aside.
3. Remove the pointer by using the pointer removal tool (T105243B)
visually inspect, straighten and aside.
4. Remove the screws of the dial by using the torque driver
(T112459) and remove the dial and aside.
5. Remove the screws that are holding down the mount to the case
of the gauge by using a Phillips head screwdriver.
Reassemble in reverse order
* - See section 8.3 for exploded view drawing of 7670 Series Wall
and Mobile Aneroid.
Classic Wall and Mobile Aneroid.
1. Remove crystal by pushing down and out at the top. Set crystal
aside.
2. Remove pointer by using the pointer removal tool (T105243B).
Inspect, straighten and aside pointer.
3. Remove the dial by removing the screws with the torque driver
(T112459) and aside.
4. Remove the movement and the mount by unscrewing the
standoffs and removing them from the case.
Reassemble in reverse order
* - See section 8.4 for exploded view drawing of the Classic Wall and
Mobile Aneroid.
Welch Allyn Inc. Page 16 of 40
Page 17

Welch Allyn Inc. Aneroid Sphygmomanometers Service Manual
Revision A
4.2 Calibration of the Wall and Mobile Gauge
1. Attach the pneumatic tubing of test equipment to the gauge.
2. Remove bezel, crystal, pointer and dial.
To set the tension:
3. Tighten all screws.
4. View sector gear and ensure proper position (i.e. right edge of sector gear
should align with mark on base of movement).
5. If sector gear not aligned properly, loosen the capsule nut using a 3/8”
wrench and adjust the sector gear by turning the capsule until sector gear is
in correct position per step 5. Tighten capsule nut.
6. Loosen sector stop lug and pull toward bottom of gauge.
7. Using your left index finger, push the sector gear all the way to the post and
hold that in position.
8. Place tension setting tool (T119628) onto pinion at the 9 o’clock position.
9. Rotate tool clock wise to the 3 o’clock position.
10. Release sector gear and continue rotation to the 6 o’clock position sector
gear should be moving during this step).
11. Bring lug back to correct position and lock into place.
To set the span:
12. Place Test Dial onto gauge. Place pointer onto pinion. Rotate dial until
pointer is at “0” at the bottom of the gauge.
13. Apply 320 mmHg to the Gauge.
14. Release pressure to 300 mmHg to the gauge.
15. If point is less than 300, Place calibration tool (T106845A) into the radius
plate in slot above screw. Pull calibration tool toward bottom of gauge moving
the sector gear upward until pointer reached “300.” Release pressure and
check “0” point.
16. If point is greater than 300, Using the calibration tool (T106845A) positioned
between the sector gear and radius plate on the left of the movement, rotate
the tool clock wise until pointer is at “300” (this brings the radius plate down).
Release pressure and check “0” point.
17. If not at “0” upon release of pressure, rotate test dial until pointer is on the “0”
mark of test dial and re-apply 300 mmHg. Repeat steps 14-17 until span is
set.
18. Check for leak by pinching off the tubing from the test equipment while
pressure is on the gauge. There should be no visible leak.
Welch Allyn Inc. Page 17 of 40
Page 18

Welch Allyn Inc. Aneroid Sphygmomanometers Service Manual
Revision A
Check and finish calibration:
19. Remove the pointer and test dial, replace the gauge’s dial.
20. Place pointer onto pinion and resting in center of oval. Tap pointer with small
hammer slightly to secure.
21. Apply 320 mmHg to the gauge.
22. Release pressure to 300 mmHg and take readings here and at given points
(see section 1.3)
23. If pointer is greater than 300, pull pointer until you feel slight resistance
counter-clock wise, tap pointer with small hammer and recheck. Make sure
pointer returns to the oval each time. Repeat until satisfied.
24. If less than 300, rotate pointer 1 complete revolution clockwise until
resistance is felt. Push pointer a little farther and tap pointer with small
hammer and recheck. Make sure pointer returns to the oval each time.
Repeat until satisfied.
25. Place crystal and bezel back onto gauge and check.
Please see section 8.8 for a drawing of the Welch Allyn Tycos Movement
Welch Allyn Inc. Page 18 of 40
Page 19

Welch Allyn Inc. Aneroid Sphygmomanometers Service Manual
Revision A
4.3 Testing
1. Hook up the Wall or Mobile Gauge that needs to be tested to the
pneumatic tubing of the test equipment.
2. Apply 320 mmHg to the gauge.
3. Release the pressure to 300 mmHg on the digital pressure meter,
or a calibrated aneroid or mercury gauge.
Note:
The aneroid or
mercury gauge must be accurate to +/- 3 mmHg at the stated
target pressures using a calibrated digital pressure meter. If using
a calibrated aneroid or mercury column the accuracy must be +/6 mmHg.
4. Check reading of the pressure meter or gauge to that of the Wall
or mobile gauge under test. Refer to section 1.3 for specifications.
Welch Allyn Inc. Page 19 of 40
Page 20

Welch Allyn Inc. Aneroid Sphygmomanometers Service Manual
Revision A
Section 5: Economy Aneroid Gauge
5.1 Opening/Removing and Replacing Parts of the
Economy Gauge*
1. Remove the two screws from the back of the case using a Phillips
head screwdriver. Aside the screws and the clip.
2. Remove the Economy cover an d crystal and aside.
3. Remove the pointer using the pointer removal tool (T105243B).
Inspect, straighten and aside the pointer
4. Pry the dial from the case using a small flat head screwdriver.
5. Remove the movement from the case using T108897 and aside.
6. Loosen screw from the case using T105258 and remove the
capsule.
Reassemble In reverse Order
* - See section 8.5 for exploded view drawing for the Economy
Aneroid.
Welch Allyn Inc. Page 20 of 40
Page 21

Welch Allyn Inc. Aneroid Sphygmomanometers Service Manual
Revision A
5.2 Calibration of the Economy Gauge
1. Attach the pneumatic tubing of test equipment to the gauge.
2. Place gauge in to fixture (T108212)
3. Remove bezel, crystal, pointer and dial.
To set the tension:
4. Tighten all screws.
5. View sector gear and ensure proper position (i.e. right edge of sector gear
should align with mark on base of movement).
6. If sector gear not aligned properly, loosen the capsule nut using wrench
(T105258) and adjust the sector gear by turning the capsule until sector gear
is in correct position per step 5. Tighten capsule nut.
7. Loosen sector stop lug and pull toward bottom of gauge.
8. Using your left index finger, push the sector gear all the way to the post and
hold that in position.
9. Place tension setting tool (T119628) onto pinion at the 9 o’clock position.
10. Rotate tool clock wise to the 3 o’clock position.
11. Release sector gear and continue rotation to the 6 o’clock position sector
gear should be moving during this step).
12. Bring lug back to correct position and lock into place.
To set the span:
13. Place Test Dial onto gauge. Place pointer onto pinion. Rotate dial until
pointer is at “0” at the bottom of the gauge.
14. Apply 320 mmHg to the Gauge.
15. Release pressure to 300 mmHg to the gauge.
16. If point is less than 300, Place calibration tool (T106845A) into the radius
plate in slot above screw. Pull calibration tool toward bottom of gauge moving
the sector gear upward until pointer reached “300.” Release pressure and
check “0” point.
17. If point is greater than 300, Using the calibration tool (T106845A) positioned
between the sector gear and radius plate on the left of the movement, rotate
the tool clock wise until pointer is at “300” (this brings the radius plate down).
Release pressure and check “0” point.
18. If not at “0” upon release of pressure, rotate test dial until pointer is on the “0”
mark of test dial and re-apply 300 mmHg. Repeat steps 14-17 until span is
set.
19. Check for leak by pinching off the tubing from the test equipment while
pressure is on the gauge. There should be no visible leak.
Welch Allyn Inc. Page 21 of 40
Page 22

Welch Allyn Inc. Aneroid Sphygmomanometers Service Manual
Revision A
Check and finish calibration:
20. Remove the pointer and test dial, replace the gauge’s dial.
21. Place pointer onto pinion and resting in center of oval. Tap pointer with small
hammer slightly to secure.
22. Apply 320 mmHg to the gauge.
23. Release pressure to 300 mmHg and take readings here and at given points
(see section 1.3)
24. If pointer is greater than 300, pull pointer until you feel slight resistance
counter-clock wise, tap pointer with small hammer and recheck. Make sure
pointer returns to the oval each time. Repeat until satisfied.
25. If less than 300, rotate pointer 1 complete revolution clockwise until
resistance is felt. Push pointer a little farther and tap pointer with small
hammer and recheck. Make sure pointer returns to the oval each time.
Repeat until satisfied.
26. Place crystal and bezel back onto gauge and check.
Please see section 8.8 for a drawing of the Welch Allyn Tycos Movement
Welch Allyn Inc. Page 22 of 40
Page 23

Welch Allyn Inc. Aneroid Sphygmomanometers Service Manual
Revision A
5.3 Testing
1. Hook up the Economy Gauge that needs to be tested to the
pneumatic tubing of the test equipment.
2. Apply 320 mmHg to the gauge.
3. Release the pressure to 300 mmHg on the digital pressure meter,
or a calibrated aneroid or mercury gauge.
Note:
The aneroid or
mercury gauge must be accurate to +/- 3 mmHg at the stated
target pressures using a calibrated digital pressure meter. If using
a calibrated aneroid or mercury column the accuracy must be +/6 mmHg.
4. Check reading of the pressure meter or gauge to that of the
Economy gauge under test. Refer to section 1.3 for specifications.
Welch Allyn Inc. Page 23 of 40
Page 24

Welch Allyn Inc. Aneroid Sphygmomanometers Service Manual
Revision A
Section 6: Silver Ring Hand Aneroid
6.1 Opening/Removing and Replacing Parts of the Silver
Ring
1. Unscrew the bulb from the gauge.
2. Place screwdriver under the bezel in the opening provided and lift
bezel.
3. Place screwdriver under the crystal in the opening provided and lift
the crystal.
4. Using the T105243A pointer removal tool, remove the pointer from
the pinion.
5. Remove the dial from the housing.
6. Remove the movement using T112833 movement removal tool.
7. Remove the movement internal housing.
8. Remove the valve body-trigger module.
Reassemble in reverse order (Ensure you tighten the movement
down with Torque wrench T112653 using adapter T112653A)
* - See section 8.6 for drawing of the Silver Ring Gauge.
Welch Allyn Inc. Page 24 of 40
Page 25

Welch Allyn Inc. Aneroid Sphygmomanometers Service Manual
Revision A
6.2 Calibration of the Silver Ring Hand Aneroid
1. Obtain gage assembly, attach air supply with luer fitting
2. Position test dial and test pointer on gage
.
3. Apply 300 mmHg pressure. View gauge and ensure the leak is no greater
than 10 mmHg in 5 seconds.
SPAN ADJUSTMENT
From average "0" starting position, pressure gage to 320 then down to 300
mmHg. Note position and maintain pressure:
1. If span is too low - obtain tweezers or jewelers screwdriver and bend the
adjustment pin away from pinion parallel to gear sector arm. Change
pressure to 0, make sure to re-adjust the test dial so that the pointer will be
slightly left of the graduation line. Re-pressurize to 320 then to 300 to
evaluate effects of adjustment.
2. If span is too high - obtain tweezers or jewelers screwdriver and bend the
adjustment pin towards the pinion parallel to the gear sector when
pressurized at 300. Change pressure to 0, make sure to re-adjust the test dial
so that the pointer will be slightly left of the graduation line. Re-pressurize to
320 then to 300 to evaluate effects of adjustment.
3. Repeat above steps as required to obtain correct span adjustment.
LINEARITY ADJUSTMENT - (As required) If 0 and 300 position are correct, and
other points at 250, 200, 150, 100 or 60 are either too high or too low at one or
more points, then perform the following adjustments.
HIGH GAGE READINGS - (Predominantly at 250 and 200)
1. Remove test pointer and test dial. Obtain calibration tool and position over
adjusting pin down to cross shaft, (move gear sector with finger of other hand
to allow access). Rotate pin to move hook away from diaphragm approx. 15
degrees. While maintaining this position, lift tool up from cross shaft approx.
1/16 inch and bend the pin back towards the operator approx. 15 degrees.
Lift the calibration tool up to the point where the pin makes contact with the
gear sector and bend the pin up, (away from operator) approx. 30 degrees.
2. Remove tool and release gear sector. The resultant bend should result in the
gear sector starting position being a max. of 2 teeth extending beyond the top
plate when viewed from a top position and a minimum of 2 teeth within the
edge of the top plate. (This must be checked by pushing the gear sector 2
teeth from the other side of the top plate). Adjust secondary bend if gear
sector is out of these limits. Re-assemble test dial and pointer, recheck span
and adjust as necessary prior to inspection at intermediate points.
Welch Allyn Inc. Page 25 of 40
Page 26

Welch Allyn Inc. Aneroid Sphygmomanometers Service Manual
Revision A
LOW GAGE READINGS - (Predominantly at 60 and 100)
1. Remove test pointer and test dial. Obtain calibration tool and position over
adjusting pin down to cross shaft. Lift tool approx. 1/16 inch and bend the pin
away from operator approx. 15 degrees. While maintaining this position, lift tool
to point where pin makes contact with the gear sector. Bend the pin down or
towards the operator approx. 30 degrees. Remove tool and release gear sector.
Check for gear sector starting position as defined previously, adjust if necessary.
Re-assemble test dial and pointer, recheck span and adjust as necessary prior to
inspection at intermediate points.
NOTE: In all adjustments during calibration, the gear sector starting position will
affect accuracy. Sometimes, this alone can be used as an individual adjustment
to achieve conformance. Higher readings will be realized when the gear sector is
extending beyond the edge of the top plate and lower readings will be realized
when it is within the edge of the top plate.
- See Section 8.9 for drawing of the S+K Movement.
Welch Allyn Inc. Page 26 of 40
Page 27

Welch Allyn Inc. Aneroid Sphygmomanometers Service Manual
Revision A
6.3 Testing of the Silver Ring Hand Aneroid
1. Hook up the Silver Ring Hand Gauge that needs to be tested to
the pneumatic tubing of the test equipment.
2. Apply 320 mmHg to the gauge.
3. Release the pressure to 300 mmHg on the digital pressure meter,
or a calibrated aneroid or mercury gauge.
Note:
The aneroid or
mercury gauge must be accurate to +/- 3 mmHg at the stated
target pressures using a calibrated digital pressure meter. If using
a calibrated aneroid or mercury column the accuracy must be +/6 mmHg.
4. Check reading of the pressure meter or gauge to that of the Silver
Ring Hand Gauge under test. Refer to section 1.3 for
specifications.
Welch Allyn Inc. Page 27 of 40
Page 28

Welch Allyn Inc. Aneroid Sphygmomanometers Service Manual
Revision A
Section 7: Pro Check Hand Aneroid
7.1 Opening/Removing and Replacing Parts of Pro
Check Hand Aneroid
1. Insert screwdriver at bottom of the crystal and pry out crystal.
2. Loosen and remove pointer using T105243A.
3. Insert screwdriver at bottom of the dial and remove the dial from
the gauge.
4. Unscrew the complete base plate with the movement and remove
the washer using T112833 movement removal tool.
Reassemble in reverse order(Ensure you tighten the movement
down with Torque wrench T112653 using adapter T112653A)
* - See Section 8.7 for drawing of the Pro Check Hand Gauge
Welch Allyn Inc. Page 28 of 40
Page 29

Welch Allyn Inc. Aneroid Sphygmomanometers Service Manual
Revision A
7.2 Calibration of the Pro Check Hand Aneroid
1. Obtain gage assembly, attach air supply with luer fitting
2. Position test dial and test pointer on gage
.
3. Apply 300 mmHg pressure. View gauge and ensure the leak is no greater
than 10 mmHg in 5 seconds.
SPAN ADJUSTMENT
From average "0" starting position, pressure gage to 320 then down to 300
mmHg. Note position and maintain pressure:
1. If span is too low - obtain tweezers or jewelers screwdriver and bend the
adjustment pin away from pinion parallel to gear sector arm. Change
pressure to 0, make sure to re-adjust the test dial so that the pointer will be
slightly left of the graduation line. Re-pressurize to 320 then to 300 to
evaluate effects of adjustment.
2. If span is too high - obtain tweezers or jewelers screwdriver and bend the
adjustment pin towards the pinion parallel to the gear sector when
pressurized at 300. Change pressure to 0, make sure to re-adjust the test dial
so that the pointer will be slightly left of the graduation line. Re-pressurize to
320 then to 300 to evaluate effects of adjustment.
3. Repeat above steps as required to obtain correct span adjustment.
LINEARITY ADJUSTMENT - (As required) If 0 and 300 position are correct, and
other points at 250, 200, 150, 100 or 60 are either too high or too low at one or
more points, then perform the following adjustments.
HIGH GAGE READINGS - (Predominantly at 250 and 200)
1. Remove test pointer and test dial. Obtain calibration tool and position over
adjusting pin down to cross shaft, (move gear sector with finger of other hand
to allow access). Rotate pin to move hook away from diaphragm approx. 15
degrees. While maintaining this position, lift tool up from cross shaft approx.
1/16 inch and bend the pin back towards the operator approx. 15 degrees.
Lift the calibration tool up to the point where the pin makes contact with the
gear sector and bend the pin up, (away from operator) approx. 30 degrees.
2. Remove tool and release gear sector. The resultant bend should result in the
gear sector starting position being a max. of 2 teeth extending beyond the top
plate when viewed from a top position and a minimum of 2 teeth within the
edge of the top plate. (This must be checked by pushing the gear sector 2
teeth from the other side of the top plate). Adjust secondary bend if gear
sector is out of these limits. Re-assemble test dial and pointer, recheck span
and adjust as necessary prior to inspection at intermediate points.
Welch Allyn Inc. Page 29 of 40
Page 30

Welch Allyn Inc. Aneroid Sphygmomanometers Service Manual
Revision A
LOW GAGE READINGS - (Predominantly at 60 and 100)
1. Remove test pointer and test dial. Obtain calibration tool and position over
adjusting pin down to cross shaft. Lift tool approx. 1/16 inch and bend the pin
away from operator approx. 15 degrees. While maintaining this position, lift tool
to point where pin makes contact with the gear sector. Bend the pin down or
towards the operator approx. 30 degrees. Remove tool and release gear sector.
Check for gear sector starting position as defined previously, adjust if necessary.
Re-assemble test dial and pointer, recheck span and adjust as necessary prior to
inspection at intermediate points.
NOTE: In all adjustments during calibration, the gear sector starting position will
affect accuracy. Sometimes, this alone can be used as an individual adjustment
to achieve conformance. Higher readings will be realized when the gear sector is
extending beyond the edge of the top plate and lower readings will be realized
when it is within the edge of the top plate.
- See Section 8.9 for drawing of the S+K Movement.
Welch Allyn Inc. Page 30 of 40
Page 31

Welch Allyn Inc. Aneroid Sphygmomanometers Service Manual
Revision A
7.3 Testing of the Pro Check Hand Aneroid
1. Hook up the Pro Check Hand Gauge that needs to be tested to
the pneumatic tubing of the test equipment.
2. Apply 320 mmHg to the gauge.
3. Release the pressure to 300 mmHg on the digital pressure meter,
or a calibrated aneroid or mercury gauge.
Note:
The aneroid or
mercury gauge must be accurate to +/- 3 mmHg at the stated
target pressures using a calibrated digital pressure meter. If using
a calibrated aneroid or mercury column the accuracy must be +/6 mmHg.
4. Check reading of the pressure meter or gauge to that of the Pro
Check Hand Gauge under test. Refer to section 1.3 for
specifications.
Welch Allyn Inc. Page 31 of 40
Page 32

Welch Allyn Inc. Aneroid Sphygmomanometers Service Manual
Revision A
Section 8: Pictures and Replacement Parts
Section 8.1: Classic Pocket Aneroid Replacement Parts
The following are the list of replacement parts for the Pocket Aneroid Gauge that can be
purchased through Welch Allyn Inc.
Part Number Description
51P52 Clip Assembly
2P1623 Case
32P180 Lock nut
34P760 Crystal
3P831 Bezel
35P804 Screw cap (NS)
61S681 Diaphragm Assembly
63S401 Pointer
93S617 Movement
9P1799 Screw, Movement
11P363 Spring
7P689 Pin for Clip
Welch Allyn Inc. Page 32 of 40
Page 33

Welch Allyn Inc. Aneroid Sphygmomanometers Service Manual
Revision A
Section 8.2: Classic Hand Aneroid Replacement Parts
The following are the list of replacement parts for the Classic Hand Aneroid Gauge that
can be purchased through Welch Allyn Inc.
Part Number Description Part Number Description
12P368 Lure Lock Fitting 2P1628 Cover, Hand Gauge
9P2651 Screw, Cover 3P831 Bezel
9S132 Thumb Screw 34P760 Crystal
42P252 Valve Body Assembly 63S401 Pointer
5090-30 Screen Assy/Bulb Adapter 9P1799 Screw, Movement
12P490 Bulb Adapter 93S617 Movement
2P1627A Case 61S694 Diaphragm Assembly
5086-01 Bulb 32P527 Lock Nut
Welch Allyn Inc. Page 33 of 40
Page 34

Welch Allyn Inc. Aneroid Sphygmomanometers Service Manual
Revision A
Section 8.3: 767 Wall/Mobile Aneroid Replacement Parts
The following are the list of replacement parts for the 767 Wall/Mobile Aneroid Gauge
that can be purchased through Welch Allyn Inc.
Part Number Description
3P844 Bezel
34P768 Crystal
63S412 Pointer
93S617A Movement
61S681 Diaphragm Assembly
2P1138 Mount
32P727 Nut
2P1631 Case
32P763 Lock nut, Case - Not pictured
8P1064 Bushing - Not pictured
96P135 Basket - Not pictured
9P2841 Dial Mounting Screw
Welch Allyn Inc. Page 34 of 40
Page 35

Welch Allyn Inc. Aneroid Sphygmomanometers Service Manual
Revision A
Section 8.4: Classic Wall/Mobile Aneroid Replacement Parts
The following are the list of replacement parts for the Classic Wall/Mobile Aneroid
Gauge that can be purchased through Welch Allyn Inc.
Part Number Description Part number Description
2P1138 Mount 34P417 Crystal
9P1804 Spacer 9P2841 Dial Mounting Screw
61S681 Diaphragm Assembly 63S298 Pointer, USA
32P727 Jam Nut 63S402 Pointer, Japan - Not pictured
14P1718 Bracket 2P1503 Case (Gray)
9P2455 Bracket Screw 2P1124 Case (Beige) - Not pictured
8P949 Bracket Bushing 9P2465 Screw (Case)
32P763 Bracket Nut 22P830 Washer (Case)
93S617A Movement
Welch Allyn Inc. Page 35 of 40
Page 36

Welch Allyn Inc. Aneroid Sphygmomanometers Service Manual
Revision A
Section 8.5: Economy Aneroid Replacement Parts
The following are the list of replacement parts for the Economy Aneroid Gauge that can
be purchased through Welch Allyn Inc.
Part Number Description
2P1437 Cover for Economy Aneroid
2P1626C Case for Economy Aneroid
34P640 Crystal
93S618 Movement
2P1130D Clip
32P727 Jam Nut
63S401 Pointer
9P2563 Screw (Case)
61S693 Capsule
9P1799 Screw, Movement
Welch Allyn Inc. Page 36 of 40
Page 37

Welch Allyn Inc. Aneroid Sphygmomanometers Service Manual
Revision A
Section 8.6: Silver Ring Hand Aneroid Replacement Parts
The following are the list of replacement parts for the Silver Ring Hand Aneroid Gauge
that can be purchased through Welch Allyn Inc.
Part Number Description Part Number Description
12P368 Adapter 52P1848 Dial
75P240 O-Ring 18P189 Bulb Collar
2P1632 Housing 23P428 Bulb Adapter
33P131 Movement Cup 97S581 Bulb
70P450 Button 11P1240 Spring
7P716 Pivot Pin 42S242 Valve Body
93S720 Movement 8S61 Valve Assembly
22P1455 Washer Silicon 5090-30 Screen Assy/Bulb Adapter
34P434 Crystal 3P847 Bezel
39P505 Trim Ring 63S410 Pointer
Welch Allyn Inc. Page 37 of 40
Page 38

Welch Allyn Inc. Aneroid Sphygmomanometers Service Manual
Revision A
Section 8.7: Pro Check Hand Aneroid Replacement Parts
The following are the list of replacement parts for the Silver Ring Hand Aneroid Gauge
that can be purchased through Welch Allyn Inc.
Part Number Description
34P761 Crystal
63S416 Pointer
52P1845 Dial
93S720 Movement
22P1460 Washer
97S583 Bulb
18P190 Bulb Ring
70P446 Trigger
8S61 Valve Assy
11P1240 Spring - Not pictured
52-09-950 Housing (order from S+K)
15-40-000 Valve Body (order from S+K)
Welch Allyn Inc. Page 38 of 40
Page 39

Welch Allyn Inc. Aneroid Sphygmomanometers Service Manual
Revision A
Section 8.8: Welch Allyn Tycos Movement
Welch Allyn Inc. Page 39 of 40
Page 40

Welch Allyn Inc. Aneroid Sphygmomanometers Service Manual
Revision A
Section 8.9: Welch Allyn S+K Movement
Welch Allyn Inc. Page 40 of 40
 Loading...