

Page 1

SP-2 Hand-Held Spirometer
Cardio Menu
Service Manual
Introduction 2
Procedure Overview 4
Main Menu 5
Entering Patient Data 6
Selecting the Test 9
Taking a Test 12
Forced Vital Capacity (FVC) Test 12
Slow Vital Capacity (SVC) Test 13
MVV Test 13
Screen Information 14
Curves 14
Tabular 15
Post-Medication Tests 16
Memory 17
Menu 19
Displaying Test Data From a Stored Patient 20
Obtaining a Printout 21
Spiro Settings (User Identification) 22
Spiro Settings (Printout) 23
SP-2 User Guide
Art. No. 71022-0000 Welch Allyn Schiller ©2000
Section 1
Spiro Settings (Device) 24
Normals 25
Changing the Mouthpiece 26
Calibration 28
Calibration Procedure 29
Explanation of Measured Values 32
Care & Maintenance 34
Self-test 34
Lifed Items 34
Cleaning the Unit 35
Batteries 35
Spirometry Tips - How To Do It and Common
Pitfalls and Problems 36
How to Do It 36
FVC 37
FEV1 38
Patient-Related Problems 39
Page 1
E
n
g
l
i
s
h
Page 2

Introduction
The SP-2 Hand-Held Spirometry Unit features three
pulmonary function testing modes for the
measurement of inspiratory and expiratory values.
The large LCD screen instantly show pulmonary
test results and provides a clear and comprehensive
result analysis in a number of different formats. All
tests and settings are initiated via an easy to use
interface.
The sensor mouthpiece is a disposable, single
patient sensor/filter assembly eliminating the need
to clean the sensor after each use.
All functions and settings are selected via menus
displayed on the LCD with direct test function
menu options for measuring the following:
n FVC Forced Vital Capacity
n SVC Slow Vital Capacity
n MVV Maximum Voluntary Ventilation
(Option)
1. Battery Compartment
Two, 1.5V non rechargeable AA batteries
2. 12 Alpha numeric keys
For text / numerical input e.g. patient data, calibration data etc.
3. Three Direct Function keys:
Print / Send. This key initiates transmission over the infrared interface
to a compatible printer using the standard data association protocol.
LCD Backlight Key - The middle key is the ON/OFF control for the
LCD backlight. The backlight is automatically switched off after
approximately 10 seconds.
The START/STOP (and ON/OFF) key has three functions:
n Switches the unit on.
n When the unit is switched on and in test mode, this key starts /
stops a measurement.
n When the unit is switched on and not in test mode, this key
switches the unit off (press for 2-3 seconds).
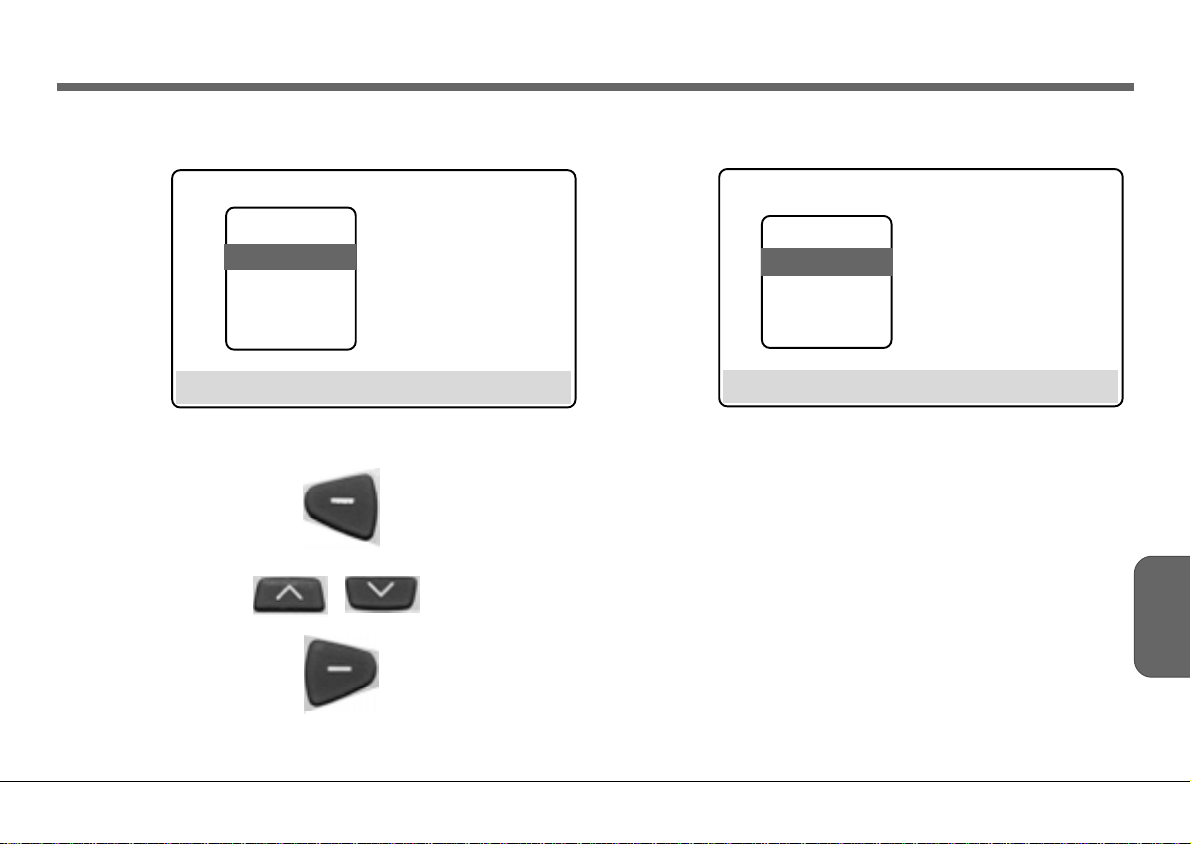
4. Four (menu navigation/selection) Function keys:
LEFT / RIGHT keys - The functions of these keys depends on the
menu displayed and is shown in the bottom line of the LCD line. In
general however, the left softkey selects the functions and the right key
acts in a similar way to the 'enter' key in a PC. See following pages.
The UP and DOWN keys move the cursor in the menu fields to
highlight the menu options. These two keys can also act as extra
function keys - in this case the function is shown in the bottom line of
the LCD line.
5. LCD
6. Infrared Data Interface (not seen)
7. Disposable Mouthpiece
Page 2
Page 3

6432 5 7
E
n
g
l
i
s
h
1
SP-2 User Guide
Art. No. 71022-0000 Welch Allyn Schiller ©2000
Page 3
Page 4
Procedure Overview
Main Menu
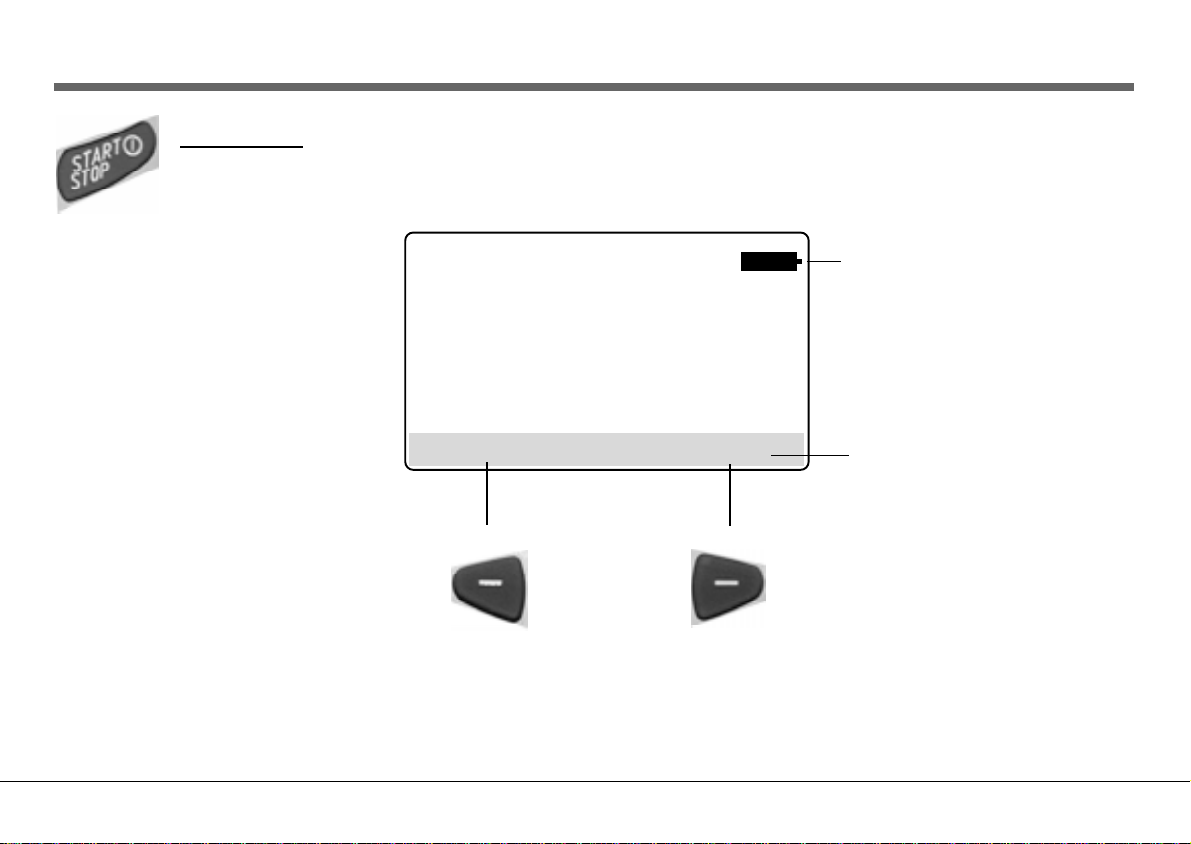
1. Press the ON key. The Introduction screen is displayed:
09:53
04.05.00
MENU PATIENT
Press the left soft key to enter the MAIN MENU Press the right soft key to enter the patient screen
(Page 5) (Page 6)
Battery Indicator - Displayed when
battery life is limited - change the
batteries as soon as possible.
When this symbol flashes, it
indicates critical battery voltage.
Tests can be completed but all other
functions ( e.g. printing, backlight)
are inhibited - change batteries
immediately.
Softkey Line - Defines the left / right
softkey functions
Page 4
Page 5
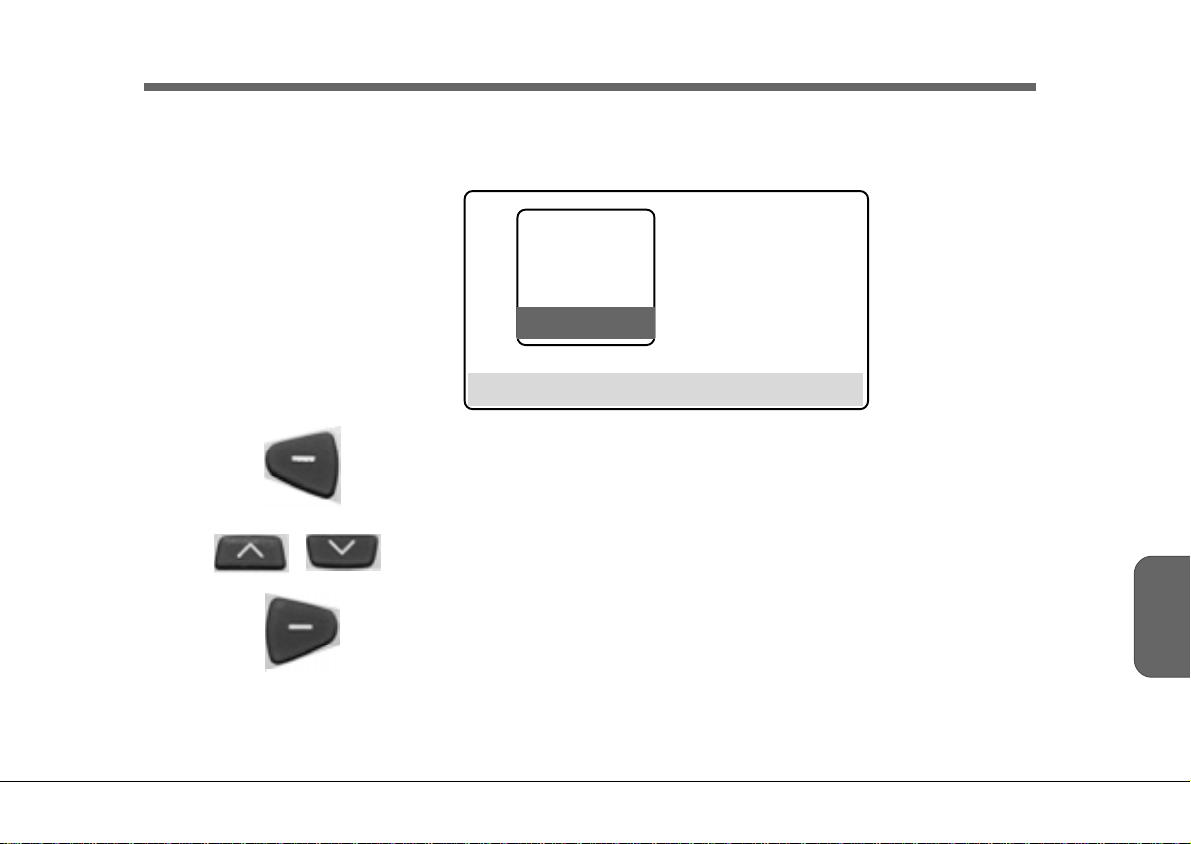
Main Menu
If using the option for the first time select the required spiro settings and Spiro Standard. Select 'Settings' from
the main menu to display the Spiro settings - details of all spiro settings are given on the following pages. All these
settings are stored when the unit is switched off.
PATIENT
TEST
MEMORY
CALIBRATION
SETTINGS
EXIT ENTER
EXIT/MENU Return to introduction screen/main menu
Details of all settings are detailed later.
SP-2 User Guide
Art. No. 71022-0000 Welch Allyn Schiller ©2000
CURSOR UP /DOWN Move cursor (highlight bar) up/down
ENTER Select highlighted item
Page 5
E
n
g
l
i
s
h
Page 6
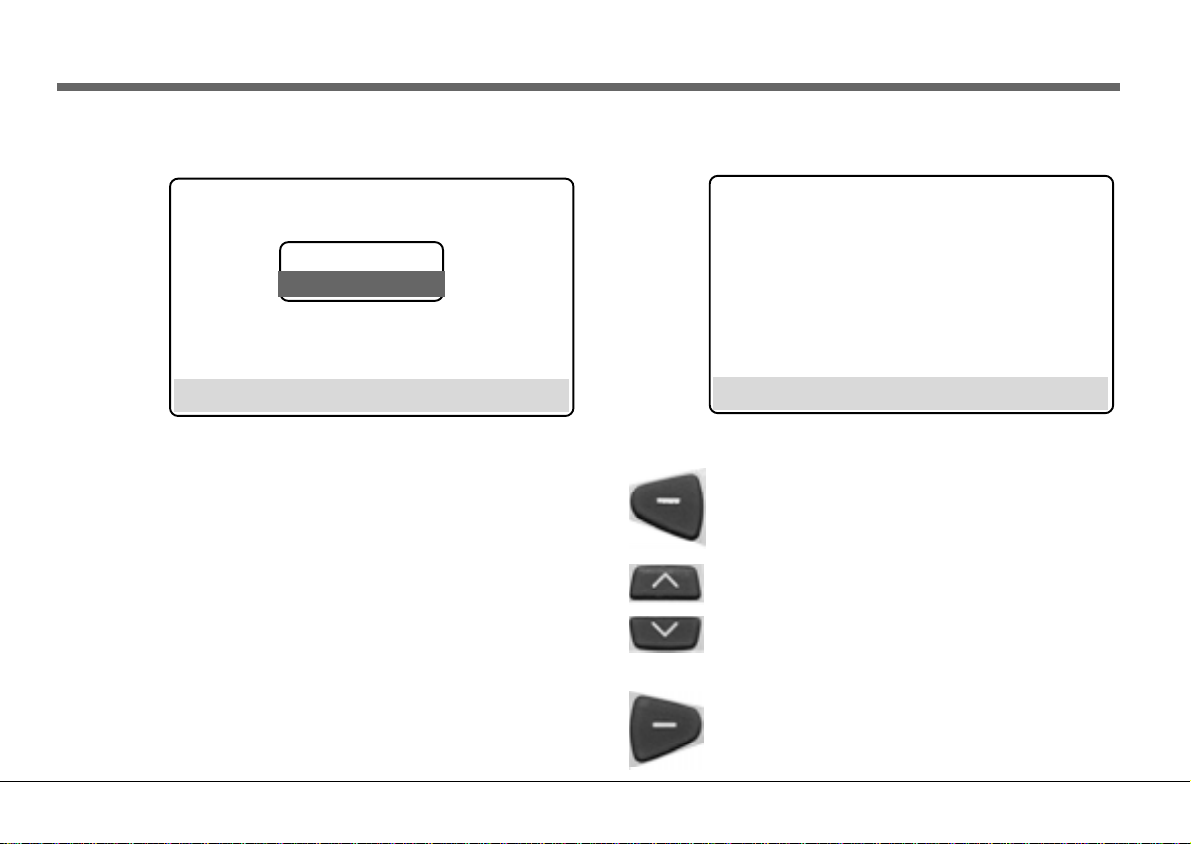
Entering Patient Data
2. From the introduction screen press the RIGHT soft key to enter patient data.
(From the main menu, highlight 'patient' and press the RIGHT soft key).
Pat-Name: Gender: M (M/F)
DAVID OVER Height: 71.7 ins
Pat-Number: Weight: 179 lbs
123-456-00 Ethnic: C (C/H/B/A)
Born: Smoker: Y (Y/N)
05-04-43 (mm-dd-yy) Room: 5
MENU ENTER MENU ENTER
3. Select a new patient or change existing patient
data with the up/down soft keys and press the
RIGHT soft key to confirm.
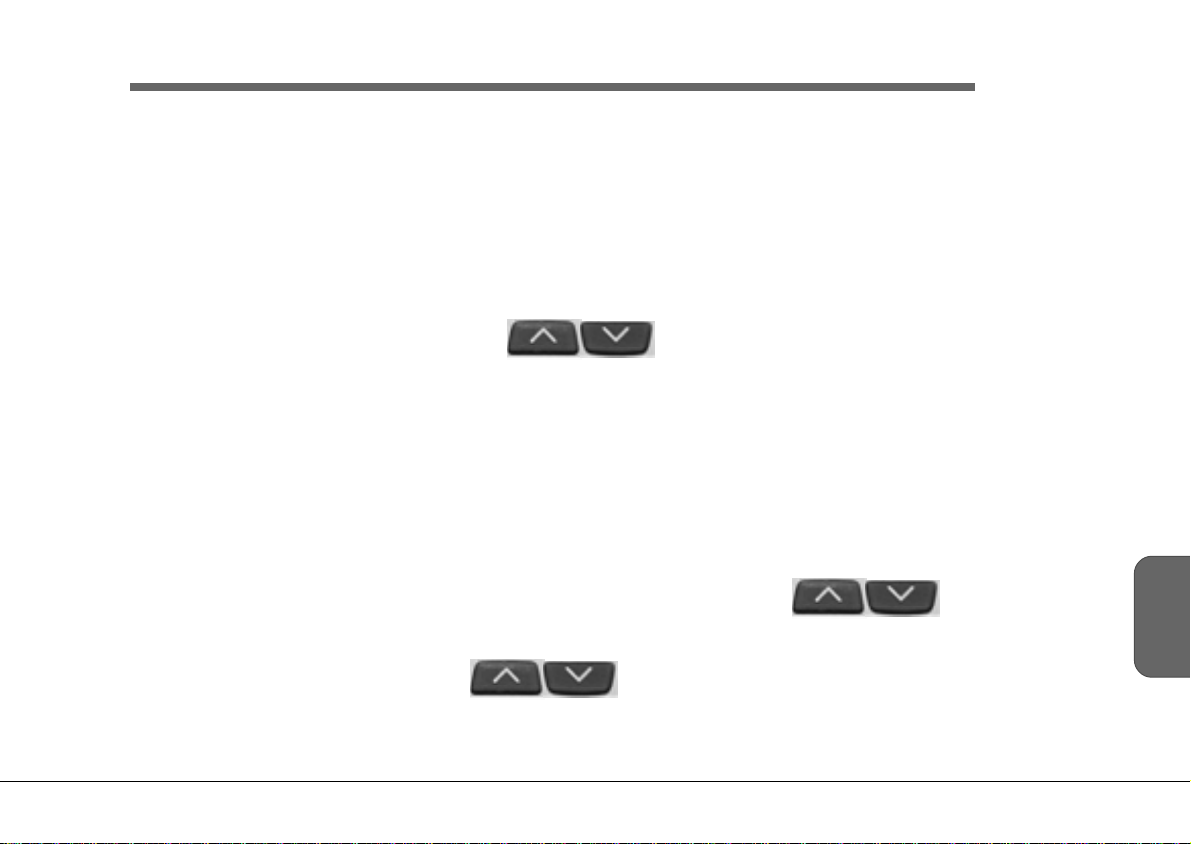
For a required character, a key must be pressed one or
more times dependant on whether in a numerical or letter
field. For example in an alpha numeric field (e.g. patient
name) the '2' key is:
1st press 'A'; 2nd press 'B'; 3rd press 'C'; 4th '1'; 5th 'A'
etc.
In a numeric field the number comes first.
Page 6
NEW PATIENT
CHANGE DATA
MENU Return to main menu
Toggle between choices
Delete last character entered
or Toggle between choices
ENTER Enter details / Go to next line
Page 7
Entering Patient Data
Each printout is complete with the name and other information concerning the patient. Before beginning a
recording, the patient data should be entered. The following parameters have to be entered:
Pat-Name: Alpha-numeric field
Pat-Number: Alpha-numeric field
Born: Enter patients` data of birth in the order shown (defined in system
settings)
Gender: Select `M` (male) or `F` (female). Use up/down toggle
keys to change.
Height: Height in centimeters (numeric field)
(or inches (scaled to 1/10 inch), depending on unit setup)
Weight: Weight in kilograms (numeric field)
(or pounds, depending on unit setup).
Ethnic: Enter patients race - either:
W/B: `W` for White, `B` for Black
or C/H/B/A: `C` for Caucasian, `H` for Hispanic, `B` for Black;
`A` for Asian. Use up down toggle keys
Smoker: Enter `Y` (yes) or `N` (no). Use up/down toggle keys
to change.
E
n
g
l
i
s
h
Room: Alpha-numeric field
SP-2 User Guide
Art. No. 71022-0000 Welch Allyn Schiller ©2000
Page 7
Page 8

Procedure Overview
4. Insert a new disposable sensor.
See page 26
WARNING
THE DISPOSABLE MOUTHPIECE IS DESIGNED FOR ONETIME USE TO MINIMIZE THE DANGER OF CROSS
CONTAMINATION - DO NOT USE THE MOUTHPIECE FOR
MORE THAN ONE PATIENT.
5. Calibrate the Unit
The unit must be calibrated
n At the beginning of each day
n When a significant temperature or pressure
difference occurs
The calibration procedure is detailed later.
Page 8
Page 9
Selecting the Test
6. From the main menu Select the Test Option
PATIENT
TEST
MEMORY
CALIBRATION
SETTINGS
EXIT ENTER MENU ENTER
SP-2 User Guide
Art. No. 71022-0000 Welch Allyn Schiller ©2000
FVC TEST
SVC TEST
MVV TEST
PRE
POST
EXIT/MENU Return to introduction screen/main menu
CURSOR UP /DOWN Move cursor (highlight bar) up/down
ENTER Select highlighted item
Page 9
E
n
g
l
i
s
h
Page 10

Taking a Test
7. For all tests the procedure is the same
The message `
before the measurement:
hold the sensor still
*** press START ***
appears on the display.
8. Press the START / STOP key once
The device must be held upright and quite still
and no air should be breathed into the device
for at least one second before the START key is
pressed.
As soon as the patient starts to breath into the
Mouthpiece, the unit begins to record the flow.
The corresponding curve is represented on the
display. The break-off point for the
measurement is reached automatically (or
when the Stop key is pressed).
Page 10
Page 11
Taking a Test
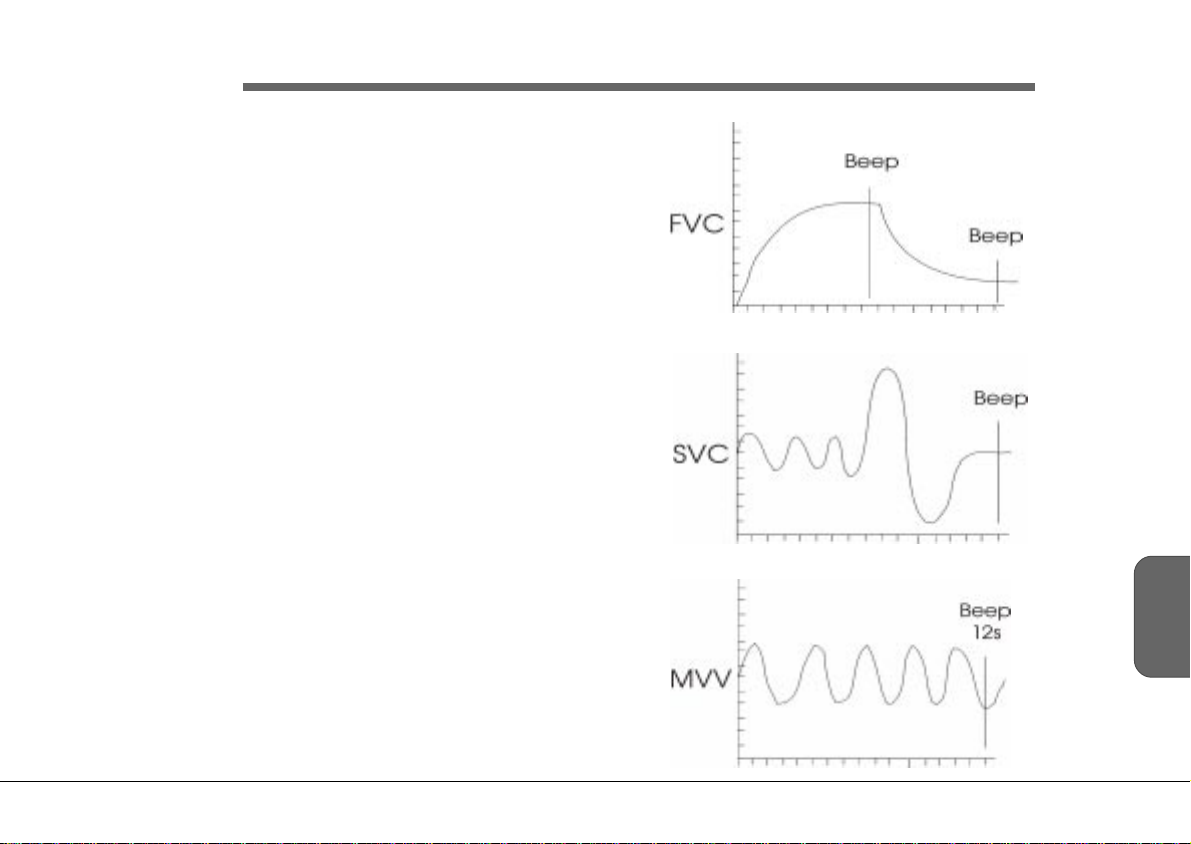
Audible indications are given for each test as
follows:
FVC A beep is given at the end of exhalation
(indicating that inhalation (if required)
can begin), and at the end of the test.
SVC A beep is given when no flow is detected
(end of test) or in any case after 30
seconds.
MVV A beep is given after 12 secs (end of test).
E
n
g
l
i
s
h
SP-2 User Guide
Art. No. 71022-0000 Welch Allyn Schiller ©2000
Page 11
Page 12

Taking a Test
WARNING: FALSE MEASUREMENTS CAN RESULT WHEN THE SENSOR IS NOT HELD VERTICALLY - ENSURE THAT THE UNIT IS HELD UPRIGHT WHEN
TAKING TESTS.
CAUTION: The SP-2 is a sensitive measuring device and must always be handled with care. Do not allow it to be dropped or
subjected to any sudden blows.
Forced Vital Capacity (FVC) Test
For this test the patient must exhale as quickly as possible from the time of starting the test.
Note: The FVC test employs the `Back extrapolation` method. If the extrapolated volume is too large (>0.15 liters or 5% of FVC),
then a warning appears on the display
To carry out the test for Forced Vital Capacity (FVC), highlight the `FVC` option in the test menu (previous page) and press the Enter key.
The corresponding coordinate presentation appears on the display.
The patient must exhale as quickly as possible from the time of starting the test so be sure that he understands what is required of him. If
inspiratory measurements are required, the exhalation can be immediately followed by a maximum inhalation. The inspiration results will be
given on the printout.
The coordinates represent the graph on which the curve will be drawn with the respiratory volume in liters being represented on the
vertical axis and the time in seconds on the horizontal axis.
ALSO SEE `SPIROMETRY TIPS` AT THE END OF THIS BOOK
Page 12
Page 13

Taking a Test
Slow Vital Capacity (SVC) Test
The patient should breathe normally 3 times and then inhale to the
maximum extent of total lung capacity and then expire to the
maximum extent. Make sure that the patient understands what is
required of him.
MVV Test
The patient should breathe as deeply and as rapidly as possible
over a period of 6 to 12 seconds.
WARNING CARE SHOULD BE EXERCISED WHEN
PERFORMING THIS TEST AS THERE IS A
DANGER OF HYPERVENTILATION. ENSURE
THAT THE PATIENT IS SITTING DOWN.
E
n
g
l
i
s
h
SP-2 User Guide
Art. No. 71022-0000 Welch Allyn Schiller ©2000
Page 13
Page 14

Screen Information
Curves
TEST RESULT
TEST Return to test menu
No function in this screen
No function in this screen
Page 14
RESULTS Display the results
Page 15

Screen Information
Tabular
Once the test is completed, the measurement results are calculated.
To display the results in Tabular form, select RESULT (right key from the graph display).
Separate result tables are given for each test (FVC, SVC and MVV). The FVC screen displayed below is typical.
FVC
MEAS PRED %Pred
FVC 4.31 4.82 87
FEV1 3.50 4.532 79
FEV1/FVC 8.23 9.36 76
FEV3/FVC - - - - -FEF.2-1.2 - - - - -FEF25-75% - - - - - -
TEST CURVE
SP-2 User Guide
Art. No. 71022-0000 Welch Allyn Schiller ©2000
TEST Return to test menu
Previous result page / Next result page. Toggle through all calculated results.
The last page gives the interpretation.
CURVE Return to Test
Page 15
E
n
g
l
i
s
h
Page 16

Post-Medication Tests
In order to carry out post-medication tests for comparison, select the `POST` from the test menu.
NOTE: THE POST OPTION IS ONLY AVAILABLE WHEN A `PRE` TEST HAS BEEN CARRIED
OUT. WHEN A POST MEASUREMENT IS NOT POSSIBLE THE MENU OPTION IS
DIMMED. ON SWITCH ON, THE `POST` OPTION IS AVAILABLE FOR THE LAST
PATIENT BEFORE THE UNIT WAS SWITCHED OFF.
FVC
SVC
MVV
PRE
POST
MENU ENTER
The post-medication tests are carried out in the same way as the premedication tests. The printout
following post-medication tests will give the curves of both pre and post-medication tests (the post
medication curve is dashed). The measurement results are shown as the best results (pre/post), results as
a percentage of those predicted, (both pre and post) and the percentage change (i.e. difference) between
pre and post-medication results.
Page 16
TO MINIMIZE THE DANGER OF CROSS INFECTION, DISPOSE OF THE
MOUTHPIECE IMMEDIATELY AFTER ALL TESTS HAVE BEEN CARRIED OUT.
Page 17

Memory
The memory allows approximately 50 recordings (dependent on size and parameters specified when the
recording was taken) to be stored, displayed and printed.
The results of the current patient are automatically stored when a new patient is entered. When the
unit is switched off, the current patient and test results are remembered and are available the next
time the device is switched on.
When no more recordings can be stored the message `MEMORY FULL` is displayed. Old recordings
must be deleted before further recordings can be stored. Enter the memory screen from the main menu:
PATIENT
TEST
MEMORY
CALIBRATION
SETTINGS
Frederick Burt 24.05.00
Jones John 27.05.00
Smith Fred 12.06.00
* Overerly Jan 24.06.00
* Wyle Helen 24.06.00
MENU TAG
SP-2 User Guide
Art. No. 71022-0000 Welch Allyn Schiller ©2000
Page 17
E
n
g
l
i
s
h
Page 18

Memory
MENU Go to Memory menu
UP Highlight previous patient
DOWN Highlight next patient
TAG Mark / Unmark highlighted
patient for deleting (see
next page). Tagged
recordings are indicated by
an asterisk before the name.
Page 18
Page 19

Memory
Menu
Frederick Burt 24.09.99
Jones John 27.09.99
Smith 12.10.99
MENU ENTER
VIEW
DELETE
CANCEL
MENU Go to Main menu
SP-2 User Guide
Art. No. 71022-0000 Welch Allyn Schiller ©2000
UP Highlight previous menu entry
DOWN Highlight next menu entry
ENTER When View selected - reads highlighted recording.
(see next page)
When Delete selected enters further menu options
for the deletion of all or only tagged recordings.
When cancel selected - returns to memory screen.
Page 19
E
n
g
l
i
s
h
Page 20

Displaying Test Data From a Stored Patient
1. From the memory menu, highlight the required patient and select the view option
as described previously.
2. Wait a few seconds for the program to display and retrieve the selected patient data.
Pat-Name:
ABROTH DAVID
Pat-Number:
123-456-00
Born:
05-04-43 (mm-dd-yy)
MENU ENTER
PATIENT
3. Return to the main menu and select the test option.
4. The test screen is displayed:
before the measurement:
hold the sensor still
*** press START ***
TEST
MEMORY
CALIBRATION
SETTINGS
Page 20
MENU RESULT
5. Select RESULT to display the test results for the selected test. Note that the stored
tests can only be displayed in tabular form.
Page 21

Obtaining a Printout
Printing is carried out via any printer that has an infra red connector.
To obtain a printout of the currently displayed recording:
1. Point the unit towards the printer and press and release the
Print / Send key.
2. A beep indicates when the data has been downloaded to the
printer and the SP-2 can be withdrawn.
The graphs are printed according to the print settings defined and
will always include the following:
n The patient data.
n The selected norm values.
n The date of last calibration.
n The diagnostic statement (if enabled in Settings menu).
SP-2 User Guide
Art. No. 71022-0000 Welch Allyn Schiller ©2000
n The date and time of the printout.
n The software version.
The print settings are detailed in the following pages.
Page 21
E
n
g
l
i
s
h
Page 22

Spiro Settings (User Identification)
The settings menu option defines all the general settings. Settings made here are remembered when the unit is switched off. For normal use,
the settings are made when the unit is first commissioned. However, the settings can be easily changed at any time for comparison
purposes or individual preference.
The user identification is given on all printouts. To define the user identification select the user id option.
PATIENT
TEST
MEMORY
CALIBRATION
SETTINGS
User Identification
WELCH ALLYN SCHILLER
USER ID
PRINTOUT
DEVICE
CLOCK
MENU Go to Main menu
ENTER Confirm displayed user ID
MENU ENTER
Page 22
Page 23

Spiro Settings (Printout)
In the printout settings screen the information given on a printout is defined.
PATIENT
TEST
MEMORY
CALIBRATION
SETTINGS
USER ID
PRINTOUT
DEVICE
CLOCK
MENU Go to Main menu
CURSOR go to next line above
CURSOR go to next line below
CHOICE Change highlighted setting
Select between:
Format : Meas1 Measurement 1 or All (best three measurements)
FVC-Graph : Yes yes; no
Flow Graph No yes; no
Diagnosis : Yes
Lung Age : No
1
yes; no
2
yes: no
PEF (l/min) : No yes; no
MENU CHOICE
Notes:1 Diagnosis: The diagnosis statement (printed or not printed) is in accordance with the defined `normals` (see next
page and Section 2).
2
Lung Age: The lung age (printed or not printed) is the calculated nominal age of the patient`s lungs according to
the results obtained and the defined `normals` (see next page and Section 2). The value given is
calculated using the actual FEV1 value against predicted FEV1 value for the age of the patient. No value
will be given if the patient age is less than 18 years or if poor FEV1 test results have been obtained.
SP-2 User Guide
Art. No. 71022-0000 Welch Allyn Schiller ©2000
Page 23
E
n
g
l
i
s
h
Page 24

Spiro Settings (Device)
PATIENT
TEST
MEMORY
CALIBRATION
SETTINGS
Normals : Knudson Normals according to software and language - See section 2
Ethnic : C/H/B/A W/B; C/H/BA
FVC-Type Flow - Loop Vol = f(t); Flow = f(Vol); Flow - loop
Report-Type : Best Best; meas 1
Unit : in/lb/oF in/lb/oF; cm/kg/oC
Date : mm-dd-yy dd-mm-yy; yy-mm-dd; mm-dd-yy
Language : English Language options according to software
MENU CHOICE
USER ID
PRINTOUT
DEVICE
CLOCK
Select between:
MENU Go to Main menu
CURSOR go to line above
CURSOR go to line below
CHOICE Change highlighted setting
Page 24
Page 25

Spiro Settings (Device)
Normals
The Normal value standards are given at the end of this section- Diagnosis and Norm Value Tables.
DIAGNOSIS ACCORDING TO `ITS` RECOMMENDATIONS IS AVAILABLE WHEN CRAPO KNUDSON, OR
COMPOSITE IS SET.
Volume = f(t) Flow = f(vol) Flow - loop
SP-2 User Guide
Art. No. 71022-0000 Welch Allyn Schiller ©2000
Page 25
E
n
g
l
i
s
h
Page 26

Changing the Mouthpiece
Align mouthpiece guides with guide
slots in the sensor
Page 26
Page 27

Changing the Mouthpiece
WARNING
THE DISPOSABLE MOUTHPIECES ARE DESIGNED FOR ONETIME USE TO MINIMIZE THE DANGER OF CROSS
CONTAMINATION. DO NOT USE THE MOUTHPIECE FOR
MORE THAN ONE PATIENT.
1. Remove disposable mouthpiece by gently but firmly pulling it away from the device.
2. Discard the complete assembly.
3. Position new disposable mouthpiece and gently but firmly click it in position.
NOTE: The disposable mouthpiece can only be positioned in one direction and no force
4. Calibrate the sensor and unit as detailed following.
SP-2 User Guide
Art. No. 71022-0000 Welch Allyn Schiller ©2000
is necessary to insert it on the device. Ensure that the orientation is correct by
checking the guide protrusion in sensor against the guide slot in the device.
Page 27
E
n
g
l
i
s
h
Page 28

Calibration
To calibrate, enter the calibration screen from the main menu:
THE UNIT MUST BE CALIBRATED WITH THE FIRST PULMONARY FUNCTION TEST OF THE
DAY AND AFTER EVERY SIGNIFICANT TEMPERATURE CHANGE.
We additionally recommend that the device is calibrated before each new patient, that is every time the disposable
Mouthpiece is changed.
PATIENT
TEST
MEMORY
CALIBRATION
SETTINGS
The following screen is displayed:
Temperature : 21 oC
Measured Vol. : 0.00 l
Syringe Vol. : 6.00 l
Deviation : -- %
Last calib. : 25.05.00
BTPS Factor : 1.090
Gain Factor : 1.002
MENU CALIB. VERIFY
Page 28
MENU Return to main menu.
CALIB Start calibration procedure and enter details
(temp., vol. etc.), as detailed on the following
pages. The calibration is accepted when the
actual volume, and the volume calculated
by the SP-2, is within a predefined limit.
When a deviation greater than the limit is
recorded, a message is displayed that the
mouthpiece (screen) must be changed.
VERIFY Verify calibration. The procedure is exactly
the same as for CALIB (above), but the actual
volume, and the volume calculated by the
SP-2, must be within 3%. If this procedure is
not within 3%, the unit must be recalibrated
using the CALIB option above.
Page 29

Calibration
Calibration Procedure
To calibrate the unit proceed as follows:
1. Connect the calibration pump to the sensor. Ensure that there
are no air leaks.
2. Press the up or down key (CALIB) to commence calibration.
3. Enter the ambient temperature and press enter to confirm.
Temperature : 21 oC
Measured Vol. : 0.00 l
Syringe Vol. : 6.00 l
Deviation : -- %
hold sensor still
*** press START ***
MENU
4. Wait 1 second.
5. Press the START/STOP key .
SP-2 User Guide
Art. No. 71022-0000 Welch Allyn Schiller ©2000
Page 29
E
n
g
l
i
s
h
Page 30

Calibration
6. Keeping the unit still, pump 3 to 6 liters of air through the Mouthpiece.
While pumping, the unit records the volume being pumped through the
Mouthpiece and indicates it on the display.
7. Press the START/STOP key when finished pumping.
8. Enter the reference volume of air (depending on the size of the calibration
pump and times of pumping; e.g. a 2 litre pump pumped 3 times = 6
liters). Confirm with ENTER.
9. The message `Calibration OK` appears on the display.
If the message `EXCESSIVE DEVIATION! exchange screen` appears on
the screen after a calibration, it indicates that the difference between the
measured volume and the entered volume is too great. Check the
temperature setting, the syringe volume and the entered syringe volume
and recalibrate.
Page 30
Page 31

Calibration Details
Last Calibration date of last calibration
BTPS Factor calculated BTPS (=> Body Temperature, Ambient Pressure,
Saturated with water vapor) value. This value compensates for the
difference in inhaled and exhaled humidity. The unit is set for
measuring exhaled volume (100% humidity, Temp 36.8o), and so
when inhaled volume is measured this factor is applied. The SP-2
uses ambient temperature to calculate the BTPS factor. This is
sufficient for accurate FIVC calculation. The formula used is as
follows:
Calibration Factor calculated value between measured and effective calibration air
Temperature ambient temperature in oC (or oF) dependent on device setting.
Measured Volume air volume measured by the system from the calibration pump.
Reference Volume entered air volume depending on the size of the calibration pump
SP-2 User Guide
Art. No. 71022-0000 Welch Allyn Schiller ©2000
BTPS = 0.033 +
273.15 + 36.8
273.15 + Tu
Where: Tu is the ambient temperature in degrees centigrade
0.033 is the equivalent to 760mmHg at 22oC
273.15 is degrees absolute
volume.
and times the air was pumped through the sensor; e.g. pumping 2
liters 3 times amounts to 6 liters (the recommended volume with a 2
litre pump is 4 liters and with a 3 litre pump 6 liters).
Page 31
E
n
g
l
i
s
h
Page 32

Explanation of Measured Values
FVC Forced (expiratory) Vital Capacity. Volume achieved by the quickest possible exhalation after a maximal
inhalation.
FEV
0.5/1.0/3.0
Forced expiratory volume. Lung volume in liters, measured after 0.5, 1.0 or 3 seconds forced expiration.
FEV1 / FVC forced expiratory air volume measured in the first second as a percentage of forced vital capacity.
FEF Forced Expiratory Flow Respiratory. Flow in terms of differing lung volumes measured in liters per
second.
FEF
FEF
FEF
FEF
FEF
FEF
25-75%
75-85%
25%
50%
75%
0.2-1.2
flow speed of the expired air by 25 to 75% of the forced vital capacity (FVC).
flow speed of the expired air by 75 to 85% of the forced vital capacity (FVC).
flow speed of the expired air by 25% of the forced vital capacity (FVC).
flow speed of the expired air by 50% of the forced vital capacity (FVC).
flow speed of the expired air by 75% of the forced vital capacity (FVC).
averaged flow between 0.2 and 1.2 liters of the forced expired vital capacity.
PEF Peak Expiratory Flow.
MEF Maximal Expiratory Flow.
MEF
MEF
MEF
Page 32
75%
50%
25%
flow speed of the expired air by 25% of the forced vital capacity (FVC).
flow speed of the expired air by 50% of the forced vital capacity (FVC).
flow speed of the expired air by 75% of the forced vital capacity (FVC).
MEF
MEF
MEF
75%
50%
25%
= FEF
= FEF
= FEF
25%
50%
75%
Page 33

Explanation of Measured Values
ERV Expiratory Reserve Volume. Possible further expiration starting from the normal expiration level.
IRV Inspiratory Reserve Volume. Possible further inspiration starting from the normal inspiration level.
TV Tidal Volume. Expirational and inspirational volumes during normal respiration.
SVC Slow Vital Capacity. Lung volume measured from a complete expiration following a deep inspiration.
MV Expired or Minute Ventilation. Volume of expired air in liters per minute measured over a minimum of one
minute.
MVV Maximum Voluntary Ventilation. Maximum volume of air which can be moved on expiration while breathing
as deeply and as rapidly as possible.
RR Respiration Rate.
FMFT Forced Mid-expiratory Flow Time. Time difference between the 25% and 75% points of the FVC.
FIVC F o rced Inspiratory Vital Capacity. Inspiration volume achieved between a maximal expiration and a
maximal inspiration.
FIV
1.0
FIV
/ FIVC forced inspiratory air volume measured in the first second as a percentage of forced inspiratory vital
1.0
forced inspiratory air volume in liters measured in the first second.
capacity.
FIV
/ FVC forced inspiratory air volume measured in the first second as a percentage of forced expiratory vital
1.0
capacity.
PIF Peak Inspiratory Flow. Maximum inspiratory flow speed in liters / second.
FIF (=MIF) Fo rced (Maximum) Inspiratory Flow. Maximum inspiratory flow in liters.
FIF
SP-2 User Guide
Art. No. 71022-0000 Welch Allyn Schiller ©2000
50%
(=MIF
) flow speed by 50 % of the forced inspiratory vital capacity.
50%
Page 33
E
n
g
l
i
s
h
Page 34

Care & Maintenance
Self-test
A self test is initiated by the unit every time it is switched on. A table giving
information for the service staff is displayed if an error is detected. To obtain
a printout press the IrDA key when the table is displayed.
The unit should undergo a technical safety check every 12 months. This
safety check should include the following:
° Visual inspection of the unit.
° Calibration of the sensor as detailed on page 26.
The test results must be documented.
Lifed Items
There are no lifed items in the SP-2 Hand-Held Spirometry Unit
Page 34
Page 35

Care & Maintenance
ONLY THE DEVICE ITSELF CAN BE CLEANED - DO NOT ATTEMPT TO CLEAN
THE DISPOSABLE MOUTHPIECE.
DO NOT, UNDER ANY CIRCUMSTANCES, IMMERSE THE UNIT INTO A
CLEANING LIQUID OR STERILIZE WITH HOT WATER, STEAM, OR AIR.
Cleaning the Unit
The unit can be cleaned with a soft damp cloth on the surface only. A standard
hospital grade disinfectant may be used. Where necessary a domestic non-caustic
cleaner can be used for grease and finger marks.
Batteries
° Battery life for the two AA 1.5V alkaline batteries is 6 months under normal
° Check batteries at least once a month for corrosion.
° Remove batteries if the unit is going to be stored for more than a month.
° Dispose of batteries properly. Welch Allyn Schiller recommends that local
SP-2 User Guide
Art. No. 71022-0000 Welch Allyn Schiller ©2000
CAUTION:
use defined as 10 patient sessions per week.
government recycling policy is followed.
Page 35
E
n
g
l
i
s
h
Page 36

Spirometry Tips - How To Do It and Common Pitfalls and Problems
How to Do It
To ensure an acceptable result, the FVC manoeuvre must be performed with maximum effort immediately following a
maximum inspiration; it should have a rapid start and the spirogram should be a smooth continuous curve.
To achieve good results, carefully explain the procedure to the patient, ensuring that he/she is sitting erect with feet
firmly on the floor (the most comfortable position). Note that for child patients, vital capacity can be greater in the
standing position. Apply a nose clip to the patients nose (this is recommended but not essential) and urge the
patient to:
° breathe in fully;
° seal his/her lips around the mouthpiece;
° blast air out as fast and as far as you can until the lungs are completely empty;
° breathe in again as forcibly and fully as possible.
If only peak expiratory flow is being measured then the patient need only exhale for a couple of seconds. Essentials
are:
Page 36
° a good seal on the mouthpiece and
° very vigorous effort right from the start of the manoeuvre and continuing until absolutely no more air can be
exhaled.
° no leaning forward during the test.
Page 37

Spirometry Tips - How To Do It and Common Pitfalls and
Problems
Remember, particularly in patients with airflow obstruction, that it may take many seconds to fully exhale. It is also important to
recognize those patients whose efforts are reduced by chest pain or abdominal problems, or by fear of incontinence, or even just
by lack of confidence. There is no substitute for careful explanation and demonstration - demonstrating the manoeuvre to the
patient will overcome 90% of problems encountered and is critical in achieving satisfactory results. Observation and
encouragement of the patients performance are also crucial. Be sure to examine the spirogram for acceptability and reproducibility,
(correction factors to the measurements for BTPS are automatic during calibration (see Calibration section).
Attention to fine detail in the performance of the breathing manoeuvre is critical to obtaining reliable results.
At least three technically acceptable manoeuvres should be obtained, ideally with less than 0.2 L variability for FEV1 (and FVC)
between the highest and second highest result. Quote the largest value. The American Thoracic Society (ATS) provides the
following guidelines for manoeuvre performance.
FVC
° Minimum of 3 acceptable blows
° A rapid start is essential: this is defined as a back-extrapolated volume of <5% of FVC or 0.15 L, whichever is greater.
° At least 6 second expiration
° End of test - no change in volume for at least 1 second after exhalation time of 6 seconds; or FET >15 seconds; or stopped
for clinical reasons
° Spirometer temperature between 17 and 40 degrees Celsius; measure spirometer temperature to one degree Celsius
° Use of nose clip is encouraged
° Sitting or standing
° Reproducibility: the highest and second highest FVC should agree to within 0.2L
SP-2 User Guide
Art. No. 71022-0000 Welch Allyn Schiller ©2000
Page 37
E
n
g
l
i
s
h
Page 38

Spirometry Tips -How To Do It and
Common Pitfalls and Problems
FEV1
° As for FVC
° Take largest FEV1 even if not from the same curve as the best FVC
° Zero time determined by back-extrapolation - extrapolated volume
should be <5% of FVC or 0.15 liters, whichever is greatest
° Smooth, rapid take off with no: hesitation, cough, leak, tongue
obstruction, glottic closure, Valsalva or early termination
° Reproducibility: the highest and second highest FEV1 should agree
to within 0.2L
Page 38
Page 39

Spirometry Tips -How To Do It and Common Pitfalls and Problems
Patient-Related Problems
The most common patient-related problems when performing the FVC manoeuvre are:
° Submaximal effort
° Leaks between the lips and mouthpiece
° Incomplete inspiration or expiration (prior to or during the forced manoeuvre)
° Hesitation at the start of the expiration
° Cough (particularly within the first second of expiration)
° Glottic closure
° Obstruction of the mouthpiece by the tongue
° Vocalization during the forced manoeuvre
° Poor posture.
Once again, demonstration of the procedure will prevent many of these problems, remembering that all effort-dependent measurements
will be variable in patients who are uncooperative or trying to produce low values.
Glottic closure should be suspected if flow ceases abruptly during the test rather than being a continuous smooth curve. Recordings
in which cough, particularly if this occurs within the first second, or hesitation at the start has occurred should be rejected. Vocalization
during the test will reduce flows and must be discouraged - performing the manoeuvre with the neck extended often helps.
SP-2 User Guide
Art. No. 71022-0000 Welch Allyn Schiller ©2000
Page 39
E
n
g
l
i
s
h
Page 40

Page 40
 Loading...