

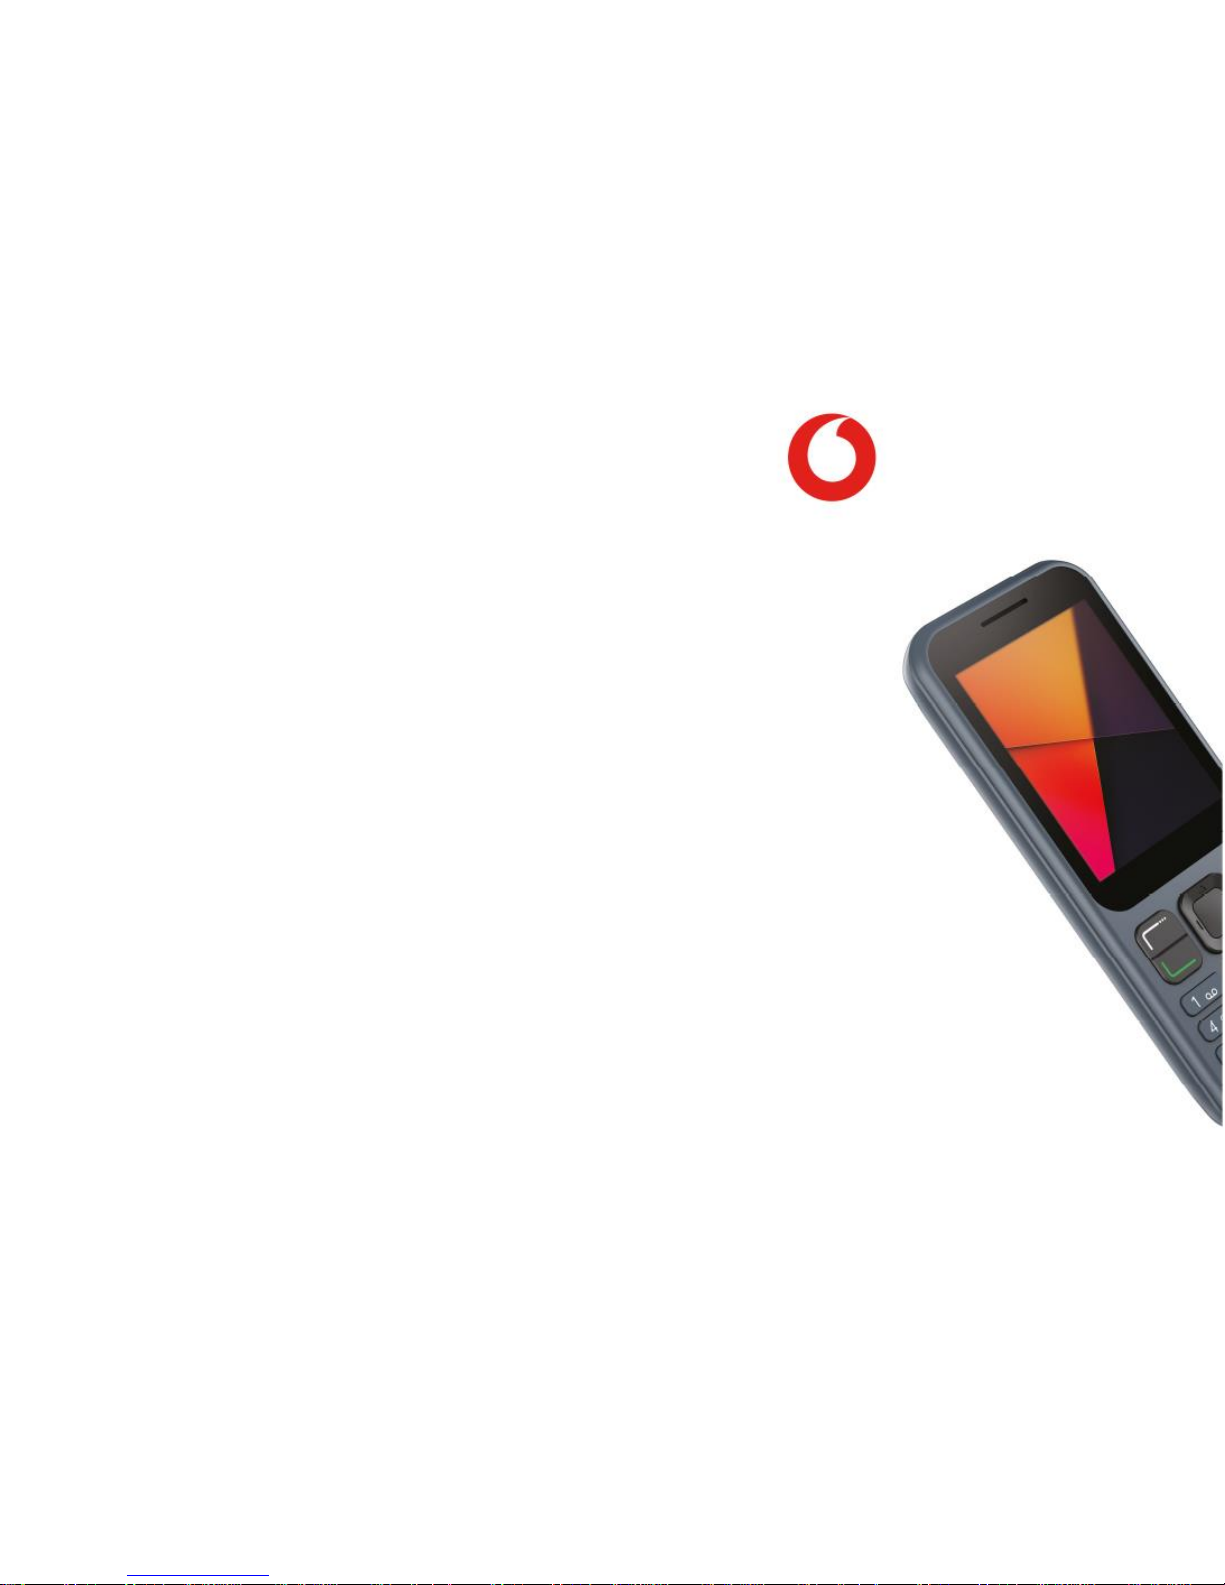
Vodafone smart a9 User Manual
Some services, features and apps may not be available in
all countries. Please ask in-store for details.
© Vodafone Group 2018, Vodacom, Vodafone and the
Vodafone logos are trade marks of the Vodafone Group.
Other product and company names mentioned herein
may be the trade marks of their respective owners.
Smart A9
User Manual

Table of Contents
1. Getting to know your device ......................................................................................... 4
2. Getting to use the keyboard .......................................................................................... 4
3. Inserting a SD card and a SIM card .............................................................................. 4
4. Switching on/off your phone ........................................................................................ 5
5. Charging your phone ........................................................................................................ 5
6. Presentation of the notification bar ........................................................................... 6
7. Accessing the application history ............................................................................... 7
8. Communication .................................................................................................................. 7
8.1 Using the predictive text ............................................................................................... 7
8.2 Launching a call .......................................................................................................... 8
8.3 Managing the call history ....................................................................................... 8
9. Sending an SMS .................................................................................................................. 9
10. Using the Email application ..................................................................................... 9
10.1 Erasing an email account ........................................................................................ 10
10.2 Customizing the email application .................................................................... 10
11. Managing contacts .................................................................................................... 10
11.1 Creating a contact ...................................................................................................... 10
11.2 Sorting contacts .......................................................................................................... 11
11.3 Sharing a contact........................................................................................................ 11
12. Customizing your phone ........................................................................................ 12
12.1 Editing the phone display ....................................................................................... 12
12.2 Changing the idle screen applications ............................................................. 12
12.3 Selecting an audio profile ....................................................................................... 12
12.4 Setting Date and Time .............................................................................................. 12
13. Adding connectivity .................................................................................................. 12
13.1 Adding a Wi-Fi connection ...................................................................................... 12
13.2 Activating Bluetooth .................................................................................................. 13
13.3 Pairing devices with Bluetooth ............................................................................. 13
14. Browsing on the Internet ......................................................................................... 13
15. Using WhatsApp .......................................................................................................... 13
16. Using Facebook ........................................................................................................... 14
17. Switching to flight mode ......................................................................................... 14
18. Using the camera ........................................................................................................ 15
19. Recording voices ........................................................................................................ 15
20. Visualizing your pictures and videos .................................................................. 16
21. Transferring pictures from your phone to your computer ....................... 16
22. Transferring files from a computer to your device ...................................... 16
23. Listening to music ...................................................................................................... 17
24. Listening to the radio ................................................................................................ 17
25. Adjusting the volume of the device ................................................................... 18
26. Setting an alarm .......................................................................................................... 18
27. Adding an event in the Agenda ............................................................................ 18
28. Using the calculator .................................................................................................. 19
29. Using the device as a torch .................................................................................... 19
30. Product safety information .................................................................................... 19
Pictograms and Graphic Symbols .................................................................................. 19
Product safety information ............................................................................................... 20

General information ............................................................................................................ 26
31. WARRANTY INFORMATION.................................................................................... 28
WARRANTY TERMS AND CONDITIONS........................................................................ 28
32. Specifications .............................................................................................................. 29
You just bought a Vodafone Smart A9 by Vodafone phone. Get to know your
phone's functionalities and specifications through this guide.
1. Getting to know your device
Your phone is a "smart feature phone" model. You can use advanced
applications as Facebook Lite and WhatsApp, and you still have a physical
keyboard.
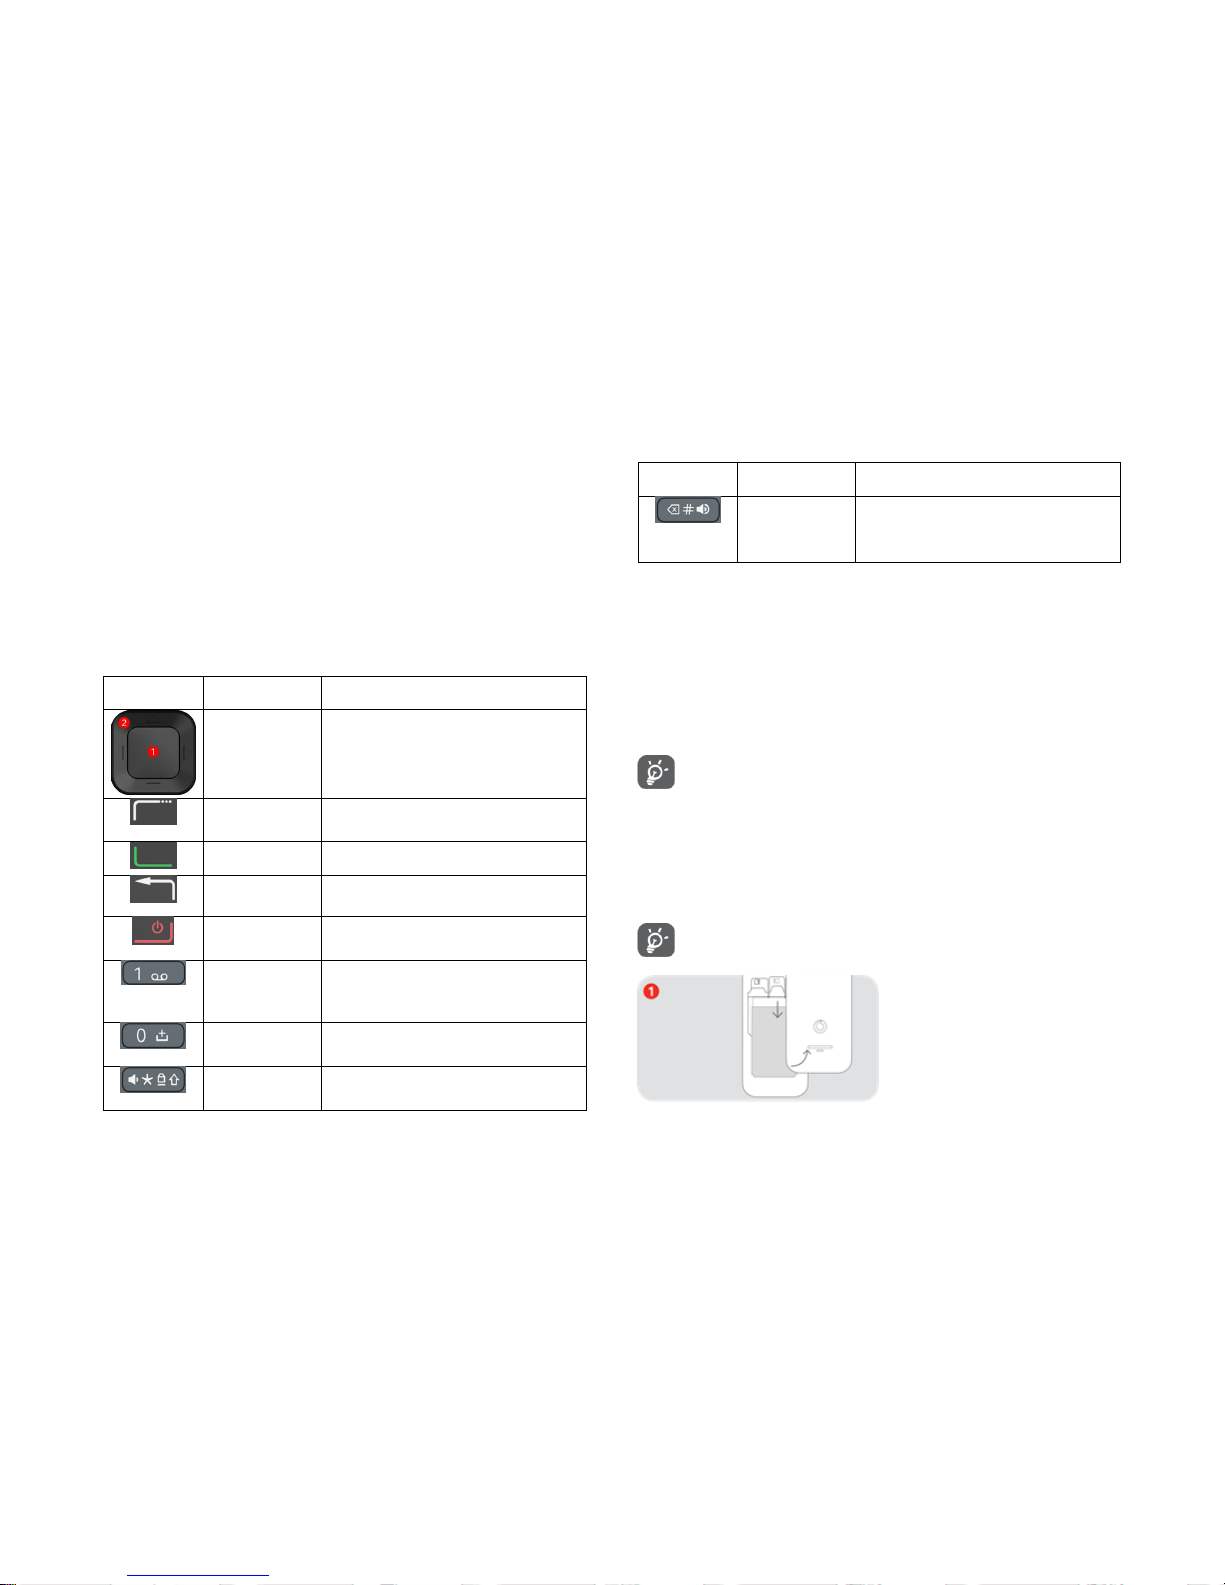
2. Getting to use the keyboard
Keys
Key name
Functions
1. Validation key
2. Navigation
pad
1. Selection and validation key
2. Use the arrows for navigation
Upper left key
Short press: Settings
Long press: Notification
Green key
Launch a call
Back key
Short press: Back function key
Long press: Applications history
Red key
Switch on/off key
Short press (during call): End call key
Voicemail
Short press (in text area): Select
punctuation
Long press: Call voicemail
Space key
Short press (in text area): Add space
Long press (in text area): Add "+"
Lock key
Short press (audio apps): Volume down
Long press (in text area): * key
Long press to lock screen
Delete key
Short press (audio apps): Volume up key
Short press (in text area): Delete key
Long press: # key
To write a message in a text area, press the keys depending on the letters you
want to add. Press the right amount of time until the desired letter/number is
displayed. To write
test
:
1. Press the 8 key once.
2. Press the 3 key, twice.
3. Press the 7 key, four times.
4. Press the 8 key once.
When you are typing a message, a bar appears at the bottom of the
screen to indicate on which letter/number you are. Keep pressing the
same key until the right letter is displayed.
3. Inserting a SD card and a SIM card
You can remove the battery cover of your phone to place the battery and the
SIM and SD cards into their sockets.
Make sure your phone is switched off before doing the following
procedure. (Switching on/off your phone)
1. Remove the battery cover.
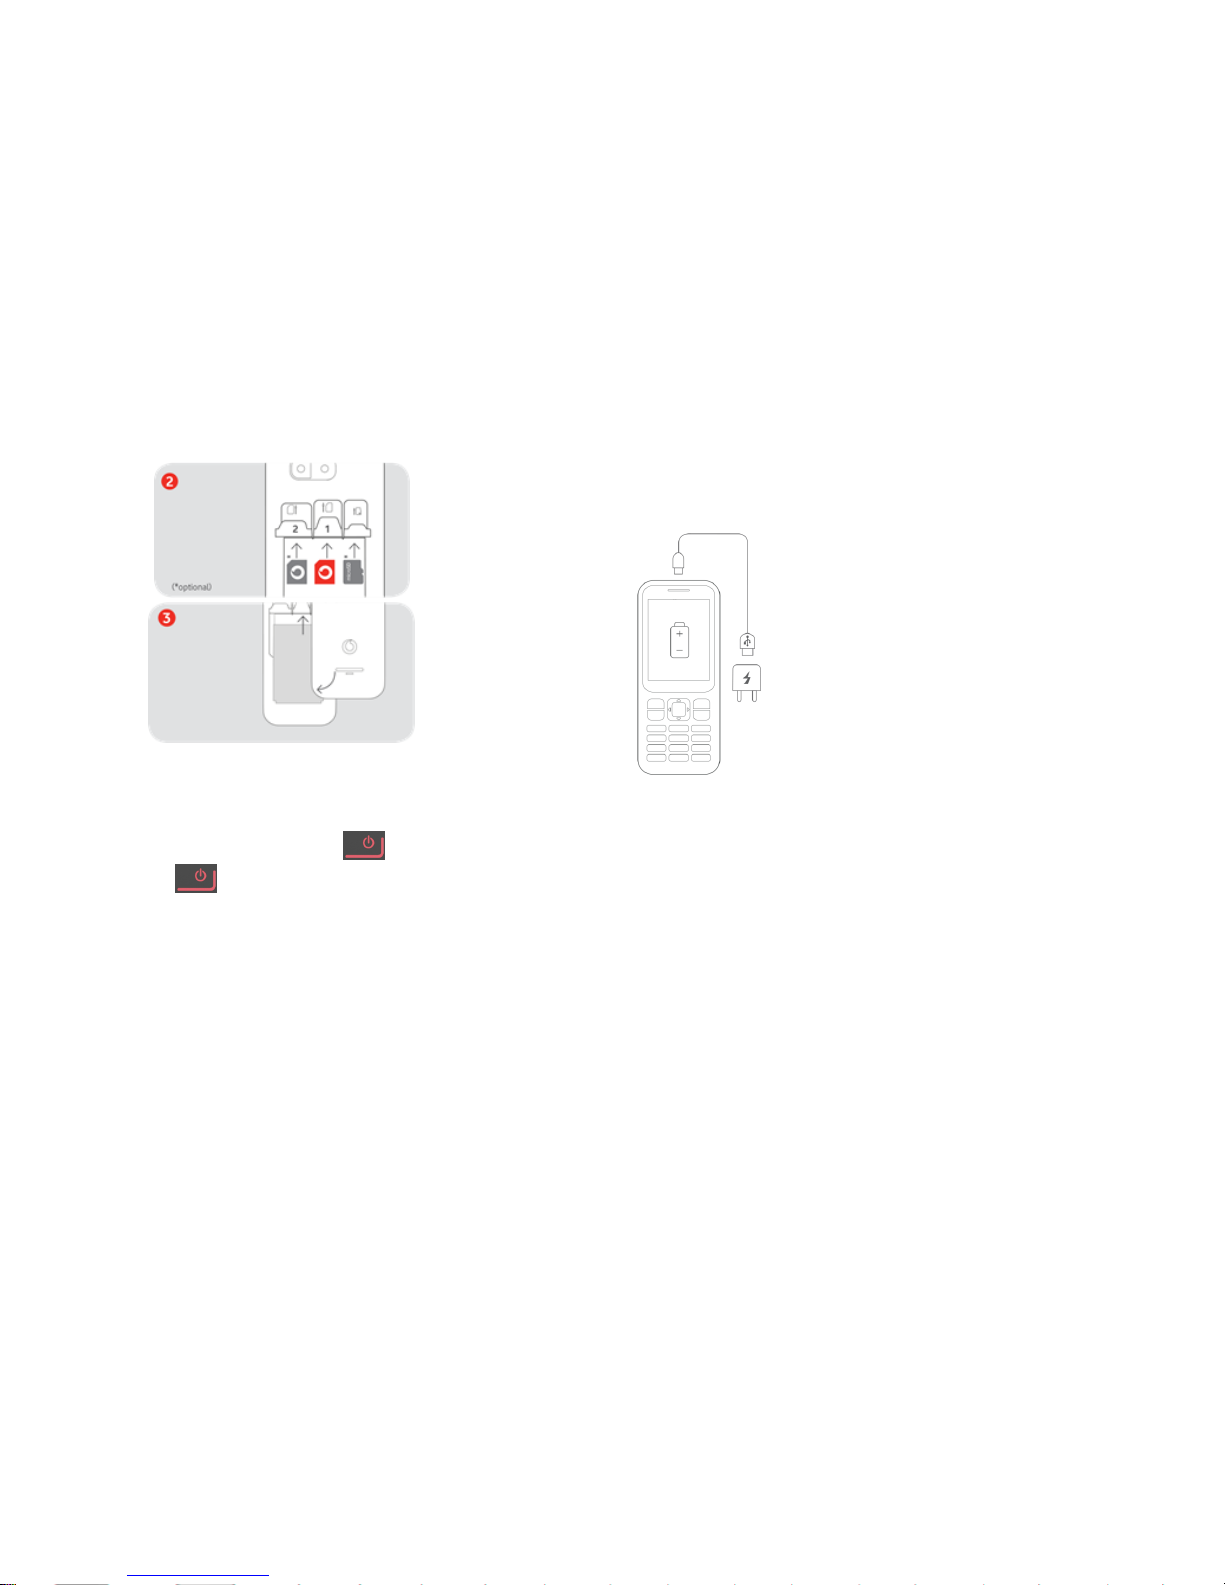
2. Insert the SIM card
and the SD card as
indicated on the drawing.
3. Place the battery
and replace the battery
cover.
4. Switching on/off your phone
To switch on your phone press red key for a moment. Press and hold
the red key again to switch off your phone.
5. Charging your phone
You may need to charge the battery before use.
To charge your phone:
1. Take the USB cable provided.
2. Plug the micro-USB side to your phone.
3. Plug the USB side to the wall charger.
4. Plug the charger to an electrical socket.
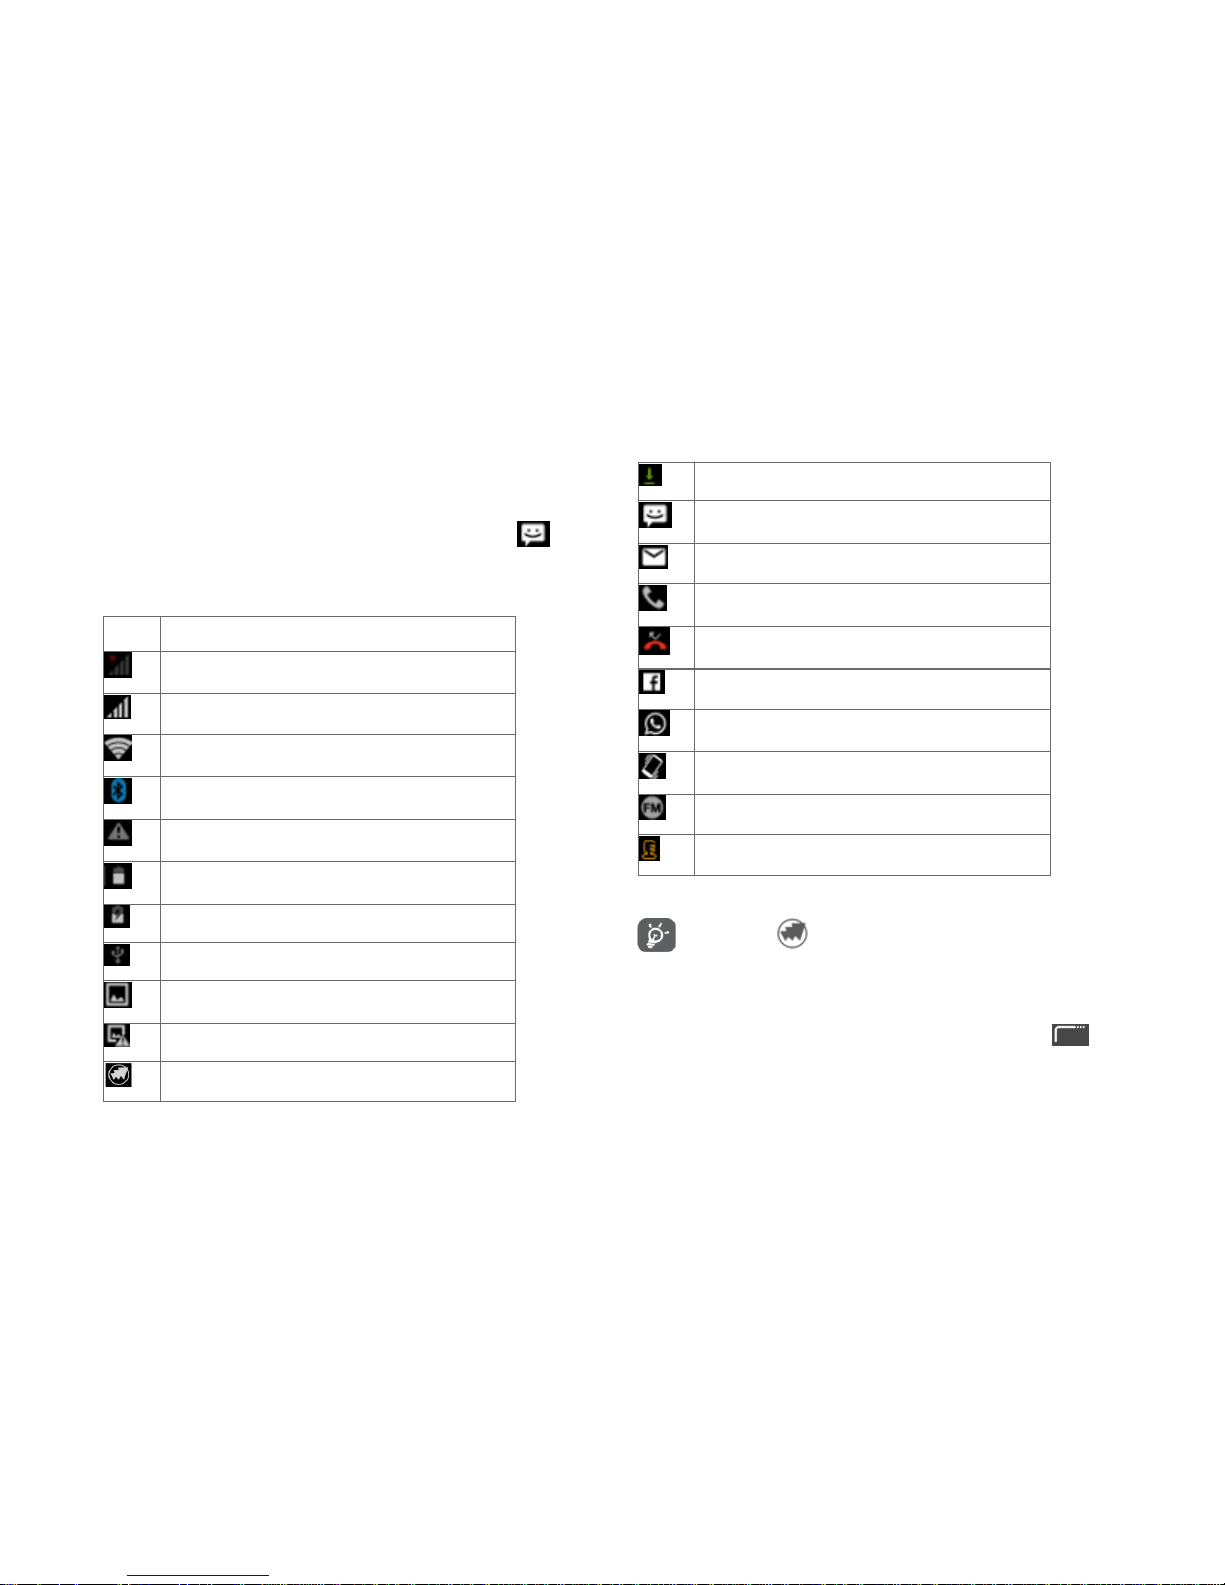
6. Presentation of the notification bar
While using your phone, information is displayed in the notification bar, at the
top of the screen. For example, if you received a message, this icon is
displayed in the notification bar.
You'll find below a table stating the icons appearing in the notification bar:
Icons
Meaning
No network
Network activated
Wi-fi activated
Bluetooth activated
No SIM card
Battery charge level
Battery charging
USB connected
Screenshot saved
Screenshot not saved
You need to update your software
Downloading
New message
New email
Call incoming / On a call
Missed call
Facebook notification
WhatsApp notification
Phone is in silent mode
You are using the FM radio application
You are using the application Recorder
When this icon appears on your notification bar, it means that
you must do a software update.
To do so :
1. When on the idle screen, press and hold the upper left key to
open the navigation bar.

2. Use the navigation pad to reach the notification following this icon
and press the central navigation key to open it.
3. Follow the instructions on the screen to update your phone.
To keep your data safe, it is recommended to do the software
updates when asked.
7. Accessing the application history
Once you are done using an application, exit the application by using the red
key to get back to the idle screen.
However, when you are using your phone, some applications may remain
open in the background. The applications history allows you to see what
applications are remaining open.
As the use of many applications at the same time may cause lack of memory,
or slow down the performance of the phone, it is recommended to regularly
close all the applications in use.
To access the application history:
1. Long press the upper right key .
2. You are now in the applications history.
3. Use the navigation pad to select Remove all
All the applications are now closed.
8. Communication
8.1 Using the predictive text
To communicate with your work colleagues and friends, you can use the
following applications on your device: Messages, Email, Phone etc…
As your device has a physical keyboard, you can use predictive text. This
feature allows you to enhance your typing time as the phone makes
proposals for content depending on the text you are typing.
To use the predictive text, you must be in a text area.
To use the predictive text feature:
1. Once you are in a text area, press this key until "Language
KT9" appears at the bottom of the screen. The predictive text feature
is activated.
2. Start typing as such: To type "test":
a. Press once the "8" key.
b. Press once the "3" key.
c. Press once the "7" key.
d. Press once the "8" key.
3. While pressing the keys, word suggestions appear at the bottom of
the screen.
Sometimes, predictive text cannot guess the word you want to type.
You can normally find it in the suggestions.
Predictive text icon
Word suggestions

To select a word suggestion:
1. Use the navigation pad to select the perfect word suggestion.
2. Press the validation key to insert the suggestion to your text.
8.2 Launching a call
Depending on your habits, you can choose the following ways to launch a call.
You can:
1. Directly dial the phone number of your contact for the idle screen
2. Use the Contacts application to choose the contact to call
1 DIALLING A NUMBER:
1. From the home screen, dial the number.
2. Press the green key to launch the call.
2 USING CONTACTS :
1. Launch the application Contacts .
2. Select a contact in the list.
3. Press the green key to launch the call.
Once you are done with your call, use the red key to hang up.
8.3 Managing the call history
The call history allows you to manage your received calls, the calls you made
and your missed calls.
To access the call history:
1. Launch the application Phone .
2. Open the sub-menu by pressing the upper left key .
3. Select Call history.
4. Aside from the All tab, you find 3 arrow-indicated tabs:
To access these tabs, use the navigation pad.
a. Under the blue arrow, you find the calls you received and
answered.
b. Under the green arrow, you find the calls you made.
c. Under the red arrow, you find your missed calls.
If one of your contact calls you, but his/her number is not saved on
your phone, you can save the number directly from the call history.
1. Launch the Phone .
2. Press the upper left key and select Call history.
3. Select the phone number to be saved.
4. Select Add to contacts.
5. Select Create new contact.
6. Fill in the fields and select OK.
TO DELETE THE HISTORY:
1. Launch the application Phone .
2. Press the upper left key and select Call history in the menu.
3. The history of your calls is displayed. Select the All tab to have an
overall view of the performed operations.
4. Select the operation you want to delete and press the central
navigation key.
5. Use the arrows to select the bin icon in the top right-hand corner and
press the central navigation key to delete it.
9. Sending SMS
To send SMS and MMS to your contacts, use the application Messages.
To access the Messages application, you can use the shortcut on
the idle screen or select the application in the application Messages
in the menu.
To send a message:
1. Launch the application Messages .
2. Press the upper left key and select New message.
3. Add a recipient.
4. Type your message in the text area and use the arrow on the right
to send your message.
TO SEND SMS TO SEVERAL RECIPIENTS:
To do so, simply add several recipients to your message.
Select this icon next to the Enter the person's name or number field
and select the recipients in the list.
You can also type the name of the recipients directly.
10. Using the Email application
To communicate with your contacts, you can use the application Email of
your phone, which you can find in the applications menu.
Before using the application Email, you need to add an email account.
1. Launch the application Email .
2. Type the email address and password. Select Next.
3. Your emails are downloaded automatically.
You can add several email accounts.
To add a new email account:
1. Launch the application Email .
2. Press the upper left key to display the sub-menu.
3. Select Settings.
4. Select on the top-right corner of the screen.
5. Type your email address and password and select Next.
If you have several accounts, to access the emails of a specific account,
do as follows:
1. Press the upper left key to access the pop-up menu and select Email
Folder.
2. Select the desired email account.
 Loading...