

Page 1

Administration Guide
TM
Page 2

Please note that you will always find the most up-to-date technical
documentation on our Web site at http://www.vmware.com/support/.
VMware, Inc.
3145 Porter Drive
Palo Alto, CA 94304
www.vmware.com
The VMware Web site also provides the latest product updates.
Copyright © 1998-2005 VMware, Inc. All rights reserved. Protected by one or more of U.S. Patent Nos.
6,397,242, 6,496,847, 6,704,925, 6,711,672, 6,725,289, 6,735,601, 6,785,886, 6,789,156 and 6,795,966; patents
pending. VMware, the VMware “boxes” logo and design, Virtual SMP and VMotion are registered trademarks or
trademarks of VMware, Inc. in the United States and/or other jurisdictions. Microsoft, Windows and Windows
NT are registered trademarks of Microsoft Corporation. Linux is a registered trademark of Linus Torvalds. All
other marks and names mentioned herein may be trademarks of their respective companies. Revision
20050707 Version: 3.2 Item: GSX-ENG-Q205-089
Page 3

Table of Contents
Introduction and System Requirements ____________________________9
VMware GSX Server: Enterprise-Class Virtual Infrastructure
for x86-Based Servers ____________________________________________10
Welcome to VMware GSX Server ___________________________________12
Enterprise-Class Virtual Infrastructure for Intel-Based Servers ___________13
What’s New in Version 3 __________________________________________14
Features in Version 3.2 _________________________________________14
Critical Bugs Fixed in GSX Server 3.2 ______________________________15
Features in Version 3.1 _________________________________________15
Critical Bugs Fixed in GSX Server 3.1 ______________________________16
Features in Version 3 __________________________________________17
Before You Install the Release ___________________________________21
If You Are Upgrading from an Earlier Version of GSX Server _____________ 23
Reinstall VMware Tools _________________________________________23
Host System Requirements ________________________________________24
Server Requirements __________________________________________24
Remote Client Requirements ____________________________________30
Virtual Machine Specifications _____________________________________32
Supported Guest Operating Systems ________________________________35
Technical Support Resources ______________________________________37
Self-Service Support __________________________________________37
Online and Telephone Support __________________________________37
Support Offerings ____________________________________________37
Reporting Problems ___________________________________________37
Log Files ____________________________________________________39
Installing VMware GSX Server ___________________________________ 43
Selecting Your Host System _____________________________________43
About the VMware Virtual Machine Console on the Server _____________ 44
Installing VMware GSX Server on a Windows Host ______________________45
Basic Installation ______________________________________________46
Default Directories ____________________________________________48
Installing the GSX Server Software on a Windows Host ________________48
Installing VMware GSX Server on a Linux Host _________________________55
Basic Installation ______________________________________________56
3
Page 4

Default Directories ____________________________________________ 58
Installing the GSX Server Software on a Linux Host ___________________59
Installing the VMware Management Interface on a Linux Host __________63
Installing an X Server __________________________________________ 64
Before You Install on a SuSE Linux 7.1 or Higher or SLES Host ___________64
Before You Install on a SuSE Linux Enterprise Server 8 Host _____________65
Before You Install the VMware Management Interface
on a Linux Host ______________________________________________65
Configuring Web Browsers for Use with GSX Server _____________________67
Launching the VMware Virtual Machine Console
from the Management Interface on an Encrypted Server ______________ 67
Connecting to the Management Interface on a Proxy Server ___________68
Launching Help in Netscape on a Linux System _____________________69
Installing the VMware Virtual Machine Console ________________________ 70
Installing the VMware Virtual Machine Console
on a Windows Host ___________________________________________ 70
Installing the VMware Virtual Machine Console on a Linux Host _________73
Installing the VMware Scripting APIs ________________________________75
Installing the VmPerl and VmCOM Scripting APIs
on a Windows Host ___________________________________________ 75
Installing the VmPerl Scripting API on a Linux Host ___________________78
Uninstalling VMware GSX Server ___________________________________ 80
Uninstalling GSX Server on a Windows Host ________________________80
Uninstalling GSX Server on a Linux Host ___________________________85
Upgrading VMware GSX Server _________________________________ 87
Preparing for the Upgrade ________________________________________ 88
Before You Install VMware GSX Server _____________________________88
When You Remove an Existing Version and Install the New Version ______90
Upgrading on a Windows Host ____________________________________91
Upgrading on a Linux Host ________________________________________ 92
Using Virtual Machines Created with Version 2 under Version 3 ____________93
Creating Everything New from the Start ___________________________93
Using an Existing Virtual Machine without Upgrading
the Virtual Hardware __________________________________________93
Using an Existing Virtual Machine and Upgrading
the Virtual Hardware __________________________________________94
Upgrading Virtual Hardware in the Guest Operating System ___________94
4
www.vmware.com
Page 5

Using Virtual Machines Created with Version 1 under Version 3 ___________103
Upgrading Virtual Hardware in the Guest Operating System __________ 103
Managing Virtual Machines and the VMware GSX Server Host _______ 107
Remotely Managing Virtual Machines ______________________________ 108
Changing the Port Number
for VMware Virtual Machine Console Connections __________________109
Downloading the VMware Virtual Machine Console _________________111
Securing Virtual Machines and the Host _____________________________114
Understanding Permissions and Virtual Machines ___________________114
Authenticating Users and Running Virtual Machines
on a GSX Server for Windows Host ______________________________117
Authenticating Users and Running Virtual Machines
on a GSX Server for Linux Host __________________________________119
Checking Permissions in the VMware Management Interface __________ 121
Securing Your Remote Sessions _________________________________121
Identifying a Virtual Machine by Its UUID ____________________________123
Specifying a UUID for a Virtual Machine ___________________________124
Logging GSX Server Events on Windows ____________________________ 125
Backing Up Virtual Machines and the GSX Server Host _________________ 127
Using a Backup Agent in the Virtual Machine ______________________127
Using a Backup Agent Running on the Host Operating System ________ 127
Backing Up the GSX Server Host ________________________________128
Considerations for Backing Up Virtual Machines ____________________ 128
Using the VMware Management Interface ___________________________129
Setting the Session Length for the VMware Management Interface _____130
Logging On to the VMware Management Interface _________________131
Using the Status Monitor ______________________________________132
Configuring a Virtual Machine __________________________________137
The Apache Server and the VMware Management Interface __________147
Logging Off of the VMware Management Interface _________________ 147
Deleting Virtual Machines ________________________________________148
Deleting a Virtual Machine Using
the VMware Virtual Machine Console ____________________________148
Deleting a Virtual Machine Using
the VMware Management Interface _____________________________148
Configuring the GSX Server Host __________________________________149
Securing Remote Connections with SSL __________________________149
5
Page 6

Configuring Startup and Shutdown Options for Virtual Machines ______150
Setting User Preferences for the VMware GSX Server Host ____________155
Setting Global Preferences for VMware GSX Server __________________ 160
Creating Network Labels ______________________________________ 163
Setting a MIME Type to Launch
the VMware Virtual Machine Console ____________________________ 166
Using VirtualCenter to Manage GSX Server Virtual Machines _____________169
Creating Virtual Machines on a GSX Server Host
from a VirtualCenter Client _____________________________________169
Connecting to a GSX Server Virtual Machine
from a VirtualCenter Client _____________________________________169
Moving and Sharing Virtual Machines ___________________________ 171
Moving a VMware GSX Server 3 Virtual Machine ______________________ 172
Virtual Machines Use Relative Paths ______________________________172
Preparing Your Virtual Machine for the Move ______________________172
Moving a Virtual Machine to a New Host __________________________ 173
Moving a GSX Server 2 Virtual Machine _____________________________ 175
Virtual Machines Use Relative Paths ______________________________175
Preparing Your Virtual Machine for the Move ______________________175
Moving a Virtual Machine to a New Host __________________________ 176
Moving Older Virtual Machines ___________________________________ 178
Virtual Machines May Use Relative or Absolute Paths ________________178
Preparing Your Virtual Machine for the Move ______________________179
Preparing the New Host Machine _______________________________179
Considerations for Moving Disks in Undoable Mode _________________180
Sharing Virtual Machines with Other Users ___________________________ 183
Performance Tuning and the VMware GSX Server Host _____________ 185
Configuring and Maintaining the Host Computer _____________________186
Configuring GSX Server _________________________________________187
General GSX Server Options ___________________________________ 187
GSX Server on a Windows Host _________________________________191
GSX Server on a Linux Host ____________________________________193
Understanding Memory Usage ___________________________________ 194
Memory Use on the Host ______________________________________194
Specifying How Much RAM is Used
by All Running Virtual Machines ________________________________195
Memory Usage on Older Linux Hosts ____________________________197
6
www.vmware.com
Page 7

High-Availability Configurations with VMware GSX Server __________ 199
Using SCSI Reservation to Share SCSI Disks with Virtual Machines _________200
SCSI Reservation Support _____________________________________200
Enabling SCSI Reservation _____________________________________201
Issues to Consider When Sharing Disks ___________________________202
Overview of Clustering with GSX Server _____________________________204
Applications That Can Use Clustering ____________________________205
Clustering Software __________________________________________205
Creating a Cluster in a Box _______________________________________206
Configuring Virtual Machines for Cluster in a Box ___________________207
Creating a Two-Node Cluster with Microsoft Clustering Services
on a Single GSX Server Computer _______________________________207
Using Network Load Balancing with GSX Server ______________________214
Overview of Network Load Balancing Clusters _____________________214
Creating a Multinode Network Load Balancing Cluster _______________215
Creating Two-Node Clusters Using Novell Clustering Services ____________ 219
Creating the First Node's Base Virtual Machine _____________________219
Creating the Second Node in the Cluster _________________________220
Installing the Guest Operating System and VMware Tools ____________220
Adding the Shared Disks to Both Virtual Machines __________________220
Installing Novell Clustering Services on the Cluster Nodes ____________ 222
Clustering Using the iSCSI Protocol ________________________________223
Clustering Scenarios Using iSCSI ________________________________223
Creating and Configuring the iSCSI Initiator Virtual Machine ___________224
Configuring the iSCSI Target in the Cluster ________________________ 225
Glossary ____________________________________________________ 227
Index ______________________________________________________ 233
7
Page 8

8
www.vmware.com
Page 9

CHAPTER 1
Introduction and System Requirements
The following sections introduce you to VMware GSX Server.
• VMware GSX Server: Enterprise-Class Virtual Infrastructure for x86-Based Servers
on page 10
• Welcome to VMware GSX Server on page 12
• What’s New in Version 3 on page 14
• Host System Requirements on page 24
• Virtual Machine Specifications on page 32
• Supported Guest Operating Systems on page 35
• Technical Support Resources on page 37
9
Page 10

VMware GSX Server Administration Guide
VMware GSX Server: Enterprise-Class
Virtual Infrastructure for x86-Based
Servers
VMware® GSX Server is virtual infrastructure for enterprise IT administrators who want
to consolidate servers and streamline development and testing operations. GSX
Server is easily installed and managed, and provides rapid return on investment (ROI).
Unlike other virtualization products, GSX Server is enterprise-proven, preserves
freedom of choice and offers an upgrade path to datacenter-class virtualization.
Because it has over four years of proven success, thousands of customers trust
VMware GSX Server as their virtualization solution. Easily installed on Windows or
Linux platforms, GSX Server provides advanced capabilities that make it the most
flexible server virtualization product on the market. GSX Server is part of the widely
deployed VMware virtual infrastructure solution with virtual machines compatible
across all VMware products, and with unified management and provisioning provided
by VMware VirtualCenter.
VMware GSX Server simplifies computing infrastructure by partitioning and isolating
servers in secure and transportable virtual machines, each of which can run standard
Windows, Linux or NetWare operating systems and applications. GSX Server allows
you to remotely manage, automatically provision and standardize virtual machines on
a secure, uniform platform.
Thousands of enterprise customers rely on VMware GSX Server to deliver server
scalability, reliability and high availability and to maximize return on IT investments.
Use GSX Server across the enterprise to:
• Streamline software development and testing operations with easily provisioned
and managed server-based virtual machines.
• Implement server consolidation for new and legacy departmental server
applications.
• Provision servers rapidly to local or remote locations.
• Streamline operating system and application patch management.
10
www.vmware.com
Page 11

CHAPTER 1 Introduction and System Requirements
Key GSX Server 3 Benefits
GSX Server 3 offers the following key benefits:
• Shipping for over four years, with thousands of successful customers, VMware
GSX Server is the most flexible and easily deployed server virtualization product
on the market.
• Offers widest selection of supported host and guest operating systems of any
virtualization technology — preserves your freedom to choose the best
operating system platform.
• Integrates easily into any environment for ultimate versatility — installs like an
application and runs on any standard x86 hardware.
• Supports large server — up to 64GB of host memory, 32 host processors and 64
powered-on virtual machines — for ultimate scalability, extensibility and
robustness.
• Offers virtual machine compatibility across the entire VMware family of
virtualization products and is ready to run with VMware VirtualCenter.
• Supports advanced virtual machine clustering for high-availability applications.
• Ensures reliable server consolidation through isolated virtual partitions.
• Allows secure remote management.
• Permits full network connectivity for virtual machines.
• Automates monitoring and control of virtual machines with VmCOM and VmPerl
Scripting APIs.
• Runs virtual disk files on any system with current VMware software installed.
To discover more new features of VMware GSX Server 3, see What’s New in Version 3
on page 14.
11
Page 12

VMware GSX Server Administration Guide
Welcome to VMware GSX Server
Thank you for choosing VMware GSX Server, the software that provides IT
professionals with enterprise-class server consolidation and high availability of server
resources by letting them run multiple operating systems in secure, transportable,
high-performance virtual computers.
If you’re new to GSX Server, this chapter is the place to start.
If you’re a veteran user of VMware products, take a few minutes to see what’s new in
version 3 and review the notes on upgrading your installation.
The VMware GSX Server Administration Guide introduces you to some of the things you
can do with GSX Server and guides you through the key steps for installing the
software, configuring your server host and managing your virtual machines.
The VMware GSX Server Virtual Machine Guide provides information on creating virtual
machines, as well as in-depth reference material for getting the most out of the
sophisticated features of GSX Server.
12
www.vmware.com
Page 13
CHAPTER 1 Introduction and System Requirements
Enterprise-Class Virtual Infrastructure for Intel-Based Servers
VMware products provide a virtualization layer that turns your physical computers
into a pool of logical computing resources. You can then dynamically allocate those
resources to any operating system or application in the way that best meets your
needs. You’ll be able to spend more time delivering tangible value to your business
and less time installing operating systems, rebooting and reconfiguring hardware.
Run the operating systems you need — all at once.
With VMware virtualization technology, you can set up completely independent
installations of operating systems on a single machine. Multiple instances of
Microsoft® Windows® or Linux® can run side by side in virtual machines that you
create with the GSX Server software. Each virtual machine is equivalent to a server
with a unique network address and a full complement of hardware devices. You install
and run a complete, unmodified operating system and application software, just as
you do on a physical server.
Host and Guest
• The physical computer
on which you install
the GSX Server
software is called the
host computer, and its
operating system is
called the host
operating system.
• The operating system
running inside a virtual
machine is called a
guest operating
system.
• For definitions of these
and other special
terms, see the glossary
at the end of this
manual.
13
Page 14

VMware GSX Server Administration Guide
What’s New in Version 3
Whether you’re a long-time power user of VMware GSX Server or a new user who is
just learning what you can do with virtual machines, the new features in VMware GSX
Server 3 extend its capabilities and make it easier to use.
Features in Version 3.2
Here are some highlights of key features to explore in VMware GSX Server 3.2:
New Operating System Support
VMware GSX Server 3.2 adds full support for the following 64-bit host operating
systems on AMD64 and Intel® EM64T processors:
• Microsoft® Windows Server 2003 x64 Edition as a host operating system on
AMD64 and Intel EM64T processors
VMware GSX Server 3.2 adds experimental support for the following 64-bit host
operating systems on AMD64 and Intel EM64T processors:
• Red Hat™ Enterprise Linux 4
• Red Hat Enterprise Linux 3 Update 4
• SUSE™ LINUX Enterprise Server 9 Service Pack 1
• SUSE LINUX 9.3
• SUSE LINUX 9.2
VMware GSX Server 3.2 adds support for the following 32-bit host and guest
operating systems:
• Microsoft Windows Server 2003 Service Pack 1
• Mandrake Linux 10.0 and 10.1
• Red Hat Enterprise Linux 4
• Red Hat Enterprise Linux 3 Update 4
• Red Hat Enterprise Linux 2.1 Update 6
• SUSE LINUX Enterprise Server 9 Service Pack 1
• SUSE LINUX 9.3 (experimental support)
• SUSE LINUX 9.2
14
Support for Clustering with the iSCSI Protocol
Using the iSCSI protocol allows you to set up a clustering environment across hosts.
For more information, see Clustering Using the iSCSI Protocol on page 223.
www.vmware.com
Page 15

CHAPTER 1 Introduction and System Requirements
Dual-Core Processor Licensing Compatibility
The two processor version of GSX Server now supports systems with two dual-core
processors.
Critical Bugs Fixed in GSX Server 3.2
Bugs fixed in this release include:
• Fix for panic that occurs on Red Hat Enterprise Linux 3.0 AS host.
• Fix for core dump when powering on virtual machine on Fedora Core 3 host.
(Fedora is not a supported GSX Server host operating system.)
• Fix to allow USB devices to work in virtual machines on SUSE LINUX 9.1 host.
• Correction for monitor error that occurred when upgrading Windows Server
2003 guest operating system to Service Pack 1 RC1.
• Fix for inability to power on virtual machine with legacy virtual disk.
• Fix for DirectInput error that occurred when GSX Server automatically powered
on a virtual machine when the Windows host starts. The message read:
Failed to create DirectInput object-
HRESULT(0x80004001:sev 1 fac 0 code 16385]:
Unknown error 16385(0x4001)
• Fix for memory issue on hosts with 32GB RAM.
• Fix for VirtualCenter alarm showing maximum memory usage when virtual
machine is idle or under low usage.
• Fix to prompt user to power off any running virtual machines before running the
vmware-config.pl configuration program.
• Fix for security vulnerability described in CAN-2004-0700.
• Fix to improve scalability and performance on NUMA hardware.
Features in Version 3.1
Here are some highlights of key features to explore in VMware GSX Server 3.1:
Manage Virtual Disks with VMware Virtual Disk Manager
Create, manage and modify virtual disk files from the command line or within scripts
with the VMware Virtual Disk Manager utility. For more information, see Using VMware
Virtual Disk Manager in the VMware GSX Server Virtual Machine Guide.
New Operating System Support
Get the freedom to choose the operating systems and applications that work best for
you. VMware GSX Server 3.1 provides experimental support for Microsoft Windows
15
Page 16

VMware GSX Server Administration Guide
Server 2003 for 64-Bit Extended Systems (beta), Red Hat Enterprise Linux 3.0 and SuSE
Linux Enterprise Server 8.0 on hosts with 64-bit processors.
Experimental guest operating system support is provided for Solaris 9 and 10
Operating System x86 Platform Edition.
VirtualCenter Ready
GSX Server 3.1 is enabled for management by VMware VirtualCenter. You can use
VirtualCenter to manage and provision virtual machines on multiple GSX Server hosts,
then migrate the virtual machines between other GSX Server and ESX Server systems
under VirtualCenter management.
GSX Server 3.1 Secured with OpenSSL 0.9.7d
GSX Server 3.1 incorporates the updated version of OpenSSL. OpenSSL 0.9.7d corrects
various security vulnerabilities.
Critical Bugs Fixed in GSX Server 3.1
Bugs fixed in this release include:
• Fix for Apache Web server crashes on Linux hosts after VMware Management
Interface timed out.
• Fix for problem that prevented the launching of the VMware Virtual Machine
Console from the VMware Management Interface on a Linux host.
• Fix for issue where the VMware Management Interface reported incorrect
memory and processor usage statistics.
• Fix for VMware Management Interface issue where connections secured with
SSL were redirected to insecure port 8222.
• Fix for Windows hosts where the Windows registry keys became read-only after
removing GSX Server 2.x. This caused the installation of GSX Server 3 to fail.
• Fix for Linux hosts where users in particular groups could not create virtual
machines.
• Fix for Linux hosts where switching to the vmxnet networking driver caused
networking to fail in a virtual machine.
• Fix for Windows hosts where a virtual machines froze and the only workaround
was to kill the virtual machine process.
• Fixes for SCSI reservation issues including deadlocks, and panics that occurred
when powering on clustered virtual machines configured with LSI Logic SCSI
adapters.
16
www.vmware.com
Page 17

CHAPTER 1 Introduction and System Requirements
• Fix for issue that caused the VMware Registration Service service to hang when
starting the host while virtual machines are configured to power on
automatically with the host.
• Fix for an application error that occurred in Windows NT 4.0 Service Pack 6a
(Japanese language version only) guest operating systems when using the
search function of Windows Explorer. The error occurred only when VMware
Tools is installed in the guest.
• Fix to allow the installation of VMware Tools in Windows NT 4.0 Support Pack 3
guest operating systems. For more information, see knowledge base article 1304
at www.vmware.com/support/kb/enduser/std_adp.php?p_faqid=1304.
• Fix for issue where a GSX Server 2.5.x virtual machine on a Windows host
configured with a static IP address lost its static IP after it was powered on under
GSX Server 3. For more information, see knowledge base article 1307 at
www.vmware.com/support/kb/enduser/std_adp.php?p_faqid=1307.
• You can now restrict which users can create virtual machines and virtual disks.
For more information, see knowledge base article 1042 at www.vmware.com/
support/kb/enduser/std_adp.php?p_faqid=1042.
• Virtual machines configured for NAT networking can now use Point-to-Point
Tunneling Protocol (PPTP).
Features in Version 3
Here are some highlights of key features to explore in VMware GSX Server 3:
GSX Server 3 Security Update: OpenSSL 0.9.7d Patches
Patches are available for GSX Server 3 that update the version of OpenSSL used in the
product. The newer version of OpenSSL corrects security vulnerabilities and is posted
on the GSX Server Security Updates Web page at www.vmware.com/download/
gsx_security.html.
GSX Server 3 users are strongly urged to download and install these patches.
Enhanced Virtual Machine User Access Control
On Windows hosts, a virtual machine runs as a user. You can specify the particular user
or let the virtual machine run as the user who powers it on. For more information, see
Authenticating Users and Running Virtual Machines on a GSX Server for Windows
Host on page 117.
17
Page 18

VMware GSX Server Administration Guide
Improved Security for Remote Connections
SSL is enabled by default for remote connections with the VMware Virtual Machine
Console and the VMware Management Interface.
VirtualCenter Ready
GSX Server 3 is enabled for management by an upcoming release of VMware
VirtualCenter. You will be able to use VirtualCenter to manage and provision virtual
machines on multiple GSX Server hosts, then migrate the virtual machines between
other GSX Server and ESX Server systems under VirtualCenter management.
New VMware Virtual Machine Console
Connect to and manage virtual machines with the VMware Virtual Machine Console,
which combines the best abilities of the local and remote consoles in one application.
Create and configure virtual machines locally and remotely. Connect to virtual
machines from the local server or remote client at the same time, while other
consoles are already connected. Run virtual machines in full screen mode locally and
remotely.
The console interface is completely updated. You can run multiple virtual machines in
the same window and switch from one to another using the new quick switch mode.
The console menus have been streamlined. The console requires less network
bandwidth over remote connections than the older console did.
For details, see Running Virtual Machines in the VMware GSX Server Virtual Machine
Guide.
18
Take Snapshots of Your Virtual Machines
You can take a snapshot of your virtual machine’s state, a point-in-time copy of the
running system state, that is saved to disk. You can revert to that snapshot at any time
— making it easier to do challenging tasks like upgrading guest operating systems.
Take a snapshot, upgrade the operating system, and if something goes wrong, revert
back to the snapshot. Or use the snapshot as a starting point for a sales
demonstration.
See Tak ing S naps hots in the VMware GSX Server Virtual Machine Guide for details.
Automatically Install GSX Server on Windows Hosts and VMware Tools in
Windows Guests
We’ve improved the installers for Windows hosts and for VMware Tools in Windows
guest operating systems. GSX Server for Windows hosts and VMware Tools for
Windows guests use the Microsoft Windows Installer runtime engine, which allows
you to automate the installation of GSX Server on a Windows host and VMware Tools
www.vmware.com
Page 19

CHAPTER 1 Introduction and System Requirements
in a Windows virtual machine. For information, see Automating the Installation of GSX
Server on page 52 and Automating the Installation of VMware Tools in a Windows
Guest in the VMware GSX Server Virtual Machine Guide.
With the Microsoft Windows Installer runtime engine, you can pick and choose the
features you want to install.
Automatically Start and Stop Virtual Machines When the Host Starts and Stops
You can configure virtual machines to automatically power on when the GSX Server
host starts or automatically power off when the GSX Server host shuts down. For more
information, see Powering Virtual Machines On and Off When the Host Starts and
Shuts Down in the VMware GSX Server Virtual Machine Guide.
Connect to Older Virtual Machines and Older GSX Server Hosts
You can connect to older GSX Server hosts with consoles and run virtual machines
from older versions of VMware products. For information, see Connecting to Older
GSX Server and ESX Server Systems and Older Virtual Machines in the VMware GSX
Server Virtual Machine Guide.
Improved VMware Management Interface
Managing virtual machines and the GSX Server host from a Web browser just got
better. You can configure more host and virtual machine features, including virtual
machine hardware, configuration options and SSL connections. For more information,
see Using the VMware Management Interface on page 129.
Log GSX Server Events on Windows Hosts
GSX Server sends information about certain events that occur in the application on
Windows hosts to the Windows Event Viewer. For details, see Logging GSX Server
Events on Windows on page 125.
Improved Virtual Disk and Networking Performance
Experience 10 to 20% improvement in virtual disk and networking performance.
Monitor Virtual Machine Performance on Windows Hosts
Use GSX Server specific counters with the Windows Performance console (PerfMon)
to monitor the performance of running virtual machines on Windows hosts. For
details, see Monitoring Virtual Machine Performance on page 191.
More Memory for Your Virtual Machines
Allocate up to 3600MB of memory to each virtual machine to run large server
applications. For more information, see Allocating Memory to a Virtual Machine in the
VMware GSX Server Virtual Machine Guide.
19
Page 20

VMware GSX Server Administration Guide
Easier Sharing of Virtual Machines with Latest VMware Products
Virtual machines created with GSX Server 3 are compatible with VMware Workstation
4 and ESX Server 2 for easier migrating and sharing of virtual machines.
New LSI Logic Virtual SCSI Adapter for Guest Operating Systems
The LSI Logic virtual SCSI adapter is included when you install Windows Server 2003,
Red Hat Enterprise Linux 3.0 or NetWare guests.
PXE Boot
Boot virtual machines over your network and install guest operating systems from a
PXE server. For more information, see Using PXE with Virtual Machines in the VMware
GSX Server Virtual Machine Guide.
Easier Virtual Networking Configuration
On Windows hosts, use the Virtual Network Editor to configure virtual networking
easily. For more information, see Networking in the VMware GSX Server Virtual Machine
Guide.
Network Adapter Teaming Support
On Windows hosts, virtual machines can bridge to teamed or bonded host network
adapters. For more information, see Configuring Bridged Networking When Using
Teamed Network Interface Cards on Your Host in the VMware GSX Server Virtual
Machine Guide.
20
Generic SCSI Tape Backup Support
Back up virtual machines using popular backup software and SCSI tape devices. For
more information, see Backing Up Virtual Machines and the GSX Server Host on
page 127.
Using DVD-ROM and CD-ROM Drives on Remote Clients
If you’re connected to a virtual machine remotely from a client, you can use the local
DVD-ROM or CD-ROM drive to install software or copy data without needing to use
the drive on the GSX Server host. For more information, see Using the DVD-ROM or
CD-ROM Drive on a Client in the VMware GSX Server Virtual Machine Guide.
Improved Virtual DVD-ROM and CD-ROM Drive Support
Read multisession DVD-ROM and CD-ROM media. Burn CD-ROMs in your guest
operating systems.
Debugging Support in Virtual Machines
GSX Server supports user- and kernel-level debuggers in virtual machines.
www.vmware.com
Page 21

CHAPTER 1 Introduction and System Requirements
New Operating System Support
VMware GSX Server 3 provides support for Red Hat Enterprise Linux 3.0, SuSE Linux
Enterprise Server 8.0 patch 3, and Turbolinux Server 8.0 and Workstation 8.0 hosts.
New supported guest operating systems include Red Hat Enterprise Linux 3.0; SuSE
Linux Enterprise Server 7 patch 2; NetWare 6.5 Server; FreeBSD 4.6.2, 4.8, 5.0 and 5.1
(prerelease version); and Turbolinux Server 7.0, 8.0 and Workstation 8.0. Experimental
support for Microsoft Windows code-named Longhorn is provided.
New Linux Kernel Support
Run your Linux guest operating systems with the new 2.6 kernel.
New Support Scripts
When you file support requests, please use the new support scripts to collect data
that help us diagnose your problems. For details, see Reporting Problems on page 37.
Automatically Check for Product Updates
VMware GSX Server now checks automatically to see if updates for the product are
available. You can specify what interval to use for the automatic check or switch to
manual checks only. For more information, see Updating GSX Server Software
Automatically on page 156.
Before You Install the Release
There are a few steps you should take — before you install this release — to ensure
the best possible experience with the new version.
Virtual machines created with GSX Server 1.x or higher, or Workstation 2.0.x or higher
can be run under GSX Server 3. You must upgrade the virtual hardware for any virtual
machine created under GSX Server 1 or Workstation 2. You should test the older
virtual machines thoroughly under GSX Server 3 before committing to production use
in the new environment. Be sure to back up the virtual machines before you begin
your tests.
• Resume and shut down suspended virtual machines.
If you plan to use virtual machines created under earlier VMware products, be
sure they have been shut down completely before you remove the release you
used to create them.
If the virtual machine is suspended, resume it in the VMware product you used
to create it (GSX Server 1 or 2, Workstation 2 or 3), shut down the guest
operating system, then power off the virtual machine.
• For virtual disks created under earlier versions of GSX Server or Workstation,
commit or discard changes to virtual disks in undoable mode.
21
Page 22

VMware GSX Server Administration Guide
If you plan to use existing virtual machines that have disks in undoable mode,
commit or discard any changes to the virtual disks before you remove the
release you used to create them.
• Resume or power on the virtual machine in the earlier release, shut down the
guest operating system, power off the virtual machine and either commit or
discard changes to the undoable disk when prompted.
• Back up virtual machines.
Back up all the files in your virtual machine directories — including the .vmdk
or .dsk, .cfg or .vmx and nvram files — for any virtual machines you plan
to use under this release.
Virtual machines updated for full compatibility with GSX Server 3 can be used
only with other VMware products beginning with GSX Server 3, Workstation 4
and ESX Server 2, but not under earlier versions of VMware software.
• Back up the GSX Server software.
If you intend to use your older GSX Server software, keep the CD-ROM or ESD
installation package handy, or else back up the drive on which GSX Server is
currently installed.
If you need to install the software on the same computer where you now have
an earlier version installed, make sure you back up the current installation and
the virtual machine files so that you can restore them later.
• Uninstall any existing version of GSX Server.
If you have GSX Server installed, you must uninstall the previous build before
installing the new version:
• To uninstall a previous version of GSX Server 3 or GSX Server 2.x for Windows
hosts, see Uninstalling GSX Server on a Windows Host on page 80 (be sure to
reboot your host operating system before installing the software).
• To uninstall a previous version of GSX Server 3 or GSX Server 2.x for Linux
hosts, see Uninstalling GSX Server on a Linux Host on page 85.
• To uninstall GSX Server 1.0 for Windows hosts, see www.vmware.com/support/
gsx/doc/uninstall_gsx_win.html.
• To uninstall GSX Server 1.x for Linux hosts, see www.vmware.com/support/gsx/
doc/uninstall_gsx_linux.html.
22
www.vmware.com
Page 23

CHAPTER 1 Introduction and System Requirements
If You Are Upgrading from an Earlier Version of GSX Server
The installation steps for your host require that you run an uninstaller to remove a
previous version of GSX Server from your machine.
On a Windows host, the uninstaller asks whether you want to keep licenses in your
registry. Do not remove the licenses.
On a Linux host, the license remains in place. You do not need to take any special
action. Just leave it where it is.
Take Note of Custom Network Configurations
If you customized any virtual network settings or created a custom network, you must
take note of these settings before you uninstall the previous version of GSX Server.
Custom network settings cannot be preserved across product upgrades and must be
configured again after you install the new version.
Reinstall VMware Tools
Installing VMware Tools ensures the best performance for your guest operating
system. See Installing VMware Tools in the VMware GSX Server Virtual Machine Guide.
For more information about upgrading, see Upgrading VMware GSX Server on
page 87.
Reinstall VMware Tools
The VMware Tools package has been improved and updated. Be sure to reinstall
VMware Tools in your guest operating system after you install VMware GSX Server 3.
See Installing VMware Tools in the VMware GSX Server Virtual Machine Guide.
23
Page 24

VMware GSX Server Administration Guide
Host System Requirements
What do you need to get the most out of VMware GSX Server? Take the following list
of requirements as a starting point. Remember that the virtual machines running
under GSX Server are like physical computers in many ways — and, like physical
computers, they generally perform better if they have faster processors, more
memory and sufficient disk space.
Be aware that system requirements may change after this manual has been printed.
For the latest system requirements, go to the VMware Web site at
www.vmware.com/support/gsx3/doc/intro_sysreqs_host_gsx.html.
Note: VMware GSX Server (for Windows and Linux hosts) is not localized and does
not support internationalization. However, virtual machines created with the localized
version of VMware Workstation for Windows still work with GSX Server, even though
certain elements do not display properly in GSX Server.
Server Requirements
The server is a Windows or Linux system where you install the GSX Server software.
Virtual machines can be stored on the server host or located on a network share.
Server Host Hardware
VMware GSX Server supports up to 32-way multiprocessor servers. The number of
virtual machines you can run concurrently depends on the resources they require, but
VMware recommends you run no more than four virtual machines concurrently per
processor. You can run a maximum of 64 virtual machines concurrently on one host.
The server must include the following.
• Standard x86-based server with up to 32 processors
• Hosts with 32-bit IA-32 processors, and IA-32 processors with 64-bit extensions
supported
• 733MHz or faster compatible x86 processor that supports the Pentium®
instruction set
Compatible processors include
• Intel: Pentium II, Pentium III, Pentium III Xeon, Pentium 4, Xeon, Xeon EM64T
• AMD™: Athlon™, Athlon XP, AMD Opteron, AMD Athlon 64
Multiprocessor systems supported
Dual-core processors supported and counted as one processor for licensing
purposes
24
www.vmware.com
Page 25

CHAPTER 1 Introduction and System Requirements
Memory
You need enough memory to run the Windows or Linux host operating system, plus
memory required for each guest operating system and applications on the host and
each guest; see your guest operating system and application documentation for their
memory requirements.
• Minimum: 512MB
• Maximum: 64GB for Windows hosts and Linux hosts that support large memory
or are PAE-enabled, 4GB for non-PAE-enabled Windows hosts or 2GB for Linux
hosts with kernels in the 2.2.x series
Display
• 16-bit display adapter or higher
Host Hard Disk
• 130MB free disk space on Windows hosts required for server, VMware
Management Interface, VmPerl API, VmCOM API and VMware Virtual Machine
Console installation
• 20MB free disk space on Linux hosts required for server, VMware Management
Interface, VmPerl API and VMware Virtual Machine Console installation
• Disk space in /tmp on Linux hosts should be equivalent to 1.5 times the amount
of memory on the host. For information on the /tmp directory, read VMware
knowledge base article 844 at
www.vmware.com/support/kb/enduser/std_adp.php?p_faqid=844.
• At least 1GB free disk space recommended for each guest operating system and
the application software used with it; using a default setup, the actual disk space
needs are approximately the same as those for installing and running the guest
operating system and applications on a physical computer
• IDE or SCSI hard drives, CD-ROM and DVD-ROM drives supported
• Guest operating systems can reside in virtual disk files or on physical (raw) disk
partitions
Local Area Networking
• Any Ethernet controller that the host operating system supports
• Non-Ethernet networks are supported using built-in network address translation
(NAT) or using a combination of host-only networking plus routing software on
the host operating system
• A static IP address for your host machine (recommended)
25
Page 26

VMware GSX Server Administration Guide
Windows Host Operating Systems
You nee d a Windows server operating system. If you intend to use the VMware
Management Interface, Internet Information Server (IIS) 5.0 or 6.0 must be installed.
Note: Operating systems and service packs that are not listed are not supported for
use as a host operating system for VMware GSX Server.
64-bit host computers can run the following operating systems for 64-bit extended
systems:
• Microsoft Windows Server 2003 x64 Edition
• Microsoft Windows Server 2003 Enterprise Edition, including Service Pack 1
• Microsoft Windows Server 2003 Standard Edition, including Service Pack 1
• Microsoft Windows Server 2003 Web Edition, including Service Pack 1
32-bit host computers can run the following operating systems:
• Microsoft Windows Server 2003 Enterprise Edition, including Service Pack 1
• Microsoft Windows Server 2003 Standard Edition, including Service Pack 1
• Microsoft Windows Server 2003 Web Edition, including Service Pack 1
• Microsoft Windows 2000 Advanced Server, Service Pack 3 and Service Pack 4
• Microsoft Windows 2000 Server, Service Pack 3 and Service Pack 4
The VmPerl API requires Perl 5.005x or higher.
The VMware Management Interface requires one of these browsers:
• Internet Explorer 5.5 or 6.0 (6.0 highly recommended)
• Firefox 1.x
• Mozilla 1.x
• Netscape® Navigator 7.0
Note: As new browser versions are released, VMware tests the management
interface for stability and reliability with these versions. We make every effort to add
support for new browser versions in a timely manner, but until a browser is added to
the above list, its use with our product is not supported. For the latest system
requirements, go to the VMware Web site at
www.vmware.com/support/gsx3/doc/intro_sysreqs_host_gsx.html.
26
www.vmware.com
Page 27

CHAPTER 1 Introduction and System Requirements
Linux Host Operating Systems
Supported distributions and kernels are listed below. GSX Server may not run on
systems that do not meet these requirements.
64-bit host computers can run the following operating systems for 64-bit extended
systems (experimental support only):
• Red Hat Enterprise Linux 4.0 AS
• Red Hat Enterprise Linux 4.0 ES
• Red Hat Enterprise Linux 4.0 WS
• Red Hat Enterprise Linux 3.0 AS
• Red Hat Enterprise Linux 3.0 ES
• Red Hat Enterprise Linux 3.0 WS
• SUSE LINUX Enterprise Server 9
• SuSE Linux Enterprise Server 8
• SUSE LINUX 9.3
• SUSE LINUX 9.2
32-bit host computers can run the following operating systems:
• Mandrake Linux 10.1
• Mandrake Linux 10.0
• Mandrake Linux 9.2
• Mandrake Linux 9.0
• Mandrake Linux 8.2
• Red Hat Enterprise Linux 4.0 AS
• Red Hat Enterprise Linux 4.0 ES
• Red Hat Enterprise Linux 4.0 WS
• Red Hat Enterprise Linux 3.0 AS
• Red Hat Enterprise Linux 3.0 ES
• Red Hat Enterprise Linux 3.0 WS
• Red Hat Enterprise Linux AS 2.1
• Red Hat Enterprise Linux ES 2.1
• Red Hat Enterprise Linux WS 2.1
• Red Hat Linux 9.0
27
Page 28

VMware GSX Server Administration Guide
• Red Hat Linux 8.0
• Red Hat Linux 7.3
• Red Hat Linux 7.2
• Red Hat Linux 7.1
• SUSE LINUX Enterprise Server 9
• SuSE Linux Enterprise Server 8
• SuSE Linux Enterprise Server 7
• SUSE LINUX 9.3
• SUSE LINUX 9.2
• SUSE LINUX 9.1
• SUSE LINUX 9.0
• SuSE Linux 8.2
• SuSE Linux 8.1
• SuSE Linux 8.0
• SuSE Linux 7.3
• Turbolinux Server 8.0
• Turbolinux Workstation 8.0
• Turbolinux Server 7.0
Platforms not listed above are not supported.
Note: As new Linux kernels and distributions are released, VMware modifies and
tests its products for stability and reliability on those host platforms. We make every
effort to add support for new kernels and distributions in a timely manner, but until a
kernel or distribution is added to the list below, its use with our product is not
supported. Look for newer prebuilt modules in the Download area of our Web site. Go
to www.vmware.com/download. For the list of supported kernels, go to the VMware
Web site at www.vmware.com/support/gsx3/doc/intro_sysreqs_host_gsx.html.
Other Linux host operating system requirements include:
• Linux kernel 2.2.14-5.0 is not supported
• Standard Linux server installation is required with glibc version 2.1 or higher
and libXpm.so
• The inetd process, which must be configured and active for VMware Virtual
Machine Console and VMware Management Interface connections
28
www.vmware.com
Page 29

CHAPTER 1 Introduction and System Requirements
• Version 2.1.36 of the SCSI Generic (sg.o) driver is required to use generic SCSI
devices in virtual machines
• Perl 5.005x or higher is required to use VmPerl API
• X server is required to run the VMware Virtual Machine Console
In addition, the VMware Management Interface requires one of these browsers:
• Firefox 1.x
• Mozilla 1.x
• Netscape Navigator 7.0
Note: As new browser versions are released, VMware tests the management
interface for stability and reliability with these versions. We make every effort to add
support for new browser versions in a timely manner, but until a browser is added to
the above list, its use with our product is not supported. For the latest system
requirements, go to the VMware Web site at
www.vmware.com/support/gsx3/doc/intro_sysreqs_host_gsx.html.
Information about Running GSX Server on Some SuSE Linux Hosts
Keep in mind the following when you run GSX Server on these SuSE Linux hosts.
• SLES 8 — Install gcc on your SLES 8 host before installing GSX Server.
• SLES 7 — If you intend to upgrade the kernel, make sure you deselect any
Samba components when you apply the update patch, as the patch incorrectly
updates Samba on your host. Running the update with the Samba packages
selected can result in serious issues on your host like system hangs or
segmentation faults.
VmPerl and VmCOM Scripting APIs
The VmPerl API includes the vmware-cmd utility. The VmCOM API works on
Windows Server 2003 and Windows 2000 hosts only. For more information, go to the
VMware Web site at www.vmware.com/support/developer.
29
Page 30

VMware GSX Server Administration Guide
Remote Client Requirements
The remote client is a Windows or Linux system from which you launch the VMware
Virtual Machine Console or use VMware Scripting APIs to remotely manage virtual
machines on the GSX Server host. You access the VMware Management Interface to
manage virtual machines on the host using a Web browser.
Hardware Requirements
• Standard x86-based computer
• 266MHz or faster processor
• 64MB RAM minimum
• 20MB (for Windows hosts) or 10MB (for Linux hosts) free disk space is required for
installation of the VMware Virtual Machine Console
• 17MB free disk space is required for VMware Scripting APIs ( VmCOM and VmPerl
Scripting APIs) installation on Windows remote clients; 14MB is required for
VmPerl API on Linux remote clients
Software — Windows Remote Client
• Windows Server 2003 x64 Edition, Windows Server 2003 Standard Edition,
Windows Server 2003 Enterprise Edition and Windows Server 2003 Web Edition
• Windows XP Professional and Windows XP Home Edition
Service Pack 1 and Service Pack 2
• Windows 2000 Professional, Server and Advanced Server, Service Pack 1, Service
Pack 2, Service Pack 3 and Service Pack 4
• Windows NT 4.0 Workstation and Server, Service Pack 6a, with Internet Explorer
6.0 installed
• The VMware Management Interface requires one of these browsers:
• Internet Explorer 5.5 or 6.0 (6.0 highly recommended)
• Firefox 1.x
• Mozilla 1.x
• Netscape Navigator 7.0
Note: As new browser versions are released, VMware tests the management
interface for stability and reliability with these versions. We make every effort to
add support for new browser versions in a timely manner, but until a browser is
added to the above list, its use with our product is not supported. For the latest
30
www.vmware.com
Page 31

CHAPTER 1 Introduction and System Requirements
system requirements, go to the VMware Web site at
www.vmware.com/support/gsx3/doc/intro_sysreqs_host_gsx.html.
Software — Linux Remote Client
• Standard Linux installation is required with glibc version 2.1 or higher and one
of the following kernels:
• For single-processor systems: kernel 2.0.32 or higher in the 2.0.x series, or
kernel in the 2.2.x, 2.4.x or 2.6.x series
• For SMP systems: kernel in the 2.2.x, 2.4.x or 2.6.x series
Note: Linux kernel 2.2.14-5.0 is not supported.
• Perl 5.005x or higher is required to use VmPerl API
• X server is required to run the VMware Virtual Machine Console on the client
• The VMware Management Interface requires one of these browsers:
• Firefox 1.x
• Mozilla 1.x
• Netscape Navigator 7.0
Note: As new browser versions are released, VMware tests the management
interface for stability and reliability with these versions. We make every effort to
add support for new browser versions in a timely manner, but until a browser is
added to the above list, its use with our product is not supported. For the latest
system requirements, go to the VMware Web site at
www.vmware.com/support/gsx3/doc/intro_sysreqs_host_gsx.html.
VmPerl and VmCOM Scripting APIs
The VmPerl API includes the vmware-cmd utility. The VmCOM API works on
Windows Server 2003, Windows XP, Windows 2000 and Windows NT clients only. For
more information, go to the VMware Web site at www.vmware.com/support/developer.
31
Page 32

VMware GSX Server Administration Guide
Virtual Machine Specifications
Each virtual machine created with GSX Server provides a platform that includes the
following devices that your guest operating system can see.
Virtual Processor
• Same processor as that on host computer (but no extended 64-bit support
available)
• Single processor per virtual machine on symmetric multiprocessor (SMP)
systems
Virtual Chip Set
• Intel 440BX-based motherboard with NS338 SIO chip and 82093AA IOAPIC
Virtual BIOS
• PhoenixBIOS™ 4.0 Release 6 with VESA BIOS
• DMI/SMBIOS-compliant for system management agent support
Virtual Memory
• Up to 3600MB of memory per virtual machine, depending upon the host
system’s configuration, the types of applications running on the host and the
amount of memory on the host
32
Virtual Graphics
• VGA and SVGA support
Virtual IDE Drives
• Up to four devices — disks, CD-ROM or DVD-ROM (DVD drives can be used to
read data DVD-ROM discs; DVD video is not supported)
• Hard disks can be virtual disks or physical disks
• IDE virtual disks up to 128GB
• CD-ROM can be a physical device or an ISO image file
Virtual SCSI Devices
• Up to 60 devices on up to four virtual SCSI controllers
• SCSI virtual disks up to 256GB
• Hard disks can be virtual disks or physical disks
• Generic SCSI support allows scanners, CD-ROM, DVD-ROM, tape drives and other
SCSI devices to be used without requiring drivers in the host operating system
www.vmware.com
Page 33

• Mylex® (BusLogic) BT-958 compatible host bus adapter
• LSI Logic Ultra160 LSI53C10xx SCSI controller
Virtual PCI Slots
• Six virtual PCI slots, to be divided among the virtual SCSI controllers, virtual
Ethernet cards, virtual display adapter and virtual sound adapter
Virtual Floppy Drives
• Up to two 1.44MB floppy devices
• Physical drives or floppy image files
Virtual Serial (COM) Ports
• Up to four serial (COM) ports
• Output to serial ports, Windows files, Linux files or named pipes
Virtual Parallel (LPT) Ports
• Up to three bidirectional parallel (LPT) ports
• Output to parallel ports or host operating system files
Virtual USB ports
• Two-port USB 1.1 UHCI controller
• Supported devices include USB printers, scanners, PDAs, hard disk drives,
memory card readers and still digital cameras
CHAPTER 1 Introduction and System Requirements
Virtual Keyboard
• 104-key Windows 95/98 enhanced
Virtual Mouse and Drawing Tablets
• PS/2 mouse
• Serial tablet support
Virtual Ethernet Card
• Up to four virtual Ethernet cards
• AMD PCnet-PCI II compatible
• Wireless networking support with bridged and NAT networking
• PXE ROM version 2.0
Virtual Networking
• Nine virtual Ethernet switches (three configured by default for bridged, hostonly and NAT networking)
33
Page 34

VMware GSX Server Administration Guide
• Virtual networking supports most Ethernet-based protocols, including TCP/IP,
NetBEUI, Microsoft Networking, Samba, Novell® NetWare® and Network File
System
• Built-in NAT supports client software using TCP/IP, FTP, DNS, HT TP and Telnet
Virtual Sound Adapter
• Sound output and input
• Creative Labs Sound Blaster® AudioPCI emulation (MIDI input, game controllers
and joysticks are not supported)
34
www.vmware.com
Page 35

CHAPTER 1 Introduction and System Requirements
Supported Guest Operating Systems
The operating systems listed here have been tested in VMware GSX Server virtual
machines and are officially supported. For notes on installing guest operating systems,
see the VMware Guest Operating System Installation Guide, available from the Help
menu or from the VMware Web site at
www.vmware.com/support/guestnotes/doc/index.html.
Operating systems that are not listed are not supported for use in a VMware GSX
Server virtual machine. For the most recent list of supported guest operating systems,
visit the VMware Web site at
www.vmware.com/support/gsx3/doc/intro_sysreqs_guest_gsx.html.
Note: Operating systems that are not listed are not supported for use in a VMware
GSX Server virtual machine. Guest operating systems using 64-bit extensions to the
IA-32 instruction set are not supported.
Microsoft Windows
• Microsoft Windows code-named Longhorn (experimental support)
• Windows Server 2003 Web Edition, Windows Server 2003 Standard Edition,
Windows Server 2003 Enterprise Edition and Windows Small Business Server
2003, including Service Pack 1
• Windows XP Professional and Windows XP Home Edition, including Service Pack
1 and Service Pack 2
• Windows 2000 Professional, Windows 2000 Server and Windows 2000 Advanced
Server, including Service Pack 1, Service Pack 2, Service Pack 3 and Service Pack 4,
and Windows 2000 Professional Service Pack 4 checked build
• Windows NT® 4.0 Server Service Pack 6a, Windows NT Workstation 4.0, including
Service Pack 6a and Windows NT 4.0 Terminal Server Edition Service Pack 6a
• Windows Me
• Windows 98, including latest Customer Service Packs, and Windows 98 SE
• Windows 95, including Service Pack 1 and all OSR releases
• Windows for Workgroups 3.11
• Windows 3.1
Microsoft MS-DOS
• MS-DOS 6.22
35
Page 36

VMware GSX Server Administration Guide
Linux
• Mandrake Linux 8.0, 8.1, 8.2, 9.0, 9.1, 9.2, 10.0 and 10.1
• Red Hat Linux 6.2, 7.0, 7.1, 7.2, 7.3, 8.0 and 9.0
• Red Hat Enterprise Linux (AS, ES and WS) 2.1, including Update 6; Red Hat
Enterprise Linux (AS, ES and WS) 3.0, including Update 4; Red Hat Enterprise
Linux (AS, ES and WS) 4.0
• SuSE Linux 7.3, 8.0, 8.1, 8.2, 9.0, 9.1 and 9.2; experimental support for SUSE LINUX
9.3
• SuSE Linux Enterprise Server 7, including Service Pack 2; 8, including Service Pack
3; and 9, including Service Pack 1
• Turbolinux Server 7.0, 8.0, and Workstation 8.0
Novell NetWare
• NetWare 4.2 Support Pack 9, 5.1 Support Pack 6, 6.0 Support Pack 3 and 6.5
Support Pack 1
FreeBSD
• FreeBSD 4.0–4.6.2, 4.8, 4.9, 5.0, 5.1 and 5.2
Solaris
• Solaris 9 and 10 Operating System x86 Platform Edition (experimental support)
36
www.vmware.com
Page 37

CHAPTER 1 Introduction and System Requirements
Technical Support Resources
The following sections describe various technical support resources available to you.
• Self-Service Support
• Online and Telephone Support
• Support Offerings
• Reporting Problems
• Log Files
Self-Service Support
Use the VMware Technology Network for self help tools and technical information:
• Product Information — www.vmware.com/support/resources
• Technology Information — www.vmware.com/vcommunity/technology
• Documentation — www.vmware.com/support/pubs
• Knowledge Base — www.vmware.com/support/kb
• Discussion Forums — www.vmware.com/community
• User Groups — www.vmware.com/vcommunity/usergroups.html
For more information about the VMware Technology Network, go to www.vmtn.net.
Online and Telephone Support
Use online support to submit technical support requests, view your product and
contract information, and register your products. Go to www.vmware.com/support.
Use phone support for the fastest response on priority 1 issues for customers with
appropriate support contracts. Go to www.vmware.com/support/phone_support.html.
Support Offerings
Find out how VMware's support offerings can help you meet your business needs. Go
to www.vmware.com/support/services.
Reporting Problems
If you have problems while running GSX Server, please report them to the VMware
support team.
You must register your serial number; then you can report your problems by
submitting a support request at www.vmware.com/requestsupport.
37
Page 38

VMware GSX Server Administration Guide
The steps below describe the information we need from you to diagnose problems.
This information largely comes from various log files. Which log file we need depends
upon the problem you encounter. The log files are listed after the steps.
You can simplify the process of collecting the needed information by running the
support script to collect the appropriate log files and system information. Follow the
steps below that apply to your host computer.
Note: The support script runs only on the GSX Server host. If you encounter
problems on a remote client, you must supply the log files manually. The two log files
you should supply, depending upon the problem you encounter on the client,
include the VMware Virtual Machine Console log file and the installation log file. See
below for more information about these logs.
Windows Host
1. Open a command prompt.
2. Change to the GSX Server program directory.
C:
cd \Program Files\VMware\VMware GSX Server
If you did not install the program in the default directory, use the appropriate
drive letter and substitute the appropriate path in the cd command above.
3. Run the support script.
cscript vm-support.vbs
4. After the script runs, it displays the name of the directory where it has stored its
output. Use a file compression utility such as WinZip or PKZIP to zip that
directory, then include the zip file with your support request.
38
Linux Host
1. Open a terminal.
2. Run the support script as the user who is running the virtual machine or as root.
vm-support
If you do not run the script as root, the script displays messages indicating that it
cannot collect some information. This is normal. If the VMware support team
needs that information, a support representative may ask you to run the script
again as root.
3. The script creates a compressed .tgz file in the current directory. Include that
output file with your support request.
www.vmware.com
Page 39

CHAPTER 1 Introduction and System Requirements
Log Files
The following log files are generated by GSX Server and are collected by the support
script as needed. Since there is no support script on a remote client, you need to
submit a support request at www.vmware.com/requestsupport for any issues you
encounter on a client and include the console’s log file or its installation log file.
Virtual Machine Log File
If a virtual machine exits abnormally or crashes, please run the support script or save
the log file before you launch that virtual machine again. The key log file to save is the
VMware log file for the affected virtual machine.
On a Windows host, the vmware.log file is in the same directory as the
configuration file (.vmx) of the virtual machine that had problems. The path to the
log file of the active virtual machine appears in the About dialog box. In a console,
choose Help > About VMware GSX Server, and look under Additional information.
On a Linux host, the <vmname>.log file is in the same directory as the
configuration file (.vmx) of the virtual machine that had problems.
Also save any core files (core or vmware-core).
Virtual Machine Event Log File
The virtual machine’s event log, some of which can be viewed in the VMware
Management Interface, is stored as a file on the host. This file can also be useful in the
event a virtual machine crashes.
Each virtual machine on the host includes an event log file called
event-<path_to_configuration_file>.vmx.log.
On a Windows host, the log is stored in C:\Program Files\VMware\VMware
GSX Server\vmserverdRoot\eventlog.
On a Linux host, the log is stored in /var/log/vmware.
VMware Virtual Machine Console Log File
The VMware Virtual Machine Console keeps a log. If you encounter problems with the
VMware Virtual Machine Console on a remote client, please submit a support request
and this log file.
On a Windows host, the log is called vmware-<username>-<PID>.log and is
stored in the user’s TEMP directory; by default, this directory is
C:\Documents and Settings\<username>\Local Settings\Temp.
The path to this file appears in the About dialog box. In a console, choose Help >
About VMware GSX Server, and look under Additional information.
39
Page 40

VMware GSX Server Administration Guide
On a Linux host, the log is called ui-<PID>.log and is stored in the user’s TEMP
directory; by default, this directory is /tmp/vmware-<username>. The path to
this file appears in the terminal when you start the console.
VMware Management Interface Log File
The VMware Management Interface keeps a log.
On a Windows host, the log is called mui.log and is stored by default in
C:\Program Files\VMware\VMware Management Interface.
On a Linux host, the log is called error_log and is stored by default in
/var/log/vmware-mui.
VMware Authorization Service Log File
You can enable logging for the VMware Authorization Service (known as
vmware-authd on Linux hosts) manually.
1. In a text editor, open the following file:
• On a Windows host, edit config.ini, located in C:\Documents and
Settings\All Users\Application Data\VMware\VMware
GSX Server.
• On a Linux host, edit /etc/vmware/config.
2. Add the following lines to the file:
vmauthd.logEnabled = TRUE
log.vmauthdFileName = "vmauthd.log"
This creates a file called vmauthd.log. On a Windows host, this file appears by
default in C:\Windows\system32 or C:\WINNT\system32; on a Linux
host, this file appears by default in /var/log/vmware.
3. Save and close the configuration file. The log is enabled on a Linux host.
4. On a Windows host, restart the VMware Authorization Service. Choose Start >
Administrative Tools > Services. Right-click VMware Authorization Service and
choose Restart. This enables logging.
40
VMware Registration Service Log File
The VMware Registration Service keeps a log.
On a Windows host, the log is called vmware-serverd.log and is stored in
C:\Windows\Temp.
On a Linux host, the log is called vmware-serverd.log and is stored in
/var/log/vmware.
www.vmware.com
Page 41

CHAPTER 1 Introduction and System Requirements
VMware GSX Server and VMware Virtual Machine Console Installation Log Files
GSX Server keeps an installation log file on the server host.
On a remote client, the VMware Virtual Machine Console keeps an installation log file.
If you encounter problems installing the VMware Virtual Machine Console, please
submit a support request and this log file.
On a Windows host, the file is VMInst.log. It is saved in your TEMP directory; the
default location is C:\Documents and Settings\<username>\Local
Settings\Temp. The Local Settings folder is hidden by default. To see its
contents, open My Computer, choose To ol s > Folder Options, click the View tab and
select Show Hidden Files and Folders.
On a Linux host, the log is called locations and is stored in /etc/vmware.
41
Page 42

VMware GSX Server Administration Guide
42
www.vmware.com
Page 43

CHAPTER 2
Installing VMware GSX Server
The following sections describe how to install VMware GSX Server on your Linux or
Windows host system:
• Selecting Your Host System on page 43
• About the VMware Virtual Machine Console on the Server on page 44
• Installing VMware GSX Server on a Windows Host on page 45
• Installing VMware GSX Server on a Linux Host on page 55
• Configuring Web Browsers for Use with GSX Server on page 67
• Installing the VMware Virtual Machine Console on page 70
• Installing the VMware Scripting APIs on page 75
• Uninstalling VMware GSX Server on page 80
Selecting Your Host System
VMware GSX Server is available for both Windows and Linux host computers. The
installation files for both host platforms are included on the same CD-ROM.
43
Page 44

VMware GSX Server Administration Guide
Your serial number allows you to use VMware GSX Server only on the host operating
system for which you licensed the software. If you have a serial number for a Windows
host, you cannot run the software on a Linux host, and vice versa.
To use VMware GSX Server on a different host operating system — for example, to use
it on a Linux host if you have licensed the software for a Windows host — purchase a
license on the VMware Web site. You may also get an evaluation license at no charge
for a 15-day evaluation of the software. For more information, see
www.vmware.com/download.
To install on a supported Windows host computer, see Installing VMware GSX Server
on a Windows Host on page 45. To install on a Linux host computer, see Installing
VMware GSX Server on a Linux Host on page 55.
To review the list of supported host operating systems on which you can install GSX
Server, see Host System Requirements on page 24.
Upgrading from Previous Versions
If you are upgrading from a previous version of VMware GSX Server, read Upgrading
VMware GSX Server on page 87 before you begin.
About the VMware Virtual Machine Console on the Server
VMware GSX Server uses the VMware Virtual Machine Console to manage virtual
machines on any GSX Server host directly from the host or remotely from a client
workstation or another host.
Multiple consoles can connect to a virtual machine at the same time, giving multiple
authorized users concurrent access to the virtual machine; similarly, multiple users can
connect to the virtual machine with VMware Scripting APIs and the VMware
Management Interface. You can run virtual machines in full screen mode from any
console.
When you install the GSX Server software, the VMware Virtual Machine Console is
installed automatically. You should install the console on any client workstation from
which you want to access virtual machines. This allows for remote management of
virtual machines.
To install the console on a client, see Installing the VMware Virtual Machine Console
on page 70. You can download the console from the VMware Management Interface
for convenient installation on a remote client. For more information, see Downloading
the VMware Virtual Machine Console on page 111.
For more information about consoles, see Running Virtual Machines in the VMware
GSX Server Virtual Machine Guide.
44
www.vmware.com
Page 45

Installing VMware GSX Server
on a Windows Host
The following sections describe how to install GSX Server on your Windows host
operating system:
• Basic Installation on page 46
• Default Directories on page 48
• Installing the GSX Server Software on a Windows Host on page 48
Getting started with VMware GSX Server is simple. The key steps are
1. Install the VMware GSX Server software (including the server, VMware
Management Interface, the VmCOM API, the VmPerl API and the VMware Virtual
Machine Console) on the server as described in this section.
2. Install the VMware Virtual Machine Console and VMware Scripting APIs on
Windows or Linux clients.
3. Start the VMware Virtual Machine Console and enter your serial number. You
need to do this only once — the first time you start a console after you install
GSX Server.
4. Create a virtual machine using the New Virtual Machine Wizard or the VMware
Management Interface. See Creating a New Virtual Machine in the VMware GSX
Server Virtual Machine Guide.
5. Power on the virtual machine and install a guest operating system. You need the
installation media (CD-ROM or floppy disks) for your guest operating system. See
Installing a Guest Operating System in the VMware GSX Server Virtual Machine
Guide.
6. Install the VMware Tools package in your virtual machine for enhanced
performance. See Installing VMware Tools in the VMware GSX Server Virtual
Machine Guide.
7. Install software in your virtual machine.
8. Start using your virtual machine. Use the VMware Virtual Machine Console,
VMware Management Interface and VMware Scripting APIs to manage your
server host and virtual machines.
CHAPTER 2 Installing VMware GSX Server
45
Page 46

VMware GSX Server Administration Guide
Basic Installation
On a Windows host, you install GSX Server from a master installer. The master installer
is a convenient way to install all the components of GSX Server — the server software,
the VMware Management Interface and the VMware Scripting APIs — or you can pick
and choose which components to install. In addition, the VMware Virtual Machine
Console is always installed. All components are installed in their own directories under
one master directory.
A basic installation of GSX Server uses two computers — a server hosting a number of
virtual machines and a client workstation. The client communicates with the virtual
machines on the server over a TCP/IP network link.
In more complex installations, one client can run multiple VMware Virtual Machine
Consoles, with each console managing multiple virtual machines on a separate server.
Before you begin, be sure you have:
• A server and host operating system that meet the system requirements for
running GSX Server. See Host System Requirements on page 24.
• A remote management client and operating system that meet the system
requirements for running the GSX Server remote management software. See
Remote Client Requirements on page 30.
• The GSX Server installation software. If you bought a GSX Server media kit, the
installation software is on the CD in your package. If you bought the electronic
distribution, the installation software is included with the files you downloaded.
• Your GSX Server serial number. The serial number is included in the email
message you received from VMware or from the reseller from whom you
purchased GSX Server.
• The installation CDs or disks for your guest operating systems.
• If you plan to use the VMware Management Interface, you must make sure
Internet Information Services (IIS) is installed and configured properly.
46
On the Server
A complete installation on the GSX Server host includes:
• The GSX Server package for the server (which includes the tools needed to
create and configure virtual machines and the VMware Virtual Machine Console
to view and control virtual machines).
• The VMware Management Interface package (a Web server for managing virtual
machines and the host from a browser; for more information, see Managing
Virtual Machines and the VMware GSX Server Host on page 107).
www.vmware.com
Page 47

CHAPTER 2 Installing VMware GSX Server
• The VmCOM API package, a scripting tool that uses COM to manage virtual
machines remotely; for more information, go to
www.vmware.com/support/developer.
• The VmPerl API package, a scripting tool that uses Perl to manage virtual
machines remotely; for more information, go to
www.vmware.com/support/developer.
You can choose a custom installation path where you install only the packages you
need.
In most cases, you work directly at the server when you install the server software. You
can manage and run virtual machines from the server or from any client.
On a Client Workstation
In addition to a Web browser, you can install the following packages on a client:
• The VMware Virtual Machine Console.
• The VmPerl and VmCOM Scripting APIs (the VmCOM API can be installed only on
a Windows client).
These packages are available in the VMware Management Interface and the GSX
Server Master Installer (on Windows hosts only). If you are installing the VMware
Virtual Machine Console on a Linux client, see Installing the VMware Virtual Machine
Console on a Linux Host on page 73.
The VMware Virtual Machine Console can run on a remote client and on the server
itself. The VMware Virtual Machine Console is available in client packages for Windows
(Windows NT 4.0, Windows 2000, Windows XP and Windows Server 2003) and Linux.
Typically, you run the console and browser on a client. The browser allows access to
the VMware Management Interface. The management interface and console let you
• Monitor the operation of virtual machines.
• Start, stop, reset, suspend and resume virtual machines.
• Create and delete virtual machines.
• Configure host and virtual machine settings.
Essentially, the console allows you to manage virtual machines locally and remotely,
while the management interface allows you to remotely manage the server host and
all the virtual machines on the host.
The VmPerl and VmCOM APIs can connect to Linux and Windows hosts. However, the
VmCOM API can run only on a Windows host or client. You can use the APIs to create
scripts to automate management of virtual machines and the server host.
47
Page 48

VMware GSX Server Administration Guide
Default Directories
By default, the GSX Server components are installed into the following directories:
• The server components and the VMware Virtual Machine Console are installed in
C:\Program Files\VMware\VMware GSX Server
• The VMware Management Interface components are installed in
C:\Program Files\VMware\VMware Management Interface
• The VmCOM API components are installed in
C:\Program Files\VMware\VMware VmCOM Scripting API
• The VmPerl API components are installed in
C:\Program Files\VMware\VMware VmPerl Scripting API
You can change the directory that contains all the components if you wish, but make
note of the new paths you intend to use. The instructions in this manual make use of
the default paths.
Installing the GSX Server Software on a Windows Host
You cannot have VMware GSX Server installed on the same host machine as any other
VMware product, such as VMware Workstation, VMware ACE or the VMware Virtual
Machine Console. The only VMware product that can be installed on the same host as
GSX Server is the VMware VirtualCenter client software. If you plan to install GSX
Server on a host machine that already contains any other VMware product, you must
uninstall that product first.
Similarly, you cannot have multiple versions of GSX Server installed on the same host.
If you are upgrading from a previous version of GSX Server, see Upgrading VMware
GSX Server on page 87. You should also read Before You Install the Release on page 21
before installing the software.
To automate the installation of GSX Server on a Windows host, see Automating the
Installation of GSX Server on page 52.
1. Log on to your Microsoft Windows host as the Administrator user or as a user
who is a member of the Windows Administrators group.
Note: On a Windows Server 2003 host, you must be logged on as a local
administrator (that is, not logged on to the domain) in order to install GSX Server.
Although you must be logged on as an administrator to install GSX Server, you
can run the program after it is installed as a user with normal user privileges.
48
www.vmware.com
Page 49

Note: A message appears if you are installing GSX Server on a Windows host
configured as an Active Directory server. You can safely ignore the message by
clicking OK to continue the installation, or choose to cancel the installation.
2. Start the GSX Server master installer.
If you are installing from a CD, from the Start menu, choose Run and enter
D:\Windows\VMware-gsx-server-installer-<xxxx>.exe,
where D: is the drive letter for your CD-ROM drive and <xxxx> is a series of
numbers representing the version and build numbers.
If you are installing from a downloaded file, from the Start menu, choose Run,
browse to the directory where you saved the downloaded installer file (the
name is similar to VMware-gsx-server-installer-<xxxx>.exe,
where <xxxx> is a series of numbers representing the version and build
numbers).
The master installer starts.
CHAPTER 2 Installing VMware GSX Server
Click Next.
3. Accept the end user license agreement (EULA).
Select the I accept the terms in the license agreement option, then click Next.
49
Page 50
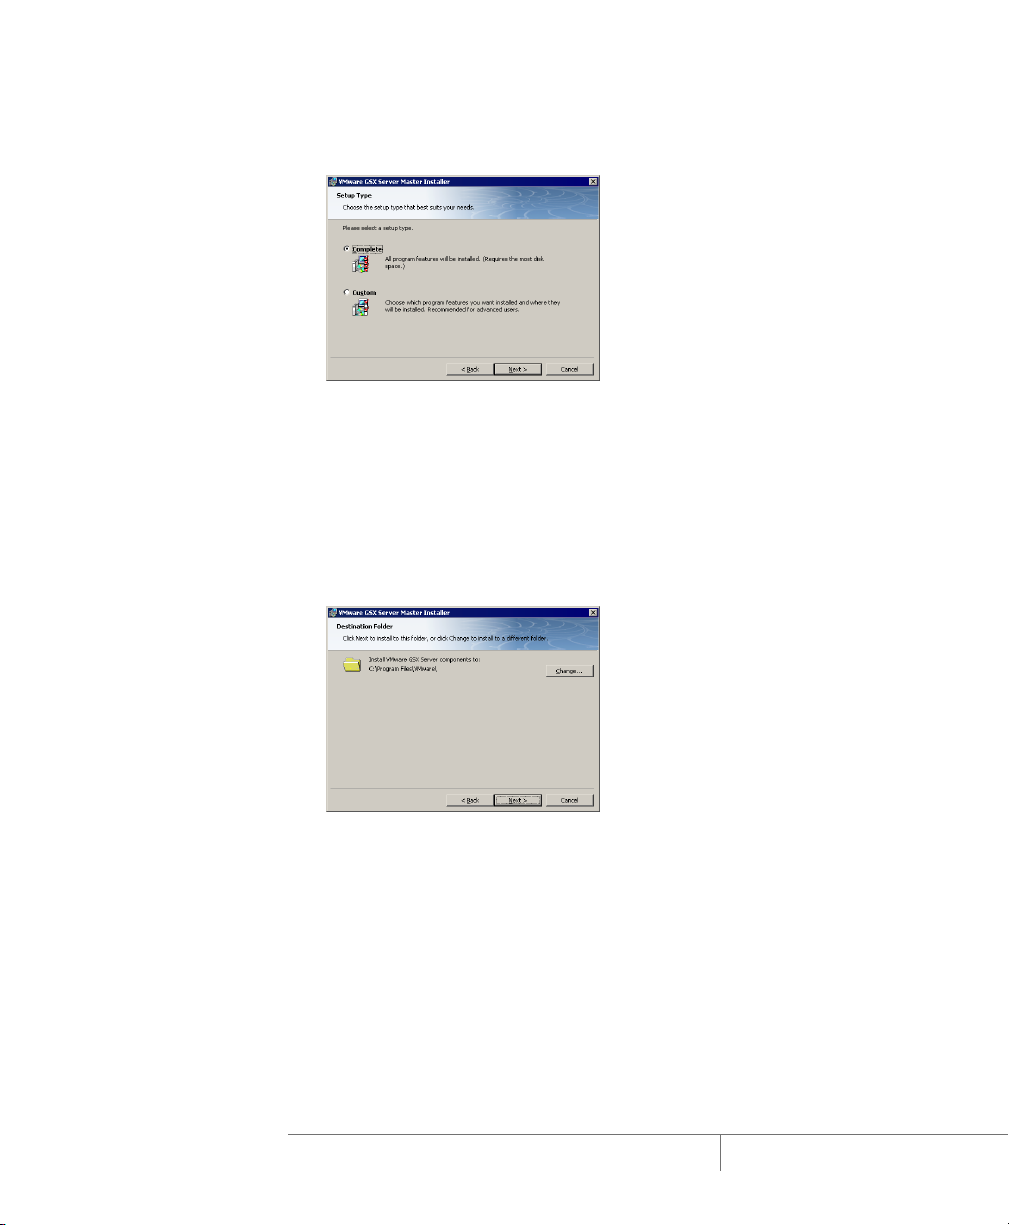
VMware GSX Server Administration Guide
4. Choose whether you want to perform a complete or a custom installation.
Complete Installation
A complete installation installs the server software, the VMware Management
Interface, the VMware Virtual Machine Console, the VmCOM API and the VmPerl
API on the GSX Server host. To choose the complete installation, select
Complete, then click Next.
If you want to install all the GSX Server components in a directory other than the
default, click Change and browse to the directory of your choice. If the directory
does not exist, the installer creates it for you.
50
Caution: GSX Server must be installed on a local drive, not a network drive.
Note: Windows and the Microsoft Installer limit the length of a path to a folder
to 255 characters for a path to a folder on a local drive and 240 characters for a
path to a folder on a mapped or shared drive. If the path to the GSX Server
program folder exceeds this limit, an error message appears. You must select or
enter a shorter path.
When you are ready to continue, click Next and go to step 5.
www.vmware.com
Page 51

CHAPTER 2 Installing VMware GSX Server
Custom Installation
A custom installation lets you pick and choose which components to install. You
can always run the installer again at a later date to install components you did
not install the first time. Select Custom and click Next. The Custom Setup screen
appears.
In the Custom Setup screen, choose the components to install. Click the arrow to
the left of the component you do not want to install and select the appropriate
option from the menu.
If you need to determine how much free space is on your host, click Space. This
is useful if you are choosing a custom installation due to limited disk space on
your host.
If you want to install all the GSX Server components in a directory other than the
default, click Browse and select the directory. If the directory does not exist, the
installer creates it for you.
Caution: GSX Server must be installed on a local drive, not a network drive.
Note: Windows and the Microsoft Installer limit the length of a path to a folder
to 255 characters for a path to a folder on a local drive, and 240 characters for a
path to a folder on a mapped or shared drive. If the path to the GSX Server
program folder exceeds this limit, an error message appears. You must select or
enter a shorter path.
When you are ready to continue, click Next.
51
Page 52
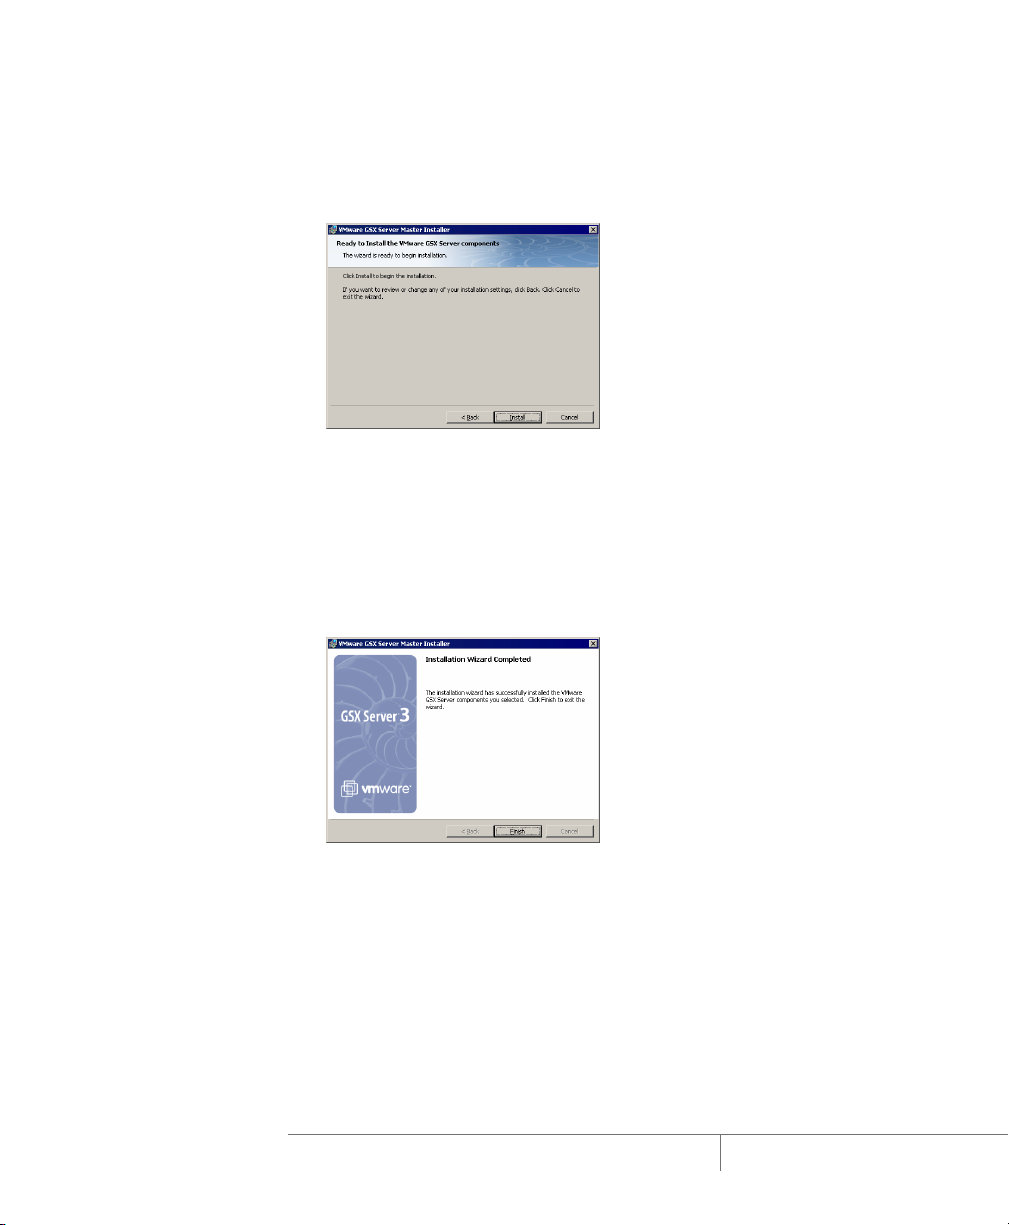
VMware GSX Server Administration Guide
5. If you want to change any settings or information you provided, now is the time
to make those changes. Click Back until you reach the screen containing the
information you want to change.
Otherwise, click Install. The installer begins copying files to your host.
6. If the installer detects that the CD-ROM autorun feature is enabled, you see a
message that gives you the option to disable this feature. Disabling it prevents
undesirable interactions with the virtual machines you install on this system.
7. Two shortcuts are created for you on your desktop automatically. They give you
easy access to virtual machines from the desktop of your host.
8. Click Finish. The GSX Server software is installed.
52
9. If you see a prompt that suggests you reboot your server, do so now to allow
GSX Server to complete the installation correctly.
Automating the Installation of GSX Server
To automate the installation of GSX Server, you can use the Microsoft Windows
Installer runtime engine to install the software silently (in quiet mode). If you are
installing GSX Server on a number of Windows hosts, you may want to use the silent
installation features.
www.vmware.com
Page 53

CHAPTER 2 Installing VMware GSX Server
The server on which you are installing GSX Server must have Microsoft Windows
Installer runtime engine version 2.0 installed. This version is included with Windows
Server 2003. If you are installing on a Windows 2000 host (or are installing the VMware
Scripting APIs on a Windows NT 4.0 client), check the version of this file:
%WINDIR%\system32\msiexec.exe
If you need to upgrade the engine, run instmsiw.exe, which is located in the
directory where you extract the installation packages; see below.
For more information on using the Microsoft Windows Installer, go to the Microsoft
Web site — msdn.microsoft.com/library/default.asp?url=/library/en-us/msi/setup/
about_windows_installer.asp.
To install GSX Server silently on a Windows host, complete the following steps.
1. Extract the individual installation packages. Open a command prompt and on
one line type:
VMware-gsx-server-installer-<xxxx>.exe /a /s /x /d
C:\temp\gsx
(where <xxxx> is a series of numbers representing version and build numbers.)
2. Run the silent installation on the extracted installation packages. At the
command prompt, on one line, type:
msiexec -i "C:\temp\gsx\VMware GSX Server.msi"
ADDLOCAL=ALL /qn
The installation command can be customized using standard Microsoft
Windows Installer installation properties as well as any of the following:
Property Name Description Default
DESKTOP_SHORTCUT Installs GSX Server shortcuts on the desktop. By default,
shortcuts are installed on the desktop.
To prevent shortcuts from being installed, add the
following in step 2:
DESKTOP_SHORTCUT = 0
DISABLE_AUTORUN Disables CD autorun on the host. By default, autorun is
disabled during the installation.
To enable autorun, add the following in step 2:
DISABLE_AUTORUN = 0
1
1
53
Page 54

VMware GSX Server Administration Guide
Property Name Description Default
REMOVE_LICENSE Uninstall only: Removes all stored licenses when you
uninstall GSX Server. By default, GSX Server keeps the
licenses on the server.
To remove licenses, add the following in step 2:
REMOVE_LICENSE = 1
Caution: VMware strongly recommends you keep your
licenses, in case you reinstall or upgrade your software.
SERIALNUMBER Automatically enters the serial number.
To enter the serial number, add the following in step 2:
SERIALNUMBER=<serialNumber>
0
none
The ADDLOCAL option defaults to install all GSX Server components. You can
customize the installation using a combination of the ADDLOCAL and REMOVE
options. You can add or remove the following components:
• All, which includes all the options in this list.
• Network, which includes the bridged networking adapter (vmnet0), the
host-only networking adapter (vmnet1) and the NAT networking adapter
(vmnet8). It also includes NAT and DHCP, but these can be removed from
the installation.
• NAT, the VMware NAT Service.
• DHCP, the VMware DHCP Service.
To include a component, use it with the ADDLOCAL option.
To exclude a component, use it with the REMOVE option. You always install the
bridged and host-only network adapters as part of the Network component.
For example, to install everything but the VMware NAT and DHCP services,
specify on the command line:
ADDLOCAL=ALL REMOVE=DHCP,NAT
Note: The DHCP and NAT components are children of the Network
component. Thus, you also skip installation of the VMware NAT and DHCP
services if you specify:
ADDLOCAL=ALL REMOVE=Network
54
www.vmware.com
Page 55

Installing VMware GSX Server
on a Linux Host
The following sections describe how to install GSX Server on your Linux host
operating system:
• Basic Installation on page 56
• Default Directories on page 58
• Installing the GSX Server Software on a Linux Host on page 59
• Installing the VMware Management Interface on a Linux Host on page 63
• Installing an X Server on page 64
• Before You Install on a SuSE Linux 7.1 or Higher or SLES Host on page 64
• Before You Install on a SuSE Linux Enterprise Server 8 Host on page 65
• Before You Install the VMware Management Interface on a Linux Host on
page 65
Getting started with VMware GSX Server is simple. The key steps are
1. Install the GSX Server software (including the server, VMware Management
Interface, the VMware Virtual Machine Console and the VmPerl API) on the
server.
2. Install the VMware Virtual Machine Console and VMware Scripting APIs on
Windows or Linux clients.
3. Start the VMware Virtual Machine Console and create a virtual machine using
the New Virtual Machine Wizard, or create one from the VMware Management
Interface. See Creating a New Virtual Machine in the VMware GSX Server Virtual
Machine Guide.
4. Power on the virtual machine and install a guest operating system in the new
virtual machine. You need the installation media (CD-ROM or floppy disks) for
your guest operating system. See Installing a Guest Operating System in the
VMware GSX Server Virtual Machine Guide.
5. Install the VMware Tools package in your virtual machine for enhanced
performance. See Installing VMware Tools in the VMware GSX Server Virtual
Machine Guide.
6. Install software in your virtual machine.
CHAPTER 2 Installing VMware GSX Server
55
Page 56

VMware GSX Server Administration Guide
7. Start using your virtual machine. Use the VMware Virtual Machine Console,
VMware Management Interface and VMware Scripting APIs to manage your
server host and virtual machines.
Basic Installation
A basic installation of GSX Server uses two computers — a server, hosting a number of
virtual machines, and a client workstation. The client communicates with the virtual
machines on the server over a TCP/IP network link.
In more complex installations, one client can run multiple VMware Virtual Machine
Consoles, with each console managing multiple virtual machines on a separate server.
And consoles on multiple clients can connect to virtual machines on any server.
Before you begin, be sure you have:
• A server and host operating system that meet the system requirements for
running GSX Server. See Host System Requirements on page 24.
• A remote management client and operating system that meet the system
requirements for running the GSX Server remote management software. See
Remote Client Requirements on page 30.
• The installation CDs or disks for your guest operating systems.
• The GSX Server installation software. If you bought a GSX Server media kit, the
installation software is on the CD in your package. If you bought the electronic
distribution, the installation software is in the files you downloaded.
• Your GSX Server serial number. The serial number is included in the email
message you received from VMware or from the reseller from whom you
purchased GSX Server.
Also, before you install and run VMware GSX Server, check the following notes and
make any necessary adjustments to the configuration of your host operating system.
• The real-time clock function must be compiled into your Linux kernel.
• GSX Server for Linux systems requires that the parallel port PC-style hardware
option (CONFIG_PARPORT_PC) be built and loaded as a kernel module (that
is, it must be set to m when the kernel is compiled).
• SuSE Linux 7.1 and higher and SLES hosts: The inetd process or xinetd
process must be configured to start when the host operating system boots. See
Before You Install on a SuSE Linux 7.1 or Higher or SLES Host on page 64.
56
www.vmware.com
Page 57

CHAPTER 2 Installing VMware GSX Server
• SuSE Linux Enterprise Server 8 hosts: The gcc package must be installed on
your host before you install GSX Server. See Before You Install on a SuSE Linux
Enterprise Server 8 Host on page 65.
Caution: Some operating systems, such as Red Hat Linux 7.2 and 7.3, include a firewall
by default. This firewall prevents access from the VMware Virtual Machine Console and
the VMware Management Interface on client computers to the GSX Server host. In
order for the VMware Virtual Machine Console to connect to the host, you need to
open up port 902. To connect to the host with the VMware Management Interface,
you need to open up port 8333 (and port 8222 if you plan to disable SSL for the
management interface).
On the Server
You can install up to three software packages on the Linux server:
• The GSX Server package for the server (from an RPM or tar archive available on
the GSX Server CD-ROM or the VMware Web site). The RPM file is called
VMware-gsx-<xxxx>.i386.rpm while the tar archive is called
VMware-gsx-<xxxx>.tar.gz, where <xxxx> is a series of numbers
representing the version and build numbers.
Note: The VmPerl API package is installed when you install the server software.
The VmPerl API is a scripting tool that uses Perl to manage virtual machines
remotely; for more information, go to www.vmware.com/support/developer.
• The VMware Management Interface package (from a tar archive available on the
GSX Server CD-ROM or the VMware Web site). This tar archive is called
VMware-mui-<xxxx>.tar.gz.
• The VMware Virtual Machine Console package (which you download from the
VMware Management Interface; the package is also available as an RPM file or tar
archive in a client GZip file that also contains the VmPerl API, available on the
GSX Server CD-ROM or from the VMware Web site). The RPM file is called
VMware-console-<xxxx>.i386.rpm while the tar archive is called
VMware-console-<xxxx>.tar.gz.
In most cases, you work directly at the server when you install the server software. You
can manage and run virtual machines from the server or from any client.
On a Client Workstation
In addition to a Web browser, you can install the following packages on a client:
• The VMware Virtual Machine Console.
57
Page 58

VMware GSX Server Administration Guide
• The VmPerl and VmCOM Scripting APIs (the VmCOM API can be installed only on
a Windows client); for more information, go to www.vmware.com/support/
developer.
These packages are available in the VMware Management Interface. If you are
installing the VMware Virtual Machine Console on a Windows client, see Installing the
VMware Virtual Machine Console on a Windows Host on page 70.
VMware Virtual Machine Consoles can run on clients and on the server itself. Console
packages are available for Windows (Windows NT 4.0, Windows 2000, Windows XP
and Windows Server 2003) and Linux.
Typically, you run the console and browser on a client. The browser allows access to
the VMware Management Interface. The management interface and console let you
• Monitor the operation of virtual machines.
• Start, stop, reset, suspend and resume virtual machines.
• Create and delete virtual machines.
• Configure host and virtual machine settings.
Essentially, the console allows you to manage virtual machines locally and remotely,
while the management interface allows you to remotely manage the server host and
all the virtual machines on the host.
The VmPerl and VmCOM Scripting APIs can connect to Linux and Windows hosts.
However, the VmCOM API can run only on a Windows client. You can use the APIs to
create scripts to automate management of virtual machines and the host.
58
Default Directories
By default, the GSX Server components are installed into the following directories:
• The server components are installed in
/usr/bin
• The VMware Management Interface components are installed in
/usr/lib/vmware-mui
• The VMware Virtual Machine Console components are installed in
/usr/bin
• The Apache server components are installed in
/usr/lib/vmware-mui/apache/bin
(so they do not conflict with existing Apache software on your server)
• The VmPerl API executable files are installed in
www.vmware.com
Page 59

CHAPTER 2 Installing VMware GSX Server
/usr/bin
• The VmPerl API library files are installed in
/usr/lib/vmware-api
If you installed the software from a tar installer, you can change these paths if you
wish, but make note of the new paths you intend to use. The instructions in this
manual make use of the default paths.
Installing the GSX Server Software on a Linux Host
The steps below describe an installation on a Red Hat Linux host from a CD-ROM. If
you downloaded the software, the steps are the same except that you start from the
directory where you saved the downloaded installer file, not from the CD. If you are
using a different Linux distribution, some of the commands may be different.
You cannot have both VMware GSX Server and VMware Workstation on the same host
machine. If you plan to install GSX Server on a host machine that already contains
Workstation, the Workstation application is automatically upgraded to GSX Server.
Before you install the GSX Server software, ensure your Linux distribution is for a
server, not a workstation. If you are running a workstation distribution, you need to
install the inetd process in order to connect to the VMware Virtual Machine Console
and VMware Management Interface. If you need to, review the Host System
Requirements on page 24.
Upgrade Note: If you are upgrading from an earlier version of GSX Server to a later
one, the choices you made during the earlier installation become the defaults for the
new installation. As a result, you may see options that are different from those
described below. For more information, see Upgrading VMware GSX Server on
page 87. You should also read Before You Install the Release on page 21 before
installing the software.
1. Log on to your Linux host with the user name you plan to use when running
VMware GSX Server.
2. In a terminal window, become root so you can perform the initial installation.
su -
3. Mount the CD-ROM drive and change to the Linux directory on the CD.
mount /dev/cdrom /mnt/cdrom
cd /mnt/cdrom/Linux
4. Do one of the following:
• Use the RPM installer: Run RPM specifying the installation file.
rpm -Uhv VMware-gsx-<xxxx>.i386.rpm
59
Page 60

VMware GSX Server Administration Guide
(VMware-gsx-<xxxx>.i386.rpm is the installation file on the CD;
where <xxxx> is a series of numbers representing version and build
numbers.)
Note: If you are upgrading from VM ware GSX Ser ver 2, you must take a special
step before you install the RPM package. You need to remove the prebuilt
modules RPM package included in the version 2 release. To remove the
modules, type the following at a command prompt:
rpm -e VMwareGSXKernelModules
• Use the tar installer: Complete the following steps.
a. Copy the tar archive to a directory on your hard drive — for example, to /tmp.
cp VMware-gsx-<xxxx>.tar.gz /tmp
(where <xxxx> is a series of numbers representing the version and build
numbers)
b. Change to the directory to which you copied the file.
cd /tmp
c. Unpack the archive.
tar zxf VMware-gsx-<xxxx>.tar.gz
d. Change to the installation directory.
cd vmware-gsx-distrib
e. Run the installation program.
./vmware-install.pl
f. Accept the default directories for the binary files, daemon files, library files,
manual files, documentation files, init directories and init scripts.
5. Run the configuration program.
vmware-config.pl
Note: If you are installing GSX Server on a Mandrake Linux host, the
configuration program asks for the location of lspci. When that prompt
appears, enter the following path:
/usr/bin/lspcidrake
Note: If you use the RPM installer, you need to run this program separately from
the command line. If you install from the tar archive, the installer offers to launch
the configuration program for you. Answer Yes when you see the prompt.
Use this program to reconfigure GSX Server whenever you upgrade your kernel.
It is not necessary to reinstall GSX Server after you upgrade your kernel.
60
www.vmware.com
Page 61

CHAPTER 2 Installing VMware GSX Server
You can also use vmware-config.pl to reconfigure the networking options
for VMware GSX Server — for example, to add or remove host-only networks.
6. Press Enter to read the end user license agreement (EULA). You may page
through it by pressing the space bar. If the Do you accept prompt doesn’t
appear, press Q to get to the next prompt.
7. Configure networking for your virtual machines.
• If you want to use any type of networking with virtual machines, answer Yes to
this prompt: Do you want networking for your virtual
machines?
Bridged networking is always enabled if you enable networking. For more
information about bridged networking, see Bridged Networking in the
VMware GSX Server Virtual Machine Guide.
• To enable NAT, answer Yes to the following prompts:
Do you want to be able to use NAT networking in your
virtual machines?
Do you want this script to probe for an unused
private subnet?
This allows you to connect your virtual machines to an external network when
you have only one IP network address on the physical network, and that
address is used by the host computer. For more information, see Network
Address Translation (NAT) in the VMware GSX Server Virtual Machine Guide.
• To enable host-only networking, answer Yes to the following prompts:
Do you want to be able to use host-only networking
in your virtual machines?
Do you want this script to probe for an unused
private subnet?
Host-only networking allows for networking between the virtual machine and
the host operating system. For more information, see Host-Only Networking
in the VMware GSX Server Virtual Machine Guide.
8. Specify the port the VMware Virtual Machine Console uses when connecting to
the GSX Server host remotely. Port 902 is the default port. If your site uses this
port for another application — for example, ideafarm-chat uses this port
— then specify a different port for the console to use here. To change the port
later, see Changing the Port Number for VMware Virtual Machine Console
Connections on page 109.
61
Page 62

VMware GSX Server Administration Guide
9. If you are upgrading from an earlier version of GSX Server, the following prompt
appears: Do you want the installer to set up permissions
for your registered virtual machines? This will be
done by setting new permissions on all files found in
/etc/vmware/vm-list.
Type y. The following permissions are set for all registered virtual machines:
• Read, write and execute — for the user who created the virtual machine (the
owner)
• Read and execute — for the primary group to which the owner belongs
• Read — for users other than the owner or a member of the owner's group
10. Specify the directory where you want to store your virtual machine files. By
default, this directory is /var/lib/vmware/Virtual Machines. Make
sure this location is on a large enough file system to contain the files, as the
virtual disk files for each virtual machine are usually are gigabytes in size.
11. Enter your GSX Server serial number exactly as it appears (with hyphens) in the
email message you received from VMware or from the reseller from whom you
purchased GSX Server. When you enter the serial number, it is saved in your
license file.
12. The configuration program displays a message saying the configuration
completed successfully. If it does not display this message, run the configuration
program again.
13. When you finish, do one of the following:
• Log off of the root account.
exit
• Install the VMware Management Interface. Go to step 3 under Installing the
VMware Management Interface on a Linux Host on page 63.
• Install the VMware Virtual Machine Console. Go to step 3 under Installing the
VMware Virtual Machine Console on a Linux Host on page 73.
62
www.vmware.com
Page 63

CHAPTER 2 Installing VMware GSX Server
Installing the VMware Management Interface on a Linux Host
The steps below describe an installation of the VMware Management Interface on a
Red Hat Linux host from a CD-ROM. If you downloaded the software, the steps are the
same except that you start from the directory where you saved the installer file you
downloaded, not from the CD. If you are using a different Linux distribution, some
commands may be different.
Note: You must install the libdb.so.3 library from your Linux CD-ROM first. For
more information, see Before You Install the VMware Management Interface on a
Linux Host on page 65.
1. In a terminal window, if you haven’t done so already, become root so you can
carry out the installation.
su -
2. Mount the CD-ROM drive and change to the Linux directory on the CD.
mount /dev/cdrom /mnt/cdrom
cd /mnt/cdrom/Linux
3. Copy the tar archive to a directory on your hard drive (for example, to /tmp).
cp VMware-mui-<xxxx>.tar.gz /tmp
(where <xxxx> is a series of numbers representing version and build numbers)
Caution: Make sure the directory to which you plan to untar the tar archive does
not contain any files from a previous management interface tar installation.
Change to the directory to which you copied the file.
cd /tmp
Unpack the archive.
tar zxf VMware-mui-<xxxx>.tar.gz
(where <xxxx> is a series of numbers representing version and build numbers)
4. Change to the installation directory.
cd vmware-mui-distrib
5. Run the installation program.
./vmware-install.pl
6. Press Enter to continue.
7. Accept the EULA.
8. Specify the directory where you want to install the management components,
the binary files, management interface files, init directories and init scripts.
Or accept the default directories.
63
Page 64

VMware GSX Server Administration Guide
9. Allow the configuration program vmware-config-mui.pl to run.
10. Specify the number of minutes before a management interface session times
out. The default session length is 60 minutes.
11. When you finish, you can:
• Log off of the root account.
exit
• Install the VMware Virtual Machine Console. Go to page 73.
Installing an X Server
You need an X server to run the VMware Virtual Machine Console. If an X server is not
installed, you must install libxpm.so.4, located on your Linux distribution disk.
Before You Install on a SuSE Linux 7.1 or Higher or SLES Host
The inetd or xinetd process, which is required for the VMware Management
Interface and the VMware Virtual Machine Console to run properly, is not configured
to start at boot time on SuSE Linux 7.1 and higher, or SuSE Linux Enterprise Server
(SLES) hosts.
Before you install GSX Server on a SuSE Linux 7.1 or higher host system, or a SLES host
system, you need to configure your host so that the inetd or xinetd process starts
at boot time. Boot the host operating system and make sure the network card and
disk subsystem work as expected.
64
Configuring the inetd or xinetd Process in the Host Operating System
1. Start your X server, if it does not start by default, and log on as the root user.
2. Run YAST2, the default configuration utility for SuSE Linux 7.1 and higher and
SLES.
3. Click Network (SuSE Linux 7.1) or Network/Basic (SuSE Linux 7.2 or higher and
SLES), then click Start/stop services (inetd) or Start/stop services (xinetd)
depending upon your distribution.
4. Select the On with default configuration option.
5. Click Finish, then click Close to exit YAST2. The inetd or xinetd process
automatically starts when you reboot the host operating system.
www.vmware.com
Page 65

CHAPTER 2 Installing VMware GSX Server
Before You Install on a SuSE Linux Enterprise Server 8 Host
The gcc program is not installed on a SLES 8 host by default. This compiler is required
by the VmPerl API.
Before you install GSX Server on a SLES 8 host system, you must install gcc.
Installing gcc in the Host Operating System
1. Start your X server, if it does not start by default, and log on as the root user.
2. Run YAST2, the default configuration utility for SLES 8.
3. Click Software in the left pane, click Install or remove software in the right pane.
4. Check C++ Compiler and Tools in the left pane, then click Accept.
5. When prompted, insert the SLES 8 CD.
6. Click Close to exit YAST2. The gcc program is installed. Now install GSX Server.
Before You Install the VMware Management Interface on a Linux Host
If you are running GSX Server on a 32-bit Linux host, you must install the
libdb.so.3 library from your Linux distribution’s CD-ROM before you install the
VMware Management Interface. The version that comes with a default Linux
installation is incompatible with the management interface and returns the following
error when you start the management interface:
Couldn't find necessary components on your system. It
appears that you are missing the following library:
libdb.so.3.
Some Linux distributions are known to ship without these
libraries. From your Linux distribution CD, install this
RPM package: compat-db-3.3.<##>-<#>.i386.rpm, where <##><#> is a version number particular to your version of the
distribution.
If your distribution CD does not have this package,
contact your vendor for a suitable library.
If you install this package after you installed the
management interface software, start the management
interface's Apache server with the following command:
/etc/init.d/httpd.vmware start
To install the correct library, run the version of the Berkeley Database
compat-db-<#>.<#>.<##>-<#>.i386.rpm RPM package included with
65
Page 66

VMware GSX Server Administration Guide
your Linux distribution, as long as you install
compat-db-3.3.<##>-<#>.i386.rpm or later. If you installed this package
after you installed the management interface software, start the management
interface’s Apache server with this command:
/etc/init.d/httpd.vmware start
The VMware Management Interface and 64-Bit Linux Hosts
The VMware Management Interface does not work on 64-bit Linux hosts.
66
www.vmware.com
Page 67

CHAPTER 2 Installing VMware GSX Server
Configuring Web Browsers for Use with
GSX Server
If you intend to run the VMware Management Interface in Internet Explorer 6.0 on a
Windows system, you must take certain steps to configure Internet Explorer properly.
These steps are needed whether the browser is running on a GSX Server Windows
host or you are using a Windows client machine to connect to a GSX Server host.
In order to run the GSX Server in-product help from a console on a Linux system, you
may need to link to the location of Netscape on the system, if it is different from the
location where GSX Server expects it to be.
The configuration steps allow you to perform the following activities:
• Launching the VMware Virtual Machine Console from the Management
Interface on an Encrypted Server on page 67
• Connecting to the Management Interface on a Proxy Server on page 68
• Launching Help in Netscape on a Linux System on page 69
Launching the VMware Virtual Machine Console from the Management Interface on an Encrypted Server
You can launch the VMware Virtual Machine Console from the VMware Management
Interface automatically. In order to do this in an Internet Explorer 6.0 browser on a
Windows system where SSL is encrypting your GSX Server remote connections, you
must ensure that the Do not save encrypted pages to disk option is disabled.
For information on encrypting remote connections, see Enabling and Disabling SSL
for Remote Sessions on page 122.
When this option is enabled, Internet Explorer does not save any files to disk,
including the files it needs to hand off to helper applications. This prevents the
console from launching automatically.
Caution: This option may have been enabled deliberately at your site to prevent the
saving of sensitive files to disk. Disabling it may permit other sensitive information to
be saved to disk.
Caution: Some patches installed when you run Windows Update reset this setting, so
you may need to repeat this process after you run Windows Update.
To disable the option, complete the following steps.
67
Page 68

VMware GSX Server Administration Guide
1. In the Internet Explorer 6.0 window, open the Internet Options control panel.
Choose To ol s > Internet Options.
2. Click the Advanced tab.
3. Scroll down to the Security section and uncheck Do not save encrypted pages
to disk.
4. Click OK.
Connecting to the Management Interface on a Proxy Server
If your network is protected behind a proxy server, there are certain steps you must
take in order to use the management interface in Internet Explorer 6.0 on a Windows
system. Follow the steps for the appropriate Windows operating system.
Windows Server 2003 Systems
1. Launch Internet Explorer 6.0.
2. Choose To ol s > Internet Options, then click the Security tab.
3. Select Trusted sites, then click Sites.
4. In the Add this Web site to the zone entry field, type
https://*.<domain>
(where <domain> is your organization’s domain name, such as vmware.com).
5. Click Add.
6. Click OK until you return to the browser window.
When you use Internet Explorer 6.0 to connect to the management interface, be sure
to use fully qualified domain names.
68
Windows Systems Other than Windows Server 2003
Follow these steps for Windows 2000, Windows XP and Windows NT operating
systems.
1. Launch Internet Explorer 6.0.
2. Choose To ol s > Internet Options.
3. Click the Connections tab, then click LAN Settings.
4. Make sure that Bypass proxy server for local addresses is checked.
5. Click OK until you return to the browser window.
When you use Internet Explorer 6.0 to connect to the management interface, do not
use fully qualified domain names.
www.vmware.com
Page 69

CHAPTER 2 Installing VMware GSX Server
Connecting to the Management Interface When There Is No Proxy Server
If you are on a Windows system and your network does not use a proxy server, you
must use fully-qualified domain names when connecting to the management
interface with Internet Explorer 6.0.
Launching Help in Netscape on a Linux System
To use VMware GSX Server Help on a Linux system, you must have a Web browser
installed on your physical computer. GSX Server expects to find the Netscape browser
in /usr/bin/netscape. If this matches the configuration of your host computer,
you do not need to take any special steps. If you are using a different browser or if your
Netscape browser is in a different location, add a symbolic link to it from /usr/bin.
ln -s <path to browser> /usr/bin/netscape
69
Page 70

VMware GSX Server Administration Guide
Installing the VMware Virtual Machine
Console
The VMware Virtual Machine Console enables you to view and control GSX Server
virtual machines from a remote client or on the server host. Multiple users can use the
console to connect to a virtual machine from the server host or from remote clients at
the same time. Use the instructions below that correspond to the operating system
running on your system.
Consoles can also be launched from the VMware Management Interface. If you use
Netscape or Mozilla as your browser, you need to configure the MIME type for the
console. To set the MIME type, see Setting a MIME Type to Launch the VMware Virtual
Machine Console on page 166. Internet Explorer is automatically configured when
you install the console software.
Caution: Do not install a console from a client installer package onto the GSX Server
host. Do not download and install a console from an older version of GSX Server or
ESX Server onto any client.
The following sections describe how to install the VMware Virtual Machine Console on
Windows and Linux computers.
• Installing the VMware Virtual Machine Console on a Windows Host on page 70
• Installing the VMware Virtual Machine Console on a Linux Host on page 73
70
Installing the VMware Virtual Machine Console on a Windows Host
On the GSX Server for Windows host, the VMware Virtual Machine Console is installed
automatically from the master installer when you installed the GSX Server
component. If you need to upgrade the console on the GSX Server host, use the
master installer.
You can download the installer from the VMware Management Interface or find it on
the GSX Server installation CD-ROM in the Windows client package. You can run this
console on any Windows client.
To download the console from the management interface, see Downloading the
VMware Virtual Machine Console on page 111.
1. After you download the console installation package, go to the directory where
you downloaded the installer and run VMware-console-<xxxx>.exe,
www.vmware.com
Page 71

where <xxxx> is a series of numbers representing the version and build
numbers. The InstallShield Wizard dialog box appears. Click Next.
2. Accept the end user license agreement (EULA).
CHAPTER 2 Installing VMware GSX Server
Select I accept the terms in the license agreement, then click Next.
3. Choose the directory in which to install the console. If you prefer to install it in a
directory other than the default, click Change and change to your directory of
choice. If the directory does not exist, it is created for you. Click Next.
71
Page 72

VMware GSX Server Administration Guide
4. If you want to change any settings or information you provided, now is the time
to make those changes. Click Back until you reach the dialog box containing the
information you want to change.
Otherwise, click Install. The installer begins copying files to your host.
5. When the setup completes, click Finish. You do not need to reboot your host
operating system after you install the console.
72
www.vmware.com
Page 73

CHAPTER 2 Installing VMware GSX Server
Installing the VMware Virtual Machine Console on a Linux Host
The steps below describe an installation of the VMware Virtual Machine Console on a
Red Hat Linux host from a CD-ROM. If you downloaded the software, the steps are the
same except that you start from the directory where you saved the installer file you
downloaded, not from the CD. If you are using a different Linux distribution, some
commands may be different.
You can download the VMware Virtual Machine Console installer from the VMware
Management Interface or find it on the GSX Server installation CD-ROM in the Linux
client package. You can run this console on the GSX Server host or any Linux client.
To download the console from the management interface, see Downloading the
VMware Virtual Machine Console on page 111.
1. In a terminal window, if you have not done so already, become root so you can
carry out the installation steps.
su -
2. Mount the CD-ROM drive and change to the Client directory on the CD.
mount /dev/cdrom /mnt/cdrom
cd /mnt/cdrom/Client
3. Unzip the client installer archive to /tmp.
unzip VMware-gsx-server-linux-client-<xxxx>.zip -d
/tmp
(where <xxxx> is a series of numbers representing the version and build
numbers)
Caution: If you intend to install the VMware Virtual Machine Console from a tar
package, make sure the directory to which you plan to untar the tar archive does
not contain any files from a previous console tar installation.
4. Change to the /tmp directory.
cd /tmp
5. Do one of the following:
• Use the RPM installer. Run RPM specifying the installation file.
rpm -Uhv VMware-console-<xxxx>.i386.rpm
(where <xxxx> is a series of numbers representing the version and build
numbers)
• Use the tar installer. Complete the following steps.
a. Unpack the archive.
tar zxf VMware-console-<xxxx>.tar.gz
73
Page 74

VMware GSX Server Administration Guide
(where <xxxx> is a series of numbers representing the version and build
numbers)
The archive unpacks to vmware-console-distrib.
b. Run the installer.
cd vmware-console-distrib
./vmware-install.pl
c. Accept the EULA and answer the questions specifying default directories for
the binary files, library files, manual files and documentation files.
d. If the Do you accept prompt doesn't appear, press Q to continue.
6. Run the configuration program vmware-config-console.pl.
Note: If you use the RPM installer, you need to run this program separately from
the command line. If you install from the tar archive, the installer offers to launch
the configuration program for you. Answer Yes when you see the prompt.
You see the following prompt: What port do you want the remote
console to use to connect to server. [902]
If you specified a different port number when you installed the server software,
enter that port number here. Otherwise, keep the default of 902.
7. When you finish, log off of the root account.
exit
74
www.vmware.com
Page 75

CHAPTER 2 Installing VMware GSX Server
Installing the VMware Scripting APIs
VMware GSX Server supports the VMware Scripting APIs, which include the VmPerl
Scripting API and the VmCOM Scripting API. You can use the VMware Scripting APIs to
manage the GSX Server host and virtual machines locally and remotely.
For more information, go to www.vmware.com/support/developer.
The following sections describe how to install the scripting APIs on Windows and
Linux hosts.
• Installing the VmPerl and VmCOM Scripting APIs on a Windows Host on page 75
• Installing the VmPerl Scripting API on a Linux Host on page 78
Installing the VmPerl and VmCOM Scripting APIs on a Windows Host
On either a Windows server host or a Windows remote computer, you can use either
the VmPerl API or the VmCOM API. Both scripting APIs are installed automatically on
the GSX Server for Windows host from the master installer if you chose a complete
installation. In addition, you can make the APIs available for download by customizing
the download menu on the Login page of the VMware Management Interface. For
more information, see Customizing the Download Menu on page 112.
You have a choice of installing either the VmCOM or the VmPerl API, or both.
1. Choose Start > Run and browse to the directory where you saved the
downloaded installer file (the name is similar to VMware-VmPerlAPI-
<xxxx>.exe or VMware-VmCOMAPI-<xxxx>.exe, where <xxxx> is a
series of numbers representing the version and build numbers).
2. The installer starts. Click Next.
75
Page 76
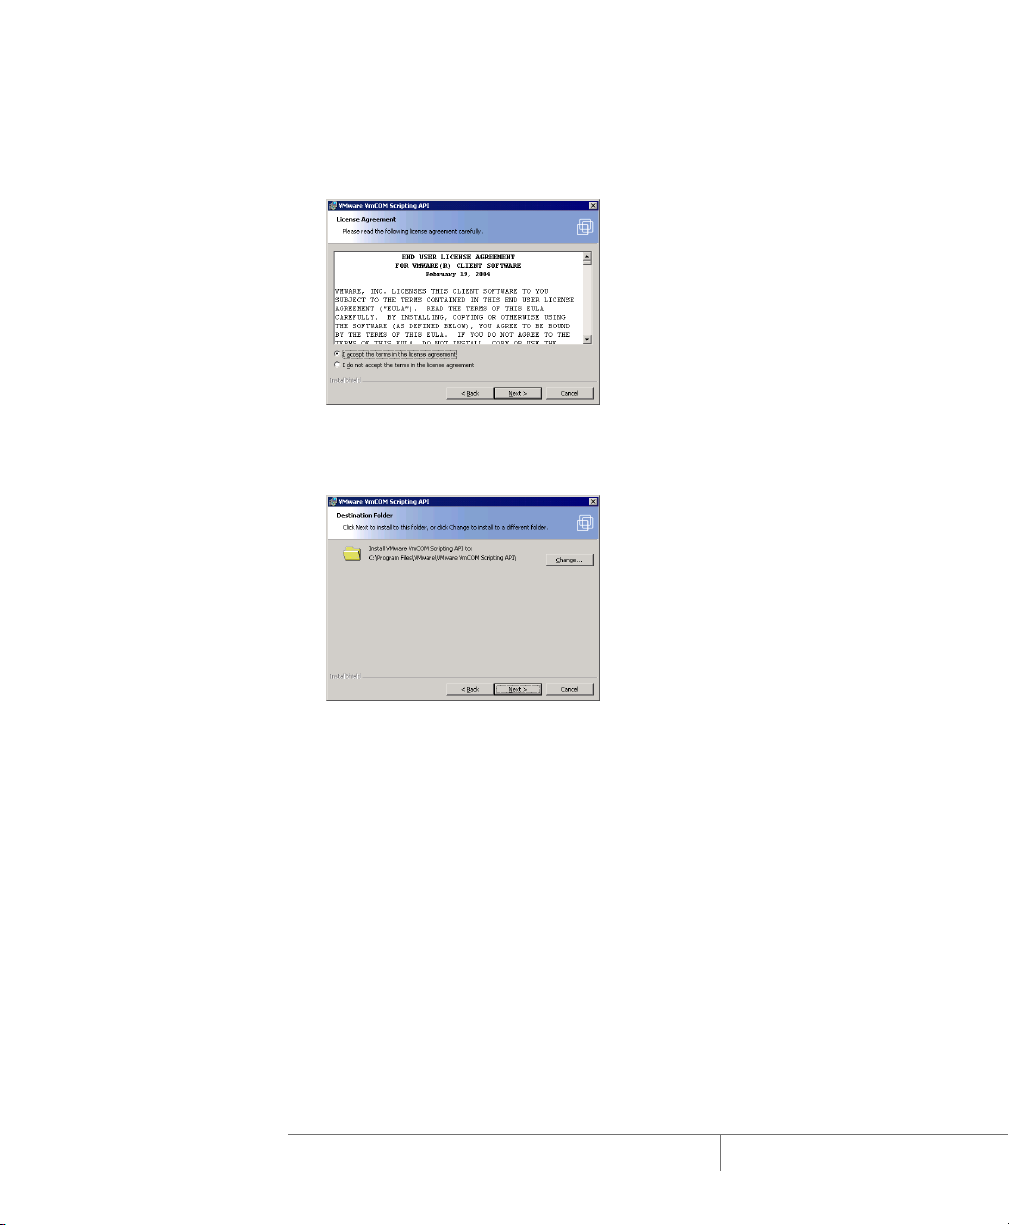
VMware GSX Server Administration Guide
3. Acknowledge the end user license agreement (EULA). Select I accept the terms
in the license agreement, then click Next.
4. Choose the directory in which to install the scripting API. To install it in a
directory other than the default, click Change and browse to your directory of
choice. If the directory does not exist, the installer creates it for you. Click Next.
76
Note: Windows and the Microsoft Installer limit the path length to 255
characters for a path to a folder on a local drive, and 240 characters for a path to
a folder on a mapped or shared drive. If the path to the scripting API program
folder exceeds this limit, an error message appears. You must select or enter a
shorter path.
www.vmware.com
Page 77

CHAPTER 2 Installing VMware GSX Server
5. If you want to change any settings or information you provided, now is the time
to make those changes. Click Back until you reach the dialog box containing the
information you want to change.
Otherwise, click Install. The installer begins copying files to your host.
6. Click Finish. The VMware Scripting API is installed.
If you install the VmCOM API, two directories named MiniMUI and
SampleScripts are created in the VmCOM API directory. The MiniMUI directory
contains a sample Microsoft Visual Basic 6 project that uses the VmCOM API. The
SampleScripts directory contains VBScript and JScript samples using the
VmCOM API.
If you install the VmPerl API, a SampleScripts directory is created in the VmPerl
API directory. The SampleScripts directory contains sample scripts using the
VmPerl API.
77
Page 78

VMware GSX Server Administration Guide
Installing the VmPerl Scripting API on a Linux Host
On either a Linux server host or a Linux remote computer, you can use only the VmPerl
API. The VmCOM API cannot be installed on a Linux host, although the VmCOM API
installed on a Windows remote client can communicate with a Linux host. You can
make the VmPerl API tar archive available for download by customizing the download
menu on the Login page of the VMware Management Interface. See Customizing the
Download Menu on page 112.
Note: There is no 64-bit version of the VmPerl API available for installation on a 64-bit
Linux host. To use the VmPerl API with a 64-bit Linux host, install the 32-bit version of
the VmPerl API on a 32-bit Linux host and use that API to control a 64-bit host.
To install the VmPerl API on a 32-bit host or client, complete the following steps.
1. Download the VmPerl API package from the VMware Management Interface
Login page to the machine on which you want to run the VMware Scripting API.
2. In a terminal window, if you have not done so already, become root so you can
carry out the installation steps.
su -
3. Untar the package.
tar zxf VMware-VmPerlAPI-<xxxx>.tar.gz
(where <xxxx> is a series of numbers representing the version and build
numbers)
4. Change to the installation directory.
cd vmware-api-distrib
5. Run the installation program.
./vmware-install.pl
6. Press Enter to read the end user license agreement (EULA). You may page
through it by pressing the spacebar. If the Do you accept? prompt doesn’t
appear, press Q to get to the next prompt. Accept the EULA.
7. Specify the directory where you want to install the VmPerl API executable files.
The default is where Perl is installed on your host, typically /usr/bin.
8. Specify the directory where you want to install the VmPerl API library files. The
default is /usr/lib/vmware-api.
This directory includes the sample scripts for the VmPerl API. The
SampleScripts directory contains example scripts that demonstrate use of
the VmPerl API. You may customize these scripts for your particular organization.
78
www.vmware.com
Page 79

9. Specify the directory where you want to install the VmPerl API documentation
files. These files consist of the README, end user license agreement and
copyright information. The default is /usr/share/doc/vmware-api.
10. When you finish, log off of the root account.
exit
CHAPTER 2 Installing VMware GSX Server
79
Page 80

VMware GSX Server Administration Guide
Uninstalling VMware GSX Server
The following sections describe how to remove the GSX Server components from
your system. Follow the steps for your host operating system.
• Uninstalling GSX Server on a Windows Host on page 80
• Uninstalling GSX Server on a Linux Host on page 85
Uninstalling GSX Server on a Windows Host
To uninstall GSX Server, complete the following steps. These steps remove all the
components you installed with the GSX Server master installer, including the server
software, the VMware Management Interface and the VMware Scripting APIs.
To uninstall the VMware Virtual Machine Console from a Windows client, see
Uninstalling the VMware Virtual Machine Console on a Windows Host on page 84.
To remove specific GSX Server components (for example, the scripting APIs or the
management interface), see Removing Selected Components on a Windows Host on
page 82.
If you chose the custom installation path, any components you installed at that time
are removed when you use the master installer to uninstall GSX Server.
1. On a Windows Server 2003 host, choose Start > Settings > Control Panel > Add
or Remove Programs. Select the VMware GSX Server Installer and click
Change.
On a Windows 2000 host, choose Start > Settings > Control Panel > Add/
Remove Programs. Select the VMware GSX Server Installer and click Change.
2. After the master installer launches, click Next.
80
www.vmware.com
Page 81

3. Select Remove, then click Next.
4. When you are ready to begin removing GSX Server, click Remove.
CHAPTER 2 Installing VMware GSX Server
5. During the uninstallation, you are asked whether you want to keep your VMware
licenses in the Windows registry. VMware strongly recommends you keep your
licenses, in case you reinstall or upgrade your software. To keep the licenses in
the registry, click Yes . The uninstallation continues.
6. During the uninstallation, you are asked whether you want to keep any login
information for any virtual machines configured to run as specific user accounts.
If you choose to delete the login information, then reinstall GSX Server, any
virtual machines configured to run as specific users will run as the user that
powers on those virtual machines. After you decide whether or not to keep the
login information, the uninstallation continues.
81
Page 82

VMware GSX Server Administration Guide
7. After all the components are removed, click Finish.
8. If you see a prompt that suggests you reboot your server, do so now to allow
GSX Server to complete the uninstallation correctly.
Removing Selected Components on a Windows Host
With the master installer, you can choose to remove specific components from your
GSX Server installation. For example, if you decide to not use the VmPerl API, you can
remove only that component.
Note: Do not use this method to remove GSX Server. Use it to remove the VMware
Scripting APIs or the VMware Management Interface only.
To remove a component, complete the following steps.
1. On a Windows Server 2003 host, choose Start > Settings > Control Panel > Add
or Remove Programs. Select the VMware GSX Server Installer and click
Change.
On a Windows 2000 host, choose Start > Settings > Control Panel > Add/
Remove Programs. Select the VMware GSX Server Installer and click Change.
2. After the master installer launches, click Next. The Program Maintenance screen
appears.
82
www.vmware.com
Page 83
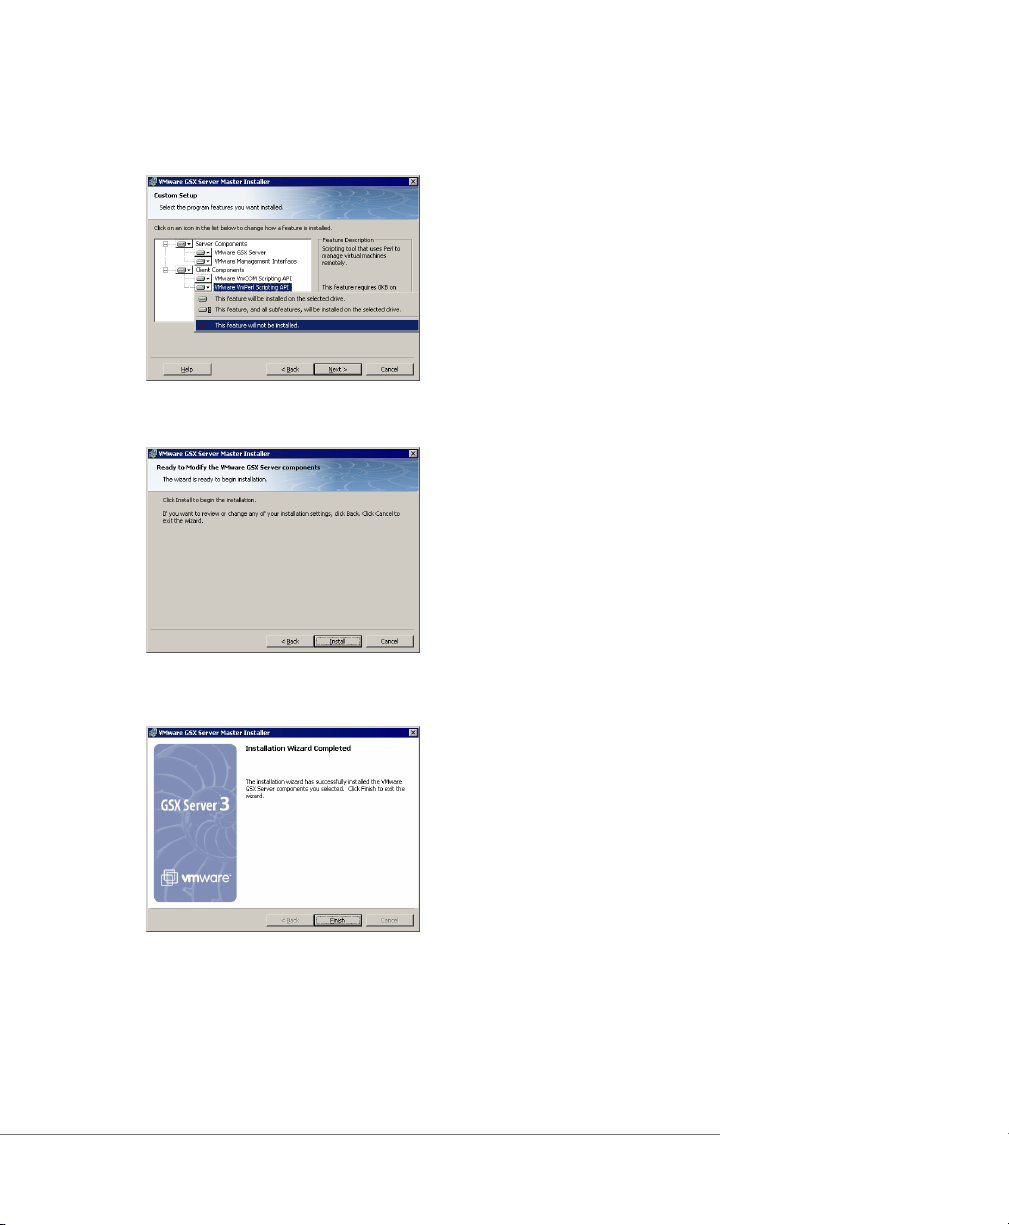
3. Select Modify, then click Next. The Custom Setup screen appears.
4. Click the arrow to open the menu next to the component you want to remove,
select This feature will not be installed, then click Next.
CHAPTER 2 Installing VMware GSX Server
5. When you are ready to begin removing the component, click Install.
6. After the component is removed, click Finish.
83
Page 84

VMware GSX Server Administration Guide
Uninstalling the VMware Virtual Machine Console on a Windows Host
To uninstall the console on a Windows host, use Add/Remove Programs in the
Windows Control Panel.
1. Choose Start > Settings > Control Panel.
2. Double-click Add/Remove Programs (Add or Remove Programs on a Windows
Server 2003 host).
3. Select VMware Virtual Machine Console, then click Change.
Note: If the console was installed on Windows NT 4.0, click Add/Remove.
4. A wizard starts. Click Next.
84
5. In the next screen, select Remove, then click Next.
www.vmware.com
Page 85

CHAPTER 2 Installing VMware GSX Server
6. To start removing the console, click Remove.
7. After the wizard finishes removing the console, click Finish. You do not need to
reboot the system after you remove the console.
Uninstalling GSX Server on a Linux Host
To uninstall any GSX Server component, open a terminal and log on as the root user.
If you used the RPM installer to install GSX Server, remove the software from your
system by running
rpm -e VMware-gsx
If you used the tar installer to install GSX Server, remove the software from your
system by running
vmware-uninstall.pl
Note: Uninstalling the server software removes the VmPerl API installed with it.
To uninstall the VMware Management Interface components, run the program
/usr/bin/vmware-uninstall-mui.pl
To uninstall a Linux console that was installed from an RPM package, type the
following
rpm -e VMware-console
To uninstall a Linux console that was installed from a tar package, run the program
/usr/bin/vmware-uninstall-console.pl
To uninstall the VmPerl API that was installed on a remote client from a client package,
type the following
/usr/bin/vmware-uninstall-api.pl
85
Page 86

VMware GSX Server Administration Guide
86
www.vmware.com
Page 87

CHAPTER 3
Upgrading VMware GSX Server
The following sections describe how to upgrade VMware GSX Server on your Linux or
Windows host system and how to use virtual machines created under earlier versions
of GSX Server with the current version:
• Preparing for the Upgrade on page 88
• Upgrading on a Windows Host on page 91
• Upgrading on a Linux Host on page 92
• Using Virtual Machines Created with Version 2 under Version 3 on page 93
• Using Virtual Machines Created with Version 1 under Version 3 on page 103
87
Page 88

VMware GSX Server Administration Guide
Preparing for the Upgrade
The following sections describe how to prepare for your upgrade:
• Before You Install VMware GSX Server on page 88
• When You Remove an Existing Version and Install the New Version on page 90
Before You Install VMware GSX Server
There are a few steps you should take — before you remove an already installed
version of GSX Server and install the new version of GSX Server — to ensure the best
possible upgrade experience.
Shut Down and Power Off All Virtual Machines
If you plan to use virtual machines created under an earlier version of GSX Server, be
sure they have been shut down completely before you remove the release you used
to create them.
If any virtual machine is suspended, resume it in the earlier release, shut down the
guest operating system, then power off the virtual machine.
Note: If you attempt to resume a virtual machine that was suspended under a
different VMware product or a different version of GSX Server, a message appears,
giving you the choice of discarding or keeping the file that stores the suspended state.
To recover the suspended state, you must click Keep, then resume the virtual
machine under the correct VMware product. If you click Discard, you can power on
normally, but the suspended state is lost.
88
Make Sure All Disks Are in the Same Mode
If you have an existing virtual machine with one or more virtual disks, and all the disks
use persistent or undoable mode, upgrading is straightforward.
If you have an existing virtual machine with one or more virtual disks, and all the disks
use nonpersistent mode, you need to take a few special steps when you upgrade
VMware Tools. For details, see www.vmware.com/info?id=44.
If you plan to use an existing virtual machine that has disks in undoable mode,
commit or discard any changes to the virtual disks before you remove the release you
used to create them.
Resume or power on the virtual machine in the earlier release, shut down the guest
operating system, power off the virtual machine and either commit or discard
changes to the disk in undoable mode when prompted.
www.vmware.com
Page 89

CHAPTER 3 Upgrading VMware GSX Server
If the disks are in persistent or nonpersistent mode, be sure the virtual machine is
completely shut down. If it is suspended, resume it, shut down the guest operating
system and power off the virtual machine.
If you have an existing virtual machine that has multiple virtual disks and the disks are
in multiple modes, the simplest approach to upgrading is to convert all the disks to
persistent mode.
Resume or power on the virtual machine in the earlier release, shut down the guest
operating system, power off the virtual machine and either commit or discard
changes to any undoable mode disks when prompted. Then open the Configuration
Editor and change all disks to persistent mode. After you upgrade, you can use the
snapshot feature to preserve the state of a virtual machine and return to that state at a
later time. For more information on the snapshot feature, see Taking Snaps hots in the
VMware GSX Server Virtual Machine Guide.
If you need to preserve special functionality that requires disks in multiple modes,
review the information at www.vmware.com/info?id=40 before you upgrade.
Back Up Virtual Machines
As a precaution, back up all the files in your virtual machine directories — including
the .vmdk or .dsk, .vmx or .cfg and nvram files — for any existing virtual
machines you plan to migrate to the new version of GSX Server. Depending on your
upgrade path, you may not be able to run your virtual machines under both the new
version of GSX Server and your previous version of GSX Server.
Virtual machines created under GSX Server 1 must have their virtual hardware
updated before they can run under GSX Server 3. Once they are updated, they cannot
be run under GSX Server 1.
You have a choice with virtual machines that you created under GSX Server 2 or
updated to use the GSX Server 2 virtual hardware.
• You may update these virtual machines for full compatibility with GSX Server 3.
In that case, the virtual machines can no longer be used under GSX Server 2.
• You may choose not to update the virtual hardware. In that case, you can run the
virtual machines under both GSX Server 2 and GSX Server 3, but you do not have
the benefits of the new virtual hardware provided by GSX Server 3. Other new
features are not available. For example, you cannot take a snapshot or revert to
the snapshot while the virtual machine is running; you must power off before
taking or reverting to the snapshot.
89
Page 90

VMware GSX Server Administration Guide
Take Note of Custom Network Configurations
If you customized any virtual network settings or created a custom network, you must
take note of these settings before you uninstall the previous version of GSX Server.
Custom network settings cannot be preserved across product upgrades and must be
configured again after you install the new version.
Remove VMware GSX Server or VMware Workstation
If you have GSX Server installed on your host system, you must remove it before you
install the new version. Also, see When You Remove an Existing Version and Install the
New Version on page 90.
If you have VMware Workstation installed on your host system, you must remove it
before you install GSX Server. See the VMware Workstation product documentation
for information on how to remove Workstation.
Make the Virtual Machine Accessible to Its Users
If the virtual machine is located on a different host or in a different directory on the
GSX Server host, be sure to set permissions on the directory so that it is accessible to
all users of the virtual machine. For more information on permissions, see Securing
Virtual Machines and the Host on page 114.
When You Remove an Existing Version and Install the New Version
There is a key precaution you should take when you remove an existing installation of
GSX Server and install the new version.
90
Leave the Existing License in Place
The installation steps for your host may require that you run an uninstaller to remove a
previous version of VMware GSX Server from your machine.
On a Windows host, the uninstaller asks whether you want to keep licenses in your
registry. Do not remove the licenses. You can safely keep licenses for multiple versions
of VMware products on the computer at the same time.
On a Linux host, the license remains in place. You do not need to take any special
action. You may safely leave the license where it is.
www.vmware.com
Page 91

Upgrading on a Windows Host
In most cases, upgrading GSX Server is a four-step process.
1. Uninstall the version now installed on your system. If you are uninstalling an
older version of GSX Server 3, see Uninstalling GSX Server on a Windows Host on
page 80. If you are uninstalling version 1 or 2, see Removing Version 1 or
Removing Version 2, below.
Note: The uninstaller may offer to remove licenses from your registry. Do not
remove the licenses.
2. If you are prompted, reboot your computer.
3. Install the latest version.
4. If you are prompted, reboot your computer.
Removing Version 2
To uninstall version 2, use the VMware GSX Server master installer. For details, see
Uninstalling GSX Server on a Windows Host on page 80. You need to keep your
existing license in the Windows registry.
After you reboot, follow the instructions in Installing VMware GSX Server on a
Windows Host on page 45.
CHAPTER 3 Upgrading VMware GSX Server
Removing Version 1
To uninstall GSX Server 1, use Add/Remove Programs in the Windows Control Panel.
Be sure to uninstall GSX Server, the VMware Management Interface and the VMware
Remote Console.
After you remove the three packages, reboot your host and follow the instructions in
Installing VMware GSX Server on a Windows Host on page 45.
Note: If you have VMware Workstation installed on your host system, you must
remove it before you install GSX Server. See the VMware Workstation product
documentation for information on how to remove Workstation.
91
Page 92

VMware GSX Server Administration Guide
Upgrading on a Linux Host
To upgrade from version 1 or 2 to version 3, you must have the full VMware GSX Server
3 product.
Upgrading Using the tar Installer
If you used the tar installer to install your current version of GSX Server, and you plan
to use the tar installer for the new version, the only special step you need to take is to
make sure the directory to which you plan to untar the tar archive does not contain
any files from a previous GSX Server tar installation. You do not need to uninstall the
older version. Just follow the installation instructions under Installing VMware GSX
Server on a Linux Host on page 55.
Upgrading Using the RPM Installer
If you used the RPM installer to install your current version of GSX Server, you need to
uninstall the software before you upgrade to the new version. See Uninstalling GSX
Server on a Linux Host on page 85.
92
www.vmware.com
Page 93

CHAPTER 3 Upgrading VMware GSX Server
Using Virtual Machines Created
with Version 2 under Version 3
The following sections describe how you can set up older virtual machines under
VMware GSX Server 3 and how to upgrade the virtual hardware.
• Creating Everything New from the Start on page 93
• Using an Existing Virtual Machine without Upgrading the Virtual Hardware on
page 93
• Using an Existing Virtual Machine and Upgrading the Virtual Hardware on
page 94
• Upgrading Virtual Hardware in the Guest Operating System on page 94
Creating Everything New from the Start
Set up a new virtual machine and install a guest operating system in the virtual
machine as described in Creating a New Virtual Machine in the VMware GSX Server
Virtual Machine Guide. Creating all new virtual machines is the easiest way to use the
latest technology and enjoy the best possible virtual machine performance.
Using an Existing Virtual Machine without Upgrading the Virtual Hardware
Upgrade VMware Tools to the new version, following the instructions in Installing
VMware Tools in the VMware GSX Server Virtual Machine Guide. Do not remove the
older version of VMware Tools before installing the new version.
A virtual machine set up in this way should run without problems. However, you do
not have the benefits of certain new features, including better performance,
improved networking, the ability to take a snapshot while the virtual machine is
running and improved virtual disk formats. Also, the console interface changes to
accommodate older virtual machine features. For more information, see Connecting
to Older GSX Server and ESX Server Systems and Older Virtual Machines in the VMware
GSX Server Virtual Machine Guide.
Note: The first time you power on the virtual machine under GSX Server 3, GSX
Server updates the CMOS. As a result, your guest operating system may detect
hardware changes and install new drivers for the new hardware even if you do not
upgrade the virtual hardware. Similarly, if you switch back to GSX Server 2, your guest
operating system may detect hardware changes and install the appropriate drivers.
93
Page 94

VMware GSX Server Administration Guide
You should expect to see this behavior each time you switch from one version of
VMware GSX Server to the other.
Using an Existing Virtual Machine and Upgrading the Virtual Hardware
If you use an existing virtual machine and upgrade the virtual hardware, you gain
access to new features, but the process is one-way — you cannot reverse it.
Start by using an existing configuration file (.vmx) and virtual disk (.vmdk or .dsk).
Upgrade VMware Tools to the new version, following the instructions in Installing
VMware Tools in the VMware GSX Server Virtual Machine Guide. Do not remove the
older version of VMware Tools before installing the new version.
Upgrade the virtual hardware so you can take advantage of better performance,
improved networking, support for taking a snapshot while the virtual machine is
running and improved virtual disk formats. See Upgrading Virtual Hardware in the
Guest Operating System on page 94.
Note: When you update the virtual hardware in a Windows XP or Windows Server
2003 virtual machine, the Microsoft product activation feature may require you to
reactivate the guest operating system.
94
Upgrading Virtual Hardware in the Guest Operating System
Upgrading a virtual machine’s virtual hardware gives it access to new features of GSX
Server. Before you upgrade the virtual hardware, however, consider the following:
• The virtual hardware upgrade is irreversible: The process of upgrading the
virtual hardware is irreversible and makes the disks attached to this virtual
machine incompatible with VMware GSX Server 1or 2. You should make backup
copies of your virtual disks before starting the upgrade.
• GSX Server 3 updates the CMOS: If you are using a virtual machine created
under VMware GSX Server 2, the first time you power on the virtual machine
under VMware GSX Server 3, GSX Server updates the CMOS. As a result, your
guest operating system may detect hardware changes and install new drivers for
the new hardware even if you do not choose to upgrade the virtual hardware.
• You must install VMware Tools: You need to install the new version of VMware
Tools. Do this before you upgrade the virtual hardware. For details, see Installing
VMware Tools in the VMware GSX Server Virtual Machine Guide.
• An error may appear when upgrading from physical disk: If you are
upgrading a virtual machine that runs from a physical disk, rather than a virtual
www.vmware.com
Page 95

CHAPTER 3 Upgrading VMware GSX Server
disk, you may see the following error message while VMware GSX Server is
upgrading the virtual hardware: “Unable to upgrade <drivename>.
One of the supplied parameters is invalid.” You may safely
click OK to continue the upgrade process.
• Windows 95 and Windows 98 guests cannot load CD-ROM drivers at first:
The first time you run a VMware GSX Server 2 virtual machine under VMware
GSX Server 3, the guest operating system discovers new hardware and attempts
to install drivers for it before it loads the CD-ROM driver. As a result, it is unable to
load drivers from the operating system installation CD. In many cases, the drivers
are already available in C:\Windows, C:\Windows\System or
subdirectories under those two directories. However, a simpler approach is to
skip any files that Windows does not find at this stage. Then, after the guest
operating system has finished loading and is able to read from the CD-ROM, you
can run the guest operating system’s Add Hardware Wizard and allow it to
detect new hardware and install the appropriate drivers.
Upgrading the Virtual Machine’s Hardware
To upgrade the virtual hardware, choose VM > Upgrade Virtual Hardware. A message
appears, warning that the upgrade process cannot be reversed. Click Yes to continue,
then follow the directions.
When you upgrade the virtual hardware, you may then need to take several steps to
be sure the new virtual hardware is recognized properly by the guest operating
system. If your guest operating system is listed below, the instructions for that guest
operating system provide examples of the steps you may need to take to perform
these updates.
Windows 2000 Guest
The following steps provide examples of what you may see as your guest operating
system recognizes the new virtual hardware. The specific steps may vary, depending
on the configuration of the virtual machine.
1. Power on the virtual machine and let it update the CMOS.
2. Windows automatically installs the software for any devices it detects.
3. Install the new version of VMware Tools. For details, see Installing VMware Tools
in the VMware GSX Server Virtual Machine Guide.
4. Shut down the Windows guest and power off the virtual machine.
5. Choose VM > Upgrade Virtual Hardware.
95
Page 96

VMware GSX Server Administration Guide
6. A message cautions you that the operation is irreversible and recommends that
you back up the virtual disks before proceeding. To continue, click Ye s.
7. A message describes what is about to happen. Click OK to continue.
8. Power on the virtual machine.
9. Windows detects the PCI SVGA adapter, then it detects the VMware SVGA II
adapter. Click Yes to continue the installation.
10. A message asks you to insert a disk. Navigate to
C:\Program Files\VMware\drivers to install the VMware SVGA II
adapter.
11. If you have serial ports configured in the virtual machine, go to the Windows
Device Manager and uninstall all the COM ports listed there.
12. Restart the virtual machine.
13. Windows detects the COM ports and installs them properly.
Windows NT 4.0 Guest
The following steps provide examples of what you may see as your guest operating
system recognizes the new virtual hardware. The specific steps may vary, depending
on the configuration of the virtual machine.
1. Power on the virtual machine and let it update the CMOS.
2. Windows displays a message about the video driver in the guest operating
system. Click OK.
3. Install the new version of VMware Tools. For details, see Installing VMware Tools
in the VMware GSX Server Virtual Machine Guide.
4. Restart the Windows guest and confirm that it is operating correctly.
5. Shut down the Windows guest and power off the virtual machine.
6. Choose VM > Upgrade Virtual Hardware.
7. A message cautions you that the operation is irreversible and recommends that
you back up the virtual disks before proceeding. To continue, click Ye s.
8. A message describes what is about to happen. Click OK to continue.
9. You can now power on the virtual machine and use the new configuration.
Windows NT does not have a Plug and Play process, so no additional steps are
required.
96
www.vmware.com
Page 97

CHAPTER 3 Upgrading VMware GSX Server
Windows XP Guest
The following steps provide examples of what you may see as your guest operating
system recognizes the new virtual hardware. The specific steps may vary, depending
on the configuration of the virtual machine.
1. Power on the virtual machine and let it update the CMOS.
2. Install the new version of VMware Tools. For details, see Installing VMware Tools
in the VMware GSX Server Virtual Machine Guide.
3. Shut down the Windows guest and power off the virtual machine.
4. Choose VM > Upgrade Virtual Hardware.
5. A message cautions you that the operation is irreversible and recommends that
you back up the virtual disks before proceeding. To continue, click Ye s.
6. A message describes what is about to happen. Click OK to continue.
7. Power on the virtual machine.
8. Windows detects the VMware SVGA adapter. Select Install the software
automatically and follow the on-screen instructions.
9. A message asks you to insert a disk. Navigate to
C:\Program Files\VMware\drivers to install the VMware SVGA II
adapter.
10. If you have serial ports configured in the virtual machine, go to the Windows
Device Manager and uninstall all the COM ports listed there.
11. Restart the virtual machine.
12. Windows detects the COM ports and installs them properly.
Windows Me Guest
The following steps provide examples of what you may see as your guest operating
system recognizes the new virtual hardware. The specific steps may vary, depending
on the configuration of the virtual machine.
1. Power on the virtual machine and let it update the CMOS.
2. Plug and Play detects an Intel 82371 EB Power Management controller. Select
Automatic search and click Next. Windows finds and installs the driver
automatically.
3. Plug and Play detects an Intel 82443 BX Pentium II Processor to PCI bridge. Select
Automatic search and click Next. Windows finds and installs the driver
automatically.
97
Page 98

VMware GSX Server Administration Guide
4. Restart the guest operating system.
5. Plug and Play detects an Intel 82371 AB/EB PCI Bus Master IDE controller. Select
Automatic search and click Next. Windows finds and install the driver
automatically.
6. Install the new version of VMware Tools. For details, see Installing VMware Tools
in the VMware GSX Server Virtual Machine Guide.
7. Shut down the Windows guest and power off the virtual machine.
8. Choose VM > Upgrade Virtual Hardware.
9. A message cautions you that the operation is irreversible and recommends that
you back up the virtual disks before proceeding. To continue, click Ye s.
10. A message describes what is about to happen. Click OK to continue.
11. Power on the virtual machine.
12. Windows detects the PCI Multimedia Audio device and installs the driver for the
Creative AudioPCI.
13. Windows detects an AMD PCNet adapter. Select Automatic search and click
Next. Windows automatically installs the driver for the adapter.
14. Click Finish to restart the virtual machine.
15. Windows detects a Creative game port device and installs the driver
automatically.
16. Windows detects a game port joystick and installs the driver automatically.
17. Windows detects the PCI SVGA adapter, which it then identifies as the VMware
SVGA II adapter and installs the driver automatically.
18. Click Ye s to restart the virtual machine.
19. If you have serial ports configured in the virtual machine, go to the Windows
Device Manager and uninstall all the COM ports listed there.
20. Restart the virtual machine.
21. Windows detects the COM ports and installs them properly.
98
Windows 98 Guest
The following steps provide examples of what you may see as your guest operating
system recognizes the new virtual hardware. The specific steps may vary, depending
on the configuration of the virtual machine.
1. Power on the virtual machine and let it update the CMOS.
www.vmware.com
Page 99

CHAPTER 3 Upgrading VMware GSX Server
2. Windows detects a PCI to ISA bridge. Go to C:\Windows\System and let
Windows select the necessary driver.
3. Windows detects an Intel 82371EB Power Management Controller. Go to
C:\Windows\System and let Windows select the necessary file.
4. Windows detects lpt.vxd. Go to C:\Windows\System and let Windows
select the necessary file.
5. Windows detects an Intel 82443BX Pentium Processor to PCI bridge. Go to
C:\Windows\System and let Windows select the necessary file.
6. Windows detects an Intel 82371AB/EB PCI Bus Master IDE controller. Go to
C:\Windows\System and let Windows select the necessary file.
7. Windows asks for the file uhcd.sys. Enter the location
C:\Windows\System32\drivers, then click OK.
8. Windows detects an Intel 82371AB/EB PCI to USB Universal host controller. Go to
C:\Windows\System and let Windows select the necessary file.
9. Windows detects an AMD PCNET Family Ethernet Adapter. Go to
C:\Windows\System and let Windows select the necessary file.
10. Windows asks for the file inetmib1.dll. Enter the location C:\Windows,
then click OK.
11. Windows asks for the file locproxy.exe. Enter the location
C:\Windows\System, then click OK.
12. Windows asks for the file ndishlp.sys. Enter the location C:\Windows,
then click OK.
13. Windows asks for the file wsock.vxd. Enter the location
C:\Windows\System, then click OK.
14. When you finish installing the AMD Family Ethernet Adapter, restart Windows 98.
15. Plug and Play detects multiple devices and restarts Windows 98.
16. After the virtual machine restarts, install the new version of VMware Tools. For
details, see Installing VMware Tools in the VMware GSX Server Virtual Machine
Guide.
17. Shut down the Windows guest and power off the virtual machine.
18. Choose VM > Upgrade Virtual Hardware.
19. A message cautions you that the operation is irreversible and recommends that
you back up the virtual disks before proceeding. To continue, click Ye s.
99
Page 100

VMware GSX Server Administration Guide
20. A message describes what is about to happen. Click OK to continue.
21. Power on the virtual machine. When Windows boots, it detects the PCI SVGA
adapter. Later, it detects the VMware SVGA II adapter and installs the driver for it
automatically.
22. Windows detects PCI Multimedia Audio and offers to install a driver for it. Click
Cancel.
23. Windows detects an AMD PCNET Family Ethernet adapter. Click Next.
24. Select Search for the best driver and click Next.
25. Select Specify a location, enter C:\Windows\System and click Next.
26. Select The updated driver (Recommended) AMD PCNET Family Ethernet
Adapter (PCI-ISA). Click Next.
27. Windows finds the .inf file for the adapter. Click Next.
28. Windows asks for the file dhcpsvc.dll. Enter the location
C:\Windows\System, then click OK.
29. Windows asks for the file inetmib1.dll. Enter the location C:\Windows,
then click OK.
30. Windows asks for the file locproxy.exe. Enter the location
C:\Windows\System, then click OK.
31. Windows asks for the file ndishlp.sys. Enter the location C:\Windows,
then click OK.
32. Windows asks for the file wshtcp.vxd. Enter the location
C:\Windows\System, then click OK.
33. A dialog box indicates that Windows has finished installing the software. Click
Finish.
34. To install the sound adapter, follow the directions in Installing Sound Drivers in
Windows 9x and Windows NT Guest Operating Systems in the VMware GSX
Server Virtual Machine Guide.
35. If you have serial ports configured in the virtual machine, go to the Windows
Device Manager and uninstall all the COM ports listed there.
36. Restart the virtual machine.
37. Windows detects the COM ports and installs them properly.
100
www.vmware.com
 Loading...