How it Works
Log In / Sign Up
Buy Points
How it Works
FAQ
Contact Us
Questions and Suggestions
Users
Viewsonic
Loading...
V
VS14969
VS15006
2
VS15103
VS15115
VS15149
VS15180
VS15197
VS15323
VS15420
VS15421
VS15423
VS15432
VS15453
VS15541
VS15560
VS15615
VS15633
VS15877
VS15878
VS15879
VS15880
VS15947
VS15948
VS15949
VS15950
VS15989
VS16021
VS16124
VS16340
VS16704
VS16814
VS16861
VS16905
2
VS16907
2
VS16909
2
VS16955
2
VS16956
2
VS16988
VS16999
2
VS17000
VS17078
VS17079
VS17090
VS17182
VS17220
VS17337
5
VS17342
VS17427
VS17435
VS17583
VS17612
2
VS17739
VS17789
VS17808
VS17884
VS17885
VS18039
2
VS18107
VS18131
2
VS18172
VS18190
3
VS18231
VS18242
VS18274
VS18294
VS18318
VS18319
VS18391
VS18401
2
VS18453
VS18551
2
VS18552
VS18571
VS18572
VS18588
VS18598
VS18613
VS18614
VS375C
VS575C
VSACC27951-1
VSACC27952-1
VSD220
2
VSD221
2
VSD224
VSD231
2
VSD241
2
VSD241WTAUS0
VSD242
2
VSD243-BKA-EU0
VSMW27922-1W
VSR100
VSVPD10000203
VSXXXXX
VT1602-L
VT1900
VT1900LED
2
VT1901LED
3
VT1930
2
VT2205
Loading...
Loading...
Nothing found
VS17612
User guide
106 pgs
20.99 Mb
0
User guide [de]
107 pgs
20.66 Mb
0
Table of contents
Loading...
Viewsonic VS17612 User guide
...
Viewsonic User guide
Download
Specifications and Main Features
Frequently Asked Questions
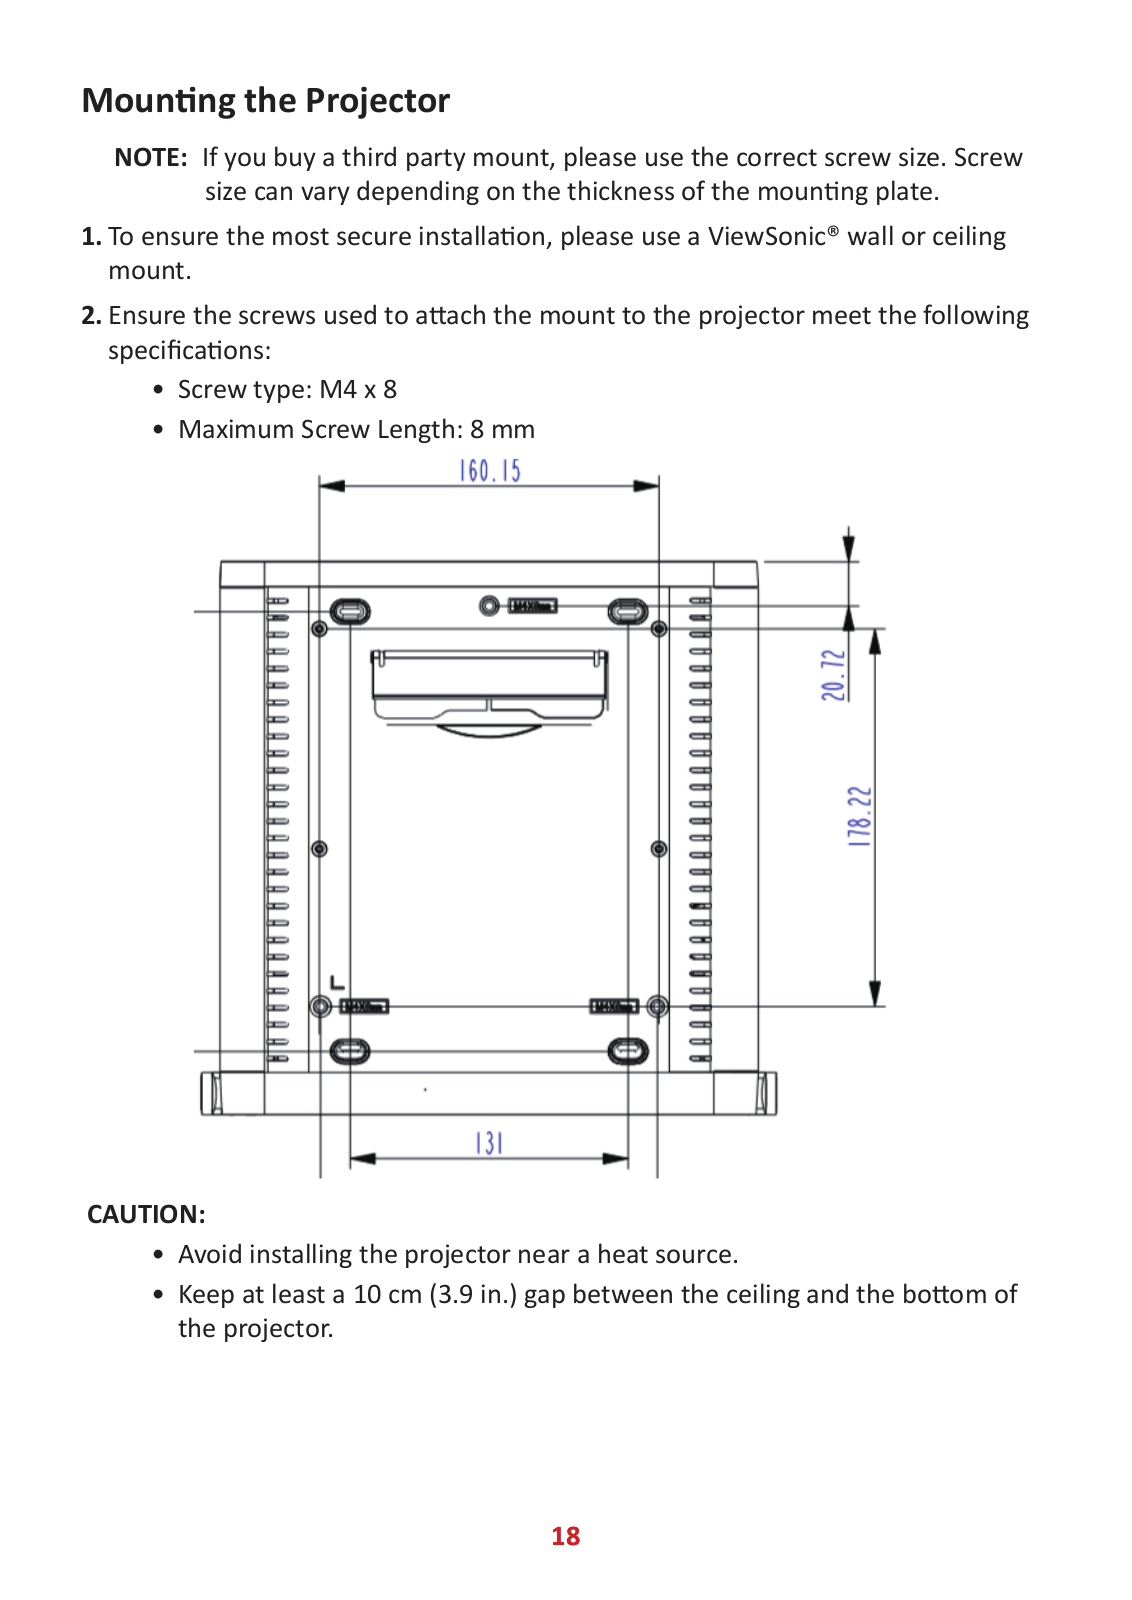
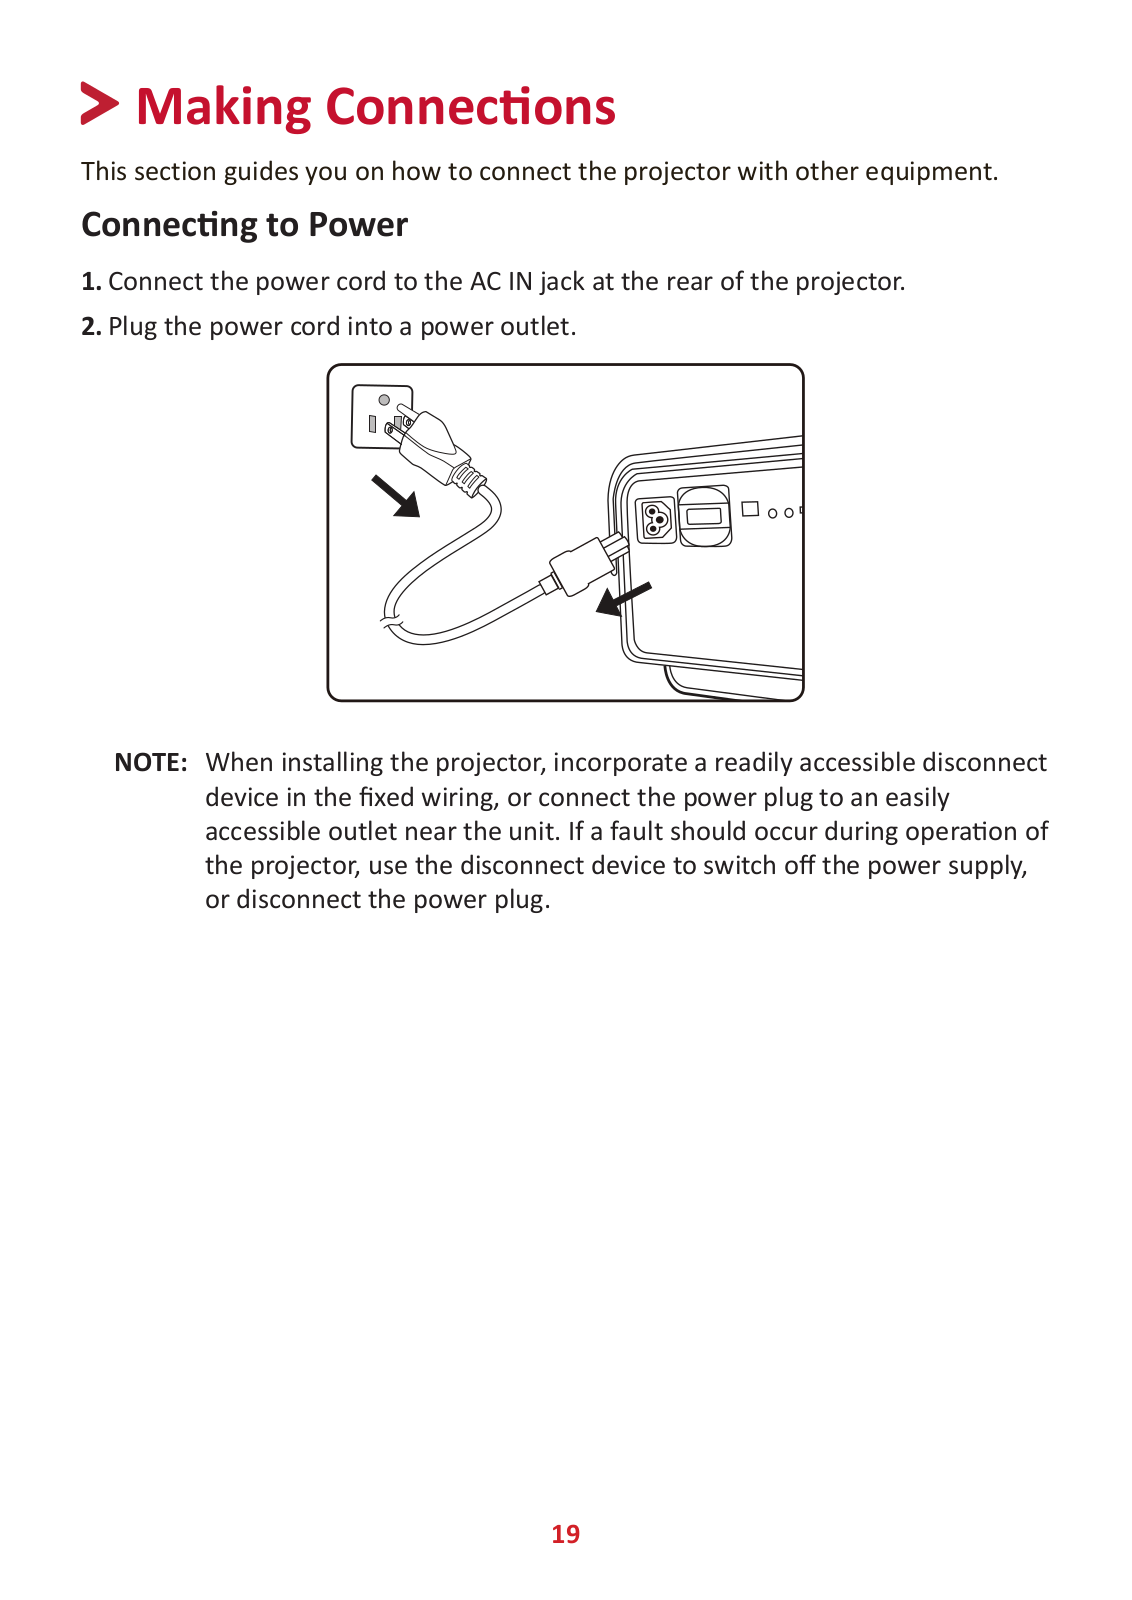
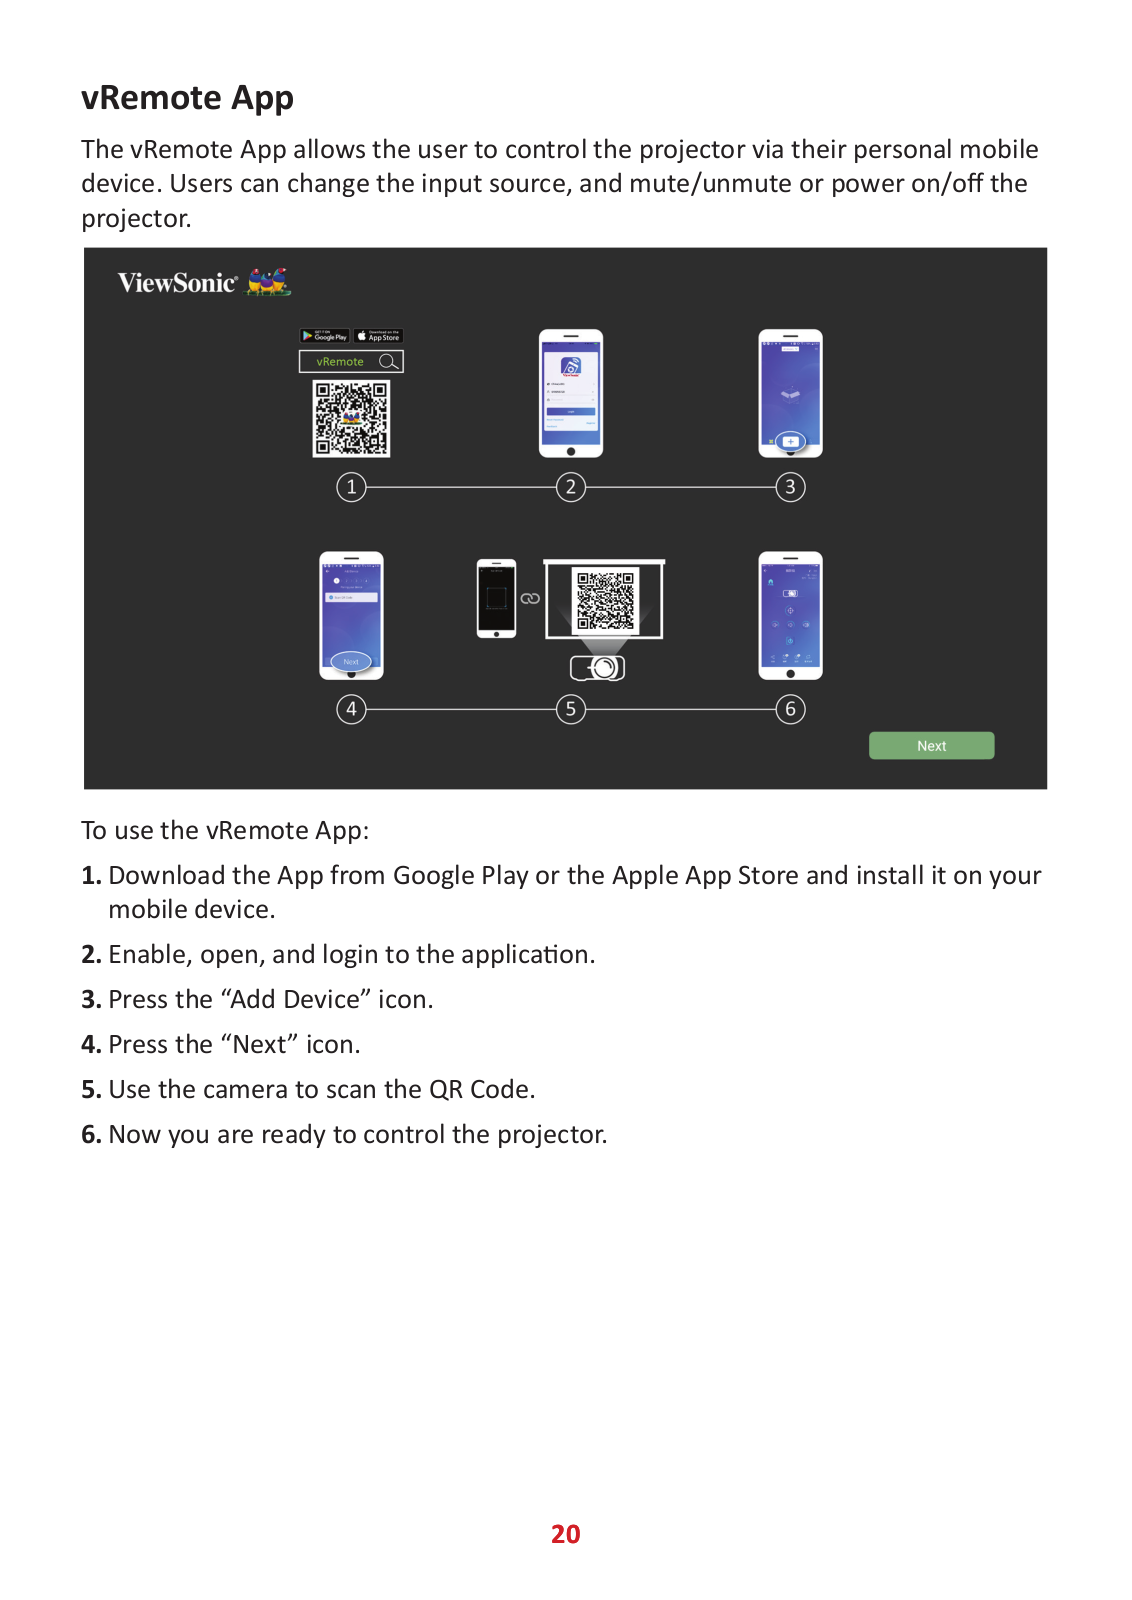
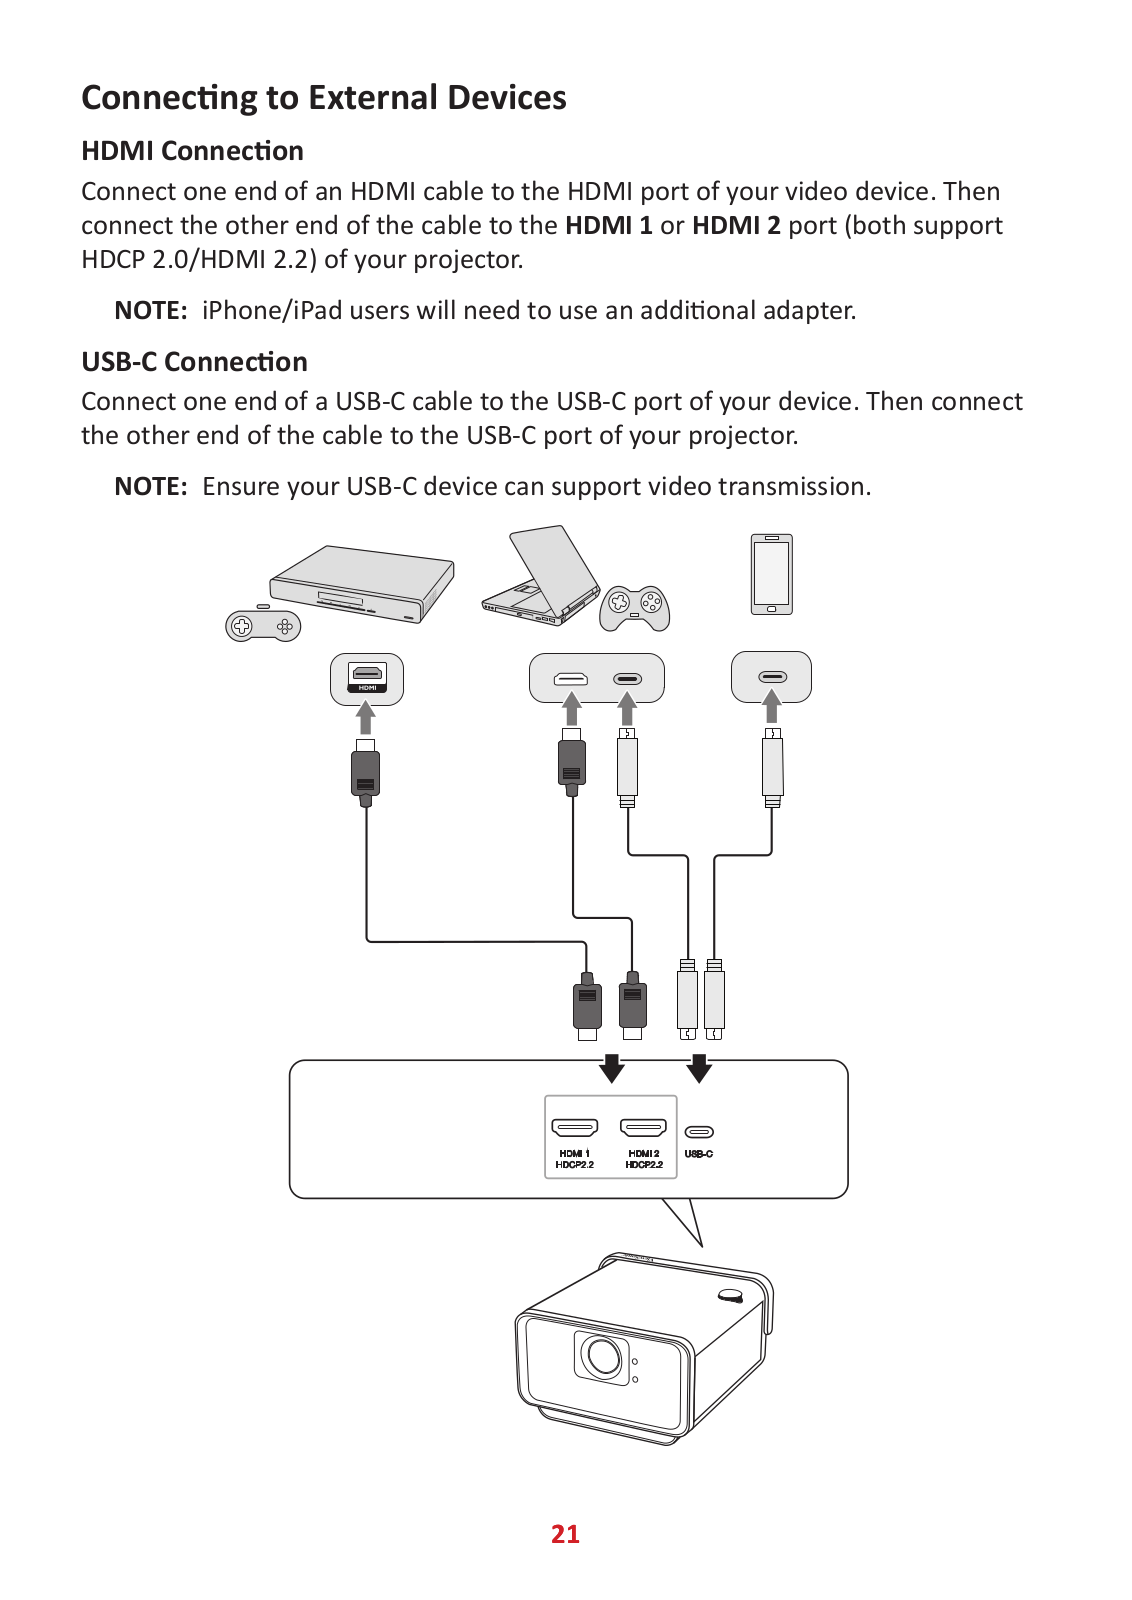
User Manual
Download
Loading...
+
76
hidden pages
Unhide
You need points to download manuals.
1 point = 1 manual.
You can buy points or you can get point for every manual you upload.
Buy points
Upload your manuals
 Loading...