

Page 1
Vx700
Installation Guide
VeriFone Part Number 28212, Revision A
Page 2

x
V
700 Installation Guide
© 2008 VeriFone, Inc.
All rights reserved. No part of the contents of this document may be reproduced or transmitted in any form without the written
permission of VeriFone, Inc.
The information contained in this document is subject to change without notice. Although VeriFone has attempted to ensure the
accuracy of the contents of this document, this document may include errors or omissions. The examples and sample programs are
for illustration only and may not be suited for your purpose. You should verify the applicability of any example or sample program
before placing the software into productive use. This document, including without limitation the examples and software programs, is
supplied “As-Is.”
VeriFone, the VeriFone logo, Omni, VeriCentre, Verix, and ZonTalk are registered trademarks of VeriFone. Other brand names or
trademarks associated with VeriFone’s products and services are trademarks of VeriFone, Inc.
All other brand names and trademarks appearing in this manual are the property of their respective holders.
Comments? Please email all comments on this document to your local VeriFone Support Team.
VeriFone, Inc.
2099 Gateway Place, Suite 600
San Jose, CA 95110 USA
1-800-VeriFone
www.verifone.com
VeriFone Part Number 28212, Revision A
Page 3

PREFACE . . . . . . . . . . . . . . . . . . . . . . . . . . . . . . . . . . . . . . . 5
Target Audience . . . . . . . . . . . . . . . . . . . . . . . . . . . . . . . . . . . . . . . . . . . . . . . . . . 5
Document Organization . . . . . . . . . . . . . . . . . . . . . . . . . . . . . . . . . . . . . . . . . . . . 5
Guide Conventions. . . . . . . . . . . . . . . . . . . . . . . . . . . . . . . . . . . . . . . . . . . . . . . . 5
Acronym Definitions . . . . . . . . . . . . . . . . . . . . . . . . . . . . . . . . . . . . . . . . . . . . 6
CHAPTER 1
Terminal Overview The V
x
700 Keypad . . . . . . . . . . . . . . . . . . . . . . . . . . . . . . . . . . . . . . . . . . . . . . . . 9
Features at a Glance . . . . . . . . . . . . . . . . . . . . . . . . . . . . . . . . . . . . . . . . . . . . . . 9
Features and Benefits. . . . . . . . . . . . . . . . . . . . . . . . . . . . . . . . . . . . . . . . . . 10
CHAPTER 2
Terminal Setup and
Usage
Ergonomic References. . . . . . . . . . . . . . . . . . . . . . . . . . . . . . . . . . . . . . . . . . . . 13
Terminal Positioning and Orientation . . . . . . . . . . . . . . . . . . . . . . . . . . . . . . 13
Screen Viewing Angle. . . . . . . . . . . . . . . . . . . . . . . . . . . . . . . . . . . . . . . . . . 14
Privacy . . . . . . . . . . . . . . . . . . . . . . . . . . . . . . . . . . . . . . . . . . . . . . . . . . . . . 15
Reach and Viewing Angles (Standing Users). . . . . . . . . . . . . . . . . . . . . . . . 16
Reach and Viewing Angles (Wheelchair Users) . . . . . . . . . . . . . . . . . . . . . . 18
Examine
x
V
700 Features . . . . . . . . . . . . . . . . . . . . . . . . . . . . . . . . . . . . . . . . . . . . . . . . . 20
Cable Connections . . . . . . . . . . . . . . . . . . . . . . . . . . . . . . . . . . . . . . . . . . . . . . . 20
RS-232 and USB Connections. . . . . . . . . . . . . . . . . . . . . . . . . . . . . . . . . . . . . . 21
Connection Options . . . . . . . . . . . . . . . . . . . . . . . . . . . . . . . . . . . . . . . . . . . 21
Pin Connections . . . . . . . . . . . . . . . . . . . . . . . . . . . . . . . . . . . . . . . . . . . . . . 22
Connection to Secure Card Reader (Optional) . . . . . . . . . . . . . . . . . . . . . . . . . 26
The SCR710 Secure Card Reader . . . . . . . . . . . . . . . . . . . . . . . . . . . . . . . . 26
Power Supply . . . . . . . . . . . . . . . . . . . . . . . . . . . . . . . . . . . . . . . . . . . . . . . . . . . 27
CHAPTER 3
Specifications Power . . . . . . . . . . . . . . . . . . . . . . . . . . . . . . . . . . . . . . . . . . . . . . . . . . . . . . . . . 29
Power Consumption . . . . . . . . . . . . . . . . . . . . . . . . . . . . . . . . . . . . . . . . . . . 29
DC Power Pack . . . . . . . . . . . . . . . . . . . . . . . . . . . . . . . . . . . . . . . . . . . . . . . . . 29
Temperature. . . . . . . . . . . . . . . . . . . . . . . . . . . . . . . . . . . . . . . . . . . . . . . . . . . . 29
External Dimensions . . . . . . . . . . . . . . . . . . . . . . . . . . . . . . . . . . . . . . . . . . . . . 29
CHAPTER 4
Maintenance Cleaning the Terminal . . . . . . . . . . . . . . . . . . . . . . . . . . . . . . . . . . . . . . . . . . . . 31
CHAPTER 5
VeriFone Service
and Support
APPENDIX A V
Returning the Terminal for Service. . . . . . . . . . . . . . . . . . . . . . . . . . . . . . . . . . . 33
Accessories . . . . . . . . . . . . . . . . . . . . . . . . . . . . . . . . . . . . . . . . . . . . . . . . . . . . 34
Power Pack. . . . . . . . . . . . . . . . . . . . . . . . . . . . . . . . . . . . . . . . . . . . . . . . . . 34
Data Cables . . . . . . . . . . . . . . . . . . . . . . . . . . . . . . . . . . . . . . . . . . . . . . . . . 35
x
700 ATM - Vending Machine Integration . . . . . . . . . . . . . . . . . . . . . . . . . . . . 37
Terminal Dimensions . . . . . . . . . . . . . . . . . . . . . . . . . . . . . . . . . . . . . . . . . . 37
Rear Terminal Dimensions . . . . . . . . . . . . . . . . . . . . . . . . . . . . . . . . . . . . . . 38
Vending Machine Integration for the V
x
700 . . . . . . . . . . . . . . . . . . . . . . . . . 39
VX700 INSTALLATION GUIDE 3
Page 4

4 V
X
700 INSTALLATION GUIDE
Page 5
PREFACE
This installation guide assists machine manufacturers to properly install the Vx700
in terms of electrical connectivity as well as mechanical, security, and privacy
specifications.
Target Audience
Document
Organization
Guide
Conventions
This document is useful to payment/banking machine
manufacturers/implementors.
This document is organized as follows:
Chapter 1, Terminal Overview, provides an overview of the basic features and
x
benefits of the V
Chapter 2, Terminal Setup and Usage, explains how to set up and install the
x
700 into a payment machine/ATM.
V
Chapter 3, Specifications, discusses power requirements and dimensions of the
x
700.
V
Chapter 4, Maintenance, explains how to maintain the V
Chapter 5, VeriFone Service and Support, provides information on contacting your
local VeriFone representative or service provider, and information on how to order
accessories or documentation from VeriFone.
This section provides a quick reference to conventions used in this guide.
The following conventions help the reader distinguish between different types of
information:
700.
x
700.
NOTE
CAUTION
• The courier typeface is used for code entries, filenames and extensions, and
anything that requires typing at the DOS prompt or from the terminal keypad.
• The italic typeface indicates book title or emphasis.
• Tex t in blue indicates terms that are cross-referenced. When the pointer is
placed over these references the pointer changes to the finger pointer,
indicating a link. Click on the link to view the topic.
Notes point out interesting and useful information.
Cautions point out potential programming problems.
VX700 INSTALLATION GUIDE 5
Page 6

PREFACE
Guide Conventions
WARNING
Warnings point out potential incidents where bodily injury might occur.
Acronym Definitions
Various acronyms are used in place of the full definition. Table 1 presents
acronyms and their definitions.
Table 1 Acronym Definitions
Acronym Definitions
AES Advanced Encryption Standard Algorithm
API Application Programming Interface
ARM Advanced RISC Machines
CAPK Certification Authority Public Key
CBC Cipher Block Chaining mode
COG Chip on Glass
COGS Cost of Goods Sold
CTS Clear to Send
DEA/DES Data Encryption Algorithm/Standard
DUKPT Derived Unique Key Per Transaction Method
ECB Electronic Code Book mode
ECR Electronic Cash Register
EMV Joint Europay, MasterCard and Visa Standard
ERS Engineering Requirements Specification
HDLC High-level Data Link Control
ICC Integrated Chip Card (Smart Card)
LCD Liquid Crystal Display
MAC Message Authentication Code
MDB Multi-Drop Bus
MMU Memory Management Unit
MSAM Multiple Secure Access Module
MSR Magnetic Stripe Reader
OS Operating System
PED PIN Entry Device
PIN Personal Identification Number
POS Point-of-Sale
PRD Product Requirement Document
PSCR Primary Smart Card Reader
RTS Ready to Send
SOC System on Chip
SAM Secure Access Module
SC Smart Card (Integrated Chip Card)
SDK Software Development Kit
SL3 Security Level 3 and 4
6 V
X
700 INSTALLATION GUIDE
Page 7

Table 1 Acronym Definitions (continued)
Acronym Definitions
SR Ship Release
SRAM Static Random Access Memory
STN Super Twisted Nematic
UI User Interface
USB Universal Serial Bus
VSS VeriShield Security Scripts
PREFACE
Guide Conventions
X
700 INSTALLATION GUIDE 7
V
Page 8

PREFACE
Guide Conventions
8 V
X
700 INSTALLATION GUIDE
Page 9

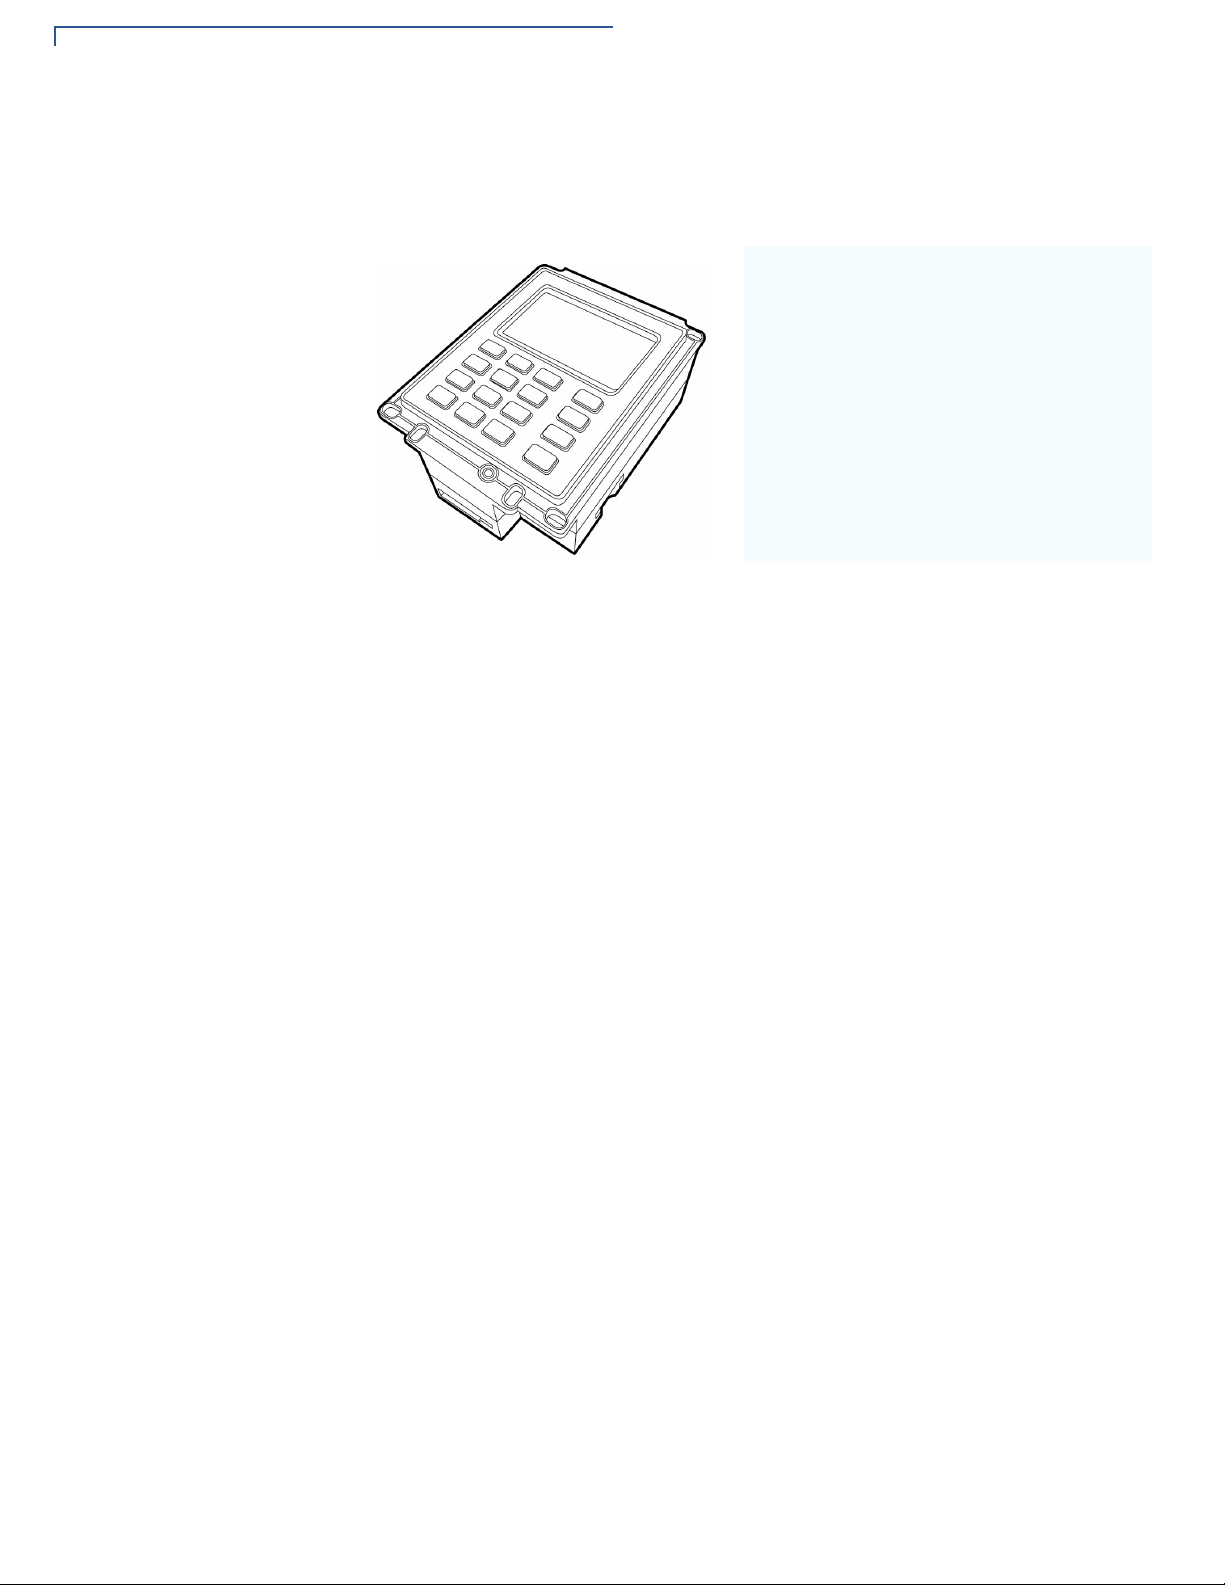
Terminal Overview
This chapter provides a brief description of the Vx700. The Vx700 is one of
VeriFone’s versatile unattended payment solutions set. The V
manufacturers who want secure, PCI PED approved, EMV-compliant transaction
payment technology in their own payment/transaction machines.
CHAPTER 1
x
700 is designed for
The
Vx700
Keypad
Features at a
Glance
The Vx700 is an outdoor-rated unattended keypad, suitable for payment
applications and process control, and features high reliability in tough
environments. Built around VeriFone’s successful Verix-based programming
environment, the V
components and sophisticated development tools.
Capable of operating from a wide range of input voltages, the V
power capabilities to enable use in critical power applications. An interface for
USB host and slave provides for simple connectivity over local or wide area
networks.
x
The V
payment solution ranging from magnetic stripe to full EMV chip card processing. It
has options to directly support contactless payment cards, including MasterCard
PayPass, Visa payWave, M/Chip, and qVSDC, with the addition of an optional
plug-in contactless interface module and an external antenna that is mounted on
the integration equipment – such as a vending machine or kiosk.
The Vx700 has a stainless steel front panel that is rated at IP65. The rear panel
containing the cable connections is rated at IP34. These features allow the V
to operate in extreme environments. It is PCI PED approved for assured payment
security, has superior graphical display with optional backlighting, easy-to-use
long-life keypad with concave keys, and is vandal-resistant.
700 links to a variety of VeriFone card accepting devices for a complete
x
700 gives access to a broad range of application software
x
700 has low
x
700
VX700 INSTALLATION GUIDE 9
Page 10
TERMINAL OVERVIEW
Features at a Glance
The unique form factor of the Vx700 allows it to be fitted into bill acceptor cut-outs
for vending applications. It is equally suited for ticketing, transportation, kiosk,
petroleum dispensing, or drive-through restaurant deployments.
• Verix-based programming
environment.
• Small, easy to integrate form factor.
• Fits into bill acceptor cut-out.
• 2 million operation keypad, 16 keys.
• 128 x 64 backlit graphical display.
• IP65 sealed, -25C to +60C operating
range.
Features and
Benefits
Figure 1 V
x
700 overview
Exceptional Ease of Use
• 16-key keypad with concave keys, high contrast legends, and tactile
identifiers.
• External interface for four function user-defined keys.
• 128 x 64 backlit LCD.
• Built-in multi-tone beeper.
• External sounder connection.
• USB and Serial connectivity.
• Wide input voltage range (9V to 28V).
• Low power consumption.
Critical Security Protection
• Stainless steel front panel rated IP65 and IK09 vandal resistance
(10 Joules impact resistance).
• Rear panel rated at IP34.
10 V
X
700 INSTALLATION GUIDE
• Petroleum and chemical resistant.
• PCI PED 1.3 on-line and off-line approved.
Page 11

TERMINAL OVERVIEW
Features at a Glance
Strong Feature Set
• Ensures uncompromising reliability from VeriFone, the worldwide leader in
e-payment.
• Verix-based – able to run existing applications with only minor modifications.
• High-level API for easy integration.
• RS-232 and USB 2.0 serial ports.
• Optional MDB interface for host and slave vending applications.
• Optional V.22bis - V.34 modem with HDLC capability via USB connection.
• Optional Ethernet 10/100 BaseT via USB connection.
• Connects to SCR710 secure card reader.
• Support for magnetic stripe cards (3 track) via SCR710.
• EMV cards (EMV 4.0) via SCR710.
• Optional support for 2 SAMs (Secure Access Modules).
Other Features
• 200 MHz ARM9 processor
• 4MB Flash, 2MB SRAM (standard)
• 8MB Flash, 4MB SRAM (option)
X
700 INSTALLATION GUIDE 11
V
Page 12

TERMINAL OVERVIEW
Features at a Glance
12 V
X
700 INSTALLATION GUIDE
Page 13

Terminal Setup and Usage
CHAPTER 2
Ergonomic
References
NOTE
Terminal Positioning
and Orientation
To ensure that the Vx700 is mounted in the most comfortable viewing and reach
position, this section shows a series of guide dimensions for both standing
persons and wheelchair users.
The data in this section is based on average Caucasian males. For different
ethnic groups, refer to more accurate anthropometric data.
This section provides a general overview of the preferred mounting angle,
orientation, and viewing angle for ease of use and privacy. When installing the
x
V
700 in an unattended transaction/payment machine, consider the situations
illustrated in Figure 2.
Figure 2 Typical Terminal Usage Situations
VX700 INSTALLATION GUIDE 13
Page 14

TERMINAL SETUP AND USAGE
Ergonomic References
Screen Viewing
Angle
The screen viewing angles, illustrated in Figure 3, denotes the angle at which the
screen can be viewed comfortably.
110º
Figure 3 Screen Viewing Angles
30º
14 V
X
700 INSTALLATION GUIDE
Page 15

TERMINAL SETUP AND USAGE
Ergonomic References
Privacy
The following requirements relates to the user’s privacy when entering PIN. The
area of visibility should be no larger than a cone taken from the number 5 key at
an angle of 45
o
and covering an area of 270o directly in front of the user, as shown
in Figure 4.
270º
45º
Figure 4 PIN Entry Visibility Area
PIN entry can be secured using the payment machine’s structure (Figure 5) or by
installing a privacy shield (Figure 6).
Figure 5 PIN Entry Privacy Using the Machine’s Structure
Figure 6 PIN Entry Privacy Shield
X
700 INSTALLATION GUIDE 15
V
Page 16

TERMINAL SETUP AND USAGE
Ergonomic References
Reach and Viewing
Angles (Standing
Users)
Refer to Figure 7 and Figure 8 for the viewing angle and reach contours most
comfortable for a standing user when utilizing a payment machine/ATM.
Figure 7 Comfortable Reach and Viewing Angle (Standing)
16 V
X
700 INSTALLATION GUIDE
Page 17

Figure 8 shows additional reach contours for standing users.
TERMINAL SETUP AND USAGE
Ergonomic References
Figure 8 Reach Contours (Standing Users)
X
700 INSTALLATION GUIDE 17
V
Page 18

TERMINAL SETUP AND USAGE
Ergonomic References
Reach and Viewing
Angles (Wheelchair
Users)
Wheelchair users prefer to use and view operating features when facing a
payment machine/ATM. They may also want to reach to the side for security,
mobility, and privacy reasons. It is important that, where possible, the machine
design provides a knee space to allow a frontal approach for wheelchair users.
Figure 9 and Figure 10 shows the viewing angle and reach contours that are most
comfortable for a wheelchair user when utilizing a payment machine/ATM.
Figure 9 Reach and Viewing Angles (Wheelchair Users)
18 V
X
700 INSTALLATION GUIDE
Page 19

TERMINAL SETUP AND USAGE
Figure 10 shows additional reach contours for wheelchair users.
Ergonomic References
Figure 10 Reach Contours (Wheelchair Users)
X
700 INSTALLATION GUIDE 19
V
Page 20

TERMINAL SETUP AND USAGE
Examine Vx700 Features
Examine
Vx700 Features
Before you continue with the installation process, familiarize yourself with the
x
V
700 features:
DISPLAY
KEYPAD
FUNCTION KEYS
x
Figure 11 V
x
The V
700 includes the following features:
700 Features
Cable
Connections
WARNING
• A 128 x 64 backlit display.
• 16-key Keypad and four Function keys.
• Four color-coded function keys beside the Keypad (CANCEL [RED], CLEAR
[
YELLOW], HELP [BLUE], ENTER [GREEN]).
The Vx700 has 3 general connection options, depending on what the Vx700
connects to:
1 MDB (Multi-Drop Bus) interface for host and slave vending applications.
2 V.22bis - V.34 modem with HDLC capability via USB connection.
3 Ethernet 10/100 BaseT via USB connection.
Do not use a unit that has been tampered with or otherwise damaged.
x
The V
appears damaged, immediately notify the shipping company and your VeriFone
representative or service provider.
700 comes equipped with tamper-evident label. If a label or component
20 V
X
700 INSTALLATION GUIDE
Page 21

TERMINAL SETUP AND USAGE
RS-232 and USB Connections
RS-232 and USB
Connections
The Vx700 USB and RS-232 ports are shown in Figure 12.
COM 2USB 2/3COM 8
SDIO
MSR
SAM
Connection Options
USB COM 1 DC IN
Figure 12 Underside with Port Labels
The different connection options are listed below:
1 USB connects to a host system using cable VPN 27720-01-(R).
2 USB 2/3 connects to Ethernet networks using VPN 08448-03(R), USB
memory sticks, USB modem, or other USB devices. Additional software may
be required to support particular USB devices.
3 COM 1 connects to host system using a cable VPN 27716-01-(R) or an MDB
interface thru VPN 27712-01-(R).
4 COM 2 connects to the SCR710 Card Reader using a VPN 27718-01-(R).
5 COM 8 connects specific applications using a cable VPN 27717-01-(R).
6 SDIO connects to a contactless module (future expansion).
7 MSR connects to a card reader (future expansion).
8 DC IN connects to the power supply unit VPN CPS11224-3B-(R) (if required).
X
700 INSTALLATION GUIDE 21
V
Page 22

TERMINAL SETUP AND USAGE
RS-232 and USB Connections
Pin Connections
The following are the possible options for cable adapters to support the
peripherals for the V
x
700:
1 Serial Port (COM 1): Logical Port 1 (USB Slave, Serial, Power)
• 6-Wire RS232 port with TX, RX, RTS, CTS, DTR, and DCD signals.
• Provides for back-to-back download capability.
• Pin 10 allows the terminal to be turned off by raising this pin high; a low on
this pin re-powers the unit (default is low if this feature is not implemented
by the host).
Table 2 Logical Port 1 (UPSTREAM) Serial connections
PIN RJ-48 (10 Way Connector)
1 TX
2 RX
3 RTS
4 CTS
5 DTR
6 VIN 9 - 28V
7 GND
8 DCD
9 MDB 12V
10 RECYCLE POWER
2 USB Slave: Logical Port 1 (USB Slave, Serial, Power)
• Provides for 2-Wire USB device port.
• Port is directly connected to CPU USB ports and is a USB slave.
• Power is not supplied from the USB Host, Pin 1 is NC. This configuration
powers the V
Table 3 Logical Port 1 (UPSTREAM) USB connections
PIN Mini USB “B” (5 way connector)
1 NC
2 nUSB (Slave)
3 nUSB (Slave)
4 NC
5 GND
x
700 by the DC Jack.
22 V
X
700 INSTALLATION GUIDE
Page 23

TERMINAL SETUP AND USAGE
RS-232 and USB Connections
3 Serial Port (COM 2 and 3): Logical Ports 2 and 3 (USB Host, Serial)
• 6-Wire RS232 port with TX, RX, RTS, CTS, DTR, and DCD signals and
VSYS out.
Table 4 Logical Port 2 (DOWNSTREAM) Serial connections
PIN RJ45 (8 Way Connector)
1 TX
2 RX
3 RTS
4 CTS
5 DTR
6 VSYS OUT 12V
7 GND
8 DCD
Table 5 Logical Port 3 (DOWNSTREAM) Serial connections
PIN RJ45 (8 Way Connector)
1 TX
2 RX
3 RTS
4 CTS
5 DTR
6 VSYS OUT 12V
7 GND
X
700 INSTALLATION GUIDE 23
V
Page 24

TERMINAL SETUP AND USAGE
RS-232 and USB Connections
4 USB Host: Logical Ports 2 and 3 (USB Host, Serial)
• 2-Wire USB Host port for external peripherals.
• Both ports provide up to 500mA, at 5V, for external peripherals.
• Devices requiring a higher current and voltage are not supported.
• A connector adaptor provides for a standard USB host connection.
• The host may use existing USB Verifone dongles, such as the USB-
Modem and USB-Serial, as well as devices in development, USB-Ethernet
and USB memory sticks.
Table 6 Logical Ports 2 & 3 (DOWNSTREAM) USB connections
PIN USB “A” (8 Way Connector)
1 USB POWER OUT 500mA
2 nUSB (HOST)
3 pUSB (HOST)
4 GND
5 USB POWER OUT 500mA
6 nUSB (HOST)
7 pUSB (HOST)
8 GND
24 V
X
700 INSTALLATION GUIDE
Page 25

TERMINAL SETUP AND USAGE
RS-232 and USB Connections
The following figure shows the approximate location of Pin 1 on the ports of the
x
V
700:
PIN 1 PIN 1
COM 2 USB 2/3 COM 8 MSR
SDIO
PIN 1
PIN 1
SAM
NOTE
WARNING
NOTE
USB
COM1 DCIN
PIN 1 PIN 1
Figure 13 Approximate Location of Pin 1
For further assistance on the location of Pin 1, please contact your VeriFone
representative.
Turn off or unplug the host system when connecting or disconnecting the Vx700.
Memory corruption and data loss can result if the host system is processing data
when power is removed.
Refer to the host system instructions for specific warnings.
If an extension cable is required, only USB-certified cables should be used.
Standard accessories included with the Vx700 depends on the selected Vx700
part number. For more information, contact your VeriFone representative.
X
700 INSTALLATION GUIDE 25
V
Page 26

TERMINAL SETUP AND USAGE
Connection to Secure Card Reader (Optional)
Connection to
Secure Card
Reader
(Optional)
The SCR710 Secure
Card Reader
NOTE
This section describes the connection of the Vx700 to the optional smart card
reader SCR710.
VeriFone’s SCR710 is an outdoor-rated and robust secure card reader, suitable
for payment card acceptance in tough environments where reliability is
paramount.
The SCR710 provides three-track magnetic stripe reading capability along with a
full EMV 4.0 chip interface and Interac approval. It is PCI certified, which ensures
that sensitive cardholder data remains confidential during transfer to the attached
x
V
700 PIN pad or Mx700 EPP.
The SCR710 is powered by the Vx700 and has a power supply requirement of
12V DC with a maximum power consumption of 2.4W.
26 V
X
700 INSTALLATION GUIDE
Page 27

TERMINAL SETUP AND USAGE
Power Supply
Power Supply
CAUTION
WARNING
NOTE
Not all Vx700 configurations and device contexts require the use of a power
supply – VeriFone ships power supplies with the V
If you have changed the context in which the V
x
700 as required.
x
700 is used or have questions
about which power supply should be used, contact your VeriFone representative.
Using an incorrectly rated power supply can damage the unit or cause it not to
work properly. Use only the recommended power supply, CPS11224-3B-(R), for
x
the V
Connect and route all cables from the V
700 VPN (see Specifications for detailed power supply specifications).
x
700 before plugging the power pack cord
into a wall outlet or surge protector.
Disconnecting power during a transaction can cause transaction data files not yet
stored in memory to be lost.
To protect against possible damage caused by lightning strikes and electrical
surges, VeriFone recommends installing a power surge protector.
When the V
x
700 has power and an application is loaded, the application starts
after the initial VeriFone copyright screen and displays a unique copyright screen.
If no application is loaded,
DOWNLOAD NEEDED appears on the display after the
initial VeriFone copyright screen.
X
700 INSTALLATION GUIDE 27
V
Page 28

TERMINAL SETUP AND USAGE
Power Supply
28 V
X
700 INSTALLATION GUIDE
Page 29

Specifications
CHAPTER 3
This chapter discusses power requirements, dimensions, and other specifications
x
of the V
700.
Power
Power Consumption
DC Power Pack
9V to 28V; 4A (option to support 45V DC)
The Vx700 has the following power consumption modes:
• 1.5W:
• 1W:
• 0.39W:
UL, ITE listed, Class 2 power supply:
a Input rated:
b Output rated:
Power connector dimensions:
Outer: 5.5mm Center: 2.1mm Shaft Length: 9.5mm
Barrel connector polarity:
Full Speed
Low Power Mode
Sleep Mode
100 - 240V AC, 50/60 Hz, 0.6A
12V DC, 4A
Temperature
External
Dimensions
The Vx700 operating range and humidity tolerance as follows:
• Operating Temperature
• Relative Humidity
The Vx700 has the following dimensions:
• Length:
• Width:
• Height:
132mm (5.2 in)
100mm (4.0 in)
48.9mm (2.0 in)
°
-25
to 60° C (13° to 140° F)
5% to 95%; non-condensing
VX700 INSTALLATION GUIDE 29
Page 30

SPECIFICATIONS
External Dimensions
30 V
X
700 INSTALLATION GUIDE
Page 31

Maintenance
CHAPTER 4
The Vx700 has no user-maintainable parts. This section discusses procedures
and precautions for terminal care and maintenance.
Cleaning the
Terminal
CAUTION
To Clean the Terminal:
• Slightly dampen a clean cloth with water and a drop or two of mild soap.
• Wipe the V
x
700 gently.
• For stubborn stains, use alcohol or an alcohol-based cleaner.
Never use thinner, trichloroethylene, or ketone-based solvents – they may cause
deterioration of plastic or rubber parts.
Do not spray cleaners or other solutions directly onto the keypad or terminal
display.
VX700 INSTALLATION GUIDE 31
Page 32

MAINTENANCE
Cleaning the Terminal
32 V
X
700 INSTALLATION GUIDE
Page 33

VeriFone Service and Support
For terminal problems, contact your local VeriFone representative or service
provider.
For product service and repair information:
• USA – VeriFone Service and Support Group, 1-800-VeriFone (837-4366),
Monday - Friday, 8 A.M. - 8 P.M., Eastern time.
• International – Contact your VeriFone representative.
CHAPTER 5
Returning the
Terminal for
Service
NOTE
Before returning a Vx700 to VeriFone, you must obtain an MRA number. The
following procedure describes how to return one or more terminals, for repair or
replacement (U.S. customers only).
International customers are advised to contact their local VeriFone representative
for assistance regarding service, return, or replacement of terminals.
To Return a Terminal for Service
1 Get the following information from the printed labels on the bottom of each
x
V
700 to be returned:
• Product ID, including the model and part number. For example, “V
and “Pxxx- xxx-xx,” “Mxxx-xx-xx-xxx,” or “2xxxx-xx”.
x
700”
• Serial number (S/N xxx-xxx-xxx).
2 Obtain the MRA number(s) by completing one of the following:
a Call VeriFone toll-free within the United States at 1-800-VeriFone and
follow the automated menu options.
• Select the MRA option from the automated message. The MRA
department is open Monday to Friday, 8 A.M.–8 P.M., Eastern Time.
• Give the MRA representative the information you gathered in Step 1.
If the list of serial numbers is long, you can fax the list, along with the
information gathered in Step 1, to the MRA department at 727-9534172 (U.S.).
b Address a fax to “VeriFone MRA Dept.” with the model and part number(s)
• Include a telephone number where you can be reached and your fax
number.
VX700 INSTALLATION GUIDE 33
Page 34

VERIFONE SERVICE AND SUPPORT
Accessories
c Complete the Inquiry Contact Form at http://www.verifone.com/aboutus/
contact/contact_form.cfm.
• Address the Subject box with “To VeriFone MRA Dept.”
• Reference the model and part number in the Note box.
NOTE
Accessories
One MRA number must be issued for each Vx700 you return to VeriFone, even if
you are returning several of the same model.
3 Describe the problem(s).
4 Provide the shipping address where the repaired or replacement unit must be
returned.
5 Keep a record of the following items:
• Assigned MRA number(s).
• VeriFone serial number assigned to the V
service or repair (terminal serial numbers are located on the bottom of the
unit.
x
700 you are returning for
• Shipping documentation, such as air bill numbers used to trace the
shipment.
• Model(s) returned (model numbers are located on the VeriFone label on
the bottom of the V
VeriFone produces the following accessories for the
x
700. When ordering, please refer to the part number in the left column.
V
x
700).
34 V
Power Pack
X
700 INSTALLATION GUIDE
• VeriFone online store at www.store.verifone.com.
• USA – VeriFone Customer Development Center, 800-VeriFone (837-4366),
Monday - Friday, 7 A.M. - 8 P.M., Eastern time.
• International – Contact your VeriFone representative.
Contact your local VeriFone distributor to determine which power pack or
power cord fits your needs.
CPS11224-3B-(R) Universal DC power pack
(supplied separately)
21973-01 AC power cord (US)
Page 35

Data Cables
VERIFONE SERVICE AND SUPPORT
Accessories
27720-01-(R) Host USB
08448-03-(R) Ethernet Adapter
27716-01-(R) Host RS-232
27712-01-(R) MDB interface
27718-01-(R) SCR710 Card Reader
27717-01-(R) USB Application
X
700 INSTALLATION GUIDE 35
V
Page 36

VERIFONE SERVICE AND SUPPORT
Accessories
36 V
X
700 INSTALLATION GUIDE
Page 37

APPENDIX A
Vx700 ATM -
Vending
Machine
Integration
Termi nal
Dimensions
This appendix shows the terminal dimensions of the Vx700 and the proper
orientation of the terminal for installation in an ATM or Vending Machine.
This section illustrates the terminal dimensions for Vending Machine integration of
x
700. The images indicate measurements in Metric units.
the V
Figure 14 Terminal Dimensions showing Length, Width, and Height
VX700 INSTALLATION GUIDE 37
Page 38

Vx700 ATM - Vending Machine Integration
Rear Terminal
Dimensions
This figure illustrates the rear terminal dimensions.
38 V
X
700 INSTALLATION GUIDE
Figure 15 Rear Terminal Dimensions, with a close up of Earth Stud slot
Page 39

Vx700 ATM - Vending Machine Integration
Vending Machine
Integration for the
Vx700
This section illustrates the proper orientation of the Vx700 terminal with a Vending
Machine terminal panel.
EARTH STUD
VENDING
MACHINE
PANEL
GASKET
Figure 16 Vending Machine Panel Orientation with the V
x
700
VX700
VX700 INSTALLATION GUIDE 39
Page 40

VeriFon e, Inc.
2099 Gateway Place, Suite 600
San Jose, CA, 95110 USA
Tel: (800) VeriFone (837-4366)
www.verifone.com
Vx700
Installation Guide
VeriFone Part Number 28212, Revision A
 Loading...