

Page 1
DEM900
5-IN-1 MULTIFUNCTIONAL ENVIRONMENT METER
MULTIFUNCTIONELE 5-IN-1 OMGEVINGSMETER
MESUREUR D'ENVIRONNEMENT MULTIFONCTIONNEL 5 EN 1
MEDIDOR MULTIFUNCIÓN - 5 EN 1
MULTIFUNKTIONS-MESSGERÄT - 5-IN-1
WIELOFUNKCYJNY MIERNIK WARUNKÓW ŚRODOWISKOWYCH
MEDIDOR DO AMBIENTE MULTIFUNÇÕES 5-EM-1
USER MANUAL 3
GEBRUIKERSHANDLEIDING 8
MODE D'EMPLOI 13
MANUAL DEL USUARIO 18
BEDIENUNGSANLEITUNG 23
INSTRUKCJA OBSŁUGI 29
MANUAL DO UTILIZADOR 35
Page 2
DEM900
V. 01 – 07/05/2015 2 ©Velleman nv
Page 3
DEM900
V. 01 – 07/05/2015 3 ©Velleman nv
USER MANUAL
1. Introduction
To all residents of the European Union
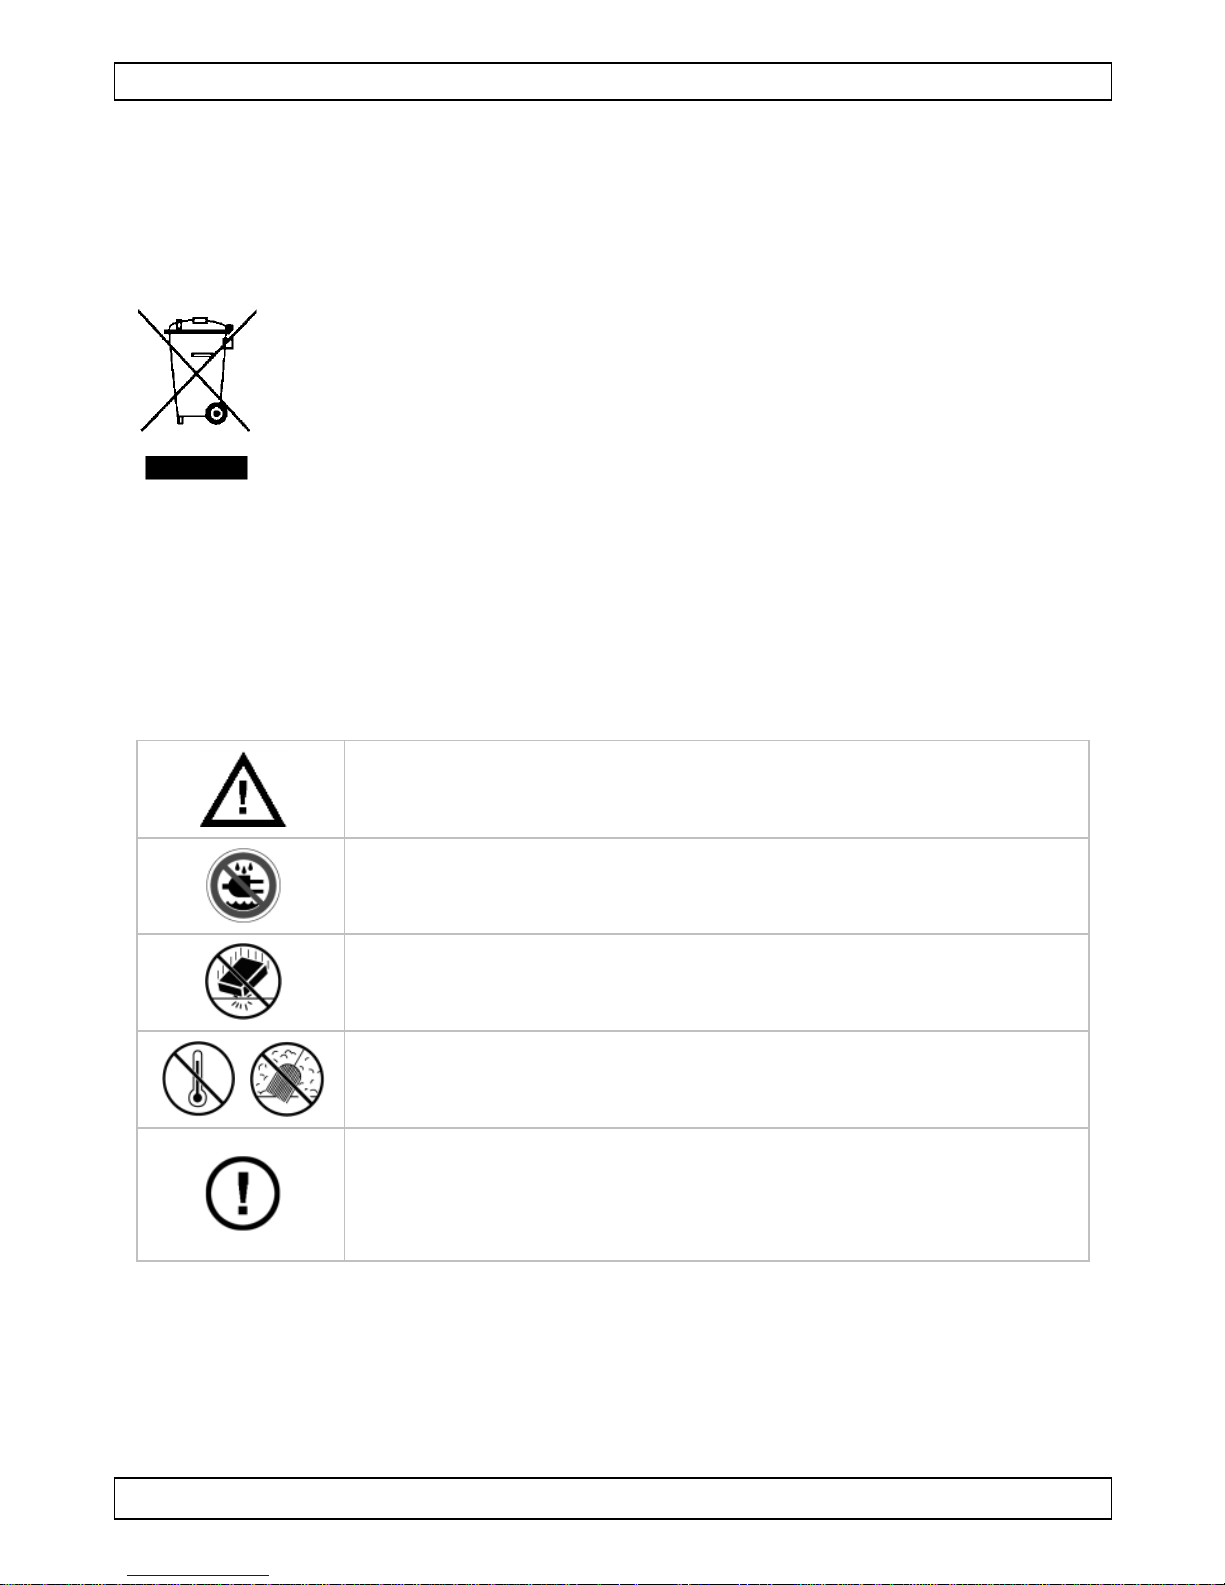
Important environmental information about this product
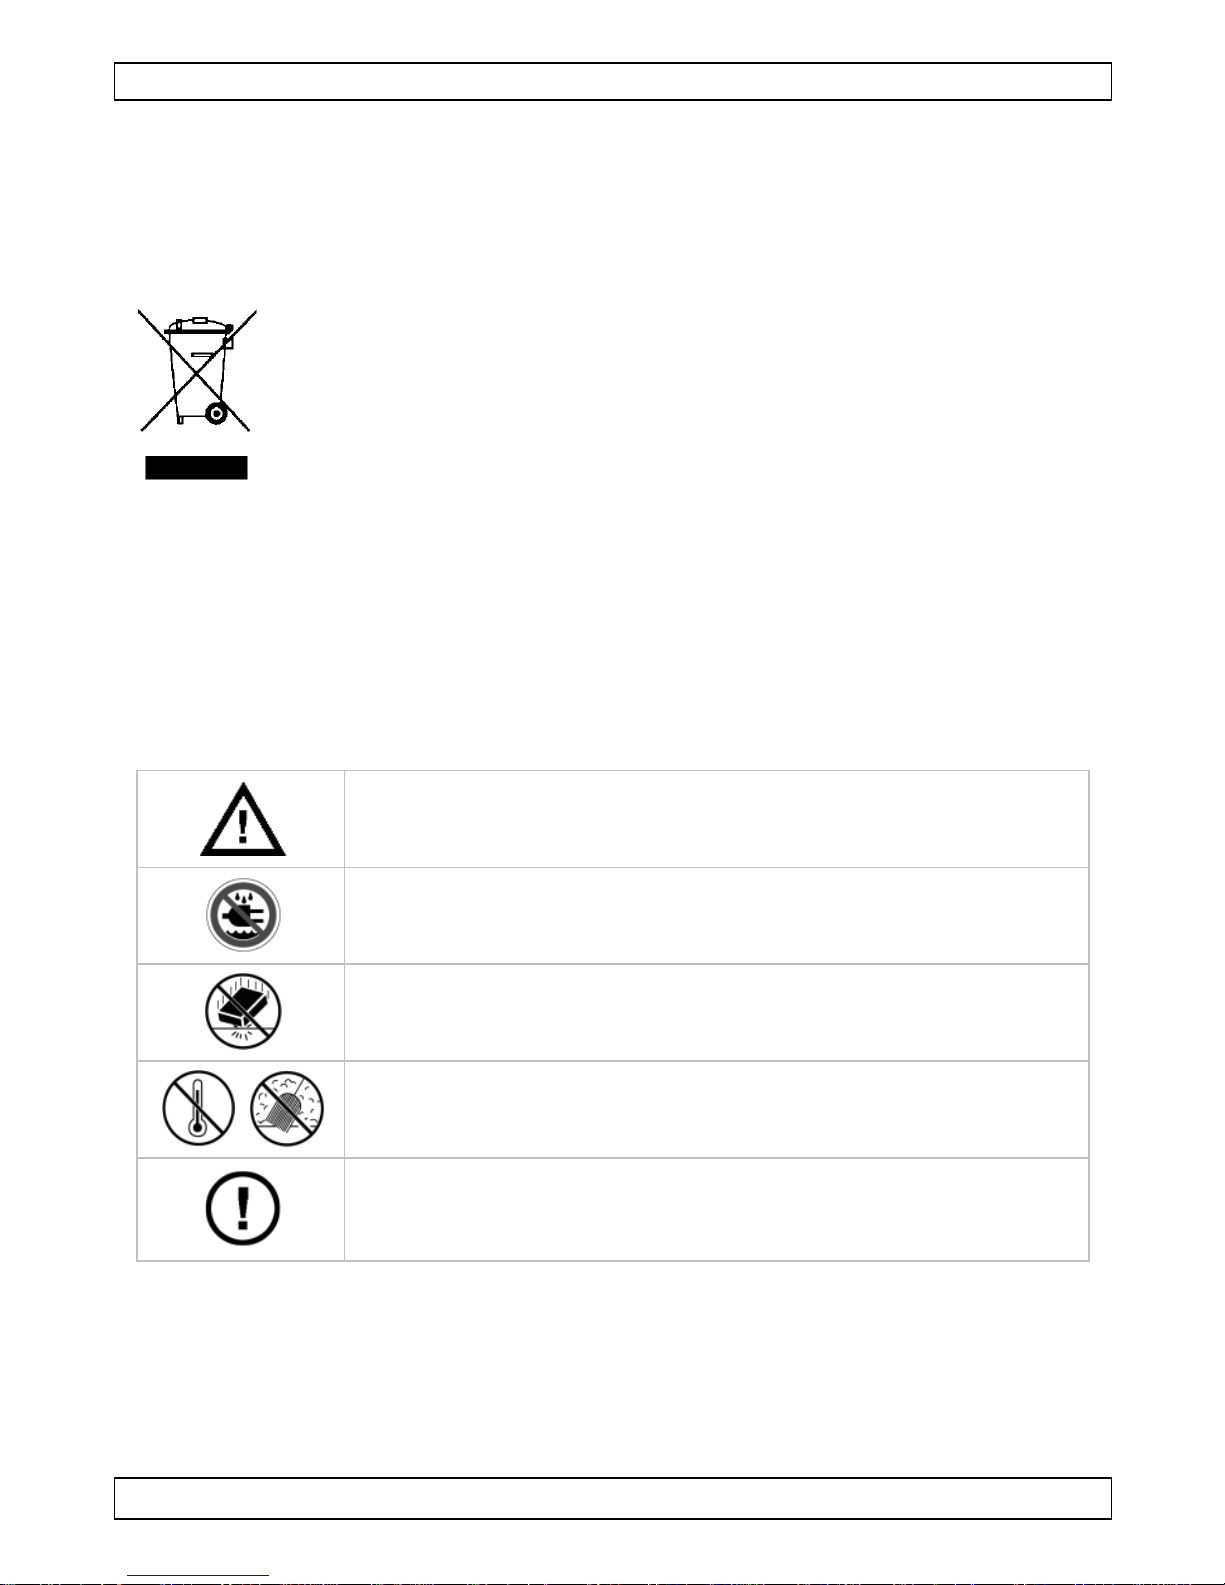
This symbol on the device or the package indicates that disposal
of the device after its lifecycle could harm the environment. Do
not dispose of the unit (or batteries) as unsorted municipal waste;
it should be taken to a specialized company for recycling. This
device should be returned to your distributor or to a local
recycling service. Respect the local environmental rules.
If in doubt, contact your local waste disposal authorities.
Thank you for choosing Velleman! Please read the manual thoroughly before
bringing this device into service. If the device was damaged in transit, do
not install or use it and contact your dealer.
2. Safety Instructions
Keep this device away from children and unauthorized
users.
Keep this device away from rain, moisture, splashing and
dripping liquids.
Protect this device from shocks and abuse. Avoid brute force
when operating the device.
Protect the device against extreme heat and dust.
There are no user-serviceable parts inside the device.
Refer to an authorized dealer for service and/or spare
parts.
3. General Guidelines
Refer to the Velleman® Service and Quality Warranty on the last pages
of this manual.
Familiarise yourself with the functions of the device before actually
using it.
All modifications of the device are forbidden.
Only use the device for its intended purpose. Using the device in an
unauthorised way will void the warranty.
Page 4
DEM900
V. 01 – 07/05/2015 4 ©Velleman nv
4. Features
display: lux, °C, °F, % RH, dB-A, dB-C, dB-low and dB-high, m/s, km/h,
ft/min, knots, mph
large 4-digit backlit LCD display
data hold and maximum hold
auto power-off and low-battery indication
comes with: 9V-battery, tripod, temperature and humidity probe, photo
detector , anemometer probe, carry case and coloured box
5. Overview
Refer to the illustrations on page 2 of this manual.
1
windscreen
10
MIN/MAX button
2
microphone
11
°C/°F selection button
3
LCD display
12
sound level calibration
4
temp./humidity button
13
probe socket
5
backlight
14
sensor socket
6
data-hold button
15
external power supply
7
unit selection button
16
tripod socket
8
power switch
17
battery compartment
9
function selection button
18
screw
Display
1
temp/humidity reading
7 sound level unit
2
battery level
8 light unit
3
temperature unit
9 MIN/MAX value
4
humidity icon
10
data hold
5
air velocity unit
11
power off timer
6
reading
6. Battery
1. To replace the battery, make sure the device is switched off.
2. Open the battery compartment at the back using an appropriate
screwdriver.
3. Take out the old battery and replace with a new and identical 9 V
battery following the polarity markings inside the compartment.
4. Close the battery compartment.
Warning: Do not puncture batteries or throw them in fire as they
may explode. Do not attempt to recharge non-rechargeable
batteries (alkaline). Dispose of batteries in accordance with local
regulations. Keep batteries away from children.
Page 5

DEM900
V. 01 – 07/05/2015 5 ©Velleman nv
7. Operation
7.1 Basic Operation
1. Press the power button to switch on the meter.
2. Press the backlight button to switch the backlight on or off.
3. Briefly press the data-hold button to freeze the reading on the display.
Press again to unfreeze.
4. Press the MIN/MAX button to display the recorded maximum value,
press again to display the recorded minimum value, press again to exit
the function.
5. Hold the power button pressed for 3 seconds to switch off the meter.
7.2 Measuring the Sound Level
1. Press the function selection button until the sound level unit appears
on the LCD display.
2. Aim the microphone to the sound source at a distance of 1 to 1.5 m.
The sound level appears on the display.
7.3 Measuring the Light Level
1. Connect the light probe to the meter.
2. Press the function selection button until the light level unit appears on
the LCD display.
3. Press the unit selection button to select the light unit.
4. The light level appears on the display.
7.4 Measuring the Air Velocity
1. Connect the wind probe to the meter.
2. Press the function selection button until the air velocity unit appears on
the LCD display.
3. Press the unit selection button to select the air velocity unit.
4. The air velocity appears on the display.
7.5 Measuring the Temperature
1. Connect the temperature/humidity probe to the meter.
2. Press the temp/humidity selection button until the temperature unit
appears on the LCD display.
3. Press the °C/°F selection button to select the temperature unit.
4. The value appears on the LCD display.
Page 6
DEM900
V. 01 – 07/05/2015 6 ©Velleman nv
7.6 Measuring the Humidity Level
1. Connect the temperature/humidity probe to the meter.
2. Press the temp/humidity selection button until the humidity level unit
appears on the LCD display.
3. The value appears on the LCD display.
7.7 Calibration
1. Select the A-weighing frequency.
2. Carefully insert the microphone into the calibrator (not included).
3. Calibrate the microphone to 94 dB through the CALL potentiometer. To
do so, use the included calibration tool.
Remarks:
It is advised to calibrate the meter once a year.
Velleman nv does not provide any calibration certificate.
8. Cleaning and Maintenance
Wipe the device regularly with a moist, lint-free cloth. Do not use
alcohol or solvents. DO NOT submerge the device in any liquid.
Store the meter in a dry place away from humidity and vibrations.
Remove the battery when the meter is to be stored for long periods of
time.
9. Technical Specifications
sound level
measurement range
35 dB ~ 130 dB
accuracy
± 2.0 dB
resolution
0.1 dB
frequency response
31.5 Hz ~ 8 kHz
frequency weighting
dBA
light
measuring range
0 lux ~ 200 klux, 0 Fc ~ 20 kFc
accuracy
± 4 % rdg ± 0.5 % f.s.(< 10,000 lux)
air velocity
air velocity range
0.5 m/s ~ 30.0 m/s
air velocity accuracy
± 3 % ± 0.3 d
measurement units
m/s, km/h, ft/min, knots, mph
temperature
measurement range
-40° C ~ 70° C (-40° F ~158° F)
accuracy
±2.0° C ± 3.6° F
measurement units
°C/°F
Page 7

DEM900
V. 01 – 07/05/2015 7 ©Velleman nv
humidity
measurement range
10 ~ 95 % RH
accuracy
± 5 % RH
power supply
1x 9 V battery 6F22 (incl.)
dimensions
252 x 66 x 33 mm
weight
575 g (with probes and battery)
Use this device with original accessories only. Velleman nv cannot
be held responsible in the event of damage or injury resulting from
(incorrect) use of this device. For more info concerning this product
and the latest version of this manual, please visit our website
www.velleman.eu. The information in this manual is subject to
change without prior notice.
© COPYRIGHT NOTICE
The copyright to this manual is owned by Velleman nv. All
worldwide rights reserved. No part of this manual may be copied,
reproduced, translated or reduced to any electronic medium or otherwise
without the prior written consent of the copyright holder.
Page 8
DEM900
V. 01 – 07/05/2015 8 ©Velleman nv
GEBRUIKERSHANDLEIDING
1. Inleiding
Aan alle burgers van de Europese Unie
Belangrijke milieu-informatie betreffende dit product
Dit symbool op het toestel of de verpakking geeft aan dat, als het
na zijn levenscyclus wordt weggeworpen, dit toestel schade kan
toebrengen aan het milieu. Gooi dit toestel (en eventuele
batterijen) niet bij het gewone huishoudelijke afval; het moet bij
een gespecialiseerd bedrijf terechtkomen voor recyclage. U moet
dit toestel naar uw dealer of naar een lokaal recyclagepunt
brengen. Respecteer de plaatselijke milieuwetgeving.
Hebt u vragen, contacteer dan de plaatselijke autoriteiten
betreffende de verwijdering.
Dank u voor uw aankoop! Lees deze handleiding grondig voor u het toestel
in gebruik neemt. Werd het toestel beschadigd tijdens het transport,
installeer het dan niet en raadpleeg uw dealer.
2. Veiligheidsinstructies
Houd dit toestel buiten het bereik van kinderen en
onbevoegden.
Bescherm dit toestel tegen regen, vochtigheid en
opspattende vloeistoffen.
Bescherm tegen schokken. Vermijd brute kracht tijdens de
bediening van het toestel.
Bescherm tegen stof en extreme temperaturen.
Er zijn geen door de gebruiker vervangbare onderdelen in
dit toestel.
Voor onderhoud of reserveonderdelen, contacteer uw
dealer.
3. Algemene richtlijnen
Raadpleeg de Velleman® service- en kwaliteitsgarantie achteraan deze
handleiding.
Leer eerst de functies van het toestel kennen voor u het gaat
gebruiken.
Page 9
DEM900
V. 01 – 07/05/2015 9 ©Velleman nv
Om veiligheidsredenen mag u geen wijzigingen aanbrengen.
Gebruik het toestel enkel waarvoor het gemaakt is. De garantie vervalt
automatisch bij ongeoorloofd gebruik.
4. Eigenschappen
weergave: lux, °C, °F, % RH, dB-A, dB-C, dB-laag en dB-hoog, m/s,
km/u, ft/min, knopen, mph
groot 4-digit lcd-scherm met achtergrondverlichting
data-hold en max. hold-functies
automatische uitschakeling en aanduiding zwakke batterij
geleverd met: 9 V-batterij, driepoot, temperatuur- en
vochtigheidssonde, lichtsensor, anemometersonde, etui en gekleurde
doos
5. Omschrijving
Raadpleeg de afbeeldingen op pagina 2 van deze handleiding.
1
windscherm
10
MIN/MAX-knop
2
microfoon
11
°C/°F-selectieknop
3
LCD-display
12
geluidsniveau kalibreren
4
knop temp./vochtigheid
13
aansluiting meetsonde
5
achtergrondverlichting
14
aansluiting sensor
6
datahold-knop
15
externe voeding
7
eenheidsselectieknop
16
statiefaansluiting
8
aan/uit-knop
17
batterijvak
9
functieselectieknop
18
schroef
Display
1
uitlezing
temp./vochtigheid
7 eenheid geluidsniveau
2
batterijniveau
8 eenheid lichtsterkte
3
temperatuureenheid
9 MIN/MAX-waarde
4
symbool luchtvochtigheid
10
data-holdfunctie
5
eenheid luchtsnelheid
11
timer uitschakelen
6
uitlezing
6. Batterij
1. Schakel het toestel uit om de batterij te vervangen.
2. Open het batterijvak achteraan het toestel met een geschikte
schroevendraaier.
Page 10

DEM900
V. 01 – 07/05/2015 10 ©Velleman nv
3. Verwijder de oude batterij en plaats een nieuwe, identieke 9 V-batterij
in het batterijvak volgens de polariteitsaanduidingen.
4. Sluit het batterijvak.
Waarschuwing: U mag batterijen nooit doorboren of in het vuur
gooien (explosiegevaar). Herlaad geen alkalinebatterijen. Gooi
batterijen weg volgens de plaatselijke milieuwetgeving. Houd de
batterijen buiten het bereik van kinderen.
7. Gebruik
7.1 Basisgebruik
1. Druk op de aan/uit-knop om de meter in te schakelen.
2. Druk op de knop voor achtergrondverlichting, om de
achtergrondverlichting in- of uit te schakelen.
3. Druk kort op de datahold-knop om de meetwaarde te bevriezen. Druk
nogmaals om de bevriezing op te heffen.
4. Houd de MIN/MAX-knop ingedrukt om de geregistreerde
maximumwaarde weer te geven, druk nogmaals om de geregistreerde
minimumwaarde weer te geven. Druk nogmaals om de functie te
verlaten.
5. Houd de aan/uit-knop gedurende 3 seconden ingedrukt om de meter
uit te schakelen.
7.2 Het geluidsniveau meten
1. Druk op de functieselectieknop totdat de eenheid van het
geluidsniveau op de display verschijnt.
2. Richt de microfoon naar de geluidsbron op een afstand van 1 tot 1.5
m. Het geluidsniveau verschijnt op de display.
7.3 De lichtsterkte meten
1. Sluit de lichtsonde aan op de meter.
2. Druk de functieselectieknop in, totdat de eenheid van de lichtsterkte
op de display verschijnt.
3. Druk de eenheidsselectieknop in om de eenheid van de lichtsterkte te
selecteren.
4. De lichtsterkte verschijnt op de display.
Page 11

DEM900
V. 01 – 07/05/2015 11 ©Velleman nv
7.4 De luchtsnelheid meten
1. Sluit de anemometersonde aan op de meter.
2. Druk op de functieselectieknop totdat de eenheid van de luchtsnelheid
op de display verschijnt.
3. Druk de eenheidsselectieknop in om de eenheid van de luchtsnelheid
te selecteren.
4. De luchtsnelheid verschijnt op de display.
7.5 De temperatuur meten
1. Sluit de temperatuur- /vochtigheidssonde aan op de meter.
2. Druk de temperatuur/vochtigheid-selectieknop in, totdat de
temperatuureenheid op de display verschijnt.
3. Druk op de °C/°F-selectieknop om de temperatuureenheid te
selecteren.
4. De waarde verschijnt op de display.
7.6 De vochtigheidsgraat meten
1. Sluit de temperatuur- /vochtigheidssonde aan op de meter.
2. Druk de temperatuur/vochtigheid-selectieknop in, totdat de eenheid
van de vochtigheid op de display verschijnt.
3. De waarde verschijnt op de display.
7.7 Kalibreren
1. Selecteer de frequentieweging A.
2. Sluit de microfoon voorzichtig aan op de kalibrator (niet meegelev.).
3. Kalibreer de microfoon tot 94 dB met de potentiometer CALL. Gebruik
hiervoor de meegeleverde kalibratietool.
Opmerkingen:
Het is raadzaam om de meter eenmaal per jaar te kalibreren.
Velleman NV verstrekt geen kalibratiecertificaat.
8. Reiniging en onderhoud
Maak het toestel geregeld schoon met een vochtige, niet pluizende
doek. Gebruik geen alcohol of oplosmiddelen. Dompel het toestel NOOIT
onder in een vloeistof.
Bewaar de meter op een droge plaats en vermijd blootstelling aan vocht
en trillingen.
Verwijder de batterij wanneer u de meter voor een lange periode
opbergt.
Page 12
DEM900
V. 01 – 07/05/2015 12 ©Velleman nv
9. Technische specificaties
geluidsniveau
meetbereik
35 dB ~ 130 dB
nauwkeurigheid
± 2.0 dB
resolutie
0.1 dB
frequentiebereik
31.5 Hz ~ 8 kHz
frequentieweging
dBA
lichtsterkte
meetbereik
0 lux ~ 200 klux, 0 Fc ~ 20 kFc
nauwkeurigheid
± 4% van de lezing ± 0.5% f.s.(<10,000 lux)
luchtsnelheid
meetbereik luchtsnelheid
0.5 m/s ~ 30.0 m/s
meetnauwkeurigheid
luchtsnelheid
± 3 % ± 0.3 d
meeteenheden
m/s, km/u, ft/min, knopen, mph
temperatuur
meetbereik
-40 °C ~ 70 °C (-40 °F ~158 °F)
nauwkeurigheid
±2.0 °C ± 3.6 °F
meeteenheden
°C/°F
vochtigheid
meetbereik
10 ~ 95 % RH
nauwkeurigheid
± 5 % RH
voeding
1 x 9V-batterij, 6F22 (meegeleverd)
afmetingen
252 x 66 x 33 mm
gewicht
575 g (met sondes en batterij)
Gebruik dit toestel enkel met originele accessoires. Velleman nv is
niet aansprakelijk voor schade of kwetsuren bij (verkeerd) gebruik
van dit toestel. Voor meer informatie over dit product en de laatste
versie van deze handleiding, zie www.velleman.eu. De informatie in
deze handleiding kan te allen tijde worden gewijzigd zonder
voorafgaande kennisgeving.
© AUTEURSRECHT
Velleman nv heeft het auteursrecht voor deze handleiding. Alle
wereldwijde rechten voorbehouden. Het is niet toegestaan om deze
handleiding of gedeelten ervan over te nemen, te kopiëren, te vertalen, te
bewerken en op te slaan op een elektronisch medium zonder voorafgaande
schriftelijke toestemming van de rechthebbende.
Page 13
DEM900
V. 01 – 07/05/2015 13 ©Velleman nv
MODE D'EMPLOI
1. Introduction
Aux résidents de l'Union européenne
Informations environnementales importantes concernant ce produit
Ce symbole sur l'appareil ou l'emballage indique que l’élimination
d’un appareil en fin de vie peut polluer l'environnement. Ne pas
jeter un appareil électrique ou électronique (et des piles
éventuelles) parmi les déchets municipaux non sujets au tri
sélectif ; une déchetterie traitera l’appareil en question. Renvoyer
l'appareil à votre fournisseur ou à un service de recyclage local. Il
convient de respecter la réglementation locale relative à la protection de
l’environnement.
En cas de questions, contacter les autorités locales pour élimination.
Nous vous remercions de votre achat ; Lire attentivement le présent mode
d'emploi avant la mise en service de l’appareil. Si l’appareil a été
endommagé pendant le transport, ne pas l’installer et consulter votre
revendeur.
2. Consignes de sécurité
Garder l'appareil hors de la portée des enfants et des
personnes non autorisées.
Protéger de la pluie, de l’humidité et des projections d’eau.
Protéger l’appareil des chocs et de l'abus. Traiter l'appareil
avec circonspection pendant l’opération.
Protéger l'appareil des températures extrêmes et de la
poussière.
Il n’y a aucune pièce réparable par l’utilisateur.
Commander des pièces de rechange éventuelles chez
votre revendeur.
3. Directives générales
Se référer à la garantie de service et de qualité Velleman® en fin de ce
mode d'emploi.
Se familiariser avec le fonctionnement de l'appareil avant de l'utiliser.
Toute modification est interdite pour des raisons de sécurité.
Page 14

DEM900
V. 01 – 07/05/2015 14 ©Velleman nv
N’utiliser l'appareil qu’à sa fonction prévue. Un usage impropre annule
d'office la garantie.
4. Caractéristiques
affichage : lux, °C, °F, % RH, dB-A, dB-C, dB-bas et dB-haut, m/s,
km/h, ft/min, nœuds, mph
large afficheur LCD 4 digits rétroéclairé
rétention de données (data hold) et rétention max. (max hold)
extinction automatique et indication de pile faible
inclut : pile de 9 V, trépied, sonde pour température et humidité,
capteur lumineux, sonde anémomètre, pochette et boîte colorée
5. Description
Se référer aux illustrations en page 2 de ce mode d'emploi.
1
pare-vent
10
bouton MIN/MAX
2
microphone
11
bouton de sélection
°C/°F
3
afficheur LCD
12
étalonner le niveau
sonore
4
bouton
température/humidité
13
connexion pour sonde
5
rétroéclairage
14
connexion pour capteur
6
bouton de rétention de
données
15
source d'alimentation
externe
7
bouton de sélection
d'unité
16
connexion pour trépied
8
bouton d'alimentation
17
compartiment à piles
9
bouton de sélection de
fonction
18
vis
Afficheur
1
affichage de la
température/humidité
7 niveau sonore
2
indicateur de pile
8 unité de luminosité
3
unité de température
9 valeur MIN/MAX
4
symbole d'humidité
10
gel d'affichage
5
unité de vitesse d'air
11
temporisateur pour
éteindre
6
affichage
Page 15

DEM900
V. 01 – 07/05/2015 15 ©Velleman nv
6. La pile
1. Eteindre l'appareil pour remplacer la pile.
2. Ouvrir le compartiment à piles avec un tournevis approprié.
3. Retirer la pile usée et la remplacer par une pile neuve de 9 V.
Respecter la polarité indiquée dans le compartiment à piles.
4. Fermer le compartiment à piles.
Avertissement : Ne jamais perforer les piles et ne pas les jeter
au feu (danger d’explosion). Ne jamais recharger des piles
alcalines. Se débarrasser des piles en respectant la
réglementation locale relative à la protection de l’environnement.
Garder les piles hors de la portée des enfants.
7. Emploi
7.1 Fonctionnement de base
1. Appuyer sur le bouton d’alimentation pour allumer le mètre.
2. Enfoncer le bouton de rétroéclairage pour allumer ou éteindre le
rétroéclairage.
3. Appuyer brièvement sur le bouton gel d'affichage pour geler la valeur
sur l'écran. Appuyer de nouveau pour dégeler l'affichage.
4. Maintenir enfoncé le bouton MIN/MAX pour afficher la valeur maximale
enregistrée, appuyer à nouveau pour afficher la valeur minimale
enregistrée. Appuyer à nouveau pour quitter la fonction.
5. Maintenir enfoncé le bouton d'alimentation pendant 3 secondes pour
éteindre le mètre.
7.2 Mesurer le niveau sonore
1. Appuyer sur le bouton de sélection de fonction jusqu'à ce que l'unité
du niveau sonore s'affiche.
2. Diriger le microphone vers la source sonore à une distance de 1 à 1.5
m. Le niveau sonore s'affiche.
7.3 Mesurer la luminosité
1. Connecter la sonde de lumière au mètre.
2. Appuyer sur le bouton de sélection de fonction jusqu'à ce que l'unité
de luminosité s'affiche.
3. Appuyer sur le bouton de sélection d'unité pour sélectionner l'unité de
luminosité.
4. Le niveau lumineux s'affiche.
Page 16

DEM900
V. 01 – 07/05/2015 16 ©Velleman nv
7.4 Mesurer la vitesse d'air
1. Connecter la sonde anémomètre au mètre.
2. Appuyer sur le bouton de sélection de fonction jusqu'à ce que l'unité
de vitesse d'air s'affiche.
3. Appuyer sur le bouton de sélection d'unité pour sélectionner l'unité de
vitesse d'air.
4. La vitesse d'air s'affiche.
7.5 Mesurer la température
1. Connecter la sonde de température/humidité au mètre.
2. Appuyer sur le bouton de sélection de température/humidité jusqu'à ce
que l'unité de température s'affiche.
3. Appuyer sur le bouton de sélection °C/°F pour sélectionner l'unité de
température.
4. La valeur s'affiche sur l'écran.
7.6 Mesurer le niveau d'humidité
1. Connecter la sonde de température/humidité au mètre.
2. Appuyer sur le bouton de sélection de température/humidité jusqu'à ce
que le niveau d'humidité s'affiche.
3. La valeur s'affiche sur l'écran.
7.7 Etalonnage
1. Sélectionner la pondération de fréquence A.
2. Connecter soigneusement le microphone au calibreur (non incl.).
3. Etalonner le microphone jusqu'à 94 dB par le potentiomètre CALL. Pour
cela, utiliser l'outil d'étalonnage fourni.
Remarques :
Il est conseillé d'étalonner le mètre une fois par an.
La SA Velleman ne prévoit aucun certificat d'étalonnage.
8. Nettoyage et entretien
Nettoyer régulièrement l’appareil avec un chiffon humide non
pelucheux. Éviter l’usage d’alcool et de solvants. NE JAMAIS immerger
l’appareil dans un liquide.
Ranger le mètre dans un endroit sec et à l'abri de l'humidité et les
vibrations.
Retirer la pile lorsque le mètre sera rangé pour une longue période de
temps.
Page 17

DEM900
V. 01 – 07/05/2015 17 ©Velleman nv
9. Spécifications techniques
niveau sonore
plage de mesure
35 dB ~ 130 dB
précision
± 2.0 dB
résolution
0.1 dB
réponse en fréquence
31.5 Hz ~ 8 kHz
pondération de
fréquence
dBA
luminosité
plage de mesure
0 lux ~ 200 klux, 0 Fc ~ 20 kFc
précision
± 4% de l'affichage. ± 0.5% f.s.(<10,000 lux)
vitesse d'air
plage de vitesse d'air
0.5 m/s ~ 30.0 m/s
précision de vitesse d'air
± 3 % ± 0.3 d
unités de mesure
m/s, km/h, ft/min, nœuds, mph, °C, °F
température
plage de mesure
-40 °C ~ 70 °C (-40 °F ~158 °F)
précision
±2.0 °C ± 3.6 °F
unités de mesure
°C/°F
humidité
plage de mesure
10 ~ 95 % RH
précision
± 5 % RH
alimentation
1 x pile de 9 V, 6F22 (incl.)
dimensions
252 x 66 x 33 mm
poids
575 g (avec sondes et pile)
N’employer cet appareil qu’avec des accessoires d’origine. La SA
Velleman ne peut, dans la mesure conforme au droit applicable être
tenue responsable des dommages ou lésions (directs ou indirects)
pouvant résulter de l’utilisation de cet appareil. Pour plus
d'informations concernant cet article et la dernière version de ce
mode d'emploi, consulter notre site www.velleman.eu. Toutes les
informations présentées dans ce mode d'emploi peuvent être
modifiées sans notification préalable.
© DROITS D’AUTEUR
SA Velleman est l’ayant droit des droits d’auteur de ce mode
d'emploi. Tous droits mondiaux réservés. Toute reproduction,
traduction, copie ou diffusion, intégrale ou partielle, du contenu de ce mode
d'emploi par quelque procédé ou sur tout support électronique que ce soit
est interdite sans l’accord préalable écrit de l’ayant droit.
Page 18

DEM900
V. 01 – 07/05/2015 18 ©Velleman nv
MANUAL DEL USUARIO
1. Introducción
A los ciudadanos de la Unión Europea
Importantes informaciones sobre el medio ambiente concerniente a
este producto
Este símbolo en este aparato o el embalaje indica que, si tira las
muestras inservibles, podrían dañar el medio ambiente. No tire
este aparato (ni las pilas, si las hubiera) en la basura doméstica;
debe ir a una empresa especializada en reciclaje. Devuelva este
aparato a su distribuidor o a la unidad de reciclaje local. Respete
las leyes locales en relación con el medio ambiente.
Si tiene dudas, contacte con las autoridades locales para residuos.
¡Gracias por elegir Velleman! Lea atentamente las instrucciones del manual
antes de usar el aparato. Si ha sufrido algún daño en el transporte no lo
instale y póngase en contacto con su distribuidor.
2. Instrucciones de seguridad
Mantenga el aparato lejos del alcance de personas no
capacitadas y niños.
No exponga este equipo a lluvia, humedad ni a ningún tipo
de salpicadura o goteo.
Proteja el aparato contra choques y golpes. Evite usar
excesiva fuerza durante el manejo.
No exponga este aparato a polvo ni temperaturas
extremas.
El usuario no habrá de efectuar el mantenimiento de
ninguna pieza.
Contacte con su distribuidor si necesita piezas de
recambio.
3. Normas generales
Véase la Garantía de servicio y calidad Velleman® al final de este
manual del usuario.
Familiarícese con el funcionamiento del aparato antes de utilizarlo.
Las modificaciones no autorizadas del aparato están prohibidas.
Page 19

DEM900
V. 01 – 07/05/2015 19 ©Velleman nv
Utilice sólo el aparato para las aplicaciones descritas en este manual. Su
uso incorrecto anula la garantía completamente.
4. Características
monitor: lux, °C, °F, %RH, dB-A, dB-C, dB-bajo y dB-alto, m/s, km/h,
ft/min, nudos, mph
gran pantalla LCD de 4 dígitos con retroiluminación
retención de datos y retención de lectura (data hold) máxima
desactivación automática e indicador de batería baja
se entrega con: pila de 9V, trípode, sonda para la temperatura y la
humedad, fotodetector, sonda de anemómetro, maletín de transporte y
caja coloreada
5. Descripción
Véase las figuras en la página 2 de este manual del usuario.
1
cortavientos
10
botón MIN/MAX
2
micrófono
11
botón de selección °C/°F
3
pantalla LCD
12
calibración del nivel
sonoro
4
botón de
temperatura/humedad
13
conexión para una sonda
5
retroiluminación
14
conexión para un sensor
6
botón de retención de
lectura (data hold)
15
alimentación externa
7
botón de selección de
unidad
16
conexión para un trípode
8
interruptor de
alimentación
17
compartimiento de pilas
9
botón de selección de
función
18
tornillo
pantalla
1
temperatura/humedad
medida
7 unidad de nivel sonoro
2
nivel de la batería
8 unidad de luz
3
unidad de temperatura
9 valor MIN/MAX
4
icono de humedad
10
retención de lectura
(data hold)
5
unidad de velocidad del
aire
11
temporizador de
desactivación
6
valor medido
Page 20

DEM900
V. 01 – 07/05/2015 20 ©Velleman nv
6. La pila
1. Para reemplazar la pila, asegúrese de que el aparato esté desactivado.
2. Abra el compartimiento de pilas de la parte trasera con un
destornillador adecuado.
3. Quite la pila agotada y reemplácela por una del mismo tipo (9 V)
siguiendo las marcas de polaridad en el compartimiento de pilas.
4. Vuelva a cerrar el compartimiento de pilas.
Advertencia: Nunca perfore las pilas y no las eche al fuego
(peligro de explosión). Nunca recargue pilas no recargables
(alcalinas). Respete las leyes locales en relación con el medio
ambiente al tirar las pilas. Mantenga las pilas lejos del alcance de
niños.
7. Funcionamiento
7.1 Funciones utilizadas frecuentemente
1. Pulse el botón ON/OFF para activar el aparato.
2. Pulse el botón de la retroiluminación para activar o desactivarla.
3. Pulse el botón de retención de datos brevemente para bloquear el
valor en la pantalla. Vuelva a pulsar para desbloquear.
4. Pulse el botón MIN/MAX para visualizar el valor máx. Vuelva a pulsar el
botón para visualizar el valor mín. Vuelva a pulsar para salir de la
función.
5. Mantenga pulsado el botón ON/OFF durante 3 segundos para
desactivar el aparato.
7.2 Medir el nivel sonoro
1. Pulse el botón de selección de función hasta que la unidad de nivel
sonoro aparezca en la pantalla LCD.
2. Apunte con el micrófono hacia la fuente sonora a una distancia de
entre 1 m y 1.5 m. El nivel sonoro se visualizará en la pantalla.
7.3 Medir el nivel de luz
1. Conecte la sonda de luz al aparato.
2. Pulse el botón de selección de función hasta que la unidad de nivel de
luz aparezca en la pantalla LCD.
3. Pulse el botón de selección de unidad para seleccionar la unidad de la
intensidad luminosa.
4. El nivel de luz se visualizará en la pantalla.
Page 21

DEM900
V. 01 – 07/05/2015 21 ©Velleman nv
7.4 Medir la velocidad del aire
1. Conecte la sonda de viento al aparato.
2. Pulse el botón de selección de función hasta que la unidad de velocidad
del aire aparezca en la pantalla LCD.
3. Pulse el botón de selección de unidad para seleccionar la unidad de
velocidad del aire.
4. La velocidad del aire se visualizará en la pantalla.
7.5 Medir la temperatura
1. Conecte la sonda de temperatura/humedad al aparato.
2. Pulse el botón de selección de temperatura/humedad hasta que la
unidad de temperatura aparezca en la pantalla LCD.
3. Pulse el botón de selección °C/°F para seleccionar la unidad de
temperatura.
4. El valor se visualizará en la pantalla LCD.
7.6 Medir el nivel de humedad
1. Conecte la sonda de temperatura/humedad al aparato.
2. Pulse el botón de selección de temperatura/humedad hasta que la
unidad de humedad aparezca en la pantalla LCD.
3. El valor se visualizará en la pantalla LCD.
7.7 Calbración
1. Seleccione una ponderación de frecuencia A.
2. Introduzca el micrófono cuidadosamente en el calibrador (no incl.).
3. Calibre el micrófono a 94 dB con el potenciómetro CALL. Utilice la
herramienta de calibración incluida.
Observaciones:
Calibre el aparato una vez al año.
Velleman nv no proporciona certificados de calibración.
8. Limpieza y mantenimiento
Limpie el aparato regularmente con un paño húmedo sin pelusas. No
utilice alcohol ni disolventes. NUNCA sumerja el aparato en un líquido.
Almacene el aparato en un lugar seco donde no esté expuesto a
humedad y vibraciones.
Quite la pila si no va a utilizar el aparato durante un largo período de
tiempo.
Page 22

DEM900
V. 01 – 07/05/2015 22 ©Velleman nv
9. Especificaciones
nivel sonoro
rango de medición
35 dB ~ 130 dB
precisión
± 2.0 dB
resolución
0.1 dB
respuesta en frecuencia
31.5 Hz ~ 8 kHz
ponderación de la
frecuencia
dBA
intensidad luminosa
rango de medición
0 lux ~ 200 klux, 0 Fc ~ 20 kFc
precisión
± 4 % de la lectura ± 0.5 % f.s.(< 10,000 lux)
velocidad del aire
rango de la velocidad del
aire
0.5 m/s ~ 30.0 m/s
exactitud de la velocidad
del aire
± 3 % ± 0.3 d
unidad de medida
m/s, km/h, ft/min, nudos, Mph
temperatura
rango de medición
-40° C ~ 70° C (-40° F ~158° F)
precisión
±2.0° C ± 3.6° F
las unidades de
medición
°C/°F
humedad
rango de medición
10 ~ 95 % RH
precisión
± 5 % RH
alimentación
1 x pila de 9V, 6F22 (incl.)
dimensiones
252 x 66 x 33 mm
peso
575 g (con sondas y batería)
Utilice este aparato sólo con los accesorios originales. Velleman NV
no será responsable de daños ni lesiones causados por un uso
(indebido) de este aparato. Para más información sobre este
producto y la versión más reciente de este manual del usuario, visite
nuestra página www.velleman.eu. Se pueden modificar las
especificaciones y el contenido de este manual sin previo aviso.
© DERECHOS DE AUTOR
Velleman NV dispone de los derechos de autor para este manual del
usuario. Todos los derechos mundiales reservados. Está estrictamente
prohibido reproducir, traducir, copiar, editar y guardar este manual del
usuario o partes de ello sin el consentimiento previo por escrito del
propietario del copyright.
Page 23

DEM900
V. 01 – 07/05/2015 23 ©Velleman nv
BEDIENUNGSANLEITUNG
1. Einführung
An alle Einwohner der Europäischen Union
Wichtige Umweltinformationen über dieses Produkt
Dieses Symbol auf dem Produkt oder der Verpackung zeigt an,
dass die Entsorgung dieses Produktes nach seinem Lebenszyklus
der Umwelt Schaden zufügen kann. Entsorgen Sie die Einheit
(oder verwendeten Batterien) nicht als unsortierter Hausmüll; die
Einheit oder verwendeten Batterien müssen von einer
spezialisierten Firma zwecks Recycling entsorgt werden. Diese
Einheit muss an den Händler oder ein örtliches Recycling-Unternehmen
retourniert werden. Respektieren Sie die örtlichen Umweltvorschriften.
Falls Zweifel bestehen, wenden Sie sich für Entsorgungsrichtlinien
an Ihre örtliche Behörde.
Vielen Dank, dass Sie sich für Velleman entschieden haben! Lesen Sie diese
Bedienungsanleitung vor Inbetriebnahme sorgfältig durch. Überprüfen Sie,
ob Transportschäden vorliegen. Sollte dies der Fall sein, verwenden Sie das
Gerät nicht und wenden Sie sich an Ihren Händler.
2. Sicherheitshinweise
Halten Sie Kinder und Unbefugte vom Gerät fern.
Schützen Sie das Gerät vor Regen und Feuchte. Setzen Sie
das Gerät keiner Flüssigkeit wie z.B. Tropf- oder
Spritzwasser, aus.
Vermeiden Sie Erschütterungen. Wenden Sie bei der
Bedienung keine Gewalt an.
Schützen Sie das Gerät vor extremen Temperaturen und
Staub.
Es gibt keine zu wartenden Teile.
Bestellen Sie eventuelle Ersatzteile bei Ihrem Fachhändler.
3. Allgemeine Richtlinien
Siehe Velleman® Service- und Qualitätsgarantie am Ende dieser
Bedienungsanleitung.
Page 24

DEM900
V. 01 – 07/05/2015 24 ©Velleman nv
Nehmen Sie das Gerät erst in Betrieb, nachdem Sie sich mit seinen
Funktionen vertraut gemacht haben.
Eigenmächtige Veränderungen sind verboten.
Verwenden Sie das Gerät nur für Anwendungen beschrieben in dieser
Bedienungsanleitung Bei falscher Anwendung dieses Gerätes erlischt der
Garantieanspruch.
4. Eigenschaften
Display: lux, °C, °F, % RH, dB-A, dB-C, dB-low und dB-high, m/s,
km/h, ft/min, Knoten, mph
große 4-stellige LCD-Anzeige mit Hintergrundbeleuchtung
Data Hold- und Max. Hold-Funktion
automatische Abschaltung und Lo-Bat-Anzeige
Lieferung mit: Batterie 9 V, Stativ, Temperatur- und
Feuchtigkeitssensor, Fotodetektor, Anemometer-Sensor, Tragkoffer und
farbige Box
5. Beschreibung
Siehe Abbildungen, Seite 2 dieser Bedienungsanleitung.
1
Windschutz
10
MIN/MAX-Taste
2
Mikrofon
11
°C/°F-Taste
3
LCD-Display
12
Schallpegel-Kalibrierung
4
Taste
Temperatur/Feuchtigkeit
13
Anschluss für Sonde
5
Hintergrundbeleuchtung
14
Anschluss für Sensor
6
Taste Data Hold
15
externe
Stromversorgung
7
Wahltaste Einheit
16
Stativgewinde
8
Netzschalter
17
Batteriefach
9
Wahltaste Funktion
18
Schraube
Display
1
gemessene
Temperatur/Feuchtigkeit
7 Einheit Schallpegel
2
Batteriezustand
8 Einheit Licht
3
Temperatur
9 MIN/MAX-Wert
4
Symbol für die Feuchte
10
Data-Hold-Funktion
5
Einheit
Luftgeschwindigkeit
11
Abschalt-Timer
6
Messwert
Page 25

DEM900
V. 01 – 07/05/2015 25 ©Velleman nv
6. Batterie
1. Schalten Sie das Messgerät vor dem Batteriewechsel aus.
2. Öffnen Sie das Batteriefach auf der Rückseite des Gerätes mit einem
geeigneten Schraubendreher.
3. Entfernen Sie die verbrauchte Batterie und legen Sie eine neue des
gleichen Typs (9 V) ein. Beachten Sie dabei die Polaritätsangaben
innerhalb des Batteriefachs.
4. Schließen Sie das Batteriefach.
Warnung: Durchbohren Sie nie die Batterien und werfen Sie
diese nicht ins Feuer (Explosionsgefahr). Laden Sie keine nichtwiederaufladbare Batterien (Alkali). Respektieren Sie die örtlichen
Umweltvorschriften beim Entsorgen der Batterien. Halten Sie die
Batterien von Kindern fern.
7. Bedienung
7.1 Häufig benutzte Funktionen
1. Drücken Sie den EIN/AUS-Schalter, um das Gerät einzuschalten.
2. Drücken Sie die Taste der Hintergrundbeleuchtung, um diese ein- oder
auszuschalten.
3. Drücken Sie die Data-Hold -Taste kurz, um der Messwert im Display
festzuhalten. Drücken Sie wieder, um den Messwert wieder
freizugeben.
4. Drücken Sie die MIN/MAX-Taste, um den Maximalwert anzuzeigen.
Drücken Sie wieder, um den Minimalwert anzuzeigen. Drücken Sie
wieder, um die Funktion zu verlassen.
5. Halten Sie den EIN/AUS-Schalter 3 Sekunden gedrückt, um das Gerät
auszuschalten.
7.2 Den Schallpegel messen
1. Drücken Sie die Wahltaste für die Funktion bis die Einheit für den
Schallpegel im Display erscheint.
2. Richten Sie das Mikrofon auf die Schallquelle in einem Abstand von 1
bis 1.5 m. Der Schallpegel erscheint im Bildschirm.
7.3 Die Lichtstärke messen
1. Verbinden Sie die Sonde für die Messung der Lichtstärke mit dem
Gerät.
2. Drücken Sie die Wahltaste für die Funktion bis die Einheit für die
Lichtstärke im Display erscheint.
Page 26

DEM900
V. 01 – 07/05/2015 26 ©Velleman nv
3. Drücken Sie die Wahltaste für die Einheit, um die Einheit der
Lichtstärke auszuwählen.
4. Die Lichtstärke erscheint im Display.
7.4 Die Luftgeschwindigkeit messen
1. Verbinden Sie die Sonde für die Messung der Luftgeschwindigkeit mit
dem Gerät.
2. Drücken Sie die Wahltaste für die Funktion bis die Einheit für die
Luftgeschwindigkeit im Display erscheint.
3. Drücken Sie die Wahltaste für die Einheit, um die Einheit der
Luftgeschwindigkeit auszuwählen.
4. Die Luftgeschwindigkeit erscheint im Display.
7.5 Die Temperatur messen
1. Verbinden Sie die Sonde für die Messung der Temperatur/Feuchtigkeit
mit dem Gerät.
2. Drücken Sie die Wahltaste für die Temperatur/Feuchtigkeit bis die
Einheit für die Temperatur im Display erscheint.
3. Drücken Sie die Wahltaste °C/°F , um die Temperatureinheit
auszuwählen.
4. Der Wert erscheint im LCD-Display.
7.6 Die Feuchtigkeit messen
1. Verbinden Sie die Sonde für die Messung der Temperatur/Feuchtigkeit
mit dem Gerät.
2. Drücken Sie die Wahltaste für die Temperatur/Feuchtigkeit bis die
Einheit für die Feuchtigkeit im LCD-Display erscheint.
3. Der Wert erscheint im LCD-Display.
7.7 Kalibrierung
1. Wählen Sie die A-Frequenzbewertung.
2. Stecken Sie das Mikrofon vorsichtig in den Kalibrator (nicht
mitgeliefert)
3. Kalibrieren Sie das Mikrofon mit dem CALL-Potentiometer auf 94 dB.
Verwenden Sie das mitgelieferte Kalibrierwerkzeug.
Bemerkungen:
Kalibrieren Sie das Gerät einmal pro Jahr.
Velleman nv liefert kein Kalibrierzertifikat.
Page 27

DEM900
V. 01 – 07/05/2015 27 ©Velleman nv
8. Reinigung und Wartung
Verwenden Sie zur Reinigung ein feuchtes, fusselfreies Tuch.
Verwenden Sie auf keinen Fall Alkohol oder irgendwelche Lösungsmittel.
Tauchen Sie das Gerät NICHT ein.
Bewahren Sie das Gerät an einem trockenen Ort auf und beachten Sie,
dass es keiner Feuchtigkeit und Vibrationen ausgesetzt wird.
Entfernen Sie die Batterie bei längerer Nichtbenutzung aus dem Gerät.
9. Technische Daten
Schallpegel
Messbereich
35 dB ~ 130 dB
Genauigkeit
± 2.0 dB
Auflösung
0.1 dB
Frequenzbereich
31.5 Hz ~ 8 kHz
Frequenzkorrektur
dBA
Lichtstärke
Messbereich
0 lux ~ 200 klux, 0 Fc ~ 20 kFc
Genauigkeit
±4% der Anzeige ±0,5% f.s.(<10.000 lx)
Luftgeschwindigkeit
Messbereich für die
Luftgeschwindigkeit
0.5 m/s ~ 30.0 m/s
Luftgeschwindigkeit
Messgenauigkeit
± 3 % ± 0.3 d
Messeinheit
m/s, km/h, ft/min, knots, Mph
Temperatur
Messbereich
-40° C ~ 70° C (-40° F ~158° F)
Genauigkeit
±2.0° C ± 3.6° F
Messeinheiten
°C/°F
Feuchte
Messbereich
10 ~ 95 % RH
Genauigkeit
± 5 % RH
Stromversorgung
1 x 9V-Batterie, 6F22 (mitgeliefert)
Abmessungen
252 x 66 x 33 mm
Gewicht
575 g (mit Sonden und Batterie)
Verwenden Sie dieses Gerät nur mit originellen Zubehörteilen.
Velleman NV übernimmt keine Haftung für Schaden oder
Verletzungen bei (falscher) Anwendung dieses Gerätes. Mehr
Informationen zu diesem Produkt und die neueste Version dieser
Bedienungsanleitung finden Sie hier: www.velleman.eu. Alle
Änderungen ohne vorherige Ankündigung vorbehalten.
Page 28

DEM900
V. 01 – 07/05/2015 28 ©Velleman nv
© URHEBERRECHT
Velleman NV besitzt das Urheberrecht für diese
Bedienungsanleitung. Alle weltweiten Rechte vorbehalten. Ohne
vorherige schriftliche Genehmigung des Urhebers ist es nicht gestattet,
diese Bedienungsanleitung ganz oder in Teilen zu reproduzieren, zu
kopieren, zu übersetzen, zu bearbeiten oder zu speichern.
Page 29

DEM900
V. 01 – 07/05/2015 29 ©Velleman nv
INSTRUKCJA OBSŁUGI
1. Wstęp
Przeznaczona dla mieszkańców Unii Europejskiej.
Ważne informacje dotyczące środowiska.
Niniejszy symbol umieszczony na urządzeniu bądź opakowaniu
wskazuje, że utylizacja produktu może być szkodliwa dla
środowiska. Nie należy wyrzucać urządzenia (lub baterii) do
zbiorczego pojemnika na odpady komunalne, należy je przekazać
specjalistycznej firmie zajmującej się recyklingiem. Niniejsze
urządzenie należy zwrócić dystrybutorowi lub lokalnej firmie
świadczącej usługi recyklingu. Przestrzegać lokalnych zasad dotyczących
środowiska.
W razie wątpliwości należy skontaktować się z firmą zajmującą się
utylizacją odpadów.
Dziękujemy za zakup produktu Velleman! Prosimy o dokładne zapoznanie
się z instrukcją obsługi przed użyciem urządzenia. Jeśli urządzenie zostało
uszkodzone podczas transportu, nie należy go instalować ani używać,
prosimy o skontaktowanie się ze sprzedawcą.
2. Instrukcje bezpieczeństwa
Chronić urządzenie przed dziećmi i nieupoważnionymi
użytkownikami.
Chronić urządzenie przed deszczem, wilgocią, rozpryskami
i ściekającymi cieczami.
Chronić urządzenie przed wstrząsami i użytkowaniem
niezgodnym z przeznaczeniem. Podczas obsługi urządzenia
unikać stosowania siły.
Chronić urządzenie przed zbyt wysoką temperaturą i
pyłem.
W urządzeniu nie występują części, które mogą być
serwisowane przez użytkownika.
W celu uzyskania części serwisowych lub zamiennych
należy skontaktować się z autoryzowanym sprzedawcą.
3. Informacje ogólne
Proszę zapoznać się z informacjami w części Usługi i gwarancja jakości
Velleman® na końcu niniejszej instrukcji.
Page 30

DEM900
V. 01 – 07/05/2015 30 ©Velleman nv
Przed rozpoczęciem pracy z urządzeniem należy zapoznać się z jego
funkcjami.
Zabronione jest wprowadzanie jakichkolwiek modyfikacji w urządzeniu.
Urządzenie należy używać tylko zgodnie z przeznaczeniem. Używanie
urządzenia niezgodnie z przeznaczeniem powoduje unieważnienie
gwarancji.
4. Właściwości
wyświetlacz: lux, °C, °F, %RH, dB-A, dB-C, dB (niski zakres) i dB
(wysoki zakres), m/s, km/h, ft/min, węzły, mph
duży 4-cyfrowy podświetlany wyświetlacz LCD
funkcja zatrzymania wyświetlanych danych i maksymalnych wartości
automatyczne wyłączanie wskazanie niskiego poziomu naładowania
baterii
w komplecie: bateria 9 V, statyw i sonda wilgotności, fotodetektor,
sonda anemometru, walizka oraz kolorowe pudełko
5. Przegląd
Patrz rysunki na stronie 2 niniejszej instrukcji.
1
Osłona przed wiatrem
10
przycisk MIN/MAX
2
mikrofon
11
przycisk wyboru °C/ °F
3
wyświetlacz LCD
12
kalibracja poziomu
dźwięku
4
przycisk
temperatury/wilgotności
13
gniazdo sondy
5
podświetlanie
14
gniazdo czujnika
6
przycisk zatrzymania
danych
15
zasilacz zewnętrzny
7
przycisk wyboru
jednostek
16
gniazdo statywu
8
włącznik zasilania
17
gniazdo baterii
9
przycisk wyboru funkcji
18
śruba
Wyświetlacz
1
odczyt
temperatury/wilgotności
7 jednostka poziomu
głośności
2
stan akumulatora
8 jednostka światła
3
jednostka temperatury
9 wartość MIN/MAX
4
ikona wilgotności
10
zapamiętywanie danych
5
jednostka prędkości
powietrza
11
licznik czasu do
wyłączenia
6
odczyt
Page 31

DEM900
V. 01 – 07/05/2015 31 ©Velleman nv
6. Bateria
1. Przed wymianą baterii należy sprawdzić, czy urządzenie jest
wyłączone.
2. Otworzyć gniazdo baterii znajdujące się z tyłu urządzenia za pomocą
odpowiedniego śrubokręta.
3. Wyjąć zużytą baterię i wymienić na nową, taką samą baterię 9 V
zgodnie z oznaczeniami biegunowości wewnątrz gniazda baterii.
4. Zamknąć gniazdo baterii.
Uwaga: Nie przebijać ani nie wrzucać baterii do ognia, ponieważ
mogą eksplodować. Nie ładować baterii, które nie są
akumulatorkami (alkaliczne). Utylizować baterie zgodnie z
lokalnymi przepisami. Baterie należy chronić przed dziećmi.
7. Obsługa
7.1 Podstawowe czynności
1. Nacisnąć przycisk on-off, aby włączyć urządzenie.
2. Nacisnąć przycisk podświetlenia, aby włączyć lub wyłączyć
podświetlenie.
3. Nacisnąć krótko przycisk zapamiętywania danych, aby zamrozić odczyt
na wyświetlaczu. Nacisnąć ponownie, aby wyłączyć zamrożenie.
4. Nacisnąć przycisk MIN/MAX, aby wyświetlić zarejestrowaną wartość
maksymalną, nacisnąć go ponownie, aby wyświetlić zarejestrowaną
wartość minimalną, i jeszcze raz, aby wyjść z tej funkcji.
5. Wciśnij włącznik na 3 sekundy aby wyłączyć miernik.
7.2 Pomiar poziomu dźwięku
1. Wciśnij przycisk wyboru funkcji aż jednostka poziomu dźwięku pokaże
się na wyświetlaczu LCD.
2. Skierować mikrofon na źródło dźwięku z odległości 1 - 1,5 m. Wyniki
pomiaru ukazują się na wyświetlaczu.
7.3 Pomiar poziomu światła
1. Podłączyć sondę światła do miernika.
2. Naciskać przycisk wyboru funkcji o momentu pojawienia się na ekranie
jednostki poziomu światła.
3. Nacisnąć przycisk wyboru jednostki, aby ustawić jednostkę poziomu
światła
4. Poziom światła pokaże się na wyświetlaczu.
Page 32

DEM900
V. 01 – 07/05/2015 32 ©Velleman nv
7.4 Pomiar prędkości powietrza
1. Podłączyć sondę powietrza do miernika.
2. Naciskać przycisk wyboru funkcji o momentu pojawienia się na ekranie
jednostki prędkości powietrza.
3. Nacisnąć przycisk wyboru jednostki, aby ustawić jednostkę prędkości
powietrza
4. Prędkość powietrza pokaże się na wyświetlaczu.
7.5 Pomiar temperatury
1. Podłączyć sondę temperatury/wilgotności do miernika.
2. Naciskać przycisk wyboru funkcji do momentu pojawienia się na
ekranie jednostki temperatury.
3. Nacisnąć przycisk °C/°F, aby wybrać jednostkę temperatury;
4. Wartość ukazuje się na wyświetlaczu.
7.6 Pomiar poziomu wilgotności
1. Podłączyć sondę temperatury/wilgotności do miernika.
2. Naciskać przycisk wyboru funkcji do momentu pojawienia się na
ekranie jednostki wilgotności.
3. Wartość ukazuje się na wyświetlaczu.
7.7 Wzorcowanie
1. Wybrać częstotliwość dla pomiaru dźwięku A.
2. Ostrożnie umieścić mikrofon w kalibratorze (brak w zestawie).
3. Skalibrować mikrofon na 94 dB za pomocą potencjometru CALL. W tym
celu wykorzystać dołączone narzędzie kalibracyjne.
Uwagi:
Zaleca się kalibrować przyrząd raz do roku.
Firma Velleman nv nie dostarcza żadnego certyfikatu kalibracji.
8. Czyszczenie i konserwacja
Co jakiś czas przetrzeć urządzenie wilgotną niestrzępiącą się ściereczką.
Nie stosować alkoholu ani rozpuszczalników. Nie zanurzać urządzenia w
cieczy.
Urządzenie należy przechowywać w suchym miejscu, chronić przed
wilgocią i drganiami.
Jeżeli urządzenie ma być przechowywane przez dłuższy okres, należy
wyjąć baterię.
Page 33

DEM900
V. 01 – 07/05/2015 33 ©Velleman nv
9. Specyfikacja techniczna
poziom głośności
zakres pomiarowy
35 dB ~ 130 dB
dokładność
± 2.0 dB
rozdzielczość
0.1 dB
pasmo przenoszenia
31,5 Hz ~ 8 kHz
Korekcja
częstotliwościowa
dBA
światło
zakres pomiaru
0 lux ~ 200 klux, 0 Fc ~ 20 kFc
dokładność
± 4 % odczytu ± 0,5 % f.s.(< 10000 lux)
prędkość powietrza
zakres prędkości
powietrza
0.5 m/s ~ 30.0 m/s
dokładność prędkości
powietrza
± 3 % ± 0.3 d
jednostki pomiarowe
m/s, km/h, ft/min, węzły, Mph
temperatura
zakres pomiarowy
-40° C ~ 70° C (-40° F ~158° F)
dokładność
±2.0° C ± 3.6° F
jednostki pomiarowe
°C/°F
wilgotność
zakres pomiarowy
10 ~ 95 % RH
dokładność
± 5 % RH
zasilanie
1 x bateria 9V (6LR22) (załącz.)
wymiary
252 x 66 x 33 mm
waga
575 g (z sondami i baterią)
Należy używać tylko oryginalnych akcesoriów. Firma Velleman nv
nie może być pociągnięta do odpowiedzialności w przypadku
uszkodzeń lub urazów wynikających z (niewłaściwego) korzystania
z niniejszego urządzenia. Aby uzyskać więcej informacji dotyczących
produktu i najnowszą wersję niniejszej instrukcji, należy odwiedzić
naszą stronę internetową www.velleman.eu. Informacje zawarte w
niniejszej instrukcji obsługi mogą ulec zmianie bez wcześniejszego
powiadomienia.
Page 34

DEM900
V. 01 – 07/05/2015 34 ©Velleman nv
© INFORMACJA O PRAWACH WŁASNOŚCI
Niniejsza instrukcja jest własnością firmy Velleman nv i jest
chroniona prawami autorskimi. Wszystkie prawa są zastrzeżone na
całym świecie. Żadna część niniejszej instrukcji nie może być kopiowana,
przedrukowywana, tłumaczona lub konwertowana na wszelkie nośniki
elektroniczne lub w inny sposób, bez uprzedniej pisemnej zgody właściciela
praw autorskich.
Page 35

DEM900
V. 01 – 07/05/2015 35 ©Velleman nv
MANUAL DO UTILIZADOR
1. Introdução
Aos cidadãos da União Europeia
Importantes informações sobre o meio ambiente no que respeita a
este produto
Este símbolo no aparelho ou na embalagem indica que, enquanto
desperdícios, poderão causar danos no meio ambiente. Não
coloque a unidade (ou as pilhas) no depósito de lixo municipal;
deve dirigir-se a uma empresa especializada em reciclagem.
Devolva o aparelho ao seu distribuidor ou ao posto de reciclagem
local. Respeite a legislação local relativa ao meio ambiente.
Em caso de dúvidas, contacte com as autoridades locais para os
resíduos.
Agradecemos o facto de ter adquirido este aparelho. Leia atentamente as
instruções do manual antes de usar o aparelho. Caso o aparelho tenha
sofrido algum dano durante o transporte não o instale e entre em contacto
com o seu distribuidor.
2. Instruções de segurança
Mantenha o aparelho fora do alcance de crianças e
pessoas não qualificadas.
Proteger o aparelho contra a chuva e humidade ou
qualquer tipo de salpicos ou gotas.
Proteja o aparelho de quedas e má utilização. Evite usar
força excessiva ao utilizar o aparelho.
Proteja o aparelho de temperaturas extremas e do pó.
O utilizador não terá de fazer a manutenção das peças.
Contacte o seu distribuidor caso necessite de peças de
substituição.
3. Normas gerais
Consulte a Garantia de serviço e qualidade Velleman® na parte final
deste manual do utilizador.
Familiarize-se com o funcionamento do aparelho antes de o utilizar.
São proibidas quaisquer modificações do aparelho.
Page 36

DEM900
V. 01 – 07/05/2015 36 ©Velleman nv
Utilize o aparelho apenas para as aplicações descritas neste manual.
Uma utilização incorreta anula a garantia completamente.
4. Características
ecrã: lux, °C, °F, %RH, dB-A, dB-C, dB-baixo e dB-alto, m/s, km/h,
ft/min, nós, mph
grande visor LCD de 4 dígitos com iluminação de fundo
retenção de dados e do valor máximo
desligamento automático e indicação de pilha fraca
é entregue com: pilha de 9V, tripé, sonda da temperatura e humidade,
fotodetector, sonda anemômetro, estojo de transporte e caixa colorida
5. Descrição
Ver as figuras da página 2 deste manual do utilizador.
1
pára-brisas
10
botão MÍN/MÁX
2
microfone
11
botão de selecção entre
°C/°F
3
ecrã LCD
12
calibragem do nível de
som
4
botão temp./humidade
13
encaixe da sonda
5
retroiluminação
14
encaixe do sensor
6
botão de retenção de
dados
15
fonte de alimentação
externa
7
botão de seleção da
unidade
16
encaixe do tripé
8
interruptor de
alimentação
17
compartimento das
pilhas
9
botão de seleção de
função
18
parafuso
Display
1
leitura temp/humidade
7 unidade do nível de som
2
estado da pilha
8 unidade de luz
3
unidade de temperatura
9 valor MÍN/MÁX
4
ícone da humidade
10
retenção de dados
5
unidade da velocidade do
ar
11
temporizador para
desligar
6
leitura
Page 37

DEM900
V. 01 – 07/05/2015 37 ©Velleman nv
6. As pilhas
1. Para substituir a pilha, certifique-se de que o aparelho está desligado.
2. Abra o compartimento da pilha na parte de trás usando uma chave
apropriada.
3. Retire a pilha gaste e substitua-a por uma pilha de 9 V nova e idêntica,
respeitando as marcas de polaridade inscritas no compartimento.
4. Fechar o compartimento das pilhas.
Advertência: Nunca perfure as pilhas nem jogá-las no fogo, pois
elas podem explodir. Não tente recarregar pilhas não
recarregáveis (alcalino). Descarte as pilhas de acordo com as
regulamentações locais. Mantenha as pilhas fora do alcance das
crianças.
7. Utilização
7.1 Utilização básica
1. Pressione o botão de ligar-desligar para ligar o medidor.
2. Pressione o botão de retroiluminação para ligar ou desligar a função.
3. Pressione brevemente o botão de retenção de dados para congelar a
leitura indicada no visor. Pressione novamente para libertar.
4. Pressione o botão MIN/MAX para mostrar o valor máximo medido,
pressione brevemente para mostrar o valor mínimo, mantenha
pressionado para sair da função.
5. Mantenha o botão de ligar-desligar pressionado durante 3 segundos
para desligar o medidor.
7.2 Medição do Nível de Som
1. Pressione o botão de seleção de função até que a unidade de nível de
som apareça no visor LCD.
2. Aponte o microfone na direção da fonte de som a uma distância de 1 a
1.5 m. O nível de som aparece no visor.
7.3 Medição do Nível de Luz
1. Ligue a sonda de luz ao medidor.
2. Pressione o botão de seleção da função até que a unidade de nível de
luz apareça no visor LCD.
3. Pressione o botão de seleção da unidade para selecionar a unidade de
luz.
4. O nível de luz aparece no visor.
Page 38

DEM900
V. 01 – 07/05/2015 38 ©Velleman nv
7.4 Medição da Velocidade do Ar
1. Ligue a sonda de vento ao medidor.
2. Pressione o botão de seleção de função até que a unidade de
velocidade do ar apareça no visor LCD.
3. Pressione o botão de seleção da unidade para selecionar a unidade de
velocidade do ar.
4. A velocidade do ar aparece no visor.
7.5 Medição da Temperatura
1. Ligue a sonda de temperatura/humidade ao medidor.
2. Pressione o botão de seleção de temp/humidade até que a unidade de
temperatura apareça no visor LCD.
3. Pressione o botão de seleção °C/°F para selecionar a unidade de
temperatura.
4. O valor aparece no visor LCD.
7.6 Medição do Nível de Humidade
1. Ligue a sonda de temperatura/humidade ao medidor.
2. Pressione o botão de seleção temp/humidade até que a unidade de
nível de humidade apareça no visor LCD.
3. O valor aparece no visor LCD.
7.7 Calibragem
1. Selecione a frequência de ponderação-A
2. Cuidadosamente introduza o microfone no calibrador (não incluído).
3. Calibre o microfone para 94 dB através do potenciómetro CALL. Para
tal, use a ferramenta de calibragem incluída.
Observação:
Recomenda-se a calibragem do medidor uma vez por ano.
A Velleman nv não fornece qualquer certificado de calibragem.
8. Limpeza e manutenção
Limpe o aparelho regularmente com um pano húmido sem pêlo. Evite o
uso de álcool ou dissolventes. NUNCA mergulhe o aparelho em qualquer
tipo de líquido.
Guarde o aparelho num local seco onde não existe humidade ou
vibrações.
Retire a pilha sempre que pretender guardar o medidor por um longo
período de tempo.
Page 39

DEM900
V. 01 – 07/05/2015 39 ©Velleman nv
9. Especificações
nível de som
amplitude de medição
35 dB ~ 130 dB
Precisão
± 2.0 dB
resolução
0.1 dB
frequência de resposta
31.5 Hz ~ 8 kHz
ponderação de
frequência
dBA
luz
amplitude de medição
0 lux ~ 200 klux, 0 Fc ~ 20 kFc
Precisão
± 4 % rdg ± 0.5 % f.s.(< 10,000 lux)
velocidade do ar
amplitude da velocidade
do ar
0.5 m/s ~ 30.0 m/s
precisão da velocidade
do ar
± 3 % ± 0.3 d
unidades de medida
m/s, km/h, ft/min, nós, Mph
temperatura
amplitude de medição
-40° C ~ 70° C (-40° F ~158° F)
Precisão
±2.0° C ± 3.6° F
unidades de medida
°C/°F
humidade
amplitude de medição
10 ~ 95 % RH
Precisão
± 5 % RH
alimentação
1 bateria de 9 V 6F22 (incl.)
dimensões
252 x 66 x 33 mm
peso
575 g (com sondas e pilha)
Utilize este aparelho apenas com acessórios originais. A Velleman
NV não será responsável por quaisquer danos ou lesões causados
pelo uso (indevido) do aparelho. Para mais informação sobre este
produto e para aceder à versão mais recente deste manual do
utilizador, visite a nossa página www.velleman.eu. Podem alterar-se
as especificações e o conteúdo deste manual sem aviso prévio.
© DIREITOS DE AUTOR
A Velleman NV detém os direitos de autor deste manual do
utilizador. Todos os direitos mundiais reservados. É estritamente
proibido reproduzir, traduzir, copiar, editar e gravar este manual do
utilizador ou partes deste sem prévia autorização escrita por parte da
detentora dos direitos.
Page 40

Velleman® Service and Quality Warranty
Since its foundation in 1972, Velleman® acquired extensive
experience in the electronics world and currently distributes its
products in over 85 countries.
All our products fulfil strict quality requirements and legal
stipulations in the EU. In order to ensure the quality, our
products regularly go through an extra quality check, both by an
internal quality department and by specialized external
organisations. If, all precautionary measures notwithstanding,
problems should occur, please make appeal to our warranty
(see guarantee conditions).
General Warranty Conditions Concerning Consumer
Products (for EU):
• All consumer products are subject to a 24-month warranty on
production flaws and defective material as from the original
date of purchase.
• Velleman® can decide to replace an article with an equivalent
article, or to refund the retail value totally or partially when the
complaint is valid and a free repair or replacement of the article
is impossible, or if the expenses are out of proportion.
You will be delivered a replacing article or a refund at the value
of 100% of the purchase price in case of a flaw occurred in the
first year after the date of purchase and delivery, or a replacing
article at 50% of the purchase price or a refund at the value of
50% of the retail value in case of a flaw occurred in the second
year after the date of purchase and delivery.
• Not covered by warranty:
- all direct or indirect damage caused after delivery to the article
(e.g. by oxidation, shocks, falls, dust, dirt, humidity...), and by
the article, as well as its contents (e.g. data loss),
compensation for loss of profits;
- consumable goods, parts or accessories that are subject to an
aging process during normal use, such as batteries
(rechargeable, non-rechargeable, built-in or replaceable),
lamps, rubber parts, drive belts... (unlimited list);
- flaws resulting from fire, water damage, lightning, accident,
natural disaster, etc.…;
- flaws caused deliberately, negligently or resulting from
improper handling, negligent maintenance, abusive use or use
contrary to the manufacturer’s instructions;
- damage caused by a commercial, professional or collective
use of the article (the warranty validity will be reduced to six (6)
months when the article is used professionally);
- damage resulting from an inappropriate packing and shipping
of the article;
- all damage caused by modification, repair or alteration
performed by a third party without written permission by
Velleman®.
• Articles to be repaired must be delivered to your Velleman®
dealer, solidly packed (preferably in the original packaging),
and be completed with the original receipt of purchase and a
clear flaw description.
• Hint: In order to save on cost and time, please reread the
manual and check if the flaw is caused by obvious causes prior
to presenting the article for repair. Note that returning a nondefective article can also involve handling costs.
• Repairs occurring after warranty expiration are subject to
shipping costs.
• The above conditions are without prejudice to all commercial
warranties.
The above enumeration is subject to modification
according to the article (see article’s manual).
Velleman® service- en kwaliteitsgarantie
Velleman® heeft sinds zijn oprichting in 1972 een ruime
ervaring opgebouwd in de elektronicawereld en verdeelt op dit
moment producten in meer dan 85 landen. Al onze producten
beantwoorden aan strikte kwaliteitseisen en aan de wettelijke
bepalingen geldig in de EU. Om de kwaliteit te waarborgen,
ondergaan onze producten op regelmatige tijdstippen een extra
kwaliteitscontrole, zowel door onze eigen kwaliteitsafdeling als
door externe gespecialiseerde organisaties. Mocht er ondanks
deze voorzorgen toch een probleem optreden, dan kunt u
steeds een beroep doen op onze waarborg (zie
waarborgvoorwaarden).
Algemene waarborgvoorwaarden
consumentengoederen (voor Europese Unie):
• Op alle consumentengoederen geldt een garantieperiode van
24 maanden op productie- en materiaalfouten en dit vanaf de
oorspronkelijke aankoopdatum.
• Indien de klacht gegrond is en een gratis reparatie of
vervanging van een artikel onmogelijk is of indien de kosten
hiervoor buiten verhouding zijn, kan Velleman® beslissen het
desbetreffende artikel te vervangen door een gelijkwaardig
artikel of de aankoopsom van het artikel gedeeltelijk of volledig
terug te betalen. In dat geval krijgt u een vervangend product of
terugbetaling ter waarde van 100% van de aankoopsom bij
ontdekking van een gebrek tot één jaar na aankoop en levering,
of een vervangend product tegen 50% van de kostprijs of
terugbetaling van 50 % bij ontdekking na één jaar tot 2 jaar.
• Valt niet onder waarborg:
- alle rechtstreekse of onrechtstreekse schade na de levering
veroorzaakt aan het toestel (bv. door oxidatie, schokken, val,
stof, vuil, vocht...), en door het toestel, alsook zijn inhoud (bv.
verlies van data), vergoeding voor eventuele winstderving.
- verbruiksgoederen, onderdelen of hulpstukken die onderhevig
zijn aan veroudering door normaal gebruik zoals bv. batterijen
(zowel oplaadbare als niet-oplaadbare, ingebouwd of
vervangbaar), lampen, rubberen onderdelen, aandrijfriemen...
(onbeperkte lijst).
- defecten ten gevolge van brand, waterschade, bliksem,
ongevallen, natuurrampen, enz.
- defecten veroorzaakt door opzet, nalatigheid of door een
onoordeelkundige behandeling, slecht onderhoud of abnormaal
gebruik of gebruik van het toestel strijdig met de voorschriften
van de fabrikant.
- schade ten gevolge van een commercieel, professioneel of
collectief gebruik van het apparaat (bij professioneel gebruik
wordt de garantieperiode herleid tot 6 maand).
- schade veroorzaakt door onvoldoende bescherming bij
transport van het apparaat.
- alle schade door wijzigingen, reparaties of modificaties
uitgevoerd door derden zonder toestemming van Velleman®.
• Toestellen dienen ter reparatie aangeboden te worden bij uw
Velleman®-verdeler. Het toestel dient vergezeld te zijn van het
oorspronkelijke aankoopbewijs. Zorg voor een degelijke
verpakking (bij voorkeur de originele verpakking) en voeg een
duidelijke foutomschrijving bij.
• Tip: alvorens het toestel voor reparatie aan te bieden, kijk nog
eens na of er geen voor de hand liggende reden is waarom het
toestel niet naar behoren werkt (zie handleiding). Op deze wijze
kunt u kosten en tijd besparen. Denk eraan dat er ook voor nietdefecte toestellen een kost voor controle aangerekend kan
worden.
• Bij reparaties buiten de waarborgperiode zullen
transportkosten aangerekend worden.
• Elke commerciële garantie laat deze rechten onverminderd.
Bovenstaande opsomming kan eventueel aangepast
worden naargelang de aard van het product (zie
handleiding van het betreffende product).
Page 41

Garantie de service et de qualité Velleman®
Depuis 1972, Velleman® a gagné une vaste expérience dans le
secteur de l’électronique et est actuellement distributeur dans
plus de 85 pays.
Tous nos produits répondent à des exigences de qualité
rigoureuses et à des dispositions légales en vigueur dans l’UE.
Afin de garantir la qualité, nous soumettons régulièrement nos
produits à des contrôles de qualité supplémentaires, tant par
notre propre service qualité que par un service qualité externe.
Dans le cas improbable d’un défaut malgré toutes les
précautions, il est possible d’invoquer notre garantie (voir les
conditions de garantie).
Conditions générales concernant la garantie sur les
produits grand public (pour l’UE) :
• tout produit grand public est garanti 24 mois contre tout vice
de production ou de matériaux à dater du jour d’acquisition
effective ;
• si la plainte est justifiée et que la réparation ou le
remplacement d’un article est jugé impossible, ou lorsque les
coûts s’avèrent disproportionnés, Velleman® s’autorise à
remplacer ledit article par un article équivalent ou à rembourser
la totalité ou une partie du prix d’achat. Le cas échéant, il vous
sera consenti un article de remplacement ou le remboursement
complet du prix d’achat lors d’un défaut dans un délai de 1 an
après l’achat et la livraison, ou un article de remplacement
moyennant 50% du prix d’achat ou le remboursement de 50%
du prix d’achat lors d’un défaut après 1 à 2 ans.
• sont par conséquent exclus :
- tout dommage direct ou indirect survenu à l’article après
livraison (p.ex. dommage lié à l’oxydation, choc, chute,
poussière, sable, impureté…) et provoqué par l’appareil, ainsi
que son contenu (p.ex. perte de données) et une indemnisation
éventuelle pour perte de revenus ;
- toute pièce ou accessoire nécessitant un remplacement causé
par un usage normal comme p.ex. piles (rechargeables comme
non rechargeables, intégrées ou remplaçables), ampoules,
pièces en caoutchouc, courroies… (liste illimitée) ;
- tout dommage qui résulte d’un incendie, de la foudre, d’un
accident, d’une catastrophe naturelle, etc. ;
- out dommage provoqué par une négligence, volontaire ou
non, une utilisation ou un entretien incorrect, ou une utilisation
de l’appareil contraire aux prescriptions du fabricant ;
- tout dommage à cause d’une utilisation commerciale,
professionnelle ou collective de l’appareil (la période de
garantie sera réduite à 6 mois lors d’une utilisation
professionnelle) ;
- tout dommage à l’appareil qui résulte d’une utilisation
incorrecte ou différente que celle pour laquelle il a été
initialement prévu comme décrit dans la notice ;
- tout dommage engendré par un retour de l’appareil emballé
dans un conditionnement non ou insuffisamment protégé.
- toute réparation ou modification effectuée par une tierce
personne sans l’autorisation explicite de SA Velleman® ; - frais
de transport de et vers Velleman® si l’appareil n’est plus
couvert sous la garantie.
• toute réparation sera fournie par l’endroit de l’achat. L’appareil
doit nécessairement être accompagné du bon d’achat d’origine
et être dûment conditionné (de préférence dans l’emballage
d’origine avec mention du défaut) ;
• tuyau : il est conseillé de consulter la notice et de contrôler
câbles, piles, etc. avant de retourner l’appareil. Un appareil
retourné jugé défectueux qui s’avère en bon état de marche
pourra faire l’objet d’une note de frais à charge du
consommateur ;
• une réparation effectuée en-dehors de la période de garantie
fera l’objet de frais de transport ;
• toute garantie commerciale ne porte pas atteinte aux
conditions susmentionnées.
La liste susmentionnée peut être sujette à une
complémentation selon le type de l’article et être
mentionnée dans la notice d’emploi.
Garantía de servicio y calidad Velleman®
Desde su fundación en 1972 Velleman® ha adquirido una
amplia experiencia como distribuidor en el sector de la
electrónica en más de 85 países. Todos nuestros productos
responden a normas de calidad rigurosas y disposiciones
legales vigentes en la UE. Para garantizar la calidad,
sometemos nuestros productos regularmente a controles de
calidad adicionales, tanto a través de nuestro propio servicio de
calidad como de un servicio de calidad externo. En el caso
improbable de que surgieran problemas a pesar de todas las
precauciones, es posible recurrir a nuestra garantía (véase las
condiciones de garantía).
Condiciones generales referentes a la garantía sobre
productos de venta al público (para la Unión
Europea):
• Todos los productos de venta al público tienen un período de
garantía de 24 meses contra errores de producción o errores
en materiales desde la adquisición original;
• Si la queja está fundada y si la reparación o sustitución de un
artículo no es posible, o si los gastos son desproporcionados,
Velleman® autoriza reemplazar el artículo por un artículo
equivalente o reembolsar la totalidad o una parte del precio de
compra. En este caso, usted recibirá un artículo de recambio o
el reembolso completo del precio de compra si encuentra algún
fallo hasta un año después de la compra y entrega, o un
artículo de recambio al 50% del precio de compra o el
reembolso del 50% del precio de compra si encuentra un fallo
después de 1 año y hasta los 2 años después de la compra y
entrega.
Por consiguiente, están excluidos entre otras cosas:
- todos los daños causados directa o indirectamente al aparato
(p.ej. por oxidación, choques, caída,...) y a su contenido (p.ej.
pérdida de datos) después de la entrega y causados por el
aparato, y cualquier indemnización por posible pérdida de
ganancias;
- partes o accesorios, que estén expuestos al desgaste
causado por un uso normal, como por ejemplo baterías (tanto
recargables como no recargables, incorporadas o
reemplazables), bombillas, partes de goma, etc. (lista ilimitada);
- defectos causados por un incendio, daños causados por el
agua, rayos, accidentes, catástrofes naturales, etc.;
- defectos causados a conciencia, descuido o por malos tratos,
un mantenimiento inapropiado o un uso anormal del aparato
contrario a las instrucciones del fabricante;
- daños causados por un uso comercial, profesional o colectivo
del aparato (el período de garantía se reducirá a 6 meses con
uso profesional);
- daños causados por un uso incorrecto o un uso ajeno al que
está previsto el producto inicialmente como está descrito en el
manual del usuario;
- daños causados por una protección insuficiente al transportar
el aparato.
- daños causados por reparaciones o modificaciones
efectuadas por una tercera persona sin la autorización explícita
de Velleman®;
- se calcula gastos de transporte de y a Velleman® si el
aparato ya no está cubierto por la garantía.
• Cualquier artículo que tenga que ser reparado tendrá que ser
devuelto a su distribuidor Velleman®. Devuelva el aparato con
la factura de compra original y transpórtelo en un embalaje
sólido (preferentemente el embalaje original). Incluya también
una buena descripción del fallo;
• Consejo: Lea el manual del usuario y controle los cables, las
pilas, etc. antes de devolver el aparato. Si no se encuentra un
Page 42

defecto en el artículo los gastos podrían correr a cargo del
cliente;
• Los gastos de transporte correrán a carga del cliente para una
reparación efectuada fuera del período de garantía.
• Cualquier gesto comercial no disminuye estos derechos.
La lista previamente mencionada puede ser adaptada
según el tipo de artículo (véase el manual del usuario del
artículo en cuestión).
Velleman® Service- und Qualitätsgarantie
Seit der Gründung in 1972 hat Velleman® sehr viel Erfahrung
als Verteiler in der Elektronikwelt in über 85 Ländern aufgebaut.
Alle Produkte entsprechen den strengen Qualitätsforderungen
und gesetzlichen Anforderungen in der EU. Um die Qualität zu
gewährleisten werden unsere Produkte regelmäßig einer
zusätzlichen Qualitätskontrolle unterworfen, sowohl von
unserer eigenen Qualitätsabteilung als auch von externen
spezialisierten Organisationen. Sollten, trotz aller
Vorsichtsmaßnahmen, Probleme auftreten, nehmen Sie bitte
die Garantie in Anspruch (siehe Garantiebedingungen).
Allgemeine Garantiebedingungen in Bezug auf
Konsumgüter (für die Europäische Union):
• Alle Produkte haben für Material- oder Herstellungsfehler eine
Garantieperiode von 24 Monaten ab Verkaufsdatum.
• Wenn die Klage berechtigt ist und falls eine kostenlose
Reparatur oder ein Austausch des Gerätes unmöglich ist, oder
wenn die Kosten dafür unverhältnismäßig sind, kann
Velleman® sich darüber entscheiden, dieses Produkt durch ein
gleiches Produkt zu ersetzen oder die Kaufsumme ganz oder
teilweise zurückzuzahlen. In diesem Fall erhalten Sie ein
Ersatzprodukt oder eine Rückzahlung im Werte von 100% der
Kaufsumme im Falle eines Defektes bis zu 1 Jahr nach Kauf
oder Lieferung, oder Sie bekommen ein Ersatzprodukt im
Werte von 50% der Kaufsumme oder eine Rückzahlung im
Werte von 50 % im Falle eines Defektes im zweiten Jahr.
• Von der Garantie ausgeschlossen sind:
- alle direkten oder indirekten Schäden, die nach Lieferung am
Gerät und durch das Gerät verursacht werden (z.B. Oxidation,
Stöße, Fall, Staub, Schmutz, Feuchtigkeit, ...), sowie auch der
Inhalt (z.B. Datenverlust), Entschädigung für eventuellen
Gewinnausfall.
- Verbrauchsgüter, Teile oder Zubehörteile, die durch normalen
Gebrauch dem Verschleiß ausgesetzt sind, wie z.B. Batterien
(nicht nur aufladbare, sondern auch nicht aufladbare,
eingebaute oder ersetzbare), Lampen, Gummiteile,
Treibriemen, usw. (unbeschränkte Liste).
- Schäden verursacht durch Brandschaden, Wasserschaden,
Blitz, Unfälle, Naturkatastrophen, usw.
- Schäden verursacht durch absichtliche, nachlässige oder
unsachgemäße Anwendung, schlechte Wartung,
zweckentfremdete Anwendung oder Nichtbeachtung von
Benutzerhinweisen in der Bedienungsanleitung.
- Schäden infolge einer kommerziellen, professionellen oder
kollektiven Anwendung des Gerätes (bei gewerblicher
Anwendung wird die Garantieperiode auf 6 Monate
zurückgeführt).
- Schäden verursacht durch eine unsachgemäße Verpackung
und unsachgemäßen Transport des Gerätes.
- alle Schäden verursacht durch unautorisierte Änderungen,
Reparaturen oder Modifikationen, die von einem Dritten ohne
Erlaubnis von Velleman® vorgenommen werden.
• Im Fall einer Reparatur, wenden Sie sich an Ihren Velleman®Verteiler. Legen Sie das Produkt ordnungsgemäß verpackt
(vorzugsweise die Originalverpackung) und mit dem OriginalKaufbeleg vor. Fügen Sie eine deutliche Fehlerbeschreibung
hinzu.
• Hinweis: Um Kosten und Zeit zu sparen, lesen Sie die
Bedienungsanleitung nochmals und überprüfen Sie, ob es
keinen auf de Hand liegenden Grund gibt, ehe Sie das Gerät
zur Reparatur zurückschicken. Stellt sich bei der Überprüfung
des Gerätes heraus, dass kein Geräteschaden vorliegt, könnte
dem Kunden eine Untersuchungspauschale berechnet.
• Für Reparaturen nach Ablauf der Garantiefrist werden
Transportkosten berechnet.
• Jede kommerzielle Garantie lässt diese Rechte unberührt.
Die oben stehende Aufzählung kann eventuell angepasst
werden gemäß der Art des Produktes (siehe
Bedienungsanleitung des Gerätes).
Velleman ® usługi i gwarancja jakości
Od czasu założenia w 1972, Velleman® zdobył bogate
doświadczenie w dziedzinie światowej elektroniki. Obecnie
firma dystrybuuje swoje produkty w ponad 85 krajach.
Wszystkie nasze produkty spełniają surowe wymagania
jakościowe oraz wypełniają normy i dyrektywy obowiązujące w
krajach UE. W celu zapewnienia najwyższej jakości naszych
produktów, przechodzą one regularne oraz dodatkowo
wyrywkowe badania kontroli jakości, zarówno naszego
wewnętrznego działu jakości jak również wyspecjalizowanych
firm zewnętrznych. Pomimo dołożenia wszelkich starań czasem
mogą pojawić się problemy techniczne, prosimy odwołać się do
gwarancji (patrz warunki gwarancji).
Ogólne Warunki dotyczące gwarancji:
• Wszystkie produkty konsumenckie podlegają 24-miesięcznej
gwarancji na wady produkcyjne i materiałowe od daty zakupu.
• W przypadku, gdy usterka jest niemożliwa do usunięcia lub
koszt usunięcia jest nadmiernie wysoki Velleman ® może
zdecydować o wymianie artykułu na nowy, wolny od wad lub
zwrócić zapłaconą kwotę. Zwrot gotówki może jednak nastąpić
z uwzględnieniem poniższych warunków:
- zwrot 100% ceny zakupu w przypadku, gdy wada wystąpiła w
ciągu pierwszego roku od daty zakupu i dostawy
- wymiana wadliwego artykułu na nowy, wolny od wad z
odpłatnością 50% ceny detalicznej lub zwrot 50% kwoty ceny
nabycia w przypadku gdy wada wystąpiła w drugim roku od
daty zakupu i dostawy.
• Produkt nie podlega naprawie gwarancyjnej:
- gdy wszystkie bezpośrednie lub pośrednie szkody
spowodowane są działaniem czynników środowiskowych lub
losowych (np. przez utlenianie, wstrząsy, upadki, kurz, brud,
...), wilgotności;
- gwarant nie ponosi odpowiedzialności za szkody
wynikających z utraty danych;
- produkty konsumenckie, części zamienne lub akcesoria
podatne na process starzenia, wynikającego z normalnego
użytkowania, np: baterie (
lub wymienne), żarówki, paski napędowe, gumowe elementy
napędowe... (nieograniczona lista);
- usterka wynika z działania pożaru, zalania wszelkimi cieczami,
uderzenia pioruna, upadku lub klęski żywiołowej, itp.;
- usterka wynika z zaniedbań eksploatacyjnych tj. umyślne
bądź nieumyślne zaniechanie czyszczenia, konserwacji,
wymiany materiałów ekspolatacyjnych, niedbalstwa lub z
niewłaściwego obchodzenia się lub niezgodnego użytkowania z
instrukcją producenta;
- szkody wynikające z nadmiernego użytkowania gdy nie jest
do tego celu przeznaczony tj. działalność komerycjna,
zawodowa lub wspólne użytkowanie przez wiele osób - okres
obowiązywania gwarancji zostanie obniżony do 6 (sześć)
miesięcy;
- Szkody wynikające ze źle zabezpieczonej wysyłki produktu;
- Wszelkie szkody spowodowane przez nieautoryzowaną
naprawę, modyfikację, przeróbkę produktu przez osoby trzecie
jak również bez pisemnej zgody firmy Velleman ®.
• Uszkodzony produkt musi zostać dostarczony do sprzedawcy
® Velleman, solidnie zapakowany (najlepiej w oryginalnym
ładowalne, nieładowalne, wbudowane
Page 43

opakowaniu), wraz z wyposażeniem z jakim produkt został
sprzedany. W przypadku wysyłki towaru w opakowaniu innym
niż oryginalnym ryzyko usterki produktu oraz tego skutki
przechodzą na właściciela produktu. Wraz z niesprawnym
produktem należy dołączyć jasny i szczegółowy opis jego
usterki, wady;
• Wskazówka: Aby zaoszczędzić na kosztach i czasie, proszę
szczegółowo zapoznać się z instrukcja obsługi; czy przyczyną
wady są okoliczności techniczne czy też wynikaja wyłącznie z
nieznajomości obsługi produktu. W przypadku wysyłki
sprawnego produktu do serwisu nabywca może zostać
obciążony kosztmi obsługi oraz transportu.
• W przypadku napraw pogwarancyjnych lub odpłatnych klient
ponosi dodatkowo koszt wysyłki produktu do i z serwisu.
wymienione wyżej warunki są bez uszczerbku dla wszystkich
komercyjnych gwarancji.
Powyższe postanowienia mogą podlegać modyfikacji w
zależności od wyrobu (patrz art obsługi).
Garantia de serviço e de qualidade Velleman®
Desde a sua fundação em 1972 Velleman® tem adquirido uma
amplia experiencia no sector da eletrónica com uma
distribuição em mais de 85 países.
Todos os nossos produtos respondem a exigências rigorosas e
a disposições legais em vigor na UE. Para garantir a qualidade,
submetemos regularmente os nossos produtos a controles de
qualidade suplementares, com o nosso próprio serviço
qualidade como um serviço de qualidade externo. No caso
improvável de um defeito mesmo com as nossas precauções, é
possível invocar a nossa garantia. (ver as condições de
garantia).
Condições gerais com respeito a garantia sobre os produtos
grande público (para a UE):
• qualquer produto grande público é garantido 24 mês contra
qualquer vício de produção ou materiais a partir da data de
aquisição efectiva;
• no caso da reclamação ser justificada e que a reparação ou
substituição de um artigo é impossível, ou quando os custo são
desproporcionados, Velleman® autoriza-se a substituir o dito
artigo por um artigo equivalente ou a devolver a totalidade ou
parte do preço de compra. Em outro caso, será consentido um
artigo de substituição ou devolução completa do preço de
compra no caso de um defeito no prazo de 1 ano depois da
data de compra e entrega, ou um artigo de substituição
pagando o valor de 50% do preço de compra ou devolução de
50% do preço de compra para defeitos depois de 1 a 2 anos.
• estão por consequência excluídos:
- todos os danos directos ou indirectos depois da entrega do
artigo (p.ex. danos ligados a oxidação, choques, quedas,
poeiras, areias, impurezas…) e provocado pelo aparelho, como
o seu conteúdo (p.ex. perca de dados) e uma indemnização
eventual por perca de receitas;
- consumíveis, peças ou acessórios sujeitos a desgaste
causado por um uso normal, como p.ex. pilhas (recarregáveis,
não recarregáveis, incorporadas ou substituíveis), lâmpadas,
peças em borracha correias… (lista ilimitada);
- todos os danos que resultem de um incêndio, raios, de um
acidente, de una catastrophe natural, etc.;
- danos provocados por negligencia, voluntária ou não, uma
utilização ou manutenção incorrecta, ou uma utilização do
aparelho contrária as prescrições do fabricante;
- todos os danos por causa de uma utilização comercial,
profissional ou colectiva do aparelho ( o período de garantia
será reduzido a 6 meses para uma utilização profissional);
- todos os danos no aparelho resultando de uma utilização
incorrecta ou diferente daquela inicialmente prevista e descrita
no manual de utilização;
- todos os danos depois de uma devolução não embalada ou
mal protegida ao nível do acondicionamento.
- todas as reparações ou modificações efectuadas por terceiros
sem a autorização de SA Velleman®;
- despesas de transporte de e para Velleman® se o aparelho
não estiver coberto pela garantia.
• qualquer reparação será fornecida pelo local de compra. O
aparelho será obrigatoriamente acompanhado do talão ou
factura de origem e bem acondicionado (de preferência dentro
da embalagem de origem com indicação do defeito ou avaria);
• dica: aconselha-mos a consulta do manual e controlar cabos,
pilhas, etc. antes de devolver o aparelho. Um aparelho
devolvido que estiver em bom estado será cobrado despesas a
cargo do consumidor;
• uma reparação efectuada fora da garantia, será cobrado
despesas de transporte;
• qualquer garantia comercial não prevalece as condições aqui
mencionadas.
A lista pode ser sujeita a um complemento conforme o tipo de
artigo e estar mencionada no manual de utilização.
Made in PRC
Imported by Velleman nv
Legen Heirweg 33, 9890 Gavere, Belgium
www.velleman.eu
 Loading...