

Page 1

BUTLER 5750
User guide / Handleiding / Manuel d’utilisateur /
Bedienungsanleitung / Manual de usuario /
ȅįȘȖȚİı ȋȡȘıȘı
v 1.0
Page 2

Important
To use ‘Caller ID’ (display caller), this service has to be activated on your phone line. Normally you
need a separate subscription from your telephone company to activate this function. If you don’t have
the Caller ID function on your phone line, the incoming telephone numbers will NOT be shown on the
display of your telephone.
Belangrijk
Om de ‘Nummerweergave’ te kunnen gebruiken, moet deze dienst geactiveerd zijn op uw telefoonlijn.
Om deze dienst te activeren, hebt U hiervoor meestal een apart abonnement van uw
telefoonmaatschappij nodig. Indien U geen nummerweergavefunctie hebt op uw telefoonlijn, zullen de
inkomende telefoonnummers NIET op de display van uw toestel verschijnen.
Important
Pour utiliser la fonction ‘Caller ID/Clip’ (affichage de l’appelant), ce service doit être activé sur votre
ligne téléphonique. Généralement, vous avez besoin d’un abonnement séparé de votre compagnie de
téléphone pour activer cette fonction. Si vous n’avez pas la fonction ‘Caller ID - Affichage Appelant’
sur votre ligne téléphonique, les numéros de téléphone entrants n’apparaîtront PAS sur l’écran de votre
téléphone.
Wichtig
Zur Verwendung der ‘Rufnummernanzeige’ muss dieser Dienst erst für Ihre Telefonleitung
freigegeben werden. Zur Aktivierung dieser Dienstleistung benötigen Sie meistens ein separates
Abonnement Ihrer Telefongesellschaft.Wenn Sie für Ihre Telefonleitung keine
Rufnummernanzeigefunktion haben, erscheinen die eingehenden Telefonnummern NICHT im Display
Ihres Gerätes.
Importante
Para poder usar la función “Identificación de llamadas,este servicio tiene que estar dado de alta en su
línea telefónica. Normalmente es necesario abonarse a dicho serviciopara que la compañía telefónica
active esta función. Si su línea telefónica no dispone de la funciónIdentificación de llamadas, la
pantalla del aparato no mostrará los números de teléfono de las llamadas entrantes.
ȈȘµĮȞIJȚțȩ
īȚĮ ȞĮ ȤȡȘıȚµȠʌȠȚȒıİIJİ IJȘȞ ȣʌȘȡİıȓĮ ĮȞĮȖȞȫȡȚıȘȢ țȜȒıİȦȞ, ʌȡȑʌİȚ Ș ȣʌȘȡİıȓĮ ĮȣIJȒ ȞĮ ȑȤİȚ
İȞİȡȖȠʌȠȚȘșİȓ
ıIJȘȞ IJȘȜİijȦȞȚțȒ ȖȡĮµµȒıĮȢ. īȚĮ ȞĮ İȞİȡȖȠʌȠȚȒıİIJİ ĮȣIJȒ IJȘ ȜİȚIJȠȣȡȖȓĮ ʌȡȑʌİȚ
țĮȞȠȞȚțȐ ȞĮ İȖȖȡĮijİȓIJİ ȟİȤȦȡȚıIJȐ ıIJȘȞ İIJĮȚȡȓĮ ʌĮȡȠȤȒȢ IJȘȜİijȦȞȚțȫȞ ȣʌȘȡİıȚȫȞ ıĮȢ. ǼȐȞ įİȞ ȑȤİIJİ
İȞİȡȖȠʌȠȚȒıİȚ ıIJȘ ȖȡĮµµȒ ıĮȢ IJȘȞ ȣʌȘȡİıȓĮ ĮȞĮȖȞȫȡȚıȘȢ țȜȒıİȦȞ, ǻǼ șĮ ݵijĮȞȓȗȠȞIJĮȚ ȠȚ ĮȡȚșµȠȓ
IJȦȞ İȚıİȡȤȩµİȞȦȞ țȜȒıİȦȞ ıIJȘȞ ȠșȩȞȘ IJȠȣ IJȘȜİijȫȞȠȣ ıĮȢ.
Page 3

UK To be connected to the public analogue telephone network.
NL Geschikt voor aansluiting op het openbare analoog geschakelde telefoonnetwerk.
FR Il est destiné à être raccordé au réseau de télécommunication public.
DE Kompatibel für den analogen telefonanschluss.
ES Conexión a la red telefónica analógica.
GR ȆȡȑʌİȚ ȞĮ ıȣȞįİșİȓ ıİ ȑȞĮ įȘµȩıȚȠ ĮȞĮȜȠȖȚțȩ IJȘȜİijȦȞȚțȩ įȓțIJȣȠ.
UK The features described in this manual are published with reservation to modifications.
NL De in deze handleiding beschreven mogelijkheden worden gepubliceerd onder voorbehoud
van wijzigingen.
FR Les possibilités décrites dans ce manuel sont publiées sous réserve de modifications.
DE Die in dieser Bedienungsanleitung umschriebenen Möglichkeiten, werden vorbehaltlich
Änderungen publiziert.
ES Las características descritas en este manual pueden ser objeto de futuras modificaciones.
GR ȅȚ ȜİȚIJȠȣȡȖȓİȢ ʌȠȣ ʌİȡȚȖȡȐijȠȞIJĮȚ ıIJȠ ʌĮȡȩȞ İȖȤİȚȡȓįȚȠ, įȘµȠıȚİȪȠȞIJĮȚ µİ İʌȚijȪȜĮȟȘ IJȣȤȩȞ
IJȡȠʌȠʌȠȚȒıİȦȞ.
This product is in compliance with the essential requirements and other
relevant provisions of the R&TTE directive 1999/5/EC.
The Declaration of conformity can be found on:
http://www.topcom.net/support/cedeclarations.php
UK The CE symbol indicates that the unit complies with the essential requirements of the R&TTE
directive.
NL Het toestel voldoet aan de basiseisen van de R&TTE-richtlijn. Dit wordt bevestigd door de
CE-markering.
FR La conformité de l’appareil avec les exigences fondamentales de la directive européenne
R&TTE relative aux terminaux, est confirmée par le label CE.
DE Die Übereinstimmung des Gerätes mit den grundlegenden Anforderungen der R&TTE-
Directive ist durch das CE-Kennzeichen bestätigt.
ES El sello CE corrobora la conformidad del equipo con los requerimientos básicos de la
directiva R&TTE.
GR ȅȚ
ȜİȚIJȠȣȡȖȓİȢ ʌȠȣ ʌİȡȚȖȡȐijȠȞIJĮȚ ıIJȠ ʌĮȡȩȞ İȖȤİȚȡȓįȚȠ, įȘµȠıȚİȪȠȞIJĮȚ µİ İʌȚijȪȜĮȟȘ IJȣȤȩȞ
IJȡȠʌȠʌȠȚȒıİȦȞ.
Page 4

English.................................................................. 1
1 Safety instructions .................................................................................................................1
2 Getting started .......................................................................................................................1
2.1 How to use this user guide............................................................................................................... 1
2.2 Installing the base ............................................................................................................................ 1
2.3 Installing the handset....................................................................................................................... 2
2.4 Keys/Led.......................................................................................................................................... 3
2.5 Symbols ........................................................................................................................................... 3
2.6 Display keys .................................................................................................................................... 4
2.7 Base LED......................................................................................................................................... 4
2.8 Navigating the menu........................................................................................................................ 4
2.9 Menu overview ................................................................................................................................ 4
3 Using the telephone................................................................................................................5
3.1 Switching the handset ON/OFF....................................................................................................... 5
3.2 Changing the menu language .......................................................................................................... 5
3.3 Making a normal telephone call ...................................................................................................... 6
3.4 Receiving a telephone call............................................................................................................... 6
3.5 Handsfree mode............................................................................................................................... 7
3.6 Adjust earpiece/handsfree volume .................................................................................................. 7
3.7 Secrecy function (Mute function).................................................................................................... 7
3.8 Locating a handset (Paging function).............................................................................................. 7
3.9 Keypad Lock ................................................................................................................................... 7
3.10 Using the alphanumerical keypad ................................................................................................... 7
4 Phonebook ..............................................................................................................................8
4.1 To add an entry................................................................................................................................ 8
4.2 To dial an entry................................................................................................................................ 8
4.3 Show Details.................................................................................................................................... 8
4.4 Delete an entry or all entries............................................................................................................ 9
4.5 Edit name and number..................................................................................................................... 9
4.6 Copy a phonebook entry to another handset ................................................................................... 9
4.7 Copy all phonebook entries to another handset............................................................................. 10
5 Caller Identification.............................................................................................................10
5.1 Normal incoming PSTN calls........................................................................................................ 10
6 Personalise the handset ....................................................................................................... 11
6.1 Ringtone and volume..................................................................................................................... 11
6.2 Handset name ................................................................................................................................ 11
6.3 Keypad beeps................................................................................................................................. 12
6.4 Setting the contrast ........................................................................................................................ 12
6.5 Autotalk ......................................................................................................................................... 12
6.6 Setting the display backlight Time................................................................................................ 12
6.7 Prefix code..................................................................................................................................... 12
6.8 Using the alarm feature ................................................................................................................. 13
6.9 Setting the date and time ............................................................................................................... 13
6.10 Setting the time format .................................................................................................................. 13
7 Base settings .........................................................................................................................14
7.1 Ringtone ........................................................................................................................................ 14
7.2 Ringer Volume .............................................................................................................................. 14
7.3 Dial Mode...................................................................................................................................... 14
7.4 Recall (Flash)................................................................................................................................. 14
7.5 System PIN.................................................................................................................................... 15
8 Tools ...................................................................................................................................... 15
I
Page 5

8.1 Appointment .................................................................................................................................. 15
8.2 Stopwatch ...................................................................................................................................... 16
9 Additional handsets and base stations ...............................................................................16
9.1 Adding a new handset ................................................................................................................... 16
9.2 Removing a handset ...................................................................................................................... 16
9.3 Select a base .................................................................................................................................. 17
9.4 Using the intercom feature ............................................................................................................ 17
10 Answering machine .............................................................................................................18
10.1 Display........................................................................................................................................... 18
10.2 Outgoing Messages ....................................................................................................................... 18
10.3 Turning Answering Machine On/Off ............................................................................................ 20
10.4 Setting number of Rings (Answer delay) ...................................................................................... 20
10.5 Programming the VIP Code .......................................................................................................... 20
10.6 Operation ....................................................................................................................................... 21
10.7 Call Screening ............................................................................................................................... 21
10.8 Recording a Memo ........................................................................................................................ 21
10.9 Playback of Incoming Messages and Memos ............................................................................... 21
10.10 Erasing Messages .......................................................................................................................... 22
10.11 Memory Full.................................................................................................................................. 22
10.12 Remote Operation.......................................................................................................................... 22
10.13 Turning answering machine on remotely...................................................................................... 23
11 Troubleshooting ...................................................................................................................24
12 Technical dataTechnical characteristics............................................................................25
13 Warranty ..............................................................................................................................25
13.1 Warranty period............................................................................................................................. 25
13.2 Warranty handling ......................................................................................................................... 25
13.3 Warranty exclusions ...................................................................................................................... 25
14 Disposal of the device (environment) ................................................................................. 26
15 Cleaning ................................................................................................................................26
16 ECO (low-radiation) mode..................................................................................................26
Nederlands ......................................................... 27
1 Veiligheidsinstructies...........................................................................................................27
2 Beginnen ...............................................................................................................................27
2.1 Deze gebruikshandleiding gebruiken ............................................................................................ 27
2.2 De basis installeren........................................................................................................................ 27
2.3 De handset installeren.................................................................................................................... 28
2.4 Toetsen/LED.................................................................................................................................. 29
2.5 Symbolen....................................................................................................................................... 29
2.6 Displaytoetsen ............................................................................................................................... 30
2.7 Basis-LED ..................................................................................................................................... 30
2.8 Door het menu bladeren ................................................................................................................ 30
2.9 Menuoverzicht ............................................................................................................................... 30
3 De telefoon gebruiken..........................................................................................................31
3.1 De handset in- en uitschakelen...................................................................................................... 31
3.2 De menutaal veranderen................................................................................................................ 31
3.3 Een normaal telefoongesprek voeren ............................................................................................ 32
3.4 Een telefoontje ontvangen ............................................................................................................. 32
3.5 Handenvrij-modus ......................................................................................................................... 33
3.6 Oorstuk/handenvrij-volume afstellen ............................................................................................ 33
II
Page 6

3.7 Geheimhoudingsfunctie (Microfoon uit-functie) .......................................................................... 33
3.8 Een handset vinden (Paging-functie)............................................................................................. 33
3.9 Toetsenbordvergrendeling............................................................................................................. 33
3.10 Het alfanumerieke toetsenbord gebruiken..................................................................................... 33
4 Telefoonboek ........................................................................................................................34
4.1 Een invoer toevoegen .................................................................................................................... 34
4.2 Een invoer kiezen .......................................................................................................................... 34
4.3 Details tonen.................................................................................................................................. 34
4.4 Eén of alle ingevoerde items wissen ............................................................................................. 35
4.5 Naam en nummer bewerken.......................................................................................................... 35
4.6 Een telefoonboekinvoer naar een andere handset kopiëren .......................................................... 35
4.7 Alle nummers in het telefoonboek naar een andere handset kopiëren .......................................... 36
5 Nummerweergave oproeper................................................................................................36
5.1 Normale inkomende PSTN-oproepen ........................................................................................... 36
6 De handset naar eigen wens instellen.................................................................................37
6.1 Beltoon en belvolume.................................................................................................................... 37
6.2 Handset naam ................................................................................................................................ 38
6.3 Toetstoon ....................................................................................................................................... 38
6.4 Het contrast instellen ..................................................................................................................... 38
6.5 Automatisch aannemen ................................................................................................................. 38
6.6 De verlichtingstijd van de display instellen................................................................................... 39
6.7 Prefixcode...................................................................................................................................... 39
6.8 De alarmfunctie gebruiken ............................................................................................................ 39
6.9 Datum en tijd instellen................................................................................................................... 40
6.10 Het tijdformaat instellen................................................................................................................ 40
7 Basisinstellingen...................................................................................................................40
7.1 Beltoon .......................................................................................................................................... 40
7.2 Belvolume...................................................................................................................................... 40
7.3 Kiesmodus ..................................................................................................................................... 40
7.4 Recall (Flash)................................................................................................................................. 41
7.5 Systeem PIN .................................................................................................................................. 41
8 Hulpmiddelen.......................................................................................................................41
8.1 Afspraak ........................................................................................................................................ 41
8.2 Stopwatch ...................................................................................................................................... 42
9 Extra handsets en basisstations ..........................................................................................42
9.1 Een nieuwe handset toevoegen...................................................................................................... 42
9.2 Een handset verwijderen................................................................................................................ 43
9.3 Een basis selecteren ....................................................................................................................... 43
9.4 De intercomfunctie gebruiken ....................................................................................................... 43
10 Beantwoorder.......................................................................................................................44
10.1 Display........................................................................................................................................... 45
10.2 Uitgaande boodschappen............................................................................................................... 45
10.3 Het antwoordapparaat in-/uitschakelen ......................................................................................... 46
10.4 Aantal beltonen instellen ............................................................................................................... 46
10.5 De VIP-code programmeren.......................................................................................................... 47
10.6 Werking ......................................................................................................................................... 47
10.7 Meeluisterfunctie........................................................................................................................... 47
10.8 Een memo opnemen ...................................................................................................................... 47
10.9 Inkomende berichten en memo's afspelen..................................................................................... 48
10.10 Boodschappen wissen.................................................................................................................... 48
10.11 Geheugen vol................................................................................................................................. 49
10.12 Bediening op afstand ..................................................................................................................... 49
III
Page 7

10.13 Antwoordapparaat op afstand inschakelen.................................................................................... 50
11 Probleemoplossing ...............................................................................................................51
12 Technische gegevens ............................................................................................................51
13 Garantie ................................................................................................................................52
13.1 Garantieperiode ............................................................................................................................. 52
13.2 Afwikkeling van garantieclaims.................................................................................................... 52
13.3 Garantiebeperkingen...................................................................................................................... 52
14 Afvoeren van het toestel (milieu)........................................................................................53
15 Reinigen ................................................................................................................................53
16 ECO-modus (lage straling) .................................................................................................53
Français.............................................................. 54
1 Instructions de sécurité .......................................................................................................54
2 Pour commencer ..................................................................................................................54
2.1 Comment utiliser ce mode d'emploi ? ........................................................................................... 54
2.2 Installation de la base .................................................................................................................... 54
2.3 Installation du combiné ................................................................................................................. 55
2.4 Touches/LED................................................................................................................................. 56
2.5 Symboles ....................................................................................................................................... 56
2.6 Touches d'écran ............................................................................................................................. 57
2.7 LED de la base............................................................................................................................... 57
2.8 Navigation dans les menus ............................................................................................................ 57
2.9 Organisation des menus................................................................................................................. 57
3 Utilisation du téléphone.......................................................................................................58
3.1 Mise en/hors service du combiné .................................................................................................. 58
3.2 Modification de la langue des menus ............................................................................................ 58
3.3 Passer un appel ordinaire............................................................................................................... 59
3.4 Recevoir un appel .......................................................................................................................... 59
3.5 Mode mains-libres......................................................................................................................... 60
3.6 Réglage du volume de l'écouteur/haut-parleur mains-libres ......................................................... 60
3.7 Fonction silence (Mute)................................................................................................................. 60
3.8 Localisation d'un combiné (fonction paging)................................................................................ 60
3.9 Verrouillage du clavier .................................................................................................................. 60
3.10 Utilisation du clavier alphanumérique........................................................................................... 61
4 Répertoire.............................................................................................................................61
4.1 Pour ajouter une entrée.................................................................................................................. 61
4.2 Pour composer un numéro............................................................................................................. 61
4.3 Montre Détail................................................................................................................................. 62
4.4 Suppression d'une entrée ou de toutes les entrées ......................................................................... 62
4.5 Modification d'un nom ou d'un numéro ........................................................................................ 62
4.6 Copie d'une entrée du répertoire vers un autre combiné ............................................................... 62
4.7 Copie de toutes les entrées du répertoire vers un autre combiné .................................................. 63
5 Identification de l'appelant .................................................................................................63
5.1 Appels entrants RTC ordinaires .................................................................................................... 63
6 Personnalisation du combiné ..............................................................................................64
6.1 Sonnerie et volume........................................................................................................................ 64
6.2 Nom du combiné ........................................................................................................................... 65
6.3 Bip Touche .................................................................................................................................... 65
6.4 Réglage du contraste...................................................................................................................... 65
6.5 Autotalk ......................................................................................................................................... 66
IV
Page 8

6.6 Réglage du temps d'éclairage de l'écran ........................................................................................ 66
6.7 Code de préfixe.............................................................................................................................. 66
6.8 Fonction d'alarme .......................................................................................................................... 66
6.9 Réglage de la date et de l'heure ..................................................................................................... 67
6.10 Réglage du format horaire ............................................................................................................. 67
7 Réglage Base.........................................................................................................................67
7.1 Sonnerie......................................................................................................................................... 67
7.2 Vol. Sonnerie................................................................................................................................. 67
7.3 Mode de numérotation................................................................................................................... 68
7.4 Rappel (Flash) ............................................................................................................................... 68
7.5 PIN Système .................................................................................................................................. 68
8 Outils.....................................................................................................................................69
8.1 Rendez-Vous ................................................................................................................................. 69
8.2 Chronomètre .................................................................................................................................. 69
9 Combinés et stations de base supplémentaires .................................................................69
9.1 Ajout d'un nouveau combiné......................................................................................................... 69
9.2 Suppression d'un combiné ............................................................................................................. 70
9.3 Sélection d'une base....................................................................................................................... 70
9.4 Fonction d'intercom....................................................................................................................... 71
10 Répondeur ............................................................................................................................72
10.1 Écran.............................................................................................................................................. 72
10.2 Messages sortants .......................................................................................................................... 72
10.3 Allumer/éteindre le répondeur....................................................................................................... 73
10.4 Régler le nombre de sonneries (délai du répondeur)..................................................................... 74
10.5 Programmer le code VIP ............................................................................................................... 74
10.6 Fonctionnement ............................................................................................................................. 74
10.7 Filtrer les appels ............................................................................................................................ 75
10.8 Enregistrer un mémo ..................................................................................................................... 75
10.9 Lire les messages entrants et les mémos ....................................................................................... 75
10.10 Effacer des messages..................................................................................................................... 76
10.11 Mémoire pleine.............................................................................................................................. 76
10.12 Commande à distance.................................................................................................................... 76
10.13 Allumer le répondeur à distance.................................................................................................... 77
11 Dépannage ............................................................................................................................ 78
12 Données et caractéristiques techniques ............................................................................. 78
13 Garantie ................................................................................................................................79
13.1 Période de garantie ........................................................................................................................ 79
13.2 Traitement de la garantie ............................................................................................................... 79
13.3 Exclusions de garantie ................................................................................................................... 79
14 Mise au rebut de l'appareil (environnement)....................................................................80
15 Nettoyage ..............................................................................................................................80
16 Mode ECO (faible rayonnement) .......................................................................................80
Deutsch............................................................... 81
1 Sicherheitshinweise..............................................................................................................81
2 Erste Schritte........................................................................................................................81
2.1 Zum Gebrauch dieser Bedienungsanleitung.................................................................................. 81
2.2 Basisstation installieren ................................................................................................................. 81
2.3 Mobilteil installieren ..................................................................................................................... 82
2.4 Tasten / Anzeigen .......................................................................................................................... 83
V
Page 9

2.5 Symbole......................................................................................................................................... 83
2.6 Displaytasten ................................................................................................................................. 84
2.7 LED der Basisstation..................................................................................................................... 84
2.8 Durch das Menü navigieren........................................................................................................... 84
2.9 Menü-Übersicht............................................................................................................................. 84
3 Telefon benutzen.................................................................................................................. 85
3.1 Mobilteil ein-/ausschalten ............................................................................................................. 85
3.2 Menüsprache ändern...................................................................................................................... 85
3.3 Telefonieren................................................................................................................................... 86
3.4 Einen Anruf annehmen.................................................................................................................. 86
3.5 Freisprechmodus............................................................................................................................ 87
3.6 Lautstärke Hörmuschel / Freisprechmodus anpassen.................................................................... 87
3.7 Stummschaltung (Mute) ................................................................................................................ 87
3.8 Mobilteil suchen (Paging) ............................................................................................................. 87
3.9 Tastatursperre ................................................................................................................................ 87
3.10 Die alphanumerischen Tasten verwenden ..................................................................................... 88
4 Telefonbuch..........................................................................................................................88
4.1 Einen Eintrag hinzufügen .............................................................................................................. 88
4.2 Eine Nummer aus dem Telefonbuch anrufen................................................................................ 88
4.3 Einen Telefonbucheintrag anzeigen .............................................................................................. 89
4.4 Einen Eintrag oder alle Einträge löschen ...................................................................................... 89
4.5 Einen Namen und Telefonnummer bearbeiten.............................................................................. 89
4.6 Einen Telefonbucheintrag auf ein anderes Mobilteil kopieren ..................................................... 89
4.7 Alle Telefonbucheinträge auf ein anderes Mobilteil kopieren ...................................................... 90
5 Anruferkennung ..................................................................................................................90
5.1 Normale eingehende PSTN-Anrufe .............................................................................................. 90
6 Mobilteil individuell anpassen ............................................................................................91
6.1 Rufton und Lautstärke ................................................................................................................... 91
6.2 Mobilteil-Name ............................................................................................................................. 92
6.3 Tastentöne...................................................................................................................................... 92
6.4 Kontrast einstellen ......................................................................................................................... 92
6.5 Automatische Anrufannahme........................................................................................................ 93
6.6 Länge der Hintergrundbeleuchtung einstellen............................................................................... 93
6.7 Automatische Vorwahl.................................................................................................................. 93
6.8 Weckfunktion verwenden.............................................................................................................. 93
6.9 Datum und Uhrzeit einstellen ........................................................................................................ 94
6.10 Zeitformat einstellen...................................................................................................................... 94
7 Basis Einstellungen ..............................................................................................................94
7.1 Rufton ............................................................................................................................................ 94
7.2 Ruftonlautstärke ............................................................................................................................ 95
7.3 Wahlverfahren ............................................................................................................................... 95
7.4 Abruf (Flash) ................................................................................................................................. 95
7.5 PIN-Nummer ................................................................................................................................. 95
8 Extras ....................................................................................................................................96
8.1 Termin ........................................................................................................................................... 96
8.2 Stoppuhr ........................................................................................................................................ 96
9 Zusätzliche Mobilteile und Basisstationen ........................................................................97
9.1 Ein neues Mobilteil hinzufügen..................................................................................................... 97
9.2 Ein Mobilteil abmelden................................................................................................................. 97
9.3 Eine Basisstation auswählen.......................................................................................................... 97
9.4 Interner Anruf verwenden ............................................................................................................. 98
10 Anrufbeantworter................................................................................................................99
VI
Page 10

10.1 Display........................................................................................................................................... 99
10.2 Ansagetexte ................................................................................................................................. 100
10.3 Anrufbeantworter ein- und ausschalten....................................................................................... 101
10.4 Anzahl Klingelzeichen einstellen (Antw. Verz.)......................................................................... 101
10.5 VIP-Code programmieren ........................................................................................................... 101
10.6 Betrieb ......................................................................................................................................... 102
10.7 Anrufüberprüfung........................................................................................................................ 102
10.8 Ein Memo aufnehmen ................................................................................................................. 102
10.9 Gespeicherte Nachrichten und Memos abspielen........................................................................ 103
10.10 Ansagetexte löschen .................................................................................................................... 103
10.11 Voller Speicher............................................................................................................................ 103
10.12 Fernbetätigung............................................................................................................................. 104
10.13 Anrufbeantworter per Fernbetätigung einschalten ...................................................................... 105
11 Problemlösung....................................................................................................................105
12 Technische Daten ...............................................................................................................106
13 Garantie .............................................................................................................................. 107
13.1 Garantiezeit.................................................................................................................................. 107
13.2 Abwicklung des Garantiefalls ..................................................................................................... 107
13.3 Garantieausschlüsse..................................................................................................................... 107
14 Entsorgung des Geräts (Umweltschutz) ..........................................................................108
15 Reinigung............................................................................................................................108
16 ECO-Modus (strahlungsarm)........................................................................................... 108
Español............................................................. 109
1 Instrucciones de seguridad................................................................................................109
2 Introducción .......................................................................................................................109
2.1 Cómo utilizar este manual del usuario ........................................................................................ 109
2.2 Instalación de la base................................................................................................................... 109
2.3 Instalación del terminal ............................................................................................................... 110
2.4 Teclas / LED................................................................................................................................ 111
2.5 Símbolos ...................................................................................................................................... 111
2.6 Teclas de pantalla ........................................................................................................................ 112
2.7 LED de la base............................................................................................................................. 112
2.8 Navegación por el menú.............................................................................................................. 112
2.9 Vista general de los menús.......................................................................................................... 112
3 Uso del teléfono ..................................................................................................................113
3.1 Activar / desactivar el terminal.................................................................................................... 113
3.2 Cambiar el idioma de los menús ................................................................................................. 113
3.3 Realizar una llamada telefónica normal ...................................................................................... 114
3.4 Recibir una llamada de teléfono.................................................................................................. 114
3.5 Modo manos libres ...................................................................................................................... 115
3.6 Ajustar el volumen del auricular / manos libres .......................................................................... 115
3.7 Función Secreto (función Mute).................................................................................................. 115
3.8 Localizar un terminal (función de búsqueda).............................................................................. 115
3.9 Bloqueo del teclado..................................................................................................................... 115
3.10 Usar las teclas alfanuméricas....................................................................................................... 115
4 Agenda ................................................................................................................................116
4.1 Para añadir una entrada: .............................................................................................................. 116
4.2 Para marcar una entrada: ............................................................................................................. 116
4.3 Ver detalles.................................................................................................................................. 116
VII
Page 11

4.4 Eliminar una entrada o todas las entradas ................................................................................... 117
4.5 Editar un nombre y un número.................................................................................................... 117
4.6 Copiar una entrada de la agenda en otro terminal ....................................................................... 117
4.7 Copiar todas las entradas de la agenda en otro terminal ............................................................. 118
5 Identificación de llamadas ................................................................................................118
5.1 Llamadas RTPC entrantes normales ........................................................................................... 118
6 Personalizar el terminal ....................................................................................................119
6.1 Timbre y volumen ....................................................................................................................... 119
6.2 Nombre del terminal.................................................................................................................... 120
6.3 Tono de pulsación de teclas......................................................................................................... 120
6.4 Ajustar el contraste ...................................................................................................................... 120
6.5 Descolgar automáticamente......................................................................................................... 120
6.6 Configuración del tiempo de iluminación de la pantalla............................................................. 120
6.7 Código de prefijo......................................................................................................................... 121
6.8 Usar la función de alarma............................................................................................................ 121
6.9 Ajustar la fecha y la hora............................................................................................................. 121
6.10 Ajustar el formato de hora ........................................................................................................... 122
7 Configurar la base .............................................................................................................122
7.1 Timbre ......................................................................................................................................... 122
7.2 Volumen del timbre ..................................................................................................................... 122
7.3 Marcación .................................................................................................................................... 122
7.4 Rellamada (Flash)........................................................................................................................ 123
7.5 PIN del sistema............................................................................................................................ 123
8 Herramientas......................................................................................................................123
8.1 Cita .............................................................................................................................................. 123
8.2 Cronómetro.................................................................................................................................. 124
9 Terminales y bases adicionales .........................................................................................124
9.1 Añadir un nuevo terminal............................................................................................................ 124
9.2 Eliminar un terminal.................................................................................................................... 125
9.3 Seleccionar una base.................................................................................................................... 125
9.4 Usar la función de intercomunicación......................................................................................... 125
10 Contestador ........................................................................................................................126
10.1 Pantalla ........................................................................................................................................ 127
10.2 Mensajes salientes ....................................................................................................................... 127
10.3 Activar / Desactivar contestador ................................................................................................. 128
10.4 Configurar número de tonos (retraso de la respuesta)................................................................. 128
10.5 Programación del código VIP ..................................................................................................... 129
10.6 Funcionamiento ........................................................................................................................... 129
10.7 Filtración de llamadas.................................................................................................................. 129
10.8 Grabar un memo .......................................................................................................................... 129
10.9 Reproducción de los mensajes entrantes y memos...................................................................... 130
10.10 Eliminar mensajes ....................................................................................................................... 130
10.11 Memoria llena.............................................................................................................................. 130
10.12 Accionamiento remoto ................................................................................................................ 130
10.13 Activar el contestador remotamente............................................................................................ 132
11 Resolución de problemas................................................................................................... 132
12 Datos técnicos Características técnicas............................................................................133
13 Garantía..............................................................................................................................133
13.1 Periodo de garantía ...................................................................................................................... 133
13.2 Tratamiento de la garantía ........................................................................................................... 133
13.3 Limitaciones de la garantía.......................................................................................................... 134
VIII
Page 12

14 Eliminación del dispositivo (medio ambiente) ................................................................134
15 Limpieza .............................................................................................................................134
16 Modo ECO (radiación baja) .............................................................................................134
ǼȜȜȘȞȚțȐ .......................................................... 135
1 ȅįȘȖȓİȢ ĮıijĮȜİȓĮȢ ............................................................................................................135
2 ȄİțȚȞȫȞIJĮȢ .........................................................................................................................135
2.1 ȉȡȩʌȠȢ ȤȡȒıȘȢ IJȠȣ ȠįȘȖȠȪ ȤȡȒıȘȢ ............................................................................................ 135
2.2 ǼȖțĮIJȐıIJĮıȘ IJȘȢ ȕȐıȘȢ.............................................................................................................. 135
2.3 ǼȖțĮIJȐıIJĮıȘ IJȠȣ ĮțȠȣıIJȚțȠȪ .................................................................................................... 136
2.4 ȆȜȒțIJȡĮ/ĭȦIJİȚȞȒ ȑȞįİȚȟȘ........................................................................................................... 137
2.5 ȈȪµȕȠȜĮ....................................................................................................................................... 137
2.6 ȆȜȒțIJȡĮ ȠșȩȞȘȢ .......................................................................................................................... 138
2.7 ǼȞįİȚțIJȚțȒ ȜȣȤȞȓĮ ȕȐıȘȢ............................................................................................................. 138
2.8 ȆİȡȚȒȖȘıȘ ıIJĮ µİȞȠȪ.................................................................................................................. 138
2.9 ǼʌȚıțȩʌȘıȘ IJȦȞ µİȞȠȪ ............................................................................................................... 138
3 ȋȡȒıȘ IJȠȣ IJȘȜİijȫȞȠȣ.......................................................................................................139
3.1 ǼȞİȡȖȠʌȠȓȘıȘ/ǹʌİȞİȡȖȠʌȠȓȘıȘ ĮțȠȣıIJȚțȠȪ.............................................................................. 139
3.2 ǹȜȜĮȖȒ IJȘȢ ȖȜȫııĮȢ µİȞȠȪ ........................................................................................................ 139
3.3 ȆȡĮȖµĮIJȠʌȠȓȘıȘ țĮȞȠȞȚțȒȢ IJȘȜİijȦȞȚțȒȢ țȜȒıȘȢ..................................................................... 140
3.4 ȁȒȥȘ IJȘȜİijȦȞȚțȒȢ țȜȒıȘȢ......................................................................................................... 141
3.5 ȁİȚIJȠȣȡȖȓĮ ĮȞȠȚȤIJȒȢ ıȣȞȠµȚȜȓĮȢ ................................................................................................. 141
3.6 ȇȪșµȚıȘ ȑȞIJĮıȘȢ ĮțȠȣıIJȚțȠȪ/ĮȞȠȚȤIJȒȢ ıȣȞȠµȚȜȓĮȢ.................................................................... 141
3.7 ȁİȚIJȠȣȡȖȓĮ ݵʌȚıIJİȣIJȚțȩIJȘIJĮȢ (ȁİȚIJȠȣȡȖȓĮ ıȓȖĮıȘȢ) ................................................................ 141
3.8 ǼȞIJȠʌȚıµȩȢ ĮțȠȣıIJȚțȠȪ (ȁİȚIJȠȣȡȖȓĮ ĮȞĮȗȒIJȘıȘȢ) .................................................................... 141
3.9 ȀȜİȓįȦµĮ ʌȜȘțIJȡȠȜȠȖȓȠȣ ........................................................................................................... 142
3.10 ȋȡȒıȘ IJȠȣ ĮȜijĮȡȚșµȘIJȚțȠȪ ʌȜȘțIJȡȠȜȠȖȓȠȣ .............................................................................. 142
4 ǼȣȡİIJȒȡȚȠ ........................................................................................................................... 142
4.1 īȚĮ ȞĮ ʌȡȠıșȑıİIJİ µȚĮ țĮIJĮȤȫȡȚıȘ ............................................................................................ 142
4.2 īȚĮ ȞĮ țĮȜȑıİIJİ µȚĮ țĮIJĮȤȫȡȚıȘ................................................................................................ 143
4.3 ǼµijȐȞȚıȘ ȜİʌIJȠµİȡİȚȫȞ.............................................................................................................. 143
4.4 ǻȚĮȖȡĮijȒ µȚĮȢ țĮIJĮȤȫȡȚıȘȢ Ȓ ȩȜȦȞ IJȦȞ țĮIJĮȤȦȡȓıİȦȞ ........................................................... 143
4.5 ǼʌİȟİȡȖĮıȓĮ ȠȞȩµĮIJȠȢ țĮȚ ĮȡȚșµȠȪ............................................................................................ 143
4.6 ǹȞIJȚȖȡĮijȒ țĮIJĮȤȫȡȚıȘȢ İȣȡİIJȘȡȓȠȣ ıİ ȐȜȜȠ ĮțȠȣıIJȚțȩ .......................................................... 144
4.7 ǹȞIJȚȖȡĮijȒ ȩȜȦȞ IJȦȞ țĮIJĮȤȦȡȓıİȦȞ İȣȡİIJȘȡȓȠȣ ıİ ȐȜȜȠ ĮțȠȣıIJȚțȩ........................................ 144
5 ǹȞĮȖȞȫȡȚıȘ țĮȜȠȪȞIJȠȢ .....................................................................................................145
5.1 ȀĮȞȠȞȚțȑȢ İȚıİȡȤȩµİȞİȢ țȜȒıİȚȢ PSTN...................................................................................... 145
6 ǻȚĮµȩȡijȦıȘ IJȠȣ ĮțȠȣıIJȚțȠȪ ...........................................................................................146
6.1 dzȤȠȢ țĮȚ ȑȞIJĮıȘ țȠȣįȠȣȞȓıµĮIJȠȢ............................................................................................... 146
6.2 ǵȞȠµĮ ĮțȠȣıIJȚțȠȪ ...................................................................................................................... 146
6.3 dzȤȠȢ ʌȜȘțIJȡȠȜȠȖȓȠȣ ................................................................................................................... 146
6.4 ȇȪșµȚıȘ IJȘȢ ĮȞIJȓșİıȘȢ ................................................................................................................ 147
6.5 ǹȣIJȩµĮIJȘ ĮʌȐȞIJȘıȘ.................................................................................................................... 147
6.6 ȇȪșµȚıȘ IJȘȢ ȫȡĮȢ ȠʌȓıșȚȠȣ ijȦIJȚıµȠȪ........................................................................................ 147
6.7 ȆȡȩșݵĮ țȦįȚțȠȪ........................................................................................................................ 147
6.8 ȋȡȒıȘ IJȘȢ ȜİȚIJȠȣȡȖȓĮȢ İȚįȠʌȠȓȘıȘȢ ........................................................................................... 148
6.9 ȇȪșµȚıȘ ȘµİȡȠµȘȞȓĮȢ țĮȚ ȫȡĮȢ .................................................................................................. 148
6.10 ȇȪșµȚıȘ IJȘȢ µȠȡijȒȢ ȫȡĮȢ........................................................................................................... 148
7 ȇȣșµȓıİȚȢ ȕȐıȘȢ .................................................................................................................148
7.1 dzȤȠȢ ............................................................................................................................................ 148
IX
Page 13

7.2 DzȞIJĮıȘ țȠȣįȠȣȞȓıµĮIJȠȢ ............................................................................................................. 149
7.3 ȁİȚIJȠȣȡȖȓĮ țȜȒıȘȢ ...................................................................................................................... 149
7.4 ǼʌĮȞȐțȜȘıȘ (Flash) .................................................................................................................... 149
7.5 ȀȦįȚțȩȢ ıȣıIJȒµĮIJȠȢ................................................................................................................... 150
8 ǼȡȖĮȜİȓĮ .............................................................................................................................150
8.1 ȈȣȞȐȞIJȘıȘ ................................................................................................................................... 150
8.2 ȋȡȠȞȩµİIJȡȠ ................................................................................................................................. 150
9 ȆȡȩıșİIJĮ ĮțȠȣıIJȚțȐ țĮȚ ıIJĮșµȠȓ ȕȐıȘȢ ........................................................................151
9.1 ȆȡȠıșȒțȘ ȞȑȠȣ ĮțȠȣıIJȚțȠȪ........................................................................................................ 151
9.2 ȀĮIJȐȡȖȘıȘ ĮțȠȣıIJȚțȠȪ .............................................................................................................. 151
9.3 ǼʌȚȜȠȖȒ ȕȐıȘȢ............................................................................................................................. 152
9.4 ȋȡȒıȘ IJȘȢ ȜİȚIJȠȣȡȖȓĮȢ İȞįȠİʌȚțȠȚȞȦȞȓĮȢ................................................................................... 152
10 ǹȣIJȩµĮIJȠȢ IJȘȜİijȦȞȘIJȒȢ ..................................................................................................153
10.1 ȅșȩȞȘ .......................................................................................................................................... 154
10.2 ǼȟİȡȤȩµİȞĮ µȘȞȪµĮIJĮ................................................................................................................. 154
10.3 ǼȞİȡȖȠʌȠȓȘıȘ/ǹʌİȞİȡȖȠʌȠȓȘıȘ IJȘȜİijȦȞȘIJȒ............................................................................. 155
10.4 ȀĮșȠȡȚıµȩȢ ĮȡȚșµȠȪ țȠȣįȠȣȞȚıµȐIJȦȞ (ȀĮșȣıIJȑȡȘıȘ ĮʌȐȞIJȘıȘȢ).......................................... 155
10.5 ȆȡȠȖȡĮµµĮIJȚıµȩȢ IJȠȣ țȦįȚțȠȪ VIP........................................................................................... 156
10.6 ȋİȚȡȚıµȩȢ .................................................................................................................................... 156
10.7 ȆȡȠȕȠȜȒ țȜȒıİȦȞ....................................................................................................................... 156
10.8 ǼȖȖȡĮijȒ ıȘµİȚȫµĮIJȠȢ ................................................................................................................ 156
10.9 ǹȞĮʌĮȡĮȖȦȖȒ İȚıİȡȤȩµİȞȦȞ µȘȞȣµȐIJȦȞ țĮȚ ıȘµİȚȦµȐIJȦȞ...................................................... 157
10.10 ǻȚĮȖȡĮijȒ µȘȞȣµȐIJȦȞ.................................................................................................................. 157
10.11 ȆȜȒȡȘȢ µȞȒµȘ ............................................................................................................................. 1
10.12 ǹʌȠµĮțȡȣıµȑȞȘ ȜİȚIJȠȣȡȖȓĮ........................................................................................................ 158
10.13 ǼȞİȡȖȠʌȠȓȘıȘ IJȘȜİijȦȞȘIJȒ İȟ ĮʌȠıIJȐıİȦȢ................................................................................ 159
57
11 ǼʌȓȜȣıȘ ʌȡȠȕȜȘµȐIJȦȞ ......................................................................................................159
12 ȉİȤȞȚțȐ įİįȠµȑȞĮ ȉİȤȞȚțȐ ȤĮȡĮțIJȘȡȚıIJȚțȐ ...................................................................160
13 ǼȖȖȪȘıȘ ..............................................................................................................................160
13.1 ȆİȡȓȠįȠȢ İȖȖȪȘıȘȢ...................................................................................................................... 160
13.2 ȋȡȒıȘ IJȘȢ İȖȖȪȘıȘȢ ................................................................................................................... 160
13.3 ǼȟĮȚȡȑıİȚȢ.................................................................................................................................... 160
14 ǹʌȩȡȡȚȥȘ IJȘȢ ıȣıțİȣȒȢ (ʌİȡȚȕȐȜȜȠȞ).............................................................................161
15 ȀĮșĮȡȚıµȩȢ ........................................................................................................................161
16 ȁİȚIJȠȣȡȖȓĮ ECO (ȤĮµȘȜȒȢ ĮțIJȚȞȠȕȠȜȓĮȢ)....................................................................... 161
X
Page 14

Safety instructions
English
1 Safety instructions
• Only use the charger plug supplied. Do not use other chargers as this may damage the battery
cells.
• Only insert rechargeable batteries of the same type. Never use ordinary, non-rechargeable
batteries. Insert rechargeable batteries so they connect to the right poles (indicated in the
battery compartment of the handset).
• Do not touch the charger and plug contacts with sharp or metal objects.
• The operations of some medical devices may be affected.
• The handset may cause an unpleasant buzzing sound in hearing aids.
• Do not place the basic unit in a damp room or at a distance of less then 1.5m away from a water
source. Keep water away from the handset.
• Do not use the telephone in environments where there is a risk of explosions.
• Dispose of the batteries and maintain the telephone in an environment-friendly manner.
• As this telephone cannot be used in case of a power cut, you should use a mains-independent
telephone for emergency calls, e.g. a mobile phone.
2 Getting started
2.1 How to use this user guide
In this user guide, following method is used to clearify the instructions:
Text.......”display”.
Text that appears on the display of the phone
Key to press. This key can be a soft key (See ”2.4 Keys/Led”). When the soft key is a symbol, it
is shown in the left column. When the soft key is text, the left or right soft key is shown in the left
column and the text is shown in the right column between quotation marks.
2.2 Installing the base
For installation, do the following:
1 Plug one end of the adaptor into the outlet and the other end into the adaptor jack on the back
of the base.
2 Connect one end of the telephone cord with the wall phone jack and the other end to the bottom
of the base.
3 Put the telephone- and AC power line cord in the base guides as shown on picture 2A.
1
Page 15

Getting started
2.3 Installing the handset
1 Open the battery compartment as shown on picture 2B.
C
B
- 2A Back view of base A. Telephone wall outlet
B. Power cable
C. Telephone cord
A
English
2 Insert the batteries respecting the polarity (+ and -).
3 Close the battery compartment.
4 Leave the handset on the base unit for 20 hours. The Line/Charge indicator
on the base will light up.
A
Butler 5750
+
-
+
B
- 2B Back view of handset A. Cover
B. Rechargeable batteries
Before you use the telephone for the first time, you must first make sure the battery
is charged for 20 hours. If you do not do this, the telephone will not work optimally.
2
Page 16
Getting started
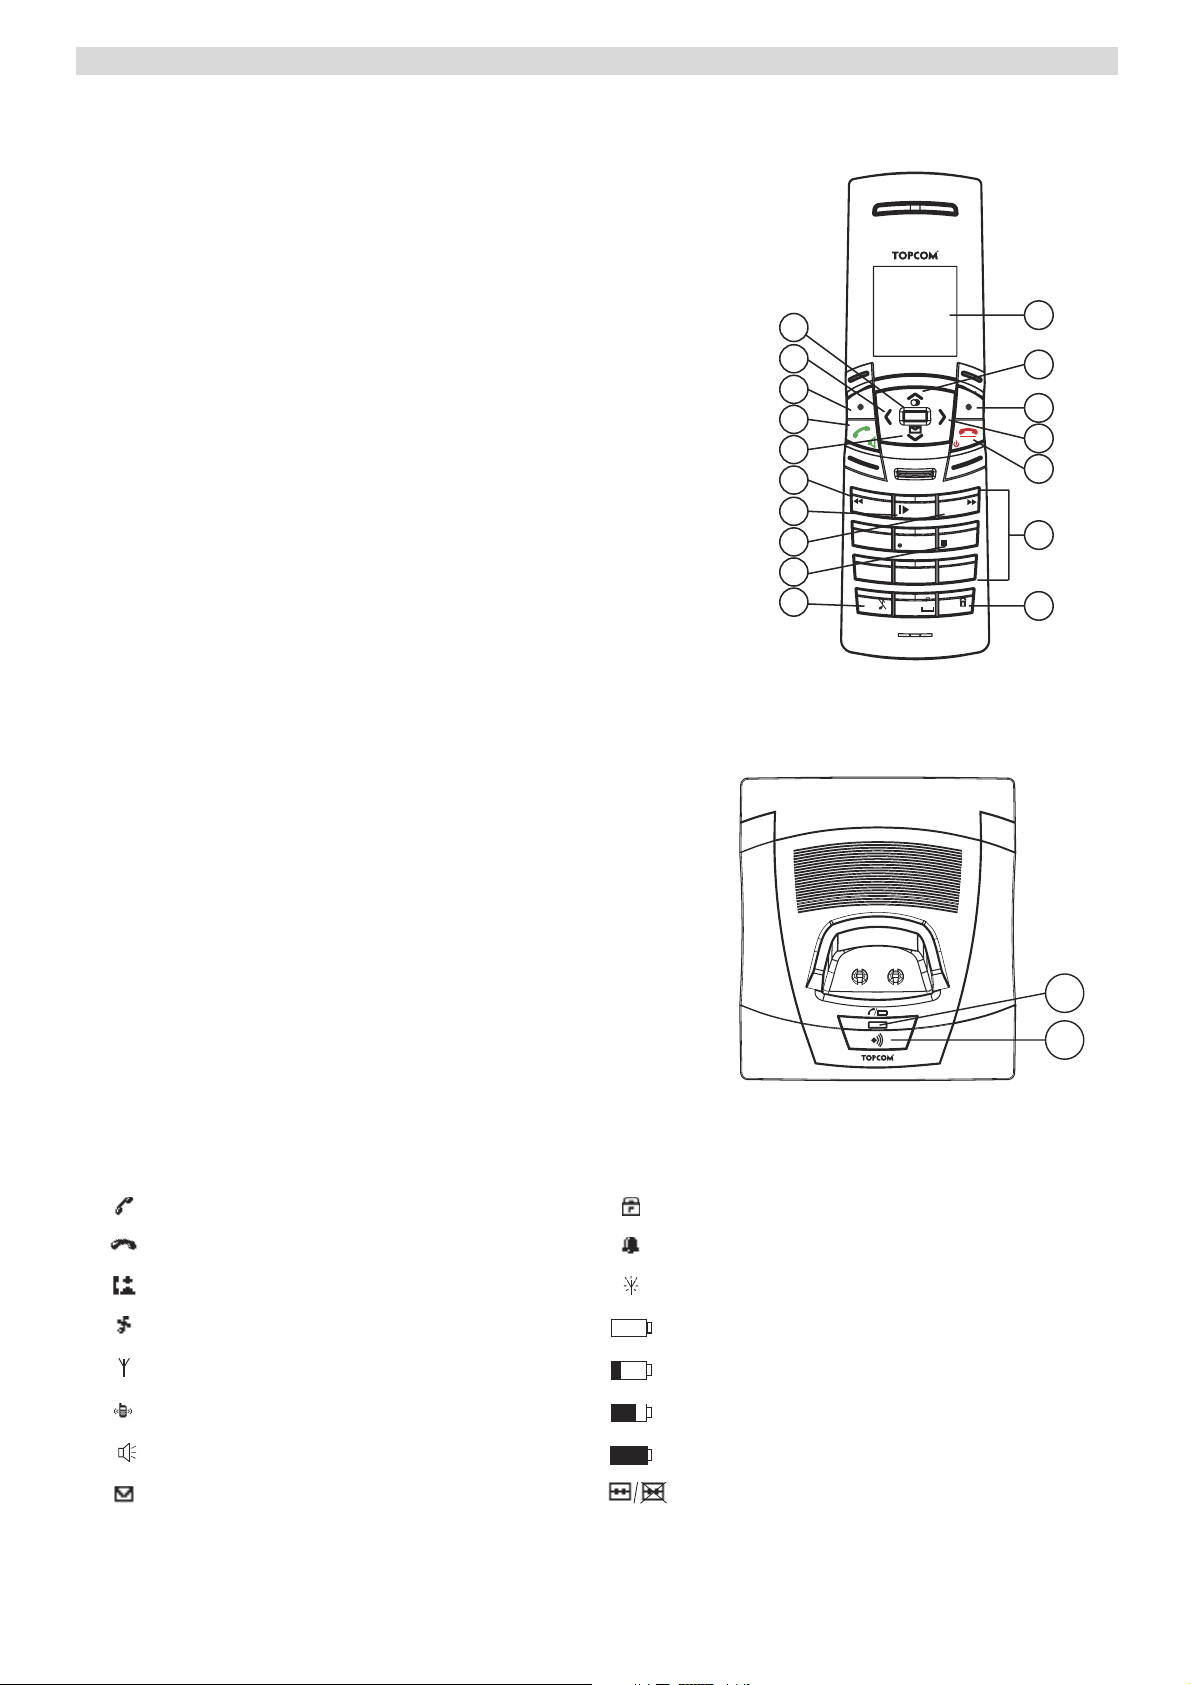
2.4 Keys/Led
Handset
1. Display
2. Up/Redial key
3. Right soft menu key
4. Right/Flash key
5. On-hook / OFF key
6. Alphanumeric keys
7. Keypad lock
8. Ringer Off-key
9. Stop Key
10. Skip forward key
11. Play/Pause key
12. Skip backwards
13. Down/call log key
14. Off-hook key/ Handsfree/ On-key
15. Left soft menu key
16. Left/INT key
17. OK key
17
16
15
14
13
12
11
10
1
2
INT
OK
R
DEF
1
GHI
4
9
8
PQRS
7
*
3
ABC
2
MNO
6
JKL
5
WXYZ
9
TUV
8
#
0
3
4
5
6
7
- 2C Handset -
Base
18. In use/Power/Handset on base LED
19. Paging key
Butler 5750
- 2D Base -
2.5 Symbols
Off hook Keypad lock
On hook Alarm set
Missed calls in call list* Handset not registered or out of range
Handset ringer volume OFF Battery empty
18
19
Handset within base range Battery low
Internall Call Battery medium
Handsfree Battery full
New voice mail Answering machine On/Off
* If the Caller line identification service is available on the telephone line.
3
Page 17

Getting started
2.6 Display keys
Display-keys (softkeys) are located directly under the display. The function of these 2 keys
changes depending on the operation mode. The actual function is displayed as icon or text directly
above the 2 display keys.
Phonebook Mute
OK/Confirm Back
Menu No key
Delete Play messages
2.7 Base LED
The LED (14) indicates the following status:
• OFF: no base power connected or handset not in base for charging
• ON: handset charging
• Blinking slowly: Off hook or during ringing
• Blinking rapidly: during registration
English
2.8 Navigating the menu
The Butler 5750 has a menu system which is easy to use. Each menu leads to a list of options. The
menu map is shown on the following paragraph.
1 When the handset is switched on and in standby, press the left soft menu
key to open the main menu.
2 Scroll to the desired menu option.
3 Press the soft menu key to view further options or to confirm the setting
displayed.
To exit or to go back one level in the menu
To go to the previous level in the menu, press the soft menu key.
To cancel and return to standby at any time, press the on-hook key.
2.9 Menu overview
Menu Submenu items
Play Msgs
Delete Msgs
Ans Machine
Ans On/Off
Record Memo
Outgoing Msg
Ans Settings
Phonebook
4
Page 18
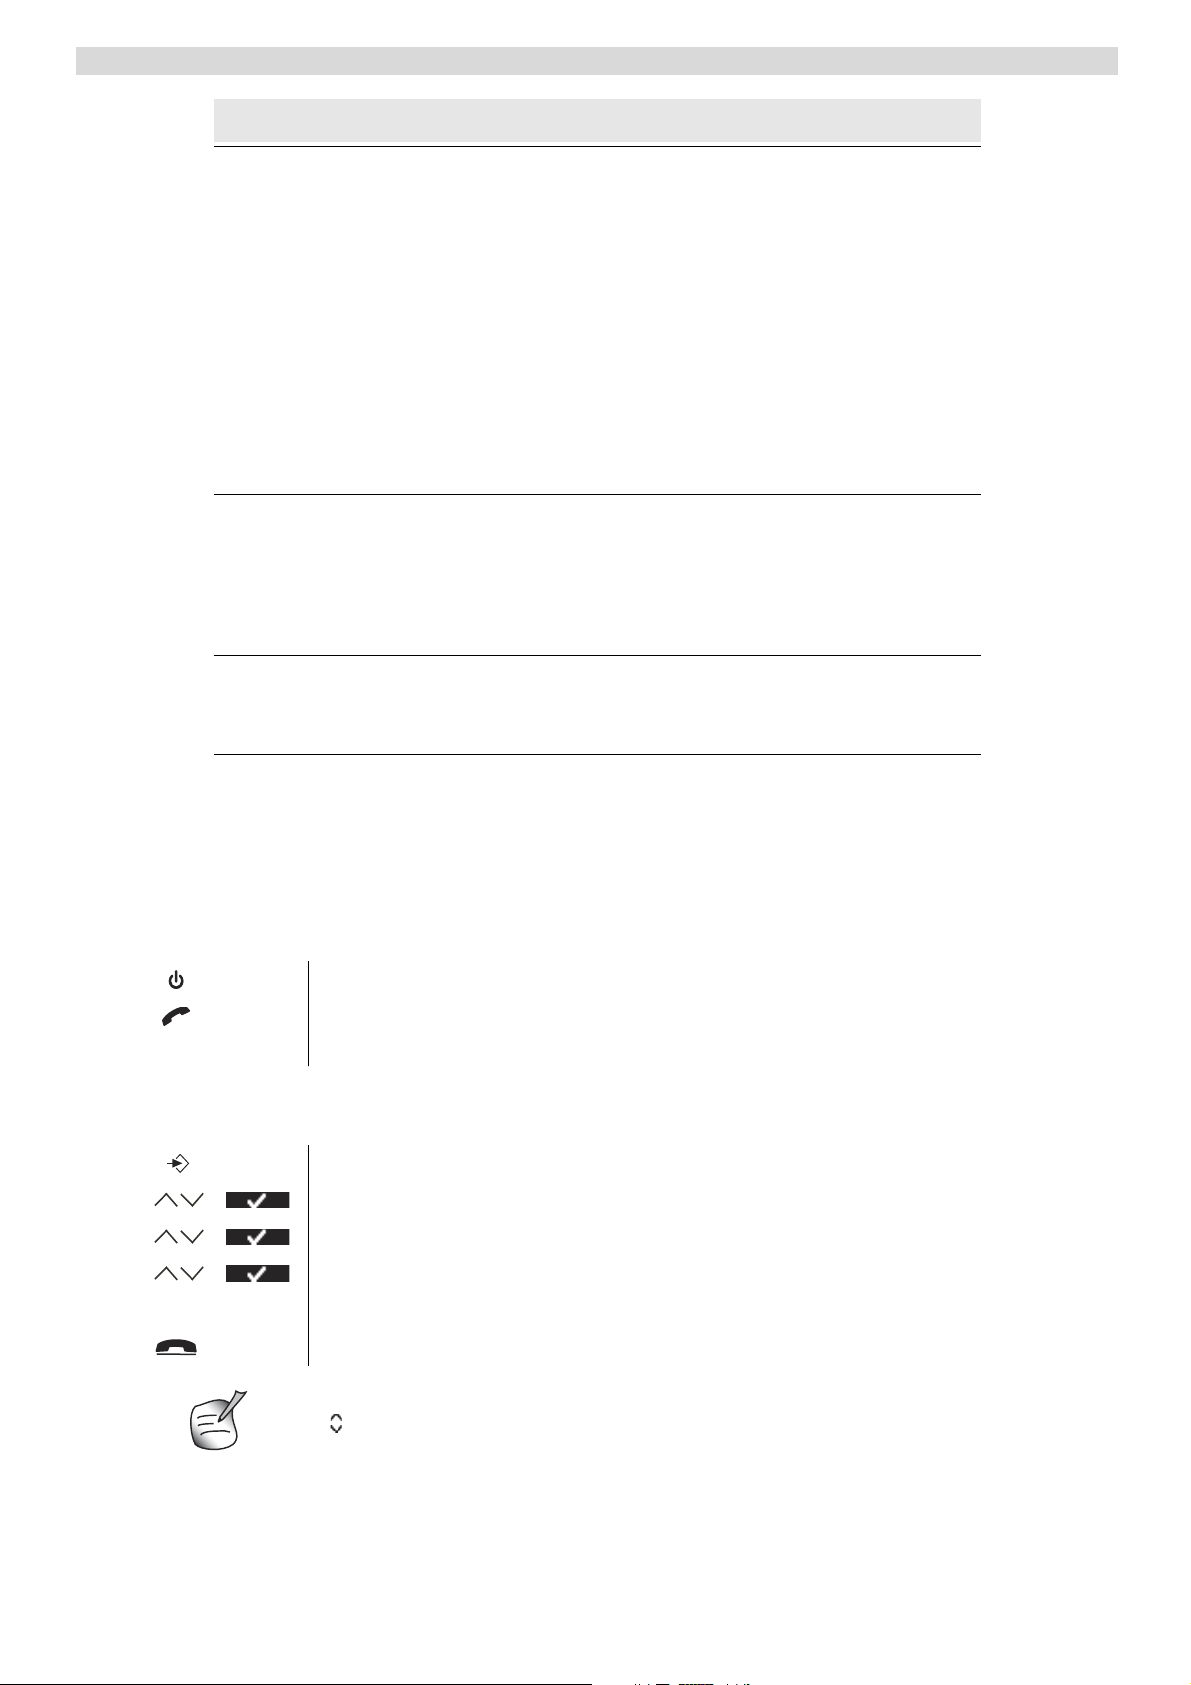
Using the telephone
Menu Submenu items
Handset
Base settings
Ringtone
Ringer Volume
Handset Name
Keypad Beep
Contrast
Auto Talk
Backlight Time
Prefix
Select Base
Language
Registration
Ringtone
Ringer volume
Dial mode
Recall
System PIN
Time
Tools
3 Using the telephone
3.1 Switching the handset ON/OFF
1 Press and hold the OFF key to switch the handset off.
2 Press the off-hook key or place the handset in the base to switch the
handset back on.
3.2 Changing the menu language
1 Enter the menu.
2 Select “Handset” and confirm.
3 Select “Language” and confirm.
Set Alarm
Date and Time
Set Time Format
Appointment
Stop watch
4 Select a language and confirm.
The screen displays “Saved”.
5 Press the on-hook key to return to standby.
The arrows indicate that further options are available in the menu.
5
Page 19

Using the telephone
3.3 Making a normal telephone call
Direct dialling
1 Press the off-hook key to start the call.
456
g h i j k l m n o
Pre-dialling
With the pre-dialling feature, you can enter and modify a number before making the call.
2 Dial the telephone number.
3 Press the on-hook key to hang up or put the handset back on the base.
English
456
g h i j k l m n o
1 Dial a number of up to 24 digits.
Press and hold the 0 key to insert a pause. The screen displays a “P”.
2 Press the soft menu key to correct.
3 Press the off-hook key to start the call.
4 Press the on-hook key to hang up or put the handset back on the base.
Redial a number from the list
You can redial up to 10 of the last numbers called. If you have stored a name in the phonebook to
go with the number, the name will be displayed instead.
1 Press the redial key.
2 Select a number. If the number is in the phonebook, the name will be
shown.
3 Press the off-hook key to start the call or select “Option”.
4 If you selected “Option”, scroll and select:
“Delete Call”: to remove the number from the call list;
“Save Number”: to store the number into the phonebook;
“Delete All”: to erase the call list.
5 Confirm selection.
6 Press the on-hook key to return to standby.
3.4 Receiving a telephone call
When you receive an external call, the screen displays “External Call”.
To take the call:
1 Press the off-hook key.
OR
Lift the handset off its base if you have activated “Auto Talk”
(See ”6.5 Autotalk”)
The call in progress icon appears on the screen. The call duration is
displayed after 15 seconds.
2 Press the on-hook key to hang up or put the handset back on the base.
You can turn the ring volume off during incoming call by selecting “Quiet”.
6
Page 20

Using the telephone
3.5 Handsfree mode
Handsfree lets you talk to your caller without holding the handset. It also enables other people in
the room to listen to both sides of your conversation.
1 To switch any call to handsfree, press the handsfree key during the call.
3.6 Adjust earpiece/handsfree volume
1 Press up or down to select volume 1-5 during a normal or handsfree call.
3.7 Secrecy function (Mute function)
To turn off the microphone so the person on the other side of the line will not hear you.
1 During a conversation, press the soft menu key to deactivate the
microphone.
“Mute On” appears on the display.
2 Select “Off” to activate the microphone again.
3.8 Locating a handset (Paging function)
1 Press the paging key on the base.
All handsets registered with the base will ring for 30 seconds.
456
g h i j k l m n o
2 Press any key on the handset to stop the paging.
3.9 Keypad Lock
To lock the keypad to prevent accidental dialling while carrying the handset around.
In standby:
1 Press and hold the keypad locked key (key 7 - Picture 2C) until “Locked”
and the keypad locked icon appears on the display.
2 To unlock, select “Unlock”, followed by the keypad locked key.
3.10 Using the alphanumerical keypad
With your telephone, you can also enter alphanumeric characters. This is useful for entering a
name into the phonebook, giving a name to the handset, ...
To select a letter, press the corresponding key as many times as necessary.
For example, to select an ‘A’, press ‘2’ once. To select a ‘B’, press ‘2’ twice and so on.
To select ‘A’ and then ‘B’ consecutively, press ‘2’ once, wait until the cursor moves on to the next
character, then press ‘2’ twice.
During entering text, the available character under each key appears below on the display.
7
Page 21
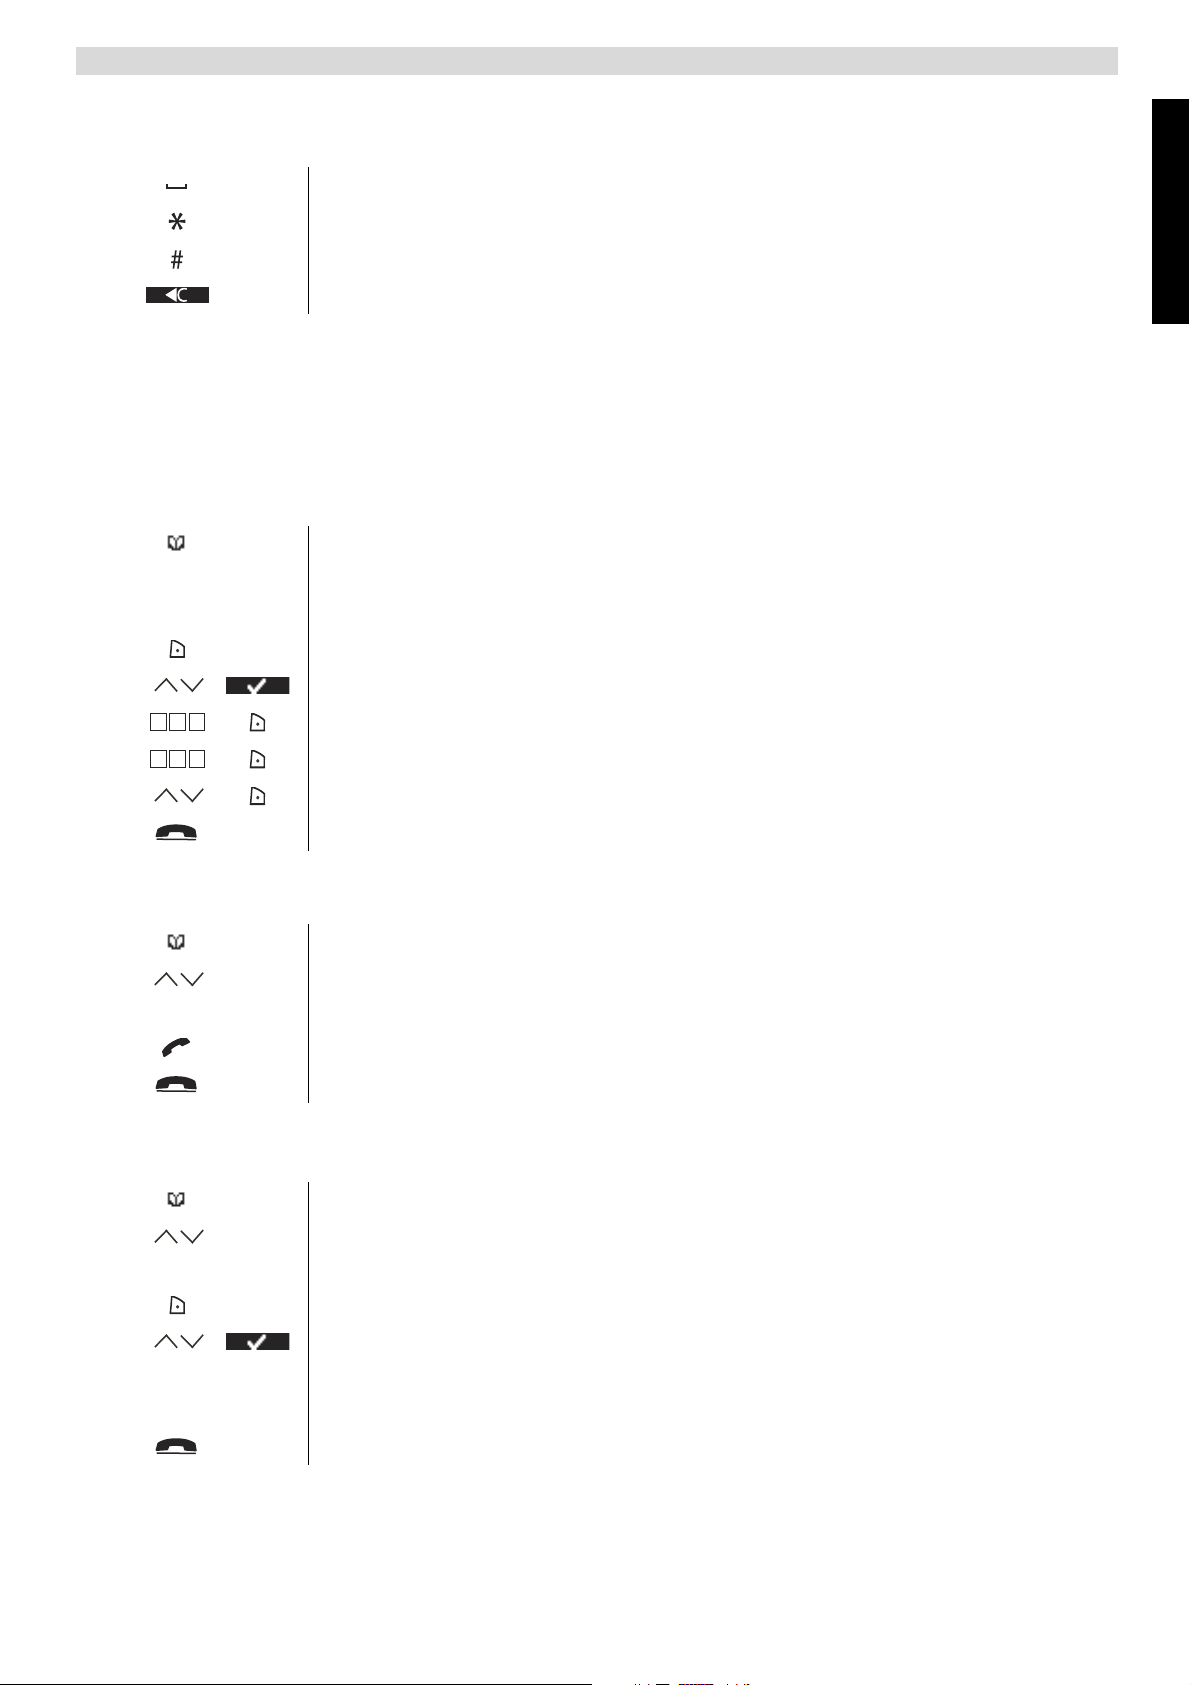
You can change the input character set from English (abc) to Latin (aàá), Greek (ǹǺī) or Russian
(ȺȻȼ) by pressing and holding the #-key for 2 seconds.
Press ‘0’ to select a space.
Press the *-key to switch between small letters and capitals.
Press and hold the #-key for 2 seconds to change the input character set.
Press the soft menu key to correct.
4 Phonebook
Each handset can store up to 200 names and numbers. Names can be up to 16 characters long and
numbers up to 24 digits.
4.1 To add an entry
1 Press the soft menu key.
If the phonebook is empty, “Phonebook Empty” appears on the display. If
names have been stored, they are listed.
Phonebook
English
2 Select “Option”.
3 Select “New Entry” and confirm.
456
g h i j k l m n o
456
g h i j k l m n o
4 Use the keypad to enter the name, then select “Save”.
5 Use the keypad to enter the number, then select “Save”.
6 Select the desired ring melody and select “Save”.
7 Return to standby.
4.2 To dial an entry
1 Press the soft menu key.
2 Select the desired name or use the keypad to enter the first letter of the
name.
3 Press the off-hook key to start the call.
4 Return to standby.
4.3 Show Details
1 Press the soft menu key.
2 Select the desired name or use the keypad to enter the first letter of the
name.
3 Select “Option”.
4 Select “Show Details” and confirm.
The name, number and ring melody you have assigned to the entry appear on
the display.
5 Return to standby.
8
Page 22
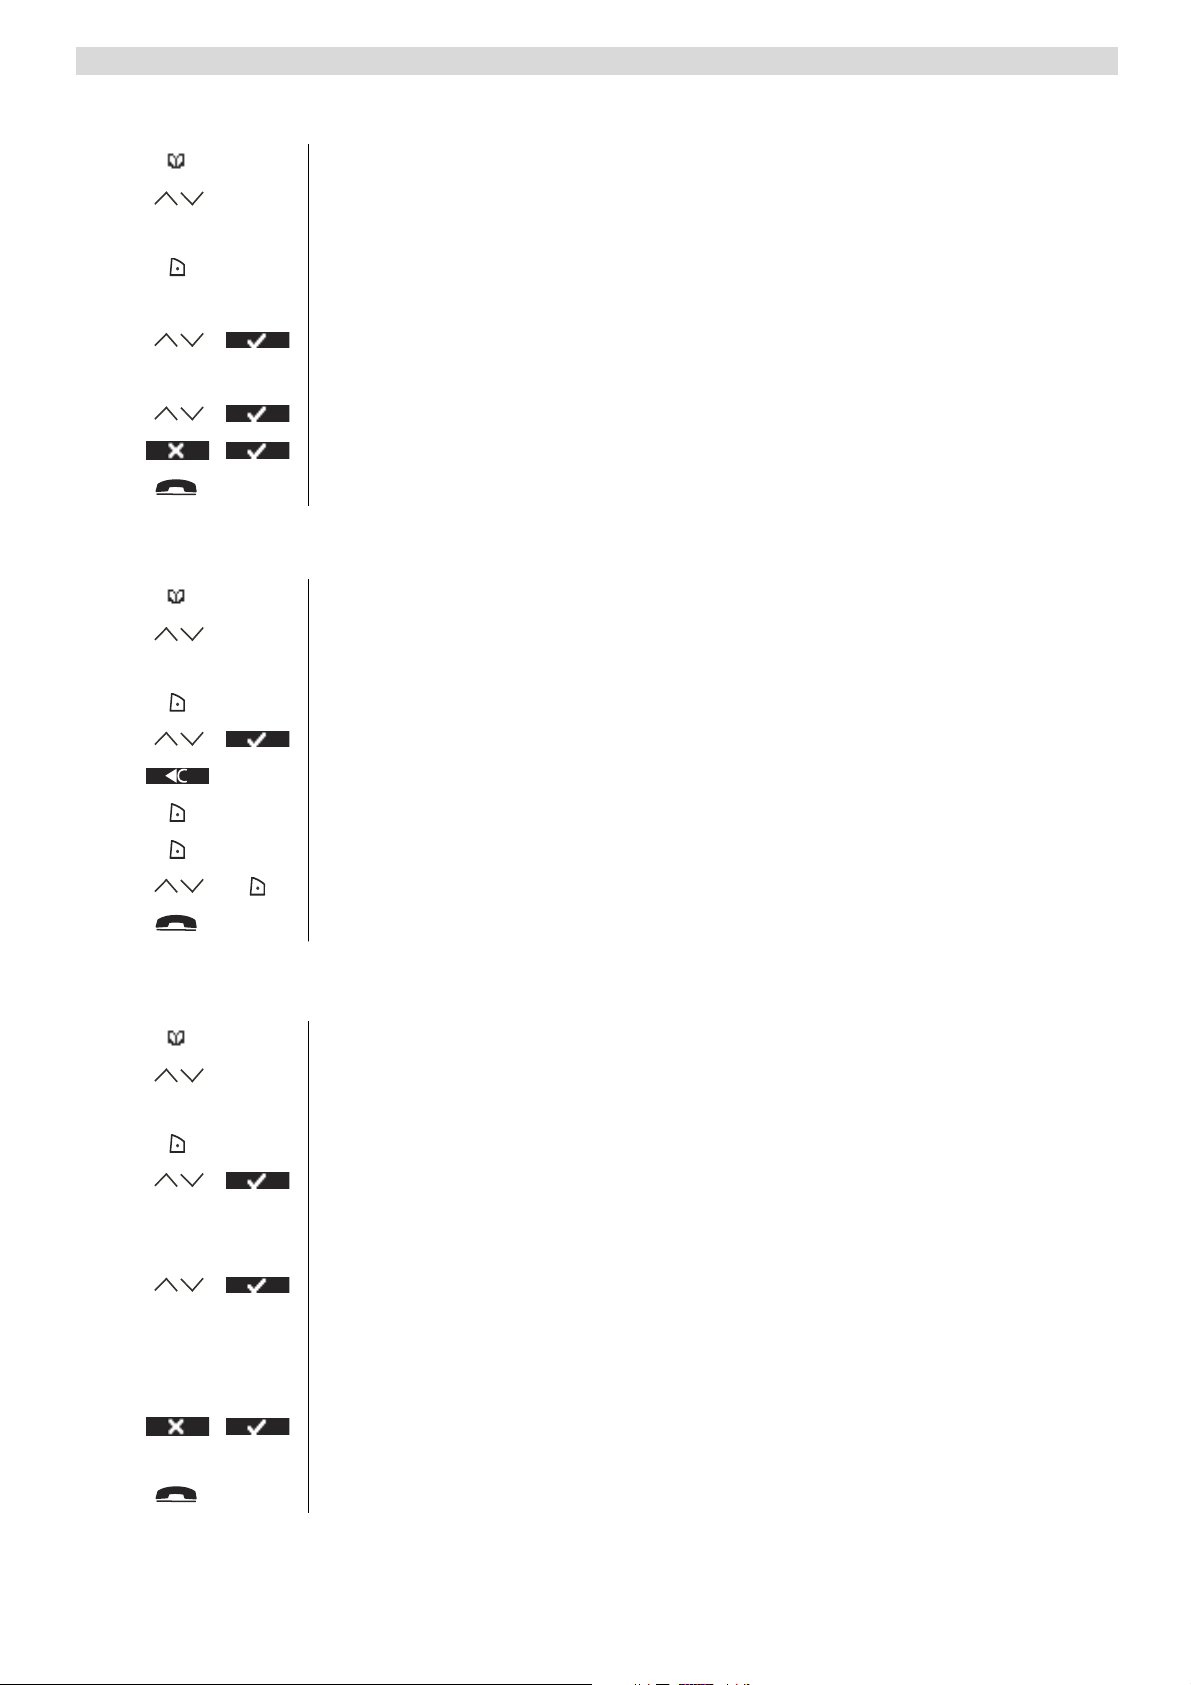
Phonebook
4.4 Delete an entry or all entries
1 Press the soft menu key.
2 Select the desired name or use the keypad to enter the first letter of the
name.
3 Select “Option”.
To delete one entry:
4 Select “Delete Entry” and confirm.
To delete all entries:
4 Select “Delete All” and confirm.
5 Press the left menu key to cancel or the right menu key to confirm.
6 Return to standby.
4.5 Edit name and number
1 Press the soft menu key.
2 Select the desired name or use the keypad to enter the first letter of the
name.
3 Select “Option”.
4 Select “Edit Entry” and confirm.
5 Press the soft menu key to delete and use the keypad to change the name.
6 Select “Save”.
7 Edit the number and select “Save”.
8 Select the desired ring melody and select “Save”.
9 Return to standby.
4.6 Copy a phonebook entry to another handset
1 Press the soft menu key.
2 Select the desired name or use the keypad to enter the first letter of the
name.
3 Select “Option”.
4 Select “Copy Entry” and confirm.
The available handsets (all the handsets that are registered on the base) are
shown.
5 Select the desired handset and confirm.
“Copying to handset x” appears on the display.
“Receive phonebook record?” appears on the display of the destination
handset.
6 On the destination handset, press the right menu key to confirm or the left
menu key to cancel the transfer.
7 Return to standby.
9
Page 23

4.7 Copy all phonebook entries to another handset
By copying all entries from one handset to another, you will erase all existing
records at the destination handset.
Caller Identification
1 Press the soft menu key.
2 Select the desired name or use the keypad to enter the first letter of the
name.
3 Select “Option”.
4 Select “Copy All” and confirm.
The available handsets (all the handsets that are registered on the base) are
shown.
5 Select the desired handset and confirm.
“Copying to handset x” appears on the display.
“Replace all phonebook records?” appears on the display of the destination
handset.
6 On the destination handset, press the right menu key to confirm or the left
menu key to cancel the transfer.
7 Return to standby.
5 Caller Identification
5.1 Normal incoming PSTN calls
English
This service only works when you have a Caller ID/Clip subscription. Please contact your telephone company.
When you receive a call from your fixed telephone line, the telephone number of the caller appears
on the handset display. The telephone can receive calls in both FSK and DTMF. You can also see
his or her name if it is transmitted by the network. If the name is programmed in the phonebook,
the name in the phonebook is displayed!
The telephone can store 30 calls in a Call List (received and missed) that can be reviewed later.
When the memory is full, the new calls automatically replace the oldest calls in the memory.
Missed calls are signalled by a blinking icon on the display. The handset
name is replaced by this icon and the amount of missed calls.
To read the received calls
1 Press the down button.
The Received calls list appears on the display. This is a combination of
received and missed calls.
2 Select the desired name or number.
3 Press the off-hook key to start the call.
OR
Select “Option”.
To delete one entry:
10
Page 24
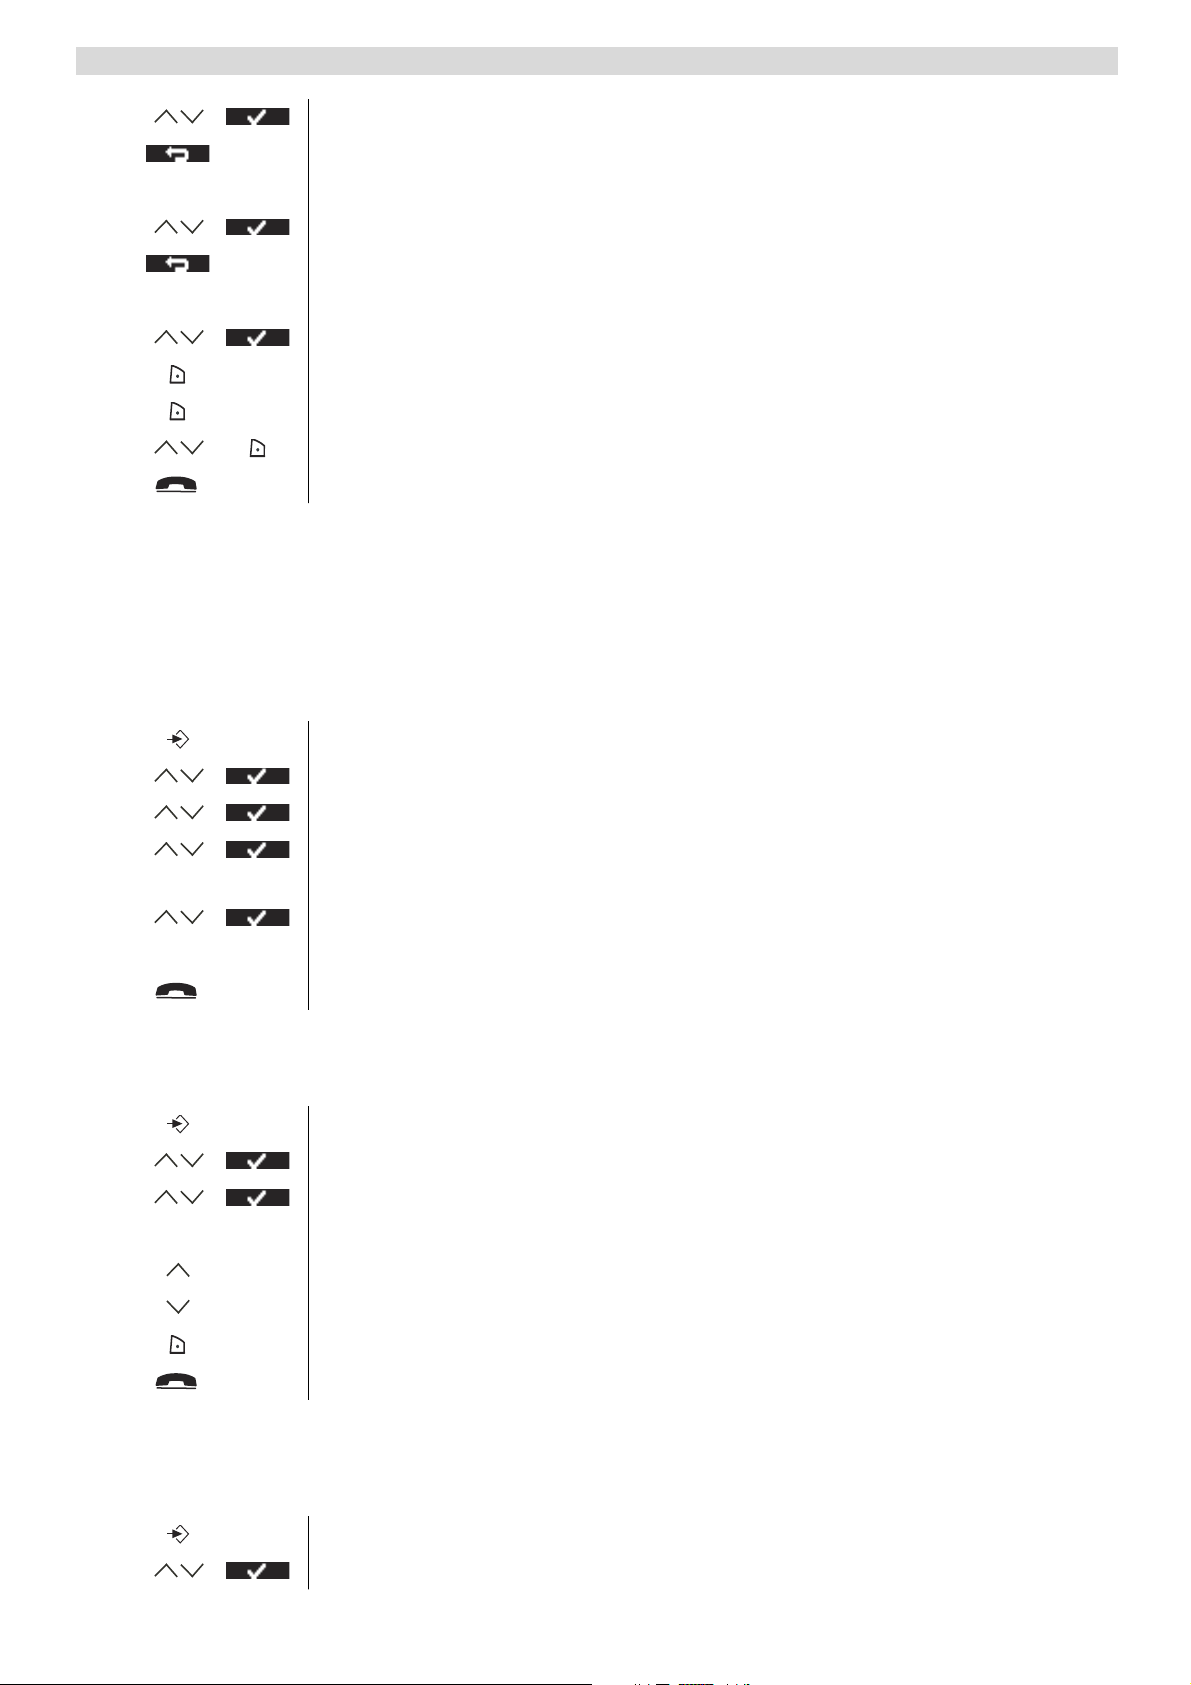
Personalise the handset
4 Select “Delete Call” and confirm.
5 Return to standby.
To delete all entries:
5 Select “Delete All” and confirm.
6 Return to standby.
To add the number to the phonebook:
5 Select “Save Number” and confirm.
6 Use the keypad to enter the name, then select “Save”.
7 Use the keypad to edit the number, then select “Save”.
8 Select the desired ring melody end select “Save”.
9 Return to standby.
6 Personalise the handset
6.1 Ringtone and volume
Ringtone
You can choose from 18 different ringer melodies for internal and external calls.
1 Enter the menu.
2 Select “Handset” and confirm.
3 Select “Ringtone” and confirm.
4 Select “External” for external calls or select “Internal for internal calls and
confirm.
5 Select the desired melody and confirm.
During scrolling the melody is played.
6 Return to standby.
Ringer volume
You can choose from 5 handset ringer volume levels and off.
1 Enter the menu.
2 Select “Handset” and confirm.
3 Select “Ringer volume” and confirm.
The current setting is displayed.
4 Press the up key to increase the volume.
5 Press the down key to decrease the volume.
6 Select “Save” to confirm.
7 Return to standby.
6.2 Handset name
You can change the name displayed on the handset during standby (max. 9 characters).
1 Enter the menu.
2 Select “Handset” and confirm.
11
Page 25
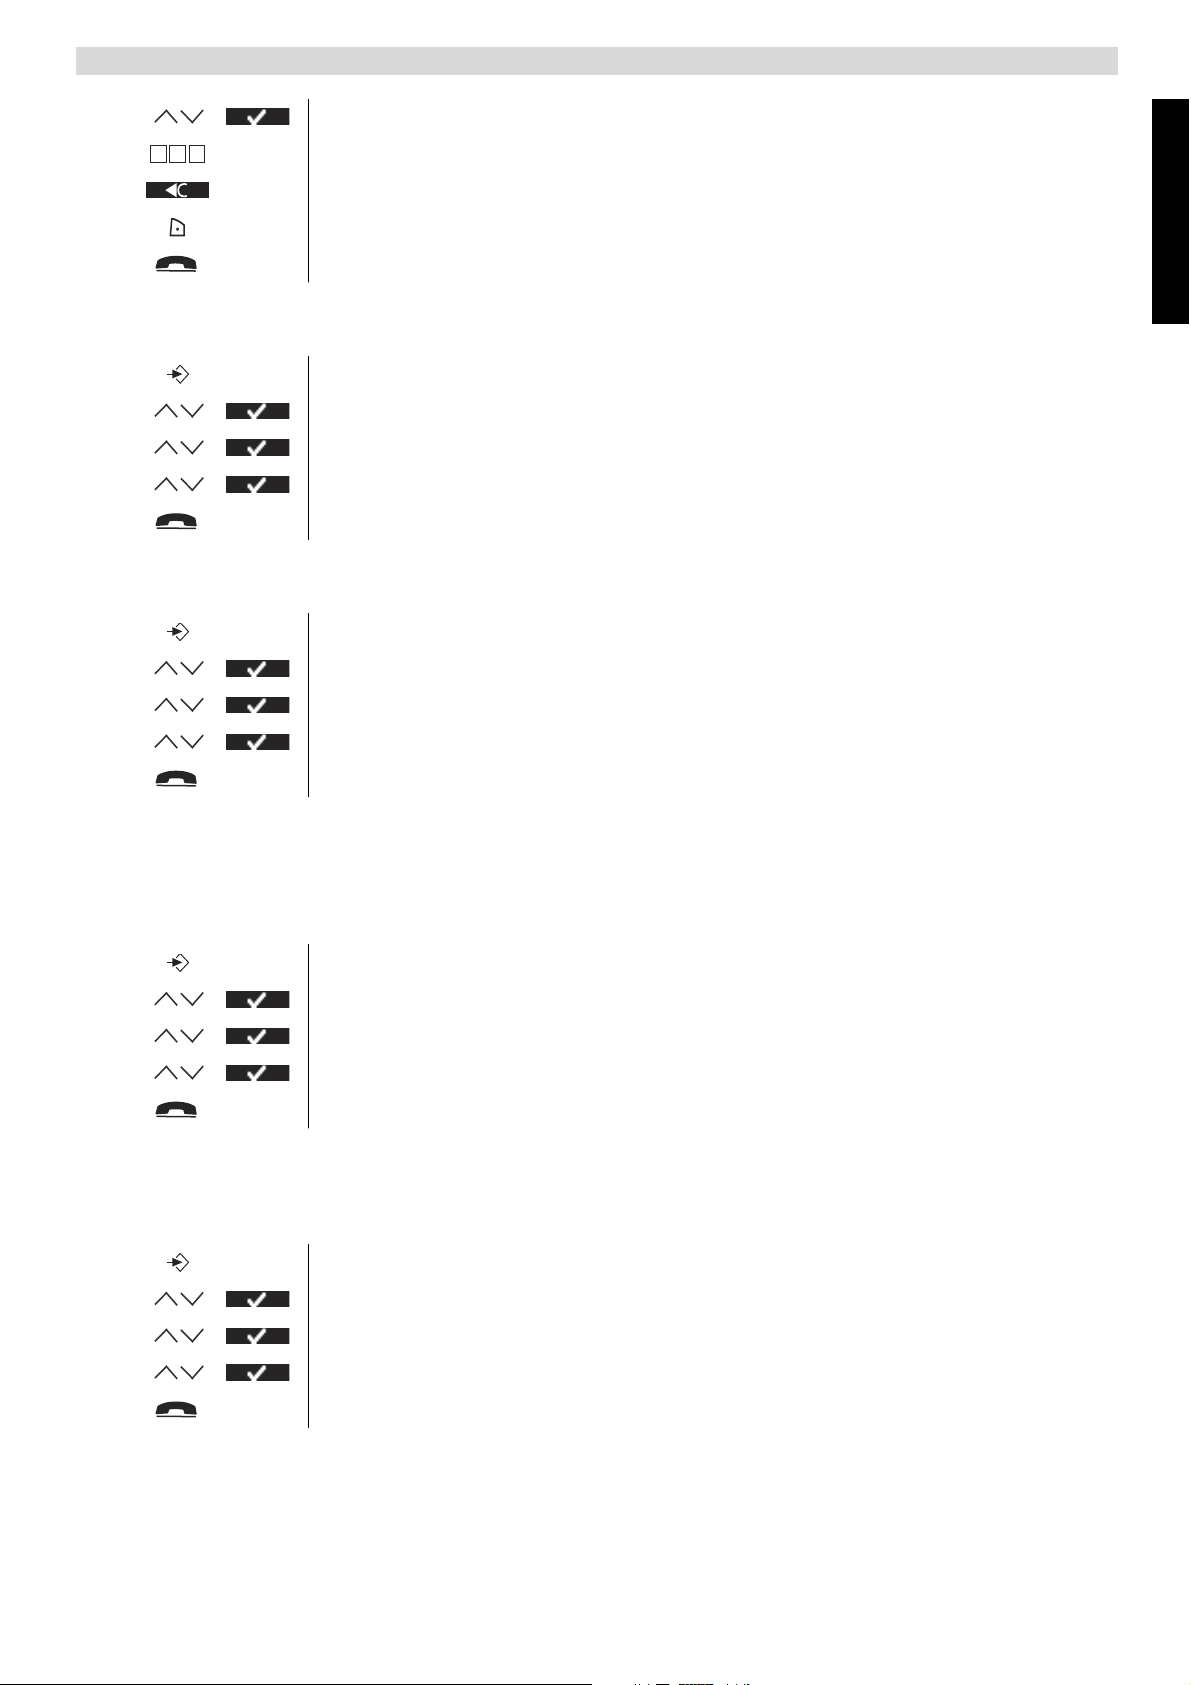
3 Select “Handset name” and confirm.
Personalise the handset
456
g h i j k l m n o
4 Enter the name you want.
5 Press the soft menu key to correct.
6 Select “Save” to confirm.
7 Return to standby.
6.3 Keypad beeps
1 Enter the menu.
2 Select “Handset” and confirm.
3 Select “Keypad beep” and confirm.
4 Select “On” or “Off” and confirm.
5 Return to standby.
6.4 Setting the contrast
1 Enter the menu.
2 Select “Handset” and confirm.
3 Select “Contrast” and confirm.
English
4 Select the contrast you want (1-8) and confirm.
5 Return to standby.
6.5 Autotalk
When there is an incoming call and the handset is on the base, the phone automatically takes the
line when lifted from the base. This function can be turned on or off.
1 Enter the menu.
2 Select “Handset” and confirm.
3 Select “Autotalk” and confirm.
4 Select “On” or “Off” and confirm.
5 Return to standby.
6.6 Setting the display backlight Time
You can adapt the number of seconds the display backlight stays on after the last action.
1 Enter the menu.
2 Select “Handset” and confirm.
3 Select “Backlight Time” and confirm.
4 Select “10”, “20”, “30” or “40” sec. and confirm.
5 Return to standby.
12
Page 26
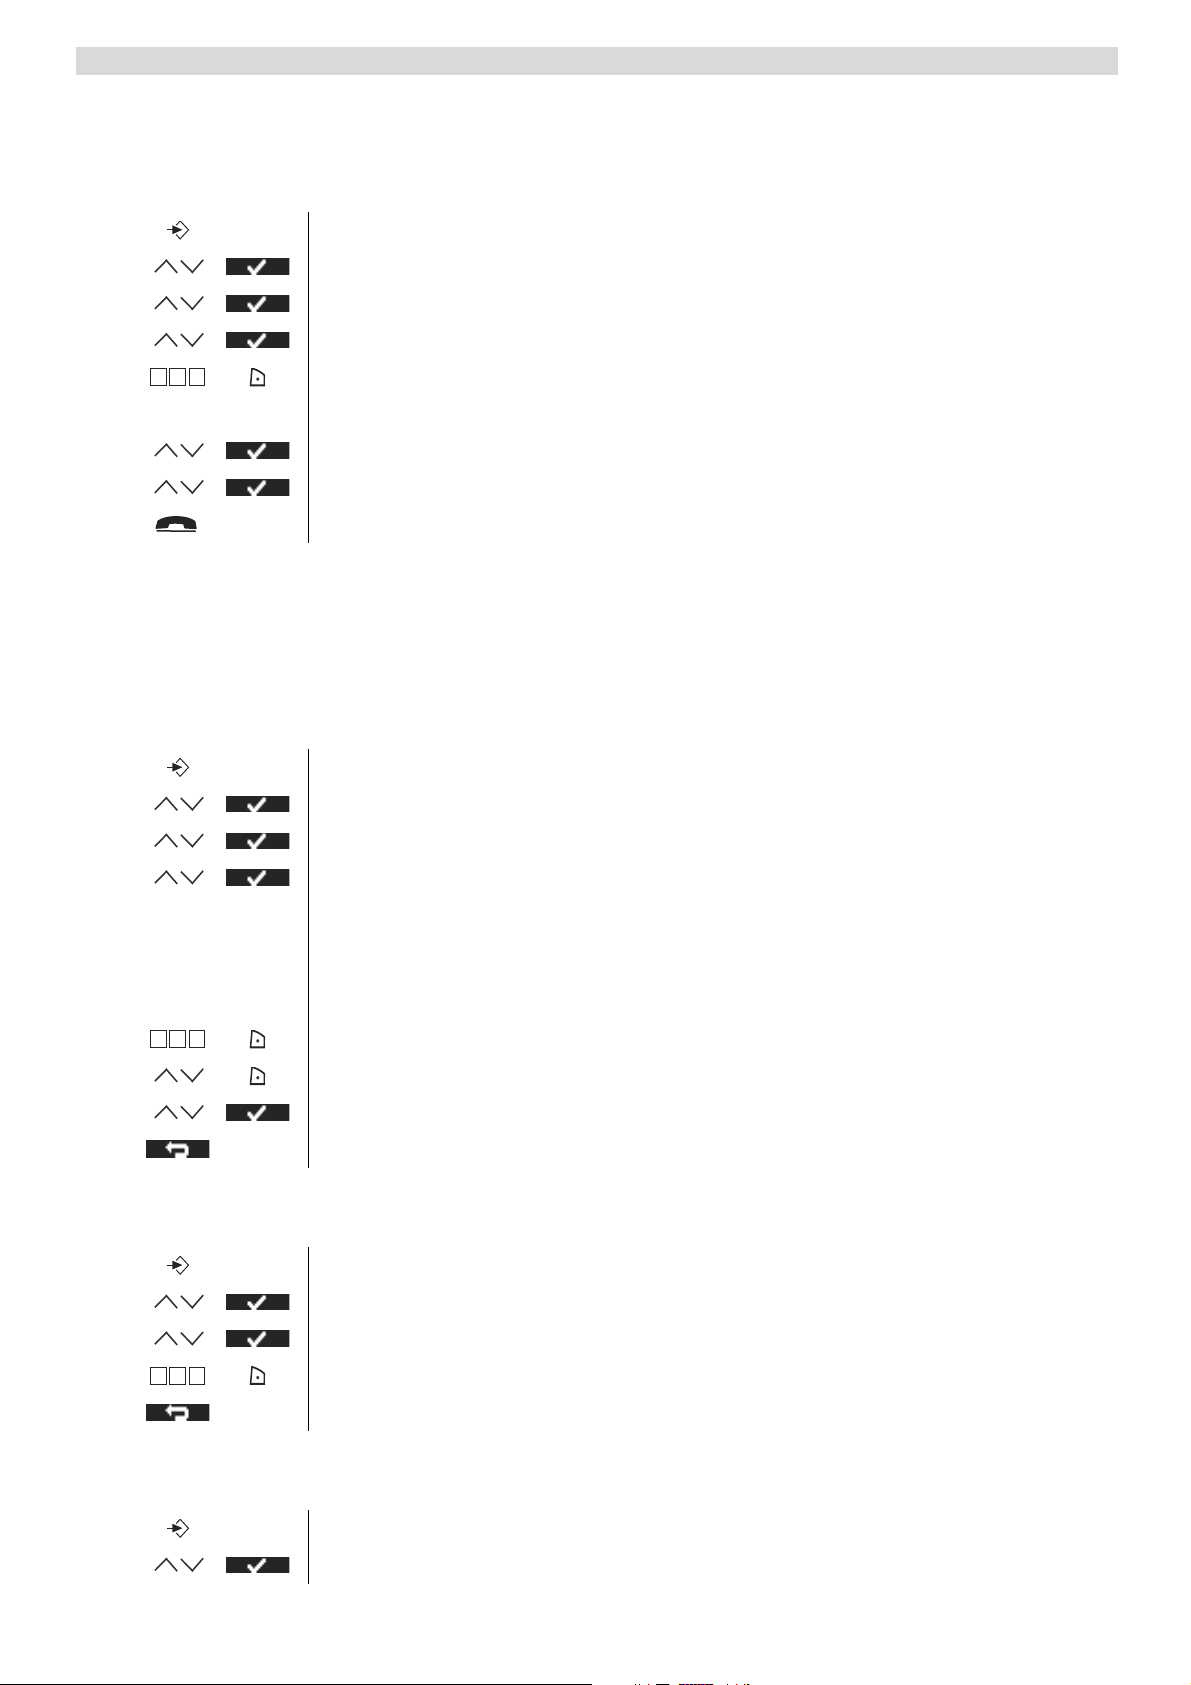
Personalise the handset
6.7 Prefix code
It is possible to use your telephone with a prefix number. When dialling telephone numbers, you
can add automatically the prefix code before the number.
1 Enter the menu.
2 Select “Handset” and confirm.
3 Select “Prefix” and confirm.
4 Select “Edit” and confirm.
456
g h i j k l m n o
5 Enter the prefix code, e.g. ‘0’ and select “Save”.
OR
4 Select “On/Off” and confirm.
5 Select “On” or “Off” and confirm.
6 Return to standby.
6.8 Using the alarm feature
You can have a different alarm setting for each handset registered to your base. The alarm rings
only at the handset, not at the base or any other handset.
Set the alarm
1 Enter the menu.
2 Select “Alarm/Clock” and confirm.
3 Select “Set alarm” and confirm.
4 Select “Once”, “On daily”, “Mon to Fri” or “Off” and confirm.
If you have selected “Once”, “On daily” or “Mon to Fri”, the display will
show:
Time (24Hr):
00:00
456
g h i j k l m n o
5 Enter the time you want the telephone to ring and confirm with “Save”.
6 Select the desired ringtone and confirm with “Save”.
7 To deactivate the alarm, select “Off” and confirm.
8 Return to the previous menu.
6.9 Setting the date and time
1 Enter the menu.
2 Select “Alarm/Clock” and confirm.
3 Select “Date & Time” and confirm.
456
g h i j k l m n o
4 Enter year, month, day, time and minutes and select “Save” to confirm.
5 Return to the previous menu.
6.10 Setting the time format
1 Enter the menu.
2 Select “Alarm/Clock” and confirm.
13
Page 27

3 Select “Time format” and confirm.
4 Select “12Hrs” or “24Hrs” and confirm.
5 Return to the previous menu.
Base settings
7 Base settings
7.1 Ringtone
You can choose from 9 different ringer melodies.
1 Enter the menu.
2 Select “Base Settings” and confirm.
3 Select “Ringtone” and confirm.
4 Select the desired melody and confirm.
During scrolling a sample is played.
5 Return to standby.
7.2 Ringer Volume
You can choose from 5 base ringer volume levels.
1 Enter the menu.
2 Select “Base Settings” and confirm.
3 Select “Ringer Volume” and confirm.
English
The current setting is displayed.
4 Press the up key to increase the volume.
5 Press the down key to decrease the volume.
6 Select “Save” to confirm.
7 Return to standby.
7.3 Dial Mode
There are 2 types of dialling mode:
• DTMF/Tone dialling (most common used)
• Pulse dialling (for older installations)
To change the dialling mode:
1 Enter the menu.
2 Select “Base Settings” and confirm.
3 Select “Dial mode” and confirm.
4 Select “Tone” or “Pulse” and select “Save”.
5 Return to standby.
7.4 Recall (Flash)
Press the Flash key “R” (Key 4 - Picture 2C) to use certain services on your external line such as
“call waiting” (if your phone company offers this feature); or to transfer calls if you use a
14
Page 28

Tools
telephone exchange (PABX). The Flash key “R” is a brief interruption of the line. You can set the
flash time to 100ms or 250ms.
1 Enter the menu.
2 Select “Base Settings” and confirm.
3 Select “Recall” and confirm.
4 Select short flash time (100ms) or long flash time (250ms) and select
“Save”.
5 Return to standby.
7.5 System PIN
The System PIN is used for registering and deregistering handsets and some other optional
settings. The default System PIN is 0000.
1 Enter the menu.
2 Select “Base Settings” and confirm.
3 Select “System PIN” and confirm.
456
g h i j k l m n o
456
g h i j k l m n o
4 Enter the old PIN (0000 by default) and select “Save”.
5 Enter the new PIN, select “Save” and repeat this.
6 Return to standby.
8 Tools
8.1 Appointment
You can set 5 appointments or reminders which you can give a name and an alarm by date and
time.
1 Enter the menu.
2 Select “Tools” and confirm.
3 Select “Appointments” and confirm.
4 Select one of the 5 appointments and select “Option”.
To edit the appointment:
5 Select “Edit” and confirm.
456
g h i j k l m n o
456
g h i j k l m n o
456
g h i j k l m n o
6 Edit the name of the appointment and select “Save”.
7 Enter the date of the appointment and select “Save”.
8 Enter the time and select “Save”.
15
9 Select the desired alarm melody and select “Save”.
10 Return to standby.
To delete the appointment:
5 Select “Delete” and confirm.
6 Press the right soft menu key to confirm.
7 Press the left soft menu key to go back.
8 Return to standby.
Page 29

8.2 Stopwatch
1 Enter the menu.
2 Select “Tools” and confirm.
Additional handsets and base stations
3 Select “Stopwatch” and confirm.
4 Select “Start” to start the stopwatch.
5 Select “Stop” to stop the stopwatch.
Select “Start” again to restart.
Select “Reset” to reset the counter.
6 Return to standby.
9 Additional handsets and base stations
You can subscribe up to 4 handsets on a base. Eacht handset can register up to 4 base stations and
the user can select the base he wants to use.
9.1 Adding a new handset
Only needed when you have deregistered a handset or when you bought a new one.
To put the base into regsitration mode:
1 Press and hold the paging key on the base.
English
The LED on the base will start to blink on the base for 90 seconds. During
that time, the base is ready to register.
On the handset:
1 Enter the menu.
2 Select “Handset” and confirm.
3 Select “Registration” and confirm.
4 Select “Register” and confirm.
5 Select the number of the base to be associated with the handset (1-4) and
confirm.
456
g h i j k l m n o
6 Enter the system PIN (0000 by default) and confirm.
7 Return to standby.
9.2 Removing a handset
This procedure needs to be carried out on a different handset then the one you want to remove.
1 Enter the menu.
2 Select “Handset” and confirm.
456
g h i j k l m n o
456
g h i j k l m n o
3 Select “Registration” and confirm.
4 Select “De-Register” and confirm.
5 Enter the system PIN (0000 by default) and confirm.
6 Enter the handset number that needs to be removed and confirm.
7 Return to standby.
16
Page 30
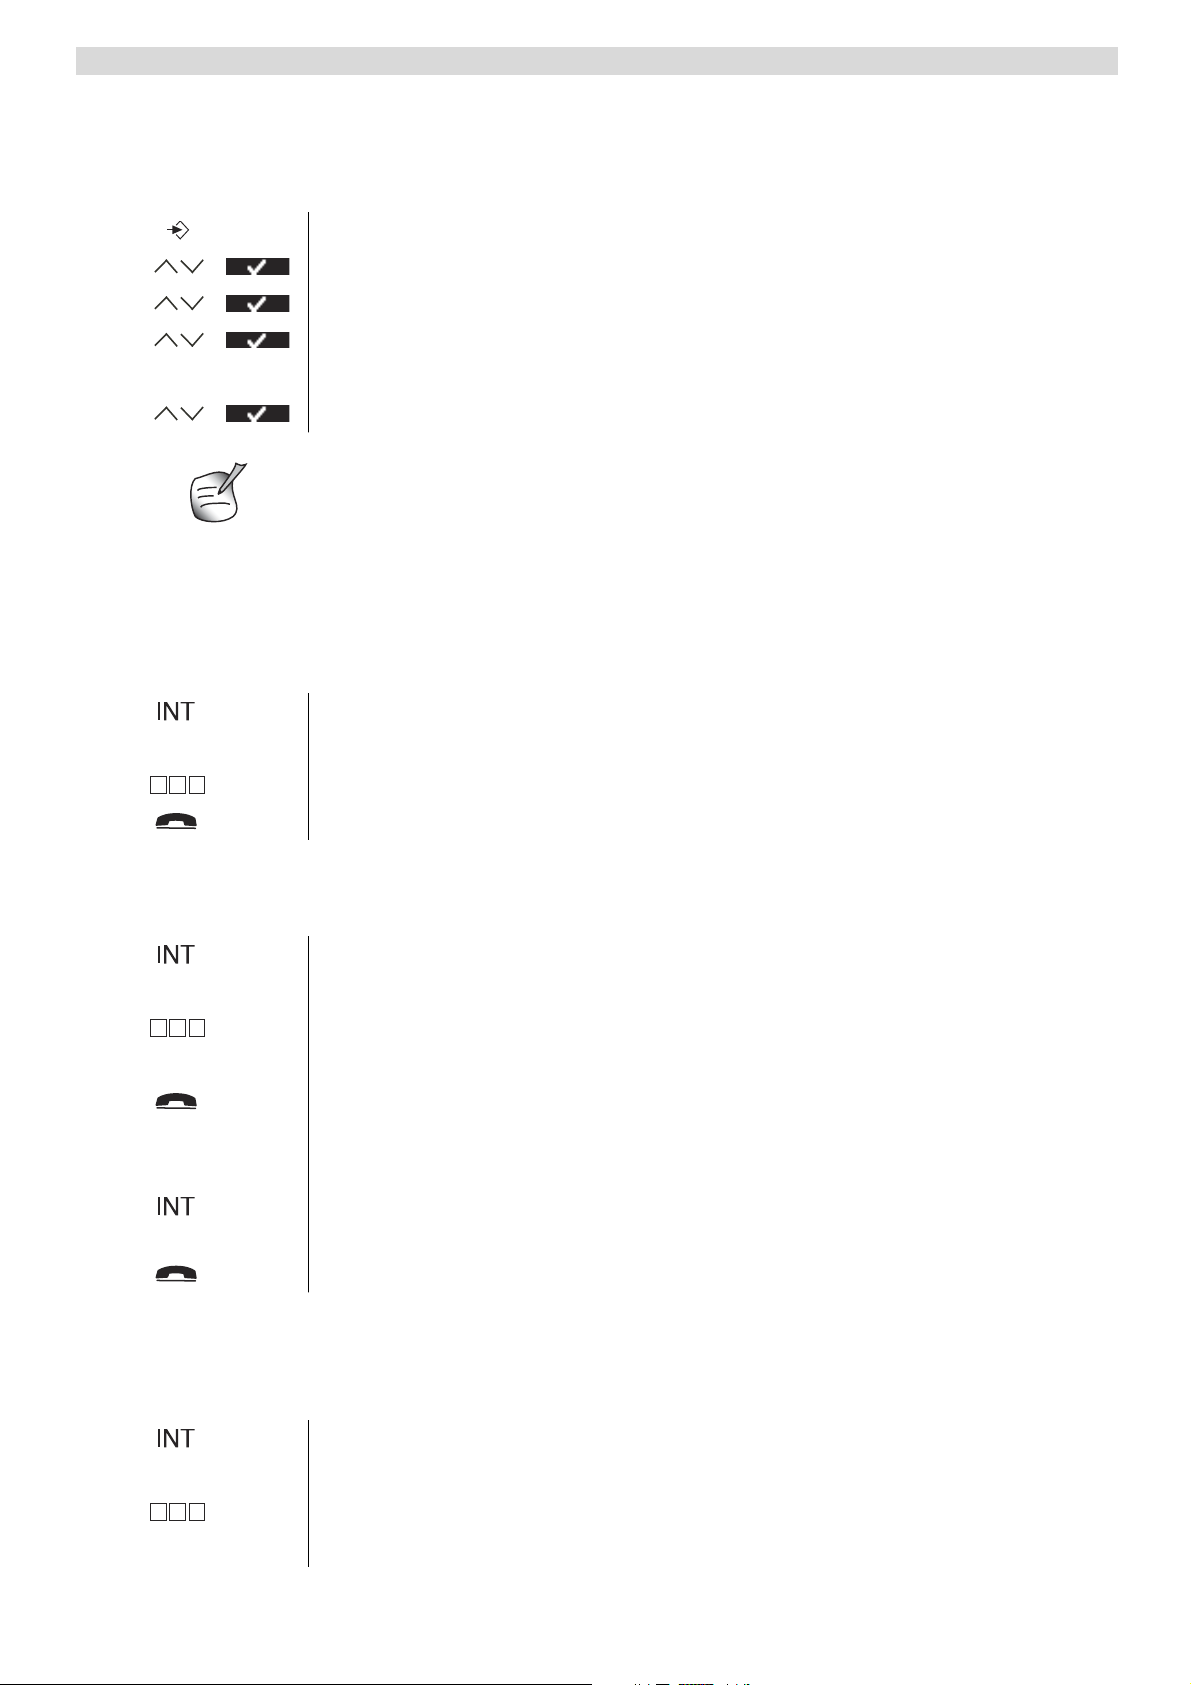
Additional handsets and base stations
9.3 Select a base
You can switch your handset between bases. You can also set it to automatically base select with
the strongest signal. The handset must first be registered with each base individually.
1 Enter the menu.
2 Select “Handset” and confirm.
3 Select “Select Base” and confirm.
4 Select “Manual” or “Auto” and confirm.
If you have selected “Manual”:
5 Select the base to be associated with the handset and confirm.
When you have activated Automatic base selection and the handset is out of range
on the current base, the handset will only search for the strongest base in standby
(not during communication).
9.4 Using the intercom feature
Calling an internal handset
1 Press the left key INT.
The screen displays “Handset _”.
456
g h i j k l m n o
2 Enter the internal number of the handset you want to call.
3 Press the on-hook key to hang up or put the handset back on the base.
Transfer an external call to another handset
During an external call:
1 Press the left key INT.
The screen displays “Handset _”.
456
g h i j k l m n o
2 Enter the internal number of the handset you want to call.
Your external correspondent is placed on hold.
3 When the internal correspondent answers, press the on-hook key to
transfer the call.
OR
3 If the inthernal correspondent doesn’t answer, press the left key INT to
retrieve the external correspondent or to go from one to the other.
4 Press the on-hook key to hang up or put the handset back on the base.
Conference call
You can talk between 2 handsets and an external line at the same time.
During an external call:
1 Press the left key INT.
The screen displays “Handset _”.
456
g h i j k l m n o
2 Enter the internal number of the handset you want to call.
Your external correspondent is placed on hold.
17
Page 31

Answering machine
3 When the internal correspondent answers, select “Conf.”.
OR
3 If the inthernal correspondent doesn’t answer, press the left key INT to
retrieve the external correspondent.
4 Press the on-hook key to hang up or put the handset back on the base.
Taking an external call during an internal communication
When you are on intercom with another handset, you can still pick up outside calls.
To take an incoming call:
1 Press the on-hook key. The internal communication is now interrupted.
2 Press the off-hook key. You are now in communication with the outside
caller.
10 Answering machine
The Butler 5750 has a built-in digital answering machine with a recording capacity of 11 min. The
answering machine can be operated by the handset and remotely. It has the possibility of
recording two outgoing messages (OGM 1 and OGM 2) (maximum of 2 min).
There are 2 possibilities:
• With OGM 1, the caller has the possibility to leave a message
• With OGM 2, only the outgoing message is given without the caller having the opportunity to
leave a message
The max. recording time for each incoming message = 3 min.
An internal voice will state various information, such as day and time of the call, as well as
settings such as VIP code, ringer tones ... The language of the internal voice is stated on the
packaging!
English
All messages playback is activated in speaker mode, to switch between earpiece and
speaker you have press the off-hook -key
10.1 Display
The display on the handset will indicate how many messages you have received. If the answering
machine is switched Off, the -Icon is shown. If it’s turn On the will be shown.
‘Memory Full’ will be shown on the display when the internal memory is full and no new
messages can be recorded.
When there are new messages on your answering machine the LCD backlit will blink to indicate
this.
10.2 Outgoing Messages
Two outgoing messages of 2 minutes can be recorded (OGM1 and OGM2).
• Outgoing message 1 for the answering function and possibility for callers to leave a message.
• Outgoing message 2 for the answering function without allowing callers to leave a messages on
the machine.
Recording outgoing message (OGM 1 or OGM 2)
1 Enter the menu.
18
Page 32

Answering machine
2 Select “Ans Machine” and confirm.
3 Select “Outgoing Msg” and confirm.
4 Select “Record Message” and confirm.
5 Select ‘Answer & Record’ for OGM1 or ‘Answer Only’ for OGM2.
6 Start speaking after the beep and press ‘Save’ to confirm.
The recorded message will be played back.
7 During playback press ‘Delete’ to erase or press ‘Stop’ to interupt the
playback.
The recording cannot exceed 2 minutes. If no outgoing message is recorded, the
prerecorded outgoing message is used.
Playback the Outgoing Message
To check the outgoing message:
1 Enter the menu.
2 Select “Ans Machine” and confirm.
3 Select “Outgoing Msg” and confirm.
4 Select “Play Message” and confirm.
5 Select ‘Answer & Record’ for OGM1 or ‘Answer Only’ for OGM2 and
confirm.
6 The message will be played back. Press ‘Delete’ to erase or press ‘Stop’ to
interupt the playback.
Select outgoing message (Answering mode)
1 Enter the menu.
2 Select “Ans Machine” and confirm.
3 Select “Ans Settings” and confirm.
4 Select “Answer Mode” and confirm.
5 Select ‘Answer & Record’ for OGM1 or ‘Answer Only’ for OGM2 and
confirm.
Erasing the Outgoing Message
If you erase the outgoing message, the default message will be played.
During playback of the outgoing message (see above) you can delete the message by pressing
‘Delete’.
19
Page 33

Answering machine
10.3 Turning Answering Machine On/Off
If the answering machine is switched Off, the -icon is shown. If it’s turn On the -icon
will be shown and the machine will automatically pick up the line after a number of rings (see
“10.4 Setting number of Rings (Answer delay)” ).
1 Enter the menu.
2 Select “Ans Machine” and confirm.
3 Select “Ans On/Off” and confirm.
4 Select ‘On’ or ‘Off’.
Even if the answering machine is off, the machine will automatically pick up after
10 rings in order to enable remote activation (see “10.13 Turning answering
machine on remotely” ).
10.4 Setting number of Rings (Answer delay)
English
The number of rings after which the answering machine will answer calls can be set from 2 – 9
and TS (Toll saver). The standard setting is 5 rings. In Toll saver mode, the machine will answer
after 5 rings if there are no new messages, and after 2 rings if there are new messages. If there are
no new messages and you call your machine to check your messages remotely (see“10.12 Remote
Operation” ), you can hang up after the 2nd ring. You do not need to pay connection fees and you
know that you don’t have any new messages.
1 Enter the menu.
2 Select “Ans Machine” and confirm.
3 Select “Ans Settings” and confirm.
4 Select “Answer Delay” and confirm.
5 Select 2-9 or ‘Toll Saver’ and confirm.
10.5 Programming the VIP Code
The VIP code is a 3-digit code used to operate the machine remotely (see “10.12 Remote
Operation” ). The VIP code is set to '321' by default.
Changing the VIP code
456
g h i j k l m n o
456
g h i j k l m n o
456
g h i j k l m n o
1 Enter the menu.
2 Select “Ans Machine” and confirm.
3 Select “Ans Settings” and confirm.
4 Select “Security Code” and confirm.
5 Enter the old PIN (321) and confirm.
6 Enter the new PIN and confirm.
7 Enter the new PIN again and confirm.
20
Page 34

Answering machine
10.6 Operation
If a call is received and the answering machine is turned on, the answering machine will
automatically pick up the line after the set number of rings. If
• Outgoing message 1 has been selected, it will be played. After the outgoing message, a beep
will be heard and the caller can leave a message (of a max. 3 minutes).
• Outgoing message 2 has been selected, it will be played. After the beep, the line will
automatically be disconnected. The caller does not have the possibility to leave a message.
If, during recording, nothing is said for 8 seconds, the line will be automatically
disconnected.
10.7 Call Screening
During the outgoing message playback or incoming message recording, you can hear to other side
of the line by pressing the Off-hook key. The display will show ‘Call Screening’ and you
can press the right-soft key to stop the answering machine and to talk to the caller.
If you have a second handset registered on the same base of your Butler 5750, you
can stop the answering machine by pressing the ‘#’-key during call screening.
10.8 Recording a Memo
With the Butler 5750, you can record memos. These memos are considered an incoming
message that can be picked up later by the user. The max. recording time for a memo is 3 minutes.
1 Enter the menu.
2 Select “Ans Machine” and confirm.
3 Select “Record Memo” and confirm.
4 Start speaking after the beep and select ‘Save’ to end the recording.
10.9 Playback of Incoming Messages and Memos
When there are new messages you can playback all new message by the soft-key:
1 Press the right soft-menu key.
Or by the Menu:
21
1 Enter the menu.
2 Select “Ans Machine” and confirm.
3 Select “Play Msgs” and confirm.
4 Select “Play New Msgs” for the new only, or “Play All Msgs” for old and
new messages playback.
During Playback you can:
Delete the message if you select ‘Delete’
Page 35

Answering machine
Go to the next message when you select ‘Next’ or press the skip forward
button
Go back to the begining of the current message press the skip backwards key
ones, to jump back to the previous message press the backwards key twice.
Pause the message playback by pressing the pause key. Press the pause key
again to continue.
Stop the playback by pressing the Stop-key
10.10 Erasing Messages
During playback of the messages you can erase the message one by one as above descibed. You
can also erase all played messages:
1 Enter the menu.
2 Select “Ans Machine” and confirm.
3 Select “Delete Msgs” and confirm.
4 Confirm again or select back to stop.
10.11 Memory Full
If the memory is full, “MEMORY FULL” will appear on the display. If the answering machine is
turned on and a call comes in, the machine will automatically play OGM 2 (answering machine
function without recorded caller message).
When listening to the messages, the internal voice will say that the memory is full and then play
back the messages.
Erase the messages one by one during listening or all by the menu as above described.
English
10.12 Remote Operation
The answering machine can only be operated remotely using a tough-tone phone
(DTMF tone selection system).
456
g h i j k l m n o
456
g h i j k l m n o
456
g h i j k l m n o
Listening to Messages
2
2
1 Call your machine.
The answering machine picks up the line, you hear the outgoing message and
a beep.
2 Slowly dial the VIP code (default 321)
You will hear two short beeps for confirmation.
3 Enter the next codes to use the desired function:
4 Press ‘2’ to Listen to messages
The answering machine will play the messages.
During playback, you have the following options:
5 Press ‘2’ to Pause playback
2
6 Press ‘2’ to Restart playback.
22
Page 36

Answering machine
3
1 1
1
6
7
5 Press ‘3’ to go to the Next Message.
5 Press ‘1’ ‘1’ to go to the Previous Message.
5 Press ‘1’ to Repeat the current message.
5 Press ‘6’ to stop playback.
5 Press ‘7’ to erase the current message.
Erasing All Old Messages
0
6 After listening to all messages, press ‘0’ to erase all messages.
Playing Outgoing Message
4
4 Press ‘4’ to play the current outgoing message.
Recording Outgoing Message
9
5
4 Press ‘9’ to select OGM 1 or OGM 2.
5 Press ‘5’ to start recording.
A beep will indicate that you can start recording.
6 Say your message.
6
7 Press ‘6’ to stop recording.
The recording will be ended automatically after 2 minutes.
Turning Answering Machine On/Off
9
9
8
4 Press '9 ' to switch on the answering machine.
5 Press ‘9’ to switch between OGM1 and OGM2
6 Press the '8' key to turn off the answering machine.
Ending Remote Operation
6
Press ‘6’ to end remote operation.
10.13 Turning answering machine on remotely
If the answering machine is switched off, you can turn it on remotely:
456
g h i j k l m n o
1 Call your machine.
The machine will pick up automatically after 10 rings and play outgoing
message 2.
23
456
g h i j k l m n o
9
6
2 Dial the VIP code (default 321) slowly while the message plays.
3 Press '9' to switch on the answering machine.
The internal voice will say that the answering machine has been turned on.
4 Press ‘6’ to end remote operation.
Page 37

11 Troubleshooting
Symptom Possible cause Solution
No display Batteries uncharged Check the position of the
No tone Telephone cord badly connected Check the telephone cord
Troubleshooting
batteries
Recharge the batteries
Handset turned OFF Turn ON the handset
connection
English
The icon flashes
The line is occupied by another
handset
Handset out of range Bring the handset closer to the
Wait until the other handset
hangs up
base
The base has no power supply Check the mains connection
to the base
The handset is not registered on
the base
Register the handset on the
base
Base or handset do not ring The ringing volume is off or low Adjust the ringing volume
Not possible to transfer a call
on PABX
Telephone does not react to
pressing the keys
The Flash Time is too short or
Change the Flash Time
too long
Manipulation error Remove the batteries and put
them back in place
24
Page 38

Technical dataTechnical characteristics
12 Technical dataTechnical characteristics
Standard DECT(Digital Enhanced Cordless Telecommunications)
GAP (Generic Access Profile)
Frequency range 1880 MHz to 1900 MHz
Number of channels 120 duplex channels
Modulation GFSK
Speech coding 32 kbit/s
Emission power 10 mW ( average power per channel )
Range 300m in open space /50m maximum inhouse
Number of handsets Up to 4
Base powersupply 230V / 50 Hz / 6V DC 300mA
Handset Batteries: 2 rechargeable batteries AAA, NiMh 1,2V, 600mA
Handset autonomy 110 hours in standby
Handset talk time 11 hours
Normal conditions of use +5 °C to +45 °C
Dialling mode Pulse / Tone
Flash time 100 or 250 ms
13 Warranty
13.1 Warranty period
The Topcom units have a 24-month warranty period. The warranty period starts on the day the new
unit is purchased. The warranty on batteries is limited to 6 months after purchase. Consumables
or defects causing a negligible effect on operation or value of the equipment are not covered.
The warranty has to be proven by presentation of the original purchase receipt, on which the date
of purchase and the unit-model are indicated.
13.2 Warranty handling
A faulty unit needs to be returned to a Topcom service centre including a valid purchase note.
If the unit develops a fault during the warranty period, Topcom or its officially appointed service
centre will repair any defects caused by material or manufacturing faults free of charge.
Topcom will at its discretion fulfil its warranty obligations by either repairing or exchanging the
faulty units or parts of the faulty units. In case of replacement, colour and model can be different
from the original purchased unit.
The initial purchase date shall determine the start of the warranty period. The warranty period is
not extended if the unit is exchanged or repaired by Topcom or its appointed service centres.
13.3 Warranty exclusions
Damage or defects caused by incorrect treatment or operation and damage resulting from use of
non-original parts or accessories not recommended by Topcom are not covered by the warranty.
Topcom cordless phones are designed to work with rechargeable batteries only. The damage
caused by the use of non-rechargeable batteries is not covered under warranty.
25
Page 39

Disposal of the device (environment)
The warranty does not cover damage caused by outside factors, such as lightning, water and fire,
nor any damage caused during transportation.
No warranty can be claimed if the serial number on the units has been changed, removed or
rendered illegible.
Any warranty claims will be invalid if the unit has been repaired, altered or modified by the buyer
or by unqualified, non-officially appointed Topcom service centres.
14 Disposal of the device (environment)
At the end of the product lifecycle, you should not throw this product into the normal
household garbage but bring the product to a collection point for the recycling of
electrical and electronic equipments. The symbol on the product, user guide and/or
box indicate this.
Some of the product materials can be re-used if you bring them to a recycling point.
By re-using some parts or raw materials from used products you make an important contribution
to the protection of the environment.
Please contact your local authorities in case you need more information on the collection points in
your area.
English
15 Cleaning
Clean the telephone with a slightly damp cloth or with an anti-static cloth. Never use cleaning
agents or abrasive solvents.
16 ECO (low-radiation) mode
• This cordless telephone (compliant with the DECT standard) facilitates low-radiation
operation.
• The radiation intensity of the radio signal between the base station and handset is reduced to a
minimum when the handset is on the base station.
• Only when the handset is removed from the base station or a call is received does the radiation
intensity of the radio signal increase to the normal strength.
• This does not mean that normal DECT radiation is harmful to health.
• The low-radiation mode prevents unnecessary DECT radiation load when no communication is
required between the base station and handset.
• For technical reasons, no additional handsets can be operated in low-radiation mode (an
additional handset that is not located in the immediate vicinity of the base station would always
be "searching for base station" due to the weak radio signal).
• Low-radiation mode is enabled in the factory settings.
• Low-radiation mode is automatically disabled if you log on an additional handset.
• Low-radiation mode is automatically enabled again when you log off all additional handsets
(only one handset may be logged onto the base station).
• The procedure for logging handsets on and off is explained in the User Manual.
26
Page 40

Veiligheidsinstructies
Nederlands
1 Veiligheidsinstructies
• Gebruik alleen de bijgeleverde stekker van de lader. Gebruik geen andere laders, omdat dit de
batterijcellen kan beschadigen.
• Plaats alleen oplaadbare batterijen van hetzelfde type. Gebruik nooit gewone, niet-oplaadbare
batterijen. Plaats de oplaadbare batterijen met de polen in de juiste richting (aangegeven in het
batterijvak van de handset).
• Raak de contactpunten van de lader en de stekker niet aan met scherpe of metalen objecten.
• De werking van sommige medische instrumenten kan worden beïnvloed.
• De handset kan een onaangenaam zoemend geluid veroorzaken in gehoorapparaten.
• Plaats het basisstation niet in een vochtige ruimte of dichter dan 1,5 m in de buurt van een
waterbron. De handset niet blootstellen aan water.
• Gebruik de telefoon niet in omgevingen met explosiegevaar.
• Recycleer de batterijen en onderhoud de telefoon op een milieuvriendelijke manier.-
• Omdat deze telefoon niet kan worden gebruikt tijdens een stroomuitval, moet u een telefoon
gebruiken die niet afhankelijk is van het elektriciteitsnet bij noodgevallen, bv. een mobiele
telefoon.-
2Beginnen
2.1 Deze gebruikshandleiding gebruiken
In deze gebruikshandleiding is de volgende methode gebruikt om de instructies te verduidelijken:
Tekst ... "display".
De tekst die in de display van de telefoon verschijnt
In te drukken toets. Deze toets kan een soft key zijn (Zie ”2.4 Toetsen/LED”). Als de soft key een
symbool is, staat de toets in de linkerkolom. Als de soft key tekst is, zal de linker of rechter soft
key in de linkerkolom worden weergegeven en de tekst tussen aanhalingstekens in de
rechterkolom.
2.2 De basis installeren
Voer het volgende uit voor de installatie:
1 Steek een uiteinde van de adapter in het stopcontact en het andere uiteinde in de aansluiting
van de adapter achter op de basis.
2 Sluit een uiteinde van de telefoonkabel aan op de telefoonaansluiting aan de wand en het
andere uiteinde op de onderzijde van de basis.
3 Plaats de telefoon- en wisselstroomkabel in de basisgeleiders, zoals weergegeven in afb. 2A.
27
Page 41

C
Beginnen
A
2.3 De handset installeren
1 Open het batterijgedeelte zoals weergegeven in afb. 2B.
2 Plaats de batterijen volgens de polariteit (+ en -).
3 Sluit het batterijgedeelte.
4 Laat de handset 20 uur op het basisstation staan. De lijn/laad-indicator
op de basis zal gaan branden.
B
- 2A Achteraanzicht van basis A. Telefoonwandcontactdoos
B. Stroomkabel
C. Telefoonkabel
A
Nederlands
Butler 5750
+
-
+
B
- 2B Achteraanzicht van handset A. Afdekplaatje
B. Oplaadbare batterijen
Voordat u de telefoon voor het eerst gebruikt, moet u controleren of de batterij 20
uur is opgeladen. De telefoon zal niet optimaal werken als u dit niet doet.
28
Page 42

Beginnen
2.4 Toetsen/LED
Handset
1. Display
2. Omhoog/Redial-toets
3. Rechter soft menu key
4. Rechts/Flash-toets
5. Opleggen/UIT-toets
6. Alfanumerieke toetsen
7. Toetsvergrendeling
8. Beltoon uit-toets
9. Stop-toets
10. Vooruit overslaan-toets
11. Afspelen/pauze-toets
12. Achteruit overslaan-toets
13. Omlaag/oproeplogbestand-toets
14. Opnemen-toets/handenvrij/Aan-toets
15. Linker soft menu key
16. Links/INT-toets
17. OK-toets
17
16
15
14
13
12
11
10
1
2
INT
OK
R
DEF
1
GHI
4
9
8
PQRS
7
*
3
ABC
2
MNO
6
JKL
5
WXYZ
9
TUV
8
#
0
3
4
5
6
7
- 2C Handset -
Basis
18. In gebruik/Aan-Uit/handset op basisLED
19. Paging-toets
2.5 Symbolen
Opnemen Toetsvergrendeling
Opleggen Alarmset
Gemiste oproepen in oproeplijst*
Belvolume van handset UIT Batterij leeg
Handset niet geregistreerd of buiten
bereik
18
19
Butler 5750
- 2D Basis -
Handset binnen bereik van basis Batterij bijna leeg
Interne oproep Batterij halfleeg
Handenvrij Batterij vol
Nieuwe voicemail Beantwoorder Aan/Uit
* Als nummerweergave oproeper beschikbaar is op de telefoonlijn.
29
Page 43

Beginnen
2.6 Displaytoetsen
Displaytoetsen (soft keys) bevinden zicht direct onder de display. De functie van deze 2 toetsen
verandert naargelang de gebruiksmodus. De werkelijke functie wordt weergegeven als pictogram
of tekst direct boven de 2 toetsen.
Telefoonboek Dempen
OK/Bevestigen Terug
Menu Geen toets
Wissen Berichten afspelen
2.7 Basis-LED
De LED (14) geeft de volgende status weer:
• UIT: geen stroom op de basis aangesloten of handset staat niet in de basis om op te laden.
• AAN: handset is bezig met laden
• Langzaam knipperen: Opgenomen of tijdens het bellen
• Snel knipperen: tijdens de registratie
2.8 Door het menu bladeren
De Butler 5750 heeft een gebruiksvriendelijk menusysteem. Elk menu geeft een lijst met opties.
De menukaart staat in de volgende paragraaf.
1 Wanneer de handset wordt ingeschakeld en in standby staat, drukt u op de
linker soft menu key om het hoofdmenu te openen.
2 Blader naar de gewenste menuoptie.
3 Druk op de soft menu key om de overige opties te bekijken of de
weergegeven instelling te bevestigen.
Afsluiten of een niveau in het menu teruggaan.
Druk op de soft menu key om naar het vorige niveau in het menu terug te
gaan.
Nederlands
Druk op de opleggen-toets om op een willekeurig moment te annuleren en
terug te keren naar standby.
2.9 Menuoverzicht
Menu Submenu-items
Beantwoorder
Telefoonboek
Boodsch. Weerg.
Boodsch. Wissen
Beantw. Aan/Uit
Memo Opnemen
Uitgnde Boodsch.
Beantw. Instell.
30
Page 44

De telefoon gebruiken
Menu Submenu-items
Handset
Basisinstellingen
Beltoon
Belvolume
Handset naam
Toetstoon
Contrast
Autom. Aanne.
Verlichtingstijd
Prefix
Kies basis
Taal
Registratie
Beltoon
Belvolume
Kiesmodus
Recall
Systeem PIN
Tijd
Hulpmiddelen
3 De telefoon gebruiken
3.1 De handset in- en uitschakelen
1 De UIT-toets ingedrukt houden om de handset uit te schakelen.
2 Druk op de opnemen-toets of plaats de handset op de basis om de handset
weer in te schakelen.
3.2 De menutaal veranderen
1 Selecteer het menu.
2 Selecteer "Handset" en bevestig.
3 Selecteer "Taal" en bevestig.
Alarm instellen
Dag & Tijd
Tijdformaat
Afspraak
Stopwatch
31
4 Selecteer een taal en bevestig.
Het scherm geeft "Opgeslagen" weer.
5 Druk op de opleggen-toets om terug te keren naar standby.
De pijlen geven aan dat er nog meer opties mogelijk zijn in het menu.
Page 45

3.3 Een normaal telefoongesprek voeren
Direct kiezen
1 Druk op de opnemen-toets om het nummer te bellen.
De telefoon gebruiken
456
g h i j k l m n o
2 Voer het telefoonnummer in.
3 Druk op de opleggen-toets om op te hangen of zet de handset terug op de
basis.
Voorkiezen
Met de voorkiesfunctie kunt u een telefoonnummer invoeren en aanpassen voordat u gaat bellen.
456
g h i j k l m n o
1 Kies een telefoonnummer van maximaal 24 cijfers.
Houd de 0-toets ingedrukt om een pauze in te voegen. Het scherm geeft een
"P" weer.
2 Druk op de soft menu key om te corrigeren.
3 Druk op de opnemen-toets om het nummer te bellen.
4 Druk op de opleggen-toets om op te hangen of zet de handset terug op de
basis.
Een telefoonnummer bellen uit de lijst
U kunt maximaal 10 van de laatste oproepen terugbellen. Als u een naam in het telefoonboek hebt
opgeslagen die bij het nummer hoort, zal de naam worden weergegeven.
Nederlands
1 Druk op de nummerherhalingstoets.
2 Selecteer een nummer. De naam wordt weergegeven als het nummer in het
telefoonboek staat.
3 Druk op de opnemen-toets om het nummer te bellen of selecteer "Optie".
4 Blader na het selecteren van "Optie" en selecteer:
"Wis oproep": om het nummer uit de oproeplijst te verwijderen;
"Sla nr. op": om het nummer in het telefoonboek op te slaan;
"Wis Alles": om de oproeplijst te wissen.
5 Bevestig de selectie.
6 Druk op de opleggen-toets om terug te keren naar standby.
3.4 Een telefoontje ontvangen
Het scherm geeft "Ext. oproep" weer als u een externe oproep ontvangt.
Om de oproep aan te nemen:
1 Druk op de opnemen-toets.
OF
Neem de handset van de basis als u "Autom. aanne." heeft geselecteerd
(Zie ”6.5 Automatisch aannemen”)
De oproep in het voortgangspictogram verschijnt op het scherm. De
oproepduur wordt na 15 seconden weergegeven.
2 Druk op de opleggen-toets om op te hangen of zet de handset terug op de
basis.
32
Page 46

De telefoon gebruiken
U kunt het belvolume uitzetten tijdens inkomende oproep door "Stil" te selecteren.
3.5 Handenvrij-modus
Met handenvrij kunt u met uw oproeper praten zonder de handset vast te houden. Andere mensen
in de kamer kunnen ook meeluisteren naar beide sprekers tijdens uw gesprek.
1 Druk op de handenvrij-toets tijdens een oproep om naar handenvrij over te
schakelen.
3.6 Oorstuk/handenvrij-volume afstellen
1 Druk op omhoog of omlaag om volume 1 - 5 te selecteren tijdens een
normale of handenvrije oproep.
3.7 Geheimhoudingsfunctie (Microfoon uit-functie)
Om de microfoon uit te schakelen zodat de persoon aan de andere kant van de lijn u niet kan
verstaan.
1 Druk tijdens een gesprek op de soft menu key om de microfoon uit te
schakelen.
"Mute Aan" verschijnt in de display.
2 Selecteer "Uit" om de microfoon weer te activeren.
3.8 Een handset vinden (Paging-functie)
1 Druk op de paging-toets op het basisstation.
Alle handsets die bij de basis staan geregistreerd zullen 30 seconden rinkelen.
456
g h i j k l m n o
2 Druk op een willekeurige toets op de handset om paging te stoppen.
3.9 Toetsenbordvergrendeling
Om het toetsenbord te vergrendelen zodat u niet per ongeluk een nummer kunt kiezen tijdens het
rondlopen met de handset.
In standby:
1 Houd de toetsenbordvergrendeling-toets (toets 7 - afb. 2C) ingedrukt totdat
"Geblokkeerd" en het toetsenbordvergrendelingspictogram in de
display verschijnen.
2 Selecteer "Vrij" gevolgd door de toetsenblokvergrendelingstoets om het
toetsenblok vrij te geven.
3.10 Het alfanumerieke toetsenbord gebruiken
Met uw telefoon kunt u ook alfanumerieke tekens invoeren. Dit is handig om een naam in het
telefoonboek te plaatsen, een naam te geven aan de handset enz.
Om een letter te selecteren: druk zo vaak als nodig is op de bijbehorende toets.
Bijvoorbeeld: druk eenmaal op "2" om "A" te selecteren. Druk tweemaal op "2" om "B" te
selecteren enz.
33
Page 47

Telefoonboek
Druk eenmaal op "2" en wacht totdat de aanwijzer naar het volgende teken gaat en druk tweemaal
op "2" om eerst "A" en vervolgens "B" te selecteren.
Tijdens het invoeren van tekst verschijnt het beschikbare teken onder elke toets onder in de
display.
U kunt de tekenset voor het invoeren van tekst wijzigen van Engels (abc) naar Latijns (aàá), Grieks
(ǹǺī) of Russisch (ȺȻȼ) door de #-toets in te drukken en ingedrukt te houden gedurende 2
seconden.
Druk op "0" om een spatie te selecteren.
Druk op de *-toets om tussen kleine letters en hoofdletters te wisselen.
Houd de #-toets gedurende 2 seconden ingedrukt om de tekenset te
veranderen.
Druk op de soft menu key om te corrigeren.
4 Telefoonboek
Elke handset kan maximaal 200 namen en nummers opslaan. De namen kunnen 16 tekens lang
zijn en de nummers maximaal 24 cijfers.
4.1 Een invoer toevoegen
1 Druk op de soft menu key.
Als het telefoonboek leeg is, verschijnt "Telefoonboek Leeg" in de display.
De namen staan in de lijst als ze zijn opgeslagen.
2 Selecteer "Optie".
3 Selecteer "Nieuwe invoer" en bevestig.
456
g h i j k l m n o
456
g h i j k l m n o
4 Gebruik het toetsenbord om de naam in te voeren en selecteer "Opsl."
(Opslaan).
5 Gebruik het toetsenbord om het nummer in te voeren en selecteer "Opsl.".
6 Selecteer de gewenste belmelodie en selecteer "Opsl.".
7 Terug naar standby.
Nederlands
4.2 Een invoer kiezen
1 Druk op de soft menu key.
2 Selecteer de gewenste naam of gebruik het toetsenbord om de eerste letter
van de naam in te voeren.
3 Druk op de opnemen-toets om het nummer te bellen.
4 Terug naar standby.
4.3 Details tonen
1 Druk op de soft menu key.
2 Selecteer de gewenste naam of gebruik het toetsenbord om de eerste letter
van de naam in te voeren.
3 Selecteer "Optie".
4 Selecteer "Toon Details" en bevestig.
34
Page 48

Telefoonboek
De naam, het nummer en de toegewezen belmelodie verschijnen in de
display.
5 Terug naar standby.
4.4 Eén of alle ingevoerde items wissen
1 Druk op de soft menu key.
2 Selecteer de gewenste naam of gebruik het toetsenbord om de eerste letter
van de naam in te voeren.
3 Selecteer "Optie".
Een invoer wissen:
4 Selecteer "Wis Invoer" en bevestig.
Alle ingevoerde items wissen:
4 Selecteer "Wis Alles" en bevestig.
5 Druk op de linker menutoets om te annuleren of op de rechter menutoets
om te bevestigen.
6 Terug naar standby.
4.5 Naam en nummer bewerken
1 Druk op de soft menu key.
2 Selecteer de gewenste naam of gebruik het toetsenbord om de eerste letter
van de naam in te voeren.
3 Selecteer "Optie".
4 Selecteer "Bewerk Invoer" en bevestig.
5 Druk op de soft key om te wissen en gebruik het toetsenbord om de naam
te veranderen.
6 Selecteer "Opsl." (Opslaan).
7 Bewerk het nummer en selecteer "Opsl.".
8 Selecteer de gewenste belmelodie en selecteer "Opsl.".
9 Terug naar standby.
4.6 Een telefoonboekinvoer naar een andere handset kopiëren
1 Druk op de soft menu key.
35
2 Selecteer de gewenste naam of gebruik het toetsenbord om de eerste letter
van de naam in te voeren.
3 Selecteer "Optie".
4 Selecteer "Kopie Invoer" en bevestig.
De beschikbare handsets (alle handsets die op de basis staan geregistreerd)
worden weergegeven.
5 Selecteer de gewenste handset en bevestig.
"Kopieer naar Handset x" verschijnt in de display.
"Ontvang Record Telefoonboek?" verschijnt in de display van de
bestemmingshandset.
Page 49

Nummerweergave oproeper
6 Druk op de bestemmingshandset op de rechter menutoets om te bevestigen
of op de linker menutoets om de overdracht te annuleren.
7 Terug naar standby.
4.7 Alle nummers in het telefoonboek naar een andere handset kopiëren
Door alle ingevoerde items van een handset naar een andere te kopiëren, wist u alle
bestaande records in de bestemmingshandset.
1 Druk op de soft menu key.
2 Selecteer de gewenste naam of gebruik het toetsenbord om de eerste letter
van de naam in te voeren.
3 Selecteer "Optie".
4 Selecteer "Kopieer Alles" en bevestig.
De beschikbare handsets (alle handsets die op de basis staan geregistreerd)
worden weergegeven.
5 Selecteer de gewenste handset en bevestig.
Nederlands
"Kopieer naar Handset x" verschijnt in de display.
"Vervang Alle Records?" verschijnt in de display van de
bestemmingshandset.
6 Druk op de bestemmingshandset op de rechter menutoets om te bevestigen
of op de linker menutoets om de overdracht te annuleren.
7 Terug naar standby.
5 Nummerweergave oproeper
5.1 Normale inkomende PSTN-oproepen
Deze dienst werkt alleen als u bent geabonneerd op nummerherkenning van
oproeper/clip. Neem hiervoor contact op met uw telefoonmaatschappij.
Bij ontvangst van een oproep van uw vaste telefoonlijn, verschijnt het telefoonnummer van de
oproeper op de display van de handset. De telefoon kan oproepen ontvangen in zowel FSK als
DTMF. U kunt ook zijn of haar naam zien als deze wordt verzonden door het netwerk. Als de naam
in het telefoonboek is geprogrammeerd, zal de naam uit het telefoonboek worden weergegeven!
De telefoon kan 30 oproepen opslaan in de oproeplijst (ontvangen en gemist) die later bekeken
kunnen worden. Als het geheugen vol is, zullen de nieuwe oproepen automatisch de oudste
oproepen in het geheugen vervangen.
Gemiste oproepen worden aangegeven met een knipperend pictogram op de
display. De naam van de handset wordt vervangen door dit pictogram en het
aantal gemiste oproepen.
36
Page 50

De handset naar eigen wens instellen
De ontvangen oproepen lezen
1 Druk op de omlaag-toets.
De lijst met ontvangen oproepen verschijnt op de display. Dit is een
combinatie van ontvangen en gemiste oproepen.
2 Selecteer de/het gewenste naam of nummer.
3 Druk op de opnemen-toets om het nummer te bellen.
OF
Selecteer "Optie".
Een invoer wissen:
4 Selecteer "Wis Oproep" en bevestig.
5 Terug naar standby.
Alle invoer wissen:
5 Selecteer "Wis Alles" en bevestig.
6 Terug naar standby.
Het nummer aan het telefoonboek toevoegen:
5 Selecteer "Sla nr. op" en bevestig.
6 Gebruik het toetsenbord om de naam in te voeren en selecteer "Opsl."
(Opslaan).
7 Gebruik het toetsenbord om het nummer te bewerken en selecteer "Opsl.".
8 Selecteer de gewenste belmelodie en selecteer "Opsl.".
9 Terug naar standby.
6 De handset naar eigen wens instellen
6.1 Beltoon en belvolume
Beltoon
U kunt kiezen uit 18 verschillende belmelodieën voor interne en externe oproepen.
1 Selecteer het menu.
2 Selecteer "Handset" en bevestig.
3 Selecteer "Beltoon" en bevestig.
4 Selecteer "Extern" voor externe oproepen of selecteer "Intern" voor
interne oproepen en bevestig.
5 Selecteer de gewenste melodie en bevestig.
Tijdens het bladeren wordt de melodie afgespeeld.
6 Terug naar standby.
Belvolume
U kunt kiezen uit 5 belvolumeniveaus en uit voor de handset.
1 Selecteer het menu.
2 Selecteer "Handset" en bevestig.
3 Selecteer "Belvolume" en bevestig.
37
Page 51

De handset naar eigen wens instellen
De huidige instelling wordt weergegeven.
4 Druk op de toets omhoog om het volume te verhogen.
5 Druk op de toets omlaag om het volume te verlagen.
6 Selecteer "Opsl." (Opslaan) om te bevestigen.
7 Terug naar standby.
6.2 Handset naam
U kunt de weergegeven naam op de handset veranderen in standby (max. 9 tekens).
1 Selecteer het menu.
2 Selecteer "Handset" en bevestig.
3 Selecteer "Handset Naam" en bevestig.
456
g h i j k l m n o
4 Voer de gewenste naam in.
5 Druk op de soft menu key om te corrigeren.
6 Selecteer "Opsl." (Opslaan) om te bevestigen.
7 Terug naar standby.
6.3 Toetstoon
1 Selecteer het menu.
2 Selecteer "Handset" en bevestig.
3 Selecteer "Toetstoon" en bevestig.
4 Selecteer "Aan" of "Uit" en bevestig.
5 Terug naar standby.
6.4 Het contrast instellen
1 Selecteer het menu.
2 Selecteer "Handset" en bevestig.
Nederlands
3 Selecteer "Contrast" en bevestig.
4 Selecteer het gewenste contrast (1 - 8) en bevestig.
5 Terug naar standby.
6.5 Automatisch aannemen
Als er een inkomende oproep is en de handset op de basis staat, zal de telefoon automatisch de
oproep aannemen als deze van de basis wordt gehaald. Deze functie kan in- of uitgeschakeld
worden.
1 Selecteer het menu.
2 Selecteer "Handset" en bevestig.
3 Selecteer "Autom. aanne." en bevestig.
4 Selecteer "Aan" of "Uit" en bevestig.
5 Terug naar standby.
38
Page 52

De handset naar eigen wens instellen
6.6 De verlichtingstijd van de display instellen
U kunt het aantal seconden dat de display verlicht blijft nadat u voor het laatst een toets hebt
ingedrukt, aanpassen.
1 Selecteer het menu.
2 Selecteer "Handset" en bevestig.
3 Selecteer "Verlichtingstijd" en bevestig.
4 Selecteer “10”, “20”, “30” of “40” sec. en bevestig.
5 Terug naar standby.
6.7 Prefixcode
Het is mogelijk om uw telefoon te gebruiken met een prefixnummer. Bij het kiezen van
telefoonnummers, kunt u automatisch de prefixcode voor het nummer toevoegen.
1 Selecteer het menu.
2 Selecteer "Handset" en bevestig.
3 Selecteer "Prefix" en bevestig.
4 Selecteer "Bewerk" en bevestig.
456
g h i j k l m n o
5 Voer de prefixcode in, bv. "0" en selecteer "Opsl." (Opslaan).
OF
4 Selecteer "Aan/Uit" en bevestig.
5 Selecteer "Aan" of "Uit" en bevestig.
6 Terug naar standby.
6.8 De alarmfunctie gebruiken
U kunt een andere alarminstelling hebben voor elke handset die op uw basis is geregistreerd. Het
alarm gaat alleen af op de handset en niet op de basis of een andere handset.
Het alarm instellen
1 Selecteer het menu.
2 Selecteer "Alarm/Klok" en bevestig.
3 Selecteer "Zet Alarm" en bevestig.
4 Selecteer "Eén keer", "Dagelijks aan", "Ma tot Vr" of "Uit" en bevestig.
Na het selecteren van "Eén keer", "Dagelijks aan" of "Ma tot Vr"
verschijnt er in de display:
Tijd (24 h):
00:00
39
456
g h i j k l m n o
5 Voer de tijd in waarop u wilt dat de telefoon rinkelt en bevestig met
"Opsl." (Opslaan).
6 Selecteer de gewenste beltoon en bevestig met "Opsl.".
7 Selecteer "Uit" en bevestig om het alarm uit te zetten.
8 Terug naar het vorige menu.
Page 53

6.9 Datum en tijd instellen
1 Selecteer het menu.
2 Selecteer "Alarm/Klok" en bevestig.
3 Selecteer "Dag & Tijd" en bevestig.
Basisinstellingen
456
g h i j k l m n o
4 Voer het jaar, de maand, dag, tijd en minuten in en selecteer "Opsl."
(Opslaan) om te bevestigen.
5 Terug naar het vorige menu.
6.10 Het tijdformaat instellen
1 Selecteer het menu.
2 Selecteer "Alarm/Klok" en bevestig.
3 Selecteer "Tijdformaat" en bevestig.
4 Selecteer "12 h" of "24 h" en bevestig.
5 Terug naar het vorige menu.
7 Basisinstellingen
7.1 Beltoon
U kunt kiezen uit 9 verschillende belmelodieën.
1 Selecteer het menu.
Nederlands
2 Selecteer "Basis inst." en bevestig.
3 Selecteer "Beltoon" en bevestig.
4 Selecteer de gewenste melodie en bevestig.
Tijdens het bladeren wordt het voorbeeld weergegeven.
5 Terug naar standby.
7.2 Belvolume
U kunt kiezen uit 5 belvolumeniveaus voor het basisstation.
1 Selecteer het menu.
2 Selecteer "Basis inst." en bevestig.
3 Selecteer "Belvolume" en bevestig.
De huidige instelling wordt weergegeven.
4 Druk op de toets omhoog om het volume te verhogen.
5 Druk op de toets omlaag om het volume te verlagen.
6 Selecteer "Opsl." (Opslaan) om te bevestigen.
7 Terug naar standby.
7.3 Kiesmodus
Er zijn twee belmodi:
• DTMF/Toonkiezen (meest gebruikt)
• Pulskiezen (voor oudere installaties)
40
Page 54

Hulpmiddelen
De kiesmodus veranderen:
1 Selecteer het menu.
2 Selecteer "Basis inst." en bevestig.
3 Selecteer "Kiesmodus" en bevestig.
4 Selecteer "Toon" of "Puls" en selecteer "Opsl." (Opslaan).
5 Terug naar standby.
7.4 Recall (Flash)
Druk op de flashtoets "R" (toets 4 – afb. 2C) om bepaalde diensten op uw externe lijn te gebruiken,
zoals "oproep in de wacht" (als uw telefoonmaatschappij deze functie aanbiedt); of om oproepen
door te schakelen als u gebruik maakt van een telefooncentrale (PABX). De flashtoets "R" is een
korte onderbreking van de lijn. U kunt de flashtijd instellen tot 100 ms of 250 ms.
1 Selecteer het menu.
2 Selecteer "Basis inst." en bevestig.
3 Selecteer "Recall" en bevestig.
4 Selecteer de korte flashtijd (100 ms) of de lange flashtijd (250 ms) en
selecteer "Opsl." (Opslaan).
5 Terug naar standby.
7.5 Systeem PIN
De systeem-PIN wordt gebruikt voor het registreren en het verwijderen van de registratie van de
handset en sommige andere optionele instellingen. De standaard systeem-PIN is 0000.
1 Selecteer het menu.
2 Selecteer "Basis inst." en bevestig.
3 Selecteer "Systeem PIN" en bevestig.
456
g h i j k l m n o
456
g h i j k l m n o
4 Voer de oude PIN in (standaard 0000) en selecteer "Opsl." (Opslaan).
5 Voer de nieuwe PIN in, selecteer "Opsl." en herhaal dit.
6 Terug naar standby.
8 Hulpmiddelen
8.1 Afspraak
U kunt 5 afspraken of herinneringen instellen die u een naam en een alarm op dag en tijd kunt
geven.
1 Selecteer het menu.
2 Selecteer "Hulpmiddelen" en bevestig.
3 Selecteer "Afspraken" en bevestig.
4 Selecteer één van de 5 afspraken en selecteer "Optie".
De afspraak bewerken:
5 Selecteer "Bewerk" en bevestig.
41
456
g h i j k l m n o
6 Bewerk de naam van de afspraak en selecteer "Opsl." (Opslaan).
Page 55

Extra handsets en basisstations
456
g h i j k l m n o
456
g h i j k l m n o
7 Bewerk de dag van de afspraak en selecteer "Opsl.".
8 Bewerk de tijd en selecteer "Opsl.".
9 Selecteer de gewenste alarmmelodie en selecteer "Opsl.".
10 Terug naar standby.
De afspraak wissen:
5 Selecteer "Wis" en bevestig.
6 Druk op de rechter menutoets om te bevestigen.
7 Druk op de linker menutoets om terug te gaan.
8 Terug naar standby.
8.2 Stopwatch
1 Selecteer het menu.
2 Selecteer "Hulpmiddelen" en bevestig.
3 Selecteer "Stopwatch" en bevestig.
4 Selecteer "Start" om de stopwatch te starten.
5 Selecteer "Stop" om de stopwatch te stoppen.
Nederlands
Selecteer nogmaals "Start" om opnieuw te starten.
Selecteer "Reset" om de teller te resetten.
6 Terug naar standby.
9 Extra handsets en basisstations
U kunt 4 handsets aanmelden bij één basisstation. Elke handset kan max. 4 basisstations
registreren en de gebruiker kan de gewenste basis selecteren.
9.1 Een nieuwe handset toevoegen
Alleen nodig wanneer u de registratie van een handset hebt verwijderd of wanneer u
zich een nieuwe hebt aangeschaft.
De basis in de registratiemodus zetten:
1 Houd de paging-toets op het basisstation ingedrukt.
De LED op de basis zal gaan knipperen gedurende 90 seconden. Op dat
moment is de basis gereed om te registreren.
Op de handset:
456
g h i j k l m n o
1 Selecteer het menu.
2 Selecteer "Handset" en bevestig.
3 Selecteer "Aanmelden" en bevestig.
4 Selecteer "Handset Aanm." en bevestig.
5 Selecteer het nummer van de basis dat moet worden gekoppeld aan de
handset (1 - 4) en bevestig.
6 Voer de systeem-PIN in (standaard 0000) en bevestig.
7 Terug naar standby.
42
Page 56

Extra handsets en basisstations
9.2 Een handset verwijderen
Deze procedure moet worden uitgevoerd op een andere handset dan die die u wilt verwijderen.
1 Selecteer het menu.
2 Selecteer "Handset" en bevestig.
3 Selecteer "Aanmelden" en bevestig.
4 Selecteer "Handset Afm." en bevestig.
456
g h i j k l m n o
456
g h i j k l m n o
5 Voer de systeem-PIN in (standaard 0000) en bevestig.
6 Voer het nummer van de handset in dat moet worden verwijderd en
bevestig.
7 Terug naar standby.
9.3 Een basis selecteren
U kunt uw handset tussen basisstations wisselen. U kunt de handset ook instellen om automatisch
de basis te selecteren met het sterkste signaal. De handset moet eerst apart worden geregistreerd
bij elke basis.
1 Selecteer het menu.
2 Selecteer "Handset" en bevestig.
3 Selecteer "Kies Basis" en bevestig.
4 Selecteer "Manueel" of "Auto" en bevestig.
Bij het selecteren van "Manueel":
5 Selecteer de basis die moet worden gekoppeld aan de handset en bevestig.
Als u automatische basisselectie hebt geselecteerd en de handset buiten bereik is
van de huidige basis, zal de handset alleen zoeken naar de sterkste basis in standby
(niet tijdens communicatie).
9.4 De intercomfunctie gebruiken
Een interne handset bellen
1 Druk op de linker INT-toets.
Het scherm geeft "Handset _" weer.
456
g h i j k l m n o
Een externe oproep naar een andere handset doorschakelen
Tijdens een externe oproep:
456
g h i j k l m n o
43
2 Voer het interne nummer van de handset in dat u wilt bellen.
3 Druk op de opleggen-toets om te eindigen of zet de handset terug op de
basis.
1 Druk op de linker INT-toets.
Het scherm geeft "Handset _" weer.
2 Voer het interne nummer van de handset in die u wilt bellen.
Uw externe correspondent wordt in de wacht geplaatst.
Page 57

3 Als de interne correspondent opneemt, drukt u op de opleggen-toets om de
oproep door te schakelen.
OF
3 Als de interne correspondent niet opneemt, drukt u op de linker INT-toets
om de externe correspondent weer terug te halen of om van de een naar de
ander te schakelen.
4 Druk op de opleggen-toets om te eindigen of zet de handset terug op de
basis.
Conferentiegesprek
U kunt tegelijkertijd met 2 handsets en een externe lijn praten.
Tijdens een externe oproep:
1 Druk op de linker INT-toets.
Het scherm geeft "Handset _" weer.
Beantwoorder
Nederlands
456
g h i j k l m n o
2 Voer het interne nummer van de handset in die u wilt bellen.
Uw externe correspondent wordt in de wacht geplaatst.
3 Selecteer "Conf." als de interne correspondent opneemt.
OF
3 Druk op de linker INT-toets om de externe correspondent weer terug te
halen als de interne correspondent niet opneemt.
4 Druk op de opleggen-toets om te eindigen of zet de handset terug op de
basis.
Een externe oproep aannemen tijdens een intern gesprek
Als u met een andere handset op de intercom zit, kunt u nog altijd externe oproepen aannemen.
Een inkomende oproep aannemen:
1 Druk op de opleggen-toets. De interne communicatie wordt nu
onderbroken.
2 Druk op de opnemen-toets. U staat nu in verbinding met de externe
oproeper.
10 Beantwoorder
De Butler 5750 heeft een ingebouwd digitaal antwoordapparaat met een opnamecapaciteit van 11
min. Dit antwoordapparaat kan vanaf de handset en op afstand worden bediend. Het
antwoordapparaat kan twee uitgaande berichten (OGM 1 en OGM 2) opnemen (maximaal 2 min.).
Dit kan op 2 manieren:
• Met OGM 1 heeft de beller de mogelijkheid om een bericht achter te laten
• Met OGM 2 wordt alleen het uitgaande bericht afgespeeld zonder dat de beller de mogelijkheid
heeft om een bericht achter te laten
De maximale opnameduur voor elk inkomend bericht = 3 min.
Een interne stem zal diverse gegevens vermelden zoals de datum en de tijd van de oproep, evenals
instellingen zoals VIP-code, beltonen ... De taal van de interne stem staat vermeld op de
verpakking!
44
Page 58

Beantwoorder
Alle boodschappen worden afgespeeld in de luidsprekermodus, om te wisselen
tussen oorstuk en luidspreker drukt u op de opnemen -toets
10.1 Display
De display van de handset geeft aan hoeveel berichten u hebt ontvangen. Als het
antwoordapparaat uitgeschakeld is, verschijnt het -pictogram. Als het ingeschakeld is,
verschijnt .
"Geheugen Vol" verschijnt op de display wanneer het interne geheugen vol is en er geen nieuwe
boodschappen opgenomen kunnen worden.
Wanneer er nieuwe boodschappen op uw beantwoorder staan, geeft de LCDachtergrondverlichting dit aan.
10.2 Uitgaande boodschappen
Er kunnen twee uitgaande boodschappen van 2 minuten worden opgenomen (OGM1 en OGM2).
• Uitgaand bericht 1 voor de antwoordfunctie en de mogelijkheid voor bellers om een bericht
achter te laten.
• Uitgaand bericht 2 voor de antwoordfunctie zonder dat de bellers een bericht achter kunnen
laten op het apparaat.
Een uitgaande boodschap opnemen (OGM 1 of OGM 2)
1 Selecteer het menu.
2 Selecteer "Beantwoorder" en bevestig.
3 Selecteer "Uitgnde Boodsch." en bevestig.
4 Selecteer "Opnemen" en bevestig.
5 Selecteer "Beantw.+Opname" voor OGM1 of "Enkel Beantw." voor
OGM2.
6 Spreek uw bericht na de pieptoon in en druk op "Opsl." (Opslaan) om te
bevestigen.
Het opgenomen bericht zal worden afgespeeld.
7 Druk tijdens het afspelen op "Wis" om te wissen of op "Stop" om het
afspelen te onderbreken.
De opname mag niet langer duren dan 2 minuten. Als er geen uitgaand bericht is
opgenomen, zal er een vooraf opgenomen uitgaand bericht worden gebruikt.
Een uitgaande boodschap afspelen
De uitgaande boodschap controleren:
1 Selecteer het menu.
2 Selecteer "Beantwoorder" en bevestig.
3 Selecteer "Uitgnde Boodsch." en bevestig.
4 Selecteer "Afspelen" en bevestig.
45
Page 59

Beantwoorder
5 Selecteer "Beantw.+Opname" voor OGM1 of "Enkel Beantw." voor
OGM2 en bevestig.
6 Het bericht zal worden afgespeeld. Druk op "Wis" om te wissen of op
"Stop" om het afspelen te onderbreken.
Een uitgaande boodschap selecteren (antwoordmodus)
1 Selecteer het menu.
2 Selecteer "Beantwoorder" en bevestig.
3 Selecteer "Beantw. Instell." en bevestig.
4 Selecteer "Modus" en bevestig.
5 Selecteer "Beantw.+Opname" voor OGM1 of "Enkel Beantw." voor
OGM2 en bevestig.
De uitgaande boodschap wissen
Als u het uitgaande bericht wist, wordt het standaardbericht afgespeeld.
Tijdens het afspelen van het uitgaande bericht (zie hierboven) kunt u het bericht wissen door op
"Wis" te drukken.
Nederlands
10.3 Het antwoordapparaat in-/uitschakelen
Als de beantwoorder uitgeschakeld is, verschijnt het -pictogram. Als de beantwoorder
ingeschakeld is, verschijnt het -pictogram en zal het apparaat de oproep automatisch
aannemen na een aantal beltonen (zie “10.4 Aantal beltonen instellen” ).
1 Selecteer het menu.
2 Selecteer "Beantwoorder" en bevestig.
3 Selecteer "Beantw. Aan/Uit" en bevestig.
4 Selecteer "Aan" of "Uit".
Zelfs als het antwoordapparaat uit staat, zal het automatisch na 10 beltonen
opnemen om de activering op afstand mogelijk te maken (zie“10.13
Antwoordapparaat op afstand inschakelen” ).
10.4 Aantal beltonen instellen
Het aantal beltonen waarna het antwoordapparaat oproepen zal aannemen, kan worden ingesteld
van 2 tot 9 en TS (Toll saver). De standaardinstelling is 5 beltonen. In de modus Toll saver, zal het
apparaat na 5 beltonen opnemen als er geen nieuwe berichten zijn en na 2 beltonen als er wel
nieuwe berichten zijn. Als er geen nieuwe berichten zijn en u uw apparaat belt om uw berichten
op afstand te beluisteren (zie “10.12 Bediening op afstand” ), kunt u na de tweede beltoon
ophangen. Zo hoeft u geen verbindingskosten te betalen en weet u meteen dat u geen nieuwe
berichten hebt.
1 Selecteer het menu.
2 Selecteer "Beantwoorder" en bevestig.
3 Selecteer "Beantw. Instell." en bevestig.
46
Page 60

Beantwoorder
4 Selecteer "Aantal Beltonen" en bevestig.
5 Selecteer 2 – 9 of "Toll saver" en bevestig.
10.5 De VIP-code programmeren
De VIP-code is een 3-cijferige code die wordt gebruikt om de machine op afstand te bedienen (zie
“10.12 Bediening op afstand” ). De VIP-code is standaard ingesteld op "321".
De VIP-code veranderen
1 Selecteer het menu.
2 Selecteer "Beantwoorder" en bevestig.
3 Selecteer "Beantw. Instell." en bevestig.
4 Selecteer "VIP Code" en bevestig.
456
g h i j k l m n o
456
g h i j k l m n o
456
g h i j k l m n o
5 Voer de oude PIN in (321) en bevestig.
6 Voer de nieuwe PIN in en bevestig.
7 Voer de nieuwe PIN opnieuw in en bevestig.
10.6 Werking
Bij het binnenkomen van een oproep en wanneer de beantwoorder ingeschakeld is, zal het
antwoordapparaat automatisch de oproep beantwoorden na het ingestelde aantal beltonen. Als
• Uitgaand bericht 1 geselecteerd is, zal dit afgespeeld worden. Na het uitgaande bericht is een
pieptoon te horen en de beller kan een bericht achterlaten (van maximaal 3 minuten).
• Uitgaand bericht 2 geselecteerd is, zal dit afgespeeld worden. Na de pieptoon zal de verbinding
automatisch worden verbroken. De beller krijgt niet de mogelijkheid om een bericht achter te
laten.
Als er tijdens de opname van een oproep gedurende 8 seconden niets wordt gezegd,
zal de verbinding automatisch worden verbroken.
10.7 Meeluisterfunctie
Tijdens het afspelen van het uitgaande bericht of de opname van een inkomend bericht, kunt u de
persoon aan de andere kant van de lijn horen door op de opnemen toets te drukken. Op de
display verschijnt "Meeluisterfunctie" en u kunt op de rechter soft key drukken om het
antwoordapparaat te laten stoppen en met de beller te praten.
Als u een tweede handset geregistreerd hebt op dezelfde basis van uw Butler 5750
kunt u het antwoordapparaat laten stoppen door op de "#’-toets te drukken tijdens
het meeluisteren.
10.8 Een memo opnemen
Met de Butler 5750 kunt u memo's opnemen. Een memo wordt gezien als een inkomend
bericht dat later kan worden opgehaald door de gebruiker. De max. opnameduur voor een memo
is 3 minuten.
47
Page 61

1 Selecteer het menu.
2 Selecteer "Beantwoorder" en bevestig.
3 Selecteer "Memo Opnemen" en bevestig.
4 Spreek uw bericht na de pieptoon in en druk op "Opsl." (Opslaan) om te
stoppen met opnemen.
10.9 Inkomende berichten en memo's afspelen
Als er nieuwe berichten zijn, kunt u alle nieuwe berichten afspelen met de soft key:
Beantwoorder
Of via het menu:
1 Druk op de rechter soft menu key.
1 Selecteer het menu.
2 Selecteer "Beantwoorder" en bevestig.
3 Selecteer "Boodsch. Weerg." en bevestig.
4 Selecteer “Nieuwe Boodsch.” als u alleen de nieuwe, of “Alle Boodsch.”
als u de oude en nieuwe berichten wilt afspelen.
Tijdens het afspelen, kunt u:
Het bericht wissen door "Wis" te selecteren.
Naar het volgende bericht gaan door "Volgende" te selecteren of de vooruit
overslaan-toets in te drukken.
Teruggaan naar het begin van het huidige bericht door eenmaal op de
achteruit overslaan-toets te drukken, teruggaan naar het vorige bericht door
tweemaal op deze toets te drukken.
U kunt het afspelen van berichten onderbreken door de pauze-toets in te
drukken. Druk nogmaals op de pauze-toets om verder te gaan.
Nederlands
Stop met afspelen door de stop-toets in te drukken.
10.10 Boodschappen wissen
Tijdens het afspelen van de berichten kunt u de berichten een voor een wissen zoals hierboven
beschreven. U kunt ook alle afgespeelde berichten wissen:
1 Selecteer het menu.
2 Selecteer "Beantwoorder" en bevestig.
3 Selecteer "Boodsch. Wissen" en bevestig.
4 Bevestig opnieuw of selecteer terug om te stoppen.
48
Page 62

Beantwoorder
10.11 Geheugen vol
Als het geheugen vol is, verschijnt "GEHEUGEN VOL" op de display. Als het antwoordapparaat
is ingeschakeld en er een oproep binnenkomt, zal het apparaat automatisch OGM 2 afspelen
(antwoordfunctie zonder opgenomen bericht van beller).
Bij het beluisteren van de berichten, zal de interne stem zeggen dat het geheugen vol is en zullen
vervolgens de berichten worden afgespeeld.
Wis de berichten een voor een tijdens het beluisteren of allemaal via het menu zoals hierboven
beschreven.
10.12 Bediening op afstand
Het antwoordapparaat kan alleen op afstand bediend worden als de gebruikte
telefoon DTMF-tonen kan verzenden.
456
g h i j k l m n o
1 Bel uw antwoordapparaat.
Het antwoordapparaat neemt de oproep aan, u hoort het uitgaande bericht en
een pieptoon.
456
g h i j k l m n o
2 Toets langzaam de VIP-code in (standaard 321)
U hoort twee korte pieptonen als bevestiging.
456
g h i j k l m n o
3 Voer de volgende codes in om de gewenste functie te gebruiken:
Boodschappen beluisteren
2
4 Druk op "2" om berichten te beluisteren
Het antwoordapparaat speelt de berichten af.
Tijdens het afspelen, hebt u de volgende opties:
2
2
3
1 1
1
6
7
5 Druk op "2" om het afspelen te onderbreken
6 Druk op "2" om opnieuw te starten met afspelen.
5 Druk op "3" om naar het volgende bericht te gaan.
5 Druk op "1" "1" om naar het vorige bericht te gaan.
5 Druk op "1" om het huidige bericht nogmaals af te spelen.
5 Druk op "6" om te stoppen met afspelen.
5 Druk op "7" om het huidige bericht te wissen.
Alle oude boodschappen wissen
0
6 Nadat u alle berichten beluisterd hebt, drukt u op "0" om alle berichten te
wissen.
Een uitgaande boodschap afspelen
4
4 Druk op "4" om het huidige uitgaande bericht af te spelen.
Een uitgaande boodschap opnemen
9
5
4 Druk op "9" om OGM 1 of OGM 2 te selecteren.
5 Druk op "5" om te starten met opnemen.
Een pieptoon geeft aan dat u kunt beginnen met opnemen.
49
Page 63

6 Spreek uw bericht in.
Beantwoorder
6
7 Druk op "6" om te stoppen met opnemen.
De opname stopt automatisch na 2 minuten.
Het antwoordapparaat in-/uitschakelen
9
9
8
4 Druk op "9" om het antwoordapparaat in te schakelen.
5 Druk op "9" om te wisselen tussen OGM1 en OGM2
6 Druk op de "8"-toets om het antwoordapparaat uit te schakelen.
Stoppen met het bedienen op afstand
6
Druk op "6" om te stoppen met het bedienen op afstand.
10.13 Antwoordapparaat op afstand inschakelen
Als het antwoordapparaat uitgeschakeld is, kunt u het op afstand inschakelen:
456
g h i j k l m n o
1 Bel uw antwoordapparaat.
Het antwoordapparaat zal de oproep automatisch aannemen na 10 beltonen en
uitgaand bericht 2 afspelen.
Nederlands
456
g h i j k l m n o
9
6
2 Toets de VIP-code langzaam in (standaard 321) terwijl het bericht
afgespeeld wordt.
3 Druk op "9" om het antwoordapparaat in te schakelen.
De interne stem zal zeggen dat het antwoordapparaat ingeschakeld is.
4 Druk op "6" om te stoppen met het bedienen op afstand.
50
Page 64

Probleemoplossing
11 Probleemoplossing
Symptoom Mogelijke oorzaak Oplossing
Geen weergave Batterijen zijn leeg Controleer de plaatsing van de
batterijen
Laad de batterijen op
Handset UITGESCHAKELD Schakel de handset IN
Geen toon Telefoonkabel is slecht
aangesloten
De lijn is bezet door een andere
handset
Het pictogram knippert
Basisstation of handset laat
geen beltoon horen
Niet mogelijk om een gesprek
naar de binnencentrale
(PABX) door te schakelen
De telefoon reageert niet op
het indrukken van de toetsen
Handset is buiten bereik Breng de handset dichter in de
Het basisstation heeft geen
stroom
De handset is niet aangemeld op
het basisstation
Het beltoonvolume staat uit of is
te laag
De flashtijd is te kort of te lang De flashtijd veranderen
Gebruikersfout Verwijder de batterijen en
Controleer de aansluiting van
de telefoonkabel
Wacht totdat de andere
handset het gesprek heeft
beëindigd
buurt van het basisstation
Controleer de aansluiting van
de stroomkabel bij het
basisstation
Meld de handset aan bij het
basisstation
Pas het volume van de beltoon
aan
plaats ze weer terug
12 Technische gegevens
Standaard DECT(Digital Enhanced Cordless Telecommunications)
Frequentiebereik 1880 MHz tot 1900 MHz
Aantal kanalen 120 duplexkanalen
Modulatie GFSK
Spraakcodering 32 kbit/s
Emissievermogen 10 mW (gemiddeld vermogen per kanaal)
Bereik 300 m in open ruimte / max. 50 m binnenshuis
Aantal handsets Max. 4
Stroomvoorziening
basisstation
Batterijen van handset: 2 oplaadbare batterijen AAA, NiMh 1,2 V, 600 mA
Autonomie van handset 110 uur in standby
Gesprekstijd van handset 11 uur
GAP (Generic Access Profile)
230 V / 50 Hz / 6 V gelijkstroom 300 mA
51
Page 65

Garantie
Normale
gebruiksomstandigheden
Kiesmodus Puls / Toon
Flashtijd 100 of 250 ms
+5 °C tot +45 °C
13 Garantie
13.1 Garantieperiode
De Topcom-toestellen hebben een garantieperiode van 24 maanden. De garantieperiode begint op
de dag waarop het nieuwe toestel wordt gekocht. De garantie op de batterijen is beperkt tot 6
maanden na aankoop. Kleine onderdelen of defecten die een verwaarloosbaar effect hebben op de
werking of waarde van het toestel worden niet gedekt door de garantie.
De garantie moet worden bewezen door het kunnen voorleggen van de originele aankoopbon
waarop de aankoopdatum en het toestelmodel staan aangegeven.
13.2 Afwikkeling van garantieclaims
Een defect toestel moet worden geretourneerd aan het onderhoudscentrum van Topcom samen
met de aankoopbon.
Als het toestel defect raakt tijdens de garantieperiode, zal Topcom of een van haar bevoegde
onderhoudscentra de defecten ingevolge materiaal- of fabricagefouten kostenloos repareren.
Topcom zal naar eigen inzicht voldoen aan haar garantieverplichtingen door de defecte toestellen,
of onderdelen ervan, te repareren of te vervangen. In het geval van vervanging kunnen de kleur en
het model verschillend zijn van het oorspronkelijk gekochte toestel.
De oorspronkelijke aankoopdatum is bepalend voor het begin van de garantieperiode. De
garantieperiode wordt niet verlengd als het toestel is vervangen of gerepareerd door Topcom of
een van haar bevoegde onderhoudscentra.
Nederlands
13.3 Garantiebeperkingen
Schade of defecten als gevolg van een onjuiste behandeling of onjuist gebruik en schade als gevolg
van het gebruik van niet-originele onderdelen of accessoires die niet worden aanbevolen door
Topcom, vallen buiten de garantie.
De draadloze telefoons van Topcom zijn alleen geschikt voor gebruik met oplaadbare batterijen.
De schade door het gebruik van normale, niet-oplaadbare batterijen valt buiten de garantie.
De garantie dekt geen schade te wijten aan externe factoren, zoals bliksem, water en brand, noch
enige transportschade.
Er kan geen aanspraak worden gemaakt op garantie als het serienummer op de toestellen is
veranderd, verwijderd of onleesbaar gemaakt.
Alle garantieclaims zullen ongeldig worden wanneer het toestel wordt gerepareerd, veranderd of
aangepast door de koper of door onbevoegde, niet officieel door Topcom erkende
onderhoudscentra.
52
Page 66

Afvoeren van het toestel (milieu)
14 Afvoeren van het toestel (milieu)
Op het einde van de levenscyclus van het product mag u dit product niet met het
normale huishoudelijke afval weggooien, maar moet u het naar een inzamelpunt
brengen voor de recyclage van elektrische en elektronische apparatuur. Dit wordt
aangeduid door het symbool op het product, in de handleiding en/of op de
verpakking.
Sommige materialen van het product kunnen worden hergebruikt als u ze naar een inzamelpunt
brengt. Door onderdelen of grondstoffen van gebruikte producten te hergebruiken, levert u een
belangrijke bijdrage aan de bescherming van het milieu.
Wend u tot uw plaatselijke overheid voor meer informatie over de inzamelpunten in uw buurt.
15 Reinigen
Reinig de telefoon met een vochtige doek of met een antistatische doek. Gebruik nooit
reinigingsmiddelen of schuurmiddelen.
16 ECO-modus (lage straling)
• Deze draadloze telefoon (conform de DECT-norm) vergemakkelijkt de lage-stralingswerking.
• De stralingsintensiteit van het radiosignaal tussen het basisstation en de handset wordt
verminderd tot een minimum wanneer de handset op het basisstation staat.
• De intensiteit van het radiosignaal wordt alleen naar de normale sterkte verhoogd wanneer de
handset van het basisstation wordt genomen of als er een oproep wordt ontvangen.
• Dit betekent niet dat de normale DECT-straling schadelijk is voor de gezondheid.
• De lage-stralingsmodus voorkomt een onnodige DECT-stralingsbelasting wanneer er geen
communicatie is vereist tussen het basisstation en de handset.
• Om technische redenen kunnen er geen extra handsets in de lage-stralingsmodus worden
gebruikt (een extra handset die niet in de directe omgeving van het basisstation staat, zal altijd
"zoeken naar het basisstation" als gevolg van het zwakke radiosignaal).
• De lage-stralingsmodus is actief in de fabrieksinstellingen.
• De lage-stralingsmodus wordt automatisch uitgeschakeld als u een extra handset aanmeldt.
• De lage-stralingsmodus wordt automatisch weer ingeschakeld als u alle extra handsets afmeldt
(er mag slechts één handset zijn aangemeld op het basisstation).
• De procedure voor het aan- en afmelden van handsets wordt uitgelegd in de
gebruikshandleiding.
53
Page 67

Instructions de sécurité
Français
1 Instructions de sécurité
• Utilisez uniquement la fiche du chargeur fournie. N'utilisez pas d'autres chargeurs, au risque
d'abîmer les éléments de batterie.
• Insérez uniquement des batteries rechargeables du même type. N'utilisez jamais de batteries
ordinaires non-rechargeables. Insérez des batteries rechargeables en respectant la polarité
(indiquée dans le compartiment à batteries du combiné).
• Ne touchez pas les contacts du chargeur et de la fiche avec des objets pointus ou métalliques.
• Le fonctionnement de certains appareils médicaux pourrait être altéré.
• Le combiné peut provoquer un bourdonnement désagréable dans les prothèses auditives.
• N'installez pas la base dans une pièce humide ou à moins d'1,5 m d'une source d'eau. Veillez à
ce que le combiné reste sec.
• N'utilisez pas le téléphone dans un environnement qui présente un risque d'explosion.
• Jetez les batteries et entretenez le téléphone dans le strict respect de l'-environnement.
• Comme ce téléphone est indisponible en cas de coupure de courant, vous devez utiliser un
téléphone autonome -pour les appels urgents, un téléphone mobile par exemple.
Français
2 Pour commencer
2.1 Comment utiliser ce mode d'emploi ?
Ce mode d'emploi adopte les règles suivantes pour clarifier les instructions :
Texte.......« écran ».
Texte qui apparaît à l'écran du téléphone.
Touche à enfoncer. Cette touche peut être une touche contextuelle (Voir 2.4 Touches/LED).
Lorsque la touche contextuelle est un symbole, elle est représentée dans la colonne de gauche.
Quand la touche contextuelle correspond à un texte, la touche contextuelle gauche ou droite est
représentée dans la colonne de gauche et le texte est représenté entre guillemets dans la colonne
de droite.
2.2 Installation de la base
Pour installer la base, procédez comme suit :
1 Branchez une extrémité de l'adaptateur dans la prise de courant et l'autre extrémité dans la
prise d'adaptateur à l'arrière de la base.
2 Branchez une extrémité du câble téléphonique dans la prise téléphonique murale et l'autre
extrémité en dessous de la base.
3 Placez le câble téléphonique et le câble d'alimentation dans les guides de la base comme
indiqué sur la figure 2A.
54
Page 68

Pour commencer
A
C
B
- 2A Vue arrière de la base b :A. Prise murale du téléphone
b :B.Câble d'alimentation
b :C.Câble téléphonique
2.3 Installation du combiné
1 Ouvrez le compartiment à batteries comme illustré sur la figure 2B.
2 Insérez les batteries en respectant les polarités (+ et -).
3 Fermez le compartiment à batteries.
4 Laissez le combiné sur la base pendant 20 heures. L'indicateur Ligne/
charge sur la base s'allume.
Butler 5750
A
+
-
55
+
B
- 2B Vue arrière du combiné b :A.Couvercle
b :B.Batteries rechargeables
Avant la première utilisation du téléphone, assurez-vous au préalable que les
batteries ont pu se charger pendant 20 heures. À défaut, le téléphone ne
fonctionnera pas de manière optimale.
Page 69

2.4 Touches/LED
Combiné
1. Écran
2. Touche haut/recomposition
3. Touche de menu contextuel droite
4. Touche droite/flash
5. Touche fin d'appel/arrêt
6. Touches alphanumériques
7. Verrouillage du clavier
8. Touche désactivation sonnerie
9. Touche arrêt
10. Touche avance
11. Touche lecture/pause
12. Touche recul
13. Touche bas/journal des appels
14. Touche prise d'appel/mains-libres/marche
15. Touche de menu contextuel gauche
16. Touche gauche/INT
17. Touche OK
17
16
15
14
13
12
11
10
1
4
9
8
7
*
- 2C Combiné -
Pour commencer
1
2
INT
OK
R
DEF
3
ABC
2
GHI
PQRS
MNO
6
JKL
5
WXYZ
9
TUV
8
#
0
3
4
5
6
7
Français
Base
18. LED en service/sous tension/combiné sur
la base
19. Touche paging
2.5 Symboles
Prise d'appel Verrouillage du clavier
Fin d'appel Réglage d'alarme
Appels manqués dans la liste d'appels*
Volume de la sonnerie du combiné
éteint
Combiné non associé à la base ou hors
de portée
Batterie vide
18
19
Butler 5750
- 2D Base -
Combiné à portée de la base Batterie faible
Appel interne Batterie à moitié chargée
Mains-libres Batterie pleine
Nouveau message vocal Répondeur allumé/éteint
* Si le service d'identification de l'appelant est activé sur votre ligne téléphonique.
56
Page 70

Pour commencer
2.6 Touches d'écran
Les touches d'écran (touches contextuelles) sont situées juste en dessous de l'écran. Le rôle de ces
2 touches varie suivant le mode de fonctionnement. La fonction en cours est affichée sous forme
d'icône ou de texte juste au-dessus de chacune des 2 touches d'écran.
Répertoire Mute
OK/valider Retour
Menu Pas de touche
Effacer Lecture des messages
2.7 LED de la base
La LED (14) indique l'état dans lequel se trouve la base :
• Éteint : la base n'est pas reliée à une prise de courant ou le combiné n'est pas sur la base pour
être rechargé.
• Allumé : le combiné est en cours de chargement.
• Clignotement lent : prise d'appel ou sonnerie.
• Clignotement rapide : enregistrement en cours.
2.8 Navigation dans les menus
Le Butler 5750 intègre un système de menus très convivial. Chaque menu aboutit à une série
d'options. L'arborescence des menus est illustrée au paragraphe suivant.
1 Le combiné étant allumé et en mode de veille, appuyez sur la touche de
menu contextuel gauche pour accéder au menu principal.
2 Faites défiler l'écran jusqu'à l'option de menu souhaitée.
3 Appuyez sur la touche contextuelle pour afficher d'autres options ou pour
valider le réglage affiché.
Pour quitter ou remonter d'un niveau dans le menu
Pour revenir au niveau précédent du menu, appuyez sur la touche
contextuelle.
Vous pouvez, à tout instant, annuler une action et revenir au mode veille en
appuyant sur la touche fin d'appel.
2.9 Organisation des menus
Menu Sous-menus
57
Répondeur
Répertoire
Lire les mess
Effacer mess.
Répond. on/off
Enregist. mémo
Mess. sortant
Régl. répond.
Page 71

Menu Sous-menus
Sonnerie
Vol. Sonnerie
Nom Combiné
Bip Touche
Contraste
Combiné
Réglage Base
Autotalk
Tps éclairage
Prefix
Choix Base
Langue
Enregistrer
Sonnerie
Vol. Sonnerie
Mode Compos.
Rappel
PIN Système
Utilisation du téléphone
Heure
Outils
3 Utilisation du téléphone
3.1 Mise en/hors service du combiné
1 Appuyez sur la touche arrêt et maintenez-la enfoncée pour éteindre le
combiné.
2 Appuyez sur la touche prise d'appel ou placez le combiné sur la base pour
le rallumer.
3.2 Modification de la langue des menus
1 Accédez au menu.
2 Sélectionnez Combiné et validez.
Régler Alarme
Jour & Heure
Format Temps
Rendez-Vous
Chronomètre
Français
3 Sélectionnez Langue et validez.
4 Sélectionnez la langue de votre choix et validez.
L'écran affiche Mémorisé.
5 Appuyez sur la touche fin d'appel pour revenir au mode veille.
Les flèches indiquent que d'autres options sont disponibles dans ce menu.
58
Page 72

Utilisation du téléphone
3.3 Passer un appel ordinaire
Composition directe
1 Appuyez sur la touche Prise d'appel pour lancer l'appel.
456
g h i j k l m n o
2 Composez le numéro de téléphone.
3 Appuyez sur la touche fin d'appel pour raccrocher ou replacez le combiné
sur sa base.
Précomposition
La fonction de précomposition vous permet de saisir et modifier un numéro avant de passer l'appel.
456
g h i j k l m n o
1 Composez un numéro de 24 chiffres maximum.
Appuyez sur la touche 0 et maintenez-la enfoncée pour insérer une pause.
L'écran affiche un P.
2 Appuyez sur la touche contextuelle pour corriger.
3 Appuyez sur la touche prise d'appel pour lancer l'appel.
4 Appuyez sur la touche fin d'appel pour raccrocher ou replacez le combiné
sur sa base.
Recomposition d'un numéro de la liste
Vous pouvez recomposer un numéro quelconque parmi les 10 derniers numéros appelés. Si vous
avez mémorisé un nom dans le répertoire pour l'associer au numéro, c'est le nom qui sera affiché
à la place.
1 Appuyez sur la touche recomposition.
2 Sélectionnez un numéro. Si le numéro est dans le répertoire, le nom
associé s'affichera.
3 Appuyez sur la touche prise d'appel pour lancer l'appel ou sélectionnez
Option.
4 Si vous avez sélectionné Option, faites défiler l'écran et sélectionnez :
Efface Appel : pour supprimer le numéro de la liste d'appels ;
Mémo.Numéro : pour mémoriser le numéro dans le répertoire ;
Efface Tout : pour effacer la liste d'appels.
5 Confirmez la sélection.
6 Appuyez sur la touche fin d'appel pour revenir au mode veille.
3.4 Recevoir un appel
Lorsque vous recevez un appel externe, l'écran affiche Appel Externe.
Pour prendre l'appel :
1 Appuyez sur la touche prise d'appel.
OU
Retirez le combiné de sa base si vous avez activé la fonction Autotalk.
(Voir 6.5 Autotalk)
59
L'icône appel en cours apparaît sur l'écran. La durée de l'appel est
affichée après 15 secondes.
Page 73

Utilisation du téléphone
2 Appuyez sur la touche fin d'appel pour raccrocher ou replacez le combiné
sur sa base.
Vous pouvez désactiver le volume de la sonnerie lors d'un appel entrant en
sélectionnant Silence.
3.5 Mode mains-libres
Le mode mains-libres vous permet de parler à votre interlocuteur sans tenir le combiné. Il permet
aussi à d'autres personnes dans la pièce d'écouter la conversation.
1 Pour basculer en mode mains-libres, appuyez sur la touche Mains-libres
pendant l'appel.
3.6 Réglage du volume de l'écouteur/haut-parleur mains-libres
1 Appuyez sur les touches haut ou bas pour régler le volume de 1 à 5 pendant
une conversation normale ou en mode mains-libres.
3.7 Fonction silence (Mute)
Cette fonction désactive le microphone de telle façon que la personne à l'autre bout de la ligne ne
vous entende pas.
1 Au cours d'une conversation, appuyez sur la touche contextuelle pour
désactiver le microphone.
Muet Encl. s'affiche à l'écran.
2 Sélectionnez Arrêt pour réactiver le microphone.
3.8 Localisation d'un combiné (fonction paging)
1 Appuyez sur la touche paging de la base.
Tous les combinés enregistrés avec la base se mettent à sonner pendant 30
secondes.
456
g h i j k l m n o
2 Appuyez sur une touche quelconque du combiné pour interrompre la
fonction paging.
3.9 Verrouillage du clavier
Cette fonction permet de verrouiller le clavier afin d'éviter de composer un numéro par
inadvertance lorsque vous vous déplacez avec le combiné dans la main.
En mode veille :
Français
1 Appuyez sur la touche verrouillage du clavier (touche 7 sur la figure 2C) et
maintenez-la enfoncée jusqu'à ce que le message "Clavier Verrouillé" et
l'icône verrouillage du clavier apparaissent sur l'écran.
2 Pour déverrouiller le clavier, sélectionnez Débloc, puis appuyez sur la
touche verrouillage du clavier.
60
Page 74

Répertoire
3.10 Utilisation du clavier alphanumérique
Avec votre téléphone, vous pouvez également saisir des caractères alphanumériques. Cette
fonction peut vous servir pour saisir un nom dans le répertoire, attribuer un nom au combiné, etc.
Pour sélectionner une lettre, appuyez sur la touche correspondante autant de fois que nécessaire.
Par exemple, pour sélectionner A, appuyez sur 2 une seule fois. Pour écrire un B, appuyez sur 2
deux fois de suite, etc.
Pour écrire A puis B consécutivement, appuyez sur 2 une seule fois, attendez que le curseur avance
d'une position, puis appuyez sur 2 deux fois.
Au cours de la saisie de texte, le caractère disponible sous chaque touche apparaît au bas de l'écran.
Vous pouvez modifier les caractères de saisie de l'anglais (abc) vers le latin (aàá), le grec (ǹǺī)
ou le russe (ȺȻȼ) en maintenant la touche # enfoncée pendant 2 secondes.
Appuyez sur 0 pour insérer un espace.
Appuyez sur la touche * pour basculer entre les minuscules et les majuscules.
Appuyez sur la touche # et maintenez-la enfoncée pendant 2 secondes pour
changer le jeu de caractères de saisie.
Appuyez sur la touche contextuelle pour corriger.
4 Répertoire
Chaque combiné peut mémoriser jusqu'à 200 noms et numéros. Les noms peuvent comprendre
jusqu'à 16 caractères et les numéros peuvent compter jusqu'à 24 chiffres.
4.1 Pour ajouter une entrée
1 Appuyez sur la touche contextuelle.
Si le répertoire est vide, le message Annuaire Vide apparaît sur l'écran. Si des
noms ont déjà été mémorisés, ceux-ci sont affichés.
2 Sélectionnez Option.
3 Sélectionnez Ajoute Entrée et validez.
456
g h i j k l m n o
456
g h i j k l m n o
4.2 Pour composer un numéro
4 Utilisez le clavier pour saisir le nom, puis sélectionnez Mémor.
5 Utilisez le clavier pour saisir le numéro, puis sélectionnez Mémor.
6 Sélectionnez la mélodie de sonnerie souhaitée et sélectionnez Mémor.
7 Revenez au mode veille.
1 Appuyez sur la touche contextuelle.
61
2 Sélectionnez le nom souhaité ou utilisez le clavier pour saisir la première
lettre du nom.
3 Appuyez sur la touche prise d'appel pour lancer l'appel.
4 Revenez au mode veille.
Page 75

4.3 Montre Détail
1 Appuyez sur la touche contextuelle.
2 Sélectionnez le nom souhaité ou utilisez le clavier pour saisir la première
lettre du nom.
3 Sélectionnez Option.
4 Sélectionnez Montre Détail et validez.
Le nom, le numéro et la mélodie de sonnerie associée à l'entrée s'affichent sur
l'écran.
5 Revenez au mode veille.
4.4 Suppression d'une entrée ou de toutes les entrées
1 Appuyez sur la touche contextuelle.
2 Sélectionnez le nom souhaité ou utilisez le clavier pour saisir la première
lettre du nom.
3 Sélectionnez Option.
Répertoire
Pour supprimer une seule entrée :
4 Sélectionnez Efface Entrée et validez.
Pour supprimer toutes les entrées :
4 Sélectionnez Efface Tout et validez.
5 Appuyez sur la touche contextuelle gauche pour annuler ou sur la touche
contextuelle droite pour valider.
6 Revenez au mode veille.
4.5 Modification d'un nom ou d'un numéro
1 Appuyez sur la touche contextuelle.
2 Sélectionnez le nom souhaité ou utilisez le clavier pour saisir la première
lettre du nom.
3 Sélectionnez Option.
4 Sélectionnez Modif. Entr. et validez.
5 Appuyez sur la touche contextuelle pour supprimer le nom ou utilisez le
clavier pour le modifier.
6 Sélectionnez Mémor.
Français
7 Modifiez le numéro et sélectionnez Mémor.
8 Sélectionnez la mélodie de sonnerie souhaitée et sélectionnez Mémor.
9 Revenez au mode veille.
4.6 Copie d'une entrée du répertoire vers un autre combiné
1 Appuyez sur la touche contextuelle.
2 Sélectionnez le nom souhaité ou utilisez le clavier pour saisir la première
lettre du nom.
3 Sélectionnez Option.
62
Page 76

Identification de l'appelant
4 Sélectionnez Copie Entrée et validez.
Les combinés disponibles (tous les combinés qui sont enregistrés sur la base)
sont mentionnés.
5 Sélectionnez le combiné souhaité et validez.
Copie vers Combiné x s'affiche à l'écran.
Recevoir Entrée Répertoire? apparaît sur l'écran du combiné de destination.
6 Sur le combiné de destination, appuyez sur la touche contextuelle droite
pour confirmer ou sur la touche contextuelle gauche pour annuler le
transfert.
7 Revenez au mode veille.
4.7 Copie de toutes les entrées du répertoire vers un autre combiné
En recopiant toutes les entrées d'un combiné vers un autre, vous effacez toutes les
entrées existantes du combiné de destination.
1 Appuyez sur la touche contextuelle.
2 Sélectionnez le nom souhaité ou utilisez le clavier pour saisir la première
lettre du nom.
3 Sélectionnez Option.
4 Sélectionnez Copie Tout et validez.
Les combinés disponibles (tous les combinés qui sont enregistrés sur la base)
sont mentionnés.
5 Sélectionnez le combiné souhaité et validez.
Copie vers Combiné x s'affiche à l'écran.
Remplacer Tous Entrées? apparaît sur l'écran du combiné de destination.
6 Sur le combiné de destination, appuyez sur la touche contextuelle droite
pour confirmer ou sur la touche contextuelle gauche pour annuler le
transfert.
7 Revenez au mode veille.
5 Identification de l'appelant
5.1 Appels entrants RTC ordinaires
Cette fonction n'est disponible que si vous avez souscrit au service de présentation
du numéro. Au besoin, veuillez prendre contact avec votre compagnie de téléphone.
Lorsque vous recevez un appel sur votre ligne téléphonique fixe, le numéro de téléphone de
l'appelant s'affiche sur l'écran du combiné. Le téléphone peut recevoir des appels de type FSK et
DTMF. Vous pouvez aussi voir le nom de l'appelant s'il est transmis par le réseau. Si le nom est
programmé dans le répertoire, c'est le nom du répertoire qui est affiché.
63
Page 77

Personnalisation du combiné
Le téléphone peut mémoriser 30 appels dans la liste d'appels (reçus et manqués) que vous pouvez
consulter ultérieurement. Quand la mémoire est pleine, les nouveaux appels remplacent
automatiquement les plus anciens appels conservés en mémoire.
Les appels manqués sont signalés par une icône clignotante sur l'écran. Le
nom du combiné est remplacé par cette icône et le nombre d'appels manqués.
Pour consulter les appels reçus
1 Appuyez sur la touche bas.
La liste Appels reçus apparaît à l'écran. Elle regroupe les appels reçus et les
appels manqués.
2 Sélectionnez le nom ou le numéro souhaité.
3 Appuyez sur la touche prise d'appel pour lancer l'appel.
OU
Sélectionnez Option.
Pour supprimer une seule entrée :
4 Sélectionnez Efface Appel et validez.
5 Revenez au mode veille.
Pour supprimer toutes les entrées :
5 Sélectionnez Efface Tout et validez.
6 Revenez au mode veille.
Pour ajouter le numéro au répertoire :
5 Sélectionnez “Enregistrer” et validez.
6 Utilisez le clavier pour saisir le nom, puis sélectionnez Mémor.
7 Utilisez le clavier pour modifier le numéro, puis sélectionnez Mémor.
8 Sélectionnez la mélodie de sonnerie souhaitée et sélectionnez Mémor.
9 Revenez au mode veille.
6 Personnalisation du combiné
6.1 Sonnerie et volume
Sonnerie
Vous pouvez choisir parmi 18 mélodies de sonnerie différentes pour différencier les appels
internes et externes.
Français
1 Accédez au menu.
2 Sélectionnez Combiné et validez.
3 Sélectionnez Sonnerie et validez.
4 Sélectionnez Externe pour des appels externes ou Interne pour des appels
internes, puis validez.
5 Sélectionnez la mélodie souhaitée et validez.
La mélodie est diffusée pendant le défilement.
6 Revenez au mode veille.
64
Page 78

Personnalisation du combiné
Vol. Sonnerie
Vous pouvez choisir parmi 5 niveaux de volume de sonnerie du combiné, voire même couper
totalement le volume.
1 Accédez au menu.
2 Sélectionnez Combiné et validez.
3 Sélectionnez Vol. Sonnerie et validez.
La valeur en cours est affichée.
4 Appuyez sur la touche haut pour augmenter le volume.
5 Appuyez sur la touche bas pour diminuer le volume.
6 Sélectionnez Mémor. pour valider.
7 Revenez au mode veille.
6.2 Nom du combiné
Vous pouvez modifier le nom affiché sur le combiné pendant le mode veille (max. 9 caractères).
1 Accédez au menu.
2 Sélectionnez Combiné et validez.
3 Sélectionnez Nom Combiné et validez.
456
g h i j k l m n o
4 Saisissez un nom à votre convenance.
5 Appuyez sur la touche contextuelle pour corriger.
6 Sélectionnez Mémor. pour valider.
7 Revenez au mode veille.
6.3 Bip Touche
1 Accédez au menu.
2 Sélectionnez Combiné et validez.
3 Sélectionnez Bip Touche et validez.
4 Sélectionnez Marche ou Arrêt et validez.
5 Revenez au mode veille.
6.4 Réglage du contraste
1 Accédez au menu.
65
2 Sélectionnez Combiné et validez.
3 Sélectionnez Contraste et validez.
4 Sélectionnez un niveau de contraste à votre convenance (1 à 8) et validez.
5 Revenez au mode veille.
Page 79

Personnalisation du combiné
6.5 Autotalk
Lorsque vous recevez un appel entrant et que le combiné est sur la base, le téléphone prend
automatiquement la ligne dès qu'il est retiré de la base. Cette fonction peut être activée ou
désactivée.
1 Accédez au menu.
2 Sélectionnez Combiné et validez.
3 Sélectionnez Autotalk et validez.
4 Sélectionnez Marche ou Arrêt et validez.
5 Revenez au mode veille.
6.6 Réglage du temps d'éclairage de l'écran
Vous pouvez modifier le nombre de secondes durant lesquelles l'écran reste rétroéclairé après la
dernière action.
1 Accédez au menu.
2 Sélectionnez Combiné et validez.
3 Sélectionnez Tps éclairage et validez.
4 Sélectionnez 10, 20, 30 ou 40 secondes et validez.
5 Revenez au mode veille.
6.7 Code de préfixe
Il vous est possible d'utiliser votre téléphone avec un code de préfixe. Lorsque vous composez des
numéros, vous pouvez faire ajouter automatiquement le code de préfixe avant le numéro.
1 Accédez au menu.
2 Sélectionnez Combiné et validez.
3 Sélectionnez Prefix et validez.
4 Sélectionnez Modifie et validez.
456
g h i j k l m n o
5 Saisissez le code de préfixe (par exemple 0) et sélectionnez Mémor.
OU
4 Sélectionnez Marche/Arrêt et validez.
5 Sélectionnez Marche ou Arrêt et validez.
6 Revenez au mode veille.
Français
6.8 Fonction d'alarme
Vous pouvez définir une alarme différente sur chaque combiné enregistré sur votre base. L'alarme
ne sonne que sur le combiné concerné, pas sur la base ni sur un autre combiné.
Réglage de l'alarme
1 Accédez au menu.
2 Sélectionnez Alarme/Horl. et validez.
3 Sélectionnez Regler Alarme et validez.
66
Page 80

Réglage Base
4 Sélectionnez Une Fois, Quotidienne, Lun à Ven ou Arrêt et validez.
Si vous avez sélectionné Une Fois, Quotidienne ou Lun à Ven, l'écran
affiche ensuite :
Temps (24h) :
00:00
456
g h i j k l m n o
5 Spécifiez l'heure à laquelle vous voulez que le téléphone sonne et validez
avec Mémor.
6 Sélectionnez la sonnerie souhaitée et validez avec Mémor.
7 Pour désactiver l'alarme, sélectionnez Arrêt et validez.
8 Retournez au menu précédent.
6.9 Réglage de la date et de l'heure
1 Accédez au menu.
2 Sélectionnez Alarme/Horl. et validez.
3 Sélectionnez Jour & Heure et validez.
456
g h i j k l m n o
4 Saisissez l'année, le mois, le jour, l'heure et les minutes, puis sélectionnez
Mémor. pour valider.
5 Retournez au menu précédent.
6.10 Réglage du format horaire
1 Accédez au menu.
2 Sélectionnez Alarme/Horl. et validez.
3 Sélectionnez "Format Temps" et validez.
4 Sélectionnez 12 h ou 24 h et validez.
5 Retournez au menu précédent.
7 Réglage Base
7.1 Sonnerie
Vous pouvez choisir parmi 9 mélodies de sonnerie différentes.
1 Accédez au menu.
2 Sélectionnez “Réglage Base” et validez.
3 Sélectionnez Sonnerie et validez.
4 Sélectionnez la mélodie souhaitée et validez.
Un extrait est diffusé pendant le défilement.
5 Revenez au mode veille.
7.2 Vol. Sonnerie
Vous pouvez choisir parmi 5 niveaux de volume de sonnerie de la base.
1 Accédez au menu.
2 Sélectionnez “Réglage Base” et validez.
67
Page 81

3 Sélectionnez Vol. Sonnerie et validez.
La valeur en cours est affichée.
4 Appuyez sur la touche haut pour augmenter le volume.
5 Appuyez sur la touche bas pour diminuer le volume.
6 Sélectionnez Mémor. pour valider.
7 Revenez au mode veille.
7.3 Mode de numérotation
Il existe 2 modes de numérotation :
• Numérotation à tonalités DTMF (la plus courante)
• Numérotation à impulsions (sur les installations plus anciennes)
Pour changer le mode de composition :
1 Accédez au menu.
2 Sélectionnez Réglage Base et validez.
3 Sélectionnez Mode Compos. et validez.
Réglage Base
4 Sélectionnez Tonalités ou Impulsions et sélectionnez Mémor.
5 Revenez au mode veille.
7.4 Rappel (Flash)
Appuyez sur la touche Flash R (touche 4 - Figure 2C) pour utiliser certains services sur votre ligne
extérieure, tels que "appel en attente" (si ce service est proposé par votre compagnie de téléphone),
ou pour transférer les appels téléphoniques lorsque vous utilisez un autocommutateur privé
(PABX). La touche Flash R produit une brève interruption de la ligne. Vous pouvez régler le flash
à 100 ms ou 250 ms.
1 Accédez au menu.
2 Sélectionnez Réglage Base et validez.
3 Sélectionnez Rappel et validez.
4 Sélectionnez un flash court (100 ms) ou un flash long (250 ms) et
sélectionnez Mémor.
5 Revenez au mode veille.
7.5 PIN Système
Français
La fonction PIN Système permet d'activer ou supprimer l'enregistrement des combinés et de
définir quelques paramètres supplémentaires. Le code PIN Système par défaut est 0000.
1 Accédez au menu.
2 Sélectionnez Réglage Base et validez.
3 Sélectionnez PIN Système et validez.
456
g h i j k l m n o
456
g h i j k l m n o
4 Saisissez l'ancien code PIN (0000 par défaut) et sélectionnez Mémor.
5 Saisissez le nouveau code PIN, sélectionnez Mémor. et répétez l'opération.
6 Revenez au mode veille.
68
Page 82

Outils
8Outils
8.1 Rendez-Vous
Vous pouvez définir 5 rappels ou rendez-vous auxquels vous pouvez associer un nom et une
alarme à déclencher à une date et une heure données.
1 Accédez au menu.
2 Sélectionnez Outils et validez.
3 Sélectionnez Rendez-Vous et validez.
4 Sélectionnez l'un des 5 rendez-vous et sélectionnez Option.
Pour modifier le rendez-vous :
5 Sélectionnez Modifie et validez.
456
g h i j k l m n o
456
g h i j k l m n o
456
g h i j k l m n o
6 Modifiez l'intitulé du rendez-vous et sélectionnez Mémor.
7 Saisissez la date du rendez-vous et sélectionnez Mémor.
8 Saisissez l'heure et sélectionnez Mémor.
9 Sélectionnez la mélodie d'alarme souhaitée et sélectionnez Mémor.
10 Revenez au mode veille.
Pour supprimer le rendez-vous :
5 Sélectionnez Efface et validez.
6 Appuyez sur la touche contextuelle droite pour valider.
7 Appuyez sur la touche contextuelle gauche pour revenir en arrière.
8 Revenez au mode veille.
8.2 Chronomètre
1 Accédez au menu.
2 Sélectionnez Outils et validez.
3 Sélectionnez Chronomètre et validez.
4 Sélectionnez Démar. pour démarrer le chronomètre.
5 Sélectionnez Arrêt pour arrêter le chronomètre.
Sélectionnez à nouveau Démar. pour redémarrer.
Sélectionnez RAZ pour remettre à zéro le compteur.
6 Revenez au mode veille.
9 Combinés et stations de base supplémentaires
Vous pouvez enregistrer jusqu'à 4 combinés sur une seule base. Chaque combiné peut enregistrer
jusqu'à 4 stations de base et l'utilisateur peut sélectionner la base qu'il souhaite utiliser.
9.1 Ajout d'un nouveau combiné
Cette opération n'est nécessaire que si vous avez supprimé l'enregistrement d'un
combiné ou si vous en avez acheté un nouveau.
69
Page 83

Pour placer la base en mode d'enregistrement :
1 Maintenez enfoncée la touche paging de la base.
La LED sur la base se met à clignoter pendant 90 secondes. Pendant cette
période, la base est prête à enregistrer un combiné.
Sur le combiné :
1 Accédez au menu.
2 Sélectionnez Combiné et validez.
3 Sélectionnez Enregistrer et validez.
4 Sélectionnez Enreg.Comb. et validez.
5 Sélectionnez le numéro de la base à associer au combiné (1-4) et validez.
Combinés et stations de base supplémentaires
456
g h i j k l m n o
6 Saisissez le code PIN système (0000 par défaut) et validez.
7 Revenez au mode veille.
9.2 Suppression d'un combiné
Cette procédure doit être réalisée sur un combiné différent de celui que vous souhaitez supprimer.
1 Accédez au menu.
2 Sélectionnez Combiné et validez.
3 Sélectionnez Enregistrer et validez.
4 Sélectionnez Suppr. Comb. et validez.
456
g h i j k l m n o
456
g h i j k l m n o
5 Saisissez le code PIN système (0000 par défaut) et validez.
6 Saisissez le numéro du combiné qui doit être supprimé et validez.
7 Revenez au mode veille.
9.3 Sélection d'une base
Vous pouvez basculer votre combiné d'une base vers une autre. Vous pouvez aussi le régler de
façon qu'il sélectionne automatiquement la base offrant le meilleur signal. Le combiné doit, au
préalable, être enregistré individuellement sur chaque base.
Français
1 Accédez au menu.
2 Sélectionnez Combiné et validez.
3 Sélectionnez Choix Base et validez.
4 Sélectionnez Manuel ou Auto et validez.
Si vous avez sélectionné Manuel :
5 Sélectionnez la base à associer au combiné et validez.
Si vous avez activé la sélection de base automatique et que le combiné se trouve
hors de portée de la base actuelle, il ne cherchera à s'associer à la base la plus
proche qu'en mode de veille (pas pendant une communication).
70
Page 84

Combinés et stations de base supplémentaires
9.4 Fonction d'intercom
Appel vers un combiné interne
1 Appuyez sur la touche gauche INT.
L'écran affiche Combiné _.
456
g h i j k l m n o
2 Saisissez le numéro interne du combiné que vous souhaitez joindre.
3 Appuyez sur la touche fin d'appel pour raccrocher ou replacez le combiné
sur sa base.
Transfert d'un appel externe vers un autre combiné
Pendant un appel externe :
1 Appuyez sur la touche gauche INT.
L'écran affiche Combiné _.
456
g h i j k l m n o
2 Saisissez le numéro interne du combiné que vous souhaitez joindre.
Votre correspondant externe est mis en attente.
3 Dès que le correspondant interne répond, appuyez sur la touche Fin d'appel
pour transférer l'appel.
OU
3 Si le correspondant interne ne répond pas, appuyez sur la touche gauche
INT pour reprendre l'appel du correspondant externe ou pour transférer
l'appel à quelqu'un d'autre.
4 Appuyez sur la touche fin d'appel pour raccrocher ou replacez le combiné
sur sa base.
Conférence téléphonique
Vous pouvez associer 2 combinés et une ligne extérieure pour mener une conversation à trois.
Pendant un appel externe :
1 Appuyez sur la touche gauche INT.
L'écran affiche Combiné _.
456
g h i j k l m n o
2 Saisissez le numéro interne du combiné que vous souhaitez joindre.
Votre correspondant externe est mis en attente.
3 Dès que le correspondant interne répond, sélectionnez Conf.
OU
3 Si le correspondant interne ne répond pas, appuyez sur la touche gauche
INT pour reprendre l'appel du correspondant externe.
4 Appuyez sur la touche fin d'appel pour raccrocher ou replacez le combiné
sur sa base.
Prise d'un appel externe pendant une communication interne
Lorsque vous êtes en mode intercom avec un autre combiné interne, vous pouvez toujours
répondre à un appel externe.
71
Page 85

Pour prendre un appel entrant :
1 Appuyez sur la touche fin d'appel. La communication interne est alors
interrompue.
2 Appuyez sur la touche prise d'appel. Vous êtes à présent en
communication avec l'appelant externe.
10 Répondeur
Le Butler 5750 dispose d'un répondeur numérique intégré d'une capacité d'enregistrement de 11
minutes. Ce répondeur peut être commandé depuis le combiné et à distance. Il offre la possibilité
d'enregistrer deux messages sortants (annonce 1 et annonce 2) de 2 minutes maximum.
Vous disposez de 2 options :
• Avec l'annonce 1, l'appelant a la possibilité de laisser un message.
• Avec l'annonce 2, le message sortant est simplement diffusé mais ne laisse pas à l'appelant
l'occasion de laisser un message.
Le temps d'enregistrement maximum pour chaque message entrant est de 3 minutes.
Une voix interne vous indique diverses informations telles que le jour et l'heure de l'appel ainsi que
les réglages (code VIP, sonneries...). La langue de la voix interne est indiquée sur l'emballage !
Répondeur
La lecture des messages se fait en mode haut-parleur. Pour basculer entre l'écouteur
et le haut-parleur, appuyez sur la touche prise d'appel .
10.1 Écran
L'écran sur le combiné indique le nombre de messages que vous avez reçus. Si le répondeur est
éteint, l'écran affiche l'icône . S'il est allumé, l'écran affiche l'icône .
L'écran indique Mém. Pleine quand la mémoire interne est saturée et que plus aucun nouveau
message ne peut être enregistré.
Lorsque de nouveaux messages sont arrivés sur votre répondeur, l'écran rétroéclairé clignote pour
vous le signaler.
10.2 Messages sortants
Deux messages sortants de 2 minutes peuvent être enregistrés (annonce 1 et annonce 2).
• Le message sortant 1 de la fonction répondeur offre à l'appelant la possibilité de laisser un
message.
• Le message sortant 2 de la fonction répondeur ne permet pas à l'appelant de laisser un message
sur le répondeur.
Enregistrement d'un message sortant (annonce 1 ou annonce 2)
Français
1 Accédez au menu.
2 Sélectionnez Répondeur et validez.
3 Sélectionnez Mess. sortant et validez.
4 Sélectionnez Enreg. mess. et validez.
5 Sélectionnez Répond&Enreg. pour l'annonce 1 ou Répondre pour
l'annonce 2.
72
Page 86

Répondeur
6 Commencez à parler après le bip sonore, puis appuyez sur Mémor. pour
7 Pendant la lecture, appuyez sur Efface pour effacer ou sur Arrêt pour
L'enregistrement ne peut pas dépasser 2 minutes. Si aucun message sortant n'est
enregistré, c'est l'annonce pré-enregistrée qui est utilisée.
Lecture du message sortant
Pour vérifier le message sortant :
1 Accédez au menu.
2 Sélectionnez Répondeur et validez.
3 Sélectionnez Mess. sortant et validez.
4 Sélectionnez Lire message et validez.
5 Sélectionnez Répond&Enreg. pour l'annonce 1 ou Répondre pour
valider.
Le message enregistré est lu.
interrompre la lecture.
l'annonce 2.
6 Le message est lu. Appuyez sur Efface pour effacer ou sur Arrêt pour
interrompre la lecture.
Sélection du message sortant (mode répondeur)
1 Accédez au menu.
2 Sélectionnez Répondeur et validez.
3 Sélectionnez Régl. répond. et validez.
4 Sélectionnez Mode répondeur et validez.
5 Sélectionnez Répond&Enreg. pour l'annonce 1 ou Répondre pour
l'annonce 2.
Effacement du message sortant
Si vous effacez le message sortant, c'est l'annonce par défaut qui sera lue.
Pendant la lecture du message sortant (voir ci-avant), vous pouvez effacer le message en appuyant
sur Efface.
10.3 Allumer/éteindre le répondeur
Si le répondeur est éteint, l'écran affiche l'icône . S'il est allumé, l'écran affiche l'icône
et le répondeur se déclenche automatiquement après un certain nombre de sonneries (voir “10.4
Régler le nombre de sonneries (délai du répondeur)” ).
73
1 Accédez au menu.
2 Sélectionnez Répondeur et validez.
3 Sélectionnez Répond. on/off et validez.
4 Sélectionnez Marche ou Arrêt.
Même éteint, le répondeur se déclenche automatiquement après 10 sonneries pour
permettre l'activation à distance (voir “10.13 Allumer le répondeur à distance” ).
Page 87

Répondeur
10.4 Régler le nombre de sonneries (délai du répondeur)
Le nombre de sonneries avant le déclenchement du répondeur en cas d'appel peut être réglé de 2
à 9 et sur TS (Eco. taxes). Le réglage standard est de 5 sonneries. En mode éco. taxes, le répondeur
se déclenche après 5 sonneries s'il n'y a pas de nouveau message et après 2 sonneries en cas de
nouveaux messages. S'il n'y a pas de nouveau message et que vous consultez votre répondeur pour
vérifier vos messages à distance (voir “10.12 Commande à distance” ), vous pouvez raccrocher
après la 2e sonnerie. Ainsi, vous ne paierez pas de frais de connexion et vous saurez que vous
n'avez pas de nouveau message.
1 Accédez au menu.
2 Sélectionnez Répondeur et validez.
3 Sélectionnez Régl. répond. et validez.
4 Sélectionnez Délai répond. et validez.
5 Sélectionnez une valeur entre 2 et 9 ou Eco. taxes et validez.
10.5 Programmer le code VIP
Le code VIP est un code à trois chiffres servant à commander le répondeur à distance (voir “10.12
Commande à distance” ). Par défaut, il est réglé sur 321.
Modification du code VIP
1 Accédez au menu.
2 Sélectionnez Répondeur et validez.
3 Sélectionnez Régl. répond. et validez.
4 Sélectionnez Cod.sécurité et validez.
456
g h i j k l m n o
456
g h i j k l m n o
456
g h i j k l m n o
5 Saisissez l'ancien code PIN (321) et validez.
6 Saisissez le nouveau code PIN et validez.
7 Saisissez une seconde fois le nouveau code PIN et validez.
10.6 Fonctionnement
Si un appel est reçu et que le répondeur est allumé, ce dernier se déclenche automatiquement après
le nombre de sonneries choisi.
• Si le message sortant 1 a été sélectionné, ce message est lu. À la fin du message sortant, un bip
indique à l'appelant qu'il peut laisser un message (de 3 minutes maximum).
• Si le message sortant 2 a été sélectionné, ce message est lu. La ligne est automatiquement
coupée après le bip. L'appelant n'a pas la possibilité de laisser un message.
Français
Si, pendant l'enregistrement, aucune parole n'est prononcée pendant 8 secondes, la
ligne est automatiquement coupée.
74
Page 88

Répondeur
10.7 Filtrer les appels
Pendant la lecture du message sortant ou l'enregistrement d'un message entrant, vous pouvez
écouter votre correspondant en appuyant sur la touche prise d'appel . L'écran affiche
Filtrage de l'appel et vous pouvez appuyer sur la touche contextuelle droite pour arrêter le
répondeur et dialoguer avec l'appelant.
Si vous avez un deuxième combiné enregistré sur la même base du Butler 5750,
vous pouvez arrêter le répondeur en appuyant sur la touche # pendant le filtrage des
appels.
10.8 Enregistrer un mémo
Le Butler 5750 vous permet d'enregistrer des mémos. Ces mémos sont considérés comme des
messages entrants qui peuvent être écoutés ultérieurement par l'utilisateur. Le temps
d'enregistrement maximum d'un mémo est de 3 minutes.
1 Accédez au menu.
2 Sélectionnez Répondeur et validez.
3 Sélectionnez Enregist. mémo et validez.
4 Commencez à parler après le bip sonore, puis sélectionnez Mémor. pour
terminer l'enregistrement.
10.9 Lire les messages entrants et les mémos
Lorsque vous avez reçu des nouveaux messages, vous pouvez les lire via la touche contextuelle :
1 Appuyez sur la touche contextuelle droite.
Ou via le menu :
1 Accédez au menu.
2 Sélectionnez Répondeur et validez.
3 Sélectionnez Lire les mess et validez.
4 Sélectionnez Lire nouv.mess pour ne lire que les nouveaux messages ou
Lire ts mess. pour lire tous les messages, anciens et nouveaux.
Lors de la lecture, vous pouvez :
Supprimer le message en sélectionnant Efface.
75
Passer au message suivant en sélectionnant Suivant ou en appuyant sur la
touche avance.
Revenir au début du message en cours en appuyant une fois sur la touche
recul ou revenir au message précédent en appuyant deux fois sur la touche
recul.
Suspendre la lecture du message en appuyant sur la touche pause. Appuyez à
nouveau sur la touche pause pour continuer.
Arrêter la lecture en appuyant sur la touche arrêt.
Page 89

Répondeur
10.10 Effacer des messages
Pendant la lecture des messages, vous pouvez effacer les messages un par un comme indiqué ciavant. Vous pouvez également effacer tous les messages lus :
1 Accédez au menu.
2 Sélectionnez Répondeur et validez.
3 Sélectionnez Effacer mess. et validez.
4 Confirmez une seconde fois ou sélectionnez Retour pour arrêter
l'opération.
10.11 Mémoire pleine
Si la mémoire est saturée, le message "MÉMOIRE PLEINE" apparaît sur l'écran. Si le répondeur
est allumé et qu'un appel lui parvient, le répondeur lit automatiquement l'annonce 2 (fonction
répondeur sans possibilité pour l'appelant de laisser un message).
Lorsque vous consulterez les messages, la voix interne signalera que la mémoire est pleine avant
de lire les messages.
Effacez les messages un par un pendant l'écoute ou tous les messages en une fois via le menu
comme indiqué ci-avant.
10.12 Commande à distance
Le répondeur ne peut être commandé à distance qu'à l'aide d'un téléphone à touches
(système de sélection à tonalités DTMF).
456
g h i j k l m n o
456
g h i j k l m n o
456
g h i j k l m n o
Écouter les messages
2
2
1 Appelez votre répondeur.
Le répondeur se déclenche : vous entendez le message sortant et un bip
sonore.
2 Composez lentement le code VIP (par défaut : 321).
Vous devez entendre deux petits bips de confirmation.
3 Saisissez les codes suivants pour utiliser la fonction souhaitée :
4 Appuyez sur 2 pour écouter les messages.
Le répondeur vous lit les messages reçus.
Pendant la lecture, vous disposez des options suivantes :
5 Appuyez sur 2 pour suspendre la lecture.
Français
2
3
1 1
1
6
7
6 Appuyez sur 2 pour reprendre la lecture.
5 Appuyez sur 3 pour passer au message suivant.
5 Appuyez deux fois sur 1 pour revenir au message précédent.
5 Appuyez sur 1 pour répéter le message en cours.
5 Appuyez sur 6 pour arrêter la lecture.
5 Appuyez sur 7 pour effacer le message en cours.
76
Page 90

Répondeur
Effacer tous les anciens messages
0
6 Après avoir écouté tous les messages, appuyez sur 0 pour effacer
l'ensemble des messages.
Lire le message sortant
4
4 Appuyez sur 4 pour lire le message sortant actuel.
Enregistrer le message sortant
9
5
4 Appuyez sur 9 pour sélectionner l'annonce 1 ou l'annonce 2.
5 Appuyez sur 5 pour commencer l'enregistrement.
Un bip vous indique que vous pouvez commencer à enregistrer.
6 Prononcez votre message.
6
7 Appuyez sur 6 pour arrêter l'enregistrement.
L'enregistrement se termine automatiquement au bout de 2 minutes.
Allumer/éteindre le répondeur
9
9
8
4 Appuyez sur 9 pour allumer le répondeur.
5 Appuyez sur 9 pour basculer entre l'annonce 1 et l'annonce 2.
6 Appuyez sur 8 pour éteindre le répondeur.
Terminer la commande à distance
6
Appuyez sur 6 pour terminer la commande à distance.
10.13 Allumer le répondeur à distance
Si le répondeur est éteint, vous pouvez le mettre en service à distance :
456
g h i j k l m n o
456
g h i j k l m n o
9
6
1 Appelez votre répondeur.
Le répondeur se déclenche automatiquement après 10 sonneries et lit le
message sortant 2.
2 Composez lentement le code VIP (par défaut : 321) pendant la lecture du
message sortant.
3 Appuyez sur 9 pour allumer le répondeur.
La voix interne signale que le répondeur a été mis en service.
4 Appuyez sur 6 pour terminer la commande à distance.
77
Page 91

11 Dépannage
Symptôme Cause possible Solution
Aucun affichage Batteries déchargées Vérifiez la position des
Pas de tonalité Câble téléphonique mal raccordé Vérifiez la connexion du câble
Dépannage
batteries
Rechargez les batteries
Combiné désactivé Activez le combiné
téléphonique
La ligne est occupée par un autre
combiné
L'icône clignote
La base ou le combiné ne
sonne pas
Impossible de transférer un
appel sur PABX
Le téléphone ne répond pas
lorsque vous appuyez sur les
touches
Combiné hors de portée Rapprochez le combiné de la
La base n'est pas alimentée Vérifiez la connexion
Le combiné n'est pas enregistré
sur la base
Le volume de la sonnerie est
désactivé ou faible
Le flash est trop court ou trop
long
Erreur de manipulation Retirez les batteries et
12 Données et caractéristiques techniques
Attendez que l'autre combiné
soit raccroché.
base
électrique de la base
Enregistrez le combiné sur la
base
Réglez le volume de la
sonnerie
Modifiez le flash
remettez-les en place.
Français
Norme DECT(Digital Enhanced Cordless Telecommunications)
GAP (Generic Access Profile)
Plage de fréquence 1880 MHz à 1900 MHz
Nombre de canaux 120 canaux duplex
Modulation GFSK
Codage de la parole 32 kbit/s
Puissance d'émission 10 mW (puissance moyenne par canal)
Portée 300 m en zone dégagée ou 50 m maximum à l'intérieur
Nombre de combinés Jusqu'à 4
Alimentation de la base 230V / 50 Hz/ 6V CC 300 mA
Batteries pour le combiné : 2 batteries rechargeables AAA, NiMh 1,2 V, 600 mA
Autonomie du combiné 110 heures en veille
Temps de conversation avec
le combiné
Conditions normales
d'utilisation
11 heures
+5 °C à +45 °C
78
Page 92

Garantie
Mode de numérotation Impulsions/tonalités
Durée de flash 100 ou 250 ms
13 Garantie
13.1 Période de garantie
Les appareils de Topcom bénéficient d'une période de garantie de 24 mois. La période de garantie
commence le jour de l'achat du nouvel appareil. La garantie sur les batteries est limitée à 6 mois à
compter de l'achat. Les accessoires et les défauts qui ont un effet négligeable sur le fonctionnement
de l'appareil ne sont pas couverts.
La garantie doit être prouvée par la présentation du ticket original d'achat sur lequel sont
mentionnés la date de l'achat et le modèle de l'appareil.
13.2 Traitement de la garantie
Tout appareil défectueux doit être retourné à un centre de service après-vente Topcom
accompagné d'un ticket d'achat valable.
Si l'appareil tombe en panne pendant la période de garantie, Topcom ou son centre de service
après-vente officiel réparera gratuitement toute panne due à un défaut matériel ou de fabrication.
Topcom assurera, à sa seule discrétion, ses obligations en matière de garantie en réparant ou en
remplaçant les appareils ou les pièces défectueux. En cas de remplacement, la couleur et le modèle
peuvent être différents de ceux de l'appareil acheté initialement.
La date d'achat initiale détermine le début de la période de garantie. La période de garantie n'est
pas prolongée si l'appareil est remplacé ou réparé par Topcom ou par l'un de ses centres de service
après-vente officiels.
13.3 Exclusions de garantie
Les dommages et les pannes causés par un mauvais traitement ou une utilisation incorrecte et les
dommages qui résultent de l'utilisation de pièces et d'accessoires non recommandés par Topcom
ne sont pas couverts par la garantie.
Les téléphones sans fil Topcom ont été conçus pour fonctionner avec des batteries rechargeables
uniquement. Les dommages causés par l'utilisation de batteries non rechargeables ne sont pas
couverts par la garantie.
La garantie ne couvre pas les dommages causés par des facteurs extérieurs tels que la foudre, l'eau
et le feu ni les dommages provoqués par le transport.
Aucune garantie ne peut être invoquée si le numéro de série indiqué sur les appareils a été modifié,
enlevé ou rendu illisible.
Aucune garantie ne peut non plus être invoquée si l'appareil a été réparé ou modifié par l'acheteur
ou par des techniciens non qualifiés et non agréés par Topcom.
79
Page 93

Mise au rebut de l'appareil (environnement)
14 Mise au rebut de l'appareil (environnement)
Au terme du cycle de vie de ce produit, ne le jetez pas avec les déchets ménagers
ordinaires mais déposez-le dans un point de collecte pour le recyclage des
équipements électriques et électroniques. Le symbole indiqué sur ce produit, sur le
mode d'emploi et/ou sur la boîte est là pour vous le rappeler.
Certains matériaux qui composent le produit peuvent être réutilisés si vous les
déposez dans un point de recyclage. En réutilisant certaines pièces ou matières premières de
produits usagés, vous contribuez fortement à la protection de l'environnement.
Pour toute information supplémentaire sur les points de collecte dans votre région, contactez les
autorités locales.
15 Nettoyage
Nettoyez le téléphone à l'aide d'un chiffon légèrement humide ou antistatique. N'utilisez jamais de
détergents ni de solvants abrasifs.
16 Mode ECO (faible rayonnement)
• Ce téléphone sans fil (conforme à la norme DECT) permet un fonctionnement à faible
rayonnement.
• L'intensité du rayonnement du signal radio entre la station de base et le combiné est réduite au
minimum lorsque le combiné se trouve sur la station de base.
• L'intensité du rayonnement du signal radio n'augmente pour atteindre sa puissance normale que
lorsque le combiné est retiré de la station de base ou lorsqu'un appel entre.
• Cela ne signifie par pour autant que le rayonnement DECT normal est nocif pour la santé.
• Le mode de faible rayonnement empêche tout rayonnement DECT inutile lorsque aucune
communication n'est nécessaire entre la station de base et le combiné.
• Pour des raisons techniques, aucun combiné supplémentaire ne peut être utilisé en mode de
rayonnement faible (un combiné supplémentaire situé à proximité immédiate de la station de
base « rechercherait » celle-ci en permanence en raison de la faiblesse du signal radio).
• Le mode de faible rayonnement est activé en usine.
• Le mode de faible rayonnement est désactivé automatiquement si vous branchez un combiné
supplémentaire.
• Le mode de faible rayonnement est réactivé immédiatement si vous débranchez tous les
combinés supplémentaires (un seul combiné peut être connecté à la station de base).
• La procédure de branchement et de débranchement des combinés est expliquée dans le mode
d'emploi.
Français
80
Page 94

Sicherheitshinweise
Deutsch
1 Sicherheitshinweise
• Verwenden Sie nur den mitgelieferten Netzadapter. Verwenden Sie keine fremden Adapter, da
die Batteriezellen beschädigt werden könnten.
• Verwenden Sie nur aufladbare Batterien des gleichen Typs. Verwenden Sie niemals normale,
nicht-aufladbare Batterien. Achten Sie beim Einlegen der Batterien auf richtige Polarität (wie
im Batteriefach des Mobilteils angegeben).
• Berühren Sie nicht die Lade- und Steckerkontakte mit spitzen oder metallischen Gegenständen.
• Medizinische Geräte können in ihrer Funktion beeinflusst werden.
• Das Mobilteil kann in Hörgeräten einen unangenehmen Brummton verursachen.
• Stellen Sie das Basisgerät nicht in einem feuchten Raum oder in einem Abstand von weniger
als 1,5 m von einem Wasseranschluss auf. Lassen Sie kein Wasser an das Mobilteil kommen.
• Verwenden Sie das Telefon nicht in Umgebungen, in denen Explosionsgefahr besteht.
• Entsorgen Sie die Batterien und pflegen Sie das Telefon auf umweltfreundliche -Weise.
• Da bei Stromausfall das Telefonieren mit diesem Gerät nicht möglich ist, verwenden Sie bitte
im Falle eines Notrufs ein -stromnetzunabhängiges Telefon, z.B. ein Handy.
2 Erste Schritte
2.1 Zum Gebrauch dieser Bedienungsanleitung
In dieser Bedienungsanleitung wird folgende Methode angewendet, um die Anweisungen zu
verdeutlichen:
Text......."Anzeige".
Angezeigter Text auf der Telefonanzeige
Zu drückende Taste. Diese Taste kann eine Menütaste sein (Siehe "2.4 Tasten / Anzeigen"). Ist die
Menütaste ein Symbol, so wird sie in der linken Spalte abgebildet. Ist die Menütaste ein Text, wird
die rechte oder linke Menütaste in der linken Spalte und der Text in der rechten Spalte zwischen
Anführungszeichen abgebildet.
2.2 Basisstation installieren
Zur Installation gehen Sie folgendermaßen vor:
1 Verbinden Sie das eine Ende des Netzadapters mit der Steckdose und das andere Ende mit der
Adapterbuchse auf der Rückseite der Basisstation.
2 Verbinden Sie das eine Ende des Telefonkabels mit dem Telefonwandanschluss und das
andere Ende mit dem Anschluss auf der Rückseite der Basisstation.
3 Befestigen Sie das Telefon- und das Netzkabel wie in Abbildung 2A dargestellt.
81
Page 95

C
B
- 2A Rückseite der Basisstation A. Telefonwandanschluss
Erste Schritte
A
2.3 Mobilteil installieren
1 Öffnen Sie das Batteriefach wie in Abbildung 2B dargestellt.
2 Legen Sie die Batterien ein. Achten Sie dabei auf die Polarität (+ und -).
3 Schließen Sie das Batteriefach.
4 Lassen Sie das Mobilteil 20 Stunden auf der Basisstation stehen. Die
Ladeanzeige an der Basisstation leuchtet auf.
Butler 5750
B. Netzkabel
C. Telefonkabel
A
+
Deutsch
-
+
B
- 2B Rückseite des Mobilteils A. Abdeckung
B. Wiederaufladbare Batterien
Bevor Sie das Telefon zum ersten Mal verwenden, stellen Sie sicher, dass die
Batterie 20 Stunden aufgeladen wurde. Geschieht dies nicht, funktioniert das
Telefon nicht optimal.
82
Page 96

Erste Schritte
2.4 Tasten / Anzeigen
Mobilteil
1. Display
2. Nach-oben-Taste / Wahlwiederholung
3. Rechte Menütaste
4. Nach-rechts-Taste / Flash-Taste
5. Auflegen / AUS-Taste
6. Alphanumerische Tasten
7. Tastatursperre
8. Rufton-Aus-Taste
9. Stopptaste
10. Vorwärtstaste
11. Abspiel- / Pausentaste
12. Rückwärtstaste
13. Nach-unten-Taste / Anrufliste
14. Gespräch annehmen / Freisprech- / EINTaste
15. Linke Menütaste
16. Nach-links-Taste / Interner Anruf INT
17. OK-Taste
17
16
15
14
13
12
11
10
1
4
9
8
7
*
- 2C Mobilteil -
1
2
INT
OK
R
DEF
3
ABC
2
GHI
PQRS
MNO
6
JKL
5
WXYZ
9
TUV
8
#
0
3
4
5
6
7
Basisstation
18. LED-Anzeige: In Betrieb / Strom /
Mobilteil auf Basisstation
19. Paging-Taste
2.5 Symbole
Gespräch angenommen Tastatursperre
Aufgelegt Wecker eingeschaltet
Entgangene Anrufe in der Anrufliste*
Ruftonlautstärke Mobilteil AUS Batterie leer
Mobilteil innerhalb der Reichweite der
Basisstation
Mobilteil nicht angemeldet oder außer
Reichweite
Batterie schwach
18
19
Butler 5750
- 2D Basisstation -
Interner Anruf Batteriestand mittel
Freisprechmodus aktiviert Batterie voll
Neue Mailbox-Nachricht Anrufbeantworter ein- und ausschalten
* Wenn die Anruferkennung für Ihren Telefonanschluss aktiviert ist.
83
Page 97

Erste Schritte
2.6 Displaytasten
Die Displaytasten (Menütasten) befinden sich direkt unter der Anzeige. Die Funktion dieser 2
Tasten ändert sich je nach Betriebsmodus. Die jeweilige Funktion wird als Symbol oder Text
direkt über den beiden Displaytasten angezeigt.
Telefonbuch Stummschaltung aktiviert
OK / Bestätigen Zurück
Menü Keine Taste
Löschen Nachrichten abspielen
2.7 LED der Basisstation
Die LED (14) zeigt Folgendes an:
• AUS: Die Basisstation ist nicht an das Netz angeschlossen oder das Mobilteil befindet sich
nicht auf der Basisstation
• EIN: Das Mobilteil wird geladen
• Langsames Blinken: Gespräch angenommen oder Telefon klingelt
• Schnelles Blinken: während der Anmeldung
2.8 Durch das Menü navigieren
Das Butler 5750 verfügt über ein leicht zu bedienendes Menü-System. Jedes Menü besteht aus
einer Reihe von Unterpunkten. Die Menü-Übersicht finden Sie im folgenden Abschnitt.
1 Um das Hauptmenü aufzurufen, drücken Sie die linke Menütaste bei
eingeschaltetem Mobilteil im Standby-Modus.
2 Bewegen Sie sich zum gewünschten Menüpunkt.
3 Drücken Sie die Menütaste zum Aufrufen weiterer Unterpunkte oder zum
Bestätigen der angezeigten Einstellung.
Das Menü verlassen oder eine Stufe im Menü zurückgehen
Um zur vorherigen Stufe des Menüs zurückzugehen, drücken Sie die
Menütaste.
Zum Abbrechen und Zurückkehren in den Standby-Modus, drücken Sie die
Auflegen-Taste.
2.9 Menü-Übersicht
Menü Untermenüpunkte
Deutsch
AB
Telefonbuch
Nachr. absp.
Nachr. lösch.
AB ein/aus
Memo aufn.
Ansagetext
AB Einstell.
84
Page 98

Telefon benutzen
Menü Untermenüpunkte
Rufton
Ruftonlautstärke
Mobilteil Name
Tastenton
Kontrast
Mobilteil
Basis Einstellungen
Automatische Annahme
Länge Hintergrundbeleuchtung
Automatische Vorwahl
Basis auswählen
Sprache
Anmelden
Rufton
Ruftonlautstärke
Wahlverfahren
Flash
PIN-Nummer
Uhrzeit
Extras
3 Telefon benutzen
3.1 Mobilteil ein-/ausschalten
1 Halten Sie die AUS-Taste gedrückt, um das Mobilteil auszuschalten.
2 Drücken Sie die Taste Gespräch annehmen oder stellen Sie das Mobilteil
auf die Basisstation, um es einzuschalten.
3.2 Menüsprache ändern
1 Rufen Sie das Menü auf.
2 Wählen Sie "Mobilteil" und bestätigen Sie.
3 Wählen Sie "Sprache" und bestätigen Sie.
Wecker einstellen
Datum und Uhr
Zeitformat einstellen
Termin
Stoppuhr
85
4 Wählen Sie die gewünschte Sprache und bestätigen Sie.
Im Display erscheint "Gespeichert".
5 Drücken Sie die Auflegen-Taste, um in den Standby-Modus zu gelangen.
Die Pfeile zeigen an, dass das Menü weitere Unterpunkte enthält.
Page 99

3.3 Telefonieren
Direkt wählen
1 Drücken Sie die Taste Gespräch annehmen, um das Gespräch zu beginnen.
Telefon benutzen
456
g h i j k l m n o
2 Geben Sie die Telefonnummer ein.
3 Drücken Sie die Auflegen-Taste oder stellen Sie das Mobilteil auf die
Basisstation, um das Gespräch zu beenden.
Vorwählen
Mit der Funktion Vorwählen, können Sie die Telefonnummer vor dem Gespräch eingeben und
ändern.
456
g h i j k l m n o
1 Geben Sie eine Nummer mit bis zu 24 Ziffern ein.
Halten Sie die Taste 0 gedrückt, um eine Pause einzugeben. Im Display
erscheint ein "P".
2 Drücken Sie die Menütaste zum Korrigieren.
3 Drücken Sie die Taste Gespräch annehmen, um das Gespräch zu beginnen.
4 Drücken Sie die Auflegen-Taste oder stellen Sie das Mobilteil auf die
Basisstation, um das Gespräch zu beenden.
Eine Nummer aus der Wahlwiederholungsliste wählen
Sie können die letzten 10 gewählten Nummern erneut wählen. Haben Sie im Telefonbuch einen
Namen mit dieser Nummer gespeichert, erscheint der Name in der Liste.
1 Drücken Sie die Taste Wahlwiederholung.
2 Wählen Sie eine Nummer aus. Ist die Nummer im Telefonbuch
gespeichert, erscheint der Name.
3 Drücken Sie die Taste Gespräch annehmen, um das Gespräch zu beginnen,
oder wählen Sie "Option".
4 Haben Sie "Option" gewählt, wählen Sie einen der folgenden Punkte:
"Nr. löschen": Um die Nummer aus der Liste zu löschen
"Nr. speichern": Um die Nummer im Telefonbuch zu speichern
"Alle löschen": Um die Liste zu löschen.
5 Bestätigen Sie die Auswahl.
6 Drücken Sie die Auflegen-Taste, um in den Standby-Modus zu gelangen.
3.4 Einen Anruf annehmen
Wenn Sie einen externen Anruf erhalten, erscheint im Display "Ext. Anruf".
Um den Anruf anzunehmen:
1 Drücken Sie die Taste Gespräch annehmen.
ODER
Nehmen Sie das Mobilteil von der Basisstation, wenn Sie "Auto.
Annahme" aktiviert haben
(Siehe "6.5 Automatische Anrufannahme")
Deutsch
86
Page 100

Telefon benutzen
Das Symbol Gespräch angenommen erscheint im Display. Die
Gesprächsdauer wird nach 15 Sekunden angezeigt.
2 Drücken Sie die Auflegen-Taste oder stellen Sie das Mobilteil auf die
Basisstation, um das Gespräch zu beenden.
Sie können die Ruftonlautstärke während eines eingehenden Anrufs mit "Leise"
ausschalten.
3.5 Freisprechmodus
Im Freisprechmodus können Sie telefonieren, ohne das Mobilteil in der Hand zu halten. Außerdem
können andere Personen im Raum das Gespräch mitverfolgen.
1 Zum Aktivieren des Freisprechmodus, drücken Sie während eines
Telefonats die Freisprechtaste.
3.6 Lautstärke Hörmuschel / Freisprechmodus anpassen
1 Drücken Sie die Tasten Nach-oben oder Nach-unten und wählen Sie
Lautstärkestufe 1-5 während eines normalen Telefonats oder im
Freisprechmodus.
3.7 Stummschaltung (Mute)
Sie können das Mikrofon ausschalten, so dass ihr Gesprächspartner Sie nicht mehr hört.
1 Drücken Sie während eines Gesprächs die Menütaste, um das Mikrofon
auszuschalten.
"Mikrofon Aus" erscheint im Display.
2 Wählen Sie "Aus", um das Mikrofon wieder einzuschalten.
3.8 Mobilteil suchen (Paging)
1 Drücken Sie die Taste Paging an der Basisstation.
Alle an der Basisstation angemeldeten Mobilteile klingeln 30 Sekunden lang.
456
g h i j k l m n o
2 Drücken Sie eine beliebige Taste am Mobilteil, um das Klingeln zu
beenden.
3.9 Tastatursperre
Sie können die Tastatur sperren, um unbeabsichtigtes Wählen beim Herumtragen des Mobilteils
zu verhindern.
Im Standby-Modus:
1 Halten Sie die Taste Tastatursperre gedrückt (Taste 7 - Abbildung 2C), bis
"Tasten gesperrt" und das Symbol Tastatur gesperrt im Display
erscheinen.
2 Um die Tastatursperre wieder aufzuheben, drücken Sie "entsp." und
anschließend die Taste Tastatursperre.
87
 Loading...