


1/10 SCALE NITRO POWERED 4WD OFF-ROAD TRUGGY
1:10
No.6197-F
This radio control model car is not a toy! Before beginning operation, please read this manual thoroughly.
The contents are subject to change without prior notice due to product improvements and specificatrion changes.
Instruction Manual
WARRANTY
Thunder Tiger Corporation guarantees this model kit to be free from defects in both material and workmanship. The total monetary value under warranty will in no case exceed the cost of the original kit purchased. This warranty does not cover any components damaged by use or modification. Part or parts missing from this kit must be reported within 60 days of purchase. No part or parts will be sent under warranty without proof of purchase. To receive part or parts under warranty, the service center must receive a proof of purchase and/or the defective part or parts. Should you find a defective or missing part, contact the authorized Thunder Tiger Service/Distributor nearest you. Under no circumstances can a dealer or distributor accept return of a kit if assembly has started.
保證事項僅限於產品本身與隨產品所附之零配件。 品質保證不包含下列事項 因使用、組裝或調整本產品所發生之損壞。 其他所有非產品本身品質所造成之損壞。

INTRODUCTION
Thank you for your purchase of this Thunder Tiger product. You should enjoy many hours of fun and excitement from this advanced R/C model. Thunder Tiger strives to bring you the highest level of quality and service we can provide. We race and test our cars around the world to bring you state-of-the-art products.
We offer on-line help on our www.acehobby.com or www.thundertiger.com forum and our product specialists are ready to take your call if you have any technical questions. Please read all instructions and familiarize yourself with the systems and controls of this model before running. Have fun and enjoy the exciting world of R/C!
TOMAHAWK ST 24 www.thundertiger.com
www.tiger.com.tw
CAUTION
Thank you for purchasing a Thunder Tiger Product.
Please read all instructions and familiarize yourself with the products and controls before operation.
1.This product is not a toy. It is a high performance model product. It is important to familiarize yourself with the model, its manual, and its construction before assembly or operation. A child operating under the supervision of the adults is necessary.
2.Always keep this instruction manual ready at your hand for your assembling and operating reference, even after completing the assembly.
3.Make sure all the screws are properly tightened and all the parts are checked after running the car for a long period of time.
4.For the best performance, it is important to make sure all the moveable parts work free without binding.
5.Do not operate model products in rain, on public roads, near crowds, near airport, or near areas with restricted radio operation.
6.Always keep fuel away from heat and open flame. Only operate in open, well-ventilated area. Store fuel in cool, dry area. Keep the fuel bottle cap tightly closed. Clean up any leak or excess fuel before starting the engine.
7.This product, its parts, and its construction tools can be harmful to your health. Always exercise extreme caution when assembling and/or operating this product. Do not touch any part of the model that rotates.
8.Check your radio frequency with the proper operating frequency of the area or country. Always check to see if there are any modelers operating on the same frequency as yours. Also, check your radio for proper operation before operating a model.
INDEX
INTRODUCTION 1 |
ADJUSTING CARBURETOR 7 |
IMPORTANT NOTES & WARNING 2 |
FUELLING 7 |
ITEMS REQUIRED FOR OPERATION 3 |
PREPARING THE ENGINE FOR STARTING 8 |
UNWRAPPING CONTENTS FROM BOX 4 |
STARTING THE ENGINE 8 |
CHARGING THE GLOW PLUG IGNITER 4 |
SHOCK ADJUSTMENT 9 |
PREPARING THE RADIO 4 |
BODY CUTTING 9 |
RADIO BATTERY INSTALLATION 5 |
ENGINE BREAK-IN & ENGINE SETTING 10 |
RADIO OPERATION 5 |
STOPPING ENGINE 11 |
OPERATING RADIO STEERING FUNCTION 5 |
WHEEL AND TIRE PREPARATION 11 |
OPERATING RADIO THROTTLE/BRAKE FUNCTION |
STORING AND MAINTENANCE 11 |
6 |
DRIVING TIPS 12 |
ADJUSTING THE THROTTLE LINKAGE 6 |
TROUBLESHOOTING 13 |
IMPORTANT NOTES & WARNING
FUEL
1.Choose a fuel from a reputable, brand name company that is approved for car/truck use. Do not use airplane or boat fuels in your car/truck. Never use gasoline in a glow model engine.
2.Fuel color is for identification purpose only and is not important to performance or durability of your engine.
3.Always store fuel in a well ventilated place, away from heating devices, open flames, direct sunlight, or batteries. Keep glow fuel away from children. Always keep your fuel bottle closed when not in use.
4.Do not dispose of fuel or empty fuel containers in a fire. It may possibly cause fire or explosion.
1.10 ~305 ~18 20
3., ,
ENGINE
1.For proper engine break-in procedure, please refer to the manual of your engine.
2.Never run your vehicle without the air filter .If the vehicle will be operated in an area with fine dust, use filter oil or caster oil on the air filter element. It is important that the foam is only moist to trap dirt and allow air passage. With the foam too wet, limited air can pass through; therefore, limiting engine performance.
3.The parts around engine could be dangerously hot after operation. Do not touch it without any protection!
1.
OPERATION
1.Choose the right place to operate your R/C model. Do not run on public streets or highways. This could cause serious accidents, personal injuries, and/or property damage. Never run R/C models near people or animals. To avoid injury, do not run in confined spaces. Do not run where loud noises can disturb others, such as hospitals and residential areas. Never run indoors. There is a high risk of fire and/or damage.
2.Inspect your model before operation. Make sure all the screws are properly tightened and all the parts are checked after running the car for a long period of time. Always use fresh batteries for your transmitter and for your receiver to avoid losing control of the model. Always test the brakes and the throttle before starting your engine to avoid losing control of the model.
3.Check your radio frequency with the proper operating frequency of the area or country. Always check to see if there are any modelers operating on the same frequency as yours. Also, check your radio for proper operation before operating a model.
4.Do not touch any part of the model that rotates.
2. 發生失控情形。
FIRST AID
1.If you drink nitro fuel by accident, immediately drink large quantities of water and try to induce vomiting. Consult with physician right after then.
2.If the nitro fuel gets into your eyes, rinse them well with water. Consult with physician right after then.
3.If the fuel gets onto your skin, wash it well with soap and water.
WARNING
1.Improper operations may cause personal and/or property damage. Thunder Tiger and its distributor have no control over damage resulting from shipping, improper construction, or improper usage.
2.Thunder Tiger assumes and accepts no responsibility for personal and/or property damages resulting from the use of improper building materials, equipment and operations. By the act of assembling or operating this product, the user accepts all resulting liability. If the buyer is not prepared to accept this liability, then he/she should return this kit in new, unassembled, and unused condition to the place of purchase.
1. 成損壞。
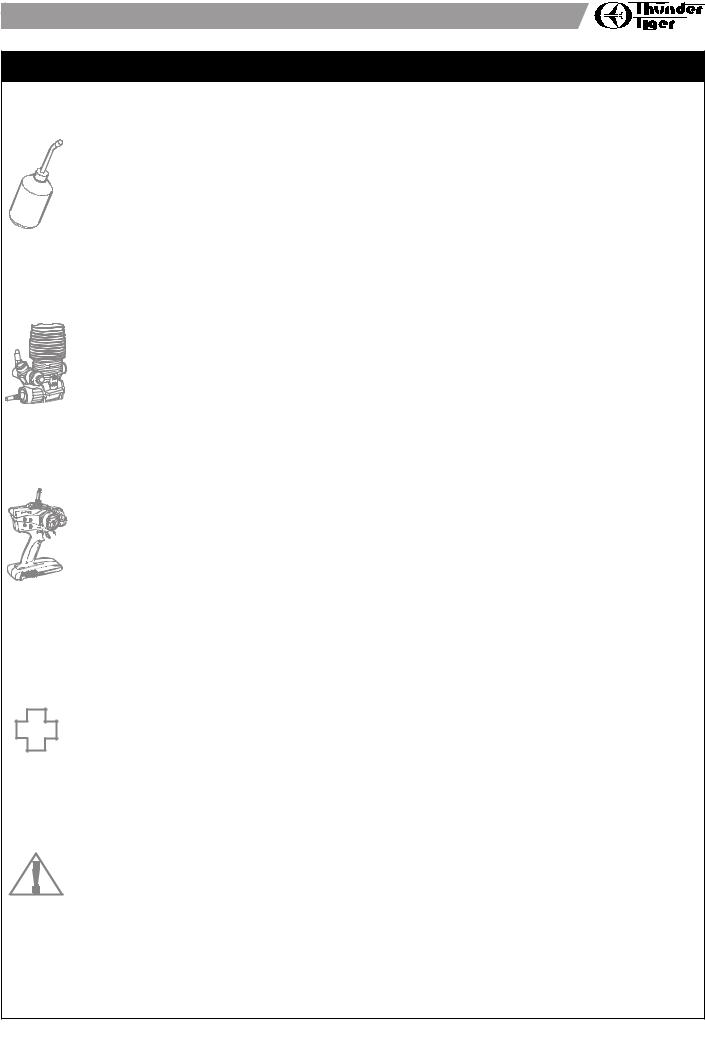
ITEMS REQUIRED FOR OPERATION
Screw Drivers, Lexan Body Reamer, Hobby Knife, |
Glow Starter w/ Charger |
Glow Fuel, Methanol 10% to 30% |
Lexan Scissors. |
|
Nitro 5% to 18% Caster / Synthetic Oil |
|
|
( 10%~30% |
|
|
5%~18% ) |
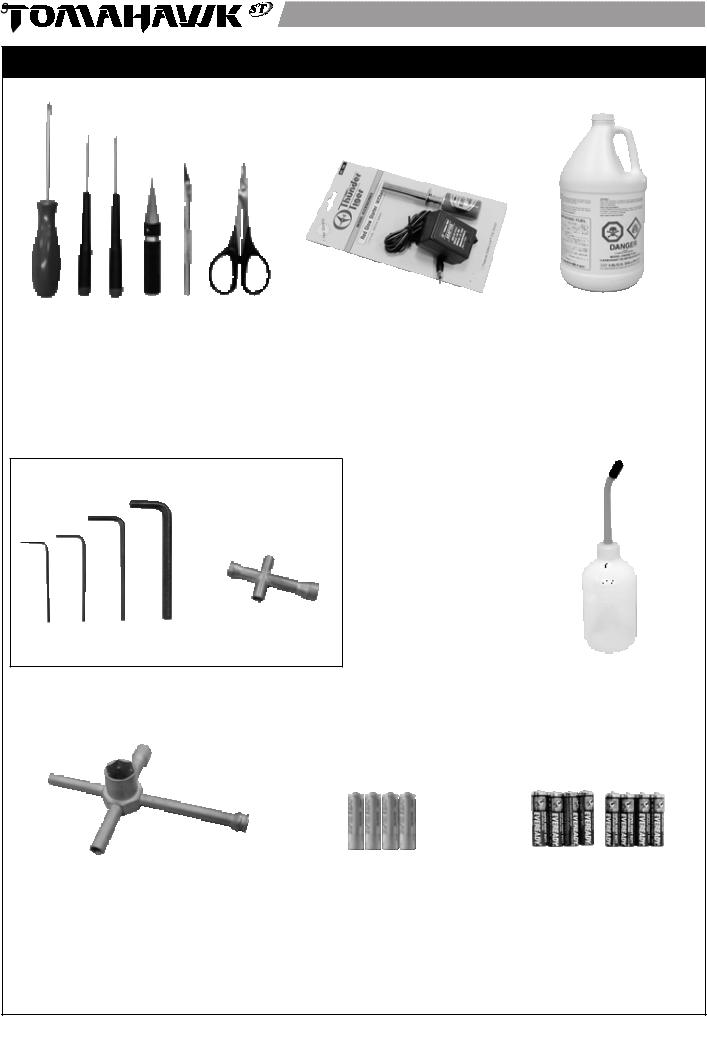
TOOLS INCLUDED
Hex Wrench Set, 1.5mm / 2.0mm / 2.5mm / 3.0mm |
Fuel Bottle |
, 1.5mm / 2.0mm / 2.5mm / 3.0mm |
|
5-Way Wrench |
*AA Rechargeable Ni-MH |
AA Alkaline dry batteries 8 |
|
battery 4 pieces for receiver |
pieces for transmitter |
|
|
|
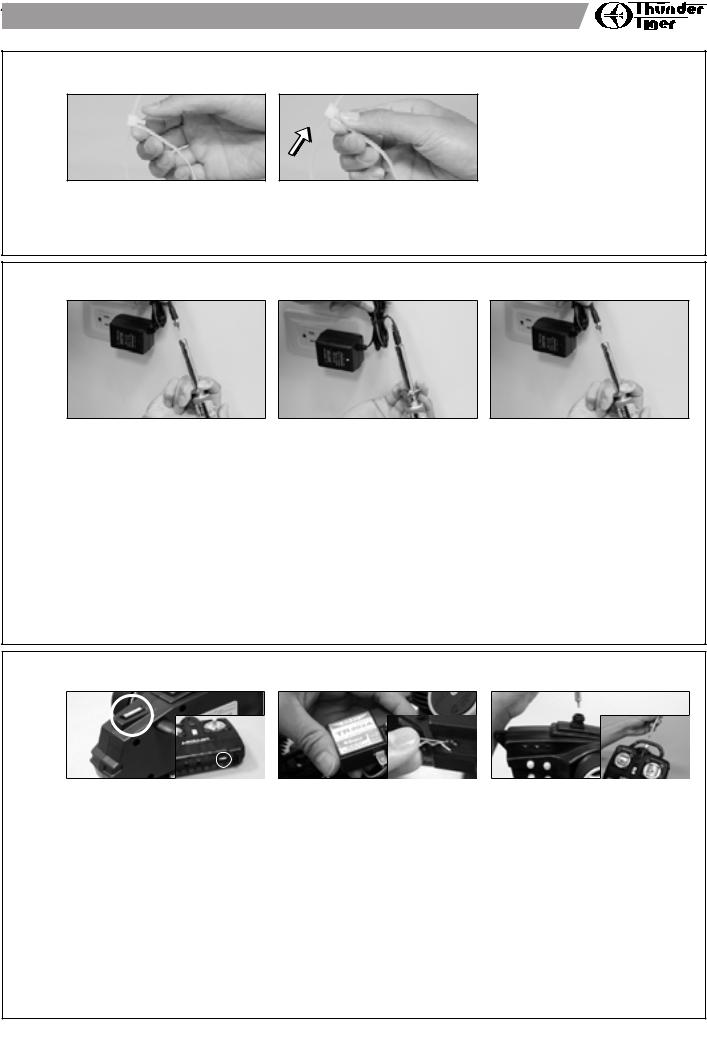
1UNWRAPPING CONTENTS FROM BOX
a b
Pull out
a.Contents of the box are secured with reusable zip-ties. To unlock zip-tie, press on the small lever.
b.Pull on the zip-tie while keeping the small lever pressed. Pull the zip-tie out completely.
CHARGING THE GLOW PLUG IGNITER |
||
2 a |
b |
c |
a.Plug the charger into an AC outlet, and then pull on the igniter lever to accept the charging adapter.
b.At this point, the small red LED indicator on the charger should light up indicating the charging sequence is in progress.
c.When the charging complete, pull on the glow plug igniter lever to unplug the glow igniter. Charge the new glow plug igniter for 16 to 24 hours on the first charge. For subsequent charges, charge it about 12 hours before next use.
NOTE:
If the igniter gets warm or hot during the charge, unplug the igniter from charger immediately. A warm / hot igniter means the igniter is overcharged. Overcharging can damage the internal battery in the igniter; thus, shortening its life.
a.110V
b.LED
c.16 20 12
(40~45°C)
3PREPARING THE RADIO
a b  c
c
a.Check the frequency printed on the transmitter crystal.
b.Remove the radio receiver from box. Check the frequency printed on the receiver crystal, and make sure it matches with the transmitter crystal. Make sure no one will operate on the same frequency when you are. When there is a radio glitch, it will most likely be caused by improper crystal, damaged crystal, or people operating on the same frequency. Ensure all wires are securely connected to the receiver:
steering servo connector plug - into the channel 1 slot 1 (CH1)— throttle servo connector plug - into the channel 2 slot 2 (CH2)— battery switch connector plug - into battery slot. (BATT)—
Then thread the receiver antenna/wire through the antenna mount. Thread the receiver antenna/wire all the way through the antenna tube and install the antenna tube onto the mount. After checking, place the receiver back in the box and secure the receiver box top.
c.Install the antenna into transmitter.
 Loading...