


1/8 4WD RALLY CAR
No.6224-F
INSTRUCTION MANUAL
WARRANTY
Thunder Tiger Corporation guarantees this model kit to be free from defects in both material and workmanship. The total monetary value under warranty will in no case exceed the cost of the original kit purchased. This warranty does not cover any components damaged by use or modification. Part or parts missing from this kit must be reported within 60 days of purchase. No part or parts will be sent under warranty without proof of purchase.
To receive part or parts under warranty, the service center must receive a proof of purchase and/or the defective part or parts. Should you find a defective or missing part, contact the authorized Thunder Tiger Service/Distributor nearest you. Under no circumstances can a dealer or distributor accept return of a kit if assembly has started.
INTRODUCTION
Thank you for your purchase of this Thunder Tiger product. You should enjoy many hours of fun and excitement from this advanced R/C model. Thunder Tiger strives to bring you the highest level of quality and service we can provide. We race and test our cars around the world to bring you state-of-the-art products.
We offer on-line help on our www.acehobby.com forum and our product specialists are ready to take your call if you have any technical questions. Please read all instructions and familiarize yourself with the systems and controls of this model before running. Have fun and enjoy the exciting world of R/C!
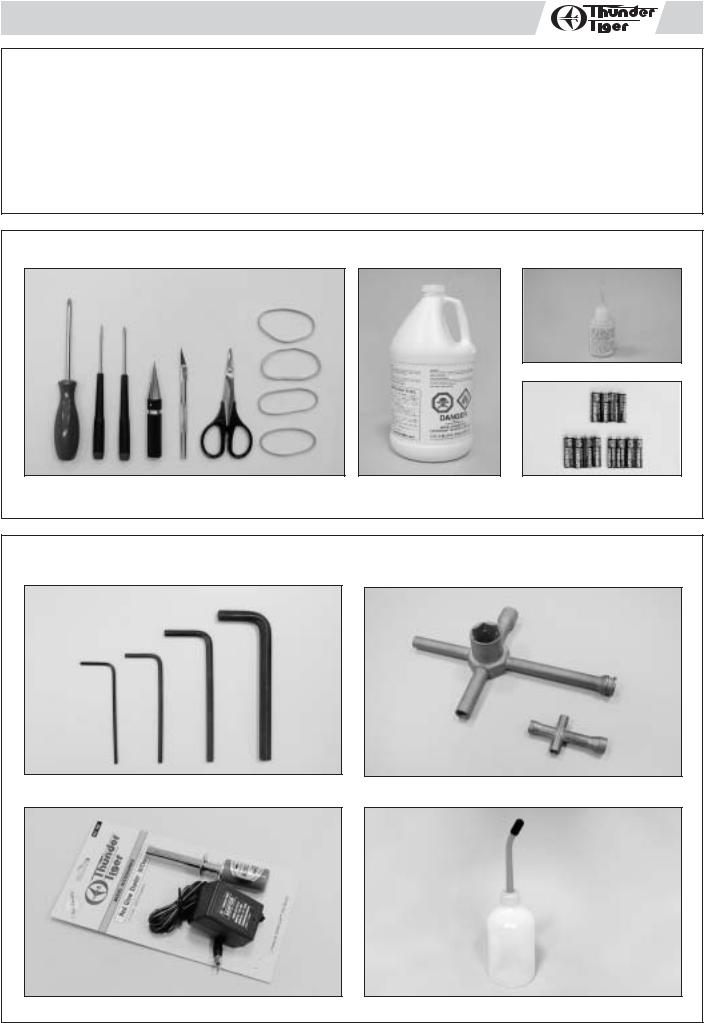
ITEMS REQUIRED FOR OPERATION
CA Glue / Instant Glue
Screw Drivers, Lexan Body Reamer, Hobby Knife, |
Glow Fuel, Methanol |
Alkaline Batteries (12), AA-size |
Lexan Scissors, Rubber Bands. |
10% to 30% Nitro |
|
5% to 18% Caster / Synthetic Oil |
|
|
|
|
TOOLS INCLUDED
5-WAY WRENCH INCLUDED IN USA VERSION
Hex Wrench Set, 1.5mm / 2.0mm / 2.5mm / 5.0mm
GLOW STARTER
INCLUDED IN USA VERSION
4-Way, 5-Way Wrench
FUEL BOTTLE
INCLUDED IN USA VERSION
Glow Starter w/ Charger |
Fuel Bottle |
1
1UNWRAPPING CONTENTS FROM BOX
a b
a. Contents of the box are secured with reusable zip-ties. To unlock zip-tie, press on the small lever. b. Pull on the zip-tie while keeping the small lever pressed. Pull the zip-tie out completely.
CHARGING THE GLOW PLUG IGNITER
2 Thunder Tiger Optional Part #2165, 1300MAH Glow Starter w/220V Charger. Thunder Tiger Optional Part #2166, 1300MAH Glow Starter w/110V Charger.
a |
|
b |
|
c |
|
|
|
|
|
a. Plug the charger into an AC outlet, and then pull on the igniter lever to accept the charging adapter.
b. At this point, the small red LED indicator on the charger should light up indicating the charging sequence is in progress.
c. When the charging complete, pull on the glow plug igniter lever to unplug the glow igniter.
Charge the new glow plug igniter for 16 to 24 hours on the first charge. For subsequent charges, charge it about 12 hours before next use.
NOTE:
If the igniter gets warm or hot during the charge, unplug the igniter from charger immediately. A warm / hot igniter means the igniter is overcharged. Overcharging can damage the internal battery in the igniter; thus, shortening its life.
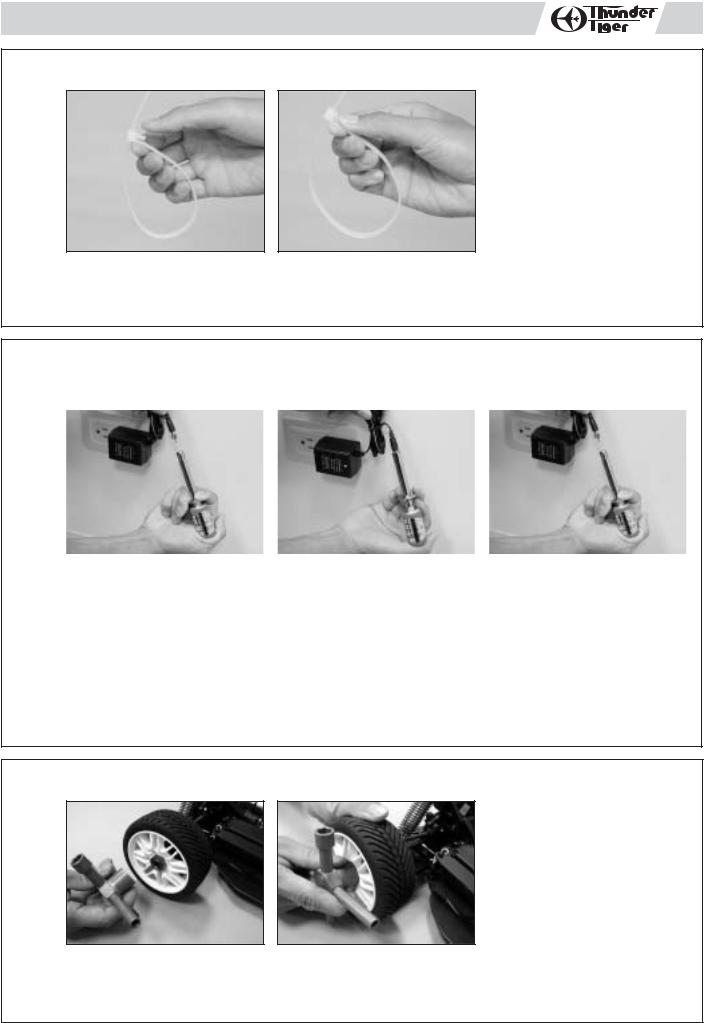
3REMOVING TIRES / WHEELS
a b
a. Use the supplied wrench to remove all 4 tires/wheels. b. Turn the wrench to loosen the wheel nuts.
2

GLUING TIRES / WHEELS |
|
|
4 a |
b |
c |
a. To glue the tires, peel back the tire from wheel.
b. Place a drop of CA glue into the opening, rotate to the next area without glue, place another drop, and keep doing this until tire and wheels are glued. Only do this step to one side of tire/wheel at a time.
c. After the CA glue has been applied, place a rubber band on the side the tire/wheel with glue until the glue has completely dried. Then, repeat the above steps for the other side of the tire/wheel.
PREPARING THE RADIO |
|
|
5 a |
b |
c |
a. Check the frequency printed on the transmitter crystal.
b. Remove the radio receiver from box with a screw driver. Check the frequency printed on the receiver crystal, and make sure it matches with the transmitter crystal. Make sure no one will operate on the same frequency when you are. When there is a radio glitch, it will most likely be caused by improper crystal, damaged crystal, or people operating on the same frequency. After checking, place the receiver back in the box and secure the receiver box top.
c. Install the antenna into transmitter.
RADIO BATTERY INSTALLATION |
|
|
6 a |
b |
c |
a. Install 8 AA-size alkaline batteries into transmitter.
b. Install 4 AA-size alkaline batteries into receiver battery box, and connect the battery connectors from car and battery box (both of which are red).
c. Use the reusable zip-ties from Step 1 and secure the battery box to battery plate. Install the battery box with plate onto the two battery posts. Secure with body clips and cut off excess zip-tie.
3
 Loading...