


 Loading...
M |
|
a |
|
n |
|
|
u |
e |
|
l |
|
d’ |
u |
t |
i l |
|
i |
s |
a |
t |
i |
o |
n |
M |
a |
n |
u |
|
a |
l |
e |
|
|
d |
i |
u t |
i |
l |
i |
z |
z |
a |
z |
i |
o |
n |
e |
U |
|
|
s |
|
|
|
e |
|
|
|
r |
m |
|
a |
|
n |
|
|
u |
a |
|
l |
|
M |
a |
|
n |
u |
|
a |
l |
|
d |
e |
|
u |
t |
i |
l |
i |
z |
a |
c |
i |
|
ó |
n |
F |
o |
l |
h |
|
e |
t |
o |
|
|
d |
e |
u |
t |
i |
l |
i |
|
z |
a |
ç |
|
ã |
o |
Ï |
ä |
|
ç |
|
|
ã |
é |
|
å |
|
ò |
÷ |
ñ |
|
ç |
|
ó |
å |
|
ù |
|
ò |
|
N |
á |
|
v |
|
|
o |
d |
|
|
|
k |
p |
o |
|
u |
|
|
¾ |
i |
|
t |
|
í |
H |
a |
s |
z |
|
n |
á |
l |
a |
|
t |
i |
u |
t |
|
a |
s |
í |
t |
|
á |
|
s |
|
N |
á |
|
v |
|
o |
d |
|
|
n |
|
a |
p |
o |
|
u |
|
¾ |
i |
|
t |
í |
|
e |
I |
n |
s |
t |
|
r |
u |
k |
c |
|
j |
a |
o |
b |
|
s |
|
|
³ |
u |
|
g |
|
i |
È |
í |
ñ |
ò |
|
ð |
ó |
ê |
ö |
|
è |
ÿ |
ï î |
ç ê ñ ï ë ó à ò à ö è è |
||||||||||
2 |
5 |
D |
G |
1 |
6 |
E |
T |
2 |
8 |
D |
G |
1 |
6 |
E |
T |

10 cm |
|
cm |
5 cm |
|
|
|
cm10 |
About this manual
This document is common to several television models. Therefore, certain functions or settings may not apply to the model you have purchased
About the switch
The position of the ON/OFF switch  differs depending on the model. It may be located on the front or on the right-hand side of your set (see the drawing inside the cover page of your manual).
About safety
To ensure your own safety and safe operation of the equipment, observe the following instructions thoroughly.
TV sets require sufficient ventilation to prevent their components from overheating, which will cause failure. Do not block the ventilation openings at the rear. If you place your TV set in a special piece of furniture, make sure there is enough space for unhindered air circulation. Do not place the TV set in the close vicinity of a heater.
The TV set has been designed for use in dry rooms. Should you use it, in exceptional circumstances in the open air (example: on the balcony, in the veranda or tent), you must absolutely protect it against moisture (dew, rain, splash water). Before switching on a cold TV set in a warm room, you should wait until any condensation in the screen has dried by itself.
Maximum ambient temperature: 35°C Maximum humidity: 85%
By the end of your TV evening or when away from home for a longer period, we recommend that you turn off the TV set with the On/Off-switch.
The mains plug must be easily accessible.
In the following cases, we recommend that you pull out the mains connector:
1.During a thunderstorm. In such a case, it is advisable that you also disconnect the TV set from the aerial socket.
2.When odour or smoke emanates from the set.
Never attempt to open your TV set yourself.
Further information:
The TV set shielding is sufficient to prevent X-radiation to the exterior.
Any operation performed by a non skilled person, change of high voltage or replacement of the picture tube by a model not complying with the manufacturer specification are likely to cause considerable increase in X-radiation. A TV set modified in such a way no longer complies with the manufacturers’ specification and must not be used.
About cleaning
The screen is to be cleaned with liquid glass cleaners.
:Never use abrasive products.
:Clean the cabinet with a soft cloth soaked with neutral cleaner. Do not use solvents, such as white spirit or alcohol-based cleaning products since they may damage your television.
:At regular intervals, clean the ventilation grids at the rear of the TV set.
About degaussing
The terrestrial magnetic field may have an influence on your TV set. This influence is revealed by the coloured spots, which appear on the screen.
Should this be the case:
:Turn the equipment off by means of the On/Off-switch.
:Wait about one hour before switching the set on again.
This procedure performs automatic degaussing of the screen. Should there still be coloured spots on the screen, repeat the operation.
The pages of this publication are printed on recycled paper.
GB
1
GB
Contents
Using the remote control and fitting the batteries.
|
Page 4 |
|
|
About this manual . . . . . . . . . . . . . . . . . . . |
1 |
Installation |
|
|
|
About the switch . . . . . . . . . . . . . . . . . . . . . |
1 |
|
About safety . . . . . . . . . . . . . . . . . . . . . . . . |
1 |
|
About cleaning . . . . . . . . . . . . . . . . . . . . . . |
1 |
|
About degaussing . . . . . . . . . . . . . . . . . . . |
1 |
|
Basic connections . . . . . . . . . . . . . . . . . . . . |
3 |
|
Remote control . . . . . . . . . . . . . . . . . . . . . . . |
4 |
|
Navigation principles . . . . . . . . . . . . . . . . . |
5 |
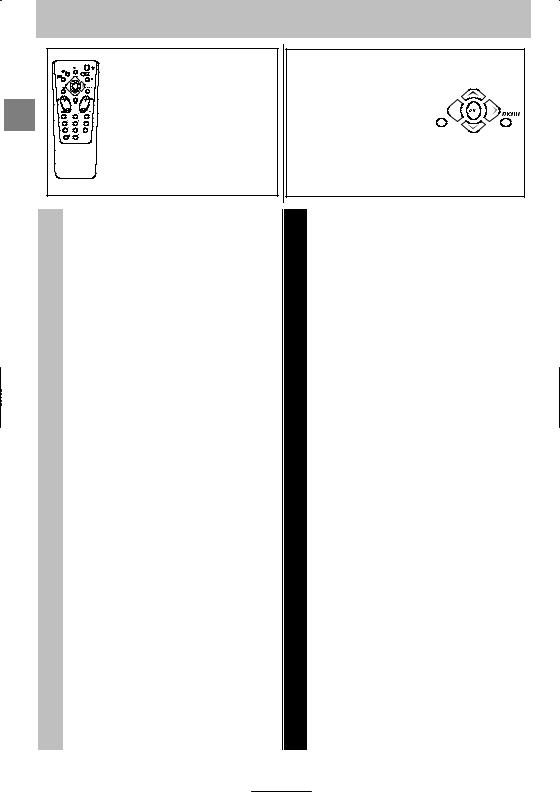
Calling up the INSTALLATION
MAIN MENU . . . . . . . . . . . . . . . . . . . . . . . . 5 Calling up the SUMMARY . . . . . . . . . . . . . 5 Calling up a Menu . . . . . . . . . . . . . . . . . . . 5 Navigating within the Menus . . . . . . . . . . . 5
Installing your television for
the first time . . . . . . . . . . . . . . . . . . . . . . . . . 6
Automatic installation . . . . . . . . . . . . . . . . . 7 Programme organisation . . . . . . . . . . . . . . 8 Manual programming . . . . . . . . . . . . . . . . . 9 Personal settings . . . . . . . . . . . . . . . . . . . 10 Preferences . . . . . . . . . . . . . . . . . . . . . . . . 11
How to call up a menu and how to select a
function, a setting or an
 option.
|
Page 5 |
|
|
Daily viewing . . . . . . . . . . . . . . . . . . . . . . . |
12 |
Use |
|
|
|
Picture Adjustment . . . . . . . . . . . . . . . . |
12 |
|
Sound Settings . . . . . . . . . . . . . . . . . . . . |
12 |
for |
|
|
|
List of Channels . . . . . . . . . . . . . . . . . . . |
12 |
|
Time . . . . . . . . . . . . . . . . . . . . . . . . . . . . . |
13 |
Instructions |
Displaying Information . . . . . . . . . . . . . . |
14 |
|
Selecting Programmes . . . . . . . . . . . . . |
14 |
|
Scrolling the Programmes . . . . . . . . . . . |
14 |
|
Audio-visual (AV) Programmes . . . . . . |
14 |
|
Volume Control . . . . . . . . . . . . . . . . . . . . |
14 |
|
Muting the Sound . . . . . . . . . . . . . . . . . . |
14 |
|
Television Lock . . . . . . . . . . . . . . . . . . . . |
14 |
|
Switching Off the Television . . . . . . . . . |
14 |
|
Teletext . . . . . . . . . . . . . . . . . . . . . . . . . . . . |
15 |
|
Standard Functions . . . . . . . . . . . . . . . . |
15 |
C17 / MONO / 100 / GB-TBA / I 6.3 / B
2

Basic connections
Basic connections
Continental
The mains plug (1) supplies power to the television. The Europe television must only be plugged in to a 220-240 V - 50 Hz
power supply. It must never be plugged in to a DC source. Should the plug become separated from the lead, never attempt to plug it in to a mains socket. This could cause electrocution.
The aerial socket (2), located on the rear of the television, can be used to connect an external aerial or other appliance equipped with a modulator such as a VCR, satellite receiver, etc.
If you connect an appliance to the aerial jack, you must give it a channel number. To do this, switch on the appliance, then use the television to find the modulator channel (see the appliance manual). Now give it a programme number and memorise it (see Manual Programming of channels). Then, when you wish to use the appliance, simply select its programme number on the television. This procedure is not required for VCR’s not equipped with a modulator.
The SCART socket AV1 (2), located on the rear of the television, is intended to connect a VCR or a camcorder (VHS, 8 mm), a Canal+ decoder, a video games console or RGB-sig- nal emitting appliances.
We strongly recommend the use of this type of connection, which gives a better picture quality. To use the peripheral appliance that you have connected, press the AV key on your remote control to select AV1. This selection is automatic for some appliances. Pressing “”play” on a VCR, or switching on a satellite receiver connected to AV1 will automatically switch on your television.
When you stop the VCR, if you have not changed channels while watching the VCR, the television automatically switches back to the channel you were watching beforehand. If the television has been switched on from the VCR, it switches to standby when the VCR is switched off. The television automatically switches to 16/9 format if the connected appliance delivers the corresponding signal.
The headphone socket (3)* is provided to connect a headphone or earphones.
Connecting headphones mute the sound from the television loudspeakers.
Your TV is provided with a headphone socket for stereo headphones, do not use a mono headphone or plug.
United Kingdom 
The plug is fitted with a fuse which protects your television. If your television does not work, the fuse may be blown. In this case, replace it with an identical 5 Amp ASTA or lr BSI (BS 1362) certified fuse.
$
Note: the mains lead of your television is fitted with a moulded plug. This lead contains all the safety equipment, so you are advised when replacing it not to use a
non-specific commercially-available model.
* on models equipped with this function
GB
3
GB
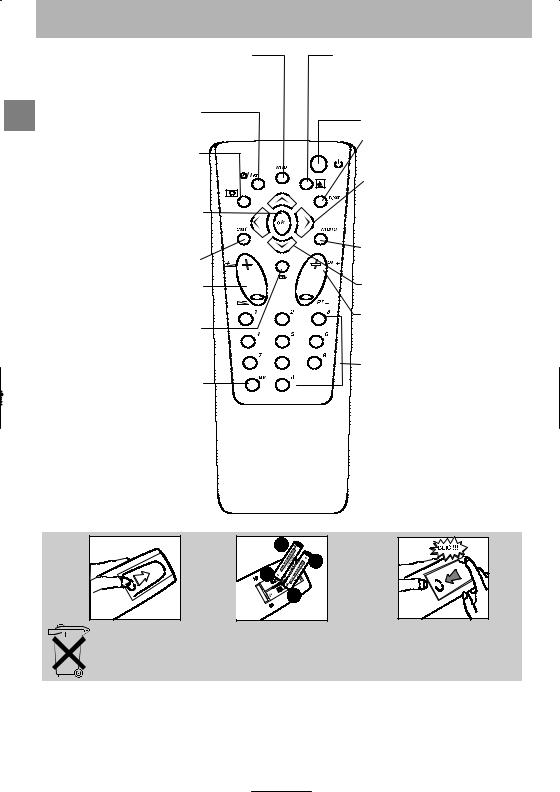
Remote control
Remote control |
|
|
Display of channel and time (yellow but- |
This key is active only when using |
|
ton) |
the Teletext (blue key) |
|
Call up programme list |
Standby |
|
(green button) |
||
|
||
|
Call up Teletext / Toptext / |
|
Reminder of picture |
Fastext function (purple button) |
|
preferences (red button) |
|
|
|
Right/Left Selection within |
|
|
menus |
|
Confirm an action or validate a |
|
|
menu option |
|
|
To leave a menu or Teletext |
Go to adjustment function MENU |
|
|
||
Volume adjustment |
Move Up/Down in menus |
|
Sound mute |
Change programme |
|
|
||
|
8 |
|
|
Go to programmes and enter |
|
Selecting appliances |
numerical values in menus |
|
|
||
connected to the television |
|
|
(AV1) |
|
The red, green, yellow and blue keys are also used for the Teletext.
For programme numbers higher than 10, press the 0 key on the remote control: ” - -” appears on the screen. Now use the number keys on the remote control to enter first the tens digit then the units digit.
|
|
|
|
|
|
|
|
|
|
Please respect the environment! Before throwing any batteries away, consult your distributor who may be able to take them back for specific recycling.
4
Loading...