

Page 1
- Data Brochure
tekmarNet®4 Timer 033
D 033
10/07
1
Information
Brochure
Choose controls
to match
application
2
Application
Brochure
Design your
mechanical
applications
3
Rough In
Rough-in
instructions
Wiring
wiring
4
Wiring
Brochure
Wiring and
installation of
specific control
5
Data
Brochure
Control settings
and sequence of
operation
6
Job
Record
Record settings &
wiring details for
future reference
Introduction
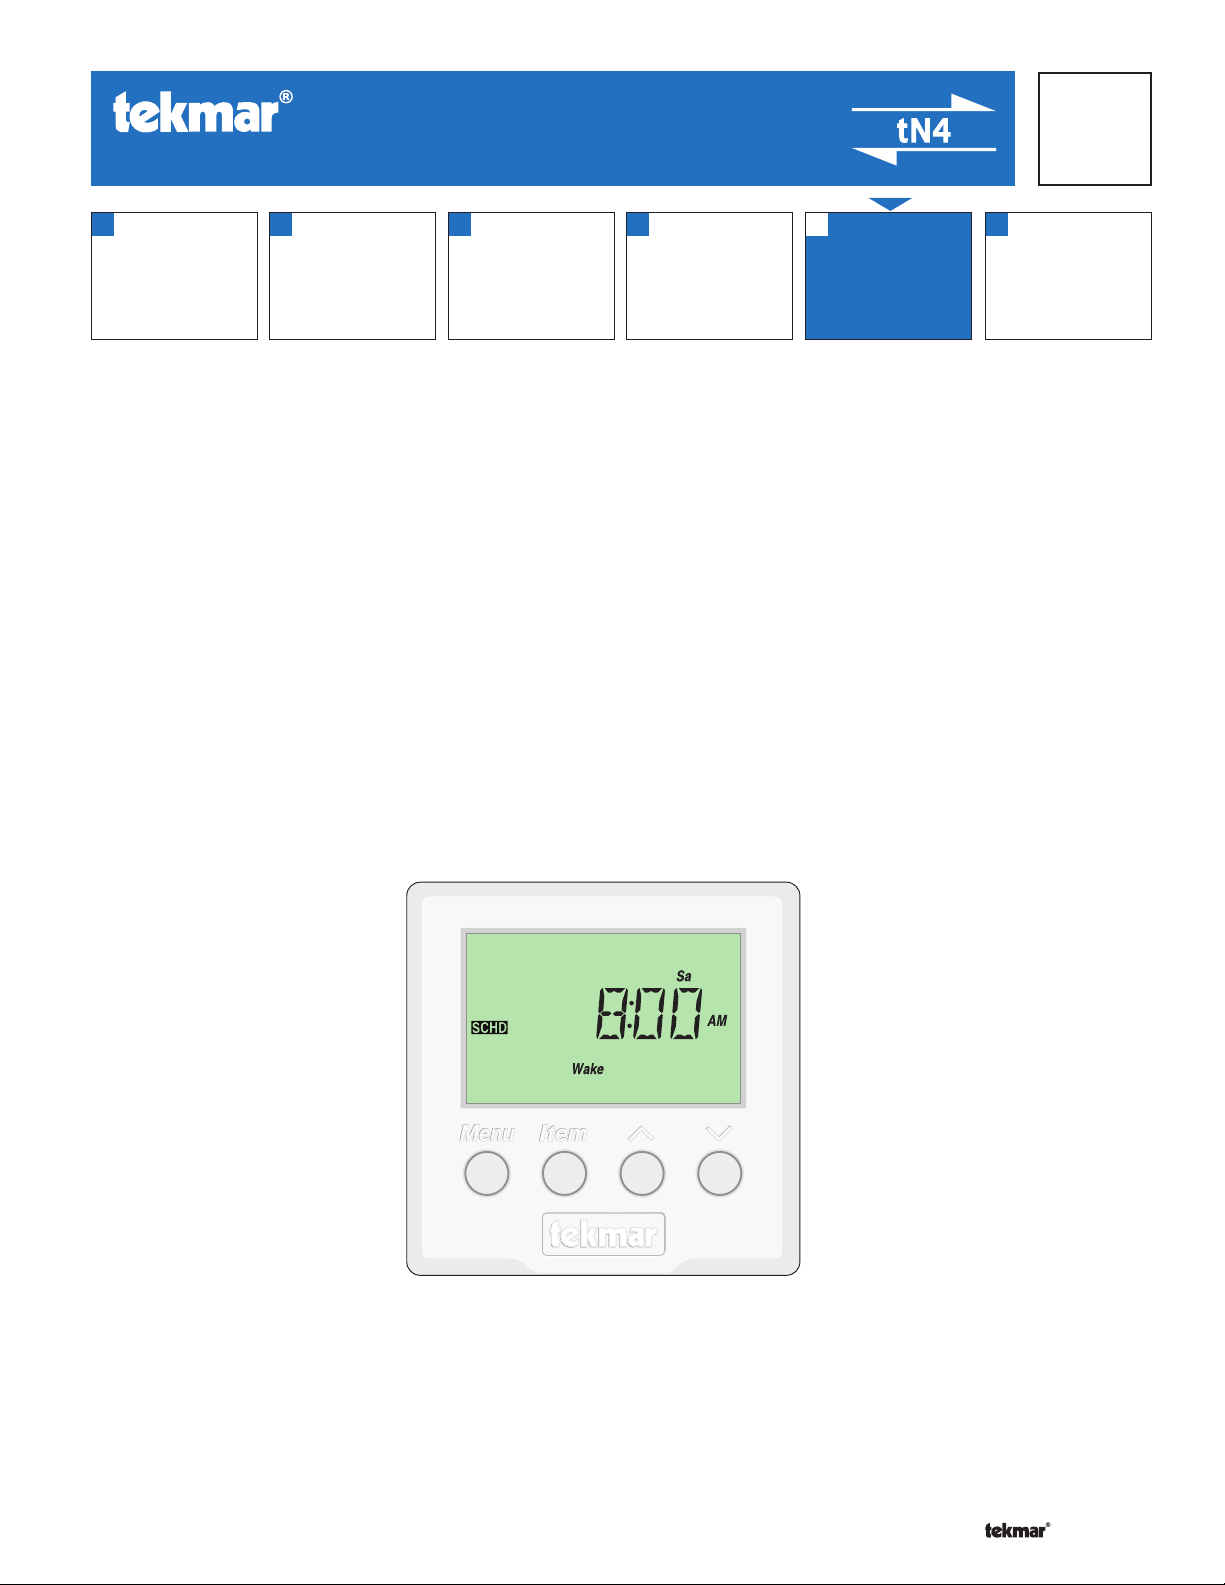
The tekmarNet®4 Timer 033 can be programmed to operate up to four events each day (Wake, Unoccupied, Occupied,
and Sleep). When used in a tekmarNet®4 system it can operate up to four separate schedules for one system. It can also
be used as a stand alone Timer by utilizing the relay contact (either normally closed or normally open).
Features
tN4 Communication Compatible
•
Up to 4 Programmable Setback Schedules
•
Daylight Savings Time
•
Batteryless Backup
•
2 or 4 Events Per Schedule
•
Backlight
•
CSA and C US Approved for use in USA
•
and Canada
1 of 12 © 2007 D 033 - 10/07
Page 2

Table of Contents
123
Switch Settings:
Relay NC
4 Schedules
1 Schedule
Relay NO
Table of Contents ............................................................2
Display and Switch Settings ...........................................2
Switch Settings .......................................................2
Access Levels .........................................................2
Display and Symbols Description............................3
User Interface .........................................................3
Setup ..............................................................................4
Time Menu ..............................................................4
Schedule Menu .......................................................6
Miscellaneous Menu ..............................................9
Display and Switch Settings
Switch Settings
Lock/Unlock (Switch #1)
Use the Lock/Unlock switch to lock or unlock the Access
•
Level of the 033.
To unlock the Access Level, set the switch to the unlocked
•
(Off) position.
To lock the Access Level, set the switch to the locked
•
(On) position. Once locked, the padlock shows in the
bottom right corner of the display except when viewing
the current time or date.
Timer Operation .............................................................9
Time Clock ............................................................10
Setting the Schedule ............................................ 10
Programming the Relay ........................................ 11
Backlight ............................................................... 11
Error Messages ............................................................ 11
Cleaning the Timer ...................................................... 12
Warranty ....................................................................... 12
Made in
Canada
Mmm YYYY
Lot #
Meets Class B:
Canadian ICES
5
Relay
4
For product instructions see brochure
Use at least 194°F (90°C) conductors
23
1
RC
tN4
FCC Part 15
tN4 Timer 033
Power: 24 V ±10% 50/60 Hz 2.7 VA
ON
Relay: 24 V (ac) 2 A
Switch Settings:
1011-03
123
Relay NC
Relay NO
033
4 Schedules
1 Schedule
Relay NO / Relay NC (Switch #2)
The Relay NO / Relay NC switch is used to change the
relay from normally open to normally closed. The user can
decide how they want the relay to operate in their specific
application. Note: The relay will always be OPEN when
there is no power present at the device.
Access Levels
The Access Level restricts the number of Menus, Items
and Adjustments that can be accessed by the user. The
Access Level setting is found in the Miscellaneous (MISC)
menu. Select the appropriate access level for the people
who work with the Timer on a regular basis.
The 033 has three Access Levels:
Advanced (ADV): access to all settings
•
User (USER): for property owners
•
Limited (LTD): limited temperature adjustment
•
For more information, see the Misc (Miscellaneous) Menu
section.
1 Schedule / 4 Schedules (Switch #3)
The 1 Schedule / 4 Schedule switch selects whether the
Timer will host a single schedule, or up to 4 schedules –
(4 Schedules is only available on a tekmarNet
In the following menu tables, the access level the item is
visible in is shown in the access column.
To adjust the Access Level:
1. Set the Unlock / Lock switch to the unlock position.
If a tN4 System Control is connected to the 033, the
Unlock / Lock switch on the tN4 System Control must
be set to the unlock position.
2. Use the Menu button to select the Misc menu.
3. Use the Item button to select the Access menu item.
4. Use the Up or Down button to select the required
Access Level.
®
4 system).
© 2007 D 033 - 10/07 2 of 12
Page 3
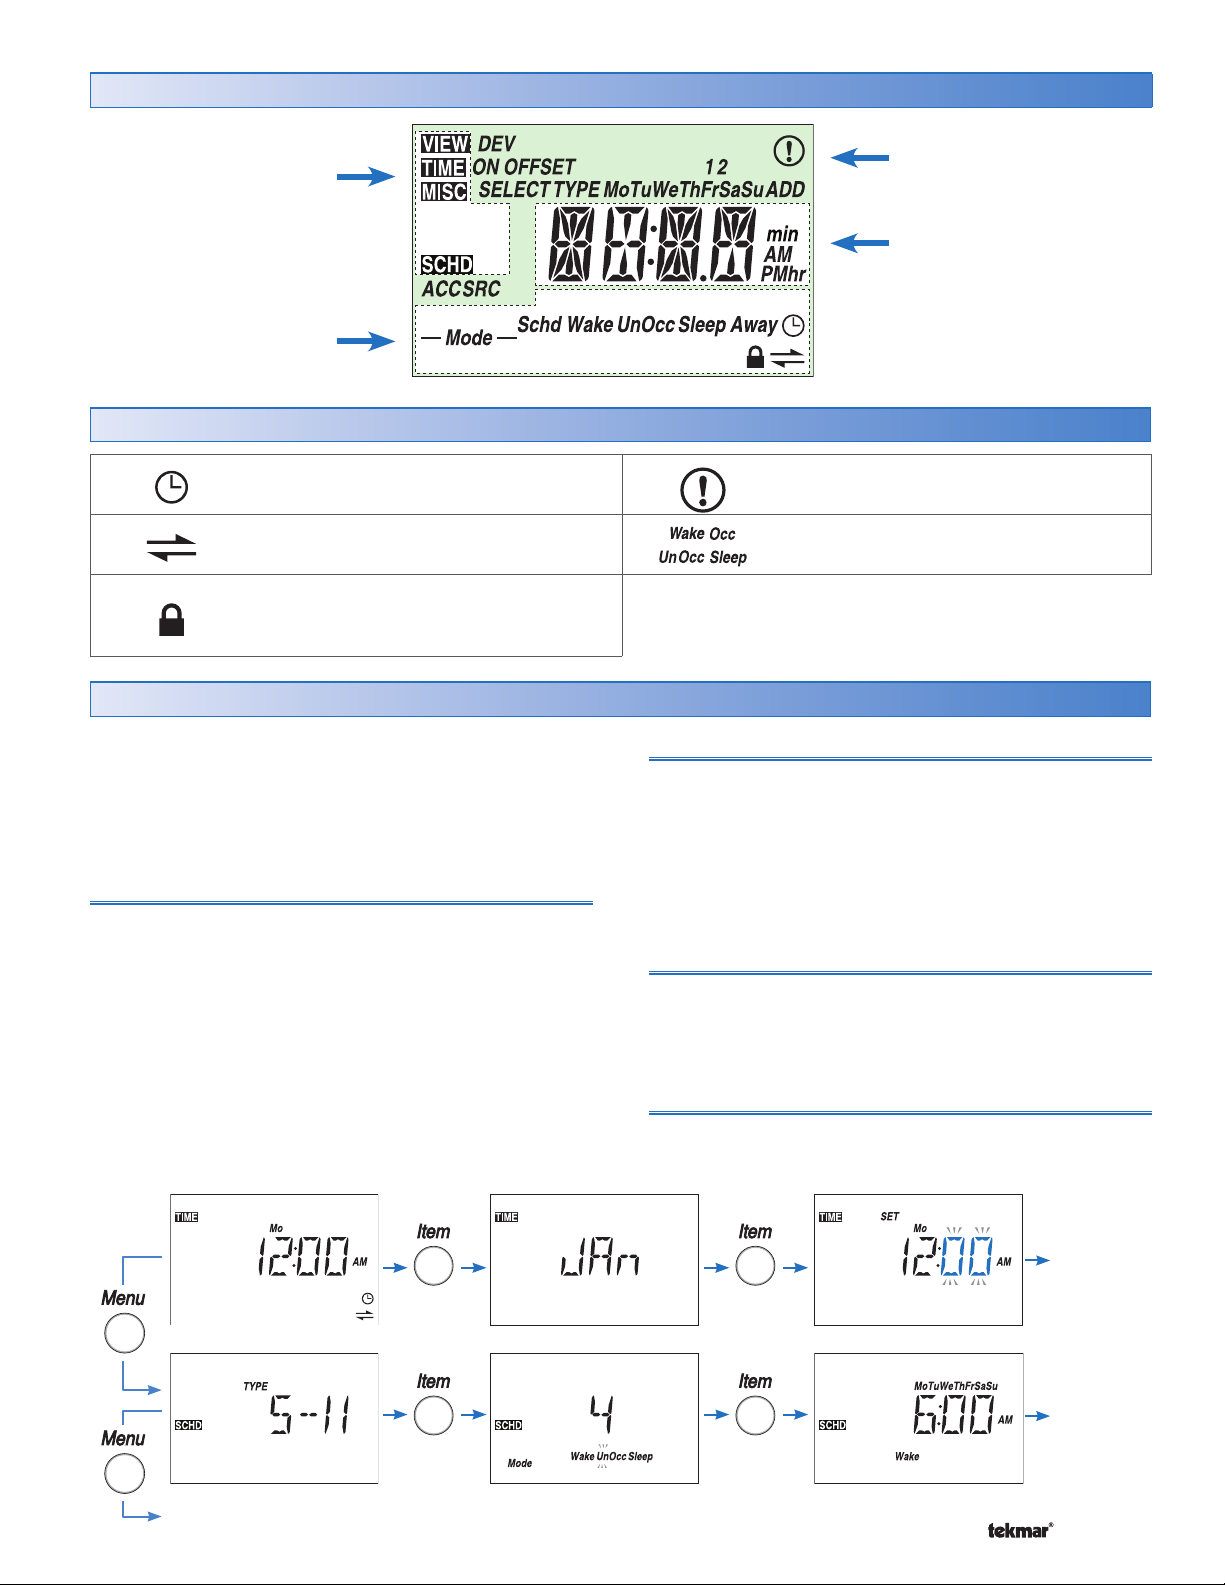
Display
Menu Field
Displays the
current menu
Status Field
Displays the current status
of the timer operation
Symbols
SCHEDULE MASTER
A schedule is in use on this timer.
tN4 COMMUNICATION
Communication is present.
LOCK
The Access Levels are locked. A menu
option is visible but not adjustable.
User Interface
Item Field
Displays an abbreviated
name of the selected item
Number Field
Displays the current value
of the selected item
WARNING
An error is present.
SCHEDULED EVENT
Displays the current scheduled event.
Use the User Interface available on the Liquid Crystal
Display (LCD) to setup and monitor the operation of the
Timer. Use the four push buttons below the LCD (Menu,
Item, Up, Down) to select settings. As you enter settings,
record the settings in the Job Record J 033.
Menu
The menus display in the Menu Field at the left of the LCD.
A maximum of six menus are available:
Time
•
Schedule 1
•
Schedule 2*
•
To select a menu, press and release the Menu button.
* These items are only available if the switch is set to 4
Schedules and the device is connected to a tekmarNet®4
system.
Schedule 3*
•
Schedule 4*
•
Miscellaneous
•
Item
In each menu, a group of items can be selected. The
abbreviated name of the selected item displays in the Item
field of the LCD display.
To view the next available item, press and release the
•
Item button.
To view the previous item, hold down the Item button and
•
press and release the Up button.
Adjusting a Setting
To adjust a setting:
1. Use the Menu button to select the appropriate menu.
2. Use the Item button to select a menu item.
3. Use the Up or Down button to adjust the setting.
Default Item
After navigating menus, the display reverts back to the default
item (Time Clock) after 60 seconds of button inactivity.
Continue
to next Item
Continue
to next Item
3 of 12 © 2007 D 033 - 10/07
Continue to next Menu
Page 4

Display Menus
Time Menu (1 of 2)
The Time menu items set the time clock, day and date.
Item Field Range
SUNDAY, MONDAY,
TUESDAY,
WEDNESDAY,
THURSDAY, FRIDAY,
SATURDAY
Default = MONDAY
Default = Jan 01 2007
12:00 to :59
Default = 12:00 AM
12:00 AM to
11:59 PM or
00:00 to 23:59
Default = 12:00 AM
Access
LTD
USER
ADV
LTD
USER
ADV
USER
ADV
USER
ADV
Description
CURRENT TIME AND DAY
Displays the current time and day of the week. The
time and date flash if the time is not set.
CURRENT DATE
Displays the current date. The month is displayed
followed by the day and year.
Note: This item is only available when Daylight Savings
Time (DST) is set to Mode 1 or 2.
CLOCK MINUTES
Set the minutes.
CLOCK HOURS
Set the hours.
TIME MENU
SUNDAY ...
WEDNESDAY ...
SATURDAY
Default = SUNDAY
OFF, 1, 2
Default = OFF
JAN to DEC
Default = JAN
Continued on next page.
© 2007 D 033 - 10/07 4 of 12
USER
ADV
ADV
USER
ADV
DAY OF THE WEEK
Set the day of the week.
DAYLIGHT SAVINGS TIME
Selects whether to use Daylight Savings Time. The
time is automatically adjusted if set to mode 1 or 2.
Note: See page 10 for a description of DST Modes.
MONTH
Set the current month of the year.
Note: This item is only available when Daylight Savings
Time is set to Mode 1 or 2.
Page 5

Time Menu (2 of 2)
Item Field Range
01 to 31
(number of days is
dependent on month)
Default = 01
2007 to 2255
Default = 2007
Access
USER
ADV
USER
ADV
TIME MENU
12 hr or 24 hr
Default = 12
After the last item, the control returns to the first item in the menu.
ADV
Description
DAY OF THE MONTH
Set the day of the month.
Note: This item is only available when Daylight
Savings Time is set to Mode 1 or 2.
YEAR
Set the current year.
Note: This item is only available when Daylight
Savings Time is set to Mode 1 or 2.
MODE
Select whether time should be displayed using a 12
or a 24 hour clock.
5 of 12 © 2007 D 033 - 10/07
Page 6

Schedule Menu (1 of 3)
The Schedule menu is the same for each of the four schedules. The schedule number is indicated along with the On/Off
selection as each Schedule menu is displayed.
The Schedule menu items set the schedule type, the number
of events per day, and the event times. The following settings
can be applied to each of the four schedules. Use the Menu
button to advance to the next schedule.
Item Field Range
– –:– – to 11:50 PM
Wake
SCHEDULE MENU
UnOccupied
ON, OFF
Default = On
24 hr, 5-2,
5-11, 7dAY
Default = 5-11
2 (Occ, UnOcc),
4 (Wake, UnOcc,
Occ, Sleep)
Default = 4
or
– –:– – to 23:50
Default = 6:00 AM
Default = 8:00 AM
Access
LTD
USER
ADV
USER
ADV
USER
ADV
USER
ADV
Description
SCHEDULE (1, 2, 3, 4)
Selects if schedule 1 is on or off.
Note: This item is only adjustable in the ADV access
level.
SCHEDULE TYPE
Select the type of schedule.
Note: This item is only available when the Schedule
is set to On.
SCHEDULE MODE
Select the number of events per day
Note: This item is only available when the Schedule
is set to On.
ALL DAYS OF THE WEEK
Select the times for the scheduled events.
Note: This item is only available when the Schedule
is set to On and the Schedule Type is set to 24 hr.
Occupied
Sleep
Wake
UnOccupied
Occupied
Sleep
Continued on next page.
© 2007 D 033 - 10/07 6 of 12
Default = 6:00 PM
Default = 10:00 PM
– –:– – to 11:50 PM
or
– –:– – to 23:50
Default = 6:00 AM
Default = 8:00AM
Default = 6:00 PM
Default = 10:00 PM
USER
ADV
MONDAY THROUGH FRIDAY
Select the time for the scheduled events.
Note: This item is only available when Schedule is
set to On and Schedule Type is set to 5-2 or 5-11.
Page 7

Schedule Menu (2 of 3)
Item Field Range
– –:– – to 11:50 PM
or
– –:– – to 23:50
Wake
UnOccupied
Occupied
Sleep
Wake
UnOccupied
Default = 6:00 AM
Default = 8:00 AM
Default = 6:00 PM
Default = 10:00 PM
– –:– – to 11:50 PM
or
– –:– – to 23:50
Default = 6:00 AM
Default = 8:00 AM
Access
USER
ADV
USER
ADV
Description
SATURDAY AND SUNDAY
Select the times for the scheduled events.
Note: This item is only available when Schedule is
set to On and Schedule Type is set to 5-2.
SATURDAY
Select the times for the scheduled events.
Note: This item is only available when Schedule is set
to On and Schedule Type is set to 5-11 or 7DAY.
Occupied
Sleep
SCHEDULE MENU
Wake
UnOccupied
Occupied
Sleep
Wake
UnOccupied
Default = 6:00 PM
Default = 10:00 PM
– –:– – to 11:50 PM
or
– –:– – to 23:50
Default = 6:00 AM
Default = 8:00 AM
Default = 6:00 PM
Default = 10:00 PM
– –:– – to 11:50 PM
or
– –:– – to 23:50
Default = 6:00 AM
Default = 8:00 AM
USER
ADV
USER
ADV
SUNDAY
Select the times for the scheduled events.
Note: This item is only available when Schedule is set
to On and Schedule Type is set to 5-11 or 7DAY.
MONDAY
Select the times for the scheduled events.
Note: This item is only available when Schedule is
set to On and Schedule Type is set to 7DAY.
Occupied
Sleep
Continued on next page.
7 of 12 © 2007 D 033 - 10/07
Default = 6:00 PM
Default = 10:00 PM
Page 8

Schedule Menu (3 of 3)
Item Field Range
– –:– – to 11:50 PM
or
– –:– – to 23:50
Wake
UnOccupied
Occupied
Sleep
Wake
UnOccupied
Default = 6:00 AM
Default = 8:00 AM
Default = 6:00 PM
Default = 10:00 PM
– –:– – to 11:50 PM
or
– –:– – to 23:50
Default = 6:00 AM
Default = 8:00 AM
Access
USER
ADV
USER
ADV
Description
TUESDAY
Select the times for the scheduled events.
Note: This item is only available when Schedule is
set to On and Schedule Type is set to 7DAY.
WEDNESDAY
Select the times for the scheduled events.
Note: This item is only available when Schedule is
set to On and Schedule Type is set to 7DAY.
Occupied
Sleep
SCHEDULE MENU
Wake
UnOccupied
Occupied
Sleep
Wake
UnOccupied
Default = 6:00 PM
Default = 10:00 PM
– –:– – to 11:50 PM
or
– –:– – to 23:50
Default = 6:00 AM
Default = 8:00 AM
Default = 6:00 PM
Default = 10:00 PM
– –:– – to 11:50 PM
or
– –:– – to 23:50
Default = 6:00 AM
Default = 8:00 AM
USER
ADV
USER
ADV
THURSDAY
Select the times for the scheduled events.
Note: This item is only available when Schedule is
set to On and Schedule Type is set to 7DAY.
FRIDAY
Select the times for the scheduled events.
Note: This item is only available when Schedule is
set to On and Schedule Type is set to 7DAY.
Occupied
Sleep
After the last item, the control returns to the first item in the menu.
© 2007 D 033 - 10/07 8 of 12
Default = 6:00 PM
Default = 10:00 PM
Page 9

Misc (Miscellaneous) Menu (1 of 1)
The Miscellaneous menu items set display and control
options such as access level and temperature units.
Item Field Range
MISC MENU
Access
LTD, USER,
ADV
Default = USER
ON, TMPY, OFF
Default = TMPY
Schedule 1, 2, 3, or 4 ADV
033, Software Version
LTD
USER
ADV
USER
ADV
LTD
USER
ADV
Description
ACCESS LEVEL
The access level of the Timer. The access column
shows which items are visible in each access level.
Note: This item is only available when the Lock/Unlock
switch on the Timer and the tN4 system control are
set to Unlock.
BACKLIGHT
Select whether the backlight displays permanently,
temporarily, or is off. The temporary backlight lasts
for 30 seconds.
RELAY SOURCE SCHEDULE
Select which schedule the relay will follow.
Note: This item is only available when the 1 Schedule
/ 4 Schedule Switch is set to 4 Schedules and the
device is on a tekmarNet®4 system.
TYPE
Product number of this Timer. Hold the Up button to
view the software version.
After the last item, the control returns to the first item in the menu.
Timer Operation
General Operation
The Timer has an internal relay contact that allows it to be
used with non-tN4 controls. This relay contact turns on and
off according to the schedule programmed by the user and
the switch located on the back of the Timer. (Note: Only
one schedule is available when not on a tN4 system.)
When this Timer is connected to a tN4 system, it provides
the network with the capability to have four individual master
schedules. To turn a schedule on, go to the desired schedule
menu (Schedule 1, Schedule 2, Schedule 3, Schedule 4)
and program it following the instructions in the “Setting the
Schedule” section. In the case of a power loss, all settings
will be stored, however, the current time and date will only
be stored for up to four hours.
The relay contact can be set to follow one of the four
schedule masters when installed on a tN4 system.
If the switch is set to Relay NO (normally open), then the
contact is open during an occupied (Occupied, Wake) event
and is closed during an unoccupied (Unoccupied, Sleep)
event. If the Timer is to be used in conjunction with a stand
alone tekmar reset control (non-tN4), the switch must be
set to the Relay NO setting.
If the switch is set to Relay NC (normally closed), then the
contact is closed during an occupied event and is open
during an unoccupied event. If there is no power present at
the Timer then the relay will always be in the open position,
regardless of the switch setting.
9 of 12 © 2007 D 033 - 10/07
Page 10

Time Clock
•
•
• •
• •
• •
•
•
•
•
•
The Timer has a built-in time clock to allow the Timer to
operate the schedules. A battery backup allows the Timer
to keep time for up to 4 hours without power. The Timer
display will revert to the Time Clock display after 60 seconds
of button inactivity. The time clock supports automatic
Daylight Savings Time Modes
Mode DST Start DST End
1 1st Sunday in April Last Sunday in October
2 2nd Sunday in March 1st Sunday in November
Setting the Schedule
To provide greater energy savings, you can operate a tN4
Control System on up to four separate programmable
schedules. The schedules are stored in memory and
are not affected by a loss of power to the Timer. A single
thermostat zone, or multiple devices on the tN4 system can
be assigned to follow one of the four schedules this Timer
is capable of operating.
Master Schedule
If the Timer is connected to other tN4 thermostats or system
controls, then the Timer can operate up to four different master
schedules. Master schedules simplify installation since one
master schedule may be used by multiple devices. Schedule
1 corresponds to Master Schedule 1 (MST1), Schedule 2
corresponds to Master Schedule 2 (MST2), and so on up
to Master Schedule 4 (MST4). If more than one schedule
is required on the Timer, make sure switch setting 3 is set
to “4 Schedules” instead of “1 Schedule”. Then, in order to
turn on a Master Schedule, go to the Schedule 1, 2, 3, or
4 menus and set the desired schedule to “On”. Follow the
instructions below to set the schedule.
Schedule Types
The schedule type determines when the schedule repeats
itself. This Timer includes four schedule types:
•
24 Hour: Repeats every 24 hours.
5-2: Repeats on a weekly basis. However, it breaks the
•
week into the weekend and weekdays. This reduces the
amount of schedule event settings.
adjustment for Daylight Saving Time (DST) once the day,
month, and year are entered. Use the Time menu to set the
correct time, day, month, and year if DST is selected.
•
5-11: Repeats on a weekly basis. However, it breaks the
week into Saturday and Sunday followed by the weekdays.
This reduces the amount of schedule event settings.
•
7 Day: Repeats on a weekly basis and allows for separate
event times for each day.
Schedule Type
Day 24 Hour 5-2 5-11 7 day
Sa
Su
Mo
Tu
We
Th
Fr
Schedule Mode
The schedule mode can have either 4 or 2 events per day.
An event is a time at which a thermostat changes the set
temperature. The event time can be set to the nearest
10 minutes. If you wish to have the Timer skip the event,
enter “--:--“ as the time. The “--:--“ time is found between
11:50 PM and 12:00 AM. See the table, Schedule Mode,
for more details regarding types of events. To follow a
master schedule:
1. Assign a thermostat to follow one of the Timer’s schedules
by selecting setback on one of the switches, or programming
the heat or cool schedule in the Schedule Menu to Member
(Mbr) 1 to 4. (This is done on the thermostat).
Schedule Mode Event 24Hr Sat Sun Mon Tue We Thu Fri
Wake
Unoccupied
6:00 AM 6:00 AM 6:00 AM 6:00 AM 6:00 AM 6:00 AM 6:00 AM 6:00 AM
8:00 AM 8:00 AM 8:00 AM 8:00 AM 8:00 AM 8:00 AM 8:00 AM 8:00 AM
4 events per day
Occupied
Sleep
6:00 PM 6:00 PM 6:00 PM 6:00 PM 6:00 PM 6:00 PM 6:00 PM 6:00 PM
10:00 PM 10:00 PM 10:00 PM 10:00 PM 10:00 PM 10:00 PM 10:00 PM 10:00 PM
or
Occupied
6:00 AM 6:00 AM 6:00 AM 6:00 AM 6:00 AM 6:00 AM 6:00 AM 6:00 AM
2 events per day
Unoccupied
© 2007 D 033 - 10/07 10 of 12
10:00 PM 10:00 PM 10:00 PM 10:00 PM 10:00 PM 10:00 PM 10:00 PM 10:00 PM
Page 11

Programming the Relay
This is only applicable if switch 3 is set to “4 Schedules”
and the Timer is connected to a tekmarNet®4 system.
The relay contact on the back can be programmed to follow
one of the four schedules available in the Timer. The schedule
must first be turned to “On” before the relay contact can
be programmed to follow it. When the schedule is in the
“Wake” or “Occupied” events, the relay will be in the normal
state. When the schedule is in the “Unoccupied” or “Sleep”
events, the relay will be in the non-normal state, which can
be programmed via switch 2 on the back of the Timer.
Locate the Relay Schedule in the Misc menu (Must be
•
in the “User” or “Adv” access level) to program which
schedule the relay will follow.
Backlight
Use the Timer’s backlight to increase the visibility of the
display. The backlight can be set to On, Temporary, or Off.
If On is selected, the backlight remains permanently on.
If Temporary is selected, the backlight comes on for 30
seconds when a button is pressed. If Off is selected, the
backlight remains permanently off. By default, the backlight
is set to Temporary.
Locate the Backlite setting in the Misc menu.•
Error Messages
If the warning symbol (flashing circle with exclamation mark) is visible on screen, this indicates that there is an error
somewhere in the system. To view the error message, you must first put the control into the Advanced access level, then
press the Menu button until the View Menu is displayed.
Error Message Description
TIME ERROR
The Timer failed to read the Time menu settings from memory and has reloaded the factory
default settings. The Timer continues to operate while displaying this error.
Note: To clear the error, the access level must be set to Advanced before checking all the
settings in the Time menu.
SCHEDULE ERROR
The Timer failed to read the Schedule menu settings from memory and has reloaded the
factory default settings. The Timer continues to operate while displaying this error.
Note: To clear the error, the access level must be set to User or Advanced before checking
all the settings in the Schedule menu.
MISCELLANEOUS ERROR
The Timer failed to read the Miscellaneous menu settings from memory and has reloaded
the factory default settings.
Note: To clear the error, the access level must be set to Advanced before checking all the
settings in the Miscellaneous menu.
tN4 BUS ERROR
The tN4 communication bus has either an open or a short circuit. The result is that there is
no communication. Check for loose wires. Check for short circuits between the tN4 and C
wires. Check for correct polarity between the C and R wires.
If the timer is intentionally removed from the tN4 bus, press the up and down buttons together
to clear the error message.
DEVICE LIMIT
You have installed more than 24 devices (thermostats, mixing expansion modules) on the tN4
bus. You must remove the additional devices and move them to a different bus if possible.
11 of 12 © 2007 D 033 - 10/07
Page 12

Cleaning the Timer
The Timer’s exterior can be cleaned using a damp cloth. Moisten the cloth with water and wring out prior to wiping the
timer. Do not use solvents or cleaning solutions.
Limited Warranty and Product Return Procedure
Limited Warranty The liability of tekmar under this
warranty is limited. The Purchaser, by taking receipt
of any tekmar product (“Product”), acknowledges the
terms of the Limited Warranty in effect at the time of
such Product sale and acknowledges that it has read
and understands same.
The tekmar Limited Warranty to the Purchaser on the
Products sold hereunder is a manufacturer’s passthrough warranty which the Purchaser is authorized to
pass through to its customers. Under the Limited Warranty, each tekmar Product is warranted against defects
in workmanship and materials if the Product is installed
and used in compliance with tekmar’s instructions, ordinary wear and tear excepted. The pass-through warranty
period is for a period of twenty-four (24) months from the
production date if the Product is not installed during that
period, or twelve (12) months from the documented date
of installation if installed within twenty-four (24) months
from the production date.
The liability of tekmar under the Limited Warranty shall be
limited to, at tekmar’s sole discretion: the cost of parts and
labor provided by tekmar to repair defects in materials and /
or workmanship of the defective product; or to the exchange
of the defective product for a warranty replacement product; or to the granting of credit limited to the original cost of
the defective product, and such repair, exchange or credit
shall be the sole remedy available from tekmar, and, without limiting the foregoing in any way, tekmar is not responsible, in contract, tort or strict product liability, for any other
losses, costs, expenses, inconveniences, or damages,
whether direct, indirect, special, secondary, incidental or
consequential, arising from ownership or use of the product, or from defects in workmanship or materials, including
any liability for fundamental breach of contract.
Any representations or warranties about the Products made
by Purchaser to its customers which are different from or in
excess of the tekmar Limited Warranty are the Purchaser’s
sole responsibility and obligation. Purchaser shall indemnify and hold tekmar harmless from and against any and all
claims, liabilities and damages of any kind or nature which
arise out of or are related to any such representations or
warranties by Purchaser to its customers.
The pass-through Limited Warranty does not apply if the
returned Product has been damaged by negligence by persons other than tekmar, accident, fire, Act of God, abuse
or misuse; or has been damaged by modifications, alterations or attachments made subsequent to purchase which
have not been authorized by tekmar; or if the Product was
not installed in compliance with tekmar’s instructions and
/ or the local codes and ordinances; or if due to defective
installation of the Product; or if the Product was not used in
compliance with tekmar’s instructions.
THIS WARRANTY IS IN LIEU OF ALL OTHER WARRANTIES, EXPRESS OR IMPLIED, WHICH THE GOVERNING
LAW ALLOWS PARTIES TO CONTRACTUALLY EXCLUDE,
INCLUDING, WITHOUT LIMITATION, IMPLIED WARRANTIES OF MERCHANTABILITY AND FITNESS FOR A PARTICULAR PURPOSE, DURABILITY OR DESCRIPTION OF
THE PRODUCT, ITS NON-INFRINGEMENT OF ANY RELEVANT PATENTS OR TRADEMARKS, AND ITS COMPLIANCE WITH OR NON-VIOLATION OF ANY APPLICABLE
ENVIRONMENTAL, HEALTH OR SAFETY LEGISLATION;
THE TERM OF ANY OTHER WARRANTY NOT HEREBY
CONTRACTUALLY EXCLUDED IS LIMITED SUCH THAT
IT SHALL NOT EXTEND BEYOND TWENTY-FOUR (24)
MONTHS FROM THE PRODUCTION DATE, TO THE
EXTENT THAT SUCH LIMITATION IS ALLOWED BY THE
GOVERNING LAW.
The pass-through Limited Warranty applies only to those
defective Products returned to tekmar during the warranty
period. This Limited Warranty does not cover the cost of the
parts or labor to remove or transport the defective Product,
or to reinstall the repaired or replacement Product, all such
costs and expenses being subject to Purchaser’s agreement and warranty with its customers.
tekmar Control Systems Ltd., Canada
tekmar Control Systems, Inc., U.S.A.
Head Office: 5100 Silver Star Road
Vernon, B.C. Canada V1B 3K4
(250) 545-7749 Fax. (250) 545-0650
Web Site: www.tekmarcontrols.com
Product design, software and literature are Copyright © 2007 by:
tekmar Control Systems Ltd. and tekmar Control Systems, Inc.
12 of 12
Product Warranty Return Procedure All Products that
are believed to have defects in workmanship or materials
must be returned, together with a written description of the
defect, to the tekmar Representative assigned to the territory in which such Product is located. If tekmar receives an
inquiry from someone other than a tekmar Representative,
including an inquiry from Purchaser (if not a tekmar Representative) or Purchaser’s customers, regarding a potential
warranty claim, tekmar’s sole obligation shall be to provide
the address and other contact information regarding the
appropriate Representative.
All specifications are subject to change without notice.
Printed in Canada. D 033 - 10/07.
 Loading...