


User Manual
DW8 40 FI VR01
EN
www.teka.com

Dear Cust omer,
Please caref ully re ad this manual befor e using the
dishwas her, it will he lp you to us e and maintain th e
dishwas her p roper ly.
Keep it to refer t o it at a later date.
Pass it on to any subse quent owne r of the appli ance.
This manu al contains sec tio ns on safety I nst ructions ,
Operati ng Instruc tions, I nstallation I nstructi ons and
Tro ubl eshootin g Tips, etc .
Control P anel..... ........ ..... ... ........ ..... ........... ......3
Dish was her Featur es......... ........ .............. ..... . ..3
A Water Soft ener........ ..... ... ..... ... ..... ........ ......4、
B Load ing the Salt i nto the S oft ener..... ..... .......5、
C Fill the R ins e Aid Di spens er.. .......... ........... ..5、
D Func tion of Detergent ................. ... ... ..... .....6、
Atte ntion before or aft er lo ading the Di shwash er
Baskets ........ ..... ............. . ....... ... ........ .............9
The Metho d Loading No rma l Dishw are..... ........ 10
To review the section on troub leshooti ng Tips
will he lp you to s olve some co mmon problems
by y ourse lf .
If you can not sol ve the pr obl ems by yourself ,
pleas e ask for t he help of professiona l tec hnici ans .
The manufa cture r, fol lowin g a pol icy of co nstan t
deve lop men t and upda ting of the pr oduct, may
make modific ati ons w ithou t giving pri or notice.
This user manual shall a lso be go t from th e
manu fac tur er or r esp onsib le ve ndor.
Was h Cyc le Tab le....... .......... ...... ... ..... .......... ..11
Turnin g on the Appliance..... ........ ........ ........ ...12
Ch an ge th e Programm e.. ..... ...... . ............... .12....
At the end of t he Wash Cyc le... ... ........ .............12
Filt ering Syst em.. ........ ... ..... ........ ..... ... ... ........13
Cari ng fo r the Dishwa she r.. ... ...... .......... ......... 14.
Positioni ng th e Applia n ce... ..... ........ ... ....... ...15..
About Power Conn ect ion. ........ ........ ....... .......1 5.
Water Connection... . ....... . ....... . ....... . ...... .......1 6.
Star t of di sh was her...... ........................ .. ......17..
Before ca ll ing for servi ce.... ............. ..... ..... .. ...18.
Erro r cod es....... .. ...... .................. ... .. ........ ....1 9.
Technical i nforma tion. ........ ..... ........ ...... .. .. ...20..

When using your dishwasher,
follow the precautions listed below:
This appliance is intended to be used in household
and similar applications such as:
-staff kitchen areas in shops, offices and other
working environments;
-farm houses;
-by clients in hotels, motels and other residential type
environments;
-bed and breakfast type environments.
This appliance can be used by children aged from 8
years and above and persons with reduced physical,
sensory or mental capabilities or lack of experience
and knowledge if they have been given supervision
or instruction concerning use of the appliance in a
safe way and understand the hazards involved.
Children shall not play with the appliance. Cleaning
and user maintenance shall not be made by children
without supervision. For EN60335-1
( )
This appliance is not intended for use by persons
(including children )with reduced physical, sensory
or mental capabilities, or lack of experience and
knowledge ,unless they have been given supervision
or instruction concerning use of the appliance by a
person responsible for their safety. For IEC60335-1
( )
This appliance is for indoor use only, for household
use only.
To protect against the risk of electrical shock, do not
immerse the unit, cord or plug in water or other liquid.
Please unplug before cleaning and maintenance the
appliance .
Use a soft cloth moisten with mild soap, and then use
a dry cloth to wipe it again.

This appliance must be earthed. In the event of a
malfunction or breakdown, earthing will reduce the risk
of anelectric shock by providing a path of least
resistance of electric current. This appliance is equipped
with a cord having an equipment-earthing conductor
and a grounding plug.
The plug must be plugged into an appropriate outlet that
is installed and earthed in accordance with all local
codes and ordinances.
Improper connection of the equipment-earthing
conductor can result in the risk of an electric shock.
Check with a qualified electrician or service
representative if you are in doubt whether the appliance
is properly grounded.
Do not modify the plug provided with the appliance;
If it does not fit the outlet.
Have a proper outlet installed by a qualified electrician.
Do not abuse, sit on, or stand on the door or dish rack of
the dishwasher.
Do not operate your dishwasher unless all enclosure
panels are properly in place.
Open the door very carefully if the dishwasher is
operating, there is a risk of water squirting out.
Do not place any heavy objects on or stand on the door
when it is open. The appliance could tip forward.
When loading items to be washed:
1) Locate sharp items so that they are not likely to
damage the door seal;

2) Warning: Knives and other utensils with sharp points
must be loaded in the basket with their points down or
placed in a horizontal position.
Check that the detergent powder is empty after
completion of the wash cycle.
Do not wash plastic items unless they are marked
dishwasher safe or the equivalent.
For plastic items n
recommendations.
Use only detergent and rinse additives designed for
an automatic dishwasher.
Never use soap, laundry detergent, or hand washing
detergent in your dishwasher.
Children should be supervised to ensure that they do not
play with the appliance.
The door should not be left open, since this could increase
the risk of tripping.
If the supply cord is damaged, it must be replaced by the
manufacturer or its service agent or a similarly qualified
person in order to avoid a hazard.
During installation, the power supply must not be
ot so marked,
check the manufacturer's
excessively or dangerously bent or flattened.
Do not tamper with controls.
The appliance is to be connected to the water mains using
new hose sets and that old hose-sets should not be reused.
The maximum number of place settings to be washed
is 9.
The maximum permissible inlet water pressure is 1MPa.
The minimum permissible inlet water pressure is 0.04MPa.

Dispose of the dishwasher packaging material
correctly.
All packaging materials can be recycled.
Plastic parts are marked with the standard
international abbreviations:
PE for polyethylene, e.g. sheet wrapping material
PS for polystyrene, e.g. padding material
POM polyoxymethylene, e.g. plastic clips
PP polypropylene, e.g. Salt filler
ABS Acrylonitrile Butadiene Styrene, e.g. Control
Panel .
Packaging material could be dangerous for children!
For disposing of package and the appliance please
go to a recycling centre. Therefore cut off the power
supply cable and make the door closing device
unusable.
Cardboard packaging is manufactured from recycled
paper and should be disposed in the waste paper
collection for recycling.
By ensuring this product is disposed of correctly, you
will help prevent potential negative consequences
for the environment and human health, which could
otherwise be caused by inappropriate waste handling
of this product.
For more detailed information about recycling of this
product, please contact your local city office and your
household waste disposal service.
DISPOSAL: Do not dispose this product as unsorted
municipal waste. Collection of such waste separately
for special treatment is necessary.

2

To get the best perfo rmance from your dishw asher, r ead all opera tin g i n struct ion s
be fore using it for the first time.
1.Program indicat ors : to show which program
you have chose;
2. Progra m Button : To Press th e button to selec t a
wa sh Prog ram .
3.Delay i ndicators: to s how the delay time
(3 h/6h/9h )
4.Delay Button : To Pres s the b utton to delay.
5.Half lo ad func tio ns Button: To select Ha lf load
functions. ( With th is Half load f unction yo u can
only use it when you have only about or less t han
7 pl ace set tin g dish wave, a nd you will se e less
wa ter and energy consump tion , can onl y be used
wi th Inte nsive, Normal , ECO, an d 90 mi n .)
Front vie w
6.Half lo ad indicator : To show wh en yo u selec t the
ha lf load function .
7.On /Off Bu tton: To tu rn on /off the po wer s upp ly.
8.Salt an d rinse ai d wa rni ng lights: To show
when the salt co nt ain er or d ispen ser need to be
refi lled
Rinse Aid indic ator:
Indicat es wh en the di spe nser needs t o be refille d.
Add salt in dicator:
Indicat es wh en the di spe nser needs t o be refille d.
Back Vie w
2
3
4
5
6
1
8
7
9
Cup sh elf
1
2
Inner pip e
3
Lower basket
4
Salt cont ain er
5
Dispens er
6
10
Cutlery r ack
7
Spray arm s
8
Filter as sembly
9
Inlet pip e connecto r
10
Drai n pip eUpper basket
11
11

Before using your dis hwasher fo r the f irst time:
A. Set t he water sof tener
B. Add 1. 5Kg dishwa sher salt an d then full fi ll th e salt co nta ine r with wa ter
C. Fil l the rinse ai d dispense r
D. Fil l in deterge nt
The water s oftener mu st be set manu all y, us ing the wate r hardness dial .
The water s oftener is d esi gned to remo ve mineral s and salts fr om the water, whic h would have
a detrime nta l or adve rse eff ect on the ope ration of the app lianc e.
The highe r the c onten t of these minera ls and salts , the harder y our water is.
The softe ner should be adjusted according to the h ardness of the water in yo ur ar ea. Your lo cal Water Au tho rity
can advis e you o n the har dness of the w ater in your area.
Adjusting Salt Consumption
The dishw asher is des igned to allow fo r adjustme nt in the amou nt of salt con sumed base d on th e hardn ess o f
the water used . Th is is intend ed to optimi se an d custo mise the lev el o f sa lt consump tion.
Please fo llow the steps below for adjustmen t in sa lt consump tio n.
1. Open the d oor ,Sw itc h on the ap pli ance;
2. Press the Progr am bu tton for mor e than 5 seconds to s tart the water soft ene r
set model within 60se conds afte r the appliance was swit ched on( The Salt and
Rinse aid warningli ght s will be on per iodicall y whe n it get in t he set model );
3. Press the Progr am bu tton to sele ct the prope r set a ccord ing to your local e nvironme nt,
the sets wi ll ch ange in the followi ng se quence: H1 ->H2->H3->H4->H5 ->H 6;
4. Press the Power b utt on to end the se t up model.
WATER HA RDNE SS
dH
6- 11
18-2 2 31-40 22-2 8 3.1 -4 .0
23-3 4 4.1-6. 0
35-5 5 61-98 43-6 9 6.1 -9 .8
fH
0~90~5 0~0.94
10-20
21- 3012-1 7 2.1-3. 0
41- 60
Clarke
0~6
7-14
15-2 1
29-4 2
mm ol /l
1.0-2. 0
Selector Pos it ion
H1 R apid)(
H2(90m in )
H3(90m in +rap id)
H4(E CO )
H5(E CO +r apid)
H6(ECO +90m in)
Sa lt consum pt io n
(gram/cy cl e)
0
9
12
20
30
60
dH =1.25 Clarke=1.78 fH=0. 178mmol/l1
dH: Ge rman deg ree
fH: Fren ch de gree
Clark: Br iti sh de gr ee
The manufactor y setting: H 3 (EN 50242)
Contact y our local water b oard for inf orm ation on the hardne ss of y our water suppl y.
If your model does not h ave any wate r soft ener, you may skip thi s section.
WATER SOF TENER
The hardn ess of the w ater varies from pl ace to place. If hard water is used in the d ishwashe r, dep osi ts will
form on the dishes an d ute nsils.
The appli anc e is eq uipped with a sp eci al softene r tha t use s a salt conta iner specifi cal ly designe d to elimi nat e
lime and miner als f rom the water.
4

Alway s us e the salt intended for use wit h dishwasher.
The salt conta iner is loca ted beneath the lower ba ske t and s hould b e fille d as explained
in the following:
Attention!
Only use salt sp eci fi cal ly de si gned for t he use in dish washers! E very other type of
salt no t specifically de sig ned for the us e in a dishwas her, e speciall y table salt, wil l
da mage the wat er so ft ener. In case of dam age s cau se d by th e use of un suitable
salt th e manufacturer does no t give any warranty nor is liable for an y dam ages ca used.
Only fill with salt just before star ting on e of the complete was hing programs.
Th is will prev ent any grains of s alt or salty wate r, which may have been spi l led,
re maining on the bo ttom of t he machine for an y period of time, whi ch may cause
corro si on.
A After t he lower baske t h as been remo ve d, unscr ew and remov e the cap from the salt container.
B Place the end of the funnel (sup plied) into the hole and introd u ce a bout 1. 5 kg of dishwasher sa lt.
Full fill the salt cont ain er wi th water,It i s no rmal for a small amount of water to come out of the
C
salt co ntainer.
D After fil ling the con tainer , s cr ew the cap t ightly bac k clo ck wis e.
E The salt war ning lig ht will stop b eing after the salt container has been fill ed wi th sa lt.
F Immedi ate ly after fillin g th e s alt into th e sal t con tai ner, a washin g progr am should be started
program Otherwise the filter syste m, p ump o r other i mportant parts of th e machi ne ma y be dama ged
by s alt y wa ter. This is out of wa rranty.
).
1. The salt containe r m ust onl y be refille d when the sal t war ning light i n the con trol panel comes on.
Depending on how we ll the sa lt dissolv es, t he salt warn ing light ma y still be on even though th e
salt container i s fil led .
If there is no salt warning li ght in the contro l panel (for s ome Mod els ),you can es timate when to fill
the salt into the softe ner by the c ycles that the dish washer has run.
2. If th ere are spills of the sa lt, a soak or a ra pid pro gra m should be ru n to remo ve the exces sive salt.
(We su ggest to us e a s ho rt
5

6

7

8

Conside r buying ute nsi ls whic h are identi fie d as dishwas her-proo f.
Use a mi ld deterge nt th at is described a s 'kind to dishes'. If nec essar y, seek fu rth er
info rma tion fr om the detergen t manufact ure rs.
For pa rti cular item s, sele ct a pr ogram with a s low a temperature as pos sib le.
To prevent da mag e, do not t ake g lass and cut ler y out of th e dis hwash er immediatel y
after the p rogramme h as ended.
Are not suitable Are of limited suitability
Cutlery w ith wooden , horn china or
mo ther- of- pearl h andles
Plastic i tems that ar e not h eat res istant
Older cut lery with gl ued parts that ar e not
tempera ture resis tan t
Bonded cu tle ry items or dishes
Pewt er or c ooper item s
Crystal g lass
Steel ite ms su bject to rusting
Wooden plat ters
Items mad e from synth etic fibre s
(For best p erforman ce of the dishwasher, follow these loadi ng guideli nes.
Features and appearance of baskets and cutl ery baskets may vary from your mod el.)
Some type s of glasses can be come
dull afte r a large numb er of washes
Silver an d aluminum part s have a
tendenc y to di scolour during washi ng
Glazed pa tterns may f ade if machi ne
washed fr equently
Scrape off an y large amou nts o f leftover f ood . Softe n remnants o f bur nt food in pan s.
It is not nec essary to ri nse the dishes un der run nin g water.
Place obj ects in the di shwasher i n following way :
1.Items su ch as cups, gl asses, pot s/p ans, etc. ar e faced down wards.
2.Curved i tem s, or one s wit h recesses , should be lo aded aslant so that wate r can run off.
3.All uten sils are sta cke d securely a nd can not tip o ver.
4.All uten sils are pla ced i n the way that t he spray arm s can rotate f reely duri ng wa shing .
Very small i tems shoul d not b e washed in th e dishw ash er as they cou ld ea sily fa ll out of the baske t.
Load holl ow items such as cu ps, glasse s, pans etc. W ith the open ing facing down wards s o that
water can not collec t in the conta ine r or a deep base.
Di shes an d items of cut ler y must no t lie i nside one an oth er, or cov er each othe r.
To avoid dama ge to glasse s, they must not to uch.
Load larg e ite ms which are m ost difficul t to clean int o the lower baske t.
The upper b asket is des ign ed to hol d more delic ate a nd lighter d ishware such as g lasses, co ff ee
and tea cups
Long blad ed kn ives st ore d in an uprigh t position are a potential ha zard!
Long and/ or sharp items of c utler y such as carving kniv es must be pos ition ed
horizontally in the uppe r basket.
Please do not ov erloa d your dishw ash er. This is im por tan t for goo d results and for
reasonable consumpti on of energy.
To prevent water dripping from the upper b asket into t he lowe r bas ket, we reco mmend that you
em pt y the l ower baske t fir st and th en the upper b asket.
9

The upper b asket is des ign ed to hol d more delic ate
and light er dishwar e suc h as glas ses , coffee and
tea cups an d saucers, a s well as plates, small bowls
and shallow pans (as lo ng as t hey are not to o dirty ).
Positio n the dishes and co okwar e so that they will
not get mov ed by the spra y of wa ter.
Please be r eminded th at:
Pots, ser ving bowls , etc , must al way s be plac ed to p down.
Deep pots s hould be sla nte d to allow wat er to flow out .
The Botto m Basket features fold ing spikes so tha t large r or mo re pots and pa ns can be load ed.
We sug gest that yo u place larg e items and th e most
difficult to clean item s are t o be plac ed in to th e lower
bask et: such as po ts, pans, li ds, s erving dis hes and
bowls, as s hown in the figure below. It is pr eferable t o
place ser ving dishes and lids on th e side of the racks
in ord er to avoid blocking t he rota tio n of the to p spray
arm.
Adjusting the Upper Basket
The heigh t of the upper basket can be a djusted in orde r to
create mo re space for large utensils both for t he upper
/lower ba ske t. The height of t he upper bas ket can be
adjuste d by plac ing t he wheels on differ ent height o f the
rails. Lo ng items, serving cutl ery, sal ad servers a nd knives
shou ld be placed on the shelf so that they do not obstru ct
the rotat ion of the spr ay ar ms..
Folding back the cup shelives
For bette r stacking o f pot s and pan s,
the spike s can b e folde d down as
show i n the p ict ure rig ht.
Folding Spikes of Lower Basket
For bette r stacking o f pot s and pan s,
the spike s can b e folde d down as
show i n the p ict ure rig ht.
Cutlery s hou ld be pla ced in the cutlery basket wit h the handle s at th e botto m. If t he rack has si de baskets , the
spoo ns sh oul d be load ed separately i nto the appropriate sl ots, espec ial ly long u ten sils should be placed in the
horizon tal positi on at t he fron t of th e upper bask et as sho wn in the picture .
Do not let any item extend through the bottom.
Always load sharp utensils with
the sharp point down!
10

( )
Means: need to fil l r inse into the Rinse-Aid Di spenser.
Intensive
No rma l
(*EN 502 42)
90 m in
Ra pid
For heaviest soiled crockery,
and norma lly soiled p ots
pans d ishes etc with drie d
、
、
on soi lin g.
For norma lly soiled load s,
such as , p lates ,glasses
pots
and lightly soiled pans.
This i s stan da rd pr og ra mm e, it i s
suitab le to clean nor mally s oi led
tabl ew are and i t is t he mos t effici ent
progra mme in ter ms of its com bi ned
en ergy a nd wat er co nsumption f or
that t yp e of tablewar e.
For light ly soiled loads t hat
do not need e xcellent dryi ng
efficiency.
A shorter wa sh for lightly
soil ed lo ads and quic k wash.
Prewash 50
Was h 60
(
(
℃)
Rinse
Rinse
(
℃)
Rinse 70
Drying
Prewash (45 )
Was h (55 )
℃
℃
Rinse
Rinse (65 )
℃
Drying
Prewash
Was h (45 )
Rinse(62 )
℃
℃
Drying
Was h(6 5 )
℃
Rinse
Rinse (65 )
℃
Drying
Was h (45 )
Rinse
(50 )℃
Rinse (55 )℃℃
℃)
5/22 g
5/22 g
5/22 g
27g
20g
16 5
175
20 5
90
30
1. 4
1. 1
0. 69
1.15
0. 7
16 .5
13
9
11.5
10
*E N 50242 : This program me is the test c ycl e. The infor mation for c omparability test
in accord ance wi th EN 5 0242, as follow s:
Capacit y: 9 se tting
Positio n Upp er bask et: upper wh eels on rails
Rinse aid setting: 6
Pl:0.49 w; Po :0.45w.
Startin g a cycle wash
Dr aw o ut th e lower and up per b asket, loa d the dishes a nd push them back.
1
It is comme nded to load t he lo wer bas ket firs t, then the upper one ( see the s ect ion entitl ed
Loading the Di shwas her ).
“ ”
Pour in the d etergent ( see the section e ntitle d Salt, Det ergent and Rinse Aid ).
2
Insert th e plug into th e socket. The power s upply is 220-24 0 VAC / 50 HZ, the specification
3
“ ”
of the sock et is 10A 250VAC. Ma ke sure th at the water supply is turned on to f ull pressu re.
Open the do or, pr ess the O N/OFF Butt on, a nd th e ON/OFF lig ht will turn on.
4
Press the p rogram But ton , the wash p rogram will be ch anged a s follows di rec tion:
5
Intensi ve->Norm al- >ECO->90 Min-> Rap id
;
If a pro gra m is selected, the re spo nse lig ht wil l li ght . Th en close the door, the d ishwa she r
begins to s tart.
11

Prem ise:
A cycle t hat i s underway c an on ly be mod ified if it has onl y bee n runni ng for a short time. Ot her wis e, the
1
deterge nt ma y have al ready been r ele ased, a nd th e appliance may h ave alrea dy drain ed the wash water.
If this is th e cas e, the detergent dispe nser must be r efill ed (see the secti on entitled " Loading th e
Dete rge nt " ).
Open the do or ,press th e Program bu tton , the machine wi ll be in st andby state,
2
then you ca n change the p rog ram to th e desired cy cle s ettin g (see the sectio n ent itled " Starti ng a
wash cycle. . ." ).
more than 3 seconds
If you o pen the door , the machine wil l pause. The progra m light will
stop blinking and the buzzer wi ll mooing every minute unless you close the door . Aft er
you close the door ,the mach ine will keep on wo rking after 1 0 seconds .
A forgotten dish can be added any time before the detergent cup opens.
Open the door a little .
1
After the spray arms stop working, you can open the door
2
completely.
Add forgotten dishes.
3
When the wo rki ng cycl e has finished, t he buzzer of t he dishwas her will sou nd for 8 seconds, t hen stop. Tur n off
the appli ance using the ON /OFF bu tto n, shut off the wa ter supply a nd open the do or of the dishwas her.
Wai t for a f ew minutes b efore unlo adi ng the di shw asher t o avo id handling the dishes and utensil s whi le they
are still h ot an d more su sceptible to br eakage. They w ill also dry bett er.
during a wash cycle
Close the door
4
The dishwasher will run after 10 seconds.
5
Switch Off the Dishwasher
The progr am light is on but is n ot blinkin g, only in thi s case the pro gramme has ended.
Open the do or.1. Swit ch off th e dishwash er by p ressi ng the ON/OFF button.
2.Turn off th e water tap!
Open the doo r carefully.
Hot dishe s are s ensit ive t o knocks. The di shes shoul d the refor e be allowed to coo l down around 15 minutes
before re mov ing fro m the appliance.
Open the di shwasher 's do or, leave it ajar and wait a fe w minutes be for e remov ing t he dishes. I n this way the y
will be coo ler a nd the dr ying will be impr oved.
Unloading the dishwasher
It is norma l tha t the dis hwasher is w et inside.
Empty the l ower baske t fir st and th en th e upper one. Thi s wil l avoid wate r dripp ing f rom the uppe r Basket ont o
the dishe s in the lower one.
It is dangerous to open the door when washing,
Was h the a rms in soapy a nd warm wate r and u se a soft brush to
clea n the j ets . Repla ce them afte r rin sing them th oroug hly.
because the hot water may scald you.
When following this procedure from step1 to step 3, the filter system will be removed;
when following it from Step 3 to Step 1, the filter system will be installed.
12

The fi lte r pre vents l arger remnants of food or oth er objects f rom gettin g ins ide the pump .
The resid ues m ay bloc k the f ilter, i n thi s case th ey mu st be remove d.
The fi lte r system con sis ts of a coarse f ilter, a fla t (Main filt er)
And a microfilter(F ine f ilter ).
1
2
3
2
1
3
Main fil ter
Food and so il particles trapped i n this filte r are pulver ize d by a
spec ial j et on the lowe r spray arm an d washed dow n to dr ain.
Coarse filter
Larger it ems, such as p ieces of bones or glass, t hat could bl ock
the drain a re trapped i n the coarse filt er. To re move the ite ms
caug ht by t he filter, ge ntly squeeze the tap on th e top o f this
filter an d lift out.
Fine fil ter
This filt er holds soil and f ood residu es in the sump a rea and
prevent s it from bein g redeposi t on the dishe s during wash cyc le.
Filter assembly
The fi lte r effic ientl y
For best pe rfo rmanc e and r esult s, the filte r must be cleaned r egularly. th is reason, i t is a good idea to
remove th e larger foo d par ticle s trapped in the filter after e ach wash cyc le by rinsing the semici rcu lar filter and
cup under r unning water. To remov e the filter d evice, pul l the cup hand le in t he upward di recti on.
remo ves f ood partic les from the w ash water, allowing it to be rec ycled during the cycle .
For
The dishwasher must never be used with out the filter s.
Imprope r replacem ent o f the filter m ay re duce the pe rformance level of t he ap plian ce
and damage dishes and utensils.
2
1
St ep 1 Tur n the filter in ant i-clockw ise direct ion,:
Step 2 lift the fi lter assy up:
When following this procedure from step1 to step 2, the filter system will be removed;
when following it from Step 2 to Step 1, the filter system will be installed.
13

Remarks:
- Insp ect t he fi lters for blockin g aft er every tim e the d ishwa sher has been used.
- By unscrewing the coa rse filter, you ca n remove the f ilter s ystem . Remove any food remn ants and
clea n the f ilter s und er running water.
The entire filter assembly should be cleaned once a week.
Cleaning the Filter
To clean the co arse filte r and the fine filter, use a cl ean ing brush. Reasse mbl e the f ilter p arts as shown in th e figur es
on the last p age and rein ser t the entire a ssembly in the di shwas her, positioni ng it in it s sea t and pressi ng downwards.
When cl ean i ng the fil ters, don't knock on them. Otherwise, the filter s could be
contorted and the performanc e of the dishwas her c oul d be dec reased.
The contr ol panel can b e cleaned by usin g a light ly dampened clo th.
After cle aning, mak e sur e to dry it thor oughl y.
For the exterior, use a go od applian ce po lish wax.
Never use s harp objec ts, scouri ng pa ds or harsh cl eaners on an y part of the di shw asher.
Cleaning The Door
To clean the ed ge around th e door, you sho uld use only a soft warm, damp cl oth.
To avoid pene tra tion of w ater into the doo r lock and ele ctrical co mpo nents , do no t
use a spray cleaner of an y kind.
Never use a spra y clean er to c lean the door pa nel a s it may damage the d oor lock
and electrical compone nts.
Abrasive agents or some pa per towels sho uld not be used becaus e of the risk of
scra tch ing or leavi ng sp ots on the stainles s steel s urface .
Protect Against Freezing
please ta ke frost pro tec tion me asu res on the dishwasher in winter. Ever y fter wash ing cycles ,
please operate as fol low s
1.Cut off the el ectrical power to the dishw asher.
2.Turn off th e water supp ly and disconnect the wa ter i nlet pipe fr om the water v alve.
3.Drain th e water from t he inlet pip e and water valve . (Use a pan to gather the water)
4.Reconn ect the wate r inlet pipe t o the water valve .
5.Remove t he filter at t he bottom of t he tub and use a spon ge to soak up water in the sum p.
:
If your dis hwasher ca nno t work becau se of the ice,
please contact prof essional s erv ice persons.
time a
Cleaning the Spray Arms
It is necessar y to clean the spray ar ms regularly fo r har d
water che micals will clog the spray arm jets and bearings.
To remove the u pper spray arm, hold the n ut, rotate t he ar m
cloc kwi se to remove i t.
To remove the l ower spray arm, pull out the sp ray arm upwa rd.
Was h the a rms in soapy a nd warm wate r and u se a soft brush to
clea n the j ets . Repla ce them afte r rin sing them th oroug hly.
14

After Every Wash
After eve ry wash, tur n off the w ater supply to the
applian ce and leave t he do or slightl y open so that
mo is tur e and odours are not trapped in side.
Remove the Plug
Before cl eaning or perfo rming main tenan ce, always
remove th e plug from the socket.
No Solvents or Abrasive Cleaning
To cle an the ex terior and rubb er parts of the dis hwasher,
do not use solve nts or abrasive clea ning products.
Only use a cl oth with war m soa py wa ter.
To remove spots or stains from the su rface of the
interior, use a cloth dampe ned with water an a little
vine gar, or a cleaning prod uct made specif ica lly for
dish was hers.
When not in Use for a LongTi me
It is rec omm end that you r un a wash cycl e with th e
dish w asher empt y and t hen rem ove t he plug from t he
socket, turn off the water s upply and le ave the door o f
the applia nce sli ght ly open. This wi ll help the door
seal s t o las t longer and p reven t odours from for ming
within the a pplia nce.
Moving the Appliance
If the appl iance must be moved , try to ke ep it i n the
ve rtica l position. If ab solut ely necessar y, it can be
posi tio ned on its back.
Seals
One of the fa ctors that c ause odour s to form in the
dish was her i s food th at re mains t rapped in th e sea ls.
Periodi c cleaning w ith a damp spo nge w ill prevent this
from occurri ng .
Electrical Shock HazardDisconnect electrical
power beforeinstalling dishwasher.
Failure to do so can result in death or
electrical shock.
The insta llation of t h e pipes
and elect rical equi pments
shou ld be d one by profes siona ls.
●
Installation preparation
The insta llation po sit ion of di shwasher s hou ld be near the e xisting in let and drai n hos es and
power cord.
One side of the cabinet sink should b e cho sen to fa cil itate the co nnect ion of drain hose s of
the di shw asher.
Note: ple ase check th e acc ompanying installation accessories(h ook for ae sth etic panel ,scre w)
15

Please carefully read the installation instruction.
Illustr ations of ca bin et dimensi ons and inst allation p osi tion of t he di shwas her
Prepara tions shou ld be made before moving the dishwasher to the i nstal lat ion place.
Choose a place near the s ink to fa cilitate t he install ation of inle t and drain ho ses
1
(see figu re 1) .
2
If dis hwa she r is inst alled at the cor ner o f the cabine t, th ere s hou ld be som e spa ce
(illust rated in fig ure 2) when th e door is o pened.
【 】Figure1
Cabinet dimensions
Less than 5m m
between the top
of dishwasher and
cabinet and the
outer door aligned
to cabinet.
820mm
580mm
90 °
Electrical, drain and
water supply line
entrances
Space between cabinet
bottom and floor
450 mm
90 °
80
100
【 】Figure2
Di shw as her
Minimum spa ce when
the door is opened
Do or of
dis hwas her
Minimum space of 50mm
Aesthetic panel's dimensions and installation
●
The aesthe tic wo ode n panel could be processed according to the Figur e 3.
1
439
416 0.2±
390 0.2±
287.5 0.2±
【 】Figure3
The aesthetic pa nel should
be p rocessed in accordance
with the illustrate d dimensions
2- 2
Cabinet
dp8
5
20 MAX( )
(Unit: mm)
dp8
286
8- 2
4- 2
dp8
38
16

2 Install t he hook on the aesthetic w ood en panel and put the ho ok into the slot of t he outer door of
dishwasher(see fi gure 4a). After po sit ionin g of the pa nel , f ix the panel onto t he outer doo r by
sc rews and bolts (Se e figure 4b) .
【 】Figure4a
Installation of aesthetic panel
【 】Figure4b
Installation of aesthetic
wooden panel
. take away th e four
1
short scre ws
2
. pin up the fou r long
screw s
17

●
Tension adjustment of the door spring
The door springs are set at the factory to the proper tension for the outer door.
If aesthetic wooden panel are installed, you will have to adjust the door spring tension.
Rotate the adjusting screw to drive the adjustor to strain or relax the stee l cable
(see figure 5).
Door spring tension is correct when
th e door remains horizontal in the
fu lly opened position yet rises
to a close with the slight lift of a
finger.
,
【 】Figure5
Tension adjustment
of the door spring
●
Connection of drain hoses
Insert th e dra in hose i nto a d rain pipe with a minimum d iameter of 4 0mm, or let it r un into the si nk, m aking sure t o
avoi d bending or crim ping it. The top of the h ose must be le ss th an 1000mm.
Front
Counter
NOTE
The top of the hose
must be less than
A
1000mm.
Drain pipe
B
18
φ 4 0mm

●
Dishwasher installation steps
1
In stall the furnitu re door to the out er door of the dishwa sher using the b rackets prov ided. Refer
to the te mplate for positioning of the bra ckets.
2
Adjust the tension of t he do or springs by us ing an Allen key turning in a clockwise motion to
tight en the left and right door springs. Failure to do thi s cou ld cause damag e to your dis hwa sher
(Illu stration 2)
3 .
Co nne ct the inlet hose to the cold water supply
4 .
Co nne ct the drain hos e. Refer to d iag ram (Figure 6 )
5 .
Co nne ct the power cor d
6
Affix the condensa tio n strip under th e work surface o f cabinet. Please ensure the cond ensation
strip is flush with edg e of wo rk surfac e.
7
Place t he dishwashe r into position.(Illustrati on 4)
8
Level the dishwashe r. The rear food can be adjusted f rom the front of the dishwasher by tu rning
the Alle n scr ew in the middle of the base of dish washer use an Allen ke y (Illustrat ion 5A). To adjust
the front feet, use a flat scr ew driver and turn the front feet until the d ishwasher is leve l (Illustration 5 B).
9 The d ishwasher must be secured in plac e. There a re two ways to do this:
A. Normal work surfac e:Put the install ati on hook int o the slot of the side plan e and secure it to t he
wo rk su rface with the w ood screws (Illustration 6) .
B. Marb le or granite work top:Fix the side with Screw. (Illustration 7).
.
【Figure 7
19
】

Dishwasher must be level for proper dish rack operation and wash performance.
Place a spirit level on door and rack track inside the tub as shown to check that the
1
dishwasher is level.
2
level the dishwasher by adjusting the three levelling legs individually.
When level the dishwasher, please pay attention not to let the dishwasher tip over.
3
【 】Figure 8
Illustration of feet adjustment
NOTE:
The maximum adjustment
height of the feet is 50 mm.
For personal safety:
Do not use an extension cord or an adapter plug
with this appliance.
Do not, under any circumstances, cut or remove the
earthing
Connection from the power cord.
Ch eck le vel F ront t o Bac k
Sp iri t leve l
Che ck le vel si de to si de
Please look at t he ra ting lab el to k now t he ra ting voltage and connec t the dishwa she r to th e app ropria te po wer supply.
Use th e req uir ed fu se 10 a mp, t ime d elay fus e or circuit breaker r ecomme nded and provide separa te circu it se rvi ng
only this a ppl iance.
Ensur e the voltage and frequency of t he po wer b ein g cor responds to
those o n the r ating pl ate. Only inser t the p lug i nto a n ele ctrical soc ket w hich is e arthed
properly. If th e ele ctr ical socke t to wh ich the appli anc e mus t be co nne cte d is n ot
appropriate for the plug , re place th e soc ket , rather than using a ada pto rs or the like a s
they co uld cause overheating and bu rns .
The appli ance must be c onnected to the w ater mains u sing ne w hos e-sets.
The old hos e-sets should n ot be reused .
Wat er pr essure mus t be between 0 ,04 MPa and 1 MP a. If t he pres sur e is below the
mini mum c onsult our S ervice Dep art ment fo r adv ice.
Pull The safety supply hoses completely out from storage compartment located at rear of dishwasher.
1
Tighter the screws of the safety supply hose to the faucet with thread 3/4inch.
2
Turn water fully on before starting the dishwasher.
3
20

The safet y sup ply hos e consists of the double walls. The hose's sy ste m guarantees its inter vention by b loc king the
flow of water in case of th e sup ply hose bre aking and wh en the air spa ce be tween t he supply ho se it self and the o ute r
corruga ted hose is fu ll of water.
A hose that at tac hes to a si nk spray can b urs t if it is insta lled on the sa me water lin e as the dishwasher. If you r sink
has one, it i s recommen ded that the hose b e disco nne cted and the h ole plu gge d.
Turn off the water.
1
Release the water pressure by depressing the pressure release button. This relieves water pressure and protects you, and the
2
room, from severe splashing.
Unscrew the safety supply hose from the faucet.
3
Connect t he cold water su ppl y hose to a thre ade d 3/4 (inch ) connector and mak e sure that it is fas tened ti ghtly in place.
If the wate r pipes a re new or have n ot been u sed f or an exte nded pe riod of t ime, let the w ater run to make sure th at the
water is cl ear and free of im pur ities . If this prec aution is not t aken, there is a risk t hat the water inlet c an get blocke d
and damage the app lianc e.
Positioning the Appliance
Positio n the appliance in the des ire d locat ion. Th e back should re st against the wa ll be hind it, and the si des,
along the a djacent ca binets or wa lls . Th e dishwasher is equipped with w ater su ppl y and d rai n hoses that can
be positi oned eithe r to the right or the left sid es to facili tate proper insta lla tion.
How to Drain Excess Water From Hoses
If the sink i s 100 0 higher from the flo or, the excess wat er in hoses ca nnot be drai ned directly
into the si nk. It will be n ecessary to drain excess wa ter from hos es in to a bowl or suitable
cont ain er th at is hel d outside an d lower than the sink.
Water Outlet
Connect the water drain ho se. The drain ho se mu st be cor rec tly fitted to avoid wate r leaks.
Ensure th at th e water i nlet hose is n ot kinked or squa shed.
Extension Hose
If y ou ne ed a drain hose extension, mak e sur e to use a simila r dra in ho se.
It m ust b e no longer than 4 metres; otherwis e the c lea nin g effec t of th e dis hwa she r could be reduced.
Syphon Connection
Insert th e dra in hose i nto a d rain pipe with a minimum d iameter of 4 0mm, or let it r un into the si nk, m aking sure t o
avoi d bending or crim ping it. The top of the h ose must be le ss th an 1000mm.
The following things should be checked before starting the dishwasher.
1 The dishwasher is level and fixed properly
2 The inlet valve is open
3 Inlet hose connections are fully tightened and not leaking
4 The wires are tightly connected
5 The power is switched on
6 The inlet and drain hoses are knotted
7 All packing materials and printings should be taken out from the dishwasher
After installation, please make sure to keep this manual.
The content of this manual is very helpfu l to the users.
21

Fuse blown, or the
circuit breaker acted
Replace fuse or reset circuit breaker. Remove any other
appliances sharing the same circuit with the dishwasher
Power supply is not
turned on
Water pressure is low
Door of dishwasher
not properly closed.
Kink in drain hose
Filter clogged
Kitchen sink clogged
Improper detergent
Spilled rinse-aid
Make sure the dishwasher is turned on and the door is
closed securely.
Make sure the power cord is properly plugged into the
wall socket.
Check that the water supply is connected properly and
the water is turned on.
Make sure to close the door properly and latch it.
Check drain hose.
Check coarse filter
the
(see section titled )
Check the kitchen sink to make sure it is draining well.
If the problem is the kitchen sink not draining ,you may
need a plumber rather than a serviceman for dishwashers.
" Cleaning The Filter "
Use only the special dishwasher detergent to avoid suds.
If this occurs, open the dishwasher and let suds evaporate.
Add 1 gallon of cold water to the tub. Close and latch the
dishwasher, then select any cycle. Dishwasher will drain
out the water at the first step.Open the door after draining
is stop and check if the suds is disappeared.
Repeat if necessary.
Always wipe up rinse-aid spills immediately.
Detergent with
colourant was used
Hard water minerals
The affected items are
not corrosion resistant.
A programme was not
run after dishwasher
salt was added.
Traces of salt have
gotten into the wash cycle.
The lid of the softer
is loose
A sp ay arm is
r
knocking against
an item in a basket
Items of crockery
are loose in the
wash cabinet
This may be caused
by on-site installation
or the cross-section of
the piping.
Make sure that the detergent is the one without
colourant.
To clean the interior, use a damp sponge with
dishwasher detergent and wear rubber gloves.
Never use any other cleaner than dishwasher
detergent for the risk of foaming or suds.
Always run the quick wash programme .
without any crockery in the dishwasher and
without selecting the Turbo function (if present),
after adding dishwasher salt.
Check the lip .Ensure the fix is fine.
Interrupt the programme, and rearrange the items
which are obstructing the sp ay arm.r
Interrupt the programme,
and rearrange the items of crockery.
This has no influence on the dishwasher function.
if in doubt, contact a suitably qualified plumber.
22
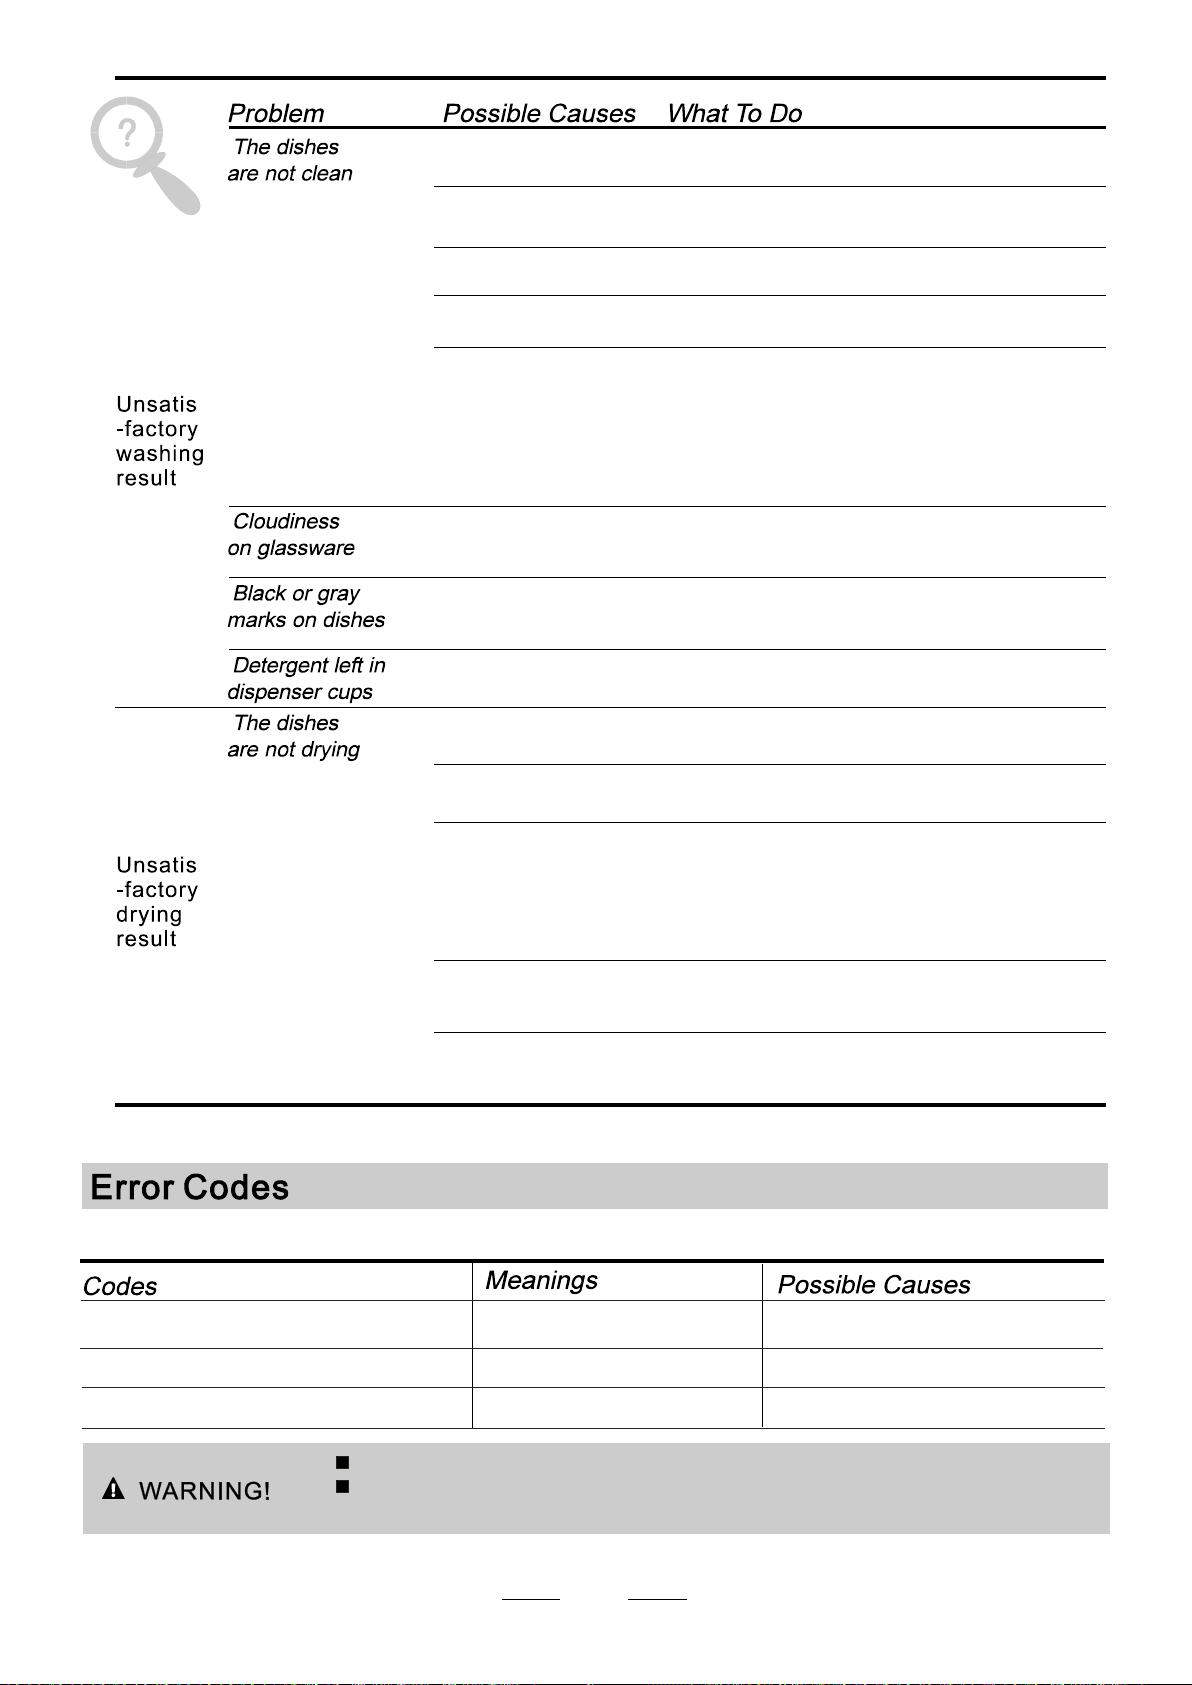
The dishes were not
loaded correctly.
See notes in " Loading the Dishwasher Baskets ".
The programme was
not powerful enough.
Not enough detergent
was dispensed.
Items are blocking
the path of sp ay arms.r
The filter combination
in the base of wash
cabinet is not clean or
is not correctly fitted.
This may cause
the sp ay arm jets
r
to get blocked.
Combination of soft
water and too much
detergent.
Aluminum utensils
have rubbed against
dishes.
Dishes block
detergent cups.
Improper loading
Too little rinse-aid
Select a more intensive programme.
See" Wash Cycle Table ."
Use more detergent, or change your detergent.
Rearrange the items so that the sp ay can rotate freely.r
Clean and/or fit the filter combination correctly.
Clean the sp ay arm jets. See "Cleaning the Spray
Arms".
Use less detergent if you have soft water and select
a shortest cycle to wash the glassware and to get
them clean.
Use a mild abrasive cleaner to eliminate those marks.
Re-loading the dishes properly.
Load the dishwasher as suggested in the directions.
Increase the amount of rinse-aid/refill the rinse-aid
dispenser.
r
Dishes are removed
too soon
Wrong program
has been selected
Use of cutlery with
a low-quality coating
Do not empty your dishwasher immediately after
washing. Open the door slightly so that the steam can
escape. Begin unloading the dishwasher only once t
he dishes are barely warm to the touch. Empty the low
basket first. This prevents water form dropping off
dishes in the upper basket.
In short program the washing temperature is lower.
This also lowers cleaning performance. Choose
a program with a long washing time.
Water drainage is more difficult with these items.
Cutlery or dishes of this type are not suitable for
washing in the dishwasher.
When some malfunctions come on, the appliance will display error codes to warn you:
The Rapid l ight fli ck er fleet ly
Th e 90min ligh t andRa pid ligh t flick er fl eetly
Th e ECO light fl icker fleetly
Longer inlet time.
Not reaching required temperature.
Overflow.
Faucets is not opened, or water intake is
restricted,or water pressure is too low.
Malfunction of heating element.
Some element of dishwasher leaks .
If overflow occurs, turn off the main water supply before calling a service.
If there is water in the base pan because of an overfill or small leak,
the water should be removed before restarting the dishwasher.
23

Height : 815mm
Width : 448 mm
Depth : 550mm
with the door closed
( )
Power supply: see rating label
Capacity: 9 place settings
24


Technical Data Sheet
Sheet of ho usehold di shw asher a cco rding to EU Di rective 10 59/ 2010:
Ma nu fac turer
Type / Descr iption
Standar d place settings
Energy efficie ncy cla ss
Annual en ergy consu mpt ion
Energy co nsumption of the stand ard c leaning cy cle
Powe r con sum ption o f off-m ode
Powe r con sum ption o f left-on mo de
Annual water consum ption
Drying effi ciency class
Standar d cleaning cycl e
Program d uration of t he standard cle aning cycl e
Noise lev el
Mo un tin g
Could be bu ild-in
TEKA
DW8 40 FI VR01
9
A++
197 kWh
0.69 kWh
0.45 W
0.49 W
2520 litr e
A
EC O 45℃
205 min
49dB(A) r e 1 pW
Build-i n
Yes
Height
Width
Depth (wi th connect ors)
Powe r con sum ption
Rated vol tage / frequ ency
Wat er pr essure (fl ow pressure) 0.4-10 ba r = 0.04-1 Mpa
NOTE:
A + + + (high est e ff iciency) t o D (lo west efficie ncy)
Energy co nsumption 19 7 kWh per year, bas ed on 280 standard cl ean ing cycles u sing cold wa ter f ill and
the consumption of th e low p ower mo des . Actual e nergy consump tion wi ll de pend on how th e app lianc e is us ed.
Wat er consump tio n 2520 litr e per yea r, based on 280 stan dard clean ing cycles . Actual wate r con sumption
will depe nd on h ow the ap pliance is u sed .
A (high est eff iciency) to G (lo west efficie ncy)
This prog ram is suitable f or cleaning soiled normally soil ed tablewa re an d that it is the
mo st effici ent p rogramme i n terms of its c ombined en erg y and water co nsumptio n for
that type o f tablewar e.
The devic e meets the Eu ropean sta nda rds and the di rectives i n the curren t version at d elivery:
- LVD 2014/35/EU
- EMC 2014/ 30/EU
- ErP 2009/12 5/E C
“ ”
“ ”
81.5 cm
44.8 cm
55 cm
1760-2100 W
AC 22 0-2 40 V/ 50 Hz
The above v alu es have been m easured in a ccordance with stand ards under spec ified operating cond ition s.
Results m ay vary greatly a ccord ing to quant ity a nd polluti on of the dishes, water ha rdness,
am ou nt of d etergent , etc.
The manua l is based on the European Unio n's standa rds and rules.


www.teka.com
Asped mos eriatius sit atet hicil et velit
 Loading...