

Page 1
TEAC FD-235 Series
3 1/2" 1.44 MB Floppy Disk Drive
Installation Guide
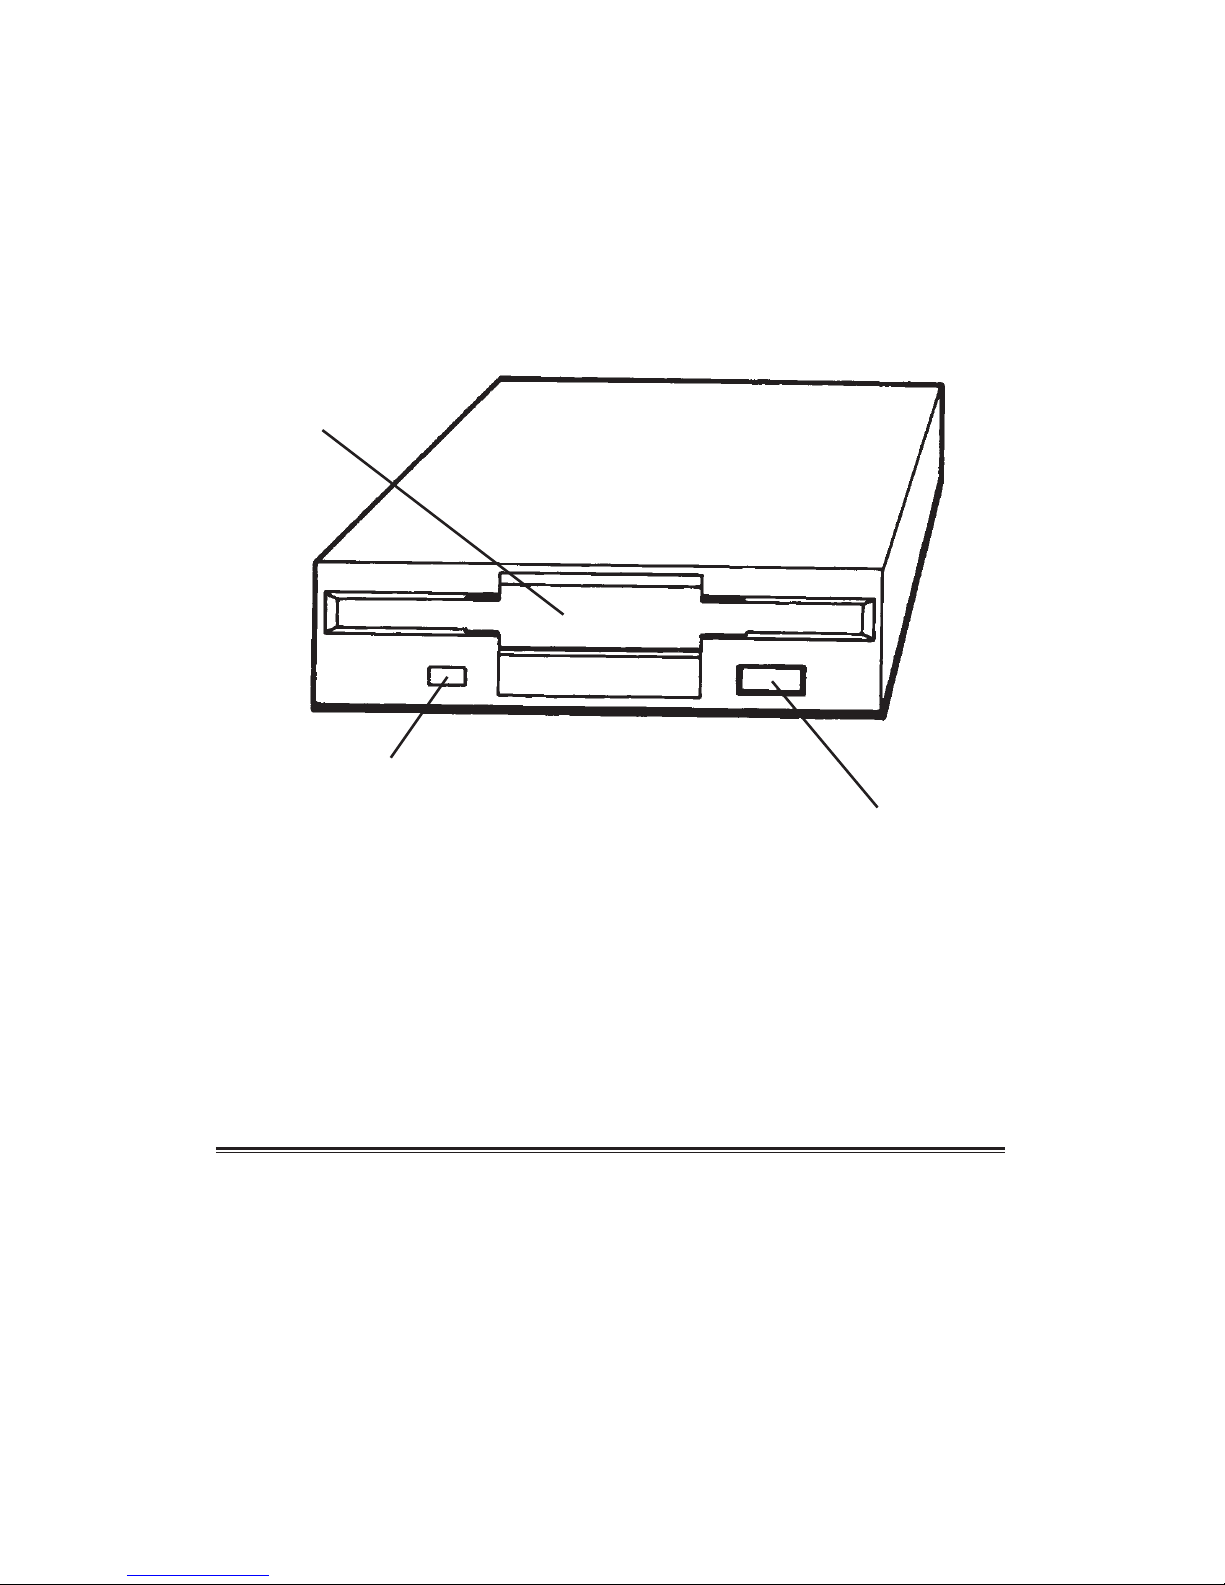
3 1/2'' diskette
insertion window
Activity indicator
Eject Button
Your FD-235 package includes:
* FD-235 3 1/2" floppy disk drive
* Installation Guide
Introduction
Thank you for purchasing the TEAC FD-235 Series 1.44 MB floppy disk
drive. This product is intended for use in IBM PC/AT compatible computers.
This quality drive will provide trouble-free operation for your computer
system if properly installed. PLEASE READ THE ENTIRE INSTALLATION
GUIDE THOROUGHLY BEFORE YOU BEGIN THE INSTALLATION.
Use a standard floppy controller card or the floppy connector (34 Pin) on
the motherboard.
Page 2
2
Preparing your Personal computer for FD-235 Floppy Drive Installation
1. Unplug your computer from the power source.
2. Remove cover from your computer. Refer to your computer system
manual for this procedure.
3. If you are replacing a current floppy, note the cables that are connected
to your floppy disk drive, as these same cables will be required to install
your FD-235. The floppy interface cable is the flat “ribbon” type, and
the power connector consists of the 4 or 2 separate wires attached to a
single connector. See Figure A.
Your system may also have a single ground wire attached to the floppy
disk drive. Carefully disconnect all cables from your floppy disk drive.
Remove original floppy disk drive.
4. Install the FD-235 Series 1.44 MB into an available drive bay.
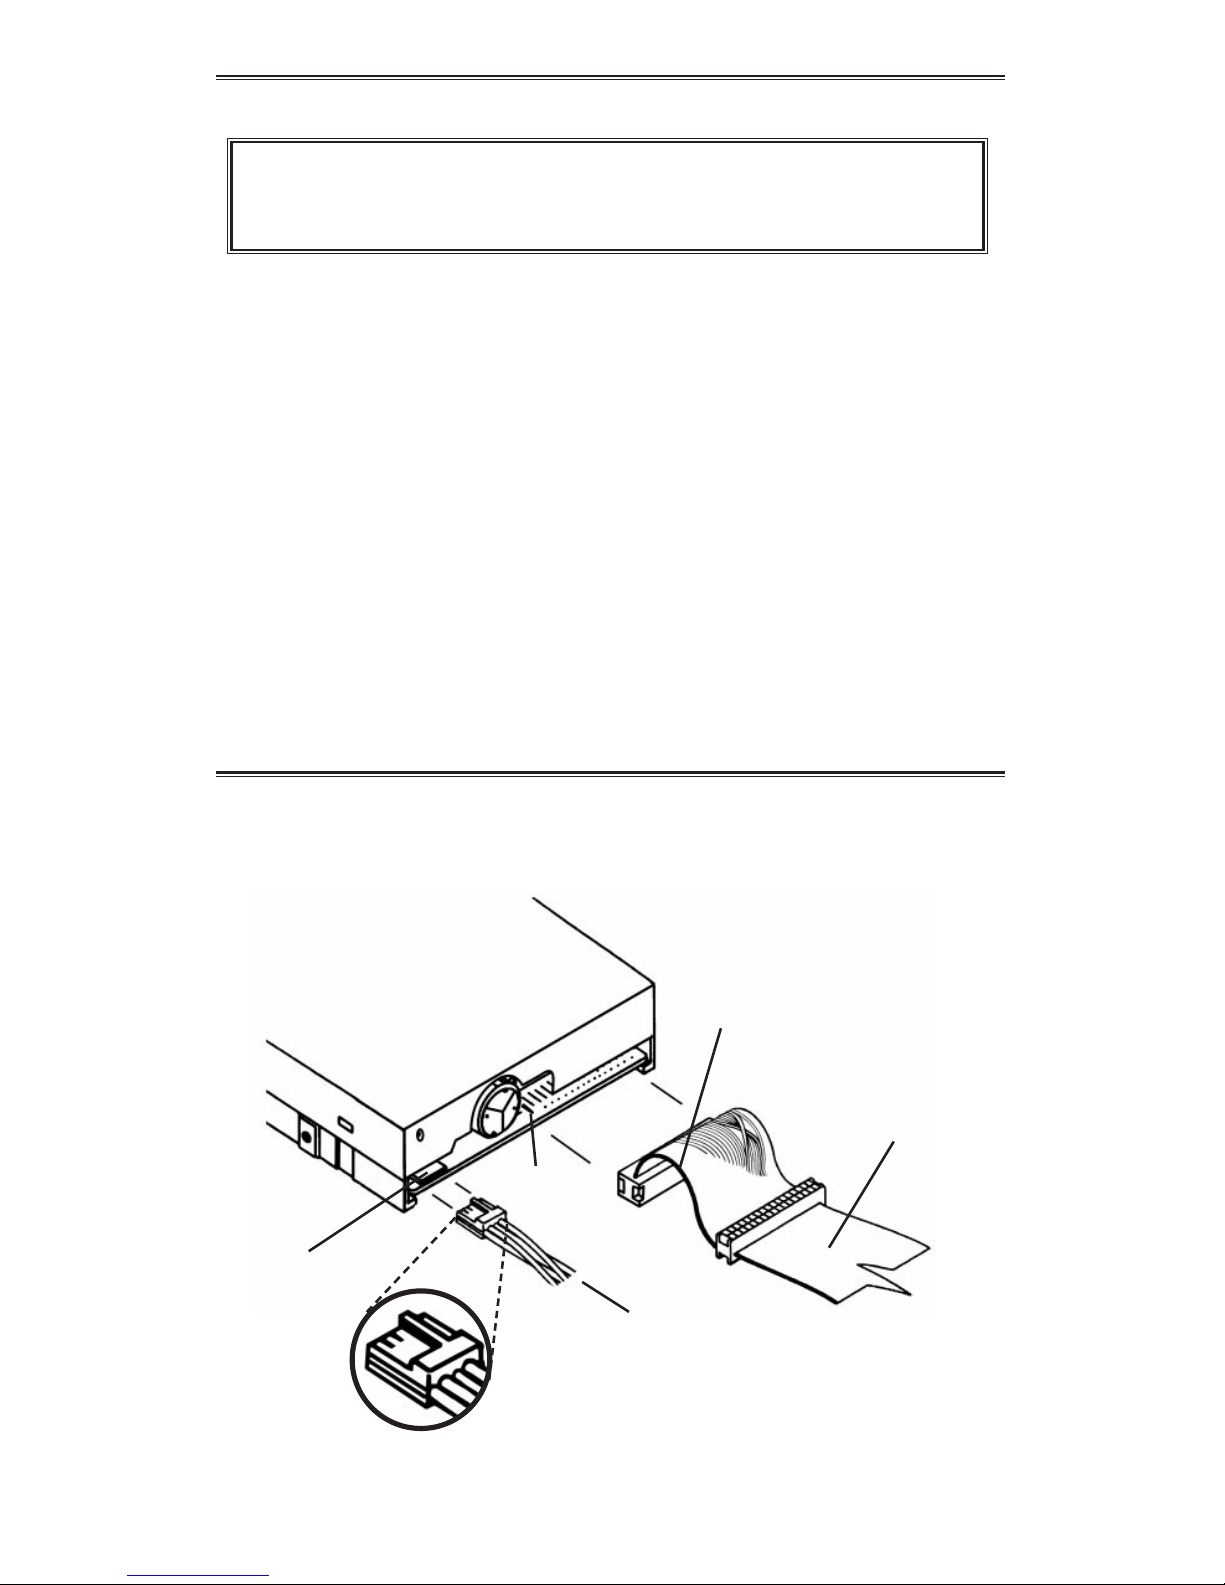
Rear View of FD-235
CAUTION: TURN OFF YOUR COMPUTER AND UNPLUG IT FROM
THE AC POWER SOURCE BEFORE INSTALLING THE FD-235.
FAILURE TO DO SO MAY RESULT IN ELECTRIC SHOCK.
Traditional power connector
from PC power supply
Pin #1 indicator stripe
(red or blue)
Flat “ribbon” cable
Power connector
FIGURE A
Pin #1
Page 3

3
Configuring for A: or B: drive
Use a standard IBM PC compatible cable with a twist at the end connector
(Figure B) to complete installation. Cable’s colored-line denotes Line 1 to
match to Pin 1 on drive and motherboard’s connectors.
a. To configure as your A: drive, connect the FD-235 Series floppy drive to
Connector A: on the flat “ribbon” cable. Connector A: is the end
connector of the cable as shown in Figure B.
b. To configure as your B: drive, connect the FD-235 Series floppy drive to
Connector B: on the flat “ribbon” cable. Connector B: is the middle
connector of the cable as shown in Figure B.
c. Make the correct changes to the CMOS BIOS setup after you install
your FD-235. Configure Floppy A: to 3.5" 1.44 MB.
d. Upon rebooting, the Operating System (DOS, Windows) will recognize
the floppy disk drive. There are no drivers required.
FIGURE B
Pin #1
I/F Cable
Twist
Connector B:
Connector A:
Page 4

4
TEAC Tech Support: If you have questions on the floppy installation, please
contact us:
Phone: 323-727-4860
Fax: 323-869-8751
Email: dspdtsg@teac.com
Hours: M-F 8am-5pm PST
Website: www.teac.com/DSPD/techsupport.htm
*IBM PC/AT are registered trademarks of International Business Machines Corp.
Rev. TRG 2/02
Symptom
Indicator light never turns on when
executing READ or WRITE
Indicator light comes on as soon as
power is applied and stays on.
Drive type mismatch during boot
Invalid media or Track 00 bad when
formatting.
The same directory is displayed for
different diskettes.
Drive not ready error reading drive X.
General failure error reading drive X
Sector not found error.
Solution
Ensure proper interface cable and power
cable connection and CMOS setup
configuration.
The ribbon cable may be reversed. Check
Pin #1 orientation. Possible bad cable.
Check CMOS setup for correct drive
type: 3.5" 1.44 MB.
Attempted to format an HD diskette to
720K or DD diskette to 1.44 MB. Drive
is not properly set in CMOS setup. Or
controller card is not configured
correctly. Check setup by referring to
controller documentation.
Controller is not receiving disk change
signal. Pin #34 on the ribbon cable is
broken. Or disk drive is malfunctioning.
No diskette inserted in the drive or
motor not spinning. Drive may need
service. Apossible bad cable.
Diskette not formatted. Drive out of
alignment. DSDD disk formatted to
1.44MB.HD disk formatted for 720K.
Use correct disk. Drive may need service.
Head seek error or drive out of
alignment. Bad media or drive.
Trouble Shooting
 Loading...