

Page 1

Z
3D0804193D
AD-RW900
ENGLISH
CD Recorder/Reverse Cassette Deck
OWNER’S MANUAL
MODE D’EMPLOI
MANUAL DEL USUARIO
FRANÇAIS ESPAÑOL
Page 2

IMPORTANT SAFETY PRECAUTIONS
CAUTION: TO REDUCE THE RISK OF ELECTRIC SHOCK, DO NOT
REMOVE COVER (OR BACK). NO USER-SERVICEABLE PARTS
INSIDE. REFER SERVICING TO QUALIFIED SERVICE PERSONNEL.
The lightning flash with arrowhead symbol, within an
equilateral triangle, is intended to alert the user to the
presence of uninsulated “dangerous voltage” within the
product’s enclosure that may be of sufficient magnitude to
constitute a risk of electric shock to persons.
The exclamation point within an equilateral triangle is
intended to alert the user to the presence of important
operating and maintenance (servicing) instructions in the
literature accompanying the appliance.
WARNING: TO PREVENT FIRE OR SHOCK HAZARD,
DO NOT EXPOSE THIS APPLIANCE TO RAIN OR
MOISTURE.
CAUTION
o DO NOT REMOVE THE EXTERNAL CASES OR CABINETS TO EXPOSE
THE ELECTRONICS. NO USER SERVICEABLE PARTS ARE INSIDE.
o IF YOU ARE EXPERIENCING PROBLEMS WITH THIS PRODUCT,
CONTACT THE STORE WHERE YOU PURCHASED THE UNIT FOR A
SERVICE REFERRAL. DO NOT USE THE PRODUCT UNTIL IT HAS BEEN
REPAIRED.
o USE OF CONTROLS OR ADJUSTMENTS OR PERFORMANCE OF
PROCEDURES OTHER THAN THOSE SPECIFIED HEREIN MAY RESULT
IN HAZARDOUS RADIATION EXPOSURE.
For U.S.A.
This equipment has been tested and found to comply with the
limits for a Class B digital device, pursuant to Part 15 of the FCC
Rules. These limits are designed to provide reasonable protection
against harmful interference in a residential installation. This
equipment generates, uses, and can radiate radio frequency
energy and, if not installed and used in accordance with the
instructions, may cause harmful interference to radio
communications. However, there is no guarantee that interference
will not occur in a particular installation. If this equipment does
cause harmful interference to radio or television reception, which
can be determined by turning the equipment off and on, the user
is encouraged to try to correct the interference by one or more of
the following measures:
• Reorient or relocate the equipment and/or the receiving
antenna.
• Increase the separation between the equipment and receiver.
• Connect the equipment into an outlet on a circuit different
from that to which the receiver is connected.
• Consult the dealer or an experienced radio/TV technician for
help.
CAUTION
Changes or modifications to this equipment not expressly
approved by TEAC CORPORATION for compliance will void the
user’s warranty.
For Canada
Industry Canada’s Compliance Statement:
This Class B digital apparatus complies with Canadian ICES-003.
Cet appareil numérique de la classe B est conforme à la norme
NMB-003 du Canada.
IN NORTH AMERICA USE ONLY ON 120 V SUPPLY.
2
Page 3
IMPORTANT SAFETY INSTRUCTIONS
For U.S.A.
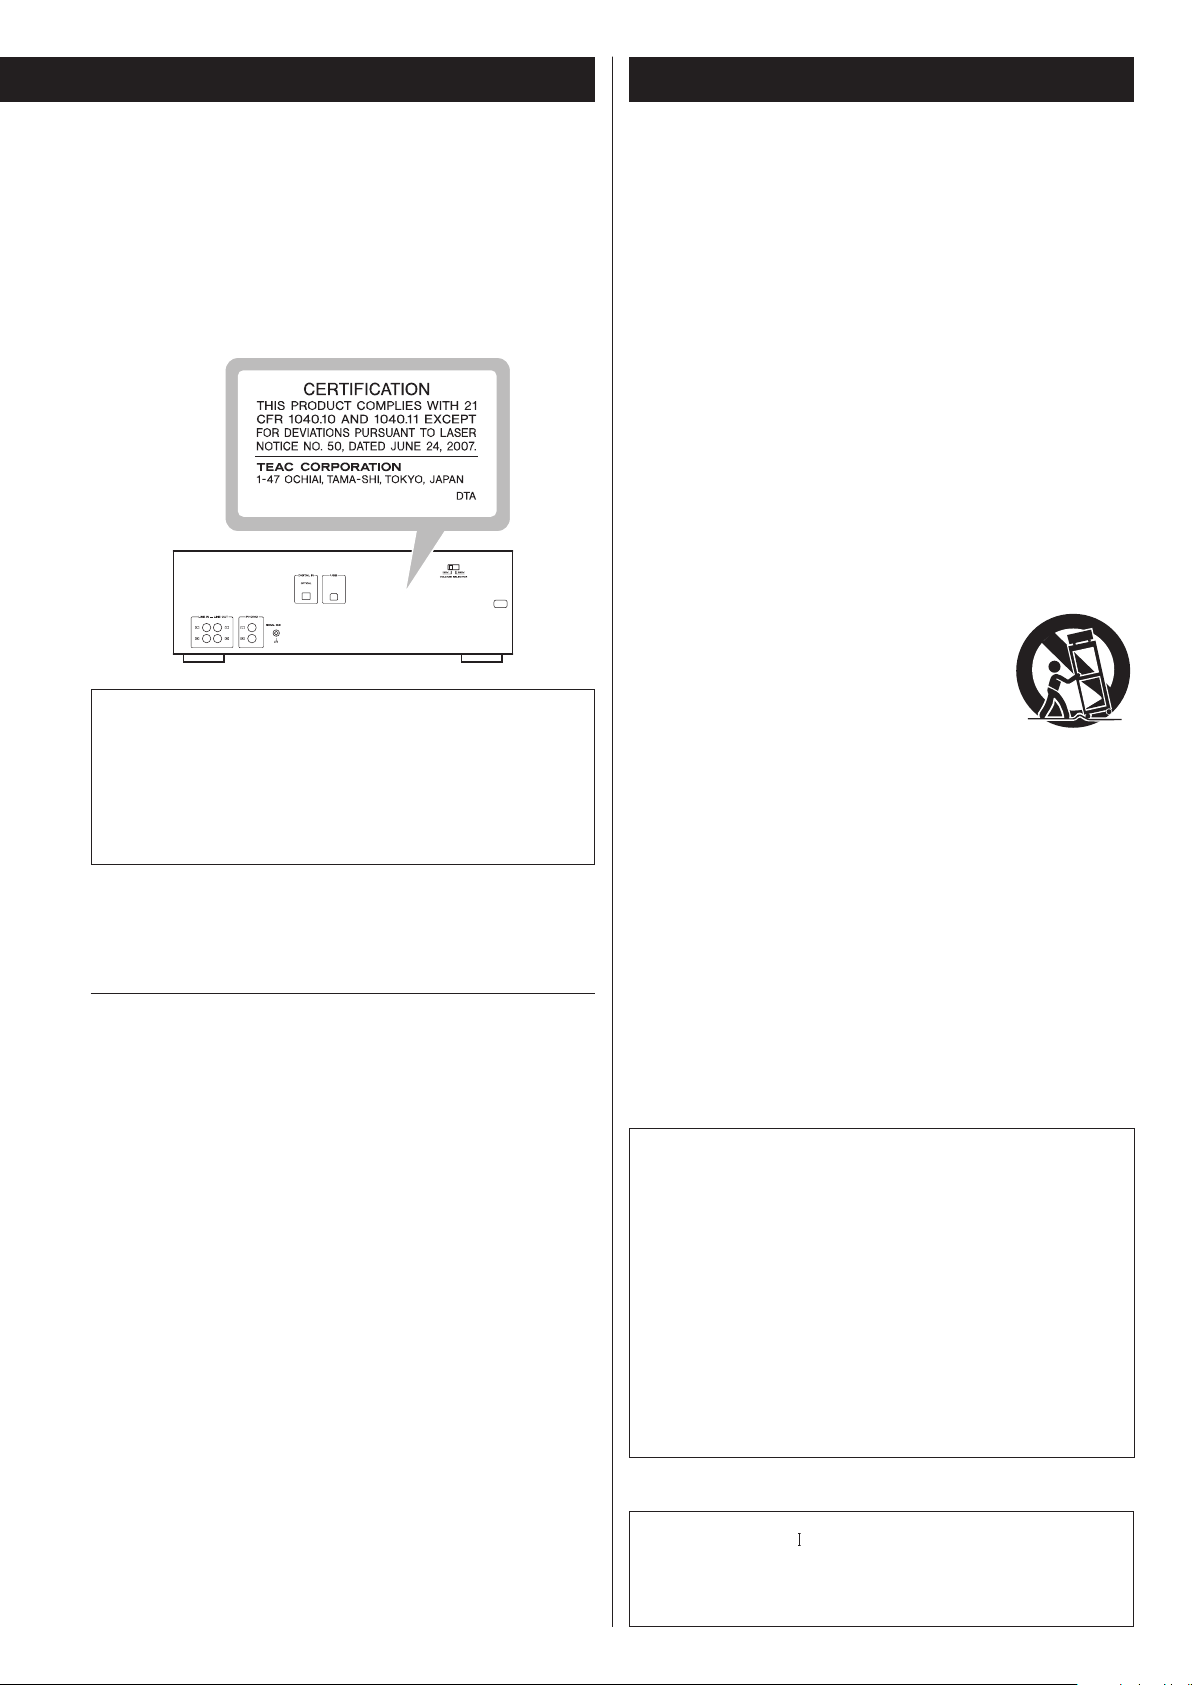
This product has been designed and manufactured according to
FDA regulations “title 21, CFR, chapter 1, subchapter J, based on the
Radiation Control for Health and Safety Act of 1968“, and is classified
as class 1 laser product. There is not hazardous invisible laser radiation
during operation because invisible laser radiation emitted inside of
this product is completely confined in the protective housings.
The label required in this regulation is as follows:
Optical pickup
Type: SF-DS1XD
Manufacturer: SANYO ELECTRIC CO., LTD.
Laser output: Less than 1.6 mW (Play) on the objective lens
Less than 47 mW (Record) on the objective lens
Less than 13 mW (Erase) on the objective lens
Wavelength: 785 nm
Supply of this product does not convey a license nor imply any
right to distribute MPEG Layer-3 compliant content created with this
product in revenue-generating broadcast systems (terrestrial, satellite,
cable and/or other distribution channels), streaming applications (via
Internet, intranets and/or other networks), other content distribution
systems (pay-audio or audio-on-demand applications and the
like) or on physical media (compact discs, digital versatile discs,
semiconductor chips, hard drives, memory cards and the like).
An independent license for such use is required. For details, please
visit http://mp3licensing.com.
MPEG Layer-3 audio coding technology licensed from Fraunhofer IIS
and Thomson.
Manufactured under license from Dolby Laboratories. Dolby and the
double-D symbol are trademarks of Dolby Laboratories.
This product is protected by certain intellectual property rights of
Microsoft. Use or distribution of such technology outside of this
product is prohibited without a license from Microsoft.
Windows XP, Windows Vista and Windows 7 are either registered
trademarks or trademarks of Microsoft Corporation in the United
States and/or other countries.
Macintosh and Mac OS X are trademarks of Apple Inc., registered in
the U.S. and other countries.
Other company names, product names and logos in this document
are the trademarks or registered trademarks of their respective
owners.
1) Read these instructions.
2) Keep these instructions.
3) Heed all warnings.
4) Follow all instructions.
5) Do not use this apparatus near water.
6) Clean only with dry cloth.
7) Do not block any ventilation openings. Install in accordance with
the manufacturer's instructions.
8) Do not install near any heat sources such as radiators, heat
registers, stoves, or other apparatus (including amplifiers) that
produce heat.
9) Do not defeat the safety purpose of the polarized or grounding-
type plug. A polarized plug has two blades with one wider than
the other. A grounding type plug has two blades and a third
grounding prong. The wide blade or the third prong are provided
for your safety. If the provided plug does not fit into your outlet,
consult an electrician for replacement of the obsolete outlet.
10) Protect the power cord from being walked on or pinched
particularly at plugs, convenience receptacles, and the point
where they exit from the apparatus.
11) Only use attachments/accessories specified by the manufacturer.
12) Use only with the cart, stand, tripod, bracket, or
table specified by the manufacturer, or sold with
the apparatus. When a cart is used, use caution
when moving the cart/apparatus combination
to avoid injury from tip-over.
13) Unplug this apparatus during lightning storms or
when unused for long periods of time.
14) Refer all servicing to qualified service personnel. Servicing is
required when the apparatus has been damaged in any way, such
as power-supply cord or plug is damaged, liquid has been spilled
or objects have fallen into the apparatus, the apparatus has been
exposed to rain or moisture, does not operate normally, or has
been dropped.
o The apparatus draws nominal non-operating power from the
AC outlet with its POWER or STANDBY/ON switch not in the ON
position.
o The mains plug is used as the disconnect device, the disconnect
device shall remain readily operable.
o Caution should be taken when using earphones or headphones
with the product because excessive sound pressure (volume) from
earphones or headphones can cause hearing loss.
CAUTION
o Do not expose this apparatus to drips or splashes.
o Do not place any objects filled with liquids, such as vases, on
the apparatus.
o Do not install this apparatus in a confined space such as a book
case or similar unit.
o The apparatus should be located close enough to the AC outlet
so that you can easily reach the power cord plug at any time.
o If the product uses batteries (including a battery pack or
installed batteries), they should not be exposed to sunshine, fire
or excessive heat.
o CAUTION for products that use replaceable lithium batteries:
there is danger of explosion if a battery is replaced with an
incorrect type of battery. Replace only with the same or
equivalent type.
WARNING
Products with Class construction are equipped with a power
supply cord that has a grounding plug. The cord of such a product
must be plugged into an AC outlet that has a protective
grounding connection.
3
Page 4

Pb, Hg, Cd
IMPORTANT SAFETY INSTRUCTIONS
o Do not expose this apparatus to drips or splashes.
o Do not place any objects filled with liquids, such as vases, on the
apparatus.
o Do not install this apparatus in a confined space such as a book
case or similar unit.
o The apparatus draws nominal non-operating power from the
AC outlet with its POWER or STANDBY/ON switch not in the ON
position.
o The apparatus should be located close enough to the AC outlet
so that you can easily reach the power cord plug at any time.
o The mains plug is used as the disconnect device, the disconnect
device shall remain readily operable.
o Products with Class construction are equipped with a power
supply cord that has a grounding plug. The cord of such a product must be plugged into an AC outlet that has a protective
grounding connection.
o If the product uses batteries (including a battery pack or installed
batteries), they should not be exposed to sunshine, fire or excessive heat.
o CAUTION for products that use replaceable lithium batteries:
there is danger of explosion if a battery is replaced with an incorrect type of battery. Replace only with the same or equivalent
type.
o Caution should be taken when using earphones or headphones
with the product because excessive sound pressure (volume)
from earphones or headphones can cause hearing loss.
For European Customers
Disposal of electrical and electronic equipment
(a) All electrical and electronic equipment should be disposed of
separately from the municipal waste stream via collection facilities designated by the government or local authorities.
(b)
By disposing of electrical and electronic equipment correctly,
you will help save valuable resources and prevent any potential
negative effects on human health and the environment.
(c)
Improper disposal of waste electrical and electronic equipment
can have serious effects on the environment and human health
because of the presence of hazardous substances in the
equipment.
(d)
The Waste Electrical and Electronic Equipment (WEEE)
symbol, which shows a wheeled bin that has been
crossed out, indicates that electrical and electronic
equipment must be collected and disposed of separately from household waste.
(e) Return and collection systems are available to end users. For
more detailed information about the disposal of old electrical and electronic equipment, please contact your city office,
waste disposal service or the shop where you purchased the
equipment.
Disposal of batteries and/or accumulators
(a) Waste batteries and/or accumulators should be disposed of
separately from the municipal waste stream via collection facilities designated by the government or local authorities.
(b)
By disposing of waste batteries and/or accumulators correctly,
you will help save valuable resources and prevent any potential
negative effects on human health and the environment.
(c) Improper disposal of waste batteries and/or accumulators can
have serious effects on the environment and human health
because of the presence of hazardous substances in them.
(d) The WEEE symbol, which shows a wheeled bin that
has been crossed out, indicates that batteries and/or
accumulators must be collected and disposed of separately from household waste.
If a battery or accumulator contains more than the specified
values of lead (Pb), mercury (Hg), and/or cadmium (Cd) as
defined in the Battery Directive (2006/66/EC), then the chemical symbols for those elements will be indicated beneath the
WEEE symbol.
(e) Return and collection systems are available to end users. For
more detailed information about the disposal of waste batteries and/or accumulators, please contact your city office, waste
disposal service or the shop where you purchased them.
4
Page 5

Contents
DIGITAL
DIGITAL
LINE IN
PHONO
DIGITAL
DIGITAL
LINE IN
What You Can Do with This Unit
Thank you for choosing this TEAC product. Read this manual
carefully to get the best performance from this unit.
Product Registration ..............................................5
What You Can Do with This Unit ..................................5
Before Use. . . . . . . . . . . . . . . . . . . . . . . . . . . . . . . . . . . . . . . . . . . . . . . . . . . . . . . .6
Discs .............................................................7
USB Flash Drives ..................................................8
MP3 Files .........................................................9
Cassette Tapes ....................................................9
Connections ................................................... 10
Identifying the Parts (Main Unit) ................................ 12
Identifying the Parts (Remote Control Unit) .....................14
Remote Control Unit ...........................................15
Display .........................................................16
Basic Operation ................................................ 18
Listening to a CD ...............................................20
Listening to Files on a USB Flash Drive (MP3/WMA) .............22
Shuffle Playback ................................................ 24
Repeat Playback ................................................ 24
Programmed Playback ..........................................25
Listening to a Cassette Tape ....................................28
About Recording ............................................... 30
Before Recording ............................................... 31
Recording on a CD ............................................. 31
Synchronous recording to CD .................................. 34
Finalizing ....................................................... 36
Unfinalizing (CD-RW only) ...................................... 37
Erasing tracks from a disc (CD-RW only) ......................... 38
Recording on a USB Flash Drive ................................. 39
Erasing Files from a USB Flash Drive .............................42
Recording on a Cassette Tape ...................................42
Timer-Controlled Playback and Recording ...................... 45
Recording to a Computer ....................................... 47
Troubleshooting ................................................48
Playback
Recording
LINE IN
PHONO
LINE IN
PHONO
LINE IN
PHONO
CD/CD-R/CD-RW
(Audio CD/MP3/WMA disc)
e “Listening to a CD” on pages20-21
Cassette tape
e “Listening to a Cassette Tape” on
pages28-30
MP3/WMA files on USB flash drive
e “Listening to Files on a USB Flash Drive
(MP3/WMA)” on pages22-23
Record on a USB flash drive from a CD,
cassette tape or an external device connected
to this unit
e “Recording on a USB Flash Drive” on
pages39-41
Record on a cassette tape from a CD, USB
flash drive or an external device connected
to this unit
e “Recording on a Cassette Tape” on
pages42-44
Record on a CD from a cassette tape or an
external device connected to this unit
e “Recording on a CD” on page 31-34
Record on a computer from a CD, cassette
tape, USB flash drive or an external device
connected to this unit
e
“Recording to a Computer” on pages 47-48
ENGLISH
MP3 Playback Order ............................................50
Specifications ..................................................51
Product Registration
Customers in the USA, please visit the following TEAC website to register your TEAC product online:
http://audio.teac.com/support/registration/
Timer operation
Requires a commercially available timer
e “Timer-Controlled Playback”
on pages45-46
e “Timer-Controlled Recording”
on page46
5
Page 6

Before Use
recording head
Erasing head
What’s in the box
Confirm that the standard accessories are included.
Remote control unit (RC-1283) × 1
Batteries (AAA) for remote control unit × 2
Stereo RCA pin cable × 2
Owner’s manual (this document) × 1
< Keep this manual in a safe place for future reference.
Warranty card × 1
< Do not place the unit on an amplifier, a receiver or any other
device that generates heat.
< When the unit is turned on, if a TV is turned on nearby lines might
appear on the TV screen depending on the frequency of the TV
broadcast. This is not a malfunction of the unit or the TV. If you see
such lines, move the unit and the TV further apart.
Beware of condensation
When the unit is moved from a cold to a warm place, or used after a
sudden temperature change, there is a danger of condensation. Vapor
in the air could cause condensation on the internal mechanism, making proper operation impossible. If this occurs, or as a preventative
measure, leave the unit turned on for one or two hours. This will allow
the unit to adjust to the temperature of its surroundings.
Maintenance
If the surface of the unit gets dirty, wipe it with a soft cloth or use
diluted mild liquid soap. Allow the surface of the unit to dry completely before using.
Q
CAUTION
< Do not move the unit during CD playback.
During CD playback, the disc rotates at high speed. Do not lift or
move the unit during playback. Doing so might damage the disc
or the unit.
< The voltage supplied to the unit should match the voltage that
is printed on the rear panel. If you are in any doubt regarding this
matter, consult an electrician.
< Do not open the cabinet as this might result in damage to the
circuitry or electrical shock. If a foreign object should get into the
unit, contact your dealer or service company.
< When removing the power plug from the wall outlet, always pull
directly on the plug, never yank on the cord.
< Always remove the disc before relocating or moving this unit.
Moving the unit with a disc inside it could cause a malfunction.
Placement of the unit
Q For safety, disconnect the power cord from the outlet before
cleaning.
< Never spray liquid directly on this unit.
< Do not use thinner or alcohol as they could damage the surface of
the unit.
Cleaning and demagnetizing the cassette deck
Cleaning
A dirty head can cause poor sound quality or the sound to skip.
Dirt on the tape tracking roller might catch the tape.
Clean the head, pinch roller, and capstan with a cotton applicator
dampened with a commercially available cleaning solution about
every ten hours of use.
Capstan
Playback/
Pinch roller
< Choose the location where you install the unit carefully. Avoid
placing it in direct sunlight or close to a source of heat. You should
also avoid locations that are subject to vibrations or exposed to
excessive dust, heat, cold or moisture.
< As the unit may become warm during operation, always leave
sufficient space around it for ventilation.
6
Demagnetizing
When the head is magnetized, it increases noise and hinders the
transmission of high notes.
If these problems occur, demagnetize the head using a commercially available head eraser.
< Do not put a cassette tape in the cassette holder of the unit until
the cleaning solution on the head dries.
Page 7

Discs (1)
Discs that can be played by this unit
CDs (12-cm and 8-cm) that bear the “COMPACT disc DIGITAL
AUDIO” logo can be played by this unit.
< The logo should be on the disc label or the CD jacket.
CD-R and CD-RW discs that have been correctly recorded in
the audio CD format and finalized, as well as finalized CD-R and
CD-RW discs that contain MP3 or WMA files, can be played by
this unit.
This unit can play these types of discs without an adapter. It cannot
play any other type of disc.
Q Playback of any other disc type could result in an unpleas-
ant loud noise, damage to the speakers as well as potential
harm to your hearing. Never try to play any other type of
disc.
< Depending on the quality of the disc and/or the condition of the
recording, some discs might not be playable.
< This unit cannot read or playback the following types of discs:
video CDs, CD-ROMs, Super Audio CDs, video DVDs, audio DVDs,
and DVD-ROMs.
Q CAUTION
If you put a video or audio DVD, DVD-ROM or other types of
DVD into the disc tray, the unit will attempt to read the disc
and rotate at high speed. If you accidentally insert such
a disc, wait until the unit stops spinning before ejecting
it in order to avoid possibly damaging the disc. Do not
attempt to remove the disc when
the display.
“READING”
appears on
Please use CD, CD-R and CD-RW discs bearing the
“DIGITAL AUDIO” mark.
CD
CD-R CD-RW
ENGLISH
< Depending on the quality of the disc and/or the condition of the
recording, some CD-R or CD-RW discs may not be playable.
About CD-R/CD-RW discs
This unit can play back CD-R and CD-RW discs that have been
recorded in the audio CD format (CD-DA) and the MP3 or WMA
format.
< Discs created by a CD recorder must be finalized before use with
this unit.
< Depending on disc quality and recording conditions, playback of
some discs might not be possible. Please see the manual for the
device that you used to create the disc.
< If you are uncertain about the handling of a CD-R or CD-RW disc,
please contact the seller of the disc directly.
< Copy-protected discs and other discs that do not conform to the
CD standard might not play correctly with this player. If you use
such discs with this unit, TEAC Corporation and its subsidiaries will
not be responsible for any consequences or guarantee the quality
of reproduction. If you experience problems with such nonstandard discs, you should contact their issuers.
CAUTION
< Do not play any disc that is warped, deformed or damaged.
Playing such discs could cause irreparable harm to the playing
mechanisms.
< While printable CD-R and CD-RW discs utilizing modern printing
technologies are generally acceptable, older systems that use
adhesives to attach paper type labels to the disc surface are not
recommended.
< Do not stick paper or protective sheets on discs and do not use
any protective coating sprays.
< Never use a stabilizer. Using commercially available CD stabilizers
with this unit will damage the mechanisms and cause them to
malfunction.
< Do not use irregularly shaped discs (octagonal, heart-shaped,
business card size, etc.). Such CDs could damage the unit.
7
Page 8

Discs (2) USB Flash Drives
Handling precautions
< Always place the disc on the disc tray with the label side up. Only
one side of a Compact Disc can be played or used for recording.
< Do not touch the signal side (the unlabeled side).
Fingerprints, oils and other substances can cause errors during
playback.
< To remove a disc from a standard storage case, press down on the
case through the center of the disc and lift the disc out, holding it
carefully by its edges.
How to remove a disc How to hold a disc
Storage precautions
< Discs should be returned to their cases after use to avoid dust and
scratches that could cause the laser pickup to “skip.”
< Do not expose discs to direct sunlight or high temperature or
humidity for extended periods. Long exposure to high
temperatures will warp discs.
< CD-R and CD-RW discs are more sensitive to the effects of heat
and ultraviolet rays than commercial CDs. It is important that they
not be stored in locations where they will be exposed to direct
sunlight. They should also be kept away from sources of heat, such
as radiators and heat-generating electrical devices.
< To clean the signal side of a disc, wipe gently with a soft dry cloth
from the center towards the outside edge.
Dirt on discs can lower the sound quality, so clean them and
always store them in a clean state.
Q
CAUTION
Never turn the unit off or disconnect a USB flash drive when
it is being accessed, for example, during writing, playback,
recording or the erasure of files.
Doing so could damage the AD-RW900 and the connected
USB flash drive.
Compatibility
< Only USB flash drives can be used. However, some USB flash drives
are not compatible with the AD-RW900.
< Some flash memory players that charge from a USB terminal
cannot be used for playback.
< Hard disk drives, CD/DVD drives, and other devices connected via
USB cannot be used.
< This unit cannot copy or move files.
< Playable formats: FAT12, FAT16, FAT32
< NTFS, HFS and HFS+ formats cannot be used.
< Max. number of playable folders: 255
< Max. number of playable/recordable files: 999
< Depending on the conditions of a USB flash drive, this unit might
not be able to play the files on it or skipping might occur.
Recording
This unit can record sound from CDs, cassette tapes and connected
external devices, including tuners, to USB flash drives in MP3 format.
See pages39-41 for details.
Maintenance
< If a disc becomes dirty, wipe its surface radially from the center
hole outward towards the outer edge with a soft, dry cloth.
< Never clean discs using chemicals such as record sprays, antistatic
sprays and fluids and thinners. Such chemicals will do irreparable
damage to the disc’s plastic surface.
If you are in any doubt as to the care and handling of a CD-R or
CD-RW disc, read the precautions supplied with the disc or contact
the disc manufacturer.
8
Page 9

MP3 Files
Cassette Tapes (1)
This unit can play MP3 files that are on CD-R/CD-RW discs and external USB flash drives.
< This unit can play back mono and stereo MP3 files that are in the
MPEG-1 Audio Layer 3 format with a sampling rate of 16-48kHz
and a bit rate of 320 kbps or less.
< This unit is not compatible with discs that have been recorded
using multiple sessions. Only the first session can be played back.
< See page 39 for information about the file format recorded on
USB flash drives using this unit.
File information display
The display of this unit can only show single-byte letters and numbers.
< If the file information uses Japanese, Chinese or other double-byte
characters, playback is possible but the name will not be shown
correctly. In such cases, “
Precautions when preparing MP3 files using a computer or
other device
< Always include the extension in the file name. This unit recognizes
MP3 files by their “.mp3” file extensions.
” is displayed.
Tape types
There are several types of cassette tapes.
Cassette tapes that can be played by this unit
Normal (type ) Chrome (type ) Metal (type )
Cassette tapes that can be recorded on by this unit
Normal (type ) Chrome (type )
CAUTION
ENGLISH
< Do not open a cassette or pull out the tape.
< Do not touch the tape.
Storage precautions
< Keep cassette tapes away from magnets or magnetized items
because they may cause noise or erase recorded contents.
< Do not leave cassette tapes in a dusty place.
< Do not store cassette tapes in a place with high temperature or
humidity.
< Always close the session (complete disc creation). This unit cannot
play discs if the session has not been closed.
< Carefully read the manual for the software that you are using when
you create an MP3 disc.
Files that are unplayable or only partially playable
< Files without extensions cannot be played. Files that are not in
the MP3 format cannot be played even if they have “.mp3” file
extensions.
< Variable bit rate files might not play back correctly.
< If the media has more than 999 files or 255 folders, this unit cannot
play any file in a folder that is 256th or later or any file that is the
1000th or later in a folder.
< Depending on disc conditions, this unit might not be able to play a
disc or skipping might occur.
Types of cassette tapes that should be avoided
The following types of cassette tapes might prevent the unit from
operating or functioning normally. The tape of such cassette tapes
could be caught in the unit and cause unexpected problems.
Deformed cassette tapes
Cassettes that are deformed, that have tape that does not track
properly, or that generate abnormal noise during fast-forwarding
or rewinding.
Long-duration tapes
Tapes that allow recording for 90minutes or longer sometimes get
caught by the capstan because they are extremely thin and stretch
easily. Avoid using them whenever possible.
Slackening of tapes
Slack tape could get caught in the capstan or other parts.
Eliminate slack by using a pencil or similar tool before use.
9
Page 10

Normal
Automatic tape type
detection holes
Accidental erasure prevention
tab
Cassette Tapes (2)
Connections
Automatic tape type detection function
This cassette deck can detect what type of tape is being used based
on the detection holes in the cassette shell. Be sure to use cassettes
with detection holes.
Metal (Type
Chrome (Type
(
Type
)
)
)
Accidental erasure prevention tabs
Tabs in the top of the cassette shell allow you to prevent important
recordings from being erased by mistake. There are two tabs in each
cassette shell—one for “side A” and one for “side B.”
Once these tabs have been removed using a screwdriver or similar
tool, there is no chance of the recording function being activated by
accident.
Voltage Selection
(General export/North America models only)
Q Be sure to remove the power cord from the AC outlet before
changing the position of the voltage selector switch.
1. Locate the VOLTAGE SELECTOR switch on the rear panel.
2. Using a flat-bladed screwdriver, set it to the appropriate position
(230V or 120V) for the power supply used in your area.
IN NORTH AMERICA USE ONLY ON 120V SUPPLY.
for “side A”
“side A”
< To record on a cassette that has had its tab broken off, cover the
hole using a piece of adhesive tape. Be careful not to block the
tape type detection holes.
Dolby NR (noise reduction)
Dolby NR is designed to reduce tape hiss, which is noise introduced
during the recording and playback processes. This cassette deck is
equipped with Dolby B-type noise reduction.
Use the DOLBY NR switch to turn the Dolby NR on and off.
Notes on turning on or off the power
When an amplifier is connected to the AD-RW900, turn on or off
the power of the AD-RW900 and the amplifier in the following
sequence.
When turning on the power
1. AD-RW900
2. Amplifier
When turning off the power
1. Amplifier
2. AD-RW900
< The Dolby NR system affects both recording and playback quality.
For playback, be sure to set the DOLBY NR switch to the same
position used when the recording was made.
10
Page 11

White (L)
Red (R)
White (L)
Red (R)
AD-RW900 (back side)
A
RCA cables
RCA cables
Optical digital cable
USB cable
Wall
socket
Amplier
REC
PLAY
(OUT)
(IN)
TAPE/MD/CD-R
Q After all connections are complete, connect the power cord’s
plug to the AC wall socket.
< Read the instructions of each device that you intend to use
with this unit.
< Be sure to connect each plug securely. To avoid hum and
noise, do not bundle the connection cords.
A
LINE IN/OUT jacks
These jacks transmit an analog 2-channel audio signal. Connect
the components using the included RCA pin cables.
Be sure to connect:
White plug e White jack (L: left channel)
Red plug e Red jack (R: right channel)
B
PHONO jacks [PHONO]
Connect the turntable’s RCA pin cable to the PHONO jacks.
Be sure to connect:
White plug e White jack (L: left channel)
Red plug e Red jack (R: right channel)
< Moving Magnet (MM) cartridges can be used for this unit.
C
SIGNAL GND [SIGNAL GND]
Connect the ground lead of the turntable to this terminal.
< This is not a safety earth.
< If the turntable’s ground lead is not connected to this terminal,
hum noise may be heard.
Turntable
CD Player,
MD Deck, etc.
DIGITAL OUT
D
DIGITAL IN terminal [DIGITAL IN]
To record digital audio signals, connect this terminal to the digital
output terminal of a digital device such as a CD player with a
commercially available optical digital cable.
If the sampling frequency of the input digital signal is changed
while an optical digital cable is connected, it might not be recognized correctly. (“OPTICAL UNLOCK” will appear on screen.)
If this occurs, disconnect the optical digital cable from the connector once and reconnect it after changing the frequency.
Alternately, after changing the frequency, you can turn the power
off once and then turn it on again.
< When the sampling frequency of the input digital signal is 48 kHz,
some of the audio specification values might differ.
E
USB port (B-type) [USB]
Connect this to a computer USB port to convert sound from this
unit to a digital signal and output it to the computer.
F
AC Power Cord
After all other connections are complete, connect the plug to an
AC wall outlet.
Q If you do not use this unit for a long period of time, unplug
the power cord from the wall outlet.
Q Be sure to connect the power cord to an AC outlet that
supplies the correct voltage.
Q Hold the power plug when plugging it into an outlet or
unplugging it. Never pull or yank on the power cord.
Computer
ENGLISH
11
Page 12

Identifying the Parts (Main Unit)
1 43 5 86 7
2
2932 31 30 28 25 23 2133 2627
24
9
2034 2226
11
10 12 13
1819 17
Display
1
See “Display” on pages16-18.
Remote sensor
2
When operating the remote control, point it towards here.
3
4
5
< Use to adjust the sound level output to a connected computer
6
7
8
9
OPEN/CLOSE (L)
Press this button to open and close the disc tray.
REC LEVEL knob
SOURCE
COUNTER RESET
Press this button to reset the tape counter to “0000”.
Turn this knob to adjust the recording level.
except when in recording standby or during recording.
Skip (.//)/Search (m/,)
Press these buttons to skip through tracks/files.
Hold down these buttons during playback to search for part of a
track/file.
RE PEAT
Use this button to set the repeat function (page24).
Use this button to select the source (page19).
Stop (H)
Press this button to stop cassette tape playback.
Press this button to stop recording to a tape.
RECORD USB
10
Use to record to an external USB flash drive. Press it once to
enable recording standby, and press it again to start recording
(pages 39-41).
Press it during recording to divide the file at that point (page41).
(When recording from a CD, however, files cannot be divided.)
RECORD TAPE
11
Use to record to a tape. Press it once to enable recording standby,
and press it again to start recording (pages42-44).
Fast-forward/Rewind (m/,)
12
Press these buttons to fast-forward/rewind the cassette tape.
Pause (
13
Press this button to pause cassette tape playback or recording.
Press this button again to resume playback or recording.
14
15
Cassette tape compartment
PHONES jack/LEVEL knob
To listen with headphones, turn the LEVEL knob to minimize the
volume level before connecting the headphones plug to the
PHONES jack. Then, adjust the volume after connecting the plug.
Q CAUTION
Do not connect headphones to the PHONES jack while
wearing them. Moreover, do not disconnect headphones
or turn the unit on or off while wearing them. Very loud
sound could be output from the headphones.
AVOID DAMAGING YOUR HEARING—Do not put on
headphones until after plugging them in.
)
J
12
EJECT (L)
16
When the tape is stopped, press this button to open the cassette
tape compartment.
Page 13

14
1516
17
18
19
20
RECORD (K)
21
22
POWER ON START OFF-PLAY-REC (TAPE)
23
24
Reverse/Forward play (g/t)
Press these buttons to start playback of the back (g)/front (t)
side of a tape.
Press during tape playback/recording standby to restart
playback/recording.
DOLBY NR switch
Use this switch to turn Dolby noise reduction on and off (pages10,
29 and 43).
PITCH CONTROL knob
Turn this knob to vary the playback speed (page30).
REV (Reverse) MODE switch
Use this switch to select the reverse mode (pages28 and 43).
Use to record to a CD. Press once to enter recording standby, and
press again to start recording (pages 31-33).
Press this button during recording to add a track number in the
song (page34).
FOLDER ( / )
Use these buttons to select folders (pages21 and 23).
Use this switch to select the timer setting (play, record or off). To
use this when set to play or record, connect a commercially available audio timer to this unit (pages45-46).
Play/Pause (t/J)
Press this button during playback or recording of a CD to pause.
Press this button again to resume playback or recording.
Use also to start finalizing, unfinalizing and erasure.
Stop (H)
25
Press this button to stop CD playback.
Press this button also to stop recording to CD.
Skip (/)/Search (,)
26
Auto (AUTO)
When in USB mode, press this button to skip to the next track.
Press and hold this button during playback to search forward.
When recording to a CD, press this button to change how numbers are added to tracks (pages 31-32).
Skip (.)/Search (m)
27
Sync (SYNC)
When in USB mode, press this button to skip to the previous
track. Press and hold this button during playback to search
backward.
When recording to a CD, press this button to change the sync
recording mode (one track or all tracks) (pages 34-35).
POWER ON START CD-TAPE-USB
28
Use this switch to set the sound source that is active when the
power is turned on.
Use this switch to set the media used for timer playback/recording. (The timer recording can only record to cassette tape.)
To use timer playback/recording, connect a commercially available audio timer to this unit (pages45-46).
Play/Pause (t/J)
29
Press this button during USB flash drive playback or recording to
pause.
Press again to resume playback or recording.
Stop (
30
Press this button to stop USB playback.
Press this button also to stop recording to USB.
Erase (ERASE)
31
Finalize/Erase (FINALIZE/ERASE)
When in USB mode, use to erase files from the USB flash drive
(page 42).
When in CD mode, use to finalize a recorded CD-R/CD-RW,
and to erase recorded songs on or unfinalize a CD-RW (pages
36-38).
Disc tray
32
USB port (A-type)
33
Connect an external USB flash drive here.
POWER
34
Press this button to turn the unit on or off.
Q CAUTION
Never turn the unit off or disconnect a USB flash drive
when it is being accessed, for example, during writing,
playback, recording or the erasure of files.
Doing so could damage the AD-RW900 and the connected
USB flash drive.
Q CAUTION
Never turn the unit off when it is writing to a CD
(recording, finalizing, unfinalizing, deleting a track).
Doing so could result in the disc being unplayable or
damage the AD-RW900.
)
H
ENGLISH
13
Page 14

Identifying the Parts (Remote Control Unit)
A
Press this button to change the display information (pages16-18).
SOURCE
B
Use this button to select a source (page19).
C
Use this button to program tracks/files (pages25-27).
D
Use this button to clear programmed tracks/files (page27).
E
E
A
F
B
C
G
D
H
I
Use this button to set the repeat function (page24).
F
Use this button to start shuffle playback (page24).
G
Use these buttons to select MP3 folders (pages21 and 23).
H
OPEN/CLOSE (L)
Press this button to open and close the disc tray.
DI SPL AY
PROGRAM
CLEAR
RE PEAT
SHUFFLE
FOLDER ( / )
J
K
To simplify explanations, instructions in this manual
might refer only to the main unit or the remote control.
In such cases, the same controls on the remote control
and main unit will operate similarly.
SYNC
When recording to a CD, press to change the sync recording
mode (one track or all tracks) (pages 34-35).
AUTO
When recording to a CD, press to change how numbers are
added to tracks (pages 31-32).
Skip (.//)/Search (m/,)
Press these buttons to skip through tracks/files.
Hold down these buttons during playback to search for part of a
track/file.
RECORD (K)
Use to record to a CD. Press once to enter recording standby, and
press again to start recording (pages 31-33).
Press this button during recording to add a track number in the
song (page 34).
FINALIZE/ERASE
When in CD mode, use to finalize a recorded CD-R/CD-RW, and to
erase recorded songs on or unfinalize a CD-RW (pages 36-38).
Stop (H)
Press this button to stop CD playback.
Press this button also to stop recording to CD.
14
Play/Pause (t/J)
Press this button during playback or recording of a CD to pause.
Press this button again to resume playback or recording.
Use also to start finalizing, unfinalizing and erasure.
Page 15

Remote Control Unit (1)
I
Skip (.//)/Search (m/,)
Press these buttons to skip through files.
Hold down these buttons during playback to search for a part of
a file.
RECORD
Use this to record to an external USB flash drive. Press it once to
enable recording standby, and press it again to start recording
(pages39-41).
Press it during recording to divide the file at that point (page41).
(When recording from a CD, however, files cannot be divided.)
ERASE
Use this button to erase files from a USB flash drive (page42).
Stop (H)
Press this button to stop playback.
Press this button to stop recording to USB.
Play/Pause (t/J)
Press this button during USB flash drive playback or recording to
pause.
Press again to resume playback or recording.
(>)
The included remote control allows this unit to be operated from a
distance.
When using the remote control, point it towards the remote sensor on
the front panel of the main unit.
< Even if the remote control unit is used within its effective range,
operation by remote control might not be possible if there are any
obstructions between the unit and the remote control.
< If direct sunlight or strong artificial illumination shines on the
remote sensor, the remote control might not function. If that is the
case, move this unit to another location.
Battery installation
ENGLISH
J
Fast-forward/Rewind (m/,)
Press these buttons to fast-forward/rewind the tape.
Stop (H)
Press this button to stop playback.
Press this button to stop recording to a tape.
Pause (J)
Press this button to pause playback or recording.
Press this button again to resume playback or recording.
Reverse/Forward play (g/t)
Press these buttons to start playback of the back (g)/front (t)
side of a tape.
Press during tape playback/recording standby to restart
playback/recording.
RECORD
Use to record to a tape. Press it once to enable recording standby,
and press it again to start recording (pages42-44).
COUNTER RESET
Press this button to reset the tape counter to “0000”.
(>)
1. Remove the battery compartment cover.
2. Insert two AAA (R03) dry batteries. Make sure that they are inserted
with their positive (+) and negative (_) poles oriented correctly.
3. Close the cover.
Battery replacement
If the distance from the main unit that the remote control works effectively decreases, the batteries are probably exhausted. Replace the
batteries with new ones when this happens.
For more information about the collection of batteries, please contact
your local municipality, your waste disposal service or the place where
you purchased them.
REC LEVEL ( – / + )
K
Use these buttons to adjust the recording level. Use these buttons as well to adjust the sound level output to a connected
computer except when in recording standby or during recording.
15
Page 16

Elapsed time of current track (min./sec.)
Currently playing track number
Currently playing file number
Total playing time
Total tracks
Total number of files
Remote Control Unit (2)
Display (1)
Precautions concerning batteries
Q The mishandling of batteries could cause them to rupture
or leak. This can lead to fire, personal injury or the staining of
nearby items. Please read and observe the following precautions
carefully.
< Be sure to insert the batteries with correct positive (+) and
negative (_) orientations.
< Use batteries of the same type. Never use different types of
batteries together.
< If the remote control is not used for a long time (more than a
month), remove the batteries to prevent them from leaking.
< If the batteries leak, wipe away the leakage inside the battery
compartment and replace the batteries with new ones.
< Do not use batteries of types other than those specified. Do not
mix new batteries with old ones or use different types of batteries
together.
< Do not heat or disassemble batteries.
< Never throw batteries into fire or water.
CD mode
During playback
Audio CD
MP3 disc
(starting with 001 in each folder)
Currently playing folder number
Elapsed time of current track
(min./sec.)
< Do not carry or store batteries with other metallic objects. The
batteries could short circuit, leak or explode.
<
Never recharge a battery unless it is confirmed to be a rechargeable
type.
Currently playing file name
(scrolls when long)
When playback is stopped
Audio CD
MP3 disc
16
Total number of folders
Page 17

TAPE mode
Currently playing file number
Total number of files
Recording source Recording indicator
recorded
(min:sec) of track
being recorded
Recording source Recording indicator
recorded
(min:sec) of track
being recorded
Recording indicator
track number
(min:sec) of track
being recorded
Recording source Recording indicator
current track
(Example: Recording from a file of more than 100 minutes in
length)
USB mode
During playback
(starting with 001 in each folder)
Currently playing folder number
Currently playing file name
(scrolls when long)
Elapsed time of current file
(min./sec.)
Current folder
number
(Example: Recording on a CD from a cassette tape)
Tape counter
(Example: Recording on a CD from an external device
connected to the PHONO jacks.)
Current file
number
Number of
track being
Elapsed time of current
file (hr./min./sec.)
Elapsed time
ENGLISH
When playback is stopped
Total number of folders
Recording mode
(Example: Recording on a cassette tape from a USB flash drive)
Current file
number
current file (min./sec.)
Recording source
(Example: Recording on a USB flash drive from a CD)
Currently
playing
Tape counterElapsed time of
Number of
track being
Elapsed time
(min:sec) of
Elapsed time
Elapsed time
17
Page 18

Remaining time of current track (min./sec.)
Total elapsed time of the disc (min./sec.)
Total remaining time of the disc (min./sec.)
Currently playing track number
and elapsed time of current track (min./sec.)
File name
Title
Artist
Album
Currently playing folder and file number,
elapsed time of current track (min./sec.),
and currently playing file name
LINE IN
PHONO
Display (2)
Changing the display (CD/USB mode)
During playback in CD mode or USB mode, each time the DISPLAY
button is pressed, the display changes as follows:
Audio CD
Basic Operation
Turning the unit on or off
Press the POWER button to turn the unit on or off.
When the unit turns on, the display lights.
Check the POWER ON START switches that determine what the
unit does when the power is turned on.
MP3 disc/USB
< “Title No” (title information unavailable), “Album No” (album
information unavailable) or “Artist No” (artist information
unavailable) appears when there is no information.
< “
< The display of this unit can only show single-byte letters and
numbers. If a file name uses Japanese, Chinese or other doublebyte characters, playback is possible but the name will not be
shown correctly. In such cases, “
” appears when the unit cannot read the information.
” is displayed.
When the power is turned on, and the POWER ON START
(OFF-PLAY-REC) switch for the timer is set to PLAY or REC
or
The source set with the POWER ON START (CD-TAPE-USB)
switch starts playback/recording.
The timer recording can only record to cassette tape (pages
45-46).
When the power is turned on, and the POWER ON START
(OFF-PLAY-REC) switch for the timer is set to OFF
The source set with the POWER ON START (CD-TAPE-USB)
switch becomes the active source.
< When you do not want to use the timer, be sure to set the OFF-
PLAY-REC switch to the OFF position to prevent accidentally
recording over an important cassette tape.
18
Page 19

Selecting a source for playback/recording
PHONO IN
LINE IN
Listening with headphones
Each time the SOURCE button is pressed, the source changes as
follows:
The selected source is shown on the upper left of the display
except for PHONO IN, which is shown at the bottom of the display.
< During recording, the source cannot be changed.
< Pressing the play button for a source also selects and starts
playback of that source.
< Select “LINE IN" to listen to a source connected to the analog
LINE IN jacks.
< Select “PHONO IN” to listen to a record player connected to the
PHONO jacks.
< Select “ ” to listen to a digital source connected to the
DIGITAL IN terminal.
To listen with headphones, turn the LEVEL knob to minimize the
volume level before connecting the headphones plug to the
PHONES jack. Then, adjust the volume after connecting the plug.
Q CAUTION
Do not connect headphones to the PHONES jack while
wearing them. Moreover, do not disconnect headphones or
turn the unit on or off while wearing them. Very loud sound
could be output from the headphones.
AVOID DAMAGING YOUR HEARING—Do not put on
headphones until after plugging them in.
ENGLISH
19
Page 20

Listening to a CD
Press the SOURCE button repeatedly to select “CD”.
1
< When a different source is selected, pressing the CD Play/Pause
(t/J) button automatically selects the CD and, if a disc is
loaded, starts playback.
Press the CD OPEN/CLOSE (L) button to open the disc
2
tray.
Press the CD OPEN/CLOSE (L) button again to close the
4
tray.
Q CAUTION
Be careful not to let your finger be pinched by the tray.
The unit takes about 20–30 seconds to read a disc in order to
determine its type.
During loading, “READING” appears on the display and no buttons will work. Wait until the total number of tracks/files is
displayed.
< When no disc is loaded, “NO DISC” is displayed.
Press the CD Play/Pause (t/J) button to start playback.
5
Place a disc on the tray with the label side up.
3
< Always confirm that the disc is centered on the tray. The disc
must be centred on the disc tray. If a disc is not correctly loaded,
it might not be possible to open the tray again after it has been
closed.
CAUTION
< Do not load more than one disc.
< Do not force the tray by hand when opening and closing it.
< Do not attach adhesive labels or similar materials to either side
of a disc.
< Do not use irregularly-shaped discs.
Failure to follow any of the above cautions could cause
malfunction.
Playback starts from the first track/file on the disc.
< If you load a disc, and then press the CD Play/Pause (t/J)
button without having first closed the disc tray, the disc tray
closes and playback starts.
< When playback of all the tracks/files has finished, the unit stops
automatically.
< MP3 files that are not placed in folders are automatically put in
the “ROOT” folder. Playback starts from the first file in the ROOT
folder.
< See page50 for information about the playback order of MP3
discs.
20
Page 21

Suspending playback temporarily
(Pause mode)
Search for a part of a track/file
Hold down
Press the CD Play/Pause (t/J) button during playback to stop
playback at the current position.
To resume playback, press the CD Play/Pause (t/J) button again .
Stopping playback
Press the CD Stop (H) button to stop playback.
Opening the disc tray
During playback, hold down a CD Search (m or ,) button to
search a part of a track/file. Release it when you find the beginning
of the part you want to hear.
ENGLISH
Skipping to an earlier or later track/file
During playback
Press a CD Skip (. or /) button repeatedly until the desired
track/file is selected. The selected track/file will be played from the
beginning.
< If the . button is pressed once during playback, the track/file
being played will be played again from its beginning. To return
to the beginning of the previous track/file, press the . button
twice.
When playback is stopped or paused
Press a CD Skip (. or /) button repeatedly to select the
track/file you want to hear. Then, press the CD Play/Pause (t/J)
button to start playback of the selected track/file.
Press the CD OPEN/CLOSE (L) button to open the disc tray.
< You cannot open the tray when in modes other than CD mode.
Selecting a folder (MP3/WMA disc)
Press a FOLDER ( or ) button to select a folder. Press the CD
Play/Pause (y/J) button to start playback of the first track in the
selected folder.
21
Page 22

Listening to Files on a USB Flash Drive (MP3/WMA)
Q CAUTION
Never turn the unit off or disconnect a USB flash drive when
it is being accessed, for example, during writing, playback,
recording or the erasure of files.
Doing so could damage the AD-RW900 and the connected
USB flash drive.
< This section uses MP3 file as an example to explain the operation
process; the same process also needs to be followed when WMA
file is used.
Press the SOURCE button repeatedly to select “USB”.
1
< When a different source is selected, starting USB playback
automatically selects the USB mode.
Pausing playback temporarily
Press the USB Play/Pause (t/J) button during playback to stop
playback at the current position.
To resume playback, press the USB Play/Pause (t/J) button again.
Stopping playback
Connect an external USB flash drive to the USB port of
2
this unit.
Reading the USB flash drive takes a few seconds.
< If no MP3 file is on the USB flash drive, “NO MUSIC FILE” is displayed.
Press the USB Play/Pause (t/J) button to start playback.
3
Press the USB Stop (H) button to stop playback.
Search for a part of a file
Hold down
During playback, hold down a USB Search (m or ,) button
to search for a part of a file. Pressing and holding a Search button
increases the search speed.
Release it when you find the beginning of the part that you want
to hear.
< When playback of all the files has finished, the unit stops
automatically.
<
MP3 files that are not put in folders are automatically put in the
“ROOT” folder. Playback starts from the first file in the ROOT folder.
<
See page50 for information about the playback order of MP3 files.
22
Page 23

Skipping to an earlier or later file
Repeat, shuffle and programmed playback
These functions can be used in USB mode.
Please see the following sections for details about using them.
During playback
Press a USB Skip (. or /) button repeatedly until the desired
file is selected. The selected file will be played from the beginning.
< If the . button is pressed once during playback, the file being
played will be played again from the beginning. To return to the
beginning of the previous file, press the . button twice.
When playback is stopped or paused
Press a USB Skip (. or /) button repeatedly to select the file
you want to hear. Then, press the USB Play/Pause (t/J) button to
start playback of the selected file.
Selecting a folder
Shuffle playback
Repeat playback
Programmed playback e pages25-27
page24
e
page24
e
ENGLISH
Press a FOLDER ( or ) button to select a folder. Then, press the
USB Play/Pause (t/J) button to start playback.
23
Page 24

REPEAT 1 REPEAT ALL
(Ordinary playback)
REPEAT 1 REPEAT ALL
(Ordinary playback)
REPEAT FOLDER
Shuffle Playback
This function can be used in CD and USB modes.
Use this function to play the tracks/files on a disc/USB flash drive in
random order.
Pressing the SHUFFLE button turns the shuffle mode on and off.
During shuffle playback, “SHUFFLE” appears on the display.
After playing back all tracks/files, the unit exits the "Shuffle" playback mode and stops playback.
To stop shuffle playback, press the CD/USB Stop (H) button.
Repeat Playback
This function can be used in CD and USB modes.
Press the REPEAT button to cycle through the following playback
modes:
Audio CD
MP3
< If you press the / button during shuffle playback, the next
track/file will be randomly selected and played. If you press the
. button, the currently played track/file will be played from the
beginning. During shuffle playback, a track/file that has completed
playback will not be played again.
< The shuffle function does not work during program playback.
< If any of the following buttons are pressed, shuffle mode will be
cancelled.
In CD mode
POWER, SOURCE, CD OPEN/CLOSE (L), SHUFFLE
In USB mode
POWER, SOURCE, SHUFFLE
< Shuffle playback cannot be used with unfinalized discs.
< If any of the following buttons are pressed, the repeat mode will
be canceled.
In CD mode
POWER, SOURCE, CD OPEN/CLOSE (L), REPEAT
In USB mode
POWER, SOURCE, REPEAT
< If you press the SHUFFLE button while REPEAT 1 or REPEAT FOLDER
is selected, the repeat playback mode will switch to “REPEAT ALL”.
< Repeat playback cannot be used with unfinalized discs.
REPEAT 1 (Repeat one track/file)
The track/file being played will be played repeatedly.
“REPEAT 1” appears on the display.
< If you use a CD/USB Skip (. or /) button to select a different
track/file, that track/file will be played repeatedly.
< You can select a track/file to be repeated when playback is
stopped. Press the REPEAT button, select a track/file using a CD/
USB Skip (. or /) button, and then press the CD/USB Play/
Pause (t/J) button to start playback.
24
REPEAT ALL (Repeat all tracks/files)
All the tracks/files on the disc will be played repeatedly.
“REPEAT ALL” appears on the display.
< During program playback, the programmed tracks/files will be
played repeatedly.
REPEAT FOLDER (Repeat all the files in a folder) (MP3 only)
All the files in the selected folder will be played repeatedly.
“REPEAT FOLDER” appears on the display.
Page 25

Programmed Playback (1)
This function can be used in CD and USB modes.
Up to 30tracks/files can be programmed in the desired order.
When playback is stopped, press the PROGRAM button
1
to enter program mode.
“PROGRAM” blinks and “P-01” appears on the display.
Example when in CD mode
Press a CD/USB Skip (. or /) button to select a
3
track/file, and then press the PROGRAM button.
The track/file is programmed, and “P-02” is displayed.
< Repeat steps 2 and 3 to program more tracks/files.
< You can program up to 30tracks/files.
< To stop programming, press the CD/USB Stop (H) button.
Programming is cancelled, but the program contents are
retained in memory. If you want to restart program playback,
press the PROGRAM button, and then press the CD/USB Play/
Pause (t/J) button.
ENGLISH
< To stop programming, press the CD/USB Stop (H) button.
(When programming an audio CD)
2
Skip to step 3 .
(When programming MP3 files)
Use a CD/USB Skip (. or /) button or FOLDER (
or ) button to select a file, and then press the
PROGRAM button.
< MP3 files not located in a specific folder are in the “001” (ROOT)
folder.
< Program playback cannot be used with unfinalized discs.
When the selection of track/file numbers is completed,
4
press the CD/USB Play/Pause (t/J ) button to start
program playback.
To stop program playback, press the CD/USB Stop (H) button.
< After program playback finishes, press the CD/USB Play/Pause
(t/J) button to play the program again.
< You can use a CD/USB Skip (. or /) button during
program playback to select and play other tracks/files in the
program.
< The shuffle function does not work during program playback.
< “REPEAT 1” and “REPEAT ALL” playback are possible during
program playback. When set to “REPEAT ALL” mode, the
programmed tracks/files will be played repeatedly.
25
Page 26

to be changed
Programmed Playback (2)
Adding tracks/files to the end of the program
When playback is stopped, press the PROGRAM button repeatedly
until “TRACK 00” appears on the display.
Press repeatedly
Example:
Select a track/file number you want to add using a CD/USB Skip
(. or /) button, and then press the PROGRAM button.
Overwriting part of the program
When playback is stopped, press the PROGRAM button repeatedly until the program number of the track that you want to
change appears on the display.
Press repeatedly
Example:
Program number
Select the track/file number that you want to add using a CD/USB
Skip (. or /) button, and then press the PROGRAM button.
The track/file is added to the end of the program.
The selected track/file is added to the program, replacing the track
that had been at that program number before.
26
Page 27

Checking the program order
Clearing the program
Press repeatedly
When playback is stopped, press the PROGRAM button repeatedly.
The numbers of the programmed tracks/files and their program
numbers will be shown in order.
Deleting tracks/files from the program
When playback is stopped, press the PROGRAM button repeatedly
until the program number of the track to be deleted appears
on the display.
Press repeatedly
Hold down
more than 1 sec.
When playback is stopped, press the PROGRAM button, followed
by the CLEAR button more than 1 second.
The PROGRAM indicator disappears and all the contents of the
program are cleared.
< If the PROGRAM indicator is not shown, press the PROGRAM
button to activate program mode before pressing the CLEAR
button.
< If one of the following buttons is pressed, the contents of the
program are also cleared.
In CD mode
POWER, CD OPEN/CLOSE (L), SOURCE
In USB mode
POWER, SOURCE
ENGLISH
Example:
Program number
to be deleted
Press the CLEAR button.
The track/file is deleted from the program.
Exiting program mode
When playback is stopped, press and hold the CD/USB Stop (H)
button. The PROGRAM indicator will disappear.
< This does not clear the contents of the program. Press the
PROGRAM button again and then press the CD/USB Play/Pause
(t/J) button if you want to restart program playback.
27
Page 28

Listening to a Cassette Tape (1)
“Side
You can play Normal (type ), Chrome (type ) and Metal (type ) tapes
with this unit.
NOTE
For the sake of simplicity, we refer to the tape side facing you
as “side A” and to the tape side facing away as “side B” in this
manual.
When you insert a cassette with “side A” and “side B” reversed,
read “side A” as “side B” and “side B” as “side A”.
“Side B” faces away
A” faces you
Press the SOURCE button repeatedly to select “TAPE”.
1
Put a cassette tape in the compartment.
3
Insert the cassette tape with its open edge facing down and the
side that you want to play facing you. Then, close the cassette
compartment by pushing its door in.
CAUTION
< Do not use deformed or slack cassette tapes.
< Do not force the door of the compartment by hand when
opening it.
Failure to follow any of the above cautions could cause
malfunction.
< When a different source is selected, starting tape playback
automatically selects the tape.
Press the TAPE EJECT (L) button to open the cassette
2
tape compartment.
Set the reverse mode setting using the REV MODE switch.
4
You can select one of three settings.
u One way mode
j Two way mode
p Repeat mode
28
Page 29

Set the DOLBY NR (noise reduction) switch.
5
Pausing playback temporarily
Set the switch to the ON position when playing back tapes
recorded with Dolby NR.
To play tapes recorded without Dolby NR, set the switch to the
OFF position.
About Dolby NR
Dolby NR is designed to reduce tape hiss, a noise introduced
during the recording and playback processes. This cassette deck
is equipped with Dolby B-type noise reduction.
Press the Reverse (g) or Forward (t) play button to
6
start playback.
Forward (t) play
Pressing this button starts playback of “side A”.
Press the TAPE Pause (J) button during playback to stop playback
at the current position.
To resume playback, press the TAPE Pause (J) button again or
press the Reverse/Forward play (g or t) button.
ENGLISH
Stopping playback
Press the TAPE Stop (H) button to stop playback.
Opening the cassette tape compartment
When the reverse mode is set to u
Playback stops when the end of “side A” is reached.
When the reverse mode is set to j
Playback continues on “side B”, stopping at the end of “side B”.
When the reverse mode is set to p
Playback cycles through both tape sides 5times.
Reverse side (g) play
Pressing this button starts playback of “side B”.
When the reverse mode is set to u or j
Playback stops when the end of “side B” is reached.
When the reverse mode is set to p
“Side B” is played back, and then playback cycles through both
tape sides 4times.
When the tape is stopped or paused, press the TAPE EJECT (L)
button to open the cassette tape compartment.
< You can also open the compartment when a source other than
TAPE is selected.
29
Page 30

Listening to a Cassette Tape (2) About Recording
Fast-forwarding/Rewinding a tape
Press the Rewind (m) button or the Fast-forward (,) button
to wind the tape rapidly.
Winding stops when the end of the tape is reached. To stop winding before the end, press the TAPE stop (H) button.
< You can wind the tape when CD/USB/LINE is selected as a source.
These buttons do not, however, function when in a recording
mode.
Pitch control
This control varies the pitch of the music during playback.
CD-R and CD-RW
A CD-R disc can be recorded only once. Recorded tracks cannot be
erased. However, if some recordable time is still available, additional
recording is possible. If you finish recording and finalize the CD-R disc,
it can be played with a normal CD player. (Some CD players may not
be compatible.)
On a CD-RW disc, even if no recordable time is available, you can erase
tracks already recorded and record tracks repeatedly. You can erase all
tracks at once or the last track only. However, you cannot erase only
tracks in the middle of the disc.
If you finish recording and finalize the CD-RW disc, it can be played with
a normal CD player (page 36). Only CD players that support CD-RW
discs can do so.
If you want to record again on a finalized CD-RW, unfinalize it (page 37).
By unfinalizing (reversing the finalization), you will be able to record
and delete tracks on the CD-RW again.
CD-RW discs can only be played with compatible CD players.
Serial Copy Management System
This unit is in compliance with the Serial Copy Management System
standard. This standard has been established to restrict digital-todigital copying to only the first generation. The basic rules governing
this system are as follows:
Turning the PITCH CONTROL knob clockwise increases the playback speed and raises the pitch by a maximum of +10%.
Turning the PITCH CONTROL knob counterclockwise reduces the
playback speed and lowers the pitch by a maximum of –10%.
< This control does not work during recording.
Tape counter
Rule 1
A digital recording is possible from a digital source such as a CD,
DAT or MD onto a recordable CD-R, CD-RW, MD or DAT through a
digital input connection. However, further digital-to-digital recording is prohibited for the second and later generations.
Rule 2
When an analog source such as an analog disc or FM broadcast is digitally recorded by using a CD-R, CD-RW, MD or DAT,
this recorded source can be digitally recorded on another CD-R,
CD-RW, MD or DAT. However, further digital copying is prohibited.
Press the COUNTER RESET button to reset the tape counter to
“0000”. You can use this function to easily locate any desired point
on the tape.
30
Page 31

LINE IN PHONO
Before Recording
Before you start recording, make sure that you understand
the following points:
< Up to 99 tracks can be recorded according to the CD standards.
When a 100th track is about to be recorded, recording will stop
automatically.
< A track less than 10 seconds in length on an audio CD cannot be
recorded .
< When recording is finished, “PMA WRITE” blinks for a few seconds,
and then the unit goes into the stop mode. Do not apply shock or
vibration to the unit while recording or “PMA WRITE” blinks.
< When the available recording time reaches 0, recording will stop
automatically.
< If a half-way recorded disc is inserted, recording continues next to
the last recorded track.
< You can add tracks to an unfinalized recordable disc. Once
finalized, a CD-R disc is “fixed” and behaves in the same way as a
CD. Finalized CD-RW discs, however, can be unfinalized, erased and
re-recorded.
Recording on a CD (1)
Load a recordable CD-R or CD-RW disc into the unit.
1
Press the OPEN/CLOSE (L) button, place a disc on the disc tray
with the disc label side up, and then press the OPEN/CLOSE (L)
button to close the disc tray.
Make sure “NO TOC” and “CD-R” (or “CD-RW”) indicators light on
the display.
Select the source to be recorded using the INPUT SELECT
2
button. (TAPE, LINE IN, PHONO or DIGITAL)
ENGLISH
< When the auto track function is used, the tracks are separated
based on the specified level. Therefore, if a silent part is contained
at the beginning or in the middle of a track, the playback time may
not be the same as the actual length of the track.
< When track numbers are added to continuous music such as live
performances, the sound is cut a moment.
< If a disc recorded with this unit is played with another player,
noises may occur when the track changes.
Auto track level
Sound level to detect “silence” to add track numbers using auto
track when recording from external devices via ANALOG or to
perform synchronous recording for digital sources such as CD,
MD, and DAT.
This instruction manual describes “silence” as the situation
where the recording source level is lower than the specified
auto track level.
−60, −50, −40, and −30 dB can be selected.
< The input source cannot be changed during recording.
< You cannot record from USB to CD.
Press the RECORD button (K RECORD).
3
The red CD RECORD indicator to the right of the display and the
indicator on the display blink.
< No button will work while “WAITING” is displayed. Wait a few
seconds until “WAITING” disappears from the display. When
DIGITAL is selected in step 2, the sampling frequency of the
digital source ( ) (“FS 44_1K”, “FS 48K” or “ FS 32K”) briefly
appears after “WAITING”.
< “OPTICAL UNLOCK” appears when the unit cannot perceive
the digital signal. In that case, connect a digital device to the
DIGITAL IN terminal, switch it on, and wait a few seconds until
the unit enters the record pause mode.
< If you cannot record even if you press the CD record button (K
RECORD), load a recordable disc. Confirm that “NO TOC” and
“CD-R” (or “CD-RW”) appears on the display and press the CD
record button (K RECORD) again.
Continued on the next page
31
Page 32

MANUAL
S-LEVEL -60 S-LEVEL -50
S-LEVEL -40 S-LEVEL -30
LINE IN PHONO
Recording on a CD (2)
Select the mode of track number assignment using the
4
AUTO button.
When the AUTO button is pressed once, the current auto track
level is displayed. Press the AUTO button repeatedly to select
another setting.
< After 2 seconds have passed, the display returns to the track/
time display.
S-LEVEL-60/50/40/30 (The track numbers are automatically added)
The auto track function activates and “AUTO TRACK” appears. The
displayed number indicates the auto track level.
The track numbers are automatically added during recording. If a
track change is detected via DIGITAL, or if silence (lower than the
auto track level) continues for three seconds or longer and then
the next track starts (sound becomes louder than the auto track
level) via ANALOG, the track numbers are automatically updated.
MANUAL (The track numbers are not automatically added)
In MANUAL mode, the track numbers are not automatically added.
To add track numbers manually, press the RECORD button (K
RECORD).
< When you record a record or other sources with much
interference, more track numbers than expected may be added
unintentionally.
< The AUTO button cannot be used during recording.
If track numbers are not properly added
When you record sources with interference via ANALOG, track
numbers may not be added if the auto track level is lower than the
interference level. In this case, set the auto track level higher than
the interference level.
If there is little interference and the track starts with a small sound
resulting in the beginning of the recorded track being truncated,
set the auto track level lower.
Noise Quiet Loud
Examples CD, MD
S-LEVEL -60 -50 -40 -30
(When recording from a tape , LINE IN or PHONO)
5
Adjust the recording level.
Before recording, adjust the recording level. Failure to do so
could cause the recorded sound to be distorted or noisy.
1. Play the source (cassette tape or external device) to be
recorded.
2. Use the REC LEVEL knob to adjust the recording level so that
the loudest sound never lights the “OVER” indicator on the
peak level meter.
Record,
cassette tape
<
The setting can be configured for DIGITAL and ANALOG respectively.
When the power is turned on, the setting is –60 dB for DIGITAL, –50
dB for LINE IN, –40 dB for TAPE and –30 dB for PHONO IN.
< If the input source is changed, the S-LEVEL setting returns to the
setting that had been set when the unit was turned on.
< If a CD is recorded via DIGITAL
added based on the CD's digital signals. There is usually no need to
change the auto track level.
<
In digital recording, even if the auto track function is activated,
track numbers may not be added depending on the digital source
player. In such a case, add track numbers manually (see page 34).
< When you record digital broadcasts or other sources without
track numbers, track numbers are not added even if the auto track
function is activated. To add a track number, press the RECORD
button (K RECORD) while recording a track.
< When you record classical music or other sources containing silent
parts via ANALOG, track numbers may not be properly added even
if the auto track function is activated. To add a track number in this
case, deactivate the auto track function, and press the RECORD
button (K RECORD) while recording a track.
( )
, the track numbers are
32
< Different sources to be recorded have different volumes. In
order to record at the optimal volume for each source, it is
necessary to adjust the recording level for each source.
< You cannot adjust the recording level when recording from a
DIGITAL source.
Page 33

Prepare the recording source.
6
Recording from a cassette tape
To record the entire tape, rewind the tape to its starting point. To
record from the middle of a tape, stop or pause at the point from
where you want to start recording.
Select the DOLBY NR (noise reduction) setting (page10).
To record from a single tape side, set the REV MODE switch to
u, and set the playback direction using the Reverse (g) or
Forward (t) play button. Then press the TAPE Stop (H) button.
To stop recording
Press the Stop (H) button to stop recording.
To record from both tape sides, set the REV MODE switch to j,
and set the playback direction to t. If you set the recording direction to g, recording will be of “side B” only.
Press the CD Play/Pause (t/J) button or RECORD button
7
(K RECORD) again to start recording.
When recording from an external source, you must also start
playback of that source.
The red CD RECORD indicator to the right of the display and the
indicator on the display stop blinking.
Q CAUTION
Do not turn the unit off or disconnect the power cord
during recording. Doing so could damage the unit and
connected devices.
< If the CD runs out of capacity during recording, recording will
stop.
< To pause recording temporarily, press the CD Play/Pause (t/J)
button. A second press of the button resumes recording. Each
time that you pause recording a new track number will be
added.
< If the CD-R is finalized, it can be played with another CD player.
< If you finalize a CD-RW, it will become playable on other CD players
that are compatible with CD-RW discs. If you want to record again
on a finalized CD-RW, unfinalize it (page 37).
< The minimum length of a track that is required for recording is 10
seconds. If you press the Stop (H) button within 10 seconds from
the beginning of a track, recording stops only after the track is
recorded for 10 seconds.
< If you completely fill a CD-R/CD-RW with recordings, you should
finalize it before removing it.
To pause recording
Press the CD Play/Pause (t/J) button. “WAITING” briefly appears
on the display, and then recording is paused.
To restart recording, press the CD Play/Pause (t/J) button.
< You cannot restart recording while “WAITING” is displayed.
< Remember that every time recording is paused or stopped, a new
track number will always be assigned. It is not possible to record in
two “stages” within one track.
ENGLISH
Recording from a cassette tape
When source playback stops, recording also automatically stops.
To stop recording, press the CD Stop (H) button. Doing this also
stops playback of the recording source.
Recording from an external source
When source playback stops, recording does not automatically
stop. Press the CD Stop (H) button to stop recording.
33
Page 34

LINE IN PHONO
ALLYONEYOFF
LINE IN PHONO
Recording on a CD (3) Synchronous recording to CD
Manual track division
It is possible to divide a track into multiple tracks by pressing the
RECORD button (K RECORD) while recording.
< Manual track division is possible regardless of the AUTO setting.
< A track cannot be less than 10 seconds in length. The RECORD
button (K RECORD) will not work if it is pressed within 10 seconds
from the beginning of a track.
The convenient synchronous recording function automatically starts
recording when receiving analog or digital signals from an externally
connected device such as a CD player and MD deck, and stops recording when signal reception is complete.
For CD, MD, or DAT
Synchronous recording starts when a digital signal is detected,
which is the beginning of a track. Synchronous recording stops if
there is a period where the sound is quieter than the specified auto
track level lasting five seconds.
For digital sources other than the above or analog sources
Synchronous recording starts when a sound louder than the specified auto track level is detected. Synchronous recording stops if
there is a period where the sound is quieter than the specified auto
track level lasting 8 seconds.
Complete steps 1 to 5 in “About Recording” to make
1
the settings, and press the CD stop button (H).
< Since the recording level cannot be adjusted when the
recording source is the digital input ( ), skip steps 4 and
5
.
Press the SYNC button and select “SYNC 1” or “SYNC
2
ALL”.
Each time you press the sync recording button (SYNC), the sync
recording will change.
Select one of three modes.
ALL
Sync recording of all
tracks.
34
ONE
Sync recording of one
track and then recording
stops.
OFF
No sync recording.
Page 35

Prepare the recording source.
3
Recording from a cassette tape
To record the entire tape, rewind the tape to its starting point. To
record from the middle of a tape, stop or pause at the point from
where you want to start recording.
Select the DOLBY NR (noise reduction) setting (page10).
Start playing the source.
5
Sync recording will start.
If no sound is heard for 8 seconds or longer during synchronous
recording, recording stops. To record the music with such periods of silence, turn off synchronous recording. After turning off
synchronous recording, start recording manually, and then play
the source to be recorded.
To record from a single tape side, set the REV MODE switch to
u, and set the playback direction using the Reverse (g) or
Forward (t) play button. Then press the TAPE Stop (H) button.
To record from both tape sides, set the REV MODE switch to j,
and set the playback direction to t. If you set the recording direction to g, recording will be of “side B” only.
Press the RECORD button (K RECORD).
4
The red CD RECORD indicator to the right of the display and the
indicator on the display blink.
< No button will work while “WAITING” is displayed. Wait a few
seconds until “WAITING” disappears from the display. When
DIGITAL is selected, the sampling frequency of the digital source
( ) (“FS 44_1K”, “FS 48K” or “ FS 32K”) briefly appears after
“WAITING”.
< Press the Stop (H) button to stop the recording manually.
< The synchronous recording function automatically turns off after
recording.
< The syn recording mode (one track or all tracks) cannot be
changed during recording or in the record pause mode.
< If you select SYNC ALL, AUTO TRACK will be enabled, and the
automatic track level will be set to −60 dB (−50 dB for analog signal
input). Use the AUTO button to select the AUTO TRACK level.
< Even if the AUTO button is set to MANUAL, the auto track function
will be on during synchronous recording. The auto track level is
set to –60 dB (–50 dB when recording via ANALOG). The setting
automatically returns to MANUAL after the recording.
< In digital recording, synchronous recording may not start
depending on the digital source player. In such a case, start and
stop recording manually.
< Depending on the source, silence could be detected, causing
recording to stop in the middle of a track or the beginning to be
cut off. If this occurs, set AUTO TRACK to MANUAL and record
manually.
ENGLISH
< “OPTICAL UNLOCK” appears when the unit cannot perceive
the digital signal. In that case, connect a digital device to the
DIGITAL IN terminal, switch it on, and wait a few seconds until
the unit enters the record pause mode.
< If you cannot record even if you press the CD record button (K
RECORD), load a recordable disc. Confirm that “NO TOC” and
“CD-R” (or “CD-RW”) appears on the display and press the CD
record button (K RECORD) again.
35
Page 36

Finalizing
Finalizing is the addition of TOC (recorded data information) to discs.
If you finalize a CD-R, it will become playable on other CD players.
Finalized CD-R discs cannot be used for additional recording.
If you finalize a CD-RW, it will become playable on other CD players
that are compatible with CD-RW discs
Press the input SOURCE button and select CD mode.
1
Press the CD Play/Pause (t/J) button to start finalizing.
4
Finalization starts.
When finalization completes, the display will show “COMPLETE”
briefly before returning to its ordinary appearance (total number
of tracks and total playback time).
< Never turn the power off nor unplug the power cord during
finalization.
< During finalization, no button works.
Load an unfinalized (recordable) disc.
2
Press the FINALIZE/ERASE button in the stop mode.
3
Press the FINALIZE/ERASE button once.
“FINALIZE” appears on the display.
< If “UNFINALIZE” appears on the display, the disc is already
finalized and so finalization is unnecessary.
< To cancel the operation at this point, press the stop button (H).
36
Page 37

Unfinalizing (CD-RW only)
If you want to record again on a finalized CD-RW, unfinalize it.
By unfinalizing (reversing the finalization), you will be able to record
and delete tracks on the CD-RW again.
Press the input SOURCE button and select CD mode.
1
Load a finalized (unrecordable) disc.
2
Press the CD Play/Pause (t/J) button to start unfinalizing.
4
Unfinalization starts.
When unfinalization completes, the display will show “COMPLETE”
briefly before returning to its ordinary appearance (total number
of tracks and total playback time).
< Never turn the power off nor unplug the power cord during
unfinalizing.
< During unfinalizing, no button works.
ENGLISH
Press the FINALIZE/ERASE button in the stop mode.
3
Press the FINALIZE/ERASE button once.
“UNFINALIZE” appears on the display.
< If ”FINALIZE” appears on the display, the disc is not finalized, so
unfinalization is unnecessary
< To cancel the operation at this point, press the stop button (H).
37
Page 38

FINALIZE
Z
ERASE #
(# is the last track number)
(Not shown if only 1 track recorded)
Z
ERSAE DISC
Z
Ordinary playback mode
(total number of tracks and total playback time)
Erasing tracks from a disc (CD-RW only)
Press the input SOURCE button and select CD mode.
1
Load a CD-RW that has not been finalized or has been
2
unfinalized.
< If you load a finalized disc, “UNFINALIZE” will appear. You must
unfinalize the disc before you can erase tracks on it (page 37).
Erasing the last track
Press the FINALIZE/ERASE button until “ERASE” and the last track
number appear on the display.
< You can also erase all the tracks from the currently selected track
number to the last track at once. To do this, use a skip (. or
/) button to select the track from which you want to start
erasing. (You cannot erase only certain tracks before the last
track.)
Erasing all tracks (ordinary mode)
< Press the FINALIZE/ERASE button until “ERASE DISC” appears on
the display.
Press a CD Play/Pause (t/J) button to start erasing.
4
Press the FINALIZE/ERASE button in the stop mode.
3
< Each time the ERASE button is pressed, the display changes as
follows:
The track(s) will be erased.
After erasure completes, the display will return to its ordinary
appearance (total number of tracks and total playback time).
< Do not turn off the power or disconnect the power cord during
erasure.
< During erasure, buttons will not function when pushed.
< Erasure cannot be undone! Be sure that you want to erase the
contents of a CD before starting.
< If a finalized disc is loaded, “UNFINALIZE” is displayed. Because
a finalized disc cannot be erased, you need to unfinalize it first
(page 37).
38
Page 39

LINE IN PHONO
Recording on a USB Flash Drive (1)
Using this unit, the contents of CDs, cassette tapes and audio input
from other devices by the LINE IN, PHONO jacks and DIGITAL IN terminal can be converted to MP3 format and recorded on USB flash drives.
< This unit can also record to CDs and cassette tapes, but it cannot
simultaneously record to these media and USB flash drives.
< Timer recording cannot use CD or USB recording media.
Q CAUTION
Do not disconnect the USB flash drive during recording. Do
not turn the unit off or disconnect the power cord during
recording. Doing so might cause damage to the AD-RW900
and the connected USB flash drive.
About recorded MP3 files
< When recording, a “RECORD” folder is automatically created and a
subfolder for each source (“CD”, “TAPE”, “LINE”, “PHONO” or “DIGITAL”)
is also created in the “RECORD” folder. MP3 files are added to the
corresponding subfolder.
< File names are assigned automatically with a numerical endings in order.
Insert a USB flash drive into the unit’s USB port.
1
< You cannot record to an external USB flash drive if there is no
free space or the device is write-protected.
< Before recording, check the remaining capacity of the USB flash
drive using a PC. You cannot check the remaining memory
capacity with this unit.
Press the SOURCE button repeatedly to select the source
2
to be recorded (CD, TAPE, or LINE).
ENGLISH
When recorded from a CD
“CD001.MP3”, “CD002.MP3” …
If there are, for example, files named “CD004.MP3” and “CD009.MP3”
in the USB folder already, and you make a recording, the next new
file will be named “CD010.MP3”.
< If you start recording a track/file that has already started playing,
the elapsed time of the track/file being recorded that appears
on the display will be the same as the elapsed time of the
current track that is also shown on the display.
When recorded from a cassette tape
“T001.MP3”, “ T002.MP3“ …
When record from an external source
“L001.MP3”, “L002.MP3“ …
<
During recording from tape or external source input, you can divide
the file manually (page41). In this case, consecutive numbers are
added to the ends of the file names.
Example:
For example, if you manually divide “T001.MP3" during recording,
the new track names will be “T001.MP3” and “T002.MP3”.
< This unit can record up to 999files to a USB flash drive. However,
if the USB flash drive already contains files, those files will be
included in the maximum total of 999 files when recording.
Press the RECORD USB button to start recording standby.
3
The red indicator above the RECORD USB button and the
icon on the display blink.
< To stop recording, press the USB Stop (H) button.
< The recordable time for one file is less than 600 minutes.
< Tracks recorded onto a USB flash drive are converted to MP3 files at
a bit rate of 128kbps.
Continued on the next page
39
Page 40

LINE IN PHONO
Recording on a USB Flash Drive (2)
(When recording from a tape , LINE IN or PHONO)
4
Adjust the recording level.
Before recording, adjust the recording level. Failure to do so
could cause the recorded sound to be distorted or noisy.
1. Play the source (cassette tape or external source) to be
recorded.
2. Use the REC LEVEL knob to adjust the recording level so that
the loudest sound never lights the “OVER” indicator on the
peak level meter.
Prepare the recording source.
5
Recording from CD
To record all the tracks/files on a CD, stop the disc first. To record
only some of the tracks/files on a CD, pause at the beginning of
the part that you want to record.
You can also record tracks in programmed order. For information
about how to set the program, see pages 25-27.
Recording from cassette tape
To record the entire tape, rewind the tape to its starting point. To
record from the middle of a tape, stop or pause at the point from
where you want to start recording.
Select the DOLBY NR (noise reduction) setting (page10).
To record from a single tape side, set the REV MODE switch to
u, and set the playback direction using the Reverse (g) or
Forward (t) play button. Then press the TAPE Stop (H) button.
To record from both tape sides, set the REV MODE switch to j,
and set the playback direction to t. If you set the recording direction to g, recording will be of “side B” only.
< Different sources to be recorded have different volumes. In
order to record at the optimal volume for each source, it is
necessary to adjust the recording level for each source.
< You cannot adjust the recording level when recording from
CD or DIGITAL source.
Recording from an external source
Prepare to start playback of the source device.
Example: Set the source selection of an amplifier.
Set the playback media in a connected player.
To record from a tuner, tune in a station.
40
Page 41

Press the RECORD USB button again to start recording.
6
When recording from an external source, you must also start
playback of that source.
The red indicator above the RECORD USB button and the
icon on the display stop blinking.
Q CAUTION
Do not turn the unit off or disconnect the power cord
during recording. Doing so could damage the unit and
connected devices.
Manually dividing files
(adding track numbers during recording)
When you are recording from a tape or device connected to the LINE
IN or PHONO jacks or recording from such a device has been paused,
you can press the RECORD USB button to divide the recording into
tracks and create new file names.
Dividing tracks takes about a few seconds.
You cannot manually divide tracks when recording from CDs. (When
recording from a CD, tracks are divided automatically.)
ENGLISH
< If the USB flash drive runs out of free space during recording,
recording stops automatically.
< To pause recording temporarily, press the USB Play/Pause (t/J)
button. A second press of the button resumes recording.
Recording from CD or cassette tape
When source playback stops, recording also automatically stops.
To stop recording, press the USB Stop (H) button. Doing this also
stops playback of the recording source.
Recording from an external source
When source playback stops, recording does not automatically
stop. Press the USB Stop (H) button to stop recording.
When recording from the LINE inputs:
During file division, a gap will be left in the recording.
< This unit cannot divide an already recorded MP3 file. This function
only works during recording.
< Consecutive numbers are added to the end of the file names after
division.
Example:
If you manually divide “T001.MP3” during recording, the new
track names will be "T001.MP3" and "T002.MP3".
41
Page 42

LINE IN PHONO
Erasing Files from a USB Flash Drive
Q CAUTION
Do not disconnect the USB flash drive during erasing. Do not
turn the unit off or disconnect the power cord during erasing.
Doing so might cause damage to the AD-RW900 and the
connected USB flash drive.
Erasing a file
Start playing the file that you want to delete (page22).
1
Press the ERASE button.
2
Recording on a Cassette Tape (1)
Using this unit, the contents of CDs, USB flash drives and audio input
from other devices by the LINE IN and PHONO jacks or the DIGITAL IN
terminal can be recorded on cassette tapes.
You can record on Normal (type ) and Chrome (type ) tapes with
this unit. Recording on Metal (type ) is not supported by this unit.
< You can record on a single or on both sides of the tape.
< This unit can also record to CDs and USB flash drives, but it cannot
simultaneously record to these media and cassette tapes.
Put a cassette tape in the compartment.
1
“Erase file?” appears on the display.
Within 6seconds, press the ERASE button again.
3
“Erasing” appears on the display, the file currently being played is
erased, and playback stops.
< If the erasure prevention tabs of the cassette tape have been
broken off, cover the holes using pieces of adhesive tape.
Press the SOURCE button repeatedly to select the source
2
to be recorded (CD, USB, LINE IN, PHONO or DIGITAL).
42
Page 43

Set the reverse mode setting using the REV MODE switch,
3
and set the recording direction.
To record on a single tape side, set the REV MODE switch to
u, and set the recording direction using the Forward (t) or
Reverse (g) play button. Then press the TAPE Stop (H) button.
To record on both tape sides, set the REV MODE switch to j
or p, and set the recording direction to t. If you set the
recording direction to g, only “side B” will be recorded on.
Set the DOLBY NR (noise reduction) switch to ON or OFF.
4
Adjust the recording level.
6
Before recording, adjust the recording level. Failure to do so
could cause the recorded sound to be distorted or noisy.
1. Play the source (external source) to be recorded.
2. Use the REC LEVEL knob to adjust the recording level so that
the loudest sound does not continually exceed the “0” indicator on the peak level meter.
ENGLISH
For information about the DOLBY NR function, see page10.
Press the RECORD TAPE button to enter recording
5
standby mode.
The red indicator above the RECORD TAPE button and the
icons on the display blink.
< To stop recording, press the TAPE Stop (H) button.
< Different sources to be recorded have different volumes. In
order to record at the optimal volume for each source, it is
necessary to adjust the recording level for each source.
Prepare the recording source.
7
Recording from CD
To record all the tracks/files on a CD, stop the disc first. To record
only some of the tracks/files on a CD, pause at the beginning of
the part that you want to record.
You can also record tracks in programmed order. For information
about how to set the program, see pages 25-27.
Recording from USB flash drive
To record the entire contents of the USB flash drive, put the unit
into stop mode. To record from the middle of the USB flash drive,
pause at the point from where you want to start recording.
You can also record tracks in programmed order. For information
about how to set the program, see pages 25-27.
< See page50 for information about the playback order of
MP3 files.
Recording from an external source
Prepare to start playback of the source device.
Example: Set the source selection of an amplifier.
Set the playback media in a connected player.
To record from a tuner, tune in a station.
Continued on the next page
43
Page 44

LINE IN
PHONO
Recording on a Cassette Tape (2)
Press the RECORD TAPE button again to start recording.
8
When recording from an external source, you must also start
playback of the source.
The red indicator above the RECORD TAPE button and the
icon on the display stop blinking.
Q CAUTION
Do not turn the unit off or disconnect the power cord
during recording. Doing so could damage the unit and
connected devices.
Erasing recordings
With every new recording, the contents of a cassette tape will be
overwritten (the previous recording is erased). You can erase a cassette tape by setting the recording level to MIN to record silence.
< We recommend that you select a source for recording that does
not output any sound during the erasing process.
Press the RECORD TAPE button to start recording standby.
1
Set the REC LEVEL control to the minimum position
2
(MIN).
< To stop recording temporarily, press the TAPE Pause (J) button.
Press the button again to resume recording.
Recording from CD or USB flash drive
When source playback stops, recording also automatically stops.
To stop recording, press the TAPE Stop (H) button. Doing this
also stops playback of the recording source.
< During auto-reverse recording to a tape, if “side A” of the tape
ends in the middle of a track/file while recording from a CD or
USB flash drive, the unit starts recording again on “side B” from
the beginning of the track/file that had been interrupted.
Recording from an external source
When source playback stops, recording does not automatically
stop. Press the TAPE Stop (H) button to stop recording.
Press the Reverse (g) or Forward (t) play button to start
3
erasing (by recording silence).
44
Page 45

Timer-Controlled Playback and Recording (1)
Wall socket
T
r
set your tuner as r
AD-RW900
Connecting a commercially available timer to your audio setup lets
you wake up to your favorite music or start recording at specified
times.
< The source for timer playback must be CD, TAPE or USB. Timer
playback does not work with external devices connected to the
LINE inputs.
< The timer recording source can only be an external device
connected to the LINE inputs. And the timer recording can only
record to cassette tape.
Connections
Referring to the illustration below, connect your audio equipment.
Timer
Timer-Controlled Playback (
< The source for timer playback must be CD, TAPE or USB. Timer
playback does not work with an external device connected to the
LINE input.
Connect this unit and a stereo system to a commercially
1
available audio timer (see left column).
Make sure that the outlet that the timer is plugged into is receiving power when it is being used.
Set the power switch of all components to ON.
2
Prepare the source for timer playback.
3
When you set a cassette tape
e Set the REV MODE switch to the desired position. To make
both sides play continuously, set the REV MODE switch to
the p position.
e Set the DOLBY NR switch. (page10).
Playback always starts from “side A”.
)
ENGLISH
Q Turn off the power of all equipment before making
Audio source
o make a timer-controlled
ecording of a radio program,
Set the input/output selectors
and other options to their
proper positions.
connections.
< Read the instructions of each component you intend to use with
this unit.
< Be sure to connect each plug securely. To prevent hum and
noise, do not bundle the connection cords.
equired.
Signal ow
during
recording
Amplier
Signal ow
during
playback
Set the CD-TAPE-USB switch to the desired source for
4
timer playback.
Set the OFF-PLAY-REC switch to the PLAY position.
5
“TIMER” appears on the AD-RW900’s display.
Continued on the next page
45
Page 46

Timer-Controlled Playback and Recording (2)
Set the audio timer to your desired start (power on) and
6
stop (power off) times.
When this setting is completed, the power to all components
should be turned off.
At this time, do not press the AD-RW900 POWER button.
Leave the button pushed in (the on position). If the
POWER button is in the off position, timer playback will
not function.
When the preset start time is reached, power will be supplied
and playback will start automatically.
< When you do not want to use the timer, set the OFF-PLAY-REC
switch to the OFF position.
Timer-Controlled Recording (
< The timer recording source can only be an external device
connected to the LINE inputs. And the timer recording can only
record to cassette tape.
< The recording level is set to 0 dB; it cannot be adjusted.
)
Set the CD-TAPE-USB switch to TAPE.
4
< This unit cannot record to CDs and USB flash drives with the
timer recording.
Set the OFF-PLAY-REC switch to the REC position.
5
“TIMER” and appear on the AD-RW900’s display.
(Example: Recording a broadcast program)
Connect this unit and a stereo system to a commercially
1
available audio timer (see page 45).
Set the power switches of all components to ON.
2
Prepare the cassette tape that you want to record to with
3
timer recording.
Recording always starts from “side A”.
To record on a single tape side, set the REV MODE switch to u.
To record on both tape sides, set the REV MODE switch to j
or p.
Set the DOLBY NR switch (page10).
If the erasure prevention tabs of the cassette tape have been
broken off, cover the holes using pieces of adhesive tape.
You can record on Normal (type ) and Chrome (type ) tapes
with this unit.
Tune in the station that you want to record (when
6
recording from radio).
Set the audio timer to your desired start (power on) and
7
stop (power off) times.
When this setting is completed, the power to all components
will be switched off.
At this time, do not press the AD-RW900 POWER button.
Leave the button pushed in (the on position). If the
POWER button is in the off position, timer recording will
not function.
When the preset start time is reached, power will be supplied
and recording will start automatically.
< When you do not want to use the timer, be sure to set the OFF-
PLAY-REC switch to the OFF position to prevent accidentally
recording over an important cassette tape.
NOTE
If you have previously used the cassette, and the tape is stopped
part of the way through “side B” of the cassette, timer recording will
then start part of the way through “side A”. Always bear this in mind,
so that you do not accidentally erase any important recordings. You
should take special note of this when recording more than once on
the same cassette using the timer recording function.
46
Page 47

Connection illustration
AD-RW900 (Back side)
Recording to a Computer (1)
Computer
ENGLISH
On its rear panel, this unit has a USB port for the output of audio
signals. When connected to a computer by USB cable, this unit can
convert audio signals to digital data and send it to the computer.
< Use a commercially available cable to make the connection.
Connecting with a computer
Turn the computer power on.
1
Confirm that the OS has started properly.
Connect this unit to a computer using a USB cable.
2
Press the POWER button to turn the unit on.
3
When the computer and this unit are connected, the
computer should automatically detect this unit’s USB
port and recognize it as “USB Audio CODEC”.
Selecting the recording source
This unit will send the audio being played back to the computer.
Press the SOURCE button to select the playback source (page 19).
Adjusting the recording level
When connected to a computer by USB, use the REC LEVEL knob to
adjust the level of the audio data sent to the computer.
Check the computer recording software or the signal from this unit
being played back by the computer, and use the LEVEL knob to
increase the level so that it is as loud as possible without distortion.
< Even when connected to a computer by USB, the REC LEVEL knob
also adjusts the recording level when in recording standby and
during recording.
< If the recording level can also be adjusted by the computer
recording software that you are using, set its recording level
approximately to the center position of the provided scale before
adjusting the level sent by this unit.
< Avoid the following things when connected to a computer by USB
and recording audio because they could cause the computer to
malfunction. Always quit the computer recording software before
doing any of the following.
N Disconnecting the USB cable
N Turning this unit off
Continued on the next page
47
Page 48

Troubleshooting (1)Recording to a Computer (2)
< If the volume setting is too high, the sound will distort, so you
should use the Windows Control Panel to adjust the volume.
Adjusting the volume (Windows 7)
Follow these procedures to adjust the volume.
Click Start above the Windows icon.
1
Open the Sound Control Panel and click the Recording
2
tab. Select Microphone (USB Audio CODEC), click the
Properties button and open the Levels tab.
Adjust the mic volume level so that the sound does not
3
distort.
< This product is designed to help you record and reproduce
sound works to which you own the copyright, or where you have
obtained permission from the copyright holder or the rightful
licensor. Unless you own the copyright, or have obtained the
appropriate permission from the copyright holder or the rightful
licensor, your unauthorized recording, reproduction or distribution
thereof may result in severe criminal penalties under copyright
laws and international copyright treaties. If you are uncertain about
your rights, contact your legal advisor. Under no circumstances
will TEAC Corporation be responsible for the consequences of any
illegal copying performed using the recorder.
If you experience any problems with this unit, please take the time to
read through these pages and see if you can solve the problem yourself before you call your dealer.
Moreover, the problem might be caused by something other than this
unit. Confirm that connected devices are also being used properly.
General
No power
e Check the connection to the AC power source. Confirm that the
AC source is not a switched outlet, and, if it is, that the switch is
turned on. Confirm that there is power to the AC outlet by plugging another device such as a lamp or a fan into the outlet.
Remote control does not work.
e Press the POWER button of the main unit to turn it on.
e If the batteries are exhausted, change the batteries.
e Use the remote control within its effective range (16ft/5m) and
point it toward the remote sensor on the front panel.
e Make sure that there are no obstructions between the remote
control and the main unit.
e If a fluorescent light is near the unit, turn it off.
Other devices with remote controls operate incorrectly.
e Other devices with remote controls might operate incorrectly
because of infrared light “overspill” when you operate the remote
control of this unit. If that is the case, use the control buttons
on this unit instead of on the remote control to operate the
AD-RW900.
Buttons do not work properly.
e If another operation is still in process, wait a moment and try
again.
No sound or only a very low sound level is heard.
e Check the connections to the amplifier.
e Check that the speakers and other audio components are con-
nected securely.
e Check the operation of the connected component.
e There might be a +/_ short in a speaker cable. Check the
speaker cables.
e Select the correct input source using the SOURCE button.
Severe hum or noise is heard.
e Place the unit as far away from TVs as possible.
e Do not bundle audio cables with speaker cables or power cord.
48
Page 49

CD Recorder
Cassette tape recorder
Will not play
e Load a disc with the label side up.
e If the disc is dirty, clean the surface of the disc. If the disc is
scratched or has any sticky substance on its surface, do not play
the disc until you have corrected the condition of the disc. Never
under any circumstances use after-market stick-on labels or “disc
enhancement” devices that sit on top of or wrap around a disc.
e If a blank disc has been loaded, load a prerecorded disc.
e Depending on the disc and other factors, playback of some
CD-R/RW discs might not be possible. Try again with another disc.
e You cannot play unfinalized CD-R/RW discs. Finalize such a disc in
a CD recorder and try again.
e If moisture condensation has occurred inside of the unit, leave
the unit for one or two hours with the power turned on.
Sound skips
e Place the unit in a stable place to avoid vibrations and shocks.
e If the disc is dirty, clean its surface.
e Do not use scratched, damaged or warped discs.
Recording is not possible.
e A playback-only disc or finalized disc has been loaded. Use a
recordable disc.
e The recording level is too low. Adjust the recording level.
e The remaining recording time of a CD-R is not sufficient. Use
another disc.
e If the remaining recording time of a CD-RW is not sufficient, erase
the last tracks or replace the disc.
e Synchronous recording does not start if the sound coming in is
quieter than the auto track level.
The numbers and lengths of tracks differ from those of the
original tracks.
e The unit recognizes the beginning of a track by detecting the
auto track level of sound. The track number may not be applied
to the silent part.
Cassette tape compartment does not close.
e The cassette tape is not properly loaded. Reinsert it.
Sound quality is poor
e Clean the heads (page6).
e If a head is magnetized, demagnetize it with a head demagnetizer.
e Check that the Dolby NR switch is set to the same position as
when the recording was made.
Playback speed seems somewhat fast or slow.
e Check the pitch control setting (page30).
Auto reverse does not occur.
e Set the REV MODE switch to j or p.
e If the REV MODE switch is set to j, start playback from the tape
side facing you (“side A”).
Cannot record
e If the erasure prevention tabs on top of the cassette are broken
off, cover the holes using pieces of adhesive tape.
e Check the recording level setting (page43).
USB
No sound even if the USB Play/Pause (t/J) button is pressed
e Confirm that there are MP3 files on the USB flash drive.
e File formats other than MP3 (e.g. MPEG 1 LAYER 2 file) and WMA
cannot be played.
Cannot record
e Confirm that the USB flash drive has free space.
e Confirm that the USB flash drive is not locked.
e When record from an analog source, check the recording level
setting (page40).
ENGLISH
Continued on the next page
49
Page 50

001 “ROOT”
Troubleshooting (2)
MP3 Playback Order
MP3/WMA files
Unknown characters are displayed on the display.
e This unit cannot display double-byte symbols and characters
(such as Japanese and Chinese) correctly. MP3 file names must
only be alphanumeric characters to be shown properly.
MP3 files
“Title No” (title information unavailable), “Artist No” (artist
information unavailable) or “Album No” (album information
unavailable) appears on the display.
e ID3 tag information for the music file is missing. Edit the title, art-
ist and/or album information of the song on a PC using a suitable
application.
Since this device uses a microcontroller, external noise and
other interference can cause the unit to malfunction. If this
occurs, turn the power off and, after waiting for about one
minute, restart operation.
MP3 files on a CD or a USB flash drive can be stored in folders in the
same way that files are managed on a computer. Moreover, multiple
folders can be contained inside another folder.
Here is an example of the file and folder structure of an MP3
disc or a USB flash drive, showing the order of the folders
(001 “ROOT” to 005) and the playback order of the files
(
1 to 9
1
2
002 folder
003 folder
).
MP3 file
MP3 file
3
4
004 folder
MP3 file
MP3 file
5
MP3 file
folder
7
005 folder
MP3 file
6
MP3 file
8
MP3 file
9
MP3 file
50
Page 51

Specifications
CD recorder
Pickup ...................................3-beam, semiconductor laser
Recording media .........................CD-R/CD-RW discs for music
Recording sampling frequency ...............................44.1 kHz
Frequency response .....................................20 Hz–20 kHz
(during playback: ±1.5 dB,
during recording/playback: ±2.0 dB)
S/N ratio .............................90 dB or higher (during playback)
90 dB or higher (during digital recording/playback)
80 dB or higher (during analog recording/playback)
Dynamic range ......................86 dB or higher (during playback)
86 dB or higher (during digital recording/playback)
78 dB or higher (during analog recording/playback)
Total harmonic distortion ............0.05% or lower (during playback)
0.05% or lower (during recording/playback)
Analog output ..............................................2.0 V (RCA)
Cassette deck
Track format .................................4-track, 2-channel stereo
Head structure. . . . . . . . . . . . . . . . recording/playback head ×1 (reversible)
Erasure head ×1
Tape type ...........................................C-60 cassette tape
Tape speed ...............................................4.76 cm/sec
Motor ..............................................DC servomotor ×1
Pitch control ..............................about ±10% (playback only)
Wow and flutter ....................................... 0.25% (W.RMS)
Frequency response (total) ...............chrome: 50–12,000 Hz ±3 dB
normal: 50–12,000 Hz ±3 dB
S/N ratio (total) ............... 59 dB (Dolby NR off, 3% THD level WTD)
69 dB (Dolby NR on, 5 kHz or higher)
Winding time ............................... about 150 sec (C-60 tape)
Line input (RCA) .............0.46 V (input impedance 20 kΩ or higher)
Line output (RCA). . . . . . . . . . . . .0.46 V (load impedance 50 kΩ or higher)
Headphone output ......................................10 mW/32 Ω
PHONO input
Input sensitivity. . . . . . . . . . . . . . . . . . . . . . . . . . . . . . . . . . . . . . . . . . 2.5 mV, 47 kΩ
Digital audio input
Input sampling frequency .............................32, 44.1, 48 kHz
USB
USB port (A-type)
Playable MP3
Supported standard ...................MPEG-1/2 Audio Layer-3
File name extension ...................................... “.mp3”
Sampling frequency ............................32, 44.1, 48 kHz
Bit rate ..............................................8–320 kbps
Maximum number of folders ................................255
Maximum number of files ...................................999
Playable WMA
Supported standard ............Windows Media Audio Standard
(DRM not compatible)
File name extension ...................................... “.wma”
Recording format (MP3)
Recording bit rate .....................................128 kbps
Sampling frequency ...................................44.1 kHz
USB port (B-type) ...................................................×1
Computer system requirements
Connection .....................................USB 2.0 full-speed
(12 Mbps, equivalent to USB 1.1)
Driver
Windows ......................... WDM (Windows standard driver)
Mac OS X ...................Core Audio (Macintosh standard driver)
Verified operating systems
Windows .................. Windows XP, Windows Vista, Windows 7
Macintosh ......................................... Mac OS X 10.5.8
<
Operation with standard computers that meet the above requirements
has been confirmed, but operation with every computer that meets
the above requirements is not guaranteed. Even with computers that
meet the same requirement, each computer will have different processing capabilities according to their design specifications and operating
environments.
General
Power .............................AC 230 V, 50 Hz (Europe/UK Model)
AC 120 V/230 V, 50-60 Hz (General Export Model)
Power consumption .............................................28 W
Dimensions (W × H × D) ..435 × 145 × 288 mm (including protrusions)
Weight ...............................................5.6 kg (12 1/3 lb)
Operating temperature range ..........................+5˚C to +35˚C
Operating humidity range ...............5% to 85% (no condensation)
Storage temperature range ............................−20˚C to +55˚C
ENGLISH
< Specifications and appearance are subject to change without
notice in order to improve the product.
< Illustrations in this manual might differ in some aspects from the
actual model.
Included accessories
Remote control (RC-1283) ×1
Batteries (AAA) for remote control unit ×2
Stereo RCA pin cable ×2
Owner’s manual (this document) ×1
Warranty card ×1
51
Page 52

Cd
o N'exposez pas cet appareil aux gouttes ni aux éclaboussures.
o Ne placez pas d'objet rempli de liquide sur l'appareil, comme
par exemple un vase.
o N’installez pas cet appareil dans un espace confiné comme une
bibliothèque ou un meuble similaire.
o L’appareil tire un courant nominal de veille de la prise secteur
quand son interrupteur POWER ou STANDBY/ON n’est pas en
position ON.
o L’appareil doit être placé suffisamment près de la prise de
courant pour que vous puissiez à tout moment atteindre
facilement la fiche du cordon d’alimentation
o La fiche secteur est utilisée comme dispositif de déconnexion
et doit donc toujours rester disponible.
o Les produits de Classe sont équipés d'un cordon
d'alimentation ayant une fiche de terre. Le cordon de ces
produits doit être branché dans une prise de terre.
o Si le produit utilise des batteries (y compris un pack d'accus ou
des piles), elles ne doivent pas être exposées au soleil, au feu ou
à une chaleur excessive.
o PRÉCAUTION pour les produits utilisant des batteries au
lithium remplaçables: il existe un danger d'explosion en cas de
remplacement par un type de batterie incorrect. Remplacez-les
par des modèles identiques ou équivalents.
o Des précautions doivent être prises pour l'emploi d'écouteurs
ou d'un casque avec le produit car une pression acoustique
(volume) excessive dans les écouteurs ou dans le casque peut
provoquer une perte d’audition.
Pour les consommateurs européens
Mise au rebut des équipements électriques et électroniques
(a) Tout équipement électrique et électronique doit être traité séparément
de la collecte municipale d'ordures ménagères dans des points de
collecte désignés par le gouvernement ou les autorités locales.
(b) En vous débarrassant correctement des équipements électriques
et électroniques, vous contribuerez à la sauvegarde de précieuses
ressources et à la prévention de potentiels effets négatifs sur la santé
humaine et l'environnement.
(c) Le traitement incorrect des déchets d'équipements électriques et
électroniques peut avoir des effets graves sur l'environnement et la
santé humaine en raison de la présence de substances dangereuses
dans les équipements.
(d) Le symbole de déchets d'équipements électriques et
électroniques (DEEE), qui représente une poubelle à roulettes
barrée d'une croix, indique que les équipements électriques
et électroniques doivent être collectés et traités séparément
des déchets ménagers.
(e) Des systèmes de retour et de collecte sont disponibles pour l'utilisateur
final. Pour des informations plus détaillées sur la mise au rebut des
vieux équipements électriques et électroniques, veuillez contacter
votre mairie, le service d'ordures ménagères ou le magasin dans lequel
vous avez acquis l'équipement.
Mise au rebut des batteries et/ou accumulateurs
(a) Les batteries et/ou accumulateurs hors d'usage doivent être traités
séparément de la collecte municipale d'ordures ménagères dans des
points de collecte désignés par le gouvernement ou les autorités
locales.
(b) En vous débarrassant correctement des batteries et/ou accumulateurs
hors d'usage, vous contribuerez à la sauvegarde de précieuses
ressources et à la prévention de potentiels effets négatifs sur la santé
humaine et l'environnement.
(c) Le traitement incorrect des batteries et/ou accumulateurs hors d'usage
peut avoir des effets graves sur l'environnement et la santé humaine
car ils contiennent des substances dangereuses.
(d) Le symbole de déchets d'équipements électriques et
électroniques (DEEE), qui représente une poubelle à
roulettes barrée d'une croix, indique que les batteries et/ou
accumulateurs doivent être collectés et traités séparément
des déchets ménagers.
Si une batterie ou un accumulateur contient plus que les valeurs
spécifiées de plomb (Pb), mercure (Hg) et/ou cadmium (Cd) telles
que définies dans la directive sur les batteries (2006/66/EC), alors les
symboles chimiques de ces éléments seront indiqués sous le symbole
DEEE.
(e) Des systèmes de retour et de collecte sont disponibles pour l'utilisateur
final. Pour des informations plus détaillées sur la mise au rebut des
batteries et/ou accumulateurs, veuillez contacter votre mairie, le service
d'ordures ménagères ou le magasin dans lequel vous les avez achetés.
Pb, Hg,
52
Page 53

Sommaire
DIGITAL
DIGITAL
LINE IN
PHONO
DIGITAL
DIGITAL
LINE IN
Ce que vous pouvez faire avec cet appareil
Nous vous remercions d’avoir choisi ce produit TEAC. Lisez ce
manuel avec attention pour tirer les meilleures performances
de cette unité.
Ce que vous pouvez faire avec cet appareil ..................... 53
Avant l’utilisation ...............................................54
Disques ........................................................55
Lecteurs flash USB .............................................. 56
Fichiers MP3 .................................................... 57
Cassettes ....................................................... 57
Branchements .................................................. 58
Identification des parties (unité principale) ...................... 60
Identification des parties (télécommande) ...................... 62
Télécommande ................................................63
Écran ........................................................... 64
Fonctionnement de base .......................................66
Écoute d'un CD .................................................68
Écoute de fichiers sur un lecteur flash USB (MP3/WMA) ......... 70
Lecture aléatoire ...............................................72
Lecture en boucle .............................................. 72
Lecture programmée ...........................................73
Écoute d'une cassette .......................................... 76
À propos de l'enregistrement ................................... 78
Avant l'enregistrement ......................................... 79
Enregistrement sur CD .........................................79
Enregistrement automatique sur CD ............................ 82
Finalisation ..................................................... 84
Définalisation (CD-RW uniquement) ............................85
Effacement de pistes d'un disque (CD-RW uniquement) ........86
Enregistrement sur un lecteur flash USB ........................ 87
Effacement de fichiers à partir d’un lecteur flash USB ...........90
Enregistrement sur cassette ....................................90
Lecture et enregistrement pilotés par minuterie ................ 93
Lecture
Enregistrement
LINE IN
PHONO
LINE IN
PHONO
LINE IN
PHONO
CD/CD-R/CD-RW (CD audio/MP3/WMA)
e “Écoute d'un CD” en pages68-69
Cassette
e “Écoute d'une cassette” en pages76-78
Fichiers MP3/WMA sur un lecteur flash USB
e “Écoute de fichiers sur un lecteur flash USB
(MP3/WMA)” en pages70-71
Enregistrez sur un lecteur flash USB à partir
d’un CD, une cassette audio ou un appareil
extérieur connecté à cet appareil
FRANÇAIS
e “Enregistrement sur un lecteur flash USB” en
pages87-89
Enregistrez sur une cassette audio à partir
d’un CD, un lecteur flash USB ou un appareil
extérieur connecté à cet appareil
e “Enregistrement sur cassette” en
pages90-92
Enregistrement sur un CD depuis une
cassette ou une source externe branchée à
cette unité
e “Enregistrement sur CD” en pages 79-82
Enregistrez sur ordinateur à partir d’un CD,
une cassette audio, un lecteur flash USB
ou un appareil extérieur connecté à cet
appareil
e “Enregistrement dans un ordinateur” en
pages 95-96
Enregistrement dans un ordinateur ............................. 95
Dépannage .................................................... 96
Ordre de lecture MP3 ........................................... 98
Caractéristiques techniques .................................... 99
Fonctionnement avec minuterie
Nécessite une minuterie du commerce
e “Lecture pilotée par minuterie”
en pages93-94
e “Enregistrement piloté par
minuterie” en page94
53
Page 54

Avant l’utilisation
Cabestan
enregistrement
Tête d’effacement
Contenu de l'emballage
Vérifiez que les accessoires livrés en standard sont inclus.
Télécommande (RC-1283) × 1
Pile (AAA) pour télécommande × 2
Câble RCA/cinch stéréo × 2
Mode d'emploi (ce document) × 1
< Conservez ce mode d'emploi dans un endroit sûr pour référence
ultérieure.
Carte de garantie × 1
< Ne placez pas l'unité sur un amplificateur, un récepteur ou tout
autre dispositif générant de la chaleur.
< Quand cette unité est en service, allumer un téléviseur à proximité
peut entraîner l’apparition de lignes sur l’écran de celui-ci, en
fonction de la fréquence de la télédiffusion. Ce n’est pas un
mauvais fonctionnement de l’unité ni du téléviseur. Si vous voyez
de telles lignes, éloignez l'unité du téléviseur.
Attention à la condensation
Si l’unité est déplacée d’un endroit froid à un endroit chaud, ou
utilisée après un changement soudain de température, il existe un
danger de condensation; la vapeur de l’air peut se condenser sur
le mécanisme interne, empêchant un bon fonctionnement. Pour
empêcher cela, ou si cela se produit, laissez l'unité allumée une heure
ou deux. Elle se stabilisera alors à la température ambiante.
Entretien
Si la surface de l'unité est sale, essuyez-la avec un chiffon doux ou
utilisez un détergent liquide léger dilué. Laissez la surface de l'unité
sécher complètement avant utilisation.
Q
ATTENTION
< Ne déplacez pas l'unité durant la lecture de CD.
Durant la lecture, le disque tourne à haute vitesse. Ne soulevez
et ne déplacez pas l'unité durant la lecture. Cela pourrait
endommager le disque ou l'unité.
< La tension d’alimentation de l'unité doit correspondre à la tension
imprimée sur la face arrière. Si vous avez des doutes à ce sujet,
consultez un électricien.
< N’ouvrez pas le boîtier car cela peut endommager le circuit ou
causer un choc électrique. Si un objet étranger pénètre dans
l’unité, consultez votre revendeur ou le service après-vente.
< Quand vous débranchez le cordon d'alimentation de la prise
secteur, tirez toujours sur sa fiche, jamais sur le cordon.
< Retirez toujours le disque avant de déplacer ou de transporter
cette unité. Transporter cette unité avec un disque à l'intérieur
peut entraîner un mauvais fonctionnement.
Emplacement de l'unité
Q Par sécurité, débranchez le cordon d'alimentation de la prise
secteur avant tout nettoyage.
< Ne vaporisez jamais du liquide directement sur cette unité.
< N’utilisez pas de diluant ni d'alcool car ils peuvent endommager la
surface de l’unité.
Nettoyage et démagnétisation de la platine cassette
Nettoyage
Une tête sale peut entraîner une qualité sonore médiocre ou
des sauts du son. La saleté sur le galet presseur de bande peut
entraîner un coincement de la bande.
Nettoyez la tête, les galets presseurs et les cabestans à l'aide un
coton-tige humidifié avec un liquide de nettoyage du commerce
environ toutes les 10 heures d'utilisation.
Tête de lecture/
Galet presseur
< Choisissez soigneusement l’emplacement de votre unité. Évitez
de l’exposer directement aux rayons solaires ou à une source
de chaleur. Évitez aussi les endroits sujets aux vibrations, à une
poussière excessive, à la chaleur, au froid et à l’humidité.
< Comme l’unité peut chauffer durant l’utilisation, laissez donc
toujours un espace suffisant autour d'elle pour la ventilation.
54
Démagnétisation
Quand la tête est magnétisée, cela accroît le bruit et gêne la
transmission des notes aiguës.
Si ces problèmes surviennent, démagnétisez la tête à l'aide d'un
démagnétiseur de tête du commerce.
< Ne placez aucune cassette dans le porte-cassette de l'appareil tant
que le liquide de nettoyage n'a pas séché sur la tête.
Page 55

Disques (1)
Disques lisibles par cette unité
Les CD (12 cm et 8 cm) portant le logo “COMPACT disc DIGITAL
AUDIO” peuvent être lus par cette unité.
< Le logo doit être sur le disque ou sur sa pochette.
Les CD-R et CD-RW qui ont été correctement enregistrés au
format CD audio et finalisés, ainsi les CD-R et CD-RW contenant
des fichiers MP3 ou WMA peuvent être lus par cette unité.
Cette unité peut lire les types de disque suivants sans adaptateur. Elle
ne peut lire aucun autre type de disque.
Q La lecture de tout autre type de disque pourrait entraîner
un bruit fort et causer des dommages aux enceintes et à
votre audition. Ne lisez jamais un autre type de disque.
< Selon la qualité du disque et/ou les conditions de l'enregistrement,
certains disques peuvent ne pas être lisibles.
< Cet appareil ne peut pas lire ou reproduire les types de disques
suivants: CD vidéo, CD-ROM, Super CD Audio, DVD Vidéo, DVD
Audio et DVD-ROM.
Veuillez utiliser des CD, CD-R et CD-RW portant le
logo “DIGITAL AUDIO”.
CD
CD-R CD-RW
< Selon la qualité du disque et/ou les conditions de l'enregistrement,
certains CD-R/CD-RW peuvent ne pas être lisibles.
À propos des CD-R/CD-RW
Cette unité peut lire les CD-R et CD-RW ayant été enregistrés au
format CD audio (CD-DA) et au format MP3 ou WMA.
< Les disques créés par un enregistreur de CD doivent être finalisés
pour être utilisés avec cette unité.
FRANÇAIS
Q ATTENTION
Si vous placez un DVD vidéo ou audio, un DVD-ROM ou tout
autre DVD dans le tiroir de disque, l'unité tentera de le lire
et de le faire tourner à haute vitesse. Si vous avez inséré
accidentellement un tel disque, attendez que la rotation
cesse avant de l'éjecter, ceci afin d'éviter d'endommager
le disque (n'essayez pas de retirer le disque tant que
“READING”
< Les disques protégés contre la copie et les disques ne se
conformant pas à la norme CD peuvent ne pas être correctement
lus par cette unité. Si vous utilisez de tels disques dans cette unité,
TEAC Corporation et ses filiales ne pourront être tenues pour
responsables des conséquences quelles qu'elles soient ni garantir
la qualité de reproduction. Si vous rencontrez des problèmes
avec de tels disques non standard, vous devez contacter leurs
diffuseurs.
est affiché à l'écran).
< Selon la qualité du disque et les conditions de l'enregistrement,
certains disques risquent de ne pas pouvoir être lus. Veuillez lire le
mode d'emploi de l'appareil ayant servi à créer le disque.
< En cas d'incertitude quant à la gestion d'un CD-R ou CD-RW,
contactez directement son vendeur.
ATTENTION
< Ne faites pas lire de disque gondolé, déformé ou endommagé.
Faire lire de tels disques pourrait causer des dommages
irréparables aux mécanismes de lecture.
< Si les disques CD-R et CD-RW imprimables employant les
technologies modernes d’impression sont en général acceptable,
les systèmes plus anciens qui utilisent des adhésifs pour
attacher des étiquettes papier à la surface du disque ne sont pas
recommandés.
< Ne collez pas de papiers ou de feuillets protecteurs sur les disques
et n'utilisez aucun aérosol de revêtement protecteur.
< N'utilisez jamais de stabilisateurs. L’utilisation de stabilisateurs
pour CD disponibles dans le commerce pourrait endommager les
mécanismes de cette unité et provoquer son dysfonctionnement.
< N'utilisez pas de disques ayant une forme irrégulière (octogonale,
en forme de cœur, de la taille d'une carte de visite, etc.). De tels CD
pourraient endommager l'unité.
55
Page 56

Disques (2) Lecteurs flash USB
Précautions de manipulation
< Placez toujours le disque sur le tiroir, face sérigraphiée vers le haut.
Les CD ne peuvent être lus ou enregistrés que d'un côté.
< Ne touchez pas le côté du signal (le côté sans étiquette).
Les empreintes de doigt, l'huile et les autres substances peuvent
causer des erreurs pendant la lecture.
< Pour sortir un disque de son boîtier, appuyez sur le centre du
boîtier et soulevez le disque, en le tenant soigneusement par la
tranche.
Comment sortir un disque Comment tenir un disque
Précautions de rangement
< Les disques doivent être rangés dans leurs boîtiers après utilisation
afin d’éviter la poussière et les rayures qui pourraient provoquer
des "sauts" du capteur laser.
< N'exposez pas les disques directement au soleil, à une température
élevée et à l'humidité durant une période prolongée. Une
exposition prolongée à des hautes températures les fera gondoler.
< Les CD-R et CD-RW sont plus sensibles aux effets de la chaleur et
des rayons ultraviolets que les CD du commerce. Il est important
de ne pas les conserver dans des lieux directement exposés au
soleil. Ils doivent aussi être tenus à l'écart des sources de chaleur
telles que les radiateurs et chauffages électriques.
Q
ATTENTION
Ne mettez jamais l’appareil hors tension ni ne déconnectez
un lecteur flash USB quand l’accès est en cours, par exemple,
pendant une écriture, une lecture, un enregistrement ou
l’effacement de fichiers.
Cela pourrait endommager l’AD-RW900 et le lecteur flash USB
connecté.
Compatibilité
< Seules les mémoires flash USB peuvent être utilisées. Toutefois,
certaines mémoires flash USB ne sont pas compatibles avec l’ADRW900.
< Certains lecteurs à mémoire flash qui se chargent par le port USB
ne peuvent pas servir de source.
< Les disques durs, lecteurs de CD/DVD et autres appareils
connectés via USB ne peuvent pas être employés.
< Cette unité ne peut pas copier ni déplacer les fichiers.
< Formats lisibles: FAT12, FAT16, FAT32
< Les formats NTFS, HFS et HFS+ ne peuvent pas être employés.
< Nombre maximal de dossiers lisibles: 255
< Nombre maximal de fichiers lisibles/enregistrables: 999
< En fonction des conditions du lecteur flash USB, cet appareil peut
ne pas être capable de lire les fichiers s’y trouvant ou des sauts
peuvent se produire.
< Pour nettoyer le côté du signal d'un disque, frottez doucement
avec un chiffon doux et sec, du centre vers la périphérie.
La poussière sur les disques peut réduire la qualité du son, c'est
pourquoi il faut les nettoyer et toujours les ranger quand ils sont
propres.
Entretien
< Si un disque est sale, essuyez sa surface d'un mouvement radial (du
trou central vers le bord externe) avec un chiffon sec et doux.
< Ne nettoyez jamais les disques avec des produits chimiques
tels que des aérosols pour disque, des aérosols ou liquides
antistatiques ou du diluant. Ces produits chimiques
provoqueraient des dégâts irréparables à la surface en plastique du
disque.
En cas de doute quant à l'entretien et à la manipulation d'un CD-R ou
CD-RW, lisez les précautions accompagnant le disque ou contactez le
fabricant du disque.
Enregistrement
Cet appareil peut enregistrer un son à partir de CD, cassettes audio et
d’appareils extérieurs connecté, y compris des tuners, sur des lecteurs
flash USB au format MP3. Voir pages 87-89 pour les détails.
56
Page 57

Fichiers MP3
Cassettes (1)
Cet appareil peut lire les fichiers MP3 se trouvant sur des disques
CD-R/CD-RW et des lecteurs flash USB.
< Cette unité peut lire les fichiers MP3 mono et stéréo au format
MPEG-1 Audio Layer 3 et ayant une fréquence d'échantillonnage
de 16 ou 48 kHz et un débit binaire de 320kb/s ou moins.
< Cette unité n'est pas compatible avec les disques ayant été
enregistrés en plusieurs sessions. Seule la première session peut
être lue.
< Reportez-vous à la page 87 pour en savoir plus sur les formats
des fichiers enregistrés sur les lecteurs flash USB en utilisant cet
appareil.
Affichage des informations de fichier
L'écran de cette unité ne peut afficher que les lettres et chiffres à
simple octet.
< Si des informations de fichier utilisent des caractères japonais,
chinois ou autres à double octet, la lecture est possible mais le
nom ne sera pas affiché correctement. Dans de tels cas, “
s'affiche.
Types de cassette
Il existe différents types de cassette.
Cassettes lisibles par cet appareil
Normal (type ) Chrome (type ) Métal (type )
Cassettes qui peuvent être enregistrées sur cette unité
Normal (type ) Chrome (type )
ATTENTION
< N'ouvrez pas une cassette et ne déroulez pas sa bande.
< Ne touchez pas la bande.
Précautions de rangement
< Gardez les cassettes à l'écart des aimants et des éléments
”
magnétisés car cela peut causer du bruit ou effacer le contenu
enregistré.
FRANÇAIS
Précautions à suivre pour préparer des fichiers MP3 à l'aide
d'un ordinateur ou d'un autre appareil
< Incluez toujours l'extension dans le nom de fichier. Cette unité
reconnaît les fichiers MP3 par leur extension de fichier “.mp3”.
< Fermez toujours la session (création d'un disque complet). Cette
unité ne peut pas lire les disques dont la session n'a pas été fermée.
< Lisez attentivement le mode d'emploi du logiciel que vous
employez pour créer le disque de MP3.
Fichiers illisibles ou partiellement lisibles
< Les fichiers sans extension ne peuvent pas être lus. Les fichiers
qui ne sont pas au format MP3 ne peuvent pas être lus même s'ils
portent l'extension “.mp3”.
< Les fichiers à débit binaire variable peuvent ne pas être lus
correctement.
< Si le support multimédia contient plus de 999 fichiers ou 255
dossiers, cet appareil ne peut lire aucun fichier dans le 256e dossier
ou les suivants, ni le 1000e fichier ou les suivants dans un dossier.
< Selon l'état du disque, cette unité peut être incapable de le lire ou
des sauts peuvent survenir.
< Ne laissez pas les cassettes dans un lieu poussiéreux.
< Ne rangez pas les cassettes dans un endroit où règne une forte
température ou humidité.
Types de cassette devant être évités
Les types de cassette suivants peuvent empêcher l'unité de
fonctionner normalement. La bande de telles cassettes peut se
bloquer dans l'unité et causer des problèmes inattendus.
Cassettes déformées
Les cassettes déformées, ayant un défilement de bande instable
ou produisant un bruit anormal durant le bobinage ou le
rembobinage.
Bandes longue durée
Les bandes permettant d'enregistrer durant 90 minutes ou plus
se coincent parfois dans le cabestan car elles sont extrêmement
minces et s'étirent facilement. Évitez de les utiliser si possible.
Bandes détendues
Une bande détendue peut se coincer dans le cabestan ou dans
d'autres pièces.
Retendez la bande en utilisant un crayon ou outil similaire avant
utilisation.
57
Page 58

Normal
Orices de détection
Languette de protection contre
l’
“face A
Cassettes (2)
Branchements
Fonction de détection automatique du type de
bande
Cette platine cassette peut détecter le type de bande utilisé en se
référant aux orifices de détection de la cassette. Veuillez utiliser des
cassettes à orifices de détection.
Métal (type
Chrome (type
(
type
)
)
)
automatique du
type de
bande
Languettes de protection contre l'effacement
accidentel
Les languettes placées sur le dessus de la cassette permettent d'éviter
d'effacer par erreur des enregistrements importants. Il y en a deux sur
chaque cassette – une pour la “face A” et une pour la “face B”.
Une fois ces languettes cassées avec un tournevis ou outil équivalent,
la fonction d'enregistrement ne peut plus être activée par accident.
Sélection de tension
(modèles export généraux/
Amérique du Nord uniquement)
Q Veillez à débrancher le cordon d'alimentation de la prise
secteur avant de changer la position du sélecteur de tension.
1. Repérez le sélecteur de tension (VOLTAGE SELECTOR) sur la face
arrière.
2. À l'aide d'un tournevis plat, réglez-le sur la position appropriée
(230V ou 120V) pour le courant en vigueur dans votre pays.
EN AMÉRIQUE DU NORD, N'UTILISEZ QU'UNE
ALIMENTATION 120V.
eacement accidentel de la
”
“face A”
< Pour enregistrer sur une cassette dont la languette de sécurité
a été cassée, recouvrez le trou en utilisant un morceau de ruban
adhésif. Faites attention de ne pas bloquer les trous de détection
de type.
Dolby NR (réduction de bruit)
Le Dolby NR est conçu pour réduire le souffle de la bande, qui est un
bruit induit par les processus d'enregistrement et de lecture. Cette
platine est équipée d'un système de réduction de bruit Dolby B.
Utilisez le sélecteur DOLBY NR pour commuter On/Off le réducteur
de bruit Dolby NR.
Notes sur la mise sous/hors tension
Quand un amplificateur est branché à l'AD-RW900, allumez ou
éteignez l'AD-RW900 et l'amplificateur dans l'ordre suivant.
À la mise sous tension
1. AD-RW900
2. Amplificateur
À la mise hors tension
1. Amplificateur
2. AD-RW900
< Le système Dolby NR affecte la qualité à la fois de l'enregistrement
et de la lecture. Pour la lecture, veillez à régler le sélecteur DOLBY
NR sur la position qu'il avait lorsque l'enregistrement a été fait.
58
Page 59

Blanc (L)
Rouge (R)
Blanc (L)
Rouge (R)
AD-RW900 (face arrière)
teur
D
Amplicateur
Câble numérique
Câbles RCA
Câbles RCA
optique
Câble USB
Prise
sec
Tourne-disque
REC
PLAY
(OUT)
(IN)
TAPE/MD/CD-R
Q Une fois tous les branchements faits, raccordez la fiche du
cordon d'alimentation à une prise secteur.
< Lisez le mode d'emploi de chaque appareil que vous
comptez employer avec cette unité.
< Assurez-vous que chaque fiche est bien enfoncée. Pour
éviter tout ronflement ou parasite, ne regroupez pas les
câbles de connexion.
A
Prises LINE IN/OUT
Ces prises transmettent les signaux audio analogiques à 2
canaux. Branchez les câbles RCA/cinch fournis.
Veillez à bien connecter:
Fiche blanche e Prise blanche (L: canal gauche)
Fiche rouge e Prise rouge (R: canal droit)
Lecteur de CD,
platine MD, etc.
SORTIE NUMÉRIQUE
D
Prise d'entrée numérique [DIGITAL IN]
Pour enregistrer des signaux audio numériques, reliez cette
prise à la prise de sortie numérique d'un appareil numérique tel
qu'un lecteur de CD à l'aide d'un câble numérique optique du
commerce.
Si la fréquence d'échantillonnage du signal numérique entrant
est changée alors qu'un câble numérique optique est connecté,
elle peut ne pas être correctement détectée (“OPTICAL UNLOCK”
s'ache).
Si cela se produit, débranchez le câble numérique optique
du connecteur puis reconnectez-le après changement de la
fréquence.
Sinon, après avoir changé la fréquence, vous pouvez éteindre
l'unité puis la rallumer.
< Quand la fréquence d’échantillonnage du signal numérique
entrant est de 48kHz, certaines valeurs des caractéristiques audio
peuvent être différentes.
Ordinateur
FRANÇAIS
B
Prises PHONO [PHONO]
< Des cellules à aimant mobile (MM) peuvent être employées.
C
Masse du signal [SIGNAL GND]
< Ce n’est pas une terre de sécurité.
< Si le fil de masse du tourne-disque n'est pas connecté à ce bornier,
un ronflement peut se faire entendre.
Connectez le câble à fiches RCA du tourne-disque aux prises
PHONO.
Veillez à bien connecter:
Fiche blanche e Prise blanche (L: canal gauche)
Fiche rouge e Prise rouge (R: canal droit)
Connectez le fil de masse du tourne-disque à ce bornier.
E
Prise USB (type B) [USB]
Reliez-la au port USB d'un ordinateur pour convertir le son de
cette unité en un signal numérique et l'envoyer à l'ordinateur.
F
Cordon d’alimentation secteur
Une fois tous les autres branchements terminés, branchez sa
fiche dans une prise secteur.
Q Si vous n’avez pas l’intention d’utiliser cet appareil pendant
une longue période de temps, débranchez le cordon
d’alimentation de la prise murale.
Q Veillez à brancher le cordon d'alimentation dans une prise
secteur fournissant la tension correcte.
Q Quand vous branchez ou débranchez le cordon
d'alimentation, saisissez-le par sa fiche. Ne tirez jamais sur le
cordon lui-même.
59
Page 60

Identification des parties (unité principale)
1 43 5 86 7
2
2932 31 30 28 25 23 2133 2627
24
9
2034 2226
11
10 12 13
1819 17
Écran
1
Voir “Écran” en page64-66.
Capteur de télécommande
2
Quand vous utilisez la télécommande, pointez-la vers ce capteur.
3
4
5
< Sert à régler le niveau du son envoyé à un ordinateur connecté
6
7
8
9
OPEN/CLOSE (L)
Appuyez sur cette touche pour ouvrir et fermer le tiroir de disque.
Bouton REC LEVEL
SOURCE
COUNTER RESET
Appuyez sur cette touche pour ramener le compteur de bande
à “0000”.
Tournez ce bouton pour régler le niveau d'enregistrement.
sauf en pause d'enregistrement ou durant l'enregistrement.
Saut (.//)/Recherche (m/,)
Appuyez sur ces touches pour changer de piste/fichier.
Maintenez ces touches enfoncées pendant la lecture pour
rechercher un morceau d’une plage/fichier.
RE PEAT
Utilisez cette touche pour régler la fonction de lecture en boucle
(page72).
Appuyez sur cette touche pour sélectionner la source (page67).
Stop (H)
Appuyez sur cette touche pour arrêter la lecture de la cassette.
Appuyez sur cette touche pour arrêter l'enregistrement sur une
cassette.
RECORD USB
10
À utiliser pour enregistrer sur un lecteur flash USB. Appuyez une fois
sur cette touche pour activer l’attente d’enregistrement et appuyez
de nouveau pour démarrer l’enregistrement (pages 87-89).
Appuyez sur cette touche durant l'enregistrement pour diviser le
fichier à cet endroit (page89). (Quand vous enregistrez depuis un
CD, les fichiers ne peuvent pas être divisés.)
RECORD TAPE
11
Sert à enregistrer sur cassette. Appuyez une fois pour armer
l'enregistrement et à nouveau pour le lancer (page90-92).
Avance/retour rapide (m/,)
12
Servent à bobiner/rembobiner la bande de la cassette.
Pause (J)
13
Appuyez sur cette touche pour mettre en pause la lecture ou
l'enregistrement sur cassette. Appuyez à nouveau sur cette
touche pour reprendre la lecture ou l'enregistrement.
14
15
Compartiment pour cassette
Prise PHONES/bouton LEVEL
Pour écouter au casque, baissez le niveau de volume au minimum
avec le bouton LEVEL avant de brancher le casque à la prise
PHONES. Ensuite, réglez le volume une fois le casque branché.
Q ATTENTION
Ne branchez pas un casque à la prise PHONES quand vous
le portez. Ne le débranchez pas non plus et n'allumez/
n'éteignez pas l'unité. Un son très fort peut être produit
par le casque.
ÉVITEZ D'ENDOMMAGER VOTRE AUDITION - Ne mettez le
casque qu'après l'avoir branché.
60
Page 61

14
1516
EJECT (L)
16
Quand la cassette est à l'arrêt, appuyez sur cette touche pour
ouvrir le compartiment de la cassette.
17
18
19
20
RECORD (K)
21
22
POWER ON START OFF-PLAY-REC (TAPE)
23
24
Lecture reverse/normale (g/t)
Appuyez pour lancer la lecture de la face arrière (g)/avant (t)
d'une cassette. Appuyez avec la cassette en pause de lecture
ou armée pour l'enregistrement afin de relancer la lecture/
l'enregistrement.
Commutateur DOLBY NR
Utilisez ce commutateur pour mettre la réduction de bruit Dolby
en (ON) ou hors (OFF) service (pages58, 77 et 91).
Bouton PITCH CONTROL
Tournez-le pour faire varier la vitesse de lecture (page78).
Sélecteur REV MODE (reverse)
Utilisez ce sélecteur pour choisir le mode reverse (page76 et 91).
Sert à enregistrer sur un CD. Appuyez une fois pour armer
l'enregistrement et à nouveau pour le lancer (page79-81).
Appuyez sur cette touche pendant l’enregistrement pour ajouter
un numéro de plage dans une chanson (page 82).
FOLDER ( / )
Utilisez-les pour sélectionner les dossiers (pages69 et 71).
Utilisez ce sélecteur pour choisir le réglage de minuterie (lecture,
enregistrement ou désactivée). Pour l'utiliser avec un réglage sur
PLAY (lecture) ou REC (enregistrement), branchez à cette unité
une minuterie du commerce (page93-94).
Lecture/Pause (t/J)
Appuyez sur cette touche pendant la lecture ou l’enregistrement
d’un CD pour mettre en pause.
Appuyez de nouveau sur cette touche pour reprendre la lecture
ou l’enregistrement.
Utilisez aussi cette touche pour démarrer la finalisation, la
définalisation et l’effacement.
Stop (H)
25
Appuyez sur cette touche pour arrêter la lecture du CD.
Sert aussi à arrêter l'enregistrement sur CD.
Saut (/)/Recherche (,)
26
Automatique (AUTO)
Pendant le mode USB, appuyez sur cette touche pour sauter à
la plage suivante. Maintenez cette touche enfoncée pendant la
lecture pour faire une recherche vers l’avant.
Pendant l’enregistrement d’un CD, appuyez sur cette touche
pour changer la méthode d’ajout des numéros aux plages (page
79-80).
Saut (.)/Recherche (m)
27
Enregistrement automatisé (SYNC)
Pendant le mode USB, appuyez sur cette touche pour sauter à la
plage précédente. Maintenez cette touche enfoncée pendant la
lecture pour faire une recherche vers l’arrière.
En enregistrement sur CD, appuyez pour changer le mode
d'enregistrement automatisé (une piste ou toutes) (page 82-83).
POWER ON START CD-TAPE-USB
28
Utilisez ce sélecteur pour choisir la source sonore qui sera active à
la mise sous tension.
Utilisez ce sélecteur pour choisir le support servant en lecture/
enregistrement avec minuterie (l'enregistrement avec minuterie
ne peut se faire que sur cassette).
Pour utiliser la lecture/l'enregistrement avec minuterie, branchez
à cette unité une minuterie du commerce (page93-94).
Lecture/Pause (t/J)
29
Appuyez sur cette touche pendant la lecture ou l’enregistrement
d’un lecteur flash USB pour mettre en pause.
Appuyez à nouveau pour reprendre la lecture ou l'enregistrement.
Stop (H)
30
Appuyez sur cette touche pour arrêter la lecture USB.
Sert aussi à arrêter l'enregistrement USB.
Eacement (ERASE)
31
Finalisation/Eacement (FINALIZE/ERASE)
Pendant le mode USB, utilisez cette touche pour effacer les fichiers
du lecteur flash USB (page 90).
En mode CD, sert à finaliser un CD-R/CD-RW enregistré et à
effacer des morceaux sur CD-RW ou à le définaliser (pages 84-86).
32
33
34
Tiroir de disque
Prise USB (type A)
Connectez un lecteur flash USB extérieur à cette prise.
POWER
Appuyez sur cette touche pour allumer ou éteindre l’unité.
Q ATTENTION
Ne mettez jamais l’appareil hors tension ni ne
déconnectez un lecteur flash USB quand l’accès est en
cours, par exemple, pendant une écriture, une lecture, un
enregistrement ou l’effacement de fichiers.
Cela pourrait endommager l’AD-RW900 et le lecteur flash
USB connecté.
Q ATTENTION
Ne mettez jamais l'appareil hors tension quand il est en
train d'écrire sur un CD (enregistrement, finalisation,
définalisation, effacement d'une plage). Cela pourrait
rendre le disque illisible ou endommager l'AD-RW900.
FRANÇAIS
61
Page 62

Identification des parties (télécommande)
A
Appuyez sur cette touche pour changer les informations
affichées (page64-66).
SOURCE
B
Appuyez sur cette touche pour choisir une source (page67).
C
Utilisez cette touche pour programmer des pistes/fichiers (page73-75).
D
Utilisez cette touche pour effacer des pistes/fichiers programmés
(page 75).
E
E
A
F
Utilisez cette touche pour régler la fonction de lecture en boucle
(page72).
B
F
C
G
D
H
Utilisez cette touche pour lancer la lecture aléatoire (page 72).
G
Utilisez-les pour sélectionner les dossiers MP3 (pages69 et 71).
DI SPL AY
PROGRAM
CLEAR
RE PEAT
SHUFFLE
FOLDER ( / )
I
J
K
Pour simplifier les explications, les instructions de ce
manuel peuvent ne se référer qu'à l'unité elle-même
ou à la télécommande. Les mêmes commandes
fonctionnent alors de façon similaire sur la
télécommande et sur l'unité.
H
OPEN/CLOSE (L)
Appuyez sur cette touche pour ouvrir et fermer le tiroir de disque.
SYNC
En enregistrement sur CD, appuyez pour changer le mode
d'enregistrement automatisé (une piste ou toutes) (page 82-83).
AUTO
En enregistrement sur CD, appuyez pour changer l'ajout des
numéros aux pistes (page 79-80).
Saut (.//)/Recherche (m/,)
Appuyez sur ces touches pour changer de fichier/piste.
Maintenez-les pour rechercher un passage de fichier/piste.
RECORD (K)
Sert à enregistrer sur un CD. Appuyez une fois pour armer
l'enregistrement et à nouveau pour le lancer (page79-81).
Appuyez sur cette touche pendant l’enregistrement pour ajouter
un numéro de plage dans une chanson (page 82).
FINALIZE/ERASE
En mode CD, sert à finaliser un CD-R/CD-RW enregistré et à
effacer des morceaux sur CD-RW ou à le définaliser (page 84-86).
62
Stop (H)
Appuyez sur cette touche pour arrêter la lecture du CD.
Sert aussi arrêter l'enregistrement sur CD.
Lecture/Pause (t/J)
Appuyez sur cette touche pendant la lecture ou l’enregistrement
d’un CD pour mettre en pause.
Appuyez de nouveau sur cette touche pour reprendre la lecture
ou l’enregistrement.
Utilisez aussi cette touche pour démarrer la finalisation, la
définalisation et l’effacement.
Page 63

Télécommande (1)
I
Saut (.//)/Recherche (m/,)
Appuyez sur ces touches pour sauter d'un fichier à l'autre.
Maintenez ces touches enfoncées pendant la lecture pour
rechercher un morceau d’un fichier.
RECORD
Utilisez cette touche pour enregistrer sur un lecteur flash
USB. Appuyez une fois sur cette touche pour activer l’attente
d’enregistrement et appuyez de nouveau pour démarrer
l’enregistrement (page 87-89).
Appuyez sur cette touche durant l'enregistrement pour diviser le
fichier à cet endroit (page89). (Quand vous enregistrez depuis un
CD, les fichiers ne peuvent pas être divisés.)
ERASE
Utilisez cette touche pour effacer les fichiers d’un lecteur flash
USB (page90).
Stop (H)
Appuyez sur cette touche pour arrêter la lecture.
Appuyez sur cette touche pour arrêter l'enregistrement sur USB.
Lecture/Pause (t/J)
Appuyez sur cette touche pendant la lecture ou l’enregistrement
d’un lecteur flash USB pour mettre en pause.
Appuyez à nouveau pour reprendre la lecture ou l'enregistrement.
(>)
La télécommande fournie permet la commande à distance de cette
unité.
Pour utiliser la télécommande, pointez-la vers le capteur de
télécommande de la face avant de l’unité.
< Même si la télécommande est employée à portée de
fonctionnement, la commande à distance peut être impossible s’il
y a des obstacles entre l'unité et la télécommande.
< Si la lumière directe du soleil ou un éclairage artificiel
puissant éclaire le capteur de télécommande, il se peut que la
télécommande ne fonctionne pas. Si c’est le cas, déplacez cet
appareil dans un autre endroit.
Mise en place des piles
FRANÇAIS
J
Avance/retour rapides (m/,)
Appuyez sur ces touches pour bobiner/rembobiner la bande.
Stop (H)
Appuyez sur cette touche pour arrêter la lecture.
Appuyez sur cette touche pour arrêter l'enregistrement sur
cassette.
Pause (J)
Appuyez sur cette touche pour mettre en pause la lecture ou
l'enregistrement.
Appuyez à nouveau sur cette touche pour reprendre la lecture
ou l'enregistrement.
Lecture reverse/normale (g/t)
Appuyez sur ces touches pour lancer la lecture de la face arrière
(g)/avant (t) d'une cassette.
Appuyez alors que la cassette est en pause de lecture ou en
armement pour l'enregistrement afin de relancer la lecture/
l'enregistrement.
RECORD
Sert à enregistrer sur cassette. Appuyez une fois pour armer
l'enregistrement et à nouveau pour le lancer (page90-92).
(>)
1. Retirez le couvercle du compartiment des piles.
2. Insérez deux piles AAA (R03). Assurez-vous qu'elles sont insérées
avec leurs pôles plus (+) et moins (_) correctement orientés.
3. Refermez le couvercle.
Remplacement des piles
Si la distance de fonctionnement efficace entre la télécommande et
l'unité se réduit, les piles sont probablement usées. Remplacez les
piles par des neuves quand cela se produit.
Pour plus d’informations sur la collecte des piles, veuillez contacter
votre mairie, votre service d’ordures ménagères ou le point de vente
dans lequel vous les avez achetées.
COUNTER RESET
Appuyez sur cette touche pour ramener le compteur de bande
à “0000”.
REC LEVEL ( – / + )
K
Utilisez ces touches pour régler le niveau d’enregistrement.
Utilisez aussi ces touches pour régler le niveau sonore sorti sur un
ordinateur connecté sauf pendant l’attente d’enregistrement ou
pendant un enregistrement.
63
Page 64

Temps écoulé sur la piste en cours (mn:s)
Numéro de la piste actuellement lue
Numéro du fichier actuellement lu
(défilant s’il est trop long)
Durée totale de lecture
Nombre total de pistes
Nombre total de fichiers
Nombre total de dossiers
Télécommande (2)
Écran (1)
Précautions concernant les piles
Q Un mauvais emploi des piles peut entraîner leur rupture ou leur
fuite, avec pour conséquence un incendie, des blessures ou la
salissure des objets proches. Veuillez lire et suivre attentivement
les précautions suivantes.
< Veillez à insérer les piles avec leurs pôles positif (+) et négatif (_)
correctement orientés.
< Utilisez des piles du même type. N’utilisez jamais des types de pile
différents ensemble.
< Si la télécommande ne doit pas être utilisée durant une période
prolongée (plus d’un mois), retirez ses piles pour éviter qu’elles ne
coulent.
< Si les piles coulent, essuyez le liquide dans le compartiment des
piles et remplacez les piles par des neuves.
< N'utilisez pas de piles d'un type autre que ceux spécifiés. Ne
mélangez pas des piles neuves avec des anciennes et n’utilisez pas
ensemble des types de pile différents.
< Ne chauffez pas et ne démontez pas les piles.
< Ne jetez jamais les piles dans un feu ou dans de l’eau.
Mode CD
Durant la lecture
CD audio
Disque MP3
(partant de 001 dans chaque dossier)
Numéro du dossier actuellement lu
Temps écoulé sur la piste
actuelle (mn:s)
< Ne conservez et ne transportez pas les piles avec d’autres objets
métalliques. Les piles pourraient entrer en court-circuit, couler ou
exploser.
< N'essayez jamais de recharger une batterie sans avoir vérifié au
préalable qu'elle est du type rechargeable.
Nom du fichier actuellement lu
Avec la lecture à l'arrêt
CD audio
Disque MP3
64
Page 65

Mode cassette (TAPE)
Compteur de bande
Numéro du fichier actuellement lu
Nombre total de fichiers
Source d’enregistrement Témoin d’enregistrement
bande
le fichier actuel (mn:s)
actuel
enregistrée (mn:s)
Source d’enregistrement Témoin d’enregistrement
enregistrée (mn:s)
Témoin d’enregistrement
lue
enregistrée (mn:s)
Source d’enregistrement
Témoin d’enregistrement
actuelle (mn:s)
(Exemple: Enregistrement d’un chier de plus de 100 minutes
de longueur)
Mode USB
Durant la lecture
(partant de 001 dans chaque dossier)
Numéro du dossier actuellement lu
Nom du fichier actuellement lu
(défilant s’il est trop long)
Temps écoulé sur la piste
actuelle (mn:s)
Numéro du
dossier actuel
(Exemple: Enregistrement sur un CD à partir d’une cassette
audio)
Compteur de
bande
(Exemple: Enregistrement sur un CD à partir d’un appareil
extérieure connecté aux prises PHONO.)
Numéro de
fichier actuel
N° de piste
enregistrée
Durée écoulée du fichier
actuel (hr./min./sec.)
Temps écoulé
sur la piste
FRANÇAIS
Avec la lecture à l'arrêt
Nombre total de dossiers
Mode d'enregistrement
(Exemple: Enregistrement sur une cassette audio à partir d’un
lecteur flash USB)
N° du fichier
Temps écoulé dans
Compteur de
Source
d’enregistrement
(Exemple: Enregistrement sur un lecteur ash USB à partir d’un
CD)
N° de la piste
actuellement
N° de piste
enregistrée
Temps écoulé
sur la piste
Temps écoulé
sur la piste
Temps écoulé
sur la piste
65
Page 66

Temps restant dans la piste actuelle (mn:s)
Temps total écoulé sur le disque (mn:s
Temps total restant sur le disque (mn:s
Numéro de la piste actuellement lue
et temps écoulé dans la piste actuelle (mn:s)
Nom du fichier
Titre
Artiste
Album
Dossier et numéro du fichier actuellement lu,
temps écoulé dans la piste actuelle (mn:s),
et nom du fichier actuellement lu
LINE IN
PHONO
Écran (2)
Changement de l'affichage (mode CD/USB)
Durant la lecture en mode CD ou USB, chaque fois que l'on appuie
sur la touche DISPLAY, l'affichage change comme suit:
CD audio
)
)
Fonctionnement de base
Mise sous ou hors tension
Appuyez sur la touche POWER pour mettre l’unité sous ou hors
tension.
Quand l'unité est sous tension, son écran est allumé.
Contrôlez les sélecteurs POWER ON START qui déterminent le
comportement de l'unité à la mise sous tension.
Disque MP3/USB
< “Title No” (informations sur le titre non disponibles), “Album
No” (informations sur l’album non disponibles) ou “Artist No”
(informations sur l’artiste non disponibles) apparaît quand il n’y a
pas d’informations.
< “
< L'écran de cette unité ne peut afficher que les lettres et chiffres à
simple octet. Si un nom de fichier utilise des caractères japonais,
chinois ou autres à double octet, la lecture est possible mais le
nom ne sera pas affiché correctement. Dans de tels cas, “
s'affiche.
” apparaît si l'unité ne peut pas lire les informations.
À la mise sous tension, quand le sélecteur POWER ON
START (OFF-PLAY-REC) pour la minuterie est réglé sur
PLAY ou REC
ou
La source choisie avec le sélecteur POWER ON START
(CD-TAPE-USB) démarre sa lecture/son enregistrement.
L'enregistrement avec minuterie ne peut se faire que sur
cassette (page 93-94).
À la mise sous tension, quand le sélecteur POWER ON
START (OFF-PLAY-REC) pour la minuterie est réglé sur
OFF
La source choisie avec le sélecteur POWER ON START
”
(CD-TAPE-USB) devient la source active.
< Quand vous ne voulez pas utiliser de minuterie, veillez à régler
le sélecteur OFF-PLAY-REC en position OFF afin d'éviter un
enregistrement accidentel sur une cassette importante.
66
Page 67

Sélection d'une source/enregistrement
PHONO IN
LINE IN
Écoute au casque
Chaque fois que vous appuyez sur la touche SOURCE, la source
change comme suit:
La source sélectionnée apparaît en haut à gauche de l’affichage
sauf pour PHONO IN, qui apparaît en bas de l’affichage.
< Durant l'enregistrement, la source ne peut pas être changée.
< Appuyer sur la touche de lecture d'une source sélectionne aussi
cette source et lance la lecture.
< Sélectionnez “LINE IN" pour écouter une source connectée aux
prises d'entrée ligne analogique LINE IN.
< Sélectionnez “PHONO IN" pour écouter une platine tourne-
disque connectée aux prises PHONO.
< Sélectionnez “ ” pour écouter une source numérique
connectée à la prise d'entrée numérique DIGITAL IN.
Pour écouter au casque, baissez le niveau de volume au minimum
avec le bouton LEVEL avant de brancher la fiche du casque à
la prise PHONES. Ensuite, réglez le volume une fois le casque
branché.
Q ATTENTION
Ne branchez pas un casque à la prise PHONES pendant que
vous le portez sur la tête. Ne le débranchez pas non plus et
n'allumez/n'éteignez pas l'unité quand vous le portez. Un
son très fort peut être produit par le casque.
ÉVITEZ D'ENDOMMAGER VOTRE AUDITION - Ne mettez le
casque qu'après l'avoir branché.
FRANÇAIS
67
Page 68

Écoute d'un CD
Appuyez répétitivement sur la touche SOURCE afin de
1
sélectionner “CD”.
< Quand une autre source est sélectionnée, appuyer sur la touche
Lecture/Pause (t/J) de CD sélectionne automatiquement le
CD et, si un disque est chargé, lance la lecture.
Appuyez sur la touche CD OPEN/CLOSE (L) pour ouvrir le
2
tiroir de disque.
Appuyez à nouveau sur la touche CD OPEN/CLOSE (L)
4
pour fermer le tiroir.
Q ATTENTION
Veillez bien à ne pas vous coincer les doigts avec le tiroir.
L’unité met de 20 à 30 secondes pour lire un disque afin de
déterminer son type.
Durant le chargement, “READING” s'affiche et aucune touche ne
fonctionne. Attendez que le nombre total de pistes/fichiers soit
affiché.
< Quand un aucun disque n'est chargé, “NO DISC” (pas de disque)
est affiché.
Appuyez sur la touche Lecture/Pause (t/J) de CD pour
5
lancer la lecture.
Placez un disque sur le tiroir avec sa face sérigraphiée
3
vers le haut.
< Veillez toujours à ce que le disque soit bien centré dans le tiroir.
Le disque doit être centré dans le tiroir. Si le disque n'est pas
correctement installé, le tiroir peut être impossible à ouvrir après
avoir été fermé.
ATTENTION
< N'insérez pas plus d'un disque.
< Ne forcez pas sur le tiroir avec la main quand vous l'ouvrez et
le fermez.
< Ne fixez pas d'étiquette adhésive ou matériau similaire sur
aucune des faces du disque.
< N'utilisez pas de disques à formes irrégulières.
Ne pas respecter une quelconque des précautions ci-dessus
peut entraîner un mauvais fonctionnement.
La lecture démarre de la première piste ou du premier fichier du
disque.
< Si vous chargez un disque puis appuyez sur la touche Lecture/
Pause (t/J) de CD sans avoir préalablement fermé le tiroir de
disque, celui-ci se ferme et la lecture démarre.
< Quand la lecture de tous les fichiers/pistes est terminée, l'unité
s'arrête automatiquement.
< Les fichiers MP3 qui ne sont pas enregistrés dans des dossiers
sont automatiquement placés dans le dossier racine (“ROOT”). La
lecture démarre par le premier fichier du dossier ROOT.
< Voir page 98 pour des informations sur l'ordre de lecture des
disques de MP3.
68
Page 69

Suspension temporaire de la lecture (mode pause)
Appuyez sur la touche Lecture/Pause (t/J) de CD durant la
lecture pour l'arrêter sur la position actuelle.
Pour reprendre la lecture, appuyez à nouveau sur la touche
Lecture/Pause (t/J) de CD.
Recherche d'un passage de piste ou de fichier
Tenir enfoncée
Durant la lecture, maintenez enfoncée une touche de recherche
de CD (m ou ,) pour retrouver un passage de piste ou de
fichier. Relâchez-la quand vous avez atteint le début du passage
que vous voulez écouter.
Arrêt de la lecture
Appuyez sur la touche d'arrêt de CD (H) pour arrêter la lecture.
Ouverture du tiroir de disque
Appuyez sur la touche CD OPEN/CLOSE (L) pour ouvrir le tiroir de
disque.
Saut à un fichier/piste précédent ou suivant
Durant la lecture
Appuyez répétitivement sur une touche de saut de CD (. ou
) jusqu’à ce que la plage/fichier soit sélectionnée. La plage ou
/
le fichier sélectionné est reproduit à partir du début.
< Si la touche . est pressée une fois durant la lecture, la lecture
du fichier/piste en cours reprend au début. Pour revenir en début
de fichier/piste précédent, appuyez deux fois sur la touche ..
Avec la lecture à l'arrêt ou en pause
Appuyez répétitivement sur une touche de saut de CD (.
ou /) pour sélectionner la plage/fichier que vous souhaitez
écouter. Puis, appuyez sur la touche de lecture/pause de CD
(t/J) pour démarrer la lecture de la plage ou du fichier
sélectionné.
FRANÇAIS
< Vous ne pouvez pas ouvrir le plateau quand l’appareil est dans un
autre mode que CD.
Sélection d'un dossier (disque MP3/WMA)
Appuyez sur une touche FOLDER ( ou ) pour sélectionner
un dossier. Appuyez sur la touche de lecture/pause de CD
(t/J) pour démarrer la lecture de la première plage du dossier
sélectionné.
69
Page 70

Écoute de fichiers sur un lecteur flash USB (MP3/WMA)
Q ATTENTION
Ne mettez jamais l’appareil hors tension ni ne déconnectez
un lecteur flash USB quand l’accès est en cours, par exemple,
pendant une écriture, une lecture, un enregistrement ou
l’effacement de fichiers.
Cela pourrait endommager l’AD-RW900 et le lecteur flash USB
connecté.
< Cette section utilise un fichier MP3 comme exemple pour
expliquer le processus; le même processus doit aussi être suivi
quand un fichier WMA est utilisé.
Appuyez répétitivement sur la touche SOURCE afin de
1
sélectionner “USB”.
< Quand une autre source est sélectionnée, lancer la lecture USB
sélectionne automatiquement le mode USB.
Pause temporaire de la lecture
Appuyez sur la touche Lecture/Pause (t/J) USB durant la lecture
pour l'arrêter sur la position actuelle.
Pour reprendre la lecture, appuyez à nouveau sur la touche
Lecture/Pause (t/J) USB.
Arrêt de la lecture
Connectez un lecteur flash USB à la prise USB de cet
2
appareil.
La lecture du lecteur flash USB prend plusieurs secondes.
< S’il n’y a pas de fichier MP3 sur le lecteur flash USB, “NO MUSIC
FILE” est affiché.
Appuyez sur la touche Lecture/Pause (t/J) USB pour
3
lancer la lecture.
Appuyez sur la touche d'arrêt (H) USB pour arrêter la lecture.
Recherche d'un passage de fichier
Tenir enfoncée
Durant la lecture, maintenez enfoncée une touche de recherche
(m ou ,) USB pour retrouver un passage de fichier. Presser et
maintenir une touche de recherche accroît la vitesse de recherche.
Relâchez-la quand vous avez atteint le début du passage que vous
voulez écouter.
< Quand la lecture de tous les fichiers est terminée, l'unité s'arrête
automatiquement.
< Les fichiers MP3 qui ne sont pas dans des dossiers sont
automatiquement placés dans le dossier racine (“ROOT”). La
lecture démarre par le premier fichier du dossier ROOT.
< Voir page98 des infos sur l'ordre de lecture des fichiers MP3.
70
Page 71

Saut à un fichier précédent ou suivant
Lecture en boucle, aléatoire et programmée
Ces fonctions peuvent être utilisées en mode USB.
Veuillez consultez les sections suivantes pour des détails sur leur
emploi.
Durant la lecture
Appuyez répétitivement sur une touche de saut USB (. ou
) jusqu’à ce que le fichier souhaité soit sélectionné. Le fichier
/
sélectionné est reproduite à partir du début.
< Si la touche . est pressée une fois durant la lecture, la lecture
du fichier en cours reprend au début. Pour revenir au début du
fichier précédent, appuyez deux fois sur la touche ..
Avec la lecture à l'arrêt ou en pause
Appuyez répétitivement sur une touche de saut USB (. ou
) pour sélectionner le fichier que vous souhaitez écouter. Puis,
/
appuyez sur la touche de lecture/pause USB (t/J) pour démarrer
la lecture du fichier sélectionné.
Lecture aléatoire
Lecture en boucle
Lecture programmée
page72
e
page72
e
page73-75
e
FRANÇAIS
Sélection d'un dossier
Appuyez sur une touche FOLDER ( ou ) pour sélectionner un
dossier. Puis, appuyez sur la touche de lecture/pause USB (t/J)
pour démarrer la lecture.
71
Page 72

REPEAT 1 REPEAT ALL
(Lecture ordinaire)
REPEAT 1 REPEAT ALL
(Lecture ordinaire)
REPEAT FOLDER
Lecture aléatoire
Cette fonction peut servir en mode CD et en mode USB.
Utilisez cette fonction pour lire les plages/fichier sur un disque/lecteur
flash USB dans un ordre aléatoire.
Appuyer sur la touche SHUFFLE active et désactive le mode
aléatoire (Shuffle).
Durant la lecture aléatoire, “SHUFFLE” s'affiche.
Après lecture de tous les fichiers/pistes, l'unité sort du mode
aléatoire ("Shuffle") et arrête la lecture.
Pour arrêter la lecture aléatoire, appuyez sur la touche d'arrêt (H)
de CD/USB.
< Si vous appuyez sur la touche / durant la lecture aléatoire,
le fichier/piste ou le fichier lu ensuite sera choisi aléatoirement.
Si vous appuyez sur la touche ., la lecture du fichier/piste en
cours reprend à son début. Durant la lecture aléatoire, un fichier/
piste déjà lu ne sera pas lu de nouveau.
Lecture en boucle
Cette fonction peut être utilisée en mode CD et en mode USB.
Appuyez sur la touche REPEAT pour passer en revue les modes de
lecture suivants:
CD audio
MP3
< Si n'importe laquelle des touches suivantes est pressée, le mode de
lecture en boucle est annulé.
En mode CD
POWER, SOURCE, CD OPEN/CLOSE (L), REPEAT
En mode USB
POWER, SOURCE, REPEAT
< La fonction Shuffle de lecture aléatoire ne fonctionne pas durant la
lecture de programme.
< Si l'on appuie sur l'une des touches suivantes, le mode aléatoire est
annulé.
En mode CD
POWER, SOURCE, CD OPEN/CLOSE (L), SHUFFLE
En mode USB
POWER, SOURCE, SHUFFLE
< La lecture aléatoire ne peut pas être employée avec des disques
non finalisés.
< Si vous appuyez sur la touche SHUFFLE pendant que REPEAT 1
ou REPEAT FOLDER est sélectionné, le mode de lecture répétée
change sur “REPEAT ALL”.
< La lecture en boucle ne peut pas être employée avec des disques
non finalisés.
REPEAT 1 (lecture en boucle d'un fichier/piste)
Le fichier/piste sera lu en boucle. “REPEAT 1” s'affiche.
< Si vous utilisez la touche de saut de CD/USB (. ou /) pour
sélectionner une plage/fichier différent, cette plage/fichier est lu
répétitivement.
< Vous pouvez sélectionner une plage/fichier à répéter quand la
lecture est arrêtée. Appuyez sur la touche REPEAT, sélectionnez
une plage/fichier en utilisant une touche de saut CD/USB (.
ou /), puis appuyez sur une touche de lecture/pause CD/USB
(t/J) pour démarrer la lecture.
REPEAT ALL (lecture en boucle de tous les fichiers/pistes)
Tous les fichiers/pistes du disque seront lus en boucle.
“REPEAT ALL” (répétition ou “lecture en boucle” globale) s'affiche.
72
< Durant la lecture de programme, les fichiers/pistes programmés
seront lus en boucle.
REPEAT FOLDER (lecture en boucle de tous les fichiers d'un
dossier) (MP3 uniquement)
Tous les fichiers du dossier sélectionné seront lus en boucle.
“REPEAT FOLDER” s'affiche.
Page 73

Lecture programmée (1)
Cette fonction peut être utilisée en mode CD et en mode USB.
30 fichiers/pistes peuvent être programmés dans l'ordre désiré.
Avec la lecture à l'arrêt, appuyez sur la touche PROGRAM
1
pour passer en mode programme.
“PROGRAM” clignote et “P-01” s'affiche.
Exemple en mode CD
< Pour arrêter la programmation, appuyez sur la touche d'arrêt (H)
de CD/USB.
Appuyez sur les touches de saut (. ou /) de CD/USB
3
pour sélectionner un fichier/piste, puis appuyez sur la
touche PROGRAM.
Le fichier/piste est programmé, et “P-02” s'affiche.
< Répétez les étapes 2 et 3 pour programmer des fichiers/pistes
supplémentaires.
< Vous pouvez programmer jusqu'à 30 pistes/fichiers.
< Pour arrêter la programmation, appuyez sur la touche d'arrêt
(H) de CD/USB. La programmation est arrêtée mais le contenu
du programme reste en mémoire. Si vous voulez reprendre la
lecture programmée, appuyez sur la touche PROGRAM puis sur
la touche Lecture/Pause (t/J) de CD/USB.
FRANÇAIS
(Pour programmer un CD audio)
2
Sautez à l’étape 3.
(Pour programmer des fichiers MP3)
Avec une touche de saut (. ou /) de CD/USB ou une
touche FOLDER ( ou ), sélectionnez un fichier puis
appuyez sur la touche PROGRAM.
< Les fichiers MP3 non situés dans un dossier spécifique se
trouvent dans le dossier racine “001” (ROOT).
< La lecture programmée ne peut pas être employée avec des
disques non finalisés.
Une fois la sélection des numéros de fichier/piste
4
terminée, appuyez sur la touche Lecture/Pause (t/J) de
CD/USB pour lancer la lecture programmée.
Pour arrêter la lecture programmée, appuyez sur la touche
d'arrêt (H) de CD/USB.
< Quand la lecture du programme est terminée, appuyez sur la
touche Lecture/Pause (t/J) de CD/USB pour relire à nouveau
le programme.
< Vous pouvez utiliser une touche de saut de CD/USB (. ou
) pendant la lecture programmée pour sélectionner et lire
/
d’autres plages/fichiers dans le programme.
< La fonction Shuffle de lecture aléatoire ne fonctionne pas
durant la lecture programmée.
< Les lectures en boucle “REPEAT 1” et “REPEAT ALL” sont possibles
en lecture programmée. En mode “REPEAT ALL”, les fichiers/
pistes programmés sont lus en boucle.
73
Page 74

à changer
Lecture programmée (2)
Ajout de pistes/fichiers à la fin du programme
Avec la lecture à l'arrêt, appuyez répétitivement sur la touche
PROGRAM jusqu'à ce que “TRACK 00” s'affiche.
Appuyez plusieurs fois
Exemple:
Sélectionnez le numéro de plage/fichier que vous souhaitez
ajouter en utilisant une touche de saut de CD/USB (. ou /),
puis appuyez sur la touche PROGRAM.
Remplacement d'une partie du programme
Avec la lecture à l'arrêt, appuyez répétitivement sur la touche
PROGRAM jusqu'à ce que le pas de programme de la piste
que vous voulez changer s'affiche.
Appuyez plusieurs fois
Exemple:
Partie de programme
Sélectionnez le numéro de plage/fichier que vous souhaitez
ajouter en utilisant une touche de saut de CD/USB (. ou /),
puis appuyez sur la touche PROGRAM.
Le fichier/piste est ajouté à la fin du programme.
Le fichier/piste sélectionné est ajouté au programme, en
remplacement de la piste qui se trouvait sur ce pas de programme
auparavant.
74
Page 75

Vérification de l'ordre de programmation
à supprimer
Effacement du programme
Appuyez plusieurs fois
À l'arrêt, appuyez répétitivement sur la touche PROGRAM.
Les numéros des fichiers/pistes programmés et leur numéro dans
le programme s'affichent tour à tour.
Suppression de fichiers/pistes du programme
Avec la lecture à l'arrêt, appuyez répétitivement sur la
touche PROGRAM jusqu'à ce que le pas de programme
correspondant à la piste à supprimer s'affiche.
Appuyez plusieurs fois
Tenir enfoncée
plus d’1 seconde
Avec la lecture à l'arrêt, appuyez sur la touche PROGRAM puis
maintenez la touche CLEAR enfoncée plus d'1seconde.
Le témoin PROGRAM disparaît et tout le contenu du programme
est effacé.
< Si le témoin PROGRAM n'est pas affiché, appuyez sur la touche
PROGRAM pour activer le mode programme avant d'appuyer sur la
touche CLEAR.
< Si on appuie sur une des touches suivantes, le contenu du
programme est également effacé.
En mode CD
POWER, CD OPEN/CLOSE (L), SOURCE
En mode USB
POWER, SOURCE
FRANÇAIS
Exemple:
Partie du programme
Appuyez sur la touche CLEAR.
Le fichier/piste est supprimé du programme.
Sortie du mode programme
À l'arrêt, maintenez pressée la touche d'arrêt (H) de CD/USB. Le
témoin PROGRAM disparaîtra.
< Cela n'efface pas le contenu du programme. Si vous voulez
reprendre la lecture programmée, appuyez à nouveau sur la
touche PROGRAM puis sur la touche Lecture/Pause (t/J) de CD/
USB.
75
Page 76

Écoute d'une cassette (1)
“F
Avec cette unité, vous pouvez lire des cassettes de type normal (type
), chrome (type ) et métal (type ).
REMARQUE
Pour des raisons de simplicité, nous appellerons le côté de
la cassette qui vous fait face la “face A” et celui tourné vers
l’intérieur “face B” dans ce mode d’emploi.
Quand vous insérez une cassette en inversant “face A” et “face B”,
lisez donc “face A” à la place de “face B” et “face B” à la place de
“face A”
“Face B” à l’opposé
ace A” vers vous
Appuyez répétitivement sur la touche SOURCE afin de
1
sélectionner “TAPE”.
Placez une cassette dans le compartiment.
3
Insérez la cassette avec son bord à bande apparente vers le
bas et le côté que vous désirez lire face à vous. Puis refermez le
compartiment de la cassette en repoussant sa porte.
ATTENTION
< N'utilisez pas de cassettes déformées ou à la bande détendue.
< Ne forcez pas l'ouverture de la porte du compartiment avec la
main.
Ne pas respecter une quelconque des précautions ci-dessus
peut entraîner un mauvais fonctionnement.
< Quand une autre source est sélectionnée, lancer la lecture de la
cassette sélectionne automatiquement celle-ci.
Appuyez sur la touche TAPE EJECT (L) pour ouvrir le
2
compartiment de la cassette.
Réglez le mode de lecture à l'aide du sélecteur REV
4
MODE.
Vous pouvez choisir un des trois
réglages suivants.
u Mode unidirectionnel
j Mode bi-directionnel
p Mode de lecture en boucle
76
Page 77

Réglez le commutateur DOLBY NR (réduction de bruit).
5
Pause temporaire de la lecture
Réglez le commutateur en position ON pour lire des cassettes
enregistrées avec le réducteur de bruit Dolby NR.
Pour lire des cassettes enregistrées sans réducteur de bruit
Dolby NR, réglez le commutateur en position OFF.
À propos du Dolby NR
Le Dolby NR est conçu pour réduire le souffle de la bande, qui
est un bruit induit durant les processus d'enregistrement et
de lecture. Cette platine cassette est équipée d'un système de
réduction de bruit Dolby B.
Appuyez sur la touche de lecture normale (t) ou reverse
6
(g) pour lancer la lecture.
Lecture normale (t)
Appuyer sur cette touche lance la lecture de la "face A".
Appuyez sur la touche pause de TAPE (J) durant la lecture pour
arrêter la lecture à la position actuelle.
Pour reprendre la lecture, appuyez à nouveau sur la touche pause
de TAPE (J) ou appuyez sur une touche de lecture (g ou t).
Arrêt de la lecture
FRANÇAIS
Appuyez sur la touche d'arrêt de TAPE (H) pour arrêter la lecture.
Ouverture du compartiment de cassette
Quand le mode de lecture est réglé sur u
La lecture s'arrête une fois la fin de la "face A" atteinte.
Quand le mode de lecture est réglé sur j
La lecture se poursuit sur la "face B", s'arrêtant à la fin de la
"face B".
Quand le mode de lecture est réglé sur p
La lecture se fait en boucle 5 fois sur les 2 faces de la cassette.
Lecture reverse (g)
Appuyer sur cette touche lance la lecture de la "face B".
Quand le mode de lecture est réglé sur u ou j
La lecture s'arrête une fois la fin de la "face B" atteinte.
Quand le mode de lecture est réglé sur p
La "face B" est lue puis la lecture se fait en boucle 4 fois sur les
deux faces de la cassette.
Une fois la cassette arrêtée ou mise en pause, appuyez sur la
touche TAPE EJECT (L) pour ouvrir le compartiment de cassette.
< Vous pouvez aussi ouvrir le compartiment quand une autre source
que TAPE est sélectionnée.
77
Page 78

Écoute d'une cassette (2) À propos de l'enregistrement
Bobinage/rembobinage d'une cassette
Appuyez sur la touche d'avance rapide (,) ou de retour rapide
(m) pour un défilement rapide de la bande.
Le défilement s'arrête quand la fin de la bande est atteinte. Pour
arrêter le défilement avant la fin de la bande, appuyez sur la touche
d'arrêt de TAPE (H).
< Vous pouvez faire défiler la bande de la cassette quand CD/USB/
LINE est sélectionné comme source. Ces touches ne fonctionnent
par contre pas en mode d'enregistrement.
Commande de hauteur
Cette commande fait varier la hauteur de la musique durant la lecture.
CD-R et CD-RW
Un CD-R ne peut être enregistré qu'une fois. Les pistes enregistrées
ne peuvent pas être effacées. Toutefois, s'il reste du temps
d'enregistrement disponible, un enregistrement supplémentaire est
possible. Si vous avez fini d'enregistrer et finalisé le CD-R, il peut être lu
avec un lecteur de CD normal (certains lecteurs de CD peuvent ne pas
être compatibles).
Sur un CD-RW, même s'il ne reste plus de temps d'enregistrement
disponible, vous pouvez effacer des pistes déjà enregistrées et de
nouveau enregistrer d'autres pistes. Vous pouvez effacer toutes les
pistes d'un coup ou seulement la dernière. Par contre, vous ne pouvez
pas effacer uniquement les pistes situées au milieu du disque.
Si vous terminez l’enregistrement et et finaliser les disque CD-RW, il
peut être lu sur un lecteur CD normal (page 84). Seuls les lecteurs CD
qui prennent en charge les disques CD-RW peuvent le faire.
Pour ré-enregistrer sur un CD-RW finalisé, définalisez-le (page 85).
En définalisant (par annulation de la finalisation), vous pouvez de
nouveau enregistrer et supprimer des pistes sur le CD-RW.
Les CD-RW ne peuvent être lus que par des lecteurs de CD
compatibles.
Système de gestion de copie en série (SCMS)
Cet appareil répond à la norme SCMS (Serial Copy Management
System) de gestion de copie en série. Cette norme a été élaborée
pour limiter à la première génération la copie de numérique
en numérique. Les règles de base régissant ce système sont les
suivantes:
Tourner le bouton PITCH CONTROL dans le sens horaire augmente
la vitesse de lecture et par conséquent la hauteur d'un maximum
de +10%.
Tourner le bouton PITCH CONTROL dans le sens anti-horaire réduit
la vitesse de lecture et par conséquent la hauteur d'un maximum
de -10%.
< Cette commande ne fonctionne pas durant l'enregistrement.
Compteur de bande
Règle 1
Un enregistrement numérique est possible à partir d’une source
numérique telle qu’un CD, DAT ou MD sur un support enregistrable
de type CD-R, CD-RW, MD ou DAT via une connexion à l’entrée
numérique. Cependant, tout nouvel enregistrement numérique
depuis les données numériques de la seconde génération et des
suivantes est interdit.
Règle 2
En cas d’enregistrement numérique d’une source analogique
telle qu’un disque analogique ou une source FM à l’aide d’un
CD-R, CD-RW, MD ou DAT, cette source peut être enregistrée
numériquement sur un autre CD-R, CD-RW, MD ou DAT. Par contre,
toute copie numérique de seconde génération est interdite.
Appuyez sur la touche COUNTER RESET pour ramener le compteur
de bande à “0000”. Vous pouvez utiliser cette fonction pour
facilement repérer un point désiré sur la bande.
78
Page 79

LINE IN PHONO
Avant l'enregistrement
Avant de commencer l'enregistrement, assurez-vous de bien
comprendre les points suivants:
< La norme CD permet d'enregistrer jusqu'à 99 pistes. Quand une
100e piste est sur le point d'être enregistrée, l'enregistrement
s'arrête automatiquement.
< Une piste de moins de 10 secondes ne peut pas être enregistrée
sur un CD audio.
< Quand l’enregistrement est terminé, “PMA WRITE” clignote
quelques secondes et l’appareil s'arrête. N'appliquez aucun choc
ou vibration à l'appareil pendant l'enregistrement ni quand “PMA
WRITE” clignote.
< Quand la durée d'enregistrement disponible atteint 0,
l'enregistrement s'arrête automatiquement.
< Si un disque partiellement enregistré est inséré, l'enregistrement se
poursuit après la dernière piste déjà enregistrée.
Enregistrement sur CD (1)
Chargez un CD-R ou CD-RW enregistrable dans l'unité.
1
Appuyez sur la touche OPEN/CLOSE (L), placez un disque sur
le tiroir de disque avec sa face sérigraphiée vers le haut, puis
appuyez sur la touche OPEN/CLOSE (L) pour fermer le tiroir du
disque.
Assurez-vous que les indicateurs “NO TOC” et “CD-R” (ou “CDRW”) s’allument sur l’affichage.
Sélectionnez la source à enregistrer avec la touche INPUT
2
SELECT (TAPE, LINE IN, PHONO ou DIGITAL).
< Vous pouvez ajouter des pistes à un disque enregistrable non
finalisé. Une fois finalisé, un CD-R est “figé” et se comporte comme
un CD. Les CD-RW finalisés peuvent toutefois être définalisés,
effacés et réenregistrés.
< Quand la fonction auto track est utilisée, les pistes sont séparées
en fonction du niveau seuil spécifié. Par conséquent, si une piste
contient une partie silencieuse en début ou en cours, la durée de
lecture peut ne pas être la durée réelle de la piste.
< Quand des numéros de piste sont ajoutés à une musique sans
interruption comme un spectacle live, le son se coupe un instant.
< Si un disque enregistré avec cette unité est lu par un autre lecteur,
des bruits peuvent survenir aux changements de piste.
Niveau auto track de détection automatique de piste
Seuil déterminant ce qui est détecté comme du “silence”
afin que la fonction auto track ajoute automatiquement des
numéros de piste lors de l'enregistrement depuis des appareils
externes avec ANALOG ou pour effectuer un enregistrement
synchronisé de sources numériques telles que CD, MD et DAT.
Ce mode d'emploi appelle “silence” un niveau de source
d'enregistrement inférieur au niveau seuil de détection
automatique de piste spécifié.
Vous pouvez sélectionner −60, −50, −40 et −30dB.
< La source d'entrée ne peut pas être changée en cours
d'enregistrement.
< Vous ne pouvez pas enregistrer de l'USB au CD.
Appuyez sur la touche RECORD (K RECORD).
3
Cela fait clignoter l’indicateur CD RECORD rouge à droite de
l’écran et l’indicateur dans l’écran.
< Aucune touche ne fonctionne tant que “WAITING” (attente) est
affiché. Attendez quelques secondes que “WAITING” disparaisse.
Si DIGITAL a été choisi à l’étape 2, la fréquence
d’échantillonnage de la source numérique ( ) (“FS 44_1K”,
“FS 48K” ou “ FS 32K”) apparaît brièvement après “WAITING”.
FRANÇAIS
< “OPTICAL UNLOCK” apparaît quand l’unité ne détecte pas de
signal numérique. Dans ce cas, branchez une source numérique
à la prise DIGITAL IN, allumez-la, et attendez quelques secondes
que l’unité passe en pause d’enregistrement.
<
Si vous ne pouvez pas enregistrer même en appuyant sur la touche
d’enregistrement de CD (K RECORD), chargez un disque enregistrable.
Vérifiez que “NO TOC” et “CD-R” (ou “CD-RW”) apparaissent sur
l’affichage et appuyez de nouveau sur la touche d’enregistrement de
CD (K RECORD).
Suite à la prochaine page
79
Page 80

LINE IN PHONO
Enregistrement sur CD (2)
Sélectionnez le mode d’affectation de numéro de piste
4
avec la touche AUTO.
Quand on appuie une fois sur la touche AUTO, le niveau seuil
auto track est affiché. Appuyez plusieurs fois sur la touche AUTO
pour sélectionner un autre réglage.
S-LEVEL -60 S-LEVEL -50
< Après que 2 secondes se soient écoulées, l’écran revient à
l’affichage de piste/temps.
S-LEVEL-60/50/40/30 (numéros de piste automatiques)
La fonction auto track s'active et “AUTO TRACK” apparaît. La valeur
affichée indique le niveau seuil de changement automatique de piste.
Les numéros de plage sont ajoutés automatiquement pendant
l’enregistrement. Si un changement de plages est détecté via DIGITAL,
ou si un silence (inférieur que le niveau de plage automatique) continue
pendant trois secondes ou plus, et qu’ensuite la plage suivante démarre
(le son devient plus fort que le niveau de plage automatique) via
ANALOG, les numéros de plages sont mis à jour automatiquement.
S-LEVEL -40 S-LEVEL -30
MANUAL
< Quand vous enregistrez un disque ou d’autres sources contenant
de nombreuses interférences, plus de numéros de piste que
prévus peuvent être générés de façon inappropriée.
< La touche AUTO ne peut pas servir en cours d’enregistrement.
Si les numéros de piste ne sont pas correctement ajoutés
Quand vous enregistrez des sources avec interférences via
ANALOG, les numéros de piste peuvent ne pas être ajoutés si le
niveau seuil est en dessous du niveau des interférences. Dans ce
cas, réglez le niveau seuil plus haut que celui des interférences.
S’il y a un peu d’interférences et si la piste démarre avec un son
faible ayant pour effet de tronquer le début de l’enregistrement,
baissez le niveau seuil auto track.
Bruit Faible Fort
Exemples CD, MD
S-LEVEL -60 -50 -40 -30
(Quand vous enregistrez depuis une cassette, l'entrée
5
LINE IN ou PHONO)
Réglez le niveau d'enregistrement.
Avant d'enregistrer, réglez le niveau d'enregistrement sous peine
de distorsion du son enregistré ou de parasites.
Disque,
cassette
MANUAL (numéros de piste non automatiques)
En mode MANUAL, les numéros de plage ne sont pas ajoutés
automatiquement. Pour ajouter des numéros de plages
manuellement, appuyez sur la touche RECORD (K RECORD).
<
Le réglage peut être configuré respectivement pour DIGITAL et ANALOG.
Quand l’appareil est sous tension, le réglage est –60 dB pour DIGITAL,
–50 dB pour LINE IN, –40 dB pour TAPE et –30 dB pour PHONO IN.
< Si la source d’entrée est changée, le réglage S-LEVEL retourne au
réglage qui était actif quand l’appareil a été mis sous tension.
<
Si un CD est enregistré via l'entrée numérique ( ), les
numéros de piste sont ajoutés en réponse aux signaux numériques
du CD. Il n'y a en général pas besoin de changer le niveau auto track.
< En enregistrement numérique, même avec auto track, les numéros
de piste peuvent ne pas s'ajouter selon le lecteur numérique
source. Dans ce cas, ajoutez-les manuellement (voir page 82).
< Quand vous enregistrez des émissions numériques ou d’autres
sources sans numéro de plages, les numéros de plages ne sont pas
ajoutés si la fonction de plage automatique n’est pas activée. Pour
ajouter un numéro de plage, appuyez sur la touche RECORD (K
RECORD) pendant l’enregistrement d’une plage.
<
Quand vous enregistrez de la musique classique ou une autre sources
contenant des parties silencieuses via ANALOG, il se peut que les
numéros de plage ne soient pas ajoutés correctement si la fonction de
plage automatique est activée. Pour ajouter un numéro de plage dans
ce cas, désactivez la fonction de plage automatique, et appuyez sur la
touche RECORD (K RECORD) pendant l’enregistrement d’une plage.
1. Faites jouer la source (cassette/source externe) à enregistrer.
2. Utilisez le bouton REC LEVEL pour régler le niveau
d'enregistrement afin que le son le plus fort ne fasse jamais
s'allumer le témoin “OVER” dans l'indicateur de niveau crête.
< Différentes sources à enregistrer auront différents volumes.
Pour enregistrer au volume optimal pour chacune, il faut
régler le niveau d'enregistrement pour chaque source.
< Vous ne pouvez pas régler le niveau d'enregistrement avec
une source numérique (DIGITAL).
80
Page 81

Préparez la source d'enregistrement.
6
Enregistrement depuis une cassette
Pour enregistrer la totalité de la cassette, rembobinez-la jusqu'à
son début. Pour enregistrer en cours de cassette, arrêtez-la ou
mettez-la en pause là où doit démarrer l'enregistrement.
Sélectionnez le réglage DOLBY NR (réduction de bruit) (page 58).
Pour enregistrer une seule face, réglez le sélecteur REV MODE
sur u, et la direction d'enregistrement sur lecture normale (t)
ou reverse (g). Puis appuyez sur la touche d'arrêt TAPE (H).
Pour enregistrer les deux faces, réglez le sélecteur REV MODE sur
j et la direction d'enregistrement sur t. Si vous réglez cette
dernière sur g, seule la “face B” sera enregistrée.
Appuyez de nouveau sur la touche de lecture/pause de
7
CD (t/J) ou sur la touche RECORD (K RECORD) pour
démarrer l’enregistrement.
Si vous enregistrez depuis une source externe, vous devez
également lancer la lecture sur cette source.
Pour arrêter l'enregistrement
Appuyez sur la touche Stop (H) pour arrêter l'enregistrement.
< Si le CD-R est finalisé, il peut être lu par un autre lecteur de CD.
< Si vous finalisez un CD-RW, il deviendra lisible par d'autres lecteurs
de CD compatibles avec les CD-RW. Pour ré-enregistrer sur un
CD-RW finalisé, définalisez-le (page 85).
< La longueur minimum d’une plage nécessaire pour un
enregistrement est de 10 secondes. Si vous appuyez sur
la touche d’arrêt (H) 10 secondes après le début d’une plage,
l’enregistrement continue pendant 10 secondes avant de s’arrêter.
FRANÇAIS
< Si vous remplissez complètement un CD-R/CD-RW avec des
enregistrements, vous devez le finaliser avant de le sortir.
Cela arrête le clignotement de l'indicateur CD RECORD rouge à
droite de l'écran et de l'indicateur dans l'écran.
Q ATTENTION
N'éteignez pas l'unité et ne débranchez pas son cordon
d'alimentation durant l'enregistrement. Cela pourrait
endommager l'unité et les appareils connectés.
< Si le CD est plein avant la fin de l'enregistrement, celui-ci s'arrête.
< Pour arrêter temporairement l'enregistrement, appuyez sur la
touche Lecture/Pause (t/J) de CD. Une seconde pression fait
reprendre l'enregistrement. Chaque fois que vous mettez en
pause l'enregistrement un nouveau numéro de piste est ajouté.
Enregistrement depuis une cassette
Quand la lecture de la source s'arrête, l'enregistrement aussi,
automatiquement. Pour arrêter l'enregistrement, appuyez sur la
touche d'arrêt (H) de CD. Cela arrête aussi la lecture de la source.
Enregistrement depuis une source externe
Quand la lecture de la source s'arrête, l'enregistrement ne
s'arrête pas automatiquement. Appuyez sur la touche d'arrêt (H)
de CD pour arrêter l'enregistrement.
Pour mettre en pause l'enregistrement
Appuyez sur la touche Lecture/Pause (t/J) de CD. “WAITING”
apparaît brièvement dans l'écran, puis l'enregistrement est mis en
pause.
Pour reprendre l'enregistrement, appuyez sur la touche Lecture/
Pause (t/J) de CD.
< Vous ne pouvez pas relancer l'enregistrement tant que “WAITING”
est affiché.
< Rappelez-vous que chaque fois que l’enregistrement est mis en
pause ou arrêté, un nouveau numéro de piste est toujours affecté.
Il n’est pas possible d’enregistrer une piste en deux “passes”.
81
Page 82

ALLYONEYOFF
LINE IN PHONO
LINE IN PHONO
Enregistrement sur CD (3)
Division manuelle de piste
Il est possible de diviser une plage en plusieurs plages en
appuyant sur la touche RECORD (K RECORD) pendant
l’enregistrement.
< La division manuelle de piste est possible quel que soit le réglage
AUTO.
< Une plage ne peut pas durer moins de 10 secondes. La touche
RECORD (K RECORD) ne fonctionne pas si elle est pressée moins
de 10 secondes après le début d’une plage.
Enregistrement automatique sur CD
La fonction très pratique d'enregistrement automatique lance
automatiquement l'enregistrement à réception de signaux
analogiques ou numériques d'un appareil externe connecté tel qu'un
lecteur de CD ou une platine MD, et arrête l'enregistrement à la fin de
la réception du signal.
Pour les CD, MD ou DAT
L'enregistrement automatique démarre quand un signal
numérique est détecté, c'est-à-dire au début d'une piste. Il s'arrête
si durant une période de cinq secondes le son descend sous le
niveau seuil de changement de piste (auto track) spécifié.
Pour les sources numériques autres que celles ci-dessus et
pour les sources analogiques
L'enregistrement automatique démarre quand un son dépassant
le niveau seuil de changement de piste (auto track) spécifié est
détecté. L'enregistrement automatique s'arrête si durant une
période de huit secondes le son descend sous le niveau seuil de
changement de piste (auto track) spécifié.
Suivez les étapes 1 à 5 de “À propos de
1
l'enregistrement” pour faire les réglages, et appuyez sur
la touche d'arrêt (H) de CD.
< Comme le niveau d'enregistrement ne peut pas être réglé
quand la source d'enregistrement est l'entrée numérique (
), sautez les étapes 4 et 5.
Appuyez sur la touche SYNC et sélectionnez “SYNC 1” ou
2
“SYNC ALL”.
Chaque fois que vous appuyez sur la touche d'enregistrement
automatique (SYNC), l'automatisme d'enregistrement change.
Sélectionnez un des trois modes.
ALL
Enregistrement automatique de toutes les pistes.
ONE
Enregistrement automatique d'une piste puis arrêt
de l'enregistrement.
82
OFF
Pas d'enregistrement automatique.
Page 83

Préparez la source d'enregistrement.
3
Enregistrement depuis une cassette
Pour enregistrer la totalité de la cassette, rembobinez-la jusqu'à
son point de départ. Pour enregistrer depuis le milieu de la
cassette, arrêtez-la ou mettez-la en pause à l'endroit duquel doit
démarrer l'enregistrement.
Sélectionnez le réglage DOLBY NR (réduction de bruit) (page 58).
Lancez la lecture de la source.
5
L’enregistrement automatique démarrera.
Durant l’enregistrement automatique, si aucun son n'est
entendu durant 8 secondes ou plus, l’enregistrement s’arrête.
Pour enregistrer de la musique contenant de telles périodes de
silence, désactivez l'enregistrement automatique. Après avoir
désactivé l'enregistrement automatique, lancez l'enregistrement
manuellement, puis faites jouer la source à enregistrer.
Pour enregistrer une seule face, réglez le sélecteur REV MODE
sur u, et la direction d'enregistrement à l'aide des touches de
lecture normale (t) ou reverse (g). Puis appuyez sur la touche
d'arrêt TAPE ( H).
Pour enregistrer les deux faces de la cassette, réglez le sélecteur
REV MODE sur j et la direction d'enregistrement sur t. Si
vous réglez la direction d'enregistrement sur g, seule la “face B”
sera enregistrée.
Appuyez sur la touche RECORD (K RECORD).
4
Cela fait clignoter l'indicateur CD RECORD rouge à droite de
l'écran et l'indicateur dans l'écran.
< Aucune touche ne fonctionne tant que “WAITING” (attente)
est affiché. Attendez quelques secondes que “WAITING”
disparaisse de l'écran. Si DIGITAL a été sélectionné, la fréquence
d'échantillonnage de la source numérique ( ) (“FS 44_1K”,
“FS 48K” or “ FS 32K”) apparaît brièvement après “WAITING”.
< “OPTICAL UNLOCK” apparaît quand l'unité ne détecte pas de
signal numérique. Dans ce cas, branchez une source numérique
à la prise DIGITAL IN, allumez-la, et attendez quelques secondes
que l'appareil passe en pause d'enregistrement.
< Appuyez sur la touche d'arrêt (H) pour arrêter manuellement
l'enregistrement.
< L'automatisation de l'enregistrement est automatiquement
désactivée après l'enregistrement.
< Le mode d’enregistrement synchronisé (une plage ou toutes les
plages) ne peut pas être changé pendant l’enregistrement ou en
mode de pause à l’enregistrement.
< Si vous sélectionnez SYNC ALL, AUTO TRACK sera activé, et le seuil
de détection automatique de piste sera réglé à −60dB (−50dB
pour l'entrée de signal analogique). Utilisez la touche AUTO pour
sélectionner le niveau seuil AUTO TRACK.
< Même si la touche AUTO est réglée sur MANUAL, la fonction
auto track sera en service durant l'enregistrement automatique.
Le niveau seuil auto track est réglé sur –60 dB (–50dB si vous
enregistrez via ANALOG). Le réglage revient automatiquement sur
MANUAL après l'enregistrement.
< En enregistrement numérique, l'enregistrement automatique peut
ne pas démarrer en fonction du lecteur source numérique. Dans ce
cas, lancez et arrêtez manuellement l'enregistrement.
< Selon la source, du silence peut être détecté, causant l'arrêt de
l'enregistrement en cours de piste ou faisant manquer son début.
Si cela se produit, réglez AUTO TRACK sur MANUAL et enregistrez
manuellement.
FRANÇAIS
< Si vous ne pouvez pas enregistrer même en appuyant sur la
touche d’enregistrement de CD (K RECORD), chargez un disque
enregistrable. Vérifiez que “NO TOC” et “CD-R” (ou “CD-RW”)
apparaissent sur l’affichage et appuyez de nouveau sur la touche
d’enregistrement de CD (K RECORD).
83
Page 84

Finalisation
La finalisation est l'ajout sur les disques d'une table des matières ou
TOC (informations sur les données enregistrées).
Si vous finalisez un CD-R, il deviendra lisible par d'autres lecteurs
de CD. Les CD-R finalisés ne peuvent plus recevoir d'autres
enregistrements.
Si vous finalisez un CD-RW, il deviendra lisible par d'autres lecteurs de
CD compatibles avec les CD-RW.
Appuyez sur la touche SOURCE d'entrée et sélectionnez
1
le mode CD.
Appuyez sur la touche de lecture/pause de CD (t/J)
4
pour démarrer la finalisation.
La finalisation démarre.
Une fois la finalisation terminée, l'écran affiche brièvement
“COMPLETE” avant de retrouver son apparence ordinaire
(nombre total de pistes et durée totale de lecture).
< Ne coupez jamais l'alimentation et ne débranchez pas le cordon
d'alimentation durant la finalisation.
< Durant la finalisation, aucune touche ne fonctionne.
Chargez un disque (enregistrable) non finalisé.
2
Appuyez à l'arrêt sur la touche FINALIZE/ERASE (finaliser/
3
effacer).
Appuyez une fois sur la touche FINALIZE/ERASE.
“FINALIZE” s'affiche.
< Si “UNFINALIZE” s'affiche, c'est que le disque est déjà finalisé et
qu'aucune finalisation n'est nécessaire.
< Pour annuler l'opération à ce moment, appuyez sur la touche
d'arrêt (H).
84
Page 85

Définalisation (CD-RW uniquement)
Pour ré-enregistrer sur un CD-RW finalisé, définalisez-le.
En définalisant (par annulation de la finalisation), vous pouvez de
nouveau enregistrer et supprimer des pistes sur le CD-RW.
Appuyez sur la touche SOURCE d'entrée et sélectionnez
1
le mode CD.
Chargez un disque finalisé (donc non enregistrable).
2
Appuyez sur la touche de lecture/pause de CD (t/J)
4
pour démarrer la définalisation.
La définalisation démarre.
Une fois la définalisation terminée, l'écran affiche brièvement
“COMPLETE” avant de retrouver son apparence ordinaire
(nombre total de pistes et durée totale de lecture).
< Ne coupez jamais l'alimentation et ne débranchez pas le cordon
d'alimentation durant la définalisation.
< Durant la définalisation, aucune touche ne fonctionne.
FRANÇAIS
Appuyez à l'arrêt sur la touche FINALIZE/ERASE (finaliser/
3
effacer).
Appuyez une fois sur la touche FINALIZE/ERASE.
“UNFINALIZE” (définaliser) s'affiche.
< Si “FINALIZE” s'affiche, c'est que le disque n'est pas finalisé et
qu'aucune définalisation n'est nécessaire.
< Pour annuler l'opération à ce moment, appuyez sur la touche
d'arrêt (H).
85
Page 86

FINALIZE
Z
ERASE #
(# est le n° de la dernière piste)
(non affiché si 1 seule piste est enregistrée)
Z
ERSAE DISC
Z
Mode de lecture ordinaire
(nombre total de pistes et durée totale de lecture)
Effacement de pistes d'un disque (CD-RW uniquement)
Appuyez sur la touche SOURCE d'entrée et sélectionnez
1
le mode CD.
Chargez un CD-RW non finalisé ou définalisé.
2
< Si vous chargez un disque finalisé, “UNFINALIZE” s'affiche. Vous
devez définaliser le disque avant de pouvoir effacer ses pistes
(page 85).
Effacement de la dernière piste
Appuyez sur la touche FINALIZE/ERASE jusqu'à l'affichage de
“ERASE” et du numéro de la dernière piste.
< Vous pouvez aussi effacer en une fois toutes les plages à
partir du numéro de plage sélectionné jusqu’à la dernière
plage. Pour le faire, utilisez la touche de saut (. ou /)
pour sélectionner la plage à partir de laquelle vous souhaitez
démarrer l’enregistrement. (Vous ne pouvez pas effacer
uniquement certaines plages avant la dernière plage.)
Effacement de toutes les plages (mode ordinaire)
< Appuyez sur la touche FINALIZE/ERASE jusqu’à ce que “ERASE
DISC” apparaisse sur l'affichage.
Appuyez sur la touche de lecture/pause de CD (t/J)
4
pour démarrer l’effacement.
Appuyez à l'arrêt sur la touche FINALIZE/ERASE (finaliser/
3
effacer).
< Chaque fois que vous appuyez sur la touche ERASE, l'affichage
change comme suit:
La ou les pistes seront effacées.
Une fois l'effacement terminé, l'écran retrouve son apparence
ordinaire (nombre total de pistes et durée totale de lecture).
< N'éteignez pas l'unité et ne débranchez pas son cordon
d'alimentation durant l'effacement.
< Durant l'effacement, les touches ne fonctionnent pas.
< L'effacement ne peut pas être annulé! Soyez bien sûr de vouloir
effacer le contenu d'un CD avant de commencer.
< Si un disque finalisé est mis en place, “UNFINALIZE” est affiché.
Comme un disque finalisé ne peut pas être effacé, vous devez
d’abord le définaliser (page 85).
86
Page 87

LINE IN PHONO
Enregistrement sur un lecteur flash USB (1)
En utilisant cet appareil, le contenu des CD, des cassettes audio et de
l’entrée audio d’autres appareils par les prises LINE IN et PHONO, et la
prise DIGITAL IN peut être converti au format MP3 et enregistré sur
des lecteurs flash USB.
< Cet appareil peut aussi enregistrer sur des CD et des cassettes
audio, mais il ne peut pas enregistrer simultanément sur ces
supports et les lecteurs flash USB.
< L'enregistrement avec minuterie ne peut pas se faire sur CD ou
support USB.
Q ATTENTION
Ne déconnectez pas le lecteur flash USB pendant
l’enregistrement. Ne mettez pas l’appareil hors tension
ou ne débranchez pas le cordon d’alimentation pendant
l’enregistrement. Cela pourrait endommager l’AD-RW900
et le lecteur flash USB connecté.
A propos des fichiers MP3 enregistrés
< Lors de l’enregistrement, un dossier “RECORD” est créé
automatiquement et un sous-dossier pour chaque source (“CD”,
“TAPE”, “LINE”, “PHONO” ou “DIGITAL”) est aussi créé dans le
dossier “RECORD”. Les fichiers MP3 sont ajoutés au sous-dossier
correspondant.
< Les noms de fichier se voient automatiquement assigner un suffixe
numérique par ordre croissant.
Insérez un lecteur flash USB dans la prise USB.
1
< Vous ne pouvez pas enregistrer sur un lecteur flash USB s’il n’y
a pas suffisamment d’espace libre ou si le périphérique est
protégé en écriture.
< Avant l’enregistrement, vérifiez la capacité restante du lecteur
flash USB en utilisant un ordinateur. Vous ne pouvez pas vérifier
la capacité mémoire restante avec cet appareil.
Appuyez répétitivement sur la touche SOURCE jusqu'à
2
sélection de la source à enregistrer (CD, TAPE ou LINE).
FRANÇAIS
Enregistrement depuis un CD
“CD001.MP3”, “CD002.MP3” …
S'il y a déjà des fichiers nommés par exemple “CD004.MP3” et
“CD009.MP3” dans le dossier USB et si vous faites un enregistrement,
le prochain fichier nouveau sera “CD010.MP3”.
< Si vous démarrez l’enregistrement d’une plage ou d’un fichier
dont la lecture a déjà commencée, la durée écoulée de la plage/
fichier en cours d’enregistrement qui apparaît sur l’affichage sera
la même que la durée écoulée de la plage actuelle qui est aussi
affichée sur l’affichage.
Enregistrement depuis une cassette
“T001.MP3”, “T002.MP3“ …
Si vous enregistrez depuis une source externe
“L001.MP3”, “L002.MP3“ …
< Pendant l’enregistrement à partir d’une cassette ou de
l’entrée d’une source extérieure, vous pouvez diviser le fichier
manuellement (page89). Dans ce cas, des numéros consécutifs
sont ajoutés à la fin des noms de fichier.
Exemple:
Par exemple, si vous divisez manuellement “T001.MP3” pendant un
enregistrement, les nouveaux noms de plage seront “T001.MP3” et “T002.MP3”.
< Cet appareil peut enregistrer un maximum de 999 fichiers sur un
lecteur flash USB. Cependant, si le lecteur flash USB contient déjà
des fichiers, ces fichiers seront compris lors de l’enregistrement
dans le nombre maximum des 999 fichiers.
Appuyez sur la touche RECORD USB pour armer
3
l'enregistrement.
Le témoin rouge situé au-dessus de la touche RECORD USB et
l'icône de l'écran clignote.
< Pour arrêter l'enregistrement, appuyez sur la touche arrêt (H) de
l'USB.
< La durée d’enregistrement pour une fichier est inférieure à 600
minutes.
< Les plages enregistrés sur un lecteur flash USB sont convertis sur
des fichiers MP3 à un débit binaire de 128kbps.
Suite à la prochaine page
87
Page 88

LINE IN PHONO
Enregistrement sur un lecteur flash USB
(Quand vous enregistrez depuis une cassette, l'entrée
4
LINE IN ou PHONO)
Réglez le niveau d'enregistrement.
Avant d'enregistrer, réglez le niveau d'enregistrement. Ne pas
le faire peut entraîner une distorsion du son enregistré ou des
parasites.
1. Faites jouer la source (cassette ou source externe) à
enregistrer.
2. Utilisez le bouton REC LEVEL pour régler le niveau
d'enregistrement afin que le son le plus fort ne fasse jamais
s'allumer le témoin “OVER” dans l'indicateur de niveau crête.
(2)
Préparez la source d'enregistrement.
5
Enregistrement à partir d’un CD
Pour enregistrer tous les fichiers/pistes d'un CD, arrêtez d'abord
le disque. Pour n'enregistrer que certains des fichiers/pistes d'un
CD, mettez ce dernier en pause au début du passage que vous
voulez enregistrer.
Vous pouvez aussi enregistrer les pistes dans l'ordre programmé.
Pour des informations sur la façon de définir le programme, voir
page73-75.
Enregistrement à partir d’une cassette audio
Pour enregistrer la totalité de la cassette, rembobinez-la jusqu'à
son point de départ. Pour enregistrer depuis le milieu de la
cassette, arrêtez-la ou mettez-la en pause à l'endroit duquel doit
démarrer l'enregistrement.
Sélectionnez le réglage DOLBY NR (réduction de bruit) (page 58).
Pour enregistrer une seule face, réglez le sélecteur REV MODE
sur u, et la direction d'enregistrement normale (t) ou reverse
(g). Puis appuyez sur la touche d'arrêt TAPE (H).
< Différentes sources devant être enregistrées auront différents
volumes. Pour enregistrer au volume optimal pour chaque
source, il est nécessaire de régler le niveau d'enregistrement
pour chaque source.
< Vous ne pouvez pas ajuster le niveau d’enregistrement
pendant l’enregistrement à partir d’un CD ou de la source
DIGITAL.
Pour enregistrer les deux faces, réglez le sélecteur REV MODE sur
j et la direction d'enregistrement sur t. Si vous la réglez sur
g
, seule la “face B” sera enregistrée.
Enregistrement depuis une source externe
Préparez-vous à lancer la lecture de l'appareil source.
Exemple: faites la sélection de source sur un amplificateur.
Réglez le support à lire dans le lecteur connecté.
Pour enregistrer depuis un tuner, calez-vous sur
une station.
88
Page 89

Appuyez à nouveau sur la touche RECORD USB pour
6
lancer l'enregistrement.
Si vous enregistrez depuis une source externe, vous devez
également lancer la lecture sur cette source.
Le témoin rouge situé au-dessus de la touche RECORD USB et
l'icône de l'écran cessent de clignoter.
Q ATTENTION
N'éteignez pas l'unité et ne débranchez pas son cordon
d'alimentation durant l'enregistrement. Cela pourrait
endommager l'unité et les appareils qui lui sont
connectés.
< Si l’espace libre sur lecteur flash USB disparaît pendant
l’enregistrement, l’enregistrement s’arrête automatiquement.
Division manuelle de fichiers
(ajout de numéros de plage pendant l’enregistrement)
Lors de l’enregistrement à partir d’une cassette ou d’un périphérique
connecté aux prises LINE IN ou PHONO ou l’enregistrement à partir
d’un appareil en pause, vous pouvez appuyez sur la touche RECORD
USB pour diviser l’enregistrement en plages et créer des nouveaux
noms de fichier.
La division de plages prend plusieurs secondes environ.
Vous ne pouvez pas diviser manuellement des pistes quand
vous enregistrez des CD (depuis un CD, les pistes sont divisées
automatiquement).
FRANÇAIS
Si vous enregistrez depuis les entrées ligne (LINE) :
Pendant la division de fichier, un espace doit être laissé dans
l’enregistrement.
< Pour mettre en pause l’enregistrement temporairement,
appuyez sur la touche de lecture/pause USB (t/ J ).
Appuyez une deuxième fois sur la touche pour reprendre
l’enregistrement.
Enregistrement à partir d’un CD ou d’une cassette audio
Quand la lecture de la source s'arrête, l'enregistrement s'arrête
aussi automatiquement.
Pour arrêter l'enregistrement, appuyez sur la touche d'arrêt USB
(H). Cela arrête aussi la lecture de la source de l'enregistrement.
Enregistrement depuis une source externe
Quand la lecture de la source s'arrête, l'enregistrement ne
s'arrête pas automatiquement. Appuyez sur la touche d'arrêt USB
(H) pour arrêter la l'enregistrement.
< Cette unité ne peut pas diviser un fichier MP3 déjà enregistré.
Cette fonction n'agit que durant l'enregistrement.
< Des numéros consécutifs sont ajoutés à la fin des noms de fichier
issus de la division.
Exemple:
Si vous divisez manuellement “T001.MP3” pendant un
enregistrement, les nouveaux noms de plage seront “T001.MP3”
et “T002.MP3”.
89
Page 90

LINE IN PHONO
Effacement de fichiers à partir d’un lecteur flash USB
Q ATTENTION
Ne déconnectez pas le lecteur flash USB pendant
l’effacement. Ne mettez pas l’appareil hors tension
ou ne débranchez pas le cordon d’alimentation pendant
l’effacement. Cela pourrait endommager l’AD-RW900 et le
lecteur flash USB connecté.
Effacement d'un fichier
Lancez la lecture du fichier que vous voulez supprimer
1
(page70).
Appuyez sur la touche ERASE.
2
Enregistrement sur cassette (1)
En utilisant cet appareil, le contenu des CD, des lecteurs flash USB et
de l’entrée audio d’autres appareils par les prises LINE IN et PHONO ou
la prise DIGITAL IN peut être enregistré sur des cassettes audio.
Vous pouvez enregistrer sur une cassette Normal (type ) et Chrome
(type ) avec cet appareil. L’enregistrement sur une cassette Metal
(type ) n’est pas pris en charge par cet appareil.
< Vous pouvez enregistrer sur une seule face ou sur les deux faces
d’une cassette.
< Cet appareil peut aussi enregistrer sur des CD et des lecteurs
flash USB, mais il ne peut pas enregistrer simultanément sur ces
supports et les cassettes audio.
Placez une cassette dans le compartiment.
1
“Erase file?” (effacer fichier ?) s'affiche.
Dans les 6 secondes, appuyez à nouveau sur la touche
3
ERASE.
“Erasing” s'affiche, le fichier actuellement lu est effacé et la
lecture s'arrête.
< Si les languettes de protection contre l’enregistrement ont été
cassées, recouvrez les trous par des morceaux de ruban adhésif.
Appuyez répétitivement sur la touche SOURCE jusqu'à
2
sélection de la source à enregistrer (CD, USB, LINE IN,
PHONO ou DIGITAL).
90
Page 91

Réglez le mode d'inversion avec le sélecteur REV MODE
3
et réglez la direction d'enregistrement.
Pour enregistrer sur une seule face, réglez le sélecteur REV
MODE sur u, et la direction d'enregistrement sur normale (t)
ou reverse (g). Puis appuyez sur la touche d'arrêt TAPE (H).
Pour enregistrer les deux faces de la cassette, réglez le sélecteur
REV MODE sur j ou p, et la direction d'enregistrement sur
t
. Si vous réglez la direction d'enregistrement sur g, seule la
“face B” sera enregistrée.
Réglez le niveau d'enregistrement.
6
Avant d'enregistrer, réglez le niveau d'enregistrement sous peine
de distorsion du son enregistré ou de parasites.
1. Faites jouer la source (source externe) à enregistrer.
2. Utilisez le bouton REC LEVEL pour régler le niveau
d'enregistrement afin que le son le plus fort ne dépasse pas
continuellement "0" dans l'indicateur de niveau crête.
Réglez le commutateur DOLBY NR (réduction de bruit)
4
sur ON ou OFF.
Pour des informations sur la fonction DOLBY NR, voir page58.
Appuyez sur la touche RECORD TAPE pour entrer en
5
mode d’attente d’enregistrement.
< Différentes sources à enregistrer auront différents volumes.
Pour enregistrer chaque source au volume optimal, il faut
régler le niveau d'enregistrement pour chacune.
Préparez la source d’enregistrement.
7
Enregistrement à partir d’un CD
Pour enregistrer tous les fichiers/pistes d'un CD, arrêtez d'abord
le disque. Pour n'enregistrer que certains fichiers/pistes d'un CD,
mettez ce dernier en pause au début du passage à enregistrer.
Vous pouvez aussi enregistrer les pistes dans l'ordre programmé.
Pour des informations sur la façon de définir le programme, voir
page73-75.
Enregistrement à partir d’un lecteur flash USB
Pour enregistre tout le contenu du lecteur flash USB, mettez
l’appareil en mode d’arrêt. Pour enregistrer à partir du milieu
du lecteur flash USB, faites une pause à l’endroit à partir duquel
vous souhaitez démarrer l’enregistrement.
Vous pouvez aussi enregistrer les pistes dans l'ordre programmé.
Pour des informations sur la façon de définir le programme, voir
page73-75.
FRANÇAIS
Le témoin rouge situé au-dessus de la touche RECORD TAPE et
l'icône de l'écran clignotent.
< Pour arrêter l'enregistrement, appuyez sur la touche d'arrêt TAPE
(H).
< Voir page98 des infos sur l'ordre de lecture des fichiers MP3.
Enregistrement depuis une source externe
Préparez-vous à lancer la lecture de l'appareil source.
Exemple: faites la sélection de source sur un amplificateur.
Réglez le support à lire dans le lecteur connecté.
Pour enregistrer un tuner, réglez une station.
Suite à la prochaine page
91
Page 92

LINE IN PHONO
Enregistrement sur cassette (2)
Appuyez à nouveau sur la touche RECORD TAPE pour
8
lancer l'enregistrement.
Si vous enregistrez depuis une source externe, vous devez
également lancer la lecture sur cette source.
Effacement d'enregistrements
Avec chaque nouvel enregistrement, le contenu de la cassette est
remplacé (l’enregistrement précédent est effacé.) Vous pouvez effacer
une cassette en réglant le niveau d’enregistrement sur MIN pour
enregistrer un silence.
< Nous recommandons que vous utilisiez une source
d’enregistrement sans son.
Appuyez sur la touche RECORD TAPE pour démarrer
1
l’attente d’enregistrement.
Le témoin rouge situé au-dessus de la touche RECORD TAPE et
l'icône de l'écran cessent de clignoter.
Q ATTENTION
N'éteignez pas l'unité et ne débranchez pas son cordon
d'alimentation durant l'enregistrement. Cela pourrait
endommager l'unité et les appareils qui lui sont
connectés.
< Pour arrêter temporairement l'enregistrement, appuyez sur la
touche pause de TAPE (J). Appuyez à nouveau sur cette touche
pour reprendre l'enregistrement.
Enregistrement à partir d’un CD ou d’un lecteur flash USB
Quand la lecture de la source s'arrête, l'enregistrement s'arrête
aussi automatiquement.
Pour arrêter l'enregistrement, appuyez sur la touche d'arrêt TAPE
(H). Cela arrête aussi la lecture de la source de l'enregistrement.
< Pendant l’enregistrement auto-reverse d’une cassette, si la
“face A” de la cassette se termine au milieu d’une plage/fichier
pendant l’enregistrement à partir d’un CD ou d’un lecteur flash
USB, l’appareil reprend l’enregistrement sur la “face B” à partir du
début de la plage/fichier qui a été interrompu.
Réglez la commande REC LEVEL à la position minimum
2
(MIN).
Appuyez sur la touche de lecture normale (t) ou reverse
3
(g) pour lancer l'effacement (par enregistrement de
silence).
Enregistrement depuis une source externe
Quand la lecture de la source s'arrête, l'enregistrement ne
s'arrête pas automatiquement. Appuyez sur la touche d'arrêt
TAPE (H) pour arrêter la lecture.
92
Page 93

Lecture et enregistrement pilotés par minuterie (1)
Prise secteur
AD-RW900
Réglez cor
sélec
et autr
Brancher une minuterie du commerce à votre configuration audio
vous permet de vous réveiller avec votre musique favorite ou de
lancer un enregistrement à une heure déterminée.
< La source de la lecture avec minuterie doit être CD, TAPE ou USB.
La lecture avec minuterie ne fonctionne pas avec des appareils
externes branchés aux entrées LINE.
< La source d'enregistrement avec minuterie ne peut être qu'un
appareil externe branché aux entrées LINE. Et l'enregistrement
avec minuterie ne peut se faire que sur cassette.
Branchements
Référez-vous à l'illustration ci-dessous pour brancher vos
équipements audio.
Minuterie
Lecture pilotée par minuterie (
< La source de la lecture avec minuterie doit être CD, TAPE ou USB.
La lecture avec minuterie ne fonctionne pas avec des appareils
externes branchés aux entrées LINE.
Branchez cette unité et une chaîne stéréo à une
1
minuterie du commerce (voir colonne de gauche).
Assurez-vous que la prise à laquelle est branchée la minuterie
reçoit du courant quand elle est utilisée.
Réglez l'interrupteur d'alimentation et tous les éléments
2
sur ON.
Préparez la source pour la lecture avec minuterie.
3
Quand vous choisissez une cassette
e Réglez le sélecteur REV MODE sur la position désirée. Pour
lire en continu les deux faces, réglez le sélecteur REV MODE
sur la position p.
)
FRANÇAIS
Pour enregistrer avec
minuterie un programme
radio, réglez votre tuner
en fonction.
rectement les
teurs d’entrée/sortie
es options.
Trajet du signal à
l’enregistrement
Source audio
Amplificateur
Trajet du
signal
en lecture
e Réglez le commutateur DOLBY NR (page 58).
La lecture commence toujours par la "face A".
Réglez le sélecteur CD-TAPE-USB sur la source désirée
4
pour la lecture avec minuterie.
Réglez le sélecteur OFF-PLAY-REC sur la position PLAY
5
(lecture).
Q Éteignez tous vos équipements avant de faire les
raccordements.
< Lisez les modes d'emploi de tous les éléments que vous comptez
employer avec cette unité.
< Assurez-vous que chaque fiche est bien enfoncée. Pour éviter
tout ronflement ou bruit parasite, ne regroupez pas les câbles de
connexion.
"TIMER" s'affiche dans l'écran de l'AD-RW900.
Suite à la prochaine page
93
Page 94

Lecture et enregistrement pilotés par minuterie (2)
Réglez la minuterie sur les heures de démarrage (mise
6
sous tension) et d'arrêt (extinction) désirées.
Une fois ce réglage fait, tous les éléments doivent être éteints.
À ce moment, n'appuyez pas sur l'interrupteur
d'alimentation POWER de l'AD-RW900. Laissezle enfoncé (en position de mise sous tension). Si
l'interrupteur d'alimentation POWER n'est pas enclenché,
la lecture avec minuterie ne fonctionnera pas.
Quand l'heure préréglée pour le démarrage est
atteinte, l'alimentation est fournie et la lecture démarre
automatiquement.
< Si vous ne désirez pas utiliser la minuterie, réglez le sélecteur
OFF-PLAY-REC sur la position OFF.
Enregistrement piloté par minuterie
< La source d'enregistrement avec minuterie ne peut être qu'un
appareil externe branché aux entrées LINE. Et l'enregistrement
avec minuterie ne peut se faire que sur cassette.
(
REMARQUE
Si la cassette a déjà été utilisée, et si la bande est arrêtée quelque
part au milieu de la "face B", l'enregistrement avec minuterie
démarrera au beau milieu de la "face A". Gardez bien cela à
l'esprit pour ne pas risquer d'effacer accidentellement des
enregistrements importants. Vous devez particulièrement en
tenir compte si vous enregistrez plus d'une fois sur la même
cassette à l'aide de la fonction d'enregistrement avec minuterie.
Réglez le sélecteur CD-TAPE-USB sur TAPE.
4
)
< Cet appareil ne peut pas enregistrer sur des CD ou des lecteurs
flash USB avec l’enregistrement par minuterie.
Réglez le sélecteur OFF-PLAY-REC sur la position REC
5
(enregistrement).
< Le niveau d'enregistrement est réglé sur 0 dB; il ne peut pas être
ajusté.
(Exemple : enregistrement d'un programme radiodiffusé)
Branchez cette unité et une chaîne stéréo à une
1
minuterie du commerce (voir page 93).
Réglez l'interrupteur d'alimentation et tous les éléments
2
sur ON.
Préparez la cassette sur laquelle vous voulez enregistrer
3
avec la minuterie.
L'enregistrement commence toujours par la "face A".
Pour enregistrer sur une seule face, réglez le sélecteur REV
MODE sur u.
Pour enregistrer sur les deux faces de la cassette, réglez le
sélecteur REV MODE sur j ou p.
"TIMER" et s'affichent dans l'écran de l'AD-RW900.
Calez-vous sur la station que vous voulez enregistrer (si
6
vous enregistrez la radio).
Réglez la minuterie sur les heures de démarrage (mise
7
sous tension) et d'arrêt (extinction) désirées.
Une fois ce réglage fait, tous les éléments doivent être éteints.
À ce moment, n'appuyez pas sur l'interrupteur
d'alimentation POWER de l'AD-RW900. Laissez-le enfoncé
(en position de mise sous tension). Si l'interrupteur
d'alimentation POWER n'est pas enclenché, l'enregistrement
avec minuterie ne fonctionnera pas.
Réglez le commutateur DOLBY NR (page 58).
Si les languettes de protection contre l’enregistrement ont été
cassées, recouvrez les trous par des morceaux de ruban adhésif.
Avec cette unité, vous pouvez enregistrer sur des cassettes de
type normal (type ) et Chrome (type ).
94
Quand l'heure préréglée pour le démarrage est atteinte,
l'alimentation est fournie et l'enregistrement démarre
automatiquement.
< Quand vous ne voulez pas utiliser de minuterie, veillez à régler
le sélecteur OFF-PLAY-REC en position OFF afin d'éviter un
enregistrement accidentel sur une cassette importante.
Page 95

$'5:)DFHDUULªUH
Enregistrement dans un ordinateur (1)
Illustration du branchement
2UGLQDWHXU
Sur sa face arrière, cette unité a un port USB pour la sortie des signaux
audio. Quand elle est reliée à un ordinateur par un câble USB, cette
unité peut convertir les signaux audio en données numériques et les
envoyer à l'ordinateur.
< Utilisez un câble du commerce pour faire le branchement.
Branchement à un ordinateur
Mettez l'ordinateur sous tension.
1
Vérifiez que son système d'exploitation (OS) a normalement
démarré.
Connectez cet appareil à un ordinateur en utilisant un
2
câble USB.
Appuyez sur la touche POWER pour allumer l’unité.
3
Quand l'ordinateur et cette unité sont connectés,
l'ordinateur doit automatiquement détecter le port USB
de cette unité et l'identifier comme “USB Audio CODEC”.
Réglage du niveau d'enregistrement
Quand l'unité est connectée à un ordinateur par USB, utilisez le
bouton REC LEVEL pour régler le niveau des données audio envoyées
à l'ordinateur.
Vérifiez le logiciel d’enregistrement de l’ordinateur ou le signal de cet
appareil reproduit par l’ordinateur, et utilisez le bouton LEVEL pour
augmenter le niveau de façon qu’il soit aussi fort que possible sans
distorsion.
< Même en cas de connexion à un ordinateur par USB, le bouton REC
LEVEL règle aussi le niveau d’enregistrement en armement pour
l’enregistrement et durant l’enregistrement.
FRANÇAIS
Sélection de la source d'enregistrement
Cette unité enverra à l'ordinateur l'audio lu. Appuyez sur la touche
SOURCE pour sélectionner la source de lecture (page67).
< Si le niveau d’enregistrement peut aussi être ajusté par le logiciel
d’enregistrement de l’ordinateur que vous utilisez, réglez son
niveau d’enregistrement approximativement au centre de l’échelle
fournie avant d’ajuster le niveau envoyer par cet appareil.
< Évitez les choses suivantes quand l’appareil est connecté à un
ordinateur par USB et lors de d’un enregistrement audio parce
que cela peut causer un mauvais fonctionnement de l’ordinateur.
Quittez toujours le logiciel d’enregistrement de l’ordinateur avant
de réaliser ce qui suit.
Débrancher le câble USB
N
Mettez hors tension cet appareil.
N
Suite à la prochaine page
95
Page 96

Enregistrement dans un ordinateur (2)
Dépannage (1)
< Si le réglage de volume est trop élevé, le son souffrira de
distorsion, donc vous devez utiliser le Panneau de configuration
Windows pour régler le volume.
Réglage du volume (Windows 7)
Suivez ces procédures pour régler le volume.
Cliquez sur Démarrer (icône de Windows).
1
Ouvrez le Panneau de configuration Son et cliquez sur
2
l’onglet Enregistrement. Sélectionnez Microphone (USB
Audio CODEC), cliquez sur le bouton Propriétés et ouvrez
l’onglet Niveaux.
Réglez le niveau de volume du micro pour ne pas avoir de
3
distorsion du son.
< Ce produit est conçu pour vous aider à enregistrer et reproduire
une oeuvre sonore dont vous détenez les droits, ou pour laquelle
vous avez obtenu la permission auprès du détenteur des droits ou
du possesseur autorisé de sa licence. A moins de détenir les droits
ou d’avoir obtenu la permission idoine du détenteur des droits
ou du possesseur autorisé de la licence, votre enregistrement,
reproduction ou distribution sans autorisation peut entraîner de
sévères condamnations en vertu des lois sur le droit d’auteur et
des traités de copyright internationaux. Si vous n’êtes pas certain
de vos droits, contactez votre conseiller juridique. En aucun cas,
TEAC Corporation ne sera responsable des conséquences d’une
quelconque copie illégale accomplie à l’aide de l’enregistreur.
En cas de problème avec l’appareil, prenez le temps de lire ces pages
et de voir si vous pouvez résoudre le problème tout seul avant de faire
appel à votre revendeur.
Par ailleurs, cette unité n'est peut-être pas la cause du problème.
Vérifiez que les appareils qui lui sont connectés sont bien employés.
Généralités
Pas d’alimentation
e Vérifiez que l’unité est bien branchée à la source d’alimentation
secteur. Assurez-vous que la source d’alimentation n’est pas une
prise commutée et, si c’est le cas, qu'elle est en service. Contrôlez
que la prise délivre bien du courant en y branchant un autre
appareil électrique, une lampe ou un ventilateur par exemple.
La télécommande ne fonctionne pas
e Appuyez sur la touche POWER de l’appareil pour le mettre sous
tension.
e Si les piles sont usées, changez-les.
e Utilisez la télécommande à portée de fonctionnement (5m) et
pointez-la vers le capteur de télécommande en face avant de
l’unité.
e Assurez-vous qu’il n’y a pas d’obstacle entre la télécommande et
l’unité.
e S’il y a un éclairage fluorescent près de l’unité, éteignez-le.
D'autres appareils à télécommande ne fonctionnent pas bien
e Notez que d'autres appareils à télécommande peuvent mal
fonctionner en raison d'un “débordement” de lumière infrarouge
quand vous utilisez la télécommande de cette unité à proximité.
Si c’est le cas, utilisez les touches de commande de cet appareil
au lieu de celles de la télécommande pour commander l’ADRW900.
Les touches ne fonctionnent pas correctement.
e Si une autre opération est toujours en cours, attendez un
moment et réessayez.
Il n'y a pas de son ou seul un son de très faible niveau se fait
entendre.
e Vérifiez le branchement à l'amplificateur.
e Vérifiez que les enceintes et autres éléments audio sont
correctement raccordés.
e Vérifiez que chacun des éléments raccordés fonctionne
correctement.
e Il peut y avoir un court-circuit +/_ dans un câble d'enceinte.
Vérifiez les câbles d'enceinte.
e Sélectionnez la source d'entrée correcte avec la touche SOURCE.
Un ronflement ou bruit sévère se fait entendre
e Placez l'unité aussi loin que possible d'un téléviseur.
e N’attachez pas ensemble les câbles audio avec les câbles
d’enceinte ou le cordon d’alimentation.
96
Page 97

Enregistreur de CD
Enregistreur à cassette
Pas de lecture
e Chargez un disque avec sa face sérigraphiée vers le haut.
e Si le disque est sale, nettoyez sa surface. S'il est rayé ou si une
substance collante se trouve à sa surface, ne le lisez pas tant
que vous n'avez pas corrigé l'état du disque. En aucun cas vous
ne devez utiliser d'étiquettes ni de dispositifs “d'amélioration de
disque” qui reposent au-dessus d'un disque ou l'enveloppent.
e Si c'est un disque vierge qui a été chargé, remplacez-le par un
disque enregistré.
e Selon le disque et d'autres facteurs, la lecture de certains CD-R/
RW peut ne pas être possible. Réessayez avec un autre disque.
e Vous ne pouvez pas faire lire de CD-R/RW non finalisé. Finalisez
un tel disque dans un enregistreur de CD et réessayez.
e Si de la condensation d’humidité s’est produite dans l’appareil,
laissez l’appareil pendant une ou deux heures sous tension.
Le son saute
e Placez l'unité sur une surface stable pour éviter les vibrations et
les chocs.
e Si le disque est sale, nettoyez sa surface.
e N'utilisez pas de disques rayés, endommagés ou gondolés.
L'enregistrement n'est pas possible
e Un disque réservé à la lecture ou déjà finalisé a été chargé.
Utilisez un disque enregistrable.
e Le niveau d'enregistrement est trop bas. Réglez le niveau
d'enregistrement.
e Le temps d'enregistrement restant sur le CD-R n'est pas suffisant.
Utilisez un autre disque.
e Si le temps d'enregistrement restant sur un CD-RW n'est pas
suffisant, effacez les dernières pistes ou changez de disque.
e L'enregistrement automatique ne démarre pas si le son entrant
est plus faible que le niveau seuil de changement de piste (auto
track).
Le compartiment de la cassette ne se ferme pas
e La cassette n'est pas correctement installée. Réinsérez-la.
La qualité sonore est médiocre
e Nettoyez les têtes (page54).
e Si une tête est magnétisée, démagnétisez-la avec un
démagnétiseur de tête.
e Vérifiez que le commutateur Dolby NR est bien réglé sur la même
position que lorsque l'enregistrement a été fait.
La vitesse de lecture semble un peu élevée ou faible
e Vérifiez le réglage de la commande de hauteur (page78).
L'auto-reverse ne fonctionne pas
e Réglez le sélecteur REV MODE sur j ou p.
e Si le sélecteur REV MODE est sur j, lancez la lecture depuis la
face de cassette visible (“face A”).
Impossible d'enregistrer
e Si les languettes de prévention contre l'effacement sur le dessus
de la cassette ont été cassées, recouvrez leur orifice à l'aide de
ruban adhésif.
e Vérifiez le réglage du niveau d'enregistrement (page91).
USB
Aucun son même quand on appuie sur la touche Lecture/
Pause (t/J) de l'USB
e Vérifiez qu’il y a des fichiers MP3 sur le lecteur flash USB.
e Les fichiers ayant un format autre que MP3 (par ex. fichier MPEG 1
LAYER 2) et WMA ne peuvent pas être lus.
FRANÇAIS
Les numéros et durées des pistes diffèrent de ceux des pistes
d'origine.
e L'unité reconnaît le début d'une piste en détectant la montée du
niveau sonore. Une partie silencieuse peut ne pas se voir assigner
de numéro de piste.
Impossible d'enregistrer
e Vérifiez que le lecteur flash USB a suffisamment d’espace libre.
e Vérifiez que le lecteur flash USB n’est pas verrouillé.
e Si vous enregistrez depuis une source analogique, vérifiez le
réglage des niveaux d'enregistrement (page88).
Suite à la prochaine page
97
Page 98

001 “ROOT”
Dépannage (2)
Ordre de lecture MP3
Fichiers MP3/WMA
Des caractères inconnus s'affichent à l'écran.
e Cette unité ne peut pas correctement afficher les symboles ni
les caractères à double octet (tels que les caractères japonais et
chinois). Les noms des fichiers MP3 ne doivent comporter que
des caractères alphanumériques pour bien s'afficher.
Fichiers MP3
“Title No” (informations sur le titre non disponibles), “Artist
No” (informations sur l’artiste non disponibles) ou “Album
No” (informations sur l’album non disponibles) apparaît sur
l’affichage.
e Il n'y a pas d'informations dans les balises ID3 du fichier
musical. Éditez le titre, le nom d'artiste et/ou les informations
d'album concernant le morceau sur un ordinateur à l'aide d'une
application adéquate.
Comme cet appareil utilise un microcontrôleur, un bruit
extérieur ou une autre interférence peut causer un mauvais
fonctionnement de cet appareil. Si cela se produit, mettez
l’appareil hors tension, attendez environ une minute et
remettez l’appareil sous tension.
Les fichiers MP3 sur un CD ou un lecteur flash USB peuvent être
stockés dans des dossiers de la même façon que les fichiers sont
traités sur un ordinateur. De plus, plusieurs dossiers peuvent être
contenus dans un autre dossier.
Voici un exemple de structure de fichiers et de dossiers d’un
disque MP3 ou d’un lecteur flash USB, montrant l’ordre des
dossiers (001 “ROOT” à 005) et l’ordre de lecture des fichiers.
(
1 à 9
1
2
).
Fichier MP3
Fichier MP3
Dossier 002
Dossier 003
3
Fichier MP3
4
Fichier MP3
Dossier 004
5
Fichier MP3
Dossier
7
Fichier MP3
Dossier 005
6
8
9
Fichier MP3
Fichier MP3
Fichier MP3
98
Page 99

Caractéristiques techniques
Enregistreur de CD
Capteur ..........................laser à semi-conducteur, 3 faisceaux
Support d'enregistrement ..............CD-R/CD-RW pour la musique
Fréquence d'échantillonnage d'enregistrement ..............44,1 k Hz
Réponse en fréquence ...................................20 Hz–20 kHz
(en lecture: ±1,5dB,
en enregistrement/lecture: ±2,0dB)
Rapport signal/bruit .........................90 dB ou plus (en lecture)
90 dB ou plus (en enregistrement/lecture numérique)
80 dB ou plus (en enregistrement/lecture analogique)
Plage dynamique ............................86 dB ou plus (en lecture)
86 dB ou plus (en enregistrement/lecture numérique)
78 dB ou plus (en enregistrement/lecture analogique)
Distorsion harmonique totale .............0,05% ou moins (en lecture)
0,05% ou moins (en enregistrement/lecture)
Sortie analogique .......................................... 2,0 V (RCA)
Platine cassette
Système de pistes ............................4 pistes, stéréo 2 canaux
Structure des têtes ........tête d'enregistrement/lecture ×1 (réversible)
tête d'eacement ×1
Type de bande ......................................... cassette C-60
Vitesse de délement ........................................4,76 cm/s
Moteur ...........................................servo moteur CC ×1
Commande de hauteur .............environ ±10 % (lecture seulement)
Pleurage et scintillement ..............................0,25% (W RMS)
Réponse en fréquence (globale) .......chrome: 50 – 12000Hz, ± 3dB
normal: 50 – 12000Hz, ± 3dB
Rapport signal/bruit (global) ...........59 dB (sans Dolby NR , DHT 3%
pondérée)
69dB (avec Dolby NR, 5kHz ou plus)
Durée de rembobinage ............................environ 150 s (C-60)
Entrée ligne (RCA) ..........0,46 V (impédance d'entrée 20 kΩ ou plus)
Sortie ligne (RCA) .........0,46 V (impédance de charge 50 kΩ ou plus)
Sortie casque ............................................10 mW/32 Ω
Entrée PHONO
Sensibilité d'entrée ......................................2,5 mV, 47 kΩ
Entrée audio numérique
USB
Prise USB (type A)
MP3 compatible
Norme prise en charge .................MPEG-1/2 Audio Layer-3
Extension de nom de chier ............................. “. mp3”
Fréquence d'échantillonnage ...................32, 44,1, 48 kHz
Débit binaire .........................................8–320 kb/s
Nombre maximal de dossiers ................................255
Nombre maximal de chiers ................................999
WMA compatible
Standard pris en charge ........Standard Windows Media Audio
(Non compatible DRM)
Extension du nom de chier. . . . . . . . . . . . . . . . . . . . . . . . . . . . . “.wma”
Format d'enregistrement (MP3)
Débit binaire d'enregistrement .........................128 kb/s
Fréquence d’échantillonnage ...........................44,1 kHz
Prise USB (type B) ...................................................×1
Conguration informatique requise
Connexion ...................................USB 2.0 pleine vitesse
(12 Mb/s, équivalente à l’USB 1.1)
Pilote
Windows .........................WDM (pilote Windows standard)
Mac OS X ...................Core Audio (pilote Macintosh standard)
Systèmes d’exploitation testés
Windows ..................Windows XP, Windows Vista, Windows 7
Macintosh ......................................... Mac OS X 10.5.8
o Le fonctionnement avec des ordinateurs standard répondant
aux besoins précédents a été vérifié, mais le fonctionnement
avec n’importe quel ordinateur répondant à ces caractéristiques
ne peut pas être garanti. Même des ordinateurs répondant aux
mêmes impératifs auront des capacités de traitement différentes
en fonction de leurs spécifications de conception et de leur
environnement de fonctionnement.
Générales
Alimentation électrique .............................230 V CA à 50 Hz
(Modèle pour l’Europe/Royaume-Uni)
120 V/230 V CA, 50-60 Hz (Modèle d’exportation général)
Consommation électrique .......................................28W
Dimensions (L × H × P) ............... 435 × 145 × 288 mm (hors tout)
Poids ............................................................5,6 kg
Température de fonctionnement .......................+5˚C à +35˚C
Hygrométrie de fonctionnement .......5 %–85% (sans condensation)
Température de stockage ..............................−20˚C à +55˚C
FRANÇAIS
Fréquence d'échantillonnage d'entrée ................32, 44,1, 48 kHz
Accessoires fournis
Télécommande (RC-1283) × 1
Piles (AAA) pour télécommande × 2
Câble RCA/cinch stéréo × 2
Mode d’emploi (ce document) × 1
Carte de garantie × 1
o Caractéristiques techniques et aspect sont sujettes à changements
sans préavis dans le but d'améliorer le produit.
o Les illustrations de ce mode d'emploi peuvent différer par certains
aspects du modèle réel.
99
Page 100

Cd
< No exponga este aparato a salpicaduras ni goteras.
< No coloque objetos que contengan líquidos, como por ejem-
plo vasos, sobre el aparato.
< No instale este aparato en lugares cerrados tales como estante-
rías o similares.
< Este aparato libera corriente nominal no válida para el funciona-
miento a través de la toma de corriente, aún cuando el interruptor de encendido y activación (POWER o STANDBY/ON) no esté
en la posición de encendido (ON).
< Este aparato debe situarse lo suficientemente cerca de una
toma de electricidad como para poder alcanzar fácilmente el
cable de corriente en cualquier momento.
< El enchufe que se conecta a la red es el dispositivo de desco-
nexión, por lo que deberá permanecer siempre en prefecto
estado de uso.
< Los productos con construcción de Clase están equipados
con un cable de alimentación que tiene una clavija de enchufe
con protección de tierra (3 puntas) . El cable de estos productos
deberá conectarse a una toma de corriente que tenga conexión de protección de tierra.
< Si el producto utiliza pilas (esto incluye las pilas instaladas y los
“packs” de pilas), se evitará su exposición directa al sol, al fuego
o a cualquier otra fuente de calor excesivo.
< PRECAUCIÓN con los productos que emplean baterías de litio
reemplazables: existe peligro de explosión si la batería se reemplaza por otra de tipo incorrecto. Reemplácela sólo por otra
igual o de tipo equivalente.
< Deberá llevar cuidado si utiliza auriculares con este producto,
ya que una excesiva presión sonora (volumen) procedente de
los mismos puede causar perdidas de audición.
Para consumidores europeos
Deshacerse de aparatos eléctricos y electrónicos
(a) Todos los aparatos eléctricos y electrónicos deben ser eliminados sepa-
rados del resto de basura común y únicamente en los “puntos limpios”
o bajo los procedimientos especificados por el gobierno o autoridades
municipales locales.
(b) Con la eliminación correcta de los equipos eléctricos y electrónicos
estará ayudando a conservar recursos muy valiosos y a evitar los posibles efectos negativos en la salud humana y en el medio ambiente.
(c) La eliminación incorrecta de los equipos eléctricos y electrónicos
puede producir efectos muy dañinos en el medio ambiente y en la
salud humana a causa de las sustancias peligrosas que pueden encontrarse en estos equipos.
(d) El símbolo de Eliminación de Aparatos Eléctricos y
Electrónicos (WEEE en inglés), identificado por un cubo de
basura tachado, indica que los equipos eléctricos y electrónicos deben ser eliminados de forma totalmente independiente con respecto a la basura doméstica.
(e) Existen sistemas para la eliminación y recogida de este tipo de aparatos
a disposición del usuario final. Si necesita más información acerca de
la forma de deshacerse de aparatos eléctricos y electrónicos antiguos,
póngase en contacto con su Ayuntamiento, con la correspondiente
empresa del servicio de recogida de residuos o con el comercio en el
que adquirió ese aparato.
Deshacerse de pilas y/o acumuladores
(a) Las pilas y/o acumuladores gastados deben ser eliminados separados
del resto de basura común y únicamente en los “puntos de recogida”
o bajo los procedimientos especificados por el gobierno o autoridades
municipales locales.
(b) Con la eliminación correcta de las pilas y/o acumuladores gastados
estará ayudando a conservar recursos muy valiosos y a evitar los posibles efectos negativos en la salud humana y en el medio ambiente.
(c) La eliminación incorrecta de las pilas y/o acumuladores gastados
puede producir efectos muy dañinos en el medio ambiente y en la
salud humana con motivo de las sustancias peligrosas que pueden
encontrarse en estos equipos.
(d) El símbolo WEEE, identificado por un cubo de basura tacha-
do, indica que las pilas y/o acumuladores gastados deben ser
eliminados de forma totalmente independiente con respecto
a la basura doméstica.
Si una pila o un acumulador contienen más cantidad de los
valores especificados de plomo (Pb), mercurio (Hg), y/o cadmio (Cd)
según está definido en la Directiva relativa a las pilas (2006/66/EC),
entonces los símbolos químicos correspondientes a estos elementos
estarán indicados debajo del símbolo WEEE.
(e) Existen sistemas para la eliminación y recogida a disposición del
usuario final. Si necesita más información acerca de la forma de eliminar pilas y/o acumuladores gastados, póngase en contacto con su
Ayuntamiento, con la correspondiente empresa del servicio de recogida de residuos o con el comercio donde se adquirieron.
Pb, Hg,
100
 Loading...