

Tascam DV-RA1000HD User Manual
D00927920A
»
DV-RA1000HD
High Definition Audio Master Recorder
OWNER'S MANUAL
1 − Introduction
IMPORTANT SAFETY PRECAUTIONS
CAUTION: TO REDUCE THE RISK OF ELECTRIC SHOCK, DO NOT REMOVE
COVER (OR BACK). NO USER-SERVICEABLE PARTS INSIDE. REFER SERVICING
TO QUALIFIED SERVICE PERSONNEL.
The lightning flash with arrowhead symbol, within equilateral triangle, is intended
to alert the user to the presence of uninsulated “dangerous voltage” within the
product’s enclosure that may be of sufficient magnitude to constitute a risk of
electric shock to persons.
The exclamation point within an equilateral triangle is intended to alert the user to
the presence of important operating and maintenance (servicing) instructions in the
literature accompanying the appliance.
Thi s ap pli a nce h as a s eri al nu mbe r
located on the rear panel. Please record
the model number and serial number and
retain them for your records.
Model number
Serial number
WARNING: TO PREVENT FIRE OR SHOCK
APPLIANCE TO RAIN OR MOISTURE.
For U.S.A.
TO THE USER
This equipment has been tested and found to comply
with the limits for a Class A digital device, pursuant to
Part 15 of the FCC Rules. These limits are designed
to provide reasonable prote ction against harmful
interference when the equipment is operated in a
commercial environment. This equipment generates,
uses, and can radiate radio frequency energy and,
if not installed and used in accordance with th e
instruction manual, may cause harmful interference to
radio communications.
Operation of this equipment in a residential area is
likely to cause harmful interference in which case the
user will be required to correct the interference at his
own expense.
CAUTION
Changes or modifications to this equipment not
expressly approved by TEAC CORPORATION for
compliance could void the user's authority to operate
this equipment.
HAZARD, DO NOT EXPOSE THIS
For the customers in Europe
WARNING
This is a Class A product. In a domestic environment,
this product may cause radio interference in which
case the user may be required t o take adequa te
measures.
Pour les utilisateurs en Europe
AVERTISSEMENT
Il s ' ag i t d'un produit d e Classe A. D a n s un
env i ron n eme n t do m est i que, c e t ap pare il pe ut
provoq uer des inter fé re nc es radio , d ans ce c as
l'utilisateur peut être amené à prendre des mesures
appropriées.
Für Kunden in Europa
Warnung
Dies ist eine Einrichtung, welche die Funk-Entstö
rung nach Klasse A besitzt. Diese Einrichtung kann
im Wohnbereich Funkstörungen versursachen; in
diesem Fall kann vom Betriebe r verlang w erden,
angemessene Maßnahmen durchzuführen und dafür
aufzukommen.
CE Marking Information
a) Applicable electromagnetic environment: E4
b) Peak inrush current: 12 A
2 TASCAM DV-RA1000HD
IMPORTANT SAFETY INSTRUCTIONS
1 Read these instructions.
2 Keep these instructions.
3 Heed all warnings.
4 Follow all instructions.
5 Do not use this apparatus near water.
6 Clean only with dry cloth.
7 Do not bl oc k any ve nt ilation openings. Install in
accordance with the manufacturer's instructions.
8 Do no t ins t all ne a r an y h e a t so u rces su c h a s
radiators, heat registers, stoves, or other apparatus
(including amplifiers) that produce heat.
9 Do not defeat the safety purpose of the polarized or
grounding-type plug. A polarized plug has two blades
with one wider than the other. A grounding type plug
has two blades and a third grounding prong. The wide
blade or the third prong are provided for your safety. If
the provided plug does not fit into your outlet, consult
an electrician for replacement of the obsolete outlet.
1 − Introduction
Do not expose this apparatus to drips or splashes.
•
Do not place any objects filled with liquids, such as
•
vases, on the apparatus.
Do not install this apparatus in a confined space such
•
as a book case or similar unit.
The apparatus draws nominal non-operating power
•
from the AC outlet with its POWER switch in the off
position.
The apparatus should be located close enough to the
•
AC outlet so that you can easily grasp the power cord
plug at any time.
An apparatus with Class I construction shall be con-
•
nected to an AC outlet with a protective grounding
connection.
Batteries (battery pack or batteries installed) should
•
not be exposed to excessive heat such as sunshine,
fire or the like.
10 Prot e ct th e po wer co rd from be ing wa lked o n
or pinch e d pa r ticu larl y a t p lugs , c onve n ienc e
receptacles, and the point where they exit from the
apparatus.
11 Only use attachments/accessories specified by the
manufacturer.
12 Use only with the cart, s tand, tripod, bracket, or
table specified by the manufacturer, or sold with the
apparatus. When a cart is used, use caution when
moving the cart/apparatus combination to avoid injury
from tip-over.
13 Unplug this apparatus during lightning storms or
when unused for long periods of time.
14 Refer all servicing to qualified service personnel.
Servicing is required when the apparatus has been
damaged in any way, such as power-supply cord or
plug is damaged, liquid has been spilled or objects
have fallen into the apparatus, the apparatus has
been exposed to rain or moisture, does not operate
normally, or has been dropped.
TASCAM DV-RA1000HD 3
1 − Introduction
1
For USA
Safety Information
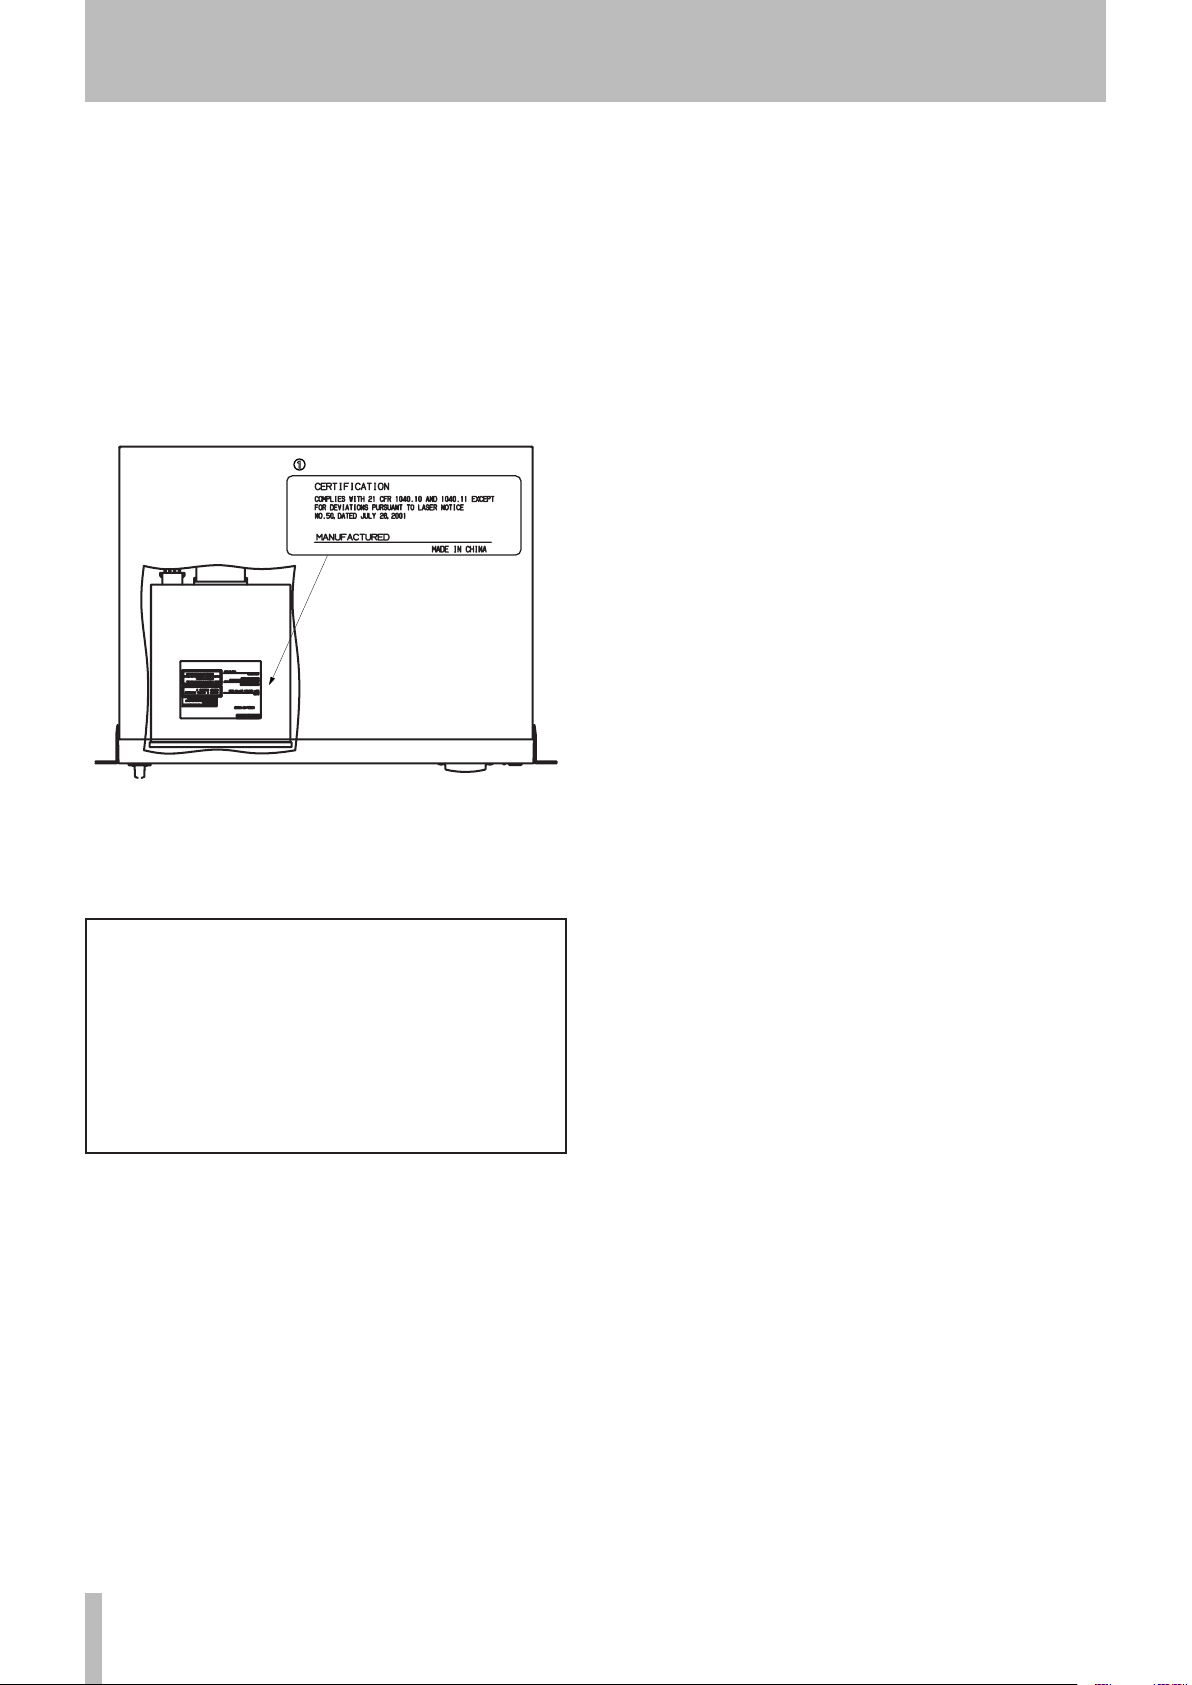
This product has been designed and manufactured
according to FDA regulations "title 21, CFR, chapter
1, subchapter J, based on the Radiation Control for
Health and Safety Act of 1968", and is classified as
a class 1 laser product. There is no hazardous invisible laser radiation during operation because invisible
laser radiation emitted inside of this product is completely confined in the protective housings.
The label required in this regulation is shown at 1.
CAUTION
• DO NOT REMOVE THE PROTECTIVE HOUSING
USING A SCREWDRIVER.
• USE OF CONTROLS OR ADJUSTMENTS OR
PERFORMANCE OF PROCEDURES OTHER THAN
THOSE SPECIFIED HEREIN MAY RESULT IN
HAZARDOUS RADIATION EXPOSURE.
• IF THIS PRODUCT DEVELOPS TROUBLE,
CONTACT YOUR NEAREST QUALIFIED SERVICE
PERSONNEL, AND DO NOT USE THE PRODUCT
IN ITS DAMAGED STATE.
Optical pickup:
Type: SF-DS10L
Manufacturer: Sanyo Electric Co,Ltd.
Laser output: CD/108 mW max
DVD/66 mW max
Wavelength:
CD/782 nm
DVD/658 nm
4 TASCAM DV-RA1000HD

1 − Introduction
DVD HD
DVD HD
DVD HD
DVD HD
DVD HD
DVD HD
DVD HD
DVD HD
DVD HD
DVD HD
DVD HD
DVD HD
DVD±RW
DVD±RW
DVD±RW
DVD HD
DVD HD
DVD±RW
HD
Contents
1 − Introduction
About this manual ..........................................7
Notes and warnings ............................................... 8
Copyright ................................................................ 8
Supplied accessories .......................................8
Rack-mounting the unit .................................. 8
Environmental considerations .......................9
Handling of optical discs ....................................... 9
Never use a stabilizer or printable discs..............10
Beware of condensation .......................................10
About CD-R and CD-RW discs ...................... 10
About DVD±R and DVD±RW discs ............... 11
2 − Names and functions
Front panel .................................................... 12
Remote control unit ...................................... 14
Keys found on only the remote control unit ......14
Keys that features the same functions as
those on the main unit .......................................14
Keys that feature the same functions as
the switches on the virtual front panel ............15
3 − Connections
Analog audio connections ............................ 16
Digital audio connections ............................. 16
Other connections......................................... 17
4 − Basic operations
HDD and ODD ............................................... 18
Drive mode ............................................................18
Storage media .......................................................18
Shut down ..................................................... 19
LCD screens .................................................... 19
Navigating the screens .........................................19
Adjusting the display contrast .............................19
The “home” screen........................................ 20
“Home” screen content........................................ 20
Menu operations ........................................... 21
Menu tree ............................................................. 22
The virtual front panel (VFP) ........................23
General preferences ...................................... 24
Short cuts for screen access ......................... 25
Clock/calendar ............................................... 26
The check screen ...........................................26
Selecting the input source............................ 27
Adjusting the input level .............................. 28
Selecting the reference clock ....................... 28
Naming files, projects, marks, etc. .............. 29
5 − CD playback & recording
Playback ......................................................... 30
Basic playback operation
Display
Programmed playback
Repeat playback
Single track playback
Auto space playback
Jog playback
Pitch change
Auto cue
Auto ready
Fades
Timer start
................................................. 30
....................................... 32
........................................ 32
.............................................. 32
.......................................... 32
.................................................... 33
.......................................... 33
..................................31
................... 30
....................... 30
..........................31
...........................31
Recording ....................................................... 33
Basic recording operation
Auto track increment
Synchronized recording
Settings in the sound level screen ...................... 35
Monitoring
Oscillator
Dithering ............................................................... 37
Copy protection .................................................... 37
Finalizing discs ...................................................... 38
Unfinalizing discs ................................................. 38
Erasing discs (CD-RW) .......................................... 38
About marks
Jumping to a mark ............................................... 39
Editing marks ........................................................ 39
.......................................... 37
............................................. 37
.................................. 39
HD ................. 33
HD ........................ 34
HD .................... 35
6 − DVD±RW/HD playback & recording
Organization of projects and files ............... 40
Writing the UDFMI ............................................... 40
Viewing the number of rewriting times ............ 40
Recording times and track lengths ......................41
Using a new DVD±RW disc ...................................41
Close and open operations for DVD-RW discs ... 43
Adding a new project .......................................... 43
Adding notes to a project .................................... 43
Changing the current project .............................. 44
Changing the name of a project ......................... 44
Deleting a project from disc ................................ 44
Formatting a disc .................................................. 44
Recording files to disc .......................................... 45
Recording mode ................................................... 45
Playing back files .................................................. 46
Play lists ................................................................ 46
TASCAM DV-RA1000HD 5

Contents
Restructuring the play list ................................... 46
Setting marks ....................................................... 46
Erasing a file ..........................................................47
Renaming a file ......................................................47
Editing files .................................................... 47
Combining files ......................................................47
Dividing files ......................................................... 48
Undo and redo ...................................................... 48
7 − Copy function
Selecting a copy mode and copy source .....49
Same project name in the destination ............... 50
Copying files and projects from a DVD to
the HD .......................................................... 50
Copying files and projects from the HD to
DVD .............................................................. 51
Creating an audio CD using a project on
the HD .......................................................... 52
Copying tracks from a CD to the HD ...........53
8 − Effects
Setting up the effect position ...................... 55
Equalization ................................................... 55
Dynamics processor ......................................56
Effect libraries ...............................................57
Recalling library data ........................................... 57
Storing library data .............................................. 57
Naming library data ............................................. 58
9 − Use with a computer
Connecting the DV-RA1000HD to a computer ... 59
Disconnecting from Windows 2000 / XP
systems ............................................................... 59
Disconnecting from Mac OS X systems .............. 59
After “ejecting” from the computer ................... 59
Transferring audio files ........................................ 60
Transferring files between a DVD disc and
a computer.......................................................... 60
10 − Specifications, etc.
Analog I/O ..................................................... 61
Digital I/O ...................................................... 61
Other connections......................................... 62
Audio performance ....................................... 63
Physical, etc. specifications .......................... 63
Dimensional drawing ....................................64
Block diagram ................................................ 65
6 TASCAM DV-RA1000HD

1 − Introduction
1 − Introduction
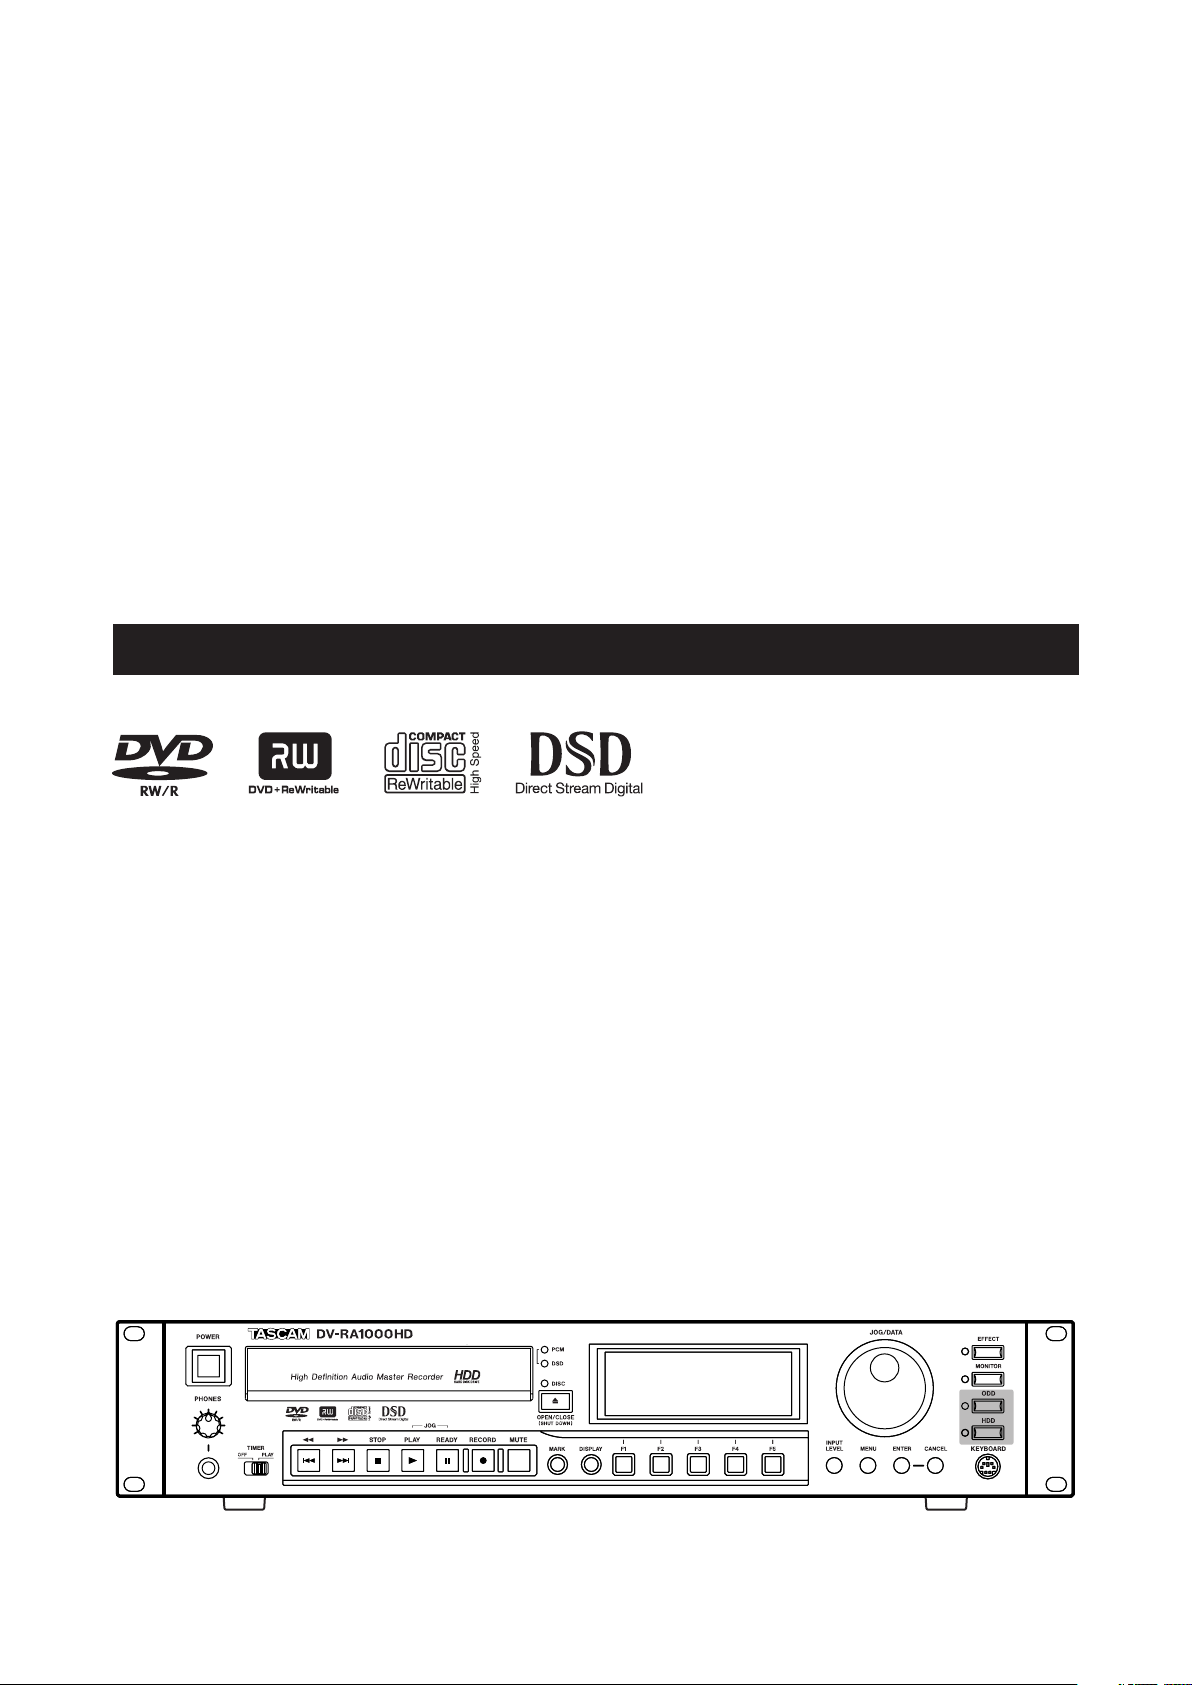
Thank you for your purchase of the TASCAM
DV-RA1000HD High Definition Audio Master
Recorder. This unit features the world's most advanced
method of recording high-resolution stereo audio on
optical disc or internal hard disk.
Fitted with digital I/O in all common formats, including
SDIF-3 (direct stream digital), as well as high-quality
AD and DA conversion: the unit allows you to record
and playback the following types of disc. (See “Storage
media” on page 18.)
CD-R and CD-RW
These discs enable you to record audio in CD-DA format from the DV-RA1000HD.
The DV-RA1000HD is also capable of creating audio
compact discs (CDs) using audio tracks recorded on its
hard disk, as well as copying audio CDs.
DVD±RW and HD (internal hard disk)
These discs are used to record audio files which are
compatible with computer based digital audio workstations, and recording can take place at 44.1/48 kHz,
88.2/96 kHz, 176.4/192 kHz sampling frequencies (all at
24-bit) as well as in DSD format.
The disc created in this way are in UDF 1.5 format.
This format is readable by personal computer system.
DVD±R
These discs enable you to duplicate audio data once it
has been recorded on a DVD±RW disc or hard disk.
These discs are useful for archiving data that has been
recorded on the DV-RA1000HD.
The unit may be connected to a personal computer
through a USB 2.0 connection, and these files can be
transferred for further processing, editing and mastering. The files may then be used for the production of
high-resolution, high-sampling frequency SACD and
DVD-audio, etc. media, as well as for more conventional CDs.
In addition, the unit provides digital effects: a 3-band
EQ with a fully-parametric mid band, and a dynamics
processor operating in one or three bands as either a
compressor or expander. These effects may be inserted
on recording (and the effect written to disc) or playback.
Before connecting and using the unit, please take time
to read this manual thoroughly to ensure you understand how to properly set up and connect the unit, as
well as the operation of its many useful and convenient
functions. After you have finished reading this manual,
please keep it in a safe place for future reference.
About this manual
In this manual, we use the following conventions:
The names of keys and controls are given in the fol-
•
lowing typeface: ERASE.
When the alphanumeric portion of the display shows
•
a message or a parameter value (incl. on or off), they
are shown in the following typeface: No Disc.
If a preset indicator or a name of a parameter in the
•
display (i.e. one which can not change) is shown, this
is shown as follows: PROJECT.
Unless otherwise specified, “HD” refers to the inter-
•
nal hard disk of the DV-RA1000HD.
“DVD” refers to a DVD±RW and DVD±R disc.
•
The sections of this manual are arranged as follows:
1 - “Introduction” (p. 7) (This chapter) Includes a
brief introduction to the DV-RA1000HD, precautions,
and information about optical disc media.
2 - “Names and functions” (p. 12) Outlines the
function of each component on the front panel and the
remote control unit. Refer to Chapter 3 for information
on the rear panel connectors.
3 - “Connections” (p. 16) Describes connections to
external devices.
4 - “Basic operations” (p. 18) Introduces the
basic principles and common operations of the
DV-RA1000HD and the remote control unit.
5 - “CD playback & recording” (p. 30) Describes
the functions available when the DV-RA1000HD is
used as a CD player and recorder. Many playback functions can be used in the same manner to play DVD±RW
discs, DVD±R discs, or the HD. Also, many recording
functions can be used in the same manner to record to
DVD±RW discs or the HD.
6 - “DVD±RW/HD playback & recording”
(p. 40) Describes using the DV-RA1000HD as a DVD/
HD recorder, as well as editing and playing back files.
7 - “Copy function” (p. 49) The DV-RA1000HD
copy function enables you to duplicate a disc or copy
files between discs. You can use DVD±RW, DVD±R,
CD-R, or CD-RW discs or the HD as the copy source or
the copy destination.
8 - “Effects” (p. 55) Describes how to use the built-
in effects (EQ and dynamics).
TASCAM DV-RA1000HD 7
1 − Introduction
NOTE
NOTE
WARNING
CAUTION
NOTE
TIP
9 - “Using with a computer” (p. 59) Describes
how to use the DV-RA1000HD when it is connected to
a computer.
Notes and warnings
These warnings should be taken very seriously.
They describe situations which can cause injury, or
damage to equipment if the instructions are not followed.
Cautions show that you may lose data or perfor-
Copyright
Windows, Windows XP, Windows 2000, Windows
Me, Windows 98 and Windows 95 are trademarks of
Microsoft Corporation.
Macintosh, MacOS, and MacOS X are trademarks of
Apple Computer.
This product is designed to help you record and
reproduce sound works to which you own the copyright, or where you have obtained permission from
the copyright holder or the rightful licensor. Unless
10 - “Specifications” (p. 61) Includes the specifi-
cations and diagrams of the DV-RA1000HD.
mance may suffer if the instructions are not followed.
These notes provide additional explanations for
special cases, etc.
We give hints and tips on using the unit in this way.
you own the copyright, or have obtained the appropriate permission from the copyright holder or
the rightful licensor, your unauthorized recording,
reproduction or distribution thereof may result in
severe criminal penalties under copyright laws and
international copyright treaties. If you are uncertain
about your rights, contact your legal advisor. Under
no circumstances will TEAC Corporation be responsible for the consequences of any illegal copying performed using the DV-RA1000HD.
Supplied accessories
In addition to this manual, the DV-RA1000HD has
been packed with the following:
• RC-RA1000 wired remote control unit .................... 1
• AC power cable ......................................................... 1
• A rack-mounting screw kit (screws and washers) ..... 1
• A warranty card ........................................................ 1
Contact your TASCAM supplier if any of these items
are missing.
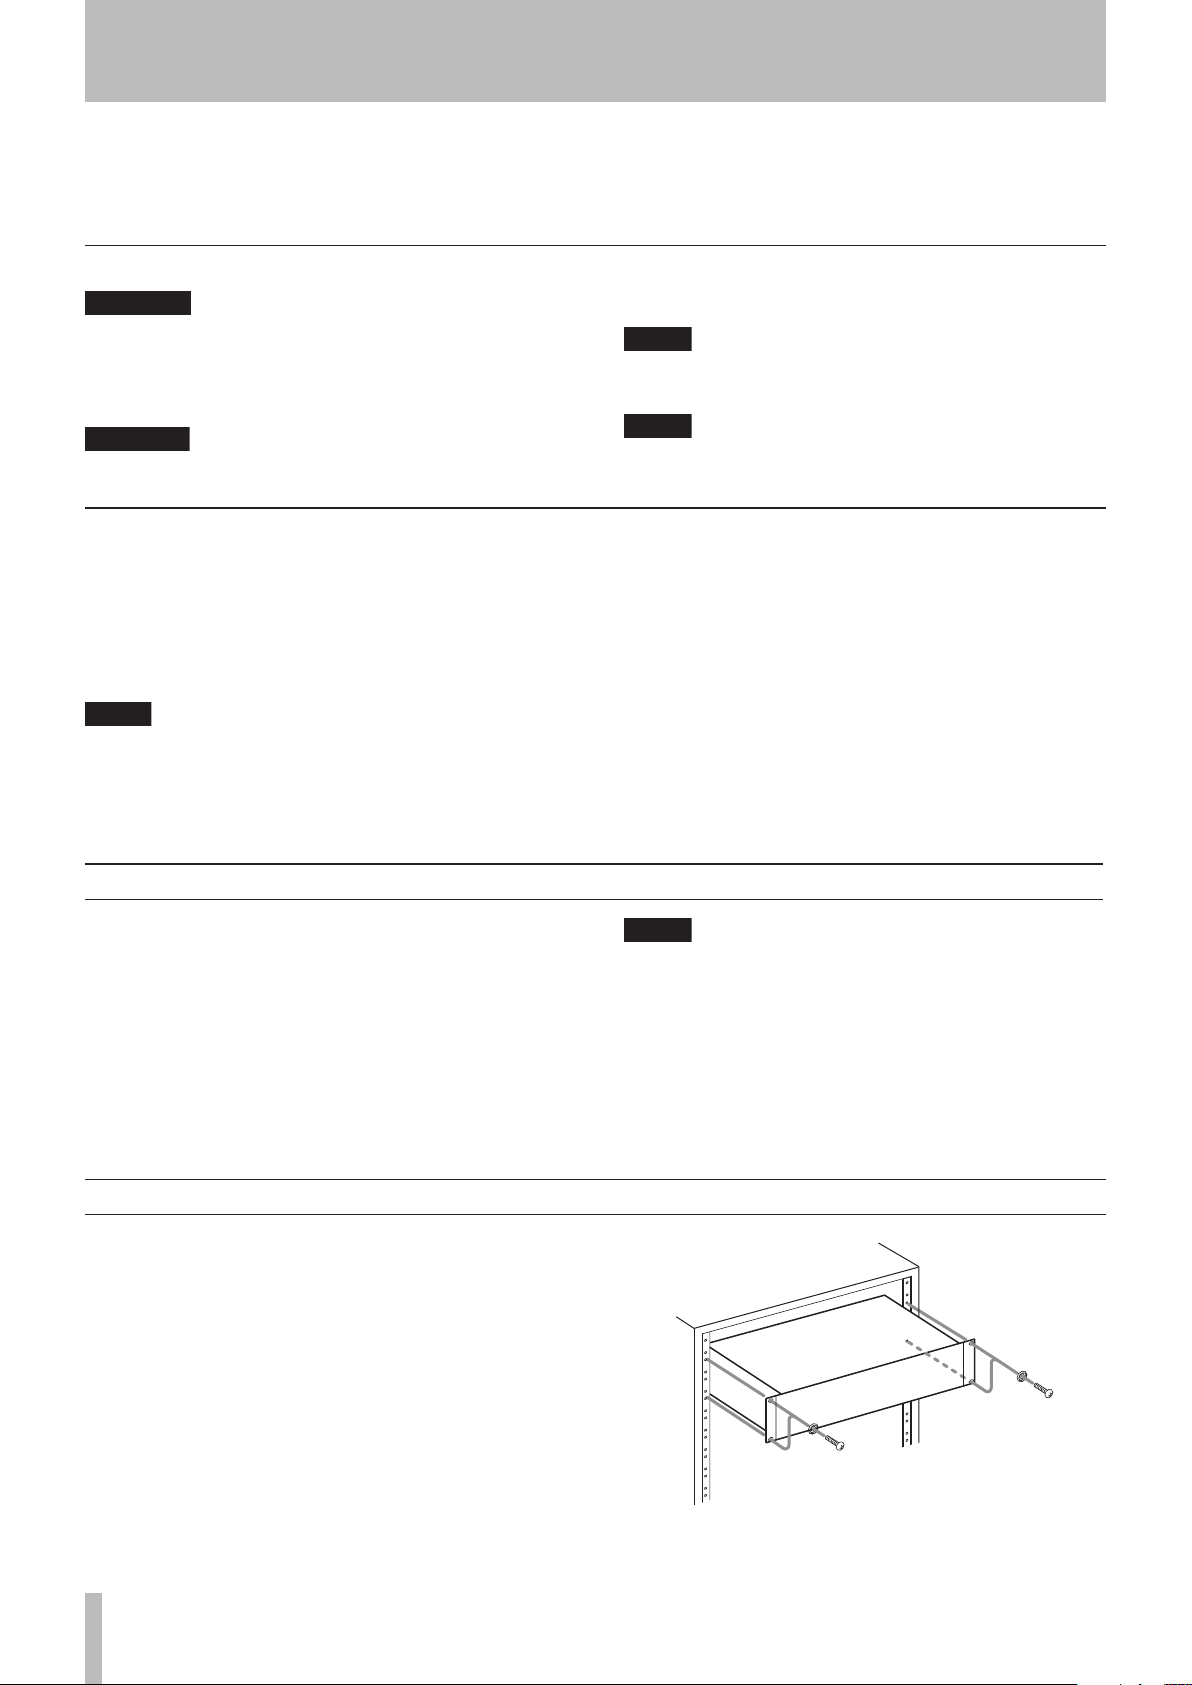
Rack-mounting the unit
If you are mounting the unit in a rack, leave 1U of space
above it and 4 inch (10 cm) or more of space at the rear.
Use the rack-mounting kit to mount the unit in a standard 19-inch equipment rack, as shown in this section.
Remove the feet of the unit before mounting.
When transporting the unit, always use the original packing materials. For this reason, we strongly
recommend that you save all the packing materials
that came with the unit, in case you need to transport it in the future.
In addition, please close the disc tray when transporting the unit.
Figure 1.1: Installing the DV-RA1000HD
8 TASCAM DV-RA1000HD
Environmental considerations
1 − Introduction
The unit may be used in most areas, but to maintain top
performance, and prolong operating life, observe the
following environmental conditions:
Avoid exposing it to extremes of temperature and
•
humidity and avoid mechanical shocks and vibration.
Keep the unit away from strong magnetic fields (TV
•
sets, computer monitors, large electric motors, etc.).
The nominal temperature should be between 5°C and
•
35°C (41°F and 95°F).
Relative humidity should be 30 to 90 percent.
•
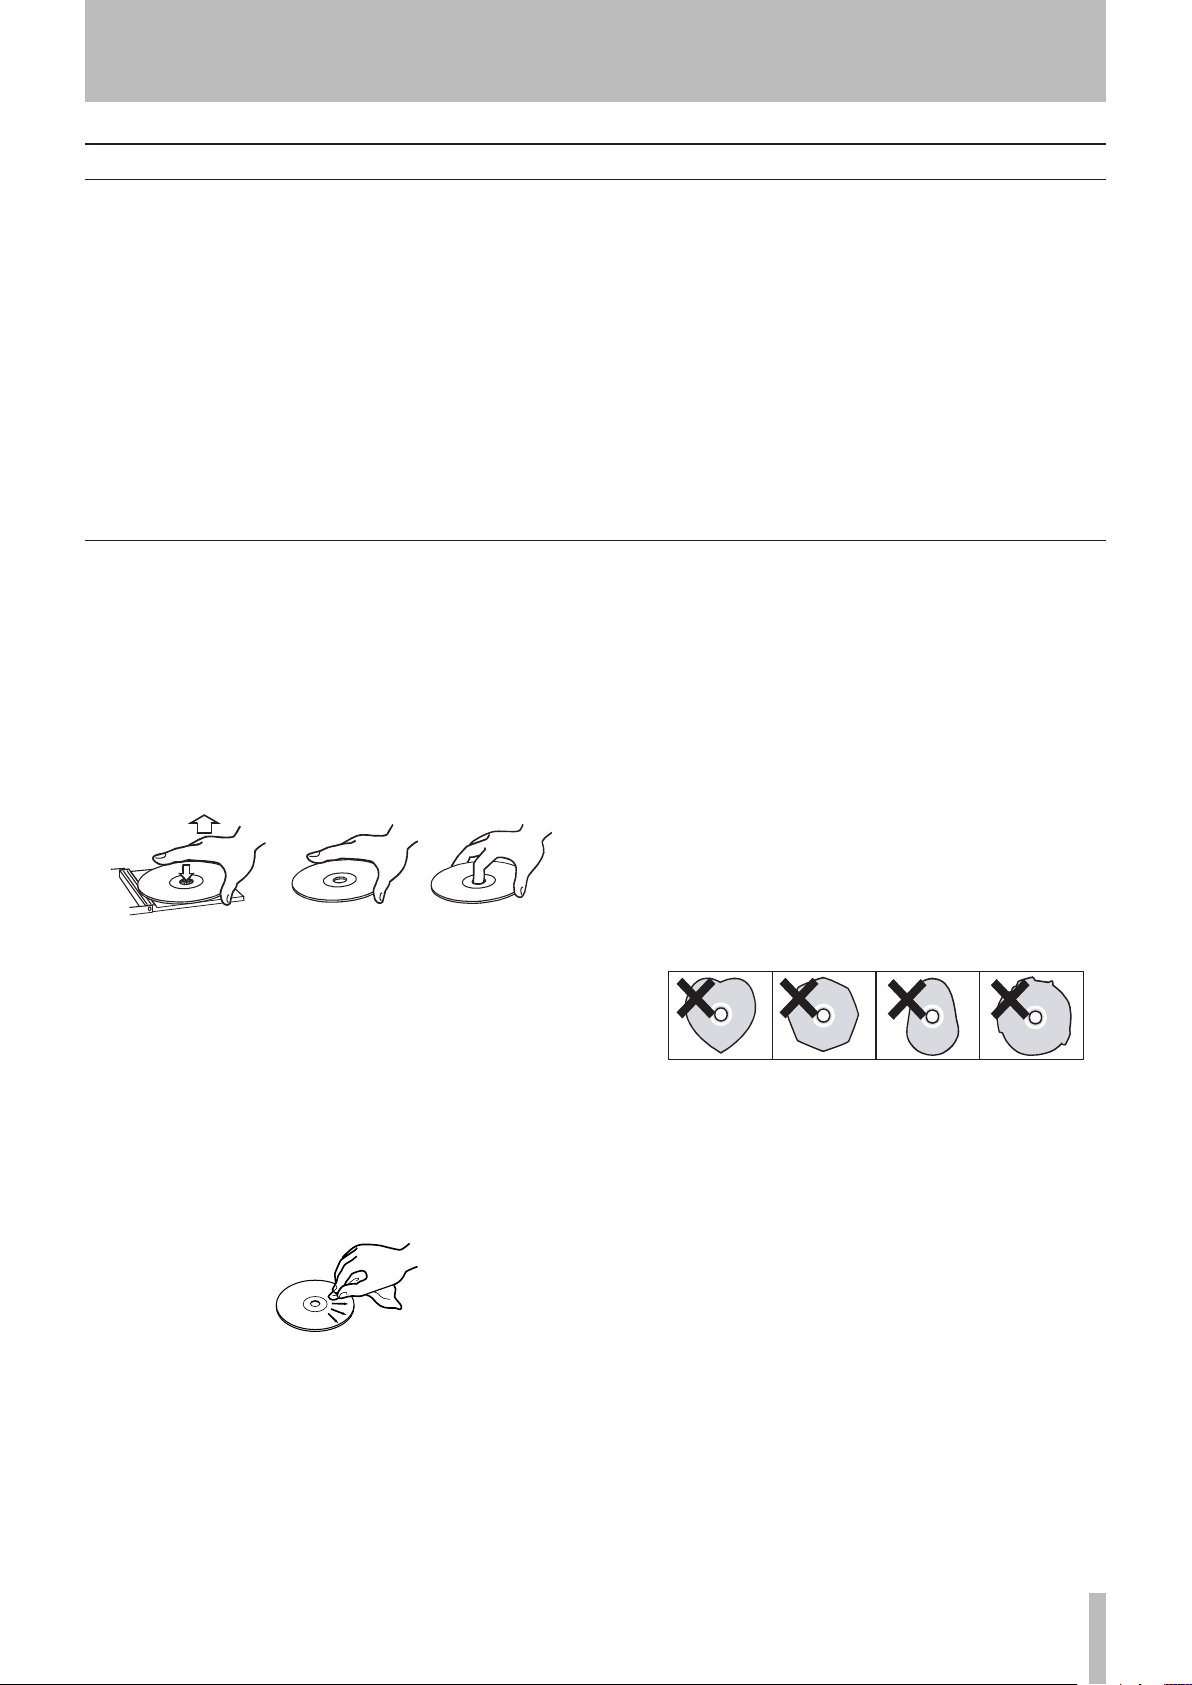
Handling of optical discs
Observe the following:
Always place discs in the tray with their label facing
•
upward (discs used in the DV-RA1000HD can only
be played on one side).
To remove a disc from its storage case, press down
•
on the center of the case, and lift the disc out, holding it carefully by the edges.
As the unit may become hot during operation, always
•
leave sufficient space above the unit for ventilation.
Do not install this unit in a confined space such as a
bookcase, and do not put anything on top of the unit.
Avoid installing this unit on top of any heat-generat-
•
ing electrical device such as a power amplifier.
The voltage supplied to the unit should match the
•
voltage as printed on the rear panel. If you are in any
doubt regarding this matter, consult an electrician.
Make sure that the unit is mounted in a level position
•
for correct operation.
Never use such chemicals as record sprays, antistatic
•
sprays or fluid, benzine or thinner to clean compact
discs. Such chemicals will do irreparable damage to
the disc’s plastic surface.
Discs should be returned to their cases after use to
•
avoid serious scratches that could cause the laser
pickup to “skip”.
Don’t expose discs to direct sunlight or high humid-
•
ity and temperature for extended periods.
Long exposure to high temperature can warp the
disc.
Figure 1.2: Handling of discs
Finger marks and dust should be carefully wiped off
•
the disc’s recorded surface with a soft cloth.
Unlike conventional records, the compact disc has
no grooves to collect dust and microscopic debris, so
gently wiping with a soft cloth should remove most
particles.
Wipe in a straight motion from the inside to the out-
•
side of the disc. Small dust particles and light stains
will have absolutely no effect on reproduction quality.
Figure 1.3: Cleaning discs
Only use circular discs. Avoid using non-circular
•
promotional, etc. discs.
Figure 1.4: Avoid using non-circular discs
To keep the laser pickup clean, and don’t touch it.
•
For the same reason, don’t leave the disc tray opened
unnecessarily.
Music discs with copy control, a copy-protection
•
system, have been released form several record
companies in an attempt to protect the copyright.
Since some of these discs do not comply with the
CD specifications, they may not be playable on the
DV-RA1000HD.
TASCAM DV-RA1000HD 9
1 − Introduction
NOTE
High Speed
Never use a stabilizer or printable discs
Using commercially available CD stabilizers or printable recordable discs with this player will damage the
mechanism and cause it to malfunction.
Beware of condensation
Never use a disc that has had a stabilizer mounted
to it. The residual adhesive may cause the disc to
stick to the turntable of the unit. If it sticks to the
turntable, you will need a technician to get it out.
If the unit (or a compact disc) is moved from a cold to a
warm place, or used after a sudden temperature change,
there is a danger of condensation; vapor in the air could
condense on the internal mechanism, making correct
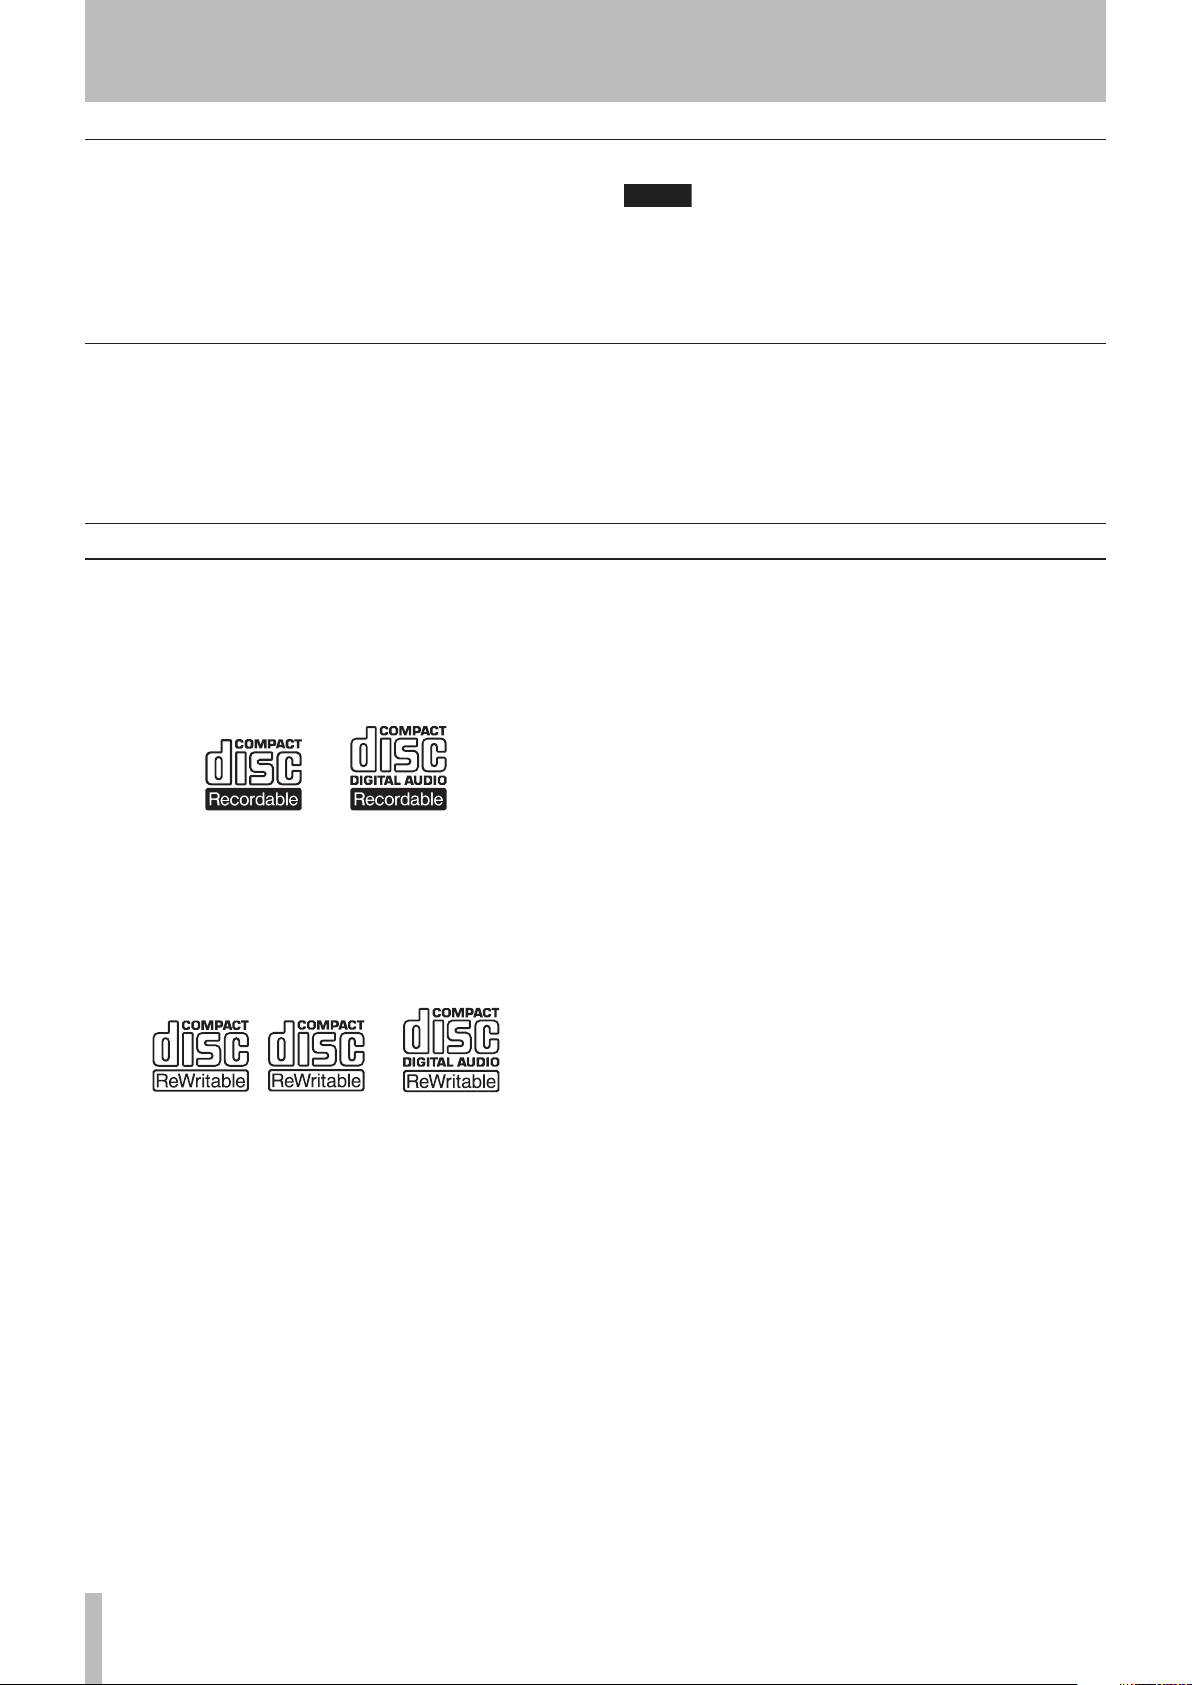
About CD-R and CD-RW discs
CD-R discs can be recorded once only. Once they
have been used for recording, they cannot be erased or
re-recorded. However, if space is available on the disc,
additional material can be recorded. The packaging of
CD-R discs will include one of the following logos:
Figure 1.5: CD-R discs
By contrast, a CD-RW disc can be used in much the
same way as a CD-R disc, but the disc can be erased,
and the disc can be re-used for other recordings. The
packaging of CD-RW discs will include one of the following logos:
operation impossible. To prevent this, or if this occurs,
let the recorder sit for one or two hours at the new room
temperature before using.
There are precautions that you should take when handling CD-R and CD-RW discs.
Avoid touching the recording (non-label) side of a
•
disc on which you will be recording. Recording on
a disc requires a cleaner surface than playing back,
and fingerprints, grease, etc. can cause errors in the
recording process.
CD-R and CD-RW discs are sensitive to the effects
•
of heat and ultraviolet rays. It is important that they
are not stored in a location where direct sunlight will
fall on them, and which is away from sources of heat
such as radiators or heat-generating electrical devices.
Always store CD-R and CD-RW discs in their cases
•
to avoid dirt and dust accumulating on their surfaces.
Figure 1.6: CD-RW discs
However, you should note that an audio CD created
using a CD-RW disc may not play back satisfactorily on
every audio CD player. It will, naturally, be playable on
the unit. This is in no way a limitation of the unit itself,
but of the difference between the different types of
media and the methods used to read them.
The unit supports normal speed (1x – 4x) and hi-speed
(4x – 10x) discs. It does not support ultraspeed discs
(10x – 24x).
•
When labeling CD-R and CD-RW discs, always use
a soft oil-based felt-tipped pen to write the information. Never use a ball-point or hard-tipped pen, as
this may cause damage to the recorded side.
•
Always keep the recording sides of the discs away
from grime and dust to avoid a reduction in sound
quality. To clean a disc, wipe gently with a soft dry
cloth from the center towards the outside edge. Do
not use thinner, gasoline, benzene or LP cleaning
fluid, as these will damage the disc and cause the
disc unplayable.
•
Do not put labels or protective sheets on the discs
and do not use any protective coating spray.
If you are in any doubt as to the care and handling of
•
a CD-R and CD-RW discs, read the precautions supplied with the disc, or contact the disc manufacturer
directly.
10 TASCAM DV-RA1000HD
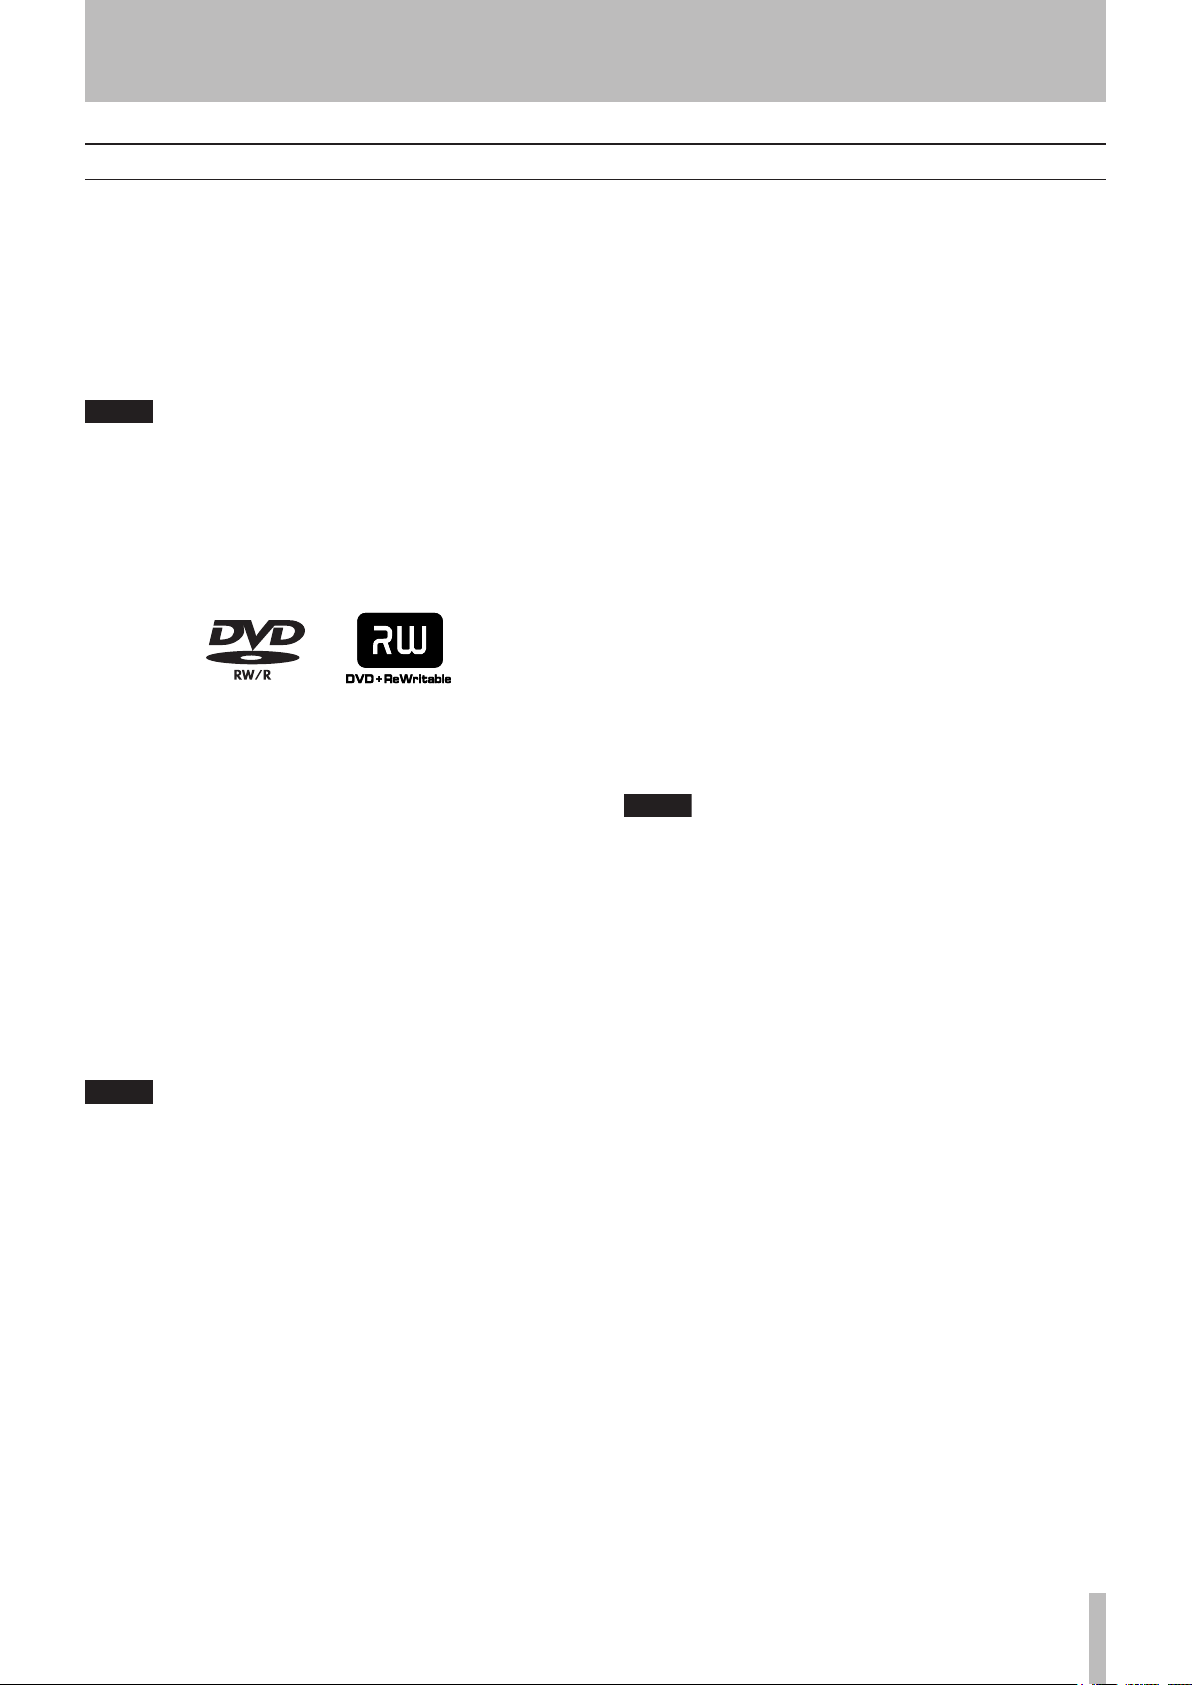
About DVD±R and DVD±RW discs
NOTE
NOTE
NOTE
1 − Introduction
The DV-RA1000HD uses DVD±RW media for digital
audio data recording and storage, and use DVD±R as
media for the archive. DVD-RAM is not supported on
this unit.
As with recordable DVD±RW media can have data
erased, and the whole disc can be erased and reused a
number of times.
Though the unit has been tested with a wide variety of commercial discs and media, you should be
aware that some discs may contain manufacturing
defects, etc. which make them unsuitable for use
with the unit.
The packaging for rewritable DVD±RW media include
the following logo:
Figure 1.7: DVD±RW discs
See “DVD±RW/HD playback & recording” on page 40
for more details regarding the use of DVD±RW media
with the unit.
If such an error occurs during recording, recording is
interrupted momentarily.
Errors during playback will cause silences to be
momentarily inserted.
Repeated continuous errors will stop playback.
Rewriting limitations
Although the theoretical number of times that a
DVD±RW disc can be re-written is 1,000, the actual
number of rewrite operations possible on a disc when
used in the DV-RA1000HD may be significantly less.
This is not a limitation of the DV-RA1000HD. In actual
practice in real-world environments, DVD±RW discs
cannot be rewritten 1,000 times.
For this reason, to maintain data integrity, TASCAM
strongly recommends the use of new DVD±RW discs
for important recordings.
In addition, before and while editing files on the
DV-RA1000HD, back up the recorded or edited files to
another disc or personal computer (as WAV files). (See
“Use with a computer” on page 59.)
Certain brands of disc have been tested with the unit
and are therefore listed as “supported.”
DVD±RW
Ricoh,Verbatim,TDK,Philips,Sony 2x - 6x
DVD±R
Ricoh,Verbatim,TDK,Maxell,Sony 4x - 16x
The use of these discs is strongly recommended in
order to achieve optimum results.
Discs not listed in the list above may not oper-
•
ate properly on the DV-RA1000HD. If you insert
an unsupported DVD disc in the tray, the unit will
display a popup alarm message on the screen.
If you plan to purchase discs in a bulk, insert a
sample disc into the tray to make sure that the
disc is supported prior to purchase. (See “Using
a non-supported disc” on page 42.
The check screen enables you to check wheth-
•
er a loaded DVD disc is supported by the
DV-RA1000HD. (See “The check screen” on page
26.
)
)
The number of times the current disc has been rewritten can be viewed in the check screen. (See “The
check screen” on page 26.
)
Note that dirt or scratches on DVD±RW media can
cause deterioration of recording quality.
TASCAM DV-RA1000HD 11
1 2 45 6 73
p
a s d f g
8 9 0
q w e r t y u i
o
1 2 45 6 73
p
a s d f g
8 9 0
q w e r t y u i
o
2 − Names and functions
Front panel
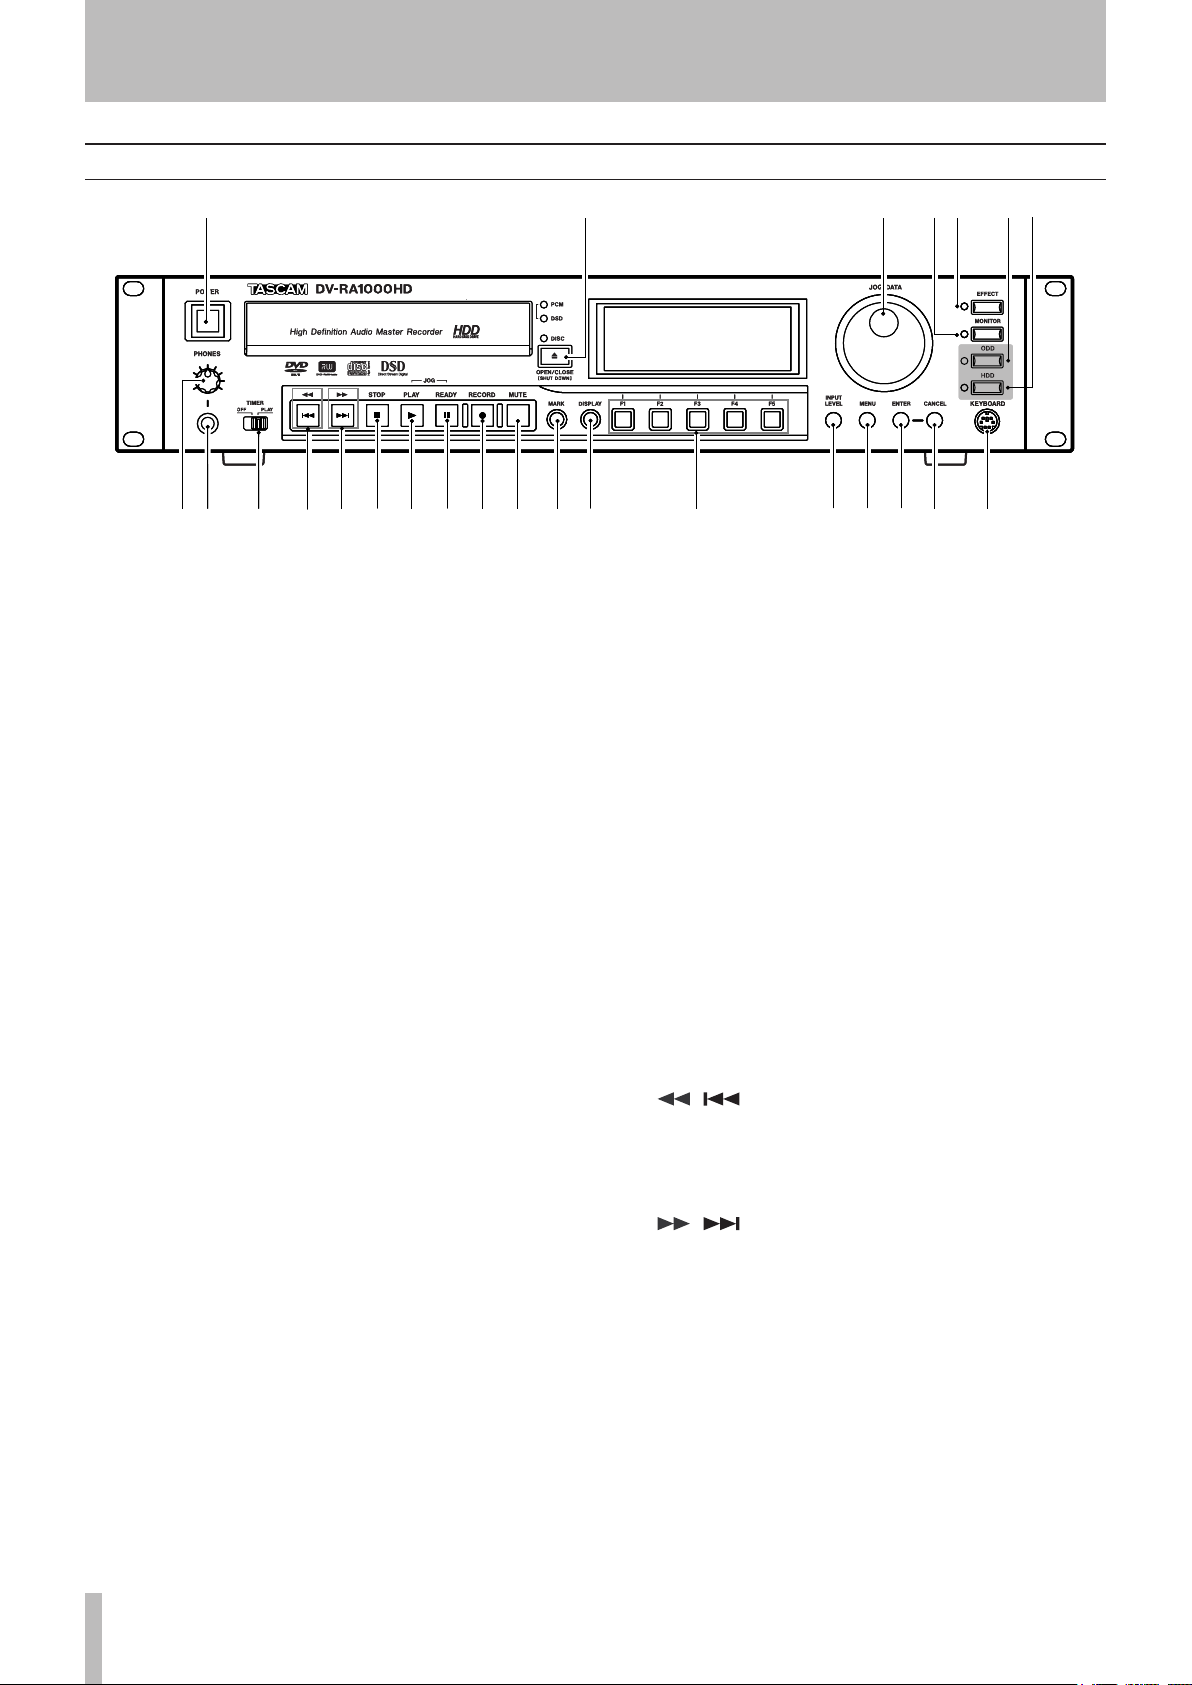
Figure 2.1: Front panel
1 POWER switch
Turns on and off the power to the DV-RA1000HD.
If you turn off the POWER switch without performing the shut down operation, the DV-RA1000HD
will automatically perform the shut down process,
then turn itself off. (If you turn off the POWER
switch during the format, copy or other operation,
the unit will perform the shut down process after
the operation is complete.)
If you turn on the POWER switch before the unit
turns itself off, it will still execute the shut down
process. In this case, turn off the power to the unit
after it completes the shut down operation.
2 OPEN/CLOSE key
Opens and closes the disc tray. To shut down the
unit safely, press and hold down this key for at least
one second.
3 JOG/DATA dial
Changes parameter values and moves the cursor in
the menu lists on the screen. In jog playback mode,
use this dial to jog the playback position backward
and forward. To change the LCD contrast, rotate the
JOG/DATA dial while pressing and holding down
the DISPLAY key.
6 ODD key
Sets Drive mode to ODD. (See “Drive mode” on
page 18.)
7 HDD key
Sets Drive mode to HDD (See “Drive mode” on
page 18.)
8 PHONES control
Adjusts the level of a connected set of stereo headphones.
9 PHONES jack
Connect a standard set of stereo headphones here.
0 TIMER switch
Turns timer start (power-on playback) on and off.
(See “Timer start” on page 33.)
q ( ) key
Press the key briefly to select (skip) tracks backward. To perform a backward cue search during
playback or pause, press and hold down this key.
w ( ) key
Press this key briefly to select (skip) tracks forward.
To perform a forward cue search during playback or
pause, press and hold down this key.
4 MONITOR key
Switches between recording source monitoring and
playback monitoring. (See “Monitoring” on page
37.)
5 EFFECT key
Turns the effects on and off. To display the effects
screen, press and hold down the key for one second
or longer. (See “Effects” on page 55.)
e STOP key
Stops the transport mechanism.
r PLAY key
Starts playback from the stopped position, resumes
playback from the paused position, or starts recording from record ready mode.
12 TASCAM DV-RA1000HD

2 − Names and functions
t READY key
Pauses playback or recording. To use the JOG/DATA
dial to jog the playback position, press and hold
down the READY key and press the PLAY key. (See
“Jog playback” on page 32.)
y RECORD key
Pressing this key while the unit is stopped places
the unit in record ready mode. Pressing this key
while recording divides a recording into tracks
(track increment).
u MUTE key
Mutes the playback signal during playback, and
mutes the recording source signal during recording. Short presses are latching: that is, pressing the
key briefly once mutes the signal, pressing the key
briefly again cancels the mute. Long presses are
non-latching: that is, pressing and holding down the
key mutes signals, and releasing the key cancels the
mute.
i MARK key
Adds a mark at the point where the key was
pressed. Pressing and holding the DISPLAY key
and pressing the MARK key brings up the locate list
screen. (See “About marks” on page 39.)
o DISPLAY key
Switches time display mode in the home screen.
(See "Display" on page 30.)
p Soft function keys (F1 - F5)
Use the soft function keys to perform the functions
displayed on the bottom row of the screen. The
functions are context-sensitive.
a INPUT LEVEL key
Displays the input level screen. (See “Adjusting the
input level” on page 28.)
s MENU key
From the home screen, press this key to enter the
menu system and display the main menu.
d ENTER key
Confirms the parameter edits or the menu item
selections on the screen. It also adds a carriage
return during character input in the naming process.
It also launches the virtual front panel when pressed
from the home screen.
f CANCEL key
Cancels the parameter edits, or selects the upper
menu in the menu hierarchy. While the virtual front
panel (VFP) is displayed, press this key to exit the
VFP and return to the home screen.
It is also used to reset the peak hold or as a delete
key during character input in the naming process.
g KEYBOARD jack
Connect a computer PS/2 keyboard (US standard
layout) here to name files and projects, and to create
project notes.
TASCAM DV-RA1000HD 13
2 − Names and functions
k
j
h
l
;
k
j
h
l
;
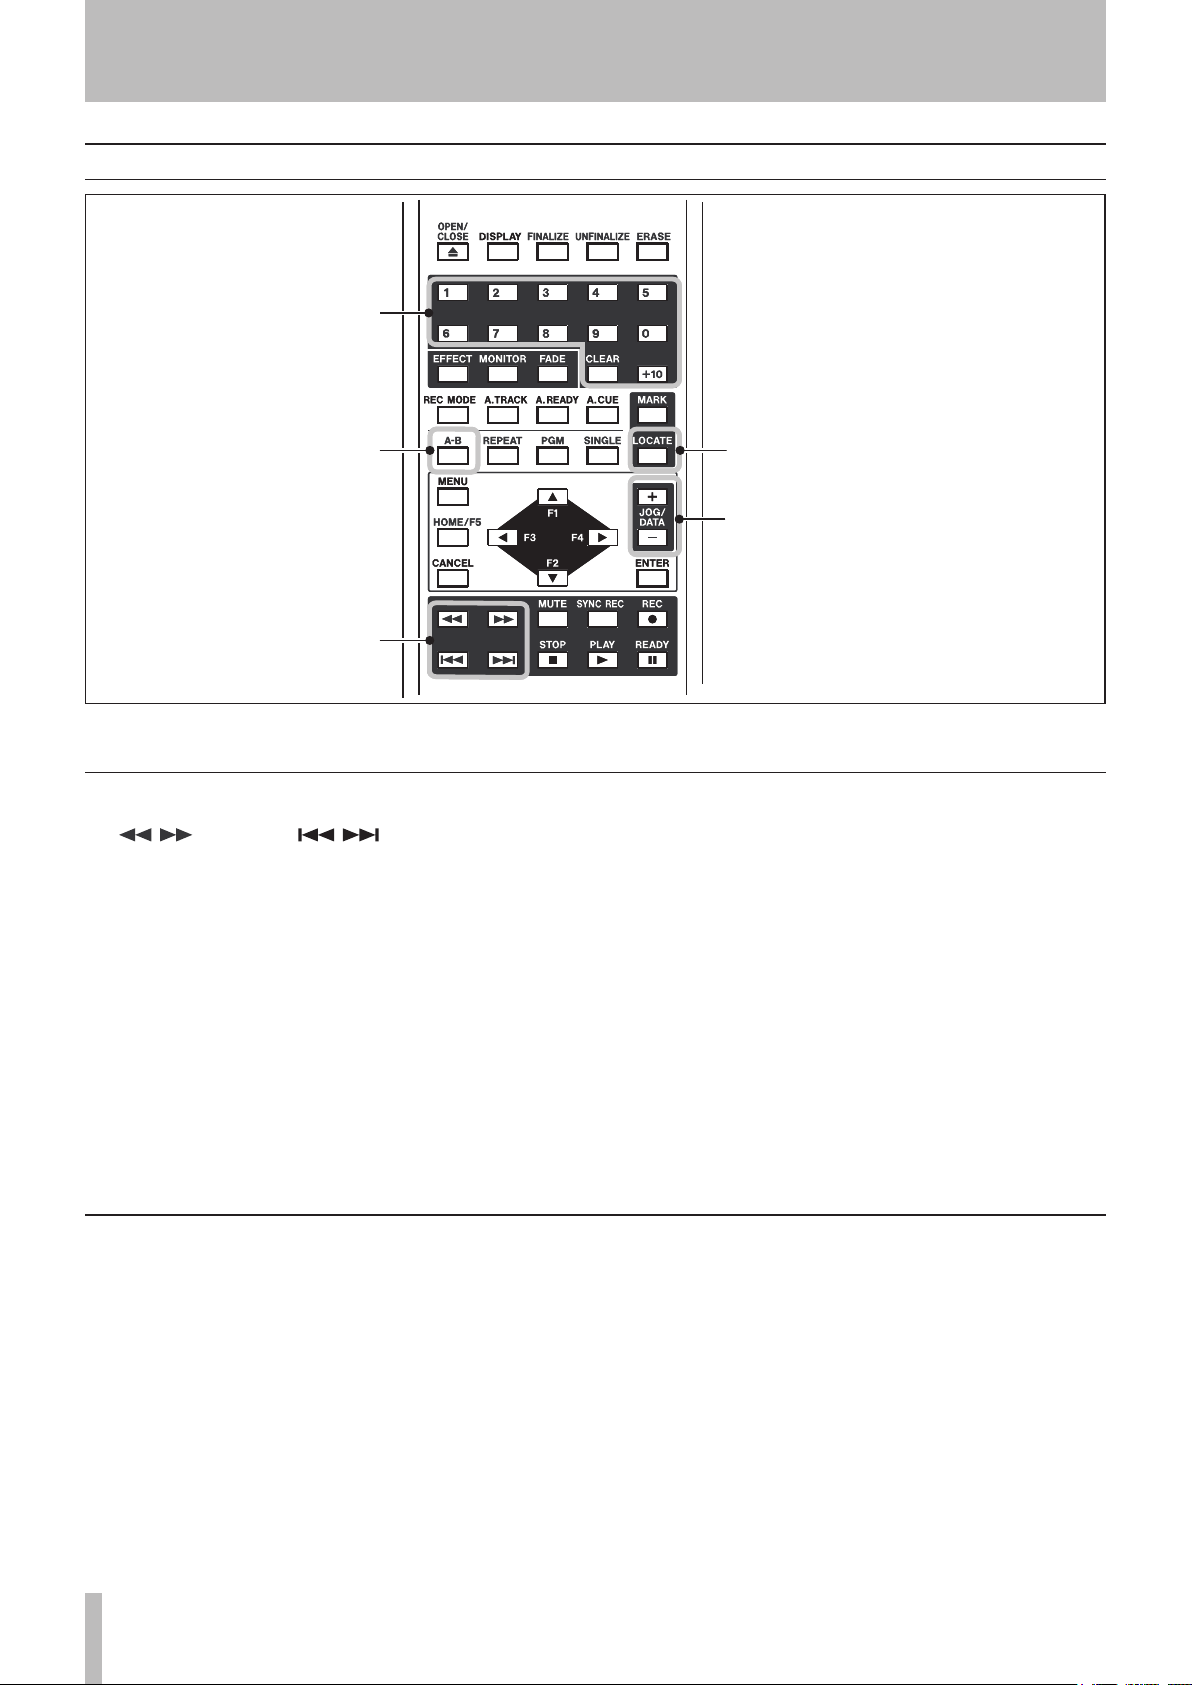
Remote control unit
Figure 2.2: Remote control unit
Keys found on only the remote control unit
h
/ keys and / keys
These are separate keys on the remote control unit,
but are the same key on the main unit (short press
for skip, long for search). (See “Basic playback
operation” on page 30.)
j
A-B key
Enables you to set and perform A-B repeat. Note
that you can set A-B repeat only from the remote
control unit. (See “A-B repeat” on page 31.)
k
Number keys and CLEAR key
Enables you to select a track directly by pressing
the number keys, and set a programmed playback.
CLEAR
ber entered at the 10's digit via the
“Programmed playback” on page 30.)
l
LOCATE key
Displays the locate point list for location and editing. (See “About marks” on page 39.)
;
JOG/DATA (+/–) keys
Functions the same as rotation of the
dial on the main unit, clockwise and counter-clockwise.
key is used to clear the current num-
The
Keys that features the same functions as those on the main unit
ENTER MUTE
The following keys function in the same way as those
of the same name on the main unit. For the function
description, refer to the “Front panel” section in the previous pages.
OPEN/CLOSE
•
DISPLAY
•
EFFECT
•
MONITOR
•
MENU
•
CANCEL
•
F1 - F5 *1)
•
•
REC *2)
•
STOP PLAY
•
READY
•
MARK
•
*1) The F1-F4 keys are arranged as cursor keys on the
remote control unit, duplicating one of their most common functions. The F5 key is labeled as
and is often pressed to display the home screen.
*2) The
the main unit.
REC
key corresponds to the
+10
key. (See
JOG/DATA
HOME/F5
RECORD
key,
key on
14 TASCAM DV-RA1000HD

2 − Names and functions
Keys that feature the same functions as the switches on the virtual front panel
FINALIZE
The following keys function in the same way as the
switches on the virtual front panel on the main unit.
(The key names that differ from those of the switches
on the VFP screen feature additional corresponding
switch names in parentheses.) For the function description, see “The virtual front panel (VFP)” on page 23.
•
UNFINALIZE (UNFINAL.)
•
ERASE
•
FADE
•
REC MODE (RMODE)
•
A.TRACK (ATRK)
•
A.READY (ARDY)
•
A.CUE (ACUE)
•
REPEAT (RPT)
•
PGM
•
SINGLE (SNGL)
•
SYNC REC (SYNC)
•
TASCAM DV-RA1000HD 15
Analog I/O (balanced
& unbalanced)
PCM digital I/O
(AES/EBU & S/PDIF)
RC-RA1000
connection
Word sync
connections
USB to PC
DSD I/O (SDIF-3
& DSD-raw)
Serial
control
Power
input
Analog I/O (balanced
& unbalanced)
PCM digital I/O
(AES/EBU & S/PDIF)
RC-RA1000
connection
Word sync
connections
USB to PC
DSD I/O (SDIF-3
& DSD-raw)
Serial
control
Power
input
NOTE
CAUTION
3 − Connections
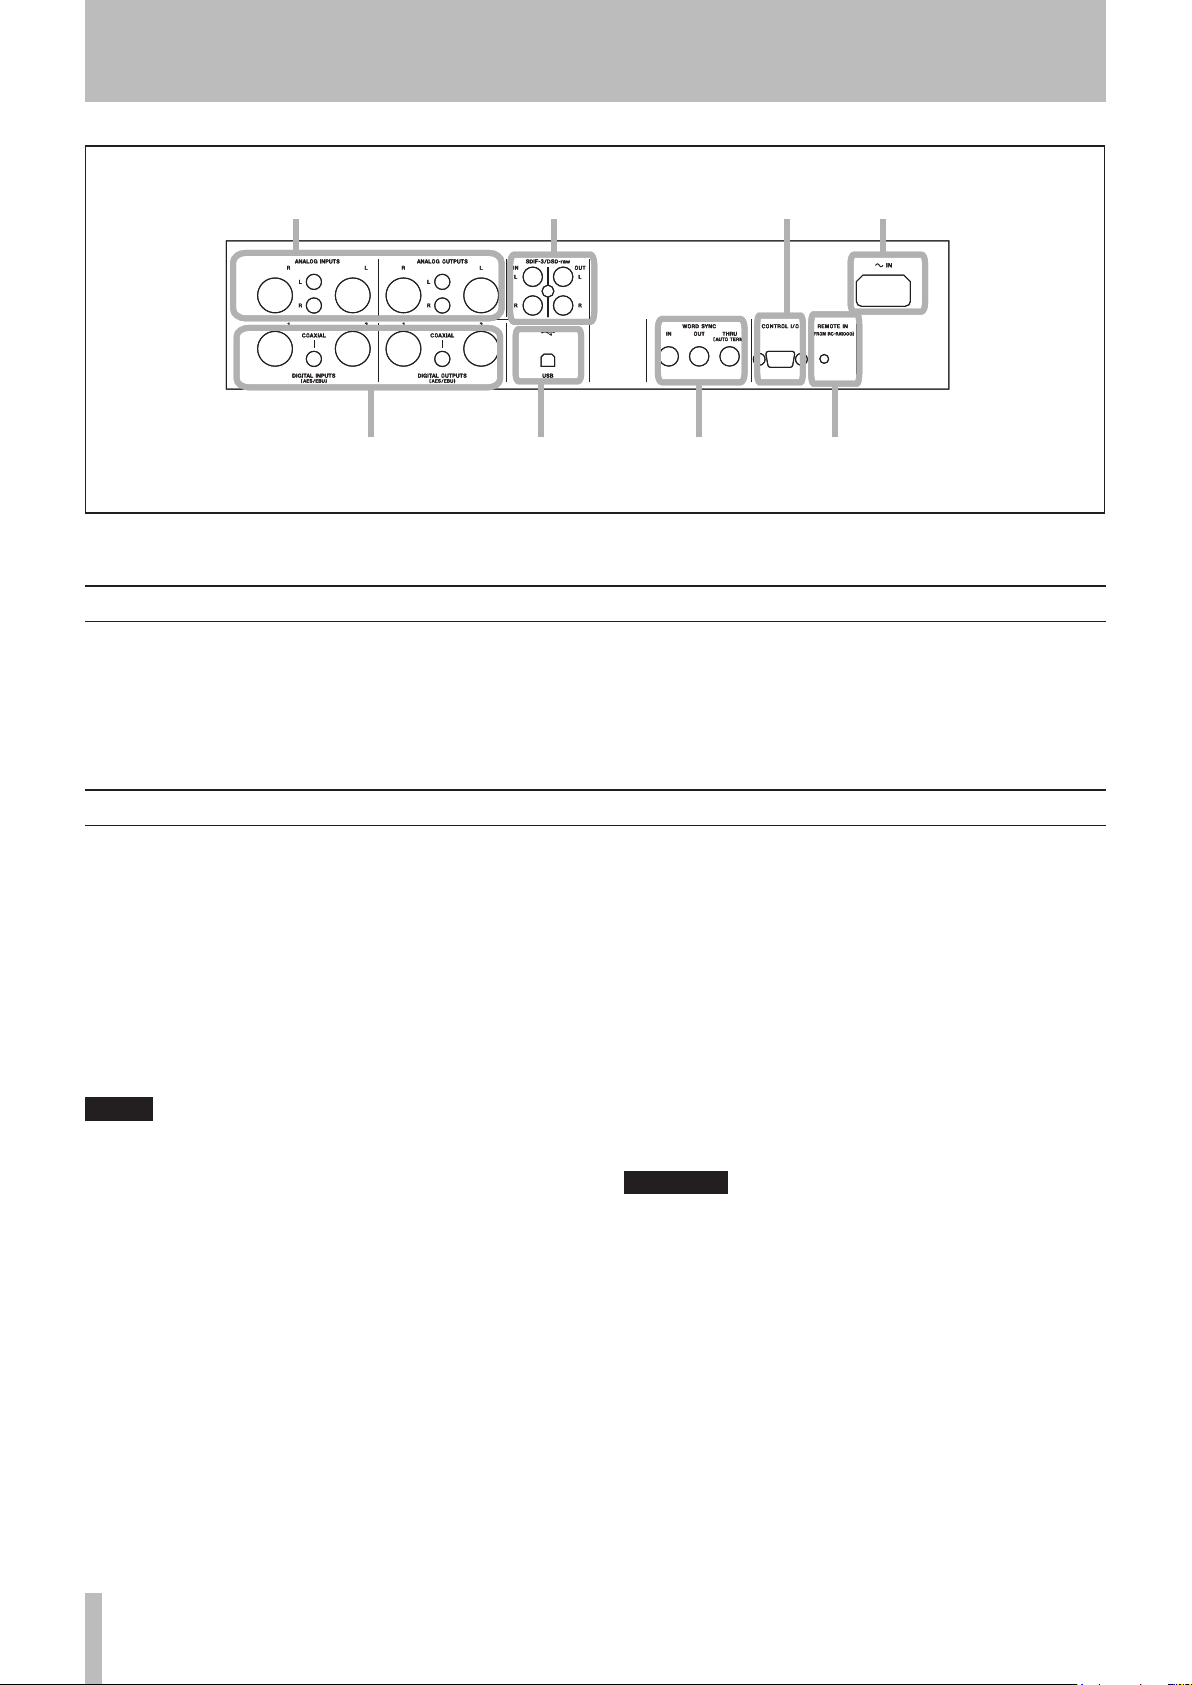
Figure 3.1: Rear panel connections
Analog audio connections
The DV-RA1000HD can accept and output both balanced +4 dBu nominal and unbalanced –10 dBV nominal signals.
Use the XLR jacks, wired as 1=ground, 2=hot, 3=cold
Digital audio connections
The DV-RA1000HD can accept digital audio data from
one of three sources, each corresponding to a different audio format, and can output digital data from the
equivalent type of connector, and in the same format as
it receives data.
AES/EBU Note that while AES/EBUs connections
usually use one XLR connector for a stereo pair, the
DV-RA1000HD is provided with two connectors for
input and output.
Strictly speaking, the format used by these connectors is called IEC-60958-4, or AES-3-1992.
When working in Sampling Frequency 88.2/96 kHz
mode, there is an option of either using one XLR connector at double speed (double-speed), or two connectors, each at normal speed (double-wire). If only one
XLR connector is being used, connections should be
made only to XLR connector 1 (input and output).
for balanced connections, and the RCA (pin) jacks for
unbalanced connections.
On playback or monitoring, audio is always output from
both sets of connectors in parallel.
In Sampling Frequency 176.4/192 kHz mode, both connectors are used at double speed (double-speed and
double-wire).
S/PDIF These RCA pin jacks are labeled as COAXIAL
on the rear panel. The format is S/PDIF (IEC60958).
These jacks can accept and transmit data at Sampling
Frequency 44.1/48 kHz mode or at Sampling Frequency
88.2/96 kHz mode.
SDIF-3/DSD-raw These BNC connectors accept and
output digital audio data in SDIF-3 (DSD-Raw) format.
Each connector carries one channel of the stereo pair.
When using DSD connections, all digital audio units
in the system, including the DV-RA1000HD, must
be synchronized to a common clock signal. On the
DV-RA1000HD, if this signal is external, a 44.1 kHz
signal should be supplied at the WORD SYNC IN terminal. Alternatively, the DV-RA1000HD can be set
to act as the system clock master, at 44.1 kHz, with
the DSD audio source acting as the clock slave. (See
“Selecting the reference clock” on page 28.
)
16 TASCAM DV-RA1000HD

Other connections
CAUTION
NOTE
3 − Connections
WORD SYNC The DV-RA1000HD is fitted with three
BNC connectors for standard word sync.
There should be one, and only one clock master in
a setup.
IN receives word sync from an external source, and
OUT is used when the DV-RA1000HD is used as the
word sync master in a setup, outputting the frequency
of the current project. THRU echoes the sync received
at IN and is terminated automatically if nothing is connected.
When in DSD recording mode, the DV-RA1000HD
inputs and outputs word sync at 44.1 kHz. Under
these conditions, the input sync can be ±6% away
from the norm.
USB Connect a suitably-equipped computer using a
USB 2.0 cable. The DV-RA1000HD appears as a mass
storage device, requiring no driver software.
USB connection enables you to transfer audio files on
the HD of DV-RA1000HD to the computer, and transfer
audio files on the computer to the DV-RA1000HD. (See
“Use with a computer” on page 59.)
CONTROL I/O You can use RS-232C serial control
with the DV-RA1000HD by connecting an appropriate
cable to this connector. Consult your TASCAM distributor for details of pin-outs, protocols, etc.
REMOTE IN Connect only the supplied wired
RC-RA1000 remote control unit to this jack. Since the
remote control unit is a wired unit, the DV-RA1000HD
will respond to the key presses on the remote control
unit precisely. It does not require any batteries, and you
do not need to point at the DV-RA1000HD for operation.
PHONES Connect a standard set of stereo headphones
to this front panel 1/4" jack. Adjust the level with the
control above the jack.
KEYBOARD (front panel) Connect a computer
PS/2 keyboard (US standard layout) to this jack located
on the right side of the front panel to name files and
projects, and to create project notes.
TASCAM DV-RA1000HD 17

NOTE
4 − Basic operations
HDD and ODD
Drive mode
The DV-RA1000HD is equipped with a DVD drive and
hard disk drive. Since a DVD drive plays optical discs,
such as CDs and DVDs, it is referred to as an “ODD
(Optical Disc Drive)” in this manual. The hard disk
drive is referred to as “HDD (Hrad Disc Drive).”
The DV-RA1000HD enables you to switch between
ODD mode and HDD mode.
In ODD mode, you cannot use the HDD. In HDD mode,
Storage media
The DV-RA1000HD enables you to record data on the
internal HD, or to various optical discs, such as CD-R,
CD-RW, DVD-R, DVD+R, DVD-RW, and DVD+RW.
The functions available with these discs vary depending on the type of media. For example, some types of
discs are writable, and some are not. Some are rewritable, and some are not. Select an appropriate disc to
suit your purpose. There are also different disc formats,
depending on the type of media. However, any format
is compatible with Windows and Macintosh computers.
Internal HD
The HD of DV-RA1000HD enables you to record audio
data that is compatible with computer-based digital
audio workstations. You can select 44.1/48 kHz, 88.2/96
kHz, 176.4/192 kHz and 24-bit. The DSD format
recording is available, too. You can also write data to
the HD using copy mode, or record data directly.
The hard disk format is FAT32.
DVD+RW and DVD-RW
These discs also enable you to record audio data that is
compatible with computer based digital audio workstations. You can also write data to the HD using copy
mode, or record data directly.
The disc format is UDF1.5. When you eject a disc or
shut down the DV-RA1000HD, the disc drive writes
the UDF management information (required for the
DV-RA1000HD to read information on the disc) to the
disc.
You must perform the “close” operation when using a
DVD-RW disc on the DV-RA1000HD to enable your
computer to read data from the disc.
you cannot use the ODD (excluding opening and closing of the disc tray).
When you press the
DV-RA1000HD will save the current project in the HD,
then switch to ODD mode. When you press the
key while operating a DVD disc in ODD mode, the
DV-RA1000HD will perform the Save UDFMI function, then switch to HDD mode.
The files recorded in DVD+RW discs using this unit
can be played back on the Tascam DV-RA1000.
Also, the files recorded on DVD+RW discs using the
DV-RA1000 can be played back with this unit.
DVD+R and DVD-R
Use these discs when you wish to duplicate project
data recorded on the unit HD. They are suitable for
archiving materials recorded with the DV-RA1000HD.
Note that data can be written in copy mode, but not
recorded directly.
The written data cannot be edited; that is, you cannot
edit the files or change the markers.
The disc format is ISO9660.
CD-R and CD-RW
You can directly record audio CD in CD-DA format.
Furthermore, you can add recordings as long as the
disc is not finalized. You can also delete or unfinalize
data on CD-RW discs, which enables you to record data
repeatedly.
During the direct recording of these discs, the
DV-RA1000HD functions as a standard CD recorder
that features synchronized recording and other functions. You can, of course, play store-bought audio CDs
using the DV-RA1000HD.
Furthermore, you can create audio CDs from audio
tracks stored on the unit’s HD, or copy audio from
audio CDs to the HD.
ODD
key in HDD mode, the
HDD
18 TASCAM DV-RA1000HD

NOTE
Shut down
NOTE
NOTE
4 − Basic operations
In order to shut down the DV-RA1000HD safely with a
disc loaded, follow the steps below.
During the shut down process, the DV-RA1000HD
writes all the UDFMI data to the DVD±RW disc. (See
“Writing the UDFMI” on page 40.
)
1 With a disc loaded, press and hold the OPEN/
CLOSE (SHUT DOWN) key for at least a second.
2 A popup menu appears. Press ENTER to do shut-
down, or CANCEL to return (if you pressed the
OPEN/CLOSE key accidentally for a long time, for
example).
3 All front panel controls are disabled. When it has
nished, a popup message appears telling you
LCD screens
The DV-RA1000HD LCD panel enables you to view
the status of the recorder, set the menu parameters,
make the switch settings, and set up the effects.
Home screens
The “home” screens display current information
regarding the mode and status of the recorder. There
are two types of home screens, depending on whether
a CD-R/CD-RW disc or DVD±RW/HD is being used.
These screens are view-only and non-editable. You can
access the screens assigned to the switches by pressing
the function keys. (See “The “home” screen” on page
20.)
that you can turn off the DV-RA1000HD using
the POWER switch.
If you turn off the POWER switch without performing the shut down operation, the DV-RA1000HD
will automatically perform the shut down process,
then turn itself off. (If you turn off the POWER switch
during the format or copy operation, the unit will
perform the shut down process after the format or
copy operation is complete.)
If you turn on the POWER switch before the unit
turns itself off, it will still execute the shut down
process. In this case, turn off the power to the unit
after it completes the shut down operation.
Menu screens
The menu screens enable you to set up the system, projects, discs, copy functions, and other functions. Press
the MENU key to display the main menu. (See “Menu
operations” on page 21.)
Virtual front panel (VFP)
The virtual front panel allows access to various switches on the screen that are not accessible on the front
panel. Press the ENTER key from the home screen to
display the virtual front panel. (See “The virtual front
panel (VFP)” on page 23.)
Other screens
The DV-RA1000HD also features special screens for
effects settings, input level settings, and the locate list.
You can recall these screens by pressing dedicated keys.
Navigating the screens
A typical screen on the DV-RA1000HD
•
features five switches on the bottom. Press
one of the function keys (F1 - F5) to execute
a function or open a screen assigned to the
corresponding key.
Press the F1 or F2 key (up/down) to select an
•
item in the screen.
Adjusting the display contrast
To adjust the display contrast:
While pressing and holding the
JOG/DATA
ing and viewing angle.
dial to adjust the contrast to suit your light-
DISPLAY
key, turn the
Use the JOG/DATA dial to adjust a value or
•
setting.
Press the ENTER key to confirm a setting or
•
selection in the screen.
You cannot use the JOG/DATA keys on the remote
control unit to adjust the display contrast.
TASCAM DV-RA1000HD 19
4 − Basic operations
TIP
1
7
8
9
0
q
r
w e
23
4
5 617
8
9
0
q
r
w e
23
4
5 6
1
7
8
9
0
q
we
2
3
4
5 617
8
9
0
q
we
2
3
4
5 6
The “home” screen
The DV-RA1000HD has two types of “home screen”,
depending on whether a CD or DVD±RW/HD disc is
being used.
“Home” screen content
The home screens are view-only and non-editable.
However, you can access the screens assigned to the
switches by pressing the corresponding function keys.
These screens are often accessible from other
screens by pressing the F5 key (which is then
marked as HOME on the display).
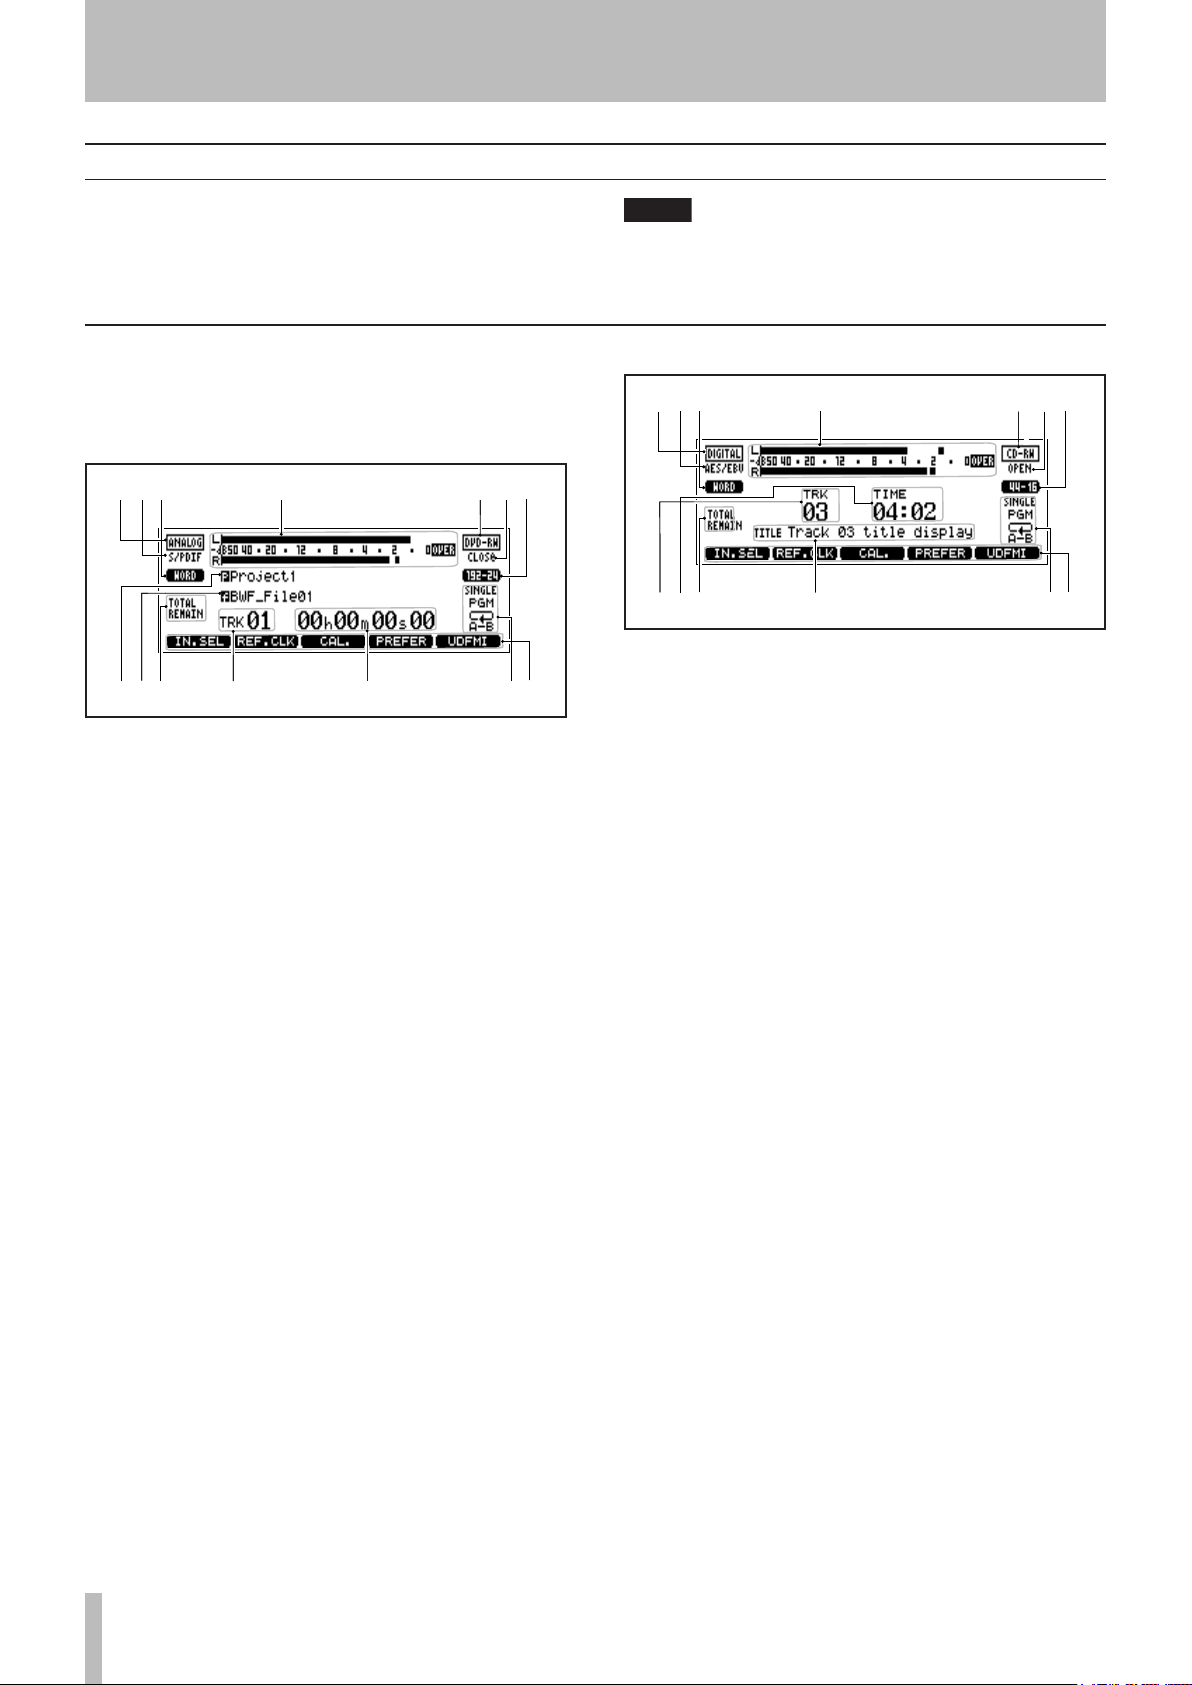
Figure 4.2: The CD home screen
Figure 4.1: DVD±RW/HD home screen
1
Input mode
2
Digital I/O
3
Reference clock
4
Meter
5
Disc type
6
Disc status
7
Audio format of the current project
8
Name of the current project
9
Name of the current file
0
Display mode of track time
q
Current track number
w
Time display of the currently-playing track
e
Playback mode (single, program, repeat)
r
Short-cut function (assignable)
1
Input mode
2
Digital I/O
3
Reference clock
4
Meter
5
Disc type
6
Disc status
7
Audio format
8
Track number
9
Track time
0
Track time display mode
q
CD text information
w
Playback mode (single, program, repeat)
e
Short-cut function (assignable)
20 TASCAM DV-RA1000HD
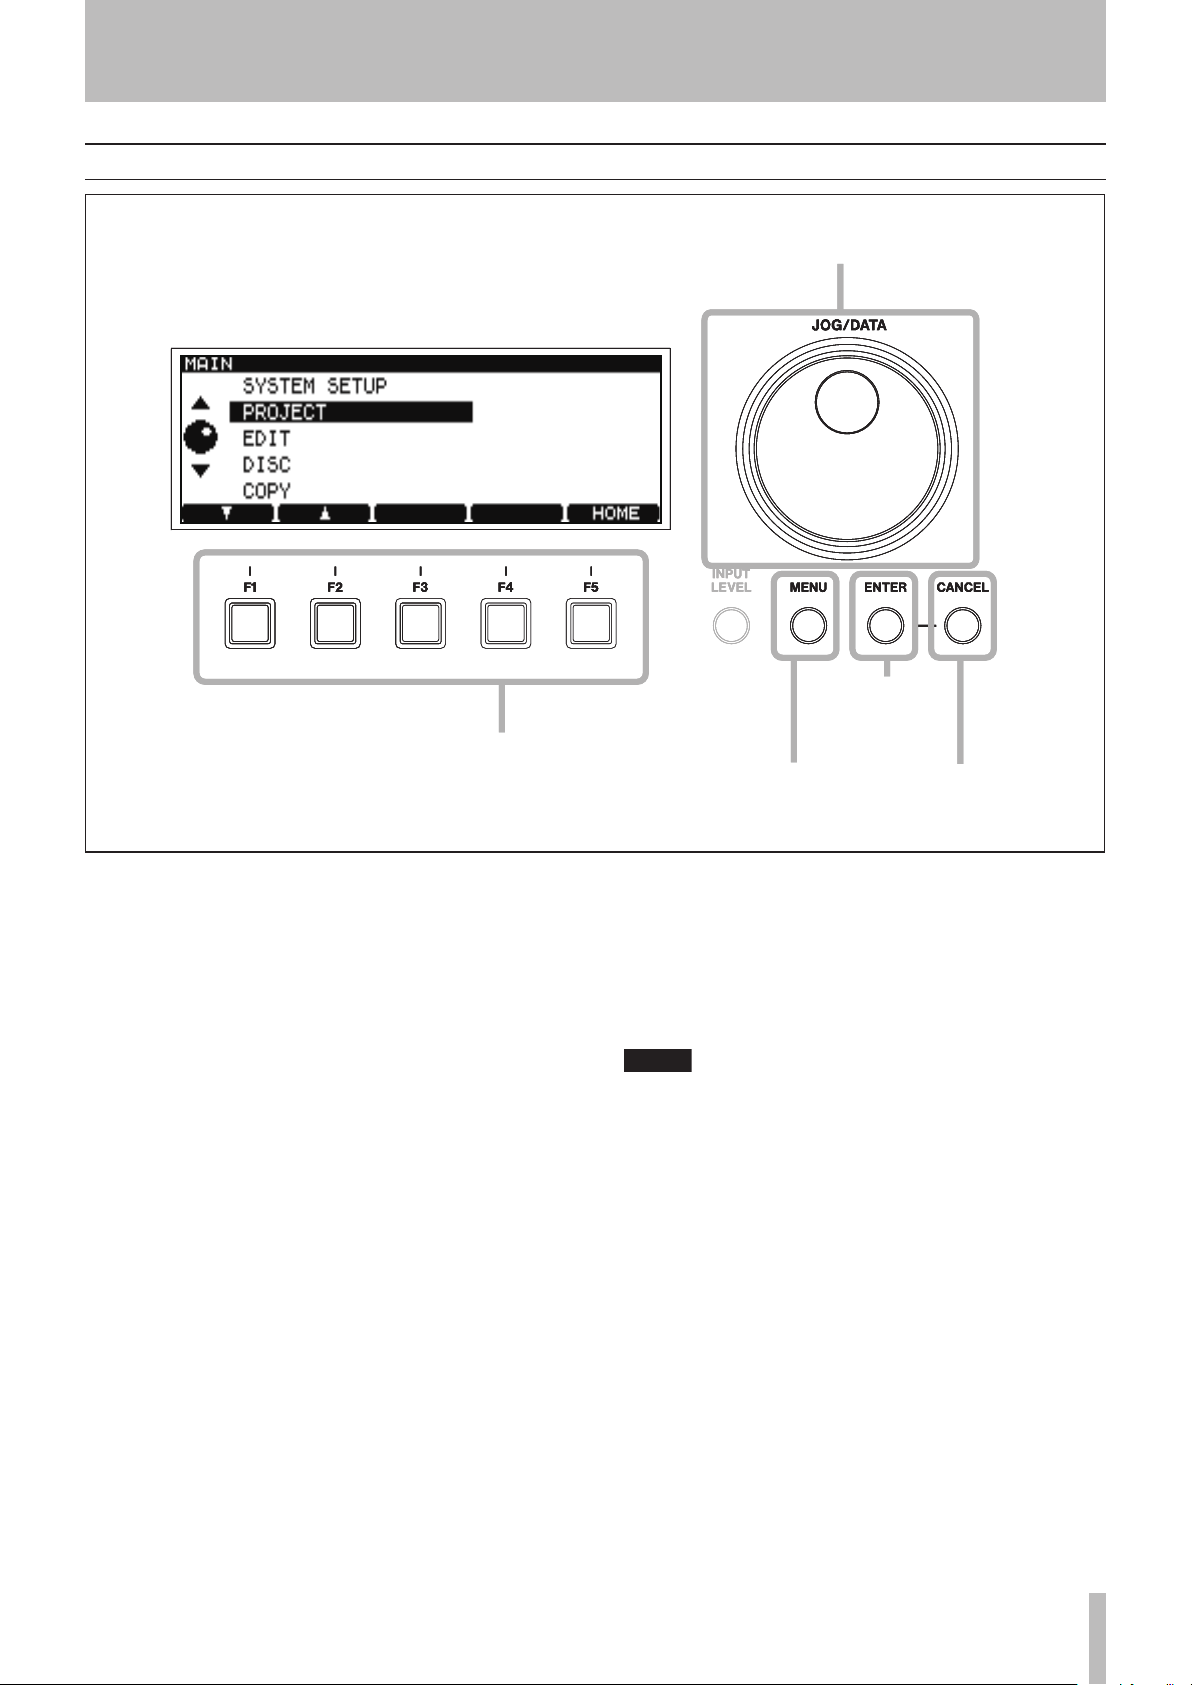
Menu operations
Change values and highlight
options with the dial
Use the soft function keys to perform
the functions on the bottom row of
the screen (often used as cursor keys)
Enter the
menu system
Go up a
level
Confirm
settings or go
down a level
Change values and highlight
options with the dial
Use the soft function keys to perform
the functions on the bottom row of
the screen (often used as cursor keys)
Enter the
menu system
Go up a
level
Confirm
settings or go
down a level
NOTE
4 − Basic operations
Figure 4.3: Using the DV-RA1000HD menu system
To enter the main setting menu of the DV-RA1000HD:
1 Press the MENU key. The main menu appears.
2 Use the JOG/DATA dial or the F1 and F2 keys on
the unit, or the JOG/DATA keys on the remote
control unit, to select (highlight) a desired menu
item.
3 Press ENTER to enter the selected menu item.
Also use the
a screen. Pressing ENTER on a screen with many
settings will conrm all these settings at once,
and return to the previous menu level.
ENTER key to conrm the settings of
CANCEL returns up a screen
•
When the F5 key is labeled as HOME on the
•
on-screen label, pressing it returns to the
home screen.
Note that the menu system cannot be accessed
while the unit is recording and many operations
cannot be carried out while playing back.
We suggest that you pause or stop playback before
trying to enter the menu system.
TASCAM DV-RA1000HD 21
 Loading...