

Page 1
DR-40
Release Notes
Contents
Updates ................................................................................................ 1
New functions ................................................................................... 1
V2.10 addition .............................................................................. 1
V2.00 additions ............................................................................ 1
V1.30 addition .............................................................................. 1
V1.20 addition .............................................................................. 1
V1.10 additions ............................................................................ 1
V1.02 addition .............................................................................. 2
Maintenance items .......................................................................... 2
V2.12 fix .......................................................................................... 2
V2.11 fix .......................................................................................... 2
V2.10 fixes ...................................................................................... 2
V2.00 fixes ...................................................................................... 2
V1.30 fix .......................................................................................... 2
V1.20 fixes ...................................................................................... 2
V1.10 fixes ..................................................................................... 3
V1.02 fixes ..................................................................................... 3
V1.01 fixes ..................................................................................... 3
Confirmation of firmware version .............................................. 3
Firmware update procedures ...................................................... 3
matic power saving function now also operates when an AC adaptor is connected.
By default, the automatic power saving function is set to
30 minutes, and the unit will automatically turn OFF (enter
standby) after 30 minutes pass without operation.
If you want to change the setting of the automatic power
saving function, use the AUTO PWR SAVE item in the
SYSTEM menu to adjust the amount of time until the unit
power automatically turns OFF (enters standby).
For details, see the “New function in version 1.30” section
in the addendum to the DR-40 Owner’s Manual.
V1.20 addition
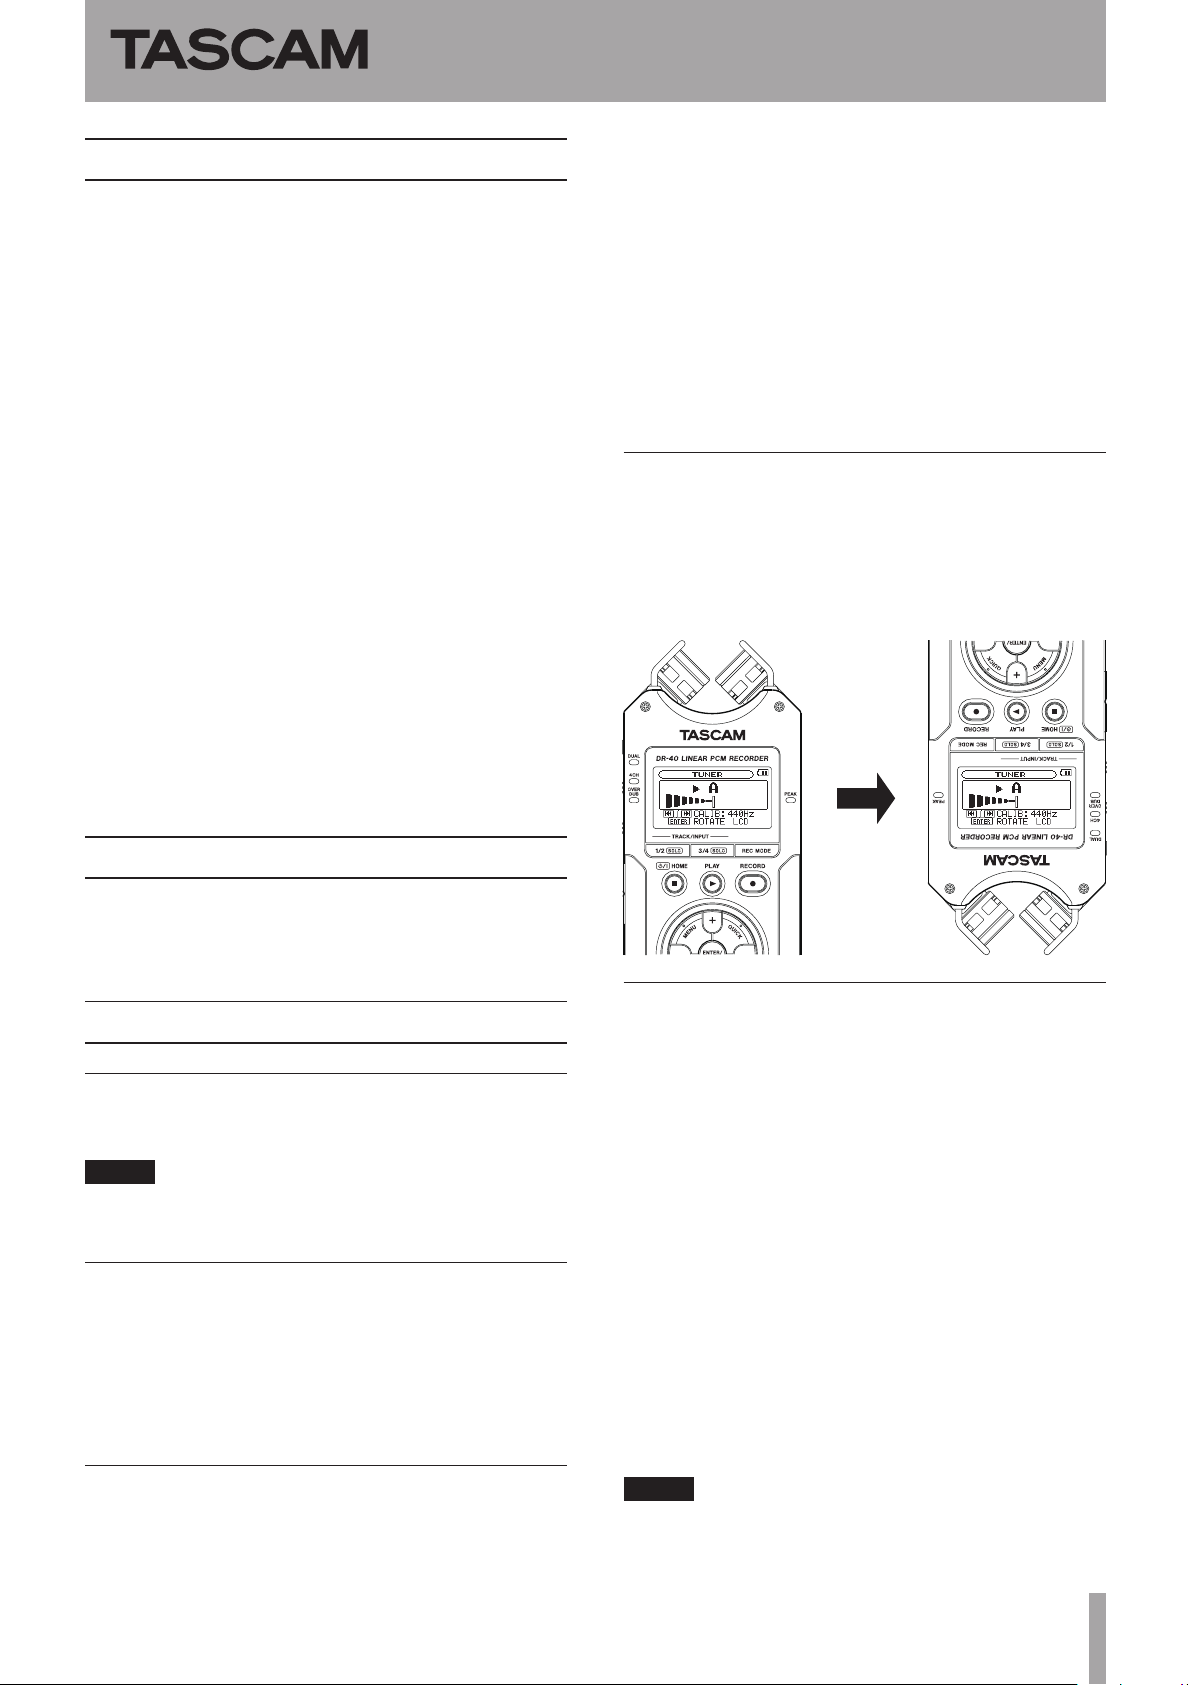
The tuner is now easier to use.
When the
ENTER/MARK button to reverse the screen orientation,
making it easier to tune using the built-in mic.
TUNER
screen is open, you can press the
Updates
Always use the most recent rmware for this device.
Please visit the TEAC Global Site at http://teac-global.com
to check for the latest rmware.
New functions
V2.10 addition
An erase format function for SD cards has been added.
•
NOTE
Using the
writing speeds.
V2.00 additions
SDXC cards of up to 128 GB can now be used.
•
An auto tone function, which is convenient when
•
editing video on other equipment, has been added.
An AUTO DIVIDE function that can be used to divide a
•
le at all its mark points at once has been added.
ERASE FORMAT
function might improve
V1.10 additions
You can now set the
the left and right channels independently.
If the input selection on the
(
SOURCE
can set the
channels independently.
When the Home Screen is open, you can use the
LEVEL
input level.
Use the following buttons to switch between adjusting
the input levels of the left and right channels.
When the
•
DUAL
[
SOLO
When the
•
OVERDUB-MIX
or
EXT IN
EXT IN
(+/–) buttons on the left side panel to adjust the
REC MODE
or
OVERDUB-SEPARATE
] button.
REC MODE
EXT IN
REC MODE
) is set to
input levels of the left and right
item is set to
item is set to
, use the
input levels for
screen
EXT INDEP.
STEREO
, use the
4CH
3/4 [SOLO
] button.
, you
INPUT
,
1/2
or
V1.30 addition
In order to comply with European standby
power regulations (ErP Directive), the auto-
D01163800J
NOTE
When the
to
EXT IN
the input signal, elements of both left and right channels
SOURCE
or
INT MIC
item on the
and an eect is applied to
EFFECT
screen is set
TASCAM DR-40 1
Page 2

DR-40
Release Notes
will be included in the eect sound, so sound from the
opposite channel will be mixed into the recorded signal.
When the input selection on the
(
SOURCE
EXT IN
right channels.
or
EXT IN
input level will be the same for both left and
) is set to
The delay time range when the
item is set to
The delay time can now be set to a maximum of 150 ms.
4CH
has been expanded.
The delay time when the
set to
4CH
can now be set independently for
REC MODE
EXT IN 1/2
REC MODE
screen
REC MODE
item is
, the
left and right channels.
If there are dierences in the distances from the sound
source to the
and to the
for the time lag by treating the
position and then adjusting the
IN R
INT MIC
EXT IN R
channel delay times.
, to the
channel, you can compensate
EXT IN L
INT MIC
EXT IN L
as the basic
channel
and
EXT
The input level setting pull-up menu has
been changed so that its items correspond to
the input source.
V1.02 addition
Right external input channel muting when
recording 4 channels
When the
MODE
the right external input channel to be muted by setting
the
you to use a mono mic on the left external input channel
with the built-in mics for three-channel recording.
The les created, however, will still be two stereo les with
the right external input channel muted.
NOTE
When the
•
eects cannot be used when recording
If you want the left external input channel to be
•
centered when monitoring, press the MIXER button
during recording or recording standby and set the
channel 3
REC MODE
screen, a new function has been added that allows
EXT IN
item to
EXT IN
PAN
item is set to
EXT IN 1
item is set to
to C (center) on the
. This function allows
4CH
on the
EXT IN 1
MIXER
screen.
REC
,
Maintenance items
V2.12 fix
When the dual recording
•
to
LIMITER
would not be highlighted. This has been xed.
Operation stability has been improved.
•
, the
V2.11 fix
When using the erase format function, writing speed
•
would slow and a
occur sometimes. This has been xed.
Write Timeout
V2.10 fixes
When using the RC-3F footswitch in
•
briey pressing the middle switch would return to the
beginning. This has been xed.
During playback, the volume pop-up sometimes
•
became slow to appear. This has been xed.
A
Write Timeout
•
when adding a mark and incrementing a track during
recording. This has been xed.
The input level range for correctly achieving the dual
•
recording eect has been improved.
Previously, depending on the
dual recording eect would not be achieved correctly
when the input level was 0–24 or less. This range has
been changed to 0–12 or less.
Operation stability has been improved.
•
V2.00 fixes
The time interval for the track incrementation setting
•
has been changed.
Operation stability has been improved.
•
V1.30 fix
Operation stability has been improved.
•
V1.20 fixes
When overdubbing in
•
MP3 le recorded on a device other than this unit
as the playback le, jumping back and searching
backward or forward (rewinding or fast forwarding), for
example, caused the audio of channel pairs 1/2 and 3/4
to become out of sync. This has been xed.
LVL CTRL
DUAL LVL
would occur sometimes
SEPARATE
item setting value
MINUTES
DUAL LVL
mode with an
item was set
error would
setting, the
mode,
2 TASCAM DR-40
NOTE
about projects with overdubbing in
using rmware versions 1.10 and earlier
If the bit rate of the playback le is one that this unit
•
can use for recording (32, 64, 96, 128, 192, 256 or
SEPARATE
mode
Page 3

DR-40
Release Notes
320 kbps) jumping back and searching backward
or forward, for example, will not cause the audio of
channel pairs 1/2 and 3/4 to become out of sync
using rmware versions 1.10 and earlier.
If the bit rate of the playback le is one that this unit
•
cannot use for recording (48, 56, 80, 112, 160 or 224
kbps) jumping back and searching backward or
forward, for example, will cause the audio of channel
pairs 1/2 and 3/4 to become out of sync using
rmware versions 1.10 and earlier. Use rmware
version 1.20 or later when overdubbing to avoid this.
After VSA playback, searching forward or backward
•
sometimes caused the volume to decrease during later
playback operations. This has been xed.
The sensitivity of the tuner has been improved.
•
V1.10 fixes
If a mixdown was executed when the open capacity
•
of an SD card was more than 4 GB, a
error would occur and the mixdown would fail in some
cases. This has been xed.
Operation stability has been improved.
•
CARD FULL
V1.02 fixes
If the
•
•
•
REC MODE
SOURCE
EXT IN 1
peak value in decibels would not be shown correctly
on the recording screen. This has been xed.
When a le recorded in MP3 format was played back
using the I/O loop function, sometimes loop playback
did not occur properly. This has been xed.
Operation reliability has been improved.
item was set to
item was set to
on the
REC MODE
DUAL
and the
INT MIC MONO
screen, the DUAL
or
V1.01 fixes
If recording was conducted when the
•
item on the
or
MONO
could show less than the actual amount and a
Full
stop even if the SD card still had remaining capacity.
This has been xed.
During recording with certain SD cards, a
•
Error
Operation reliability has been improved.
•
REC MODE
, the remaining recording time display
message might appear and recording might
would occur. This has been xed.
screen was set to
REC MODE
STEREO
Card
File
Confirmation of firmware version
Conrm the rmware version of your DR-40 before conducting a rmware update.
1 Turn the unit’s power ON.
2 Press the MENU button to open the
3 Use the +/− buttons to select the
item, and press the ENTER/MARK button to open
the
OTHERS
4 Use the +/− buttons to select the
menu item, and press the ENTER/MARK button to
open the
5 Use the +/− buttons to open the
where you can check the
that shows the firmware version.
If the
System Ver.
newer than the rmware version that you planned to
update to, then there is no need to update it.
submenu.
INFORMATION
screen
System Ver.
shown here is the same or
MENU
screen.
OTHERS
INFORMATION
FILE
SYSTEM
menu
page.
page
item
Firmware update procedures
CAUTION
When updating the rmware, be sure that the batteries
have sucient charge or power the unit using a TASCAM
PS-P515U AC adaptor (sold separately) or USB bus power
from a computer.
The program has been set so that the update will not be
conducted if battery power is insucient.
1 Download the most recent firmware from the TEAC
Global Site (http://teac-global.com/). If the file that
you have downloaded is compressed in ZIP format,
for example, decompress it.
2 Turn the unit’s power ON and use the included
USB cable to connect it with a computer. This unit
will be recognized as an external drive (external
storage device) by the computer.
3 Copy the downloaded firmware (DR40_074.130 for
V1.30) to the UTILITY folder on the DR-40.
4 After copying has completed, disconnect the
unit from the computer following the correct
procedures, and turn the unit power OFF.
5 While pressing and holding both the MIXER and
 buttons, turn the unit power ON.
The unit starts up in update mode, and the update le
appears on the screen.
CAUTION
If this screen does not appear, turn the power OFF.
•
Then while pressing and holding both the MIXER and
TASCAM DR-40 3
Page 4

 buttons, turn the unit’s power ON again. Continue
to press and hold the MIXER and  buttons rmly
until this screen appears.
When rmware has been copied to this unit’s UTILITY
•
folder from a Mac, in addition to the rmware le itself,
another le with “._” added to the beginning of the
rmware name is also shown. Use the le without the
“._” at the beginning of the name.
NOTE
This screen shows a list of the rmware update les
•
inside the UTILITY folder of the unit. Also, the screen
shows the rmware copied at Step 3 above.
Update File
the UTILITY folder.
The screen shown is an example. The actual display
•
diers.
6 Use the +/− buttons to select the firmware and
press the ENTER/MARK button to open the
following screen.
appears if there is no update le in
No
DR-40
Release Notes
The current version appears on the left and the updated version appears on the right.
NOTE
The screen shown is an example. The actual display differs.
7 Press the ENTER/MARK button to start the update.
8 When the update is complete,
Complete
and then the power turns OFF automatically. Turn
the power ON again.
9 Follow the “Confirmation of firmware version”
instructions above to check that the
Ver.
firmware.
This completes the procedure for updating this unit.
10 Connect to a computer with USB and delete the
firmware update from the unit’s UTILITY folder.
appears at the bottom of the screen,
is now the most recent version of the
Update
System
4 TASCAM DR-40
 Loading...