

Tanita BF-2000 Owner's Manual

MANUAL
Radio Wireless Body Fat Monitor
Model : BF-2000
Instruction Manual
Read this Instruction Manual carefully and keep it for future reference.
Manual de instrucciones
Lea detenidamente este manual de instrucciones y guárdelo para futura referencia.

Table of Contents
Introduction ...........................................................................................................................1
Features and functions ...........................................................................................................1
Preparations before use .........................................................................................................2
Getting accurate readings ......................................................................................................2
Using TANITA Wireless Remote Display (D-1000plus and D-1100plus) ................................3
Troubleshooting .....................................................................................................................6
Table des matières
Introducción ...........................................................................................................................7
Prestaciones y funciones .......................................................................................................7
Preparaciones antes del uso ..................................................................................................8
Cómo obtener lecturas exactas ..............................................................................................8
Utilizando el Display TANITA Remoto Inalambrico (D-1000plus y D-1100 plus) ....................9
Resolución de fallos .............................................................................................................13
Introduction
Thank you for selecting a Tanita Body Fat Monitor. This monitor is one in a wide range of home
healthcare products produced by Tanita.
This Instruction Manual will guide you through the setup procedures and outline the key features.
Please keep it handy for future reference. Additional information on healthy living can be found on our
website www.tanita.com.
Tanita products incorporate the latest clinical research and technological innovations.
All data is monitored by our Tanita Medical Advisory Board to ensure accuracy.
Note: Read this Instruction Manual carefully and keep it handy for future reference.
Safety Precautions
People with an electronic medical implant, such as a pacemaker, should not use a Body Fat Monitor as it passes a low-level electrical
signal through the body, which may interfere with its operation.
Pregnant women should use the weight function only. All other functions are not intended for pregnant women.
Do not place this monitor on slippery surfaces such as a wet floor.
Important Notes for Users
This Body fat monitor is intended for children (ages 5-17) with inactive to moderately active lifestyles.
The body fat monitor function is not intended for pregnant women, professional athletes or bodybuilders.
Note: Body fat percentage estimates will vary with the amount of water in the body, and can be affected by dehydration or over-
hydration due to such factors as alcohol consumption, menstruation, illness, intense exercise, etc. It is recommended that if
possible all readings should be taken at the end of one’s day since in the morning after rising from sleep, hydration levels are
at their lowest.
Tanita takes no responsibility for any kind of damage or loss caused by the monitor, or any kind of claim made by a third
person.
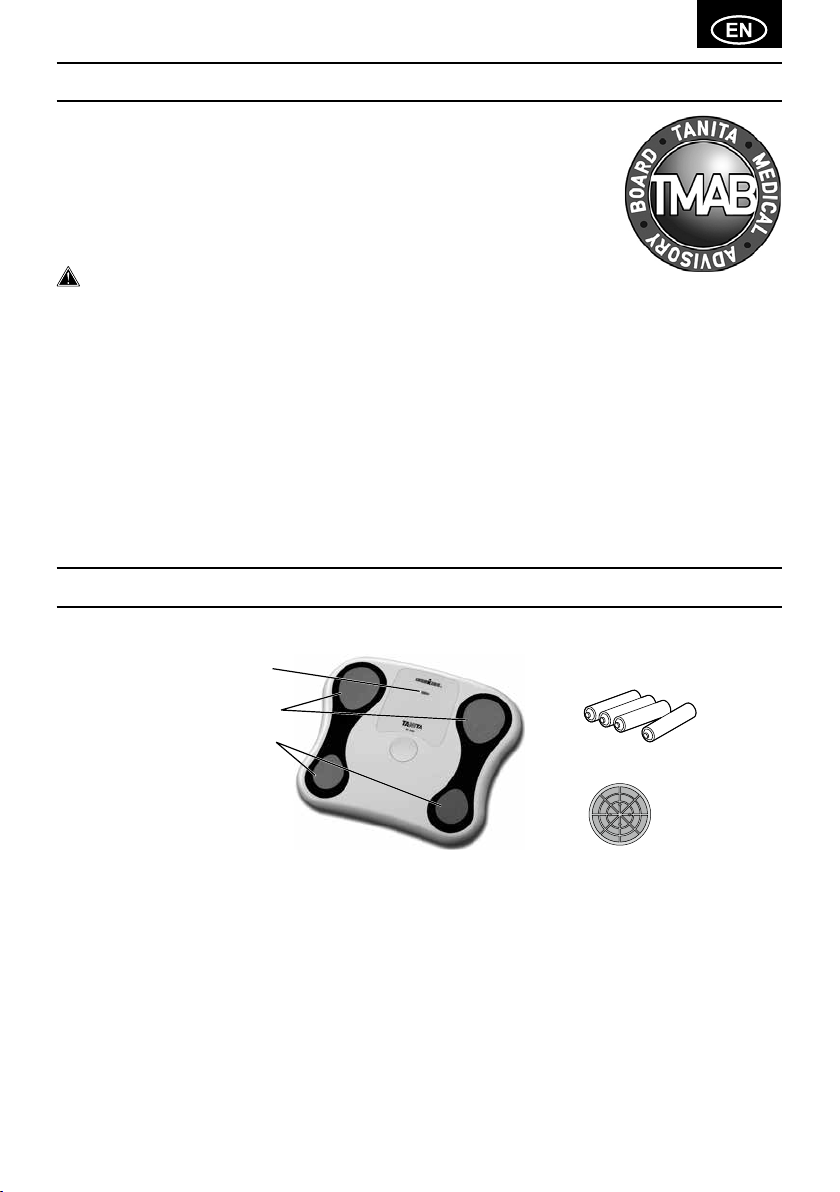
Features and functions
Measuring Platform Accessories
1. Indicator light (Green and Red)
4. AA-Size Batteries (4)
2. Ball-of Foot Electrodes
3. Heel Electrodes
5. Carpet Feet (4)
1
Preparations before use
Inserting the Batteries
Open as shown.
Direction of
the batteries.
Detachable Carpet Feet (only for
piles up to 0.28” ( 7 mm) thick)
Handling Tips
This monitor is a precision instrument utilizing state-of-the-art technology.
To keep the unit in the best condition, follow these instructions carefully:
• Do not attempt to disassemble the measuring platform.
• Avoid excessive impact or vibration to the unit.
• Place the unit in an area free from direct sunlight, heating equipment, high humidity, or extreme temperature change.
• Never submerge in water. Use alcohol to clean the electrodes and glass cleaner (applied to a cloth first) to keep them shiny; avoid
soaps.
• Do not step on the platform when wet.
• Do not drop any objects onto the platform.
• Do not use this scale while operating transmitters (such as a cell phone) as this may affect your results.
• If not in use for a prolonged period of time it is recommended that you remove the batteries.
Open the battery cover on the back of the measuring platform. Insert the supplied
AA-batteries as indicated.
Note: Be sure that the polarity of the batteries is set properly. If the batteries are
incorrectly positioned the fluid may leak and damage floors. If you do not intend
to use this unit for a long period of time, it is advisable to remove the batteries
before storage.
Please note that the included batteries from the factory may have decreased energy levels
over time.
Positioning the Monitor
Place the measuring platform on a hard, flat surface where there is minimal vibration to
ensure safe and accurate measurement.
Use carpet feet when the scale is used on soft surface, such as rugs or carpetings.
Note : To avoid possible injury, do not step on the edge of the platform.
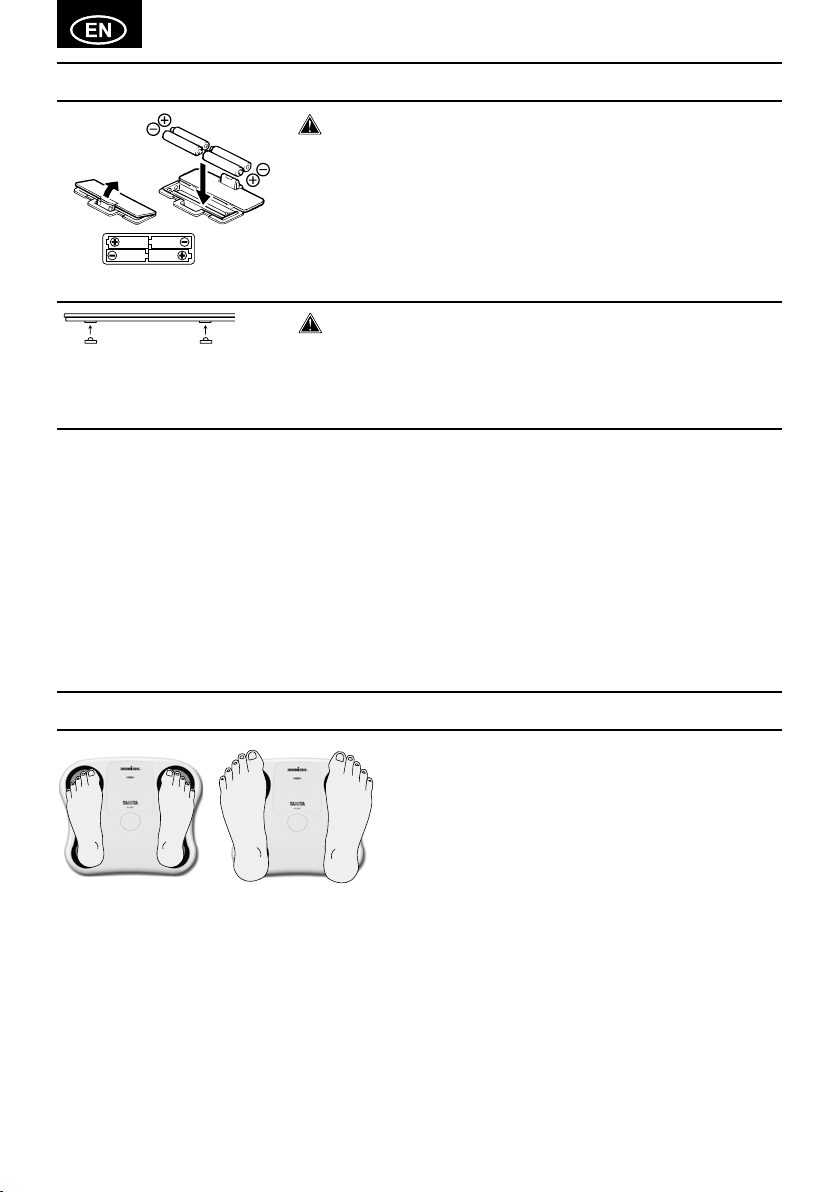
Getting accurate readings
To ensure accuracy, readings should be taken without clothing and
under consistent conditions of hydration. If you do not undress,
always remove your socks or stockings, and be sure the soles of your
feet are clean before stepping on the measuring platform. Be sure
that your heels are correctly aligned on the measuring platform. Don’t
worry if your feet appear too large for the unit -accurate readings can
still be obtained if your toes overhang the platform.
Heels centered on
electrodes
Note : An accurate reading will not be possible if the soles of your feet are not clean, or if your knees are bent or you are in a sitting
position.
Toes may overhang
measuring platform
2
It is best to take readings at the same time of day. Try to wait about
three hours after rising, eating, or hard exercise before taking
measurements.
While readings taken under other conditions may not have the same
absolute values, they are accurate for determining the percentage of
change as long as the readings are taken in a consistent manner. To
monitor progress, compare weight and body fat percentage taken
under the same conditions over a period of time.

Using TANITA Wireless Remote Display (D-1000plus and D-1100plus)
1.Initial Setting (Clock Setting)
Insert batteries into the remote display and then press
any front panel button to set the clock.
Battery Cover
1) Set Hour
Press s/t buttons to set hour and then press SET.
The unit will beep once to confirm.
2) Set Minute
Press s/t buttons to set minute and then press
SET.
The unit will beep twice to confirm the programming.
Resetting Clock
•
Press the clock button on the bottom of the remote display.
Then follow the clock setting procedure 1) and 2).
Backlight Button
Upright Position
2.Pairing the remote display and the BF-2000 (”platform”)
The platform needs to pair with the applicable remote display before measurements are attempted.
Pairing compatible remote displays: D-1000plus and D-1100plus
1) Before proceeding,
a) Install the batteries in the platform.
b) Install the batteries and set the clock in the remote display.
c) The platform and the remote display are within 17 feet (5 m) of each other.
2) Press and hold OFF button for 2 seconds on the
remote display. The remote display will show
"1234" for selecting a personal number. Select the
preferred personal number which will be paired
with the platform using s/t buttons and press
the SET button to confirm.
3) The remote display will show "SEt-P". Select "YES"
or "no" using s/t buttons, and press the SET
button to confirm,
a) "YES": The pairing process will continue to the next step.
b) "no": The pairing process will be cancelled and then the
clock will be displayed.
4) Input the 5 digit serial number found on the bottom
of the platform using s/t buttons and press the
SET button to confirm.
Cancellation-1: Press the OFF button to cancel during the pairing process and then the clock will be displayed.
Cancellation-2: The pairing process will be cancelled if inactive for 1 minute and then the clock will be displayed.
Note : • “ 00000 ”, “ 000001 ” and more than “ 65535 ”.
These serial numbers are not allowed. Please input the correct serial number.
• The serial number is located on the bottom of the platform.
Continued on the next page.
t
3
 Loading...