


The information in this documentation is subject to change without notice and
does not represent a commitment on the part of Steinberg Media Technologies GmbH. The software described by this document is subject to a License
Agreement and may not be copied to other media. No part of this publication
may be copied, reproduced, or otherwise transmitted or recorded, for any
purpose, without prior written permission by Steinberg Media Technologies
GmbH.
All product and company names are ™ or ® trademarks of their respective
owners. Windows XP is a trademark of Microsoft Corporation. The Mac logo
is a trademark used under license. Macintosh is a registered trademark.
Mac OS X is a registered trademark. Cakewalk SONAR is a registered trademark of Twelve Tone Systems. ReWire is a trademark of Propellerhead Software AB. Logic is a trademark of Apple Computer, Inc. registered in the U.S.
and other countries.
© Steinberg Media Technologies GmbH & Wizoo Sound Design GmbH, 2005.
All rights reserved.
HYPERSONIC
2 English

Table of contents
6 Register your software!
6 The Steinberg Key
7 Minimum system requirements (PC version)
8 Installing Hypersonic 2 (PC version)
8 Removing Hypersonic 2 (PC version)
9 Minimum system requirements (Mac version)
9 Installing Hypersonic 2 (Mac version)
10 Activating the Steinberg Key
11 Preparations
11 Setting up Hypersonic 2 as a VST Instrument in Cubase
12 Setting up Hypersonic 2 as a DXi2 Synth
13 Using Hypersonic in an AU compatible application
13 Hypersonic stand-alone and ReWire
15 Latency
16 Overview
21 Quickstart
22 Linking parts
23 Tweaking a sound
23 Checking polyphony
24 Create a key split/crossfade
25 Adding a drumloop
26 User interface
26 Changing values
27 Assigning MIDI Controllers
28 Editing text
28 Using the MIDI keyboard
30 Play PC Keyboard
30 All Notes Off
31 Hyperknobs
31 The concept of Hyperknobs
32 Using Hyperknobs
33 Reference of most common knob labels
35 Sound generation structure
35 Combi
35 Patch
35 Element
37 Browsing, searching, loading and saving
ENGLISH
English 3
HYPERSONIC

37 Browsing patch banks
38 Loading a patch into a part slot
38 Selecting patches from within the host application
39 Loading patches from disk
39 Browsing the patch library
40 Finding patches
42 Managing banks and patches
42 Managing user banks
43 Managing user patches
44 Selecting banks and patches via MIDI program change
45 Combis
46 The Part area
46 Arranging parts
47 Layering parts (Link)
47 Muting parts
48 Setting levels and metering
48 Setting part levels
48 Activating meters
49 The Combi Chain
52 The MIDI page
52 Key Range
53 Velocity range
54 Transposing and tuning
54 Voices
55 Parameter lock
56 The Mix page
58 The Edit page
59 Managing elements
62 The Patch Settings [P]
64 The Arpeggiator
66 The Arpeggiator’s programmable step sequencer
68 Editing synth elements
69 The Easy Page
71 The Osc Page
72 Sample Element [S]
72 Sample Selector Display
72 Startpoint
73 Formant/Zone Shift
73 Velocity to Layer
74 Mono Legato Offsets
HYPERSONIC
4 English

75 Analog Element [A]
75 Analog Osc 1 & 2
77 Oscillator 3
78 HPF – High Pass Filter
78 PWM Limit – Pulse Width Modulation Limit
78 WT Alias – Wavetable Aliasing
78 Wavetable Element [W]
80 FM Element [F]
80 Carrier
81 Modulator 1 & 2
83 The FX page
83 Global or patch FX
84 Programming FX
86 Using patch FX
87 FX Management
87 Effects structure
89 FX elements in a patch
90 The Setup Page
90 Configuring outputs
92 MIDI Settings
94 Loading and saving patches and combis
94 Memory Usage
96 Help menu
ENGLISH
English 5
HYPERSONIC
Register your software!
Please take a moment to complete and return the registration card
enclosed with Hypersonic 2. This will entitle you to technical support,
and we’ll also keep you up to date with the latest news and updates.
The Steinberg Key
Please read this section before installing the Hypersonic software.
Included with the Hypersonic 2 package, you will find an activation
code for the Steinberg Key (sometimes referred to as a “dongle”), a
hardware copy protection device that is part of the Hypersonic copy
protection scheme. Hypersonic 2 will not run if there is no Steinberg
Key and if this key hasn’t been properly activated. You can either separately purchase a new Steinberg Key for use with Hypersonic 2, or use
a key previously bought for use with a different Steinberg application.
The Steinberg Key
The Steinberg Key is, in fact, a little computer on which your Steinberg
software licenses are stored. All hardware-protected Steinberg products use the same type of key, and you can store more than one license
on one key. Also, licenses can (within certain limits) be transferred between keys – which is helpful, e.g. if you want to sell a piece of software.
•
If you have a Windows PC, the installation routine will initiate a restart
of Windows after installation of the key drivers and the program software. After the restart, you can plug the key into the USB port to proceed with the key activation.
•
If you have an Apple Macintosh computer, there will be no automatic
restart. Be sure to read the information regarding the Steinberg Key
that is displayed during the installation process.
HYPERSONIC
6 English

•
If you already own copy-protected Steinberg software, you should remove any existing Steinberg Keys from the computer’s USB port during the Hypersonic 2 installation routine.
The Steinberg Key must not be plugged in before or during the installation of Hypersonic if this is the first time you use such a key. Otherwise
the operating system of your computer will register it as new USB hardware and try to find drivers that won’t be present before Hypersonic 2 installation.
If you already own a Steinberg Key (e.g. for Cubase or Nuendo), you can
load your Hypersonic licenses onto that one, using the activation codes
supplied with Hypersonic. This way you need only one USB key for both
your host application and Hypersonic 2 (see below).
Minimum system requirements (PC version)
•A PC with a 1.4 GHz Pentium or equivalent AMD processor
(faster recommended)
• 512 MB of RAM (1 GB recommended)
• 1.7 GB of free hard disk space for the content
• Windows® XP Home or XP Professional
• Windows MME compatible audio hardware (an ASIO compatible audio card
is recommended).
• If you want to use Hypersonic 2 as a plug-in or ReWire slave device, you’ll
need Cubase or Nuendo or another VST 2.0, ReWire or DXi 2 compatible
host application.
•A Steinberg Key and an available USB port
•A DVD-ROM drive for installation
• Monitor and graphics card supporting at least 1024 x 768 resolution.
•A working internet connection for the activation of the Steinberg Key.
• Please also observe the system requirements of your host application.
ENGLISH
Please note that some features may not be supported in some host
applications.
HYPERSONIC
English 7

Installing Hypersonic 2 (PC version)
Proceed as follows to install Hypersonic:
1.
Make sure that NO Steinberg Key is connected to the USB port.
2.
Insert the Hypersonic 2 DVD into your DVD drive, launch the Explorer
or open the “My Computer” window and double click on the symbol
for the DVD drive that holds the Hypersonic 2 DVD.
If autostart is activated, the DVD contents will automatically open in a new window.
3.
Double click on the Hypersonic 2 Installer symbol to launch the installation program and follow the instructions on screen.
4.
After installation of the software, the installation routine will initiate a
restart of your computer.
5.
After the automatic restart, you will be prompted to plug the Steinberg
Key into the USB port to proceed with the key activation.
Once the key is activated, you can start using Hypersonic 2, see page
10.
Removing Hypersonic 2 (PC version)
1.
Open the “Add or Remove Programs” control panel of Windows XP.
2.
Select Hypersonic 2 and click “Add/Remove.”
3.
Follow the on-screen instructions.
HYPERSONIC
8 English

ENGLISH
Minimum system requirements (Mac version)
•A Power Mac G4 867 MHz computer (faster recommended)
• 512 MB of RAM (1 GB recommended)
• 1.7 GB of free hard disk space for the content
• Mac OS X version 10.4
• CoreAudio compatible audio hardware
• If you want to use Hypersonic 2 as a plug-in or ReWire slave device, you’ll
need Cubase or Nuendo or another VST 2.0, ReWire or AU compatible host
application.
•A Steinberg Key and an available USB port
•A DVD-ROM drive for installation
• Monitor and graphics card supporting at least 1024 x 768 resolution.
•A working internet connection for the activation of the Steinberg Key.
• Please also observe the system requirements of your host application.
Please note that some features may not be supported in some host
applications.
Installing Hypersonic 2 (Mac version)
Proceed as follows to install Hypersonic:
1.
Make sure that NO Steinberg Key is connected to the USB port.
2.
Quit all other applications so that you return to the Finder. Disable any
system activity monitoring software or extension, in particular anti-virus
software. Now, insert the Hypersonic DVD into the computer’s DVD
drive.
3.
If the DVD window doesn’t open automatically, double-click on the
Hypersonic 2 DVD icon on your desktop.
4.
Double-click the Syncrosoft LCC.mpkg file to run the copy protection
installation program and follow the on-screen instructions.
5.
Depending on the format you want to install, open the folder
“Hypersonic 2 VST”, “Hypersonic 2 AU” or “Hypersonic 2 ReWire”.
Double-click the corresponding PKG file to run the Hypersonic 2
installation program and follow the on-screen instructions.
English 9
HYPERSONIC

6.
After installing the plug-in, copy the folder “Hypersonic 2 Content” to
your system hard drive in the folder “Library/Application Support/
Steinberg/”.
If you copy the content to another directory on your hard drive you will
have to run the “Set VB Content Location” application in the “Hypersonic
2 Content” folder on your hard drive, otherwise Hypersonic 2 will not find
its data!
Do not move the Hypersonic 2 plug-in itself – it must stay in the VST
plug-ins folder so the host application(s) can find it.
7.
When the program software has been installed, proceed with the key
activation (see below).
Activating the Steinberg Key
Whether you bought a new key when you bought Hypersonic 2, or if you
want to use one you previously bought with a different Steinberg product: your Steinberg Key does not yet contain the license required for
Hypersonic 2. You must download this license before you can launch
Hypersonic 2!
Use the activation code supplied with the program in order to download the valid Hypersonic 2 license to your Steinberg Key. This process is the same both for existing and new keys. Proceed as follows:
1.
After installation of the dongle drivers and the program software (and,
on a Windows PC, after restarting your computer), plug the Steinberg
Key into the USB port.
If you are unsure of which port this is, consult the documentation of your computer.
2.
If this is the first time a copy protection device is plugged in, it will be
registered as a new hardware device. On a Mac, drivers are found automatically without further user interaction. Windows will display a dialog asking you whether you would like to find drivers for the device
manually or automatically.
Under Windows, choose to find drivers automatically. The dialog closes, and you may
have to reboot your computer.
HYPERSONIC
10 English

3.
Make sure that your computer has a working internet connection.
License download is made “online”. If the computer on which you installed Hypersonic 2
is not connected to the internet, it is possible to use another computer for the online connection – proceed with the steps below and see the help for the License Control Center
application.
4.
Launch the “License Control Center” application (found in the Windows
Start menu under “Syncrosoft” or in the Macintosh Applications folder).
This application allows you to view your Steinberg Keys and load or transfer licenses.
5.
Use the License Control Center “Wizard” function and the activation
code supplied with Hypersonic 2 to download the license for
Hypersonic 2 to your Key. Simply follow the on-screen instructions.
If you are uncertain about how to proceed, consult the help for LCC.
When the activation process is completed, you are ready to launch
Hypersonic 2!
Preparations
The following sections describe how to set up Hypersonic 2 for use
with different interface formats.
ENGLISH
Setting up Hypersonic 2 as a VST Instrument in Cubase
The following information refers to the use of Hypersonic within Cubase
SX. We assume that you have correctly set up both Cubase SX and your
MIDI and audio hardware.
Should you wish to use Hypersonic within another VST host application
such as Nuendo, please refer to its documentation.
Proceed as follows to activate Hypersonic:
1.
Make sure that Cubase SX receives MIDI data that you generate with
your external MIDI master keyboard.
2.
In Cubase SX, open the “VST Instruments” window from the Devices
menu, and select “Hypersonic” from the pop-up menu of a free VST
Instrument slot.
HYPERSONIC
English 11

3.
Clicking the “Power” button in the rack will activate/deactivate
Hypersonic 2.
By default this is automatically activated when a VST Instrument is loaded.
4.
Click on the “Edit” button (“e”) to open the Hypersonic 2 window.
•
Make sure that the currently selected Cubase SX track is set to MIDI
channel 1 or ANY.
When set, you are ready to start using Hypersonic 2!
Setting up Hypersonic 2 as a DXi2 Synth
The following information refers to the use of Hypersonic 2 within Cakewalk SONAR 1. We assume that you have correctly set up both SONAR
and your MIDI and audio hardware. Should you wish to use Hypersonic 2
within another DXi2 compatible host application, please refer to its documentation.
Proceed as follows to activate Hypersonic 2:
1.
Make sure that SONAR receives MIDI data that you generate with
your external MIDI master keyboard. You can check this visually with
the “MIDI In/Out Activity” tray icon.
2.
In SONAR, open the “Synth Rack” window from the View menu.
3.
Click the Insert button (or select the Insert option on the main menu).
4.
Open the DXi Synth submenu and select “Hypersonic 2” from the
pop-up menu.
5.
By default, the “Insert DXi Synth Options” dialog appears. To create
one MIDI track and connect an audio track to the outputs 1 and 2 of
Hypersonic, activate the options “MIDI Source Track” and “First Synth
Output (Audio)”. To create all available Hypersonic outputs, activate
“All Synth Outputs (Audio)”.
Refer to your host application’s documentation for further details.
6.
Clicking the “Connection State” button in the Synth Rack will activate/
deactivate Hypersonic 2. By default this is automatically activated
when DXi SoftSynths are loaded.
HYPERSONIC
12 English

7.
Double-click on the “Hypersonic 2” entry or click the “Synth Properties” button in the toolbar of the Synth Rack to open the Hypersonic 2
window.
8.
In SONAR, select the previously created MIDI track “Hypersonic 2”.
Hypersonic 2 will now receive MIDI data from the selected track. Make
sure that the MIDI channel of the currently selected SONAR track is set
to the channel on which Hypersonic 2 is to receive MIDI data.
When set, you are ready to start using Hypersonic!
Using Hypersonic in an AU compatible application
You can use Hypersonic in an AU host application (e.g. Logic).
The Hypersonic 2 AU version is installed in the folder “Library/Audio/
Plug-ins/Components”.
For Logic Pro 7 proceed as follows:
1.
Open the Track Mixer and choose the desired Instrument channel.
2.
Click the I/O field and, in the pop-up menu that appears, choose
Stereo, AU Instruments, Steinberg and finally, Hypersonic 2.
Now Hypersonic 2 is loaded and ready to play.
ENGLISH
Hypersonic stand-alone and ReWire
Hypersonic can be used as a stand-alone application, independently
of any host application. This makes it possible to use Hypersonic in
sequencer applications that do not support one of the provided plugin formats of Hypersonic (i.e. VST, DXi and AU), but allow for data exchange using ReWire.
ReWire 2 is a special protocol for streaming audio and MIDI data between two computer applications. When using ReWire, the order in
which you launch and quit the two programs is very important, as the
first audio application launched will capture the audio card resources.
English 13
HYPERSONIC

Proceed as follows:
1.
First, launch the sequencer application you wish to use (e.g. Ableton
Live, ProTools).
If your sequencer supports ReWire, it will provide a way to assign audio and MIDI channels for the exchange of data. See the documentation of your sequencer application for
details.
2.
Now, launch Hypersonic as a stand-alone application.
You can launch the program just like any other application on your computer through
the Start menu or desktop icon (Win) or by double-clicking the application symbol in
the Applications folder (Mac). You can also double-click the Hypersonic program file
in the installation folder.
When you now play with Hypersonic, the sound is streamed via ReWire
to the assigned mixer channels in your host.
Note that you are now running two completely separate applications.
When you save your sequencer project, this will include the overall
channel and bus configuration, but none of the settings in Hypersonic!
To retain your Hypersonic settings, choose the Save Bank command
(in Hypersonic either from the File menu or from the context menu).
You may want to choose a file name that indicates that the file contains settings created for a particular sequencer project.
Similarly, when you re-open a project in your sequencer application and
have launched Hypersonic, use the Load Bank command in Hypersonic
to reload the Hypersonic settings pertaining to this particular project.
The Preferences dialog
When running Hypersonic as a stand-alone application, you will find a
Preferences item in the File menu in the top left corner of the application window (Win) or in the Hypersonic menu in the top left of the display (Mac). When selected, a dialog with a number of options opens.
•
Select an audio card driver from the ASIO Device pop-up.
•
In the table below the ASIO device pop-up, click one of the entries in
the ASIO Output column to change the assignment of virtual outputs
of your VST Instrument to the physical outputs on your audio hardware.
Click the ASIO Control Panel button to open a dialog with advanced settings for your
ASIO device.
HYPERSONIC
14 English

•
Use the MIDI Input pop-up to specify a MIDI input. Click the Reset
MIDI button to reset all MIDI controllers.
Clicking Reset MIDI is similar to pressing the Panic button on a MIDI keyboard.
•
The Tempo and Time Signature fields provide Hypersonic with tempo
and time signature information.
In stand-alone mode, such information is not available from a host application.
The other items on the File menu (Save/Load Bank and Save/Load
Program) are the same as on the VSTi’s rack menu.
Latency
Although Hypersonic is practically latency-free, high latency times
(the delay between pressing keys on your MIDI keyboard and hearing
a sound) can occur when you play Hypersonic via your MIDI keyboard
in real time.
This is often caused by the audio card or the MIDI interface, although
it won’t be an issue when playing back a song with a Hypersonic 2
MIDI track. To get rid of annoying real time latency, we recommend
you to replace your current audio card with a professional audio card
for which an ASIO driver is available. Most soundcards built into offthe-shelf computers don’t use an ASIO driver and usually produce
large latencies of up to several hundred milliseconds.
ENGLISH
HYPERSONIC
English 15
Overview
In this section we’ll show you around Hypersonic 2 and its various areas. If you’re impatient and want to start exploring on your own, skip
this section and go to page 21.
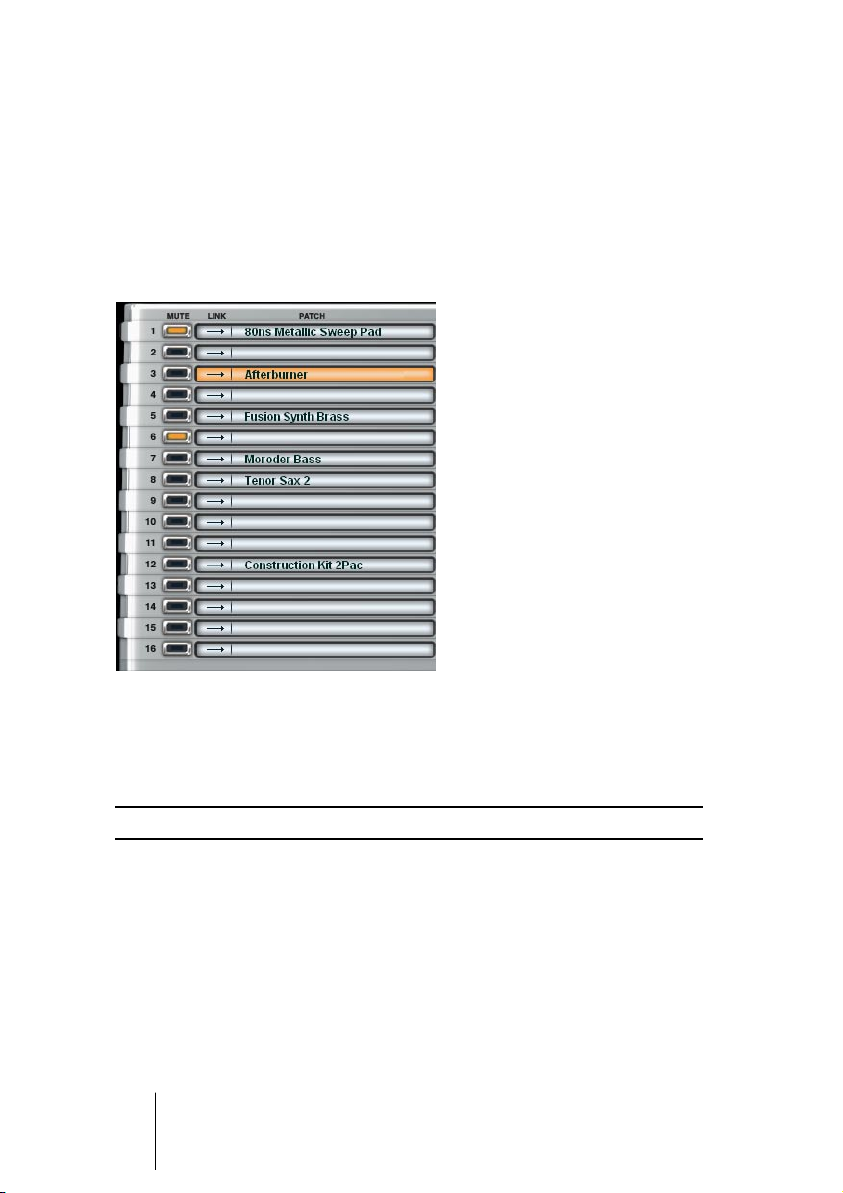
The Part area
A “Part” in Hypersonic 2 is a slot that is assigned to a MIDI channel
and holds a patch with its mixer and MIDI parameters. The 16 parts
are displayed and editable in the Part area. Here you can select a
patch for a MIDI channel, mute patches, or link them.
The Mute buttons flash to show MIDI activity.
HYPERSONIC
16 English

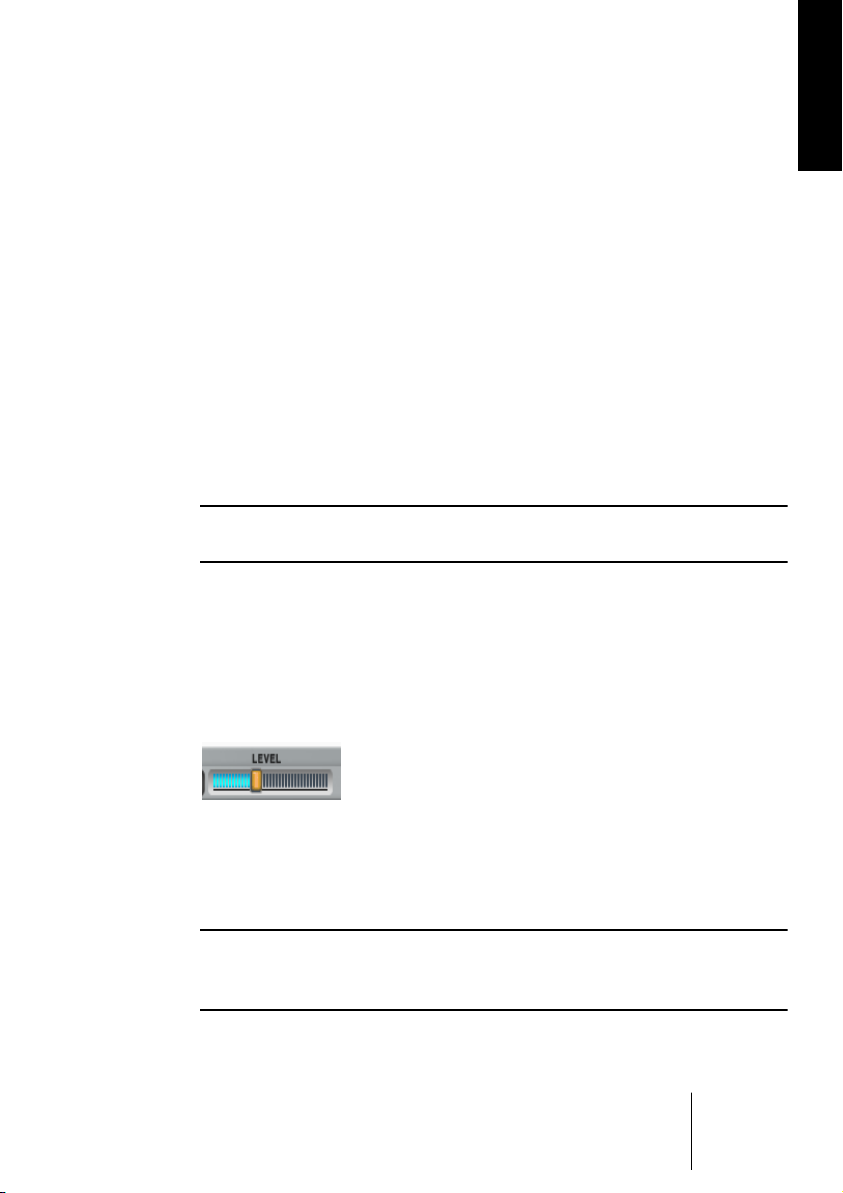
The Level Strip
The Level strip is a volume mixer for the 16 parts. Under the hood, it features meters for audio level, polyphony and velocity (explained below).
ENGLISH
HYPERSONIC
English 17
The Display
The Display area is like an editor window that can switch to one of the
seven editor pages, using the page selector buttons to the right.
Here you can load patches, edit them, set MIDI and Mixer settings for
parts, tweak the FX, create Combi Chains and adjust your global settings in the Setup page.
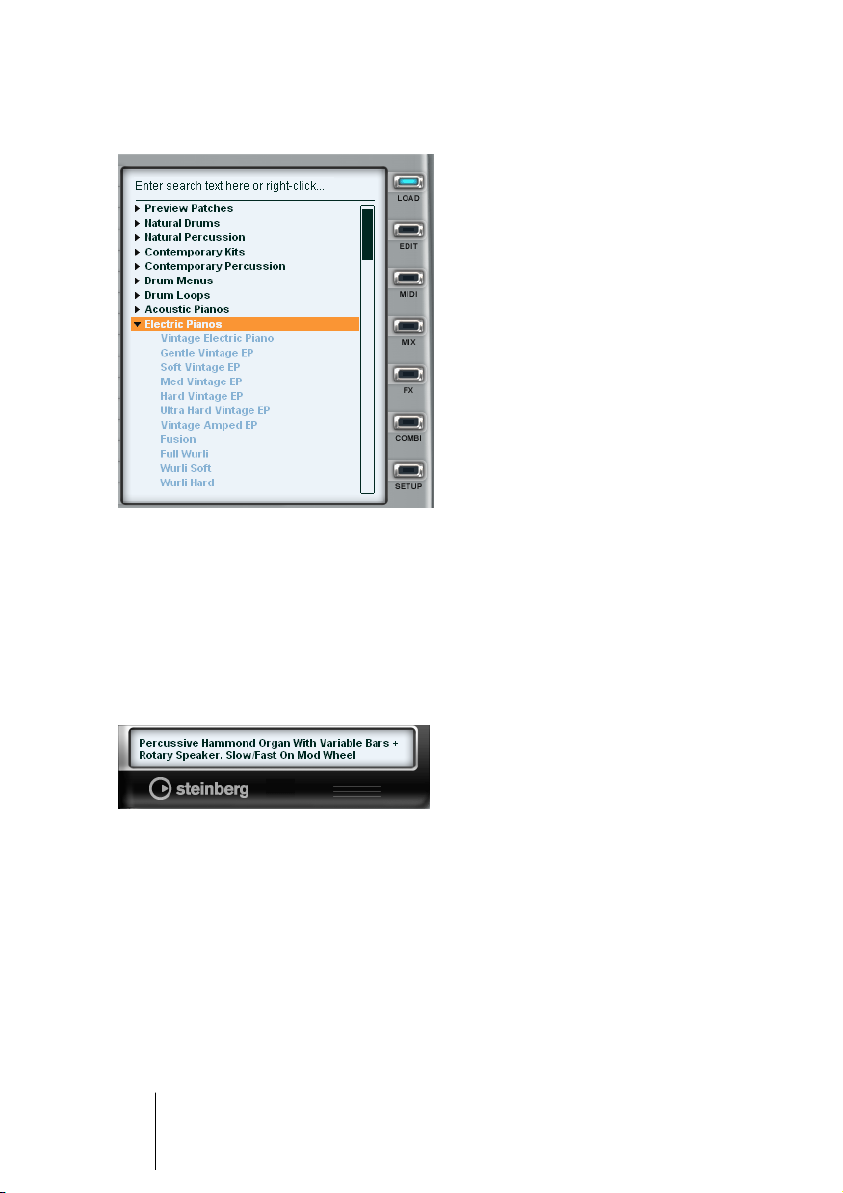
The Hyper Display
The Hyper display is a context-sensitive text display. When you browse
or select a patch, it shows the patch description. It also displays controller assignments and parameter values. You can edit patch descriptions when creating or editing user patches.
HYPERSONIC
18 English
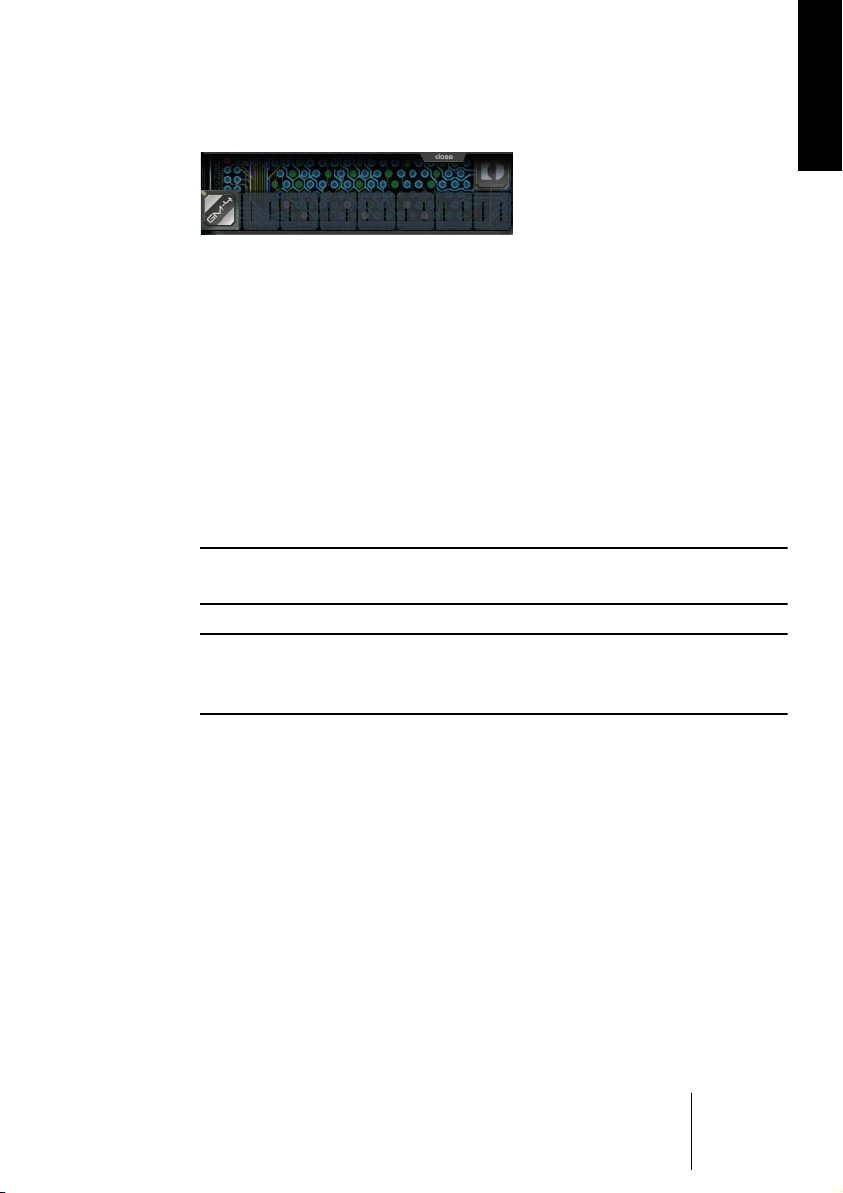
The Expansion Bay
Clicking on the three lines at the bottom of the Hyper display opens a
lid, revealing the expansion bay. This holds the Hyper modules, which
expand the standard instrument with more synthesizers or sound libraries. Slot 1 holds the built-in Wizoo Wave ROM, Slot 2 holds the GM4
General MIDI module.
The 3 demo expansions
In addition to the Wizoo Wave ROM and the GM4 General MIDI module, Hypersonic 2 comes with three Wizoo demo expansions. To use
these demo versions, you must activate them using the corresponding
30 day trial licenses.
Attention! If you already own Expansions please don’t install the expansion demo licenses on your dongle!
ENGLISH
Clicking on the empty slots takes you to a web page (assuming your
computer is connected to the internet) with current info about available
Hyper modules.
The three demo modules are:
• US-1 Ultra Synth
High-end analog synth with fat and powerful sound, flexible modulation options, 3 oscillators with analog waveforms, wavetable synthesis, sync, and unison mode, Multimode
filter with osc audio modulation and overdrive envelopes, 3 LFOs, Modulation matrix for
easy modulation control and expressive playing, expert page for detailed adjustment of
various sound parameters. Includes 256 patches from professional sound designers.
• GP-2 Grand Pianos
Two outstanding piano models with character adjustment knob (soft/ natural/ bright/
hard). Three versions of each piano are optimized for different amounts of available
host RAM, adjustable velocity curve with three preset buttons.
HYPERSONIC
English 19
• NB-3 Virtual Tonewheel Organ
9 drawbars, unique tonewheel emulation (variable from the original sine wave sound to
a dirtier, more complex timbre), buttons for percussion on/off, loud/soft, short/long,
3rd/2nd harmonic, virtual rotary speaker cabinet with valve preamp, controls for speed,
color and overdrive, authentic rotor horn display. Rotary cabinet can be an FX element
in any patch. Includes 64 patches by Peter Gorges.
For more information about the Expansions refer to the Hyper Modules
manual PDF file on the Hypersonic 2 DVD.
The Hyperknobs
The six Hyperknobs are probably the most effective editing options
ever offered by a synthesizer. For each patch, each Hyperknob can be
assigned to a specific function. The Hyperknobs have names indicating the parameters they control.
Hyperknobs provide an optimized combination of quick but in-depth
access to the most important elements of each patch. Finally, you can
create customized “signature sounds” without having to spend hours
tweaking the many and often confusing parameters. Learn more in the
section “The Edit page” on page 58.
The MIDI keyboard
Hypersonic 2 features a built-in MIDI keyboard with pitch bend and
modulation wheels. You can use it as a substitute for a hardware MIDI
keyboard when editing sounds, or to monitor incoming MIDI notes.
HYPERSONIC
20 English
Quickstart
Getting started with Hypersonic 2 is simple – this isn’t an instrument
that takes years of study before you can start playing. If you’re impatient,
click around and you’ll likely figure out most of it. If you need some support taking the first steps with Hypersonic 2 read the following tutorial.
Hypersonic 2 must be loaded, receiving MIDI, and outputting audio prior
to starting the tutorial.
Loading your first patch
Suppose you get a brilliant idea for a song based on an electric piano
figure – and you need a perfect electric piano sound, right now. No
problem:
1. Click on part 1 (corresponding to MIDI channel 1) so it becomes
highlighted.
2. Click the Load button right next to the display area.
Alternatively, you can simply double-click an empty part slot. The Display area will automatically switch to display the Load page.
ENGLISH
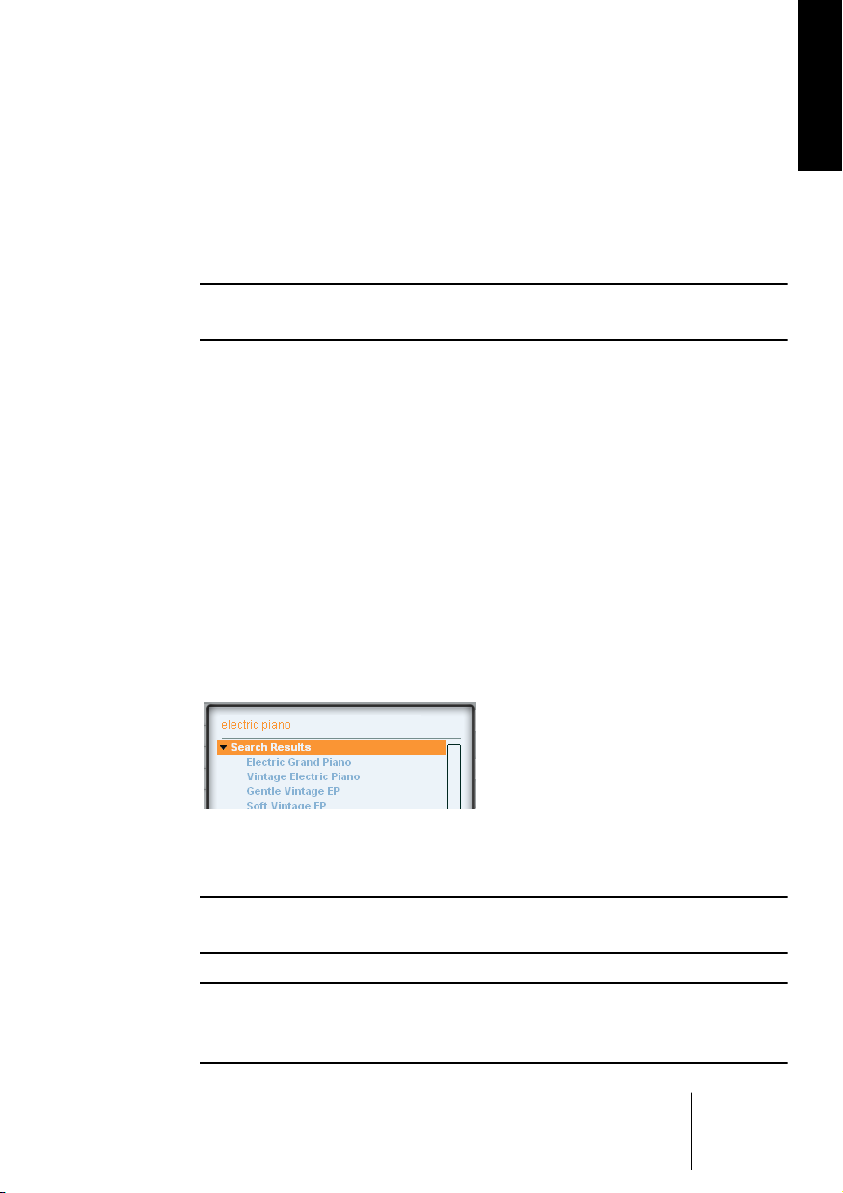
3. Click into the text entry field (top row), type “electric piano,” and hit
[Return]. Hypersonic 2 will find all electric piano patches.
4. Select “Vintage Electric Piano” by double-clicking it. This loads it into
the part you selected in Step 1.
If you have Hypersonic 2 running in a host with MIDI record function,
why don’t you record a couple of bars right now.
You may alternatively check the bank/patch selector of your host’s MIDI
track. If it complies fully to the VST 2.0 standard, you can browse and select your Hypersonic 2 patches directly from within the track.
HYPERSONIC
English 21
Linking parts
In the next step you probably want to underlay the electric piano with
a wide, soft pad. Easy:
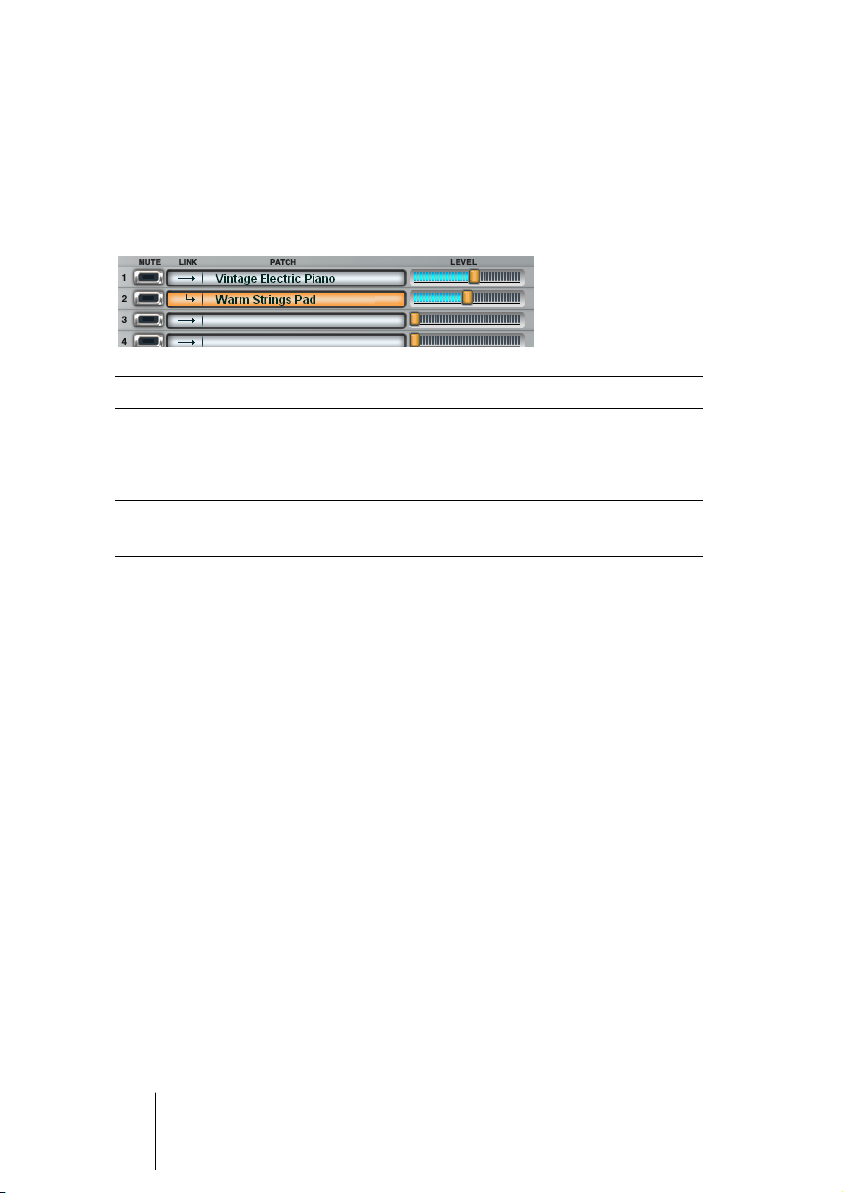
1. Click the arrow to the left of the patch name in part 2.
Now part 2 corresponds to the MIDI channel of part 1.
2. Select part 2 – otherwise the electric piano would get replaced by
your new selection.
Every part corresponds to the particular MIDI channel – part 2 to MIDI
channel 2 – unless you link it to the previous part.
3. This time, we’ll select a patch directly from the browser: Scroll the list
in the display area so you can see the “Soft Pads” bank.
4. To open it, double-click on the arrow.
5. Double-click a couple of pads until you find one you like.
Now when you play the electric piano part, the pad doubles it.
HYPERSONIC
22 English
Tweaking a sound
Let’s say you want less key-off noise, yet more phasing, in the electric
piano, and you want the pad to fade in and out more slowly. Welcome
to Hyperknobs!
1. Highlight part 1 (electric piano). The Hyperknob labels match the controls you’d expect on an electric piano.
2. For less electric piano key-off noise, drag-click knob 1 (Note Off
Level) a bit to the left.
3. For more phasing, turn up knob 5 (Phaser) a bit.
4. To change the pad’s fade time, highlight part 2. Now the Hyperknobs
turn into pad controls.
5. Turn up knobs 5 and 6 (Attack, Release) as desired.
Click the Edit button to open the Edit page and take a look. There are
more parameters, but we’ll come to these later.
Checking polyphony
ENGLISH
You can use the Level strip for metering. Turn the light blue bars into
displays for audio level, polyphony, or velocity:
1. Click the meter strip’s “Level” label.
2. It changes to “Polyphony”.
3. The meters turn into meters for polyphony. Play some chords and
check the polyphony of both piano and pad.
Note that the polyphony meter in part 2 (pad) increases after playing a
couple of chords. This is due to the pad’s long release time, where
notes continue to decay after new notes are sounded.
HYPERSONIC
English 23
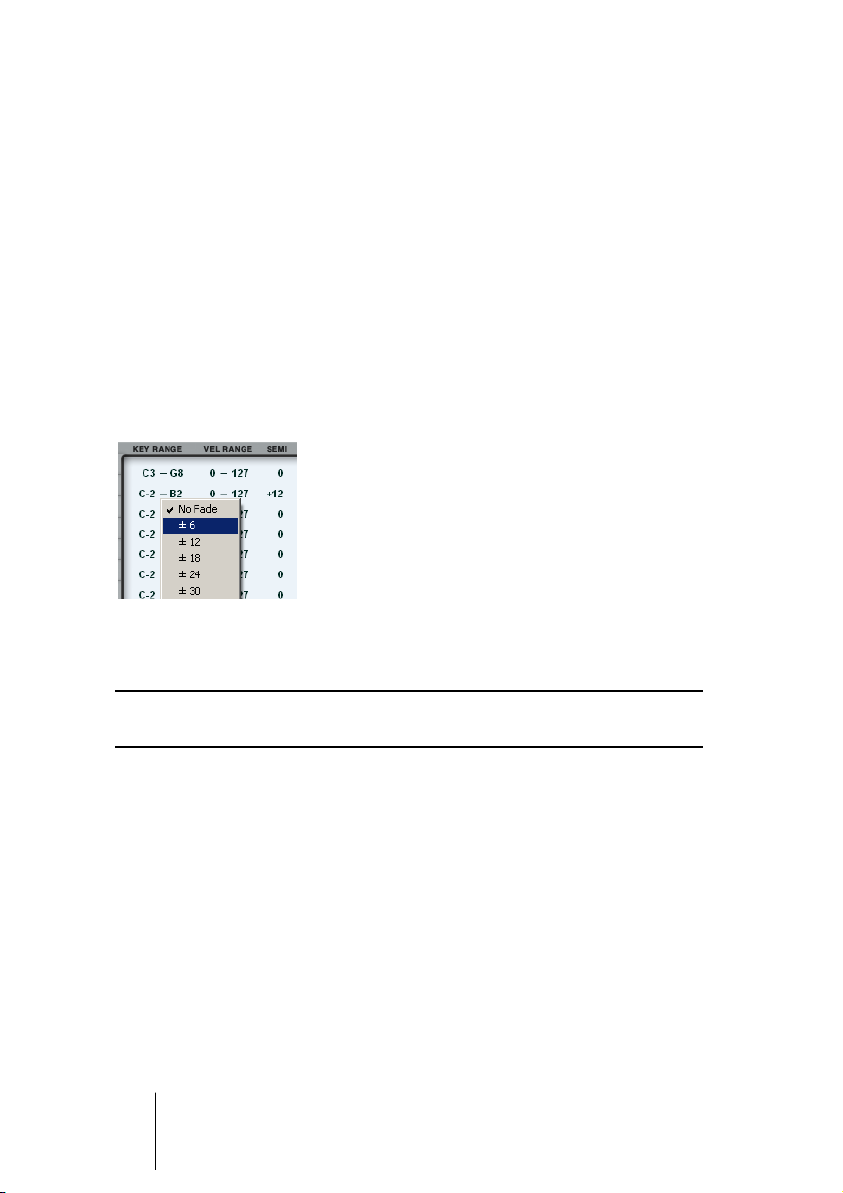
Create a key split/crossfade
Now let’s assign the pad chords to the lower key range, and solo with
the electric piano on the upper range.
1. Select the MIDI page.
2. Set the left key range limit for part 1 to C3 by hold-dragging the
mouse over the value.
3. Set the right key range limit for part 2 to B2.
4. Click on the hyphen between the two note limits of a part and choose
crossfade range +6 for both parts from the pop-up menu. This crossfades notes around the split point rather than creating a hard split.
5. Transpose part 2 up by one octave by setting the Semi parameter to
+12.
For a velocity switch, reset the key ranges to their original values and
use the Vel Range parameters accordingly.
HYPERSONIC
24 English

Adding a drumloop
Hypersonic 2’s drumloops can also serve as drum kits because they’re
“sliced” at the various hits, and the slices are mapped across the keyboard.
1. Select part 3, use the search function to find the patch “Tite Room
Funk”, and load it.
2. Play the note C4. The loop plays in sync with your song. If you like,
record a bar or two as a backing groove.
Note that if you play a key between F2 and G#8, the loop changes its
pitch but the tempo remains constant.
3. Now play chromatically from C1 up to D2 and beyond. Get the idea?
When Hypersonic 2 auto-plays the loop, it internally plays this range at the tempo of
the host software.
4. Choose any other loop and play C4. Change your host’s tempo; the
drumloops always sync to the host tempo.
5. Get creative with the Hyperknobs and tweak the loops.
ENGLISH
You should now be able to try your own first steps with Hypersonic 2. If
this isn’t enough for you and you want to become a “power user”, take a
closer look at the following, detailed sections in this manual.
HYPERSONIC
English 25
User interface
Read the following and click around the user interface to get used to
the most common controls in Hypersonic 2.
Changing values
Knobs and sliders
There are three types of controllers in Hypersonic 2: six virtual hardware knobs (Hyperknobs) on the main interface, LCD knobs and sliders in the display area. To set them:
• Clicking on a knob position sets the value to that position. To turn a knob,
click and drag the mouse vertically or horizontally. This also applies for sliders.
• Sliders can be bidirectional, the default setting is the middle position. From
there you can drag bipolar sliders to positive (right) or negative (left) values.
Knob behavior may vary according to preference settings in your host.
Alphanumeric values
Alphanumeric values (such as values, note numbers) appear in the
display area only. To edit them:
• To decrease a value by one discrete step, click the value. To increase
by one discrete step right-click(Win)/[Ctrl]-click (Mac) the value. Hold
[Shift] when clicking or right-clicking for larger intervals (e.g. octaves,
increments of 10).
• Click and drag up and down for bigger changes. Hold [Shift] for finetuning.
• [Ctrl]-click (Win)/[Command]-click (Mac) to set knobs to default values.
HYPERSONIC
26 English
Selectable values
Sometimes a parameter has a selection of options rather than alphanumerical values. In this case:
• Click on the value field to open a pop-up menu, and select a value.
Use of modifier keys when changing values
• [Shift]-click generally enables fine-tuning mode (slows down value changes).
•A click with the [Ctrl] (Win)/[Command] (Mac) key pressed resets the knob to
its default value.
• [Alt]-click changes knob’s behavior from circular to linear.
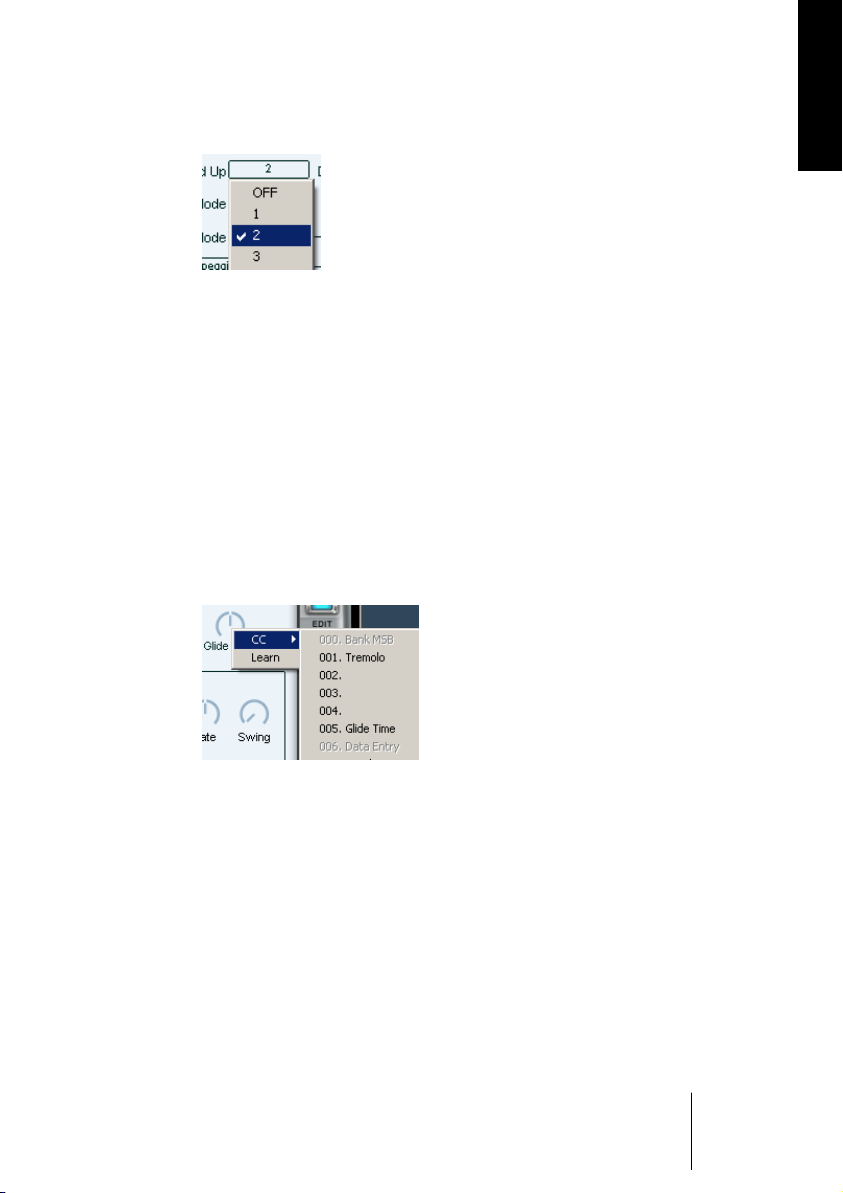
Assigning MIDI Controllers
ENGLISH
You can assign many of the features of Hypersonic 2 to MIDI controllers for automation or real-time control via, for example, the knobs of
your MIDI keyboard. There are two ways to do this:
1. Right-click the parameter, then click “CC” and choose a controller
number from the drop-down list.
2. Right-click the parameter, select Learn and move the desired knob or
controller on your MIDI keyboard or sequencer host. Hypersonic 2 will
“learn” (set this MIDI controller to) the parameter you have chosen.
• To unload the MIDI assignment right-click the parameter and choose
“Forget”.
HYPERSONIC
English 27

Editing text
There are three areas where you will want to change text: patch names
in the Part area, Hyperknob names and patch comments in the Hyper
display.
• To edit text, just double-click it and edit, or enter new text.
You can copy and paste text from any text field to another.
Using the MIDI keyboard
The keyboard in Hypersonic 2 has all the obvious functions of an onscreen keyboard, along with a couple of “under the hood” goodies.
MIDI note display
The keyboard displays notes received on the currently highlighted
part channel.
Playing notes
The MIDI keyboard “sends” data to the currently highlighted patch.
Use this feature to quickly check out parts without having to re-assign
your hardware MIDI keyboard.
• Click on a key to play the corresponding note.
The keyboard sends higher velocity values as you click closer to the key’s lower edge.
• Right-click a key to play only the highlighted part (kind of a “solo”
function for linked parts).
HYPERSONIC
28 English
When the Edit page is open, right-clicking a key has an additional feature: the next element in the patch that responds to that key is displayed
on the Edit page. Just above the keys of the keyboard, a red bar indicates the key range of this element. This way, you can step through the
individual elements of the patch quickly, making the editing of certain
elements within a patch easier.
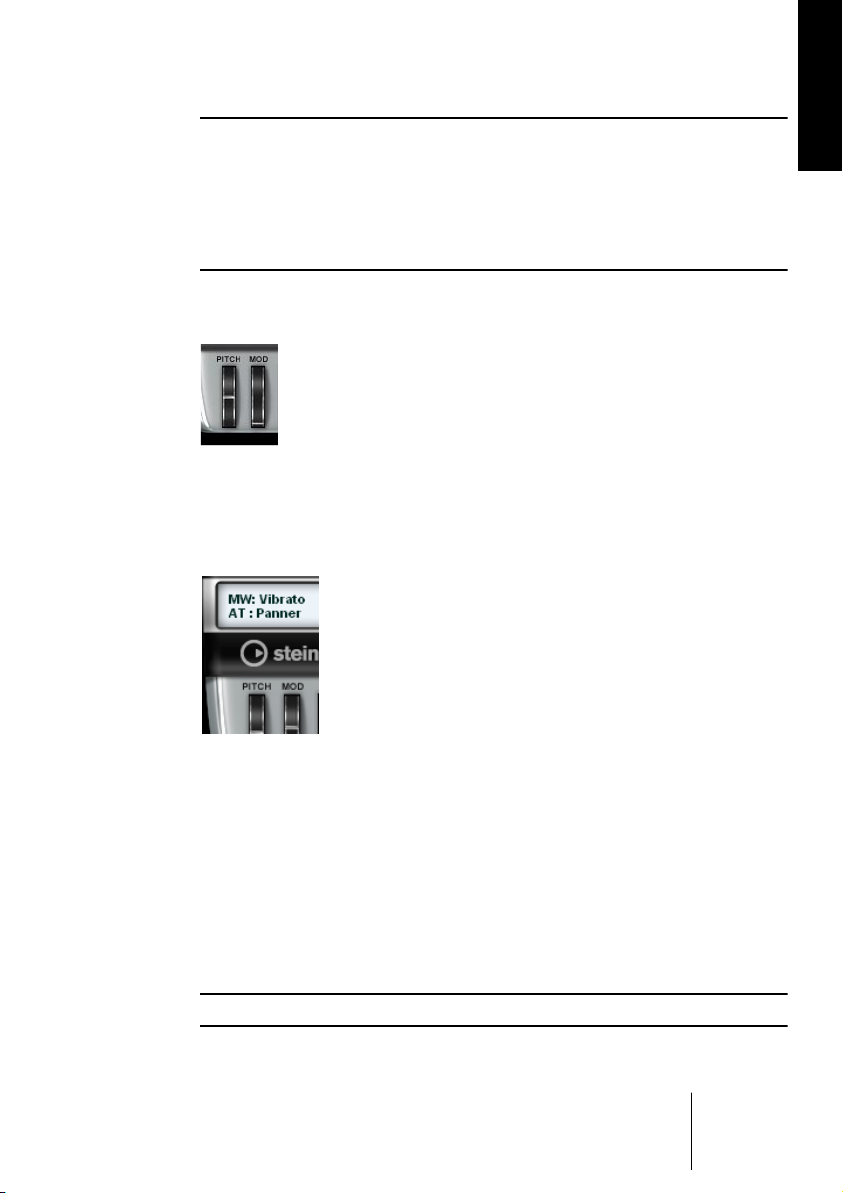
Using the wheels
• To turn a wheel, click-drag it. The pitch wheel (left) jumps back to zero
when you release it. The mod wheel (right) doesn’t.
Viewing controller assignments
ENGLISH
When you turn the modulation wheel, the Hyper display shows how
modulation and aftertouch affect that particular patch.
Shifting the key range
The current key range is displayed by gray numbers on the C keys,
representing the MIDI octave.
• Shift the key range of the MIDI keyboard by holding [Shift] and dragging the keyboard left or right.
The middle C on the Hypersonic 2 keyboard is C3 (MIDI note number 60).
HYPERSONIC
English 29

Hard disk activity display
The “2” in the Hypersonic 2 logo lights up to show hard disk activity
when you load sample-based patches. (If your computer is reasonably
fast, you’ll seldom see it flashing.)
Play PC Keyboard
You will find this feature by right-clicking (Win)/[Ctrl]-clicking (Mac)
anywhere around the edge of Hypersonic. This feature allows you to
play Hypersonic patches from your computer keyboard. The currently
highlighted Hypersonic part (and any linked parts) will be played. The
notes you play are also output via MIDI, allowing you to record them or
to use Hypersonic as a MIDI source to play other instruments in your
host application.
The Hypersonic on-screen keyboard now also outputs MIDI information.
Your host application must support MIDI output from plug-ins.
• The 'C' key plays a C3 note. Keys on the same row play the adjacent white
notes.
• The 'F' key plays a C#3 note. Keys on the same row play the available black
notes.
• The 'R' key plays a C4 note. Keys on the same row play the adjacent white
notes.
• The '5' key plays a C#4 note. Keys on the same row play the available black
notes.
• The left and right arrow keys transpose the keyboard in octaves.
If you are using a computer keyboard layout for a language other than
English or German, this may result in some interesting scales!
Select “Play PC Keyboard” mode a second time to disable it.
All Notes Off
You will find this feature by right-clicking (Win)/[Ctrl]-clicking (Mac)
anywhere around the edge of Hypersonic. It releases all currently
playing Hypersonic voices, useful if you have hanging MIDI notes. This
is often called a 'Panic' mode.
HYPERSONIC
30 English

Hyperknobs
Speed and ease of use are among the most important prerequisites
for music production tools. Great ideas are evanescent, so you don’t
want to encounter any limitations in the process of turning your ideas
into reality.
When working with a synthesizer, after finding a patch you almost
always have to adapt it to your tune by adjusting the feel, timbre,
enveloping, etc.
Hyperknobs offer many advantages: No sound design skills required.
Good overview, with easy handling and fast, complex changes at the
turn of a knob.
The concept of Hyperknobs
ENGLISH
Hypersonic 2 focuses on very fast and easy sound-tweaking options
that don’t stop you from making music. However, “easy” doesn’t mean
“limited”. This is why we devised the concept of Hyper patches and
their controls – Hyperknobs:
• For each patch, a professional sound designer has decided which six attributes
are most relevant for that patch, and thus need to be tweakable.
• Multiple parameters are assigned (over particular ranges) to each knob so they
work together to modify the desired attribute. This process of continuous variation of multiple parameters is sometimes called “morphing.” Doing the same
changes in a generic editor would take considerable time, and require reasonable sound design skills.
• We pre-assigned a musically meaningful label to each knob. As a Hypersonic 2
user you don’t have to bother about whether “richness” is a result of more PWM
depth plus Chorus plus Detuning plus some subtle panning – for you it’s “richness,” which is probably all you really care about when making music.
• On the Edit page you can assign functions to Hyperknobs and edit their routing. Read more about this in the PDF document “The Mod Page” on the
Hypersonic 2 DVD.
HYPERSONIC
English 31

Using Hyperknobs
The following properties of a Hyperknob have been carefully set by
the sound designer:
• Name
• Assignment to sound parameters (multiple per patch, individual range per
assignment)
• Knob Range
• Knob Mode (Switch, Control)
• Knob default setting.
Upon loading a patch, all Hyperknobs are automatically configured
and set to a sensible default setting, as defined by the programmer.
What’s the point of Hyperknobs and the Hyper display anyway?
After loading a patch, we recommend you look at the info provided by
the Hyper display so you can get acquainted with the Hyperknob options for that patch.
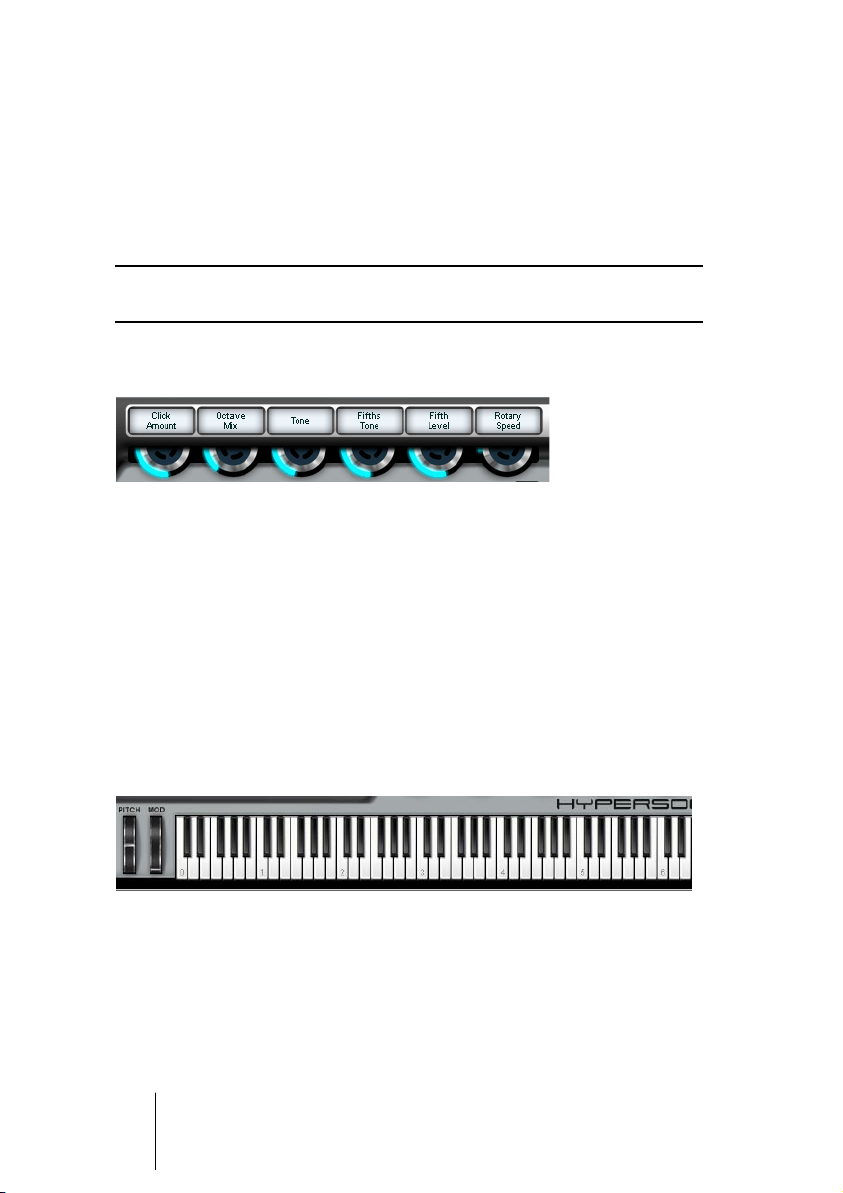
Here’s an example. We’ve loaded the Rock Organ patch from the preset Organs bank:
The Hyper display tells you that it’s a gritty, classic-style rock organ
with rotary speaker. It also notes you can change the rotary speed
with the modulation wheel (built-in documentation – nice!).
Now check out the Hyperknobs. Instead of generic “Attack,” “Cutoff,”
or “Velo” controls that have little to do with this kind of instrument,
they’re exactly the controls you’d expect on a Rock Organ: Percussion, Color, Tone, Key Click, Rotary Speed and Dirt.
HYPERSONIC
32 English

ENGLISH
Let’s take a look at another, more exotic example – the “Sad Strings
Velo Swell” from the Orchestra bank:
Again – look at the info and the Hyperknobs. The display reads that this
is a string patch with minor 7th and sus 4 intervals, and that velocity
controls attack time. Consequently, the Hyperknobs are set to adjust
the levels of the intervals; you can also control overall tone, resonance,
attack time, and release time.
Now consider what the Hyperknobs do in these two patches, and then
imagine how long it would take you to find the respective parameters in
a conventional synthesizer editor – let alone that one Hyperknob controls multiple parameters at once. The more you need to tweak sounds
quickly, the more you’ll appreciate Hyperknobs.
When you load an unfamiliar patch, you can just fiddle around with the
knobs to find out what they do. You can always click with [Ctrl] (Win)/
[Command] (Mac) pressed to reset the knob to its default setting.
Reference of most common knob labels
Our sound designers have created dozens of knob labels, most of
which are self-explanatory – such as Brilliance, Delay Speed, and
Chorus Depth. However, a few may seem ambiguous at first; see the
following table for more detailed explanations.
Knob Label Description
Attack Shape “Percussiveness” of a sound. Turning up the knob moves the sample
start point towards the end (multisample elements) or reduces attackcreating parameters in the patch.
Balance Adjusts the balance between the different elements of a patch.
Extreme left or right mutes elements.
Color Creates a change in the oscillator source (e.g. multisample shift,
oscillator waveform, wavetable position).
English 33
HYPERSONIC

Knob Label Description
Drive Overdrive, harmonic content. Often created using amp simulation, but
can also be FM modulator level or wavetable sweep.
EQ Turning to the right adds brightness; left reduces brightness.
Filter Select Changes the filter mode. Available modes from left to right are Off, Low
24, Low 12, Band 18, Band 12, High 12, Peak EQ, Presence, Damper.
Octaves Transposes one or more elements within the patch by an octave while
leaving others unaffected.
Pitch On/Off Turns keyboard pitch key tracking on or off.
Select … Selects different sources (e.g., waveforms, samples).
Thump Adds a percussive attack element.
Tone Brightness – sort of a smart version of “cutoff.”
Velocity … Adjusts the influence of velocity on a parameter (tone, attack time, level).
Warmth Adjusts the amount of modulation effect in the patch (such as chorus,
flanger, phaser).
Width Stereo width.
In single-element patches: Sets how key tracking affects pan position.
In multiple-element patches: Moves elements towards extreme left and
right positions.
Assigning MIDI controls to Hyperknobs
You can remote control the Hyperknobs using MIDI continuous controller messages. This comes in handy if you use a USB remote keyboard with hardware knobs, or any other remote control surface.
There are two ways to assign a Hyperknob to a MIDI controller:
1. Right-click (Win)/[Ctrl]-click (Mac) the parameter, then click “CC”
and choose a controller number from the drop-down list.
2. Right-click (Win)/[Ctrl]-click (Mac) the parameter, select “Learn” and
move the desired knob or controller on your MIDI keyboard or sequencer host. Hypersonic 2 will set this MIDI controller to the parameter you have chosen.
Many remote MIDI keyboards offer a set of 4 to 8 hardware knobs,
which you most probably want to assign to the Hyperknobs.
HYPERSONIC
34 English

Sound generation structure
To work and make music with Hypersonic 2, you needn’t bother about
how the sounds are actually created. Thanks to Hyperknobs, you
don’t even have to deal with cryptic synthesizers parameters.
However, a basic understanding of the sound generation structure
can help you to understand what’s going on inside Hypersonic 2 and
what makes it “tick”.
Combi
The top level in the Hypersonic 2 structure is the combi. A combi is a
complete setting or status of the instrument including loaded patches,
part settings, temporary edits and parts of the setup.
Combis can be fully edited and loaded and stored to disk.
Patch
A patch is one sound (otherwise referred to as program, voice or preset) that can be loaded into a part slot.
ENGLISH
A patch is built from up to 16 elements (drumkits: up to 64).
Patches can be loaded from and stored to disk. They can be effectively
tweaked using the Hyperknobs and fine-tweaked in the Edit page.
Element
An element is the smallest building block of a patch. Any element within
a patch can be either a synthesis element or an FX element. Elements
can be found and edited on the edit page. For more details, see “The
Edit page” on page 58.
English 35
HYPERSONIC

Technical synthesis details
If you’re not technically inclined, you can skip this section. You don’t need
to learn technical synthesis details to make full use of Hypersonic 2.
The voice structure of a synthesis element always consists of a sound
generator section (explained in more detail below), a multimode/multi
slope filter, three envelopes, and one LFO. Two more LFOs and an arpeggiator are common to all elements.
For the sound generator section, five synthesis methods are available:
• Multisampled waveforms – The oscillator plays back multisamples, which are
stored in Wave “ROM” (or in an optional Hyper module).
• Virtual Analog – Three analog oscillators with multiple waveforms, PWM and
Sync capabilities.
• FM (Frequency Modulation) – Three FM operators (one carrier, two modulators in parallel).
• Wavetable – A wavetable oscillator and an analog oscillator.
• Sliced Wave Loop – The arpeggiator is “abused” for playing back a number of
waveforms, usually extracted from a sliced rhythmic loop (drumloop, sequence),
synced with the song tempo.
Depending on the complexity of a patch, its editor may hold hundreds of
pages of parameters. Although the Hyperknobs spare you from having
to deal with this, you can edit patches and elements in the Edit page.
The number, type, or combination of elements within a patch has been
programmed by the sound designers. You can’t delete or add elements,
but you can access element parameters on the Edit page. For more details, see “The Edit page” on page 58.
HYPERSONIC
36 English

Browsing, searching, loading and saving
One of the most important requirements in music production is finding
the right sounds quickly. So, we’ve put a lot of time and effort into making the Hypersonic 2 patch browser the fastest and most effective
patch accessing tool ever.
ENGLISH
All patches have been sorted into meaningful banks, extensively tagged
as parts of clearly-defined categories, and given attributes for tone,
character and effect. As a result, you can search for names or selectable search terms like “warm” or “metallic,” and obtain relevant search
results with minimal redundancy.
Browsing, searching and selecting patches is all done in the Load page.
Browsing patch banks
The Load page’s default status displays a list of available patch banks.
• Use the scroll bar to see more banks.
• Open a bank by clicking its little triangle to the left.
HYPERSONIC
English 37

Loading a patch into a part slot
Before loading a patch, make sure the correct destination part is highlighted, otherwise you might lose a previously edited patch.
Within a bank:
• Double-click on a patch name to load the patch into the selected part
slot, or
• Drag-and-drop the patch into the part slot.
Patches marked with ≈ are layers of different sounds in one patch, such
as piano and strings. This is often more convenient and saves part slots.
Selecting patches from within the host application
In VST 2.0 compatible hosts such as Cubase SX or Nuendo, you can
select patches directly from the track inspector. With this ideal level of
integration, Hypersonic 2 truly becomes a transparent part of the recording environment.
HYPERSONIC
38 English

Loading patches from disk
You can load any Hypersonic 2 FXP files (patches) from disk and into
the highlighted part slot.
• If your host provides a file menu, load the patch from there.
• If your host does not provide a file menu, the Setup page provides
loading and saving options:
ENGLISH
Browsing the patch library
When you have loaded a patch into a part slot in the Part area and this
part slot is highlighted, holding [Shift] and pressing the up-arrow key
or the down-arrow key on your computer keyboard will load the next
or previous patch in the library into that part slot.
This is a convenient way to preview the patches available in the patch
library.
HYPERSONIC
English 39

Finding patches
The Load page is where you find the search function described previously. You can search for text strings (e.g., parts of names, sound
properties), or select attributes from a menu of pre-defined terms.
Text search
The text search function looks for strings in patch names, categories
and attributes.
• Type text into the Load page’s top row and hit [Return].
Hypersonic 2 appends a new “temporary bank” called “Search Results”
to the patch bank list and displays the results. From here you can select
patches. Search results are memorized until the next search.
You can search for multiple text strings at a time. Just enter them separated by a space, e.g. “piano warm chorus.” The search logic is always
AND, so the search function returns only those patches matching all
search strings.
HYPERSONIC
40 English

Keyword selection
Instead of typing text, you can search for pre-defined search terms
(keywords) by selecting them from a menu:
1. Right-click (Win)/[Ctrl]-click (Mac) into the text entry field to open the
selection menu.
ENGLISH
2. Choose either a category or an attribute.
3. You can choose more keywords, or combine the search with text you
type, to narrow your search.
Technically a menu selection does nothing else than “type” the predefined term into the entry field.
Find on Load Page
When you right-click (Win)/[Ctrl]-click (Mac) a patch name in a part
slot in the Part area and select the “Find on Load Page” option from the
displayed pop-up menu, on the Load page, the name of the currently
loaded patch is highlighted in the list of patches.
HYPERSONIC
English 41

Managing banks and patches
The preset patch library is an integral part of Hypersonic 2. Although
the preset banks and patches cannot be changed or removed, you
can edit any preset patch and save the result to a user bank.
Hypersonic 2 can manage up to 20 user banks with up to 128 patches
each (2560 total).
User banks and patches reside in the “Patches” folder within the
Hypersonic 2 content folder. User banks are folders, while patches
are FXP files inside these folders.
The Load page always reflects the Patches folder of the content folder.
Instead of editing banks or patches in Hypersonic 2, you can edit, copy,
rename or delete their respective files in the Patch folder of the content
folder in the Windows Explorer or the Macintosh Finder. This is particularly helpful when you want to add banks and patches from another user
or 3rd party vendor.
Managing user banks
You can create or rename banks in the Load page.
Creating a user bank
Depending on whether you want to create a patch or combi bank,
right-click (Win)/[Ctrl]-click (Mac) a corresponding bank in the Load
page and choose “New Patch Bank” or “New Combi Bank” from the
pop-up menu. A new entry will be created and you can type a name
into the text entry field.
Renaming a user bank
Right-click (Win)/[Ctrl]-click (Mac) a bank name and choose “Rename”
from the pop-up menu, then type a new name or edit the existing one.
HYPERSONIC
42 English

Managing user patches
Creating your own patches
You can change preset patches to your liking and save them as user
patches. Here’s what you can edit:
• Hyperknob settings
• Patch and element settings in the Edit page
• Patch name and comment
Editing patch comments
You can enter your own patch comments into the text entry field of the
Hyper display.
Saving a patch
1. To save a patch to a specific user bank, open the user bank in the
Load page first. Otherwise the patch is saved to the first user bank.
ENGLISH
2. In the Part area, right-click (Win)/[Ctrl]-click (Mac) the patch you want
to save and choose “Save” from the pop-up menu.
3. If there is already a patch with the same name in that bank, you’ll be
asked if you want to overwrite it. If not, your new patch is saved under
the same name so you have two patches with that name.
As with hardware, patch names don’t have to be unique because each
patch has a program number.
Deleting a patch from a user bank
Right-click (Win)/[Ctrl]-click (Mac) the patch in the Load page and
choose “Delete” from the pop-up menu.
HYPERSONIC
English 43

Renaming a patch in a user bank
1. Right-click (Win)/[Ctrl]-click (Mac) the patch in the Load page and
choose “Rename” from the pop-up menu.
2. Type a new name or edit the existing one.
Resetting a patch
You can reset an edited patch by right-clicking (Win)/[Ctrl]-click (Mac)
the patch in the Load page and choosing “Reset” from the pop-up
menu. This reloads the patch from the library, discarding all changes
made since you loaded the original patch.
Selecting banks and patches via MIDI program change
Bank and program numbers are shown in the Hyper display.
Hypersonic 2 receives MIDI bank select and program change messages, so you can remotely select any patch from any bank (preset or
user) via MIDI.
Here’s how:
1. To change the bank, first send a bank select message.
When you click on a patch name in the Load page, its bank number is shown for a few
seconds in the Hyper display. User banks start at bank number 100.
2. Next, send a program change with the patch number.
The patch number is also shown in the Hyper display.
HYPERSONIC
44 English

Combis
A combi is an entire Hypersonic 2 setup including all patches, FX, and
part settings. By loading or switching combis, you can change from a
4 channel string layer to a multitimbral 16-part setup and on to a grand
piano just by hitting a button. Combis can be loaded or selected via
program change. There’s a bank of preset combis included with
Hypersonic 2, and you can create your own combi user banks.
Combi files are FXB files.
Managing combis (loading, saving, deleting, renaming, and managing
combi banks) is exactly like managing patches. If you’re not already familiar with those concepts, please refer to the corresponding explanations in the section “Managing banks and patches” on page 42.
Note that when saving a combi to a combi bank you should first edit the
combi name in the host’s display (in monotimbral plug-ins, this is the
display area that normally shows the current patch name).
ENGLISH
Combi MIDI channel and bank select messages
Hypersonic 2 accepts program changes for combis only on MIDI
channel 16. To access the combi banks, send the following bank
select messages:
• Preset combi bank: 120
• User combi banks: 121-128
• Within the combi bank, you can directly access combis by their corresponding program change number (which is, like always, viewable in the Hyper display when you click a combi in the Load page).
If there are fewer than 8 user combi banks, bank select messages with
no matching number will be ignored.
Enabling MIDI combi loading
We’ve provided a safety feature that prevents you from erroneously
switching a combi before saving your temporary setup: You have to
enable the switch “MIDI Combi Sel” on the Setup page.
HYPERSONIC
English 45

The Part area
Arranging parts
Selecting (loading) a patch for a part
Highlight the part into which you want to load a patch, then doubleclick a patch in the Load page (or drag it into the patch name row).
Removing a patch from a part slot
To free up memory, you can remove patches from part slots:
• Highlight the patch name and hit the computer’s [Delete] key (hold
[Shift] to bypass the delete confirmation dialog), or
• Right-click (Win)/[Ctrl]-click (Mac) on the patch name and choose
“Delete” from the context menu.
Renaming a patch in a part
You can rename patches (e.g., just in the current song) by doubleclicking on the patch name. You have to save patches to a user bank
to make changes permanent.
You cannot edit preset patch names in the Load page.
HYPERSONIC
46 English

Copying/moving parts
To copy or move a part to another one (including the MIDI and Mix
page parameters):
• To copy a part, click on the name and drag it.
• To move a part to another, hold [Shift], click the patch name, and drag it.
Layering parts (Link)
You can use the Link function to layer any part with its neighbor(s) below. For example, linking parts 1, 2 and 3 causes MIDI events received
on channel 1 to also trigger parts 2 and 3, so all three parts play simultaneously. Setting a link is easy:
• To link a part to its neighbor above, click the arrow in the Link column.
The arrow changes to a right-angled arrow to indicate an active link.
ENGLISH
You can “test drive” any linked part within a layer by highlighting it and
[Ctrl]-clicking notes on the on-screen keyboard.
Muting parts
You can mute any part by activating its Mute button, which then turns
orange.
A Mute button does double-duty as a MIDI indicator that flashes when
MIDI events are received on the corresponding channel.
HYPERSONIC
English 47

Setting levels and metering
The fader area in the middle of the user interface, called the Level Strip,
contains 16 faders. Use these for mixing the part volumes internally. Under the hood, you can turn the light blue bars into meters.
Setting part levels
Move the fader in a part row to set that part’s volume.
Remember – holding [Shift] enables fine-adjustment, click with [Ctrl]
(Win)/[Command] (Mac) sets a default level.
Activating meters
To activate metering, proceed as follows:
1. Click on the label “Level” (on top of the Level Strip) and select the
metering option you’d like to monitor.
2. Select one of the options described below. The light blue bars that
used to follow the fader position are magically transformed into meters.
HYPERSONIC
48 English

Metering options
• Polyphony: Shows the number of currently used voices in each part – one dot
per active voice.
The polyphony meter is especially useful for measuring a patch’s relative
CPU load.
• Velocity: Shows the incoming velocity. One dot always remains lit while keys
are held.
• Audio Level: Shows peak audio level at the part’s output. One dot remains lit
until the output is silent.
• Level: No metering – the light blue bars follow the fader position.
The Combi Chain
ENGLISH
The Combi Chain feature allows you to set up and preload up to 128
combis which you can switch through by program change. This feature
is very helpful for performing on stage. You set up a whole chain of
combis (e.g. one combi for each song) that can be preloaded into RAM.
This allows you to play one song with Combi A and load Combi B within
seconds while Combi A will keep playing and not be cut off.
HYPERSONIC
English 49

To setup a Combi chain, proceed as follows:
1. Set up your Combis and save them.
2. Go to the Combi page.
3. Right-click (Win)/[Ctrl]-click (Mac) a number in the list (e.g. 000).
4. Choose a combi from the list that appears.
5. Go to the next numbers in the list and assign the number of Combis
you need.
6. Now you can switch through the Combi Chain by clicking the arrows
on top of the page, or assign these arrows to MIDI controllers by rightclicking and choosing a MIDI control from the menu.
If this control is a slider or mod wheel, for Hypersonic 2 any transition
between the top and the lower half is a switching operation. Same if the
control is a foot pedal or switch. If both buttons (prev/next) are assigned
to the same slider or mod wheel control, Hypersonic 2 interprets any
movement into the top quarter as an “next” command, every movement
into the bottom quarter as a “prev” command.
• Use the buttons on the left to Save, Load or Clear your Combi Chain.
You can also change Combis from the Combi Chain via program
change. To do this:
1. Go to the Setup page.
2. Set the button MIDI Combi Sel to “Chain”.
Now you can select Combis from the Combi Chain via program change sent on any
MIDI channel.
Note that enabling this feature will disable the feature “Selecting banks
and patches via MIDI program change”.
HYPERSONIC
50 English

Preload Mode
The Preload Mode lets you define how much sample content of your
Combi Chain is preloaded into RAM for quicker access. Click on the
Preload Mode button and choose:
• “Off” – no preloading of sample content into RAM
• “Next” – only the next Combi in the chain is preloaded
• “Full” – all Combis in the chain are preloaded into RAM
Master Volume
This is the same Hypersonic Master Volume control as featured on the
setup page.
Panic
This MIDI panic button sends an “All Notes Off” MIDI message on all
channels.
ENGLISH
HYPERSONIC
English 51

The MIDI page
The MIDI page is where you assign keyboard range, velocity range,
transposition and tuning to your parts. It’s like a mixing console for
MIDI parameters.
Key Range
To specify the range of notes over which a part will play, edit the note
values in the Key Range column. This allows you to create hard keyboard splits or soft keyboard crossfades; anything from a simple keyboard bass/piano split to a complex 16-part zone crossfade is possible.
Setting upper and lower limit
The left value sets the part’s lower key limit, the right value sets the
high key limit. For details on editing values, refer to the section “Knobs
and sliders” on page 26.
HYPERSONIC
52 English

Setting a key range crossfade
You can set a part’s crossfade range so that the part fades smoothly
over the selected range.
1. Click the hyphen between the two values to open the crossfade popup menu.
2. Choose the crossfade note range (values represent semitones).
The crossfade range will be added, and the fade will occur between
the note limit and crossfade limit. For example, if you set the right note
limit to C4 and the crossfade range to +12, the part will fade out
smoothly between C4 and C5.
To create hard or soft gaps in the middle of the MIDI note range, set the
left note limit to a higher value than the right one. For example, if you set
the key range to “C4-C3,” the part will play over the whole key range except between C3 and C4.
Velocity range
ENGLISH
Similar to the key range, each part’s velocity range can be limited to
create velocity switches or crossfades. Possibilities are unlimited here
as well – from a smooth velocity crossfade between a soft pad and a
brilliant brass stab to a 16-part velocity switch that almost creates
random sounds.
Setting upper and lower limit
• The left value sets the part’s lower velocity limit.
• The right value sets the part’s upper velocity limit.
To create hard or soft gaps in the middle of the velocity range, set the left
parameter to a higher value than the right one. This way you can make a
part play over the whole velocity range except for the specified zone.
HYPERSONIC
English 53

Setting a velocity range crossfade
You can set a Velocity Crossfade for a part, which means that the part
will fade in and out smoothly outside the set velocity range.
1. Click the hyphen between the two Vel Range values to open the
crossfade pop-up menu.
2. Choose the crossfade range.
For example, to create a smooth velocity crossfade between part 1 and
part 2, set part 1 to “0 x 64” and part 2 to “65 x 127” with a crossfade
range of 36.
Transposing and tuning
Semi
The Semi parameter transposes incoming MIDI notes up or down by
up to 36 notes.
Cent
The Cent parameter tunes the part in cents (100 cents = one semitone). Maximum range is 100 cents.
Voices
You can limit the polyphony of a certain part using the Voices parameter. Restricting parts to use no more voices than needed improves
system performance.
Note that the number of voices does not necessarily correspond to the
actual number of notes being played. In many patches (e.g. layered
ones), one note plays two or more voices, so increase the voice count
accordingly.
HYPERSONIC
54 English

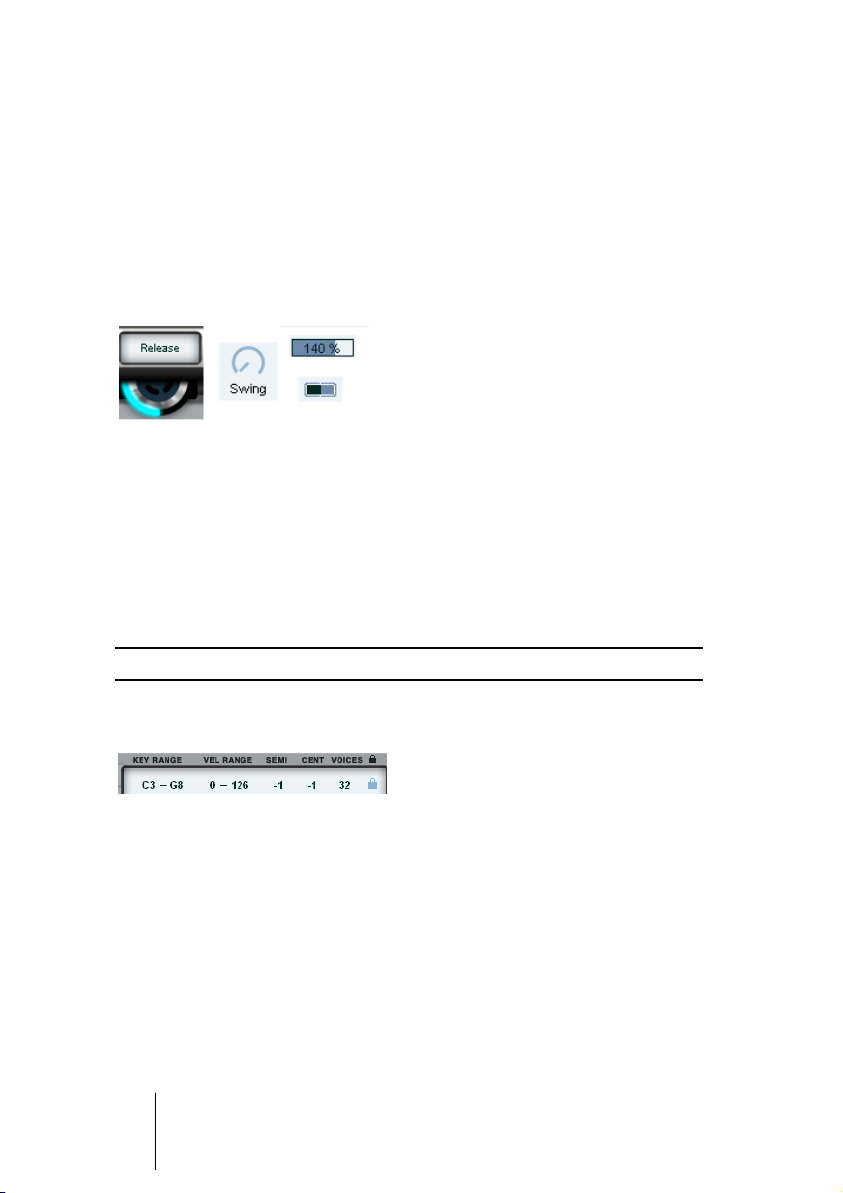
Parameter lock
To prevent MIDI and Mix page parameters from being reset when
loading a new patch, activate the parameter lock (the lock symbol is
highlighted).
Usually when loading a new patch you will want transposition or key
zones to be reset to default. However, when you have a complex key
split combi and just want to replace patches, lock the split zones so they
remain unaffected by the new patches you load in.
ENGLISH
HYPERSONIC
English 55

The Mix page
The Mix page is the mixer of Hypersonic 2. Here you can set the panning for each patch, manage the FX sends and select whether the
patch prefers global or patch FX. You can route patches to single outputs and also lock the patch’s mixer settings.
Move the black slider in the blue fields to edit settings. Click the “P” and
Lock knobs to enable, enabled knobs appear black.
Pan
This determines the part position in the stereo field. Move the slider to
the right or to the left to edit the patch’s stereo position.
Output
This selects the Hypersonic 2 output on which a part’s output will
appear. For more details, see “Configuring outputs” on page 90.
HYPERSONIC
56 English

FX sends
The four FX sends determine the signal level sent to the corresponding FX section. For more information on using and editing FX, see
“The Edit page” on page 58 and “The Setup Page” on page 90.
“P” – Patch FX switch
Activating this switch causes the part to use its patch FX (if any)
rather than the global FX. For more details about FX elements, patch
FX and global FX, refer to the section “The Edit page” on page 58.
Parameter Lock
This function is identical to the Parameter Lock parameter on the MIDI
page. See page 55 for details.
ENGLISH
HYPERSONIC
English 57

The Edit page
The Edit page is a built-in patch editor that offers in-depth patch adjustments. You can edit and mute elements, edit patch parameters,
and make individual adjustments to the element parameters. The Edit
page allows you to create your own patches in Hypersonic 2.
The Edit page is the only page in Hypersonic 2 that partly presumes some
synth programming skills. If your focus is entirely on making music rather
than sound design, you won’t need it. Yet, it’s a very useful feature if you’re
more into tweaking patches and creating your own special sounds.
When creating your own patches, you always start with an existing
patch – so be careful to choose a patch that contains the “raw materials” you need for your own patch. One tip is to find a patch from the
same category as the one you want to create, and search for a patch
that has a similar (or bigger) patch structure. You can always mute
elements, but you can’t add any, so make sure your original patch has
enough elements of the desired type.
HYPERSONIC
58 English

The editing concept of Hypersonic 2 makes it very easy to create greatsounding patches and to tweak existing ones in less time, with less effort and less programming skills required, than with conventional synth
editors or user interfaces. If you haven’t been into editing sounds before,
we encourage you to get creative and explore the world of synthesis that
Hypersonic 2 brings to you.
Managing elements
The left column of the Edit page shows the patch structure, i.e., the elements used in that patch. Up to 16 elements are available, and you can
select, mute, copy, paste and tweak them separately.
The patch structure
ENGLISH
The patch structure reflects the combination and routing of elements
used in the patch. You can’t change the structure, but you can mute
elements.
An element can either be a Synthesizer or an FX element (for more
info, refer to “Technical synthesis details” on page 36).
HYPERSONIC
English 59

Element type display
The capital letters in the icons indicate the element types used in the
patch. This makes it easy to analyze which elements make up a patch:
• S: Sample-based. This can either be a Multisample or a Sliced Loop, which
are equivalent on an element level.
• A: Analog. This is a virtual analog element with up to 3 oscillators.
• F: FM. A classic frequency modulation synthesizer with one carrier and two
modulators.
• W: Wavetable. A classic wavetable synthesizer with 45 wavetables containing 64 waves each.
• FX: Effect element, explained in “FX Management” on page 87.
• P: Piano element, appears in the GP2 expansion patches.
• O: Organ element, appears in the NB3 expansion patches.
An FX element that breaks the chain indicates signal routing to the
output from this point. Here are two examples:
• In drumkits, a group of instruments (such as kicks, hi-hats or toms) usually
uses its own FX, most probably some kind of ambience. Each group feeds
into the part output separately, so in the patch structure the FX elements
break the chain between the group outputs and the part output.
• In instrument sounds, all elements usually are chained together even if there
are FX elements in between.
For example, by inserting a chorus the sound designer has chosen all
Synth elements above the Chorus element to get chorused, while the
ones below aren’t. Yet, all elements run through any delay FX at the end
of the chain.
HYPERSONIC
60 English

Selecting elements
There are two possible ways to select an element for editing:
• Click on the element’s icon in the patch structure, or
• click into the Edit field at the Edit page’s top right. A pop-up menu
opens where you can select elements by their names.
To get back to the Patch Settings Element, you can either click on the “P”
icon in the structure or select the first entry in the Edit selector menu.
Drumkits
In drumkits, each drum instrument (residing on its own key) has its own
sample element. Thus, you can tweak drumkits easily by exchanging
instruments, tuning them, or adjusting their individual sound characteristics.
ENGLISH
Muting elements
You can mute elements – for example while tweaking others, or to thin
out a patch.
• To mute an element, right-click (Win)/[Ctrl]-click (Mac) the element
icon.
• Another right-click (Win)/[Ctrl]-click (Mac) unmutes it.
HYPERSONIC
English 61

The Patch Settings [P]
The Edit page first appears with the patch settings selected. The patch
settings page is indicated by the “P” in the signal chain on the left hand.
Here, you can edit a number of the patch’s most common settings. This
page also features the powerful arpeggiator which is described in “The
Arpeggiator” on page 64.
Mono Mode
You can change the default mono mode preset setting:
• Select “On” to force the patch to mono mode (monophonic).
• Select “Off” to disable the patch’s mono mode (polyphonic).
Glide Mode
Use this control to enable pitch glide between two notes played legato.
The Glide Time knob on the right adjusts the time it takes for the pitch
to glide between notes played legato.
HYPERSONIC
62 English

ENGLISH
Glide Time
Sets the glide time as a percentage relative to glide time values preprogrammed in the elements:
• -100%: short glide time
• 0: uses the element’s default glide time
• +100%: long glide time
Bend Up/Down
This sets the Pitch bend range and behavior separately for the up and
down ranges:
• Any number sets the Pitch bend range in semitones – e.g., 12 is a range of
one octave.
• 12 Q: One octave range, quantized to semitones (glissando).
• Harm: Harmonic sequence (one octave range) with the 3rd harmonic at the
center.
For a lead guitar e.g., you would typically set Bend Up to 2 and Bend
Down to 24.
HYPERSONIC
English 63

The Arpeggiator
Arpeggiator ON/OFF
Switches the arpeggiator on or off.
Rate
Sets the arpeggio rate in note values. The arpeggiator is always
synced to song tempo.
Mode
• Up, Down, Up+Down: Arpeggiator plays only upwards, downwards, or combined (cycles back and forth between the lowest and highest note).
• As Played: Notes arpeggiate in the order played.
• Random: Notes arpeggiate in a random order.
• Step Seq/Ctrl Seq/Rand Seq/Elem Seq: These are special functions using
the Arpeggiator’s step sequencer and will be explained later on.
• Phrase:
MIDI phrases. See “Phrase” below.
Set the Arpeggiator to “Phrase” to play one of 200 categorized
Octaves
Sets the number of octaves spanned by the arpeggio pattern.
Steps
Sets the number of steps before the arpeggio pattern resets.
For example, when you press three keys and set Steps to 5, the arpeggiator will play 1-2-3-1-2 and repeat.
HYPERSONIC
64 English

ENGLISH
Sync
This determines the way in which you can manually reset the arpeggiator:
• 1st note: After releasing all keys, hitting a new one resets the arpeggiator.
• Retrig: Hitting a new key retriggers the arpeggio pattern.
• Beat: Like Retrig, but retriggering waits until the next song beat (often referred
to as input quantization).
Latch
When activated, the arpeggiator continues playing even after you release the keys. You can use the sustain pedal to temporarily put the
arpeggiator into latch mode.
Phrase
When the Arpeggiator “Mode” is set to “Phrase”, you can use this
drop-down menu to select from over 200 categorized MIDI phrases,
designed to suit any musical style or instrument. You can also select
“Import” from the list. This allows you to import your own short MIDI
files that will trigger the arpeggiator.
Key
Selecting a scale from the drop-down menu forces the Arpeggiator to
use only notes of this scale in its performance.
HYPERSONIC
English 65

Gate
Adjust the length of MIDI notes played by the Arpeggiator.
Swing
Swing allows you to adjust the feel of the Arpeggiator’s performance.
Technically speaking, Swing allows you to move the offbeats of a bar
earlier or later. You can get the Arpeggiator to play exact triplets by
setting Swing to 100%.
The Arpeggiator’s programmable step sequencer
Hypersonic 2 features a programmable 16-step sequencer in the
arpeggiator section.
To use the step sequencer, proceed as follows:
1. Load a patch.
2. Click Edit.
3. Select the Patch Settings page.
4. Set the Arpeggiator Mode to “Step Seq”.
5. Click the Edit button in the Arpeggiator section.
HYPERSONIC
66 English

Creating sequences
The Hypersonic 2 step sequencer is very easy to use and an effective
and creative patch making tool.
To create your own step sequences for any patch, simply set a pitch
value for each step (displayed in semitone increments) in the “Note”
column and set a velocity amount in the neighboring “Vel” column. The
step sequencer responds to the arpeggio Rate and Steps controls on
the Patch Settings page, to allow you to adjust the playback speed
and number of steps to be played.
Also displayed on the Step Sequencer edit page are two extra columns,
Seq 1 and Seq 2. These allow you to generate and edit control sequences for use in the powerful modulation matrix on the Edit page.
Control Sequences can be used, for example, to create gating effects,
automate panning or to sweep wavetables, the possibilities are endless.
Random Seq
When you select this option from the Arpeggio Mode menu, sequencer
steps will be played in a random sequence.
ENGLISH
Ctrl Seq
When you select this option from the Arpeggio Mode menu, only the
Seq 1 and Seq 1 controller sequences will be sent to the Modulation
Matrix while the arpeggiator is running. Any notes held are not arpeggiated.
Elem Seq
Similar to Step Seq mod, but triggers notes in the range C1-D#2, and
applies a transposition depending on the held notes.
HYPERSONIC
English 67

Editing synth elements
For the editing of the synth elements Sample, Virtual Analog, Wavetable and FM, Hypersonic 2 features three sub-pages.
Easy
This is the page to tweak general settings for a synth element, such as
tuning, voices, levels, panning, velocity sensitivity and amp and filter
envelopes.
Osc
This is short for Oscillators. Here you will find particular controls for
each type of synth element explained in detail later on.
Mod
The Modulation Matrix page. This is the place to go for the literally limitless modulation possibilities and some ‘expert’ features such as
the assigning and routing of Hyperknobs.
For detailed explanations of the Mod page please refer to the PDF
document “The Mod Page” on the Hypersonic 2 DVD.
HYPERSONIC
68 English

The Easy Page
Octave/Semi/Cent
These three controls adjust the element’s pitch in octave, semitone or
cent increments.
ENGLISH
Max Voices
This parameter limits the number of voices (polyphony) the element
can play.
Filter mode
Each Hypersonic 2 element features a multimode, multislope filter.
Changing the filter mode drastically alters the sound’s timbre and
“color”, particularly when swept. The following modes are available:
• Filter Off – Filter is bypassed.
• Lowpass 24/12 dB: The lowpass filter rolls off frequencies above the cutoff
frequency while leaving the lower ones unaffected. The higher the frequency
is compared to the cutoff frequency, the greater the degree of attenuation.
This degree is set by the slope rate, in dB/octave. A 24 dB/octave slope is
steeper and good for synth sounds, while 12 dB/octave sounds less artificial
and is better-suited to acoustic/natural sounds.
HYPERSONIC
English 69

• Bandpass 18/12 dB: A bandpass filter rolls off frequencies both below and
above the cutoff frequency, thus “peaking” a certain range of frequencies.
This response is good for synthetic filter sweeps and thinning out the sound
character.
• Highpass 12 dB: The highpass filter is a mirror image of the lowpass filter; it
rolls off frequencies below the cutoff frequency. This type of response emphasizes the upper frequency ranges and thins out the overall sound.
• Peaking EQ: This is similar to a bandpass response but is more drastic, and
amplifies or attenuates the frequency range around the cutoff frequency. Use
this for emphasizing resonances or formants within a sound.
• Presence: This shelving EQ response boosts the high frequency range. Cutoff adjusts the low frequency limit above which boosting occurs.
• Damper: This type of shelving EQ gently attenuates the high frequency range.
Cutoff adjusts the low frequency limit above which attenuation occurs.
Cutoff
This adjusts the frequency where the filter starts affecting the sound.
Cutoff’s precise effect depends on the chosen filter mode (see above).
Reso
This boosts the frequency range around the cutoff frequency, making
the filter effect sharper and more resonant. High values can cause the
filter to self-oscillate, creating a sine wave pitched at the cutoff frequency.
Vel->Cutoff / Key->Cutoff
This sets whether the velocity or the keyboard note affect the cutoff
frequency. For example, acoustic instruments often become brighter
when struck or played more forcefully. You can simulate this effect by
tying cutoff to velocity, adjusted using this control.
Env (Depth)
Sets how much the filter envelope level affects the cutoff frequency.
Vel->Env
The extent to which velocity influences the Env Depth can be adjusted
using this control.
HYPERSONIC
70 English

ENGLISH
Filter ADSFR envelope
These five controls set the Filter Envelope times and levels:
• Attack Time: When you hit a key, the envelope level increases from zero to
maximum over the time set by the Attack Time parameter.
• Decay Time: This sets the time for the envelope to decay from maximum to the
Sustain Level (see next).
• Sustain Level: Sets the level at which the envelope remains during key-down.
• Fade Time: If set to the midpoint, the envelope stays at the Sustain Level while
the key is down. If set to a value below the midpoint, while the key is down the
envelope fades out to zero over the specified amount of time. If set to a value
above the midpoint, while the key is down the envelope goes to maximum
level over the specified amount of time.
• Release Time: Sets the time for the envelope to decay to its final level (usually
zero) after releasing the key.
Level
Sets the element’s audio level in dB increments.
Pan
Adjusts the element’s pan position within the stereo field.
Vel Sens
Adjusts how velocity influences the element’s level.
Amp ADSFR envelope
The amp envelope controls the contour of the element’s audio level
over time. The complement of controls and how they affect the envelope is the same as described above.
The Osc Page
As mentioned before, each type of synth element has its particular
Osc page. In the following all four types are explained.
English 71
HYPERSONIC

Sample Element [S]
Sample Selector Display
From this drop-down list you can choose any sample you like from numerous categories in the complete Hypersonic sample content. This
feature is especially handy for customizing or creating drum and percussion kits:
1. Load a Hypersonic patch that uses sample elements.
A drum kit would be an easy first choice.
2. Click Edit.
3. Choose a sample [S] element from the elements list on the left of the
Hyper Display or from the list shown when clicking in the Edit Name
field.
4. Click in the field “Sample:” under the Edit menu.
5. A drop-down menu appears with a complete list of all Hypersonic
sample banks and samples.
Startpoint
Offset
Sets the multisample’s start time e.g. to remove the attack portion of a
multisample or to soften the attack.
Mono
Plays only the left channel of stereo multisamples.
Vel
Allows you to control the multisample start point via keyboard velocity.
When set to a positive value, lower velocities play from positions further into the multisample. Negative values will result in the opposite
behaviour.
HYPERSONIC
72 English

Rand (Random)
Depending on the value set here, all note ons play from a random
position in the multisample.
Formant/Zone Shift
Offset
This parameter shifts the multisample’s keyrange up or down in semitone steps to produce a tonal variation without effecting pitch.
The effectiveness of this control depends on the selected multisample.
Vel
Allows you to control the formant offset via keyboard velocity.
Rand
The formant is moved randomly within the range set by this parameter.
ENGLISH
Velocity to Layer
Allows you to control which layers of a multisample are played depending on the velocity of the notes you play. This only has an effect on multisamples consisting of more than one velocity layer.
Offset
Adds a positive or negative offset to the incoming velocity, making it
more likely that higher or lower velocity layers are triggered, respectively.
Scale
Adjusts the range of incoming velocities. 100% is normal, 0% makes
the velocity have no effect on the velocity layer played.
English 73
HYPERSONIC

Random
Adds a random element to the selection of velocity layers. Set to maximum, each note will randomly select from any of the available velocity layers.
The patch or element must be set to a monophonic mode for these
parameters to have any effect.
Mono Legato Offsets
The following parameters are available for you to tweak the transition
of monophonic notes when played legato.
Sample Start
Sets the playback start position in a multisample for monophonic legato
notes, this is particularly useful for example with solo brass and woodwind where more realistic trills are produced when monophonic legato
notes play from a start position further into the sample avoiding repetition of the attack transients with each note.
Amp Env Attack
Adjusts a volume crossfade for the attack of subsequent legato monophonic notes played.
Filt Env Attack
Adjusts a filter crossfade for the attack of subsequent legato monophonic notes played.
HYPERSONIC
74 English

Analog Element [A]
Analog Osc 1 & 2
Oscillators 1 and 2 are the two main oscillators, they have identical
controls and are able to produce the most varied wave shapes.
ENGLISH
Mode Menu & Wave knob
The mode menu and the wave knob are very closely related. The mode
menu selects the basic waveform and the wave knob varies this selected waveform.
1. Let’s turn the mix knob for oscillator 2 all the way to the left, so we
can’t hear it.
2. Click in the mode menu for oscillator 1.
This produces a drop-down menu for selecting the oscillator 1 wave
shape. Why not select each oscillator type as we describe it and test
the effect of the wave knob as we go.
HYPERSONIC
English 75

List of selectable waveforms
• Saw Sync: When the wave knob is turned all the way to the left a sawtooth
wave is produced. Turning the knob to the right adjusts the sync frequency.
• Square Sync: When the wave knob is turned all the way to the left a square
wave is produced. Turning the wave knob to the right adjusts the sync frequency.
• Pulse Width: When the wave knob is centered a square wave is produced.
Turning the wave knob to the right reduces the pulse width, turning it to the
left widens the pulse width to produce a thinner sound.
• Saw Pitch: Produces a regular sawtooth wave. The wave knob adjusts the oscillator pitch up and down. The oscillator is exactly in tune when the wave knob
is centered.
• Square Pitch: Produces a regular square wave. The wave knob adjusts the
oscillator pitch up and down. The oscillator is exactly in tune when the wave
knob is centered.
• Wavetable: Uses the currently selected wavetable shown and selectable in
the menu at the top of the page. 45 wavetables are available, each consisting
of 64 single cycle waveforms. The waveforms are selected via the “Wave”
knob and can be modulated via the Mod Matrix.
Semi
Changes the pitch of the oscillator in semitone steps.
Cent
Adjusts the fine tuning of the oscillator in cents.
Mix
Controls the volume of the oscillator.
More about the wavetables
1. Make sure oscillator 1 mode is set to Wavetable.
2. Click on the wavetable field.
This is where you select one of the 45 wavetables available for oscillators 1 & 2.
Select the Single Cycles wavetable and see what happens when you
play a note and move the oscillator 1 wave knob.
HYPERSONIC
76 English

As you move the oscillator 1 wave knob you’ll notice that the wavetables in the Single Cycles bank are 64 very different sounding waveforms.
Now let’s try a different wavetable, VoSim Vowels for example, which
is much more subtle and consistent.
Let’s try another, Classic Bell for example, which evolves gently from a
soft to bright bell sound.
The 45 wavetables are varied and versatile and allow totally different
waveform colors to be produced by oscillator 1 & 2 in addition to the
classic analog waveforms.
Oscillator 3
Oscillator 3 is designed to add body and color to oscillators 1 & 2. In
this area of the user interface you will also find the sub oscillator and
white noise controls.
Oscillator 3 Modes
• Saw: Produces a regular sawtooth wave.
• Squ: Produces a regular square wave.
• Tri: Produces a regular triangle wave.
ENGLISH
Mix
Controls the volume of oscillator 3.
The pitch of oscillator 3 is always set to the master octave tuning.
Sub
Adds an additional oscillator, pitched one octave below oscillator 3.
When oscillator 3 is set to saw or square, the sub oscillator produces
a square wave but when oscillator 3 is set to triangle the sub oscillator
also produces a triangle waveform.
Noise
Produces white noise.
HYPERSONIC
English 77

HPF – High Pass Filter
A High Pass Filter for the three oscillators.
PWM Limit – Pulse Width Modulation Limit
Sets the smallest pulse wave width that can be produced by the pulse
waveform.
WT Alias – Wavetable Aliasing
Adds bright distortion to wavetable oscillators.
Wavetable Element [W]
The wavetables are the same as those available in the Analog element.
The wavetable element has a reduced set of features and so is more
efficient.
Wavetable selection menu
Click the “Wavetable” drop-down menu to select a wavetable from
the list.
HYPERSONIC
78 English

Index
Wavetables consist of 64 different (although usually similar) waveforms. The Index parameter chooses which of these you will hear.
Wavetables are generally modulated to produce sounds that change
their texture through time.
Key -> Index
Allows you to control which wave in the wavetable is selected via keyboard position.
Vel -> Index
Allows you to control which wave in the wavetable is selected via keyboard velocity.
Rand -> Index
Waves within a wavetable are played randomly within the range set by
this parameter.
ENGLISH
If the current wavetable index is already near to the end of the wavetable, additional modulation will have no audible effect.
Semi
Changes the pitch of the wavetable in semitone steps.
Cent
Adjusts the fine tuning of the wavetable in cents.
Alias
Produces a bright distortion for wavetable oscillators.
Sync
Switches on oscillator sync, so the “osc 1” waveform restarts once
per cycle of “osc 2”. This gives a wide range of timbres, controlled by
the “semi” and “cents” parameters.
HYPERSONIC
English 79

Osc 2
Oscillator 2 is a basic oscillator provided to fatten up wavetable elements. Select a waveform from the drop-down menu and use “Mix” to
adjust the relative level of the wavetables and “osc 2” waveforms.
FM Element [F]
The Hypersonic FM element is a classic single carrier, two modulator
frequency modulation synthesizer.
Carrier
Let’s start with the carrier which is a simple sine wave oscillator.
Master Depth
Controls the combined modulation depths of the two modulators, after
their individual depth controls.
Key
Allows the master depth to increase or decrease across the keyboard.
HYPERSONIC
80 English

Vel
Allows the master depth to be varied by note velocity.
Rand
Adds a random offset to the master depth for each note.
LF
Sets the carrier to a fixed low frequency (displayed in the Hyperdisplay)
for a subtle “chorus” effect.
Modulator 1 & 2
Depth
Controls the modulation depth applied to the carrier and therefore the
brightness of the resulting sound.
Vel Sens -> Depth
Allows the depth to be varied according to the velocity of played notes.
ENGLISH
Coarse
Sets the pitch of the modulator sine wave, the ratio of the modulator
frequency relative to the carrier.
Fine
Fine tunes the modulators pitch.
Thru Mix (Modulator 1 only)
This is a direct output volume control for the modulator, independent
of the modulator’s depth.
Keytrack (Modulator 2 only)
Controls the way the pitch of modulator 2 follows the notes played. At
0% modulator 2 ignores the note and outputs a fixed pitch.
HYPERSONIC
English 81

Breakpoint
Allows you to set an axis point on your keyboard from which you can
control the modulator depth above and below the axis point independently. The breakpoint position is displayed in MIDI note values in the
Hyperdisplay.
Lo
Increases or decreases the depth of modulation below the breakpoint.
Hi
Increases or decreases the depth of modulation above the breakpoint.
Modulator 2 features its own simple envelope with three additional
controls:
Level
When the level control is set to a positive value an attack envelope
(upward ramp) is produced for modulator 2. When a negative value is
set a decay envelope (downward ramp) is produced.
Rate
Controls the speed of the attack or decay.
Vel
Increases or decreases the rate according to the velocity of notes
played.
HYPERSONIC
82 English

The FX page
Understanding the global/patch FX concept
Hypersonic 2 uses a very flexible FX concept, which can be confusing
at first. However, once understood, it greatly simplifies working with
FX. Please read the following sections carefully so you can fully understand how the global/patch FX protocol works.
ENGLISH
Global or patch FX
First, you need to know that for each part, four send effects can be active at a time. Each of them can either be a global or a patch effect,
but never both at the same time.
The four global FX sections are shared among all parts, and they are
always active.
English 83
HYPERSONIC

FX selectors
The top area of the FX page is called the FX selector. It has two rows
with 4 FX sections each. In this FX selector you can:
• View which combination of global and patch FX the selected part uses.
• Select an FX slot for editing.
• Mute or unmute an FX slot by right-clicking ([Ctrl]-clicking on Mac).
On the right there’s the activity switch (“P Active“) that shows
whether the selected part uses patch FX at all.
Programming FX
To program an FX, click one of the FX selector slots (FX1 to FX4) in
either the global or patch FX row, depending on which type of effect
you want to edit.
Selecting an FX type
To select an FX type, click on the FX type button and select a type
from the pop-up menu.
You’ll find a description of the available FX types in the folder “Content
Reference” on the Hypersonic 2 program DVD.
HYPERSONIC
84 English

Editing FX parameters
Depending on the FX you’ve selected, the Edit area shows the available parameters; tweak them as desired.
Switching an FX slot on/off
To activate/deactivate an FX slot, click the On/Off button or right click
the FX selector.
ENGLISH
Syncing an FX to song tempo
You can sync several FX to the song tempo by activating the Sync
button in the Edit area (next to the On/Off button).
Any rate-related parameters in the Edit area change to note resolution
units upon activating Sync.
Routing FX and setting level
• Set the FX output’s overall level using the volume knob at the bottom
left of the FX page.
• Click the button below to route the FX slot to any of the audio outputs.
If “Off” is selected, the effect is not routed to an output and therefore
inaudible.
HYPERSONIC
English 85

Panning the FX signal
Use the Pan control (right next to the volume knob) to place the FX in
the stereo field.
Using patch FX
Patch FX are similar to element FX and global FX – all parameters and
types are the same.
Use patch FX to add a special FX to a part, assuming that particular
FX is neither in the element nor global FX.
Example: Assume you’re using a dry electric piano in part 1. You want to
put a phaser on it, but there’s no phaser in the patch itself, and the global FX are occupied with two reverbs and two delays.
To add a patch FX:
1. Find a slot that is not yet used by a global FX or a patch FX.
2. Activate the patch FX, select a type and adjust it – done.
Saving patch FX
Patch FX are automatically saved with a patch. This allows creating
variations of preset patches by just adding FX.
Patch FX in the factory content
Factory content patches are generally programmed to leave the patch
FX slots free.
The one exception is drumkits – most of them use patch FX for individual room ambience. However, in this case only slots 3 and 4 are
used, leaving slots 1 & 2 available.
HYPERSONIC
86 English

Switching patch FX on and off
For each part, you can choose whether it uses patch FX or not:
• Click the P button in either the Mix or FX page to switch patch FX on or off.
• By switching off the P button, you force the part to use global FX regardless
of whether patch FX are programmed for the currently loaded patch.
• By switching on the P button, you enable the use of patch FX. However, if
there’s no patch FX loaded, or if it is muted, the corresponding global FX is
used.
FX Management
Effects structure
Users of older hardware workstations often encounter a problem concerning effects: A patch that sounds great in single mode suddenly
sounds dull and lifeless when used in a combi or multi setup. This is
because hardware workstations have a limited number of FX sections.
In single mode, the patch can use all the effect sections with their individual settings, but in multi or combi mode these have to be shared
among all the patches.
ENGLISH
Hypersonic 2 works differently. First, the number of FX used in a combi
is flexible – it can reach a theoretical total of (16 x 15) + (16 x 4) = 304
independent FX sections. Second, FX never have to be shared, although they can be if desired.
Types of FX sections in Hypersonic 2
Hypersonic 2 has three types of FX sections, each of which has a different position in the signal flow and a different purpose:
• First, FX that are an integral part of the sound – such as the distortion of a
lead guitar or the rotary effect of a rock organ – are built into the patch. We
call them FX element (in fact that’s what they are) and they cannot be used or
changed by other patches. FX elements are typically insert-type FX such as
EQ, compressor, distortion, but can also be modulation FX or even reverbs. A
patch can have up to 15 FX elements, but typically uses one or two. These FX
are found on a patch’s Edit page.
HYPERSONIC
English 87

• Second, each patch has four FX sections that are exclusive to that patch. These
are called “patch FX.” They are accessible on the FX page, and typically are
send effects such as reverb, delay or chorus.
• Finally there are four global FX sections. They are like a built-in FX rack and are
ideal for mixing the composite sound. Global FX are shared among all patches.
Patch or global effects
There are two scenarios where you would rather use global FX than
patch FX:
• Reducing CPU load: Each active FX section needs CPU time, and more FX
means more strain on your system. Although Hypersonic 2 FX are very efficient,
the sheer possible number of FX can add up.
• Keeping the mix clean: The careful use of two or three reverbs leads to more
spatial coherence in your mix. You would probably want to use a large and a
small room from the global FX and share them among all tracks, rather than use
a different room for each sound, which would make the mix overly “busy.” Artistic considerations aside, a few global FX are also easier to manage in the mix.
HYPERSONIC
88 English

FX elements in a patch
FX elements are identical to patch or global FX. Therefore the editor
for FX elements resembles the parameter area in the FX page. For
more details on editing FX, see “The FX page” on page 83.
1. Choose a FX element.
2. Click on the “Edit” field to open the FX selection menu.
3. Choose an effect algorithm. Its parameter set will appear in the edit
window; tweak as desired.
ENGLISH
In drumkits, you’ll find a lot of “placeholder” FX elements that have no FX
loaded. They’re used as group outputs. Use these to add different reverbs
or other effects per drum group. You can also use the send levels in the
FX element to send the output of the drum group to patch or global FX.
HYPERSONIC
English 89

The Setup Page
Configuring outputs
Hypersonic 2 offers up to 32 audio output channels, divided into 16
Slots of 2 channels each. The number and configuration of output slots
is freely assignable. For example, you could route each Hypersonic 2
part to a different stereo output, send two linked pads to a quadraphonic surround channel, or create any other combination of the above.
• For each output slot, you can select from three options: M (2 mono channels),
S (1 Stereo Channel) or Q (one Quadro channel).
Activating and Configuring Output Slots
As audio outputs need mixer space and use system resources, you
can limit the number of Hypersonic 2 outputs. It’s good practice not to
activate any more output slots than needed.
HYPERSONIC
90 English

• Click on an output slot to open a pop-up menu.
• To deactivate a slot, choose Off.
• To activate a slot, choose one of the three options described below.
After reconfiguring output slots, restart Hypersonic 2 for the changes to
take effect.
Mono channels
Select M for 2 mono channels in the host mixer. This makes sense for
bass tracks or solo voices so you can handle both signals independently.
To assign a signal to a mono channel, select the output slot and set the
signal’s pan position to extreme left or right.
Stereo channel
Select S for a stereo channel in the host mixer. This is the standard
mode for a Hypersonic 2 output.
ENGLISH
Quadro channel
When you select Q, Hypersonic 2 creates a quadrophonic channel in
your host mixer, combining the slot you’ve selected and the slot right
next to it.
A quadro channel routes the first stereo pair to the front and the second one to the rear. Of course, this is intended for surround setups.
Nuendo and Cubase SX 3 support quadro channels. In other hosts,
selecting Q for a slot creates four mono channels.
In Hypersonic 2, you can still select the two slots making up the Quadro
channel individually. Selecting the first slot for a part sends the part to
the front. Assigning it to the second slot sends it to the rear. Pan controls function normally.
HYPERSONIC
English 91

Output Hype
The Hype feature is essentially a 'mastering' processor which produces a more punchy and bright sound. Many hardware keyboards
and modules have this kind of Hyping active under the hood where
you can't get your hands on it, but we've given you the control. This
feature effects all Hypersonic patches and is active on all outputs.
Because all Hypersonic settings are saved with your song, you can
tweak the Hype to just the amount you like for each project or choose
'Save Defaults' to always have your preferred setting when starting
new projects.
Master Volume
Hypersonic’s overall volume control.
Master Tuning
Offsets the pitch by semitones and semitone cents for all Hypersonic
patches globally.
Patches can of course be tuned individually on the Hypersonic MIDI page.
MIDI Settings
Receive MIDI Program Changes and Enable MIDI Combi Selection
1. To enable or disable the accepting of MIDI program change messages
of the plug-in set the parameter “Pgm Change” to “On” or “Off”.
When this option is switched off, patches can no longer be listed and
selected in the host (e.g., in the Inspector in Cubase or Nuendo).
HYPERSONIC
92 English

Note that changing this option requires a restart of the plug-in for the
change to take effect.
2. Use “MIDI Combi Sel” to enable or disable the accepting of MIDI pro-
gram changes for user banks (program change messages on channel
16 for bank numbers 120 and above). Or enable the Combi Chain to
receive MIDI program changes by selecting “Chain”. For more info
read “The Combi Chain” on page 49.
Vel Sens
Allows you to customize the velocity response of Hypersonic 2 to your
master keyboard.
Touch Sens
Allows you to customize the response of Hypersonic 2 to the depth of
aftertouch modulation produced by your master keyboard.
GM On/Off (General MIDI mode)
Switches Hypersonic’s General MIDI mode on.
ENGLISH
• In GM mode program changes recall GM patches. GM patches are found in
banks 78 and 79.
• “GM Reset" Sysex is received.
• Clicking Reset in activated GM mode produces a GM reset that loads GM
pianos and drum kits, as well as GM reverb and chorus send FX.
Reset
Resets Hypersonic 2 to its default settings.
HYPERSONIC
English 93

Loading and saving patches and combis
The Setup page contains an area where you can load and save combis. This has been included because some host applications don’t
provide this functionality for plug-ins.
For detailed info about loading and saving patches and combis, see the
section “Combis” on page 45.
Memory Usage
This small section within the Setup page consists of a display, a lock
button and a selector option where you can view and set the memory
usage of Hypersonic 2.
The memory saving methods in Hypersonic 2
Hypersonic 2 is extremely effective in terms of RAM usage:
• It uses a proprietary, sample optimization algorithm that not only minimizes the
size of the sample content on disk, but also in RAM. This technology saves up
to 66% of valuable storage space with no loss in audio quality.
• For each multisampled Waveform bigger than 5 MB, there is an ECO version
using less samples, again saving up to 50% memory usage.
• When several parts use the same multisampled waveforms, they are only
loaded once into memory (“memory sharing”). This also applies when you use
several drumkits that share all or a part of the drum samples.
HYPERSONIC
94 English

ENGLISH
Memory Usage display
This shows the total RAM usage (in Megabytes, or MB) of all currently
loaded parts. The plug-in instance itself adds approximately 15 MB to
this figure.
Memory Usage setting
Underneath the MB display is a little selector button whose setting is
relevant only for patches with [S] elements (sample-based).
Per [S] element within a patch, the sound designers have chosen
whether it uses an ECO or an XXL version of the waveform. This
means that within a patch there can be ECO and XXL elements,
depending on their importance for the patch.
Click the selector button to open a menu with the following options:
• XXL – all elements use XXL Waveforms - more samples, maximum quality
• Default – uses the settings the programmers made in the patches
• ECO – all elements use ECO Waveforms - helps you to save system resources
Lock
Activating the Lock switch keeps all loaded sample data in RAM. This
allows a patch you have used before to be reloaded faster, for example if you have a song containing many MIDI program changes.
HYPERSONIC
English 95

Help menu
To access the Help menu in Hypersonic 2, right-click (Win)/[Ctrl]-click
(Mac) in any free (gray) area of the plug-in interface.
Hypersonic 2 Website
Takes you to the Hypersonic 2 page, which provides more and updated
info on Hypersonic 2.
Steinberg website
Takes you to the Steinberg website.
Both website options require that your computer is connected to the
internet.
About Hypersonic
Opens the About box (alternatively click the Steinberg logo on the
Hyper display).
Reset/Clear All
Clears all parts and resets Hypersonic 2 to its initialized state. You will
be prompted with a safety dialog.
Play PC Keyboard
This feature is explained in detail on page 30.
All Notes Off
This feature is explained in detail on page 30.
HYPERSONIC
96 English

DEUTSCH
Hypersonic 2 – Handbuch
von Wolfram Knelangen

Die in diesem Dokument enthaltenen Informationen können ohne Vorankündigung geändert werden und stellen keine Verpflichtung seitens der Steinberg
Media Technologies GmbH dar. Die Software, die in diesem Dokument beschrieben ist, wird unter einer Lizenzvereinbarung zur Verfügung gestellt und
darf ausschließlich nach Maßgabe der Bedingungen der Vereinbarung (Sicherheitskopie) kopiert werden. Ohne ausdrückliche schriftliche Erlaubnis durch
die Steinberg Media Technologies GmbH darf kein Teil dieses Handbuchs für
irgendwelche Zwecke oder in irgendeiner Form mit irgendwelchen Mitteln reproduziert oder übertragen werden.
Alle Produkt- und Firmennamen sind ™ oder ® Warenzeichen oder Kennzeichnungen der entsprechenden Firmen. Windows XP ist ein Warenzeichen der
Microsoft Corporation. Das Mac-Logo ist eine Marke, die in Lizenz verwendet
wird. Macintosh ist ein eingetragenes Warenzeichen. Mac OS X ist ein eingetragenes Warenzeichen. Cakewalk SONAR ist ein eingetragenes Warenzeichen von Twelve Tone Systems. ReWire ist eine Marke von Propellerhead
Software AB. Logic ist eine Marke von Apple Computer, Inc., registriert in den
USA und anderen Staaten.
© Steinberg Media Technologies GmbH & Wizoo Sound Design GmbH, 2005.
Alle Rechte vorbehalten.
HYPERSONIC
98 Deutsch

Inhaltsverzeichnis
102 Registrieren Sie Ihre Software!
102 Der Steinberg Key
104 Systemanforderungen (PC-Version)
104 Installation (PC-Version)
105 Deinstallieren von Hypersonic (PC-Version)
105 Systemanforderungen (Mac-Version)
105 Installation (Mac-Version)
106 Aktivieren des Steinberg Key
108 Einrichten des Systems
108 Einrichten von Hypersonic 2 als VST-Instrument in Cubase
109 Einrichten von Hypersonic 2 als DXi2-Synth
110 Verwenden von Hypersonic in einer AU-kompatiblen Anwendung
110 Hypersonic 2 als Standalone-Anwendung und ReWire
112 Latenz
113 Überblick
118 Einführungslehrgang
119 Verknüpfen von Parts
120 Verändern des Sounds
121 Überprüfen der Anzahl der verwendeten Stimmen
121 Erzeugen eines Split-Sounds mit Crossfade
122 Hinzufügen einer Drumloop
123 Die Benutzeroberfläche
123 Verändern von Werten
125 Zuweisen von MIDI-Controllern
126 Texteingabe
126 Das MIDI-Keyboard
128 Play PC Keyboard
129 Die Hyper-Drehregler
130 Das Konzept
131 Verwenden der Hyper-Drehregler
132 Die Bedeutung der gebräuchlichsten Hyper-Drehregler-
Bezeichnungen
135 Struktur der Hypersonic-Klangerzeugung
135 Combi
135 Patch
135 Element
137 Suchen, Laden und Speichern
DEUTSCH
HYPERSONIC
Deutsch 99

138 Durchsuchen von Patch-Bänken
138 Laden eines Patches in einen Part
139 Auswählen von Patches im VST-Host
140 Laden von Patches von der Festplatte
140 Überprüfen der verfügbaren Patches
141 Suchen nach Patches
143 Verwalten von Bänken und Patches
143 Verwalten von User-Bänken
144 Verwalten von User-Patches
146 Auswählen von Patches und Bänken mit MIDI-Programm-
wechselbefehlen
146 Combis
148 Der Part-Bereich
148 Einrichten von Parts
149 Verknüpfen von Parts
150 Stummschalten von Parts
151 Der Level-Bereich
151 Einstellen der Lautstärke eines Parts
151 Einschalten der Anzeigen
153 Combi-Chains
156 Die MIDI-Seite
156 Key Range
158 Velocity Range
159 Transponieren und Feinstimmen
159 Voices
160 Sperren von Parametern
161 Die Mix-Seite
163 Die Edit-Seite
164 Verwalten von Elementen
167 Die Patch-Einstellungen [P]
168 Der Arpeggiator
171 Der Step-Sequenzer für den Arpeggiator
173 Bearbeiten von Synthese-Elementen
174 Die Easy-Seite
178 Die Osc-Seite
178 Sample-Elemente [S]
178 Sample-Auswahl
178 Startpoint
179 Formant/Zone Shift
179 Velocity to Layer
HYPERSONIC
100 Deutsch
 Loading...