

Page 1
SBS-KW-5TW | 10TW
USER‘S MANUAL
CRANE SCALE
EN
Page 2
CONTENT
3
2 3
EN
1. OVERVIEW
This crane scale is a very modern scale that uses the latest technology.The digital crane scale
employs both, the advanced hardware and sophisticated software. It uses AT-89 series singlechip micro-processor and a highly precision A/D converter. In addition, the crane scale is equipped with specially designed compensating circuitry for rocking loads. With its quick stabilization
and strong interference-rejection, it can be widely used in weighing applications in commerce,
industrial and mining industries, warehousing wharf, etc.
2. FEATURES & SPECIFICATIONS
Accuracy class III
Initial on zero range
Selectable 0%, 5%,10%, 20%, 50%, 100% F.S
Time for stable static reading ≤10 seconds
Maximum safe load 150% F.S.
Display screen
Super bright 1.2″ 5-digit LED display
Operating temperature -10 °C ~ +40°C
Operating humidity ≤85%RH
LOB indicator When the power is low, the indicator will switch
on
Auto-OFF The scale will shut off automatically once the
power is severely low.
Recharging protective circuitry To prolong the performing life of the battery
Cast aluminum housing Rust protection, antistatic & light weight
Model Max. capa-
city (kg)
Min. weight
(kg)
Measured
division
Selectable
division
SBS-KW-5TW 5000 40 2 1
SBS-KW-10TW 10000 100 5 2
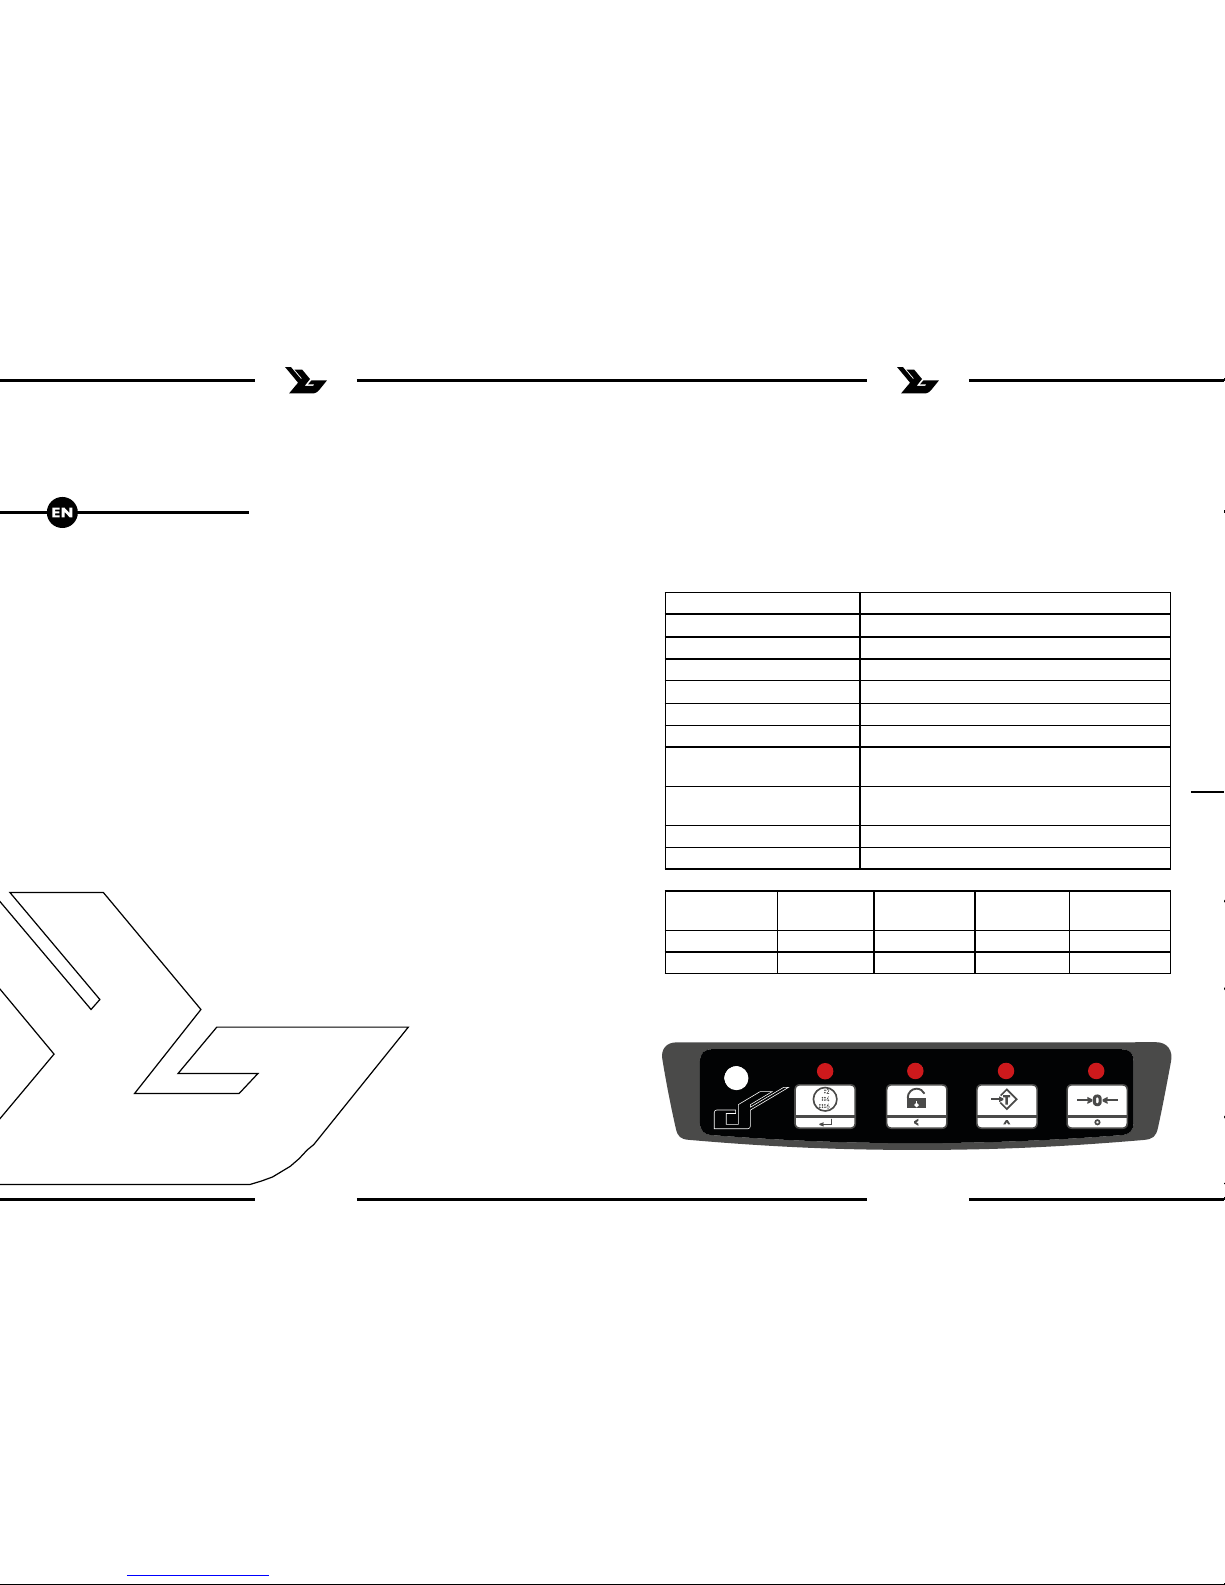
3. FUNCTIONS OF KEY PAD & INDICATORS
Crane scale front panel:
KgLb
Page 3
4
EN
Here, “b” means the total number of loads and “XXXX” indicates the total number
of adding.
DISPLAY OF TOTAL WEIGHT
When the displaying value is within the zero range, press key to see the total
number of adding and the total weight of loads. It will rstly display the total number of loads. For example, the scale shows “b0327”, that indicates that 327 loads
are weighed so far. Press again, it will display the four left-hand number of the
added value. For instance, “H 108” indicates the left-hand number of the total weight
is “108”. Press for the third time, it will show the four right-hand number of the
total weight. For your information, “ L 2896” indicates the right-hand number of the
total weight is “2896”. Accordingly, the total weight of the loads is “1082896 kg”.
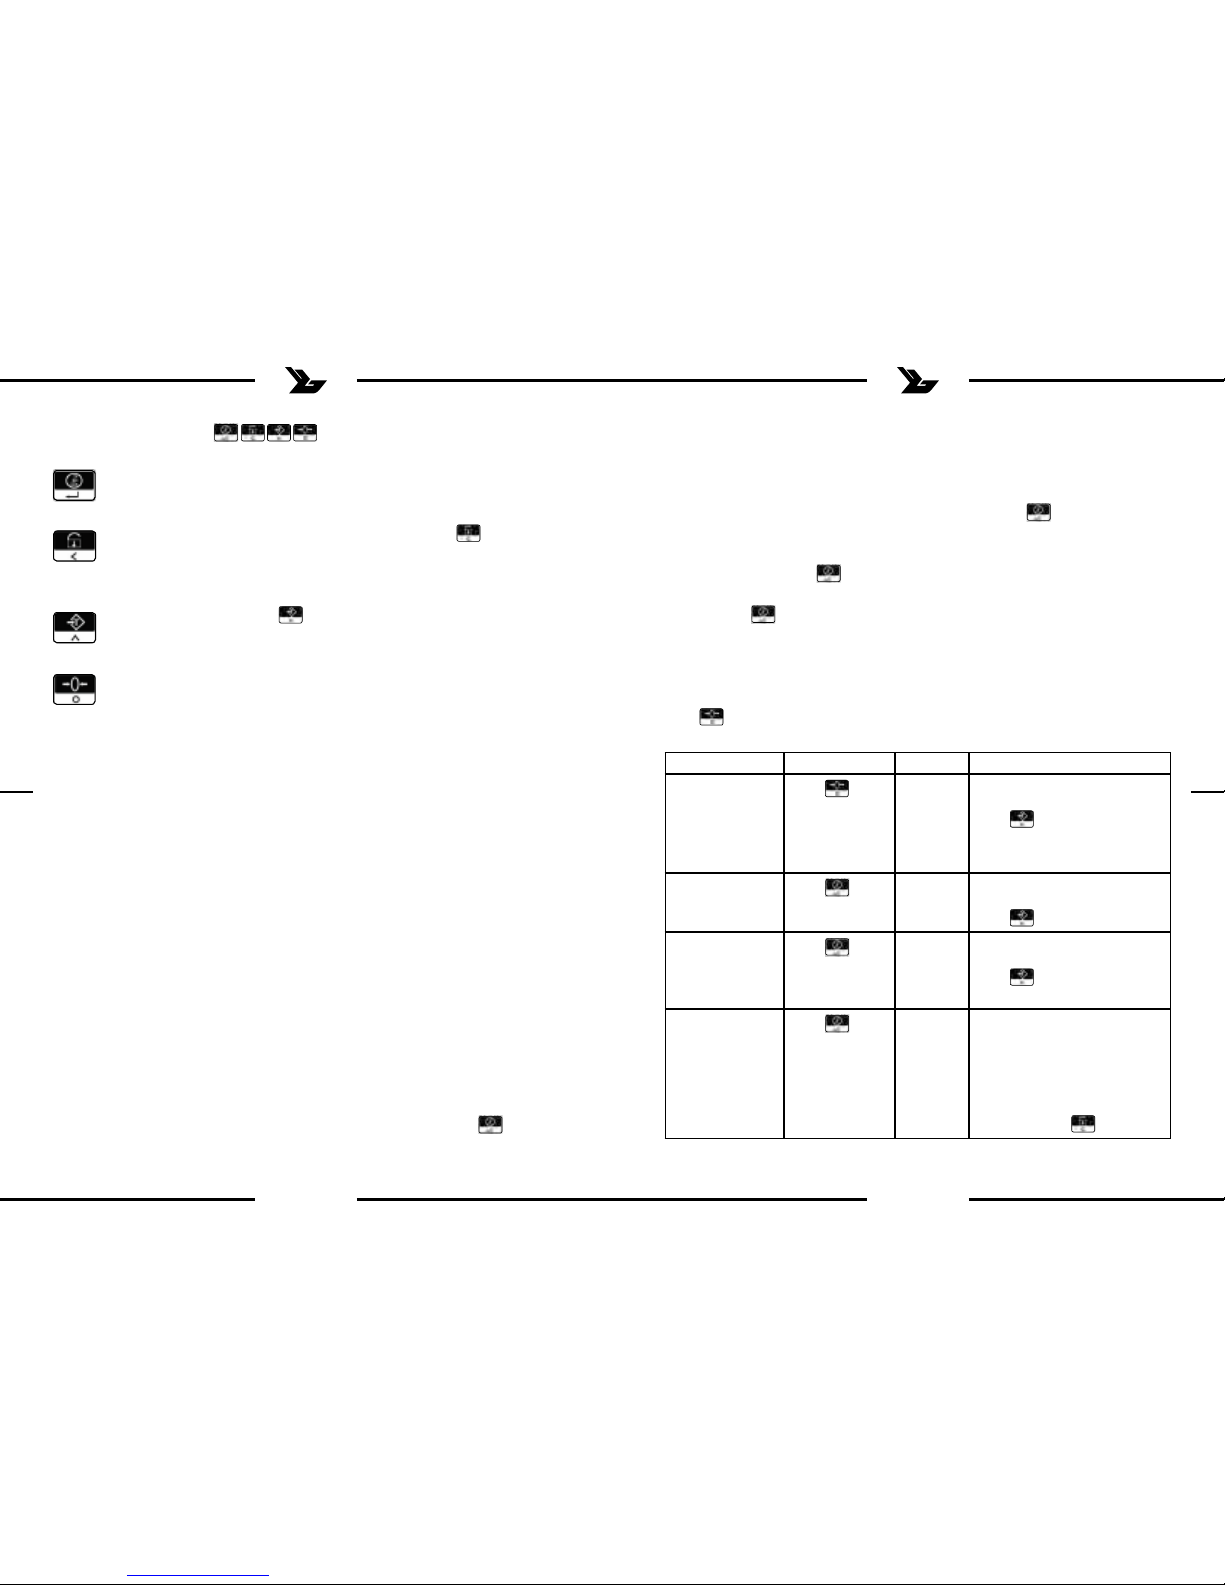
SET PARAMETERS
Press during self-check sequence from “99999” to “00000”
Function Operation Display Remarks
Division
Press during self-check
sequence from
“99999” to
“00000”
dS 1 0: Measured division
1: Selectable division
Press to change.
Sets buzzer
Press
bEE 1 0: Disable
1: Enable
Press to change.
Zero point drift
Press
to 1 0: Close
1: Activate
Press to change.
Switch off the
scale mode
Press
oFF 2 0: The scale will keep displaying.
1: The displaying window will go
into sleeping mode with stable
weighing value for 30 minutes.
It will be activated when the
displaying value is unstable or
by pressing the key.
5
EN
As presented on the panel, , are operating keys, of whose functions
are the following:
Use this key to add the load weight. It is also being used for forwarding
(scrolling forward only) the setup menu.
Press this key to keep the current displaying weight and the indicator
will switch on. Press the key again to turn off temporarily holding function.
For value input, press this key to circulate between desired values.
Press this key to tare and the indicator will switch on. Press the key
again to turn off temporarily tare function.
Press this key to zero the current displaying value.
LB/KG- When the red light is on, that means the unit is on KG. When the light
turns green, the unit is on LB.
4. BASIC OPERATIONS
POWER ON
Turn on the power switch at the back of the scale (“ON” position). The scale will
display the version number and then the maximum weight capacity individually for
approximately one second. Then the light will display “99999”,”88888”…….”00000”
alternately, followed by a self-check of reset sequences. During that process the
display will be blinking for some time. After this has stopped the display will show the
actual weight loaded to the hook. Now the crane scale is in accurate weighing mode.
INITIAL ON ZEROING
After switching the power on, the scale enters into weighing mode and then displays
“0”kg. If it is not “0’kg, it’s normally caused by overloading the permitted value of the
initial on zero range. In this case, please switch off the scale and re-start it and choose
the desired parameter. (Please see initial on zero Range below).
MANUAL ADDITION
When the displaying value is above zero, with weight on the scale, press key. The
current weighing value will be added to the total weight if within valid parameter.
(Please see “Set parameters”) The scale will show “bXXXX” for about one second.
Page 4
EN
7
EN
6
Function Operation Display Remarks
2: The scale will keep working
for 30 minutes with stable weighing value displayed and then
switches off automatically. Press
to change.
Addition condition
Press
AS 1 0: Adding allowed when unsta-
ble
1: Adding not allowed when
unstable
Press to change.
Sets units
Press
Unt 0 0: kg
1: lb
Press to change.
Initial on zero
range setup
Press
o 20 Percent of capacity
Press to change.
Clear
Press
CLEAr
Press to save clear operation then quit.
Press to quit without save.
POWER OFF
After the weighing operation, turn off the scale by using the power switch on the
back of the scale.
5. BATTERY CHARGING
It adopts maintenance-free rechargeable battery (6V/4.5Ah) and smart charger
(DC6V/1000mA).
The LOB indicator will be on if there is low power. The battery needs to be charged
now. The scale, however, can continue to operate for about 5 hours without charging.
After the LOB indicator is ON for several hours without charging or if the battery is
running low, the scale will be switching off automatically. It will take about 5 hours to
fully charge the battery.
After battery is fully charged, with a blank display, that indicates that either there is a
difculty in battery charging or a damaged battery. Please contact supplier for repair
or replacement.
To prolong the battery life, we suggest you charge the battery not less than once per
week. If the scale needs not to be charged for a long time, you should charge it not
less than once per week. To avoid any damage to the battery, please charge it correctly. Additionally, we suggest you switch off the scale in order to shorten the charging
time.
6. MAINTENANCE AND USE
Do not overload the scale in order to prevent damage to the force transducer inside
the scale.
Please check the scale frequently to insure safe use. The basic checking list contains:
• Whether the screw has come loose.
• Whether the hook or shackle or any other component is cracked or distorted.
• If the mechanical components showing signs of metal fatigue or defects.
• Whether the pin is off or the components are lost.
If there is any sign of the above mentioned conditions, please send the scale or components back to the manufacturer for repair or exchange before using the scale again.
Avoid any impact to the display panel.
Do not use the scale under wet or heavily polluted conditions.
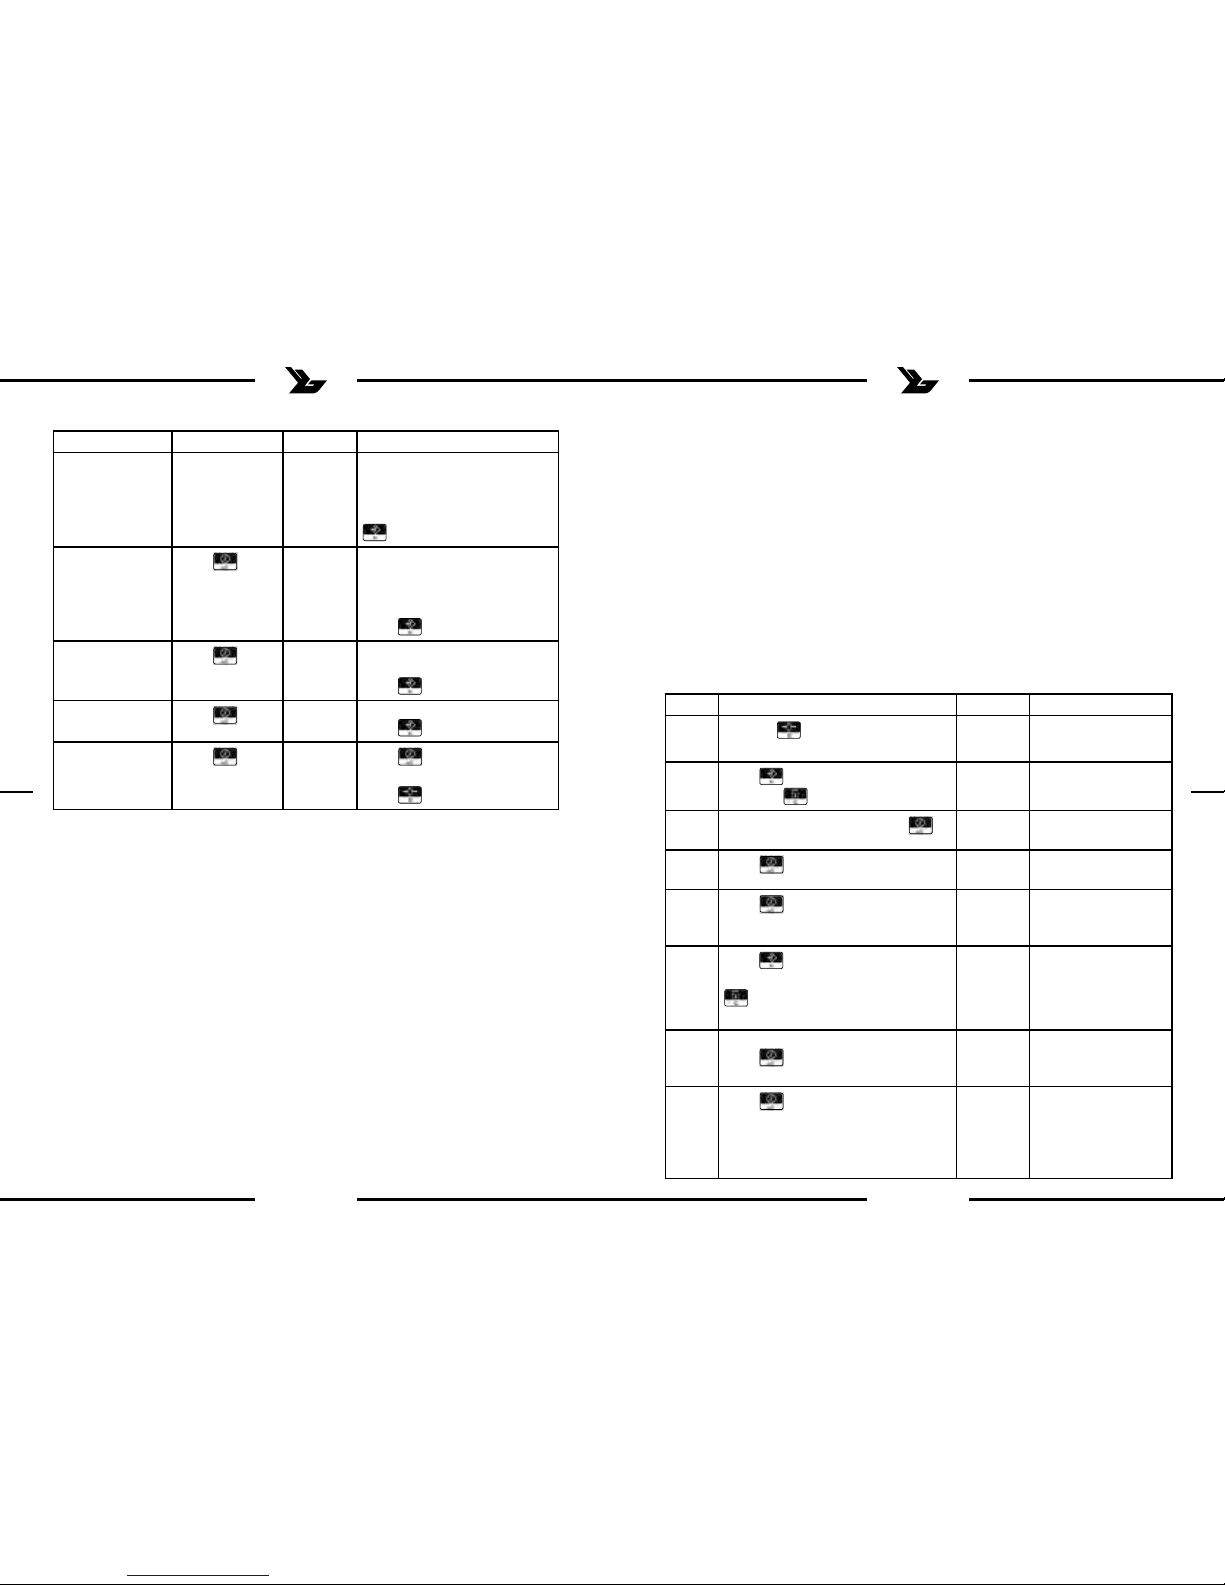
7. CALIBRATION
Steps Operation Display Remarks
1
Hold on
to switch on the scale
00000 1st step of calibration.
Password is required.
2
Press to select the desired number, press to shift digit
****** ****** is the pass-
word
3
After entering password, press
SPEN There should be no
load on the scale
4
Press
9500 9500 is the encode
when zeroing load
5
Press
00000 Wait until the codes
become stabilized and
press [ADD/INPUT]
6
Press to change to the desired
number for the standard weight, press
to shift digits
03000 03000 is the standard
weight of 3000kg to
be loaded.
7 After the standard weight is loaded,
press
77683 77683 is the encode
number of standard
weight - 3000kg.
8
Press
3000
Calibration is completed. The scale is in
weighing mode. The
current weight load is
displayed.
Page 5

EN
9
EN
8
NOTE:
1. Please make sure to wait until the encode is stabilized, then press .
Otherwise it will lead to incorrect weighing results.
2. Do not calibrate the scale without standard weight.
DIMENSIONS:
Model
[mm]
B G H L L1 L2 D1 Ф2 Фd ФF
SBS-KW-5TW 120 163 198 511 204 47 52 60 26 80
SBS-KW-10TW 135 181 206 589 239 66 52 70 36 98
8. WIRELESS REMOTE
GENERAL NOTES
After turning on power, if the upper display of the device indicates that the batteries
are empty, please recharge. After several seconds the remote control of the hoist
scale will shutdown automatically.
MAINTENANCE & SAFETY POINTS
Please avoid collisions, rain and humidity. Falling from height would damage the wireless remote seriously.
When the device is not used for a long time, please turn it off via switch at the back
of the device. Please do so in order to protect the battery. If you use the device daily,
there is no need to use the switch.
Messages:
“ YY-MM-DD ”
HH:MM:SS
If the device does not receive the correct weighing signal, please check power of hoist
scale end.
“ --OV-- ”
Shows overloading. If there is no weight on the scale and the display still shows the
overloading message, the down-lead from load cell to transmitter is linked wrong or
is even cut.
dC LL
After the power-on self-test, if the device displays the above message and the undervoltage sign lights up, it will shutdown automatically after two seconds. It shows that
the hand-held instrument’s batteries are empty and cannot be used normally. In that
case please recharge the device.
HOW HOIST SCALE WORKS
Put batteries in hoist scale and turn on the switch. The work indicator light will light
up, which shows that the scale is ready for operation.
Attention:
The scale shuts down automatically after one hour idle time. To use it again, it must
be turned off and turned on again via the switch.
Display functions:
After pressing “ON” button, the device will run the self-test. Once the self-test phase
is completed, the display will show current weight loaded on the crane scale
Attention:
If there is no signal, the device shuts down automatically in 30 minutes.
In condition of stable weighing data, without any operational and data changes within
30 minutes, the device shuts down automatically. To use it again, the device must be
turned on again.
Page 6

Symbol shows hand-held display receives signals accurately.
Symbol shows that weight loaded on the crane scale is stable. It also shows
that weight loaded on the crane scale can be accumulated (see Accumulation data for details).
Symbol shows that the scale body is in the state of zero, or press “
“so that the device displays zero.
Symbol shows that there is some data accumulated in the memory of the
remote. Symbol will disappear when data will be cleared.
Symbol shows Tare-function. The weight value will be the net weight.
Shows weighing unit is kg.
4. KEYBOARD FUNCTIONS
SYMBOL ICONS
Symbol shows the battery power, the longer the line is, the higher the
power is.
“ “
By pressing this key, either in weighing state or standby state, you can enter the function menu.
Press the key under menu or function setting to conrm.
Press “ OK ” button and go to menu F:
F 1 no function
F 2 no function
F 3 Date/time
F 4 no function
F 5 no function
F 6 no function
F 7 U 0 0 kg 1 lb
F 8 SN01 SN 00 see internal code, SN01, SN02.
F 9 P000 input the passwords 111 to go to menu S.
S 1 no function
S 2 dP 0 please select the decimal point among 0,1,2,3,4
S 3 full scale
F05000 to set the full capacity with 6 digits
S 4 no function
S 5 no function
S 6 modify the S menu passwords
“np”: input the original passwords; “op”: input the new passwords
S 7 no function
S 8 OFF 0
Power save mode
OFF 0 1: valid 0: invalid
S 9 function of changing the division value
“dd” 0 1:valid 0: invalid
“ V ”and “ ”
Pressing these keys will cause a change in the options of the menu. These keys are
also responsible for changing the numerical values, once inside the individual menu
positions. (For example: changing the individual numbers of the date and time.)
EN EN
1110
Page 7

EN
13
EN
12
“ ”
This key is designed for switching between the desired number to be set inside the
“date” and “time” menus.
“ C ”
When in the menu, press this button to go up one level in the menus. Repeatedly
pressing this button will bring the display into weighing mode.
“ →0← ”
Press this key to zero the current displaying value.
“ →T ”
Press this key to tare.
“ F ”
No function / not applicable.
“ ”
Pressing the key under weighing state can keep current data in memory (See accumulation operation for details)
“ ”
If have accumulation data, pressing this key can review accumulated weights and times
(See accumulation operation for details)
“ ”
Zero key
“ ”
Press this key to control the brightness.
Press this key to show “ b xx ”, where “ xx ” means the brightness level, which can be
adjusted by pressing keys “ V ”and “ ”, then press “ OK ” button to conrm.
“xx” means that the effective value ranges from 02~15. The higher the number, the
brighter it will be. As a result the power consumption will also increase.
“ ”
This button can clear accumulative data of the remote (See clear operation page for
details)
“ ON ”
Power on
“ OFF ”
Power off
“ ”
Tare key.
HOW TO TOTALIZE CURRENT WEIGHING DATA
Step 1: Hang the load on the scale
Step 2: Wait for data to be stabilized (displays stable symbol)
Step 3: Press “ ”
Step 4: Instrument will display “Total accumulative data” and “accumulative times”
ATTENTION:
Zero and minus weight cannot be accumulated.
Operate until stable symbol is displayed.
One weighing value can only be totalized for one time, cannot be repeated to accumulate.
Can totalize 99 sets of data, save and turn off.
In case of accumulating wrong data, it is only necessary to clear the last data. There is
no need to repeat the whole accumulation procedure.
HOW TO REVIEW RESERVED DATA
If there is a need to check the subsequent accumulative data, please adhere to the
following steps:
Step 1: Press “ ”
Displays “accumulative total weights”
Step 2: Press “ ” again
Displays “accumulative times”
Attention:
By pressing “ ”, the display will show the total weight and total times of accumulative actions. After 10 seconds the display will go back to normal, weighing mode.
When there is no accumulative data in memory, pressing “ ” will have no effect.
HOW TO CLEAR DATA
Clear: Single clear and total clear:
Single clear: Clear last weighing data.
Total clear: Clear all weighing data.
Page 8

EN
15
EN
14
Step 1: Press “ ”
Display: CLL 1
Step 2: Press “ V ”or “ ”
Convert last bit between 1 and 2
1 --- Single clear
2 --- Total clear
Step 3: Choose single clear or total clear
press “ ” to conrm.
Attention:
No data in memory, press “ ”, instrument displays “ no ”.
When display clear interface, press “ C ” to exit clear state.
SPECIFICATIONS
Interval Value: 1/2/5/10/20/50
Load cell excitation: DC 5V
Display ” OLED128 * 64 dot matrix display, adjustable brightness 15 levels
Battery: 4.8V/3.2AH nickel-hydrogen batteries, use for approximately 24 hours of
continuous work without charging. Charger: DC 6V1A
Environment temperature: Scale body -10⁰C~50⁰C; Instrument 0⁰C~40⁰C
Maximum wireless transceiver distance: 200 m (open area)
Radio frequency: 433MHz
LOW POWER SYMBOL OF BATTERIES
When hand-held display is in process of normal weighing, it will show “ L ” at the left
of the display.
L * * * *
Indicates transmitter batteries are in low power, need to be recharged.
The device can be used for another 30 minutes after low power, then the transmitter
shuts down automatically.
BATTERY SAFETY POINTS
When using the remote please follow the tips for use. This device is powered by a
rechargeable battery. When the battery is new, please discharge it by using the device
normally. After that, fully charge the battery. For best performance of the battery
please do so two to three times. If you want to use the battery for a long time, you
have to charge it before it completely runs out of energy.
Protect battery from water and short circuit as it will damage the battery.
If the connectors of the battery are being short circuited so the battery will be damaged. If the device is not being used for a long time, please charge every three months.
CHARGER USE
3 indication states of charger:
Power on 230V, indicator light is green.
In charging, indicator light is red.
Charging full, indicator light is green.
Attention:
The charger automatically turns into low ow state in order to protect battery. To
prolong life of battery, after it is fully charged, you may as well take out the battery.
CHARGING INDICATOR
Charging indicator of hand-held display
When the “ low-power ” symbol is shown on hand-held display, the device needs to
be charged. Please do so immediately.
When the symbol of “low power” lights up, the instrument can be used for another
15 minutes. After that it will shut down automatically.
Charging method of hand-held display
Please use charger along with the scale, using other chargers may cause damage to
the instrument and battery.
Batteries take 5-7 hours to be fully charged. After being fully charged, the charger will
automatically turn into small ow state.
9. INSTRUCTION OF INFRARED CONTROLLER
Remote control & usage is the same with the scale body buttons.
(the controller is powered by AAA battery)
Page 9

1716
NOTES NOTES
Page 10

NOTES
18 19
DE
Hiermit bestätigen wir, dass die hier in dieser Anleitung aufgeführten Geräte
CE-konform sind.
EN
We hereby certify that the appliances listed in this manual are CE compliant.
FR
Par la présente, nous conrmons que les appareils présentés dans ce mode d´emploi
sont conformes aux normes Ce.
PL
Niniejszym potwierdzamy, że urządzenia opisane w tej instrukcji są zgodne z
deklaracją CE.
IT
Con la presente documentazione si certica che i dispositivi descritti all´interno del
manuale sono conformi alle vigenti norme CE.
ES
Por la presente conrmamos que los dispositivos detallados en este manual son
conformes con las normativas de la CE.
NOTES
Page 11

www.steinbergsystems.de
Hersteller an Verbraucher
Sehr geehrte Damen und Herren,
gebrauchte Elektro- und Elektronikgeräte dürfen gemäß europäischer Vorgaben [1] nicht zum unsortierten Siedlungsabfall
gegeben werden, sondern müssen getrennt erfasst werden. Das Symbol der Abfalltonne auf Rädern weist auf die Notwendigkeit
der getrennten Sammlung hin. Helfen auch Sie mit beim Umweltschutz. Sorgen Sie dafür, dieses Gerät, wenn Sie es nicht mehr
weiter nutzen wollen, in die hierfür vorgesehenen Systeme der Getrenntsammlung zu geben.
In Deutschland sind Sie gesetzlich [2] verpichtet, ein Altgerät einer vom unsortierten Siedlungsabfall getrennten Erfassung
zuzuführen. Die öffentlich - rechtlichen Entsorgungsträger (Kommunen) haben hierzu Sammelstellen eingerichtet, an denen
Altgeräte aus privaten Haushalten ihres Gebietes für Sie kostenfrei entgegengenommen werden. Möglicherweise holen die
rechtlichen Entsorgungsträger die Altgeräte auch bei den privaten Haushalten ab.
Bitte informieren Sie sich über Ihren lokalen Abfallkalender oder bei Ihrer Stadt- oder Gemeindeverwaltung über die in Ihrem
Gebiet zur Verfügung stehenden Möglichkeiten der Rückgabe oder Sammlung von Altgeräten.
[1] RICHTLINIE 2002/96/EG DES EUROPÄISCHEN PARLAMENTS UND DES RATES
ÜBER ELEKTRO- UND ELEKTRONIK - ALTGERÄTE
[2] Gesetz über das Inverkehrbringen, die Rücknahme und die umweltverträgliche Entsorgung
von Elektro- und Elektronikgeräten (Elektro- und Elektronikgerätegesetz - ElektroG).
Umwelt- und Entsorgungshinweise
CONTACT
emaks spółka z ograniczoną
odpowiedzialnością sp.k.
Ul. Dekoracyjna 3
65-155 Zielona Góra
Nr. kom.: +48 506 06 05 74
E-mail: info@emaks.pl
www.expondo.de
Po zakończeniu okresu użytkowania nie wolno usuwać niniejszego produktu poprzez normalne odpady komunalne, lecz należy
go oddać do punktu zbiórki i recyklingu urządzeń elektrycznych i elektronicznych. Informuje o tym symbol, umieszczony na
produkcie, instrukcji obsługi lub opakowaniu.
Zastosowane w urządzeniu tworzywa nadają się do powtórnego użycia zgodnie z ich oznaczeniem. Dzięki powtórnemu użyciu,
wykorzystaniu materiałów lub innym formom wykorzystania zużytych urządzeń wnoszą Państwo istotny wkład w ochronę
naszego środowiska.
Informacji o właściwym punkcie usuwania zużytych urządzeń udzieli Państwu administracja gminna.
For the disposal of the device please consider and act according to the national and local rules and regulations.
 Loading...