

Page 1
Networking
Page 2

Cristina Bachmann, Heiko Bischoff, Marion Bröer, Sabine Pfeifer
The information in this document is subject to change without notice and does not represent a commitment on the part
of Steinberg Media Technologies GmbH. The software described by this document is subject to a License Agreement
and may not be copied to other media except as specifically allowed in the License Agreement. No part of this publication may be copied, reproduced or otherwise transmitted or recorded, for any purpose, without prior written permission
by Steinberg Media Technologies GmbH.
All product and company names are ™ or ® trademarks of their respective owners. Windows XP is a trademark of
Microsoft Corporation. Windows Vista is either a registered trademark or trademark of Microsoft Corporation in the
United States and/or other countries. The Mac logo is a trademark used under license. Macintosh and Power Macintosh
are registered trademarks.
Release Date: September 14, 2007
© Steinberg Media Technologies GmbH, 2007.
All rights reserved.
Page 3

Table of Contents
Page 4

5 Networking
6 Introduction
6 What can I use the Networking functions for?
6 About the technology
7 Getting started - selecting a user name and basic
procedure
9 Setting up a network
11 Sharing projects
17 Joining projects
19 Working with shared projects
22 Chatting with other users on the network
22 Opening projects with network settings
22 The Network dialogs
25 Index
4
Table of Contents
Page 5

Networking
Page 6

Introduction
About the technology
This document describes how you can use Nuendo’s networking technology to collaborate with other users of Nuendo in a peer-to-peer network.
The “owner” of a project can share it with any number of
users via LAN (Local Area Network) connections and/or
WAN (Wide Area Network) connections via standard network protocols.
This allows several separate users to work on a project simultaneously and coordinate their efforts, as well as exchange ideas and suggestions.
Using Nuendo to collaborate in a network requires that:
• All users have the same version of Nuendo.
• All computers are either connected via LAN or via the Internet
through IP addresses.
What can I use the Networking functions for?
The networking technology in Nuendo allows collaboration
with, and exchange of, MIDI, video and audio data – i.e. it
is possible to exchange and edit MIDI, video and audio.
Marker and Instrument tracks are also included in a shared
project. As of this writing, it is not possible to exchange
any mixer settings.
Even though the networking technology allows for collaboration via WAN connections over the Internet, it is primarily designed for use in a LAN workgroup.
If you intend to use it for collaboration over the Internet,
bear in mind that communication is considerably slower
over the Internet, and that there are also other factors
(such as security issues and firewall problems) involved
which can complicate matters (see below).
In addition to TCP/IP, the Nuendo networking technology
uses the standard network protocol UDP (User Datagram
Protocol - primarily used to broadcast messages over a
network).
Since the technology uses the standard protocols and
calls of the operating system, no special hardware or drivers are required to use it, aside from a working NIC card.
Nuendo uses three ports in your system for establishing
communication, broadcasting messages and transferring
data between users: UDP port 6990, TCP port 6991 and
TCP port 6992. These ports need to be open for network
communication to be possible.
Considerations for Internet use
As previously mentioned, the Nuendo networking technology is designed mainly for use in local area networks, but
it is also possible to use it over the Internet.
If you intend to use it for collaborating with other users
over the Internet however, there are a few things to keep in
mind and some system settings you may need to make:
• If a network is to be created with any users connected
via the Internet, all users need to know the respective IP
addresses of the other computers in the network, and use
these to establish the connection.
See “Setting up WAN connections” on page 9 for details about how to
use the IP address of a computer to establish network communication
with it in Nuendo.
• There may also be issues that need to be resolved regarding firewalls and/or computers connected to the Internet via private subnets. If a computer is protected by a
firewall or is in a subnet, the user may need to perform the
actions described below.
If your computer is behind a firewall
In a LAN, Nuendo uses the UDP port 6990 to establish
communication with the other computers. Over the Internet however, Nuendo does not use this port. Instead, connection and communication is established and handled via
TCP/IP messages sent to the TCP ports 6991 and 6992.
6
Networking
Page 7
This means that the TCP ports 6991 and 6992 must be
open on all computers. Firewalls may block messages to
these ports, thus making connection impossible. Consult
the documentation for your firewall (or operating system)
for information about how to open ports – or contact your
network administrator.
If your computer is in a subnet that uses NAT
If your computer resides in a subnet that uses NAT (Network Address Translation), all computers in the subnet
share the same external IP address, while the individual
computers in the subnet have internal IP addresses.
In this case, you must set up a port mapping from the external ports 6991 and 6992 to your internal ports 6991
and 6992 - i.e. the actual ports on your computer, as opposed to the ports of the subnet.
If computers are in different NAT subnets
If you want to collaborate with users whose computers reside in different subnets that use NAT (see above), it
might be a good solution to set up a VPN (Virtual Private
Network). A VPN allows secure communication between
networks, using the Internet for transferring data.
It is beyond the scope of this document to go into any details on how to set up a VPN, but make sure that your VPN
will act as a single network and that the ports 6991, 6992
and, if possible, 6990 are open.
Getting started - selecting a user name and basic procedure
The following is a quick summary of how to use Nuendo’s
networking technology - how to enter a user name, and
the basic procedure for sharing a project with other users.
In other words, it’s a quick guide for getting down to business and sharing a project, but you will probably want and
need to read the rest of this document as well for more indepth descriptions of procedures and functions.
When your computer meets the criteria for communicating
with other computers (see above), this is how you quickly
go about establishing network communication and share a
project with others:
1. Launch Nuendo.
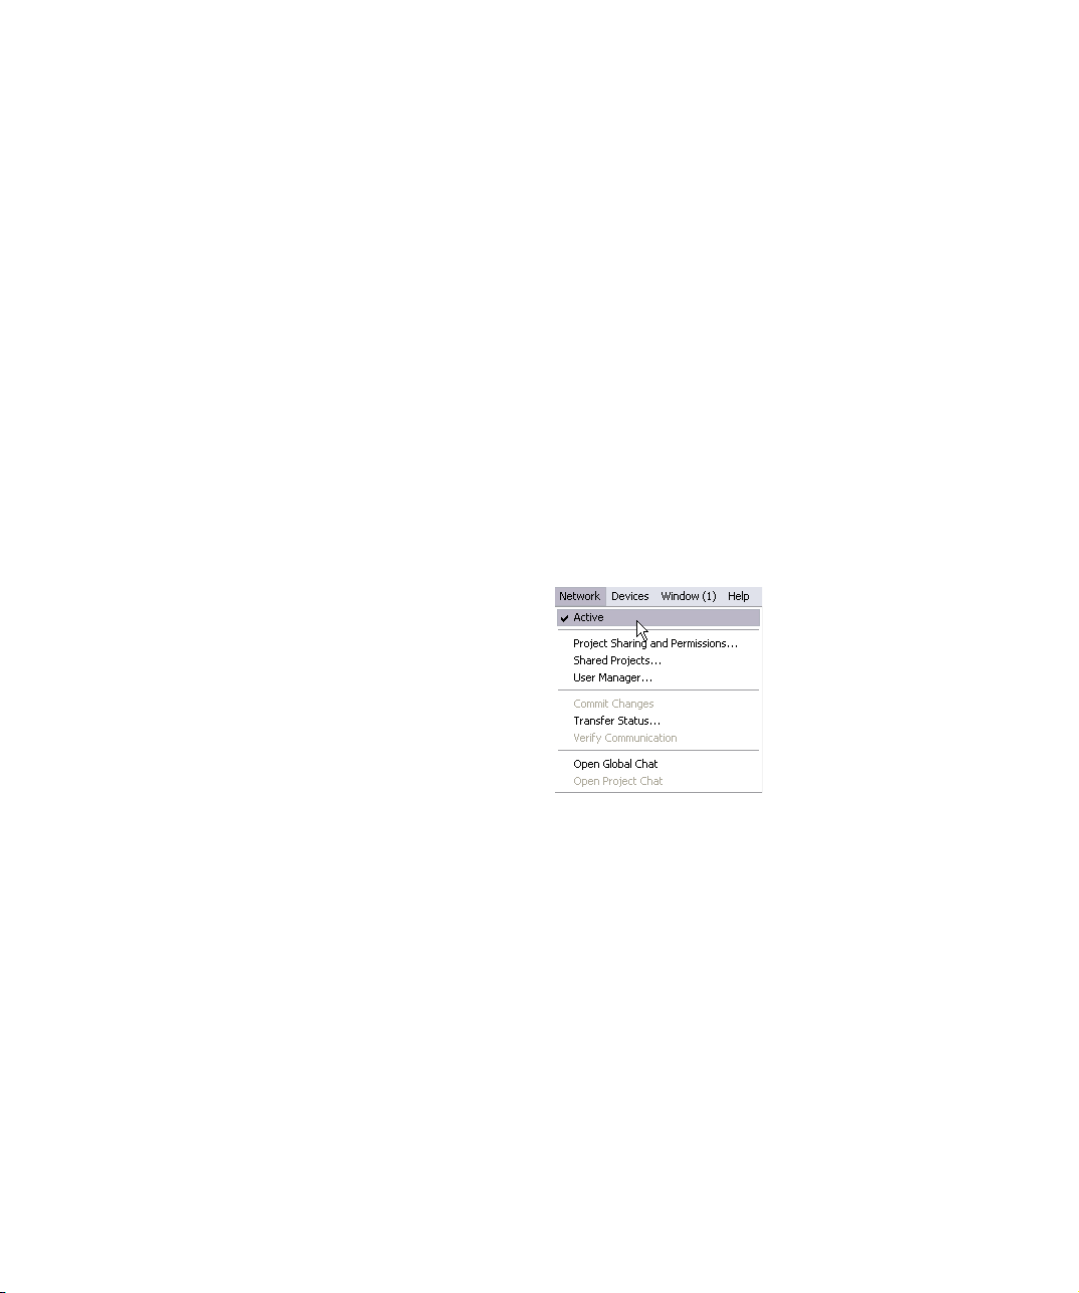
2. Activate the network by opening the Network menu
and checking the “Active” item.
This establishes network communication and introduces your computer
to any computers already present in the network. Your computer now
needs to have a unique ID for identification (see below).
3. A dialog opens in which you can enter a unique user
name to identify your computer in the network.
This is the name that will be displayed in all the network dialogs to identify you to the other users in a network.
Ö Each user in a network must specify a user name, or
network name, in order to be identified in the network.
You can also change the name later (see “Selecting a user name - alter-
native method” on page 8).
7
Networking
Page 8
4. Click “Yes” to enter your user name.
A dialog opens in which you can enter your user name.
• If you don’t enter a user name at this point, the network
will not be activated.
5. Click in the text box, type in a name of your choice and
click “OK”.
If the network has already been created, the original creator - or administrator - may have already decided on user names for all participants. If so,
ask the administrator if a name already exists for you and enter that. See
“Creating a permission preset” on page 11 for more information about
selecting user names for other participants.
Ö If a name you enter is already in use for another computer in the network, you will be prompted to select another name.
6. When you have entered a user name, load or create a
project that you want to share with the other users.
7. Open the “Project Sharing and Permissions” dialog
from the Network menu and activate the “Share Project”
option.
The project is now shared and all other users have full access to it. See
“Sharing projects” on page 11 for more details about sharing projects
and what you can do in this dialog.
Now everyone can collaborate on the project, contribute
new tracks, edit existing data and commit the changes to
the other users.
The above procedure is a short and sweet summary of the
basic usage, but the Nuendo networking technology offers
far more options. For instance, you can specify which users in a network should have access to a project, whether
they should have complete access or only partial access,
and much more.
On the following pages we will also describe how to join
projects shared by others, and describe in detail how you
go about working with shared projects.
Selecting a user name - alternative method
As previously stated, each user in a network needs to
specify a unique user name, or network name, in order to
be identified in the network.
If you didn’t specify a user name or if you need to change
it, proceed as follows:
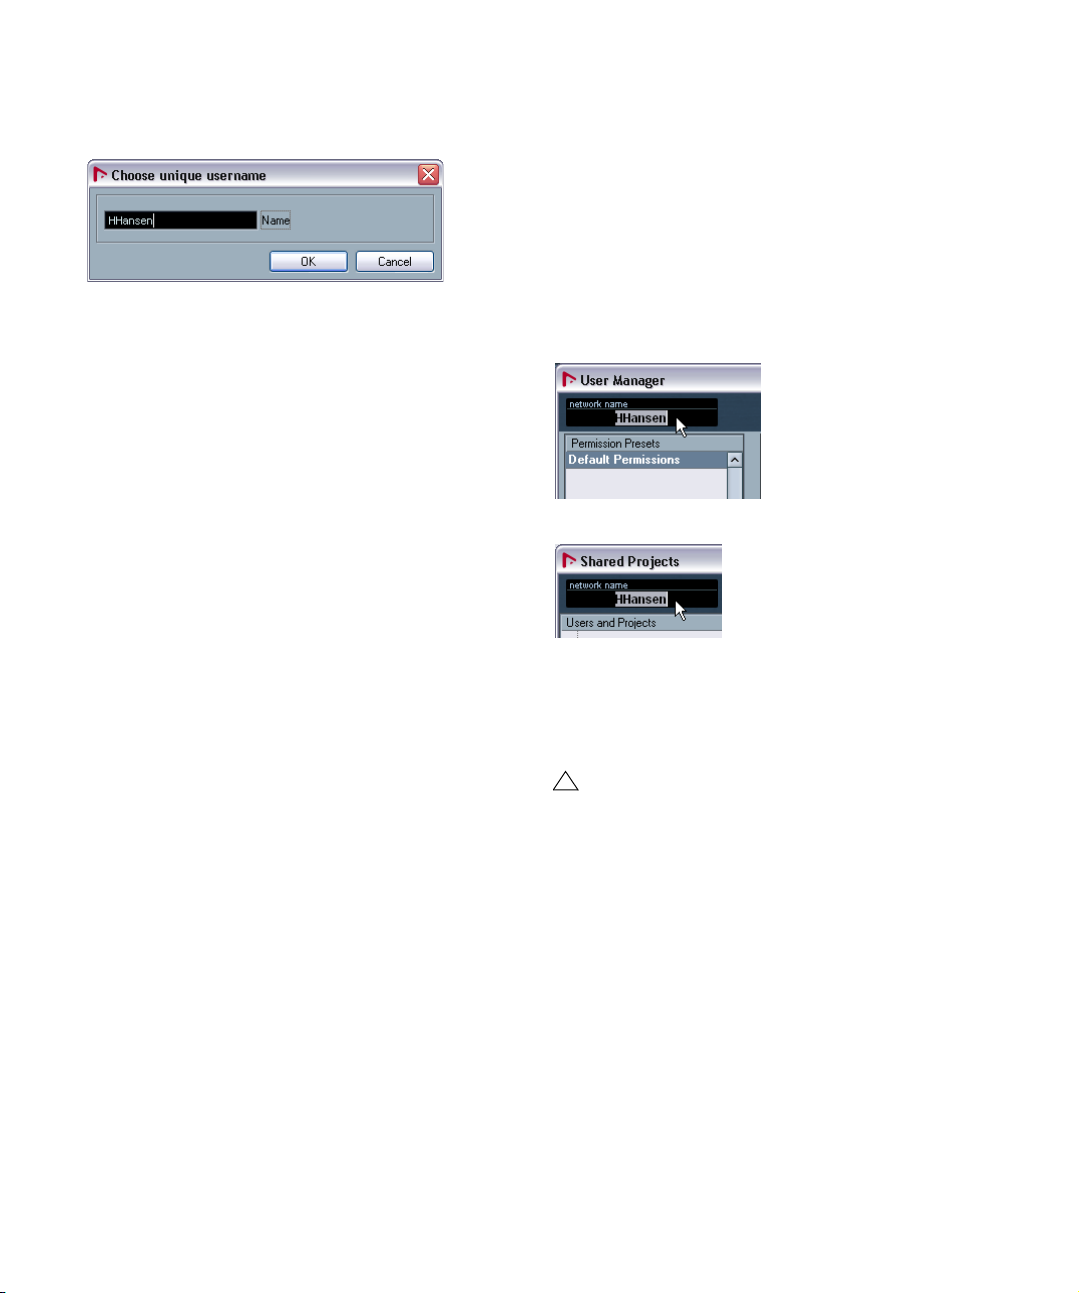
1. Open either the User Manager dialog or the Shared
Projects dialog from the Network menu.
In the top left corner of both dialogs you will find the Network Name text
field.
Entering a network name in the User Manager dialog…
…and in the Shared Projects dialog.
2. Click in the text field, type in a name of your choice
and press [Return].
This is the name that will be displayed in all the network dialogs to identify you to the other users in a network.
!
Note that the following user names are reserved and
can’t be used: “Guest”, “Administrator”, “Admin” and
“Anonymous”.
Once you have entered a user name and this has been established in the network, it shouldn’t be changed unless
absolutely necessary! To use an analogy, this is similar to
registering for an Internet service or discussion forum –
once you have registered under a specific name, you can’t
log in under another name, unless you create a new account.
8
Networking
Page 9

Setting up a network
The following is a description of how to set up a network
with both LAN and WAN connections.
• For LAN connections, all computers must be part of the same
network and communicate properly.
•
For WAN connections, all computers must have a working Internet connec
If your intended network meets these criteria, follow the
procedures described below to set things up.
tion and a public IP address.
2. Open the Shared Projects dialog from the Network
menu.
3. Click the “Add WAN Connection” button in the toolbar.
A dialog appears, requesting the Domain Name or the IP address of the
computer you want to connect to. In other words, you either need to
know the user’s IP address or its Domain Name.
Setting up LAN connections
If you want to connect to other users via a LAN, you only
have to make sure all computers actually use the same
LAN, that they are communicating properly via the TCP/IP
protocol, and that you have activated the network by
checking the “Active” item on the Network menu (see below). If the computers are unable to communicate, contact
your network administrator, or consult the network documentation for your operating system.
Setting up WAN connections
If you want to connect to other users over the Internet, you
have to open a WAN connection to each. This requires
that all users have a working Internet connection and a
public IP address. See “Considerations for Internet use”
on page 6 for information about potential problems with
Internet connections and how to remedy them.
WAN connections are set up in the Shared Projects dialog in the following way:
1. Make sure the “Active” item on the Network menu is
checked.
This initiates network communication with the other participants.
The “Add WAN Connection“ button.
4. Type in the IP address/Domain Name of the computer
you want to connect to and click OK.
An item called “Global IP Network” now appears in the dialog. This lists
either the IP
domain name of its Intern
address of the computer to which you have connected, or the
et service provider.
5. Repeat this procedure for every user you want to connect to over the Internet.
Ö Note that if a computer is dynamically allocated an IP
address by its Internet service provider – as opposed to
having a permanent IP address – you will have to repeat
the above procedure each time the computer receives a
new IP address!
• You can remove a WAN connection by selecting it and
clicking the “Remove WAN Connection” button.
The “Remove WAN Connection” button.
• You can remove the entire “Global IP Network” item by
selecting it and pressing [Delete] or [Backspace].
This will also remove any existing WAN connections.
9
Networking
Page 10

Should you be unable to establish a WAN connection, first
verify that you entered the IP address correctly. Connection problems may also occur for the following reasons:
• Your computer and/or the computer you’re trying to
connect to is protected by a firewall.
See “Considerations for Internet use” on page 6 for more information
about how to resolve firewall problems.
• Your computer and/or the computer you’re trying to
connect to doesn’t have the necessary ports open.
See “Considerations for Internet use” on page 6 for information about
which ports need to be open for network communication.
Updating the network information
If all users in a network are online and have entered user
names (see “Getting started - selecting a user name and
basic procedure” on page 7), you can do the following to
update the network information in Nuendo:
• Open the Shared Projects dialog and click the “Rescan
Network” button to update the network information.
At this point, the following will happen:
• The item “Users in Local Network” should be updated to dis-
play a list of all the online users connected via LAN, along with
their user names.
• The item “Global IP Network” should be updated to display a
list of all the online users connected via WAN, along with their
user names.
If the user list isn’t updated as it should, this is probably
because the computers in the network aren’t communicating properly, see above.
Ö Information about users that are offline will not be updated.
Verify Communication
Whenever project information needs to be updated over
the network, Nuendo will first check if the connection with
all project participants is still working. This check is performed in the background with a preset timeout period.
When participants do not respond within this timeout period, a “Commit Failed” message is displayed. At this
stage, no further action is performed, as the problem
might be temporary (e.g. Laptop unplugged). If the problem persists, however, you can call the “Verify Communication” function via the Network menu.
When this function is called, a dialog shows the progress
of the checking process.
• When all project participants are found, a dialog will be
shown listing all project participants and their response
times (i.e. the time it took for their computers to respond to
the check). If the response times were longer than the standard threshold, or if a participant was not found who you
know is in fact online and waiting for network information,
you may want to click on Adjust timer. This will change the
timeout threshold in Nuendo to a longer setting, allowing
for participants with slower response times to be found.
• If project participants are not found because they are
offline, a dialog will be shown allowing you to remove
these users from the workgroup.
10
Networking
Page 11

Transfer Status
Transfer of network data always is performed in the background. If you want to check on the progress of you transfer processes, you can open the Transfer Status window
by pulling down the Network menu and selecting “Transfer Status…”.
As you upload or download project data, the Transfer Status window displays progress bars for every track in the
project. The Transfer Status window features Cancel buttons for each of the transfer operations. Use these if you
want to stop any transfer operation.
Sharing projects
The following is a description of how to set up things up in
order to share a project you have created with other users.
When you want to share a project with others, you first
decide which users you want to have access to the project,
and then specify their read and write permissions.
To set up a list of users and their read and write permissions, you have the following possibilities:
• You can create a permission preset containing all the
settings.
Storing permission presets is practical since they let you quickly and
easily apply the same list of users and their permissions to future
projects.
• You can set up users and their permissions manually for
each project.
This method also allows you to specify permissions for separate tracks in
a project, as opposed to the entire project.
• Alternatively, you can let all the participants in a network
have access to a project, in which case you don’t have to
make any special permission settings, but instead use the
“Default Permissions”.
See “About the Default Permissions preset and the Guest user” on page
13 for more information.
We will first describe all of these methods here, and then
proceed to describe how you go about sharing a project.
Creating a permission preset
In the User Manager dialog, read and write permission
settings for us
These can then be applied to other projects, i.e. the users
will automatically get read and write permissions according to the settings stored in the permission preset.
• Read permission allows users to view and play back
shared projects or tracks but not make any changes to
them.
• Write permission allows users to make any changes to
shared projects or tracks.
It is not possible to have write permission without also having read permission.
11
Networking
ers can be stored in permission presets.
Page 12

When creating a permission preset, there may generally
be two kinds of situations:
• Users have been established in the network and are online.
• Users are offline and have not been established in the
network.
The following procedure describes how to create a permission preset for a combination of the two situations
above:
1. Open the User Manager dialog from the Network
menu.
2. Click the plus sign below the “Permission Presets”
column.
A dialog appears, allowing you to name the permission preset to be created.
3. Type in the desired name and click “OK”.
The permission preset is created and added to the list.
However, there may also be instances when you want to
add a user who is offline and hasn’t been established in
the network. In such a case that user isn’t available in the
User Pool list, but you can still add this user to a permission preset in the following way:
4. Click the plus sign below the “User Pool” column.
A user with a generic name – “User #” – is added to the list.
5. Double-click the generic name and type in the desired
name.
The user you’re adding may have decided on a user name and entered it,
as described on “Selecting a user name - alternative method” on page 8,
but has been offline and therefore not yet established in the network. In
this case, you can enter that name if you know it. Otherwise, enter a
name of your own choice and later let the user know which name to use.
The next step is to add users to the permission preset.
6. Make sure the preset is selected in the “Permission
Presets” column.
7. In the “User Pool” column, select the user(s) you want
to add to the permission preset.
To select several users, hold down [Shift] or [Ctrl]/[Command] and click
on the user names.
8. When you have selected the user(s) you want to add,
click the Arrow symbol to the left of the “User Pool” column.
The users you selected will now be added to the “User” column in the
middle of the dialog.
The “User Pool” column to the right lists all the users who
have entered a user name and at some point have been
online and established in the network. Regardless of
whether they are currently online or offline, they are still
listed.
Networking
12
Page 13

The next thing to do is to define the read and write permissions for the added users:
9. In the Read and Write columns, the read and write
permissions for each user can be specified. By default
each added user has both read and write permission. If
you don’t want a user to have read or write permission,
make sure the corresponding column is unchecked by
clicking in it.
Note that having write permission automatically means to also have read
permission.
• If “Guest” is added to a permission preset, anyone in
the network can utilize the Guest permissions.
I.e. if you share a project and have Guest as a user, anyone in the network can join it and have the read and write permissions specified for the
user “Guest”.
Ö If you want to share a project with everyone in a network and let everyone have both read and write permission for the entire project, the easiest and quickest way to
do this is to use the De
fault Permissions preset as is.
Setting up users and permissions manually
Instead of creating a permission preset in the User Manager dialog, you can use the “Project Sharing and Permissions” dialog to manually set up which users should be
allowed to share a project, and what read and write permissions they should have.
10. When you have added the desired users and specified
their read and write permissions, the preset is complete.
The permission preset will now be available for use. See “Loading a per-
mission preset” on page 15 for information on how to utilize a saved per-
mission preset.
Permission presets apply to entire projects – i.e. when a
permission preset is loaded, the read and write permission
settings in it are valid
ever also specify permissions sepa
for the entire project. You can how-
rately for each track, see
“Setting up permissions for separate tracks” on page 14.
Ö Note that it is also possible to create a permission preset in the Project Sharing and Permissions dialog, see
“Saving the settings as a permission preset” on page 14.
Removing permission presets and users
Below each column to the right is a Remove button (the
trash icon). You can remove one or several permission
preset(s) or user(s) (including the “Guest” user – see below) from the respective columns by selecting them and
clicking this icon.
About the Default Permissions preset and the Guest user
The “Default Permissions” preset cannot be removed. You
can however use it either as is, or you can modify it as you
wish by adding and removing users. By default, it contains
one user – “Guest” – with both read and write permission.
Ö You can also save the permission settings you make in
this dialog as a permission preset (see “Saving the set-
tings as a permission preset” on page 14). However, un-
like in the “User Manager” dialog, it is not possible to add
users who have not yet been established in the network
(see “Creating a permission preset” on page 11).
Proceed as follows:
1. Open the “Project Sharing and Permissions” dialog
from the Network menu.
13
Networking
Page 14

2. In the “All Users” column to the right, select the
user(s) you want to share the project with.
All users in the network that have entered user names and are established in the network are listed, along with the default “Guest” user (see
“About the Default Permissions preset and the Guest user” on page 13).
To select several users, hold down [Shift] or [Ctrl]/[Command] and click
on the user names.
3. When you have selected the user(s) you want to share
the project with, click the Add User button above the column (the left button).
The selected users are added to the “User Name” column above the “All
Users” column.
• To remove a user, select the user name in the “User
Name” column and click the Delete User button below the
column (the right button).
The user is removed from the “User Name” column. You can remove several
users at once. You will probably want to remove the “Guest” user if
you don’t want ev
eryone in the network to have full access to the project.
4. In the “Project & Tracks” column, make sure the top
item (the project name) is selected.
This way, the settings you make affect the entire project, rather than separate tracks.
Saving the settings as a permission preset
If you have manually added users and set up their read and
write permissions for the project in the “Project Sharing and
Permissions” dialog as described above, you can create a
permission preset based on the settings you have made:
1. Click the plus sign to the left of the “Permission Presets” menu in the bottom right corner.
A dialog appears, allowing you to enter a name for the permission preset.
2. Type in the desired name and click “OK”.
The permission preset is saved and added to the menu. You can now
also access this preset in the “User Manager” dialog, as described in the
section “Creating a permission preset” on page 11.
Setting up permissions for separate tracks
The “Project Sharing and Permissions” dialog also offers
the possibility of specifying read and write permissions
separately for each track in the project, if you so wish.
To make permission settings on a track basis, do the following:
1. In the “Projects & Tracks” column, select the track(s)
for which you want to make separate settings.
As you can see, the right part of the dialog now only contains a checkbox
and the text “Override Project Permissions”.
5. Define the project read and write permissions for the
added users, by checking and unchecking the Read and
Write permission columns (“r”, “w”) as desired.
Note that having write permission automatically means also having read
permission.
The settings you have now made are valid for the entire
project. However, this dialog also allows you to specify
read and write permissions separately for each track, as
opposed to the entire project. This is described on “Set-
ting up permissions for separate tracks” on page 14.
Networking
2. Activate the “Override Project Permissions” option.
The dialog changes again, and in the left column, you can see that the
text “Uses Project Permissions” for the track(s) has now been replaced
with the text “Overrides Project Settings” in red.
3. Add users and specify their read and write permissions for the track(s) as described in the section “Setting
up users and permissions manually” on page 13.
4. When you are done, select the top item (the project
name) in the “Project & Tracks” column again.
14
Page 15

Note that permission settings for separate tracks are not
saved in a permission preset. You can however use permission presets in conjunction with separate track permissions, by first loading a preset with the project permissions
(see “Loading a permission preset” on page 15) and then
making settings for separate tracks.
Ö It is also possible to make separate track permissions
in the project Inspector. Selecting a track in the Track list,
opening the Network section in the Inspector (this section
is hidden by default, see the chapter “Customizing” in the
Operation Manual) and clicking the “Override Project Permissions” button (the key symbol) makes it possible to
make read and write permission settings for the track directly in the Inspector.
Loading a permission preset
As previously mentioned, a permission preset contains information specifying which users should be allowed to
share a project and their read and write permissions for it.
To load a permission preset for the active project, proceed
as follows:
1. Open the “Project Sharing and Permissions” dialog
from the Network menu.
2. In the bottom right corner of the dialog, click anywhere
in the text box to open a pop-up menu.
The menu lists all available permission presets.
3. From the menu, select the permission preset you wish
to use.
As you can see, the users defined in the permission preset are now listed
in the User Name column, and their read and write permissions are displayed.
You can now either use the settings of the loaded permission preset as they are for the shared project, or you can
make manual adjustments on a project or track basis (see
“Setting up users and permissions manually” on page 13).
Sharing a project
When you have set up all the users and their permissions –
i.e. loaded a permission preset and/or manually added
users and specified their permissions for this particular
project – it’s time to actually share the project.
This can be done in the following ways:
In the “Project Sharing and Permissions” dialog
1. If it is not already active, activate the network by checking the option “Active” on the Network menu.
2. Open the “Project Sharing and Permissions” dialog
from the Network menu.
15
Networking
Page 16

3. Activate the “Share Project” option.
The project is now shared and available to the users you have specified.
• To revoke sharing of a project, select it in the “My
Shared Projects” folder and click the “Unshare Selected
Project” button.
• To revoke sharing of the project, deactivate the “Share
Project” option.
• You can at any time make changes in this dialog, i.e.
add or remove users and change permissions, and then
update the shared project accordingly for all users by
making the desired changes and clicking the “Commit”
button.
Quick Sharing
Ö If you just want to share a project with full read and
write access for every user in the network without loading
any permission preset or manually setting up users, the
easiest way to do this is to click the “Share Project” button
on the Project window toolbar (or activating “Share
Project” in the “Project Sharing and Permissions” dialog) .
This is provided you haven’t made any changes to the “Default Permissions” preset. The reason is that the default permissions (with only the
user “Guest”) grant all users full access (see “About the Default Permis-
sions preset and the Guest user” on page 13).
In the “Shared Projects” dialog
1. If it is not already active, activate the network by checking the option “Active” on the Network menu.
2. Open the “Shared Projects” dialog from the Network
menu.
3. Click the “Share Active Project” button.
This will open the “Project Sharing and Permissions” dialog, to let you
verify that all permissions are OK before sharing. You can then share the
project in the dialog as described above. When the active project is
shared, it appears in the “My Shared Projects” folder.
The “Unshare Selected Project” button.
Deactivating a shared project
If you are sharing a project and want to stop working on it,
you do this by deactivating the network. When you deactivate the network during work with a shared project, the
other users will be disconnected from it. However, sharing
will not be revoked (as described above) unless you specify it – meaning that the next time you connect to the network, the project will still be shared, allowing the other
users to join it without you having to make permission settings and share it all over again.
• To deactivate the network, pull down the Network
menu, select the item “Active”, so that it is not checked.
• A dialog will appear, asking you to confirm that you want
to disconnect the network.
All the users will be disconnected from the project. The project will still
be shared when you connect to the network again
The “Share Active Project” button.
16
Networking
Page 17

• To reactivate the network, check the item “Active” on
the Network menu again.
However, when you are using a Windows workstation, note
that when you connect your file server using a drive letter
(e.g. V:\), Nuendo will treat this server as a local drive,
which means that any data from this server used in a shared
project will always be copied over the Nuendo network.
Therefore, try placing your large files on a file server and
import them into Nuendo without using the “Copy File to
Working Directory” option. The server path should now be
displayed in the Pool.
Joining projects
• A dialog will appear, asking you to confirm that you want
to reconnect the network.
All the users with whom you previously shared the project will now be
able to join it again.
About the project folder
When you’re sharing a project, you have to decide whether
the project folder for it should be located on your local hard
disk, or – if you’re sharing the project over a LAN and have
access to a common file server – if it should be located on
the server.
You should consider the following:
• If the project folder is located on your hard disk, the files
it contains will be copied to the other users’ hard disks,
and their project folders.
This way, work on the files will be done locally on the computer of each
user, and the upd
users.
ated files are then copied to the hard disks of the other
• If you have access to a file server and place the project
folder and its contents on it, the other users can specify
this folder as the project folder when they join the project.
In this case, the project files will not be copied to the other users’ hard
disks, but are in
files directly on a server may be slower compared to working on them locally. On the other hand, the files will not have to be copied to each hard
disk every time they are updated.
stead accessed directly on the server. Working on the
Where to put large media files
If you have a file server that is fast enough for connected
workstations to call audio or video playback of files stored
on this server, you should place large media files on this
server to avoid excessive network traffic.
The “Shared Projects” dialog lets you join projects shared
by other users in the network.
This dialog lists all the established users in the network,
and any projects they are sharing. For you to be able to
join a project, the user sharing it must be online and have
given you read and/or write access.
To join a project, proceed as follows:
1. Connect to the network by checking the “Active” option on the Network menu.
2. Open the “Shared Projects” dialog from the Network
menu.
3. If necessary, click the “Rescan Network” button (the
rightmost button on the toolbar).
By clicking this button, you instruct Nuendo to scan the network for
any updated inform
refresh the Shared Projects dialog accordingly.
ation about online users and/or shared projects, and
• The item “Users in Local Network” lists all the established users in a LAN.
• The item “Global IP Network” lists all the users with whom you
have established WAN connections (see “Setting up WAN
connections” on page 9).
17
Networking
Page 18

4. If there are plus signs beside these items, this indicates that they contain lists of users that can be displayed.
Click the plus signs to display the users.
5. If a user is sharing projects, this is indicated by a plus
sign beside the user name. Click this to display a list of the
projects shared by this user.
If there are shared projects you can join, these are indicated by the text “You can join” in green.
6. To join a project, select it and click the “Join Project”
button (or just double-click the project name in the list).
A dialog appears, allowing you to specify the project folder.
The “Join Project” button.
7. Select a project folder.
There may be two cases which require special approaches:
• If you are connected over a LAN, the owner of the project may
have decided to keep the project files in a special, common
project folder on a server. If this is the case, you will need to
specify this folder as the Project folder.
• If the owner of the project keeps the project files in a project
folder on a local hard disk, select a local folder on your hard
disk. In this case, the project files will be copied to the project
folder on your hard disk.
See “About the project folder” on page 17 for more information about the project folder in shared projects.
8. When you have selected a project folder, the project
and the files are copied to your hard disk (unless you’re
working on a server, as described above).
If you have access not to the entire project, but only separate tracks, only
the tracks for which you have read or write permission will be loaded.
Merging your project to the network project
When you click the “Merge Active Project to Selected
Network Project” button, the currently active project will
be merged with the selected Network project.
You will be asked whether you wish to download the
shared project before merging.
• Clicking “No” allows you to simply commit your tracks
without having to download all shared tracks. (Please stay
connected until all others have received your tracks.)
• When you click “Yes”, this is like joining a project by
clicking the Join Project button (see above) except that
you can join using your active project instead of having to
create a new project locally.
Then, the Project Sharing and Permissions dialog for your
local project will be displayed. When you are happy with all
permission settings, click on “Start Merge”. This will join the
Network project and download all available tracks. When
the download is complete, you can commit your tracks.
Disconnecting from projects
If you have joined a project and want to stop working on it,
you do this by deactivating the network. When you deactivate the network during work with a shared project, you
will disconnect from it. However, you will still have access
to the project in the future as long as the owner shares it
with you. The next time you connect to the network, the
project will still be shared with you (unless the owner has
changed the permissions) and you can join it again.
• To deactivate the network, pull down the Network menu
and select the Active item, so that it is not checked.
Downloading selected tracks
When you click the “Download Selected Tracks” button,
you can select which tracks from which shared projects
you want to download to your computer.
You will be asked whether you wish to create a new
project. When you select No, the downloaded tracks will
be added to your active project. Note that you cannot
download tracks into a shared project.
Networking
• A dialog will appear, asking you to confirm that you want
to disconnect from the network.
You will disconnect from the project.
18
Page 19

• To reactivate the network, select “Active” on the Net-
work menu again.
The Network section contains a host of controls which are
used for a number of network related functions for the
track:
• A dialog will appear, asking you to confirm that you want
to reconnect to the network.
If the project is accessible on the network, you will rejoin it and all the
project files will be loaded (see below).
Working with shared projects
The following are some general descriptions about the
common procedures for working with shared projects
over a network.
Any user who has write access to the project or separate
tracks in it can make changes and commit these to the
other users. The communication and transfer of updated
files is handled mainly in the Network section for each
track in the Inspector.
The permission status of a track is indicated in the Inspector as follows:
• If the Network tab in the Inspector is displayed in light
blue, this indicates that you have both read and write access to the track, and can make changes to it.
• If the Network tab in the Inspector is orange, this indi-
cates that you have only read access to the track, and
can’t make changes to it.
Automatically
apply updates.
Load
available update.
Commit changes
on this track.
Get exclusive access (lock track).
Override Project Settings – only
available for the owner of the project.
(see “Setting up permissions for sep-
arate tracks” on page 14).
Open the “Project Sharing
and Permissions” dialog (see
“The Project Sharing and Permissions dialog” on page 22).
Open the “User
Manager” dialog
(see “The User
Manager dialog”
on page 24).
• In addition to the above, the Network section also displays the user name of the owner of a project you join.
Ö Note that you can also customize Nuendo so that the
four main network control buttons (update, auto update,
lock and commit) are available in the Track list. This is
done in the Track Controls Settings dialog. Please refer to
the chapter “Customizing” in the Nuendo Operation Manual for instructions on how to do this.
The network controls in the Track list.
Committing changes
To a track
When you have made changes to a track, proceed as follows to commit them and make them known to the users
in the network:
1. Open the Network section for the track in the Inspector
by clicking its tab.
If you have set things up so that the commit button is available in the
track list, as described above, you don’t have to use the Inspector. Note
that the track must be selected in the track list.
2. Click the button “Commit changes on this track”.
The changes are committed to the network.
19
Networking
Page 20

Ö Note that if more than one track is selected, clicking
this button for one selected track will commit the changes
on all selected tracks.
Ö Note also that for the owner of a project, this is also the
way to update permission settings made directly in the Inspector (see “Setting up permissions for separate tracks”
on page 14).
To a project
If you have made changes to several tracks, or made other
project changes, you will probably want to commit all
changes at once:
• Pull down the Network menu and select “Commit
Changes”.
The changes are committed over the network. Note that there is also a
button for this function available in the Project window toolbar. However,
this is not visible by default. Refer to the chapter “Customizing” in the
Nuendo Operation Manual for information about how to customize the
toolbar.
!
Please note that each time you commit a change to a
track or project, network activity is initiated, slowing
the network down. Depending on the speed of the
network, it may take some time before the changes
are distributed to all users and work can continue, so
commit changes sparingly and only when necessary.
Loading changes
When other users have made changes to a track and
committed them over the network, the “Load available update” button in the network controls for the corresponding
track will light up in blue to indicate that you can load the
changes and update the project.
You can use two different methods to load available
changes to tracks over the network:
• Click the “Load available update” button in the Inspector or the Track list.
This will load the available update for the track.
• Click the “Automatically apply updates” button in the Inspector or the Track list for one or more tracks.
This way, all changes committed to the track(s) by other users will be automatically loaded without requiring your intervention.
There is also a special method for loading changes made
to the tempo and signature tracks, as well as loading new
tracks:
• Click the “Sync project to network state” button in the
Project window toolbar.
This button lights up in blue to indicate that there are changes available.
Click it to have any new tracks and any changes made to the tempo and
signature tracks loaded.
Ö By default, the Network controls are not visible in the
toolbar. If you want them to be visible, you need to customize the toolbar, as described in the chapter “Customizing” in the Nuendo Operation Manual.
Ö Note that you can also undo an update! If you have
loaded an available update, you can select “Undo Net Update” from the Edit menu. Similarly, you can “undo the
undo” by selecting “Redo Net Update”.
Locking tracks
If you have write permission for a track and want to prevent other users from making changes to it, you can lock it
for your own use only.
• Click the “Get exclusive access” button for the track in
the Inspector or the Track list.
The track is locked for your exclusive use. When a track is locked by a
user, the “Get exclusive access” button lights up in blue.
The “Load available update” button is located in the Network section of the Inspector. However, when working with
shared projects, you will probably want to customize Nuendo so that it is also available in the Track list (see above),
since this makes it somewhat easier to get a visual overview
of when committed changes are available.
Networking
• To unlock a track, click the “Get exclusive access” button again so it is no longer lit.
The owner of a project has the possibility of unlocking a
track, regardless of who locked it:
20
Page 21

• When you click the “Get exclusive access” button for a
locked track that wasn’t locked by you, a warning message appears.
• When you are the owner of the project or track, select
“Release Lock” to unlock the track.
Other users can only click “Cancel” to leave the track locked.
About network communication problems
In any network, occasionally, connections may be lost.
When network communication with a participant fails, you
can
initiate a communication verification process, and attempt to re-establish the lost connection, see “Verify
Communication” on page 10.
• During the verification process, a window appears,
showing a status bar for its progress.
• After the verification process, a dialog will appear.
This lists the results of the verification process. Nuendo may either have
been able to restore communication through the process, or still be unable to communicate with some participant(s). The dialog will list each
participant with whom communication still failed (see below).
Ö Note that you can initiate the verification process manually as well. If you experience communication problems
and the process doesn’t start automatically, select “Verify
Communication” from the Network menu.
Reconnecting participants to the Master Network project
When several users have joined a Network project and
this is unexpectedly disconnected from the network (i.e. it
is not disconnected by e.g. deactivating the Network or by
closing the project), these participants can be automatically reconnected.
Proceed as follows:
1. Open the Master project again.
The program automatically searches 10 seconds for the other users in
the network. When users are found, the following dialog appears:
2. Select “Reconnect” if you want the other user(s) to be
automatically reconnected.
When you click the “Unshare” button, the project is unshared.
At this point, you will have to decide whether to remove
the participant(s) from the network:
• If you suspect the communication problems are temporary, select “No” and wait to see if communications can be
restored.
You can then later manually perform the verification process if you wish
(see below).
• If you believe the communication problems are more severe, for instance if the participant(s) have experienced a
system or network crash, select “Yes”.
The participant(s) will then be removed from the network until able to rejoin again.
If the verification process does not solve the problem, the
communication problems are probably of a more serious
nature and may require re-configuration of the network
settings (see “Setting up a network” on page 9).
Networking
Ö For this to work, the Master project has to have been
saved once. If the project was not saved before being unexpectedly disconnected, the settings are lost and the
participants cannot be automatically reconnected.
Ö Please note that if you are unsure about the state of
connection, it might be a good idea to unshare the project
and to submit it as new Network project, in order to avoid
conflicts.
21
Page 22

Chatting with other users on the network
When you are connected to the network, it is possible to
chat with other users to discuss changes you are making
to shared projects. To chat with all other users on the network, select “Open Global Chat”. To chat only with the
users working on the currently shared project, select
“Open Project Chat”. The chat window (either for global
chatting or for chatting to users of the current project) will
open allowing you to send text messages back and forth
between network users. All network users can see the
same chat window.
• Enter your text message in the area at the bottom of the
chat window and press [Return].
Ö Note that when you first enter the chat, you will not be
able to see text messages posted prior to your entry. Only
messages entered after you joined the chat will be visible
to you.
Opening projects with network settings
The Network dialogs
To round off this document, we will provide a break-down
of the three Network dialogs and their contents.
The Project Sharing and Permissions dialog
When you are loading a project containing Network settings and the Network is deactivated in Nuendo, the following dialog appears:
• Click “Activate” to activate the Network in Nuendo and try to
reconnect the project.
• Click “Remove” to remove all Network settings. You can
choose this when you do not want to work in the network any
longer. Note that this can also be handy if you have e.g. older
projects with corrupt network settings and want to delete all
the network objects and then start again.
• Click “Do Nothing” to open the project without changing any
Network settings.
Networking
This dialog is where you specify the user permissions for
the active project before sharing it, either on a project basis, a track basis or both.
The dialog is dominated by three lists:
• The Project & Tracks list.
This lists all the tracks in the project, including the Tempo track and the
signature track. Furthermore, it displays the permission status for each
track – “Uses Project Settings”
owner of the project/track is listed in the Owner colu
• The User Name list.
This displays all the users that are allowed to share the project, and their
read and write permissions. Users can be added either manually from the
All Users list, or by loading a permission preset. You can remove users
from this list by selecting them and clicking the Delete User button below
the list (the right button).
• The All Users list.
This lists all the users that have entered user names and been established in the network. To add a user to the User Name list, select it and
click the Add User button above the list (the left button).
22
or “Overrides Project Settings”. Also, the
mn.
Page 23

In addition, the dialog contains the following:
• The Share Project checkbox and the Commit button.
By activating the Share Project option, you share the project over the
network. Click the
shared and you want to commit modified per
Commit button when a project has already been
mission settings.
• The Permission Presets menu.
This menu in the bottom right corner allows you to select and load a permission preset. Also, by clicking the button to the left of the menu, you can
save the permission settings you have made in this dialog as a preset.
• The “Override Project Permissions” checkbox, which is
only available when a separate track is selected in the
Projects & Tracks list.
By clicking this, you specify that the track should not use the project
permission sett
ings.
The Shared Projects dialog
This dialog lists all the identified users and shared projects
in the network. It lets you share your own projects as well
as join projects shared by other users. Furthermore, the
dialog offers the possibility of connecting to WAN (Wide
Area Network) users.
The users and projects are listed hierarchically in the following categories:
My Shared Projects
This folder contains a list of all projects you share over the
network.
• If you have shared projects, you can click the plus sign
beside the folder to have them displayed in a list.
Displayed with each shared project is a list of which users are currently
sharing it.
Global IP Network
This item first appears when you open a WAN connection,
and lists all the users connected through WAN. This
works just like the “Users in Local Network” item, meaning
that you can click the plus sign beside the item to display
the list of users, and the plus sign beside the user names
to display any projects they share.
• You can remove the “Global IP Network” item by selecting it and pressing [Delete] or [Backspace].
This will also remove any WAN connections.
The toolbar
The toolbar contains the following items:
Remove WAN Connection. Lets you
remove an established WAN connection.
Download Selected Tracks.
Click this to specify which
tracks you want to download.
Join Project. Select
a shared project
and click to join it.
Add WAN Connection.
Lets you establish a
WAN connection over
the Internet by entering
an IP address.
Users in Local Network
This item lists all the identified users in the Local Area Network and any projects they are sharing.
•
The plus sign beside the item can be clicked to display
a list of the es
tablished users in a LAN.
• If a user is sharing projects, this is indicated by a plus
sign beside the user name.
Click the plus sign to display a list of projects shared by this user. Displayed with each shared project is a list of which users are currently
sharing it.
Networking
Merge Active Project to
Selected Network
Project.Click this to merge
the active project to the
selected network project.
Share Active
Project.
Unshare Selected Project. Select
one of your shared projects in the
dialog and click to revoke sharing.
Rescan Network. Click
this to update the
network information
• You can specify your name in the network by entering
the desired name in the field to the left of these buttons.
23
Page 24

The columns
The columns in the list display the following information:
Column Description
Users and
Projects
Status The status column displays how many users are estab-
Info
(User Name)
Projects This displays the total number of projects a user is shar-
Program Lists which Nuendo program version a user is working
URL Displays the IP address of the user.
Displays a list of all the established users and any projects
they share. The names displayed are the workstation
names in a LAN, or the domain names for WAN connections.
lished in the network and their online/offline status. For
shared projects, this column displays whether you can
join a project (denoted by
green), or not (denoted by the text “Ac
red). Furthermore, the column displays the number of
participants in each shared project.
Displays the user names for the established users in the
network. If the name “Anonymous” is displayed, this
means that the user is online but has not entered a user
name. If it reads “Unknown”, this means the user is offline
and has not been established in the network.
ing.
with.
the text “You can join” in
cess denied” in
The User Manager dialog
• The Permission Presets column to the left displays a list
of all the available presets.
To add a preset, click the plus icon below the column. To remove a preset, select it in the list and click the trash icon.
• The User column in the middle lists all the users that
should be included in a selected permission preset, and
their read and write permissions.
Users are added to this list from the User Pool list. You can remove users
from this list by selecting them and clicking the trash icon below the column.
• The User Pool column to the right lists all the users that
have entered user names and are established in the network.
To add a user to the User column, select it and click the arrow button to
the left of the list. To add a user that has not yet been established in the
network, click the plus icon below the column. To remove a user name
from the list, select it and click the trash icon.
This dialog lets you set up lists of users, define their read
and write permissions and save the settings as a permission preset. The presets can then be loaded in the
“Project Sharing and Permissions” dialog, letting you
share a project with the settings of the permission preset.
• The Network Name field in the top left corner displays
your user name in the network. You can click in the name
field and type in a name.
Networking
24
Page 25

Index
Page 26

A
Active (Activating network) 7
Add WAN Connection 9
C
Chatting options 22
Commiting changes 19
D
Default Permissions 13
F
Firewall 6
G
Get exclusive access (lock track) 20
Global IP Network 9, 23
Guest user 13
I
Inspector network controls 19
J
Join project 17
L
LAN 6
LAN connections 9
Loading changes 20
M
My Shared Projects 16, 23
N
NAT 7
Network name 7
O
Override Project Permissions 14
P
Permission preset
Creating in Project Sharing &
Permissions dialog 14
Creating in User Manager
dialog 11
Loading 15
Removing in User Manager
dialog 13
Permissions
Default preset 13
Presets 11
Setting up for tracks 14
Setting up manually 13
Project folder 17
Project Sharing and Permissions
dialog 22
R
RCP 6
Redo Net Update 20
Remove WAN Connection 9
Rescan Network 10
S
Share Active Project 16
Share project 15
Shared Projects dialog 23
T
TCP/IP 6
Track list network controls 19
Transfer Status 11
U
UDP 6
Undo Net Update 20
Unshare Selected Project 16
User Manager dialog 24
User name 7, 8
Users in Local Network 10, 23
V
Verify Communication 10, 21
VPN 7
W
WAN 6
WAN connections 9
26
Index
 Loading...