

Page 1
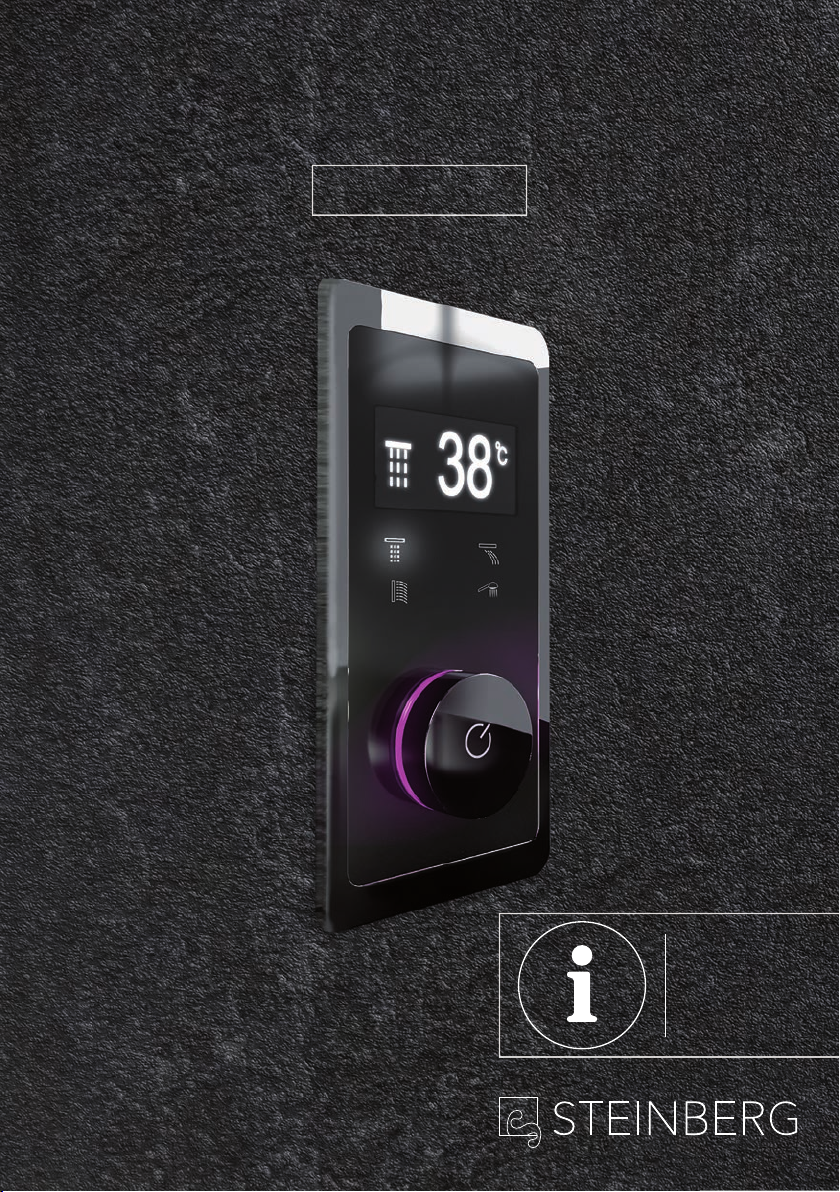
iFlow
390 4645
DEUTSCH
ENGLISH
Page 2

ANIMIERTES DISPLAY
ANIMATED DISPLAY
4
VERBRAUCHER
OUTLETS
SOF T TOUCH
TASTEN
BUTTONS
TEMPERATURANZEIGE
ÜBER LED FARBVERLAUF
TEMPERATURE SENSITIVE
COLOUR GRADIENT LED
COLD
HOT
Page 3
MONTAGEANLEITUNGDE
iFLOW
390 4645 – VOLLELEKTRONISCHE ARMATUR MIT DIGITALANZEIGE
FÜR BIS ZU 4 VERBRAUCHER
• mit Einbaukörper für Steuerung und Regelung
• intuitiver Bedienkomfort dank Softtouch Tasten und Digitaldisplay
• Sicherheitssperre bei 38°C voreingestellt
• ohne Mengenregulierung
• ½“ Ausgänge
• elektronische Temperaturregelung
• Durchfl ussmenge bis zu 25 l/min bei 3 bar
• schwarz/chrom
ALLGEMEIN
Die Montageanleitung beinhaltet Vorgaben für die vorschriftsgemäße Installation der
iFlow. Die Produktgarantie erlischt, wenn das Produkt nicht gemäß der Montageanleitung
installiert wird. Die Montage ist nur durch qualifi zierte Sanitärinstallations-Fachbetriebe
unter Beachtung dieser Montageanleitung und den länderspezifi sch geltenden Normen,
Regelungen und Sicherheitsbestimmungen zulässig.
4 5
Page 4
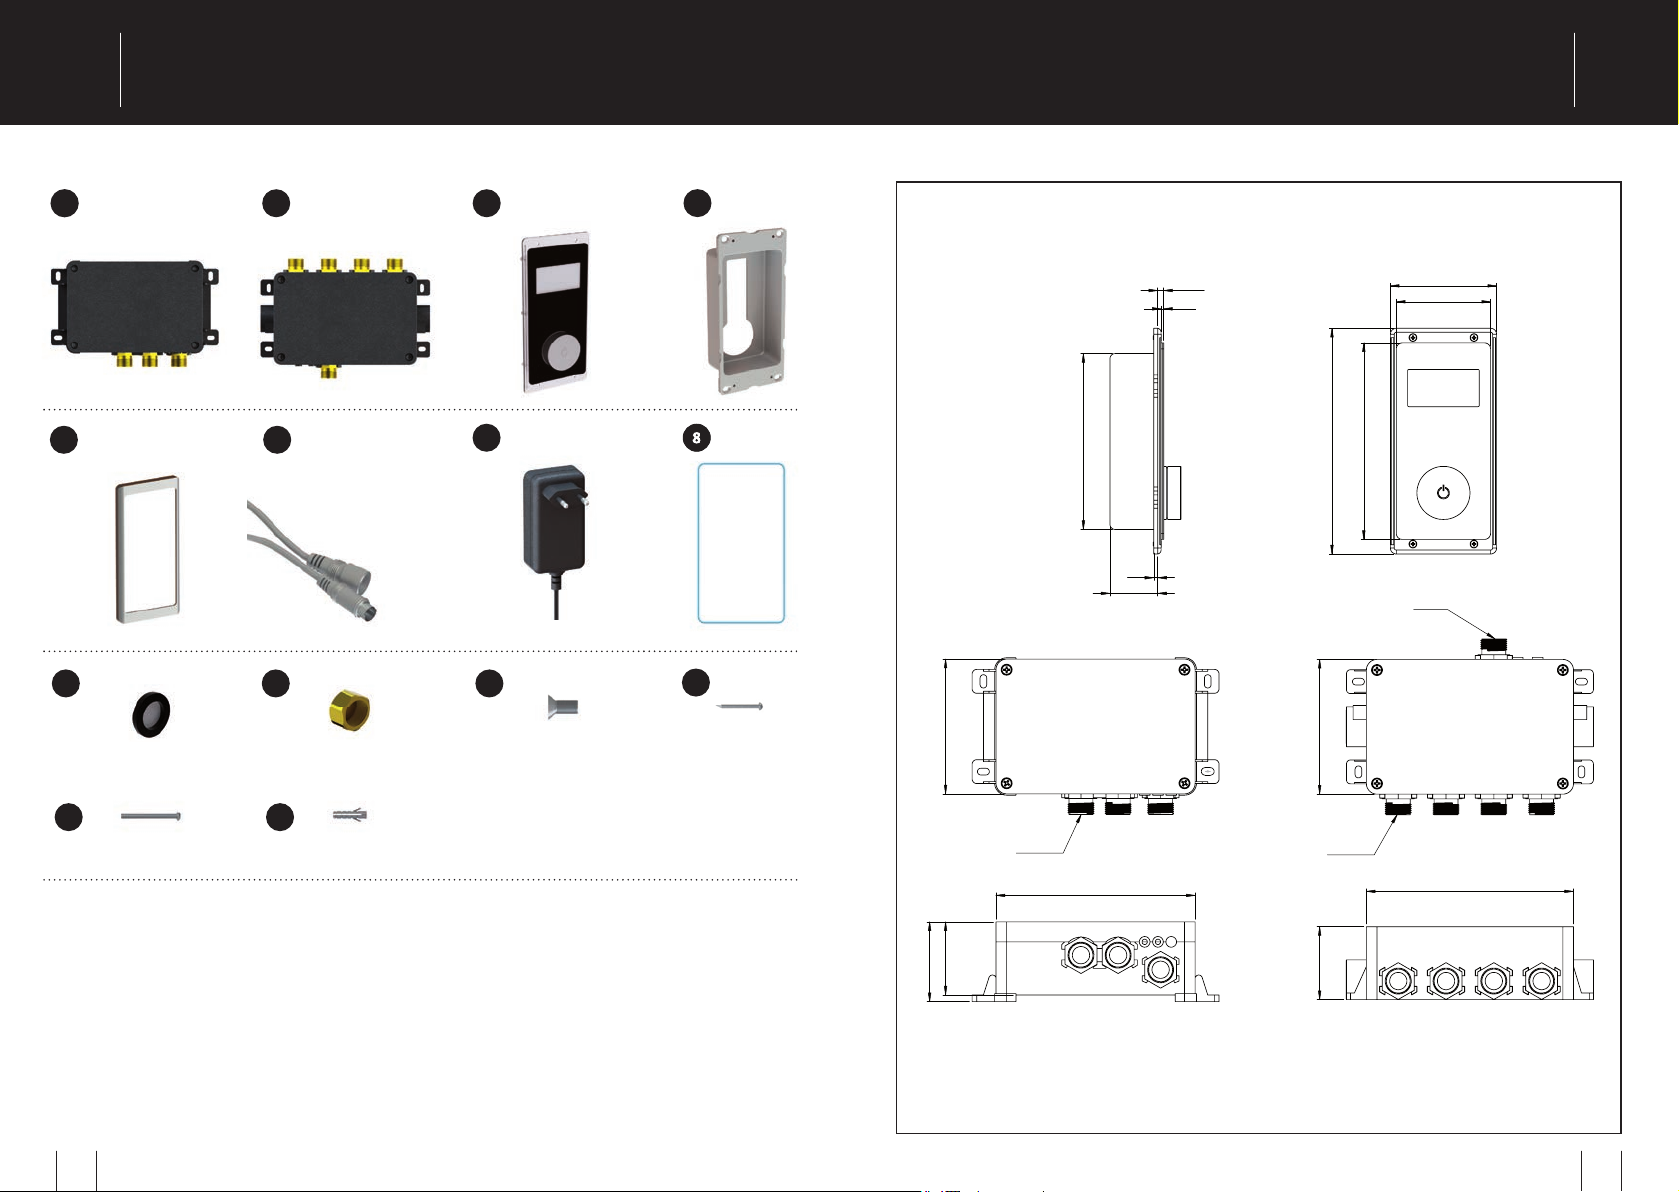
LIEFERUMFANGDE
8
390 4645
TECHNISCHE ZEICHNUNG
DE
12
4
G1/2"
80
71
101,50
132,50
3
36
4,50
2
170
101,50
148
1
5
9
10
2
6
3
7 8
11
13 14
1. Mischeinheit
2. Umstelleinheit
3. Bedieneinheit
4. Montagekasten
5. Rosette
6. Mini-DIN-Kabel (7,5 m)
7. Netzteil 12V
8. O-Ring 120 x 1,2 mm
9. 2 x Siebdichtung ½“
10. 2 x Verschlusskappe ½“
mit Gummidichtung
11. 4 x Innensechskant
Senkschraube M3 x 6 mm
12. 4 x Senkkopfschrauben
M4,2 x 38 mm
13. 8 x Linsenkopfschrauben
M4,2 x 45mm
14. 12 x Dübel
M6
60
55
3xG1/2"
150
4xG1/2"
156
55
76
Page 5

1
MONTAGEANLEITUNGDE
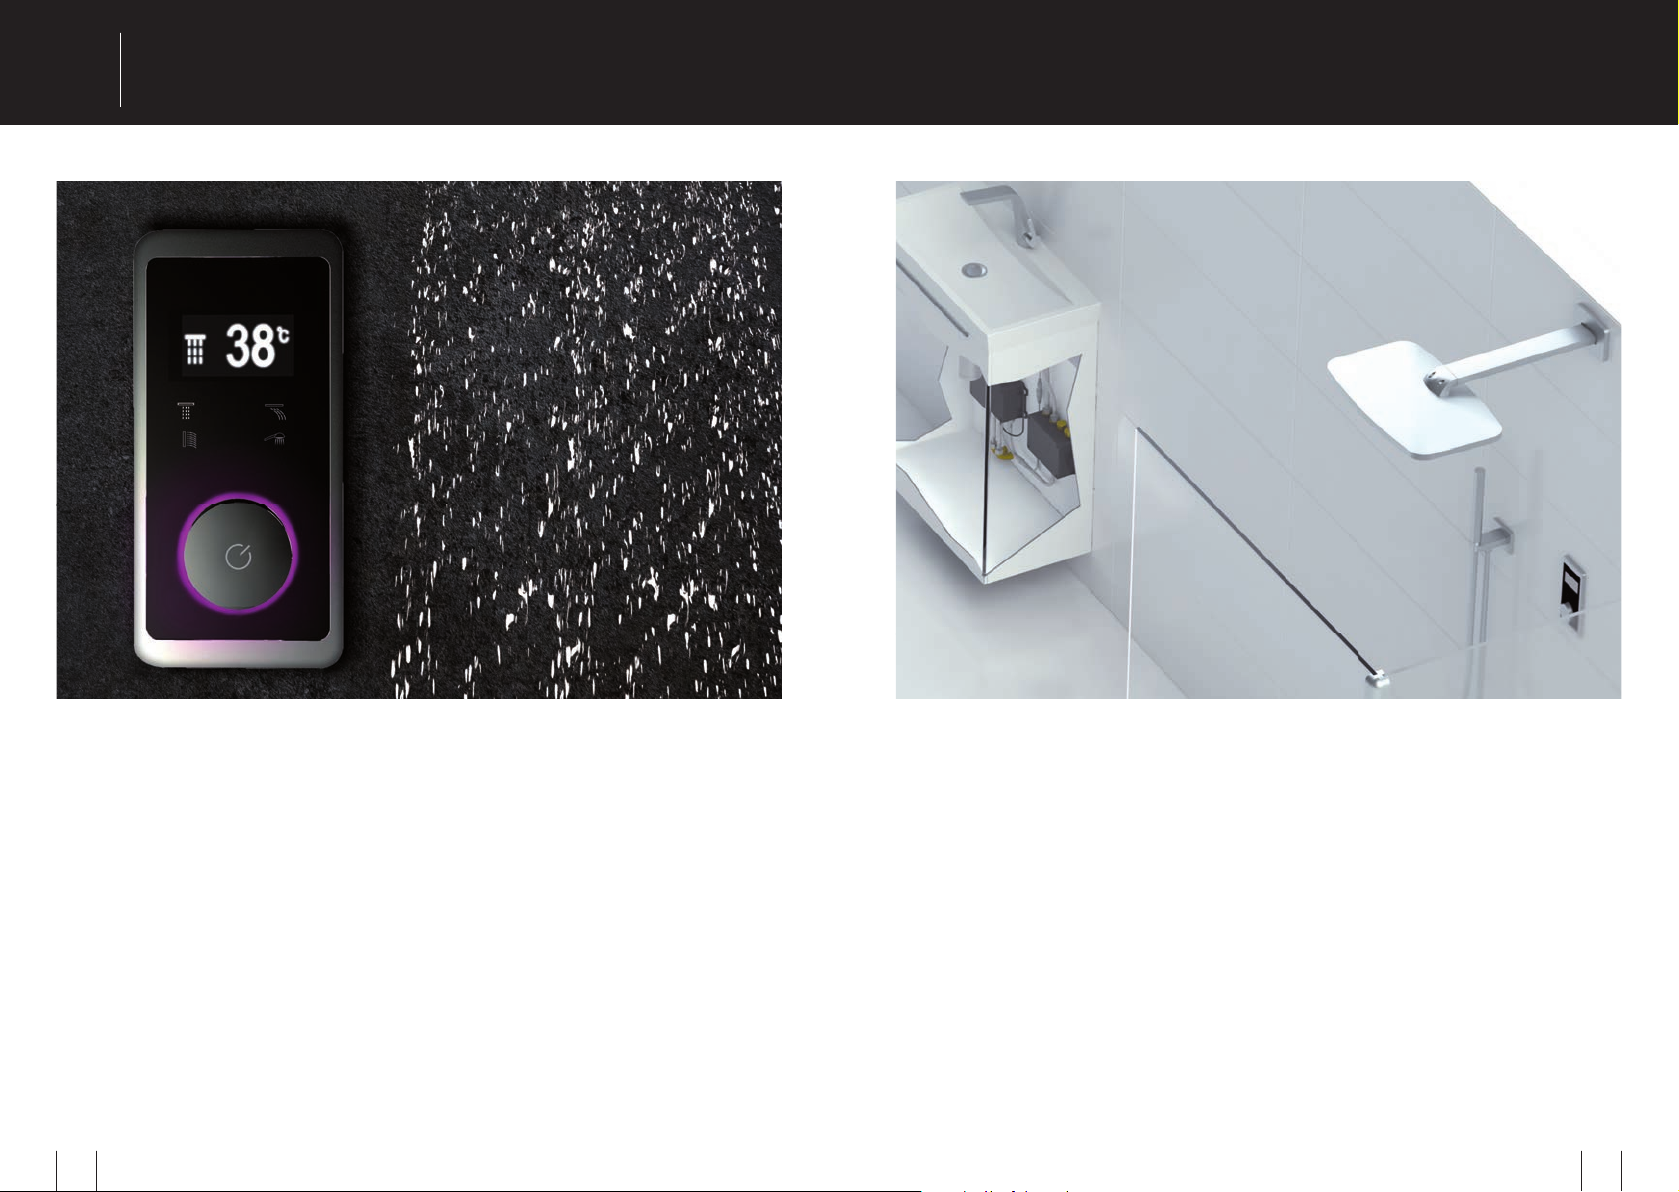
VERLEGEN DES MINIDINKABELS FÜR DIE ELEKTRONISCHE STEUERUNGEMPFEHLUNG
1.1
BEISPIELE FÜR
INSTALLATIONSORTE
Um problemlosen Betrieb und Wartung
zu gewährleisten, muss die iFlow leicht
zugänglich installiert werden. Mischund Umstelleinheit im Idealfall in einem
Verteilerschrank oder unter Putz – mit
Wartungsklappe – außerhalb des Duschbereichs installieren.
8 9
1.1 Kunststoff rohr unter Putz für Steuerungskabel (Mini-DIN) zwischen Einstell- und Bedien-
einheit verlegen (Kunststoff rohr nicht im Lieferumfang enthalten).
ACHTUNG: Durchmesser des Mini-DIN-Kabels beachten!
1.2 Mini-DIN-Kabel einziehen – Schnur
oder anderes dünnes Kabel als
Einzugshilfe verwenden (Schnur/Hilfs-
kabel nicht im Lieferumfang enthalten)
ACHTUNG: Länge des im Lieferumfang
enthaltenen Mini-DIN-Kabels (7,5 m)
beachten
1.2
Page 6

MONTAGEANLEITUNGDE
SETZEN DES MONTAGEKASTENS FÜR BEDIENEINHEIT MONTAGE VON UMSTELL UND MISCHEINHEIT
2
2.1
76 mm
Tiefe des Montagekastens: 36 mm
Zugabe für Mini-Din Anschlüsse: 40 mm
2.1
Für die Mini-DIN-Anschlüsse mindestens 40 mm zur Tiefe des
VERTIEFUNG FÜR MONTAGEKASTEN
ACHTUNG: Montagetiefe beachten!
Montagekastens hinzugeben!
2.2
4 x Senkkopfschrauben
M4,2 x 38 mm
2.3
3
2.2 Befestigungslöcher bohren
- Dübel setzen
- Mini-DIN-Kabel von hinten in den Montagekasten einziehen
- Montagekasten zur Wand mit Silikon abdichten
(ACHTUNG: Silikon nicht auf die Fliese auftragen!)
2.3 Montagekasten in Waage bringen und festschrauben
8 x Linsenkopfschrauben
3.1
M4,2 x 45mm
3.1 Befestigungslöcher bohren und
Dübel setzen
3.2
3.2 Misch- und Umstelleinheit in Waage
bringen und festschrauben
10 11
Page 7

MONTAGEANLEITUNGDE
MONTAGE DER BEDIENEINHEIT ANSCHLIESSEN DER WASSERLEITUNGEN UND VERBRAUCHER
4 5
4.1 O-Ring (im Bild blau) von der Rückseite aus über
die Bedieneinheit ziehen, bis dieser an der Frontplatte
anliegt
4.2 Interne Mini-DIN-Anschlüsse der Bedieneinheit für
Temperaturwahl und Anzeige miteinander verbinden
4.3 Externen Mini-DIN-Anschluss der Bedieneinheit mit
Mini-DIN-Anschluss der Umstelleinheit verbinden
4.4 Bedieneinheit an Montagekasten anschrauben
- Rosette auf Montagekasten aufsetzen
Rückansicht
4.1
Rückansicht
4.2
4.3 5.1
O-Ring
5.1 ACHTUNG: Anschlusssymbole auf der Umstelleinheit
beachten!
- Nicht verwendete Ausgangsanschlüsse mit
Verschlusskappen G ½“ verschließen
4 x Innensechskant
4.4
Senkschraube M3 x 6 mm
Handbrause Schwall Regenbrause Seitenbrause
12 13
Page 8

MONTAGEANLEITUNGDE
ANSCHLIESSEN DER WASSERLEITUNGEN UND VERBRAUCHER VERBINDEN DER ANSCHLÜSSE FÜR DIE ELEKTRONISCHE STEUERUNG
6 7
6.1
7.1 7.2 7.3
7.1 Mini-DIN-Anschluss der Umstelleinheit mit Mini-DIN-Anschluss
der Bedieneinheit verbinden
7.2 Mini-DIN-Anschluss der Mischeinheit mit Mini-DIN-Anschluss
der Umstelleinheit verbinden
7.3 Netzteil mit Umstelleinheit verbinden
6.2
6.1 Siebdichtungen G ½“ in KW- und WW- Zulauf einsetzen
6.2 KW- und WW-Zulauf (G ½“) an Mischeinheit anschließen
(Anschlusssymbole beachten!)
6.3 Mischwasserzuleitung zwischen Mischeinheit und
Umstelleinheit anschließen (G ½“)
6.4 Verbraucher an Umstelleinheit anschließen (G ½“)
6.3
6.4
14 15
Page 9

INSTALLATION INSTRUCTIONSEN
iFLOW
390 4645 – HANDS FREE ELECTRONIC MIXER WITH DIGITAL INDICATOR
FOR UP TO 4 OUTLETS
• complete with concealed body for controls and adjustment
• intuitive use thanks to soft touch buttons and digital indicator
• anti-scald device preset at 38°
• without volume control
• 1/2“ outlets
• with electronic temperature control
• fl ow rate up to 25 L/min at 3 bars
• black/chrome
IMPORTANT INFORMATION
This manual contains instructions for proper installation and commissioning of the iFLow.
Warranty will be void if this product is not installed and commissioned as stated in this
manual. Installation and commissioning must be done as stated in this manual and by a
fully qualifi ed sanitary installation business and must comply with applicable standards and
safety regulations in your country.
16 17
Page 10

PARTS IDENTIFICATIONEN
390 4645
8
DIMENSIONS
EN
SHOWN IN MILLIMETRES
12
4
1/2" BSP
80
71
101.50
132.50
3
36
4.50
2
170
101.50
148
1
5
9
10
2
6
3
7 8
11
13 14
1. mixer module
2. diverter module
3. control module
4. control module casing
5. control module cover
rosette
6. mini-DIN cable (7.5m)
7. AC adapter 12V
8. O ring 120 x 1.2 mm
9. 2 x fi lter gasket ½“ BSP
10. 2 x end cap ½“ BSP
with rubber gasket
11. 4 x countersunk
Allen bolt M3 x 6 mm
12. 4 x countersunk screw
M4.2 x 38 mm
13. 8 x raised countersunk
screw M4.2 x 45 mm
14. 12 x plastic screw anchor M6
60
55
3x1/2" BSP
150
4x1/2" BSP
156
55
1918
Page 11

EN INSTALLATION INSTRUCTIONS
EXAMPLES OF
FIXING POSITIONS
RECOMMENDED FIXING POSITION
INSTALLING THE CONTROL MODULE CABLE
1.1
The iFlow must be installed for easy
access to allow proper operation and
servicing. Ideal for mixer and diverter
module is installation in a distribution box
or concealed – with a lid for servicing –
outside the shower area.
1.1 Install concealed fl exible plastic pipe for mini-DIN control cable connecting control
and diverter module (Plastic pipe not supplied)
NOTE: Width of mini-DIN cable
1.2 Insert mini-DIN cable – Use string or
wire as aid (not supplied).
NOTE: Length of the supplied mini-DIN
cable is 7.5m.
1.2
20 21
Page 12

EN INSTALLATION INSTRUCTIONS
INSTALLING THE CONTROL MODULE CASING MOUNTING DIVERTER AND MIXER MODULE
2
2.1
76 mm
Depth of control module casing: 36 mm
Add 40 mm for mini-DIN cable
2.1
MAKE A RECESS IN THE WALL TO HOUSE
Allow a minimum of 40 mm clearance from back of casing
THE CONTROL MODULE CASING
Note installation depth to be suffi cient:
for mini-DIN jacks
2.2
4 x countersunk screw
M4.2 x 38 mm
2.3
3
2.2 Drill fi xing holes
- Apply screw anchors
- Insert mini-DIN cable from back of casing
- Apply silicone sealant to the sides of the casing
facing the wall (NOTE: Do not apply silicone sealant
to the tiling)
2.3 Align casing and fi x with screws
3.1
8 x raised countersunk
screw M4.2 x 45 mm
3.1 Apply screw anchors
3.2
3.2 Align mixer and diverter module and
fi x with screws
22 23
Page 13

EN INSTALLATION INSTRUCTIONS
MOUNTING THE CONTROL MODULE CONNECTING WATER FEEDS AND OUTLETS
4 5
4.1 Apply O ring (marked in blue) to back of control
module and pull to front so that it has contact with
front plate
4.2 Connect mini-DIN jacks of temperature knob and
indicator
4.3 Connect mini-DIN jacks of control and diverter unit
4.4 Fix control module to casing with screws
- Attach cover rosette to casing
back view
4.1
back view
4.2
4.3 5.1
O ring
5.1 Note symbols for proper connection
- Apply ½“ BSP end caps to unused outlets
4.4
4 x countersunk
Allen bolt M3 x 6 mm
Handshower Waterfall Rainshower Lateral Shower
24 25
Page 14

MONTAGEANLEITUNGDE
CONNECTING WATER FEEDS AND OUTLETS CONNECTING CABLES FOR ELECTRONIC CONTROL
6
6.1
6.2
7
7.1 7.2 7.3
7.1 Connect mini-DIN jacks of diverter and control module
7.2 Connect mini-DIN jacks of mixer and diverter module
7.3 Connect AC adapter to diverter module
6.1 Insert ½“ BSP fi lter gaskets in Cold and Hot water feed
6.2 Connect Cold and Hot water feed (½“ BSP) to mixer
module (Note symbols for proper connection)
6.3 Connect blended Cold/Hot water feed from mixer to
diverter module (½“ BSP)
6.4 Connect diverter module to outlets (½“ BSP)
26 27
6.3
6.4
Page 15

sensual
R
AIN
Der Hersteller behält sich das Recht vor, ohne vorherige Ankündigung technische Änderungen vorzunehmen.
The manufacturer reserves the right to make technical modifi cations without prior notice.
STEINBERG GmbH
Schiess-Str. 30
D-40549 Düsseldorf
Tel. +49 (0)211 520 249-0
Fax: +49 (0) 211 520 249 -20
info@steinberg-armaturen.de
www.steinberg-armaturen.de
 Loading...