

Page 1
FM/AM
FM/MW/LW
Cassette Car
Stereo
3-856-405-11 (1)
Operating Instructions
Mode d’emploi
Gebruiksaanwijzing
For installation and connections, see the supplied installation/connections
manual.
En ce qui concerne l’installation et les connexions, consulter le manuel
d’installation/connexions fourni.
Zie voor het monteren en aansluiten van het apparaat de bijgeleverde [Montage/
Aansluitingen]-handleiding.
XR-C110
EN
F
NL
XR-C111
1996 by Sony Corporation
Page 2
EN
Features
General
• Detachable-front panel enables you to take
the front panel away with you when you
leave your car (page 4).
• Caution alarm is activated if you turn off the
ignition key without removing the front
panel from the unit.
• Built-in power amplifier (max. output:
20 W × 4 ch) enables you to enjoy a
4-speaker system.
• Digital 24-hour clock provided (page 5).
Tuner section
• Up to 18 stations can be preset: 12 stations on
FM and 6 stations on AM (for the XR-C110).
• Up to 24 stations can be preset: 12 stations on
FM and 6 stations each on MW and LW (for
the XR-C111).
• Automatic Memory function stores a total
of 18 stations (24 stations for the XR-C111) in
memory quickly and easily (page 7).
Optional CD changers can be used.
Up to two Sony CD changers (not supplied)
can be connected and controlled with the unit
by using the Sony source selector (not
supplied).
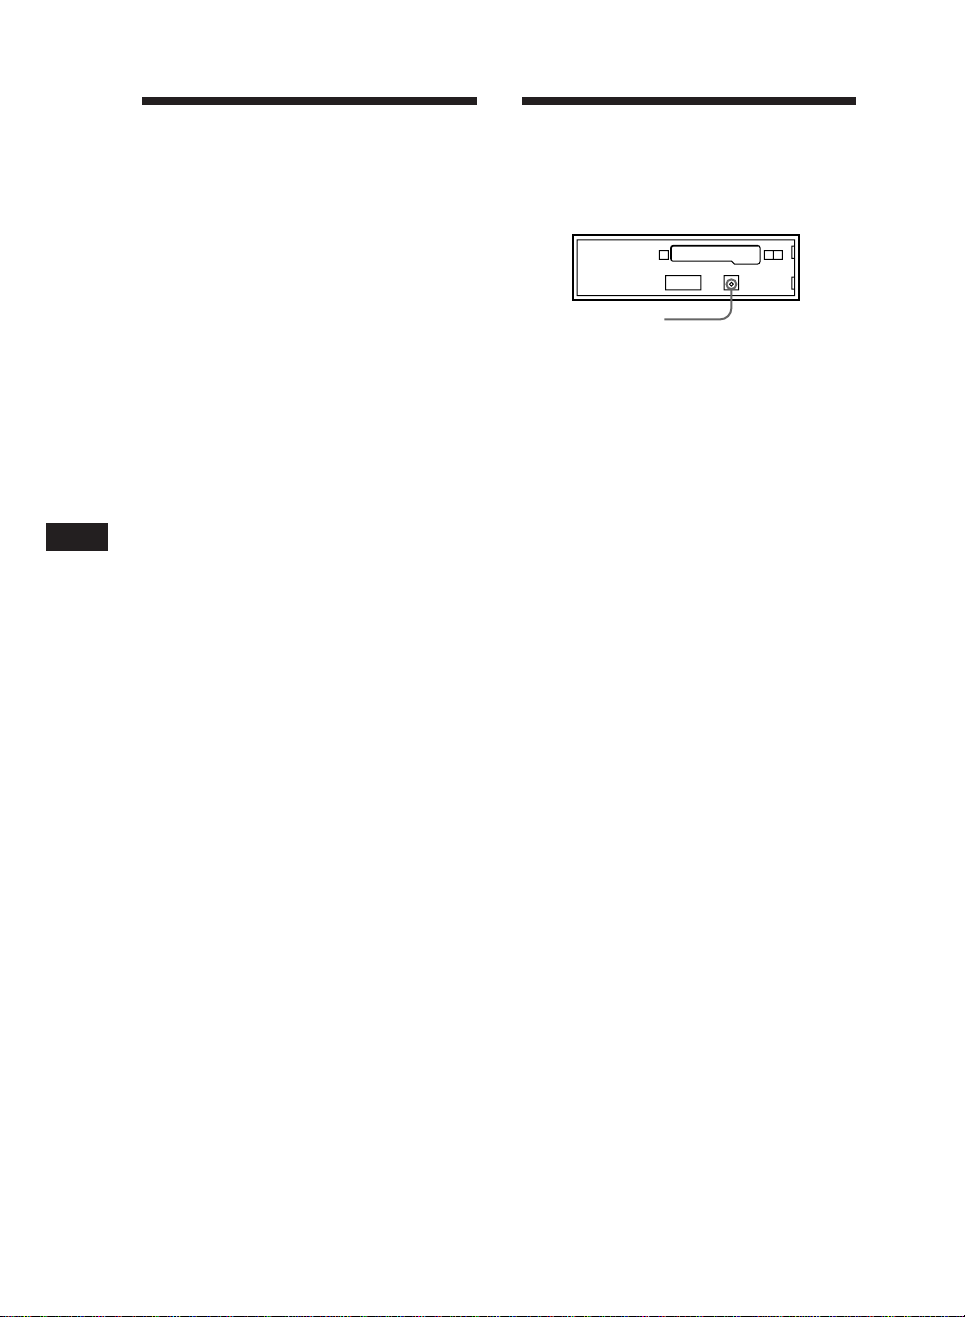
Precautions
• Before operating the unit for the first time or
after replacing the car battery, press the reset
button with a ball-point pen etc., and then
start operating the unit.
Reset button
• If your car is parked in direct sunlight
resulting in a considerable rise in
temperature inside the car, allow the unit to
cool off before operating it.
• If no power is being supplied to the unit,
check the connections first. If everything is in
order, check the fuse.
• If no sound comes from the speakers of a
2-speaker system, set the fader control to the
center position.
• If your car is equipped with a power
antenna, note that it is automatically
extended while the unit is operating.
If you have any questions or problems
concerning your unit that are not covered in
this manual, please consult your nearest Sony
dealer.
2
Page 3

Notes on Cassettes
Table of Contents
Cassette care
• Do not touch the tape surface of a cassette, as
any dirt or dust contaminates the heads.
• Keep cassettes away from equipment with
built-in magnets such as speakers and
amplifiers, as erasure or distortion of the
recorded tape could occur.
• Do not expose cassettes to direct sunlight,
extremely cold temperatures, or moisture.
• When the tape is played back for a long
period, the cassette shell may become warm
because of the built-in power amplifier. This
is not a sign of a malfunction.
Notes on Cassette Deck Tape Heads
• Long use of cassette tapes contaminates the
tape head causing poor sound quality or
complete sound dropout. Therefore, we
recommend cleaning the tape head once a
month or so with the separately available
Sony Cassette Cleaning Set. If the sound does
not improve after using a cleaning cassette,
please consult your nearest Sony dealer.
• In case of old or inferior cassette tapes, the
tape head gets contaminated much more
quickly. Depending on the tape, one or two
playbacks may cause poor sound.
Cassettes longer than 90 minutes
The use of cassettes longer than 90 minutes is
not recommended except for long continuous
play. The tapes used for these cassettes are
very thin and tend to be stretched easily.
Frequent playing and stopping of these tapes
may cause them to be pulled into the cassette
deck mechanism.
Detaching and Attaching the Front Panel ............ 4
Setting the Clock ...................................................... 5
Cassette Player Operation
Listening to Tape Playback .................................... 5
Ejecting the Cassette ................................................ 5
Fast-winding the Tape ............................................ 6
Radio Reception
Searching for Stations Automatically
— Automatic Tuning ......................................... 6
Tuning in by Adjusting the Frequency
— Manual Tuning ............................................... 7
Memorizing Stations Automatically
— Automatic Memory Function ...................... 7
Memorizing Only the Desired Stations ................ 7
Receiving the Memorized Stations ....................... 7
Other Functions
Adjusting the Sound Characteristics .................... 8
Enjoying Bass and Treble at Low Volume
— Loudness Function ......................................... 8
CD Changer Operation
With the optional CD changer(s) connected
Playing a CD ............................................................. 8
Locating the Beginnings of the Tracks
— AMS (Automatic Music Sensor)
Function .......................................................... 8
Locating the Desired Part of a Track
— Manual Search ................................................ 8
Changing CDs .......................................................... 9
Selecting CD Changers ........................................... 9
EN
Maintenance ............................................................. 9
Dismounting the Unit ........................................... 10
Button Locations .................................................... 11
Specifications .......................................................... 12
Troubleshooting Guide ......................................... 13
3
Page 4
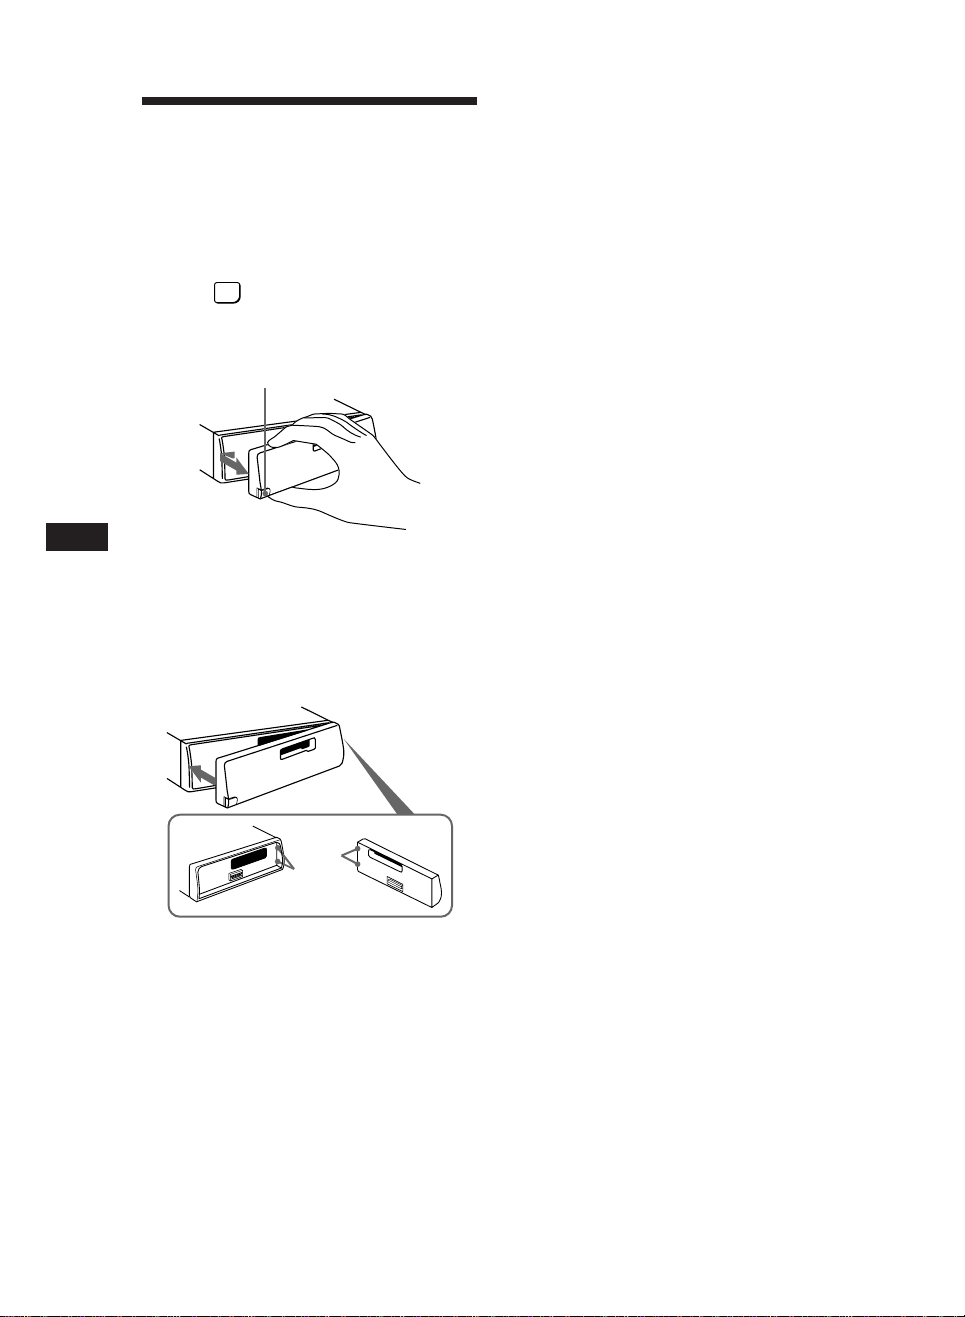
Detaching and Attaching
the Front Panel
The front panel of this unit can be detached in
order to prevent the unit from being stolen.
Detaching the Front Panel
Before detaching the front panel, be sure to
press the
RELEASE button to open up the front panel,
and slide the front panel a little to the left.
Then pull it off towards you.
OFF
button first. Then press the
RELEASE button
• Do not expose the front panel to direct sunlight, heat
sources such as hot air ducts or leave it in a humid place.
Never leave it on the dashboard etc. of a car parked in
direct sunlight where there may be a considerable rise in
temperature inside the car.
Caution alarm
If you turn the ignition key to the OFF position
without removing the front panel, the caution
alarm is activated and a beep tone is heard for
a few seconds.
EN
Be sure not to drop the panel after detaching it
from the unit.
Attaching the Front Panel
Apply the right hand side of the front panel to
the unit by attaching part A of the front panel
to part B of the unit as illustrated, then swing
the left side into the unit until it clicks.
A
B
Notes
• Make sure that the front panel is the right way up when
attaching it to the unit as it cannot be attached upside
down.
• Do not press the front panel hard against the unit when
attaching it to the unit. It can easily be attached by
pressing it lightly against the unit.
• When you carry the front panel with you, put it in the
supplied front panel case.
• Do not press hard or give excessive pressure to the
display windows of the front panel.
• Before removing the front panel, be sure to turn the
power off. However, if you press the RELEASE button to
detach the panel while the unit is still turned on, the
power is automatically turned off in order to protect the
speakers from being damaged.
4
Page 5

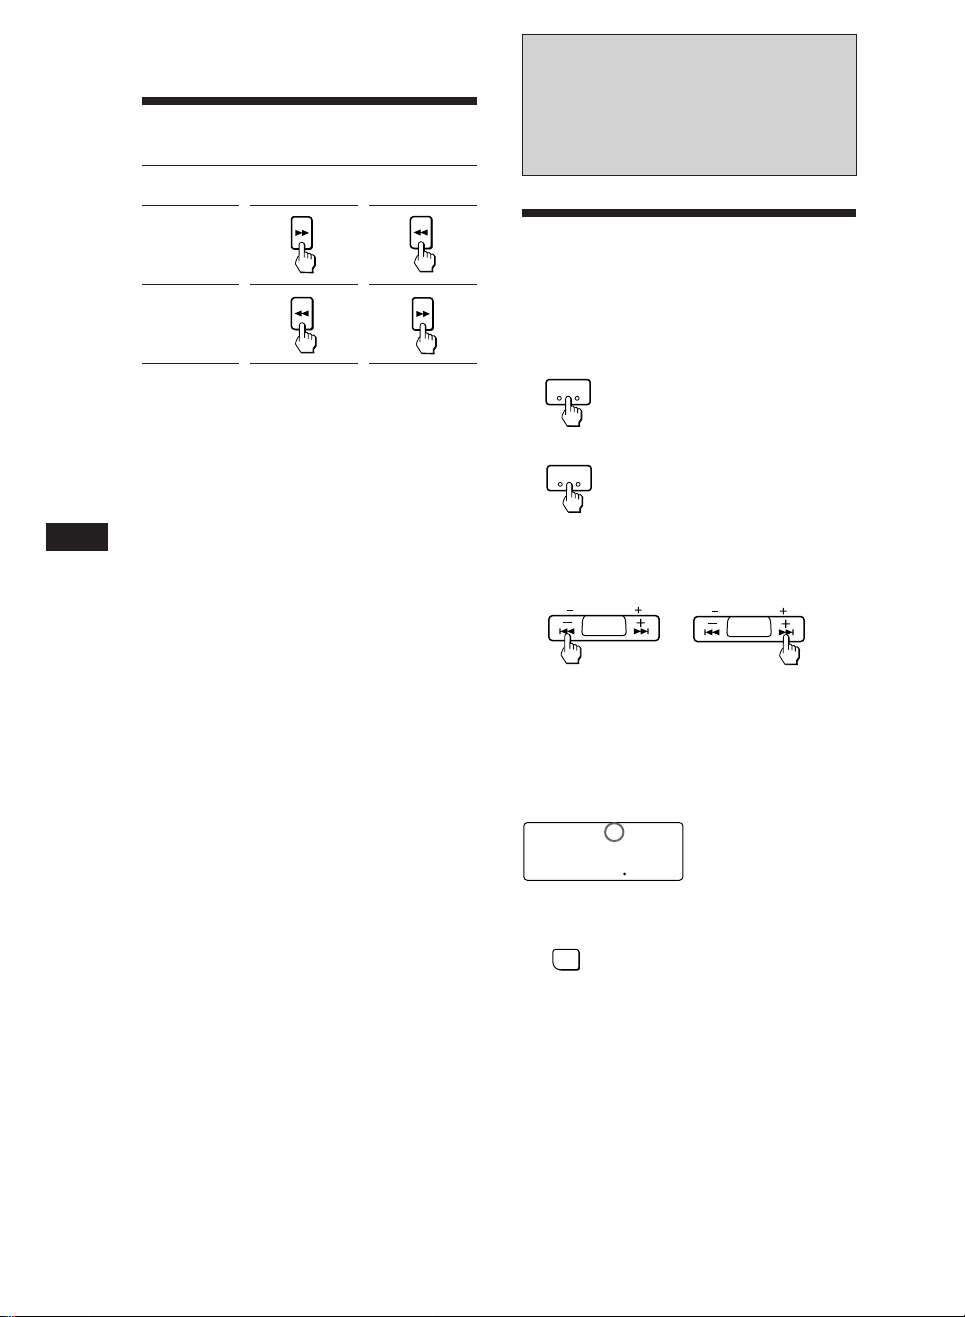
Setting the Clock
The clock has a 24-hour digital indication.
Cassette Player
Operation
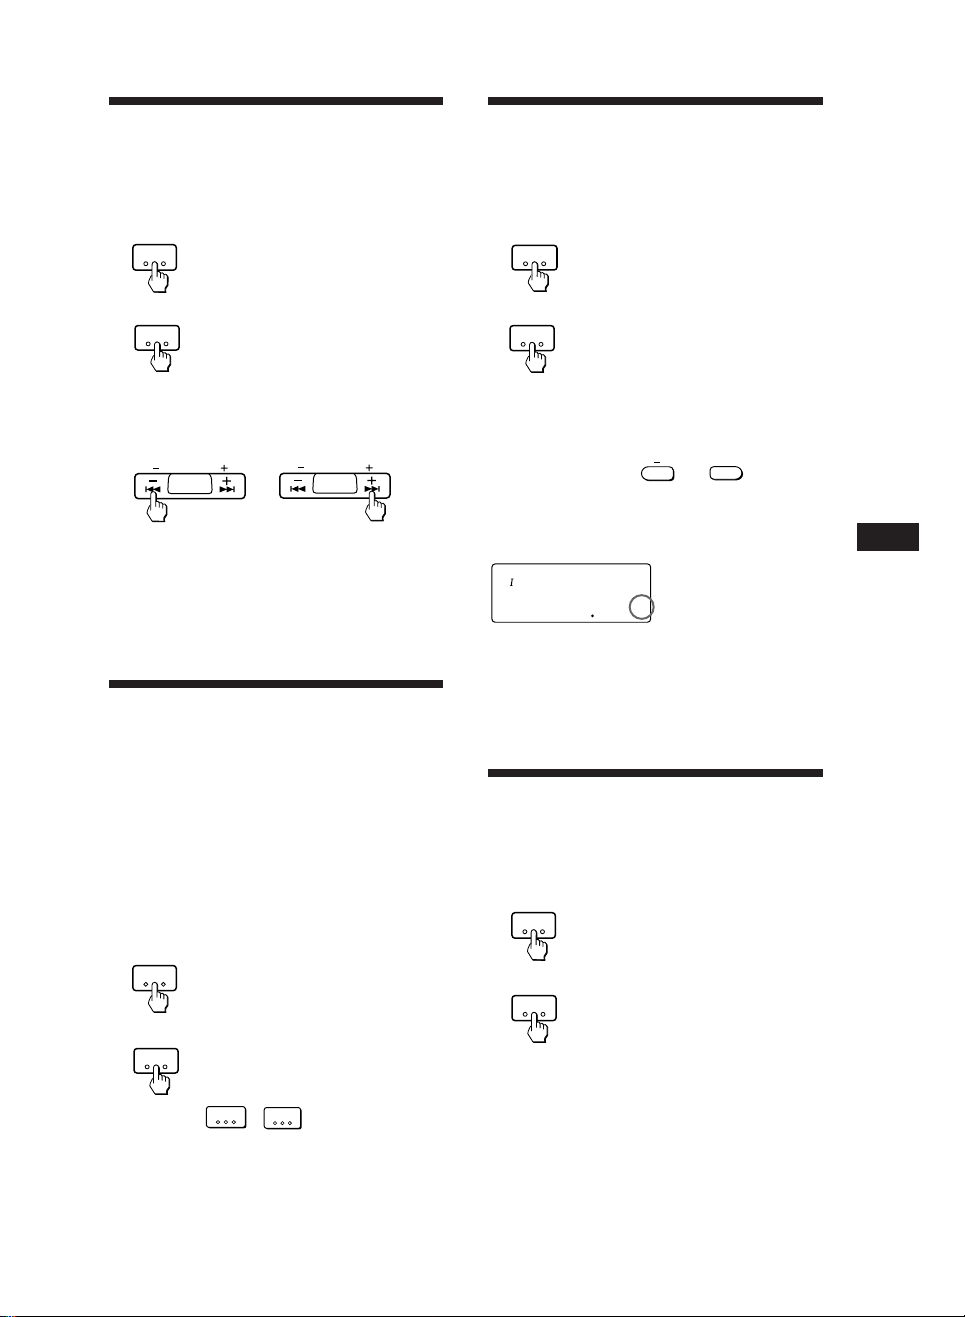
For example, setting it to 10:08
1 Press the
on the unit.
2 Display the time.
(Press the
operation.)
3 Press the
seconds.
A.MEM
A.MEM
FM/AM
TUNER
(
) button to turn
DSPL
button during unit
DSPL
button for more than two
100
The hour digit blinks.
Set the hour digits.
(to go back) (to go forward)
1000
4 Press the
SEL
button momentarily.
1000
The minute digit blinks.
Set the minute digits.
(to go back) (to go forward)
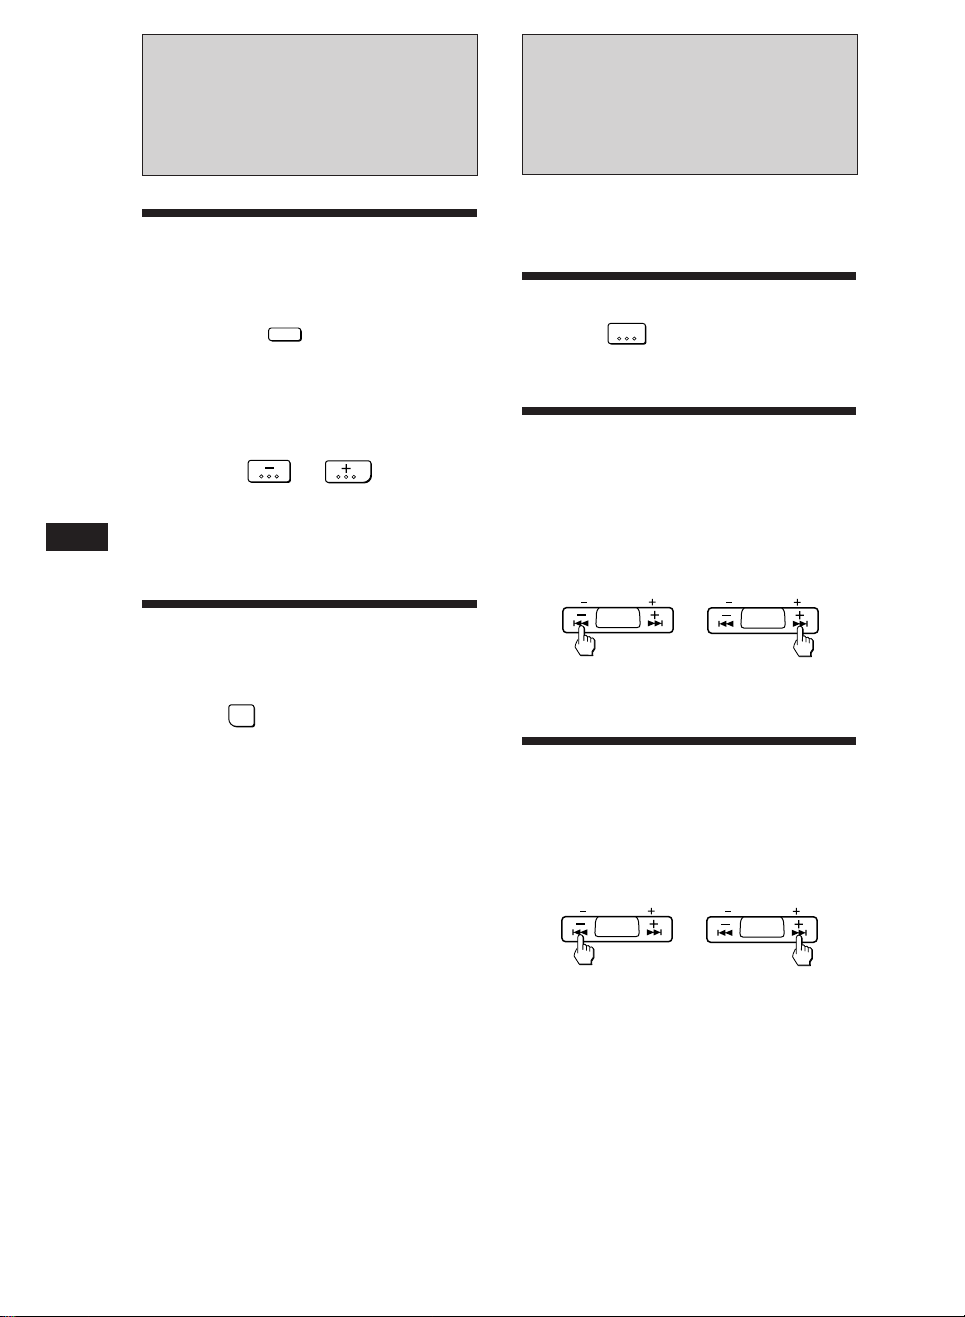
Listening to Tape Playback
After inserting the cassette, playback
starts automatically.
To change the tape direction,
press both the 0 and the ) buttons at the
same time.
EN
Cassette Player Operation
Indication of Tape Transport Direction
The side facing up is being played.
The side facing down is being played.
Tape playback automatically changes
direction at the end of the tape.
Note
Before turning off the unit, eject the tape to avoid tape
damage.
1008
5 Press the
DSPL
button momentarily.
1008
The clock activates.
Note
The clock cannot be set unless the power is turned on. Set
the clock after you turn on the radio, or during tape
playback.
Ejecting the Cassette
Press the button to stop playback and
eject the cassette.
5
Page 6
Fast-winding the Tape
Direction
indicator*
To advance To rewind
Radio Reception
EN
(
9
To resume playback, press the other fastwinding button partially until the locked
button is released.
* The 9 or ( indicator flashes while fast-winding the
tape.
Searching for Stations
Automatically
— Automatic Tuning
1 Select the desired band.
XR-C110:
A.MEM
FM/AM
FM I n FM II n AM n FM I
XR-C111:
A.MEM
TUNER
FM I n FM II n MW n LW n
FM I
2 Press either side of the SEEK/AMS/MANU
button momentarily to search for the
next station (automatic tuning).
MANU
SEEK
AMS
For lower
frequencies
The scanning stops when a station is received.
Press either side of the button repeatedly until
the desired station is received.
When an FM stereo program with a sufficient
signal strength is tuned in,
ST
MANU
SEEK
AMS
For higher
frequencies
1043
the “ST” indication appears.
To avoid the automatic tuning from stopping on
stations too frequently (local seek mode), press
LOUD
SENS
the
indication.
Only the stations with relatively strong signals are tuned
in. The local seek mode functions only when the automatic
tuning is in operation.
6
button momentarily to get the “LCL”
Page 7
Tuning in by Adjusting the
Frequency
— Manual Tuning
Memorizing Only the
Desired Stations
1 Select the desired band.
XR-C110:
A.MEM
FM/AM
FM I n FM II n AM n FM I
XR-C111:
A.MEM
TUNER
FM I n FM II n MW n LW n
FM I
2 Press and hold either side of the SEEK/
AMS/MANU button.
Release the button when the desired station
is received.
MANU
SEEK
AMS
For lower
frequencies
MANU
SEEK
AMS
For higher
frequencies
PREVENT ACCIDENTS!
When tuning in during driving, use the
automatic tuning and the memory preset
tuning instead of the manual tuning.
Memorizing Stations
Automatically
— Automatic Memory Function
Stations with the clearest reception are
automatically searched and memorized on
each band (FM I, FM II and AM (MW, LW for
the XR-C111)). Up to 6 stations on each band
can be stored on the preset number buttons 1
to 6 in the order of band frequency.
1 Select the desired band.
XR-C110:
A.MEM
FM/AM
FM I n FM II n AM n FM I
XR-C111:
A.MEM
TUNER
FM I n FM II n MW n LW n
FM I
A.MEM
A.MEM
FM/AM
2 Press the
than two seconds.
The unit starts scanning the selected band
and memorize the tuned stations on the
preset number button 1 through 6
automatically.
TUNER
(
) button for more
1 Select the desired band.
XR-C110:
A.MEM
FM/AM
FM I n FM II n AM n FM I
XR-C111:
A.MEM
TUNER
FM I n FM II n MW n LW n
FM I
2 Tune in the station which you wish to
store on the preset number button.
3 Press and hold the desired preset
number button (
1
about two seconds.
The number of the pressed preset number
button appears on the display.
FM
Up to 6 stations on each band (FM I, FM II and AM
(MW, LW for the XR-C111)) can be stored on the preset
number buttons in the order of your choice. Therefore, 12
stations can be memorized on FM.
If you try to store another station on the same preset
number button, the previously stored station is erased.
ST
1043
1
to
6
) for
Receiving the Memorized
Stations
1 Select the desired band.
XR-C110:
A.MEM
FM/AM
FM I n FM II n AM n FM I
XR-C111:
A.MEM
TUNER
FM I n FM II n MW n LW n
FM I
2 Press momentarily the preset number
button on which the desired station is
stored.
Note
If you press the preset number button for more than two
seconds, the currently received station is memorized. To
receive the previously memorized station, make sure that
the preset number button is pressed only momentarily.
EN
Cassette Player Operation/Radio Reception
7
Page 8
EN
Other Functions
Adjusting the Sound
Characteristics
1 Select the item you want to adjust by
pressing the
BAS (bass) n TRE (treble) n BAL
(balance) n FAD (fader) n VOL (volume)
n BAS (bass)
2 Adjust the selected item by pressing
either the or button.
Adjust within three seconds after selecting.
(After three seconds the button will again
serve as the volume control button.)
Enjoying Bass and Treble
at Low Volume
— Loudness Function
Press the
two seconds. n “LOUD” appears on the
display.
Bass and treble are boosted. To cancel, press
again.
SEL
button repeatedly.
LOUD
SENS
button for more than
CD Changer Operation
With the optional CD changer(s)
connected
Playing a CD
Press the
CD playback starts.
Locating the Beginnings
of the Tracks
— AMS (Automatic Music Sensor) Function
During playback, press either side of
the SEEK/AMS/MANU button the
number of times you wish to skip the
tracks.
To locate the
previous tracks
Locating the Desired Part
of a Track
During playback, press and hold either
side of the SEEK/AMS/MANU button.
Release the button when you have found the
desired part.
CD
button.
MANU
SEEK
AMS
—Manual Search
MANU
SEEK
AMS
MANU
SEEK
AMS
To locate the
succeeding tracks
MANU
SEEK
AMS
To reverse To forward
8
Page 9
Changing CDs
During playback, press either the
or
button momentarily.
2
DISC
21
To return to the
previous disc
DISC
21
To advance to
the next disc
Selecting CD Changers
(with two CD changers connected)
Press the
playback.
Each time you press, another CD changer is
selected.
CD I ˜ CD II
CD
button during CD
Maintenance
1
Fuse Replacement
When replacing the fuse, be sure to use one
matching the amperage rating stated on the
fuse. If the fuse blows, check the power
connection and replace the fuse. If the fuse
blows again after replacement, there may be an
internal malfunction. In such a case, consult
your nearest Sony dealer.
Fuse (10 A)
Warning
Never use a fuse with an amperage rating
exceeding the one supplied with the unit as
this could damage the unit.
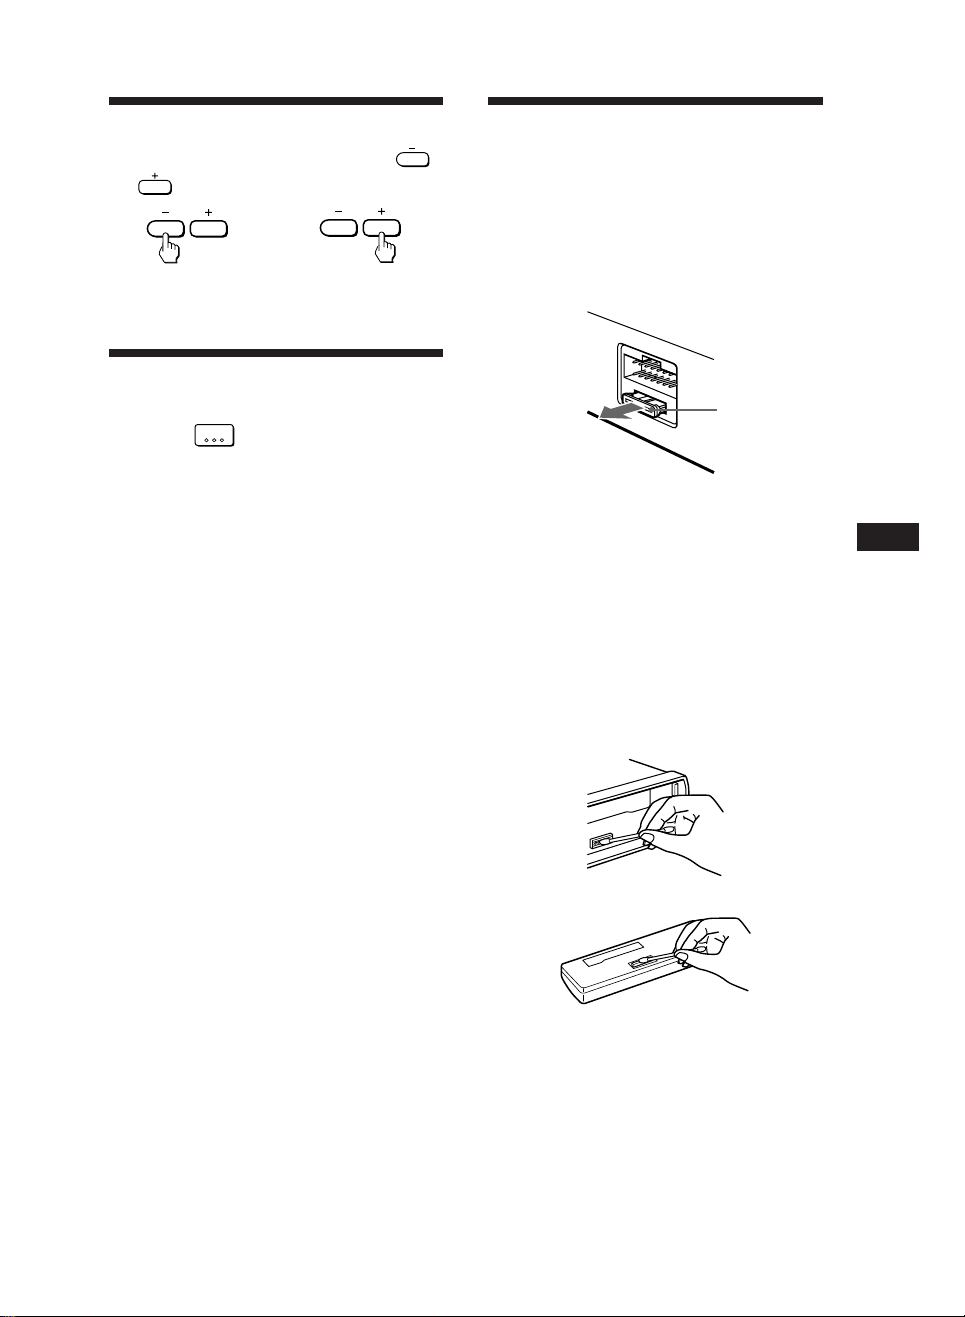
Cleaning the Connectors
The unit may not function properly if the
connectors between the unit and the front
panel are not clean. In order to prevent this,
open the front panel by pressing the RELEASE
button, then detach it and clean with a cotton
swab dipped in alcohol. Do not apply too
much force. Otherwise, the connector may get
damaged.
EN
Other Functions/CD Changer Operation
Main unit
Back of the front panel
9
Page 10
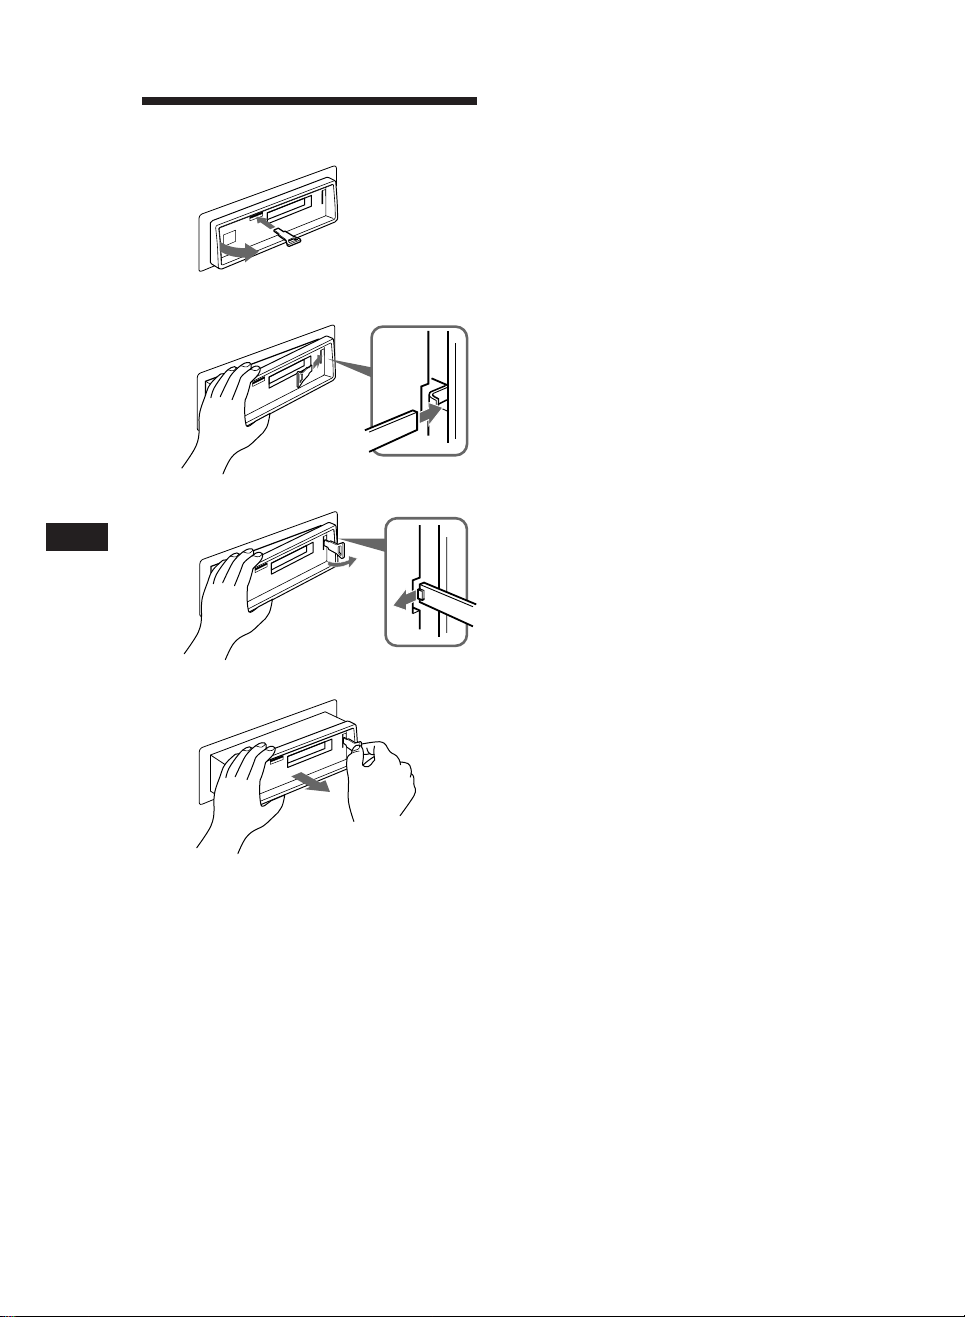
Dismounting the Unit
1
Release key (supplied)
2
EN
3
4
10
Page 11
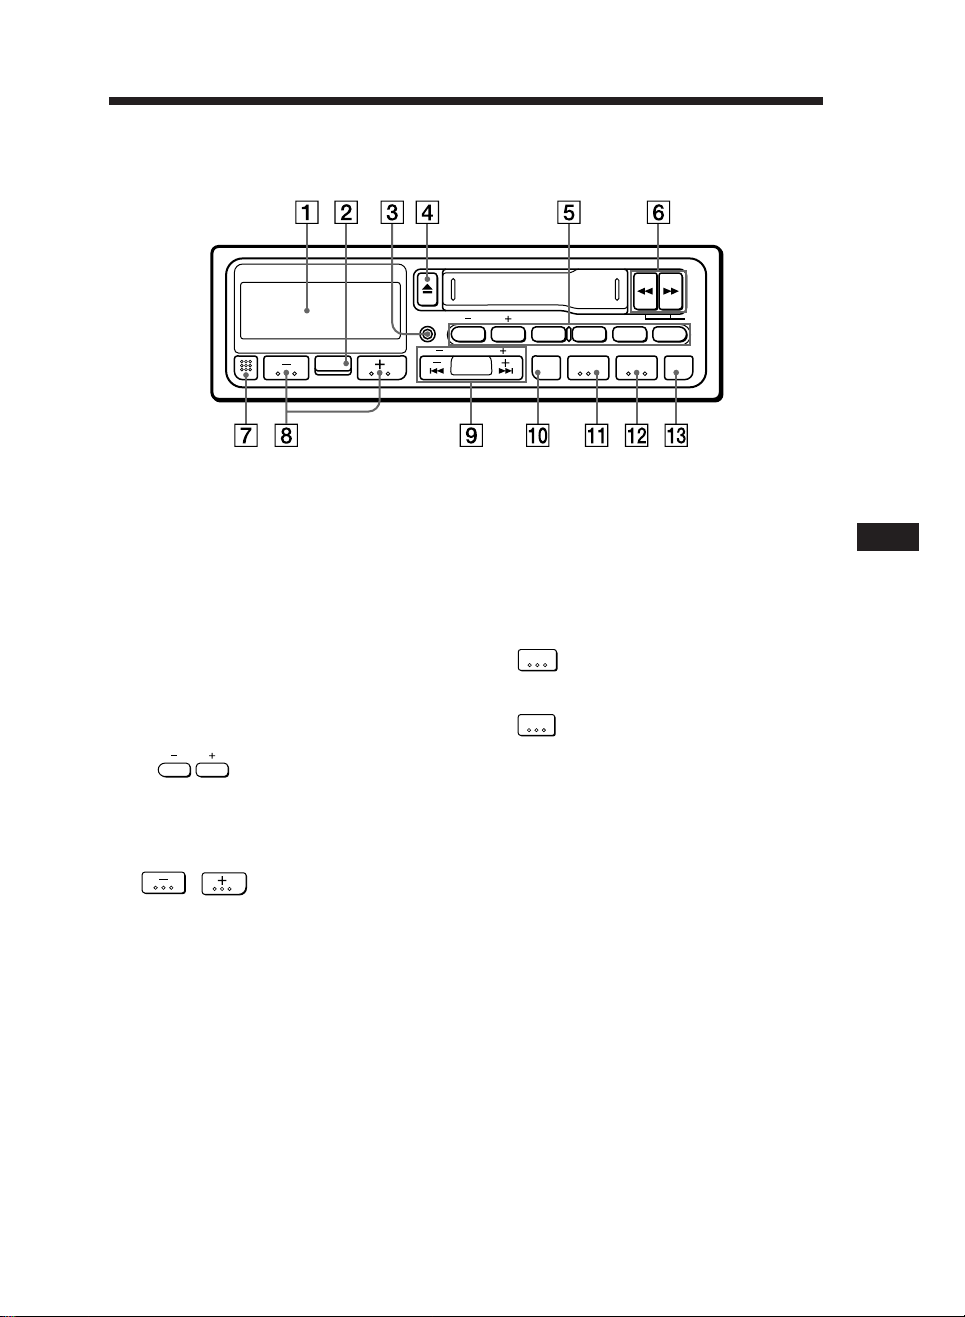
Button Locations
TUNER
A.MEM
RELEASE
SEL
Refer to the pages in r for details.
1 Display window
2 SEL (control mode select) button 58
3 DSPL (display mode change/time set)
button 5
4 6 (eject) button 5
5 During radio reception:
Preset number buttons 7
During CD playback:
DISC
21
(changing discs) buttons 9
6 0 • ) (fast winding)/DIR (tape
transport direction change) buttons 56
7 RELEASE (front panel release) button
49
8 (bass/treble/balance/
fader control/volume) buttons 58
DSPL
DISC
21 3456
MANU
SEEK
AMS
LOUD
SENS
A.MEM
FM/AM
DIR
CD OFF
9 SEEK/AMS/MANU button 678
0 SENS/LOUD (sensitivity adjust/loudness)
button 68
!¡ XR-C110:
A.MEM
FM/AM
(radio on • band select/automatic
memory) button 567
XR-C111:
(radio on • band select/automatic
memory) button 567
!™ CD (disc play/CD changer select) button
89
!£ OFF button 4
The illustration of the front panel in this
manual is of the XR-C110.
EN
11
Page 12

Specifications
EN
Cassette player section
Tape track 4-track 2-channel stereo
Wow and flutter 0.13 % (WRMS)
Frequency response 30 – 15,000 Hz
Signal-to- noise ratio 55 dB
Tuner section
FM
Tuning range 87.5 – 108.0 MHz
Antenna terminal External antenna connector
Intermediate frequency 10.7 MHz
Usable sensitivity 12 dBf (75 ohms)
Selectivity 70 dB at 400 kHz
Signal-to-noise ratio 63 dB (stereo),
68 dB (mono)
Harmonic distortion at 1 kHz
0.5% (stereo),
0.4% (mono)
Separation 28 dB at 1 kHz
Frequency response 30 – 15,000 Hz
Capture ratio 5 dB
AM (for the XR-C110)
Tuning range 531 – 1,602 kHz
Antenna terminal External antenna connector
Intermediate frequency 450 kHz
Sensitivity 35 µV
MW/LW (for the XR-C111)
Tuning range MW: 531 – 1,602 kHz
LW : 153 – 281 kHz
Antenna terminal External antenna connector
Intermediate frequency 450 kHz
Sensitivity MW: 35 µV
LW : 70 µV
General
Output lead Power antenna relay
Tone controls Bass ±8 dB at 100 Hz
Power requirements 12 V DC car battery
Dimensions Approx. 188 × 58 × 170 mm
Mounting dimension Approx. 182 × 53 × 153 mm
Mass Approx. 1.3 kg
Supplied accessories Parts for installation and
Optional accessories BUS cable (supplied with
Optional equipment CD changer
Design and specifications are subject to change without
notice.
control lead
Power amplifier control
lead
Treble ±8 dB at 10 kHz
(negative ground)
(w/h/d) not incl.
projecting parts and
controls
(w/h/d) not incl.
projecting parts and
controls
connections (1 set)
Front panel case (1)
an RCA pin cord)
RC-61 (1 m), RC-62 (2 m),
RCA pin cord
RC-63 (1 m), RC-64 (2 m),
RC-65 (5 m)
CDX-45, CDX-51,
CDX-65 etc.
Source selector XA-C30
Power amplifier section
Outputs Speaker outputs
Speaker impedance 4 – 8 ohms
Maximum power output 20 W × 4 (at 4 ohms)
(sure seal connectors)
12
Page 13

Troubleshooting Guide
The following checklist assists in the correction of most problems which you may encounter with
your unit.
Before going through the checklist below, refer to the connection and operating procedures.
General
Problem
No sound
Indications do not appear on
the display.
Tape playback
Problem
Playback sound is distorted.
Cause/Solution
• Adjust the volume with the button.
• Set the fader control to the center position for 2-speaker
systems.
Remove the front panel and clean the connectors. See “Cleaning
the Connectors” of “Maintenance” for details.
Cause/Solution
Contamination of the tape head. n Clean the head.
Radio reception
Problem
Preset tuning is not possible.
Automatic tuning is not possible.
The “ST” indication flashes.
Cause/Solution
• Memorize the correct frequency.
• The broadcast is too weak.
The broadcast is too weak. n Use the manual tuning.
Tune in precisely.
Disc play
Problem
Playback sound skips.
Cause/Solution
A dusty or defective disc.
Error displays (with the operational CD changer(s) connected)
The following indication flashes for about five seconds.
Display
E01
E02
E04
E99
If the above-mentioned solutions do not help to improve the situation, consult your nearest Sony
dealer.
Cause
The disc magazine is not inserted in the
CD changer.
No disc is inserted in the disc
magazine.
The disc is dirty.
The disc is inserted upside down.
The CD changer cannot be operated
because of some problem.
Solution
Insert the disc magazine with discs into
the CD changer.
Take out the magazine and insert the
discs.
Clean the disc.
Insert the disc correctly.
Press the reset button of the unit.
EN
13
Page 14

Caractéristiques
Généralités
• Vous pouvez emporter la façade détachable
quand vous quittez votre véhicule (page 4).
• Un avertisseur retentit si vous tournez la clé
de contact sans avoir préalablement enlevé la
façade de l’appareil.
• L’amplificateur de haute puissance intégré
(sortie max. 4 ca × 20 W) permet d’utiliser
quatre haut-parleurs.
• Horloge numérique à cycle de 24 heures
(page 5).
Tuner section
• Possibilité de présélectionner jusqu‘à 18
stations : 12 stations FM et 6 stations AM.
(sur le XR-C110)
• Possibilité de prérégler jusqu’à 24 stations: 12
stations sur la gamme FM et 6 stations sur les
gammes PO et GO. (sur le XR-C111)
• Fonction de mémoire automatique pour
présélectionner 18 stations (24 stations sur le
XR-C111) de façon simple et rapide (page 7).
F
Possibilité d’utilisation de
changeurs CD
Plusieurs changeurs CD Sony (non fournis)
peuvent être reliés et pilotés par l’autoradio en
utilisant le(s) sélecteur(s) de source externe(s)
(non fournis).
Précautions
• Avant la mise en service de l’appareil ou
après avoir remplacé la batterie de la voiture,
appuyez sur le petit bouton de
réinitialisation avec un stylo à bille ou un
objet pointu, puis allumez l’appareil.
Bouton de
réinitialisation
• Si vous avez garé votre voiture en plein soleil
et que la température à l’intérieur a
considérablement augmenté, attendez que
l’appareil se refroidisse avant de vous en
servir.
• Si l’alimentation électrique n’arrive pas à
l’appareil, vérifiez d’abord les connexions. Si
elles sont correctes, vérifiez le fusible.
• Si aucun son ne sort des deux haut-parleurs,
réglez le fader (balance avant-arrière) sur la
position centrale.
• Si votre voiture est équipée d’une antenne
électrique, elle se déploie automatiquement
quand l’appareil est en service.
Pour toute question ou problème au sujet de
cet appareil, dont vous ne trouveriez pas
l’explication dans ce mode d’emploi, consultez
votre revendeur Sony.
2
Page 15

Remarques sur les
cassettes
Entretien des cassettes
• Ne touchez pas la face sensible de la bande;
toute salissure peut se déposer sur les têtes.
• Eloignez les cassettes enregistrées des
appareils contenant des aimants puissants
comme les haut-parleurs ou les
amplificateurs, car le son peut s’effacer
partiellement ou être déformé.
• N’exposez pas vos cassettes en plein soleil,
au froid intense ou à l’humidité.
• Le boîtier de la cassette peut chauffer un peu
si vous écoutez la cassette pendant
longtemps. Cette chaleur provient de
l’amplificateur de puissance de l’autoradio.
Ce n’est pas un signe de mauvais
fonctionnement.
Remarques sur les têtes de lecture
de la platine à cassette
• L’utilisation de cassettes entraîne à la longue
une contamination de la tête de lecture, ce
qui a pour effet une qualité sonore médiocre
ou même une perte de son. Nous vous
conseillons par conséquent de nettoyer la tête
de lecture environ une fois par mois au
moyen du set de cassette de nettoyage Sony.
Si la qualité sonore ne s’est pas améliorée
après avoir utilisé la cassette de nettoyage,
consultez votre revendeur Sony.
• Les cassettes usagées ou de qualité médiocre
contaminent beaucoup plus rapidement la
tête de lecture. Suivant le type de la cassette,
la qualité sonore peut s’avérer médiocre
après une ou deux lectures.
Remarque sur les cassettes de plus
de 90 minutes
L’utilisation de cassettes de plus de 90 minutes
n’est pas recommandée sauf pour une lecture
prolongée et ininterrompue. La bande de ces
cassettes est extrêmement fine et a tendance à
se détendre. Elle s’emmêle facilement dans le
mécanisme de la platine en cas de lecture et
arrêts fréquents.
Table des matières
Retrait et pose de la façade ..................................... 4
Réglage de l’horloge ................................................ 5
Fonctionnement du lecteur de
cassette
Ecoute d’une cassette .............................................. 5
Ejection de la cassette .............................................. 5
Bobinage rapide de la bande .................................. 6
Réception radio
Recherche automatique des stations
— Accord automatique ...................................... 6
Accord par réglage de la fréquence
— Accord manuel ............................................... 7
Mémorisation automatique des stations
— Fonction de mémoire automatique ............. 7
Mémorisation de stations particulières ................ 7
Réception des stations mémorisées ...................... 7
Autres fonctions
Réglage du son ......................................................... 8
Pour obtenir un son équilibré même à faible
niveau
— Correction physiologique ............................. 8
Fonctionnement du changeur
CD
Avec changeur(s) CD en option
Lecture d’un CD ...................................................... 8
Recherche des débuts de plage
— Fonction AMS (Automatic Music
Sensor) ............................................................. 8
Recherche d’un passage déterminé d’une plage
— Recherche manuelle ...................................... 8
Changement de CD ................................................. 9
Sélection du changeur ............................................. 9
F
Entretien .................................................................... 9
Retrait de l’autoradio ............................................ 10
Nomenclature des touches ................................... 11
Spécifications .......................................................... 12
Guide de dépannage ............................................. 13
3
Page 16

Retrait et pose de la
façade
Vous pouvez détacher la façade afin d’éviter
que l’appareil ne soit volé.
Retrait de la façade
Avant de détacher la façade, appuyez sur la
OFF
touche
RELEASE pour déverrouiller la façade et
faites-la glisser légèrement vers la gauche.
Enlevez-la ensuite en tirant vers vous.
Veillez à ne pas laisser tomber la façade quand
vous la détachez de l’appareil.
F
Pose de la façade
Appliquez la partie droite de la façade sur
l’appareil et fixez la partie A de la façade sur
la partie B de l’appareil, comme indiqué sur
l’illustration, puis poussez de manière à
l’enclencher.
. Appuyez ensuite sur la touche
Touche RELEASE
Avertisseur
Si vous mettez la clé de contact du véhicule sur
la position OFF (arrêt) sans enlever la façade,
l’alarme se déclenche et émet un bip pendant
quelques secondes.
A
B
Remarques
• Vérifiez que la façade est dans le bon sens avant de la
fixer, car elle ne peut pas être fixée dans l’autre sens.
• Ne forcez pas pour fixer la façade sur l’appareil.Une
légère pression est suffisante.
• Rangez la façade dans son étui pour la transporter.
• N’appuyez pas avec force sur l’afficheur de la façade.
• Mettez l’appareil hors tension avant de retirer la façade.
Cependant, si vous appuyez sur la touche RELEASE
quand l’appareil est sous tension, il se met
automatiquement hors tension pour protéger les hautparleurs.
• Ne laissez pas la façade en plein soleil, près de sources de
chaleur comme des conduits d’air chaud ou dans un
endroit humide. Ne la laissez jamais sur le tableau de
bord, etc. d’une voiture garée en plein soleil, car la
4
température risque d’augmenter considérablement.
Page 17

Réglage de l’horloge
L’horloge fonctionne sur 24 heures
Fonctionnement du
lecteur de cassette
Par exemple, réglez l’heure sur 10:08.
1 Appuyez sur la touche
pour allumer l’appareil.
2 Affichez l’heure
(Appuyez sur
est allumé)
3 Appuyez sur
secondes.
DSPL
pendant que l’appareil
DSPL
pendant plus de deux
A.MEM
FM/AM
TUNER
(
100
Les chiffres des heures clignotent.
Réglez l’heure
(pour reculer) (pour avancer)
1000
4 Appuyez brièvement sur la touche
1000
Les chiffres des minutes clignotent.
Réglez les minutes
(pour avancer)(pour reculer)
A.MEM
)
SEL
Ecoute d’une cassette
La lecture démarre automatiquement
lorsque vous introduisez une cassette.
Pour changer le sens de défilement de
la bande,
appuyez simultanément sur les touches 0 et
).
Indication du sens de défilement de la bande.
La face supérieure de la cassette est reproduite.
.
La face inférieure de la cassette est reproduite.
Le sens de lecture change automatiquement
lorsque la cassette arrive en fin de bande.
Remarque
Avant de mettre l’appareil hors tension, retirez la cassette
pour éviter d’en endommager la bande magnétique.
F
Fonctionnement du lecteur de cassette
1008
5 Appuyez brièvement sur la touche
DSPL
.
1008
L’horloge fonctionne.
Remarque
L’horloge ne peut être mise à l’heure que si l’appareil est
sous tension. Régler l’horloge après avoir mis la radio sous
tension, ou déclenché la lecture d’une cassette.
Ejection de la cassette
Appuyez sur la touche pour arrêter la
lecture et éjecter la cassette.
5
Page 18

Bobinage rapide de la
FM/AM
A.MEM
bande
Indicateur
de sens de
défilement*
(
Pour
avancer
Pour
rebobiner
Réception radio
Recherche automatique
des stations
— Accord automatique
9
Pour reprendre la lecture, appuyez sur l’autre
touche d’avance rapide jusqu’à ce que la
touche verrouillée se libère.
* Le témoin 9 ou ( clignote pendant le bobinage rapide
de la bande.
F
1 Choisissez la gamme d’ondes.
XR-C110:
FM I n FM II n AM n FM I
XR-C111:
A.MEM
TUNER
FM I n FM II n MW n LW n
FM I
2 Appuyez brièvement sur l’un des deux
côtés de la touche SEEK/AMS/MANU
pour chercher la station (accord
automatique).
MANU
SEEK
AMS
Pour descendre
de fréquence
MANU
SEEK
AMS
Pour monter
de fréquence
L’exploration s’arrête lorsque l’accord se fait
sur une station. Appuyez plusieurs fois de
suite sur l’un des côtés de la touche jusqu’à ce
que vous obteniez la station que vous
cherchez.
Si la réception de la station FM stéréo donne un
signal suffisant,
ST
1043
Le témoin “ST” s’allume.
Pour éviter que l’accord automatique s’arrête sur
des stations trop faibles (recherche locale),
appuyez brièvement sur
l’indication “LCL”.
Seules les stations dont le signal est suffisamment intense
seront accordées. Le mode “local” ne fonctionne qu’avec
l’accord automatique.
LOUD
pour obtenir
SENS
6
Page 19

Accord par réglage de la
fréquence
1 Choisissez la gamme d’ondes.
XR-C110:
A.MEM
FM/AM
XR-C111:
A.MEM
TUNER
2 Appuyez sur l’un des deux côtés de la
touche SEEK/AMS/MANU et maintenezle enfoncé.
Lâchez la touche quand la station désirée
est captée.
Vers les fréquences
inférieures
EVITEZ LES ACCIDENTS
Quand vous conduisez, utilisez l’accord
automatique ou les présélections plutôt que
l’accord manuel.
— Accord manuel
FM I n FM II n AM n FM I
FM I n FM II n MW n LW n
FM I
MANU
SEEK
AMS
MANU
SEEK
AMS
Vers les fréquences
supérieures
Mémorisation
automatique des stations
— Fonction de mémoire automatique
Les stations dont la réception est la plus claire
sont automatiquement recherchées et
mémorisées dans chaque bande (FM I, FM II et
AM (PO et GO sur le XR-C111)). Six stations
peuvent être mémorisées dans l’ordre de leur
fréquence dans chaque bande sous les touches
de présélection 1 à 6.
1 Choisissez la gamme d’ondes
XR-C110:
A.MEM
FM/AM
XR-C111:
A.MEM
TUNER
2 Appuyez sur la touche
pendant au moins deux secondes.
L’appareil commence à explorer la bande
sélectionnée et mémorise automatiquement
les stations syntonisées sous les touches de
présélection 1 à 6.
FM I n FM II n AM n FM I
FM I n FM II n MW n LW n
FM I
A.MEM
A.MEM
FM/AM
TUNER
(
)
Mémorisation de stations
particulières
1 Choisissez la gamme d’ondes.
XR-C110:
A.MEM
FM/AM
XR-C111:
A.MEM
TUNER
FM I n FM II n AM n FM I
FM I n FM II n MW n LW n
FM I
2 Accordez la station que vous voulez
mémoriser sous un numéro de
présélection.
3 Appuyez sur la touche de présélection
voulue (
enfoncée pendant environ deux
secondes.
Le numéro de la présélection apparaît dans la
fenêtre d’affichage.
FM
1043
Six stations peuvent être mémorisées dans chaque gamme
d’ondes (FM I, FM II et AM (PO, GO sur le XR-C111))
sous les touches de présélection et dans l’ordre de votre
choix. Ainsi, vous disposez de 12 présélections FM.
Si vous mémorisez une station sous un numéro déjà
occupé, la présélection précédente est effacée.
à 6) et maintenez-la
1
ST
1
Réception des stations
mémorisées
1 Choisissez la gamme d’ondes.
XR-C110:
A.MEM
FM/AM
XR-C111:
A.MEM
TUNER
2 Appuyez brièvement sur la touche du
numéro sous lequel est mémorisée la
station que vous voulez écouter.
Remarque
Si vous appuyez sur la touche du numéro de présélection
pendant plus de deux secondes, la station sera remémorisée.
Pour recevoir la station mémorisée précédemment, veillez à
ne pas appuyer trop longtemps sur la touche.
FM I n FM II n AM n FM I
FM I n FM II n MW n LW n
FM I
F
Fonctionnement du lecteur de cassette/Réception radio
7
Page 20

Fonctionnement du
Autres fonctions
Réglage du son
1 Choisissez le paramètre que vous voulez
régler en appuyant plusieurs fois sur
SEL
.
BAS (grave) n TRE (aigu) n BAL
(balance) n FAD (fader) n VOL (volume)
n BAS (grave)
2 Réglez le paramètre en appuyant sur
Faites le réglage dans les trois secondes du
choix du paramètre. (Après trois secondes, ces
touches servent à nouveau au réglage du
volume.)
F
Pour obtenir un son
équilibré même à faible
niveau
Appuyez sur la touche
plus de deux secondes. n L’indication
“LOUD” apparaît dans la fenêtre
d’affichage.
Le grave et l’aigu sont renforcés. Pour annuler,
appuyez à nouveau sur la touche.
ou .
— Correction physiologique
LOUD
SENS
pendant
changeur CD
Avec changeur(s) CD en option
Lecture d’un CD
MANU
SEEK
AMS
MANU
SEEK
AMS
CD
.
MANU
SEEK
AMS
Pour chercher les
plages suivantes
MANU
SEEK
AMS
Appuyez sur
La lecture du CD commence.
Recherche des débuts de
plage
— Fonction AMS (Automatic Music Sensor)
Pendant la lecture, appuyez sur l’un des
côtés de la touche SEEK/AMS/MANU un
nombre de fois égal à celui de plages
que vous voulez sauter.
Pour chercher les
plages précédentes
Recherche d’un passage
déterminé d’une plage
— Recherche manuelle
Pendant la lecture, appuyez sur l’un des
côtés de la touche SEEK/AMS/MANU et
maintenez-le enfoncé.
Lâchez la touche lorsque vous avez trouvé la
plage.
Vers l’arrière
Vers l’avant
8
Page 21

Changement de CD
Pendant la lecture, appuyez brièvement
sur l’un des côtés de la touche
.
2
DISC
21
Pour revenir au
CD précédent
Pour aller au CD
suivant
DISC
1
ou
21
Sélection du changeur
(si plusieurs changeurs sont raccordés)
Appuyez sur
d’un CD.
Chaque pression correspond à un changement
de changeur.
CD I ˜ CD II
CD
pendant la lecture
Entretien
Remplacement du fusible
Si vous devez remplacer le fusible, veillez à
utiliser un fusible dont l’intensité est identique
à celle inscrite sur le fusible usagé. Si le fusible
grille, vérifiez le raccordement de la source
d’alimentation et remplacez le fusible. Si le
fusible grille une nouvelle fois après avoir été
remplacé, cela peut révéler une défaillance
interne de l’appareil. Le cas échéant, consultez
un revendeur Sony.
Fusible (10 A)
Avertissement
N’utilisez jamais de fusible dont l’intensité
dépasse celle du fusible fourni avec l’appareil,
car vous risqueriez d’endommager l’appareil.
Nettoyage des connecteurs
Si les connecteurs situés entre l’appareil et la
façade ne sont pas propres, il peut arriver que
le système ne fonctionne pas bien. Pour éviter
cela, ouvrez la façade en poussant sur la
touche RELEASE, déposez-le ensuite et
nettoyez-le à l’aide d’un Coton-tige imprégné
d’alcool. N’exercez pas une pression trop
importante. Vous risqueriez sinon
d’endommager le connecteur.
F
Autres fonctions/Fonctionnement du changeur CD
Appareil principal
Dos du panneau avant
9
Page 22

Retrait de l’autoradio
1
Clé de dégagement (fournie)
2
3
F
10
4
Page 23

Nomenclature des touches
FM/AM
A.MEM
TUNER
A.MEM
DSPL
RELEASE
SEL
Voyez les pages r pour les détails.
1 Fenêtre d’affichage
2 Touche SEL (sélection du mode de
commande) 58
3 Touche DSPL (changement d’affichage/
réglage de l’horloge) 5
4 Touche d’ejection 6 5
5 Pendant la réception radio:
Touches des numéros de présélection 7
Pendant la lecture CD:
Touches
DISC
21
(Changement de
CD) 9
6 Touches 0•) (bobinage rapide)/DIR
(inversion du sens de défilement de la
bande) 56
7 Touche RELEASE (pour enlever la façade)
49
8 Touches (grave/aigu/
balance/fader/volume) 58
DISC
21 3456
MANU
SEEK
AMS
LOUD
SENS
A.MEM
FM/AM
DIR
CD OFF
9 Touche SEEK/AMS/MANU 678
!º Touche SENS/LOUD (réglage de
sensibilité/Correction physiologique)
68
!¡ XR-C110:
Touche
(radio enclenchée •
sélection de gamme d’ondes/mémoire
automatique) 567
XR-C111:
Touche
(radio enclenchée •
sélection de gamme d’ondes/mémoire
automatique) 567
!™ Touche CD (lecture disque/sélection de
changeur) 89
!£ Touche OFF 4
La façade illustrée dans le présent mode
d’emploi est celle du modèle XR-C110.
F
11
Page 24

Spécifications
Section lecteur de cassette
Pistes 4 pistes 2 canaux stéréo
Pleurage et scintillement 0,13% (Val. eff. pond.)
Réponse en fréquence 30 – 15.000 Hz
Rapport signal/bruit 55 dB
Section tuner
FM
Plage d’accord 87,5 – 108,0 MHz
Entrée d’antenne Connecteur pour antenne
Fréquence intermédiaire 10,7 MHz
Sensibilité utile 12 dBf (75 ohms)
Sélectivité 70 dB à 400 kHz
Rapport signal/bruit 63 dB (stéréo),
Distorsion harmonique à 1 kHz
Séparation 28 dB à 1 kHz
Réponse en fréquence 30 – 15.000 Hz
Taux de capture 5 dB
AM (sur le XR-C110)
Plage d’accord 531 – 1.602 kHz
F
Borne d’antenne Connecteur externe
Fréquence intermédiaire 450 kHz
Sensibilité: 35 µV
PO/GO (sur le XR-C111)
Plage d’accord PO: 531 – 1.602 kHz
Entrée d’antenne Connecteur pour antenne
Fréquence intermédiaire 450 kHz
Sensibilité: PO: 35 µV
extérieure
68 dB (mono)
0,5% (stéréo),
0,4% (mono)
GO: 153 – 281 kHz
extérieure
GO: 70 µV
Généralités
Fil de sortie Fil de commande de relais
pour antenne électrique
Fil de commande
d’amplificateur
Réglages de tonalité Graves ±8 dB à 100 Hz
Aiguës ±8 dB à 10 kHz
Alimentation Batterie de voiture 12 V
DC (masse négative)
Dimensions env. 188 × 58 × 170 mm
(l/h/p)
parties saillantes et
commandes non comprises
Dimensions de montage env. 182 × 53 × 153 mm
(l/h/p)
parties saillantes et
commandes non comprises
Poids env. 1,3 kg
Accessoires fournis Pièces de montage et de
raccordement (1 jeu)
Etui pour la façade (1)
Accessoires en option Câble de connexion BUS
(Avec cordon à fiches
RCA)
RC-61 (1 m), RC-62 (2 m)
Cordon à fiches RCA
RC-63 (1 m), RC-64 (2 m),
RC-65 (5m)
Appareils en option Changeurs CD
CDX-45, CDX-51,
CDX-65, etc.
Sélecteur de source
XA-C30
Conception et spécifications modifiables sans préavis.
Section amplificateur de puissance
Sorties Haut-parleurs
Impédance des haut-parleurs
Puissance maximum 20 W × 4 (sur 4 ohms)
(connecteurs de sécurité)
4 – 8 ohms
12
Page 25

Guide de dépannage
Les vérifications suivantes vous aideront à résoudre la plupart des problèmes que vous pourriez
rencontrer avec cet appareil.
Avant de parcourir la liste suivante, consultez à nouveau les procédures de branchement et de
fonctionnement.
Généralités
Problème
Pas de son
Pas d’affichage dans la fenêtre
Lecture de cassette
Problème
Le son est déformé
Cause/Solution
• Réglez le volume en appuyant sur la touche .
• Si vous avez une installation à deux haut-parleurs, réglez le
fader sur la position centrale.
Enlevez la façade et nettoyez les contacts. Voyez “Nettoyage des
connecteurs” de la section “Entretien”.
Cause/Solution
La tête est sale; n Nettoyez-la.
Réception radio
Problème
Impossible de faire une
présélection
Accord automatique impossible
L’indication “ST” clignote
Cause/Solution
• Mémorisez la fréquence correcte.
• L’émission est trop faible.
L’émission est trop faible; n Faites l’accord manuellement.
Accordez la station avec plus de précision.
Lecture de CD
Problème
La lecture saute
Cause/solution
Disque sale ou défectueux.
Affichage d’erreurs (avec un ou plusieurs changeurs CD reliés)
Les indications suivantes clignotent pendant environ cinq secondes.
Affichage
E01
E02
E04
E99
Si les solutions ci-dessus ne vous aident pas à résoudre le problème, consultez votre revendeur Sony.
Cause
Le chargeur de CD n’est pas présent
dans le changeur.
Aucun disque ne se trouve dans le
chargeur.
Le disque est sale.
Le disque est à l’envers.
Le changeur CD ne fonctionne pas à
cause d’un problème quelconque.
Solution
Insérez-le avec des disques.
Enlevez le chargeur et insérez des
disques.
Nettoyez le disque.
Posez le disque correctement.
Poussez sur le bouton de réinitialisation.
F
13
Page 26

NL
Kenmerken
Algemeen
• Afneembaar voorpaneel, dat u gemakkelijk
kunt verwijderen van het apparaat, wanneer
u de auto verlaat (pagina 4).
• Een pieptoon waarschuwt u als u het
contact afzet en vergeet het voorpaneel van
het apparaat te verwijderen.
• Krachtige ingebouwde eindversterker
max. uitgangsvermogen: 20 Watt × 4 voor
een systeem met 4 luidsprekers.
• Digitale klok met 24-uurs aanduiding
(pagina 5).
Tuner-gedeelte
• Maximaal 18 zenders kunnen vooraf worden
ingesteld: 12 op de FM en 6 op de AM (bij de
XR-C110).
• Maximaal 24 zenders kunnen worden
vooringesteld: 12 FM-zenders en telkens 6
MG- en LG-zenders (bij de XR-C111).
• Automatische geheugenfunctie om in
totaal 18 zenders (24 zenders voor de
XR-C111) snel en makkelijk in het geheugen
op te slaan (pagina 7).
Optionele CD-wisselaars
U kunt maximaal twee Sony CD-wisselaars
(niet meegeleverd) aansluiten en vanuit het
apparaat bedienen met de Sony
schakeleenheid (niet meegeleverd).
Voorzorgsmaatregelen
• Voordat u het apparaat voor het eerst
gebruikt of nadat u de accu van de auto hebt
verwisseld, dient u met een balpen of een
ander puntig voorwerp op de terugsteltoets
te drukken. Vervolgens kunt u het apparaat
gebruiken.
Terugsteltoets
• Als de temperatuur in de auto als gevolg van
parkeren in de volle zon bijzonder hoog is
opgelopen, moet u het apparaat eerst even
laten afkoelen alvorens u het inschakelt.
• Als het apparaat geen stroom krijgt,
controleer dan eerst de aansluitingen.
Is alles in orde, controleer dan de zekering.
• Als een systeem met twee luidsprekers geen
geluid geeft, zet dan de voor/achter-balans
(FAD) in de middenpositie.
• Als uw wagen is uitgerust met een elektrisch
bediende antenne, schuift deze automatisch
uit wanneer het toestel aan staat.
Als u na het lezen van deze
gebruiksaanwijzing nog vragen of problemen
hebt, kunt u altijd contact opnemen met uw
Sony dealer.
2
Page 27

Enkele opmerkingen over
cassettes
Omgaan met cassettes
• Raak het bandje in de cassette niet aan, want
zelfs het geringste vuil of stof kan aan de
koppen blijven kleven.
• Leg cassettes nooit in de buurt van
apparatuur die magneten bevat, zoals
luidsprekers en versterkers. Een magnetisch
veld kan de opnamen op het bandje
gemakkelijk vervormen of zelfs wissen.
• Stel cassettes niet bloot aan rechtstreeks
zonlicht, extreme koude of vocht.
• Als een bandje gedurende lange tijd wordt
afgespeeld, kan de cassette in het apparaat
warm worden ten gevolge van de
ingebouwde eindversterker. Dit betekent niet
dat er iets mis is.
Opmerkingen over de koppen van
het cassettedeck
• Bij langdurig gebruik van cassettes raken de
koppen vervuild, waardoor de
geluidskwaliteit achteruitgaat of het geluid
zelfs helemaal wegvalt. Daarom bevelen wij
aan om de koppen ongeveer eenmaal per
maand schoon te maken met de afzonderlijk
verkrijgbare Sony cassettereinigingsset.
Indien het geluid niet verbetert na het
gebruik van de reinigingscassette, raadpleeg
dan uw Sony dealer.
• Bij gebruik van oude cassettes of cassettes
van minderwaardige kwaliteit raken de
koppen veel sneller vervuild. Bij sommige
cassettes kan de geluidskwaliteit al na een- of
tweemaal afspelen verslechteren.
Cassettes met een speelduur die
langer is dan 90 minuten
Het gebruik van cassettes met een speelduur
die langer is dan 90 minuten, wordt afgeraden,
tenzij de cassette gedurende lange tijd achter
elkaar kan spelen. De bandjes in deze cassettes
zijn zo dun dat ze gemakkelijk kunnen
uitrekken. Veelvuldig afspelen en stoppen van
deze bandjes kan tot gevolg hebben dat ze
verstrikt raken in het mechanisme van het
cassettedeck.
Inhoudsopgave
Verwijderen en aanbrengen van het
voorpaneel ........................................................... 4
De klok instellen ...................................................... 5
Bediening van het
cassettedeck
Cassettes afspelen .................................................... 5
Cassettes uitwerpen ................................................ 5
Snelspoelen ............................................................... 6
Radio-ontvangst
Automatisch zoeken naar zenders
— Automatische afstemming ........................... 6
Afstemmen op een bepaalde frequentie
— Handmatige afstemming .............................. 7
Zenders automatisch vastleggen in het geheugen
— Automatische geheugenfunctie ................... 7
Alleen de gewenste zenders vastleggen .............. 7
Afstemmen op vastgelegde zenders ..................... 7
NL
Overige functies
Kenmerken van het geluid instellen ..................... 8
Goede weergave van hoge en lage tonen bij een
laag volume
— Loudness-functie ........................................... 8
Bediening van de CD-wisselaar
Als een of meer optionele CD-wisselaars
zijn aangesloten
Een CD afspelen ....................................................... 8
Het begin van een nummer zoeken
— AMS-functie (Automatic Music Sensor) .... 8
Het gewenste deel van een nummer zoeken
— Handmatig zoeken ........................................ 8
CD’s wisselen ........................................................... 9
De gewenste CD-wisselaar instellen ..................... 9
Onderhoud ............................................................... 9
Apparaat verwijderen ........................................... 10
Plaats van de toetsen ............................................. 11
Technische gegevens ............................................. 12
Verhelpen van problemen .................................... 13
3
Page 28

Verwijderen en
aanbrengen van het
voorpaneel
Het voorpaneel van dit apparaat kan
verwijderd worden, om diefstal van de
apparatuur te voorkomen.
Verwijderen van het voorpaneel
Vergeet niet, voordat u het voorpaneel
verwijdert, eerst op de
Druk vervolgens op de RELEASE toets om het
voorpaneel te openen en schuif het voorpaneel
een beetje naar links. Verwijder vervolgens het
voorpaneel door het naar u toe te trekken.
RELEASE toets
OFF
toets te drukken.
• Oefen nooit grote druk uit op het uitleesvenster van het
voorpaneel.
• Voor u het voorpaneel verwijdert, moet u het apparaat
eerst uitschakelen. Als u echter op de RELEASE toets
drukt om het voorpaneel te verwijderen zonder dat het
apparaat is uitgeschakeld, zal de installatie automatisch
worden uitgeschakeld om beschadiging van de
luidsprekers te voorkomen.
• Stel het voorpaneel nooit bloot aan direct zonlicht,
extreme hitte of een hoge vochtigheidsgraad. Laat het
afneembare voorpaneel ook nooit achter op het dashboard,
e.d., wanneer uw wagen in de volle zon staat geparkeerd,
aangezien de temperatuur in de auto bijzonder hoog kan
oplopen.
Waarschuwingstoon
Wanneer u de contactsleutel van de auto in de
“OFF” stand zet zonder eerst het voorpaneel
van het apparaat te verwijderen, zal er ter
waarschuwing enkele seconden lang een
pieptoon klinken.
NL
Pas op dat u het voorpaneel niet laat vallen
wanneer u dit van het apparaat haalt.
Aanbrengen van het voorpaneel
Bevestig de rechterkant van het voorpaneel
aan het apparaat door deel A van het
voorpaneel tegenover deel B van het apparaat
te plaatsen, zoals afgebeeld. Druk vervolgens
de linkerkant van het voorpaneel tegen het
apparaat aan tot u een klik hoort.
A
B
Opmerkingen
• Let op dat het voorpaneel met de juiste kant boven wordt
aangebracht, aangezien omgekeerd aanbrengen van het
voorpaneel niet mogelijk is.
• Oefen bij het aanbrengen van het voorpaneel hier niet te
veel druk op uit. Het voorpaneel kan gemakkelijk
bevestigd worden door het lichtjes tegen het apparaat aan
te drukken.
• Wanneer u het voorpaneel meeneemt, is het aanbevolen
dit in de bijgeleverde beschermhoes te verpakken.
4
Page 29

De klok instellen
De klok werkt met een digitale 24-uurs cyclus.
Bediening van het
cassettedeck
Voorbeeld: instellen van de klok op 10:08 uur.
1 Druk op de
apparaat aan te zetten.
2 Tijdweergave
(Druk op de toets
werkt.)
3 Houd de
ingedrukt.
A.MEM
A.MEM
FM/AM
TUNER
(
) toets om het
DSPL
terwijl het apparaat
DSPL
toets meer dan 2 seconden
100
Het getal voor het uur knippert.
Stel het uur in.
(achteruit)
(vooruit)
1000
4 Druk lichtjes op de
SEL
toets.
1000
De getallen voor de minuten knipperen.
Stel de minuten in.
(achteruit) (vooruit)
Cassettes afspelen
Nadat u een cassette in het apparaat
hebt gestoken, wordt het afspelen
automatisch gestart.
Om de bandlooprichting te wijzigen,
druk tegelijk op de toets 0 en de toets ).
Aanduiding van de bandlooprichting
De bovenkant van de cassette wordt afgespeeld.
De onderkant van de cassette wordt afgespeeld.
Bij weergave wordt de bandlooprichting
aan het eind van de band automatisch
omgekeerd.
Opmerking
Voor u het toestel afzet, haalt u best de cassette eruit om
beschadiging van de cassette te voorkomen.
NL
Bediening van het cassettedeck
1008
5 Druk lichtjes op de
DSPL
toets.
1008
De klok begint te lopen.
Opmerking
De klok kan enkel worden ingesteld wanneer het apparaat
ingeschakeld is. Stel de klok dus in nadat u de radio of
cassettespeler al ingeschakeld hebt.
Cassettes uitwerpen
Druk op de toets om het afspelen te
stoppen en werp de cassette uit.
5
Page 30

Snelspoelen
FM/AM
A.MEM
Bandlooprichtingaanduiding
*
Vooruitspoelen
Radio-ontvangst
Terugspoelen
NL
(
9
Om het afspelen voort te zetten drukt u
gedeeltelijk op de andere snelspoeltoets tot de
vergrendelde toets vrijkomt.
* Tijdens het snelspoelen van de band knippert de 9 of
( aanduiding.
Automatisch zoeken naar
zenders
— Automatische afstemming
1 Kies de gewenste afstemband.
XR-C110:
FM I n FM II n AM n FM I
XR-C111:
A.MEM
TUNER
2 Druk kort op een van beide zijden van de
toets SEEK/AMS/MANU om een
volgende zender te zoeken
(automatische afstemming).
Lagere frequenties
zoeken
Het zoeken stopt als een zender wordt
ontvangen. Blijf op een van beide zijden van
de toets drukken tot de gewenste zender
wordt ontvangen.
Als op de FM een zender met een stereosignaal
van voldoende sterkte wordt gekozen,
FM I n FM II n MW n LW n
FM I
MANU
SEEK
AMS
ST
MANU
SEEK
AMS
Hogere frequenties
zoeken
1043
verschijnt de aanduiding “ST” in het uitleesvenster.
Om te voorkomen dat de automatische
afstemming te vaak stopt, kunt u even op de toets
LOUD
SENS
drukken. In het uitleesvenster verschijnt de
aanduiding “LCL” (local seek mode).
De automatische afstemming stopt dan alleen bij zenders
met een relatief sterk signaal. Deze functie werkt alleen bij
automatische afstemming.
6
Page 31

Afstemmen op een
bepaalde frequentie
— Handmatige afstemming
1 Kies de gewenste afstemband.
XR-C110:
A.MEM
FM/AM
FM I n FM II n AM n FM I
Alleen de gewenste
zenders vastleggen
1 Kies de gewenste afstemband.
XR-C110:
A.MEM
FM/AM
FM I n FM II n AM n FM I
XR-C111:
A.MEM
TUNER
FM I n FM II n MW n LW n
FM I
2 Druk op een van beide zijden van de toets
SEEK/AMS/MANU en houd de toets
ingedrukt.
Laat de toets los als de gewenste zender
wordt ontvangen.
MANU
SEEK
AMS
Lagere frequenties
zoeken
MANU
SEEK
AMS
Hogere frequenties
zoeken
VERKEERSVEILIGHEID!
Wanneer u tijdens het rijden wilt afstemmen,
gebruik dan de automatische afstemming en
de voorinstelnummertoetsen in plaats van de
handmatige afstemming.
Zenders automatisch
vastleggen in het geheugen
— Automatische geheugenfunctie
De zenders die het best worden ontvangen
worden automatisch gezocht en opgeslagen
per afstemband (FM I, FM II en AM (MG, LG
voor de XR-C111). Per afstemband kunnen
maximaal 6 zenders in volgorde van frequentie
worden opgeslagen onder de
voorinstelnummertoetsen 1 tot en met 6.
1 Kies de gewenste afstemband.
XR-C110:
A.MEM
FM/AM
XR-C111:
A.MEM
TUNER
2 Houd de toets
twee seconden ingedrukt.
Het apparaat begint te zoeken in de
gekozen afstemband en slaat de ontvangen
zenders automatisch op onder de
voorinstelnummertoetsen 1 tot en met 6.
FM I n FM II n AM n FM I
FM I n FM II n MW n LW n
FM I
A.MEM
A.MEM
FM/AM
TUNER
(
) meer dan
XR-C111:
A.MEM
TUNER
FM I n FM II n MW n LW n
FM I
2 Stem af op de zender die u wilt opslaan
onder een voorinstelnummertoets.
3 Houd de gekozen
voorinstelnummertoets (1 tot en met
6
) ongeveer twee seconden lang
ingedrukt.
Het voorinstelnummer van de
voorinstelnummertoets verschijnt in het
uitleesvenster.
FM
Per afstemband (FM I, FM II en AM (MG, LG voor de
XR-C111) kunnen maximaal 6 zenders in elke gewenste
volgorde worden opgeslagen onder de
voorinstelnummertoetsen. Op de FM kunnen dus in totaal
12 zenders worden vastgelegd in het geheugen.
Als u probeert een andere zender op te slaan onder dezelfde
voorinstelnummertoets, gaat een eventuele eerdere
instelling voor die toets verloren.
ST
1043
1
Afstemmen op
vastgelegde zenders
1 Kies de gewenste afstemband.
XR-C110:
A.MEM
FM/AM
XR-C111:
A.MEM
TUNER
2 Druk even kort op de
voorinstelnummertoets voor de
gewenste zender.
Opmerking
Als u een geheugentoets langer dan twee seconden
ingedrukt houdt, wordt de huidige zender opgeslagen. Om
af te stemmen op de in het geheugen opgeslagen zender
moet u dus kort op de geheugentoets drukken.
FM I n FM II n AM n FM I
FM I n FM II n MW n LW n
FM I
NL
Bediening van het cassettedeck/Radio-ontvangst
7
Page 32

Bediening van de CD-
NL
Overige functies
Kenmerken van het geluid
instellen
1 Kies het kenmerk dat u wilt instellen
door enkele malen op de toets
drukken.
BAS (lage tonen) n TRE (hoge tonen) n
BAL (links/rechts-balans) n FAD (voor/
achter-balans) n VOL (volume) n BAS
(lage tonen)
2 Wijzig de instelling van het gekozen
kenmerk door op de toets of
te drukken.
Wijzig de instelling binnen drie seconden
nadat u het kenmerk hebt gekozen. (Na drie
seconden krijgt de toets zijn functie van
volumeregelaar terug.)
Goede weergave van
hoge en lage tonen bij een
laag volume
— Loudness-functie
Druk minimaal twee seconden lang op
LOUD
SENS
de
verschijnt “LOUD”.
De hoge en lage tonen worden extra versterkt.
Druk nogmaals op de toets om de functie te
annuleren.
toets. n In het uitleesvenster
SEL
te
wisselaar
Als een of meer optionele CDwisselaars zijn aangesloten
Een CD afspelen
Druk op de toets
Het afspelen van de CD begint.
Het begin van een
nummer zoeken
— AMS-functie (Automatic Music Sensor)
Druk tijdens het afspelen op een van
beide zijden van de toets SEEK/AMS/
MANU. Herhaal deze handeling tot het
gewenste nummer is gevonden.
Zoeken naar
vorige nummers
MANU
SEEK
AMS
Het gewenste deel van
een nummer zoeken
— Handmatig zoeken
Druk tijdens het afspelen op een van
beide zijden van de toets SEEK/AMS/
MANU en houd die ingedrukt.
Laat de toets los als het gewenste nummer is
gevonden.
MANU
SEEK
AMS
CD
.
SEEK
Zoeken naar
volgende nummers
SEEK
MANU
AMS
MANU
AMS
Achterwaarts
Voorwaarts
8
Page 33

CD’s wisselen
Druk tijdens het afspelen even kort op
één van beide toetsen
DISC
21
Terug naar een
vorige CD
1
of 2.
DISC
21
Verder naar een
volgende CD
De gewenste CD-wisselaar
instellen
(als twee CD-wisselaars zijn aangesloten)
Druk tijdens het afspelen van een CD
op de toets
Iedere keer dat u op deze toets drukt, wordt
een andere CD-wisselaar gekozen.
CD I ˜ CD II
CD
.
Onderhoud
Zekering vervangen
Let er bij het vervangen van de zekering op dat
de nieuwe zekering het op de zekering
vermelde ampère heeft. Als de zekering
springt, controleer dan de voedingsaansluiting
en vervang de zekering. Als de zekering weer
springt nadat ze werd vervangen, kan dit
wijzen op een intern defect van het toestel.
Raadpleeg in dit geval een Sony dealer.
Zekering (10 A)
Waarschuwing
Gebruik nooit een zekering met een hoger
aantal ampère dan de bij het apparaat
geleverde zekering, want hierdoor kan het
apparaat beschadigd raken.
Reinigen van de aansluitingen
Het apparaat kan niet naar behoren
functioneren als de aansluitingen tussen het
apparaat en het voorpaneel niet schoon zijn.
Om dat te voorkomen, opent u het voorpaneel
door op de RELEASE toets te drukken, neemt
u het weg en maakt u de aansluitingen schoon
met een in alcohol gedrenkt wattenstaafje.
Oefen niet teveel kracht uit om de stekker niet
te beschadigen.
Apparaat zelf
Achterkant van het
voorpaneel.
NL
Overige functies/Bediening van de CD-wisselaar
9
Page 34

NL
Apparaat verwijderen
1
Vrijmaaksleuteltje
(bijgeleverd)
2
3
4
10
Page 35

Plaats van de toetsen
FM/AM
A.MEM
DSPL
RELEASE
SEL
Zie de pagina’s in r voor meer informatie.
1 Uitleesvenster
2 Toets SEL (kenmerk kiezen) 58
3 Toets DSPL (uitleesvenster instellen/klok
instellen) 5
4 Toets 6 (uitwerpen) 5
5 Tijdens radio-ontvangst:
Voorinstelnummertoetsen 7
Tijdens afspelen van CD:
Toetsen
DISC
21
(CD’s wisselen) 9
6 Toetsen voor snelspoelen/cassettekant
(0•)/DIR) 56
7 Toets RELEASE (voorpaneel verwijderen)
49
8 (lage tonen; hoge tonen;
links/rechts-balans; voor/achter-balans;
volume) 58
DISC
21 3456
MANU
SEEK
AMS
LOUD
SENS
A.MEM
FM/AM
DIR
CD OFF
9 Toets SEEK/AMS/MANU 678
!º Toets SENS/LOUD (gevoeligheid
instellen/loudness) 68
!¡ XR-C110:
(radio aan • kiezen afstemband/
autom. geheugen) 567
XR-C111:
A.MEM
TUNER
(radio aan • kiezen afstemband/
autom. geheugen) 567
!™ Toets CD (CD afspelen/CD-wisselaar
kiezen) 89
!£ Toets OFF 4
In deze handleiding staat het voorpaneel van
de XR-C110 afgebeeld.
NL
11
Page 36

NL
Technische gegevens
Cassettedeck-gedeelte
Sporensysteem 4 sporen, 2 kanalen stereo
Snelheidsfluctuaties 0,13% (WRMS)
Frequentiebereik 30 – 15.000 Hz
Signaal-ruisverhouding 55 dB
Radio-gedeelte
FM
Afstembereik 87,5 – 108,0 MHz
Antenne-aansluiting Externe antenne-
aansluiting
Tussenfrequentie 10,7 MHz
Bruikbare gevoeligheid 12 dBf (75 ohms)
Selectiviteit 70 dB bij 400 kHz
Signaal-ruisverhouding 63 dB (stereo),
68 dB (mono)
Harmonische vervorming bij 1 kHz
0,5% (stereo),
0,4% (mono)
Kanaalscheiding 28 dB bij 1 kHz
Frequentiebereik 30 – 15.000 Hz
Vangverhouding 5 dB
AM (voor XR-C110)
Afstembereik 531 – 1.602 kHz
Antenne-aansluiting Externe antenne-
aansluiting
Tussenfrequentie 450 kHz
Gevoeligheid 35 µV
MG/LG (voor XR-C111)
Afstembereik MG: 531 – 1.602 kHz
LG: 153 – 281 kHz
Antenne-aansluiting Externe antenne-
aansluiting
Tussenfrequentie 450 kHz
Gevoeligheid MG: 35 µV
LG: 70 µV
Versterkergedeelte
Uitgangen Luidsprekeruitgangen
(afgeschermde
aansluitingen)
Luidspreker-impedantie 4 – 8 ohms
Maximaal uitgangsvermogen
20 W × 4 (bij 4 ohms)
Algemeen
Uitgangssnoeren Automatisch antenne-
relaisdraad
Eindversterkerbedieningssnoer
Toonregeling Lage tonen ±8 dB bij
100 Hz
Hoge tonen ±8 dB bij
10 kHz
Stroomvoorziening 12 V gelijkstroom van
auto-accu (met negatieve
aarde)
Afmetingen Ongeveer 188 × 58 × 170
mm (b/h/d) exclusief
uitstekende delen en
bedieningsorganen
Inbouw-afmetingen Ongeveer 182 × 53 × 153
mm (b/h/d) exclusief
uitstekende delen en
bedieningsorganen
Gewicht Ongeveer 1,3 kg
Bijgeleverde accessoires Onderdelen voor montage
en aansluiting (1 set)
Beschermhoes voor
voorpaneel (1)
Los verkrijgbare accessoires
BUS-kabel met
tulpstekkersnoer
RC-61 (1 m), RC-62 (2 m)
Tulpstekkersnoeren
RC-63 (1 m), RC-64 (2 m),
RC-65 (5 m)
Los verkrijgbare apparatuur
CD-wisselaars
CDX-45, CDX-51,
CDX-65 enzovoort
Geluidsbronkiezers
XA-C30
Ontwerp en technische gegevens kunnen zonder
voorafgaande kennisgeving worden gewijzigd.
12
Page 37

Verhelpen van problemen
Het volgende overzicht stelt u in staat de meest voorkomende problemen zelf te verhelpen.
Controleer echter eerst of de aansluitingen allemaal in orde zijn en of er geen vergissingen zijn
gemaakt bij de bediening.
Algemeen
Probleem
Geen geluid
Er verschijnen geen
aanduidingen in het
uitleesvenster.
Cassettes afspelen
Probleem
Het geluid klinkt vervormd.
Radio-ontvangst
Probleem
Geheugenafstemming is niet
mogelijk.
Automatische afstemming is
niet mogelijk
De aanduiding “ST” knippert.
Oorzaak/Oplossing
• Wijzig het volume met de toets.
• Stel in het geval van een systeem met twee luidsprekers de
voor/achter-balans in op de middenpositie.
Verwijder het voorpaneel en reinig de aansluitingen. Raadpleeg
“Reinigen van de aansluitingen” bij “Onderhoud” voor meer
informatie.
Oorzaak/Oplossing
De weergavekop is vuil. n Maak de weergavekop schoon.
Oorzaak/Oplossing
• Leg de juiste frequentie vast in het geheugen.
• Het zendersignaal is te zwak.
Het zendersignaal is te zwak. n Gebruik handmatige
afstemming.
Stem nauwkeuriger af.
NL
Afspelen van CD’s
Probleem
Er worden delen overgeslagen.
Oorzaak/oplossing
De CD is vuil of beschadigd.
Foutmeldingen (als een of meer CD-wisselaars zijn aangesloten)
De volgende foutmeldingen knipperen gedurende ongeveer vijf seconden.
Foutmelding
E01
Oorzaak
Er bevindt zich geen CD-houder in de
wisselaar.
Er bevindt zich geen CD in de houder.
E02
De CD is vuil.
E04
E99
Als u het probleem met behulp van de bovenstaande aanwijzingen niet kunt oplossen, neem dan
contact op met uw Sony-leverancier.
De CD is ondersteboven ingebracht.
Er is een probleem met de bediening
van de CD-wisselaar.
Oplossing
Plaats een houder met CD’s in de
wisselaar.
Haal de houder uit de wisselaar, doe
CD’s in de houder en plaats die
vervolgens terug.
Maak de CD schoon.
Draai de CD om.
Druk op de terugsteltoets op het
apparaat.
13
Page 38

Sony Corporation
 Loading...