


|
|
|
|
|
|
|
Amplifier Operations |
Amplifier Operations |
|
|
|
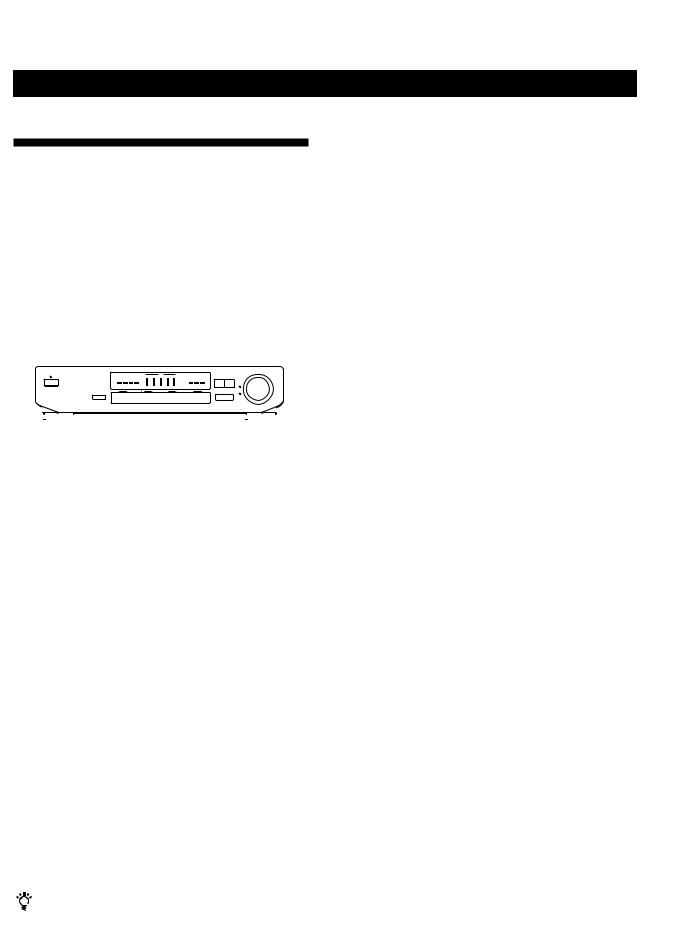
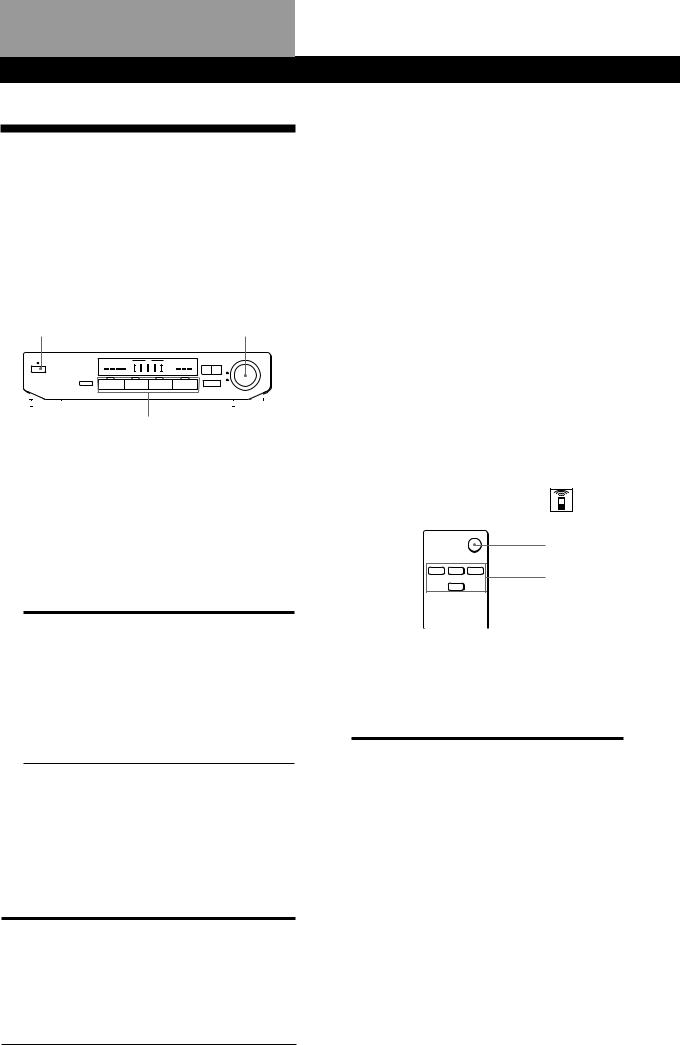
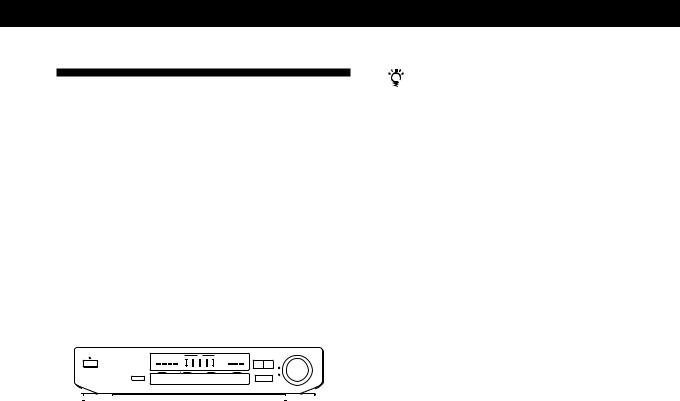
Selecting a Component
To listen to or watch a connected component, first select the function on the amplifier or with the remote. Before you begin, make sure you have:
•Connected all components securely and correctly as indicated on pages 5 to 6.
•Turned MASTER VOLUME to the leftmost position
(0) to avoid damaging your speakers.
POWER |
|
|
MASTER VOLUME |
||||||
|
|
|
|
|
|
|
|
|
|
|
|
|
|
|
|
|
|
|
|
|
|
|
|
|
|
|
|
|
|
|
|
|
|
|
|
|
|
|
|
|
|
|
|
|
|
|
|
|
|
|
|
|
|
|
|
|
|
|
|
|
|
|
|
|
|
|
|
|
|
Function buttons
1Press POWER to turn on the amplifier. Using POWER OFF on the remote puts the
amplifier in STANDBY mode. Press one of the Function buttons to turn on the power, using the amplifier, when it is in STANDBY mode.
2Press a function button to select the component you want to use:
To listen to or watch |
Press |
|
|
Video tapes |
VIDEO 1 |
|
|
TV programmes |
TV |
|
|
Laser discs (or video tapes) |
VIDEO 2 |
|
|
Records, Radio programmes, |
AUX* |
Compact discs (CD), |
|
Audio tapes, or MiniDiscs (MD) |
|
*If you connected an additional audio component to the AUX IN jacks as shown on page 5.
3Turn on the component, the VCR for example, and start playback.
4Turn MASTER VOLUME to adjust the volume.
To |
Do this |
|
|
Mute the sound |
Press MUTING. Press again to |
|
restore the sound |
|
|
Reinforce the bass |
Press BASS BOOST to turn on |
|
the BASS BOOST indicator. |
|
|
Watching video programmes
To take full advantage of the amplifier’s surround sound effects, like Dolby Surround, turn off the speakers on your TV before you start. This also lets you use the amplifier’s remote to control the sound.
To watch TV programmes, do the following:
1Turn on your TV.
2Turn on the amplifier and press TV.
To watch videos or laser discs, do the following:
1Turn on your VCR or LD player.
2Turn on the amplifier and press VIDEO 1 (to watch a video).
Using the remote
POWER OFF
FUNCTION
1Press one of the FUNCTION buttons to select the component you want to use. When the amplifier is in STANDBY mode, the power turns on and the input switches to the component you selected.
To listen to or watch |
Press |
|
|
TV programmes |
TV |
|
|
Video Tapes |
VIDEO 1 |
|
|
Laserdiscs (or video tapes) |
VIDEO 2 |
|
|
an audio component |
AUX |
|
|
2 Start playback.
To turn off the amplifier
Press POWER OFF.
7GB
Amplifier Operations
Recording
This amplifier makes it easy to record to and from the components connected to the amplifier. You don’t have to connect playback and recording components directly: once you select a programme source on the amplifier, you can record and edit as you normally would using the controls on each component.
Before you begin, make sure you’ve connected all components properly.
Function buttons
|
|
|
|
|
|
|
|
|
|
|
|
|
|
|
|
|
|
|
|
|
|
|
|
|
|
|
|
|
|
|
|
|
|
|
|
|
|
|
|
|
|
|
|
|
|
|
|
|
|
|
|
|
|
|
|
|
|
|
|
|
|
|
|
|
|
|
|
|
|
|
|
|
|
|
|
ç |
c |
||
ç |
c |
|
|
|
|
|
|
|
|
|
|
|
|||
|
|
|
|
|
|
|
|
|
|
|
|
|
|
||
|
Playback component |
|
|
|
Recording |
|
|||||||||
|
(programme source) |
|
|
|
component |
|
|||||||||
|
|
|
|
|
|
|
|
|
|
|
(VCR) |
|
|
|
|
ç: Audio signal flow |
|
|
|
||||||||||||
|
|
|
|
|
|
|
|
||||||||
|
|
|
|
|
|
|
|
||||||||
c: Video signal flow |
|
|
|
|
|
|
|
|
|||||||
Recording on a video tape
You can record from a LD player using the amplifier. You can also add audio from a variety of audio sources when editing a video tape.* See your VCR or LD player’s instruction manual if you need help.
*If you connect a stereo system, or an individual audio component, to the AUX IN jacks as shown on page 5.
1Press VIDEO 2 (if an LD player is connected to the VIDEO 2 jacks) to select the programme source.
2Set the component to be ready for playing. For example, insert the laser disc you want to record from into the LD player.
3Insert a blank video tape into the VCR for recording.
4Start recording on the VCR and then start playing the laser disc you want to record.
You can replace audio while copying a laser disc
At the point you want to start adding different sound, press AUX (if an audio component system is connected to the AUX IN jacks, be sure to select the proper source beforehand) and start playback. The sound from the selected component will be recorded over the original audio.
To resume recording the sound of the laser disc, press the VIDEO 2 function button.
8GB

|
|
|
|
|
|
|
|
|
|
|
Using Surround Sound |
Using Surround Sound |
||
|
|
|
|
|
|
|
|
|
|
|
|
|
|
|
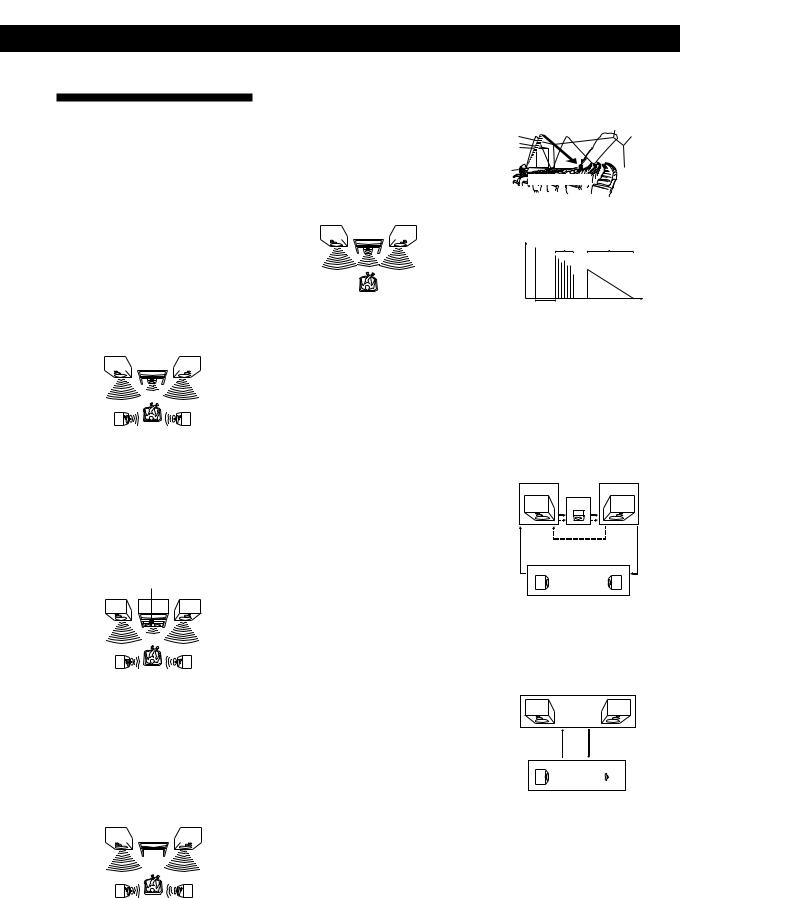
Choosing a Surround Mode
You can take advantage of surround sound simply by selecting one of the three pre-programmed surround modes according to the type of programme you wish
to play.
SURROUND MODE
Getting the Most Out of Dolby
Pro Logic Surround Sound
To obtain the best possible Dolby Pro Logic Surround sound, first select the centre mode according to the speaker system you have. Then, adjust the volume of each speaker.
Note that you must connect the rear speakers and/or one centre speaker to do the following adjustments.
SURROUND
ON/OFF
1Press SURROUND MODE to turn on the surround sound.
One of the SURROUND indicators lights up in the display.
2Press SURROUND MODE repeatedly until the indicator for the surround mode you want lights up.
Select the appropriate surround mode as follows:
Select |
To |
|
|
PRO LOGIC |
Decode programmes processed with Dolby |
|
Surround and create the atmosphere of a |
|
movie theatre. |
|
|
THEATER |
Reproduce the acoustics of a movie |
|
theatre. Ideal for soft, acoustic sounds. |
|
|
SIMULATED |
Create a simulated surround sound from |
|
monaural sources such as old movies or |
|
TV programmes. |
|
|
To turn off surround sound
Press SURROUND ON/OFF on the remote.
You can find Dolby Surround-encoded software by looking at the packaging
However, some videos and laser discs may use Dolby Surround sound even if it’s not indicated on the package.
CENTER MODE LEVEL
Indicators Indicators EFFECT –/+
CENTER MODE |
SURROUND SURROUND MODE |
|
Indicators |
|
SURROUND |
SURROUND |
Modes |
ON/OFF |
EFFECT +/– |
|
|
TEST TONE |
|
REAR |
CENTER |
LEVEL +/– |
LEVEL +/– |
(continued)
9GB

Using Surround Sound
Selecting the centre mode
The amplifier offers you four centre modes: Phantom, Normal, Wide, and 3 Channel Logic. Each mode is designed for a different speaker configuration. Select the mode that best suits your speaker’s system configuration:
1Press SURROUND MODE repeatedly to select the PRO LOGIC sound field.
The CENTER MODE indicator may not light immediately when using SURROUND MODE on the amplifier to select the PRO LOGIC.
2Press CENTER MODE repeatedly until the indicator for the centre mode you want lights in the display. Select the centre mode as follows:
|
If you have |
Select |
So that |
|
|
|
|
|
|
|
Front and rear |
PHANTOM |
The sound of the |
|
|
speakers, no |
|
centre channel is |
|
|
centre speaker |
|
output from the front |
|
|
|
|
speakers. |
|
|
|
|
|
|
|
Front and rear |
NORMAL |
The bass sound of the |
|
|
speakers, and a |
|
centre channel is |
|
|
small centre |
|
output from the front |
|
|
speaker |
|
speakers (because a |
|
|
|
|
small speaker cannot |
|
|
|
|
produce enough |
|
|
|
|
bass). |
|
|
|
|
|
|
|
Front and rear |
WIDE |
For “complete” |
|
|
speakers, and a |
|
Dolby Pro Logic |
|
|
large centre |
|
Surround sound. |
|
|
speaker |
|
|
|
|
|
|
|
|
|
Front and centre |
3 CH LOGIC |
The sound of the rear |
|
|
speakers, no rear |
(3 Channel |
channel is output |
|
|
speaker |
Logic) |
from the front |
|
|
|
|
speakers. |
|
|
|
|
|
|
Adjusting the speaker volume
The test tone feature lets you set the volume of your speakers to the same level.
You can only use the test tone when the surround mode is set to Pro Logic.
Using the controls on the remote lets you adjust the volume level from your listening position.
1Press TEST TONE on the remote.
You will hear the test tone from each speaker sequentially.
2Adjust the volume level so that the test tone from each speaker is at the same level from your listening position.
•To adjust the level of centre speaker, press CENTER LEVEL + or – on the remote.
•To adjust the level of rear speakers, press REAR LEVEL + or – on the remote.
3Press TEST TONE on the remote to turn off the test tone.

 You can adjust all speakers at one time
Adjust MASTER VOLUME on the amplifier or remote.
Note
The centre and rear levels are indicated on the LEVEL meter in the centre of the display during adjustment.
Adjusting the Effect Level
(for THEATER and SIMULATED only)
You can make the surround sound more prominent by increasing the EFFECT level. This control lets you adjust the “presence” of the surround effect in five steps (1-5).
1Start playing a programme source.
2Use EFFECT (–/+) to select the level you prefer. The effect level is indicated on the LEVEL meter in the centre of the display.
Note
Changing the effect level may not produce major variations in the surround effect when used with certain playback sources.
10GB

|
|
|
|
Additional Information |
Additional Information |
|
|
|
Troubleshooting
If you experience any of the following difficulties while using the amplifier, use this troubleshooting guide to help you remedy the problem. Should any problem persist, consult your nearest Sony dealer.
There’s no sound or only a very low-level sound is heard.
/Check that the speakers and components are connected securely.
/Press MUTING if the MUTING indicator turns on.
/Make sure you select the correct component on the amplifier.
/Check wether or not you used the appropriate AV cables.
The left and right sounds are unbalanced or reversed.
/Check that the speakers and components are connected correctly and securely.
Severe hum or noise is heard.
/Check that the speakers and components are connected securely.
/Check that the connecting cords are away from a transformer or motor, and at least 10 feet (3 meters) away from a TV set or fluorescent light.
/Place your TV away from the audio components.
/The plugs and jacks are dirty. Wipe them with a cloth slightly moistened with alcohol.
No sound or only a very low-level sound is heard from the rear speakers.
/Select the appropriate centre mode (see page 10).
/Adjust the speaker volume appropriately (see page 10).
/Make sure you turned on the surround mode.
Note
The Dolby Surround effect is dependent on the software and reception mode being used.
Check the speaker leves using the test mode and make sure to use stereo recordings and to set the TV and VCR to stereo reception mode.
No sound is heard from the centre speaker.
/Select the appropriate centre mode (see page 10).
/Adjust the speaker volume appropriately (see page 10).
Surround effect cannot be obtained.
/Make sure you turn on the surround mode.
No picture or an unclear picture is seen on the TV screen.
/Select the appropriate function on the amplifier.
/Place your TV away from the audio components.
Recording cannot be made.
/Check that the components are connected correctly.
No picture or a scrambled picture from the connected Pay-TV decoder.
/Select the channel using the VCR (see “Connections Using EURO-AV Terminals”).
The remote does not function.
/Point the remote at the remote sensor g on the amplifier.
/Remove the obstacles in the path of the remote and the amplifier.
/Replace both batteries in the remote with new ones if they are weak.
/Make sure you select the correct function on the remote.
11GB

Additional Information
Specifications
Amplifier section
Power output
Surround mode
Frequency response
(DIN 1 kHz) Front:
25 W+25 W/8 ohms Centre:
25 W/8 ohms
(only in the PRO LOGIC and THEATER modes)
Rear:
10 W+10 W/8 ohms
VIDEO 1 + 2, TV, AUX: 20 Hz - 20 kHz ±2 dB
Audio section
Inputs
|
Sensitivity |
Impedance |
|
|
|
VIDEO 1, |
150 mV |
50 kilohms |
VIDEO 2, |
|
|
TV, AUX |
|
|
|
|
|
Outputs |
VIDEO 1 REC: |
|
|
Voltage 150 mV, |
|
|
Impedance 470 ohms |
|
|
REAR, MIX: |
|
|
Voltage: 1 V |
|
|
Impedance: 1 kilohms |
|
BASS BOOST |
+7 dB at 60 Hz |
|
Video section
Inputs |
VIDEO 1, VIDEO 2: |
|
1 Vp-p 75 ohms |
Outputs |
VIDEO 1 REC, TV: |
|
1 Vp-p 75 ohms |
General
Power |
|
requirements |
220-230 V AC, 50/60 Hz |
Power |
|
consumption |
110 W |
Dimensions |
430 x 95 x 280 mm |
|
(17 x 3 3/4 x 11 1/8 inches) |
Mass (Approx.) |
4.6 kg |
|
(10 lb 2 oz) |
Supplied |
|
accessories |
Remote controller |
|
(remote) (1) |
|
Size AA (R6) batteries (2) |
Design and specifications are subject to change without notice.
12GB
Additional Information
Glossary
Centre mode
Setting of speakers to enhance Dolby Pro Logic Surround mode. To obtain the best possible surround sound, select one of the following four centre modes according to your speaker system.
•NORMAL mode
Select NORMAL mode if you have front and rear speakers and a small centre speaker. Since a small speaker cannot produce enough bass, the bass sound of the centre channel is output from the front speakers.
Front |
|
Centre |
Front |
||||||
speaker |
|||||||||
speaker (L) |
|
|
|
|
|
|
speaker (R) |
||
|
|
|
|
|
|
||||
|
|
|
|
|
|
|
|
|
|
|
|
|
|
|
|
|
|
|
|
|
|
|
|
|
|
|
|
|
|
Rear |
Rear |
speaker (L) |
speaker (R) |
•WIDE mode
Select WIDE mode if you have front and rear speakers and a large centre speaker. With the WIDE mode, you can take full advantage of Dolby Surround sound.
Front |
Centre |
Front |
speaker |
||
speaker (L) |
|
speaker (R) |
Rear |
Rear |
speaker (L) |
speaker (R) |
•PHANTOM mode
Select PHANTOM mode if you have front and rear speakers but no centre speaker. The sound of the centre channel is output from the front speakers.
Front |
|
|
Front |
|||
speaker (L) |
|
speaker (R) |
||||
|
|
|
|
|
|
|
|
|
|
|
|
|
|
Rear |
Rear |
speaker (L) |
speaker (R) |
•3 CH LOGIC mode
Select 3 CH LOGIC mode if you have front and centre speakers but no rear speaker. The sound of the rear channel is output from the front speakers to let you experience some of the surround sound without using rear speakers.
Front |
Centre |
Front |
||||||||
speaker |
||||||||||
speaker (L) |
speaker (R) |
|||||||||
|
|
|
|
|
|
|||||
|
|
|
|
|
|
|
|
|
|
|
|
|
|
|
|
|
|
|
|
|
|
|
|
|
|
|
|
|
|
|
|
|
|
|
|
|
|
|
|
|
|
|
|
• Types of sound
Early reflections |
Reverberation |
Direct sound
•Transition of sound from rear speakers
Direct sound Early
Level  reflections Reverberation
Dolby Pro Logic Surround
Decoding system of Dolby Surround sound standardized in TV programmes and movies. Compared with the former Dolby Surround system, Dolby Pro Logic Surround improves sound image by using four separate channels: off-screen audio effects, on-screen dialog, left-to-right panning, and music. These channels manipulate the sound to be heard and enhance the action as it happens on the screen. To take advantage of Dolby Pro Logic, you should have at least one pair of rear speakers and/or one centre speaker. You also need to select the appropriate centre mode to enjoy a full effect.
Dolby Surround
Encoding and decoding system of Dolby Surround sound for consumer use. Dolby Surround decodes the extra channels on the Dolby Surround-encoded sound tracks of movie videos and TV programmes and produces sound effects and echoes that make the action seem to envelop you.
The amplifier offers Dolby Surround (PRO LOGIC) as one of the pre-programmed sound fields. If you have rear or centre speaker(s), we recommend that you customize the Dolby Surround sound field (PRO LOGIC) by selecting the appropriate centre mode to take advantage of Dolby Pro Logic Surround sound.
Surround sound
Sound that consists of three elements: direct sound, early reflected sound (early reflections) and reverberative sound (reverberation). The acoustics where you hear the sound affect the way these three sound elements are heard. These sound elements are combined in such a way that you can actually feel the size and the type of a concert hall.
Early reflection time |
Time |
Test tone
Signal given out by the amplifier for adjusting the speaker volume. The test tone will come out as follows:
•In a system with a centre speaker (NORMAL/WIDE/3 CH LOGIC modes)
The test tone is output from the front L (left), centre, front R (right), and rear speakers in succession.
Front (L) |
Front (R) |
Centre
3 CH LOGIC
Rear (L, R)
NORMAL/WIDE
•In a system without a centre speaker (PHANTOM mode)
The test tone is output from the front and the rear speakers alternately.
Front (L, R)
PHANTOM
Rear (L, R) 
13GB
Index
Index
A, B
Adjusting
speaker volume 10 volume 7
Audio component hookups 5
C
Centre mode 10, 13 NORMAL mode 10, 13 PHANTOM mode 10, 13 3 CH LOGIC mode 10, 13 WIDE mode 10, 13
Connecting. See Hookups
E, F, G
Editing. See Recording
H, I, J, K, L, M
Hookups
audio components 5 mains lead 6 overview 4 speakers 6 TV/VCRs 5
N, O
NORMAL mode 10, 13
P, Q
PHANTOM mode 10, 13 Programme source
selecting 7
D |
Dolby Pro Logic |
R |
|
|
|||
|
Rear panel 5, 6, 14 |
||
|
Surround 13 |
||
|
Recording |
||
|
getting the most out of 9 |
||
|
on a video tape 8 |
||
|
Dolby Surround sound 9, 13 |
||
|
Remote buttons 7, 9 |
||
|
centre mode 10, 13 |
||
|
|
|
|
|
Dubbing. See Recording |
|
|
|
|
|
|
|
|
|
|
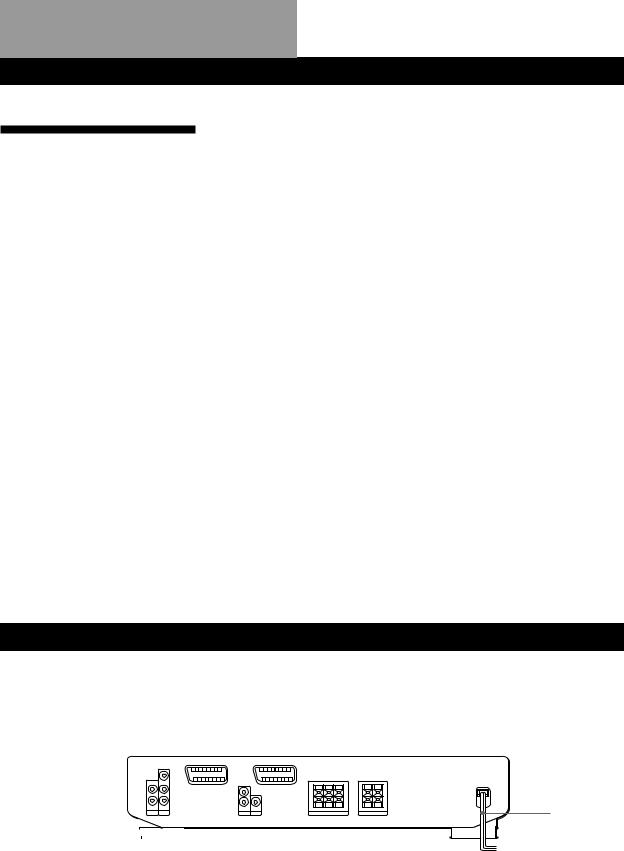
Rear Panel Descriptions
|
1 |
|
2 |
|
|
3 |
|
4 |
|
5 |
6 |
|
7 |
|
8 |
|
9 |
|
|||||
|
|
|
|
|
|
|
|
|
|
|
|
|
|
|
|
|
|
|
|
|
|
|
|
|
|
|
|
|
|
|
|
|
|
|
|
|
|
|
|
|
|
|
|
|
|
|
|
|
|
|
|
|
|
|
|
|
|
|
|
|
|
|
|
|
|
|
|
|
|
|
|
|
|
|
|
|
|
|
|
|
|
|
|
|
|
|
|
|
|
|
|
|
|
|
|
|
|
|
|
|
|
|
|
|
|
|
|
|
|
|
|
|
|
|
|
|
|
|
|
|
|
|
|
|
|
|
|
|
|
|
|
|
|
|
|
|
|
|
|
|
|
|
|
|
|
|
|
|
|
|
|
|
|
|
|
|
|
|
|
|
|
|
|
|
|
|
|
|
|
|
|
|
|
|
|
|
|
|
|
|
|
|
|
|
|
|
|
|
|
|
|
1 |
AUX IN |
4 |
SURROUND REAR out |
2 |
VIDEO 2 IN |
5 |
TV (EURO-AV) |
3 |
VIDEO 1 (EURO-AV) |
|
Audio in |
Audio in/out |
Video out |
Video in/out |
(Without RGB) |
(Without RGB) |
6 SURROUND MIX out |
S
Selecting a programme source 7
using the remote 7
Speakers |
|
connection |
6 |
impedance |
12 |
placement |
6 |
Surround sound 9, 10, 13
T
Test tone 10, 13
3 CH LOGIC mode 10, 13 Troubleshooting 11 TV/VCR hookups 5
U, V
Unpacking 4
W, X, Y, Z
Watching video programmes 7
WIDE mode 10, 13
0
7SPEAKERS (REAR)
8SPEAKER (CENTER)
9FRONT SPEAKERS
0mains lead
14GB

AVERTISSEMENT
Afin d’éviter tout risque d’incendie ou d’électrocution, éviter d’exposer l’appareil à la pluie ou à l’humidité.
Afin d’écarter tout risque d’électrocution, garder le coffret fermé. Ne confier l’entretien de l’appareil qu’à un personnel qualifié.
Précautions
Sécurité
•Si un solide ou un liquide tombait dans le coffret, débranchez l’amplificateur et faites-le vérifier par un technicien qualifié avant de le remettre en service.
Sources d’alimentation
•Avant de mettre l’amplificateur en service, vérifiez que sa tension de fonctionnement correspond à celle du courant secteur local. La tension de fonctionnement est indiquée sur la plaque signalétique à l’arrière de l’amplificateur.
•L’amplificateur n’est pas déconnecté de la source d’alimentation tant qu’il est branché sur une prise murale (secteur), même si vous le mettez hors tension.
•Si vous ne comptez pas utiliser l’amplificateur pendant un certain temps, débranchez-le de la prise murale. Pour débrancher le cordon, tirez sur la fiche et jamais sur le cordon proprement dit.
•Si le cordon d’alimentation secteur doit être remplacé, faites appel à un professionnel uniquement.
•L’interrupteur d’alimentation se trouve sur le panneau avant.
Installation
•N’installez pas l’amplificateur dans un espace confiné, comme dans une bibliothèque ou un meuble encastré.
•Installez l’amplificateur dans un endroit bien ventilé pour éviter tout risque de surchauffe interne et prolonger la durée de vie des composants.
•N’installez pas l’amplificateur près d’une source de chaleur, dans un endroit en plein soleil, poussiéreux ou exposé à des chocs mécaniques.
•Ne posez rien sur le coffret qui puisse bloquer les orifices de ventilation et provoquer un mauvais fonctionnement.
Fonctionnement
•Avant de raccorder d’autres appareils, mettez l’amplificateur hors tension et débranchez-le.
Nettoyage
•Nettoyez le coffret, le panneau et les commandes avec un chiffon doux légèrement imprégné d’une solution détergente neutre. N’utilisez pas de tampon abrasif, poudre à récurer ou solvant, comme de l’alcool ou de la benzine.
En cas de question ou de problème concernant l’amplificateur, consultez le revendeur Sony le plus proche.
2F

Au sujet de ce manuel
Conventions
•Ce mode d’emploi décrit les commandes de l’amplificateur. Vous pouvez également utiliser les commandes de la télécommande qui ont un nom identique ou similaire à celles de l’amplificateur.
•Les icônes suivants sont utilisés dans ce manuel:
Indique que vous ne pouvez
utiliser que la télécommande pour effectuer cette opération.
 Donne des conseils
  supplémentaires pour faciliter l’utilisation.
Cet amplificateur intègre le système surround Dolby.
Fabriqué sous licence de Dolby Laboratories Licensing Corporation. DOLBY, le symbole double-D aet PRO LOGIC sont des marques de Dolby Laboratories Licensing Corporation.
TABLE DES MATIÈRES
Préparatifs
Déballage 4
Description des raccordements 4
Raccordement d’un téléviseur et d’un magnétoscope 5
Raccordement de composants audio 5
Raccordement d’enceintes 6
Raccordement au courant secteur 7
Fonctionnement de l’amplificateur
Sélection d’un composant 8
Enregistrement 9
Ecoute du son surround
Choix d’un mode surround 10
Utilisation optimale du son surround Dolby Pro Logic 10
Informations supplémentaires
Guide de dépannage 12 |
|
F |
Spécifications 13 |
|
|
Glossaire 14 |
|
|
|
|
|
Index 15 |
|
|
|
|
|
Description du panneau arrière 15 |
|
|
3F
Préparatifs
Déballage
Vérifiez si les accessoires suivants sont fournis avec l’amplificateur:
•Télécommande (1)
•Piles de format AA (R6) (2)
Mise en place des piles dans la télécommande
Insérez deux piles de format AA (R6) en faisant correspondre les bornes + et – avec le schéma dans le logement. Pour utiliser la télécommande, dirigez-la vers le détecteur infrarouge g sur l’amplificateur.
]
}
}
]
Quand remplacer les piles
Dans des conditions d’utilisation normales, les piles durent environ six mois. Quand vous ne pouvez plus contrôler l’amplificateur avec la télécommande, remplacez les piles par des neuves.
Remarques
•Ne laissez pas la télécommande dans un endroit extrêmement chaud ou humide.
•N’utilisez pas une pile neuve avec une vieille pile.
•Ne pas exposer le détecteur infrarouge aux rayons directs du soleil ou à un éclairage pour éviter tout mauvais fonctionnement.
•Si vous prévoyez de ne pas utiliser la télécommande pendant longtemps, enlevez les piles pour éviter tout dommage dû à une fuite d’électrolyte et à la corrosion.
Description des raccordements
Vous pouvez raccorder les composants audio/vidéo suivants à l’amplificateur. Selon les composants que vous voulez raccorder, reportez-vous aux pages indiquées pour les connexions. Pour plus de détails sur les différentes prises du processeur, reportez-vous à “Description du panneau arrière” page 15.
Raccordement d’un téléviseur et d’un magnétoscope (5)
Raccordement Téléviseur d’enceintes (6)
Enceinte |
|
|
Magnétoscope |
|
|
|
|
|
|
|
|
|
||||
|
|
|
|
|
|
|
Enceinte |
|||||||||
avant |
|
|
|
|
|
Enceinte |
|
avant |
||||||||
|
|
|
|
|||||||||||||
(gauche) |
|
|
Lecteur LD |
|
centrale |
|
(droite) |
|||||||||
|
|
|
|
|
|
|
|
|
|
|
|
|
|
|
|
|
|
|
|
|
|
|
|
|
|
|
|
|
|
|
|
|
|
|
|
|
|
|
|
|
|
|
|
|
|
|
|
|
|
|
|
|
|
|
|
|
|
|
|
|
|
|
|
|
|
|
|
|
|
|
|
|
|
|
|
|
|
|
|
|
|
|
|
|
|
|
|
|
|
|
|
|
|
|
|
|
|
|
|
|
|
Enceinte |
|
Amplificateur de |
|
Caisson de |
|
Enceinte |
arrière |
|
contrôle, lecteur |
|
grave |
|
arrière |
(gauche) |
|
CD, etc. |
|
amplifié |
|
(droite) |
Raccordement de composants audio (5)
Avant de commencer
•Mettez tous les composants hors tension avant d’effectuer les connexions.
•Effectuez toutes les connexions avant de brancher le cordon d’alimentation secteur.
•Enfoncez les fiches correctement pour éviter un bourdonnement et du bruit.
•Lors du raccordement d’un cordon audio/vidéo, faites correspondre les fiches codées par couleur aux prises des composants: jaune (vidéo) à jaune, blanc (audio, gauche) à blanc et rouge (audio, droit) à rouge.
4F
Raccordement d’un téléviseur et d’un magnétoscope
Aperçu
Ce paragraphe explique comment raccorder des composants vidéo à l’amplificateur. L’illustration cidessous indique l’emplacement des prises.
Voir le manuel supplémentaire “Raccordements aux bornes EURO-AV” pour raccorder le décodeur de télévision à péage ou d’un récepteur satellite.
VIDEO 1
|
|
|
|
|
|
|
|
|
|
|
|
|
|
|
|
|
|
|
|
|
|
|
|
|
|
|
|
|
|
|
|
|
|
|
|
|
|
|
|
|
|
|
|
|
|
|
|
|
|
|
|
|
|
|
|
|
|
|
|
|
|
|
|
|
|
|
|
|
|
|
|
|
|
|
|
|
VIDEO 2 |
TV |
|
||||||||
De quels cordons avez-vous besoin?
•Câble à prise Scart (non fourni) (1 pour le téléviseur et 1 pour le magnétoscope)
•Cordon audio/vidéo (non fourni)
(1 pour un autre magnétoscope ou un lecteur LD)
Jaune |
Jaune |
Blanc (gauche) |
Blanc (gauche) |
Rouge (droit) |
Rouge (droit) |
Raccordements
La flèche ç indique le sens du signal.
Téléviseur
Amplificateur |
Téléviseur |
||||||||||||||||||||||||||||||||||
|
|
|
|
|
|
|
|
|
|
|
|
|
|
|
|
|
|
|
|
|
|
|
|
|
|
|
|
|
|
|
|
|
|
|
|
|
|
|
|
|
|
|
|
|
|
|
|
|
|
|
|
|
|
|
|
|
|
|
|
|
|
|
|
|
|
|
|
|
|
|
|
|
|
|
|
|
|
|
|
|
|
|
|
|
|
|
|
|
|
|
|
|
|
|
|
|
|
|
|
|
|
|
|
|
|
|
|
|
|
|
|
|
|
|
|
|
|
|
|
|
|
|
|
|
|
|
|
|
|
|
|
|
|
|
|
|
|
|
|
|
|
|
|
TV
EURO AV
Magnétoscope
Amplificateur Magnétoscope
VIDEO 1
EURO AV
Préparatifs
Magnétoscope ou lecteur LD
|
Magnétoscope ou |
Amplificateur |
lecteur LD |
|
OUTPUT |
|
VIDEO |
VIDEO |
|
IN |
|
L |
AUDIO |
|
|
R |
L |
|
|
AUDIO |
|
IN |
R |
VIDEO 2 |
|
Remarque
Avec certains téléviseurs, le changement de chaîne de télévision peut produire un bruit de commutation sur le signal audio EURO AV. Réduisez le volume de l’amplificateur avant de changer de chaîne pour éviter d’endommager les enceintes ou vos facultés auditives. Si vous voulez éliminer ce bruit, essayez de faire les raccordements indiqués dans “Autres raccordements” du manuel supplémentaire “Raccordements aux bornes EUROAV”.
Raccordement de composants audio
Aperçu
Ce paragraphe explique comment raccorder toute une chaîne audio ou un élément seulement à l’amplificateur pour écouter des sources stéréo en surround.
L’illustration ci-dessous indique l’emplacement des prises.
AUX IN
De quels cordons avez-vous besoin?
Cordon audio (non fourni) (1)
Blanc (gauche) |
Blanc (gauche) |
Rouge (droit) |
Rouge (droit) |
(continuer page suivante)
5F

Préparatifs
Raccordements
La flèche ç indique le sens du signal.
Chaîne audio
Raccorder les prises PRE OUT, ADAPTER OUT ou TAPE REC de l’amplificateur de contrôle aux prises AUX IN de l’amplificateur.
Amplificateur |
Amplificateur de |
|
contrôle |
||
|
||
L |
PRE OUT |
|
|
||
|
L |
|
R |
|
|
IN |
R |
|
|
||
AUX |
|
Lecteur CD (ou autre)
Raccordez les prises LINE OUT de votre lecteur CD (ou autre appareil) aux prises AUX IN de l’amplificateur.
Amplificateur |
Lecteur CD (etc.) |
L |
LINE OUT |
|
|
|
L |
R |
|
IN |
R |
|
|
AUX |
|
Raccordement d’enceintes
Aperçu
Ce paragraphe décrit la liaison des enceintes à l’amplificateur. Le raccordement d’un caisson de grave amplifié améliorera la réponse des graves. L’illustration ci-dessous indique l’emplacement des bornes de l’amplificateur.
CENTER SPEAKERS
Sortie SURROUND REAR |
|
FRONT SPEAKERS |
||||||||||||||||
|
|
|
|
|
|
|
|
|
|
|
|
|
|
|
|
|
|
|
|
|
|
|
|
|
|
|
|
|
|
|
|
|
|
|
|
|
|
|
|
|
|
|
|
|
|
|
|
|
|
|
|
|
|
|
|
|
|
|
|
|
|
|
|
|
|
|
|
|
|
|
|
|
|
|
|
|
|
|
|
|
|
|
|
|
|
|
|
|
|
|
|
|
|
|
|
|
|
|
|
|
|
|
|
|
|
|
|
|
|
|
|
|
|
Sortie SURROUND REAR SPEAKERS
MIX
Pour obtenir un effet surround optimum, positionnez les enceintes comme illustré ci-dessous.
Arrière
60 - 90 cm
45°
Avant
De quels cordons avez-vous besoin?
Vous avez besoin de cordons d’enceintes (non fournis) (1 pour chaque enceinte)
(+) |
(+) |
(–) |
(–) |
Dénudez environ 15 mm de gaine à chaque extrémité du cordon. Veillez à faire correspondre les bornes des cordons d’enceintes aux bornes des composants: + à + et – à –. Si les cordons sont inversés, le son sera déformé et les graves feront défaut.
Raccordements
Enceintes avant
Enceinte avant |
Amplificateur |
Enceinte avant |
(droite) |
(gauche) |
} |
] |
} |
] |
|
R |
L |
|
|
|
FRONT |
|
|
SPEAKERS |
|
|
Enceintes centrale et arrière
Enceinte |
|
arrière (droite) |
Amplificateur |
} |
] |
|
|
R |
L |
|
REAR |
CENTER |
|
SPEAKERS |
|
Enceinte Enceinte arrière centrale (gauche)
} |
] |
} |
] |
|
|
Caisson de grave amplifié
Amplificateur |
Caisson de grave |
|
|
L |
INPUT |
|
R
REAR MIX
SURROUND
•Si vous utilisez des enceintes arrière sans fil
Vous pouvez raccorder le système d’enceintes arrière sans fil aux prises de sortie SURROUND REAR.
Amplificateur |
Emetteur (pour les |
|
enceintes arrière sans fil) |
||
|
AUX |
|
L |
INPUT |
|
R |
L |
|
|
||
REAR MIX |
R |
|
SURROUND |
||
|
6F

Préparatifs
Raccordement au courant secteur
Branchement du cordon d’alimentation secteur
Branchez le cordon d’alimentation secteur de l’amplificateur et des composants audio/vidéo sur une prise murale.
/
à une prise murale
Avant d’utiliser l’amplificateur
Assurez-vous que la commande MASTER VOLUME est tournée complètement vers la gauche (0).
7F
Fonctionnement de l’amplificateur
Sélection d’un composant
Pour écouter ou regarder un composant raccordé, vous devez d’abord sélectionner la fonction sur l’amplificateur ou avec la télécommande.
Avant tout, vérifiez que:
•Vous avez raccordé tous les composants correctement comme indiqué aux pages 5 à 7.
•Vous avez tourné la commande MASTER VOLUME complètement à gauche (position 0) pour éviter d’endommager les enceintes.
POWER |
MASTER VOLUME |
|||
|
|
|
|
|
|
|
|
|
|
|
|
|
|
|
Touches de fonction
1Appuyez sur POWER pour mettre l’amplificateur sous tension.
La touche POWER OFF sur la télécommande met l’amplificateur en mode STANDBY. Appuyez sur une des touches de fonction pour mettre l’appareil sous tension par l’amplificateur quand il est en mode STANDBY.
2Appuyez sur une touche de fonction pour sélectionner un composant:
Pour écouter ou regarder |
Appuyer sur |
|
|
Cassettes vidéo |
VIDEO 1 |
|
|
Programmes de télévision |
TV |
|
|
Disques laser (ou cassettes vidéo) |
VIDEO 2 |
|
|
Disques analogiques, programmes |
AUX* |
radio, disques compacts (CD), |
|
cassettes audio ou minidisques (MD) |
|
*Si vous raccordez un appareil audio supplémentaire aux prises AUX IN, comme indiqué sur la page 6.
3Mettez le composant, par exemple le magnétoscope, sous tension et commencez la lecture.
4Tournez la commande MASTER VOLUME pour régler le volume.
Pour |
Vous devez |
|
|
Couper le son |
Appuyer sur MUTING. |
|
Appuyez de nouveau pour |
|
rétablir le son. |
|
|
Renforcer les graves |
Appuyer sur BASS BOOST |
|
pour allumer l’indicateur |
|
BASS BOOST. |
Pour regarder des programmes vidéo
Pour tirer le meilleur parti des effets surround de l’amplificateur, tel le Dolby Surround, désactivez les haut-parleurs du téléviseur. Vous pourrez ainsi utiliser la télécommande de l’amplificateur pour contrôler le son.
Pour regarder des émissions de télévision, procédez comme suit:
1Allumez le téléviseur.
2Allumez l’amplificateur et appuyez sur TV.
Pour regarder des vidéos ou des disques laser, procédez comme suit:
1Allumez le magnétoscope ou le lecteur LD.
2Allumez l’amplificateur et appuyez sur VIDEO 1 (pour regarder une vidéo).
Utilisation de la télécommande
POWER OFF
FUNCTION
1Appuyez sur une des touches FUNCTION pour sélectionner le composant à utiliser. Quand l’amplificateur est en mode STANDBY, il se met sous tension et se règle sur l’entrée du composant sélectionné.
Pour écouter ou regarder |
Appuyez sur |
|
|
Programmes TV |
TV |
|
|
Cassettes vidéo |
VIDEO 1 |
|
|
Disques laser (ou cassettes vidéo) |
VIDEO 2 |
|
|
Appareil audio |
AUX |
|
|
2 Démarrez la lecture.
Pour mettre l’amplificateur hors tension
Appuyez sur POWER OFF.
8F
Fonctionnement de l’amplificateur
Enregistrement
Vous pouvez réaliser facilement des enregistrements entre les différents composants raccordés à l’amplificateur. Il n’est pas nécessaire de raccorder directement les composants de lecture et d’enregistrement, car une fois que vous avez sélectionné la source de programme sur l’amplificateur, vous pouvez procéder à l’enregistrement ou au montage comme si vous utilisiez les commandes de chaque composant.
Avant de commencer, vérifiez que vous avez raccordé correctement tous les composants.
Touches de fonction
|
|
|
|
|
|
|
|
|
|
|
|
|
|
|
|
|
|
|
|
|
|
|
|
|
|
|
|
|
|
|
|
|
|
|
|
|
|
|
|
|
|
|
|
|
|
|
|
|
|
|
|
|
|
|
|
|
|
|
|
|
|
|
|
|
|
|
|
|
|
|
|
|
|
|
ç |
c |
|||
ç |
c |
|
|
|
|
|
|
|
|
|
|
||||
|
|
|
|
|
|
|
|
|
|
|
|
|
|||
|
|
Appareil de lecture |
|
|
|
Appareil |
|||||||||
|
(source de programme) |
|
|
d’enregistrement |
|||||||||||
|
|
|
|
|
|
|
|
|
|
(magnétoscope) |
|||||
ç: Sens du signal audio |
|||||||||||||||
|
|
|
|
|
|
|
|||||||||
|
|
|
|
|
|
|
|||||||||
c: Sens du signal vidéo |
|
|
|
|
|
|
|
||||||||
Enregistrement sur une cassette vidéo
Vous pouvez enregistrer un disque laser en utilisant l’amplificateur. Vous pouvez également ajouter le son de diverses sources sonores lors du montage d’une cassette vidéo.* Consultez le mode d’emploi du magnétoscope ou du lecteur LD si nécessaire.
*Si vous raccordez une chaîne stéréo ou un composant audio séparé aux prises AUX IN, comme indiqué à la page 6.
1Appuyez sur VIDEO 2 (si un lecteur LD est raccordé aux prises VIDEO 2) pour sélectionner la source de programme.
2Réglez le composant pour la lecture.
Par exemple, insérez un disque laser dans le cas du lecteur LD.
3Insérez une cassette vierge dans le magnétoscope pour l’enregistrement.
4Démarrez l’enregistrement sur le magnétoscope, puis la lecture du disque laser que vous voulez enregistrer.
Vous pouvez changer le son pendant l’enregistrement d’un disque laser
A l’endroit où vous voulez ajouter une autre bande son, appuyez sur AUX (si une chaîne audio est raccordée aux prises AUX IN, veillez à sélectionner auparavant la source) et commencez la lecture. Le son du composant sélectionné est enregistré à la place du son original.
Pour enregistrer de nouveau le son du disque laser, appuyez sur la touche de fonction VIDEO 2.
9F
 Loading...