

Sony SLV-999HF, SLV-M11HF, SLV-M91HF Service manual
SLV-999HF/M11HF/M91HF
RMT-V267B/V278/V280
SERVICE MANUAL
j
G
System
Format
VHS NTSC standard
Video recording system
Rotary head helical scanning FM system
Video heads
Double azimuth four heads
Video signal
NTSC color, EIA standards
Tape speed
SP: 33.35 mm/s (1
EP: 11.11 mm/s
LP: 16.67 mm/s
playback only
Maximum recording/playback time
8 hrs. in EP mode (with T-160 tape)
Fast-forwar d and rewind time
Approx. 1 min. (with T-120 tape)*
* The time may vary according to the brand
and/or type of tape or the operating
condition of the VCR.
uner section
T
Channel coverage
VHF 2 to 13
UHF 14 to 69
CATV A-8 to A-1, A to W, W+1 to W+84
Antenna
75-ohm antenna terminal for VHF/UHF
3
/8 inches/s)
7
(
/16 inches/s)
11
(
/16 inches/s),
Photo: SLV-M91HF
RMT-V278
SPECIFICATIONS
Inputs and outputs
LINE-1 IN and -2 IN
VIDEO IN, phono jack (1 each)
Input signal: 1 Vp-p, 75 ohms, unbalanced,
sync negative
AUDIO IN, phono jacks (2 each)
Input level: 327 mV rms
Input impedance: more than 47 kilohms
LINE OUT
VIDEO OUT , phono jack (1)
Output signal: 1 Vp-p, 75 ohms, unbalanced,
sync negative
AUDIO OUT, phono jacks (2)
Standard output: 327 mV rms
Load impedance: 47 kilohms
Output impedance: less than 10 kilohms
S-LINK (CONTROL S IN)
Mini jack (1)
CABLE BOX CONTROL (CONTROL S OUT)
Stereo mini jack (plug in power) (1)
CPD IN (M11HF/M91HF only)
Mini jack (1)
Timer section
Clock
Quartz locked
Timer indication
12-hour cycle
Timer setting
ograms per month (max.)
8 pr
Power back-up
Built-in self-charging capacitor
Back-up duration: up to 1 hour at a time
US Model
SLV-M11HF/M91HF
Canadian Model
SLV-999HF/M11HF/M91HF
SR MECHANISM
Refer to the SERVICE MANU AL of VHS MECHANICAL
ADJUSTMENT
(9-921-647-11).
for MECHANICAL ADJUSTMENTS
General
Power requirements
120 V AC, 60 Hz
Power consumption
35 W
Operating temperatur e
5°C to 40°C (41°F to 104°F)
Storage temperature
– 20°C to 60°C (– 4°F to 140°F)
Dimensions
Approx. 430 × 100 × 281 mm (w/h/d)
Approx. (17 × 4 × 11
including projecting parts and controls
Mass
Approx. 4.6 kg (10 lb 2 oz)(M11HF/M91HF)
Approx. 4.3 kg (9 lb 8 oz)(999HF)
1
/8 inches)
Supplied accessories
Remote commander (1)
Size AA (R6) batteries (2)
75-ohm coaxial cable with F-type connectors (1)
Audio/video cable (3-phono, 1-mini to 3-phono,
1-mini) (1)
Monaural cable (1-mini to 1-mini) (1)
(M11HF/M91HF only)
Cable Mouse (cable box controller) (1)
SmartFile labels (5) (M11HF/M91HF only)
Design and specifications are subject to change
without notice.
MICROFILM
VIDEO CASSETTE RECORDER
SAFETY CHECK-OUT
After correcting the original service problem, perform the following
safety checks before releasing the set to the customer.
1. Check the area of your repair for unsoldered or poorly-soldered
connections. Check the entire board surface for solder splashes
and bridges.
2. Check the interboard wiring to ensure that no wires are
"pinched" or contact high-wattage resistors.
3. Look for unauthorized replacement parts, particularly
transistors, that were installed during a previous repair . Point
them out to the customer and recommend their replacement.
4. Look for parts which, though functioning, show obvious signs
of deterioration. Point them out to the customer and
recommend their replacement.
5. Check the line cord for cracks and abrasion.
Recommend the replacement of any such line cord to the
customer.
6. Check the B+ voltage to see it is at the values specified.
7. Check the antenna terminals, metal trim, "metallized" knobs,
screws, and all other exposed metal parts for AC leakage.
Check leakage as described below.
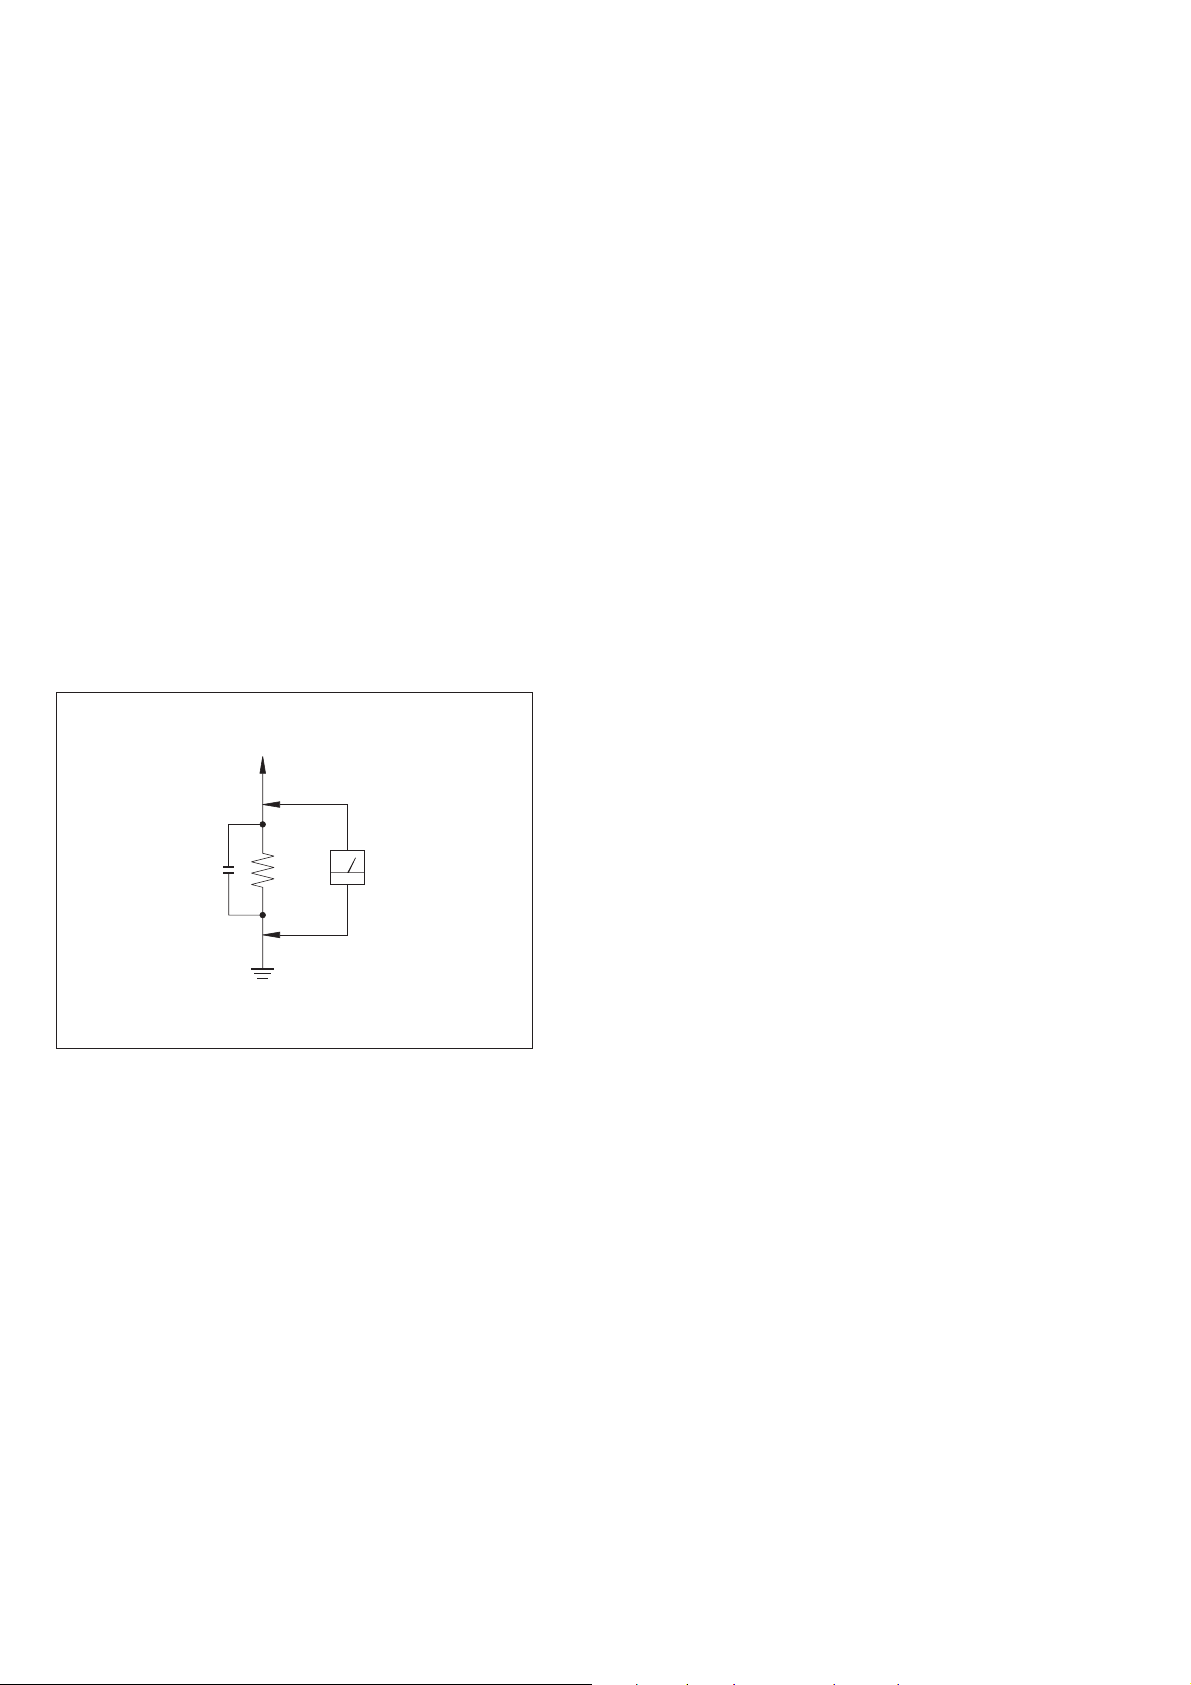
T o Exposed Metal
Parts on Set
AC
0.15
µ
F
1.5 k
Ω
Voltmeter
(0.75 V)
LEAKAGE TEST
The AC leakage from any exposed metal part to earth ground and
from all exposed metal parts to any exposed metal part having a
return to chassis, must not exceed 0.5mA (500 microampers).
Leakage current can be measured by any one of three methods.
1. A commercial leakage tester, such as the Simpson 229 or RCA
TW-540A. Follo w the manufacturers' instructions to use these
instruments.
2. A battery-operated A C milliammeter. The Data Precision 245
digital multimeter is suitable for this job.
3. Measuring the voltage drop across a resistor by means of a
VOM or battery-operated AC v oltmeter. The "limit" indication
is 0.75V, so analog meters must have an accurate low voltage
scale. The Simpson 250 and Sanwa SH-63Trd are examples
of a passive VOM that is suitable. Nearly all battery operated
digital multimeters that have a 2V A C range are suitable. (See
Fig. A)
Earth Ground
Fig. A. Using an A C v oltmeter to check A C leakage.
SAFETY-RELATED COMPONENT WARNING!!
COMPONENTS IDENTIFIED BY MARK ! OR DO TTED LINE WITH
MARK ! ON THE SCHEMATIC DIAGRAMS AND IN THE PARTS
LIST ARE CRITICAL TO SAFE OPERATION. REPLACE THESE
COMPONENTS WITH SONY PARTS WHOSE PART NUMBERS
APPEAR AS SHOWN IN THIS MANUAL OR IN SUPPLEMENTS
PUBLISHED BY SONY.
ATTENTION AU COMPOSANT AYANT RAPPORT
À LA SÉCURITÉ!
LES COMPOSANTS IDENTIFÉS P AR UNE MARQUE ! SUR LES
DIAGRAMMES SCHÉMA TIQUES ET LA LISTE DES PIÈCES SONT
CRITIQUES POUR LA SÉCURITÉ DE FONCTIONNEMENT. NE
REMPLACER CES COMPOSANTS QUE PAR DES PIÈSES SONY
DONT LES NUMÉROS SONT DONNÉS DANS CE MANUEL OU
DANS LES SUPPÉMENTS PUBLIÉS PAR SONY.
— 2 —

TABLE OF CONTENTS
SERVICE NOTE
1. ERROR CODE INDICATION ··········································· 5
1. GENERAL
Basic Operations
Playing a tape·········································································1-1
Recording TV programs ························································1-1
Locating a channel by Station ID ··········································1-2
Recording TV programs using the
VCR Plus+ GOLD system····················································· 1-3
Setting the timer manually····················································· 1-3
Additional Operations
Playing/searching at various speeds ······································1-4
Creating a favorite channel list with Station ID ····················1-5
Setting the duration time························································1-6
Checking/changing/ canceling timer settings ························ 1-6
Recording stereo and bilingual programs ······························1-6
Searching using the index function········································1-7
Adjusting the picture ·····························································1-7
Changing menu options ························································· 1-8
Watching the camcorder picture without
connecting cables — LASER LINK······································1-8
Editing
Editing methods ·····································································1-9
Hooking up to a VCR or stereo system ·································1-9
Basic editing (When recording on this VCR)························1-9
Insert editing ········································································1-10
SmartFile function
About the SmartFile function ··············································1-10
Recording using the SmartFile function ······························1-11
Selecting and playing a program ·········································1-13
Checking the contents of a tape ···········································1-13
Labeling a recorded program and tape ································1-14
Protecting a recorded program·············································1-15
Erasing the data of an unwanted program ···························1-15
Registering the contents of a recorded tape
in the SmartFile label··························································· 1-16
Storing program data from the DIRECTV
digital satellite receiver (Program Data Download) ············1-16
Additional Information
Troubleshooting ···································································1-17
Index to parts and controls···················································1-18
2. DISASSEMBLY
2-1. UPPER CASE, FRONT PANEL BLOCK
ASSEMBLY ····································································2-1
2-2. AN-19, DM-87, FR-163, JK-172, PD-111 BOARDS····2-1
2-3. LR-15 BOARD, REAR PANEL ·····································2-2
2-4. AN-18, ML-18 BOARDS, SR MECHANISM DECK ··2-2
2-5. POWER BLOCK, MA-360 BOARD······························ 2-3
2-7. INTERNAL VIEWS························································2-4
2-8. CIRCUIT BOARDS LOCATION ··································2-5
3. BLOCK DIAGRAMS
3-1. OVERALL BLOCK DIAGRAMS ··································3-1
3-2. VIDEO BLOCK DIAGRAM ··········································3-3
3-3. SYSTEM CONTROL BLOCK DIAGRAM ···················3-5
3-4. MODE CONTROL BLOCK DIAGRAM ·······················3-7
3-5. AV LINK BLOCK DIAGRAM ·······································3-9
3-6. AUDIO BLOCK DIAGRAM ········································3-11
3-7. POWER BLOCK DIAGRAM······································· 3-13
4. PRINTED WIRING BOARDS AND
SCHEMATIC DIAGRAMS
4-1. FRAME SCHEMATIC DIAGRAM································4-3
4-2. PRINTED WIRING BOARDS AND
SCHEMATIC DIAGRAMS ············································4-5
•MA-360 (REC/PB HEAD AMP,
Y/C. AUDIO PROCESSOR, Y/C OUT,
SERVO/SYSTEM CONTROL, AUDIO,
MODE CONTROL, TUNER, POWER SUPPLY)
PRINTED WIRING BOARD ·························4-5
•MA-360 (REC/PB HEAD AMP)(1/8)
SCHEMATIC DIAGRAM ······························4-7
•MA-360 (Y/C. AUDIO PROCESSOR)(2/8)
SCHEMATIC DIAGRAM ······························4-9
•MA-360 (Y/C OUT)(3/8)
SCHEMATIC DIAGRAM ····························4-11
•MA-360 (SERVO/SYSTEM CONTROL)(4/8)
SCHEMATIC DIAGRAM ····························4-13
•MA-360 (AUDIO)(5/8)
SCHEMATIC DIAGRAM ····························4-15
•MA-360 (MODE CONTROL)(6/8)
SCHEMATIC DIAGRAM ····························4-17
•MA-360 (TUNER)(7/8)
SCHEMATIC DIAGRAM ····························4-19
•MA-360 (POWER SUPPLY)(8/8)
SCHEMATIC DIAGRAM ····························4-21
•JK-172 (LINE 2 IN)
PRINTED WIRING BOARD AND
SCHEMATIC DIAGRAM ····························4-24
•FR-163 (INDICATOR)
PRINTED WIRING BOARD ·······················4-25
•FR-163 (INDICATOR)
SCHEMATIC DIAGRAM ····························4-27
•VD-29 (Y/C SEP, SYNC SEP)
PRINTED WIRING BOARD ·······················4-29
•VD-29 (Y/C SEP, SYNC SEP)
SCHEMATIC DIAGRAM ····························4-31
•ML-18 (SMART FILE),
AN-18 (INNER SMART FILE SENSOR),
AN-19 (FRONT SMART FILE SENSOR),
RJ-83 (CPD IN)
PRINTED WIRING BOARDS ·····················4-33
•ML-18 (SMART FILE),
AN-18 (INNER SMART FILE SENSOR),
AN-19 (FRONT SMART FILE SENSOR),
RJ-83 (CPD IN)
SCHEMATIC DIAGRAMS··························4-35
•LR-15 (VIDEO/AUDIO PROCESSOR)
PRINTED WIRING BOARD ·······················4-37
•LR-15 (VIDEO/AUDIO PROCESSOR)
SCHEMATIC DIAGRAM ····························4-39
•DM-87 (USER CONTROL)
PRINTED WIRING BOARD AND
SCHEMATIC DIAGRAM ····························4-41
•PD-111 (V/A SEPARATOR)
PRINTED WIRING BOARD AND
SCHEMATIC DIAGRAM ····························4-43
•SRV886UC (POWER SUPPLY)
PRINTED WIRING BOARD ·······················4-45
•SRV886UC (POWER SUPPLY)
SCHEMATIC DIAGRAM ····························4-47
— 3 —

5. INTERFACE, IC PIN FUNCTION
DESCRIPTION
5-1. SYSTEM CONTROL —
VIDEO BLOCK INTERFACE
(MA-360 BOARD IC161)···············································5-1
5-2. SYSTEM CONTROL —
SERVO PERIPHERAL CIRCUIT INTERFACE
(MA-360 BOARD IC161)···············································5-1
5-3. SYSTEM CONTROL —
MECHANISM INTERFACE
(MA-360 BOARD IC161)···············································5-2
5-4. SYSTEM CONTROL —
SYSTEM CONTROL PERIPHERAL CIRCUIT
INTERFACE (MA-360 BOARD IC161) ························ 5-2
5-5. SYSTEM CONTROL —
AUDIO BLOCK INTERFACE
(MA-360 BOARD IC161)···············································5-2
5-6. SERVO/SYSTEM CONTROL MICROPROCESSOR
PIN FUNCTIONS
(MA-360 BOARD IC161)···············································5-3
5-7. TUNER/TIMER CONTROL MICROPROCESSOR
PIN FUNCTIONS
(MA-360 BOARD IC460)···············································5-4
6. ADJUSTMENTS
6-1. MECHANICAL ADJUSTMENT ···································6-1
6-2. ELECTRICAL ADJUSTMENT······································6-1
2-1. PREPARATION BEFORE ADJUSTMENT ···················6-1
2-1-1.Equipment Required ························································6-1
2-1-2.Equipment Connection ···················································· 6-1
2-1-3.Setup for adjustment························································ 6-1
2-1-4.Alignment Tape ·······························································6-1
2-1-5.Input/Output Levels and impedance································6-2
2-1-6.Adjustment Sequence ······················································ 6-2
2-2. POWER SUPPLY CHECK ·············································6-2
2-2-1.Power Supply Voltage Check (MA-360 board) ···············6-2
2-3. SERVO SYSTEM ADJUSTMENT·································6-3
2-3-1.RF Switching Position Adjustment
(MA-360 Board)······························································6-3
2-3-2.Hi-Fi Switching Position Adjustment
(MA-360 Board)······························································6-3
2-4. VIDEO SYSTEM CHECK ·············································6-4
2-4-1.Playback Level Check (MA-360 board)··························6-4
2-4-2.Sync AGC Check (MA-360 board) ·································6-4
2-4-3.Deviation Check ······························································ 6-4
2-5. AUDIO SYSTEM ADJUSTMENT·································6-5
2-5-1.Hi-Fi Audio System Check·············································· 6-5
1. E-E Output Level Check ·················································6-5
2. Overall Level Characteristics Check ·······························6-5
2-5-2.Normal Audio System Adjustment·································· 6-5
1. ACE Head Adjustment ····················································6-5
2. Frequency Response Check·············································6-5
2-6. Laser Link System Adjustment ······································· 6-6
2-6-1.Laser Link video output Level Adjustment
(LR-15 Board) ·································································6-6
7. REPAIR PARTS LIST
7-1 EXPLODED VIEWS ······················································7-1
7-1-1.FRONT PANEL ASSEMBLY AND
UPPER CASE SECTION ···············································7-1
7-1-2.CHASSIS SECTION·······················································7-2
7-1-3.MECHANISM DECK-1 ·················································7-3
7-1-4.MECHANISM DECK-2 ·················································7-4
7-1-5.MECHANISM DECK-3 ·················································7-5
7-2. ELECTRICAL PARTS LIST ··········································7-6
— 4 —
SERVICE NOTE
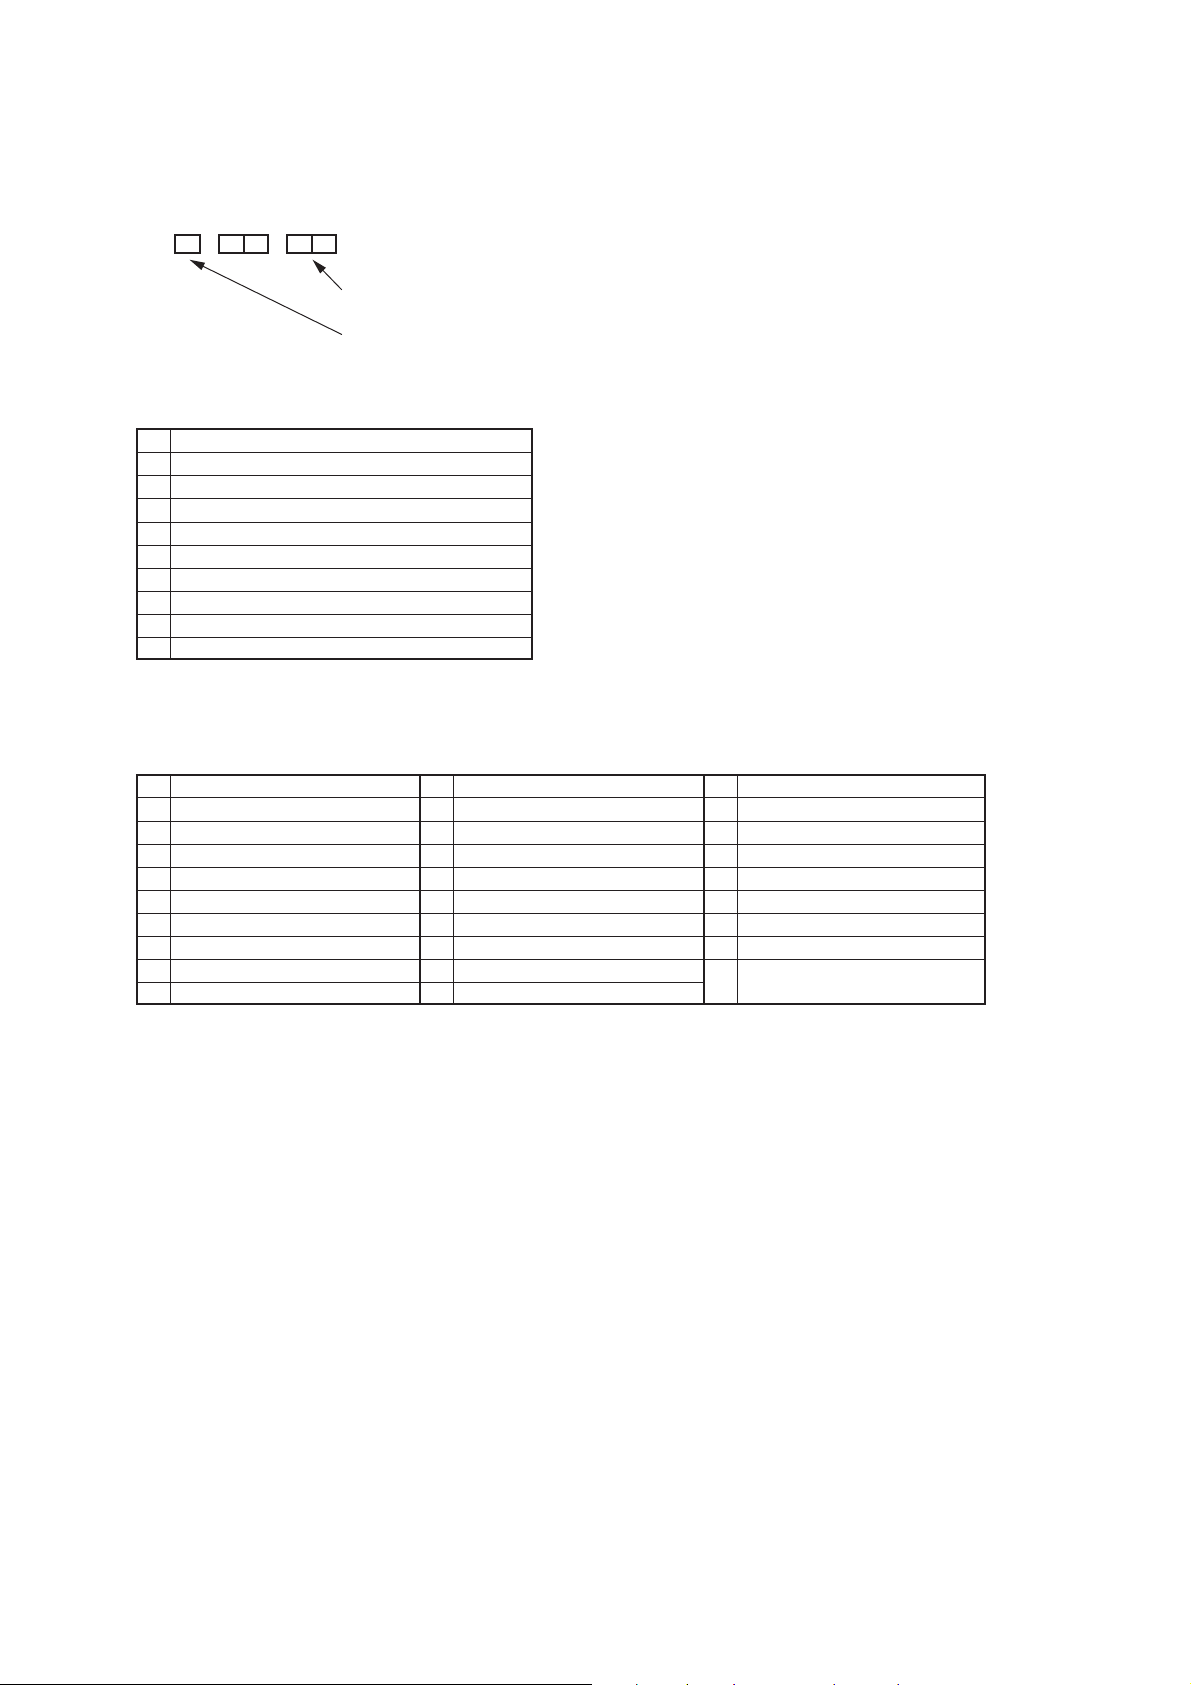
1. ERROR CODE INDICATION
• Error codes are indicated using the lower 5 digits in the fluorescent display tube.
“At this time, Colon “:” between character is not indicated.”
Mode code indication when the error has occurred.
Error code
ERROR CODE
0 No error
1 Cam encoder error Loading direction
2 Cam encoder error Unloading direction
3 T reel error
4 S reel error
5 Capstan error
6 Drum error
7 Error on initializing
8 Cassette loading error
9 Reserve
MODE CODE
0 Power-on eject 10 FWD x1 20 REW play
1 P ower-on initial 11 FWD x2 21 Cas. loading
2 P ower-off eject 12 CUE 22 Tape loading
3 P ower-off stop 13 PB-pause 23 Power-off loading
4 FF 14 RVS-pause 24 Mecha. error (Power on)
5 REW 15 RVS x1 25 Power-on eject initial
6 REC 16 RVS x2 26 Power-off eject initial
7 REC- pause 17 REV 27 APC REC
8 Power-on stop 18 Power-off initial 28 Cas. loading
9 PB 19 Mecha. error (Power off) (No auto PB check)
— 5 —
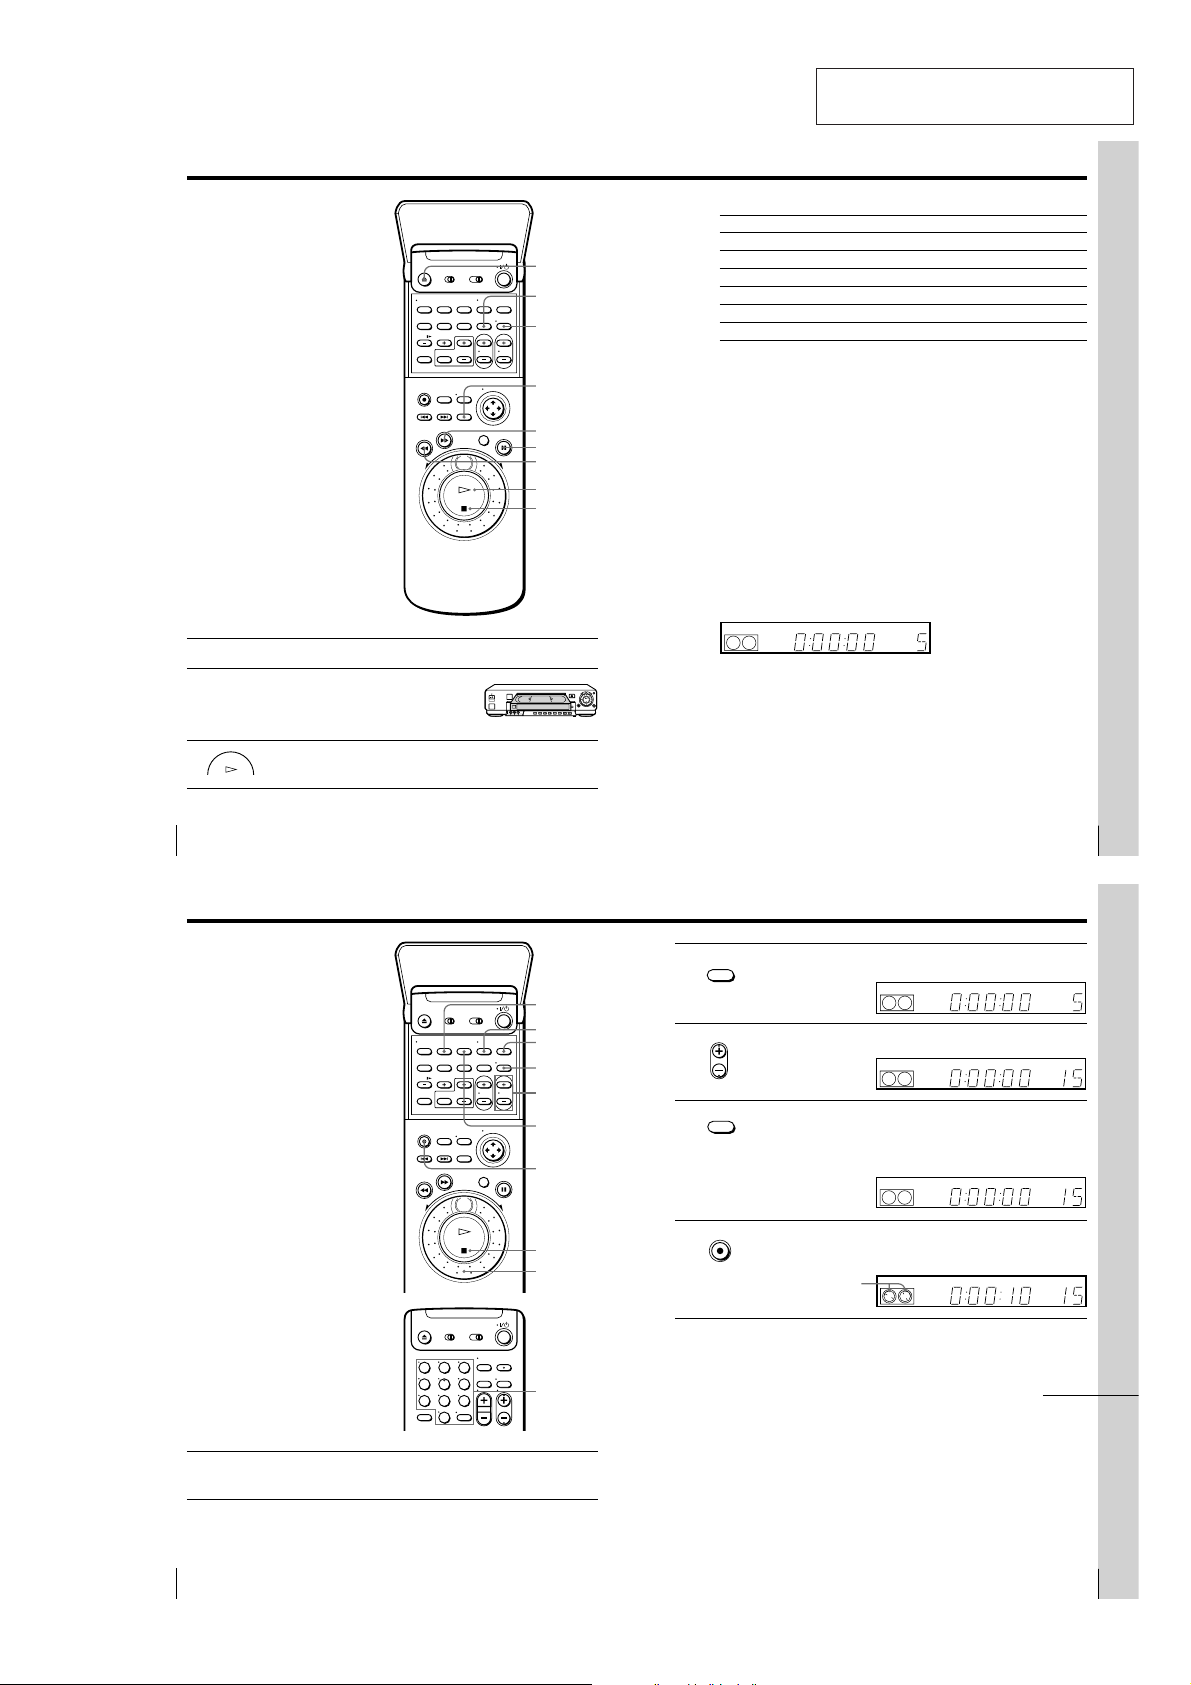
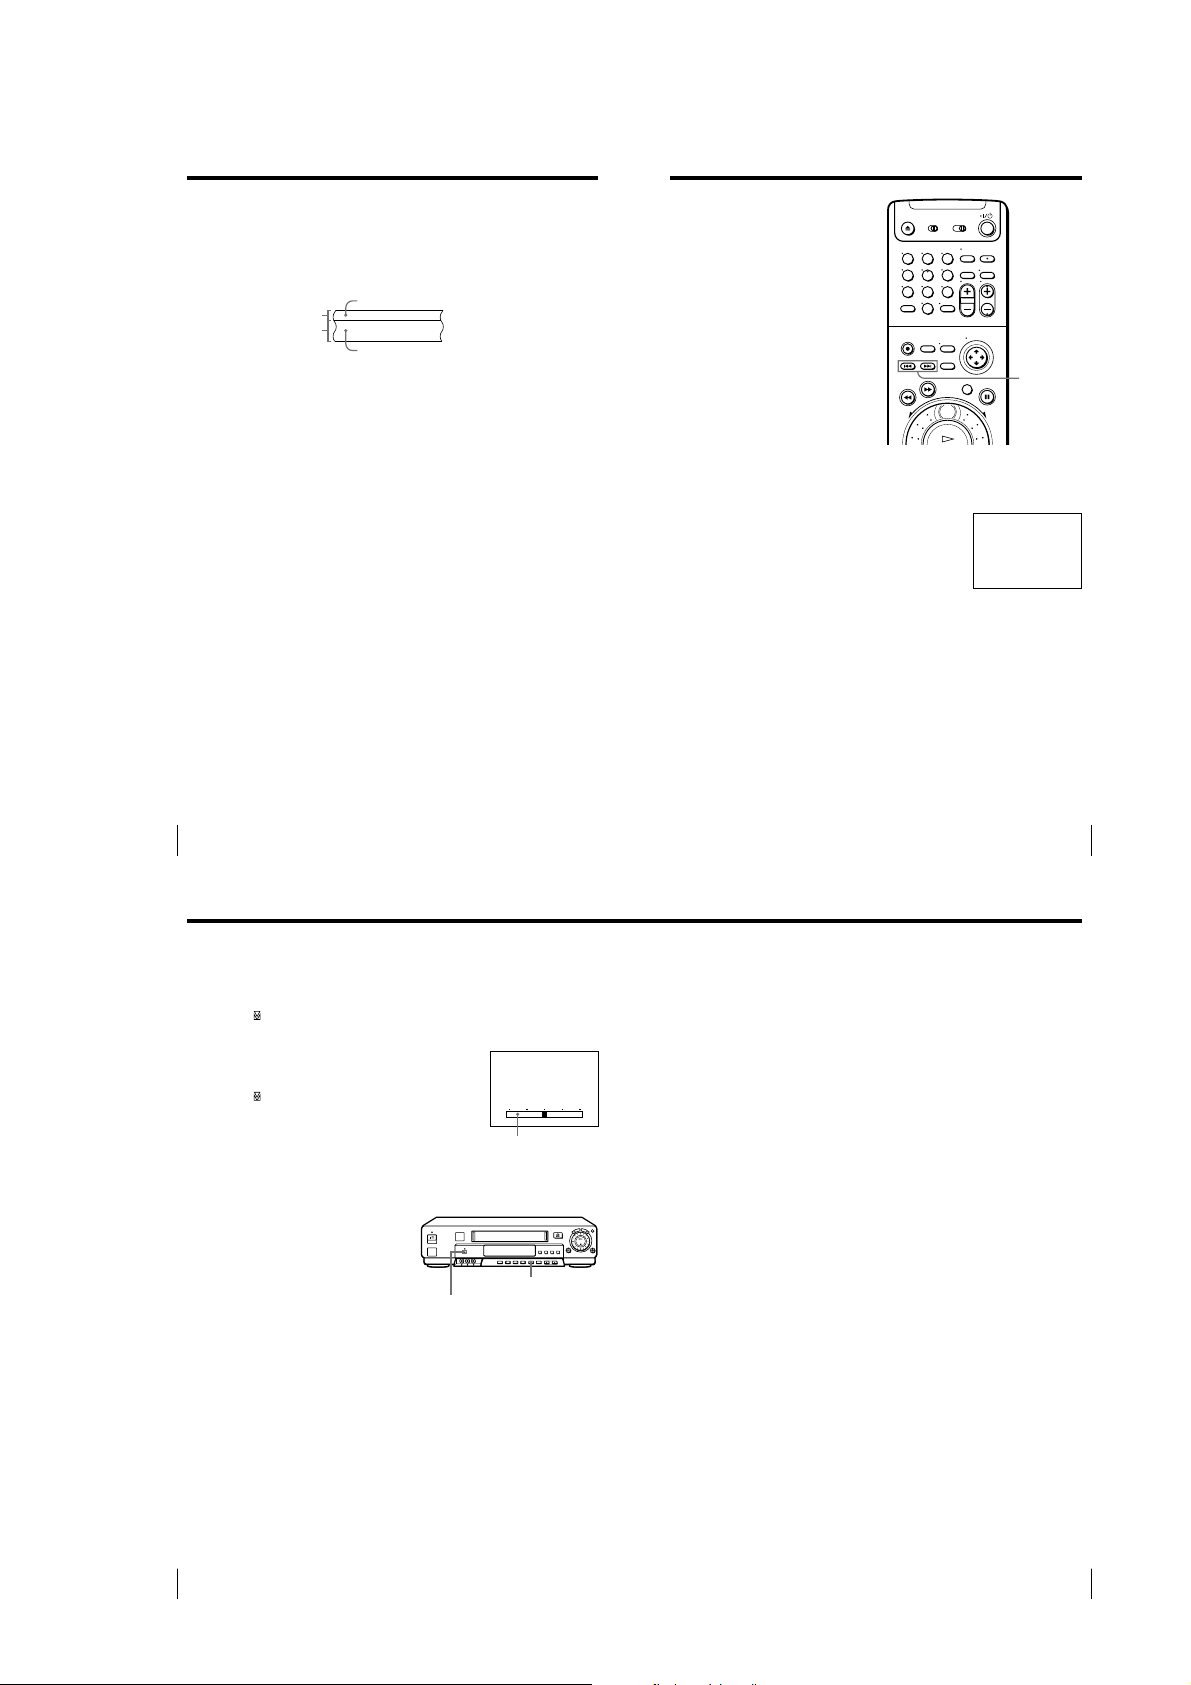
Basic Operations
Playing a tape
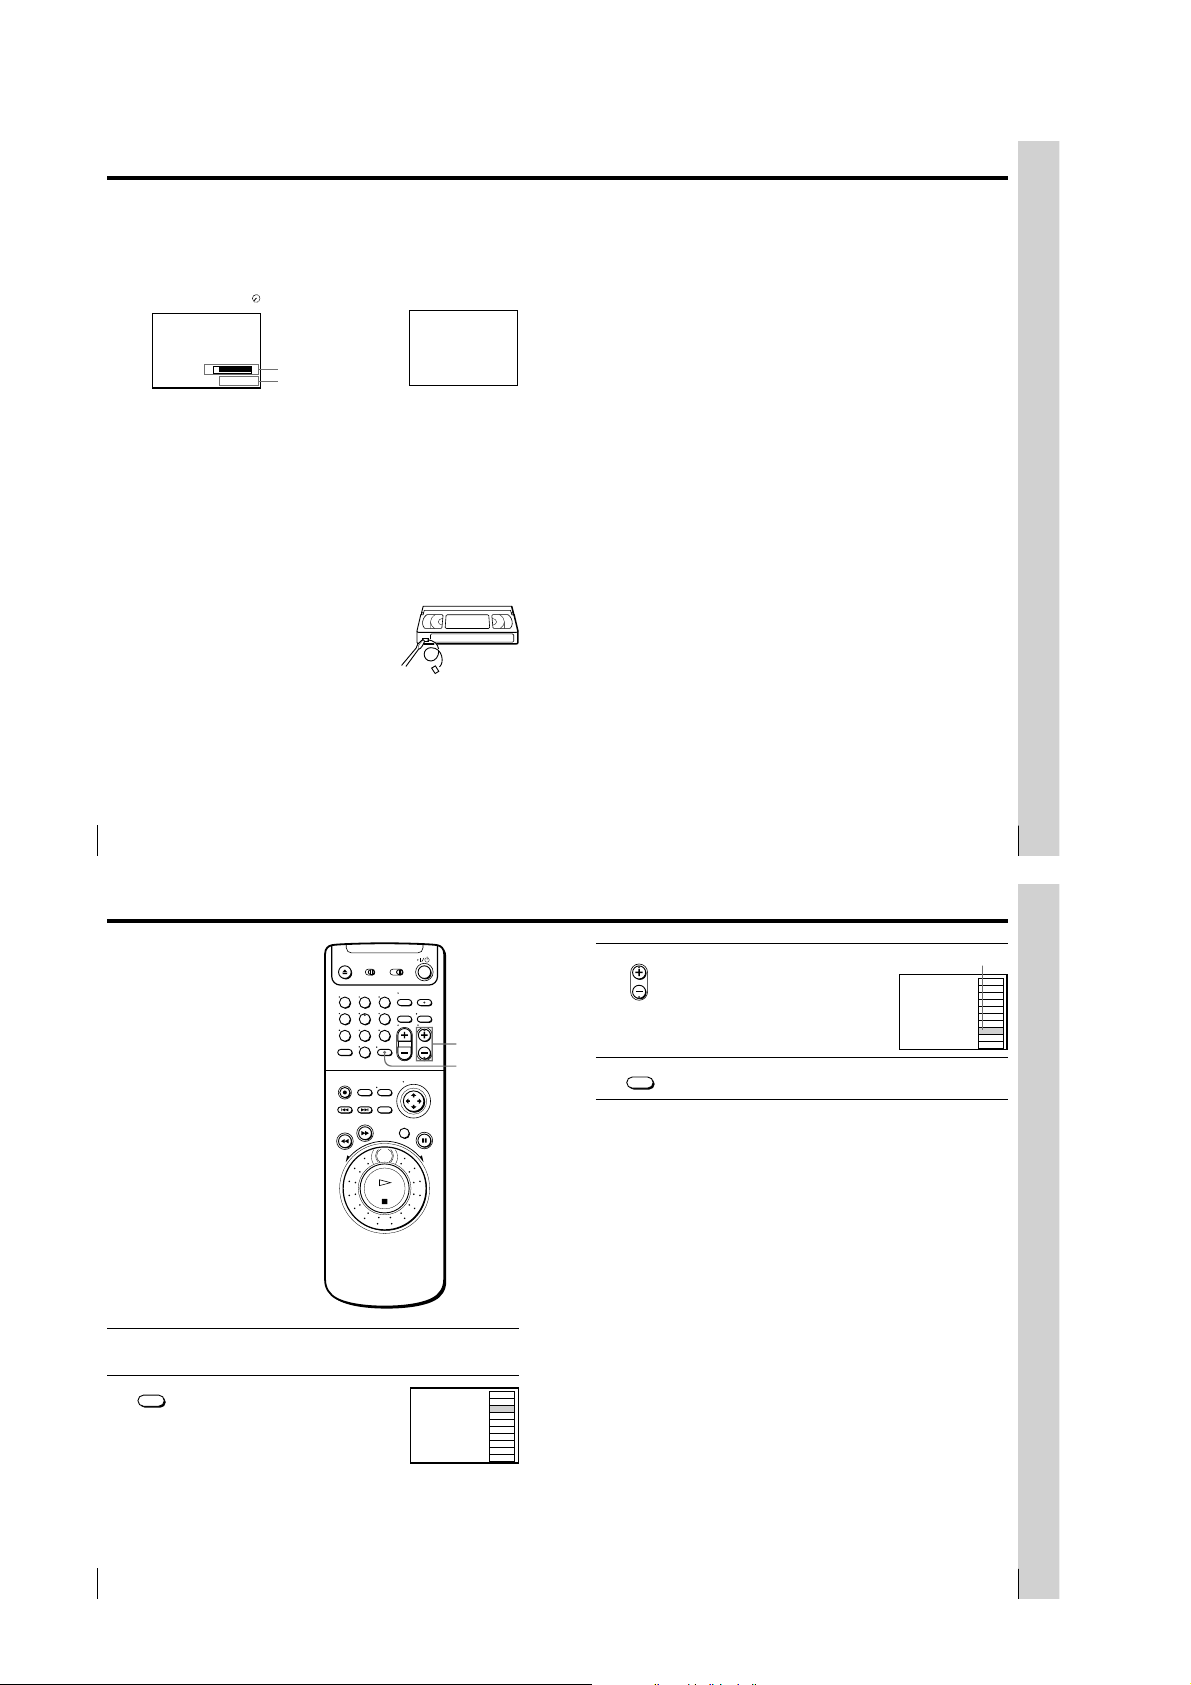
1 Turn on your TV and set it to the video channel.
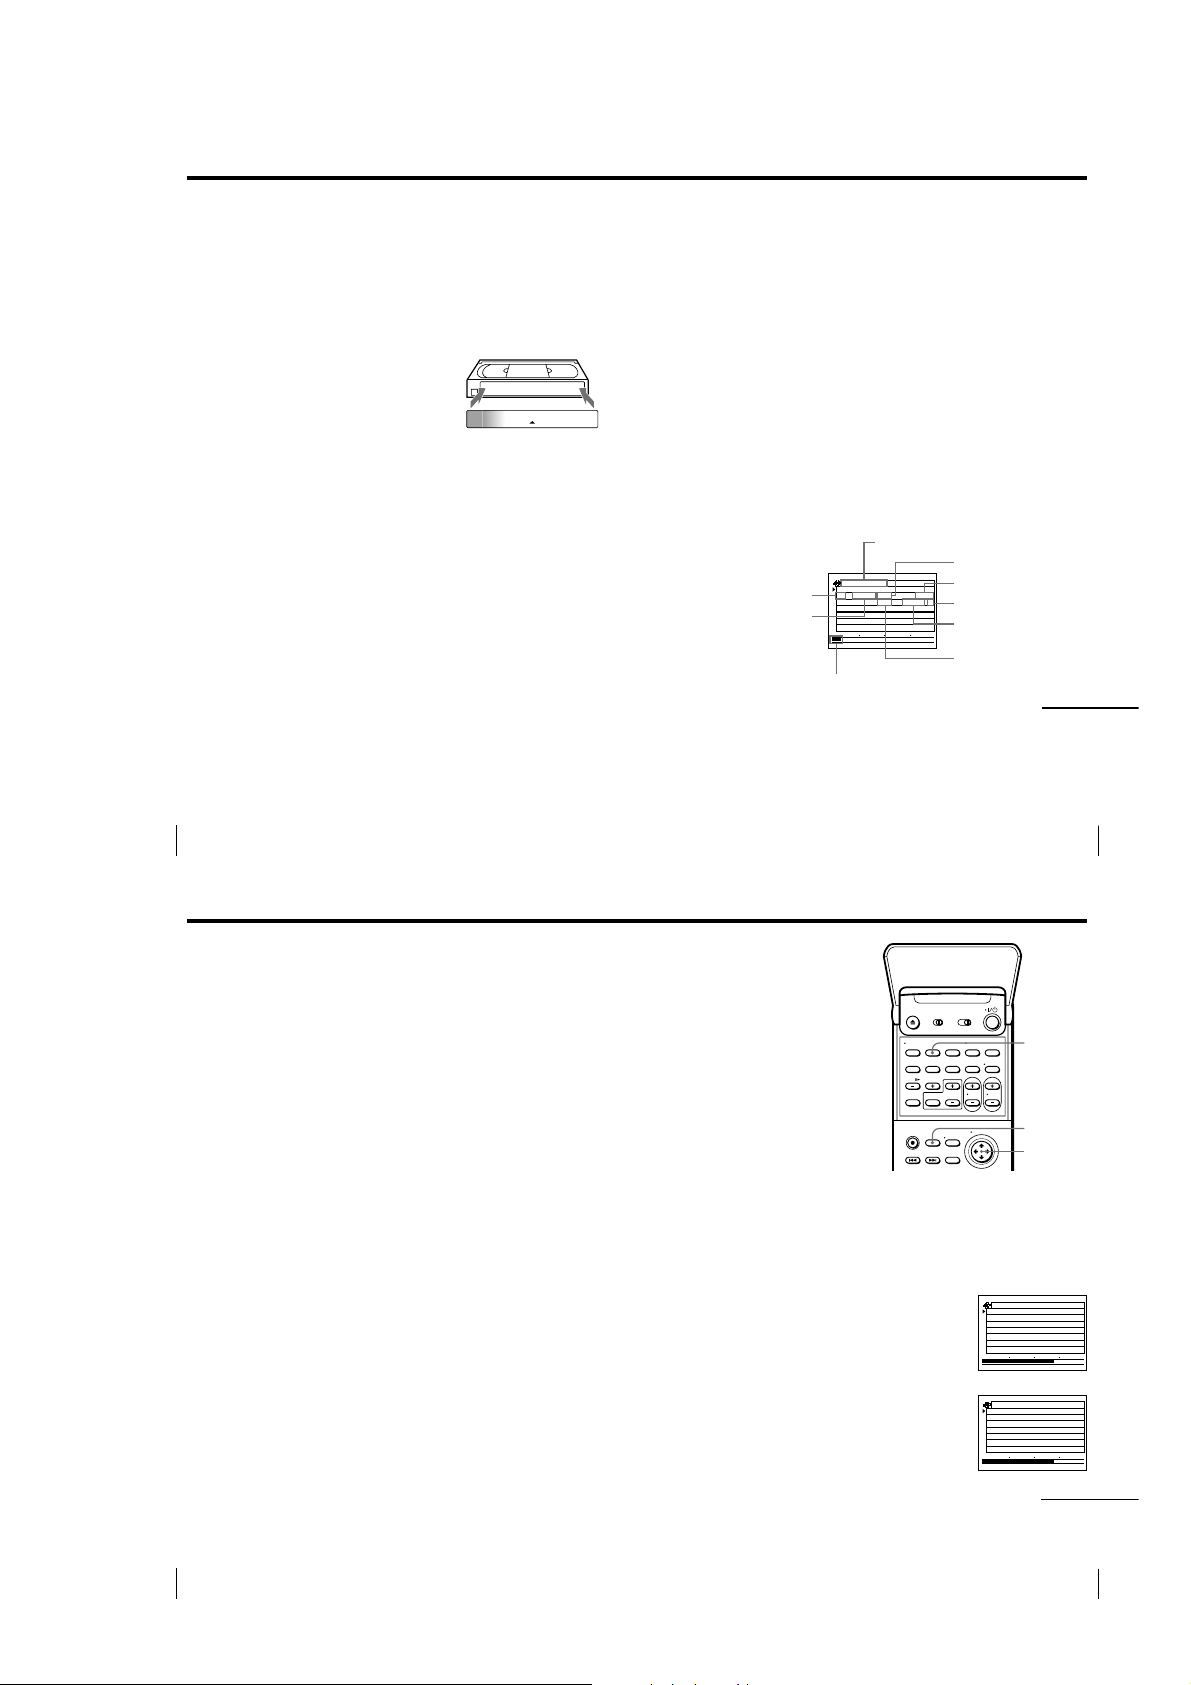
2 Insert a tape.
The VCR turns on and starts playing
automatically if you insert a tape with
its safety tab removed.
3 Press H PLAY.
PLAY
When the tape reaches the end, it will rewind automatically.
SECTION 1
GENERAL
Z EJECT
CLEAR
DISPLAY
SMART CUE
M FF
X PAUSE
m REW
H PLAY
x STOP
SLV-999HF/M11HF/M91HF
This section is extracted from instruction
manual. (SLV-M91HF model)
Additional tasks
To Press
Stop play x STOP
Pause play X PAUSE
Resume play after pause X PAUSE or H PLAY
Fast-forward the tape M FF during stop
Rewind the tape m REW during stop
Eject the tape Z EJECT
To skip playback
You can skip a portion of playback you don’t want to watch such as a
commercial and restart playback by pressing a single button.
1
Press SMART CUE during playback of the scene you want to skip. The
VCR starts searching.
2
Press SMART CUE again when you find the scene you want to watch.
The VCR stops searching, rewinds a few seconds, then resumes normal
playback.
If you press and hold SMART CUE while the VCR is skip searching, the VCR
will stop searching, and continue rewinding until you release SMART CUE.
Tip
• You can change the length of rewinding time on the ADVANCED OPTIONS menu.
For details, see page 33.
To use the time counter
At the point on the tape that you want to find later, press CLEAR. The
counter in the display window resets to “0:00:00”. Search for the point
afterwards by referring to the counter.
STEREO SAP
To display the counter on the TV screen, press DISPLAY.
Notes
• Tapes recorded in the LP mode on other VCRs can be played back on this VCR but
the picture quality cannot be guaranteed.
• The counter resets to “0:00:00” whenever a tape is reinserted.
• The counter stops counting when it comes to a portion with no recording.
LP SP EPVIDEO APC EDIT
VTR
123
BLANK
AV INSERT
Basic Operations
Basic Operations
4
Recording TV
programs
123
456
789
0
SP/EP
TV/VIDEO
INPUT
SELECT
DISPLAY
CH +/–
COUNTER/
REMAIN
z REC
x STOP
Shuttle ring
Number
buttons,
ENTER
Basic Operations
INPUT
3 Press INPUT SELECT until a channel number appears in the display
SELECT
window.
• CH
4 Press CH +/– to select the channel you want to record.
SP / EP
5 Press SP/EP to select the tape speed, SP or EP.
6 Press z REC to start recording.
EP (Extended Play) provides recording time three times as long as
SP (Standard Play), however, SP produces better picture and audio
quality.
REC
STEREO SAP
STEREO SAP
STEREO SAP
LP SP EPVIDEO APC EDIT
VTR
123
LP SP EPVIDEO APC EDIT
VTR
123
LP SP EPVIDEO APC EDIT
VTR
123
BLANK
BLANK
BLANK
AV INSERT
AV INSERT
AV INSERT
The recording indicator lights up red in the display window.
Recording indicator
STEREO SAP
VTR
123
LP SP EPVIDEO APC EDIT
BLANK
AV INSERT
To stop recording
Press x STOP.
continued
5
Basic Operations
1 Turn on your TV and set it to the video channel.
To record from a cable box, turn it on.
2 Insert a tape with its safety tab in place.
Basic Operations6
1-1
Basic Operations
7
Recording TV programs (continued)
To check the remaining tape length
Press DISPLAY. The white bar indicates the approximate length of tape
remaining. With the display on, press COUNTER/REMAIN to check the
remaining time. Each time you press COUNTER/REMAIN, the time
counter and the remaining tape length appear alternately. The remaining
tape length with the
SP
To check the remaining tape length of a T-140 or T-180 tape, set TAPE
SELECT in the ADVANCED OPTIONS menu to 180. (For details, see
page␣33.)
To watch another TV program while recording
1
Press TV/VIDEO to turn off the VIDEO indicator in the display
window.
2
If the TV is connected to the VCR’s LINE OUT jacks, set the TV to TV
input; if not, skip this step.
3
Select another channel on the TV.
To select the channel using the shuttle ring
To select a channel in step 4 above, you can also use the shuttle ring. During
stop, turn the shuttle ring clockwise for higher channels or counterclockwise
for lower channels. The VCR switches the channel in the preset order.
indicator also appears in the display window.
S
E
Remaining tape length
0 : 00 : 22
Time counter
To save a recording
To prevent accidental erasure, break off the
safety tab as illustrated. To record on a tape
again, cover the tab hole with adhesive tape.
TAPE REMAINING
1 : 46
Safety tab
Tips
• To select a channel, you can use the number buttons on the remote commander.
Enter the channel number, then press ENTER.
• You can select a video source from the LINE-1 IN or LINE-2 IN jacks using the
INPUT SELECT button.
• “L3” is reserved for LASER LINK input when viewing the camcorder picture
(page␣35). Cable connection is recommended when recording the picture from the
camcorder (page 38).
• The display appears on the TV screen indicating information about the tape, but the
information won’t be recorded on the tape.
• If you don’t want to watch TV while recording, you can turn off the TV. When
using a cable box, make sure to leave it on.
• You can set the channel with the shuttle ring during stop. However, you cannot set
the channel with the shuttle ring on the remote commander when:
– you set CABLE MOUSE in the CABLE BOX CONTROL menu to ON.
– you press JOG so that the remote commander is in jog mode.
Notes
• The remaining tape length may not be indicated accurately for short tapes such as
T-20 or T-30, or tapes recorded in the LP mode.
• The display does not appear during still (pause) mode or slow-motion playback.
• It may take up to one minute for the VCR to calculate and display the remaining
tape length after you press DISPLAY.
Basic Operations
Basic Operations
8
Locating a
channel by
Station ID
You can select the TV program from
station ID.
Before you start...
• Set FAVORITE CH to OFF in the
ADVANCED OPTIONS menu
(page␣33).
1
2
Turn on your TV and set it to the video channel.
To record from a cable box, turn it on.
• ENTER
Press ENTER.
The station ID appears on the TV screen.
123
456
789
0
CH +/–
ENTER
9
AAB
3
CDE
9
10
FGH
IJK
12
13
LMN
OPQ
15
RST
19
22
UVW
XYZ
43
ABB
45
• CH
3 Press CH +/– to select the station ID
4 Press ENTER.
you want.
• ENTER
Note
• If the TV channel has no station ID, the channel number appears on the TV screen.
Basic Operations
The selected station ID
Basic Operations
AAB
3
CDE
9
10
FGH
IJK
12
13
LMN
OPQ
15
RST
19
22
UVW
XYZ
43
ABB
45
Basic Operations
10
1-2
Basic Operations
11
Recording TV
WEEKLY ONCE
DAI L Y
Pl usCode
Use keys f o r :
To c on f i rm :
To cancel :
CLEAR
ENTER
SP / EP
EP–––29253
VCR Plus+
VCR Plus+
Plus Code
53292––– SP
To ca n pu s h
POWER
l,
RECORDING TIME
ce
To se t t i mer, pu sh
93/0 8:00
11
:30 52
EP
THU
PM PM
DATE START STOP CH
CLEAR
SP / EP
programs using
the VCR Plus+
GOLD system
Just enter the PlusCode number listed in
the TV program guide. The date, time
and channel number of that program are
set automatically. You can preset up to
eight programs at a time.
Before you start…
• Check that the VCR clock is set to the
correct time.
• Turn on your TV and set it to the
video channel. When using a cable
box, turn it on.
• Insert a tape with its safety tab in
place. Make sure the tape is longer
than the total recording time.
• If you insert a tape with the SmartFile
function, make sure the total recording
time doesn’t overlap the protected
program. For details about the
SmartFile function, see page 42.
VCR Plus+
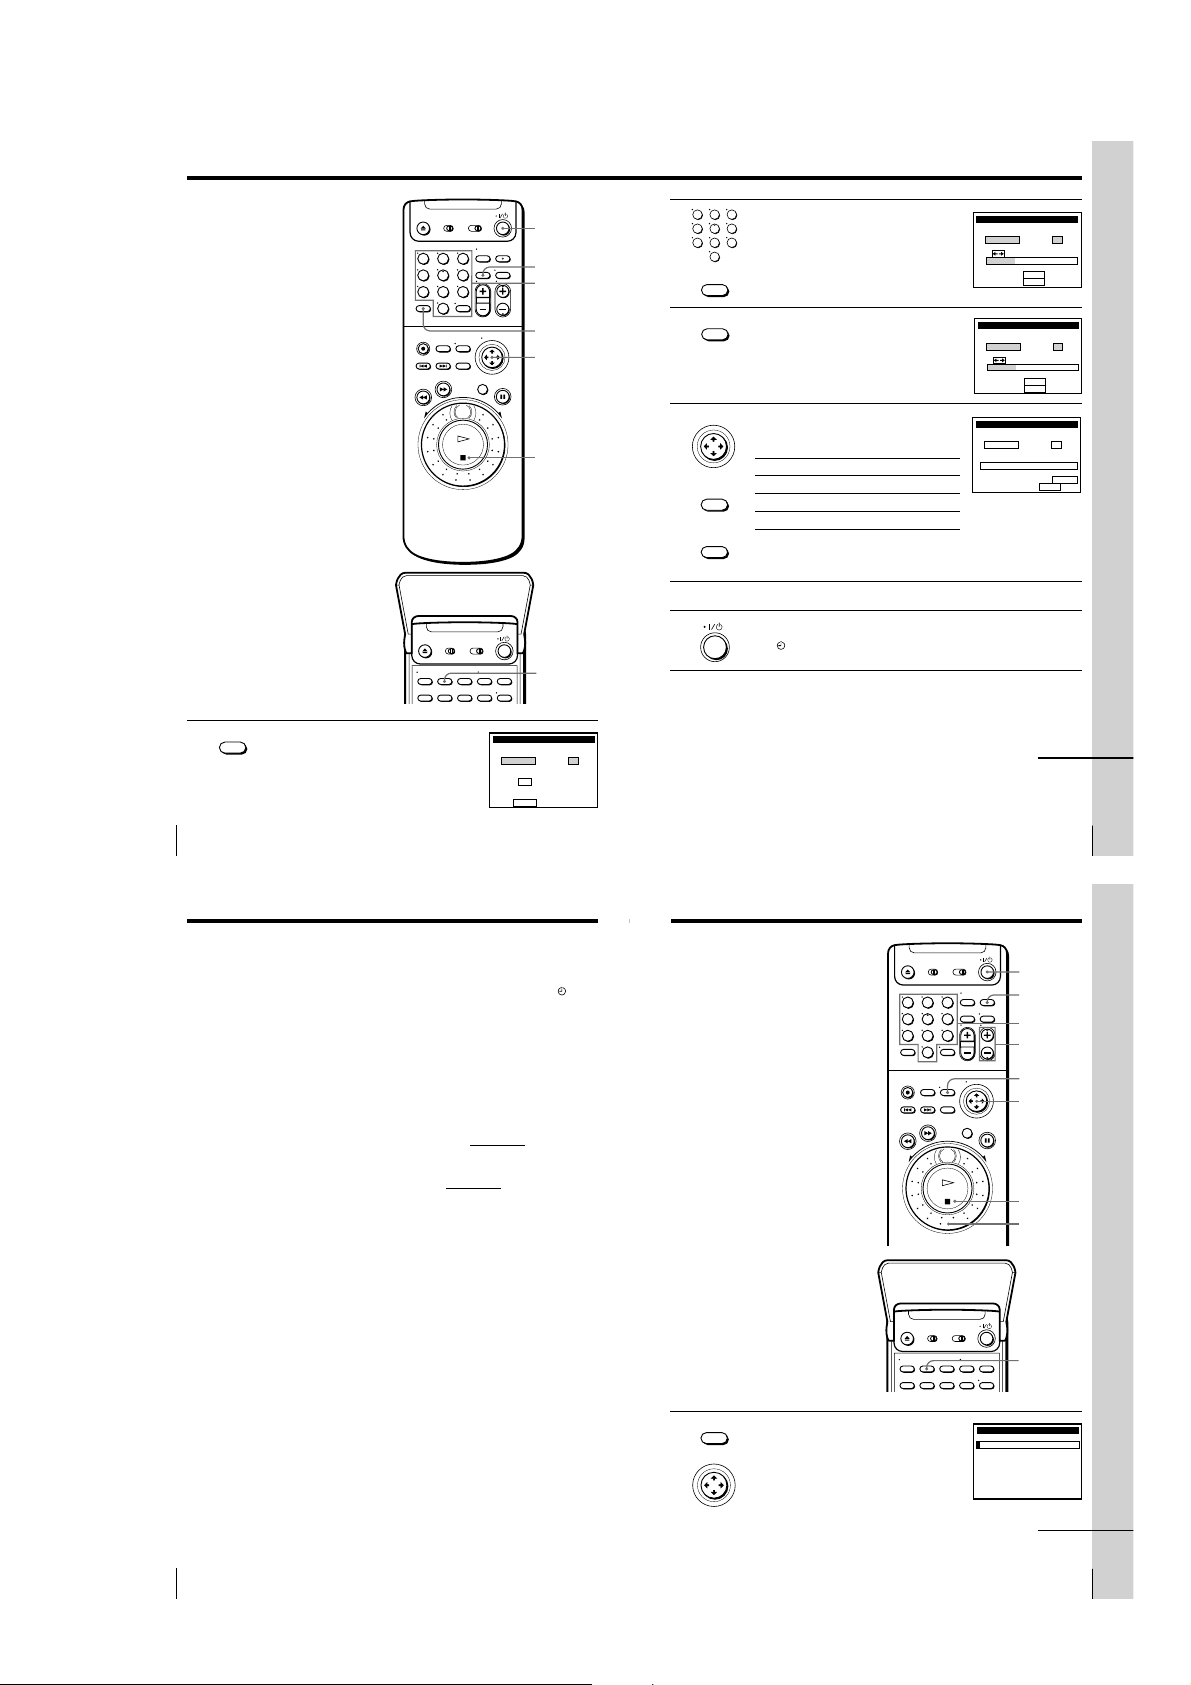
1 Press VCR Plus+.
Basic Operations
12
123
456
789
0
`/1
CLEAR
Number
buttons,
ENTER
VCR Plus+
Cursor stick
</,
x STOP
SP/EP
VCR Plus+
PlusCode
––––––––
Ente r p rog ram’s Pl usCode
us i ng
To change tape speed,
push
0–9 key s
SP / EP
SP / EP
EP
123
2
3
4
Press the number buttons to enter the
456
PlusCode number.
789
0
CLEAR
If you make a mistake, press CLEAR and
re-enter the correct number.
SP / EP
Press SP/EP to select the tape speed, SP or
EP.
• CURSOR
Move the cursor stick </, to select
ONCE, DAILY, or WEEKLY, then press
ENTER:
To record Select
PUSH OK
Only once ONCE
• ENTER
Everyday Monday to Friday DAILY
Once a week WEEKLY
CLEAR
The date, start and stop time, channel number and tape speed
appear on the TV screen. If the information is not correct, press
CLEAR to cancel the setting.
5
6
To enter another setting, repeat steps 1 to 4.
Press `/1 to turn off the VCR.
The
indicator appears in the display window and the VCR stands
by for recording. When using a cable box, leave it on.
To stop recording
To stop the VCR while recording, press x STOP.
VCR Plus+
Pl usCode
Use keys f o r :
DAI L Y
To c on f i rm :
ENTER
To cancel :
CLEAR
Basic Operations
SP / EP
SP–––29253
WEEKLY ONCE
continued
Basic Operations
13
Recording TV programs using the VCR Plus+ GOLD system
(continued)
To use the VCR after setting the timer
To use the VCR before a timer recording begins, just press `/1. The
indicator disappears from the display window and the VCR switches on.
Remember to press `/1 to reset the VCR to the timer recording standby
mode after using the VCR.
You can also do the following tasks while the VCR is recording:
• Reset the counter.
• Display tape information on the TV screen.
• Check the timer settings.
• Watch another TV program.
To lock the VCR after setting the timer (Child Lock)
While the VCR turns on, hold down `/1 POWER
indicator appears in the display window. The VCR turns off and the indicator remains lit. The VCR will not work except for timer recording.
To unlock the VCR, hold down `/1 POWER
indicator disappears from the display window. The VCR is unlocked and
turns on.
To stop timer recording while the VCR is locked, press x STOP. The
recording stops and the VCR is unlocked.
Tips
• To cancel the VCR Plus+ GOLD system recording, press VCR Plus+ before pressing
ENTER in step 4 above.
• When you are recording a program in the SP mode and the remaining tape becomes
shorter than the recording time, the tape speed is automatically changed to the EP
mode. Note that some noises will appear on the picture when the tape speed is
changed. If you want to keep the tape speed, set AUTO TAPE SPEED to OFF in the
ADVANCED OPTIONS menu (page 33).
• When a tape with a SmartFile label attached is inserted, the AUTO BLANK
SEARCH screen appears after step 5. Wait about ten seconds for the screen to
appear before pressing the `/1 button in step 6. For details, see “Setting timer
recording in the Blank Time space” (page␣50).
Notes
• If the VCR does not accept the PlusCode number, this means that:
– The PlusCode number is incorrect.
– ONCE, DAILY, or WEEKLY was selected incorrectly. You cannot select DAILY or
WEEKLY for a program that airs more than seven days ahead.
• The VCR will be unlocked when:
– you stop timer recording by pressing x STOP
– you insert a tape
– the AC power cord is disconnected or power supply stops.
on the VCR until the -
on the VCR until the -
Setting the timer
manually
If the VCR Plus+ GOLD system is not
available in your area, follow the
instructions below to set the timer to
record programs.
Before you start…
• Check that the VCR clock is set to the
correct time.
• Turn on your TV and set it to the
video channel. When using a cable
box, turn it on.
• Insert a tape with its safety tab in
place. Make sure the tape is longer
than the total recording time.
• If you insert a tape with the SmartFile
function, make sure the total recording
time doesn’t overlap the protected
program. For details about the
SmartFile function, see page 42.
• MENU
1
Press MENU, then move the cursor stick
M/m to select TIMER SET/CHECK and
push the cursor stick (OK).
• CURSOR
PUSH OK
123
456
789
0
`/1
INPUT
SELECT
Number
buttons
CH +/–
MENU
Cursor stick
M/m/</,
OK
x STOP
Shuttle ring
SP/EP
TIMER SET / CHECK
DATE START STOP CH
/– –:–– –:–– –– –
–
–
––/– –:–– –:–– –– –
––/– –:–– –:–– –– –
––/– –:–– –:–– –– –
––/– –:–– –:–– –– –
––/– –:–– –:–– –– –
––/– –:–– –:–– –– –
––/– –:–– –:–– –– –
9 / 28
continued
Basic Operations
TUE
Basic Operations14
1-3
Basic Operations
15

Setting the timer manually (continued)
• CURSOR
2
Move the cursor stick M/m to select the line that is to be set.
6 Press `/1 to turn off the VCR.
The
indicator appears in the display window and the VCR stands
by for recording. When using a cable box, leave it on.
3
4
5
Basic Operations
16
PUSH OK
• CURSOR
Set the date, start and stop time, channel
number and tape speed:
1 Move the cursor stick , to highlight
PUSH OK
INPUT
SELECT
• CURSOR
PUSH OK
• CURSOR
PUSH OK
each item in turn.
2 Move the cursor stick M/m to set each
item.
To correct a setting, move the cursor stick
< to return to that setting and reset.
When you set the channel number, the
station ID appears on the TV screen. You
can set it while checking the station ID.
To record the same program every day or
the same day every week, move the cursor
stick m while the date is highlighting. For
details, see “Daily/weekly recording”
below.
To record from a source connected to the LINE-1 IN or LINE-2 IN
jacks, press INPUT SELECT to display “LINE1” or “LINE2” in the
“CH” position.
Move the cursor stick , to confirm the setting.
The cursor appears at the beginning of the line. To enter another
setting, select the next line and repeat step 3.
Push the cursor stick (OK).
TIMER SET / CHECK3TUE
DATE START STOP CH
9
THU
0
/–:–– –:–– ––
––/– –:–– –:–– –– –
––/– –:–– –:–– –– –
––/– –:–– –:–– –– –
––/– –:–– –:–– –– –
––/– –:–– –:–– –– –
––/– –:–– –:–– –– –
––/– –:–– –:–– –– –
Channel number
TIMER SET / CHECK3TUE
DATE START STOP IJK
9
THU0AM AM
/7:00 8:00 12
––/– –:–– –:–– –– –
––/– –:–– –:–– –– –
––/– –:–– –:–– –– –
––/– –:–– –:–– –– –
––/– –:–– –:–– –– –
––/– –:–– –:–– –– –
––/– –:–– –:–– –– –
9 / 28
Station ID
9 / 28
To stop recording
To stop the VCR while recording, press x STOP.
SP
SP
Daily/weekly recording
In step 3 above, move the cursor stick m to select the recording pattern. Each
time you move the cursor stick m, the indication changes as shown below.
Move the cursor stick M to change the indication in reverse order.
the current date t SUN-SAT t MON-SAT t MON-FRI t EVERY SAT t .....
t EVERY MON t EVERY SUN t 1 month later t (date counts down) t
the current date
To use the VCR after setting the timer
To use the VCR before a timer recording begins, just press `/1. The
indicator disappears from the display window and the VCR switches on.
Remember to press `/1 to reset the VCR to the timer recording standby
mode after using the VCR.
Basic Operations
You can also do the following tasks while the VCR is recording:
• Reset the counter.
• Display tape information on the TV screen.
• Check the timer settings.
• Watch another TV program.
To lock the VCR after setting the timer (Child Lock)
While the VCR turns on, hold down `/1 POWER
indicator appears in the display window. The VCR turns off and the indicator remains lit. The VCR will not work except for timer recording.
To unlock the VCR, hold down `/1 POWER
indicator disappears from the display window. The VCR is unlocked and
turns on.
To stop timer recording while the VCR is locked, press x STOP. The
recording stops and the VCR is unlocked.
on the VCR until the -
on the VCR until the -
Basic Operations
continued
17
Setting the timer manually (continued)
Tips
• To set the channel, you can also use the CH +/– or number buttons.
• You can set the channel with the shuttle ring during stop. However, you cannot set
the channel with the shuttle ring on the remote commander when:
– you set CABLE MOUSE in the CABLE BOX CONTROL menu to ON.
– you press JOG so that the remote commander is in jog mode.
• To set the tape speed, you can also use the SP/EP button.
• When you are recording a program in the SP mode and the remaining tape becomes
shorter than the recording time, the tape speed is automatically changed to the EP
mode. Note that some noises will appear on the picture when the tape speed is
changed. If you want to keep the tape speed, set AUTO TAPE SPEED to OFF in the
ADVANCED OPTIONS menu (page 33).
• “LINE3” is reserved for LASER LINK input when viewing the camcorder picture
(page␣35). Cable connection is r ecommended when recording the picture from the
camcorder (page 38).
• When a tape with a SmartFile label attached is inserted, the AUTO BLANK
SEARCH screen appears after closing the menu in step 5. For details, see “Setting
timer recording in the Blank Time space” (page␣50).
Notes
• If you are using cable box control, you cannot select “LINE1”, “LINE2” or “LINE3”.
• The station ID appears on the TV screen only when you complete Smart Channel
Mapping and the VCR receives the program information signal (see page 54 of the
supplied hookup/setup manual).
Additional Operations
Playing/searching
at various speeds
m REW M FF
H PLAY
Playback options Operation
View the picture during
fast-forward or rewind
Search forward
Search backward
Play at twice the normal speed
Play in slow motion
JOG
Shuttle ring
During fast-forward, hold down M FF. During rewind, hold
down m REW.
During playback, press M FF.
During playback, press m REW.
During playback, press ×2.
During playback or pause, press y SLOW +/–. Press the +/–
buttons to change the speed.
y SLOW
+/–
CLEAR
TAPE
RETURN
×2
M FF
JOG
m REW
H PLAY
x STOP
Shuttle ring
continued
Basic Operations
18
1-4
Additional Operations
19
Playing/searching at various speeds (continued)
IJK
OPQ
BBA
LMN
RST
AAB
ABB
XYZ
UVW
FGH
FAVORITE CH 12
15
27
13
19
3
45
43
22
10
Playback options Operation
Replay a scene
Rewind and start play
During playback, first press CLEAR when you come to a scene
you want to replay later. When you are ready to replay the
scene, press x STOP. Then press TAPE RETURN and
H PLAY in quick succession.
During stop, press H PLAY
m REW
on the VCR.
on the VCR while holding down
To resume normal playback
Press H PLAY.
Using the shuttle ring
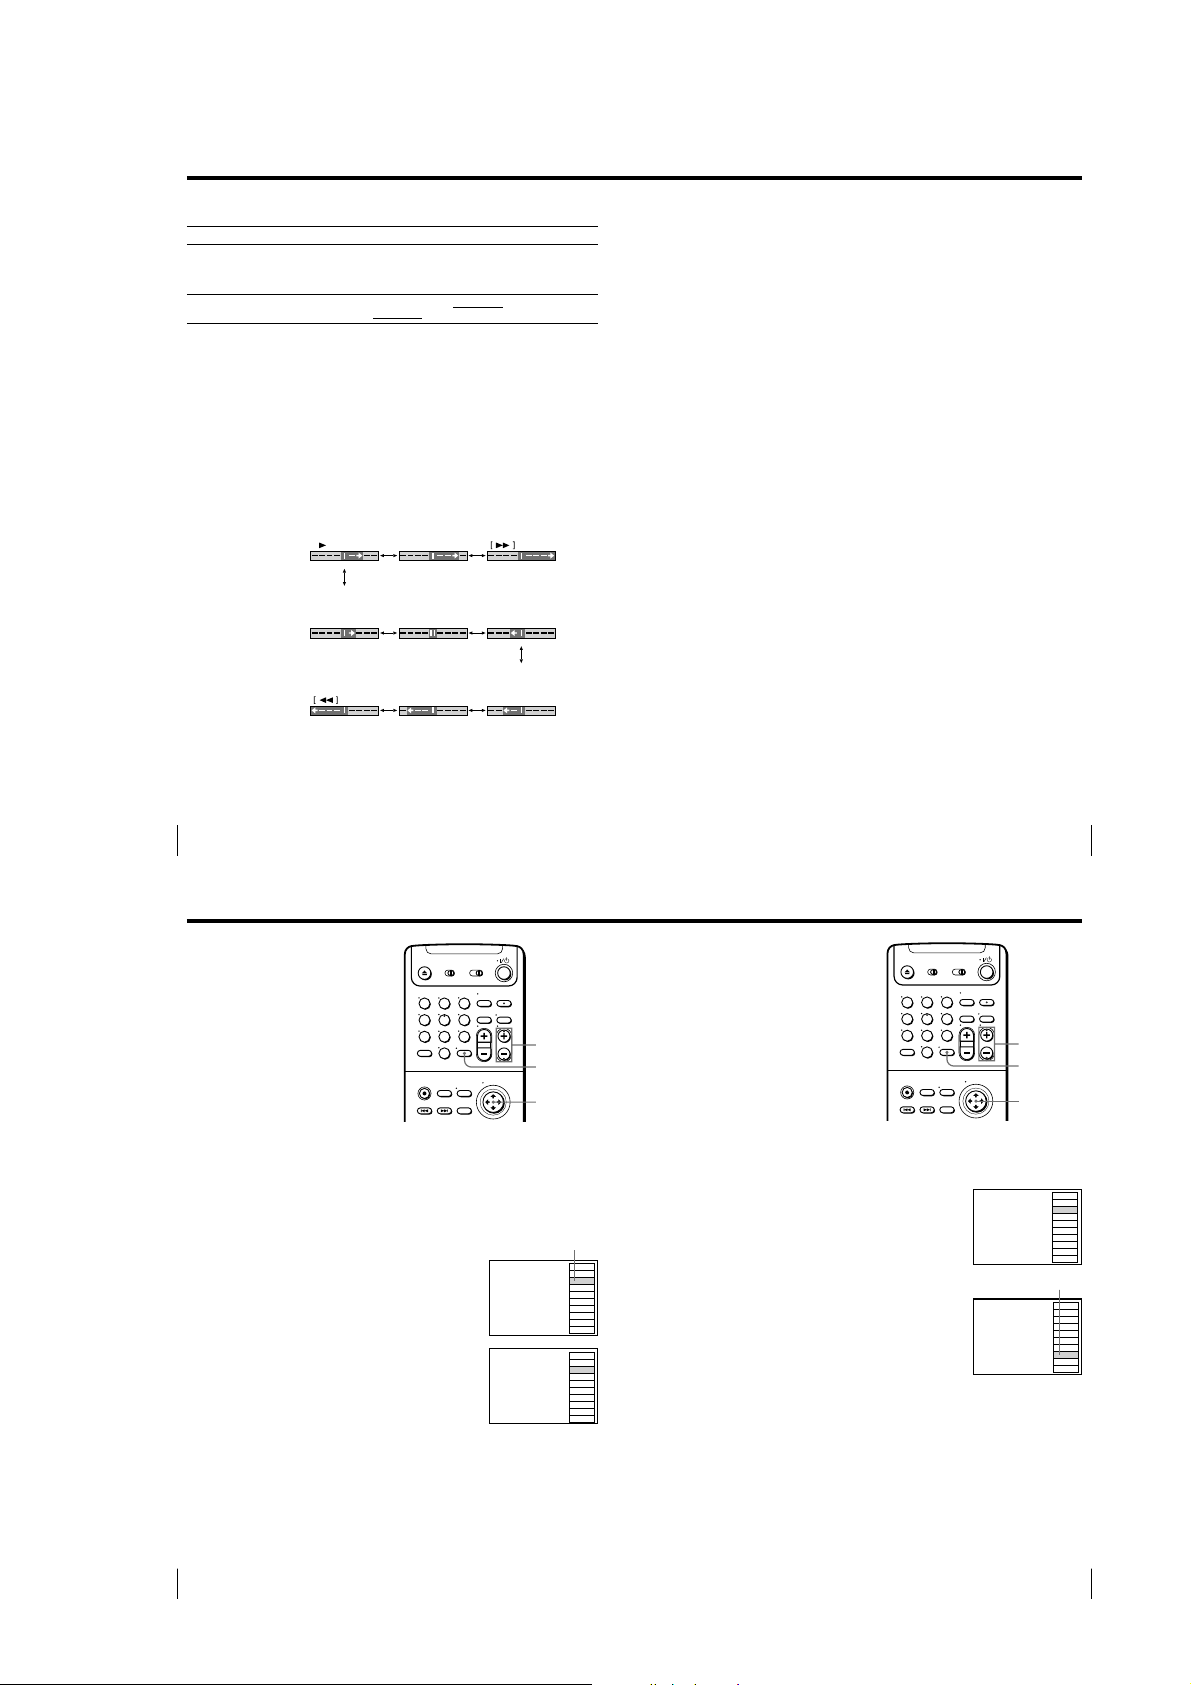
With the shuttle ring, you can operate a variety of playback options. There
are two ways for using the shuttle ring, normal mode and jog mode.
To use the shuttle ring in normal mode
During playback or pause, turn the shuttle ring clockwise or
counterclockwise. Each change in the shuttle ring position changes the
playback mode, and the corresponding mark appears on the TV screen for a
few seconds in the following way if the on-screen display function is on:
Playback mode Normal speed Double speed High speed
Mark on the TV screen
X2
To use the shuttle ring in jog mode
Use this mode for frame-by-frame playback.
Press JOG to enter the jog mode. The JOG button lights up. If you change to
the jog mode during any playback mode, the playback pauses so you can see
a still picture. Each change in the shuttle ring position shifts the picture one
frame. To shift frames in reverse, turn the shuttle ring counterclockwise.
The frame shift speed depends on the speed you turn the shuttle ring.
To resume normal mode, press JOG again. The JOG button goes off.
Tip
• Adjust the picture using the TRACKING +/– buttons if:
– Streaks appear while playing in slow motion.
– The picture shakes while pausing.
To set tracking to the center position, press both buttons (+/–) at the same time.
Notes
• The sound is muted during these operations.
• Tapes recorded in the LP mode on other VCRs can be played back on this VCR but
the picture quality cannot be guaranteed.
• The picture may have snow:
– when playing at high speed in reverse
– when playing in reverse slow motion
– when playing in reverse
• If the playback mode mark doesn’t appear on the TV screen, press DISPLAY.
• The picture may flutter a bit when playing in slow motion.
20
Additional Operations
Creating a
favorite channel
list with Station
ID
You can create your favorite channel list
of the TV channels with station ID. You
can store up to 10 channels with station
ID and select the channel from your
favorite channel list.
Before you start...
• Set FAVORITE CH to ON in the
ADVANCED OPTIONS menu
(page␣33).
Creating your favorite channel list
1 Press ENTER.
The FAVORITE CH screen appears on the TV screen.
2 Press CH +/– to select the station ID you
want to replace.
You can also use the cursor stick M/m instead.
3 Move the cursor stick </, to select the
station ID you want to set.
4 Repeat steps 2 and 3 to set the station IDs as required.
5 Press ENTER.
You can also use the cursor stick (OK) instead.
Note
• If the TV channel has no station ID, the channel number appears on the TV screen.
Slow motion Pause Slow motion
High speed Double speed Normal speed
in reverse in reverse in reverse
X2–X1–
123
456
789
in reverse
0
The selected station ID
FAVORITE CH 12
FAVORITE CH 12
CH +/–
ENTER
Cursor stick
M/m/</,
OK
IJK
OPQ
15
CDE
9
13
LMN
RST
19
AAB
3
ABB
45
XYZ
43
22
UVW
FGH
10
IJK
OPQ
15
BBA
27
13
LMN
RST
19
AAB
3
ABB
45
XYZ
43
22
UVW
FGH
10
Selecting a channel from
your favorite channel list
123
456
789
0
1
Turn on your TV and set it to the video channel.
To choose a channel from a cable box, turn the cable box on.
2
Press ENTER.
Your FAVORITE CH screen appears on the TV
screen.
3
Press CH +/– to select the station ID you
want.
You can also use the cursor stick M/m instead.
4
Press ENTER.
You can also use the cursor stick (OK) instead.
Note
• If the TV channel has no station ID, the channel number appears on the TV screen.
Additional Operations
CH +/–
ENTER
Cursor stick
M/m
OK
The selected station ID
FAVORITE CH 12
IJK
OPQ
15
BBA
27
13
LMN
RST
19
AAB
3
ABB
45
XYZ
43
22
UVW
FGH
10
21
22
Additional Operations
1-5
Additional Operations
23
Setting the
recording
duration time
After starting recording in the normal
way, you can have the VCR stop
recording automatically after a specified
duration.
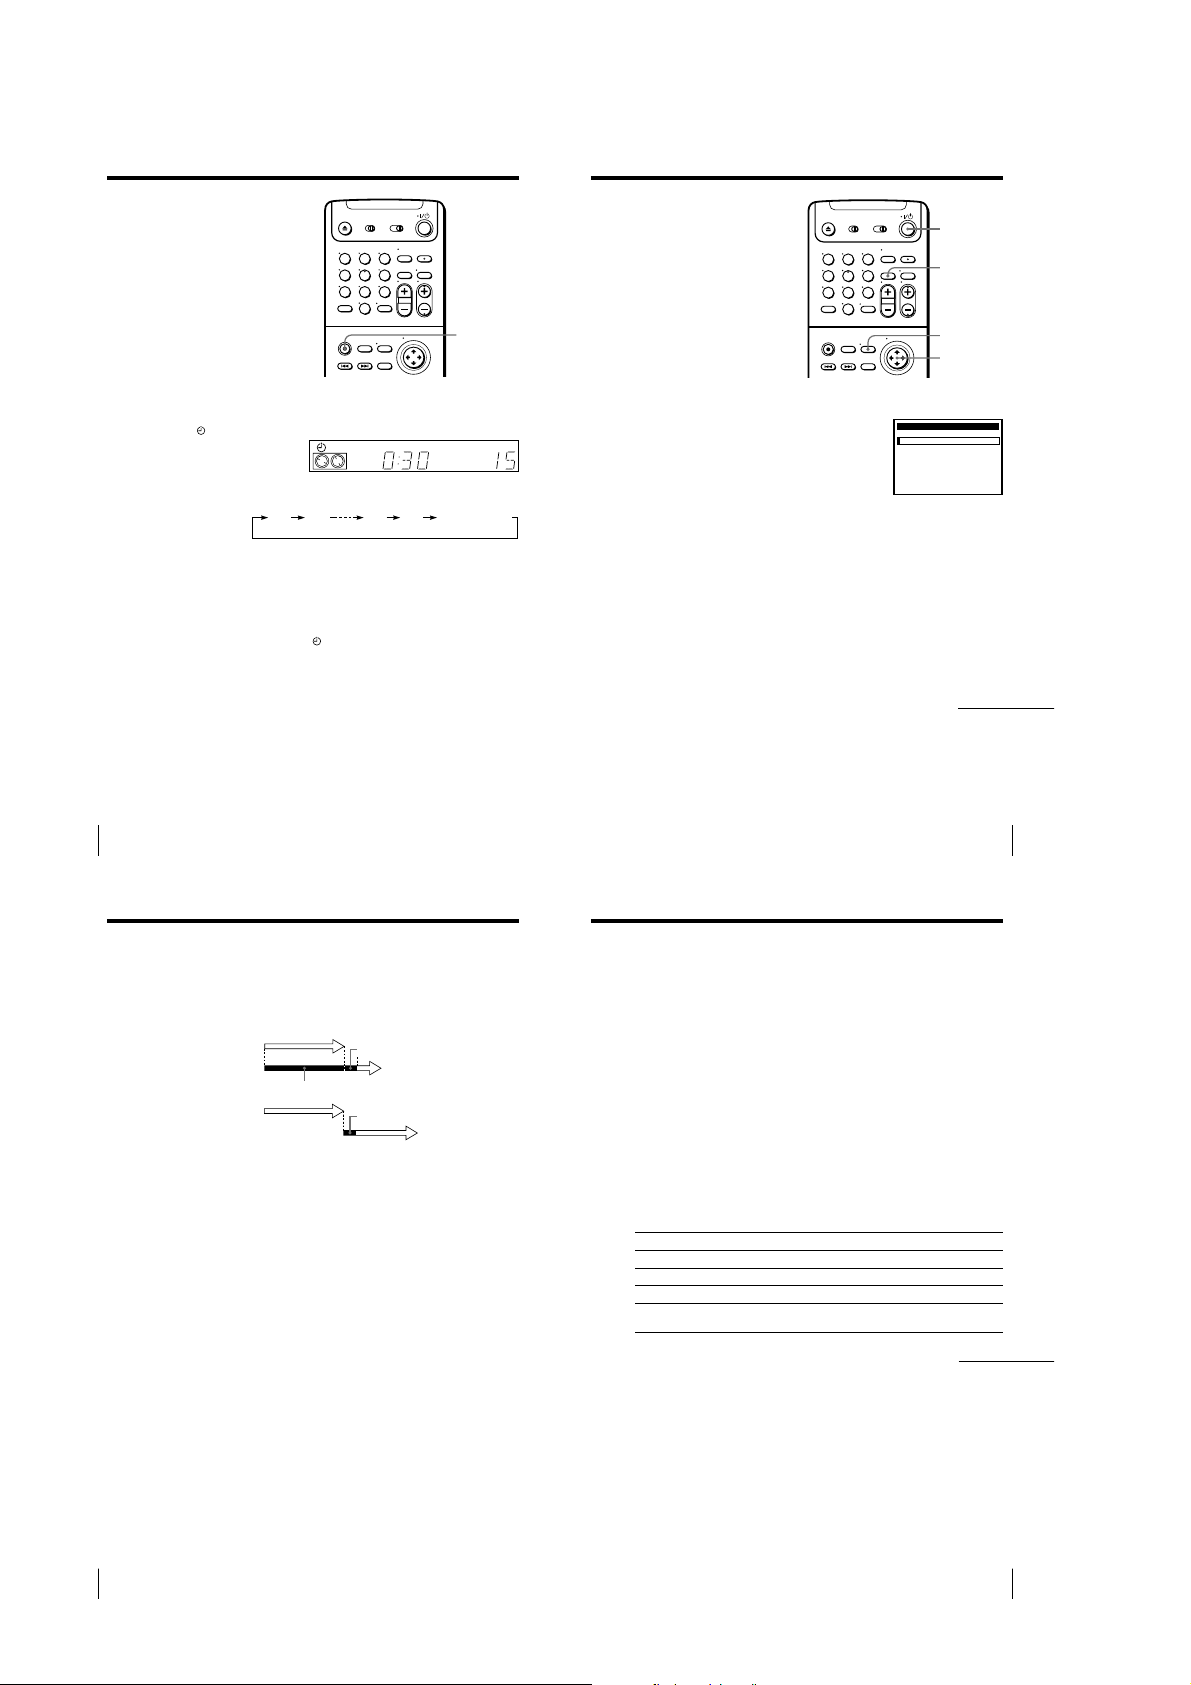
1
While recording, press z REC.
The
indicator appears in the display window.
2
Press z REC repeatedly to set the duration.
Each press advances the time in increments of 30 minutes.
The tape counter decreases minute by minute to 0:00, then the VCR
stops recording and turns off automatically.
To extend the duration
Press z REC repeatedly to set a new duration.
To cancel the duration
Press z REC repeatedly until the
returns to normal recording mode.
To stop while recording
Press x STOP.
Note
• You cannot display the current tape time in the display window when setting the
recording duration.
123
456
789
0
STEREO SAP
LP SP EPVIDEO APC EDIT
VTR
123
indicator disappears and the VCR
Checking/
changing/
canceling timer
settings
Before you start…
z REC
AV INSERT
BLANK
Normal recording0:30 1:00 5:30 6:00
• Turn on your TV and set it to the
video channel.
1
Press `/1 to turn on the VCR.
2
Press MENU, then move the cursor stick M/m
to select TIMER SET/CHECK and push the
cursor stick (OK).
• If you want to change a setting, go on to the
next step.
• If you do not need to change the settings,
push the cursor stick (OK), then turn off the
VCR to return to recording standby.
3
Move the cursor stick M/m to select the setting you want to change or
cancel:
• To change the setting, move the cursor stick </, to highlight the
item you want to change, and move the cursor stick M/m to reset it.
Then, move the cursor stick , repeatedly until the cursor appears at
the beginning of the line.
• To cancel the setting, press CLEAR.
4
Push the cursor stick (OK).
If any timer settings remain, turn off the VCR to return to recording
standby.
123
456
789
0
`/1
CLEAR
MENU
Cursor stick
M/m/</,
OK
TIMER SET / CHECK
DATE START STOP CH
3
/7:00 8:00 6
9
THU
AM AM
0
:
:
102/10
11
SAT
PM PM
30
15 50
–1:00 3:00
SATMON
AMPMAM
:
PM
SUN
EVERY 12
55 1:30 12
––/– –:–– –:–– –– –
––/– –:–– –:–– –– –
––/– –:–– –:–– –– –
––/– –:–– –:–– –– –
continued
9 / 28
TUE
SP
EP
LINE1
EP
SP
24
Additional Operations
Checking/changing/canceling timer settings (continued)
When the timer settings overlap
The program that starts first has priority and the second program starts
recording only after the first program has finished. If the programs start at
the same time, the program listed first in the menu has priority.
Program 1
Program 2
Will be cut off
Program 1
Program 2
About 20 seconds
About 20 seconds will be cut off
Recording stereo and bilingual
programs
Recording stereo programs
This VCR automatically receives and records stereo programs. When a
stereo program is received, the STEREO indicator lights up. If there is noise
in the stereo program, set AUTO STEREO in the ADVANCED OPTIONS
menu to OFF. The sound will be recorded in monaural (on both hi-fi and
normal audio tracks) but with less noise. For details, see page 32.
Recording bilingual programs
Normally, this VCR records only the main sound. When a SAP (Second
Audio Program) is received, the SAP indicator lights up. To record only SAP
sound, set TUNER AUDIO in the ADVANCED OPTIONS menu to SAP. For
details, see page 33.
Selecting the sound during playback
Press AUDIO MONITOR to select the sound you want. (The sound being
recorded will not change.)
To listen to On-screen display Display window
Stereo STEREO STEREO
Left channel LEFT CH STEREO
Right channel RIGHT CH STEREO
Monaural sound on the No indicator No indicator
normal audio track
Additional Operations
continued
25
26
Additional Operations
1-6
Additional Operations
27
Recording stereo and bilingual programs (continued)
I NDEX
SEARCH
8
How sound is recorded on a video tape
The VCR records sound onto two separate tracks. Hi-fi audio is recorded
onto the main track along with the picture. Monaural sound is recorded
onto the normal audio track along the edge of the tape.
Normal audio track
Hi-fi audio track
(main track)
Notes
• To play a tape in stereo, you must use the A/V connections.
• When you play a tape recorded in monaural, the sound is heard in monaural
regardless of the AUDIO MONITOR setting.
• If the AUDIO MONITOR button does not function, check that AUDIO MIX in the
ADVANCED OPTIONS menu is set to OFF.
Monaural sound
Stereo sound
(left/right channels)
Searching using
the index
function
The VCR marks the tape with an index
signal at the point where each recording
begins. Use these signals as references
to find a specific recording. The VCR
can search up to 99 index signals ahead
of or behind the current position.
1
Insert an indexed tape into the VCR.
2
Press ./> INDEX SEARCH repeatedly to specify how many
index signals ahead or behind you want to search:
• To search ahead, press > INDEX
SEARCH.
• To search backwards, press . INDEX
SEARCH.
The VCR starts searching and the index
number on the TV screen counts down to
zero. Playback starts automatically from
that point.
To stop searching
Press x STOP.
Note
• No index signal will be added when recording starts from recording pause.
However, an index signal will be marked if you change the program position
during recording pause.
123
456
789
0
./>
INDEX
SEARCH
28
Additional Operations
Adjusting the picture
Adjusting the tracking
Although the VCR automatically adjusts the tracking when playing a tape
(the indicator flashes in the display window, then goes off), distortion
may occur if the tape was recorded in poor condition. In this case, manually
adjust the tracking.
Press the TRACKING +/– buttons to display
the tracking meter. The distortion should
disappear as you press one of the two buttons
(the
indicator lights up). To resume
automatic tracking adjustment, eject the tape
and reinsert it.
About the Reality Regenerator function
The Reality Regenerator function automatically restores the picture to its
original quality during playback.
To use the Reality Regenerator
function, press REALITY
REGENERATOR. The REALITY
REGENERATOR indicator lights up.
To turn it off, press REALITY
REGENERATOR. The REALITY
REGENERATOR indicator goes off.
NORMAL TRACKING
Tracking meter
REALITY REGENERATOR
REALITY REGENERATOR indicator
Additional Operations
About the Adaptive Picture Control (APC) function
The Adaptive Picture Control (APC) function automatically improves
recording and playback quality by adjusting the VCR to the condition of the
video heads and tape. To maintain better picture quality, we recommend
that you set APC to ON in the ADVANCED OPTIONS menu (with the APC
indicator in the display window lit). For details, see page 33.
APC playback
The APC function automatically works on all types of tapes, including rental
tapes and tapes that were not recorded with APC.
APC recording
Whenever you insert a tape and first start recording, the VCR adjusts to the
tape using the APC function (the APC indicator flashes rapidly). This
adjustment is retained until the tape is ejected.
Notes
• The automatic tracking adjustment cannot be guaranteed to work with tapes
recorded in the LP mode on other VCRs.
• The APC function does not work if the tape speed is automatically changed from
the SP to EP mode during a timer recording when AUTO TAPE SPEED is set to ON
in the ADVANCED OPTIONS menu, unless the tape has been recorded in the EP
mode with the APC function.
• There is a delay of about ten seconds before the VCR actually starts recording while
the VCR analyzes the tape. To avoid the delay, first set the VCR to recording pause
(the APC indicator flashes slowly) and press z REC to have the VCR analyze the
tape (the APC indicator flashes rapidly). After the APC indicator stops flashing,
press X PAUSE to start recording immediately.
If you want to start recording quickly without using the APC function, first set the
VCR to recording pause (the APC indicator flashes slowly) and press X PAUSE to
start recording.
29
30
Additional Operations
1-7
Additional Operations
31
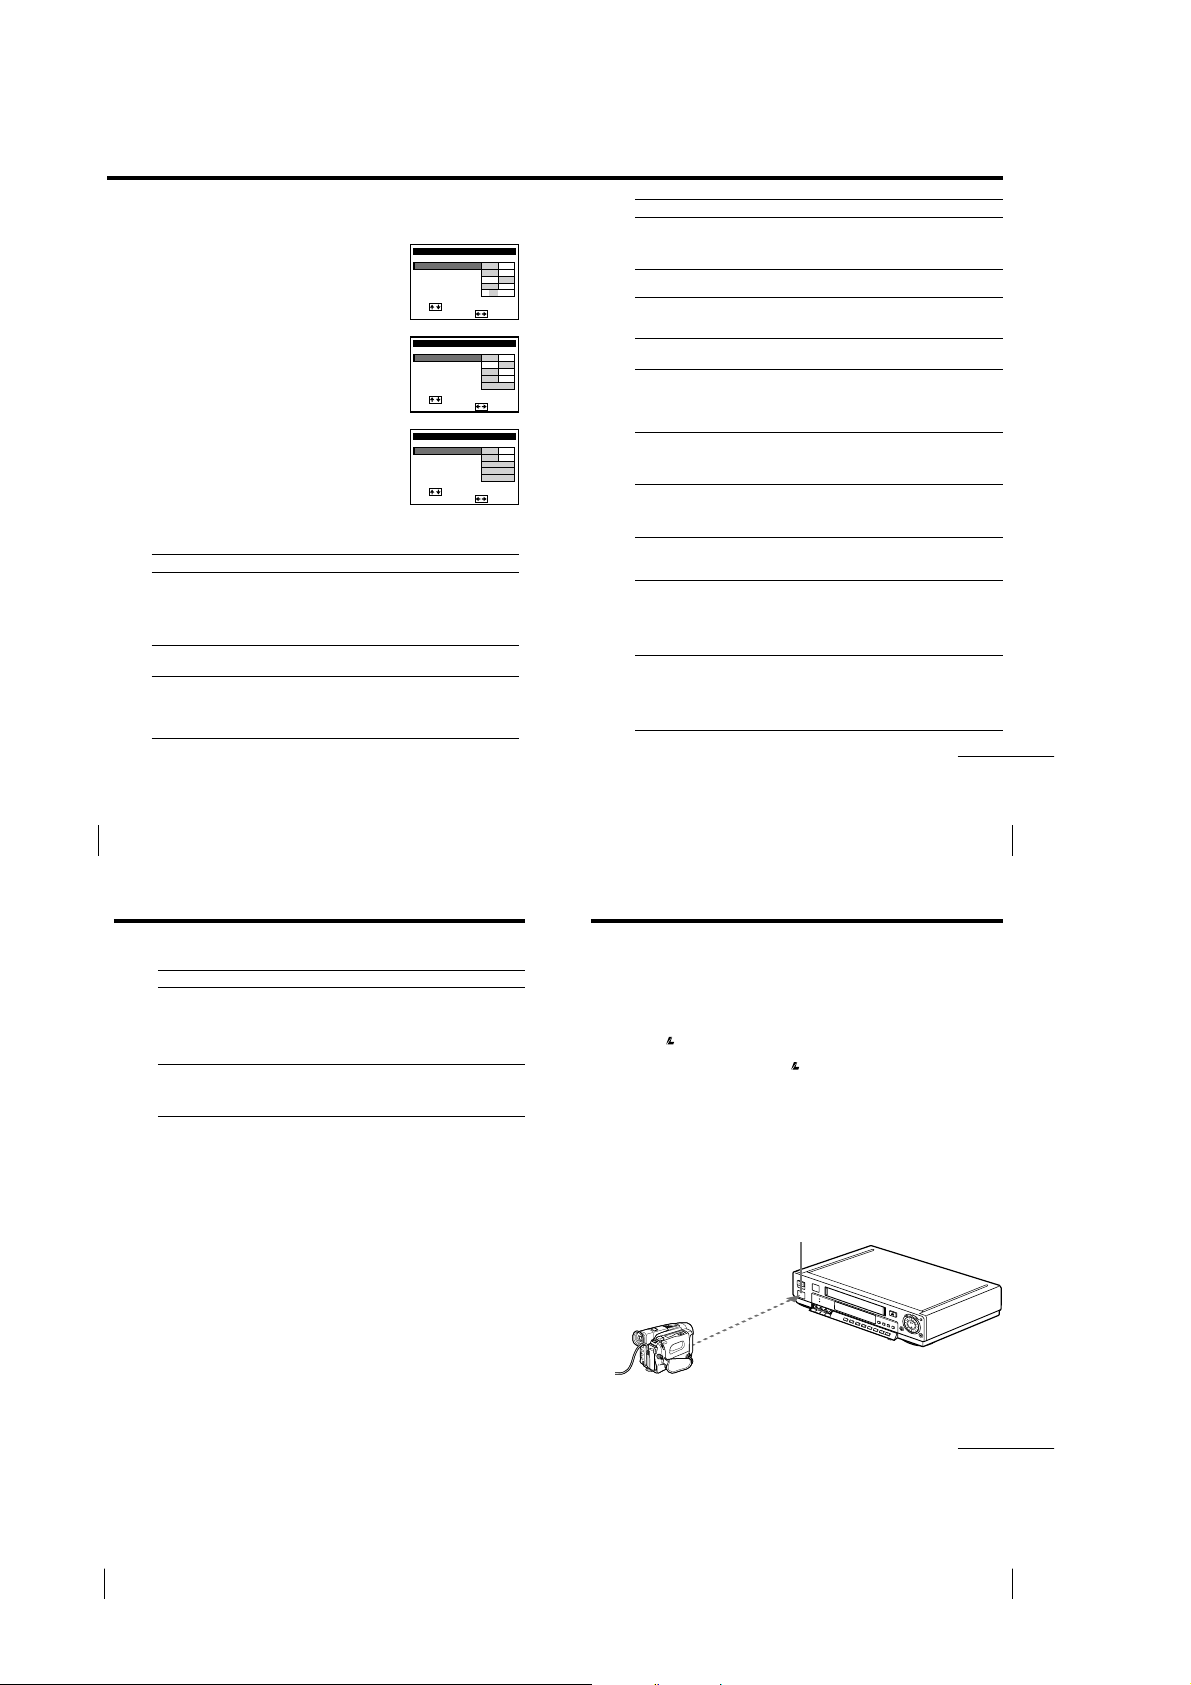
Changing menu options
1
Press MENU, then move the cursor stick
M/m to select ADVANCED OPTIONS and
push the cursor stick (OK).
2
Move the cursor stick M/m to select the
option to change, then move the cursor
stick </, to change the setting.
The ADVANCED OPTIONS menu has 3
pages. Moving the cursor stick M/m
repeatedly will turn the pages.
3
Push the cursor stick (OK) to return to the
original screen.
Menu choices
Initial settings are indicated in bold print.
Menu option Set this option to
AUTO ANT SEL • ON if your TV is connected only to VHF/UHF OUT on
AUTO STEREO • ON to receive stereo programs.
AUDIO MIX • ON to listen to the sound recorded on hi-fi and normal
the VCR. To play a tape, set the TV to the VCR channel
(channel 3 or 4).
• OFF if your TV is connected to both VHF/UHF OUT and
LINE OUT on the VCR. To play a tape, set the TV to the
VCR input.
• OFF to reduce noise. The sound changes to monaural.
audio tracks at the same time. The AUDIO MONITOR
button will not function.
• OFF to listen to hi-fi and normal audio tracks separately.
Select the sound using the AUDIO MONITOR button.
Page 1
ADVANCED OPTIONS
AUTO ANT SEL
AUTO STEREO
AUDIO MIX
TUNER AUDIO
SHARPNESS
se t o se l ec t a n
U
tem, then push
i
Page 2
ADVANCED OPTIONS
APC
DIMMER
AUTO TAPE SPEED
TAPE SELECT
SMART CUE
se t o se l ec t an
U
tem, then push
i
Page 3
ADVANCED OPTIONS
FAVORITE CH
AUTO LASER LINK
DEFAULT SPEED
BLANK SEARCH
SMARTFILE LIST
se t o se l ec t a n
U
tem, then push
i
ON OFF
ON OFF
ON OFF
MAIN SAP
LH––
ON OFF
ON OFF
ON OFF
AUTO
MEDIUM
ON OFF
ON OFF
EP
MANUAL
MANUAL
page1
page2
180
page3
Menu option Set this option to
TUNER AUDIO • MAIN to record the main sound on both hi-fi and normal
SHARPNESS L (Low) through H (High) to adjust the sharpness of the
APC • ON to switch on the APC (Adaptive Picture Control)
DIMMER • ON to make the display window dim.
AUTO TAPE SPEED • ON to change the timer recording tape speed
TAPE SELECT • AUTO when using a T-160 length tape or any tape shorter
SMART CUE • MEDIUM to set the automatic rewinding time on skip
FAVORITE CH • ON when using favorite channel list.
AUTO LASER LINK • ON to switch the video input automatically to “L3” and
DEFAULT SPEED • EP to set the recording tape speed automatically back to
audio tracks.
• SAP to record the SAP (Second Audio Program) sound on
both hi-fi and normal audio tracks.
picture. L to turn off the sharpness control.
function and improve picture quality.
• OFF to switch off APC.
• OFF to make it brighter.
automatically to the EP mode when the remaining tape
length becomes shorter than the recording time. To
operate AUTO TAPE SPEED, set TAPE SELECT correctly.
• OFF to keep the tape speed.
than a T-140 length tape.
• 180 when using a T-140 or T-180 length tape.
For details, see page 8.
playback to a medium length.
• SHORT to set to a short length.
• LONG to set to a long length.
• OFF when using station ID list.
For details, see pages 10 and 22.
display the camcoder picture on the TV screen when the
camcorder is aimed at the LASER LINK IR receiver of the
VCR.
• OFF to not switch the video input automatically.
For details, see page 35.
EP after recording.
• SP to set the recording tape speed automatically back to
SP after recording.
• FLOAT to set the recording tape speed to the last position
selected from the SP/EP button.
continued
32
Additional Operations
Changing menu options (continued)
Menu option Set this option to
BLANK SEARCH • MANUAL to display a screen asking whether to search for
SMARTFILE LIST • MANUAL to display the SmartFile search list only when
Note
• If you set the DEFAULT SPEED option to EP, you can still change the recording tape
speed to SP, or vice versa by pressing the SP/EP button only for that program. Next
time you record a program, the recording tape speed is automatically set to the
position you set in the DEFAULT SPEED option.
the Blank Time when the timer is set.
• AUTO to set the VCR to perform the Blank Time search
automatically each time the timer is set.
• OFF to switch off the Blank Time search function.
For details, see page 51.
you press the SMARTFILE button.
• AUTO to display the SmartFile search list automatically
when you insert a SmartFile tape.
Additional Operations
Watching the camcorder picture
without connecting cables
— LASER LINK
This VCR has a built-in AV cordless IR receiver which lets you watch
the picture of a LASER LINK* compatible camcorder on your TV
without connecting cables. LASER LINK is a system which transmits
and receives pictures and sound between
video equipment by using infrared rays.
Before you start...
• Turn on your TV and set it to the video channel.
1 Press `/1 POWER to turn on this VCR.
2 Adjust the angle and direction of the LASER LINK IR emitter of the
camcorder to match the LASER LINK IR receiver of this VCR.
Place the camcorder directly in front of this VCR within the range
specified below.
LASER LINK compatible
LASER LINK IR receiver
5 m or less,
directly in front
33
34
Additional Operations
1-8
* LASER LINK is a trademark of Sony Corporation.
continued
Additional Operations
35
Watching the camcorder picture without connecting cables
— LASER LINK (continued)
3
Start camcorder playback using LASER LINK.
The VCR input automatically switches to “L3” and the camcorder
picture appears on the TV screen.
Refer to the operating instructions of the camcorder for camcorder
operations using LASER LINK.
4
Adjust the distance and angle between the camcorder and the VCR so
that the playback picture appears clearly on the TV.
To stop watching the camcorder picture
Move the camcorder so that its LASER LINK IR emitter no longer points at
the LASER LINK IR receiver of this VCR. The video channel or input
returns to the position selected before using LASER LINK.
Tips
• Cable connection is recommended when recording or editing the picture from the
camcorder (page 38).
• If you do not want to automatically switch the video input and display the picture
on the TV when the camcorder is aimed at the IR receiver of the VCR, set AUTO
LASER LINK to OFF in the ADVANCED OPTIONS menu. In this case, you can
view the picture by pressing the INPUT SELECT button to switch the input to “L3”
(see page 33).
Notes
• Do not cover the IR emitter of the camcorder or the IR receiver of the VCR with
your hands or other objects.
• Infrared rays cannot pass through walls or opaque glass. Be sure to place the VCR
in an unobstructed position. Using LASER LINK through glass will shorten the
transmission range.
• Do not place the camcorder too close to the VCR, as this may cause noise and/or
beat.
• When connecting the VCR to the TV using only the antenna cable, press the
TV/VIDEO button to display the VIDEO indicator in the VCR’s display window
before starting to use LASER LINK.
• The IFT-AV1 Cordless AV Transmitter System uses a different frequency band, so it
cannot be used with this VCR.
Editing
Editing methods
This section introduces you to various ways to edit tape recordings.
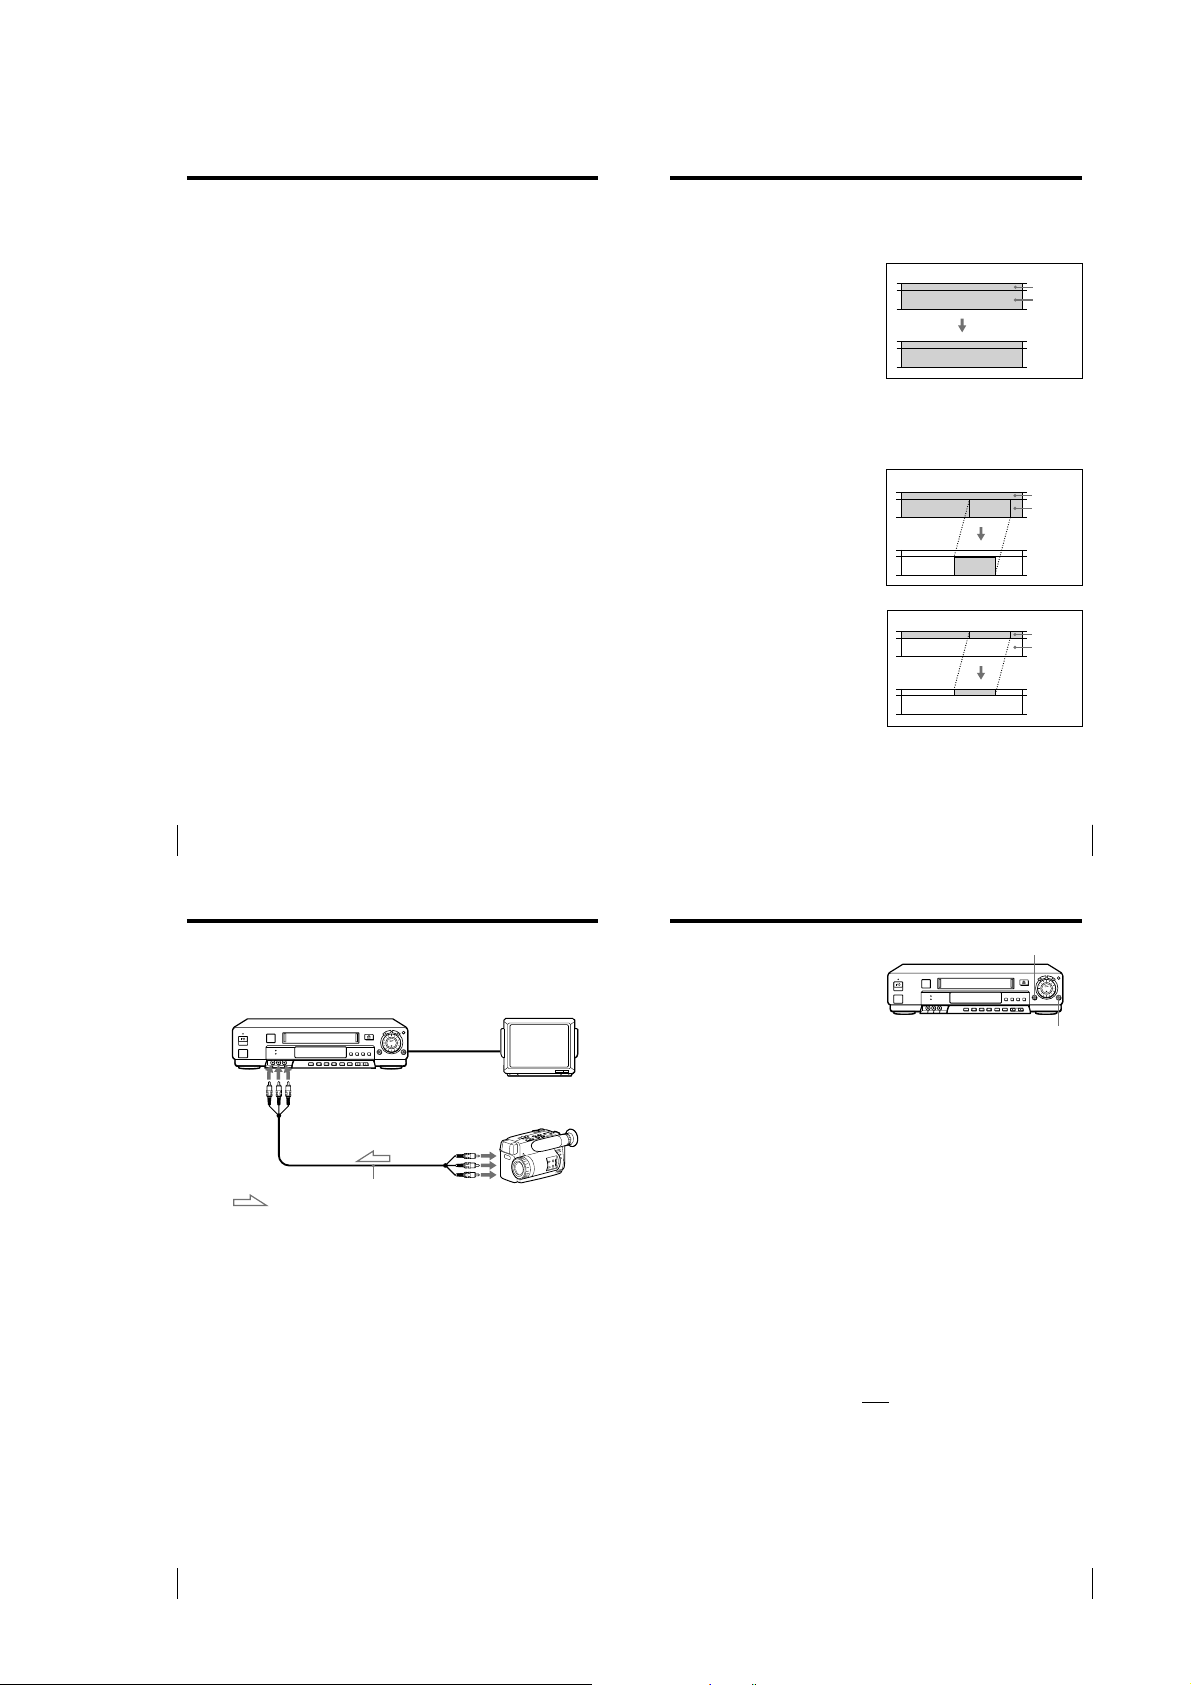
Basic editing
You can make a copy of a tape.
Insert editing
You can replace an existing scene with
material from another recording. There
are three kinds of insert editing.
Video insert
Replaces the original video and hi-fi
audio. The monaural sound on the
normal audio track is retained.
Audio insert
Replaces the original monaural sound
on the normal audio track. The video
and hi-fi sound are left intact. For
example, you can use this feature to add
commentary to a tape recorded on a
camcorder.
A/V insert
Replaces the original video and both hifi and monaural sound.
Source tape
Edited tape
Video insert
Source tape
Edited tape
Audio insert
Source tape
Edited tape
Normal audio
Video and
hi-fi audio
Normal audio
Video and
hi-fi audio
Normal audio
Video and
hi-fi audio
36
Additional Operations
Hooking up to a VCR or stereo system
How to hook up to record on this VCR
This VCR (Recorder)
LINE-2 IN
Other VCR (Player)
LINE OUT
VMC-810HG audio/video cable
: Signal flow
How to hook up to a stereo system
Connect LINE-2 IN AUDIO on this VCR to the audio output jacks on the
stereo system, using the RK-C510KS audio cable (not supplied).
If the other VCR has a CONTROL S OUT jack for synchronized editing
Hook up to record on the other VCR, then connect the VCRs via the
CONTROL S jacks. The CONTROL S connection lets you control (pause and
release pause) both VCRs from the recording VCR.
Notes
• Make sure you connect the plugs to jacks of the same color.
• If the other VCR is a monaural type and connected to this VCR’s LINE-2 IN jacks,
connect the audio plug to the AUDIO L (white) jack. The sound is recorded on both
right and left channels. When connecting to the AUDIO R (red) jack, the sound is
recorded only on the right channel.
• If you connected this VCR to both the LINE IN and LINE OUT jacks of the other
VCR, select the input correctly to prevent a humming noise.
• You can also use the LINE-1 IN jacks for editing. If the other VCR is a monaural
type, the sound is recorded only on the channel whose jack is connected to the
audio plug. To record on both right and left channels, connect the audio plugs to
the AUDIO R/L jacks using a VMC-910HG audio/video cable (not supplied).
• If the CONTROL S IN jack is used for S-Link (A/V bus control) with a TV, the
CONTROL S connection cannot be used for editing.
(not supplied)
37
Editing
Basic editing
(when recording on this
VCR)
TV
Before you start editing
• Turn on your TV and set it to the
video channel.
• Press INPUT SELECT to display “L2”
(or “L1”) in the display window.
• Press SP/EP to select the tape speed, SP or EP.
• On this VCR, press EDIT to display “EDIT” in the display window. If
the other VCR has a similar button, press it to activate edit function.
1
Insert a source tape with its safety tab removed into the other
(playback) VCR. Search for the point to start playback and set it to
playback pause.
2
Insert a tape into this (recording) VCR. Search for the point to start
recording and press X PAUSE.
3
Press z REC on this VCR and set it to recording pause.
4
To start editing, press the X PAUSE buttons on both VCRs at the same
time.
To stop editing
Press the x STOP buttons on both VCRs.
Tip
• To cut out unwanted scenes while editing, press X PAUSE on this VCR when an
unwanted scene begins. When it ends, press X PAUSE again to resume recording.
Note
• If you start recording following the procedure above, the VCR won’t start recording
with the APC function. To record a tape with the APC function, press z REC again
during recording pause in step 3 so that the VCR analyzes the tape. Then when you
start recording in step 4, press X PAUSE immediately after the APC indicator stops
flashing. If you press X PAUSE before the APC indicator stops flashing, the APC
function is canceled.
X PAUSE
z REC
38
Editing
Editing
39
1-9
Insert editing
Before you start editing
• Turn on your TV and set it to the
video channel.
• Press INPUT SELECT to display “L2”
in the display window.
• Press SP/EP to select the tape speed,
SP or EP.
• On this VCR, press EDIT to display
“EDIT” in the display window. If the
other VCR has a similar switch, set it
to ON as well.
1
Insert a source tape into the playback VCR or the stereo system. Search
for the point to start playback and set it to playback pause.
2
Insert a prerecorded tape into this (recording) VCR. Search for the end
of the scene to be replaced and press X PAUSE.
3
Press CLEAR on this VCR to reset the counter to “0:00:00”.
4
Rewind the prerecorded tape to the beginning of the scene to be
replaced.
The VCR pauses.
CLEAR
VIDEO
INSERT
AUDIO
INSERT
X PAUSE
5
Press the INSERT buttons:
To replace Press
Picture and hi-fi sound
Monaural sound only
Picture, hi-fi and
monaural sound
To cancel the video or audio insert function, press VIDEO INSERT or
AUDIO INSERT again.
6
To start editing, press the X PAUSE buttons on this VCR and the other
VCR (or stereo system) at the same time.
VIDEO INSERT.
“VID INS X” appears on the TV screen and
“V␣INSER T” appears in the display window.
AUDIO INSERT.
“AUD INS X” appears on the TV screen and
“A␣INSER T” appears in the display window.
AUDIO INSERT, then VIDEO INSERT.
“A/V INS X” appears on the TV screen and
“AV␣INSERT” appears in the display window.
To stop editing
Press the x STOP buttons on this VCR and the other VCR (or stereo system).
To listen to both the hi-fi and normal audio
Set AUDIO MIX to ON in the ADVANCED OPTIONS menu (page 32). Use
this feature to listen to inserted audio together with the original hi-fi audio.
When AUDIO MIX is set to ON, the AUDIO MONITOR button does not
function. Remember to reset AUDIO MIX to OFF after playing the tape.
Note
• To use the INSERT function, this VCR must be set to playback pause, not recording
pause.
40
Editing
SmartFile Function
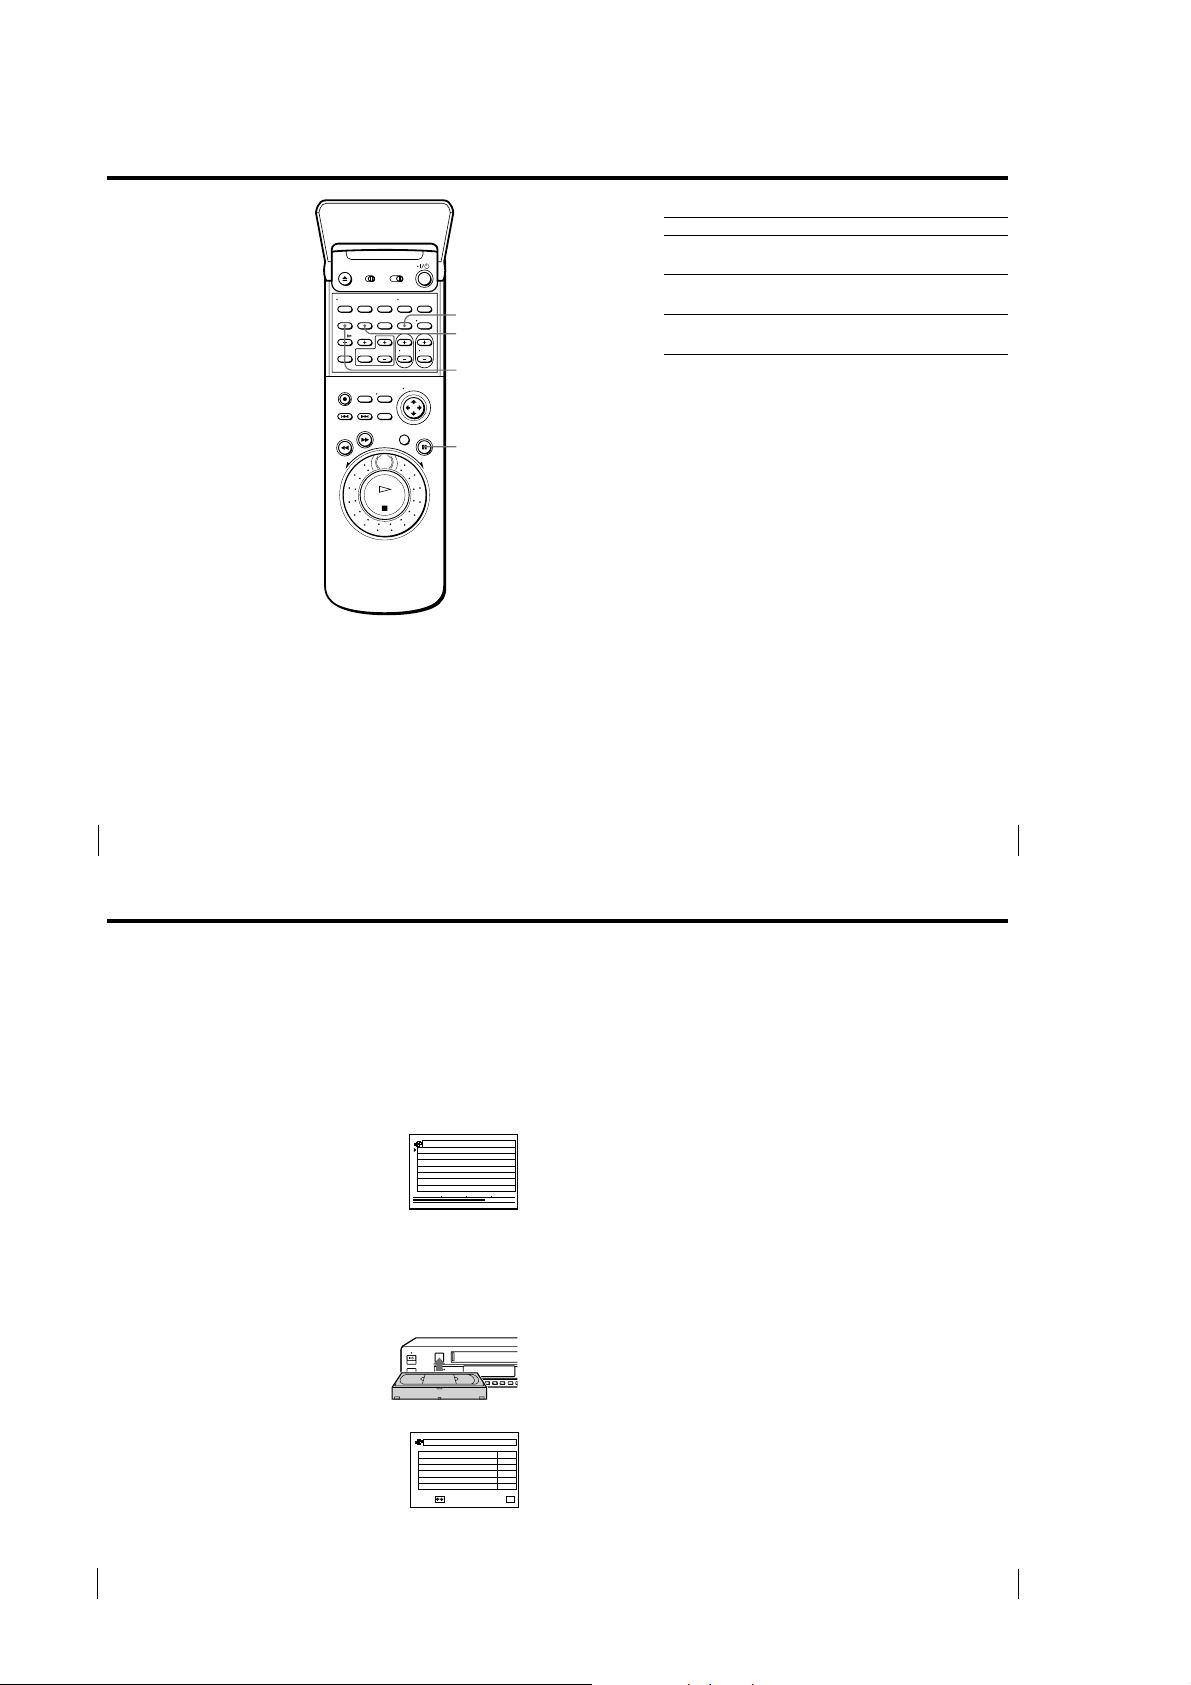
About the SmartFile function
SmartFile* allows you to view the contents of your video tape (recording
date, channel, etc.) on the TV screen. It is no longer necessary to rewind,
fast-forward, or play back a tape to find out what is recorded. You can also
locate and start playback of a specific program, or find the position from
which you want to start recording by using this list. Program data is stored
in the memory of the SmartFile label attached to the tape.
The following functions are possible using SmartFile:
Recording using the SmartFile
function (page 44)
To use the SmartFile function, attach the
SmartFile label to the tape. If you record a
program on a tape with a SmartFile label, the
contents will appear on the SmartFile search list.
With the SmartFile list, you can also easily find
the beginning of the available recording space.
Selecting and playing a program (page 53)
To play back a recorded program, select the program you want to watch
using the SmartFile search list. The VCR locates the program and playback
starts automatically.
Checking the contents of a tape
(page 55)
When you bring the SmartFile label close to the
SMARTFILE sensor on the VCR, a summary of
the recorded programs appears in the SmartFile
check list. It is not necessary to insert the tape
into the VCR and press H PLAY to find out
what is recorded on it. This feature allows you
to easily find the program you want to watch, or
to quickly find a tape with enough recording
space.
SmartFile search list
8/10/99~8/16/99
BLANK TIME
MON
6:30
PM
CH
16/8
8:00
2:30
0
PM
CH
13/8
0
PM
CH
80/8
0
FRI
TUE
START END
SmartFile check list
8/10/99~8/30/99
BLANK TIME
MON
9:00
PM
CH
16 0/83
SUN
6:30
PM
CH
49/82
FRI
8:00
PM
CH
12 7/82
FRI
5:45
PM
CH
77/82
THU
1:00
PM
CH
12 6/82
TUE
4:30
PM
CH
84/82
NEXT :
QUIT :
41
Editing
Labeling a recorded program and tape (page 56)
You can attach an electronic “label” to the video tape and it’s programs on
the SmartFile list. Labeling the recorded programs enables you to find a
program easily when you want to play it back. Also, once you label a
program which you set to record regularly (i.e. everyday, same day of a
week, etc.), the VCR recognizes the label and will automatically label all
future recordings of the same program.
Protecting a recorded program (page 61)
You can protect a recorded program from accidental over-recording or
erasure.
Erasing the data of an unwanted program (page 63)
p . 1
M84H1EP
16
SP
M03H
12
SP
M05H
1
EP
M03H
p . 1
M84H1EP
OK
By erasing a program from the SmartFile list, the VCR will record over the
unwanted program.
Registering the contents of a recorded tape in the
SmartFile label (page 65)
You can register programs recorded on a tape in the memory of a new
SmartFile label.
Storing program data from the DIRECTV digital
satellite receiver (Program Data Download) (page 67)
If you connect a DIRECTV digital satellite receiver equipped with the
Program Data Download function, you can store the program and category
name transmitted from the DIRECTV digital satellite receiver on a SmartFile
tape. The DIRECTV digital satellite receiver equipped with the Program
Data Download function will be available in the future.
SmartFile Function
42
* SmartFile is a trademark of Sony Corporation.
1-10
SmartFile Function
43
Recording using the SmartFile
function
To use the SmartFile function, attach the SmartFile label to the spine of the
cassette tape. If you record a program on a tape with a SmartFile label,
program data, such as the date and channel, is automatically stored in the
memory of the SmartFile label.
Attaching the SmartFile label to
the cassette tape
To use the SmartFile function, attach the
supplied SmartFile label to the cassette tape.
Remove any stains or dirt from the surface of
the spine of the tape. Then, holding both
edges of the SmartFile label so that it doesn’t
bend, attach it along the guide line to the spine
of the cassette tape. This tape is henceforth
referred to as a SmartFile tape.
Note on the purchase of SmartFile labels
• For the customers in the USA
To order additional SmartFile labels, see the back page.
• For the customers in Canada
Additional SmartFile labels can be purchased at Sony of Canada Ltd. Authorized
VHS Dealers.
Notes
• The SmartFile label is equipped with a memory chip. The memory chip may be
damaged and cannot be used when you:
– twist or fold the SmartFile label.
– remove the SmartFile label and re-attach it to a tape.
– attach more than one SmartFile label to a tape.
– attach some metal, or sticker which has metal, to the SmartFile label.
– write too strongly on the SmartFile label using a ballpoint pen or similar sharp
instrument.
– disassemble or remodel a label.
• Do not leave the SmartFile label in a place subject to excessive dust or dirt, direct
sunlight, humidity, mildew, strong magnetism, or near heat sources.
• If you attach the SmartFile label to a short length tape, such as T-30 or shorter, you
cannot use the SmartFile function.
SMARTFILE SENSOR
Recording a program on the SmartFile tape
When recording a program on the SmartFile tape, no matter what method
you use to record the program (normal recording, the VCR Plus+ GOLD
system recording, etc.), program data (date, channel, recording start time,
etc.) is stored in the memory of the SmartFile label. The SmartFile label can
contain up to 12 programs’ data. When the number of the stored programs
goes over 12, the oldest program data is erased from the SmartFile list.
However, a program which lasts less than about 15 minutes in EP mode or
about 5 minutes in SP mode cannot be stored in the memory.
When you record a program on the SmartFile tape which already contains
program data, see “Recording after locating the Blank Time space” on
page␣47.
Tip
• You can protect a recorded program from accidental over-recording or erasure (see
page 61).
Note
• If you press X PAUSE one or more times during recording, thereby creating short
lengths of recorded time between such pauses, program data may not be stored in
the SmartFile label.
To check the information of a recorded program
Press SMARTFILE. The SmartFile search list appears. The recording day of
the week, start time, channel, date, station ID, recording time, and tape
speed appear on the list. The longest space which doesn’t have any program
data (Blank Time space) appears as “BLANK TIME”.
Initial and latest dates of use for this
Day of the week
Recording start time
SmartFile tape
8/10/99~8/10/99
BLANK TIME
TUE
2:30
PM
CH
80/8
START END
Estimated position of the recorded program
Channel
p . 1
Date
M03H5EP
EP
M03H
01XZY
Tape speed
Recording time
Station ID
continued
SmartFile Function
44
Recording using the SmartFile function (continued)
Tips
• The station ID appears on the TV screen only when you complete Smart Channel
Mapping and the VCR receives the program information signal (see page 54 of the
supplied hookup/setup manual).
• When the VCR receives the program information signal, the program name may
appear in place of the day of the week, recording start time and channel.
• You can manually name a recorded program and select the category. You can also
name the SmartFile tape (see page 56).
Notes
• If you don’t set the clock or the clock isn’t set to the correct time, the initial and
latest dates of use for the SmartFile, the recording date and day of the week, and the
recording start time won’t be stored correctly on the SmartFile list.
• When you record a program using the normal recording mode while CABLE
MOUSE is set to ON in the CABLE BOX CONTROL menu, the channel number is
stored as “CH– – –”.
• When you set AUTO TAPE SPEED to ON in the ADVANCED OPTIONS menu, and
the tape speed automatically changes from SP to EP during recording, the VCR
displays the entire recording time converted in SP mode to the SmartFile list.
• The recording time length in the SmartFile list is an estimation and may be slightly
different from the actual recorded time length.
Recording after locating the
Blank Time space
The SmartFile function identifies not
only the largest amount of available
blank space, but also recorded material
that doesn’t have corresponding
program data stored in the SmartFile
label. The longest available recording
space (including programs that are not
stored on the SmartFile label) is referred
to as “Blank Time space”. You can locate
the beginning of the Blank Time space
for recording. If there is a recorded
program after the Blank Time space, the
VCR will record over that program
unless you stop recording. If there is a
program you want to prevent from
being recorded over or erased, protect
that program before you start recording
another program (see page 61).
Before you start…
• Turn on your TV and set it to the video channel.
1 Insert a SmartFile tape with its safety tab in place.
The VCR turns on and the SMARTFILE indicator lights up.
2 Press SMARTFILE.
The SmartFile search list appears on the TV
screen. The Blank Time space appears in the
“BLANK TIME” row.
The BLANK indicator lights up and the Blank
Time space also appears in the display
window.
3 Move the cursor stick M/m to select BLANK
TIME.
BLANK TIME is on page 1 of the SmartFile
search list.
SmartFile Function
SP/EP
SMARTFILE
Cursor stick
M/m
OK
8/10/99~8/16/99
BLANK TIME
MON
6:30
PM
CH
16/8
8:00
2:30
6:30
8:00
2:30
0
PM
CH
13/8
0
PM
CH
80/8
0
PM
CH
16/8
0
PM
CH
13/8
0
PM
CH
80/8
0
FRI
TUE
START END
8/10/99~8/16/99
BLANK TIME
MON
FRI
TUE
START END
45
p . 1
M84H1EP
16
SP
M03H
12
SP
M05H
1
EP
M03H
p . 1
M84H1EP
16
SP
M03H
12
SP
M05H
1
EP
M03H
continued
SmartFile Function46
SmartFile Function
47
1-11
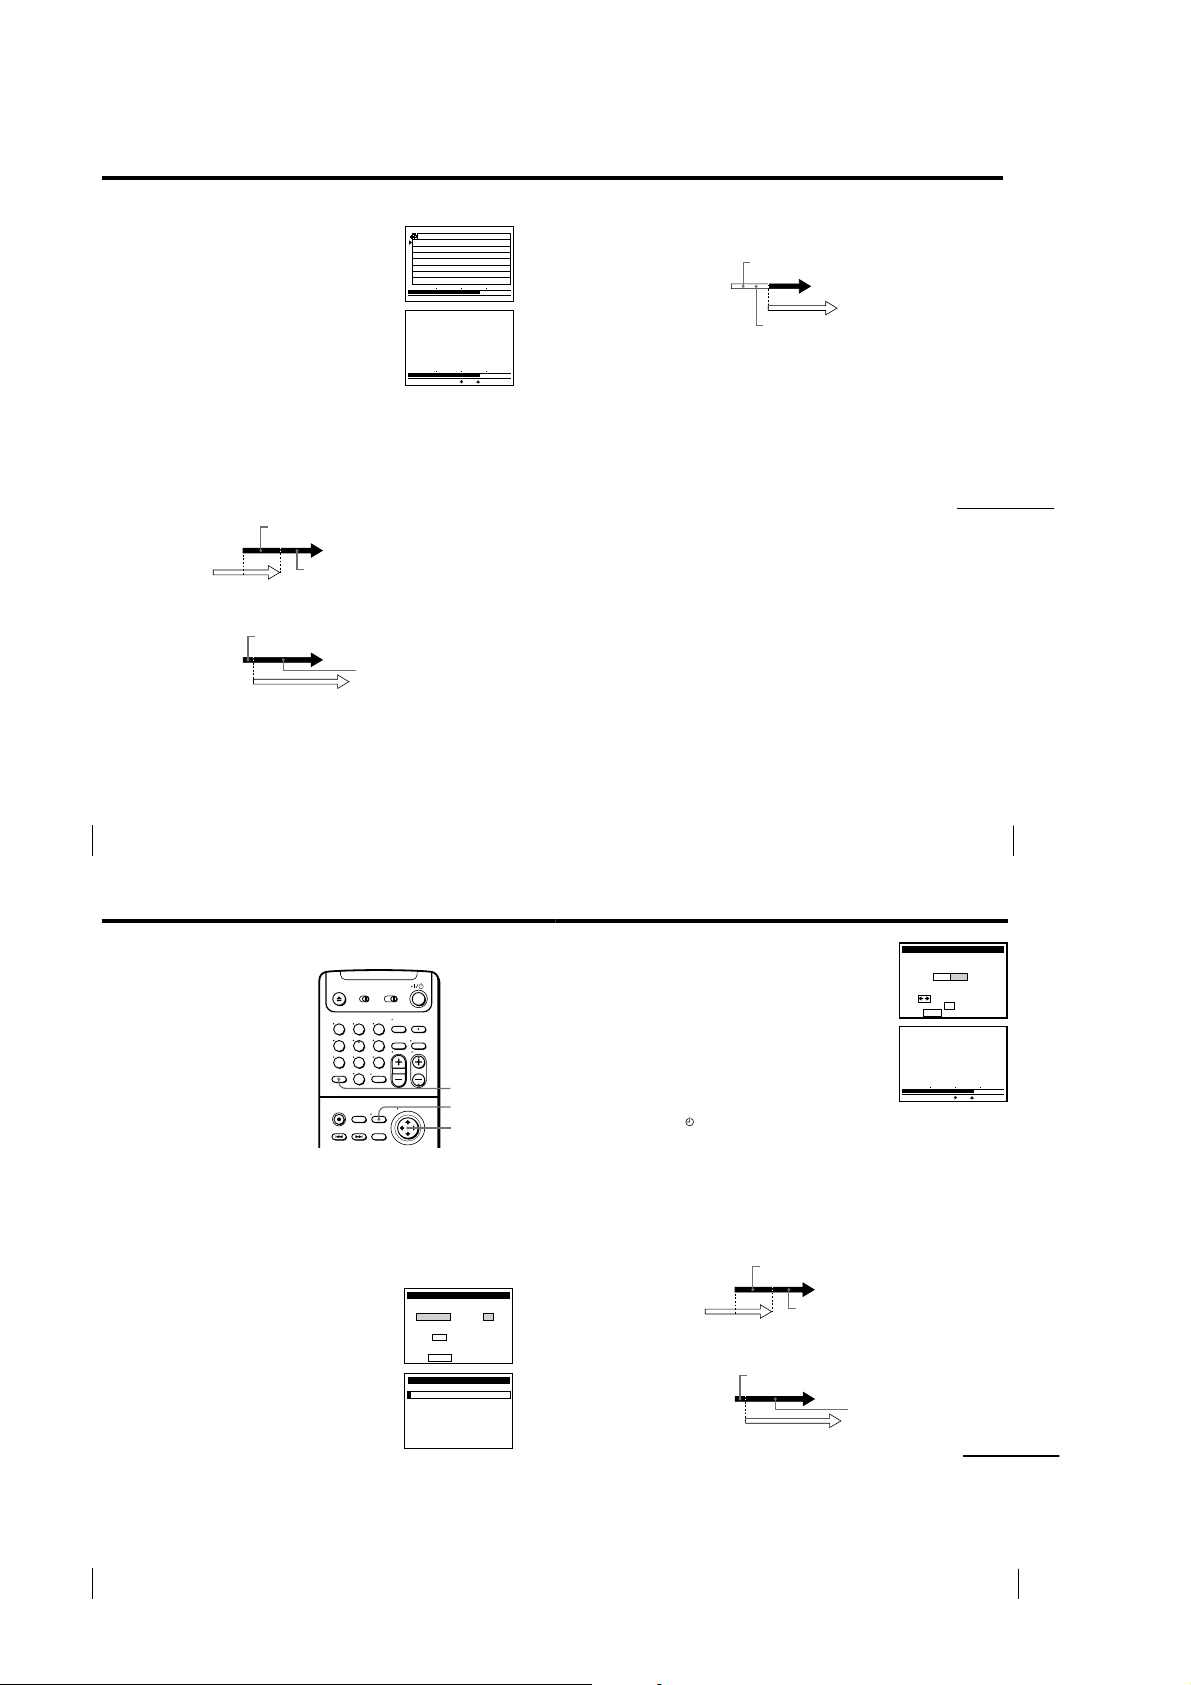
Recording using the SmartFile function (continued)
4
Press SP/EP to select the tape speed, SP or EP.
The BLANK TIME changes according to the
selected tape speed. Select a tape speed that
matches the length of the program you want
to record.
5
Push the cursor stick (OK).
The VCR goes to the beginning of the Blank
Time space and stops.
6
Start recording.
If the recordings overlap
If a newly recorded program overlaps a stored program, the data appearing
in the SMARTFILE list is as follows.
• If the second program overwrites the first program for 15 minutes or more in EP
mode or 5␣minutes or mor e in SP mode from where the first program starts, the first
program data is erased.
Program 1
Program 2
• If the remaining length of the first program is 15 minutes or less in EP mode or
5␣minutes or less in SP mode after being overwritten by the second program, the
first program data is erased.
Program 1
Program 2
15 minutes or more in EP mode,
5 minutes or more in SP mode
Information will be erased
15 minutes or less in EP mode,
5 minutes or less in SP mode
Information will be erased
8/10/99~8/16/99
BLANK TIME
MON
6:30
PM
CH
16/8
8:00
2:30
PM
CH
PM
CH
SEARCHING
0
13/8
0
80/8
0
FRI
TUE
START END
START END
• If the second program starts recording 15 minutes or more in EP mode or 5␣minutes
or more in SP mode after the first program starts, the data for both programs
p . 1
M63H0SP
16
SP
M03H
12
SP
M05H
1
EP
M03H
appears. In this case, the stored program’s recording time is updated to the time
when the second program starts.
15 minutes or more in EP mode,
5 minutes or more in SP mode
Program 1
Program 2
Tip
• If you set SMARTFILE LIST to AUTO in the ADVANCED OPTIONS menu, the
SmartFile search list appears automatically when you insert a SmartFile tape (see
page 34).
Note
• You may not be able to locate the beginning of the Blank Time space correctly in the
above step 5 when:
– the SmartFile tape contains one or more short length (less than about 15 minutes
in EP mode and about 5 minutes in SP mode) programs that are not stored in the
SmartFile label.
– the SmartFile tape is damaged or dirty.
The recording time is updated to
the time until overwriting starts.
continued
SmartFile Function
48
Recording using the SmartFile function (continued)
Setting timer recording in
the Blank Time space
If you set the timer to record programs
while a SmartFile tape is inserted, the
VCR searches for the Blank Time space.
When the Blank Time space is located,
the VCR goes to the beginning of the
Blank Time space and stands by for
recording. If there is a recorded
program after the Blank Time space, the
VCR will record over that program
unless you stop recording. If there is a
program you want to prevent from
being recorded over or erased, protect
that program before you start recording
another program (see page 61).
123
456
789
Before you start…
• Turn on your TV and set it to the video channel.
1 Insert a SmartFile tape with its safety tab in place.
The VCR turns on and the SMARTFILE indicator lights up.
2 Set the timer.
• When using the VCR Plus+ GOLD system
(for details, see page 12):
1 Press VCR Plus+.
2 Enter the PlusCode number.
• When setting the timer manually (for
details, see page 15):
1 Press MENU, then move the cursor stick
M/m to select TIMER SET/CHECK and
push the cursor stick (OK).
2 Set the date, start and stop times, channel
number and tape speed.
3 Move the cursor stick , to confirm the
setting and push the cursor stick (OK).
0
VCR Plus+
MENU
Cursor stick
M/m/</,
OK
VCR Plus+
Plus Code
––––––––
Ente r p rog ram’s Pl usCode
us i ng
To change tape speed,
push
TIMER SET / CHECK
DATE START STOP CH
/– –:–– –:–– –– –
–
––/– –:–– –:–– –– –
––/– –:–– –:–– –– –
––/– –:–– –:–– –– –
––/– –:–– –:–– –– –
––/– –:–– –:–– –– –
––/– –:–– –:–– –– –
––/– –:–– –:–– –– –
–
0–9 key s
SP / EP
SP / EP
EP
9 / 28
SmartFile Function
The AUTO BLANK SEARCH screen appears.
3 Move the cursor stick </, to select YES
and push the cursor stick (OK).
The Blank Time search screen appears.
The VCR goes to the beginning of the Blank
Time space and stops, then turns off
automatically.
The
indicator appears in the display
window and the VCR stands by for recording.
If you are using a cable box, leave it on.
If the recordings overlap
If a newly recorded program overlaps a stored program, the data appearing
in the SMARTFILE list is as follows.
• If the second program overwrites the first program for 15 minutes or more in EP
mode or 5␣minutes or mor e in SP mode from where the first program starts, the first
program data is erased.
15 minutes or more in EP mode,
5 minutes or more in SP mode
AUTO BLANK SEARCH
BLANK SEARCH?
YES
NO
Use t o se l e c t
OK
Then push
to quit
Pus h
MENU
SEARCHING
START END
49
Program 1
Program 2
• If the remaining length of the first program is 15 minutes or less in EP mode or
5␣minutes or less in SP mode after being overwritten by the second program, the
first program data is erased.
TUE
Program 1
Program 2
Information will be erased
15 minutes or less in EP mode,
5 minutes or less in SP mode
Information will be erased
continued
SmartFile Function50
SmartFile Function
51
1-12
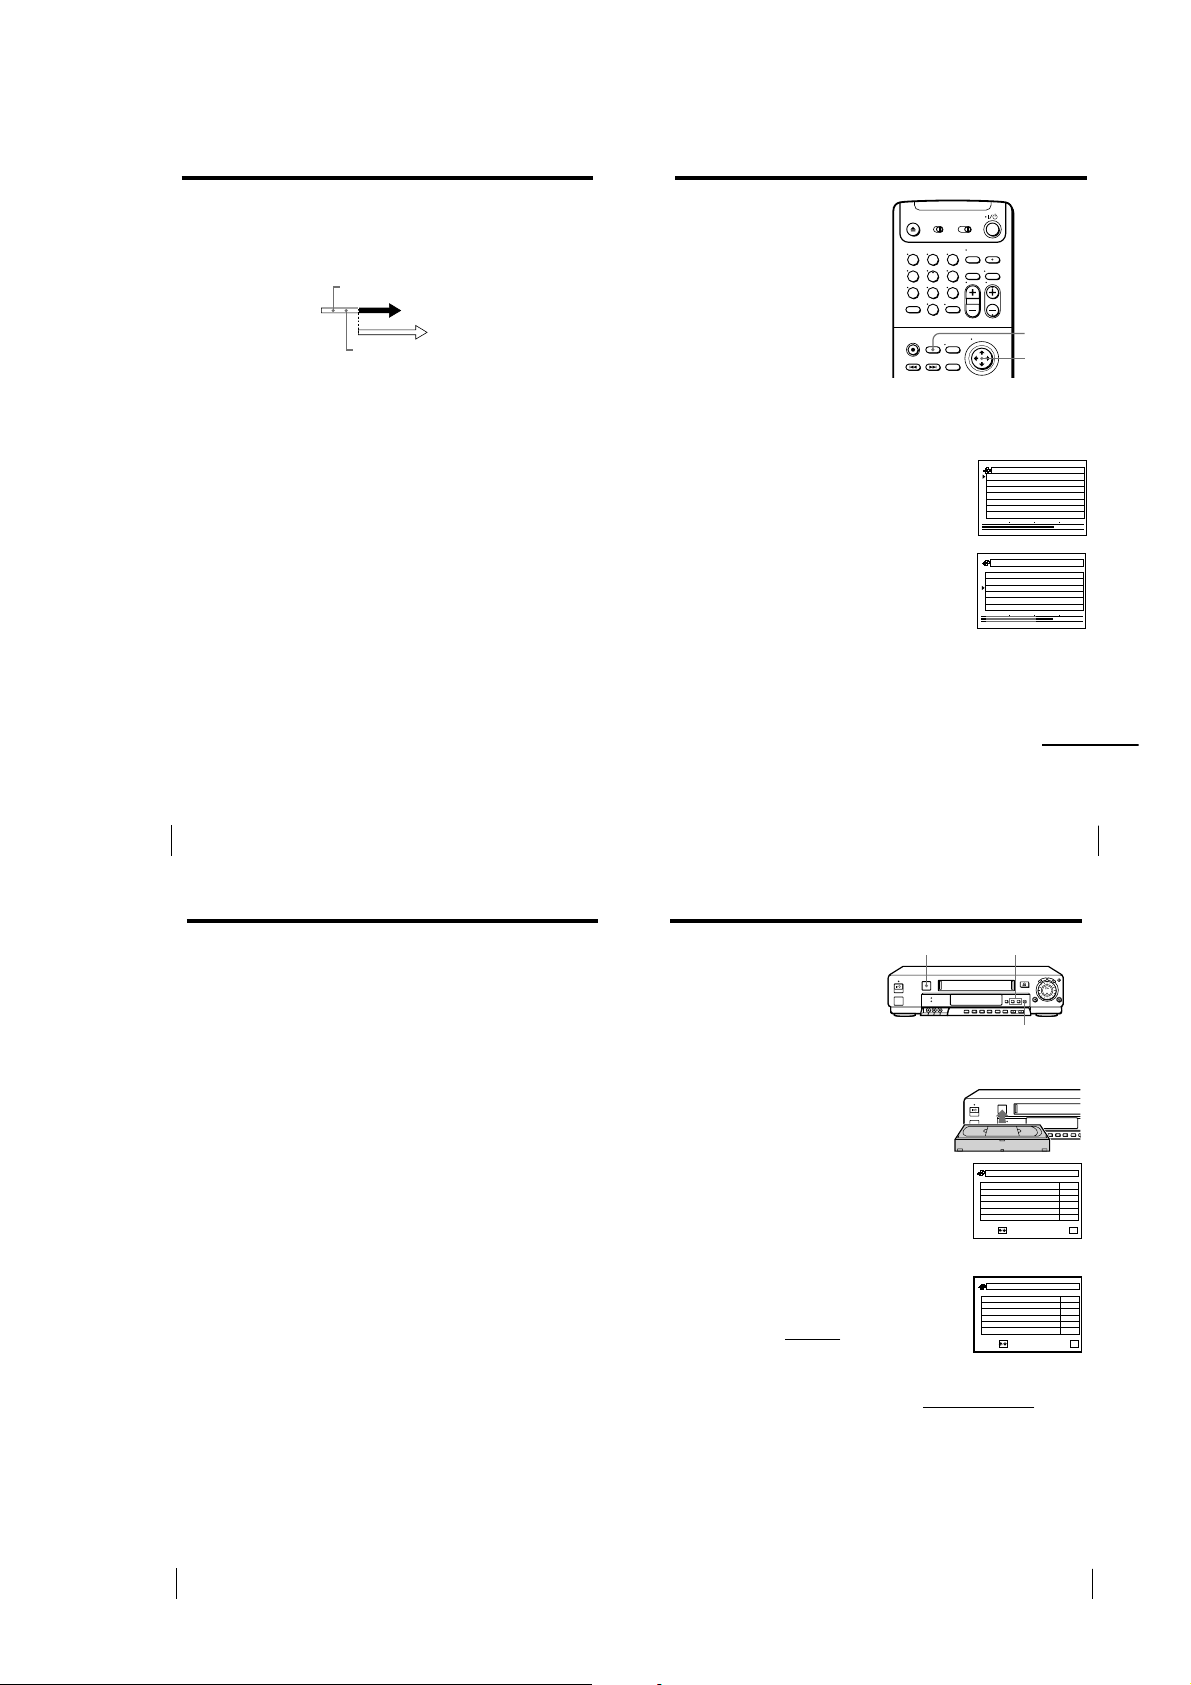
Recording using the SmartFile function (continued)
• If the second program starts recording 15 minutes or more in EP mode or 5␣minutes
or more in SP mode after the first program starts, the data for both programs
appears. In this case, the stored program’s recording time is updated to the time
when the second program starts.
Program 1
Program 2
Tip
• You can set BLANK SEARCH in the ADVANCED OPTIONS menu so that Blank
Time search is automatically performed each time the timer is set (AUTO). Select
OFF to cancel this option (see page 34).
Note
• You may not be able to locate the beginning of the Blank Time space correctly in the
above step 3 when:
– the SmartFile tape contains one or more short length (less than about 15 minutes
in EP mode and about 5 minutes in SP mode) programs that are not stored in the
SmartFile label.
– the SmartFile tape is damaged or dirty.
15 minutes or more in EP mode,
5 minutes or more in SP mode
The recording time is updated to
the time until overwriting starts.
Selecting and
playing a
program
You can automatically locate and start
playback of a program recorded on the
SmartFile tape. Select a program in the
SmartFile search list. The SmartFile
search list can contain up to 12
programs.
Before you start…
• Turn on your TV and set it to the
video channel.
1
Insert a SmartFile tape.
The VCR turns on and the SMARTFILE indicator lights up.
2
Press SMARTFILE.
The SmartFile search list appears on the TV
screen.
The BLANK indicator lights up and the Blank
Time space also appears in the display
window.
3
Move the cursor stick M/m to select a
program.
Moving the cursor stick M/m repeatedly will
turn the pages.
4
Push the cursor stick (OK).
The VCR starts searching for the beginning of the selected program.
Playback starts automatically from that point.
To stop searching
Press x STOP.
123
456
789
0
SMARTFILE
Cursor stick
M/m
OK
8/10/99~8/16/99
BLANK TIME
MON
6:30
PM
CH
16/8
8:00
2:30
6:30
8:00
2:30
PM
PM
PM
PM
PM
CH
CH
CH
16/8
CH
13/8
CH
80/8
0
13/8
0
80/8
0
0
0
0
FRI
TUE
START END
8/10/99~8/16/99
BLANK TIME
MON
FRI
TUE
START END
continued
p . 1
M84H1EP
16
SP
M03H
12
SP
M05H
1
EP
M03H
p . 1
M84H1EP
16
SP
M03H
12
SP
M05H
1
EP
M03H
SmartFile Function
52
Selecting and playing a program (continued)
Tip
• If you set SMARTFILE LIST to AUTO in the ADVANCED OPTIONS menu, the
SmartFile search list appears automatically when you insert a SmartFile tape (see
page 34).
Note
• You may not be able to locate the beginning of the selected program correctly when:
– the SmartFile tape contains one or more short length (less than about 15 minutes
in EP mode and about 5 minutes in SP mode) programs that are not stored in the
SmartFile label.
– the SmartFile tape is damaged or dirty.
Checking the
SmartFile sensor
contents of a tape
You can display the program data list of
a SmartFile tape on the TV screen. It is
not necessary to insert the tape into the
VCR. This feature allows you to quickly find a specific program or to
find a tape with enough recording space.
The SmartFile check list can contain up to 12 programs.
Before you start…
• Turn on your TV and set it to the video channel.
1
Hold the label side of the SmartFile tape
close to the SmartFile sensor.
Slowly bring the center of the label within
3 cm of the SmartFile sensor.
There is a short beep, the SMARTFILE
indicator lights up, and the SmartFile
check list appears.
The BLANK indicator lights up and the Blank
Time space also appears in the display
window.
2
Press CURSOR m/M repeatedly to turn the
pages.
3
Press OK on the VCR to exit the menu.
Tips
• The SmartFile check list automatically disappears after about 3 minutes of nonuse.
• If you press SP/EP while the SmartFile check list is displayed, the BLANK TIME
remaining tape display changes.
• You can also use the cursor stick M/m and OK on the remote commander.
• If you press a button other than SP/EP or the cursor stick (OK), the SmartFile check
list disappears.
Notes
• You cannot display the SmartFile check list while:
– you display the SmartFile list of a different SmartFile tape inserted into the VCR.
– you display any other menu.
– you play back the tape at any speed other than normal.
– you view the camcorder picture using LASER LINK.
• If the SmartFile check list doesn’t appear on the TV screen, try again by drawing the
SmartFile tape away from the SmartFile sensor at least 5 cm, then bring it back to
within 3 cm of the sensor.
BLANK TIME
MON
SUN
FRI
FRI
THU
TUE
NEXT :
BLANK TIME
SUN
FRI
TUE
MON
FRI
TUE
BACK :
SmartFile Function
CURSOR m/M
OK
8/10/99~8/30/99
9:00
PM
CH
16 0/83
6:30
PM
CH
49/82
8:00
PM
CH
12 7/82
5:45
PM
CH
77/82
1:00
PM
CH
12 6/82
4:30
PM
CH
84/82
8/10/99~8/30/99
6:30
PM
CH
16 2/82
8:00
PM
CH
12 0/82
9:30
PM
CH
16 7/81
6:30
PM
CH
16 6/81
8:00
PM
CH
12 3/81
2:30
PM
CH
80/81
QUIT :
QUIT :
53
p . 1
M84H1EP
OK
p . 2
M84H1EP
OK
SmartFile Function54
SmartFile Function
55
1-13
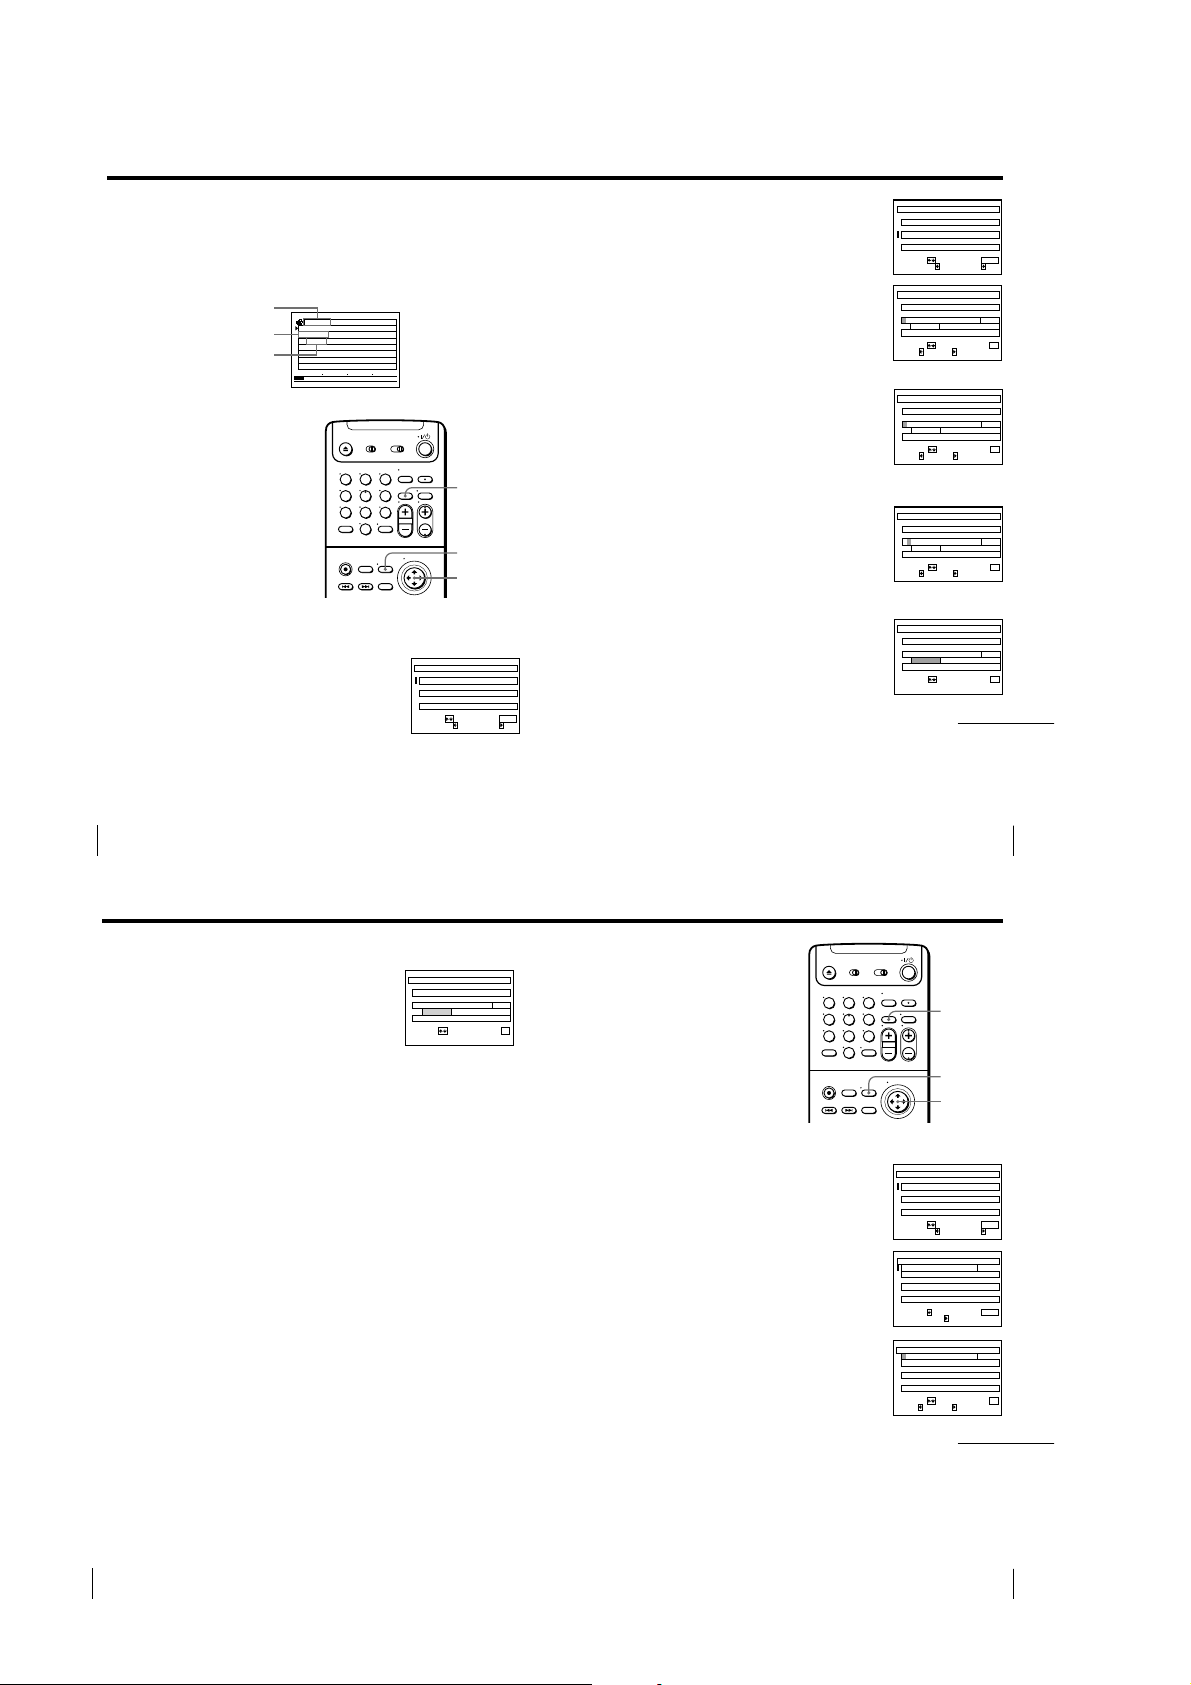
Labeling a recorded program and tape
You can electronically “label” a program and select a category, such as
SPECIAL or MOVIE, for a recorded program in the SmartFile list. You can
also label a tape. Up to 18 characters can be input for a program and tape
label.
Tape title
Program label
Category
Labeling a recorded
program and selecting a
category
Before you start...
• Turn on your TV and set it to the
video channel.
1
Insert a SmartFile tape.
The VCR turns on and the SMARTFILE indicator lights up.
2
Press MENU, then move the cursor stick M/m
to select SMARTFILE EDIT and push the
cursor stick (OK).
The SMARTFILE EDIT menu appears.
Favorites
BLANK TIME
MUSIC
START END
p . 1
EP
M03H0
123
456
789
0
M03H5
1Rock Box
0/8
EP
SMARTFILE EDIT
8/10/99~8/16/99
MON
FRI
TUE
SELECT : QUIT :
6:30
8:00
2:30
CLEAR
MENU
Cursor stick
M/m/,
OK
PM
CH
16 6/8
PM
CH
12 3/81
PM
CH
8
TITLE :CATEGORY:
3
0
H
0
0
0
MENU
3
Move the cursor stick M/m to select a
program.
4
Move the cursor stick ,.
The cursor moves to the program label input
position.
5
Label the program.
1 Move the cursor stick M/m to select a
character.
Each time you move the cursor stick m,
the character changes as shown below.
A t B t … t Z t symbol t 0 t
1 t … 9 t a t b t … t z t
(blank space)
SMARTFILE EDIT
8/10/99~8/16/99
MON
PM
CH
16 6/8
6:30
FRI
8:00
PM
CH
12 3/81
TUE
2:30
PM
CH
8
SELECT : QUIT:
SMARTFILE EDIT
SELECT :
SMARTFILE EDIT
SELECT :
8/10/99~8/16/99
MON
6:30
TUE
2:30
8/10/99~8/16/99
6:30
MON
TUE
2:30
TITLE :CATEGORY:
PM
CH
16 6/8
PM
CH
8
CONFIRM :
NEXT :BACK:
PM
CH
16 6/8
PM
CH
8
CONFIRM :
NEXT :BACK:
p . 1
1
3
SP
M
0
H
0
SP
M05H
0
01/8
EP
M03H
0
MENU
p . 1
1
3
SP
M
0
H
0
3/81
SP
M05H
0
01/8
EP
M03H
0
OK
p . 1
1
3
SP
M
0
H
0
3/81N
SP
M05H
0
01/8
EP
M03H
0
OK
If you make a mistake, press CLEAR.
2 To set the next character, move the cursor
stick ,.
The cursor moves to the next position.
3 Repeat steps 1 and 2 to label the
program.
6
Push the cursor stick (OK).
p . 1
1
SP
M
SP
M05H
01/8
EP
M03H
SMARTFILE EDIT
8/10/99~8/16/99
MON
6:30
TUE
2:30
SELECT :
NEXT :BACK:
SMARTFILE EDIT
8/10/99~8/16/99
MON
6:30
TUE
2:30
SELECT :
PM
PM
PM
PM
CH
16 6/8
CH
8
CONFIRM :
CH
16 6/8
CH
8
CONFIRM :
continued
p . 1
1
3
SP
M
0
H
0
3/81N
SP
M05H
0
01/8
EP
M03H
0
OK
p . 1
1
3
SP
M
0
H
0
3/81Nick & Matt
SP
M05H
0
01/8
EP
M03H
0
OK
SmartFile Function
56
Labeling a recorded program and tape (continued)
7 Move the cursor stick M/m to select a
category.
Each time you move the cursor stick m, the
category changes as shown below.
SPECIAL t MOVIE t NEWS t SHOW t
SPORTS t KIDS t MUSIC t ARTS t
SERIES t EDUCATI (education) t HOBBY t
SHOPPIN (shopping) t VARIETY t
COMEDY t DRAMA t DAYTIME t
HOW TO t OTHERS t (blank)
8 Push the cursor stick (OK).
The program label and a selected category are stored.
9 Press MENU to exit the menu.
To erase the program label
Press CLEAR after step 3 above. The program label is erased and the
recording start time and channel number reappear.
To erase the selected category
Press CLEAR in step 7 above. The selected category is erased and the space
becomes blank.
To label a regularly scheduled timer-recorded program
Once you label a program which is set to record regularly (i.e. everyday,
same day of the week, etc.) in the VCR Plus+ GOLD system or timer
recording mode, the VCR recognizes the label and will automatically label
all future recordings of the same program. The set label is assigned even
when an information signal containing the program name, category name or
other information is broadcast with the program. However, if you change
the program label and category several times, the VCR may automatically
label only the last program of which the program label and category are
changed.
SMARTFILE EDIT
8/10/99~8/16/99
MON
6:30
COMEDY
TUE
2:30
SELECT :
SmartFile Function
57
Labeling a tape
p . 1
PM
CH
16 6/8
1
3
SP
M
0
H
0
3/81Nick & Matt
SP
M05H
0
PM
CH
8
01/8
EP
M03H
0
CONFIRM :
OK
Before you start...
• Turn on your TV and set it to the
video channel.
123
456
789
0
CLEAR
MENU
Cursor stick
M/m/,
OK
1 Insert a SmartFile tape.
2 Press MENU, then move the cursor stick M/m
to select SMARTFILE EDIT and push the
cursor stick (OK).
The SMARTFILE EDIT menu appears.
3 Move the cursor stick M to select the tape title.
4 Move the cursor stick ,.
The cursor moves to the tape title input
position.
SMARTFILE EDIT p . 1
8/10/99~8/16/99
Someday
DRAMA
Nick & Matt
COMEDY
Rock Box
MUSIC
SELECT :
SMARTFILE EDIT p . 1
8/10/99~8/16/99
Someday
DRAMA
Nick & Matt
COMEDY
Rock Box
MUSIC
SELECT :
SMARTFILE EDIT p . 1
Someday
DRAMA
Nick & Matt
COMEDY
Rock Box
MUSIC
SELECT :
0
3H0
0
0
QUIT :
MENU
TITLE :CATEGORY:
0
3H0
0
0
QUIT :
MENU
:T I TLE ED I T
0
3H0
0
0
CONFIRM :
NEXT :BACK:
continued
1
6/8
SP
M
3/81
SP
M05H
01/8
EP
M03H
1
6/8
SP
M
3/81
SP
M05H
01/8
EP
M03H
1
6/8
SP
M
3/81
SP
M05H
01/8
EP
M03H
OK
SmartFile Function58
SmartFile Function
59
1-14
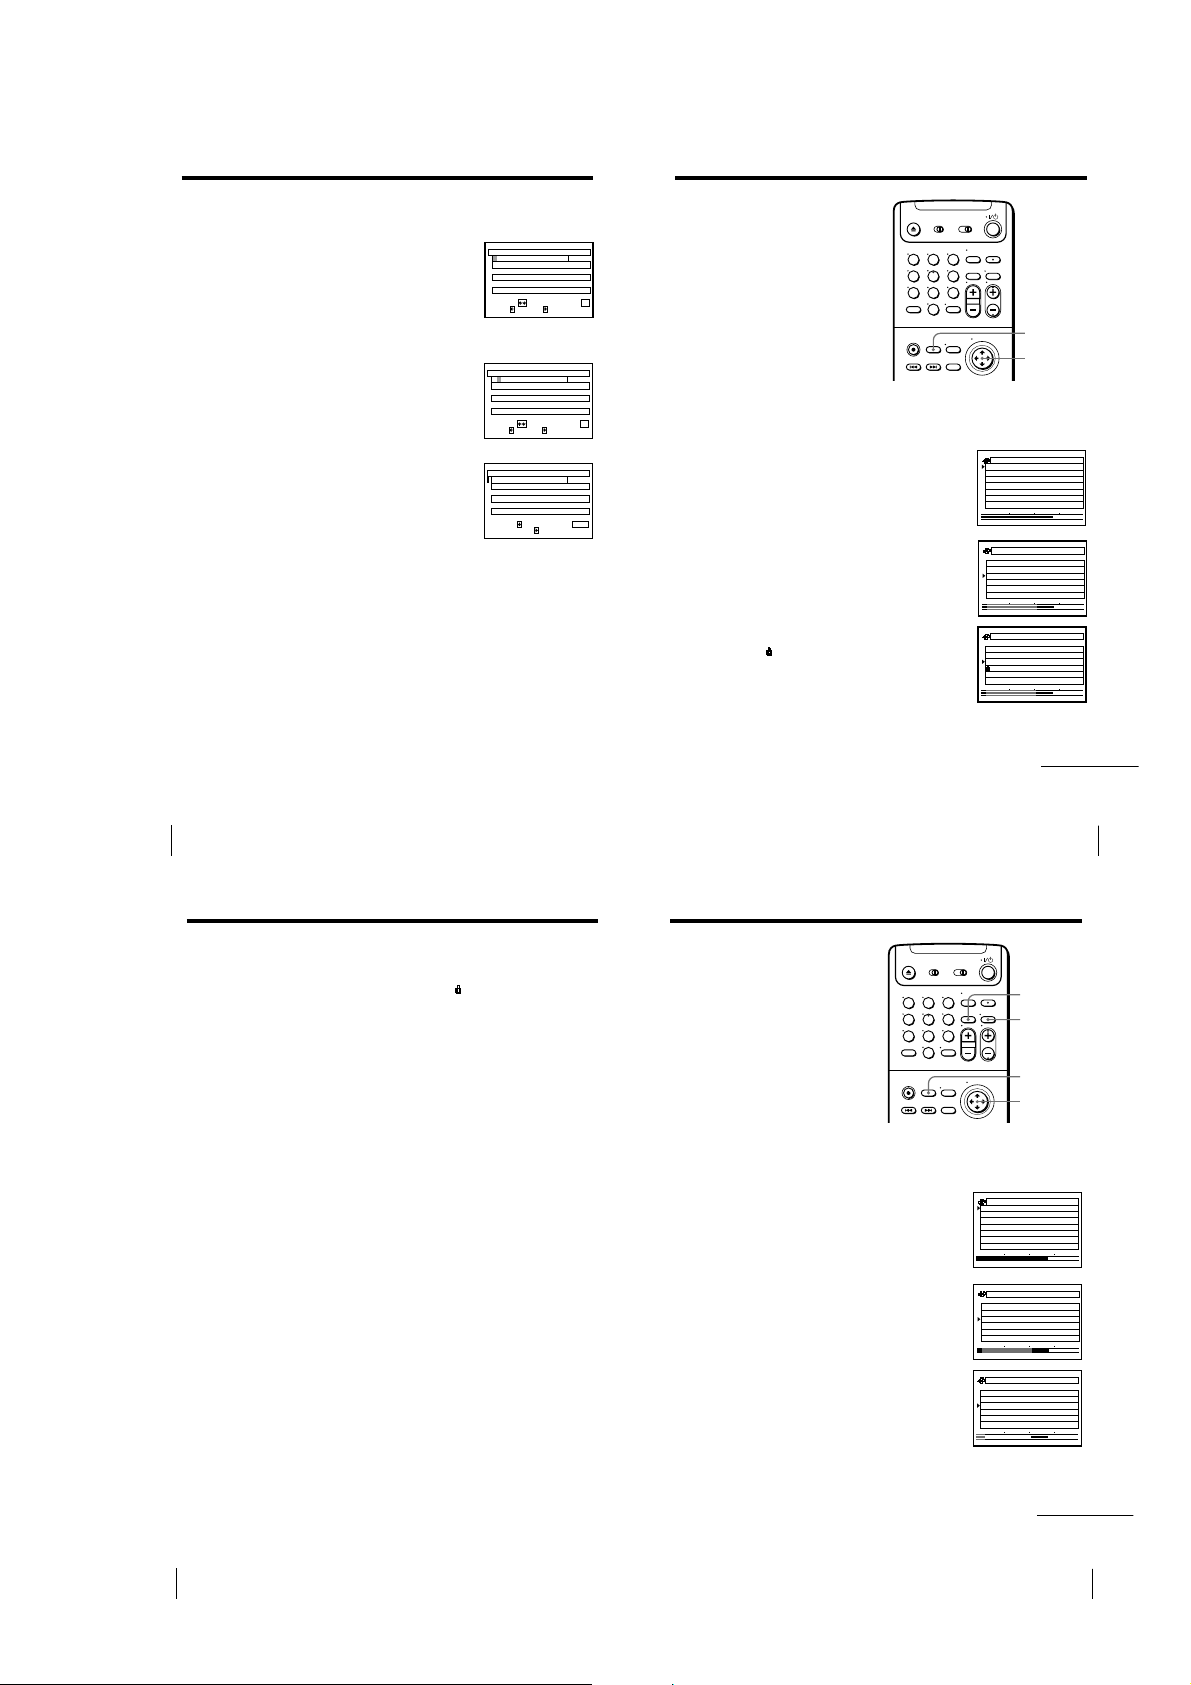
Labeling a recorded program and tape (continued)
p . 1
BLANK TIME
M84H1EP
START END
8/10/99~8/16/99
MON
6:30
PM
CH
16/8
SP
M03H
0
16
FRI
8:00
PM
CH
13/8
SP
M05H
0
12
TUE
2:30
PM
CH
80/8
EP
M03H
0
1
5
Label the tape.
1 Move the cursor stick M/m to select a
character.
Each time you move the cursor stick m,
the character changes as shown below.
A t B t … t Z t symbol t 0 t
1 t … 9 t a t b t … t z t
(blank space)
If you make a mistake, press CLEAR.
2 To set the next character, move the cursor
stick ,.
The cursor moves to the next position.
3 Repeat steps 1 and 2 to label the tape.
6
Push the cursor stick (OK).
The tape title is stored.
7
Press MENU to exit the menu.
To erase the tape title
Press CLEAR after step 3 above. The tape title is erased and the recording
date reappears. When you want to erase the recording date from the tape
title column, press CLEAR again.
SMARTFILE EDIT p . 1
F
Someday
DRAMA
Nick & Matt
COMEDY
Rock Box
MUSIC
SELECT :
SMARTFILE EDIT p . 1
F
Someday
DRAMA
Nick & Matt
COMEDY
Rock Box
MUSIC
SELECT :
SMARTFILE EDIT p . 1
Favorites
Someday
DRAMA
Nick & Matt
COMEDY
Rock Box
MUSIC
SELECT :
0
3H0
0
0
CONFIRM :
NEXT :BACK:
0
3H0
0
0
CONFIRM :
NEXT :BACK:
0
3H0
0
0
QUIT :
MENU
:T I TLE ED I T
Protecting a
recorded program
6/8
1
SP
M
3/81
SP
M05H
01/8
EP
M03H
OK
1
6/8
SP
M
3/81
SP
M05H
01/8
EP
M03H
OK
1
6/8
SP
M
3/81
SP
M05H
01/8
EP
M03H
You can protect a recorded program
using the SmartFile function from
accidental over-recording or erasure.
When you start recording from a
position prior to the protected program,
the recording stops automatically before
the protected program.
Before you start…
• Turn on your TV and set it to the
video channel.
1
Insert a SmartFile tape.
The VCR turns on and the SMARTFILE indicator lights up.
2
Press SMARTFILE.
The SmartFile search list appears on the TV
screen.
The BLANK indicator lights up and the Blank
Time space also appears in the display
window.
3
Move the cursor stick M/m to select the
program you want to protect.
4
Move the cursor stick ,.
The
indicator appears to the left of the
selected program and the program becomes
protected.
5
Press SMARTFILE.
The SmartFile search list disappears.
123
456
789
0
SMARTFILE
Cursor stick
M/m/,
8/10/99~8/16/99
BLANK TIME
MON
6:30
PM
CH
16/8
8:00
2:30
6:30
8:00
2:30
6:30
8:00
2:30
PM
PM
PM
PM
PM
PM
PM
PM
CH
13/8
CH
80/8
CH
CH
CH
CH
16 6/8
CH
12
CH
8
0
0
0
16/8
0
13/8
0
80/8
0
0
0
0
3
0
H
FRI
TUE
START END
8/10/99~8/16/99
BLANK TIME
MON
FRI
TUE
START END
8/10/99~8/16/99
BLANK TIME
MON
FRI
TUE
START END
continued
p . 1
M84H1EP
16
SP
M03H
12
SP
M05H
1
EP
M03H
p . 1
M84H1EP
16
SP
M03H
12
SP
M05H
1
EP
M03H
p . 1
M84H1EP
1
SP
M
31/8
SP
M05H
01/8
EP
M03H
SmartFile Function
60
Protecting a recorded program (continued)
To unlock the protected program
Move the cursor stick < in step 4 above. The indicator disappears and
you can record over this program.
Tips
• When you start recording from a position prior to the protected program, the
recording automatically stops no more than about 3 minutes in SP mode and about
8 minutes in EP mode before the beginning of the protected program.
• If you protect a program just after the Blank Time space, BLANK TIME becomes
shortened by about 3 minutes in SP mode and about 8 minutes in EP mode.
• If you try to record on a SmartFile tape containing a protected program, a message
indicating that there is a protected program on this tape appears on the TV screen.
• If you set SMARTFILE LIST to AUTO in the ADVANCED OPTIONS menu, the
SmartFile search list appears automatically when you insert a SmartFile tape (see
page␣34).
Notes
• When you record another program just after a protected program, locate the
beginning of the Blank Time space by following the instructions in “Recording after
locating the Blank Time space” on page 47. Otherwise, if the recording start point
overlaps the protected program, the VCR may record over the protected program.
• If the VCR Plus+ GOLD system or timer recording program overlaps the protected
program, the VCR automatically stops recording before the protected program and
ejects the tape.
• If you insert a SmartFile tape which contains a protected program or protect a
program for the first time on a new tape, the VCR will analyze the position of the
protected program for a few seconds. You cannot operate the VCR while the VCR is
analyzing the tape.
• If the SmartFile list contains 12 protected programs, the next program you record
won’t be stored in the SmartFile list.
Erasing the data
of an unwanted
program
You can erase an unwanted program
from the SmartFile list. When you erase
a program from the list, that portion of
tape is subject to Blank Time space
priority.
Before you start…
• Turn on your TV and set it to the
video channel.
1
Insert a SmartFile tape.
The VCR turns on and the SMARTFILE indicator lights up.
2
Press SMARTFILE.
The SmartFile search list appears on the TV
screen.
The BLANK indicator lights up and the Blank
Time space also appears in the display
window.
3
Move the cursor stick M/m to select a
program you want to erase from the list.
4
Press CLEAR.
The selected program is erased from the
SmartFile list.
If you erase a program by mistake, press
DISPLAY to make the program reappear.
5
Press SMARTFILE.
The SmartFile search list disappears.
123
456
789
0
SmartFile Function
CLEAR
DISPLAY
SMARTFILE
Cursor stick
M/m
8/10/99~8/16/99
BLANK TIME
MON
6:30
PM
CH
16/8
8:00
2:30
6:30
2:30
PM
PM
PM
PM
CH
13/8
CH
80/8
CH
16 6/8
CH
8
0
0
0
3
0
H
0
0
FRI
TUE
START END
8/10/99~8/16/99
BLANK TIME
MON
TUE
START END
continued
61
p . 1
M84H1EP
16
SP
M03H
12
SP
M05H
1
EP
M03H
p . 1
M03H2EP
1
SP
M
01/8
EP
M03H
SmartFile Function62
1-15
SmartFile Function
63
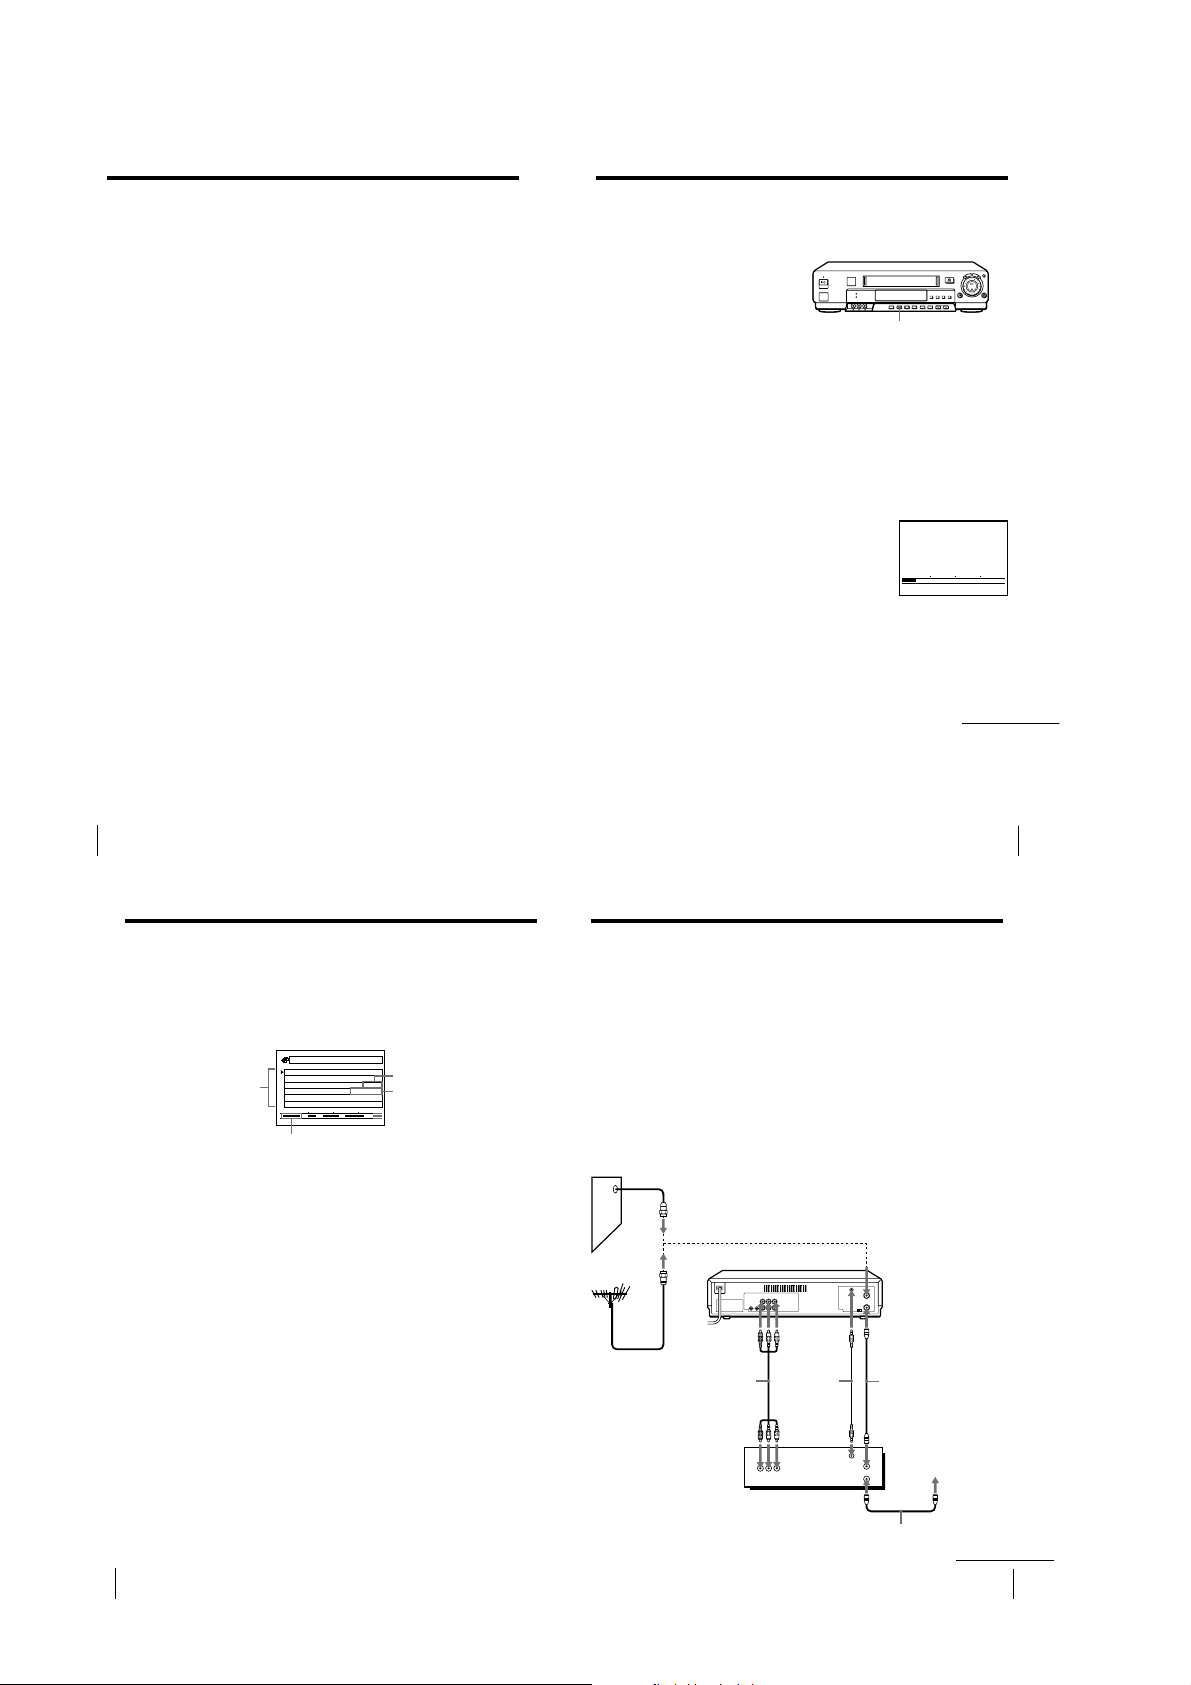
Erasing the data of an unwanted program (continued)
Tip
• If you set SMARTFILE LIST to AUTO in the ADVANCED OPTIONS menu, the
SmartFile search list appears automatically when you insert a SmartFile tape (see
page 34).
Notes
• You cannot erase a protected program from the SmartFile list. You have to first
unlock the protected program by following the instructions in “To unlock the
protected program” on page 62, then erase that program from the list.
• If a program is left about 15 minutes or less in EP mode, or about 5 minutes or less
in SP mode, you cannot make the program reappear by using the DISPLAY button.
Registering the contents of a recorded
tape in the SmartFile label
The VCR will register programs
recorded on a tape in the memory of a
new SmartFile label by detecting the
index signals indicating the start of
recorded programs. You can register up
to the 12th program from the start of the
tape. The programs appear from the
bottom of the screen as Program No.␣1,
Program No.␣2, ... Pr ogram No.␣12 in
order from the start of the tape. The
13th and subsequent programs are
ignored. You can manually name the
registered program numbers and select
the category (see page 56).
Before you start...
• Turn on your TV and set it to the video channel.
1
Attach a new SmartFile label to a recorded cassette tape.
2
Insert the SmartFile tape.
3
Press SMARTFILE GENERATOR.
A message appears indicating that the
recorded programs are being registered. The
index signals are detected from the start of the
tape, and registration stops if the end of the
tape is reached. The message disappears
when registration is complete.
To stop registration to the SmartFile label
Press SMARTFILE GENERATOR.
The data registered before the button is pressed remains in the SmartFile
label. You can register the programs again by pressing SMARTFILE
GENERATOR.
SMARTFILE GENERATOR
SMARTF I LE I NDEX I NG I S
I N PROCESS
START
continued
END
SmartFile Function
64
Registering the contents of a recorded tape in the SmartFile label
(continued)
To check the information of a registered program
Press SMARTFILE.
The SmartFile search list appears. The registered program number,
registration date and recording time appear in this list. Note that the
registration date differs from the recorded date.
BLANK TIME
Progr am No.6
Program located in
a recorded tape
Tips
• The programs recorded on the tape can be registered again in a SmartFile label that
already contains program data. However, the recorded date and time, program
name and information input manually (such as the program label and category) are
replaced with “Program No. XX”.
• If the SmartFile label contains stored program data that includes protected
programs, a message appears and registration stops.
Notes
• Program data is not registered correctly in the SmartFile label when:
– the program length is about 20 minutes or less in EP mode or about 7 minutes or
less in SP mode.
– the program does not have an index signal or the index signal has been recorded
over and erased.
– the tape is damaged or dirty.
• If you don’t set the clock or the clock isn’t set to the correct date, the registration
date won’t be stored correctly on the SmartFile list.
• After you press SMARTFILE GENERATOR and start registration, registration is
interrupted if you press x STOP, H PL AY, M FF, m REW, `/1 or ./>
INDEX SEARCH. In these cases as well, the data registered up to the point when
registration was interrupted remains in the SmartFile label.
• Tape speed may not be registered correctly when:
– you set AUTO TAPE SPEED to ON in the ADVANCED OPTIONS menu, and the
tape speed automatically changes from SP to EP during recording.
– you use tapes recorded in the LP mode on other VCRs.
SmartFile Function66
Progr am No.5
Progr am No.4
START END
Estimated position of the registered program
0
3H0
2
0
p . 1
M01H2EP
0/8
2
Registration date
SP
M
02/8
EP
M00H
Recording time
02/8
EP
M03H
Storing program data from the
DIRECTV digital satellite receiver
(Program Data Download)
If you connect a DIRECTV digital satellite receiver equipped with the
Program Data Download function and use the timer recording of the
DIRECTV digital satellite receiver, the program and category name
transmitted from the DIRECTV digital satellite receiver are stored on the
SmartFile tape. The DIRECTV digital satellite receiver equipped with the
Program Data Download function will be available in the future.
How to hook up to the DIRECTV digital satellite
receiver
You should connect CPD IN of the VCR and VCR CONTROL of the
DIRECTV digital satellite receiver using the supplied monaural cable.
Wall
or
Audio/video cable
(not supplied)
LINE-1 IN
AUDIO R/L/
VIDEO
LINE OUT
AUDIO/VIDEO
DIRECTV digital
satellite receiver
VCR
Monaural
cable
(supplied)
VCR
CONTROL
VHF/UHF IN
VHF/UHF OUT
CPD IN
Coaxial cable (supplied)
VHF/UHF IN
VHF/UHF
OUT
Coaxial cable (not supplied)
SmartFile Function
To T V
continued
SmartFile Function
65
67
1-16
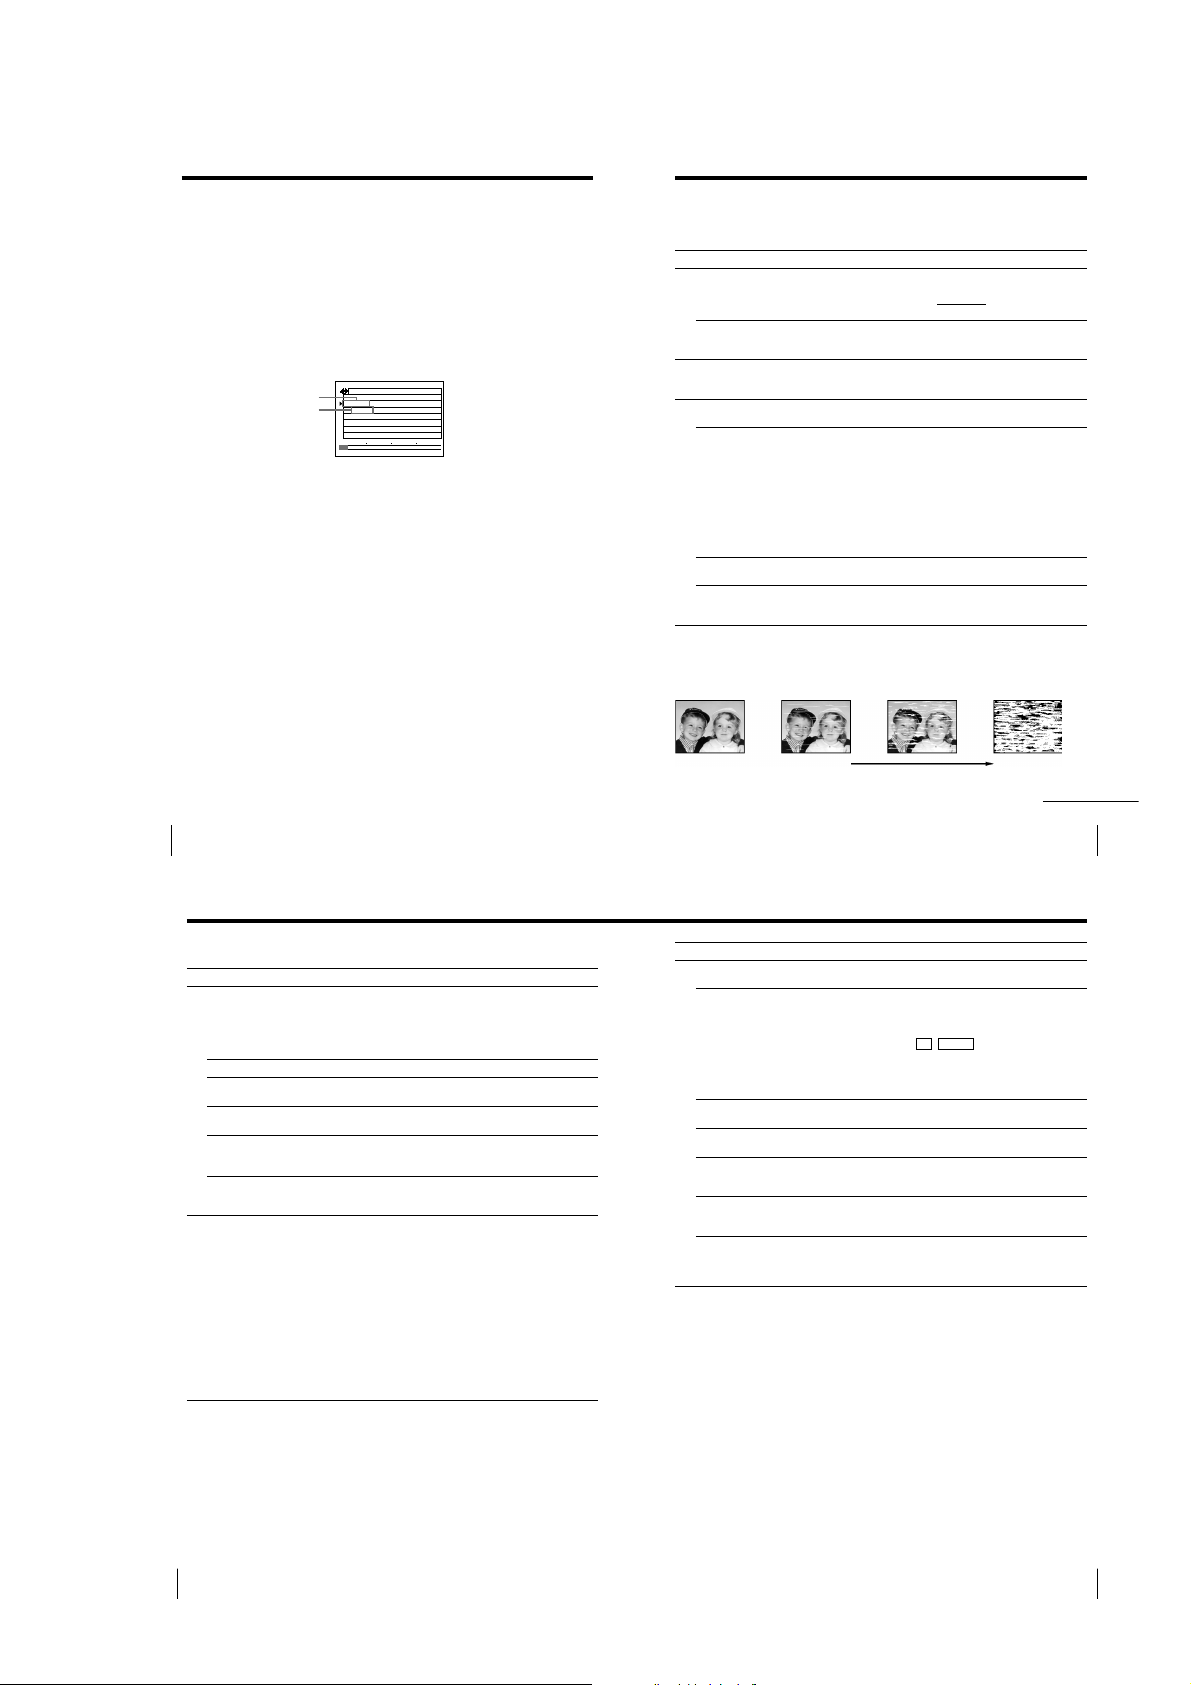
Storing program data from the DIRECTV digital satellite receiver
(Program Data Download) (continued)
Setting up the DIRECTV digital satellite receiver
You have to set the VCR brand number on the DIRECTV digital satellite
receiver. For example, select “99” in the VCR CONTROL menu to use a
Sony VCR with the SmartFile function. For details, refer to the instruction
manual of your DIRECTV digital satellite receiver.
Storing program data on the SmartFile tape
When you record a DIRECTV digital satellite program using the DIRECTV
digital satellite receiver’s timer, the program and category name are
automatically stored on the SmartFile tape.
8/16/99~8/16/99 p . 1
Program name
Category name
Notes
• Do not operate the VCR, the DIRECTV digital satellite receiver, and any other
equipment connected to these units for at least 2 minutes after timer recording
starts. If you operate these equipment immediately after timer recording starts, the
correct program data may not be sent from the DIRECTV digital satellite receiver.
• When you use the VCR’s timer for recording, program data from the DIRECTV
digital satellite receiver is not stored on the SmartFile tape.
BLANK TIME
Someday
DRAMA
START END
M03H1SP
1
6/8
SP
M03H
0
Additional Information
Troubleshooting
If you have any questions or problems not covered below, please consult your
nearest Sony dealer.
Symptom
The `/1 switch does not
function.
Power
The power is turned on but the
VCR does not operate.
The clock has stopped and
“–:– –” lights in the display
Clock
window.
The playback picture does not
appear on the TV screen.
The picture is not clear.
Playback
The picture rolls vertically
during picture search.
The picture has no sound.
Symptoms caused by contaminated video heads
• Normal picture
• Rough picture
Remedy
• Connect the AC power cord securely.
• Make sure the VCR is not locked. To unlock, hold
down `/1 POWER
disappears.
• Moisture condensation occurs. Turn the power off,
unplug the AC power cord and leave the VCR to dry
for over three hours.
• The clock stops if the VCR is disconnected from the
wall outlet for more than one hour. Reset the clock
(and timer).
• Make sure the TV is set to the channel for the VCR. If
you are using a monitor, set it to video input.
• Adjust the tracking with the TRACKING +/– buttons.
• The video heads are dirty (see below). Clean the video
heads using the Sony T-25CLD, T-25CLDR, or
T-25CLW video head cleaning cassette. If these
cleaning cassettes are not available in your area, have
the heads cleaned at your nearest Sony service facility
(a standard service fee will be charged). Do not use a
commercially available liquid type cleaning cassette
other than Sony’s, as it may damage the video heads.
• The video heads may have to be replaced. Consult
your local Sony dealer for more information.
• Adjust the vertical hold control on the TV or monitor.
• The tape is defective.
• If you made A/V connections, check the audio cable
connection.
on the VCR until the - indicator
• Unclear picture
• No picture (or
black & white
screen appears)
SmartFile Function
68
Tr oubleshooting (continued)
Symptom
A TV program does not appear
on the TV screen.
TV reception is poor.
The tape starts playing as soon
as it is inserted.
The tape is ejected when you
Recording
press z REC.
Nothing happens when you
press z REC.
Recording stops halfway.
The timer does not operate.
Timer recording
Remedy
• Make sure the TV is set to the channel for the VCR. If
you are using a monitor, set it to video input.
• Select the correct source with the INPUT SELECT
button. Select a channel number when recording TV
programs; select “L1” or “L2” when recording from
other equipment.
• Adjust the TV antenna.
• The safety tab has been removed. To record on this
tape, cover the tab hole.
• Check that the safety tab has not been removed.
• Make sure the tape is not at its end.
• The current position of the tape is record protected.
Search for the recording available space.
• If the tape contains a protected program, recording
automatically stops before the protected program. Use
another tape which has enough recording space.
• Check that the clock is set.
• Make sure a tape has been inserted.
• Check that the safety tab has not been removed.
• Make sure the tape is not at its end.
• The recording start point overlaps the protected
program.
• Make sure a program has been set for timer recording.
• Make sure your timer settings have not already passed
the current time.
• Check that the cable box is turned on.
• The clock stops if the VCR is disconnected from the
wall outlet for more than one hour. Reset the clock and
timer.
• When you use cable box control, make sure the CABLE
BOX CONTROL option is set to ON.
Symptom
A tape cannot be inserted.
The remote commander does
not function.
The channels on the VCR
cannot be changed.
Others
The tracking meter does not
appear on the screen.
You cannot control other TVs.
The SMARTFILE screen
appears when a tape is not
inserted.
The VCR needs to be cleaned.
initial
contamination
Remedy
• Check that a tape isn’t already in the tape
compartment.
• Make sure you are pointing the remote commander at
the remote sensor on the VCR.
• Replace all the batteries in the remote commander with
new ones if they are weak.
• Make sure the TV / VIDEO switch is set correctly.
• If you are not using S-Link, make sure that both
miniplugs are unconnected.
• The command mode of the remote commander is
different from the one of the VCR.
• Make sure the CABLE BOX CONTROL option is set to
OFF.
• The recording condition of the tape is very poor and
tracking cannot be adjusted.
• Set your TV’s code number. The code number may
change when you replace the batteries of the remote
commander.
• Press x STOP to close the SMARTFILE demonstration
screen.
• Clean the cabinet, panel and controls with a dry, soft
cloth, or a soft cloth slightly moistened with a mild
detergent solution. Do not use any type of solvent,
such as alcohol or benzine.
terminal
continued
Additional Information
69
Additional Information70
Additional Information
71
1-17
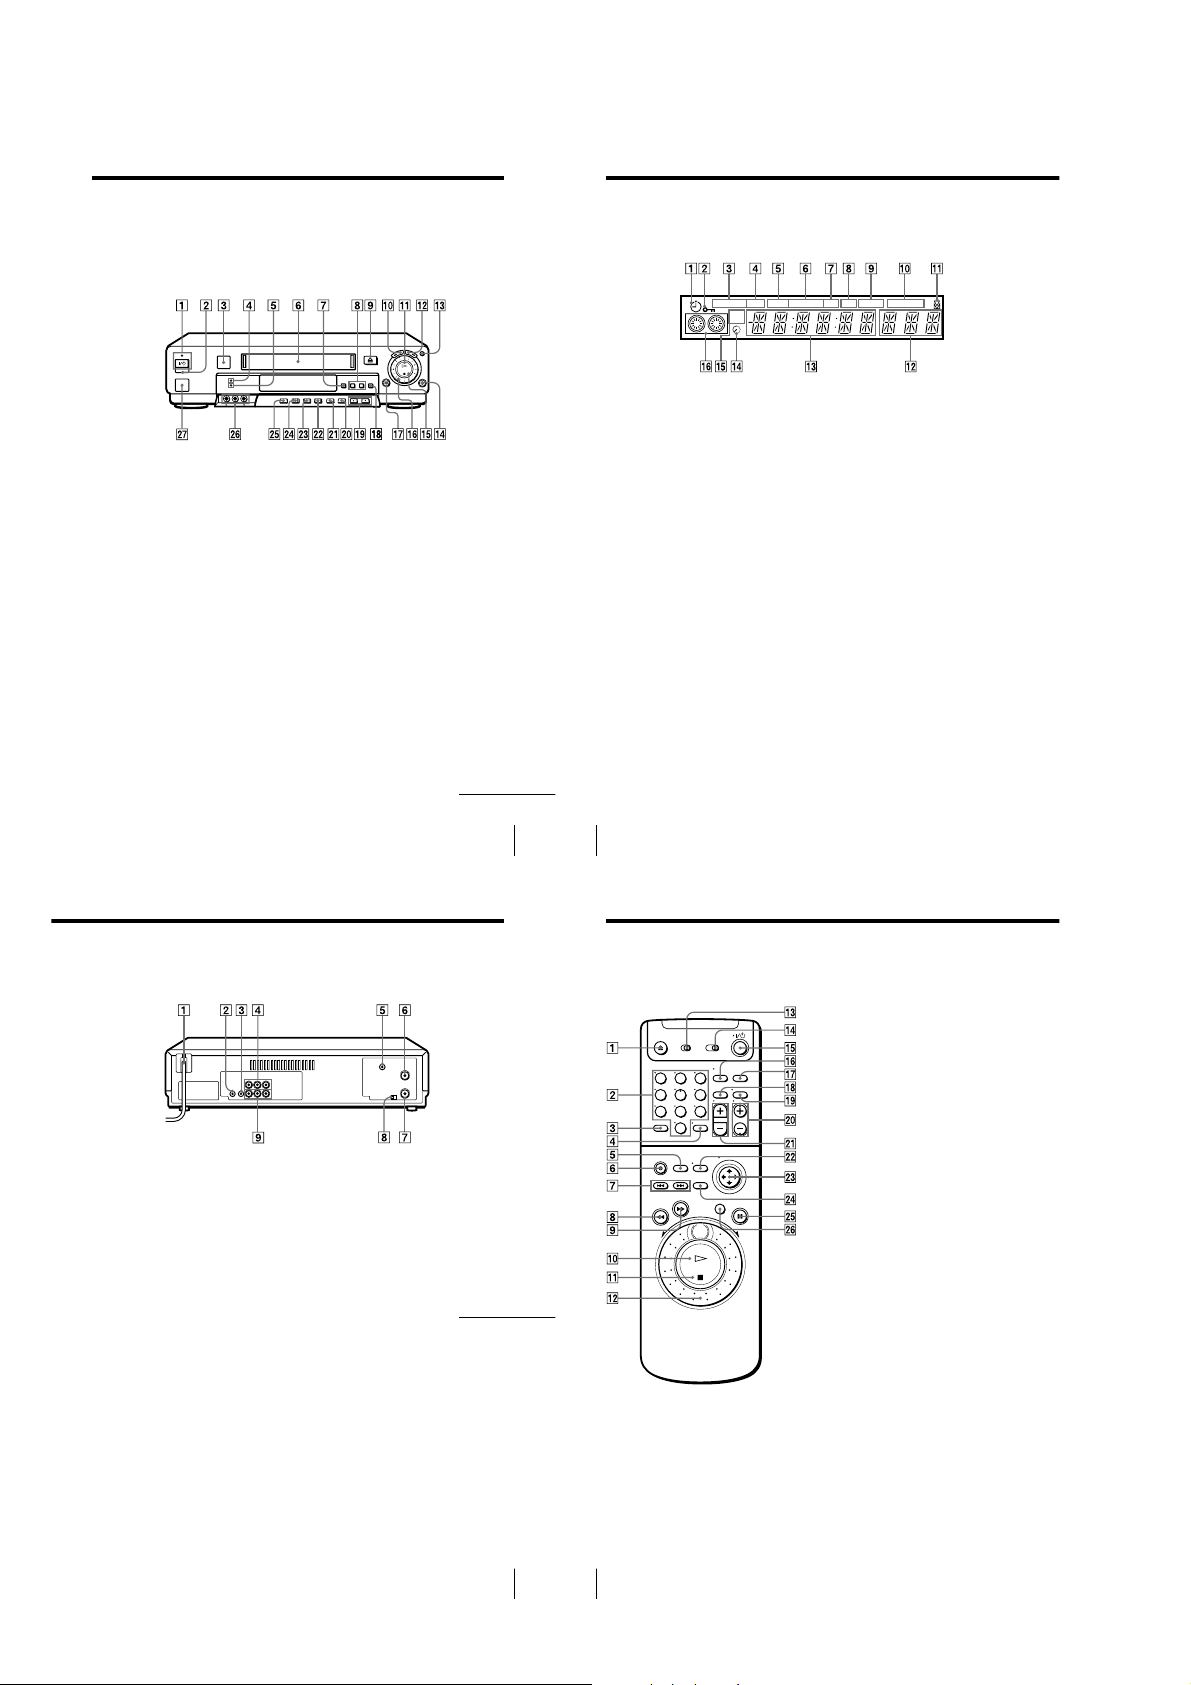
Index to parts and controls
Refer to the pages indicated in parentheses ( ) for details.
Front panel
Index to parts and controls (continued)
Display window
STEREO SAP
VTR
123
LP SP EPVIDEO APC EDIT
BLANK
AV INSERT
1 `/1 POWER switch/indicator (13)
2 Remote sensor
3 SmartFile sensor (42, 55)
4 SMARTFILE indicator (47, 55)
5 REALITY REGENERATOR
indicator (30)
6 Tape compartment
7 SMARTFILE button (45, 53, 61)
8 CURSOR m/M buttons (55)
9 A EJECT button (5)
0 m REW (rewind) button (5, 19)
qa H PLAY button (4, 20)
qs M FF (fast-forward) button (5, 19)
qd JOG button (21)
qf z REC (record) button (7, 24, 39)
qg x STOP button (5, 39)
Rear panel
1 AC power cord
2 S-LINK (CONTROL S IN) jack (38)
3 CABLE BOX CONTROL
(CONTROL S OUT) jack
4 LINE-1 IN AUDIO R/L/VIDEO
jacks (38, 67)
5 CPD (Control and Program Data) IN
jack (67)
qh Shuttle ring (8, 20)
qj X PAUSE button (5, 39)
qk OK button (15, 48, 55)
ql CHANNEL/TRACKING +/–
buttons (7, 30)
w; EDIT button (39)
wa REALITY REGENERATOR button
(30)
ws EASY SET UP button
wd COMMAND MODE button
wf SMARTFILE GENERATOR button
(65)
wg INPUT SELECT button (7, 9, 39)
wh LINE-2 IN VIDEO/AUDIO L/R
jacks (38)
wj LASER LINK IR receiver (35)
continued
Additional Information
6 VHF/UHF IN connector (67)
7 VHF/UHF OUT connector (67)
8 RF (Radio Frequency) UNIT switch
9 LINE OUT AUDIO R/L/VIDEO
jacks
continued
1 Timer indicator (13, 17)
2 Child Lock indicator (14)
3 STEREO indicator (27)
4 SAP (Second Audio Program)
indicator (27)
5 VIDEO indicator (8)
6 Tape speed indicator (7)
7 APC (Adaptive Picture Control)
indicator (31)
9 BLANK indicator (47)
0 AV INSERT indicator (41)
qa Tracking indicator (30)
qs Line/channel indicator (7, 39)
qd Time counter/clock indicator (5)
qf Remaining time indicator (8)
qg COMMAND MODE indicator
qh Tape/recording indicator (7)
8 EDIT indicator (39)
Additional Information
73
74
Index to parts and controls (continued)
Remote commander
1 Z EJECT button (5)
2 Number buttons (13)
3 VCR Plus+ button (12)
123
456
789
0
4 ENTER button (10, 13, 22)
5 SMARTFILE button (45, 53, 61)
6 z REC (record) button (7, 24)
7 ./> INDEX SEARCH buttons
(29)
8 m REW (rewind) button (5, 19)
9 M FF (fast-forward) button (5, 19)
0 H PLAY button (4, 20)
qa x STOP button (5)
qs Shuttle ring (8, 20)
Additional Information
75
Additional Information76
1-18

qd TV / VIDEO switch
qf COMMAND MODE switch
qg `/1 (power) switch (13)
qh TV/VIDEO button (8)
qj INPUT SELECT button (7, 9, 39)
qk CLEAR button (5, 13, 25, 57)
ql DISPLAY button (8)
w; CH (channel) +/– buttons (7)
wa VOL (volume) +/– buttons
ws MENU button (15, 25)
wd Cursor stick (15, 25, 47)
M/m/</,
OK
wf SMART CUE button (5)
wg X PAUSE button (5)
wh JOG button (21)
continued
Index to parts and controls (continued)
1 COUNTER/REMAIN button (8)
2 SP (Standard Play)/EP (Extended
3 AUDIO MONITOR button (27)
4 AUDIO/VIDEO INSERT buttons
5 y SLOW +/– buttons (19)
6 ×2 button (19)
7 TV/VIDEO button (8)
8 INPUT SELECT button (7, 9, 39)
9 TAPE RETURN button (20)
0 CLEAR button (5, 13, 25, 57)
qa DISPLAY button (8)
qs CH (channel) +/– buttons (7)
qd VOL (volume) +/– buttons
qf Receiver operation buttons
Play) button (7, 48)
(41)
RECEIVER VOL (volume) +/–
buttons
MUTING button
Additional Information
77
Additional Information
78
1-19E
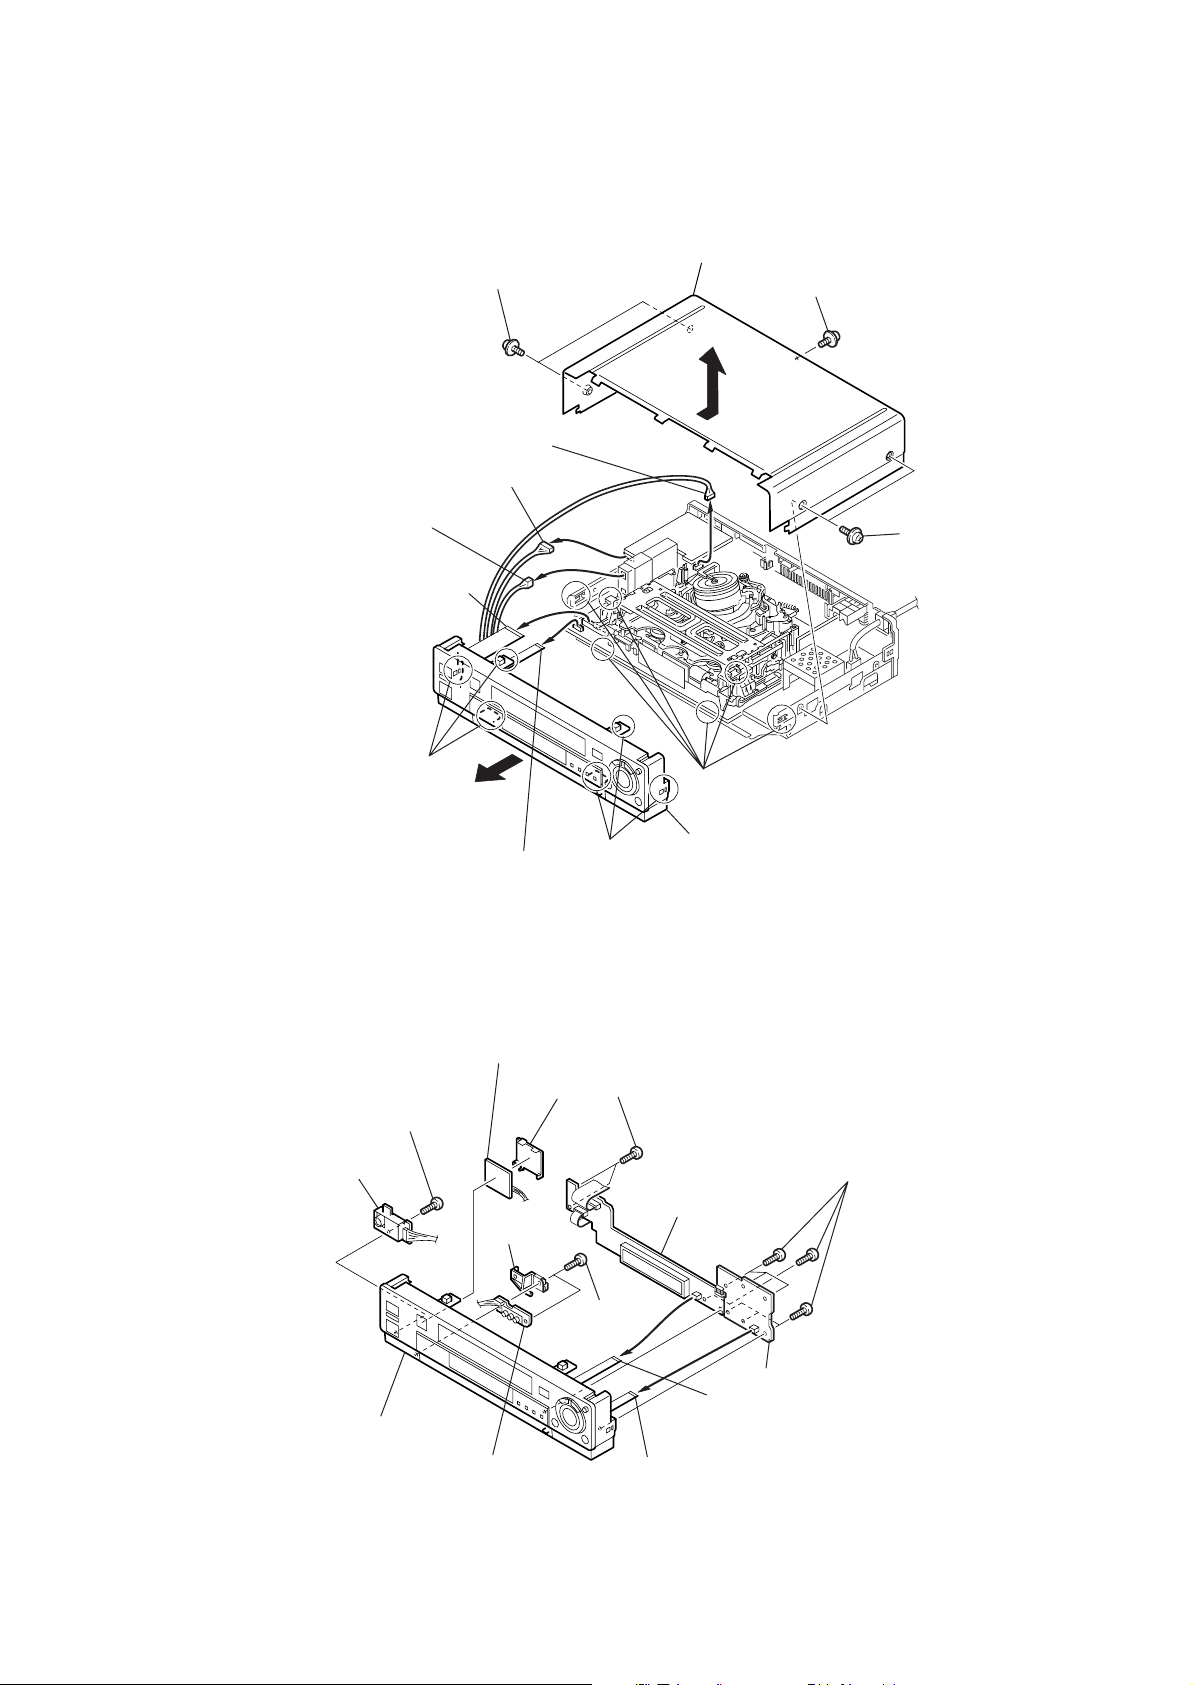
SECTION 2
)
)
DISASSEMBLY
NOTE: Follow the disassembly procedure in the numerical order given.
2-1. UPPER CASE, FRONT PANEL BLOCK ASSEMBLY
Upper case
1
Two screws (case)
2
3
Connector
3
(From CN602 on LR-15 board)
3
Connector
(From CN001 on ML-18 board)
(M11HF/M91HF)
3
Flat cable
(From CN461 on MA-360 board)
(M91HF)
(From CN303 on MA-360 board)
Connector
SLV-999HF/M11HF/M91HF
Two screw (case)
1
1
Two screws (case
4
Hooks
3
Flat cable
(From CN462 on MA-360 board)
4
Hooks
4
Hooks
5
Front panel block assembly
2-2. AN-19, DM-87, FR-163, JK-172, PD-111 BOARDS
8
AN-19 board (M11HF/M91HF)
1
Two screws (B2.6 × 8)
2
4
T wo screws
(B2.6
×
8)
FR-163 board
9
Screw (B2.6 × 8)
!º
PD-111 board
(M91HF)
5
Fulcrum
plate (L)
7
1
Three screws (B2.6 × 8)
Front panel assembly
6
JK-172 board
2
DM-87 board
3
Flexible board
(From CN401 on FR-163 board
3
Flexible board
(From CN601 on DM-87 board)
Note: When peeling off the antenna (large)
2-1
shield plate, XX-X board.
If not so, the resonance level of AN-19
board becomes small.
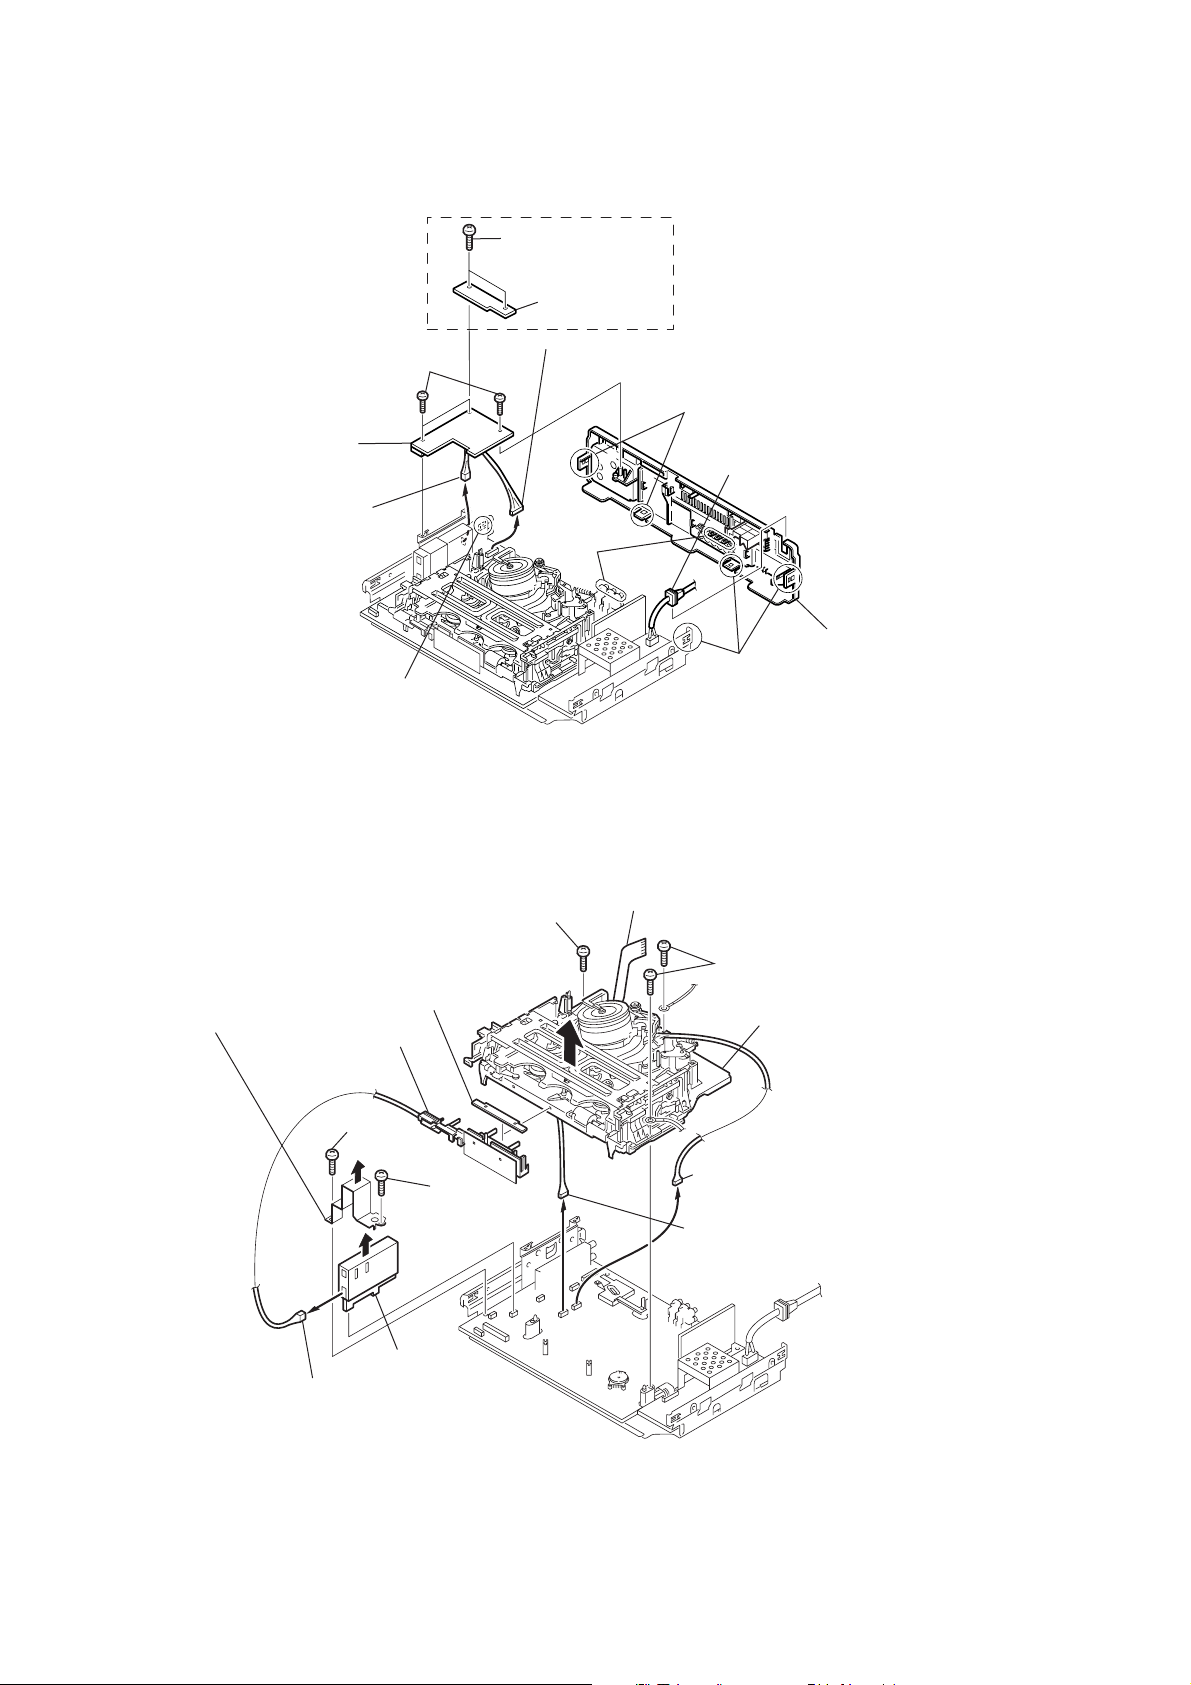
2-3. LR-15 BOARD, REAR PANEL
l
)
1
Three screws (M91HF)
2
LR-15 board (M91HF)
3
Connector
(From CN005 on ML-18 board)
(M11HF/M91HF)
5
Hook
(M11HF)
1
T wo screws
2
RJ-83 board
3
Connector
(From CN304 on MA-360 board)
5
Hooks
5
Hooks
4
Release cable stopper
from rear panel
6
Rear pane
5
Hooks
2-4. AN-18, ML-18 BOARDS, SR MECHANISM DECK
5
Flexible board
(From CN260 on MA-360 board)
×
8)
3
Holder, ML
(M11HF/M91HF)
6
Screw
(BVTP 3
9
AN-18 board
8
(M11HF/M91HF)
1
Connector
(From CN002 on ML-18 board)
(M11HF/M91HF)
(M11HF/M91HF)
AN holder
2
Screw
(B2.6
4
(M11HF/M91HF)
×
8)
2
Screw
(BVTP 3
ML-18 board
×
12)
6
Two screws (BVTP 3 × 12)
7
SR Mechanism deck
5
Connector
(From CN301 on MA-360 board
5
Connector
(From CN302 on MA-360 board)
2-2
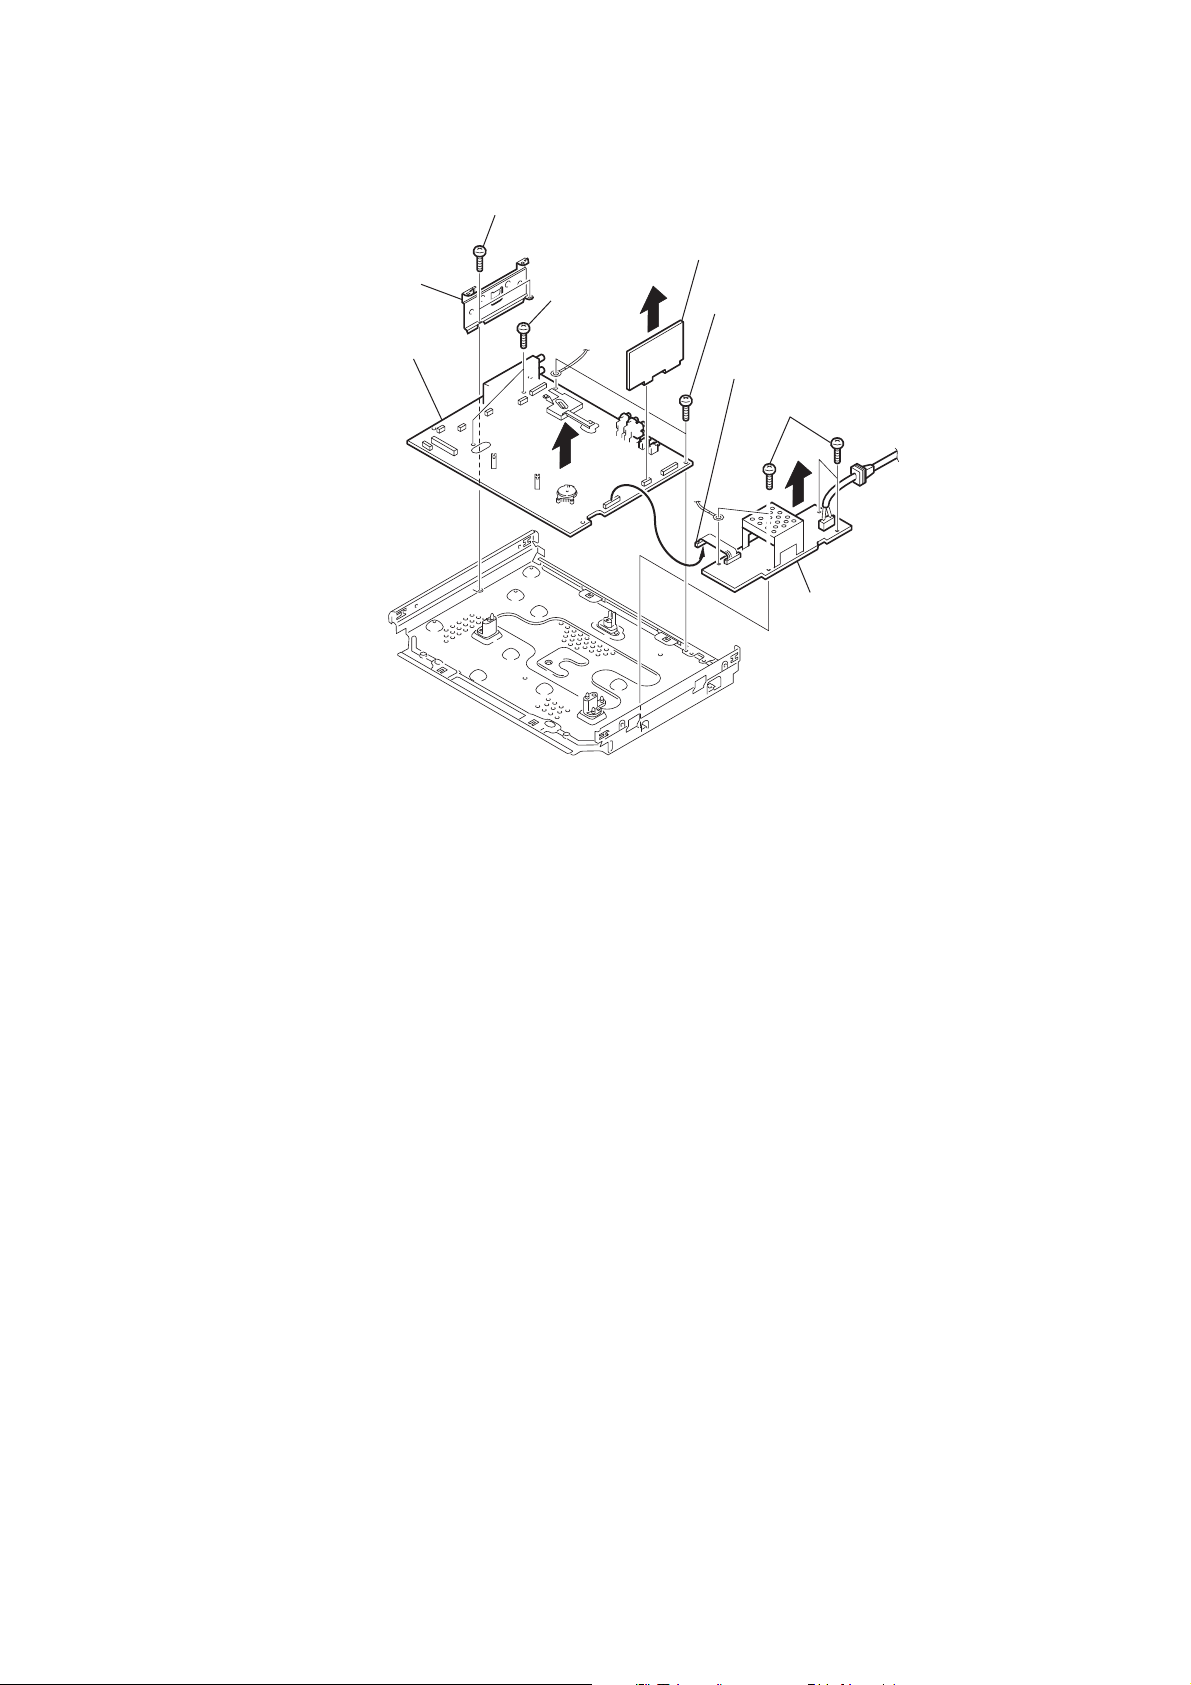
2-5. POWER BLOCK, MA-360 BOARD
5
T wo screws
6
NL holder
(M91HF)
8
MA-360 board
7
T wo screws
1
VD-29 board
7
T wo screws
2
Connector
(From CN603 on MA-360 board)
3
Four screws
4
Power block
2-3

2-7. INTERNAL VIEWS
— T op View —
M901
Drum Assembly
DZH-0A8A/Z-NP: 8-839-058-51 (999HF/M91HF)
DZH-0A7A/Z-NP: 8-839-057-51 (M11HF)
ACE head block assembly
A-6759-620-A
FE head
1-500-144-11
— Bottom View —
Reel (S) table
3-977-507-01
M902
DC motor (capstan)
1-698-971-11
Pinch press block assembly
A-6759-615-A
FL complete assembly
A-6759-619-B
Reel (T) table
3-977-508-01
M903
Loading motor assembly
X-3947-577-1
2-4
M901
Drum Assembly
DZR-0A8A/Z-NP: 8-839-058-51 (999HF/M91HF)
DZR-0A7A/Z-NP: 8-839-057-51 (M11HF)
Rubber belt
3-977-510-01
 Loading...