

Page 1
Quick Reference Guide
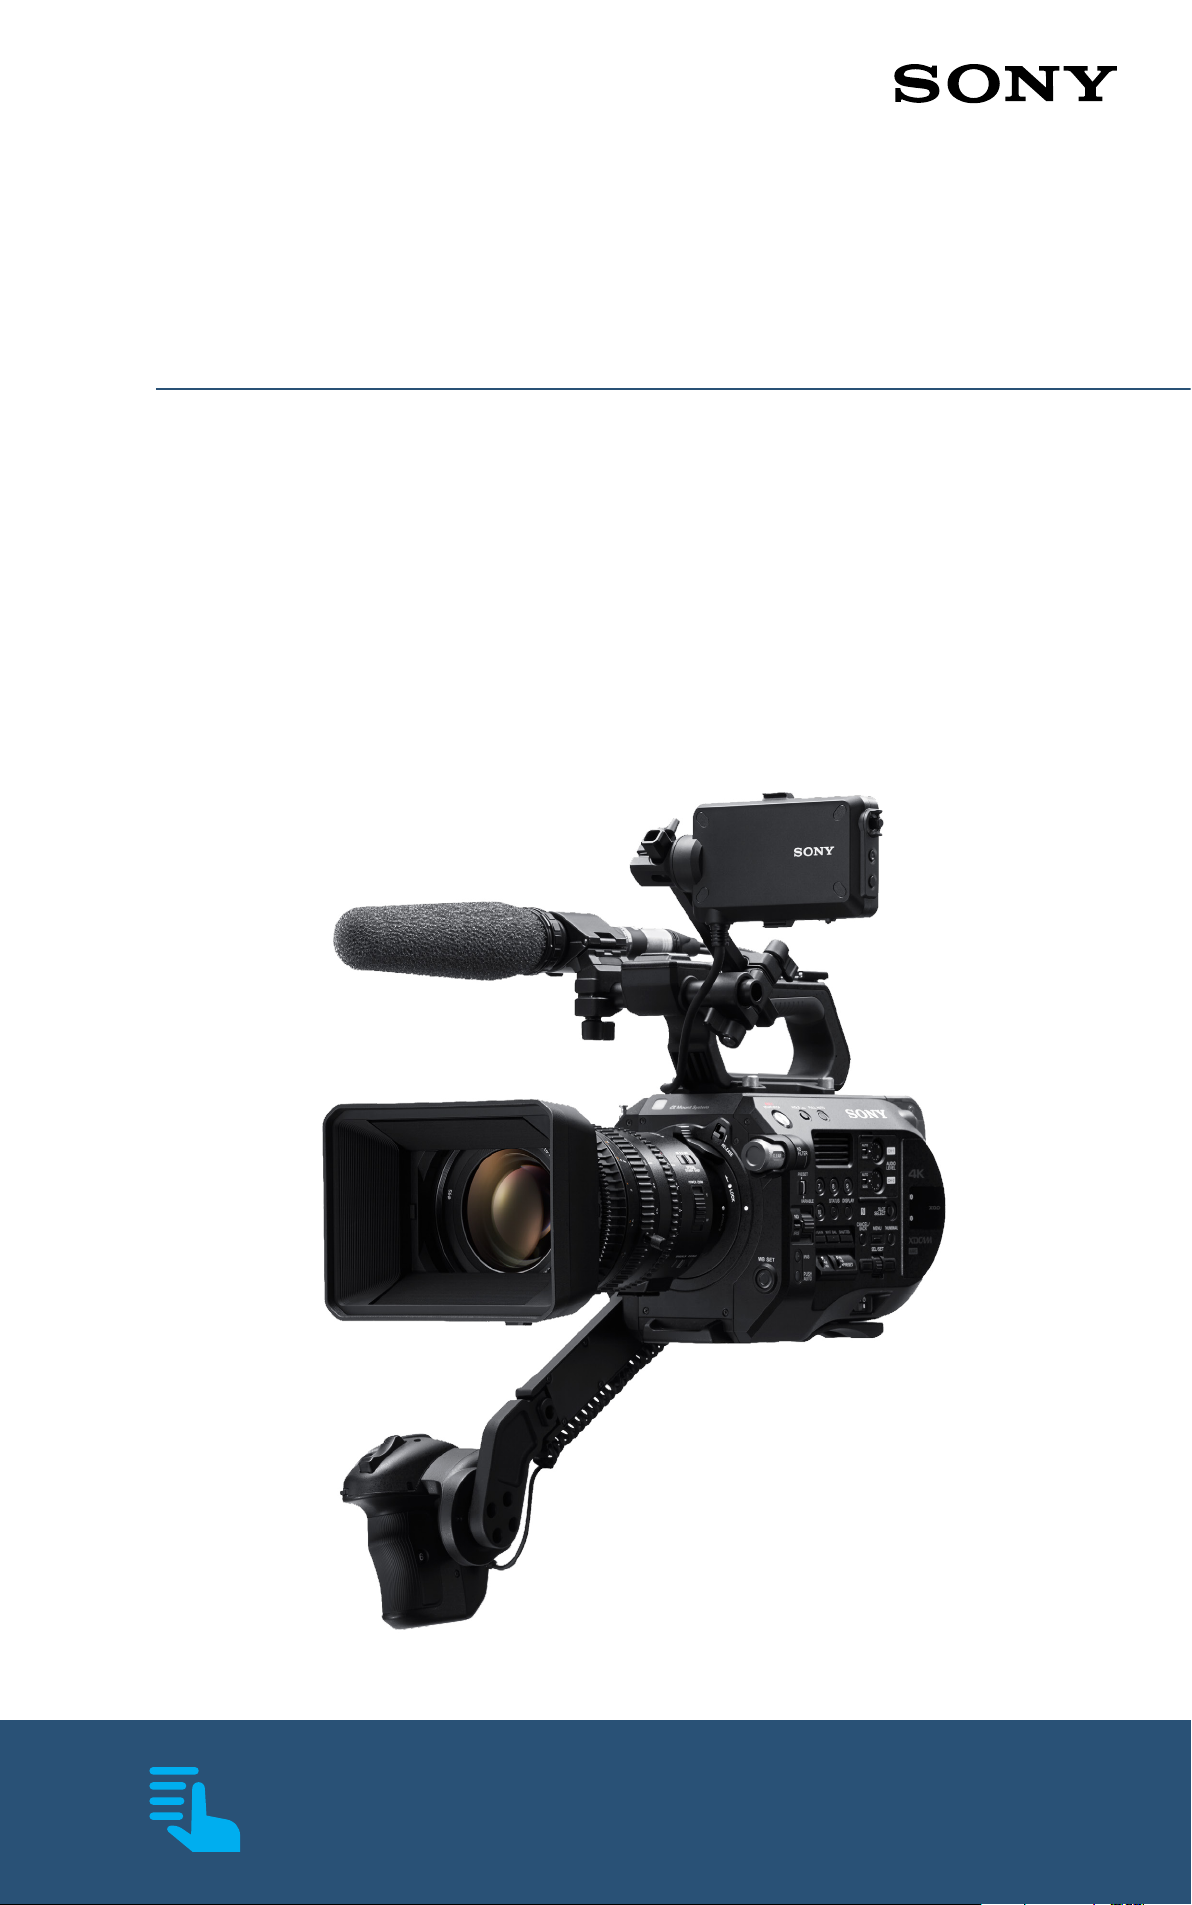
PXW-FS7
PXW-FS7M2
sony.net/pro/PXW-FS7
sony.net/pro/PXW-FS7M2
This guide has been optimised for
mobile viewing and is fully interactive
Page 2
Contents
A. Introduction to this guide
B. Saving the camera setup
C. Choosing the right operating mode
D. Preparing the camera and shooting
E. Advanced picture settings for Custom Mode
F. Detailed guide to the Cine EI Mode
G. Slow motion, time-lapse and picture cache
H. Audio recording
I. Recording, media and troubleshooting
Index
2
Page 3

A. Introduction to this guide
A1. Introduction
This guide does not replace the user manual. It is intended
to be used in conjunction with the user manual and it is
recommended that you read both this guide and the user
manual to get the very best from the camera.
Where you see text in bold it indicates a menu setting,
button or switch setting. For example:
(MENU: System – Base Setting – Shooting Mode)
Indicates: refer to the camera menu, System page, Base
Setting page, Shooting mode sub page.
Where there are multiple menu choices a suggested or
recommended setting will be given as an initial starting
point to get you going. These settings should give good
results in the majority of cases.
Status Button: The STATUS button on the camera body
allows you to view several pages of information about
the way the camera is set up. This can be very useful
for checking settings, audio levels and setup, media
remaining and camera configuration. Press STATUS to
enable the status display pages and then use the scroll
wheel to step through the information screens. Pressing
STATUS again will turn the status pages o.
Contents
3
Page 4

B. Saving the camera setup
B1. All files All files are a great way of quickly changing
shooting modes and saving your favorite settings. Once
you have the camera setup in a way you are happy
with I recommend saving those settings as an All File.
See the section on all files for more information.
All Files: All Files can be used to save a snapshot of
the way the camera is set up or to load a specific set of
camera settings.
An all file saves almost every available user setting,
including things like frame rate, shooting mode, paint
settings, viewfinder and MLUT settings. All files are very
useful for quickly switching between modes of operation
or for sharing settings across multiple cameras. Each all fie
can be given a unique alpha-numeric name that describes
the settings being saved. You can save up to 99 all files on
an SD card.
To save an all file you will need to insert an SD card (SD
card or SDHC card) into the SD card slot. You do not need
a large capacity SD card. The files are very small. An 8GB
card would be large enough for most peoples needs.
To save an All File first you must set the name for the
All File you wish to save.
Contents
4
Page 5

B. Saving the camera setup
(MENU: File – All File – File ID)
Set the file name and select Done when finished.
Then save the file:
(MENU: File – All File – Save SD Card)
Choose an empty “No File” location to save the file in an
unused location or overwrite a previously saved all file
with the new file.
To recall an All File:
(MENU: File – All File – Load SD Card)
Choose the desired All File from the list and press
SEL/SET to load. The camera may reboot during the
loading process.
5
Contents
Page 6

C. Choosing the right operating mode
C1. Understanding the dierent operating modes
Custom Mode and Cine El Mode: The PXW-FS7 has two
distinctly dierent operating modes which are called
“Custom” and “Cine EI”. The camera will create high quality
images at all available frame rates and resolutions in both
modes.
In Custom Mode the PXW-FS7 behaves much like any
other conventional video camera where the picture you
see in the viewfinder is the picture recorded to the XQD
cards and this is the image the end viewer will see.
This is the image as seen in the viewfinder and this is the image
recorded when shooting in custom mode.
Contents
6
Page 7

C. Choosing the right operating mode
In the Cine EI mode the camera operates using optimized
settings that allow it to capture the widest possible
dynamic range and color range. This wide range image
will look flat and washed out if viewed directly. But it
contains a huge amount of picture information that can
be manipulated and adjusted on a computer in post
production to achieve the desired final look. To make
shooting this way easier the camera incorporates a system
of MLUT’s (Monitor Look Up Tables) that allow the operator
to see in the viewfinder or on a monitor an approximation
of how the footage being shot will look after it has been
adjusted in post production.
This is the picture that is
recorded in the Cine EI mode.
And this is how the
image may look after post
production grading.
Contents
7
Page 8

C. Choosing the right operating mode
C1.1 More information on custom mode
In this mode you have the ability to change many of the
cameras image quality settings including gamma (contrast
and brightness range), the matrix (color) and sharpness if
you wish to alter the look of the recorded images. In most
cases in this mode the dynamic range (scene brightness
range) that can be captured is limited by the need to
create an on screen image with natural looking contrast
and colors that will not need any further adjustment. To
achieve this the camera must produce a signal range
that is directly compatible with the display device that
the pictures will be viewed on. For HD TV this standard is
called “Rec-709”.
Having to stay within the limitations of conventional TV
and monitor displays does impose some limitations on
the amount of adjustment available within the camera
and on the dynamic range that can be captured while still
producing a realistic looking image. But by staying within
this range very often it is not necessary to adjust the
images in post production.
8
Contents
Page 9

C. Choosing the right operating mode
Custom mode would normally be used for projects that
have little or no time for post production grading or
adjustment. Where a fast turn-around is important or a
simple, straight forward workflow is desired. Although
the image quality in custom mode can be very high, it
is normally possible for experienced users to get better
quality images and greater post production flexibility by
using the Cine EI mode.
C1.2 More information on Cine El Mode
The Cine EI mode is quite dierent to custom mode and
the way a conventional video camera works. In the Cine EI
mode the camera is setup to capture the greatest possible
brightness and color range. A range that will often exceed
what can be shown correctly on a conventional TV or
monitor. These extended range images are then taken in
to post production where they will be adjusted or “graded”
to create the desired look for the finished production.
As a result of the greatly extended capture range the
images captured will typically look very flat and lack
contrast and color if viewed on a conventional monitor.
This can sometimes make exposure assessment dicult.
Contents
9
Page 10

C. Choosing the right operating mode
To help with exposure and to help gauge what the
material will look like after grading the camera can apply
a Monitor Look Up Table (MLUT or LUT) to the viewfinder
or monitor outputs. The MLUT converts the image from
the flat looking S-Log2/3 range to a conventional viewing
range. Dierent MLUT’s can be used to give dierent
monitoring ranges and dierent looks. You can even load
user created MLUT’s in to the camera. The MLUT isn’t
normally recorded. It is just added to the viewfinder or
monitor output as a tool to help estimate what the final
pictures will look like.
In order to maximize the cameras dynamic range in Cine
EI the recording ISO of the camera is locked to it’s native
ISO of 2000. To help cope with dicult or challenging
lighting situations the camera can be “rated” at a higher or
lower equivalent ISO by changing the cameras Exposure
Index or EI. This changes the brightness of the MLUT or
LUT rather than the actual recording ISO. For a detailed
explanation of this please see the Using Cine EI chapter.
In the Cine EI mode the auto exposure functions such as
auto iris, auto shutter speed and automatic gain (AGC) are
disabled, so exposure must be set and adjusted manually.
Contents
10
Page 11
D. Preparing the camera and shooting
Section Index
1. Preparing to shoot
2. The shutter and shutter speed
3. Setting the gain or ISO
4. White Balance in Custom Mode
5. White Balance in Cine EI mode
6. Exposure, Waveform and Histogram
7. Aperture/Iris control
8. The ND filter System
9. Focus and Focus Aids
Contents
11
Page 12

D. Preparing the camera and shooting
D1. Preparing to shoot
After switching the camera on you may see a message
saying “Execute APR”. This is not an error or malfunction.
The APR function minimizes the appearance of bright or
dark sensor pixels and minimizes sensor noise.
Cover/cap the lens and press SEL/SET to execute the
APR function.
If you do not perform APR you will be reminded to
perform APR the next time the camera is turned on.
You should perform APR regularly to maintain the best
possible image quality.
Choose the appropriate frame rate, frame size and
recording codec for your production.
12
Contents
Section Index
Page 13

D. Preparing the camera and shooting
D1.1 Start by setting the country area. The country area
setting determines which frame rates are available.
Choose PAL Area to enable 50i/50p/25p, choose NTSC
Area for 60i/60p/30p//23.98p/24p.
D1.2 Next choose the recording codec.
(MENU: System – Codec - Select).
The options available will depend on the whether you
have the extension unit installed on the camera or not.
Recommendation: Use the XAVC-I codec. This codec
oers the greatest frame rate flexibility combined with
excellent image quality for HD, UHD and 4K. XAVC-L may
be considered for situations where you do not have
enough media for XAVC-I. MPEG HD 422 may be needed
when only legacy edit systems are available.
13
Contents
Section Index
Page 14

D. Preparing the camera and shooting
MPEG HD 422: HD only, the same as the XDCAM 422
codec, 8 bit, 422 at 50Mb/s. Good for news, quick turnaround, small file size. Not best for heavy post production
work or grading, Not recommended for use with S-Log2/3.
XAVC-I: HD/UHD/4K DCI. XAVC-I is always 10 bit 422.
XAVC-I is normally the easiest version of XAVC to edit,
requiring the least processing power. XAVC-I is the best
choice for working with S-Log2/3.
XAVC-L: HD/UHD XAVC-L is a long GOP codec oering
similar image quality to XAVC-I but with a smaller
file size. In HD it is 10bit 422. In UHD it is 8bit 422 (not
recommended for S-Log2/3).
In HD there 3 bit rate choices of 50, 35 and 25Mbps.
50Mbps oers image quality comparable to XAVC-I.
35Mbps is comparable to MPEG2 HD 422 50Mbps.
25Mbps is suitable for corporate or other professional non
broadcast applications.
XAVC-L requires more processing power in post
production than XAVC-I, so a high performance
computer is recommended.
Contents
14
Section Index
Page 15

D. Preparing the camera and shooting
ProRes (with XDCA-FS7 only): HD only. ProRes is a widely
adapted codec originally developed by Apple for use in
post production but now finding use as an acquisition
codec. ProRes 422 HQ oers slightly higher quality than
ProRes 422.
Raw (with XDCA-FS7 only): High quality external
recording option that allow the recording of raw sensor
data on a compatible external recorder.
15
Contents
Section Index
Page 16

D. Preparing the camera and shooting
D1.3 Now select the frame size/recording format and
frame rate. The (MENU: System – Rec Format – Video
Format) page is where you set the frame size and frame
rate that will be the cameras base rate. The options
available will depend on the country area and codec
choice.
1920x1080 = HD, 3840x2160 = UHD (the standard frame
size for consumer 4K television), 4096x2160 = 4K DCI (the
standard for 4K digital cinema).
If you have chosen XAVC-L as well as frame size and frame
rate you will also have a choice of dierent data rates for
the 1920x1080 modes. These are 25, 30 and 50 Mb/s.
50Mb/s is the highest quality and recommended for
broadcast productions.
Choose the operating mode.
Recommendation: Use Custom mode unless you
understand the Cine EI operating mode.
Choose between Custom Mode or Cine EI Mode:
(MENU: System – Base Settings – Shooting Mode).
The camera should now be ready to start shooting.
Contents
16
Section Index
Page 17

D. Preparing the camera and shooting
D2. Shutter Speed or Shutter Angle
It is recommended that to avoid issues with flicker from
some types of light fixtures that the shutter speed is
set to a multiple of the local mains electricity frequency.
Please check the mains frequency of the country you are
shooting in to determine the most appropriate shutter
speed. In a 50Hz country 1/50 or 1/100 is recommended.
In a 60Hz country 1/60 or 1/120 is recommended.
D2.1 The shutter speed or shutter angle eects how
motion is portrayed in the recordings. A very fast shutter
will freeze rapid movements in each frame of the
recording making them crisper but possibly adding judder
or jitter. Too slow a shutter speed will result in blurred
motion and handheld camera wobble can result in soft
looking pictures. In addition a fast shutter speed reduces
the amount of captured by the sensor.
The camera can display the shutter time period as either
fractions of a second (shutter speed) or in degrees. In
either case the operation of the shutter is identical, there
is no dierence in the quality of the images captured.
Contents
17
Section Index
Page 18

D. Preparing the camera and shooting
Shutter speed is the easiest to understand and is similar
to how the shutter period would be expressed in a stills
camera. With Shutter Speed the shutter timing remains
fixed at the speed set even if you change the recording
frame rate (unless the shooting frame rate is increased
beyond the set shutter speed, in which case the shutter
speed will become set to the slowest possible speed for
the shooting rate chosen).
The Shutter Angle setting mimics the way the shutter
period of a movie film camera would be expressed. The
shutter in a film camera is a spinning circular disc, part
of which is cut away to allow light to fall on the film. The
most commonly used shutter angle is 180 degrees, which
is half of the 360 degrees of a full circle. So a 180 degree
shutter on a film camera would allow light to fall on the
film for half of the shutters rotation period. In a video
camera this means that the sensor will capture light for
half of the recording frame rate. For example, if shooting
at 24fps a 180 degree shutter will be open for half of 1/24
which is 1/48th of a second. With shutter angle, if you
change the recording frame rate the shutter speed will
also change as it will always be the same fraction of the
recording rate.
Contents
18
Section Index
Page 19

D. Preparing the camera and shooting
D2.2 To change the shutter period indication
between Speed and Degrees go to
(MENU: Camera – Shutter – Mode).
To change the shutter speed: Press the Shutter button
on the side of the camera body and use the scroll wheel
to choose your desired shutter speed or angle. Then press
the sel/set button to set the shutter speed. Do not press
the shutter button again you wish to set the shutter speed
control to automatic.
Suggested settings are 180 degrees or for 50Hz countries
1/50 and for 60Hz countries 1/60.
19
Contents
Section Index
Page 20

D. Preparing the camera and shooting
D3. Setting the Gain or ISO (Custom Mode)
The signal that comes from the cameras sensor can be
made brighter by adding additional amplification by
increasing the gain of the cameras image processors.
This may be useful when shooting in low light situations.
However it should be noted that when you increase the
camera’s gain, as well as making the desirable image
brighter you will also increase the noise seen in the image.
Because of this it is normally desirable to use the lowest
possible amount of gain for the best results.
The gain setting of the camera can be displayed as “gain”
in dB or as the equivalent ISO rating of the camera.
D3.1 dB gain is easy to understand. 0dB is no added gain
and the optimum setting for the best possible image
quality. Every time you increase the gain by 6dB you are
making the picture twice as bright (equivalent of opening
the lens aperture by 1 stop). But adding 6dB of gain also
increases the noise in the image by a factor of 2. Adding
+6dB gain makes the picture twice as bright but 2 time
noisier, adding +12dB will mean a picture 4 times brighter
than 0dB but also 4 times noisier and so on.
Contents
20
Section Index
Page 21

D. Preparing the camera and shooting
ISO can be a little more confusing. ISO is used to
determine the correct exposure for a camera when using
an external light meter. As dierent gamma curves require
slightly dierent exposure levels the optimum ISO (native
sensitivity) will vary depending on the gamma curve used.
STD Gamma curves = 800 ISO = 0dB
Hypergamma HG1, HG2, HG3, HG4 = 800 ISO = 0dB
Hypergamma HG7, HG8 = 1600 ISO = 0dB
S-Log2 and S-Log3 = 2000 ISO = 0dB
If you double the ISO, for example going from 800 ISO to
1600 ISO this is the same as adding 6dB of gain. So if you
are using STD gamma and the camera is set to 1600 ISO
that is the same as STD gamma at +6dB gain.
I recommend that to avoid confusion when in custom
mode you should use dB gain rather than ISO.
21
Contents
Section Index
Page 22

D. Preparing the camera and shooting
D3.2 To select the use of gain or ISO
(MENU: Camera – ISO/Gain/EI – Mode).
Manual gain control is then done via the gain switch on
the side of the camera body the gain or ISO level assigned
to each of the 3 switch positions can be set in:
(MENU: Camera – ISO/Gain/EI – ISO/Gain<L>) etc.
To enable/disable automatic gain control press the
Gain button on the camera body.
If using the Cine EI mode please see the section on
“Exposure Index”.
22
Contents
Section Index
Page 23

D. Preparing the camera and shooting
D4. White Balance (Custom Mode)
Setting the white balance correctly ensures that white
objects in the scene appear white and that the overall
color response of the camera is true to life. There are
several ways of setting the white balance.
Pressing the white balance button on the camera will
toggle between automatic white balance (ATW) and
the white balance function selected by the white
balance switch.
ATW: The camera can determine the correct white balance
automatically by continuously analyzing the scene being
shot and adjusting the white balance while you shoot.
This function is called ATW – Auto Tracing White Balance.
Generally this works well but under some situations you
may occasionally see a shift in colors while shooting.
With the white balance switch you can chose between
PRESET white balance and MEMORY A and MEMORY B
white balance.
23
Contents
Section Index
Page 24

D. Preparing the camera and shooting
D4.1 Preset
The white balance can be fixed to a set value. When the
white balance switch is set to PRESET the preset value
is used. To change the preset value go (MENU: Paint –
Preset White) and select the desired color temperature.
D4.2 Memory Mode A and B
There are two memories in the camera that will remember
the white value for a white target. To set the white balance
correctly aim the camera at a white target such as a piece
of white paper that is under the same lighting as the rest
of the scene. Expose correctly and then press the WB SET
button on the front of the camera. This will store the white
balance in the memory selected by the switch.
D5. White Balance (Cine El Mode)
When shooting using the Cine EI mode a white balance
preset is selected using the white balance switch. Only 3
possible settings can be chosen, (Preset) 3200K, (A) 4300K,
(B) 5500K. Choose the option closest to the scene you are
shooting. Preset white balance is used to preserve the
full dynamic range of the camera, fine tuning of the white
balance would be done in post production as part of the
normal grading process.
Contents
24
Section Index
Page 25

D. Preparing the camera and shooting
D6. Exposure, Zebras, Waveform and Histogram
Exposure is controlled through a combination of shutter
speed, gain/ISO, iris aperture and ND filter. The camera
includes a number of tools for measuring exposure.
D6.1 Zebras
Zebras are commonly used to measure the brightness of
either skin tones or highlights. Zebra 1 is designed to be
used for skin tones. (MENU: VF – Zebra). For STD gammas
the default level of 70% works well in most cases, a small
amount of zebras appearing across a face. However for
the Hypergammas the zebra level should be reduced to
60% for good results.
Zebra1 at 70% on skin tones with STD gamma (note how darker faces
may not always show zebras at 70%).
Contents
25
Section Index
Page 26

D. Preparing the camera and shooting
In (MENU: VF – Zebra - Select) you can choose whether to
show zebra 1, zebra 2 or both in the viewfinder. The zebras
can be turned on and o via the push button on the side
of the viewfinder or with (MENU: VF – Zebra – Setting).
In Cine EI when a MLUT is enabled for the Viewfinder the
zebras measure the exposure levels of the MLUT as seen
on the viewfinders LCD screen, not the S-Log2 or S-Log3
recording level.
26
Contents
Section Index
Page 27
D. Preparing the camera and shooting
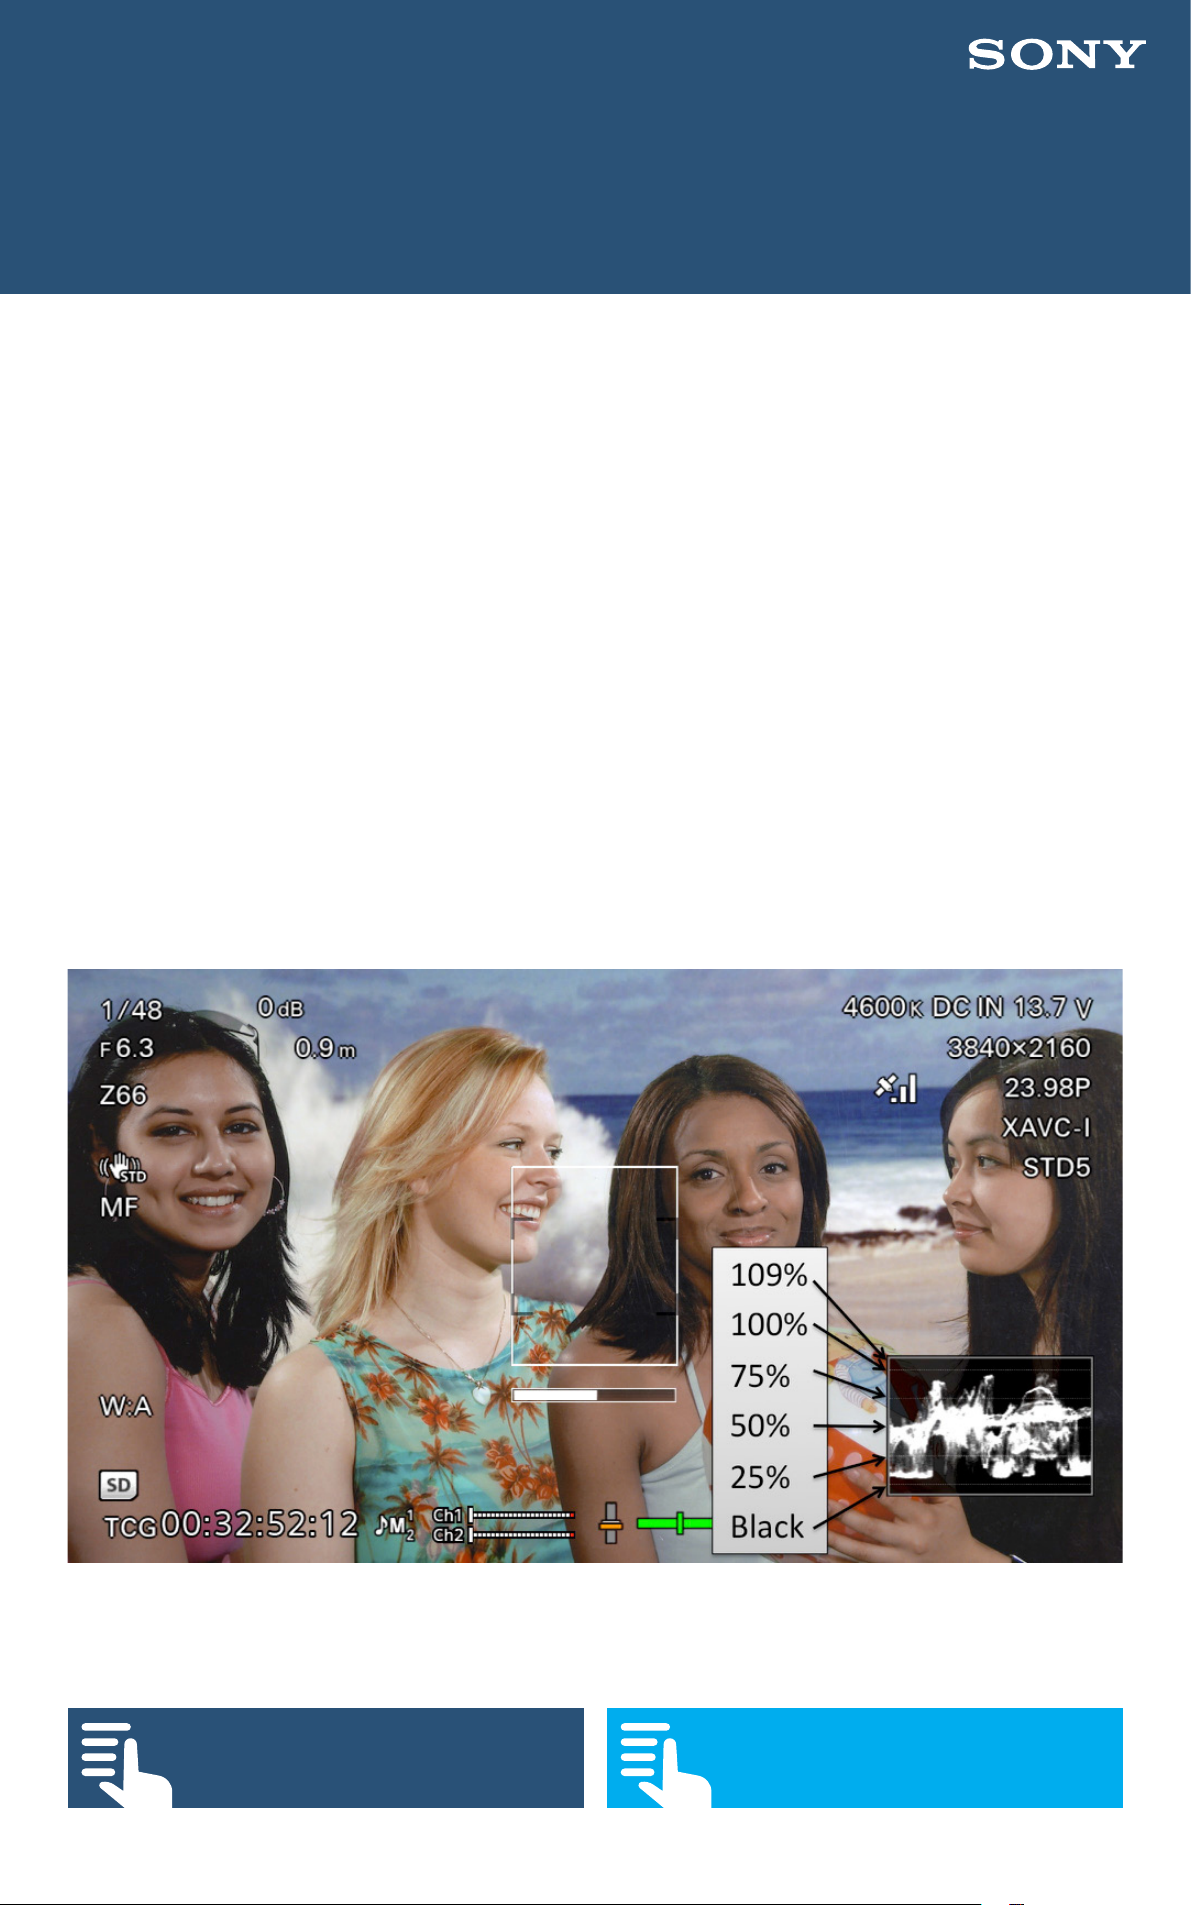
D6.2 Waveform Vectorscope and Histogram
These are selected via (MENU: VF – Video Signal Monitor).
Waveform: The waveform display measures the
brightness of the recorded image and displays the
brightness levels on a vertical scale that goes from 0%
or black at the lower dotted line at the bottom to 109%
(clipping point) at the top. There are additional dotted
reference lines at 25, 50 75 and 100%. The left side of the
waveform meter represents the left side of the image
being recorded while the right side of the waveform meter
is the right side of the image.
The Waveform Monitor and the levels indicated
Contents
27
Section Index
Page 28

D. Preparing the camera and shooting
Vector: This is a vectorscope which is used to measure the
color levels and color hue of what is being shot. In most
cases it is not necessary to use the vectorscope.
Histogram: The histogram displays the exposure
brightness on a horizontal scale where black is at the
left and 109% (clipping point) is on the right. The vertical
height of the indicated level represents the amount of the
image that is exposed at that brightness.
28
Contents
Section Index
Page 29

D. Preparing the camera and shooting
The histogram
Video Signal Monitor Source: When shooting in the
Cine EI mode it is possible to select whether the video
signal monitor displays the levels of the recorded signal
or the level of any LUT being used. Please refer to the
Cine EI section of this guide to better understand which to
use. The selected source signal is indicated just above the
signal monitor.
(MENU: VF – Video Signal Monitor – Source).
29
Contents
Section Index
Page 30

D. Preparing the camera and shooting
D7. Aperture/Iris
D7.1 In Custom Mode the iris of an electronically controlled
lens can be controlled automatically or manually. In the
Cine EI mode only manual operation is possible.
In Custom mode pressing assignable button 2 (iris)
toggles between manual and automatic control. When
manual control is selected the Iris Push Auto button can
be used to momentarily set the iris automatically. When
using auto iris it is possible to include an oset to the
exposure to brighten or darken the image, for example to
brighten a backlit scene via
(MENU: Camera – Auto Exposure – Level).
D7.2 Custom and Cine EI modes
The iris can be opened and closed using the iris control
wheel on the side of the camera or by assigning iris
control to the assignable dial on the handgrip
(MENU: System – Assignable Dial).
30
Contents
Section Index
Page 31

D. Preparing the camera and shooting
D7.3 For a shallow depth of field, film-like look you should
use a large aperture (f1.4 – f5.6). To avoid softening of the
image due to diraction eects you should avoid using
very small apertures (f16, f22 etc). Most lenses provide
the best performance in the middle of their aperture
range. Use the cameras built in ND filters to maintain your
desired aperture when there are high light levels.
Note that with some 3rd party lenses the iris may operate
in steps and the lens may be heard to click. This is normal.
D8. ND Filter system
Neutral Density filters are used to reduce and control the
amount of light falling on the sensor in bright filming
conditions. They allow the use of larger apertures than
would otherwise be possible in high light level scenes.
The PXW-FS7 has a system of 1 clear filter and 3 neutral
density filters to assist with exposure control. The filters are
selected via a knob on the side of the camera. The options
are: Clear, 1/4ND (2 stops), 1/16ND (4 stops) and 1/64ND (6
stops). Use the appropriate amount of ND filtration to gain
the most appropriate iris aperture.
Contents
31
Section Index
Page 32

D. Preparing the camera and shooting
D8.1 PXW-FS7 II and the variable ND filter
The PXW-FS7 II has an advanced variable ND filter system.
When the filter dial is in the clear position there is no
additional filtration in the optical path. When you select
ND filter dial position 1, 2 or 3 the variable ND filter system
is inserted into the optical path.
When the ND filter switch is set to preset you the filter
provides 3 preset levels of ND filtration: 2 = 1/4ND (2
stops), 3 = 1/16ND (4 stops) and 4 = 1/64ND (6 stops).
However if you wish you can change these preset ND
levels in the menu
(MENU: Camera -ND Filter).
Switching the ND filter switch to Variable allows you to
use the IRIS/ND Dial to vary the amount of ND filtration
smoothly and seamlessly from 1/4ND (2 stops) to 1/128ND
(7 stops). The variable function allows you to use the
aperture you desire for the best depth of field or lens
performance and then finely control the exposure via the
variable ND filter.
32
Contents
Section Index
Page 33

D. Preparing the camera and shooting
D8.2 The Variable ND filter can also be made to operate
automatically by engaging filter position 2, 3 or 4 and then
pressing an assignable button that has been assigned the
auto ND function. I suggest assigning Auto ND to button 7.
(MENU: System –Assignable Button).
D9. Focus, Peaking, Focus Indicator
and Focus Magnification
D9.1 When fitted with a suitable auto focus capable
E-Mount lens the camera can be set to Auto focus using
the Focus Auto/Manual switch. In addition the Focus Push
Auto button can be used to momentarily engage the
auto focus system. Otherwise the camera can be focused
manually. In order for the cameras auto focus functions to
operate correctly if the lens has an AF/MF switch it must
be set to AF. If using a lens with a focus ring that slides
between AF/MF it must be in the AF position.
33
Contents
Section Index
Page 34

D. Preparing the camera and shooting
D9.2 The focus detection area of the auto focus system
and the one push auto focus can be altered. If you chose
the flexible spot function you can use the hand grip
joystick or scroll wheel to move the focus detection area to
any part of the frame.
(MENU: Camera – Focus)
The focus detection area (yellow box) can be moved by selecting
“flexible spot” in the Camera – Focus menu.
To assist with obtaining the best possible focus there are a
number of focus aids.
Contents
34
Section Index
Page 35

D. Preparing the camera and shooting
D9.3 Peaking
The cameras peaking function can be turned on and o
via the peaking button on the side of the viewfinder LCD
screen. The peaking settings can be changed in
(MENU: - VF – Peaking).
Often colored peaking is easier to see than normal balck
and white peaking so consider setting the peaking type to
color. Avoid using an excessively high peaking level.
Peaking works by enhancing the appearance of sharp and
high contrast edges within the image by adding colored
or black or white (normal peaking) highlights to the high
contrast areas. This makes it easier to determine which
parts of the image are in focus. However it should be
noted that as peaking is contrast based, in high contrast
scenes the peaking signal may be seen across large areas
of the image, even areas not quite in focus. As a result
peaking should be used with caution and high peaking
levels should be avoided.
35
Contents
Section Index
Page 36

D. Preparing the camera and shooting
D9.4 Focus Indicator
The focus indicator appears as a bar graph across the
lower middle of the viewfinder screen with a white box
above (Focus Area Indicator). The bar graph measures
the sharpness of the image within the box. When the
graph is all the way to the left the image is soft. When it
is to the right it is sharp. Best focus is when the indicator
peaks as far to the right as you can get it, typically about
75% of the full scale. The indicator will never get all the
way to the right. The Focus Indicator and Focus Indicator
Area box can be turned on and o in
(MENU: VF – Display On/O – Focus Indicator /and/
Focus Area Indicator).
36
Contents
Section Index
Page 37

D. Preparing the camera and shooting
D9.5 Focus Magnification
The Focus Magnification Function allows you to magnify
the image seen in the viewfinder to closer inspect the
focus. Pressing assignable button 4 on the hand grip
magnifies the image by 4x, pressing a second time by 8x
and the third press returns the image to normal. Focus
Magnification has no eect on the recordings or HDMI
or SDI outputs so can be used at any time. When Focus
Magnification is enabled the joystick on the handgrip can
be used to select which part of the full image is magnified.
The Focus Magnification function can be assigned to an
assignable button in case you are not using the handgrip
(MENU: System – Assignable Button).
37
Contents
Section Index
Page 38

E. Advanced picture settings for Custom Mode
Section Index
1. Gamma and color settings in Custom Mode
2. Gamma categories (custom mode)
3. Custom Mode Matrix (color) settings
38
Contents
Page 39

E. Advanced picture settings for Custom Mode
E1. Gamma and Color Settings In Custom Mode
In Custom Mode you have the ability to change many of
the cameras image quality settings including the Gamma
Curve and Color Matrix.
The gamma curve of the camera can be changed to alter
the contrast and dynamic range of the captured image
(MENU: Paint – Gamma).
Using dierent gamma curves can dramatically alter the
look of the recorded image. There is no requirement
to use any specific gamma curve. You should use the
gamma curve that provides what you regard as the best
looking images. It is worth experimenting with dierent
gamma curve settings to achieve dierent looks.
A gamma curve with a large dynamic range will capture
a larger scene brightness range but result in a flatter on
screen image. A gamma curve with a smaller dynamic
range will result in a higher contrast image but is only
capable of capturing a narrower scene brightness range
before the recorded image becomes over exposed.
39
Contents
Section Index
Page 40

E. Advanced picture settings for Custom Mode
E1.1 Suggested gamma settings
For shoots that take place under controlled lighting then
the standard default gamma curve (STD5 R709) provides
pleasing images with accurate contrast. For challenging
lighting situations the Hypergamma gamma curves (HG)
are very useful. If you are producing material that will
be used directly within a broadcast TV show then HG1 is
a good all round curve that is broadcast safe (does not
exceed 100%). For very bright scenes then HG2 may be
used.
For other productions where you do not need to ensure
you are broadcast safe then HG3 works well as a general
purpose curve and HG4 works well for very bright scenes.
(MENU: Paint – Gamma – Gamma Catorgory – HG) +
(MENU: Paint – Gamma – Gamma Select).
Note that if using zebras to check skin tone exposure you
should reduce the zebra 1 level to 60%.
(MENU: VF – Zebra – Zebra 1 Level).
40
Contents
Section Index
Page 41

E. Advanced picture settings for Custom Mode
E2. Gamma Categories
The PXW-FS7 Gammas are split in to 3 categories: STD/
HG/S-Log (MENU: Paint – Gamma – Gamma Category).
E2.1 STD
Standard Gamma. The gamma curves available under
this category are all variations on standard television
gamma. These curves will all provide realistic and true to
life contrast when viewed on a conventional TV or monitor.
However to comply with current television standards these
curves have a limited dynamic range. This means that the
scene brightness range that can be captured is restricted
to maintain compatibility with normal TV displays. STG
gamma curve STD5-R709 is the standard gamma for HD
TV production.
41
Contents
Section Index
Page 42

E. Advanced picture settings for Custom Mode
STD-R709 Gamma Curve
E2.2 HG
Hypergamma. These advanced gamma curves are
designed to capture a wider dynamic range than the
standard gammas with only a small reduction in on
screen contrast (normally the higher the cameras capture
dynamic range the lower the on screen contrast will be).
This is achieved through careful addition of a gradual
highlight roll o. The dierent curves oer dierent
dynamic ranges and as a result should be exposed slightly
dierently to standard gammas for the very best results.
42
Contents
Section Index
Page 43

E. Advanced picture settings for Custom Mode
The capture range and optimum exposure levels are
indicated in the full name of the hypergamma curve,
for example:
HG4609G40 = HG – 460 – 9 – G40, which indicates
HG(Hypergamma), with an over exposure range 460%
greater than standard TV gamma. Recording to 109%
(the other option being a “0” which indicates recording to
100%). G40 being the optimum exposure for a 18% middle
grey card of 40%.
In practice a Hypergamma with a lower “G” middle grey
number, G33, G30 etc will be better suited to brighter
scenes. A higher “G” number, G40 etc will be better suited
to darker scenes. A larger dynamic range 460 or 800 will
be good for high contrast scenes while a smaller dynamic
range (360) will be better suited to controlled lighting.
43
Contents
Section Index
Page 44

E. Advanced picture settings for Custom Mode
Hypergamma 1 Hypergamma 2
Hypergamma 3 Hypergamma 4
I find that Hypergamma 4 works very well for brighter
outdoor scenes while Hypergamma 3 works well for
indoor scenes. Hypergammas 7 and 8 are also very good
for challenging lighting situations.
E2.3 User
It is possible for advanced users to upload their own
gamma curves to the camera.
44
Contents
Section Index
Page 45

E. Advanced picture settings for Custom Mode
E2.4 S-Log2
You can use the S-log2 gamma curve in Custom Mode
to capture an extremely large scene brightness range
(14 stops or 1300%). This will result in a very flat on screen
image. The PXW-FS7 is primarily designed to use S-Log
recording in the Cine EI mode but the option is also
oered in Custom Mode to help deal with particularly
dicult lighting situations.
S-Log3: Like S-Log2 you can use the S-log3 gamma curve
in Custom Mode to capture an extremely large scene
brightness range (14 stops or 1300%). Note that the peak
recording level for S-log3 is 92%.
45
Contents
Section Index
Page 46

E. Advanced picture settings for Custom Mode
E3. Custom Mode Matrix Settings (Color adjustment)
The camera’s color reproduction can be adjusted by
making changes to the matrix settings.
(MENU: Paint – Matrix)
There are 5 preset matrix settings designed to give easy
access to a number of dierent color responses.
E3.1 Recommended settings
The standard color matrix works well for general purpose
acquisition. If you are shooting under florescent lights or
LED lights and you notice a green cast in your images the
you should use the FL Light matrix.
For a more film-like look you should use the Cinema
matrix. The Cinema matrix works very well when paired
with a Hypergamma (HG) gamma curve.
(MENU: Paint – Matrix – Preset Select).
46
Contents
Section Index
Page 47

E. Advanced picture settings for Custom Mode
Standard Matrix Standard Matrix
FL Light Matrix FL Light Matrix
Cinema Matrix Cinema Matrix
47
Contents
Section Index
Page 48

E. Advanced picture settings for Custom Mode
Combining a Hypergamma with the Cinema Matrix produces images
that are more film-like than the standard settings. In this example
Hypergamma HG3 is combined with the Cinema gamma.
E3.2 PXW-FS7 II and the Rec2020 Matrix
The FS7 includes an additional matrix that complies with
the new Rec2020 color standard. This standard allows for
the capture and display of a wider range of colors than
possible with Rec-709. Many recent TV’s have the ability
to reproduce the extended Rec-2020 color range.
If you are producing content that will be show on a
Rec-2020 display you should use the Rec-2020 matrix.
Do not use the Rec-2020 matrix if the material will be
shown on a conventional Rec-709 display as the colors
will be reproduced by a Rec-709 TV/Monitor incorrectly.
Contents
48
Section Index
Page 49

E. Advanced picture settings for Custom Mode
E3.3 The High Saturation matrix can be used to provide
vibrant colors for music or pop videos, but it must be
noted that in some cases strong colors in the scene you
are shooting will reach the maximum recording intensity
more quickly.
Hi Sat Matrix Hi Sat Matrix
49
Contents
Section Index
Page 50

E. Advanced picture settings for Custom Mode
The F55 709 Like matrix is designed to mimic the color
response of the Sony F55 camera. It provides vibrant
colors. This matrix can be used when trying to match
the pictures from an FS7 to a PMW-F55 that is shooting
Rec-709.
F55 709 Like Matrix F55 709 Like Matrix
50
Contents
Section Index
Page 51

F. Detailed guide to the Cine El Mode
F1. Using the Cine El Mode
The Cine EI mode is quite dierent to custom mode and
the way a conventional video camera works. In most
cases when used correctly the Cine EI mode will result in
superior images to custom mode.
When using the Cine EI mode first you must choose the
Color Space and log curve that you wish to use.
Recommendation: For most applications S-Gamut3.cine/
Slog3 works very well.
(MENU: System – Base Settings – Color Space).
51
Contents
Page 52

F. Detailed guide to the Cine El Mode
F1.1 Colorspace and S-Log2/S-Log3
In the Cine EI mode you have the ability to select one of 3
dierent color spaces and two dierent S-Log curves.
S-Gamut: The original Sony wide range color gamut.
Allows a wider than normal color range to be recorded
giving greater post production flexibility. Works in
conjunction with S-log2.
S-Gamut3: Revised wide range color gamut that provides
a similar color range to S-Gamut but with a color response
that is normally easier to grade than S-Gamut. Works with
S-Log3.
S-Gamut3.cine: Revised wide range color gamut with
improved color response. Not quite as wide as S-Gamut or
S-Gamut3 but still wider than can be reproduced by most
of todays TV and cinema displays. The slightly reduced
range makes this the easiest of the S-Gamuts to grade.
S-Gamut3.cine is recommended for most production
types. Works with S-log3.
52
Contents
Page 53

F. Detailed guide to the Cine El Mode
S-Log2: Sony’s second generation 14 stop log gamma
curve. Excellent dynamic range, using the cameras full
recording range. Can sometimes be tricky to grade well
without the use of LUT’s. This is the same curve as used in
Sony A7s.
S-Log3: 3
rd
generation 14 stop log curve very similar to the
“Cineon” standard used for digital film prints. Also very
similar to Arri’s LogC. Easy to grade (especially when used
with S-Gamut3.cine). Note that the peak recording level is
only 92%, the video levels never go above this in order to
match the Cineon and Arri curves.
Recommendation: Use S-Gamut3.cine and S-log3 unless
there are good reasons to use a dierent combination.
53
Contents
Page 54

F. Detailed guide to the Cine El Mode
F1.2 Exposing via an MLUT, suggested settings
Recommendation: Enable MLUT’s for SDI2, HDMI and
Viewfinder. Ensure that the MLUT is OFF for SDI1 & Internal
Rec. (MENU: Video – Monitor LUT).
Recommendation: Use LUT Category – LUT, LUT Select –
P1:709(800). (MENU: Video – Monitor LUT).
Recommendation: Set the Exposure Index switch settings
as follows:
(MENU: Camera – ISO/Gain/EI).
Exposure Index<H> 2000, Exposure Index<M> 800,
Exposure Index<L> 640.
Set the L/M/H gain/EI switch to M (800EI) for general
purpose shooting. Use H (2000EI) for very bright, high key
scenes with few shadows. Use L (640EI) for scenes with
few highlights where shadow information is important.
Expose by looking at the viewfinder image with the
MLUT applied. For the 709(800) MLUT use conventional
exposure levels, for example Zebra 1 at 70% for skin tones.
54
Contents
Page 55

F. Detailed guide to the Cine El Mode
MLUT operation is limited to ON or OFF for all outputs and
internal recording in each of the following situations: The
HDMI output is set to 4K/UHD. S&Q Motion is enabled.
Lens distortion compensation is set to AUTO
(MENU: System – Lens – Distortion Comp)
55
Contents
Page 56

F. Detailed guide to the Cine El Mode
F1.3 The Video Signal Monitor can be used to measure
either the MLUT level or the Internal Recording level.
I recommend measuring and monitoring the MLUT level
for the correct operation of the Cine EI mode
(MENU: VF – Video Signal Monitor – Source – SDI2)
Note that if the SDI output is disabled, selecting the source
as SDI2 will still allow you to monitor the MLUT levels as
seen in the viewfinder. The Video Signal Monitor source is
indicated just above the Video Signal Monitor.
The viewfinder image with the 709(800) MLUT applied, correctly
exposed. Note the indications for what is being recorded and what is
being measured by the Video Signal Monitor.
Contents
56
Page 57

F. Detailed guide to the Cine El Mode
F1.4 In the Cine EI mode the way you expose your footage
is dierent to custom mode. In order to obtain the
cameras full dynamic range the camera must record at it’s
native ISO of 2000.
In addition the exposure levels used by log gamma
curves are dierent to conventional gammas and the log
image will look flat and washed out when viewed on a
conventional monitor.
To make exposure and focusing easier you can apply
a MLUT (Monitor Look Up Table) to the viewfinder and/
or monitor to convert from the flat, dull looking S-Log2/3
image to a more normal looking image with more contrast
and better color. Then set your exposure by looking at the
image with the LUT applied rather than trying to expose
by looking at the S-Log recording.
When the LUT is correctly exposed, so too is the S-Log2 or
S-Log3 recording. For exposure the built in 709(800) LUT is
very good as this uses conventional video levels and it is
normally very obvious when the exposure is right. When
an MLUT or LUT is being used the cameras zebra function
measures the MLUT/LUT output. So if you wish to use
zebra’s for exposure assessment (when viewing via a LUT)
you should set and use the zebra function exactly as you
would for normal gamma curves.
Contents
57
Page 58

F. Detailed guide to the Cine El Mode
F1.5 One issue with most LUT’s is that the LUT cannot
show you your full recording range. There is however a
simple way to check the full range of the recordings by
using a function called “High/Low Key”.
Before you can use this function you must first assign
it to one of the cameras assignable buttons. I suggest
assigning it to button <2> the “Iris” button as this button
has no eect in the Cine EI mode.
MENU: System – Assignable Button - <2> - High/Low Key
Once assigned to a button, one press of the button will
show the “High” exposure range allowing you to view how
the highlights within the scene are being recorded. This is
an easy way to check for any highlight clipping issues. The
second press of the button will show the low key or darker
parts of the scene allowing you to see how well the camera
is seeing in to the deepest shadows. The third press of the
buttons returns to view to the LUT’s normal range.
58
Contents
Page 59

F. Detailed guide to the Cine El Mode
The viewfinder image with
709(800) MLUT applied. Looking at
this image you may be concerned
that the brightest highlights will
be recorded too bright. Using the
Hi Low Key function you can check
the highlight and shadow areas of
the image recorded image.
After the first press of the Hi Low
Key assigned button the MLUT is
darkened to allow you to check
for clipping in the brighter parts
of the image. As you can see
the highlights in the image are
not clipped so will be recorded
without clipping by the wide
range S-Log2 or S-Log3 recording.
Pressing the Hi Low Key button again brightens the MLUT image so you
can check the darker parts of the recording range.
Contents
59
Page 60

F. Detailed guide to the Cine El Mode
F1.6 Changing the exposure index (EI)
Changing the exposure index (by using the L/M/H switch)
changes the brightness of the LUT/MLUT. It has no direct
eect on the recordings, the camera continues to record at
it’s native 2000ISO.
However when you decrease the EI, for example selecting
an EI of 800 (the default L setting) the images seen via the
LUT become darker, the equivalent of changing the LUT’s
ISO to 800. In response to this darker image you would
now adjust the exposure by opening the aperture to
restore the LUT’d image back to a normal brightness.
This is the 709(800) MLUT
viewfinder image when exposed
This is the brightness of the S-Log3
recording when the EI is set to
correctly at 2000 EI.
Contents
60
2000 EI and the 709(800) MLUT is
exposed correctly.
Page 61

F. Detailed guide to the Cine El Mode
This is the 709(800) MLUT
viewfinder image after switching
the EI from 2000 EI to 640 EI with
no change to the aperture or
shutter speed. To compensate for
this dark image on the monitor or
in the viewfinder you should open
the aperture to compensate.
By opening the aperture the
brightness of the MLUT is restored
to a normal level.
Opening the aperture to compensate for a dark MLUT results is brighter
S-Log recording. This is often beneficial as after grading there will be
less noise in the image.
Contents
61
Page 62

F. Detailed guide to the Cine El Mode
As the cameras actual recording ISO has not changed
opening the aperture results in a brighter recorded image.
With conventional gammas this would be a problem
but with S-Log2/3 there is typically enough headroom in
reserve to cope with this deliberate over exposure. Don’t
forget, if you are concerned about highlight clipping you
can use the High/Low Key function to check for this.
When your recording is good and bright, in post
production the colorist will tend to reduce the brightness
of the scene for a natural looking picture. This post
production level reduction will also bring down the
noise levels within the pictures resulting in cleaner less
grainy images.
62
Contents
Page 63

F. Detailed guide to the Cine El Mode
The cameras total dynamic range does not change when
you adjust the EI. What you are doing is altering the mid
point of the dynamic range. Using a low EI results in a
brighter S-Log recording with a deeper shadow range but
reduce highlight range. Using a high EI (it is not normally
advisable to exceed 2000 EI) results in a reduced shadow
range but increased highlight range. you are shooting an
extremely bright scene where highlights are a concern
then you can use a high EI to give more over exposure
headroom. When you shoot with a high EI the images
scene via the LUT will be brighter than normal.
63
Contents
Page 64

F. Detailed guide to the Cine El Mode
F1.7 Correct Exposure When MLUT’s can’t be used
MLUT’s cannot always be used just for the viewfinder
or monitor when the camera is shooting in S&Q motion
or when the HDMI output is set to UHD. So in order to
expose correctly you must check the exposure level of the
S-Log2/3 images directly.
One of the easiest ways to do this is by using a dedicated
90% white card (available form most good photo/video
stores) or a piece of white paper to set the correct white
level. The cameras Zebra’s can be used to measure the
brightness of the white card or paper.
MENU: VF – Zebra – Setting – On
MENU: VF – Zebra – Zebra Select – 1
MENU: VF – Zebra1 Level – 59 (for S-Log2) 61 (for S-Log3)
MENU: VF - Zebra1 Aperture Level – 4%
Once the zebras are set as above simply place your white
card in the shot and adjust the exposure so that the
zebras appear across the white card. This will give the
correct recommended exposure.
If a white card is not available or practical skin tones can
be used as an alternative. In this case set the Zebra1 Level
to 53 for both S-Log2 and S-log3.
Contents
64
Page 65

G. Slow Motion, Time-lapse and picture cache
Section Index
1. Slow and Quick Motion (S&Q Motion)
2. Interval Record (Time Lapse)
3. Picture Cache Record
4. Imager Scan Mode
65
Contents
Page 66

G. Slow Motion, Time-lapse and picture cache
G1. Slow and Quick Motion – S&Q motion
S&Q motion allows the camera to shoot at a frame rate
that is faster or slower than the play back frame rate. By
shooting at a lower frame rate than the base frame rate
action can be sped up, by shooting at a higher frame rate
action can be slowed down. When shooting UHD or 4K
the camera can shoot at between 1fps and 60fps. When
set to HD the camera can record HFR (High Frame Rate)
slow motion footage at up to 180fps internally (240fps is
possible with the addition of the XDCA-FS7 and a suitable
external raw recorder).
No Audio is recorded when using S&Q motion.
66
Contents
Section Index
Page 67

G. Slow Motion, Time-lapse and picture cache
In order to use S&Q motion the XAVC-L or XAVC-I codec
must be selected
(MENU: System – Codec).
A progressive record format must be used (p) and
the base playback rate of any slow motion footage is
determined by the selected record format
(MENU: System – Rec Format).
To enable the S&Q mode press the assignable S&Q button
or turn it on in the menu
(MENU: Recording – S&Q Motion).
The frame rate can be set either via the menu or by
pressing and holding the S&Q button until the frame rate
selection menu appears and use the handgrip joystick or
SEL/SET dial to select the desired rate.
G1.1 To shoot at more than 60fps you must enable the
High Frame Rate mode in the menu
(MENU: Recording – S&Q Motion – High Frame Rate
Mode).
There are three options, O, Full Scan and Center Scan.
Contents
67
Section Index
Page 68

G. Slow Motion, Time-lapse and picture cache
G1.2 Full Scan
Uses the full sensor so there is no change to the field of
view. However due to the way the sensor is read when
shooting HFR, in certain circumstances there may be
unwanted artifacts in the footage such as colored
rainbow like patterns (moiré) or jagged edges in high
contrast areas.
G1.3 Center Scan
Uses only the center portion of the sensor. This eliminates
the unwanted artefacts that may be present in full
scan HFR, but results in a field of view 2x narrower than
achieved with Full Scan.
68
Contents
Section Index
Page 69

G. Slow Motion, Time-lapse and picture cache
G1.4 Recommendation: For the best image quality when
shooing HFR consider the use of Center Scan.
NOTE: When the camera country area is set to PAL area
the maximum frame rate in HD is 150fps. To shoot at
180fps the camera must be set to NTSC Area
(MENU: System – Country –NTSC/PAL Area).
For a comprehensive list of all the frame rates available
please refer to the user manual.
When using S&Q motion in Cine EI mode MLUT operation
is limited to either MLUT ON for all outputs and recording
or MLUT OFF for all outputs and recording.
69
Contents
Section Index
Page 70

G. Slow Motion, Time-lapse and picture cache
G2. Interval Record – Time lapse recording
Interval record can be used to capture frames at a preset
interval. The frames are then played back as a video
clip that significantly speeds up the action in the scene
recorded. You can shoot using 4K, UHD or HD.
In order to use Interval Record the XAVC-L, XAVC-I or MPEG
HD 422 codec must be selected
(MENU: System – Codec).
A progressive record format must be used (p) and the
playback rate of the footage is determined by the selected
record format
(MENU: System – Rec Format).
Interval record is enabled and set via the menu
(MENU: Recording – Interval Record)
or it can be assigned to an assignable button.
70
Contents
Section Index
Page 71

G. Slow Motion, Time-lapse and picture cache
G2.1 Recommendation: Set the Interval Time to 1 second
and the Number of Frames to 1. Increasing the number
of frames beyond 1 typically results in jerky motion. A 1
second interval works well for scenes up to 30 minutes
long, footage can always be sped up further in post
production if required. For longer shooting periods use a
longer interval.
Tip: Consider setting the shutter to 1/3 of a second or
to 360 degrees, especially when shooting night scenes
to add a pleasing blur to movement (If shooting during
daylight you may need addition ND filters to control the
exposure).
71
Contents
Section Index
Page 72

G. Slow Motion, Time-lapse and picture cache
G3. Picture Cache Record
Picture cache record can be used to make the camera
include a few seconds of video from the period
immediately prior to the press of the record button in
each clip. This can be very useful for recording unexpected
events. The maximum cache recording period is
dependent on the frame size, frame rate and recording
codec. Only the XAVC-I, XAVC-L and Mpeg2 HD422 codecs
can be used (XAVC-I 59.94p and 50p are not supported).
The cache duration is shorter in UHD/4K than in HD, so
if you need a long cache period consider shooting in HD
rather than UHD/4K
(MENU: Recording – Picture Cache Rec)
For a comprehensive list of the available cache durations
for each record mode please refer to the user manual.
72
Contents
Section Index
Page 73

G. Slow Motion, Time-lapse and picture cache
G4. Imager Scan Mode
When recording 4K or UHD the full camera sensor is
always used. However when shooting in HD it is possible
to choose whether to use the full sensor or just the center
2K portion of the sensor. Using just the center portion of
the sensor will have the eect of reducing the field of view
of the image shot, in eect enlarging the recorded image
by a factor of 2 compared to full sensor scan. It also allows
the use of lenses designed for use with 16mm film camera
(a lens mounting adapter may be required).
The imager scan size can be set in the menu
(MENU: System – Base Settings – Imager Scan Mode)
73
Contents
Section Index
Page 74

G. Slow Motion, Time-lapse and picture cache
G4.1 Recommendation: Use Normal Scan when possible
as it normally provides the best image quality. Use Center
Scan if you need to extend the eective focal length of
the lens.
When 2K Full Scan is selected
an “F” is added to the frame size
indication.
When 2K Center Scan is selected
a “C” is added to the frame
size indication. Note also how
compared to Normal Scan or 2K
Full Scan the image now appears
enlarged in by 2x.
74
Contents
Section Index
Page 75

H. Audio Recording
H1. Audio Recording
An external microphone should be connected to one or
both of the XLR inputs for the best results. However if
an external microphone is unavailable there is a small
microphone built in to the camera body. This Internal MIC
can be selected in the menu and recorded on to any of
the 4 audio channels
(MENU: Audio – Input Select).
H1.1 If you need to connect more than 2 external
microphones to the camera this can be achieved through
the use of a Multi-Interface (MI) input adapter or wireless
receiver connected to the MI Shoe (the front shoe on the
handle). Adapters to add extra XLR inputs as well as single
and dual channel wireless microphone receivers
are available.
75
Contents
Page 76

H. Audio Recording
H1.2 The correct input reference levels for the type
of external audio source you are using is selected by
switches on the right side of the camera body. In addition
if using an external microphone that requires +48V
Phantom Power this is enabled by selecting “Mic+48v”.
H1.3 The recording levels for audio channels 1 and 2 can
be controlled either automatically or manually using the
level control knobs on the left side of the camera body.
The recording levels for channels 3 and 4 can be set to
automatic or manual in the menu
(MENU: Audio – CH3 Level Control/Ch4 Level Control)
and (Audio – CH3 Input Level/CH4 Input Level).
76
Contents
Page 77

H. Audio Recording
H1.4 To view the audio level meters for all 4 audio
channels press the “Status” button and use the scroll
wheel to select the Audio display page. Press the status
button once more to turn o the status display pages.
If using manual audio control do not allow the audio levels
to go into the red part of the audio level meters, this will
result in distortion.
The Audio STATUS page allows you to view the levels of all
4 audio channels.
Contents
77
Page 78

I. Recording, media and troubleshooting
Section Index
1. Recording, Recording Media and Backups
2. Error messages and common problems
78
Contents
Page 79

I. Recording, media and troubleshooting
I1. Recording, Recording Media and File Backup
Always use approved XQD cards. Store unused media in a
case to prevent dust and debris from accumulating inside
the connector slot.
It is recommended that cards are formatted periodically to
maintain the best performance.
(MENU: Media – Format Media).
Never remove a card from the camera when the Red led
adjacent to the card slot is illuminated.
For additional security it is possible to record to
both XQD slots simultaneously
(MENU: Recording – Simul Rec).
Recording for both slots can be controlled by a single
record button or independently by the record button on
the camera body and the record button on the handle
(MENU: Recording – Simul Rec – Rec Button Set).
79
Contents
Section Index
Page 80

I. Recording, media and troubleshooting
When backing up media from the XQD cards to a
computer, hard drive or other storage it is important that
the entire contents of the card are copied retaining the
original file structure. The additional “sidecar” files on the
cards contain important metadata and other information
important for the correct decoding of the video clips. Use
a new folder to store the contents of each card backed up.
Do not attempt to merge files from multiple cards into one
folder (unless using Sony’s Catalyst Browse application to
manage your content).
80
Contents
Section Index
Page 81

I. Recording, media and troubleshooting
I2. Error Messages and common problems
Restore Media: If on switching on the camera or inserting
an XQD card you see the message “Restore Media”
do not worry. This is the camera performing routine
maintenance on the card to keep the file system tidy and
free from corruption. Always allow the camera to perform
the Restore Media function. It is not an error or fault, just
housekeeping.
Execute APR: After switching the camera on you may see
a message saying “Execute APR”. This is not an error or
malfunction. The APR function minimizes the appearance
of bright or dark sensor pixels and minimizes sensor noise.
Cover/cap the lens and press SEL/SET to execute the APR
function.
If you do not perform APR you will be reminded to
perform APR the next time the camera is turned on.
You should perform APR regularly to maintain the best
possible image quality.
Audio is not being recorded: When using S&Q motion or
Interval Record audio recording is not possible.
Contents
81
Section Index
Page 82

I. Recording, media and troubleshooting
Unable to enable MLUTS on the HDMI output in the
Cine EI mode: The MLUT can only applied to the HDMI
output if
(MENU: Video – Output Setting – HDMI Target)
is set to Monitor.
Unable to enable MLUTS for just SDI2, HDMI or the
Viewfinder: MLUT operation is limited to ON or OFF for
all outputs and internal recording in each of the following
situations: The HDMI output is set to 4K/UHD. S&Q Motion
is enabled. Lens distortion compensation is set to AUTO
(MENU: System – Lens – Distortion Comp).
Unable to view the Waveform, Vector or Histogram
in the Cine EI Mode: Both the SDI2/HDMI output and
Viewfinder MLUT settings must be the same.
Viewfinder Information overlays are not being
displayed: Press the “Display” button on the camera body
to turn the viewfinder and monitor overlays on and o.
System Reset: If the camera is not performing as
expected try a system reset to restore the factory defaults.
Contents
82
Section Index
Page 83

Index
A1. Introduction
B1. All Files: Saving the camera setup
C1. Choosing the right operating mode,
Custom Mode or Cine EI
C1.1 Overview of Custom mode
C1.2 Overview of Cine EI mode
D1. Preparing to shoot
D1.1 Setting the country area
D1.2 Choosing the right codec
D1.3 Setting the recording format
83
Contents Section Index
Page 84

Index
D2. The shutter and shutter speed
D2.1 Choosing between shutter speed or shutter angle
D2.2 Setting the shutter speed
D3. Setting the gain or ISO
D3.1 What is the dierence between gain and ISO
D3.2 Selecting gain or ISO
D4. White Balance in Custom Mode
D4.1 Preset White Balance
D4.2 Memory Mode White Balance
D5. White Balance in Cine EI mode
Contents Section Index
84
Page 85

Index
D6. Exposure, Waveform and Histogram
D6.1 Using Zebras
D6.2 Using the Waveform or Histogram
D7. Aperture/Iris control
D7.1 Iris in Custom Mode
D7.2 Iris in Cine EI Mode
D7.3 Getting a shallow depth of field for the filmic look
D8. The ND filter System
D8.1 The Variable ND filter on the FS7 II
D8.2 Auto ND filter on the FS7 II
85
Contents Section Index
Page 86

Index
D9. Focus and Focus Aids
D9.1 Auto Focus
D9.2 Auto Focus Detection Area
D9.3 Peaking
D9.4 Focus Indicator
D9.5 Focus Magnification
86
Contents Section Index
Page 87

Index
E1. Gamma and Color Settings in Custom Mode
E1.1 Suggested Gamma Settings
E2. Gamma Categories (Custom Mode)
E2.1 Standard Gamma
E2.2 Hypergamma
E2.3 User Gamma
E2.4 S-Log2 and S-Log3
E3. Custom Mode Matrix (color) settings
E3.1 Suggested Matrix settings
E3.2 The Rec-2020 matrix in the PXW-FS7 II
E3.3 Other Matrix settings
Contents Section Index
87
Page 88

Index
F1. Using the Cine EI Mode (in detail)
F1.1 Colorspace (Gamut) and S-Log2/S-Log3
F1.2 Suggested settings for using LUT’s and
exposing via an MLUT
F1.3 The Video Signal monitor in Cine EI mode
F1.4 Cine EI and MLUT’s explained
F1.5 The High/Low Key function
F1.6 Changing the Exposure Index
F1.7 Correct exposure when MLUT’s cannot be used
88
Contents Section Index
Page 89

Index
G1. Slow and Quick Motion (S&Q Motion)
G1.1 High Frame Rate (HFR) mode
G1.2 Full Scan
G1.3 Center Scan
G1.4 HFR recommendations and notes
G2. Interval Record (Time Lapse)
G2.1 Interval Record suggested settings and notes
G3. Picture Cache Record
G4. Imager Scan Mode
G4.1 Recommended scan mode setting
89
Contents Section Index
Page 90

Index
H1. Audio Recording
H1.1 Connecting more than 2 audio sources (MI Shoe)
H1.2 Setting the correct input levels
H1.3 Setting the recording levels
H1.4 Viewing the audio levels
I1. Recording, Recording Media and Backups
I2. Error messages and common problems
90
Contents
Page 91

©2017 Sony. All rights reserved. Reproduction in whole or in part
without written permission is prohibited.
Features and specifications are subject to change without notice.
Screen images are simulated.
Sony, XDCAM, Memory Stick, Memory Stick PRO, Memory Stick Duo,
Memory Stick PRO Duo, Memory Stick Micro, AVCHD, DV, DVCAM, HDV,
XAVC, Exmor, i.LINK, BRAVIA, alpha, XGA OLED TruFinder, SteadyShot,
InfoLITHIUM, and the Sony logo are trademarks of Sony.
WiFi is a trademark of the WiFi Alliance
HDMI is a trademark of HDMI Licensing, LLC.
All other trademarks are the properties of their respective owners.
91
 Loading...