

Sony PWS-100RX1, PWS-110RX1A, PWS-110RX1 Help Manual
Help Guide
NETWORK RX STATION
PWS-100RX1 / PWS-110RX1 / PWS-110RX1A Ver.1.11 or later
This guide describes a system for live streaming on the Internet using the PWS-100RX1.
It describes the required steps for connecting to a camcorder in the field, registering and configuring PWS-100RX1 units,
and starting streaming.
About model names in the Help Guide
This Help Guide applies to the PWS-100RX1, PWS-110RX1, and PWS-110RX1A. Functions that are common to all
models are described as belonging to the PWS-100RX1. All references to the PWS-100RX1 model apply equally to the
PWS-110RX1 and PWS-110RX1A models. Differences in functions according to the model are described separately for
each model.
Overview
Features
System Configuration Examples
Setup and Operation Flow
Starting and Exiting
Turning Devices On
Launching the Connection Control Manager Admin Screen
Importing a Certificate
Screen Description
Structure of the Streaming Screen
Structure of the File Transfer Screen
Structure of the Settings Screen
Receiver System Settings
Configuring Network Settings
Configuring Connection Control Manager Preferences
Registering Receivers
Configuring Connection Control Manager Receiver and Output Settings
Transmitter Device Settings
Setting the Wireless Adapter to Network Client Mode
1

4-746-464-14(1) Copyright 2015 Sony Corporation
Setting the Camcorder to Network Client Mode
Configuring XDCAM pocket
Streaming Operations
Starting Streaming
Displaying Shooting Locations on a Map
Displaying the Camcorder Control Screen
File Transfer Operations
Transferring Camcorder Clips to an FTP Server
Intercom Operations
Intercom Operations
Others
Adding Licenses
Supported Formats
Restrictions
Trademarks
2
Help Guide
NETWORK RX STATION
PWS-100RX1 / PWS-110RX1 / PWS-110RX1A Ver.1.11 or later
Features
This unit is a system for live streaming over a network. The PWS-100RX1 receives streaming video transmitted from a
shooting location using a camcorder which has a network function, and outputs SDI signals for live streaming.
You can also transfer video files (clips) stored on an SD card in the camcorder to an external FTP server using control
from a PWS-100RX1 unit.
The PWS-100RX1 is comprised by a Streaming Receiver that receives the streaming video, and a Connection Control
Manager that manages the connections between the camcorder and the unit. The Connection Control Manager has a
web GUI that can be displayed using a web browser on a client PC, and can be used to manage multiple connections
simultaneously.
Related Topic
System Configuration Examples
Supported Formats
4-746-464-14(1) Copyright 2015 Sony Corporation
3
Help Guide
NETWORK RX STATION
PWS-100RX1 / PWS-110RX1 / PWS-110RX1A Ver.1.11 or later
System Configuration Examples
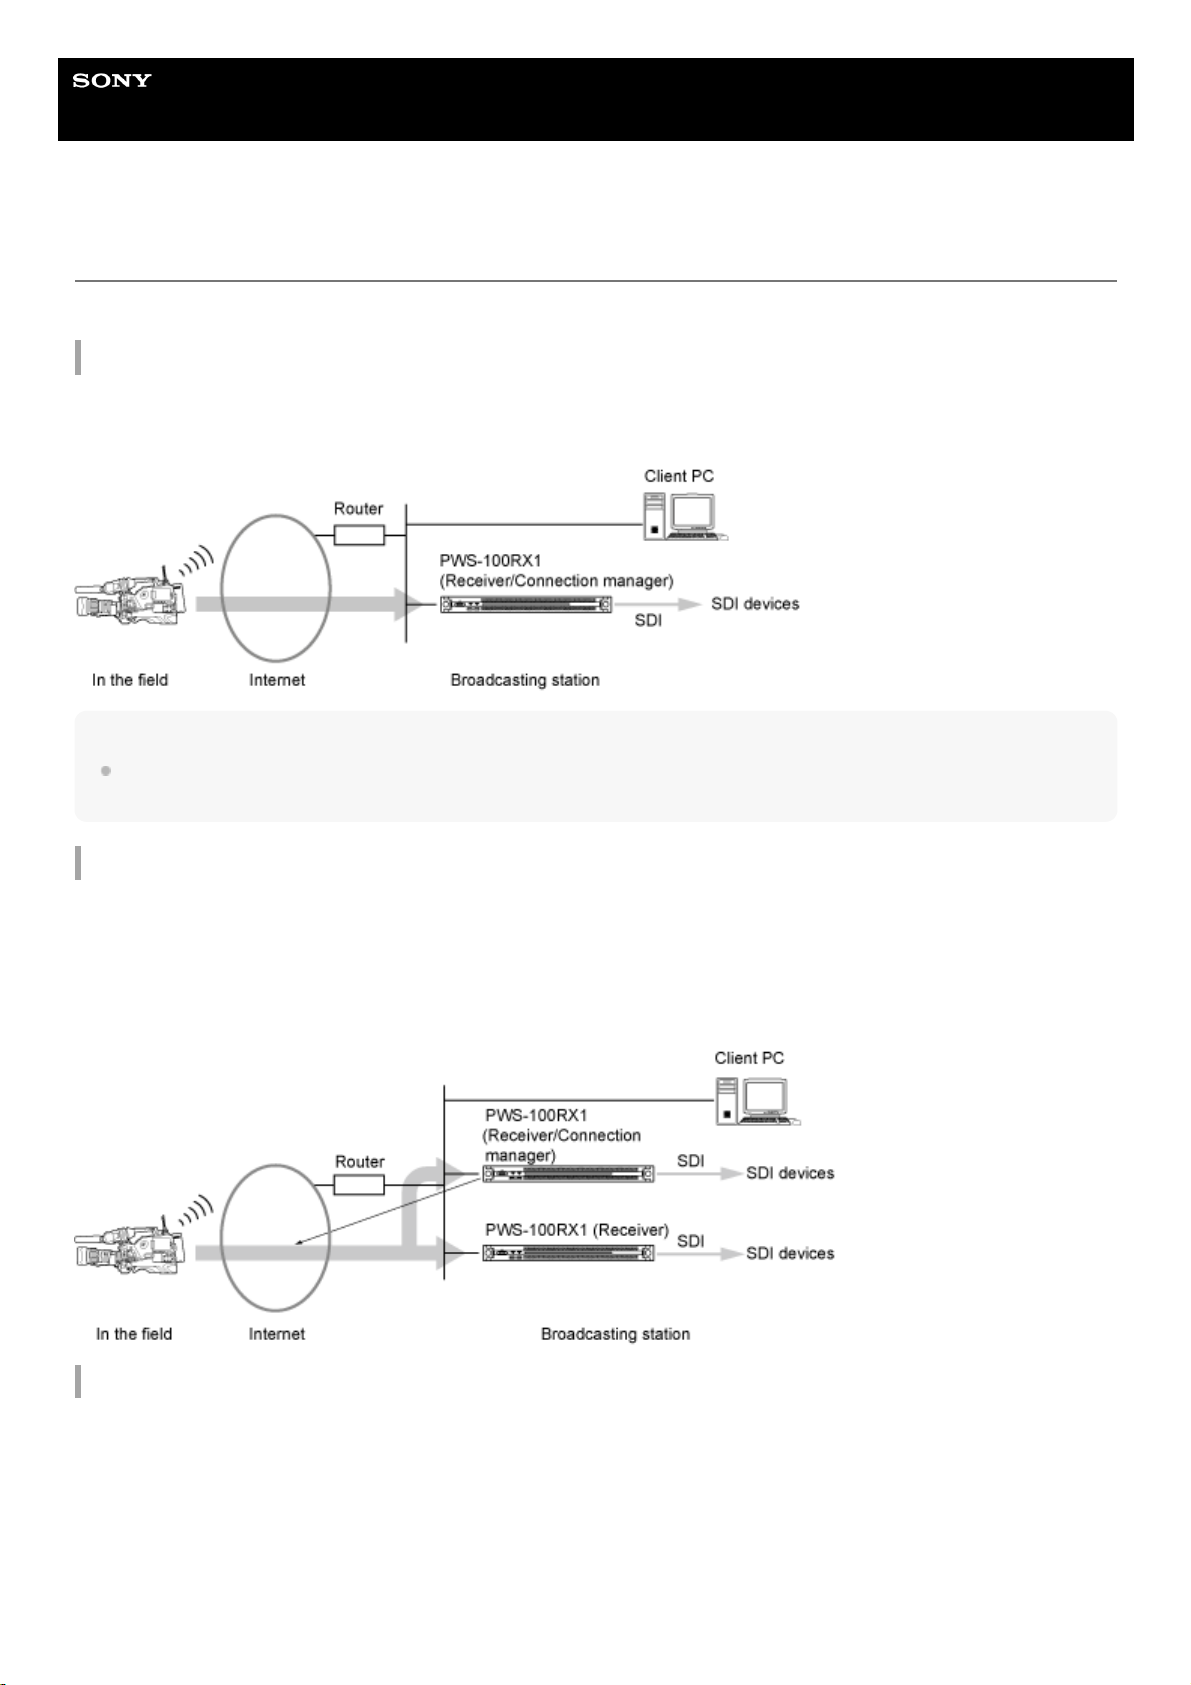
This topic shows live streaming system configuration examples using the PWS-100RX1.
Configuration using a single PWS-100RX1 unit
This shows a small-scale system using only one PWS-100RX1 unit. The PWS-100RX1 unit acts as both streaming
receiver and connection manager.
Note
To stream from a camcorder, a camcorder with a CBK-WA100/101 Wireless Adapter attached or a camcorder with network
functions is required. For details about supported camcorders, consult your Sony representative.
Configuration using multiple PWS-100RX1 units
Additional PWS-100RX1 units acting as streaming receivers can be used. The following configuration shows an example
with one PWS-100RX1 unit acting as both streaming receiver and connection manager, and another unit acting as a
streaming receiver.
When using a multiple unit configuration, control the units from a web browser on a client PC, and not the PWS-100RX1
units themselves.
When using XDCAM pocket
You can receive a stream from XDCAM pocket. A separate license is required to use XDCAM pocket.
4

When transferring files from camcorder to FTP server
You can transfer video files (clips) stored on an SD card in the camcorder to an FTP server. Configure the FTP server on
the same network as the PWS-100RX1 unit, as shown below.
When using an intercom
You can make calls between the broadcast station and units in the field using camcorders with an intercom function.
The audio interface is sold separately. For details about supported devices, refer to the Software Update Guide.
A separate license is required to use an intercom.
Saving video images during streaming to a file
Network storage connected to the same network as a PWS-100RX1 unit can be used to store video images during
streaming.
When storing video images during streaming, control the unit from a web browser on a client PC, and not the PWS100RX1 unit itself.
5

Related Topic
Features
4-746-464-14(1) Copyright 2015 Sony Corporation
6

Help Guide
NETWORK RX STATION
PWS-100RX1 / PWS-110RX1 / PWS-110RX1A Ver.1.11 or later
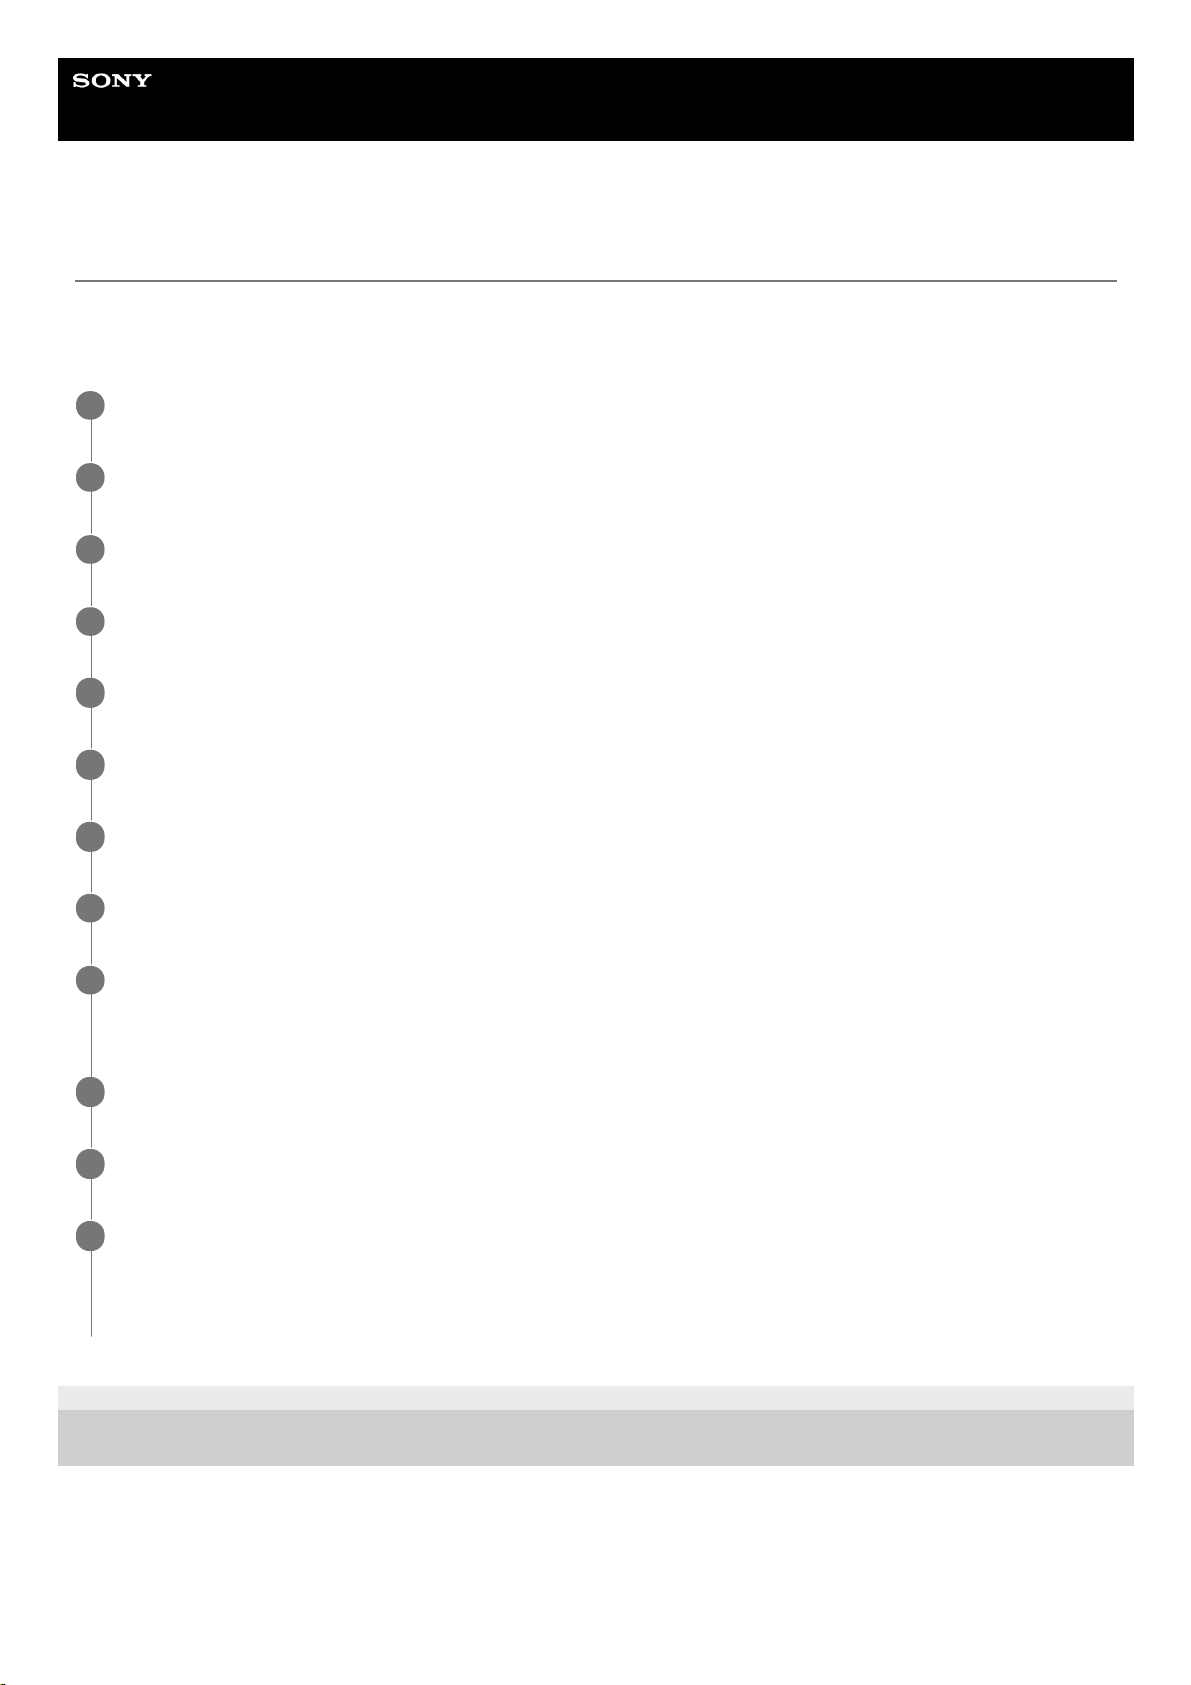
Setup and Operation Flow
Perform setup and operation in the following sequence to use this system. If using XDCAM air, the unit and transmitting
devices must be registered in XDCAM air beforehand. For details about registering, refer to the XDCAM air Setup Guide.
4-746-464-14(1) Copyright 2015 Sony Corporation
Setup
1
Configuring Network Settings
Configure the required network settings to connect the PWS-100RX1 units installed within a broadcasting
station with the camcorders in the field or with XDCAM pocket.
1.
Configuring Connection Control Manager Preferences
Configure the preferences on one PWS-100RX1 unit within the system to function as the Connection Control
Manager.
2.
Registering Receivers
Register the PWS-100RX1 units that will start Streaming Receiver in the Connection Control Manager using
the Initialization Tool.
3.
Configuring Connection Control Manager Receiver and Output Settings
Launch the Connection Control Manager admin screen, and configure the streaming output settings.
4.
Operation in the field
Setting the Wireless Adapter to Network Client Mode
When shooting using a camcorder with a wireless adapter attached, set the wireless adapter to network client
mode.
Setting the Camcorder to Network Client Mode
When shooting using a network-enabled camcorder, set the camcorder to network client mode.
Configuring XDCAM pocket
When using XDCAM pocket, start XDCAM pocket on a smartphone.
2
Operation at the broadcasting station
3
Launching the Connection Control Manager Admin Screen
Log in to the Connection Control Manager from a web browser on a client PC that is connected to the same
network as the PWS-100RX1 that is running the Connection Control Manager.
1.
Starting Streaming
Start streaming distribution of video received from the camcorder in the field using the Connection Control
Manager.
2.
7

Help Guide
NETWORK RX STATION
PWS-100RX1 / PWS-110RX1 / PWS-110RX1A Ver.1.11 or later
Turning Devices On
Use the following procedure to turn on the power when using the PWS-100RX1.
To turn the power off
Press and hold the PWS-100RX1 On/Standby button for two seconds or longer. The PWS-100RX1 enters standby state,
and the On/Standby button indicator lights up red.
Note
There is no power switch on the PWS-100RX1. The unit is in either standby state or on state when the power cord is connected.
The power can be completely turned off by disconnecting the power cord, but first check that the On/Standby button indicator is lit
red before removing the power cord.
To ensure security, make sure to change the default password.
If prompted to change the password when signing in, set a new password.
Related Topic
Launching the Connection Control Manager Admin Screen
4-746-464-14(1) Copyright 2015 Sony Corporation
When configuring PWS-100RX1 preferences, connect a keyboard and mouse to the USB connectors on the
front panel, and connect a monitor to the HDMI connector on the rear panel.
This step can be skipped once the preferences have been configured on the PWS-100RX1. Check that the unit is
connected correctly to the network.
1
Press the PWS-100RX1 On/Standby button.
The On/Standby button indicator lights up green.
2
When the Windows sign-in screen appears on the display, enter the user name and password to sign in.
The factory default user name is “rx1” and the default password is “rx1”. If the user name and password were
changed during preferences configuration, enter the new user name and password.
3
8

Help Guide
NETWORK RX STATION
PWS-100RX1 / PWS-110RX1 / PWS-110RX1A Ver.1.11 or later
Launching the Connection Control Manager Admin Screen
Use the following procedure on a client PC connected to the same network as the system to connect to the Connection
Control Manager.
Logging out from the Connection Control Manager admin screen
Click [Logout] on the Streaming screen. The login screen appears.
Note
When accessing the system from a web browser, an SSL authentication message may be displayed. In this case, execute the
procedure described in “Importing a Certificate” to import a certificate.
The maximum number of users that can be logged in simultaneously is three.
To ensure security, make sure to change the user name and password.
Related Topic
Starting Streaming
4-746-464-14(1) Copyright 2015 Sony Corporation
Launch a web browser (Google Chrome 64 or later).
1
Enter “https://<PWS-100RX1_IP_address>:443” or “https://<PWS-100RX1_host_name>:443” in the address
field.
2
Enter the user name and password to log in.
The factory default user name is “Admin” and the default password is “123456”. You must change the password the
first time you log in.
After logging in, the Streaming screen of the Connection Control Manager appears.
3
9
Help Guide
NETWORK RX STATION
PWS-100RX1 / PWS-110RX1 / PWS-110RX1A Ver.1.11 or later
Importing a Certificate
When accessing the system from a web browser, an SSL authentication message may be displayed. If using a client PC,
use the following procedure on the client PC. The following procedure is applicable to Windows. For details about
importing a certificate, refer to the manual for the corresponding OS.
4-746-464-14(1) Copyright 2015 Sony Corporation
Temporarily close all browsers.
1
Copy the certificate file (C:\CCM-Server\ca.crt) on the PWS-100RX1 to any location on the client PC.
2
On the client PC, double-click the copied certificate file (ca.crt).
3
Click the [Install Certificate…] button.
4
Turn the [Local Machine] radio button on.
5
Click the [Next] button.
6
If the User Account Control dialog appears, click the [Yes] button.
7
Turn the [Place all certificates in the following store] radio button on.
8
Click the [Browse…] button.
The Select Certificate Store dialog appears.
9
Select [Trusted Root Certification Authorities], and click the [OK] button.
10
Click the [Next] button, then click the [Finish] button.
11
Register the PWS-100RX1 host name in the hosts file (C:\Windows\System32\drivers\etc\hosts).
You can check the host name by running the hostname command from the command prompt of the PWS-100RX1.
After registering, check that you can access “https://<PWS-100RX1_host_name>:443”.
12
10
Help Guide
NETWORK RX STATION
PWS-100RX1 / PWS-110RX1 / PWS-110RX1A Ver.1.11 or later
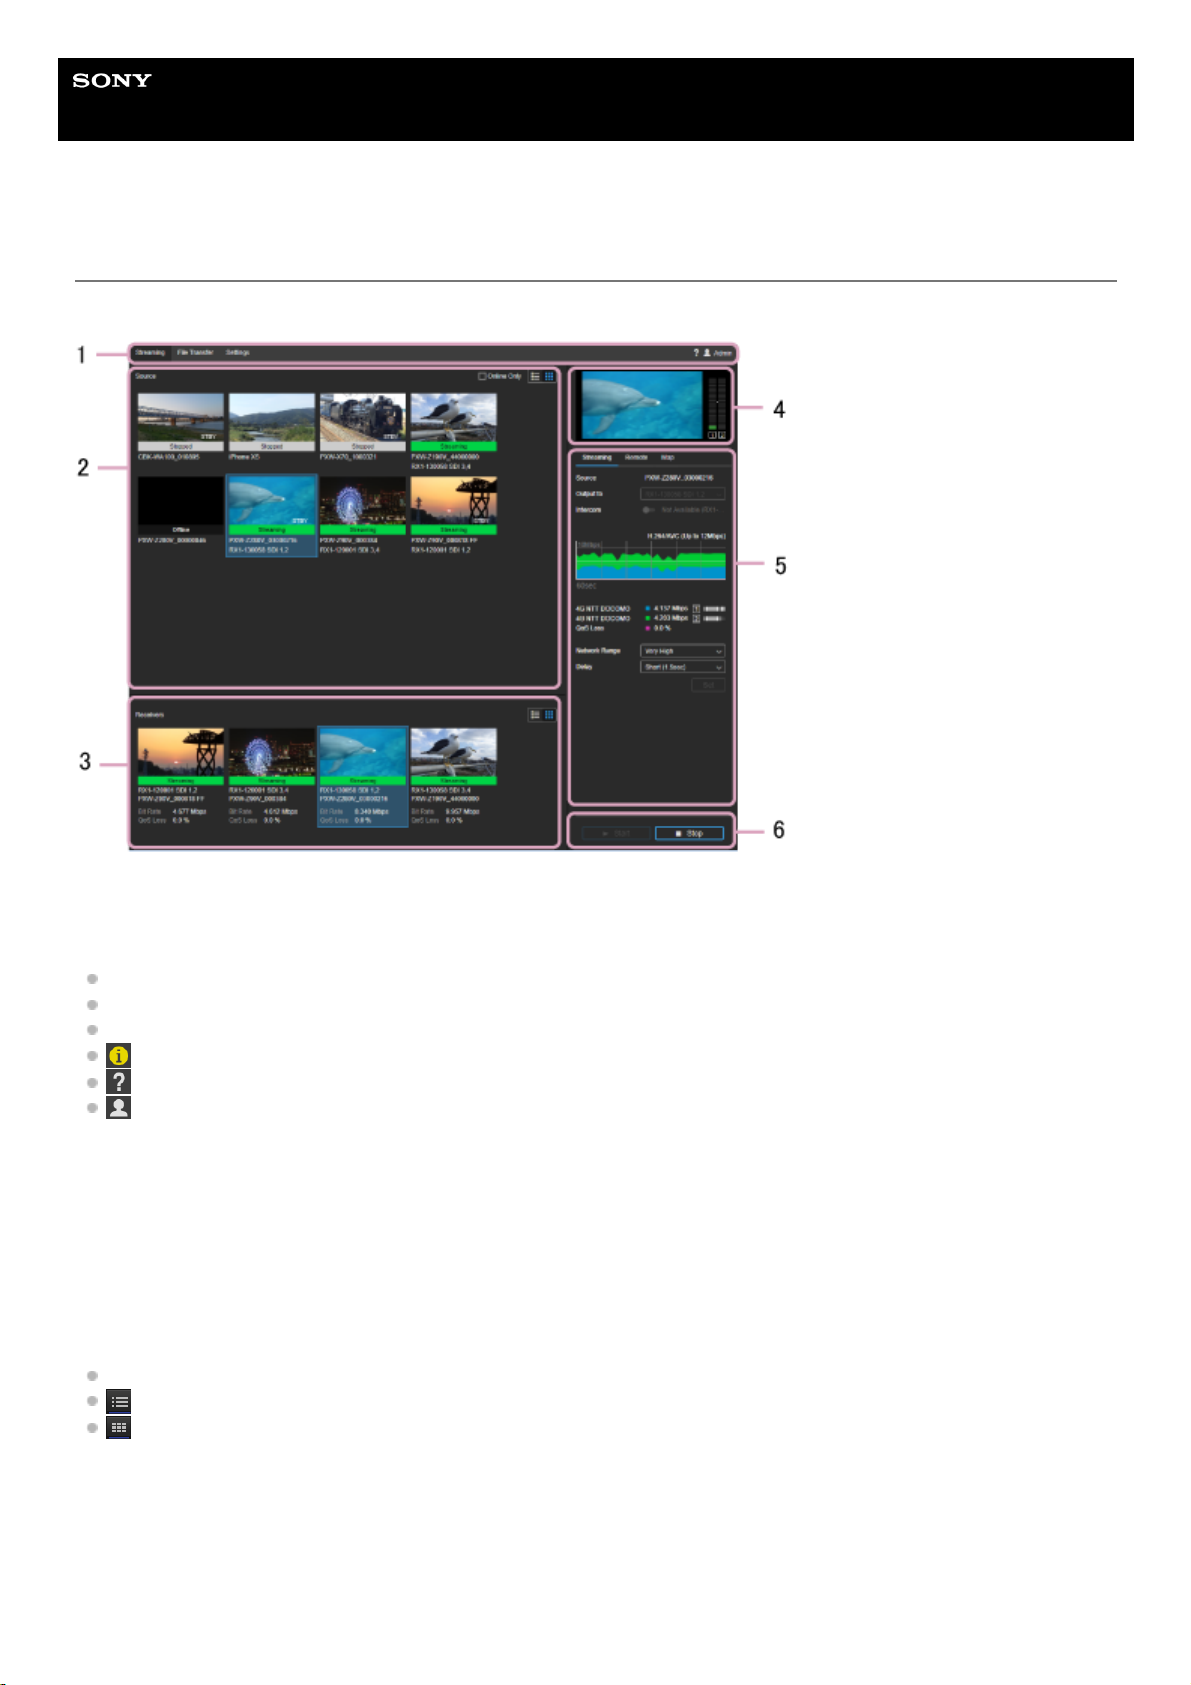
Structure of the Streaming Screen
The Streaming screen displays the devices that perform streaming and controls for starting/stopping streaming.
1. Global header
Click the tabs and icons to move between screens.
Streaming: Displays the Streaming screen.
File Transfer: Displays the File Transfer screen.
Settings: Displays the Settings screen.
(Notifications): Displays license status warnings.
(Help): Displays the Help and EULA.
(user name): Logs the user out.
2. Source area
Displays the streaming output devices in thumbnail view or list view.
In thumbnail view, thumbnails, streaming status (Streaming/Unstable/Stopped/Reserved/Disabled/Offline), names of
transmitting devices (camcorder model or XDCAM pocket), and names of receiving devices (PWS-100RX1 units) are
displayed. The transmitting device recording status ([REC] for recording, [STBY] for standby) is also displayed above the
thumbnails.
In list view, only the names of transmitting devices and names of receiving devices are displayed.
Online Only checkbox: Displays online devices only.
button: Displays the devices in list view.
button: Displays the devices in thumbnail view.
3. Receiver area
Displays the streaming receiving devices in thumbnail view or list view.
In thumbnail view, thumbnails, streaming status (Streaming/Unstable/Stopped/Reserved/Offline), names of transmitting
devices (camcorder model or XDCAM pocket), names of receiving devices (PWS-100RX1 units), bit rate, and streaming
11

loss rate are displayed. A icon is displayed above the thumbnails when streaming video is saved to a file on the
PWS-100RX1 side.
In list view, only the names of transmitting devices and names of receiving devices are displayed.
button: Displays the devices in list view.
button: Displays the devices in thumbnail view.
4. Preview area
Displays a preview of the streaming content from the device selected in the Source area.
Note
There is short delay between the display of the preview display and the SDI output.
The preview display refresh time differs from that of the SDI output.
5. Settings area
Configures streaming settings for the selected source.
Streaming tab
Source: Displays the name of the streaming device.
Output to: Selects the PWS-100RX1 or SDI port streaming output destination. Cannot be modified while streaming is
in progress.
Intercom: Turns the intercom function on/off. It also displays the status of the intercom function. For details about the
status, see “Intercom Operations.”
Graph: Displays the variation in the bit rate, streaming loss rate, and codec.
Carrier: Displays the name of the network carrier used for communication with the camcorder and the bit rate. The
information displayed varies depending on the connected camcorder and camcorder status.
QoS Loss: Displays the streaming loss rate.
Network Range: Selects the streaming resolution and maximum bit rate. [Very High], [High], [High (F)], [High (R)],
[Middle], [Low], or [Very Low] can be selected. The values available for selection vary depending on the connected
camcorder and camcorder status.
Target Bit Rate: Selects the target bit rate when [Target Bit Rate Setting] is set on the [CCM] tab. The bit rate options
available for selection varies according to the [Network Range] setting.
Delay: Selects the streaming delay time. [Short (1.5sec)], [Middle (3sec)], [Long (5sec)], or [Very Long (10sec)] can
be selected (the displayed delay time is an estimate, and may vary from the actual delay time).
Set button: Applies changes to the [Network Range], [Target Bit Rate], and [Delay] settings.
Remote tab
Note
Each function is enabled only for supported camcorders.
The displayed buttons, switches, and control panels vary depending on the connected camcorder.
Camera Control switch: Enables remote control of the camcorder.
Proxy REC switch: Sets whether to record a proxy file on the camcorder.
Map tab
Note
This function is enabled only for supported camcorders.
Show Location button: Displays the current location of the camcorders on a map.
6. Streaming control area
Controls streaming operation.
12
 Loading...