

Page 1
EN
System Monitoring
METER CONNECTION BOX
Installation Guide
METERBOX-IEN110611 | 98-0027111 | Version 1.1
Page 2

Page 3

SMA Solar Technology AG Table of Contents
Table of Contents
1 Information on this Manual. . . . . . . . . . . . . . . . . . . . . . . . . 5
1.1 Validity . . . . . . . . . . . . . . . . . . . . . . . . . . . . . . . . . . . . . . . . . . . . 5
1.2 Target Group . . . . . . . . . . . . . . . . . . . . . . . . . . . . . . . . . . . . . . . 5
1.3 Symbols Used . . . . . . . . . . . . . . . . . . . . . . . . . . . . . . . . . . . . . . . 5
2 The Meter Connection Box . . . . . . . . . . . . . . . . . . . . . . . . . 6
3 Safety . . . . . . . . . . . . . . . . . . . . . . . . . . . . . . . . . . . . . . . . . . 7
3.1 Appropriate Usage. . . . . . . . . . . . . . . . . . . . . . . . . . . . . . . . . . . 7
3.2 Safety Instructions . . . . . . . . . . . . . . . . . . . . . . . . . . . . . . . . . . . . 8
4 Unpacking. . . . . . . . . . . . . . . . . . . . . . . . . . . . . . . . . . . . . . . 8
4.1 Scope of Delivery . . . . . . . . . . . . . . . . . . . . . . . . . . . . . . . . . . . . 8
4.2 Identifying the Product . . . . . . . . . . . . . . . . . . . . . . . . . . . . . . . . 9
4.2.1 Type Label. . . . . . . . . . . . . . . . . . . . . . . . . . . . . . . . . . . . . . . . . . . . . . . . . . . . .9
4.2.2 Firmware Version and Hardware Version. . . . . . . . . . . . . . . . . . . . . . . . . . . . .9
5 Mounting. . . . . . . . . . . . . . . . . . . . . . . . . . . . . . . . . . . . . . . 10
5.1 Selecting the Mounting Location. . . . . . . . . . . . . . . . . . . . . . . . 10
5.2 Mounting the Meter Connection Box on the Wall . . . . . . . . . . 10
5.3 Mounting the Meter Connection Box on the Top-Hat Rail . . . . 12
6 Electrical Connection . . . . . . . . . . . . . . . . . . . . . . . . . . . . . 14
6.1 Device Overview . . . . . . . . . . . . . . . . . . . . . . . . . . . . . . . . . . . 14
6.2 LED Overview . . . . . . . . . . . . . . . . . . . . . . . . . . . . . . . . . . . . . . 14
6.3 Connecting the Meter Connection Box to the RS485
Communication Bus . . . . . . . . . . . . . . . . . . . . . . . . . . . . . . . . . 15
6.4 Terminating the Meter Connection Box . . . . . . . . . . . . . . . . . . 17
6.5 Connecting the Meter Connection Box to an Energy Meter. . . 17
Installation Guide METERBOX-IEN110611 3
Page 4

Table of Contents SMA Solar Technology AG
7 Commissioning . . . . . . . . . . . . . . . . . . . . . . . . . . . . . . . . . . 18
7.1 Connecting the Meter Connection Box to the Power Supply . . 18
7.2 Detecting the Meter Connection Box with the
Sunny WebBox. . . . . . . . . . . . . . . . . . . . . . . . . . . . . . . . . . . . . 18
7.3 Setting the Meter Connection Box Parameters . . . . . . . . . . . . . 18
8 Maintenance and Care . . . . . . . . . . . . . . . . . . . . . . . . . . . 19
8.1 Maintenance. . . . . . . . . . . . . . . . . . . . . . . . . . . . . . . . . . . . . . . 19
8.2 Care . . . . . . . . . . . . . . . . . . . . . . . . . . . . . . . . . . . . . . . . . . . . . 19
9 Decommissioning . . . . . . . . . . . . . . . . . . . . . . . . . . . . . . . . 20
9.1 Disassembling the Meter Connection Box . . . . . . . . . . . . . . . . 20
9.2 Packaging the Meter Connection Box . . . . . . . . . . . . . . . . . . . 20
9.3 Disposing of the Meter Connection Box . . . . . . . . . . . . . . . . . . 20
10 Troubleshooting . . . . . . . . . . . . . . . . . . . . . . . . . . . . . . . . . 21
11 Parameter Overview . . . . . . . . . . . . . . . . . . . . . . . . . . . . . 22
11.1 Display Values . . . . . . . . . . . . . . . . . . . . . . . . . . . . . . . . . . . . . 22
11.2 Adjustable Parameters . . . . . . . . . . . . . . . . . . . . . . . . . . . . . . . 23
12 Technical Data . . . . . . . . . . . . . . . . . . . . . . . . . . . . . . . . . . 25
12.1 Meter Connection Box . . . . . . . . . . . . . . . . . . . . . . . . . . . . . . . 25
12.2 Plug-in Power Supplies . . . . . . . . . . . . . . . . . . . . . . . . . . . . . . . 26
12.2.1 CINCON, TRG30R 120. . . . . . . . . . . . . . . . . . . . . . . . . . . . . . . . . . . . . . . . 26
12.2.2 TaiyTech, TYT251200200UV/3000 . . . . . . . . . . . . . . . . . . . . . . . . . . . . . . 26
12.2.3 TaiyTech, TYT251200200EU/3000 . . . . . . . . . . . . . . . . . . . . . . . . . . . . . . 27
13 Contact . . . . . . . . . . . . . . . . . . . . . . . . . . . . . . . . . . . . . . . . 28
4 METERBOX-IEN110611 Installation Guide
Page 5
SMA Solar Technology AG Information on this Manual
1 Information on this Manual
1.1 Validity
This manual is valid for the Meter Connection Box from hardware version A and firmware version 1.0
and higher.
1.2 Target Group
This manual is intended for installers.
1.3 Symbols Used
The following types of safety precautions and general information appear in this document:
DANGER!
DANGER indicates a hazardous situation which, if not avoided, will result in death or
serious injury.
WARNING!
WARNING indicates a hazardous situation which, if not avoided, could result in death or
serious injury.
CAUTION!
CAUTION indicates a hazardous situation which, if not avoided, could result in minor or
moderate injury.
NOTICE!
NOTICE indicates a situation that can result in property damage if not avoided.
Information
Information provides tips that are valuable for the optimal installation and operation of
your product.
Installation Guide METERBOX-IEN110611 5
Page 6

The Meter Connection Box SMA Solar Technology AG
2 The Meter Connection Box
The Meter Connection Box records meter pulses from an energy meter and supplies the data to the
Sunny WebBox from SMA Solar Technology AG. The data can be used to display the energy
consumption, grid feed-in and self-consumption. Depending on the requirements, the Meter
Connection Box can be connected, as displayed, to one of three energy meter types:
• Option 1: Connection to the PV yield meter
• Option 2: Connection to the feed-in meter
• Option 3: Connection to the grid consumption meter
The data is displayed by SMA communication products. The communication is carried out via RS485.
The voltage is supplied by a plug-in power supply.
*
*
PV = photovoltaics
6 METERBOX-IEN110611 Installation Guide
Page 7
SMA Solar Technology AG Safety
3 Safety
3.1 Appropriate Usage
The Meter Connection Box allows the meter pulses of an energy meter to be transmitted exclusively
to the Sunny WebBox.
Only connect the Meter Connection Box to energy meters that meet the requirements specified in the
technical data (see "Requirements for Energy Meters" (page26)).
Information on Sealed Energy Meters
If the energy meter that you would like to connect to the Meter Connection Box is sealed,
contact your electric utility company. Never remove the seal on the energy meter without
consulting your electric utility company!
Information on Connecting the Unit to Bi-directional Meters
If you would like to connect the Meter Connection Box to a bi-directional meter, make sure
that the bi-directional meter has galvanically isolated S0 interfaces.
Information on the Energy Meter LEDs
The energy meter's S0 LED only outputs the pulse value half as fast as the energy meter's
pulse LED.
Do Not Use the Meter Connection Box's Meter Pulses for Billing Purposes
You cannot use the meter pulses recorded by the Meter Connection Box to prepare
electricity invoices for the responsible electric utility company. The meter pulses of the
respective energy meter are still critical for electricity invoicing purposes.
Permissible Number of Devices:
• You can connect a maximum of 1 Meter Connection Box to 1 energy meter.
• You can connect a maximum of 3 Meter Connection Boxes to 1 Sunny WebBox.
Only use the Meter Connection Box exclusively for the purposes described in this manual. The
warranty becomes void if the Meter Connection Box is opened or modified.
The Meter Connection Box is intended for private and industrial use. Only use the Meter Connection
Box in the field of application specified in the technical data. Carefully read this manual before you
commission the Meter Connection Box. Keep this manual in a convenient place for future reference.
Installation Guide METERBOX-IEN110611 7
Page 8

Unpacking SMA Solar Technology AG
3.2 Safety Instructions
Information in order to avoid injury to persons:
• Risk of lethal electric shock as a result of incorrect working on electrical devices.
– All work on the inverter may only be carried out by an electrically skilled person.
4 Unpacking
4.1 Scope of Delivery
Check the scope of delivery for compl eteness and for any vis ible damage. Please contact your dealer
if the scope of delivery is not complete or you find any damage.
Item Quantity Description
A 1 Meter Connection Box
B 1 Installation guide
C 1 RS485 cabling plan poster
D 1 Plug-in power supply with 4 adapters
E 3 Plugs (1 x 2-pole, 2 x 4-pole)
F 1 Termination resistor (120 Ω)
G2 Conductive adhesive films
H1 Shield clamp
I2 Screw anchors
K2 Screws
L1 Bracket
M1 Clip
N1 Screw
8 METERBOX-IEN110611 Installation Guide
Page 9

SMA Solar Technology AG Unpacking
4.2 Identifying the Product
4.2.1 Type Label
You can identify the Meter Connection Box using the type label. The type label is on the bottom of
the device.
4.2.2 Firmware Version and Hardware Version
The Meter Connection Box's firmware and hardware version are displayed as parameters on the user
interface of the Sunny WebBox.
Installation Guide METERBOX-IEN110611 9
Page 10
Mounting SMA Solar Technology AG
5 Mounting
5.1 Selecting the Mounting Location
Observe the following requirements regarding the mounting location:
• The Meter Connection Box is only suitable for indoor installation.
• The mounting location must be in the vicinity of a socket-outlet.
• The maximum cable length between the Meter Connection Box and energy meter may not
exceed 3 meters.
• The maximum cable length of the RS485 communication bus may not exceed 1 200 meters.
• The Meter Connection Box can be mounted horizontally or vertically.
5.2 Mounting the Meter Connection Box on the Wall
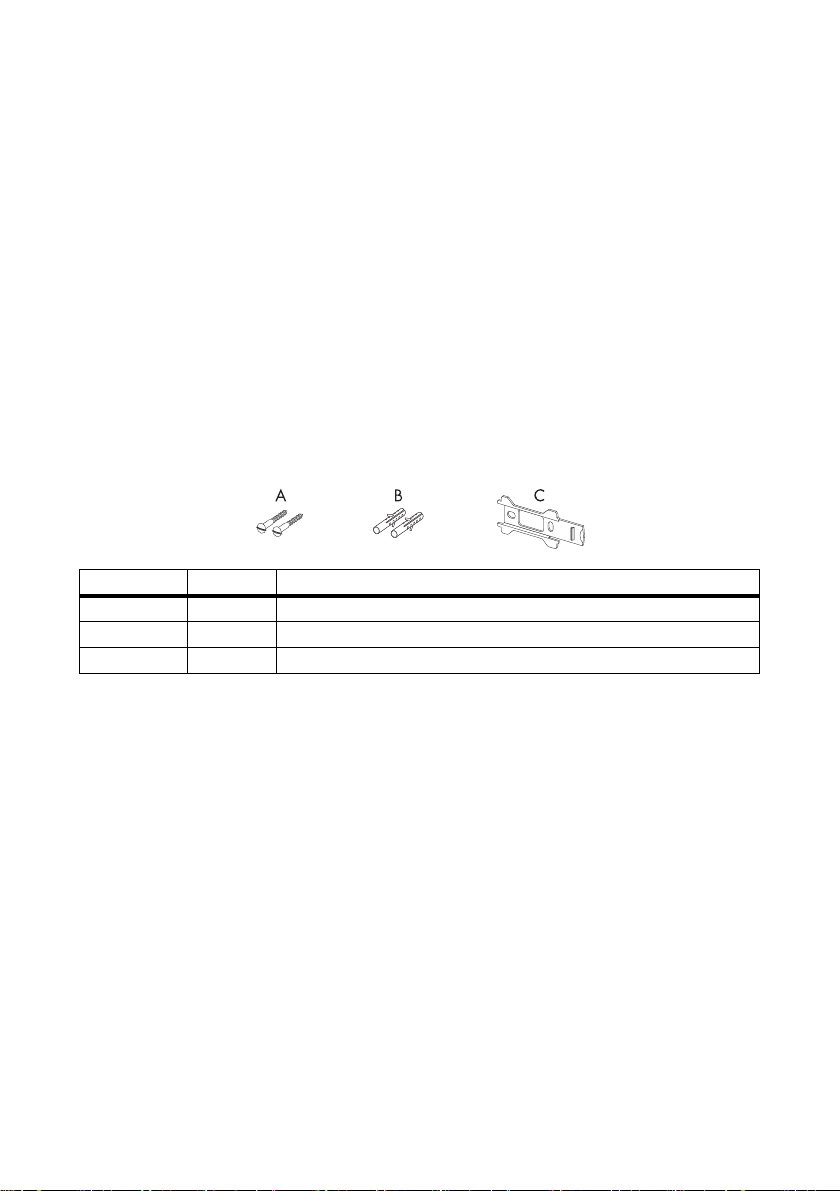
Included Mounting Accessories
Item Quantity Description
A2Screws
B2Screw anchors
C1Bracket
1. Select the mounting location taking into consideration the requirements for the mounting
location.
10 METERBOX-IEN110611 Installation Guide
Page 11

SMA Solar Technology AG Mounting
2. Check the minimum distances using the following illustration and mark the drill hole positions.
3. Drill holes with a 6 mm diameter and attach the wall mounting bracket to the wall using the
screws and the screw anchors.
4. Slide the Meter Connection Box into the bracket as illustrated here.
☑ The Meter Connection Box is mounted.
Installation Guide METERBOX-IEN110611 11
Page 12

Mounting SMA Solar Technology AG
5.3 Mounting the Meter Connection Box on the Top-Hat Rail
Included Mounting Accessories
Item Quantity Description
A1Bracket
B1Screw
C1Clip
1. Select the mounting location taking into consideration the requirements for the mounting
location.
2. Fasten the clip to the bracket using the screw as displayed.
The unit can be mounted vertically or horizontally. Make sure to fasten the clip accordingly.
3. Fasten the bracket on the top-hat rail as displayed. The illustration shows how the unit is
arranged when installed vertically.
12 METERBOX-IEN110611 Installation Guide
Page 13

SMA Solar Technology AG Mounting
4. Slide the Meter Connection Box into the bracket as illustrated here.
☑ The Meter Connection Box is mounted.
Installation Guide METERBOX-IEN110611 13
Page 14

Electrical Connection SMA Solar Technology AG
6 Electrical Connection
6.1 Device Overview
Item Description Meaning
A"RS485" Terminal for the RS485 communication bus
B"Power" Connection for the plug-in power supply
C"Ready""Ready" LED for the power supply
D"Pulse""Pulse" LED for transmitting measurement data using meter pulses
E"S0" S0 terminal
6.2 LED Overview
"Ready" LED (green)
Status Meaning
Flashes Communication is now taking place via the RS485
communication bus.
Glows continuously Voltage is ok.
"Pulse" LED (yellow)
Status Meaning
Flashes Normal operation
Meter pulses are being received from the energy meter.
Glows continuously Energy meter is not being read out
No meter pulses are being received from the energy meter.
Depending on the energy meter type connected (see page 23),
this means:
• no energy consumption
• no grid feed-in
•no PV yield
14 METERBOX-IEN110611 Installation Guide
*
Page 15

SMA Solar Technology AG Electrical Connection
"Pulse" LED (yellow)
Status Meaning
Permanently off Energy meter is not being read out*
No meter pulses are being received from the energy meter.
Depending on the energy meter type connected (see page 23),
this means:
• no energy consumption
• no grid feed-in
•no PV yield
*
If meter pulses are being received from the energy meter and the "Pulse" LED is still glowing continuously or is permanently off,
refer to section 10"Troubleshooting" (page21).
6.3 Connecting the Meter Connection Box to the RS485 Communication Bus
Item Description
ASunny WebBox
BInverter
C Meter Connection Box
D Energy meter
Information on the RS485 Cabling
See the RS485 cabling plan poster for information on RS485 cabling.
1. Remove 4 cm of the cable sleeve.
2. Shorten the cable shield to 1.5 cm.
Installation Guide METERBOX-IEN110611 15
Page 16

Electrical Connection SMA Solar Technology AG
3. If the Meter Connection Box is in the center of the RS485 communication bus:
• Pull back the cable shield and cover with
conductive adhesive film. This is where the shield
clamp will be attached later.
4. Shorten the insulated conductors not required
down to the cable sleeve.
5. Strip approx. 6 mm off the wires.
6. Connect the insulated conductors to the 4-pole plug.
7. Write down the color of the insulated conductors.
Symbol Signal Meter Connection Box
Terminal for the RS485
Insulated conductor
color
RS485
communication bus
communication bus
GND 5 5
Data+ 2 2
Data − 7 7
8. Insert the plug in the Meter Connection Box in one
of the two terminals for the RS485 communications
bus.
9. Connect the other end of the cable to the RS485 communication bus.
See the RS485 cabling plan poster for the connection layout and system wiring.
10. If the Meter Connection Box is in the center of the RS485 communication bus:
• Push the shield clamp on the cable shield on both cables.
☑ The Meter Connection Box is now connected to the RS485 communication bus.
16 METERBOX-IEN110611 Installation Guide
Page 17

SMA Solar Technology AG Electrical Connection
6.4 Terminating the Meter Connection Box
You only have to terminate the Meter Connection Box if
it is located on one of two ends of the RS485
communication bus.
1. In ser t the res ist or provi ded in the pi ns 2 and 7 of the
4-pole plug.
2. Insert the plug in the unused terminal of the Meter
Connection Box for the RS485 communications bus.
☑ The Meter Connection Box is terminated.
6.5 Connecting the Meter Connection Box to an Energy Meter
Maximum Cable Length: 3 m
The maximum cable length of 3 m may not be exceeded.
Cabling Recommendations
You can also use the RS485 communication cable to connect the Meter Connection Box
to the energy meter.
1. Remove 4 cm of cable sleeve.
2. Shorten the insulated conductors not required.
3. Strip approx. 6 mm off the insulated conductors.
4. Connect the insulated conductors to the 2-pole plug.
5. Write down the color of the insulated conductors.
Meter Connection Box
S0 terminal
++ (e.g. +ve)
−− (e.g. −ve)
6. Insert the plug in the Meter Connection Box's "S0"
terminal.
7. Connect the other end of the cable to the energy
meter.
☑ The Meter Connection Box is connected to the
energy meter.
Installation Guide METERBOX-IEN110611 17
Insulated conductor color Energy meter's pulse output
Page 18

Commissioning SMA Solar Technology AG
7 Commissioning
7.1 Connecting the Meter Connection Box to the Power Supply
NOTICE!
Damage to the Meter Connection Box caused by an incorrect plug-in power
supply.
The Meter Connection Box can be damaged by technically unsuitable plug-in power
supplies.
• Use only the plug-in power supply designated for the Meter Connection Box.
1. Connect all devices to the RS485 communication bus.
2. Insert the plug-in power supply's plug in the Meter Connection Box's "Power" terminal.
3. Insert the plug-in power supply plug into a socket-outlet.
☑The "Ready" LED glows green and the Meter Connection Box has voltage. The Meter
Connection Box starts. The start-up will take approximately 20 seconds.
–If the "Ready" LED is not on, see section 10"Troubleshooting" (page21).
☑ The Meter Connection Box is connected to the power supply. The Meter Connection Box is
ready to sent data to the Sunny WebBox.
7.2 Detecting the Meter Connection Box with the Sunny WebBox
1. Connect the Meter Connection Box to the power supply.
2. Detect the Meter Connection Box with the Sunny WebBox as a device as described in the
Sunny WebBox's manual.
7.3 Setting the Meter Connection Box Parameters
The Meter Connection Box's parameters are set on the user interface of the Sunny WebBox. To do
this, follow the Sunny WebBox manual. The adjustable parameters are described in the section
11.2"Adjustable Parameters" (page23).
18 METERBOX-IEN110611 Installation Guide
Page 19

SMA Solar Technology AG Maintenance and Care
8 Maintenance and Care
8.1 Maintenance
• Regularly check the Meter Connection Box for external damage or dirt.
• If a component is defective or no longer meets safety requirements, replace the device or cable.
NOTICE!
Do not repair the Meter Connection Box yourself.
If the Meter Connection Box is defective, do not repair it yourself.
• Send the Meter Connection Box for repairs to SMA Solar Technology AG.
8.2 Care
NOTICE!
Damage to the device due to ingress of liquids.
The Meter Connection Box is not water-proof; no liquids may enter the device.
• When cleaning the device, only use a lightly damp cloth in order to prevent water
from entering the device. If there is a considerable amount of dirt, you can also use
a mild, non-abrasive and non-corrosive cleaning agent.
Installation Guide METERBOX-IEN110611 19
Page 20

Decommissioning SMA Solar Technology AG
9 Decommissioning
9.1 Disassembling the Meter Connection Box
1. Securely hold the Meter Connection Box in place and remove all plugs.
2. Remove the Meter Connection Box from the bracket as displayed.
3. Remove the bracket.
4. Remove the insulated connectors from the plugs.
5. Remove the device's cable connections from the other devices as described in the device's
respective manual.
6. If the Meter Connection Box is in the middle of the RS485 communication bus, it must be
ensured that the remaining devices are still connected via the RS485 communication bus and
that all cables are connected.
7. If the Meter Connection Box is the last device connected to the RS485 communication bus,
terminate the device that is now the last device connected to the RS485 communication bus
instead of the Meter Connection Box.
☑ The Meter Connection Box is decommissioned.
9.2 Packaging the Meter Connection Box
For reshipment, use a transport-secure packaging - if possible the original packaging.
9.3 Disposing of the Meter Connection Box
At the end of its service life, dispose of the Meter Connection Box in accordance with the currently
applicable disposal regulations for electronic waste at the installation location. Alternatively, send it
back at your expense to SMA Solar Technology AG labeled "ZUR ENTSORGUNG" ("For Disposal").
20 METERBOX-IEN110611 Installation Guide
Page 21

SMA Solar Technology AG Troubleshooting
10 Troubleshooting
Problem Cause Rectification
The "Ready" LED is
continuously off.
The "Pulse" LED is
continuously on.
The "Pulse" LED is
continuously off.
There is no voltage. Check the supply voltage and
The voltage is too low.
There is a short circuit in the
S0 terminal.
No meter pulses are being received
from the energy meter.
plug-in power supply.
Check wiring.
Check wiring.
Installation Guide METERBOX-IEN110611 21
Page 22

Parameter Overview SMA Solar Technology AG
11 Parameter Overview
11.1 Display Values
The display values are displayed on the computer using the Sunny WebBox. The display values are
read only.
Name Description
*
OpTM
**
PacPV
PacFeed-In
**
PacConsumption
ResetCount
ImpPV
ImpFeed-In
*
*) **)
*) **)
ImpConsumption
**
kWhPV
kWhFeed-In
**
kWhConsumption
FwVer Firmware version
HwVer Hardware version
SN Serial number
*
This display value is only visible when you are logged on to the Sunny WebBox as "Installer". To do this, follow the
Sunny WebBox manual.
**
This display value is reset to the value "0" if you select another energy meter type for the adjustable parameter "DeviceType"
(see page 23).
Number of operating hours
Calculated current output of the corresponding energy meter type
**
Quantity of resets (restarts)
Number of the pulses of the corresponding energy meter type
**
Energy consumption in kWh of the corresponding energy meter type
**
22 METERBOX-IEN110611 Installation Guide
Page 23

SMA Solar Technology AG Parameter Overview
11.2 Adjustable Parameters
The adjustable parameters are displayed on the computer using the Sunny WebBox. The adjustable
parameters can be changed on the user interface of the Sunny WebBox.
Name Description Value/Range Explanation Default
value
DevNam Name of the Meter
Connection Box
You can enter up to 32
characters. The following
characters can be used:
A-Z a-z 0-9 _ - + * #
(space). Unknown characters
*
DevRs
DeviceType Selects the energy meter type PV-Generation PV yield meter is
SmaNetBd
S0 Edge
S0 Impuls/
kWh
S0 Offset Meter reading of the energy
*
This parameter is only visible when you are logged on to the Sunny WebBox as "Installer". To do this, follow the Sunny WebBox
manual.
**
This parameter is only visible and adjustable when you are logged on to the Sunny WebBox in Service mode.
are replaced by spaces.
Restart
Restarts the Meter
Connection Box
0Restart off0
> 0 The unit is being
restarted
selected
GridFeed-In PV feed-in meter is
selected
GridConsumption Grid consumption
meter is selected
**
Sets the baud rate 1 200 1 200 baud
*
Evaluates the energy meter's
signal
Rising Edge Rising edge is
evaluated
Falling Edge Falling edge is
evaluated
Number of energy meter
pulses per kWh
meter
The Meter Connection Box's
meter reading must be
adjusted to the meter reading
of the energy met er. You must
enter product of the meter
reading multiplied by 100
(e.g. to obtain 10.25 kWh,
you must enter 1 025).
0
Installation Guide METERBOX-IEN110611 23
Page 24

Parameter Overview SMA Solar Technology AG
Information on the Parameter "S0 Pulse/kWh"
This p arameter is res et to the value " 0" and th e Mete r Conne ction Box s tops co unting if y ou
select another energy meter type for the adjustable parameter "DeviceType"
(see page 23).
• If you have selected another energy meter type, enter the value for the parameter
"S0 pulse/kWh" that corresponds to the S0 interface of the selected energy meter
(see type label of the selected energy meter).
Information on the Parameter "S0 Offset"
This parameter is reset to the value "0" if you select another energy meter type for the
adjustable parameter "DeviceType" (see page 23). If you wish, enter the meter reading of
th e ne wly sel ect ed e ner gy m ete r ty pe h ere. If y ou d o no t en ter the meter reading, the Meter
Connection Box begins to count again with the value "0".
24 METERBOX-IEN110611 Installation Guide
Page 25

SMA Solar Technology AG Technical Data
12 Technical Data
12.1 Meter Connection Box
Mechanical Data
Width x height x depth 102 mm x 30 mm x 54 mm
Weight 80 g
Mounting location Indoors
Mounting type Top-hat rail / wall mounting bracket
Status display LEDs
Connections
Sunny WebBox 4-pole spring-type terminal
Inverter 4-pole spring-type terminal
Energy meter 2 pole spring-type terminal
Power Supply
Power supply Plug-in power supply
Input voltage 12V…24VDC ±10%
Typical power consumption 1 W
Environmental Conditions During Operation
Ambient temperature – 20 °C … + 65 °C
Relative humidity 5 % … 95 %, non condensing
Degree of protection IP20
Altitude above mean sea level (MSL) 0 m … 2 000 m
Ambient Conditions During Storage/Transport
Ambient temperature − 40 °C … +70 °C
Relative humidity 10 % … 95 %, non condensing
Altitude above mean sea level (MSL) 0 m … 2 000 m
Communication
Data logger RS485
Inverter RS485
Maximum range 1 200 m
Installation Guide METERBOX-IEN110611 25
Page 26

Technical Data SMA Solar Technology AG
Range of Usage
Maximum number of devices that can be
operated for each energy meter
Maximum number of devices that can be
operated for each Sunny WebBox
1
3
Requirements for Energy Meters
Minimum pulse duration 30 ms
Recommended minimum pulse value 1 000 pulses/kWh
S0 interface DIN EN 62053-31 class A
12.2 Plug-in Power Supplies
12.2.1 CINCON, TRG30R 120
Mechanical Data
Width x height x depth 107.8 mm x 57.5 mm x 33.5 mm
Weight 300 g
Power Supply
Voltage 100 V − 240 V AC, 50 / 60 Hz
Nominal current 0.8 A
12.2.2 TaiyTech, TYT251200200UV/3000
Mechanical Data
Width x height x depth 92.0 mm x 58.0 mm x 41.4 mm
Weight 244 g
Power Supply
Voltage 100 V − 240 V AC, 50 / 60 Hz
Nominal current 0.75 A
26 METERBOX-IEN110611 Installation Guide
Page 27

SMA Solar Technology AG Technical Data
12.2.3 TaiyTech, TYT251200200EU/3000
Mechanical Data
Width x height x depth 92.0 mm x 90.6 mm x 36.0 mm
Weight 128 g
Power Supply
Voltage 100 V − 240 V AC, 50 / 60 Hz
Nominal current 0.75 A
Installation Guide METERBOX-IEN110611 27
Page 28

Contact SMA Solar Technology AG
13 Contact
If you have technical problems concerning our products, contact the SMA Serviceline. We need the
following information in order to provide you with the necessary assistance:
• inverter serial number and type
• serial number and firmware version of the Sunny WebBox
• serial number and firmware version of the Meter Connection Box
SMA Solar Technology AG
Sonnenallee
34266 Niestetal, Germany
www.SMA.de
SMA Serviceline
Inverters: +49 561 9522 1499
Communication: +49 561 9522 2499
Fax: +49 561 9522 4699
E-Mail: Serviceline@SMA.de
28 METERBOX-IEN110611 Installation Guide
Page 29

SMA Solar Technology AG Legal Restrictions
The information contained in this document is the property of SMA Solar Technology AG. Publishing its content, either partially or
in full, requires the written permission of SMA Solar Technology AG. Any internal company copying of the document for the
purposes of evaluating the product or its correct implementation is allowed and does not require permission.
Exclusion of liability
The general terms and conditions of delivery of SMA Solar Technology AG shall apply.
The content of these documents is continually checked and amended, where necessary. However, discrepancies cannot be
excluded. No guarantee is made for the completeness of these documents. The latest version is available online at www.SMA.de
or from the usual sales channels.
Guarantee or liability claims for damages of any kind are excluded if they are caused by one or more of the following:
• Damages during transportation
• Improper or inappropriate use of the product
• Operating the product in an unintended environment
• Operating the product whilst ignoring relevant, statutory safety regulations in the deployment location
• Ignoring safety warnings and instructions contained in all documents relevant to the product
• Operating the product under incorrect safety or protection conditions
• Altering the product or supplied software without authority
• The product malfunctions due to operating attached or neighboring devices beyond statutory limit values
• In case of unforeseen calamity or force majeure
The use of supplied software produced by SMA Solar Technology AG is subject to the following conditions:
• SMA Solar Technology AG rejects any liability for direct or indirect damages arising from the use of software developed by
SMA Solar Technology AG. This also applies to the provision or non-provision of support activities.
• Supplied software not developed by SMA Solar Technology AG is subject to the respective licensing and liability agreements
of the manufacturer.
SMA Factory Warranty
The current guarantee conditions come enclosed with your device. These are also available online at www.SMA.de and can be
downloaded or are available on paper from the usual sales channels if required.
Trademarks
All trademarks are recognized even if these are not marked separately. Missing designations do not mean that a product or brand
is not a registered trademark.
The Bluetooth
Solar Technology AG is under license.
SMA Solar Technology AG
Sonnenallee 1
34266 Niestetal
Germany
Tel. +49 561 9522-0
Fax +49 561 9522-100
www.SMA.de
E-Mail: info@SMA.de
© 2004 to 2011 SMA Solar Technology AG. All rights reserved
®
wor d mark an d logos a re registe red trad emarks own ed by Blu etoo th SIG , Inc. an d any use of such mar ks by SMA
Installation Guide METERBOX-IEN110611 29
Page 30

Page 31

Page 32

XXX4."4PMBSDPN
4."4PMBS5FDIOPMPHZ
4."4PMBS5FDIOPMPHZ"(
XXX4."EF
4.""NFSJDB--$
XXX4.""NFSJDBDPN
4."5FDIOPMPHZ"VTUSBMJB1UZ-UE
XXX4.""VTUSBMJBDPNBV
4."#FOFMVY413-
XXX4."#FOFMVYDPN
4."#FJKJOH$PNNFSDJBM$P-UE
XXX4."$IJOBDPN
4."$[FDI3FQVCMJDTSP
XXX4."$[FDIDPN
4."'SBODF4"4
XXX4."'SBODFDPN
4.")FMMBT"&
XXX4.")FMMBTDPN
4."*C©SJDB5FDOPMPHB4PMBS4-
XXX4."*CFSJDBDPN
4."*UBMJB4SM
XXX4."*UBMJBDPN
4."5FDIOPMPHZ,PSFB$P-UE
XXX4.",PSFBDPN
 Loading...