

Page 1
PERSONAL CARE
4
KOMPERNASS GMBH
BURGSTRASSE 21 · D-44867 BOCHUM
www.kompernass.com
ID-Nr.: SNHT 1.5 A1-02/11-V1
IAN: 63709
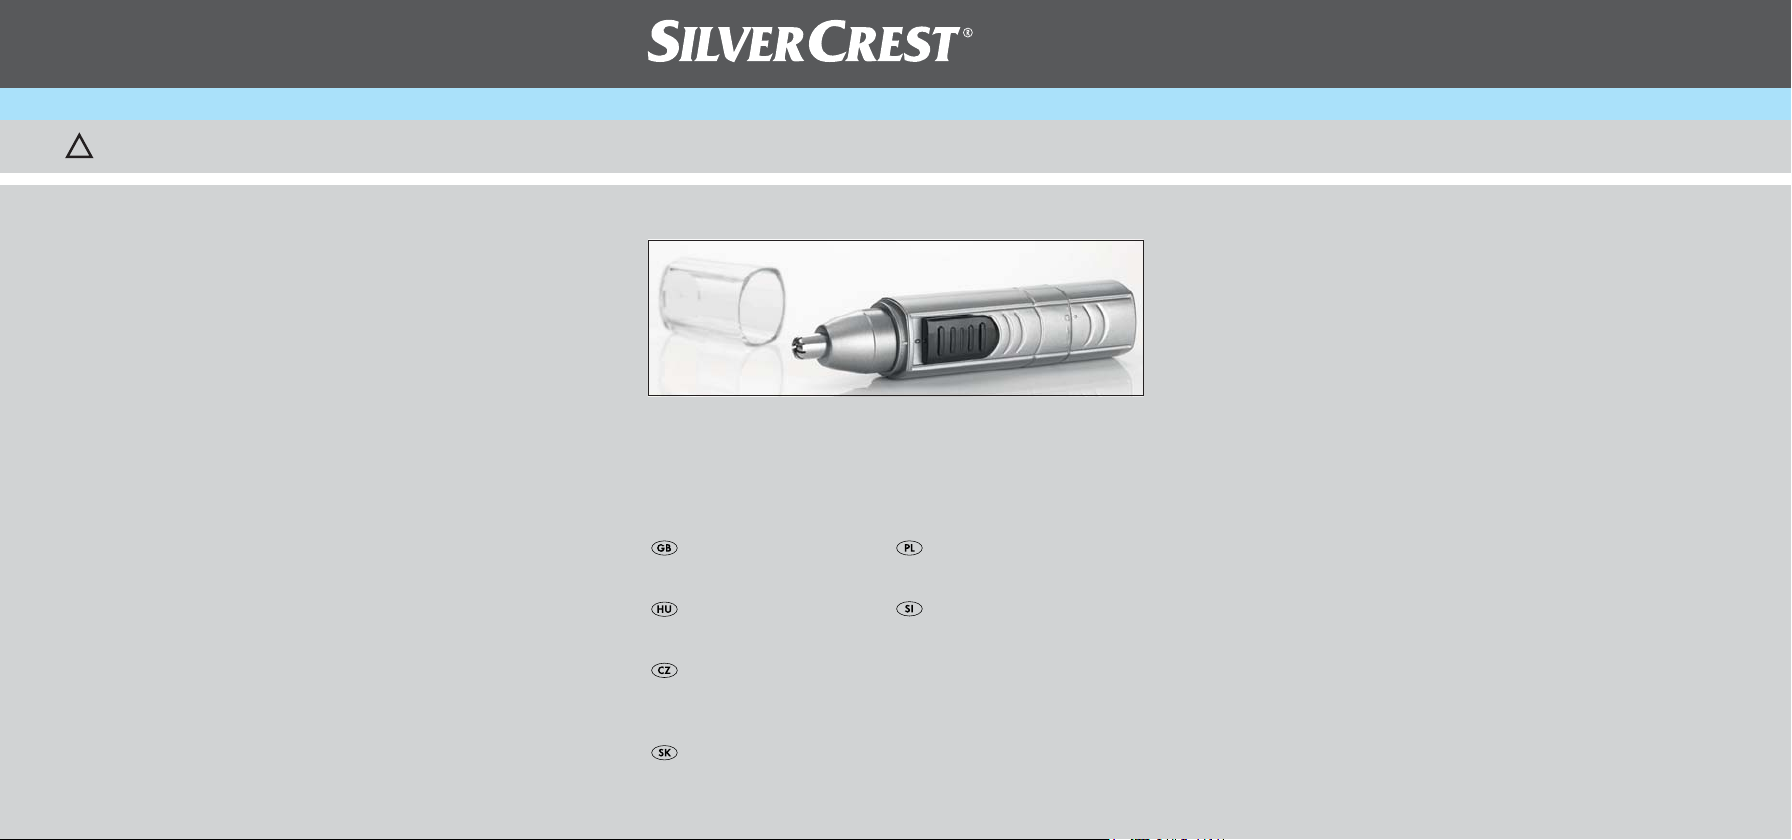
Nose/Ear Trimmer SNHT 1.5 A1
Nose/Ear Trimmer
Operating instructions
Univerzális nyíró
Használati utasítás
Zastřihovač nosních
a ušních chloupků
Návod k obsluze
Zastrihávač
Návod na obsluhu
Trymer do nosa i uszu
Instrukcja obsługi
Aparat za odstranje-
vanje nosnih in
ušesnih dlačic
Navodila za uporabo
Page 2
SNHT 1.5 A1
1
2
3
4
5
Page 3

INDEX PAGE
Intended use 2
Technical data 2
Safety Instructions 2
Items supplied 4
Appliance description 4
Inserting the battery 4
Attaching and removing the blade attachment 5
Removing nasal and ear hairs 5
Cleaning and care 5
Disposal 7
Warranty & Service 8
Importer 9
Read these operating instructions carefully before using the appliance for the
first time and preserve this manual for later reference. Pass this manual on to
whoever might acquire the appliance at a future date.
- 1 -
Page 4
NOSE/EAR TRIMMER
Intended use
With this Multitrimmer you can gently remove hair from your nose and ears.
The appliance in intended exclusively for domestic use. It is not intended for
commercial applications.
Technical data
Power supply: 1 x 1,5 V DC (Type AA/Mignon/LR06)
Protection class: IPX 4
Safety Instructions
Risk of personal injuries
• Insert the appliance into the nostril or ear only as far as the narrow tip will
reach.
• Do not use the appliance if the blades are deformed or damaged in any
way.
• Protect the blades from knocks and do not use excessive force. This will
prevent the blades from becoming damaged.
• Do not open the housing: there are no user-serviceable elements inside.
- 2 -
Page 5
• This appliance is not intended for use by individuals (including children)
with restricted physical, physiological or intellectual abilities or deficiences
in experience and/or knowledge unless they are supervised by a person
responsible for their safety or receive from this person instruction in how
the appliance is to be used.
• Children should be supervised to ensure that they do not play with the
appliance.
Information regarding the handling of batteries
When handling batteries, please pay heed to the following:
• Do not throw batteries into a fire. Do not recharge the batteries. There is a
risk of explosions and injuries!
• Never open batteries, never solder or weld batteries. There is a risk of explosions and injuries!
• Regularly check the condition of the batteries. Leaking batteries can cause
damage to the appliance.
• If you do not intend to use the appliance for an extended period, remove
the batteries.
• Wear protective gloves in the event of having to remove a leaking battery.
Then clean the battery compartment and the battery contacts with a dry
cloth.
• Keep batteries away from children. Children can put batteries into their
mouths and swallow them. Should a battery be swallowed, seek medical
assistance IMMEDIATELY.
- 3 -
Page 6
Items supplied
Facial hair trimmer
Battery (Type AA/Mignon/LR06)
Operating instructions
Appliance description
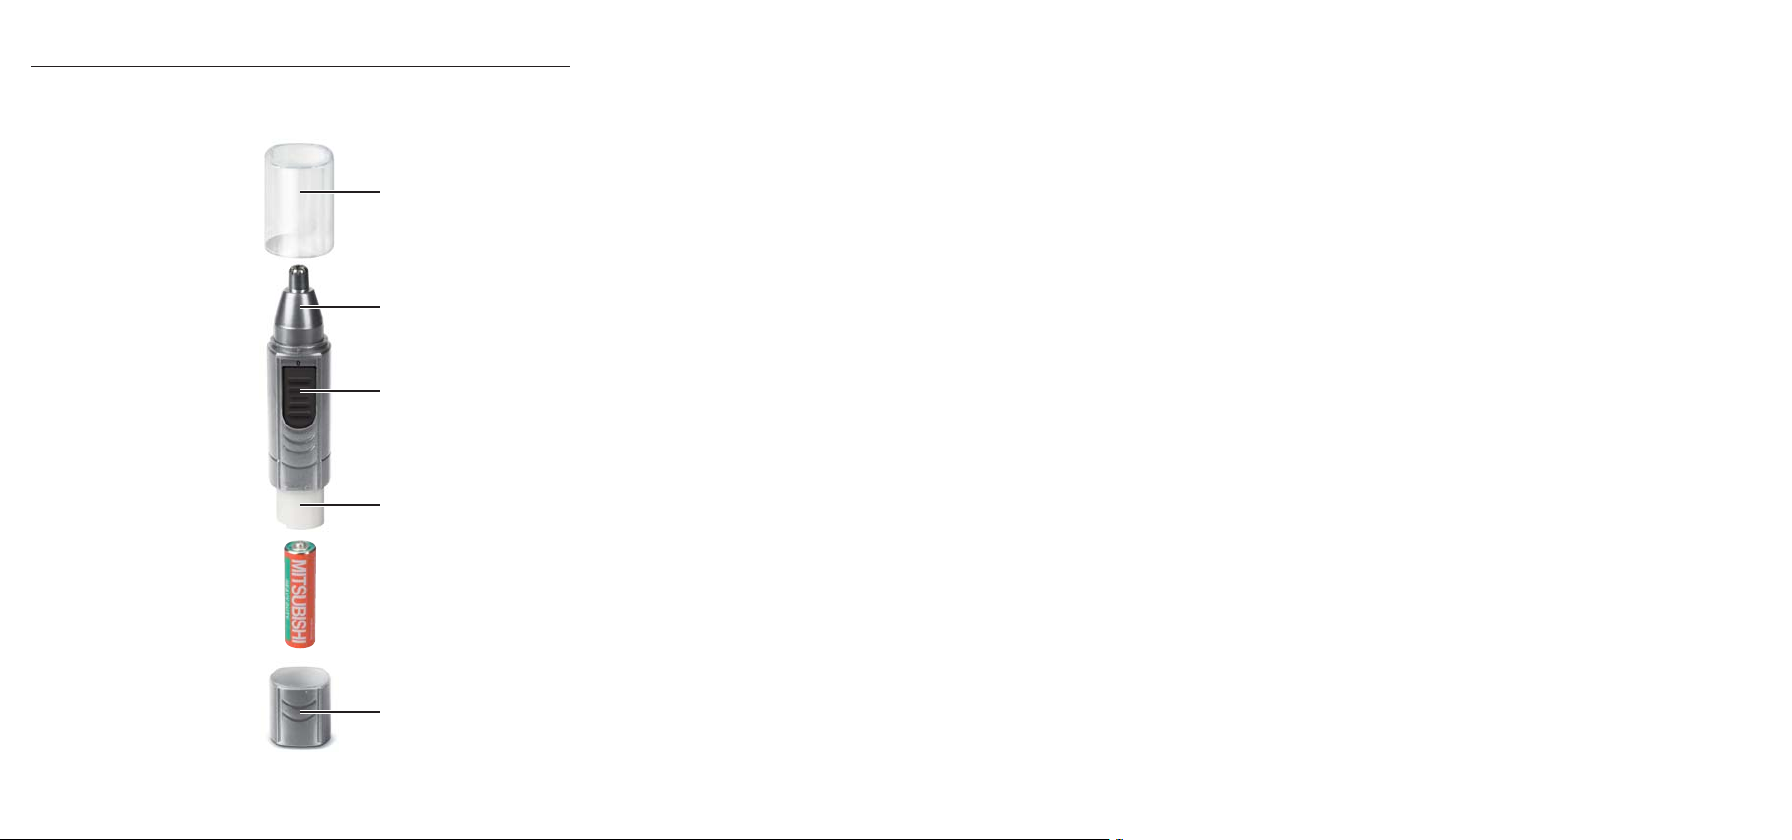
1 Protective cover
2 Blade attachment for nose/ear hair
3 Hand appliance with On / Off switch
4 Battery compartment
5 Battery compartment cover
Inserting the battery
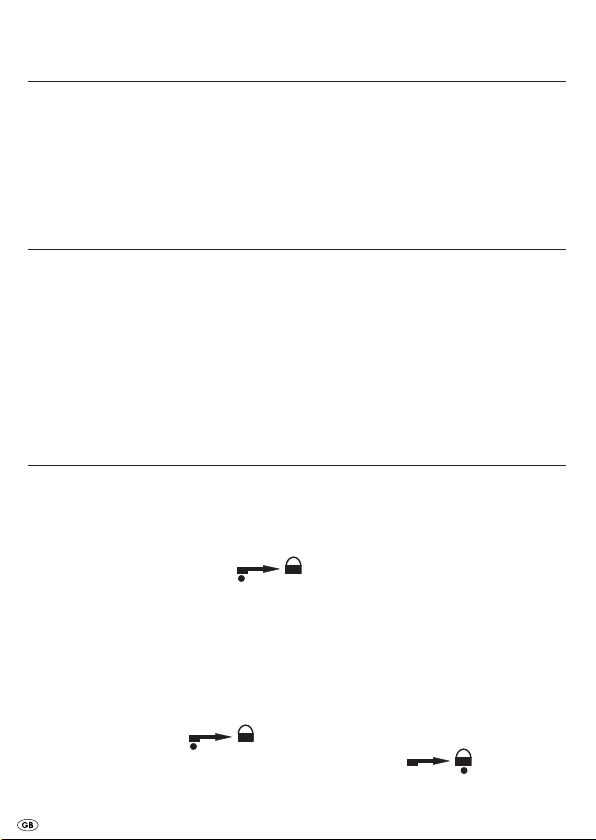
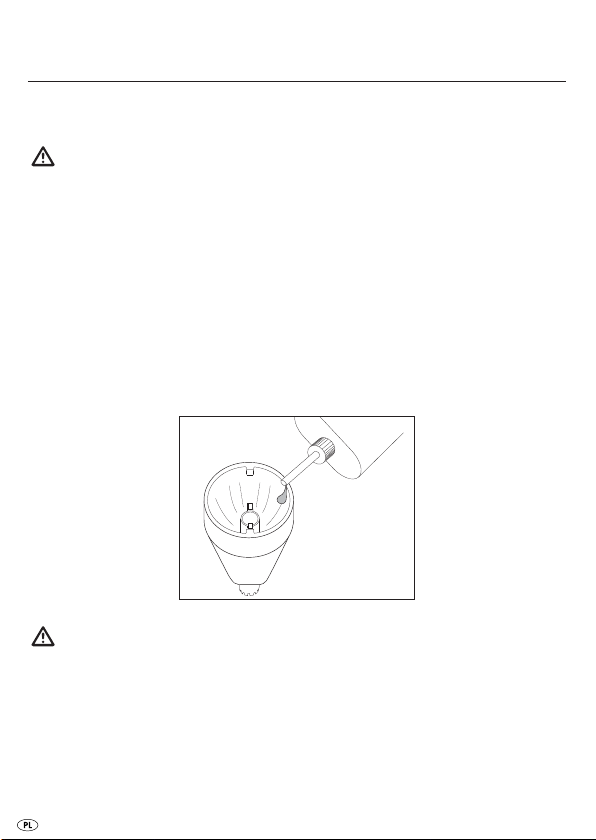
³ To open the battery compartment 4, turn the battery compartment cover
5 so far in the opposite direction of the arrow on the hand appliance 3
that the point on the battery compartment cover 5 lies against the arrow
on the hand appliance 3 . You can now lift the battery compartment cover 5 off.
³ Insert a battery of the type AA/Mignon/LR06. Observe the correct polari-
ty (this is indicated in the battery compartment 4)!
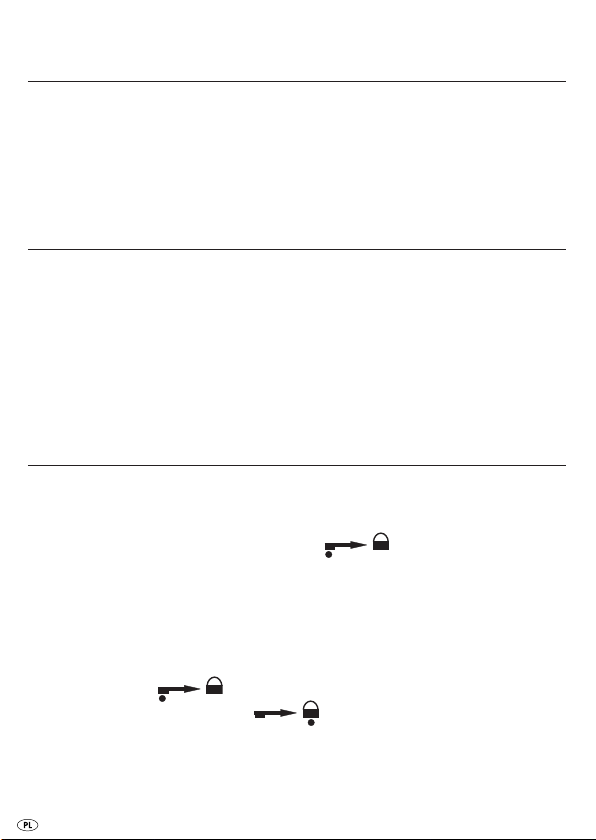
³ Close the battery compartment 4. To do this, place the battery compart-
ment cover 5 at a slant on the battery compartment 4, so that the mark
on the battery compartment cover 5 is placed against the arrow on the
hand appliance 3 . Then turn the battery compartment cover
5 until the mark is placed against the lock symbol .
- 4 -
Page 7
Attaching and removing the blade attachment
³ Place the blade attachment 2 on the hand appliance 3 slanted by approx.
45° to the right so that it grasps the guides on the hand appliance 3.
³ Turn the blade attachment 2 clockwise to secure it.
³ Turn the blade attachment 2 anticlockwise to release and remove it.
Removing nasal and ear hairs
³ Assemble the blade attachment for nose/ear hairs 2 as described in the
chapter "Attaching and removing the blade attachment".
³ Double-check to ensure that the blade attachment 2 is firmly and securely
attached before taking the appliance into use.
³ First then switch the hand unit 3 on with the On/Off switch (slide the
switch upwards, number 1 visible).
³ Carefully insert the tip of the blade attachment 2 into the nostril / ear. The
rotating blades remove the hairs painlessly.
³ After use, switch the appliance off (slide the switch downwards, number 0
visible).
Cleaning and care
³ Remove the assembled blade attachment 2 from the hand unit 3 and
rinse it under running water.
Warning:
The hand unit 3 is only splashproof. NEVER submerse it in water. This could
irreparably damage the appliance.
- 5 -
Page 8
³ Afterwards, dry the blade attachment 2 completely.
³ Should any hairs remain on the blade of the attachment, remove them
with, for example, a soft brush.
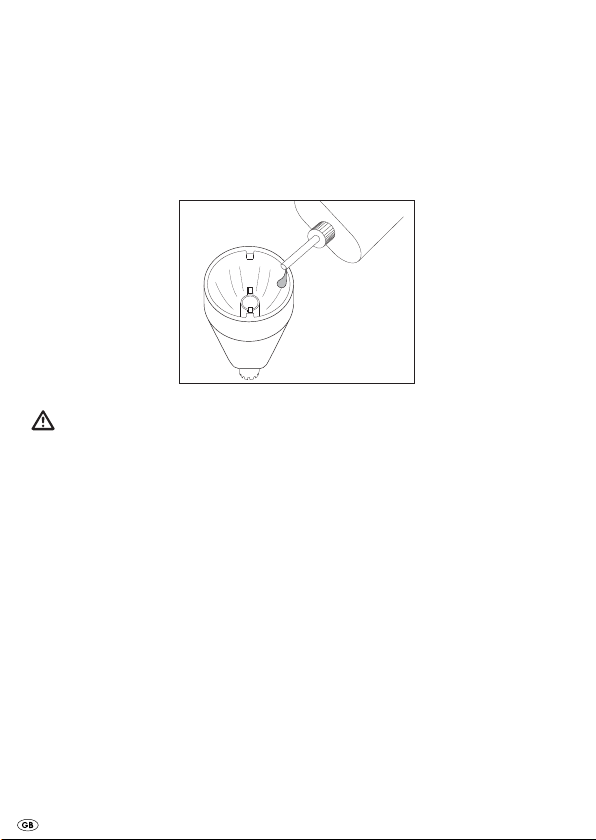
³ At regular intervals apply a few drops of oil suitable for electric razors to
the blade attachment 2. At the latest, however, when the blades no longer run smoothly.
Important:
Do not use cleaning agents or solvents. They can damage the plastic
surfaces.
³ Keep the appliance in a cool dry place.
³ Remove the battery if you are not intending to use the appliance for a long
period.
- 6 -
Page 9
Disposal
Do not dispose of the appliance in your normal domestic
waste. This product is subject to the European guideline
2002/96/EC.
Dispose of the appliance through an approved dis-posal centre or at your
community waste facility.
Observe the currently applicable regulations.
In case of doubt, please contact your waste disposal centre.
Battery disposal!
Batteries may not be disposed of with normal domestic waste. All consumers
are statutorily obliged to dispose of batteries at the collection point in their
community/district or with the original supplier.
The purpose of this obligation is to ensure that batteries can be disposed of in
an environmentally friendly manner. Only dispose of batteries when they are
fully discharged.
Dispose of all packaging materials in an environmentally friendly
manner.
- 7 -
Page 10

Warranty & Service
The warranty for this appliance is for 3 years from the date of purchase. The
appliance has been manufactured with care and meticulously examined before delivery. Please retain your receipt as proof of purchase. In the event of
a warranty claim, please make contact by telephone with our Service Department. Only in this way can a post-free despatch for your goods be assured.
The warranty covers only claims for material and maufacturing defects, but
not for transport damage, for wearing parts or for damage to fragile components, e.g. buttons or batteries. This product is for private use only and is not
intended for commercial use. The warranty is void in the case of abusive and
improper handling, use of force and internal tampering not carried out by our
authorized service branch. Your statutory rights are not restricted in any way
by this warranty.
The warranty period will not be extended by repairs made unter warranty.
This applies also to replaced and repaired parts. Any damage and defects
extant on purchase must be reported immediately after unpacking the appliance, at the latest, two days after the purchase date. Repairs made after the
expiration of the warranty period are subject to payment.
Service Great Britain
Tel.: 0871 5000 700
E-Mail: kompernass@lidl.gb
Service Ireland
Tel.: 1850 930 412 (0,082 EUR/Min.)
Standard call rates apply. Mobile operators may vary.
E-Mail: kompernass@lidl.ie
(£ 0.10 / minute)
- 8 -
Page 11

Importer
KOMPERNASS GMBH
BURGSTRASSE 21
44867 BOCHUM, GERMANY
www.kompernass.com
- 9 -
Page 12

- 10 -
Page 13

SPIS TREŚCI STRONA
Przeznaczenie 12
Dane techniczne 12
Wskazówki dotyczące bezpieczeństwa 12
Zakres dostawy 14
Zakres dostawy / Opis urządzenia 14
Wkładanie baterii 14
Zdejmowanie i zakładanie nasadki ostrzy 15
Usuwanie włosów z nosa i uszu 15
Czyszczenie i przechowywanie 16
Utylizacja 17
Gwarancja i serwis 18
Importer 19
Przed pierwszym użyciem urządzenia należy zapoznać się z instrukcją
obsługi i zachować ją w celu późniejszego wykorzystania. W przypadku
przekazania urządzenia osobom trzecim należy przekazać im także
niniejszą instrukcję.
- 11 -
Page 14
TRYMER DO NOSA I USZU
Przeznaczenie
Tym trymerem możesz delikatnie usunąć włosy z nosa lub uszu.
Urządzenie przeznaczone jest wyłącznie do zastosowań prywatnych.
Nie jest ono przeznaczone do użytkowania komercyjnego.
Dane techniczne
Zasilanie: 1 x 1,5 V DC (typ AA/Mignon/LR06)
Klasa ochrony: IPX 4
Wskazówki dotyczące bezpieczeństwa
Niebezpieczeństwo skaleczenia!
• Wsuwać urządzenie do nosa lub do ucha tylko na tyle, na ile sięga tam
wąski koniec.
• Nie używać urządzenia ze zdeformowanymi lub uszkodzonymi ostrzami.
• Chronić ostrza przed uderzeniami i nie wywierać zbyt mocnego nacisku.
W przeciwnym razie ostrza mogą ulec uszkodzeniu.
• Nie otwierać obudowy - w jej wnętrzu nie ma żadnych elementów obsłu-
gowych.
- 12 -
Page 15
• Urządzenie nie powinny używać osoby (w tym również dzieci) z ogranic-
zoną sprawnością fizyczną, ruchową lub umysłową lub z brakiem
doświadczenia i / lub wiedzy, chyba że dla ich bezpieczeństwa będą
przebywały pod opieką dorosłej osoby lub zostaną poinstruowane przez
osobę sprawującą opiekę o sposobie użytkowania urządzenia.
• Nie można pozwolić dzieciom na zabawę urządzeniem.
Wskazówki dotyczące użytkowania baterii:
Podczas obchodzenia si´ z bateriami nale˝y przestrzegaç nast´pujàcych
zasad:
• Baterii nie wolno wrzucać do ognia. Nie wolno ładować rozładowanych
baterii. Istnieje niebezpieczeństwo wybuchu i odniesienia obrażeń!
• Baterii nie wolno otwierać, lutować ani spawać. Istnieje niebezpieczeńst-
wo wybuchu i odniesienia obrażeń!
• Regularnie sprawdzaj stan baterii. Rozlane baterie mogą spowodować
uszkodzenia urządzenia.
• Baterie należy wyjąć, jeśli urządzenie nie jest użytkowane przez dłuższy
okres czasu.
• W celu wyjęcia z urządzenia wylanych baterii zakładaj zawsze rękawice
ochronne. Schowek baterii i styki baterii należy czyścić tylko suchą szmatką.
• Baterie nie powinny nigdy trafić w ręce dzieci. Dziecko może połknąć ba-
terię. W razie połknięcia baterii należy natychmiast skorzystać z pomocy
medycznej.
- 13 -
Page 16
Zakres dostawy
Trymer
Bateria (typ AA/Mignon/LR06)
Instrukcja obsługi
Zakres dostawy / Opis urządzenia
1 Przykrywka
2 Końcówka do strzyżenia włosów w nosie/uszach
3 Przyrząd z włącznikiem/wyłącznikiem
4 Komora na baterię
5 Pokrywa komory na baterie
Wkładanie baterii
³ W celu otwarcia komory na baterie 4, odsuń pokrywę 5 w golarce 3
w kierunku przeciwnym do strzałki w taki sposób, by punkt na pokrywie
5 przylegał do strzałki na golarce 3 . Teraz możesz podnieść
pokrywę 5.
³ Włóż baterię typu AA/Mignon/LR06. Zwróć przy tym uwagę na
prawidłową biegunowość (oznaczenia na komorze baterii 4)!
³ Zamknij komorę na baterię 4. W tym celu pokrywę 5 przystaw ukośnie
do komory 4 tak, by punkt na pokrywie 5 przy strzałce przylegał do
urządzenia 3 . Obracaj pokrywą 5 dotąd, aż punkt będzie
przylegał do symbolu kłódki .
- 14 -
Page 17

Zdejmowanie i zakładanie nasadki ostrzy
³ Ustaw głowicę 2 pochylając ją około 45° w prawo i załóż w tym
położeniu na golarkę 3 tak, by weszła na szynę prowadzącą w golarce
3.
³ Obróć nasadką pstrzy 2 w kierunku zgodnym z ruchem wskazówek
zegara, by ją zamocować.
³ Aby poluzować i zdjąć nasadkę ostrzy 2, obróć ją w kierunku
przeciwnym do ruchu wskazówek zegara.
Usuwanie włosów z nosa i uszu
³ Załóż nasadkę do strzyżenia włosów w uszach i nosie 2, jak opisano w
rozdziale „Zdejmowanie i zakładanie nasadki ostrzy”.
³ Przed użyciem urządzenia sprawdź, czy nasadka ostrzy 2 jest prawidło-
wo zamocowana.
³ Następnie włącz urządzenie 3 włącznikiem/wyłącznikiem (przesunięcie
przełącznika do góry, widoczna cyfra 1).
³ Ostrożnie wsuń końcówkę nasadki ostrza 2 do nosa lub ucha. Wirujące
ostrza bezboleśnie usuwają włosy.
³ Po użyciu wyłącz urządzenie (przesunięcie przełącznika w dół, widoczna
cyfra 0).
- 15 -
Page 18
Czyszczenie i przechowywanie
³ Zdejmij nasadkę 2 z urządzenia 3 i wymyć ją pod bieżącą wodą.
Uwaga:
Urządzenie 3 jest odporne tylko na rozpryski wody. Nie wolno zanurzać
urządzenia pod wodę. Prowadzi to do uszkodzenia urządzenia, którego nie
będzie można naprawić.
³ Dokładnie wysusz nasadkę ostrzy 2.
³ Ewentualnie usuń z ostrzy nasadki resztki zgolonego owłosienia, np. za
pomocą pędzelka.
³ W regularnych odstępach czasu smaruj głowicę 2 golarki specjalnym
olejem do golarek. Noże głowicy muszą zawsze równo się obracać.
Uwaga:
Nie używać żadnych środków do czyszczenia lub rozpuszczalników. Mogą
one uszkodzić powierzchnię z tworzywa sztucznego.
³ Przechowywać urządzenie w chłodnym i suchym miejscu.
³ Wyjąć baterię, jeżeli urządzenie nie będzie używane przez dłuższy czas.
- 16 -
Page 19
Utylizacja
Urządzenia nie należy wyrzucać wraz z normalnymi
odpadami domowymi. Niniejszy produkt podlega działaniom, przewidziamyn w przepisach dyrektywy europejskiej
2002/96/EC.
Urządzenie należy usuwać w akredytowanych zakładach utylizacji odpadów lub komunalnych zakładach utylizacji odpadów.
Należy przestrzegać aktualnie obowiązujących przepisów. W razie pytań i
wątpliwości odnośnie zasad utylizacji należy skontaktować się z najbliższym
zakładem utylizacji odpadów.
Usuwanie akumulatorów
Akumulatorów nie można wyrzucać do śmieci wraz z pozostałymi odpadami
domowymi. Każdy użytkownik jest ustawowo zobowiązany do składowania
zużytych akumulatorów / baterii w odpowiednich punktach zbiórki, wyznaczanych przez władze miasta lub oddawania ich do punktu handlowego.
Ten przepis ma na celu ochronę środowiska naturalnego przed niekontrolowanym usuwaniem szkodliwych odpadów, jakimi są zużyte akumulatory i
baterie. Należy zwracać wyłącznie całkowicie rozładowane akumulatory /
baterie.
Materiał opakowaniowy należy przekazywać do utylizacji zgodnie
z przepisami o ochronie środowiska.
- 17 -
Page 20

Gwarancja i serwis
Urządzenie objęte jest dwuletnią gwarancją, licząc od daty zakupu. Urządzenie zostało starannie wyprodukowane i poddane skrupulatnej kontroli przed wysyłką. Paragon należy zachować jako dowód dokonania zakupu. W
przypadku roszczeń gwarancyjnych należy skontaktować się telefonicznie z
serwisem. Tylko w ten sposób można zagwarantować bezpłatną wysyłkę zakupionego produktu.
Gwarancja obejmuje wyłącznie wady materiałowe i fabryczne, natomiast
nie obejmuje szkód powstałych podczas transportu, części ulegających zużyciu ani uszkodzeń części łatwo łamliwych, np. wyłączników, akumulatorów.
Produkt przeznaczony jest wyłącznie do użytku domowego, a nie do zastosowań profesjonalnych.
Gwarancja traci ważność w przypadku niewłaściwego używania urządzenia,
używania niezgodnego z przeznaczeniem, użycia siły lub ingerencji w urządzenie dokonywanej poza naszymi autoryzowanymi punktami serwisowymi.
Niniejsza gwarancja nie ogranicza ustawowych praw nabywcy urządzenia.
Okres gwarancji nie ulega wydłużeniu o czas trwania usługi gwarancyjnej.
Dotyczy to również wymienionych i naprawionych części. Szkody i wady
zauważone już w chwili zakupu należy zgłosić od razu po rozpakowaniu,
nie później niż po upływie dwóch dni od daty zakupu. Po upływie okresu
gwarancyjnego wszystkie naprawy będą wykonywane płatnie.
Service Polska
Tel.: 022 / 3972212
E-Mail: kompernass@lidl.pl
- 18 -
Page 21

Importer
KOMPERNASS GMBH
BURGSTRASSE 21
44867 BOCHUM, GERMANY
www.kompernass.com
- 19 -
Page 22

- 20 -
Page 23

TARTALOMJEGYZÉK OLDALSZÁM
Felhasználási cél 22
Műszaki adatok 22
Biztonsági irányelvek 22
A csomag tartalma 24
A csomagolás tartalma/a készülék leírása 24
Elemek behelyezése 24
A pengefej felhelyezése és levétele 25
Orr- és fülszőrzet eltávolítása 25
Tisztítás és tárolás 26
Ártalmatlanítás 27
Garancia és szerviz 28
Gyártja 29
Az első használat előtt figyelmesen olvassa el a használati utasítást majd
későbbi használatra tegye el. A készülék harmadik fél részére történő
továbbadásakor adja át a leírást is.
- 21 -
Page 24

UNIVERZÁLIS NYÍRÓ
Felhasználási cél
Ezzel a többfunkciós fül- és orrszőrnyíróval kíméletesen távolíthatja el a fül- és
orrszőrt.
A készülék kizárólag otthoni használatra készült. A készülék nem alkalmas
kereskedelmi használatra.
Műszaki adatok
Tápfeszültség: 1 x 1,5 V DC (AA/ceruzaelem/LR06 típusú)
Védettségi osztály: IPX 4
Biztonsági irányelvek
Sérülésveszély!
• A készüléket csak olyan mélyre dugja az orr- vagy füllyukba, ameddig
a keskeny hegy ér.
• Ne használja a készüléket, ha a pengék el vannak ferdülve vagy sérültek.
• Védje a pengéket az ütéstől, és ne tegye ki őket erős nyomásnak, mert
különben megsérülhetnek.
• A burkolatot ne nyissa fel, mert nincsenek benne tartozékok.
- 22 -
Page 25

• A készülék nem alkalmas arra, hogy olyan személyek (ideértve a gyerme-
keket is) használják, akiket testi, érzékszervi vagy elmebeli képességeik
vagy tapasztalatuk és ismeretük hiánya megakadályoznának abban,
hogy biztonságosan használják a készüléket, kivéve ha a biztonságukról
gondoskodó felügyelettel vannak, vagy ha előtte felvilágítosották őket a
készülék használatáról.
• Vigyázni kell a gyermekekre, hogy ne játsszanak a készülékkel.
Tudnivalók az elemek kezeléséről
Az elemek kezelésére vonatkozólag az alábbiakat kell betartani:
• Ne dobja az elemet a tűzbe. Ne töltse fel az elemeket. Ekkor robbanás-
és balesetveszély alakul ki!
• Soha ne nyissa fel az elemeket, ne forrassza és hegessze őket! Ekkor rob-
banás- és balesetveszély alakul ki!
• Ellenőrizze rendszeresen az elemeket. A kifolyó elemsav kárt okozhat a
készülékben.
• Ha a készüléket hosszabb ideig nem használja, kérjük, vegye ki az elemeket.
• Ha kifolyt az elemsav, vegyen fel védőkesztyűt.
Az elemrekeszt és az elemek érintkezéseit csak száraz kendővel tisztítsa!
• Ne engedje, hogy az elemek gyermek kezébe jussanak. A gyermekek a
szájukba vehetik az elemeket és lenyelhetik őket. Ha valaki lenyelné az
elemet, azonnal orvoshoz kell fordulni.
- 23 -
Page 26

A csomag tartalma
Többfunkciós fül- és orrszőr nyíró
elem (AA/ceruzaelem/LR06 típusú)
Használati útmutató
A csomagolás tartalma/a készülék leírása
1 védőkupak
2 pengefeltét az orr- és fülszőrhöz
3 kézi készülék be- és kikapcsolóval
4 elemrekesz
5 elemrekesz fedele
Elemek behelyezése
³ Az elemtartó 4 kinyitásához fordítsa el az elemtartó fedelét 5 annyira a
kézi készüléken 3 lévő nyíl irányába, hogy az elemtartó fedelén 5 lévő
pont a kézi készüléken 3 lévő nyílra mutasson. Az elemtartó
fedelét 5 ekkor leemelheti.
³ Helyezzen be AA/ceruzaelemet/LR06. Ügyeljen a megfelelő pólusokra
(az elemrekeszen 4 meg vannak jelölve)!
³ Csukja be az elemrekeszt 4. Ehhez helyezze az elemrekesz fedelét 5
ferdén az elemrekeszre 4, hogy az elemrekesz fedelén 5 lévő pont a
kézi készüléken 3 lévő nyílra mutasson . Fordítsa el az elemrekesz fedelét 5 annyira, hogy a lakat jelnél lévő ponton legyen .
- 24 -
Page 27

A pengefej felhelyezése és levétele
³ Helyezze a pengetartozékot 2 a kézi készülékre 3 kb. 45°-kal jobbra
elfordítva, hogy az belenyúljon a kézi készülék 3 sínjébe.
³ Rögzítéséhez fordítsa el a pengefejet 2 az óramutató járásával megegy-
ező irányba.
³ A pengefej 2 kilazításához és eltávolításához fordítsa el az óramutató
járásával ellentétes irányban.
Orr- és fülszőrzet eltávolítása
³ Helyezze a fül- és orrszőrvágó pengefejet 2 a „Pengefej felhelyezése és
levétele“ részben leírtak szerint.
³ Mielőtt használná, győződjön meg arról, hogy a pengefej 2 megfelelően
van-e rögzítve.
³ Csak ekkor kapcsolja be a kézi készüléket 3 a kapcsolóval (tolja fel a
kapcsolót, az 1-es szám válik láthatóvá).
³ Óvatosan vezesse be a pengefej 2 csúcsát a fül- vagy orrlyukba. A forgó
pengék fájdalommentesen távolítják el a szőrzetet.
³ A készüléket használat után kapcsolja ki (nyomja le a kapcsolót, a 0 válik
láthatóvá).
- 25 -
Page 28

Tisztítás és tárolás
³ Vegye le a felhelyezett pengefejet 2 a kézi készülékről 3 és tisztítsa meg
csapvíz alatt.
Figyelem:
A kézi készülék 3 csak a fröccsenő víz elleni védelemmel rendelkezik. Ezért
soha ne merítse vízbe. Ez a készülékben helyrehozhatatlan kárt okoz.
³ Utána jól szárítsa meg a pengefejet 2.
³ Szedje le a pengéről például ecsettel az esetlegesen rajta maradt szőrt.
³ Rendszeres időközönként, de legkésőbb ha már nem forognak egyenlet-
esen a pengék, tegyen borotvához való megfelelő pengeolajat a pengetartozékra 2.
Figyelem:
Ne használjon semmiféle tisztító vagy oldószert. Ezek megsérthetik a készülék műanyag felületét.
³ A készüléket hűvös, száraz helyen tárolja.
³ Ha a készüléket hosszabb időn keresztül nem használja, vegye ki belőle
az elemeket.
- 26 -
Page 29

Ártalmatlanítás
Semmi esetre se dobja a készüléket a háztartási hulladékba.
Jelen termékre a 2002/96/EC számú európai utasítás rendelkezési vonatkoznak.
A készüléket engedélyeztetett hulladékgyűjtő helyen vagy a helyi
hulladékeltávolító üzemnél tudja kidobni.
Vegye figyelembe az érvényben lévő idevonatkozó előírásokat. Ha kérdése
merülne fel, vegye fel a kapcsolatot a hulladékfeldolgozó vállalattal.
Az elemek eltávolítása
Az elemeket nem szabad a háztartási hulladékba dobni. Valamennyi
fogyasztót törvény kötelezi arra, hogy az elemeket/akkumulátorokat a
helyi/kerületi vagy a kereskedelemben található gyűjtőhelyen adja le.
Ez a kötelezettség azt a célt szolgálja, hogy az elhasznált elemek
környezetbarát módon kerüljenek kiselejtezésre.
Csak a kimerült elemeket/akkumulátorokat adja vissza.
A csomagolóanyagot juttassa környezetvédő ártalmatlanítóhelyre.
- 27 -
Page 30

Garancia és szerviz
A készülékre 3 év garanciát adunk a vásárlás dátumától számítva. A készüléket gondosan gyártottuk, és szállítás előtt lelkiismeretesen ellenőriztük.
Kérjük, a vásárlás igazolására őrizze meg a pénztári blokkot.
Kérjük, garanciaigény esetén vegye fel a kapcsolatot telefonon az Ön közelében lévő szervizzel. Csak ebben az esetben garantálhatjuk, hogy ingyen
tudja beküldeni az árut.
A garancia csak anyag- és gyártási hibára vonatkozik, nem pedig szállítási
kárra, kopásra vagy törékeny részek (pl. kapcsoló vagy elem) sérülésére. A
termék kizárólag magánhasználatra, nem üzleti használatra készült.
A garancia érvényét veszti visszaélésszerű vagy szakavatatlan kezelés, erőszak alkalmazása vagy olyan beavatkozások esetén, amelyeket nem engedélyeztetett szervizelő üzleteink hajtottak végre. Az ön törvényes jogait ez a garancia nem korlátozza.
A garanciaidő nem hosszabbodik a jótállással. Ez a kicserélt vagy javított alkatrészekre is érvényes. Az esetlegesen már a megvételkor meglévő károkat
és hiányosságokat azonnal kicsomagolás után, legkésőbb két nappal a vétel
dátumától számítva jelezni kell. A garanciális idő lejárta után esedékes javítások térítéskötelesek.
Service Hungary
Tel.: 06 40 104680
E-Mail: kompernass@lidl.hu
- 28 -
Page 31

Gyártja
KOMPERNASS GMBH
BURGSTRASSE 21
44867 BOCHUM, GERMANY
www.kompernass.com
- 29 -
Page 32

- 30 -
Page 33

KAZALO VSEBINE STRAN
Namen uporabe 32
Tehnični podatki 32
Varnostni napotki 32
Lieferumfang 34
Obseg dobave/opis naprave 34
Vstavitev baterij 34
Nameščanje in odstranjevanje
rezilnega nastavka 35
Odstranjevanje dlak v nosu in ušesih 35
Čiščenje in shranjevanje 35
Odstranitev 37
Garancijski list 38
Proizvajalec 39
Pred prvo uporabo ta navodila skrbno preberite in jih shranite za poznejšo
uporabo. Ob predaji naprave tretji osebi zraven priložite tudi navodila za
uporabo.
- 31 -
Page 34

APARAT ZA ODSTRANJEVANJE
NOSNIH IN UŠESNIH DLAČIC
Namen uporabe
S tem večnamenskim strižnikom lahko preprosto odstranite dlake
v nosu ali ušesih.
Naprava je namenjena samo za privatno uporabo. Ni predvidena za
uporabo na obrtnih področjih.
Tehnični podatki
Napajanje: 1 x 1,5 V DC (tip AA/Mignon/LR06)
Vrsta zaščite: IPX 4
Varnostni napotki
Nevarnost poškodbe!
• Napravo v nosnico ali v uho vstavite samo tako daleč, kakor daleč seže
ozka konica.
• Naprave ne uporabljajte, če so rezila spremenjena ali poškodovana.
• Rezila zaščitite pred udarci in ne izvajajte prekomernega pritiska. Rezila
bi se sicer lahko poškodovala.
• Ne odpirajte ohišja – v njemu ni upravljalnih elementov.
- 32 -
Page 35

• Ta naprava ni namenjena temu, da jo uporabljajo osebe (vključno z otroci)
z omejenimi fizičnimi, zaznavnimi ali duševnimi sposobnostmi ali s pomanjkljivimi izkušnjami in/ali znanjem, razen pod nadzorom osebe, ki je zanje
odgovorna ali jim je dala navodila v zvezi z uporabo naprave.
• Otroke je treba nadzorovati, da preprečite igro z napravo.
Napotki za rokovanje z baterijami
V zvezi z rokovanjem z baterijami upoštevajte naslednje:
• Baterij ne mečite v ogenj. Baterij ne polnite. Obstaja nevarnost eksplozije
in poškodb!
• Baterij nikoli ne odpirajte, jih spajkajte ali varite. Obstaja nevarnost eks-
plozije in poškodb!
• Baterije redno preverjajte. Iztekajoče baterije lahko povzročijo poškodbe
naprave.
• Če naprave dlje časa ne uporabljate, baterije vzemite iz nje
• Če so baterije iztekle, si nataknite zaščitne rokavice. Predalček za baterije
in baterijske kontakte očistite s suho krpo.
• Baterije ne smejo zaiti v otroške roke. Otroci bi baterije lahko dali v usta
in jih pogoltnili. Če bi prišlo do zaužitja baterije, je treba takoj poiskati
zdravniško pomoč.
- 33 -
Page 36

Lieferumfang
Prirezovalnik dlačic
Baterija (tip AA/Mignon/LR06)
Návod na používanie
Obseg dobave/opis naprave
1 Zaščitni pokrov
2 Rezilni nastavek za dlake v nosu/ušesih
3 Ročni aparat s stikalom za vklop/izklop
4 Predalček za baterije
5 Pokrov predalčka za baterije
Vstavitev baterij
³ Da lahko odprete predalček za baterije 4, obrnite pokrov predalčka za
baterije 5 v obratni smeri puščice na ročnem aparatu 3, tako da se pika
na pokrovu predalčka za baterije 5 sklada s puščico na ročnem aparatu
3 . Pokrov predalčka za baterije 5 sedaj lahko dvignete.
³ Vstavite baterijo tipa AA/Mignon/LR06. Pri tem pazite na pravilno polar-
nost (oznaka na predalčku za baterije 4)!
³ Zaprite predalček za baterije 4. V ta namen pokrov predalčka za bateri-
je 5 namestite poševno na predalček za baterije 4, tako da se pika na
pokrovu predalčka za baterije 5 prilega puščici na ročnem aparatu 3
. Pokrov predalčka za baterije 5 obrnite tako daleč, da se pika
nahaja na simbolu ključavnice .
- 34 -
Page 37

Nameščanje in odstranjevanje rezilnega nastavka
³ Namestite nastavek z rezili 2, zamaknjenega za okrog 45°, na desno
na ročni aparat 3, tako da sega v vodilo na ročnem aparatu 3.
³ Rezilni nastavek 2 obrnite v smeri urnega kazalca, da ga pritrdite.
³ Rezilni nastavek 2 obrnite v obratni smeri urnega kazalca, da ga razrahl-
jate in odstranite.
Odstranjevanje dlak v nosu in ušesih
³ Rezilni nastavek za dlake v nosu in ušesih 2 namestite, kot je opisano v
poglavju „Nameščanje in odstranjevanje rezilnega nastavka“.
³ Pred uporabo preverite, ali je rezilni nastavek 2 pravilno pritrjen.
³ Šele potem vklopite ročni aparat 3 na stikalu za vklop/ izklop (stikalo
potisnite navzgor, številka 1 je vidna).
³ Konico rezilnega nastavka 2 previdno vstavite v odprtino nosu/ušesa.
Vrteča rezila vaše dlake odstranijo brez bolečin.
³ Po uporabi napravo ponovno izklopite (stikalo potisnite navzdol, številka
0 je vidna).
Čiščenje in shranjevanje
³ Nameščeni rezilni nastavek 2 vzemite z ročnega aparata 3 in ga očisti-
te pod tekočo vodo.
Pozor:
Ročni aparat 3 je zaščiten le proti brizgom vode. Nikoli ga ne potapljajte v
vodo. To bi privedlo do nepopravljive škode na napravi.
- 35 -
Page 38

³ Potem rezilni nastavek 2 dobro obrišite.
³ Odstranite morebitne preostale dlake iz rezil nastavka, na primer s
čopičem.
³ V nastavek z rezili 2 v rednih presledkih dajajte olje za rezila, primerno
za brivske aparate. Najpozneje pa, ko rezila ne delujejo več brez težav.
Pozor:
Ne uporabljajte čistil ali topil. Ta bi lahko poškodovala površine iz umetne
snovi.
³ Napravo shranite na hladnem, suhem mestu.
³ Napravo odstranite, če je dlje časa ne uporabljate.
- 36 -
Page 39

Odstranitev
Naprave v nobenem primeru ne odvrzite v običajne hišne
smeti. Ta proizvod je podvržen evropski Direktivi
2002/96/EC.
Napravo oddajte pri podjetju, registriranem za predelavo odpadkov, ali pri
svojem komunalnem podjetju za predelavo odpadkov.
Upoštevajte trenutno veljavne predpise. V primeru dvoma se obrnite na svoje
podjetje za predelavo odpadkov.
Odstranitev baterij!
Baterije se ne smejo odstranjevati skupaj z gospodinjskimi odpadki. Vsak
potrošnik je po zakonu dolžan baterije/akumulatorje oddati na zbiralnem
mestu svoje občine/svoje četrti ali v trgovini.
Ta obveznost prispeva k ekološkemu odstranjevanju baterij. Baterije/
akumulatorje oddajajte le v izpraznjenem stanju.
Embalažo oddajte za okolju primerno odstranitev.
- 37 -
Page 40

Garancijski list
1. S tem garancijskim listom jamčimo Kompernass GmbH, da bo izdelek v
garancijskem roku ob normalni in pravilni uporabi brezhibno deloval in se
zavezujemo, da bomo ob izpolnjenih spodaj navedenih pogojih odpravili
morebitne pomanjkljivosti in okvare zaradi napak v materialu ali izdelavi
oz. po svoji presoji izdelek zamenjali ali vrnili kupnino.
2. Garancijski rok za proizvod je 3 leta od dneva nabave.
3. Kupec je dolžan okvaro javiti pooblaščenemu servisu oz. se informirati o na-
daljnih postopkih na zgoraj navedeni telefonski številki. Svetujemo vam, da
pred tem natančno preberete navodila o sestavi in uporabi izdelka.
4. Kupec je dolžan pooblaščenemu servisu predložiti garancijski list in račun,
kot potrdilo in dokazilo o nakupu.
5. V primeru, da proizvod popravlja nepooblaščeni servis ali oseba, kupec ne
more uveljavljati zahtevkov iz te garancije.
6. Vzroki za okvaro oz. nedelovanje izdelka morajo biti lastnosti stvari same,
in ne vzroki, ki so zunaj proizvajalčeve oz. prodajalčeve sfere. Kupec ne
more uveljavljati zahtevkov iz te garancije, če se ni držal priloženih navodil za sestavo in uporabo izdelka ali, če je izdelek kakorkoli spremenjen
ali nepravilno vzdrževan.
7. Jamčimo servisiranje in rezervne dele za dobo, ki je minimalno zahtevana s
strani zakonodaje.
8. Obrabni deli oz. potrošni material so izvzeti iz garancije.
9. Vsi potrebni podatki za uveljaljanje garancije se nahajajo na dveh ločenih
dokumentih (garancijski list, račun).
Prodajalec:
Lidl d.o.o.k.d., Žeje pri Komendi 100,
SI-1218 Komenda
Servis Slovenija
Phone: 080080917
E-Mail: kompernass@lidl.si
- 38 -
Page 41

Proizvajalec
KOMPERNASS GMBH
BURGSTRASSE 21
44867 BOCHUM, GERMANY
www.kompernass.com
- 39 -
Page 42

- 40 -
Page 43

OBSAH STRANA
Účel použití 42
Technické údaje 42
Bezpečnostní pokyny 42
Rozsah dodávky 44
Popis přístroje 44
Vkládání baterie 44
Nasadit a sejmout čepelkový nástavec 45
Odstraňování chloupků v nose a uších 45
Čištění a úschova 45
Likvidace 47
Záruka & servis 48
Dovozce 49
Uschovejte tento návod pro případné pozdější dotazy a předejte jej v případě přenechání přístroje třetím osobám zároveň s ním!
- 41 -
Page 44

Zastřihovač nosních
a ušních chloupků
Účel použití
S tímto multitrimmerem můžete jemně odstranit chloupky v nose nebo uchu.
Přístroj je určen výhradně pro soukromé použití. Není určen pro použití
v živnostenských provozovnách.
Technické údaje
Zdroj napětí: 1 x 1,5 V DC (typ AA/Mignon/LR06)
Krytí: IPX 4
Bezpečnostní pokyny
Nebezpečí zranění!
• Zasunujte přístroj do nosní dírky nebo do ucha jen tak daleko, jak sahá
úzký hrot.
• Přístroj nepoužívejte, jestliže jsou čepelky zdeformované nebo poškozené.
• Chraňte čepelky před nárazy a nepoužívejte nadměrný tlak. Čepelky by
se mohly poškodit.
• Kryt přístroje neotvírejte - uvnitř nejsou žádné ovládací prvky.
- 42 -
Page 45

• Tento přístroj není určen k tomu, aby jej používaly osoby (včetně dětí),
které mají omezené fyzické, senzorické nebo duševní schopnosti či nedostatek zkušeností a/nebo znalostí, ledaže by jej používaly pod bezpečnostním dohledem zodpovědné osoby nebo by od ní obdržely pokyny, jak
přístroj používat.
• Dohlížejte na děti, aby si s přístrojem nehrály.
Pokyny k manipulaci s bateriemi
Pro manipulaci s bateriemi respektujte následující pokyny:
• Baterie nevhazujte do ohně. Baterie znovu nenabíjejte. Hrozí nebezpečí
výbuchu nebo zranění!
• Baterie nikdy neotvírejte, neprovádějte na nich letování ani svařování.
Hrozí nebezpečí výbuchu nebo zranění!
• Pravidelně kontrolujte baterie. Vytékající baterie mohou přístroj poškodit.
• Jestli-že přístroj delší dobu nepoužíváte, vyjměte baterie.
• Pokud baterie vytekly, natáhněte si ochranné rukavice. Přihrádku na bate-
rie a kontakty baterií vyčistěte suchým hadříkem.
• Baterie se nesmějí dostat do rukou dětem. Hrozí nebezpečí, že by děti
mohly baterie vložit do úst a spolknout. Dojde-li ke spolknutí baterie, musí
se okamžitě vyhledat lékařská pomoc.
- 43 -
Page 46

Rozsah dodávky
Multitrimmer
Baterie (typ AA/Mignon/LR06)
Návod k obsluze
Popis přístroje
1 Ochranné víčko
2 Nástavec čepele pro chloupky v nosu/uších
3 Ruční přístroj se zapínačem / vypínačem
4 Přihrádka na baterie
5 Víko přihrádky na baterie
Vkládání baterie
³ Pro otevření přihrádky na baterie 4 pootočte víko přihrádky 5 tak dale-
ko do protisměru šipky na ručním přístroji 3, dokud nedolehne bod na
víku přihrádky na baterie 5 na šipku na ručním přístroji 3 .
Nyní můžete víko přihrádky na baterie 5 nadzvednout.
³ Vložte baterie typu AA/Mignon/LR06. Dodržujte při tom správnou polari-
tu (označení na přihrádce na baterie 4)!
³ Zavřete přihrádku na baterie 4. Nasaďte k tomu víko přihrádky na bate-
rie 5 příčně na přihrádku na baterie 4 tak, že bod na víku na přihrádce
5 doléhá na šipku ručního přístroje 3 . Vytočte víko přihrádky
na baterie tak daleko 5, že bod doléhá na symbol zámku .
- 44 -
Page 47

Nasadit a sejmout čepelkový nástavec
³ Nasaďte nadstavec čepele 2, posunutý o cca. 45° do prava, na ruční
přístroj 3 tak, aby zapadl do přípojnice na ručním přístroji 3.
³ Pro jeho upevnění otočte čepelkovým nástavcem 2 ve směru otáčení ho-
dinových ručiček.
³ Otáčením proti směru hodinových ručiček čepelkový nástavec 2 uvolníte
a sejmete.
Odstraňování chloupků v nose a uších
³ Nasaďte čepelkový nástavec pro nosní/ušní chloupky 2 tak, jak je
popsáno v kapitole „Čepelkový nástavec nasadit a sejmout“.
³ Před použitím se ujistěte, že je čepelkový nástavec 2 správně upevněný.
³ Ruční přístroj 3 zapněte na zapínači/vypínači až potom (spínač vytáhn-
out nahoru, viditelná cifra 1).
³ Zasuňte hrot čepelkového nástavce 2 opatrně do nosu či do ucha.
Rotující čepelky chloupky bezbolestně odstraní.
³ Po použití přístroj opět vypněte (spínač vypnout směrem dolů, viditelná
cifra 0).
Čištění a úschova
³ Sejměte nasazený čepelkový nástavec 2 z ručního přístroje 3 a vyčistěte
ho pod tekoucí vodou.
Pozor:
Ruční přístroj 3 je chráněný pouze před postříkáním vodou. Proto ho nikdy
do vody nepotápějte. To může přístroj nevratně poškodit.
- 45 -
Page 48

³ Poté čepelkový nástavec 2 dobře osušte.
³ Odstraňte resp. zbývající chloupky z čepelky nástavce, například štětcem.
³ Nakapejte v pravidelných intervalech do nástavce čepele 2 olej, vhodný
pro čepele holicích strojků. Nejpozději však tehdá, když už se více čepelky neotáčí.
Pozor:
Nepoužívejte čisticí prostředky ani rozpouštědla. Ty mohou umělohmotné
povrchy poškodit.
³ Přístroj uchovávejte na chladném a suchém místě.
³ Pokud přístroj delší dobu nepoužíváte, vyjměte baterii.
- 46 -
Page 49

Likvidace
V žádném případě nevyhazujte přístroj do běžného domovního odpadu. Tento výrobek musí plnit ustanovení evropské
směrnice 2002/96/EC.
Zlikvidujte přístroj prostřednictvím firmy na likvidaci s příslušným povolením
nebo zařízení na likvidaci komunálního odpadu.
Dodržujte aktuální platné předpisy. V případě pochybností kontaktujte
příslušnou firmu, která se zabývá likvidací odpadu.
Likvidace baterií!
Baterie se nesmí v žádném případě házet do běžného domovního odpadu.
Každý spotřebitel má ze zákona povinnost odvezdat baterie/akumulátory
v komunální sběrně ( v obci nebo v městské části) nebo v prodejně.
To napomáhá tomu, aby mohlo dojít k ekologické likvidaci abterií.
Baterie/akumulátory odevzdávejte vždy ve vybitém stavu.
Veškeré obalové materiály nechte zlikvidovat v souladu s
ekologickými předpisy.
- 47 -
Page 50

Záruka & servis
Urządzenie objęte jest dwuletnią gwarancją, licząc od daty zakupu. Urządzenie zostało starannie wyprodukowane i poddane skrupulatnej kontroli przed wysyłką. Paragon należy zachować jako dowód dokonania zakupu. W
przypadku roszczeń gwarancyjnych należy skontaktować się telefonicznie z
serwisem. Tylko w ten sposób można zagwarantować bezpłatną wysyłkę zakupionego produktu.
Gwarancja obejmuje wyłącznie wady materiałowe i fabryczne, natomiast
nie obejmuje szkód powstałych podczas transportu, części ulegających zużyciu ani uszkodzeń części łatwo łamliwych, np. wyłączników, akumulatorów.
Produkt przeznaczony jest wyłącznie do użytku domowego, a nie do zastosowań profesjonalnych.
Gwarancja traci ważność w przypadku niewłaściwego używania urządzenia, używania niezgodnego z przeznaczeniem, użycia siły lub ingerencji w
urządzenie dokonywanej poza naszymi autoryzowanymi punktami serwisowymi. Niniejsza gwarancja nie ogranicza ustawowych praw nabywcy urządzenia.
Okres gwarancji nie ulega wydłużeniu o czas trwania usługi gwarancyjnej.
Dotyczy to również wymienionych i naprawionych części. Szkody i wady
zauważone już w chwili zakupu należy zgłosić od razu po rozpakowaniu,
nie później niż po upływie dwóch dni od daty zakupu. Po upływie okresu
gwarancyjnego wszystkie naprawy będą wykonywane płatnie.
Servis Česká republika
Hotline: 800143873
E-Mail: kompernass@lidl.cz
- 48 -
Page 51

Dovozce
KOMPERNASS GMBH
BURGSTRASSE 21
44867 BOCHUM, GERMANY
www.kompernass.com
- 49 -
Page 52

- 50 -
Page 53

OBSAH STRANA
Účel použitia 52
Technické údaje 52
Bezpečnostné pokyny 52
Obsah dodávky 54
Obsah dodávky a opis prístroja 54
Vloženie batérie 54
Namontovanie a odmontovanie
čepieľkového nástavca 55
Odstraňovanie chĺpkov
v nose a ušiach 55
Čistenie a skladovanie 55
Likvidácia 57
Záruka a servis 58
Dovozca 59
Uschovajte si tento návod na použitie v budúcnosti – a pri odovzdávaní prístroja tretej osobe odovzdajte aj návod!
- 51 -
Page 54

ASTRIHÁVAČ
Účel použitia
Pomocou tohto viacúčelového strihača si môžete šetrne odstraňovať chlpy z
nosa alebo uší.
Prístroj je určený výhradne na súkromné použitie. Nie je určený na použitie
v podnikateľských prevádzkach.
Technické údaje
Napájanie: 1 batéria 1,5 V (veľkosť AA/Mignon/LR06)
Trieda ochrany: IPX 4
Bezpečnostné pokyny
Nebezpečenstvo poranenia!
• Zasúvajte prístroj do nosnej dierky alebo do ucha len tak ďaleko, ako
siaha úzky hrot.
• Prístroj nepoužívajte, ak sú čepieľky zdeformované alebo poškodené.
• Chráňte čepieľky pred nárazmi a nepoužívajte nadmerný tlak. Čepieľky
by sa mohli poškodiť.
• Kryt prístroja neotvárajte - vo vnútri nie sú žiadne ovládacie prvky.
- 52 -
Page 55

• Tento prístroj nie je určený na to, aby ho používali osoby (vrátane detí)
s obmedzenými fyzickými, zmyslovými alebo duševnými schopnosťami,
alebo s nedostatkom skúseností alebo nedostatkom znalostí, len za
predpokladu, že budú pod dohľadom osoby zodpovednej za ich bezpeč
nosť alebo od nej dostanú pokyny, ako sa má prístroj používať.
• Na deti treba dohliadať, aby sa zabezpečilo, že sa nebudú hrať s
prístrojom.
Pokyny pre zaobchádzanie s batériami
Pri zaobchádzaní s batériami dodrÏiavajte nasledujúce pokyny:
• Nikdy nezahadzujte batérie do ohňa. Nenabíjajte batérie. Hrozí nebez-
pečenstvo výbuchu a poranenia!
• Nikdy batérie neotvárajte, ani na nich nespájkujte a nezvárajte. Hrozí ne-
bezpečenstvo výbuchu a poranenia!
• Pravidelne kontrolujte batérie. Vytečené batérie môžu spôsobiť poškode-
nia na prístroji.
• Keď nebudete prístroj dlhšiu dobu používať, vyberte z neho batérie.
• Ak sú batérie vytečené, natiahnite si ochranné rukavice. Priestor pre
batériu a kontakty batérie vyčistite suchou handrou.
• Batérie sa nesmú dostať do rúk deťom. Deti by si mohli dať batérie do úst
a prehltnúť ich. V prípade, že došlo k prehltnutiu batérie, treba sa ihneď
obrátiť na lekára o pomoc.
- 53 -
Page 56

Obsah dodávky
Viacúčelový strihač
Batérie (veľkosť AA/Mignon/LR06)
Návod na používanie
Obsah dodávky a opis prístroja
1 Ochranné viečko
2 Nástavec s čepieľkami na chlpy v nose a v ušiach
3 Ručný prístroj s vypínačom
4 Priestor pre batériu
5 Kryt priestoru pre batériu
Vloženie batérie
³ Ak chcete otvoriť priestor pre batériu 4, dovtedy otáčajte kryt priestoru
pre batériu 5 proti smeru šípky na ručnom prístroji 3, kým sa bodka na
kryte batériového priestoru 5 nebude kryť so šípkou na ručnom prístroji
3 . Teraz môžete zdvihnúť kryt priestoru pre batériu 5.
³ Vložte doň batérie veľkosti AA (Mignon, LR06). Dajte pritom pozor na
správnu polaritu (je vyznačená v priestore pre batériu 4)!
³ Zatvorte priestor pre batérie 4. Položte viečko priestoru pre batérie 5
šikmo na priestor pre batérie 4 tak, aby bodka na viečku 5 ležala na
šípke na ručnom prístroji 3 . Otočte viečko priestoru pre batérie
5, až bude bodka ležať na symbole zámky .
- 54 -
Page 57

Namontovanie a odmontovanie čepieľkového
nástavca
³ Nástavec s čepieľkami 2 nasaďte pootočený asi o 45° doprava na
ručný prístroj 3 tak, aby zasahoval do koľajničky v ručnom prístroji 3.
³ Otáčaním čepieľkového nástavca 2 v smere hodinových ručičiek ho upevníte.
³ Ak chcete čepieľkový nástavec 2 uvoľniť a odmontovať, otočte ho proti
smeru hodinových ručičiek.
Odstraňovanie chĺpkov v nose a ušiach
³ Nasaďte čepieľkový nástavec na chĺpky v nose a ušiach 2, ako je opí-
sané v kapitole „Namontovanie a odmontovanie čepieľkového nástavca“.
³ Pred použitím si overte, či je čepieľkový nástavec 2 správne upevnený.
³ Až potom zapnite ručný prístroj 3 vypínačom (posuňte vypínač nahor,
číslica 1 je viditeľná).
³ Zaveďte hrot čepieľkového nástavca 2 opatrne do nosa alebo do ucha.
Rotujúce čepieľky vám bezbolestne odstránia chĺpky.
³ Po použití prístroj znova vypnite (posuňte vypínač nadol, číslica 0 je
viditeľná).
Čistenie a skladovanie
³ Odmontujte nasadený čepieľkový nástavec 2 z ručného prístroja 3 a
vyčistite ho pod tečúcou vodou.
- 55 -
Page 58

Pozor:
Ručný prístroj 3 je chránený len pred striekajúcou vodou. Preto
ho nikdy neponárajte do vody. To vedie k neopraviteľnému poškodeniu
prístroja.
³ Potom čepieľkový nástavec 2 dobre vysušte.
³ V prípade potreby odstráňte zvyšné chĺpky z čepieľok nástavca vhodným
nástrojom, napríklad štetcom.
³ V pravidelných časových odstupoch olejujte nástavec s čepieľkami 2 ole-
jom vhodným do holiacich strojčekov. Najneskoršie tak urobte vtedy, keď
sa už čepieľky neotáčajú.
Pozor:
Nepoužívajte čistiace prostriedky ani rozpúšťadlá. Tie môžu umelohmotné
povrchy poškodiť.
³ Prístroj uschovávajte na chladnom a suchom mieste.
³ Ak prístroj dlhší čas nepoužívate, vyberte batériu.
- 56 -
Page 59

Likvidácia
Prístroj v žiadnom prípade nevyhadzujte do normálneho
domového odpadu. Tento výrobok podlieha európskej
smernici 2002/96/EC.
Zlikvidujte prístroj v príslušnom zariadení (firme) na likvidáciu odpadu.
Dodržte aktuálne platné predpisy. V prípade pochybností sa obráťte na
zariadenia na likvidáciu odpadu.
Likvidácia batérií
Batérie sa nesmú vyhadzovať do bežného domového odpadu. Každý
spotrebiteľ je zo zákona povinný odovzdať batérie a akumulátory na
zbernom mieste v obci, časti mesta alebo v obchode.
Táto povinnosť slúži na to, aby sa batérie mohli zlikvidovať ekologickým
spôsobom. Batérie a akumulátory odovzdajte vo vybitom stave.
Všetok baliaci materiál zlikvidujte ekologickým spôsobom.
- 57 -
Page 60

Záruka a servis
Na tento prístroj máte trojročnú záruku od dátumu nákupu. Prístroj bol starostlivo vyrobený a pred expedíciou dôkladne vyskúšaný. Uschovajte si, prosím,
účtenku ako dôkaz o nákupe. V prípade uplatňovania záruky sa spojte s
opravovňou telefonicky. Len tak sa dá zabezpečiť bezplatné zaslanie tovaru.
Záruka platí len na chyby materiálu a výroby, nie na poškodenia spôsobené
prepravou, opotrebením ani na poškodenia krehkých častí, ako sú spínače
alebo akumulátory.
Výrobok je určený výlučne na súkromné používanie a nie na komerčné účely.
Záruka prestáva platiť pri zaobchádzaní nezodpovedajúcom účelu, pri neprimeranom zaobchádzaní, pri používaní násilia a pri zásahoch, ktoré neurobil
nami autorizovaný servis. Práva vyplývajúce zo zákona nie sú touto zárukou
obmedzené.
Záručná doba sa nepredlžuje o dobu trvania záručných opráv. To platí aj na
vymenené alebo opravené diely. Prípadné poškodenia a nedostatky zistené
už pri nákupe musíte ohlásiť ihneď po vybalení, najneskoršie však do dvoch
dní od dátumu zakúpenia. V prípade opráv spadajúcich do obdobia po uplynutí záručnej doby ste povinní uhradiť vzniknuté náklady.
Service Slowakia
Tel.: 0850 00 10 16 (
E-Mail: kompernass@lidl.sk
0,075 EUR/Min.)
- 58 -
Page 61

Dovozca
KOMPERNASS GMBH
BURGSTRASSE 21
44867 BOCHUM, GERMANY
www.kompernass.com
- 59 -
Page 62

- 60 -
 Loading...