

Page 1
4C
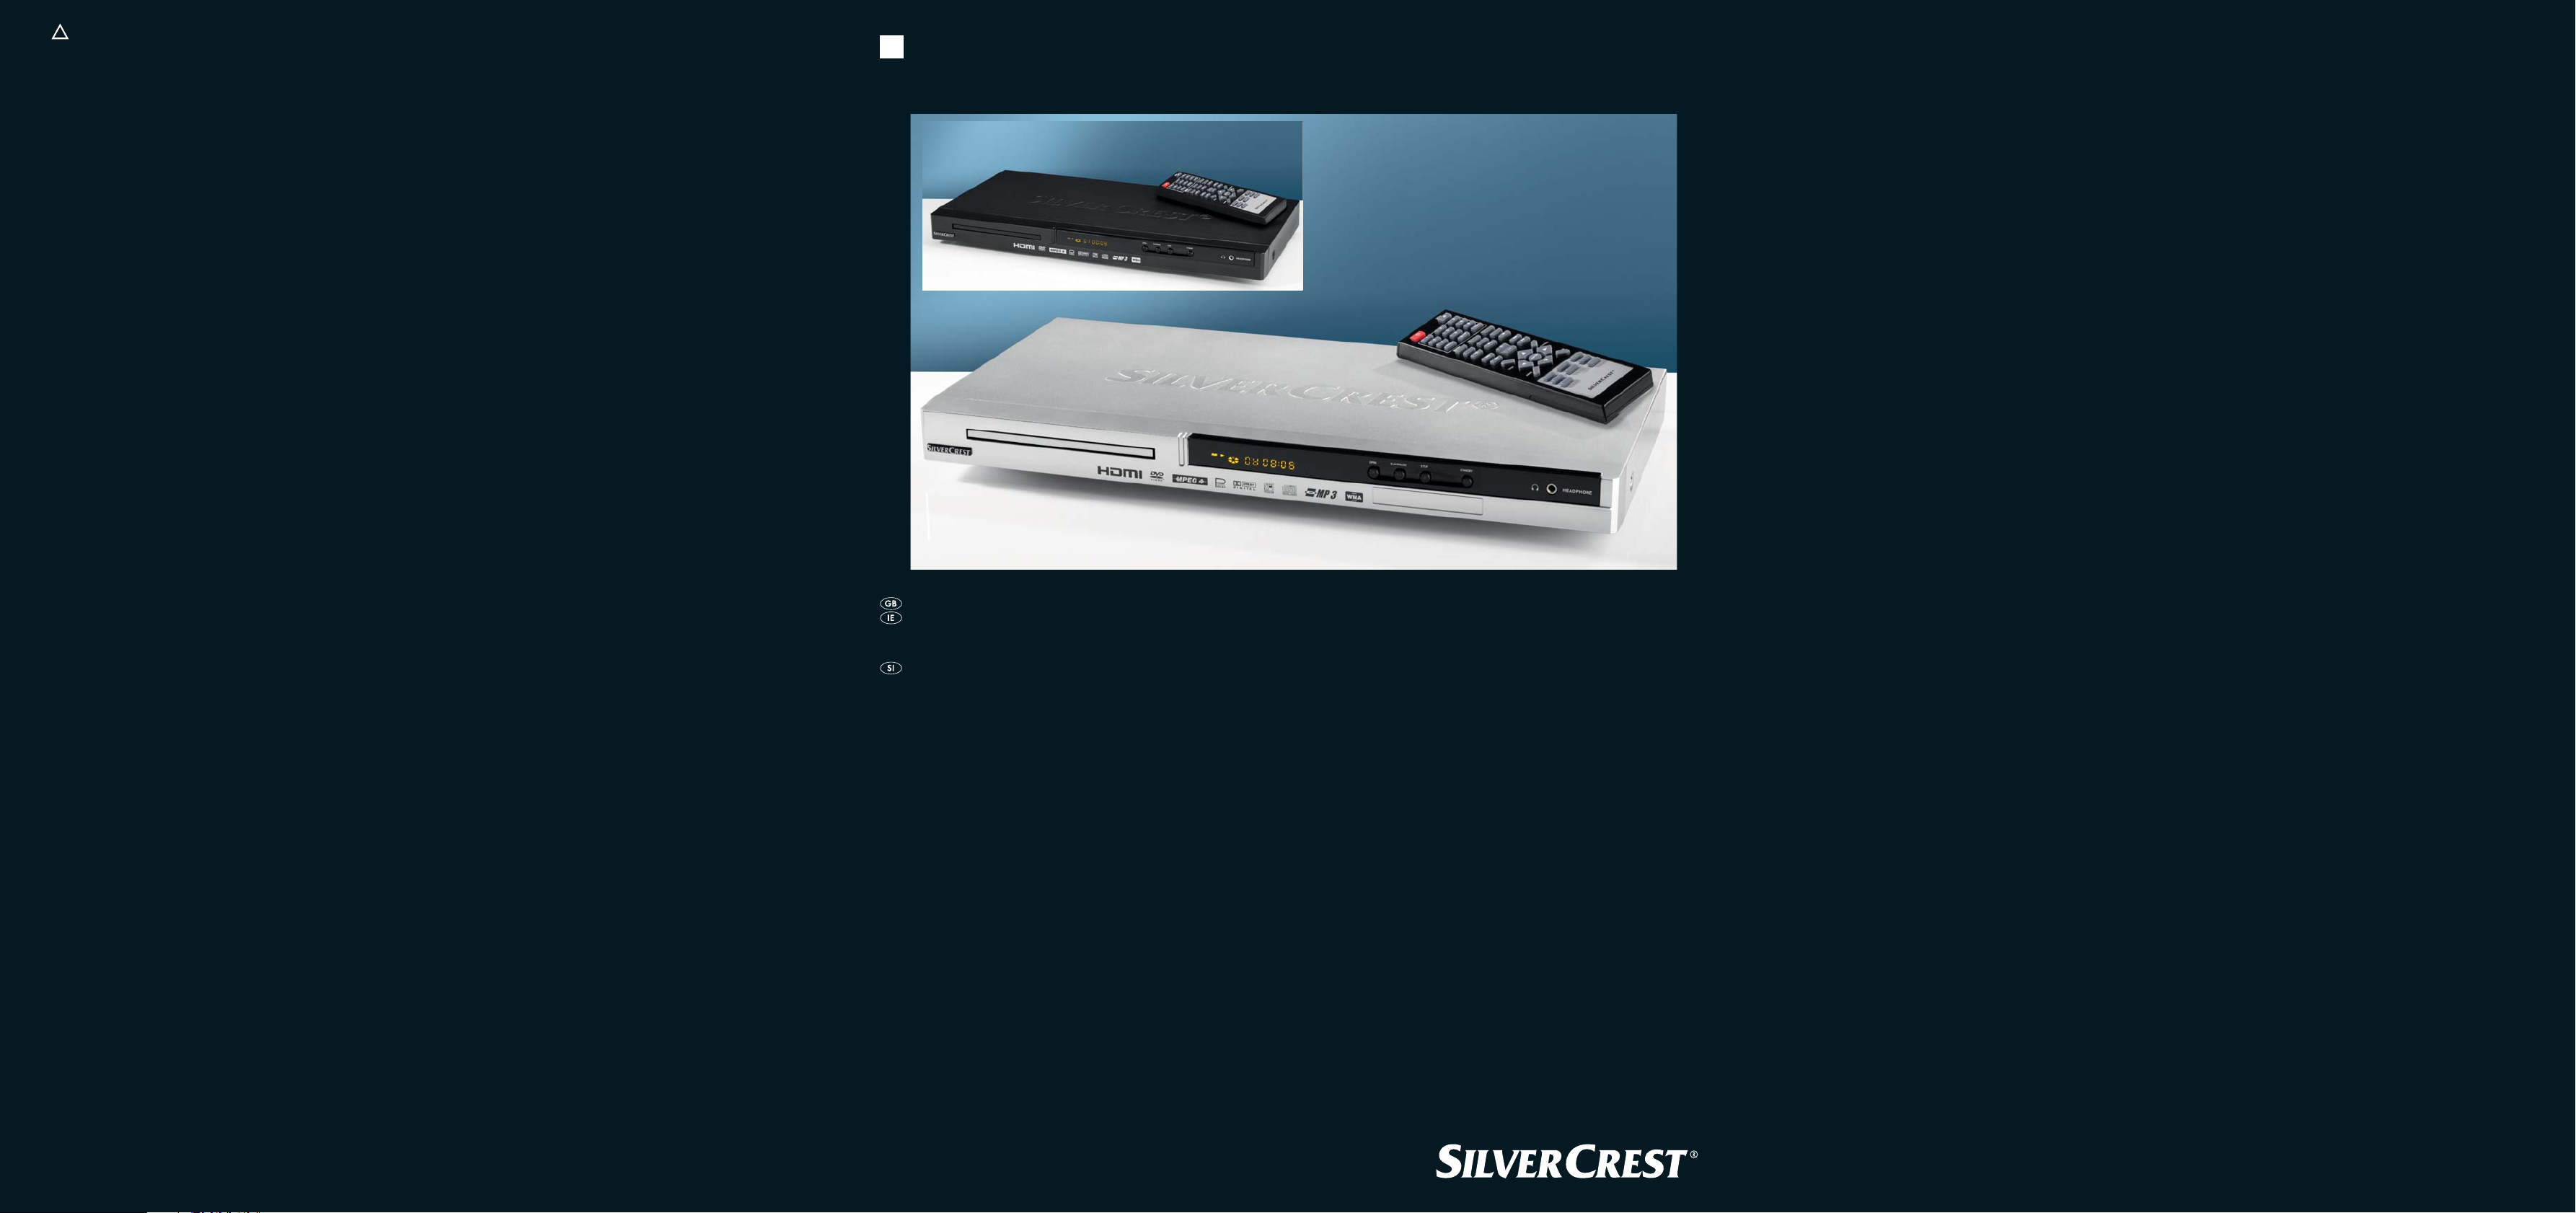
DVD PLAYER
KH 6523
DVD Player
Operating instructions
DVD predvajalnik
Navodila za uporabo
KOMPERNASS GMBH · BURGSTRASSE 21 · D-44867 BOCHUM
www.kompernass.com
ID-Nr.: KH6523 - 11/09-V2
Page 2
KH 6523
A
B
qweruyt
oi
asd
fgh
2)2!
C
3#
q
jkl;
w
3@
e
3)
2*
3!
2(
r
t
y
u
2&
2^
2%
i
o
a
s
d
f
2$
2#
2!
2)
2@
h
g
j
k
l
;
Page 3

INDEX PAGE
1. Technical Data 2
2. Intended use 2
3. Package contents 2
4. Operating components 2
5. Setting up of the DVD player 3
6. Safety instructions 3
7. Remote control 4
7.1 Inserting the batteries . . . . . . . . . . . . . . . . . . . . . . . . . . . . . . . . . . . . . . . . . . . . . . . . . . . . . . . . . . . . . . . . . . . . . . . . . . . . . . . . . . . . . . . . . .4
7.2 Using the remote control . . . . . . . . . . . . . . . . . . . . . . . . . . . . . . . . . . . . . . . . . . . . . . . . . . . . . . . . . . . . . . . . . . . . . . . . . . . . . . . . . . . . . . .4
7.3 Replacing the batteries . . . . . . . . . . . . . . . . . . . . . . . . . . . . . . . . . . . . . . . . . . . . . . . . . . . . . . . . . . . . . . . . . . . . . . . . . . . . . . . . . . . . . . . . .4
8. Connecting the DVD player to a television 4
8.1 Connecting to a television via ScartCable/RGB . . . . . . . . . . . . . . . . . . . . . . . . . . . . . . . . . . . . . . . . . . . . . . . . . . . . . . . . . . . . . . . . . . . . .5
8.2 Connecting to a television via S-Video . . . . . . . . . . . . . . . . . . . . . . . . . . . . . . . . . . . . . . . . . . . . . . . . . . . . . . . . . . . . . . . . . . . . . . . . . . . .5
8.3 Connection to a television via video input (Composite Video) . . . . . . . . . . . . . . . . . . . . . . . . . . . . . . . . . . . . . . . . . . . . . . . . . . . . . . . . . .5
8.4 Connecting via component signal (YPbPr/YUV) . . . . . . . . . . . . . . . . . . . . . . . . . . . . . . . . . . . . . . . . . . . . . . . . . . . . . . . . . . . . . . . . . . . . .5
8.5 Connecting to a television via HDMI . . . . . . . . . . . . . . . . . . . . . . . . . . . . . . . . . . . . . . . . . . . . . . . . . . . . . . . . . . . . . . . . . . . . . . . . . . . . .6
9. Connecting audio components to the DVD player 6
9.1 Requirements for the connection of a HiFi system . . . . . . . . . . . . . . . . . . . . . . . . . . . . . . . . . . . . . . . . . . . . . . . . . . . . . . . . . . . . . . . . . . . .6
9.2 Connecting digital audio components via digital cables . . . . . . . . . . . . . . . . . . . . . . . . . . . . . . . . . . . . . . . . . . . . . . . . . . . . . . . . . . . . . .7
9.3 Connecting audio components via an analogue cable . . . . . . . . . . . . . . . . . . . . . . . . . . . . . . . . . . . . . . . . . . . . . . . . . . . . . . . . . . . . . . .7
9.4 Connecting the headphones . . . . . . . . . . . . . . . . . . . . . . . . . . . . . . . . . . . . . . . . . . . . . . . . . . . . . . . . . . . . . . . . . . . . . . . . . . . . . . . . . . . .7
10. OSD menu settings 8
10.1 Using the OSD Menu . . . . . . . . . . . . . . . . . . . . . . . . . . . . . . . . . . . . . . . . . . . . . . . . . . . . . . . . . . . . . . . . . . . . . . . . . . . . . . . . . . . . . . . .8
10.2 Setup menu GENERAL . . . . . . . . . . . . . . . . . . . . . . . . . . . . . . . . . . . . . . . . . . . . . . . . . . . . . . . . . . . . . . . . . . . . . . . . . . . . . . . . . . . . . . . .8
10.3 Setup menu AUDIO . . . . . . . . . . . . . . . . . . . . . . . . . . . . . . . . . . . . . . . . . . . . . . . . . . . . . . . . . . . . . . . . . . . . . . . . . . . . . . . . . . . . . . . . . .9
10.4 Setup menu DOLBY . . . . . . . . . . . . . . . . . . . . . . . . . . . . . . . . . . . . . . . . . . . . . . . . . . . . . . . . . . . . . . . . . . . . . . . . . . . . . . . . . . . . . . . . .10
10.5 Setup menu VIDEO . . . . . . . . . . . . . . . . . . . . . . . . . . . . . . . . . . . . . . . . . . . . . . . . . . . . . . . . . . . . . . . . . . . . . . . . . . . . . . . . . . . . . . . . .10
10.6 Setup menu PREFERENCE . . . . . . . . . . . . . . . . . . . . . . . . . . . . . . . . . . . . . . . . . . . . . . . . . . . . . . . . . . . . . . . . . . . . . . . . . . . . . . . . . . . .11
11. Initial operation of the DVD player 12
11.1 Switching the DVD player on/off . . . . . . . . . . . . . . . . . . . . . . . . . . . . . . . . . . . . . . . . . . . . . . . . . . . . . . . . . . . . . . . . . . . . . . . . . . . . . .12
11.2 Inserting the DVD . . . . . . . . . . . . . . . . . . . . . . . . . . . . . . . . . . . . . . . . . . . . . . . . . . . . . . . . . . . . . . . . . . . . . . . . . . . . . . . . . . . . . . . . . . .12
12. Playing back DVDs, VCDs or S-VCDs 12
12.1 Features during playback of a DVD, VCD or S-VCD . . . . . . . . . . . . . . . . . . . . . . . . . . . . . . . . . . . . . . . . . . . . . . . . . . . . . . . . . . . . . . .13
13. Playback of JPEG-Photo CD/WMA/MP3/MPEG4 17
14. Cleaning of the DVD player 18
15. Disposal 18
16. Troubleshooting 18
17. Glossary / Key Word Index 19
18. Warranty and Service 21
19. Importer 21
Read these operating instructions carefully before using the device for the first time and preserve this manual for later reference.
Pass this manual on to whoever might acquire the device at a future date.
- 1 -
Page 4
DVD PLAYER KH6523
2. Intended use
This documentation is copyright protected.
Any duplication and/or reproduction, wholly or partially including extracts as
well as the reproducing of illustrations also in modified form is only permitted
with written agreement from the manufacturer.
1. Technical Data
This device conforms regarding compliance to the basic requirements and
other relevent provisions of the low-voltage directive 2006/96/EC, the
EMV directive 2004/108/EC as well as the Ecological design directive
2009/125/EC (Ordinance 1275/2008) Supplement II, Number 1).
Power supply: AC 220 V - 240 V ~ 50 Hz
Power consumption: 20 Watt
Power consumption:
Standby: < 1 W
Protection class: II /
TV standard: PAL/NTSC
Operating temperature: +5 ~+40°C
Humidity: 5 ~90% (no condensation)
Measurements
(L x W x H): 220 x 430 x 45 mm
Weight : 1,6 kg approx.
Laser class: 1
Video Output
Format: 4:3 / 16:9
Decoder: MPEG 2
D/A converter: 12 Bit
Audio Output
Decoder: MPEG Dolby Digital (AC-3)
DTS only possible with additional external decoder
D/A converter: 24 Bit / 96 kHz
Headphones output
Jackplug: 3,5 mm
Maximum
output voltage: approx. 25 mV
Playable mediums/formats
VIDEO: DVD, DVD+R, DVD+RW, DVD-R, DVD-RW,
DVD-R DL, DVD+R DL, VCD, S-VCD
Audio: CD, CD-R, CD-RW, Audio-DVD, MP3, WMA,
OGG Vorbis
Additional formats: AVI, MPEG 4, Xvid, JPEG (Foto-CD)
Regional code: or
The Silvercrest KH 6523 DVD player is exclusively intended for the playback
of CDs and DVDs in a closed room residential environment. The device is
intended exclusively for private, non-commercial use.
The device is intended for use as a home entertainment device.
No liability/warranty will be accepted for damages that result from improper
use of the device or from unauthorised reconstruction!
3. Package contents
- DVD Player
- Infrared remote control
- 2 Batteries for remote control, type AAA/ (Micro cells)
- RGB Scart cable
- HDMI cable
- Operating manual
4. Operating components
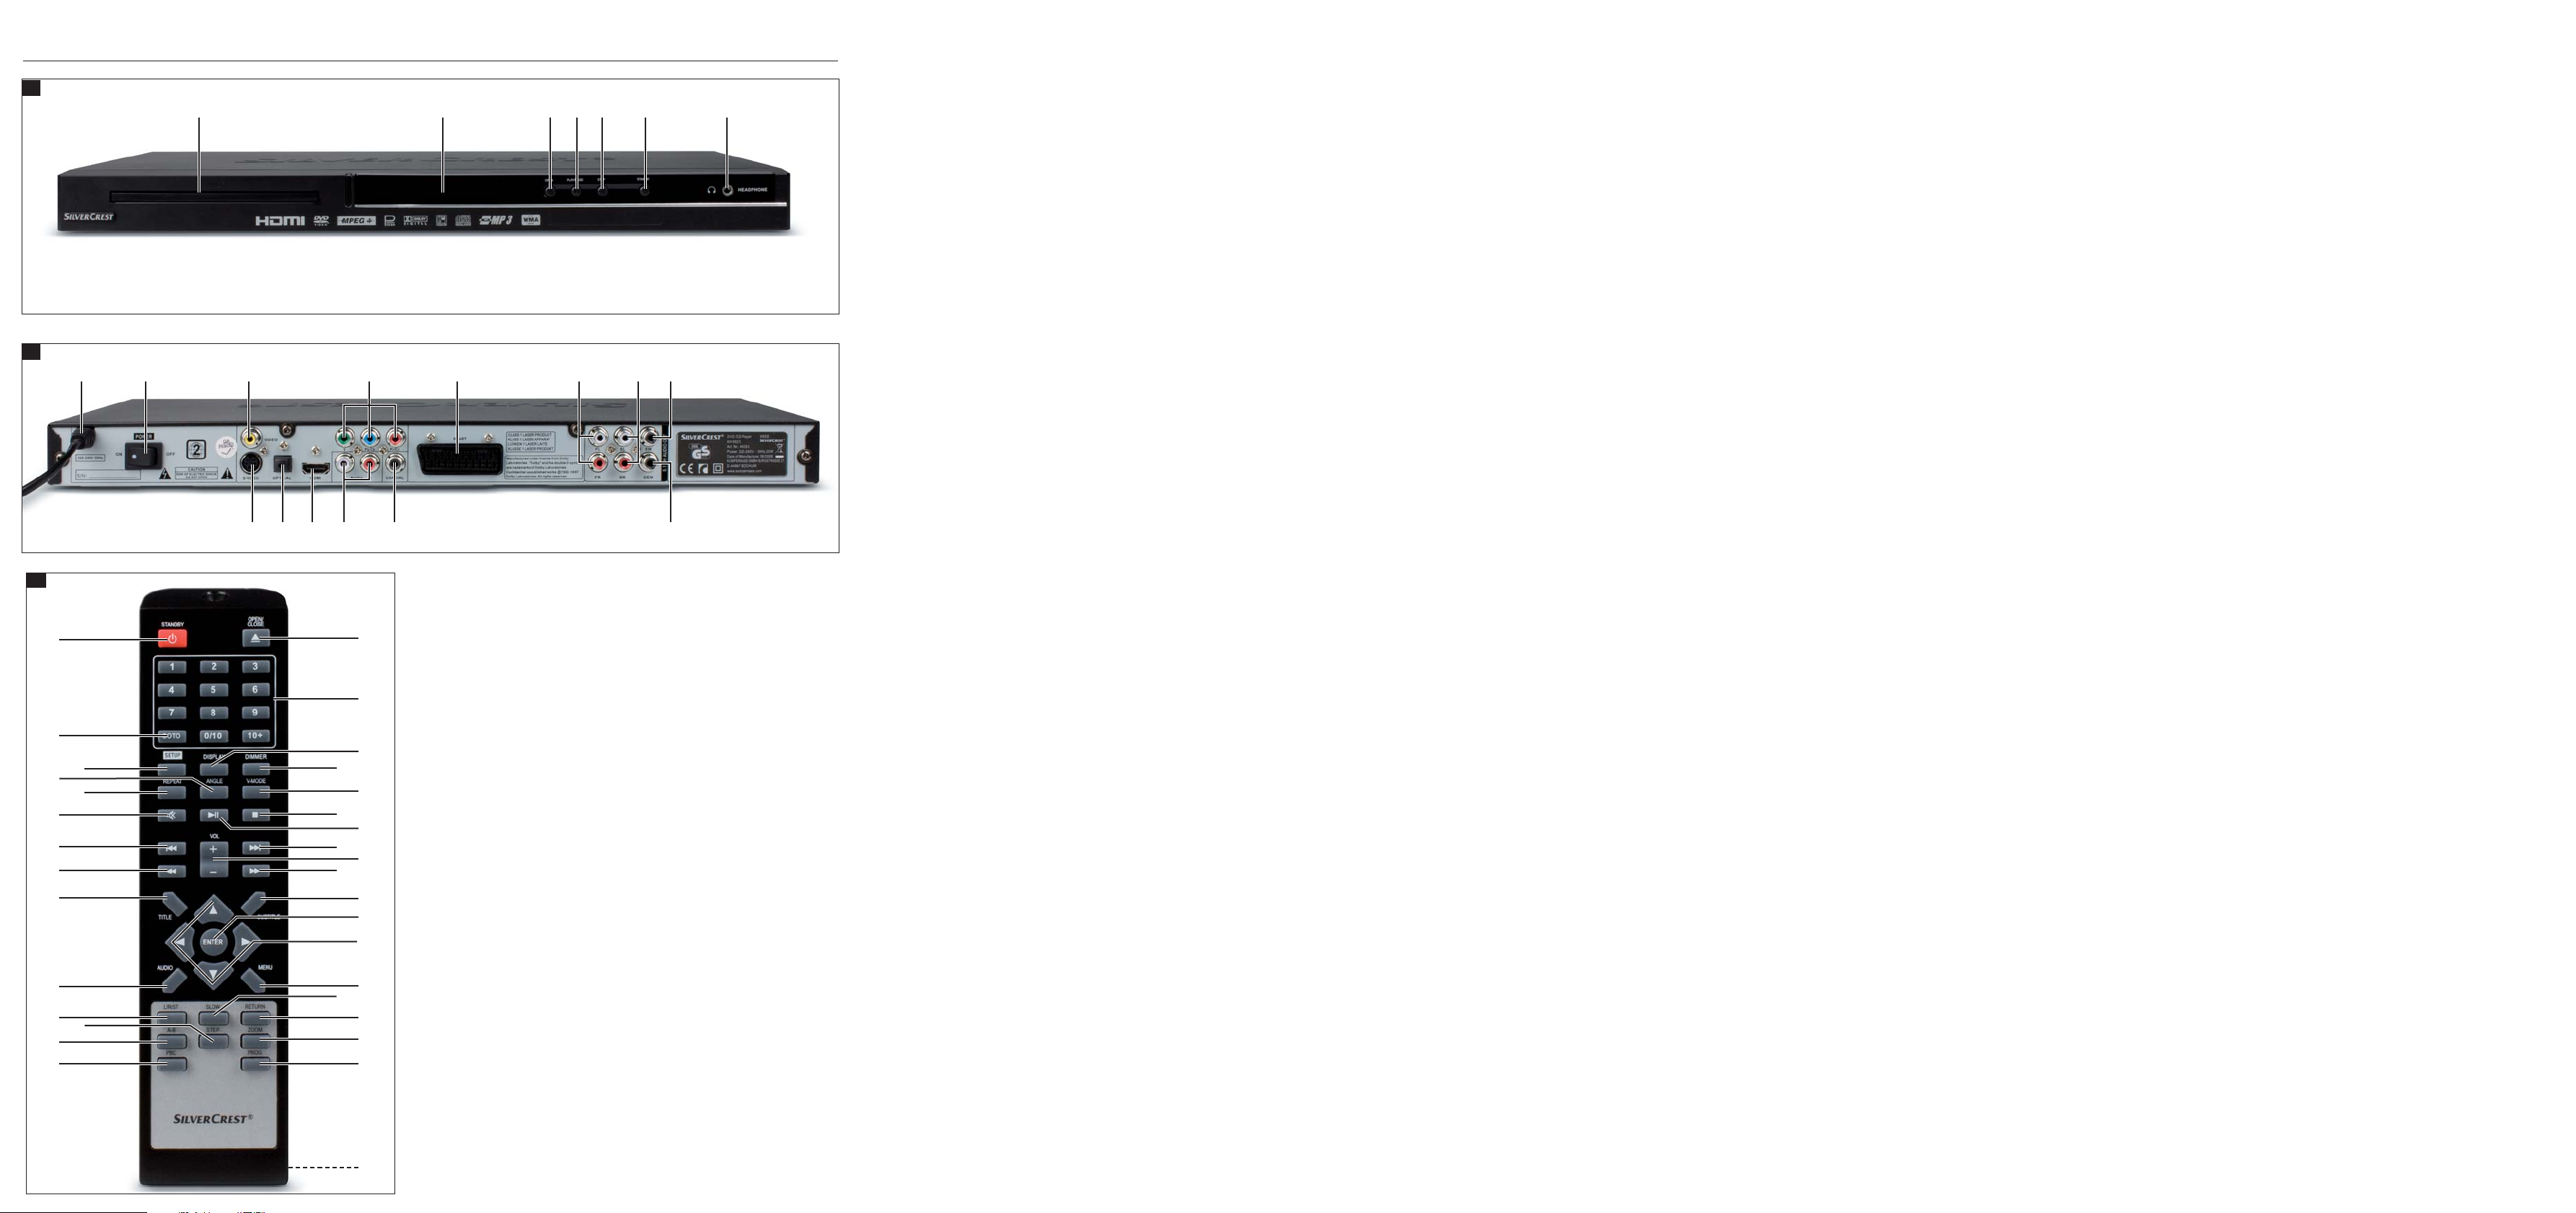
A. DVD player front panel
Disc tray
q
Display (with standby LED (green) and IR sensor for remote control)
w
OPEN/CLOSE button
e
PLAY/PAUSE button
r
STOP button
t
STANDBY button
y
Headphones output for 3,5 mm jackplug
u
B. DVD player rear panel
Power cable
i
POWER switch
o
VIDEO: Composite video output
a
Y, Pb/Cb, Pr/Cr: Component video outputs
s
SCART: Scart/RGB output
d
FL/FR: Output for front, left and right audio channels
f
SL/SR: Output for rear, left and right audio channels
g
SW: Output for bass audio channel
h
CEN: Output for centre audio channel
j
COAXIAL: Coaxial audio output
k
AUDIO L/R: Left and right audio outputs
l
HDMI: HDMI output
;
OPTICAL: optical digital audio output
2)
S-VIDEO: S-Video output
2!
- 2 -
Page 5

C. Remote control
OPEN/CLOSE : Open/Close the disc tray
q
Number buttons
w
DISPLAY: Superimpose disc information
e
DIMMER: Adjust the display brightness
r
V-MODE: Set the video output
t
STOP: Stop playback
y
PLAY/PAUSE : Start/Suspend playback
u
:
SKIP FWD
i
VOL +/- : Raise/lower the sound level
o
FAST FWD: Fast search forward
a
SUBTITLE: Set the subtitle
s
ENTER: Confirm input
d
Control buttons
f
MENU: Access disc menu
g
SLOW: Slow motion function
h
RETURN: Set the playback mode
j
ZOOM: Set the image enlargement
k
PROG: Access the programme function
l
Battery compartment (on the rear panel)
;
PBC: PBC function activate/deactivate (VCD, SVCD only)
2)
A-B: Repeat sequence
2!
STEP: Individual frame playback
2@
L/R/ST: Set the audio channel
2#
AUDIO: Set the audio language
2$
TITLE: Access the title menu
2%
FAST RWD: Fast search backwards
2^
SKIP BWD
2&
MUTE : Switch the sound on/off
2*
REPEAT: Set the repeat function
2(
ANGLE: Change the camera perspective
3)
SETUP: Access the OSD menu
3!
GOTO:Access titles, chapters and time direct select menus
3@
STANDBY : Switch the device to standby mode
3#
Chapter skip forwards
: Chapter skip backwards
6. Safety instructions
• This device is not intended for use by individuals (including children)
with restricted physical, physiological or intellectual abilities or deficiences
in experience and/or knowledge unless they are supervised by a person
responsible for their safety or receive from this person instruction in how
the device is to be used.
• Children should be supervised to ensure that they do not play with the
device.
• To avoid unintentionally switching on the device pull the power cord
from the mains supply after use and before cleaning.
• Check the device and all parts for visible damages. The safety concept
can work only if the device is in a faultless condition.
• The power plug must always be easily accessible, so that the device can
be quickly disconnected from the mains in the event of an emergency.
Risk of electrical shocks!
• Connect the device only to correctly installed and earthed mains sockets.
Ensure that the rating of the local power supply tallies completely with
the details given on the rating plate of the device.
• Arrange for defective power plugs and/or cables to be replaced at
once by qualified technicians or our Customer Service Department.
• Arrange for customer service to repair or replace connecting cables
and/or devices that are not functioning properly or have been damaged.
• Never immerse the device in water. Wipe it only with a slightly damp
cloth.
• Do not expose the device to rain and never use it in a humid or wet
environment.
• Ensure that the power cable never becomes wet during operation.
• You must not open the housing or repair the device yourself.
Should you do so, device safety can no longer be assured and the
warranty will become void.
• Protect the device against drip and spray water. Do not place any
water-filled vessels (e.g. flower vases) on the device.
5. Setting up of the DVD player
1. Carefully remove the DVD player and the supplied accessories from
the packing.
2. Remove the protective foil from the display.
3. Place the DVD player on a flat, even and firm base. Do not subject the
device to any external heat or moisture source. Make sure that the device
has sufficient ventilation on all sides. Do not place any television directly
on top of the DVD player.
Attention!
Do not plug the DVD player into an electrical outlet at this time.
Wait until you have connected the DVD player to a television set.
In the event that you wish to change the type of video or audio connection
you must first pull the power plug from the power socket! Otherwise the
DVD player and possibly equipment connected to it could become
irreparably damaged through voltage peak strikes!
Risk of fire!
• Do not use the device in the vicinity of hot surfaces.
• Do not locate the device in places exposed to direct sunlight.
If you do, it may overheat and become irreparably damaged.
• Do not leave the device unattended when in use.
• Never cover the ventilation slots of the device while it is being used.
• Do not place any open sources of fire, like candles, on the device.
Injury hazard!
• Keep children away from the connecting cable and the device.
Children frequently underestimate the dangers of electrical equipment.
• Ensure that the device stands with a safe and secure positioning.
• Do not operate the device if it has sustained a fall or is damaged.
Arrange for the device to be checked and/or repaired by qualified
technicians.
• Batteries/ battery cells are potentially fatal if swallowed. Store batteries
out of the reach of children. If a battery is swallowed medical assistance
must be sought immediately.
• Also, store the packaging foils well away from children. There is a risk
of suffocation.
- 3 -
Page 6
Danger! Laser radiation!
This device is fitted with a „Class 1 Laser“.
• Never open the device.
• Never attempt to repair the device.
• There is invisible laser radiation inside the device.
Do not expose yourself to the laser beam.
Note:
Some aggressive furniture finishes can have a destructive influence on the
device's rubber feet. If necessary, place the device on a nonslip pad.
Thunderstorms!
Equipment connected to a power supply can be damaged during a
thunderstorm. You should therefore always pull the power plug from the
power socket when there is a storm.
Notice regarding electrical power surges
(EFT / electrical fast transient) and electrostatic discharges:
In the case of malfunction due to an electrical fast transient (power surge)
and/or electrostatic discharge, the device must be returned to default
settings in order to re-establish normal operation. The power supply may
have to be disconnected and then reconnected. The batteries (if present)
must be removed and then reinserted.
Notice regarding disconnection from mains-power
The POWER switch does not completely disconnect the device from
the power network. Additionally, the device consumes power when in
standby-mode. To completely disconnect the device from mains-power,
the power plug MUST be removed from the wall socket.
Information regarding the handling of batteries
The remote control is operated by batteries.
For the safe handling of batteries please observe the following safety
information:
Danger exists from uses other than those intended!
• Do not throw the batteries into a fire.
• Do not short circuit the batteries.
• Do not attempt to recharge the batteries.
• Regularly check the condition of the battery. Leaking battery acid can
cause permanent damage to the device. When handling a damaged or
leaking battery special care should be taken. Danger from acid burns!
Wear protective gloves.
• Clean the battery compartment and the battery contacts with a dry cloth.
• Store batteries out of reach of children. When swallowed seek immediate
medical attention.
• Remove the batteries from the device if you do not intend to use the device
for an extended period of time.
• Never open batteries, never solder or weld batteries.
The risk of explosions and injuries exists!
7. Remote control
7.1 Inserting the batteries
1. Open the battery compartment on the rear of the remote control.
2. Place the two supplied batteries type AAA (micro cells) into the battery
compartment. Make sure that the batteries are inserted in accordance
with the correct polarity.
3. Replace the battery compartment cover.
7.2 Using the remote control
In order to guarantee faultless operation when using the remote control…
• Always point the remote control, during use, directely at the DVD player
• Make sure that there are no obstructions between the remote control
and the DVD player that will hinder reception.
• When using the remote control place yourself not more than 5 metres
from the DVD player
otherwise interferences can occur during operation of the DVD player functions
with the remote control.
7.3 Replacing the batteries
If the operation of the DVD player via the remote control does not function
properly or does not function at all the batteries must be replaced
• Always renew all batteries in order to return the remote control to its full
performance ability.
8. Connecting the DVD player to a television
After setting up the DVD player, you can now connect it to a television.
The DVD player can be connected to televisions which operate with the PAL
and NTSC standards.
If you want to use the DVD player on a television with the NTSC standard
you must change the video setting in the DVD players "OSD menu". There
PAL is set as the television standard at the factory. Depending on the televisions
equipment there are different methods of connecting the DVD player to it,
these are explained as follows.
Attention!
No liability/warranty will be considered for damage to the DVD player
caused by the effects of moisture, water penetration or overheating!
- 4 -
Page 7
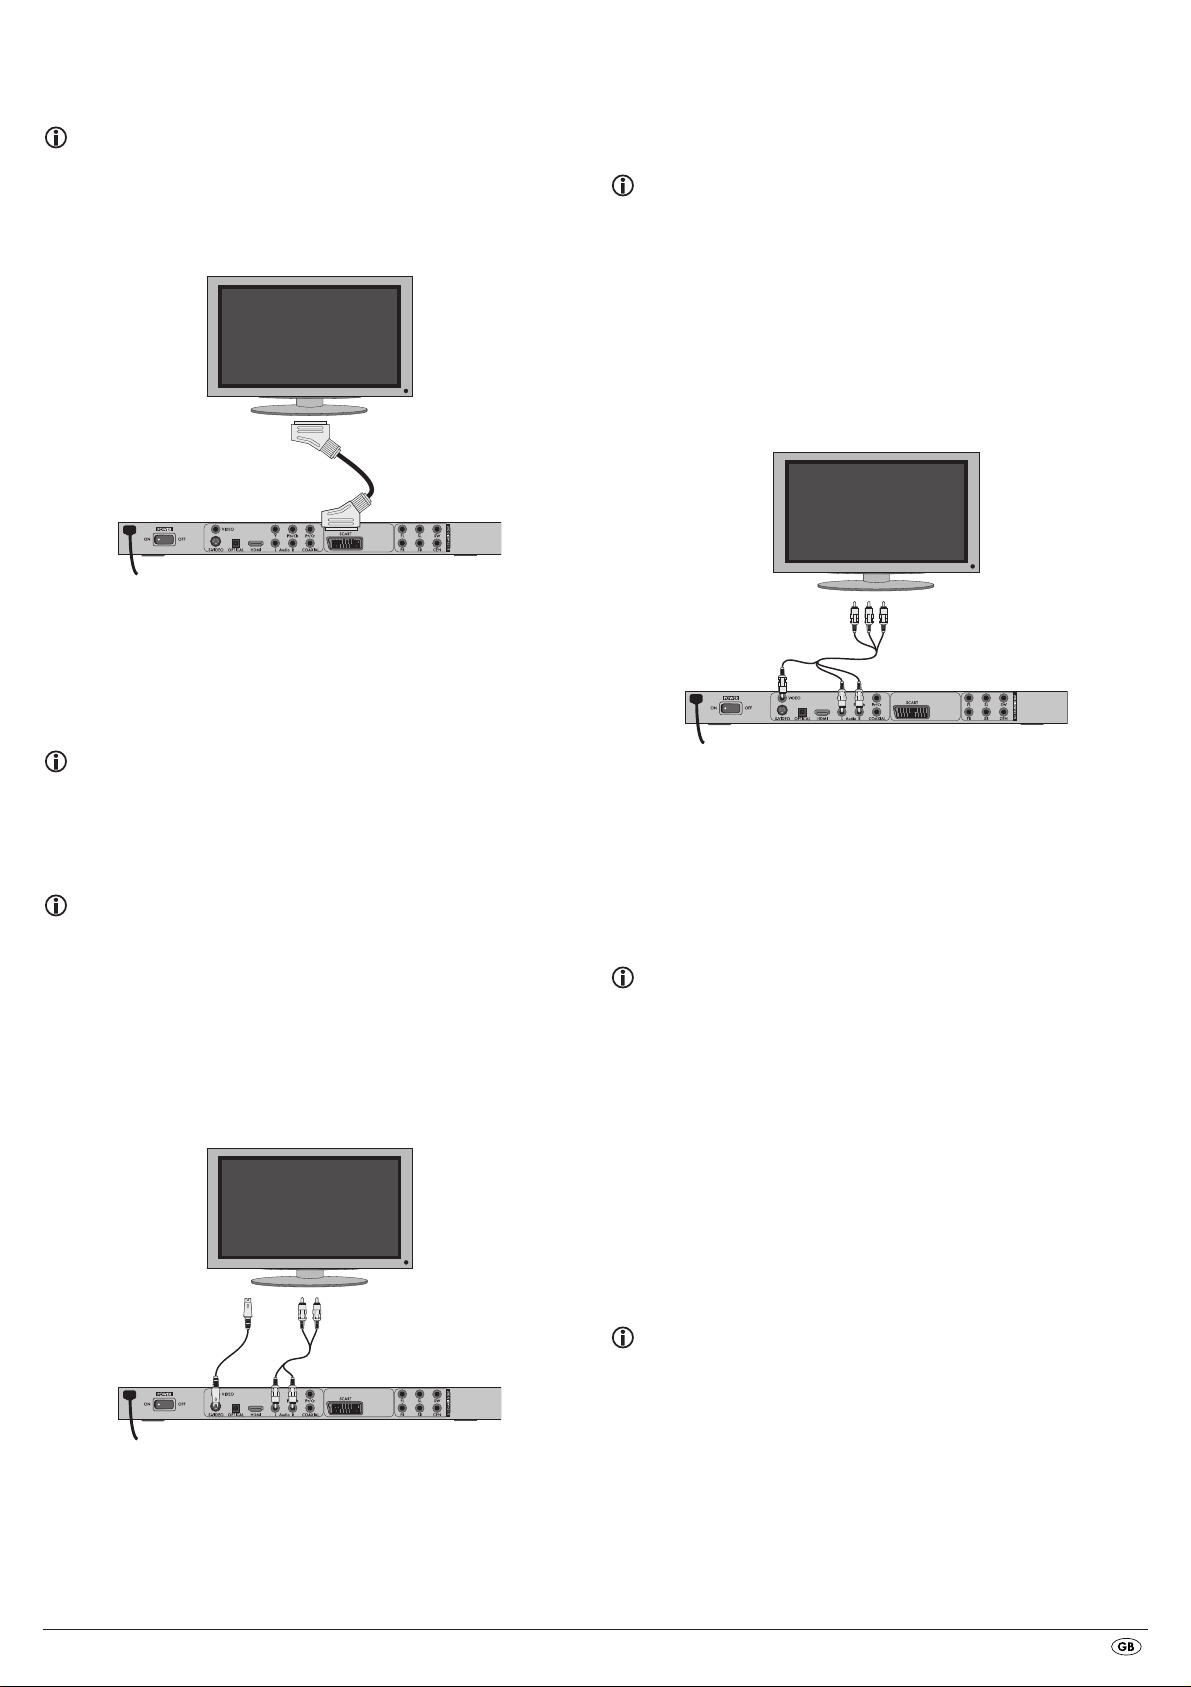
8.1 Connecting to a television via ScartCable/RGB
Note:
Connecting the DVD player to a television with a Scart cable via the RGB input
offers a high quality connection. Select this connection variation in the case of
televisions equipped with an RGB input. If you are not sure if the television is
equipped with an RGB input then you can check this by consulting the television's
instruction manual.
• For playback select the matching channel on your television Check with
the television's instruction manual on how you can set the AV channel.
• In the OSD menu select the menu option VIDEO/VIDEO OUTPUT/OFF .
The menu option VIDEO OUTPUT is only selectable when the HDMI output
is deactivated. On this subject see also chapter 10 "Settings in the OSD
menu".
8.3 Connection to a television via video input
(Composite Video)
For this connection variant the television must be equipped with Audio/Video
cinch sockets (Composite Video).
In order to connect the DVD player to a television via Composite Video you
will need
• an audio/video RCA cinch cable (not supplied)
• Connect the jack inscribed with
using the supplied Scart cable.
• For playback select the matching channel on your television Check with
the television's instruction manual on how you can set the AV channel.
• In the OSD menu select under the VIDEO/VIDEO OUTPUT/RGB or
OFF menus.
The menu option VIDEO OUTPUT is only selectable when the HDMI output
is deactivated. On this subject see also chapter 10 "Settings in the OSD
menu".
SCART to a television Scart socket by
8.2 Connecting to a television via S-Video
Note:
For this type of connection the television must have available an S-VIdeo input
and two audio "IN" cinch sockets. If you are not sure if the television is equipped
with S-Video and/or cinch sockets you can check this by consulting the television's
instruction manual.
For this connection variant you will need:
• an audio cinch cable (not supplied)
• an S-video cable (not supplied) These can be obtained from your dealer.
To connect the DVD player to a television via S-video:
• Connect the yellow marked video socket with the yellow
the television.
• Connect the audio output sockets
DVD player to the corresponding audio inputs on the television. Make
sure that the colour markings yellow, red and white correspond.
• For playback select the matching channel on your television Check with
the television's instruction manual on how you can set the AV channel.
• In the OSD menu select the menu option VIDEO/VIDEO OUTPUT/OFF.
The menu option VIDEO OUTPUT is only selectable when the HDMI output
is deactivated. On this subject see also chapter 10 "Settings in the OSD
menu".
AUDIO L/R on the rear panel of the
VIDEO socket on
8.4 Connecting via component signal (YPbPr/YUV)
This connection variant is only possible with very high grade televisions,
LCD/Plasma screens or Video projectors.
Check with the instruction manual of the corresponding playback device to
see if this connections variant is available. It is possible that additional playback
device settings may have to be implemented.
The so called "Component signal" is put out via the YPbPr socket of the DVD
player. Component signals are available in the form of the so called "YUV"
signal (Half image) as well as in the form of the so called "YPbPr" signal
(Full image/Progressive scan).
• Connect the jack inscribed with S-VIDEO to a television S-Video socket
using an S-Video cable.
• Connect the audio output sockets
player via an audio cinch cable to the corresponding audio inputs on
the television. Make sure that the red and white colour markings
correspond.
AUDIO L/R on the rear panel of the DVD
On this topic, please refer to Section 17. "Glossary / KeyWord Index".
The cable connections are the same in both cases; YPbPr-signal for Progressive
Scan however can only be used if the television (or Video projector), to which
you want to connect the DVD player, is capable of Progressive Scan. If you
are not sure whether the television (or Video projector), to which you want to
connect the DVD player is capable of Progressive Scan and has cinch sockets
available then you can check this by consulting the television's (or Video
projectors's) instruction manual.
- 5 -
Page 8
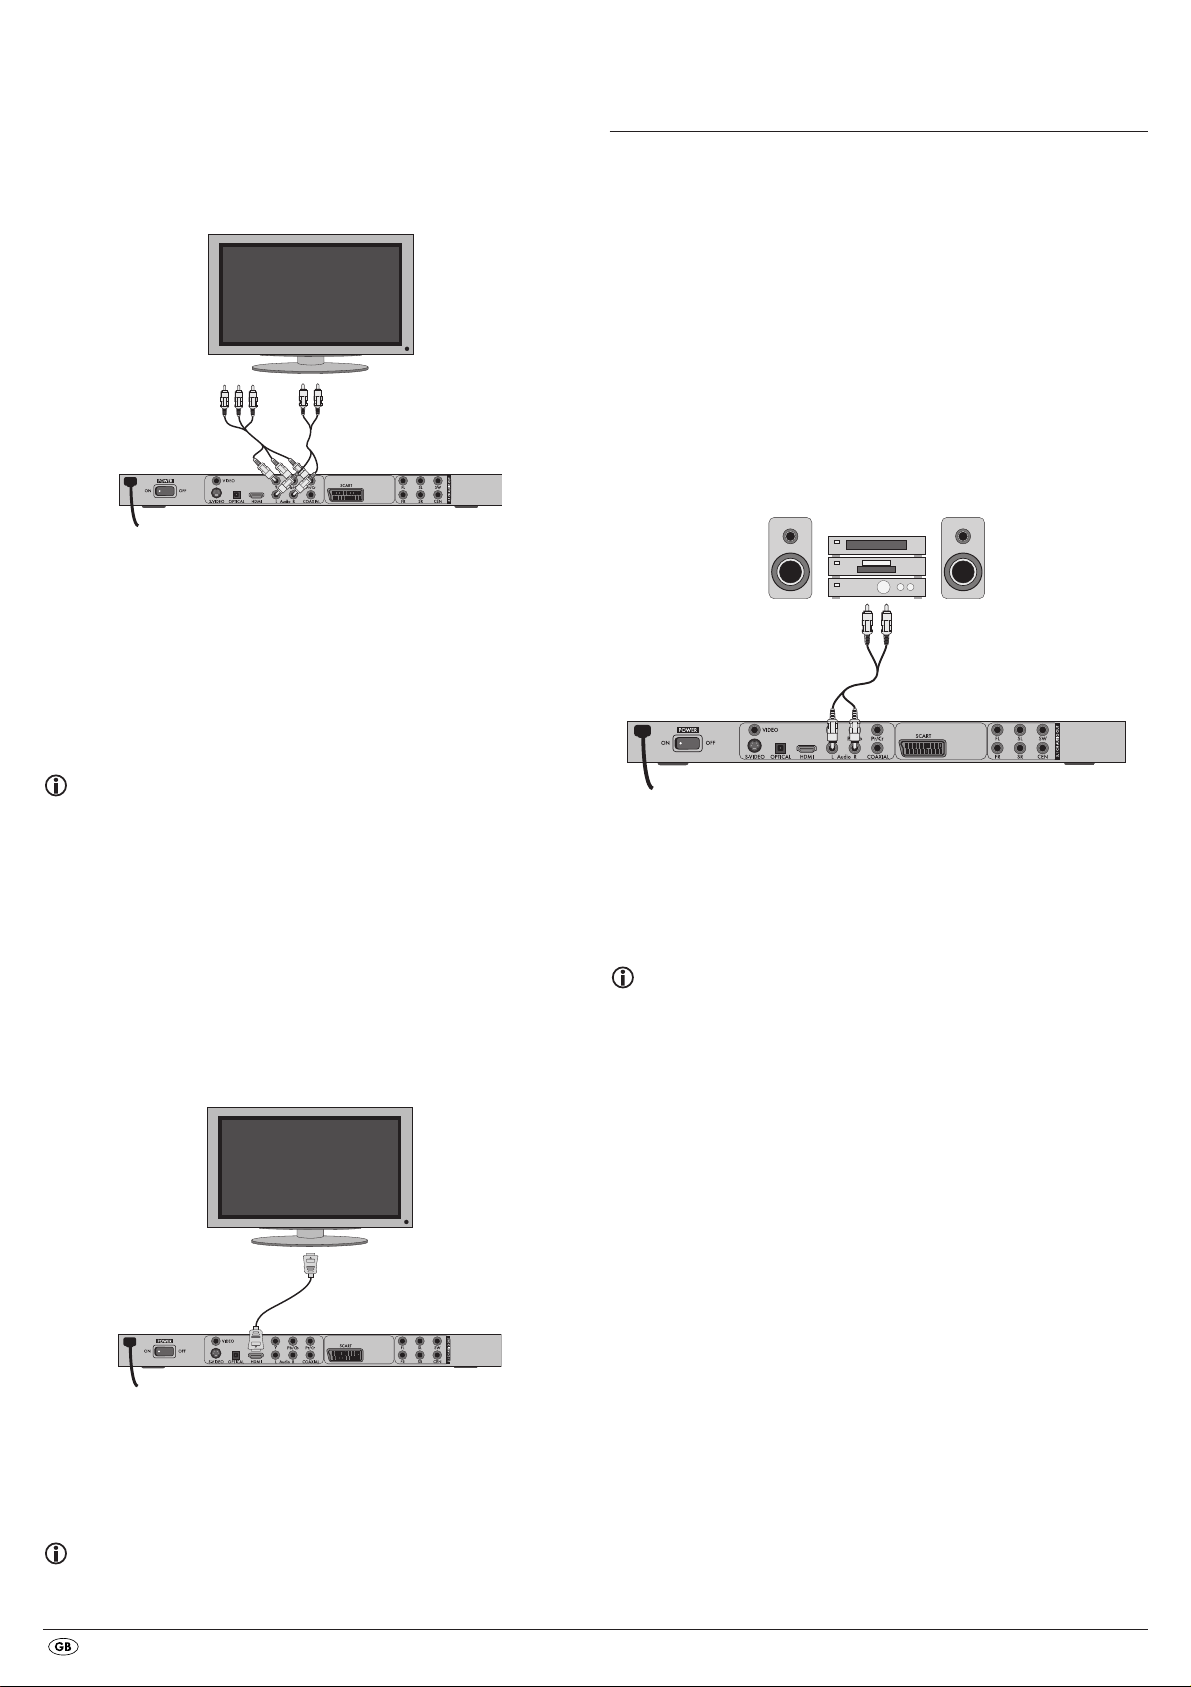
For both variations – "YPbPr" and "YUV"– you will need
• an audio cinch cable (not supplied)
• an YUV cable (not supplied) These can be obtained from your dealer.
On the rear panel of the DVD player you will find the connection sockets
Y, Pb/Cb and Pr/Cr.
Connecting the DVD player via component signal:
• Connect the sockets Y (green), Pb/Cb (blue) and Pr/Cr (red) with the
corresponding sockets on the television.
• Connect the audio output sockets
DVD player to the corresponding audio inputs on the television with an
audio cinch cable.
Make sure that the red and white colour markings correspond.
• For playback select the matching channel on your television Check with
the television's instruction manual on how you can set the AV channel.
• In the OSD menu select the menu option VIDEO/VIDEO OUTPUT/YUV.
AUDIO L/R on the rear panel of the
9. Connecting audio components to the
DVD player
Besides sound playback of DVDs, VCDs/S-VCDs and audio and MP3-CDs
via the speaker of the television, to which the DVD player is connected,
sound can also be played back via external audio components such as
a HiFi system, Dolby digital/DTS receiver or a surround sound system.
9.1 Requirements for the connection of a HiFi system
In order to enjoy a full sound experience when playing DVDs with the DVD
player you can connect a HiFi system to the player. Before connecting check
with the HiFi system's instruction manual to verify...
• if the HiFi system is suitable for connection to a DVD player.
• if the HiFi system is equipped with cinch sockets; if yes, you can connect
the HiFi system to the DVD player via cinch cables.
Connecting a HiFi system:
The menu option VIDEO OUTPUT is only selectable when the HDMI output
is deactivated. On this subject see also chapter 10 "Settings in the OSD
menu".
8.5 Connecting to a television via HDMI
This connection variant is only possible with very high grade televisions,
LCD/Plasma screens or Video projectors
Check with the instruction manual of the corresponding playback device to
see if this connections variant is available. It is possible that additional playback device settings may have to be implemented. For this type of connection
you will need the HDMI cable (supplied);
Connecting the DVD player via HDMI:
• Connect the audio output sockets AUDIO L/R on the rear panel of the DVD
player to the corresponding audio inputs on the HiFi system with an audio
cinch cable. Make sure that the red and white colour markings correspond.
• Check with the instruction manual which settings on the HiFi system may
be necessary in order to reproduce sound via the HiFi system during the
playback of a DVD, VCD/S-VCD, audio or MP3-CD from the DVD player.
Note:
For an optimal sound experience place your HiFi system's loud speakers to
the left and to the right of the television, on which you connected the DVD
player.
If you connected the DVD player to the television via a Scart cable the audio
signal will be transmitted via the cinch cable to your HiFi system as well as
via the Scart cable to the television. In this case, set the volume of the television
to the lowest value.
• Connect the jack inscribed with "HDMI" using a HDMI cable to the
corresponding socket on the television.
• For playback select the matching channel on your television Check with
the television's instruction manual on how you can set the AV channel.
• In the OSD menu select the menu option VIDEO/HDMI Setup/ON.
On this subject see also chapter 10 "Settings in the OSD menu".
- 6 -
Page 9
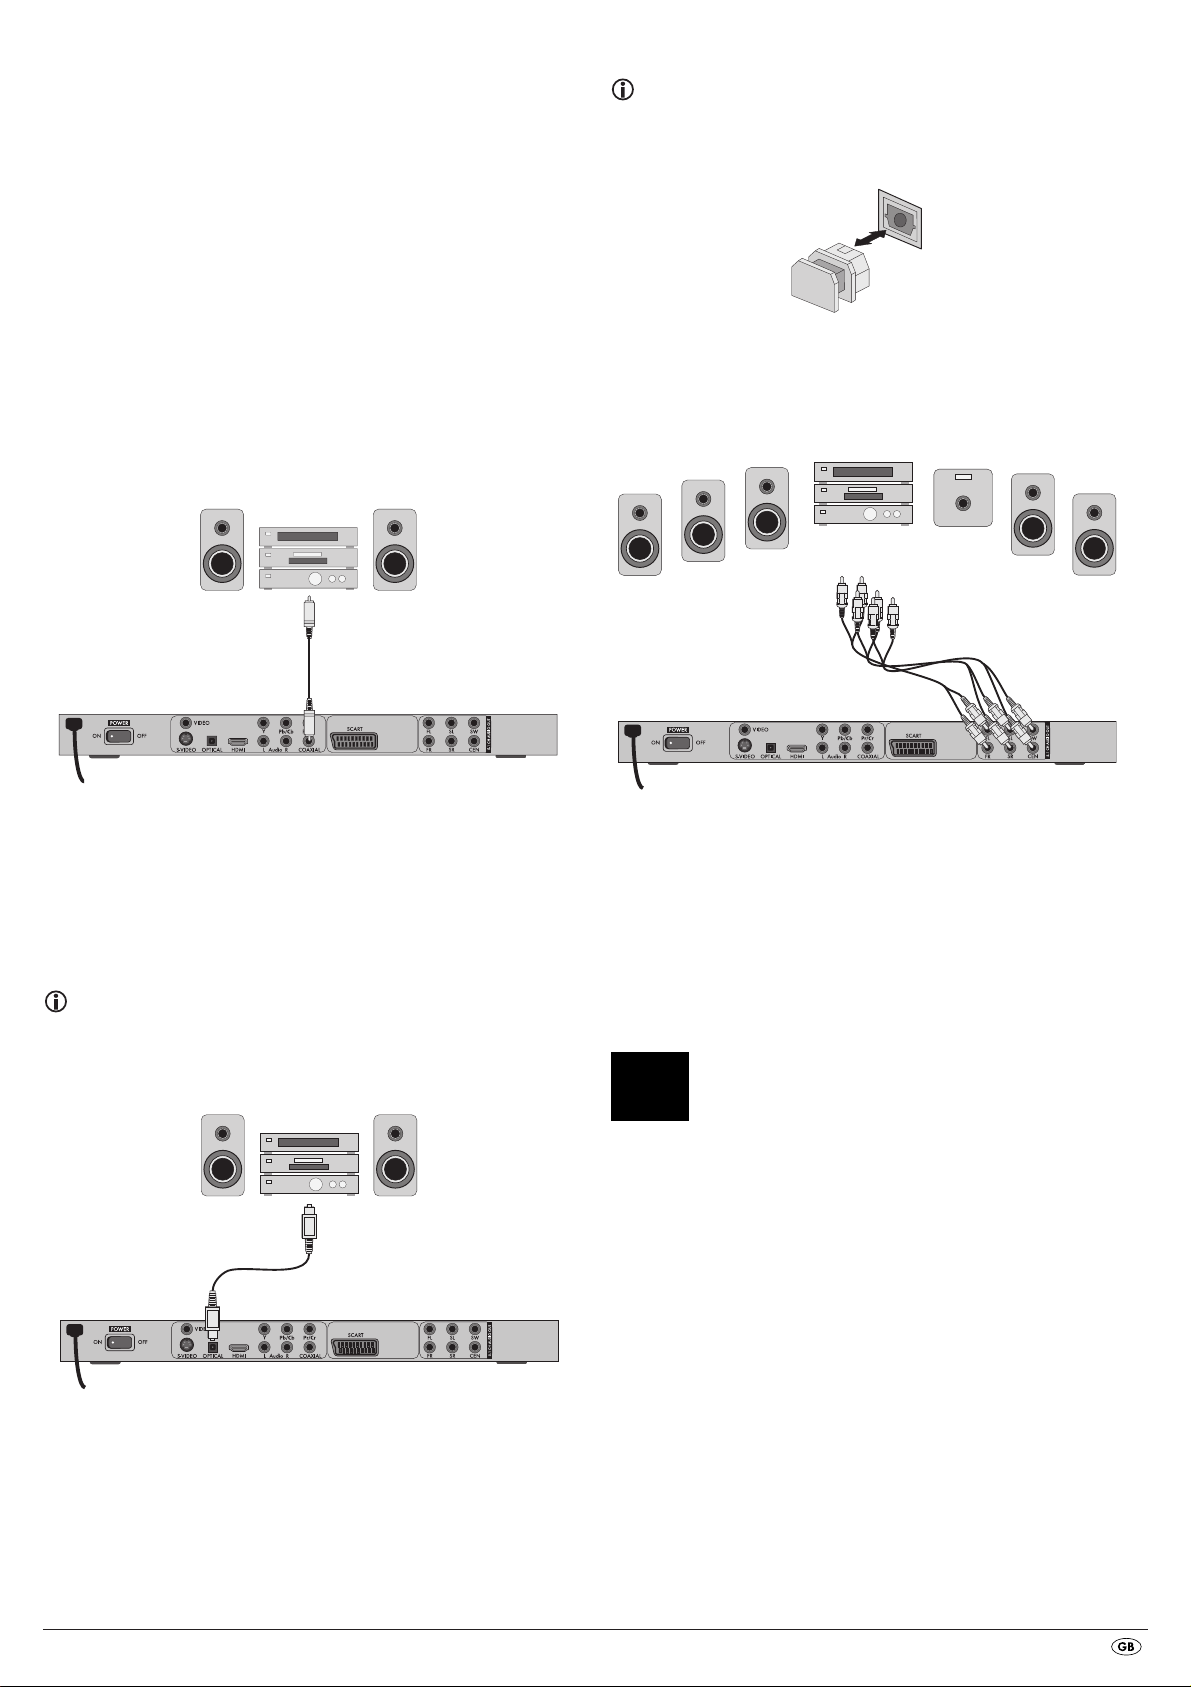
9.2 Connecting digital audio components via digital cables
In order to enjoy sound playback throughout the room from correspondingly
equipped DVDs (recognizable by the Dolby Digital or DTS logos), you can
connect the DVD player to a digital audio component, for example, a Dolby
Digital or DTS receiver or a suitable surround sound system.
The cables necessary for the following described connection variations can
be obtained from your dealer.
Firstly check with the digital component’s instruction manual to see if it allows
for connection to the DVD player...
• via a coaxial cable
• or via an optical cable.
Note:
Make sure that no dirt can enter into the optical cable socket. This could cause
signal interference. Always insert the protective plug into the socket if no optical
cable is connected.
Connection via coaxial cable
To connect the DVD player to a digital audio component with a digital coaxial
cable:
• Connect the
digital audio component.
COAXIAL inscribed plug to the corresponding socket on the
Connecting via optical cable
To connect the DVD player to a digital audio component with an optical cable:
• Remove the protective plug from the
panel of the DVD player and insert the optical cable plug.
• Insert the plug at the other end of the optical cable in the corresponding
socket of the digital audio component.
OPTICAL inscribed socket on the rear
Note:
The optical cable is a glass fibre cable and must not be bent during installation.
Otherwise the glass fibre contained in the cable could break and the cable
would become unusable.
9.3 Connecting audio components via an analogue cable
If a digital input is not available on the audio component you can connect
the DVD player to it via conventional analogue cinch cables.
To connect the DVD player with analogue cables:
• Plug a cinch cable into each of the sockets
FL (front left channel),
FR (front right channel), SL (rear left channel), SR (rear right channel),
CEN (front centre channel) and SW (Bass) on the rear panel of the DVD player.
• Insert the cinch cables into the corresponding analogue inputs of the
audio component.
9.4 Connecting the headphones
The headphones output is located on the front panel of the DVD player.
• Plug the 3.5 mm headphones jackplug into the headphones output.
Attention!
Listening to music with headphones for long periods and at high
volume levels can lead to hearing damage!
- 7 -
Page 10
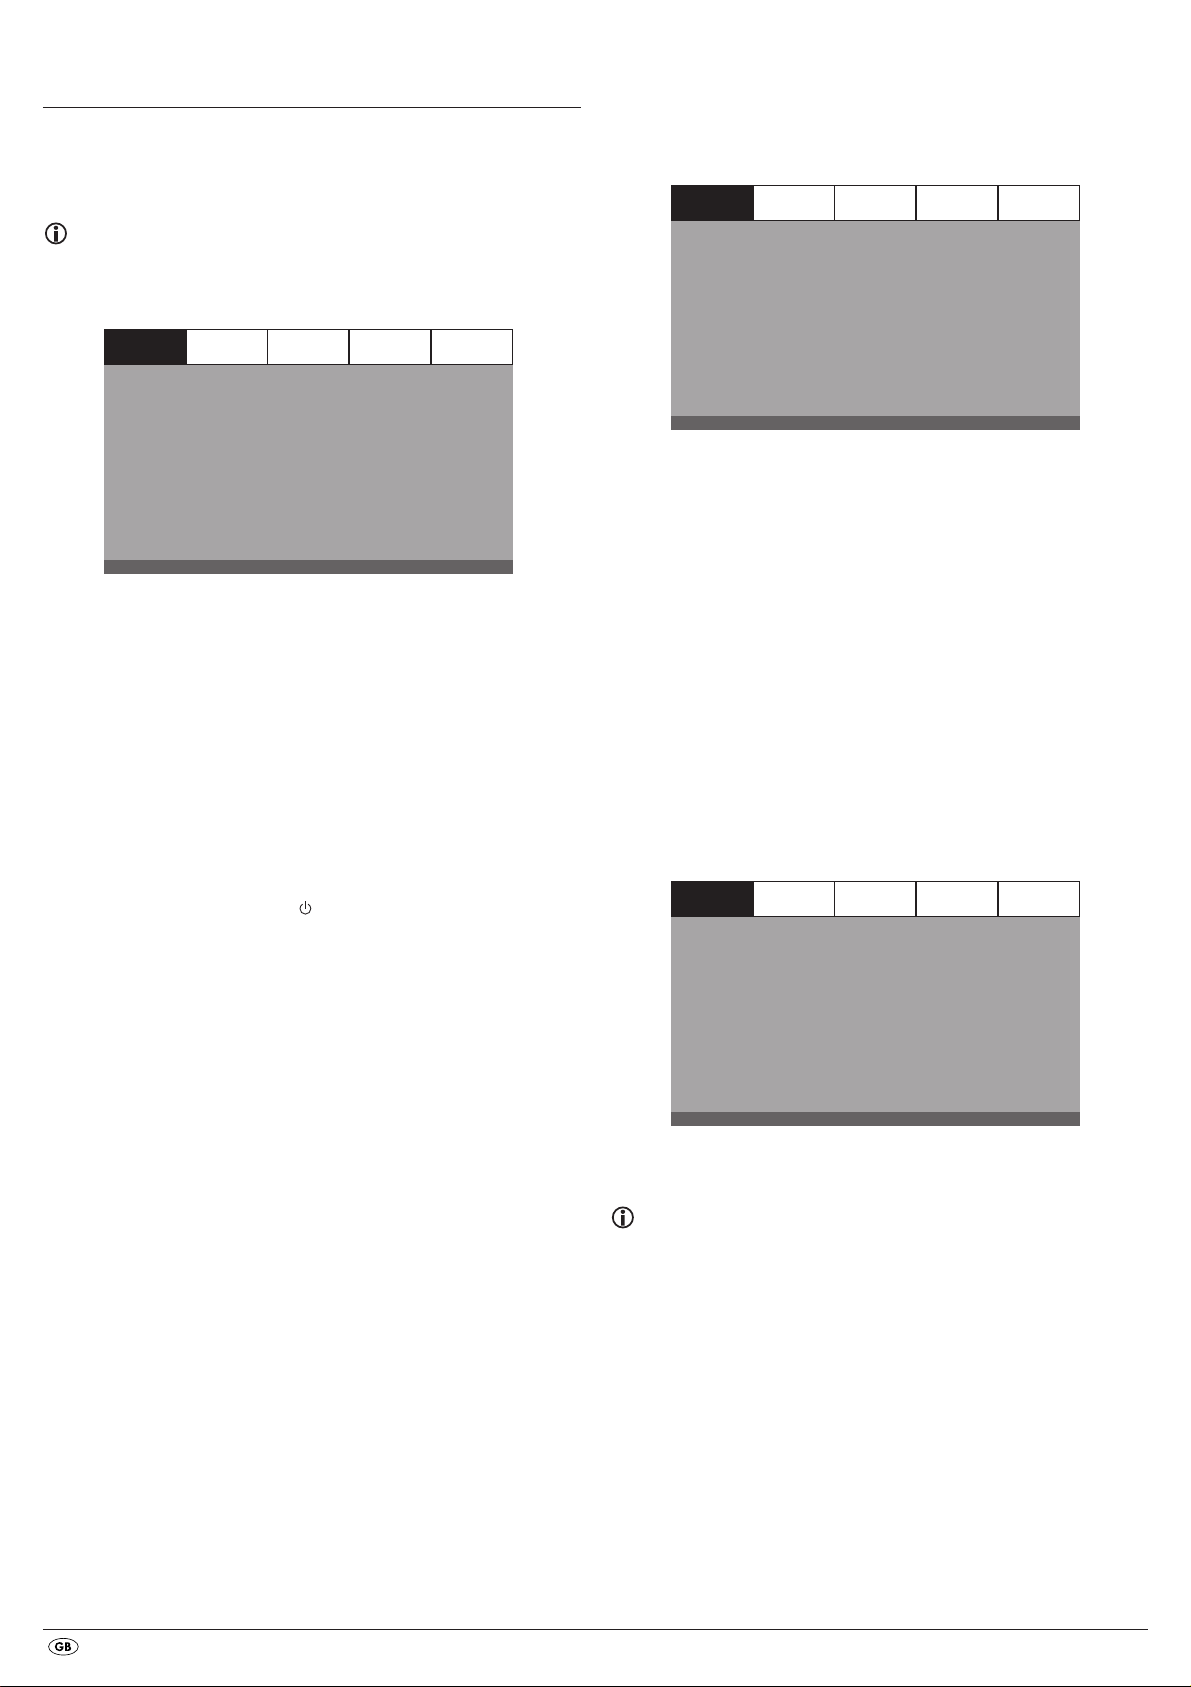
10. OSD menu settings
All of the DVD player's settings can be made with the remote control via
the so called "On Screen Display" menu ("OSD menu" for short). The OSD
Menu will be superimposed on the television screen.
10.1 Using the OSD Menu
• To access the DVD players OSD menu press the SETUP button on the remote
control. The OSD Menu with its menu options will appear on the television
screen:
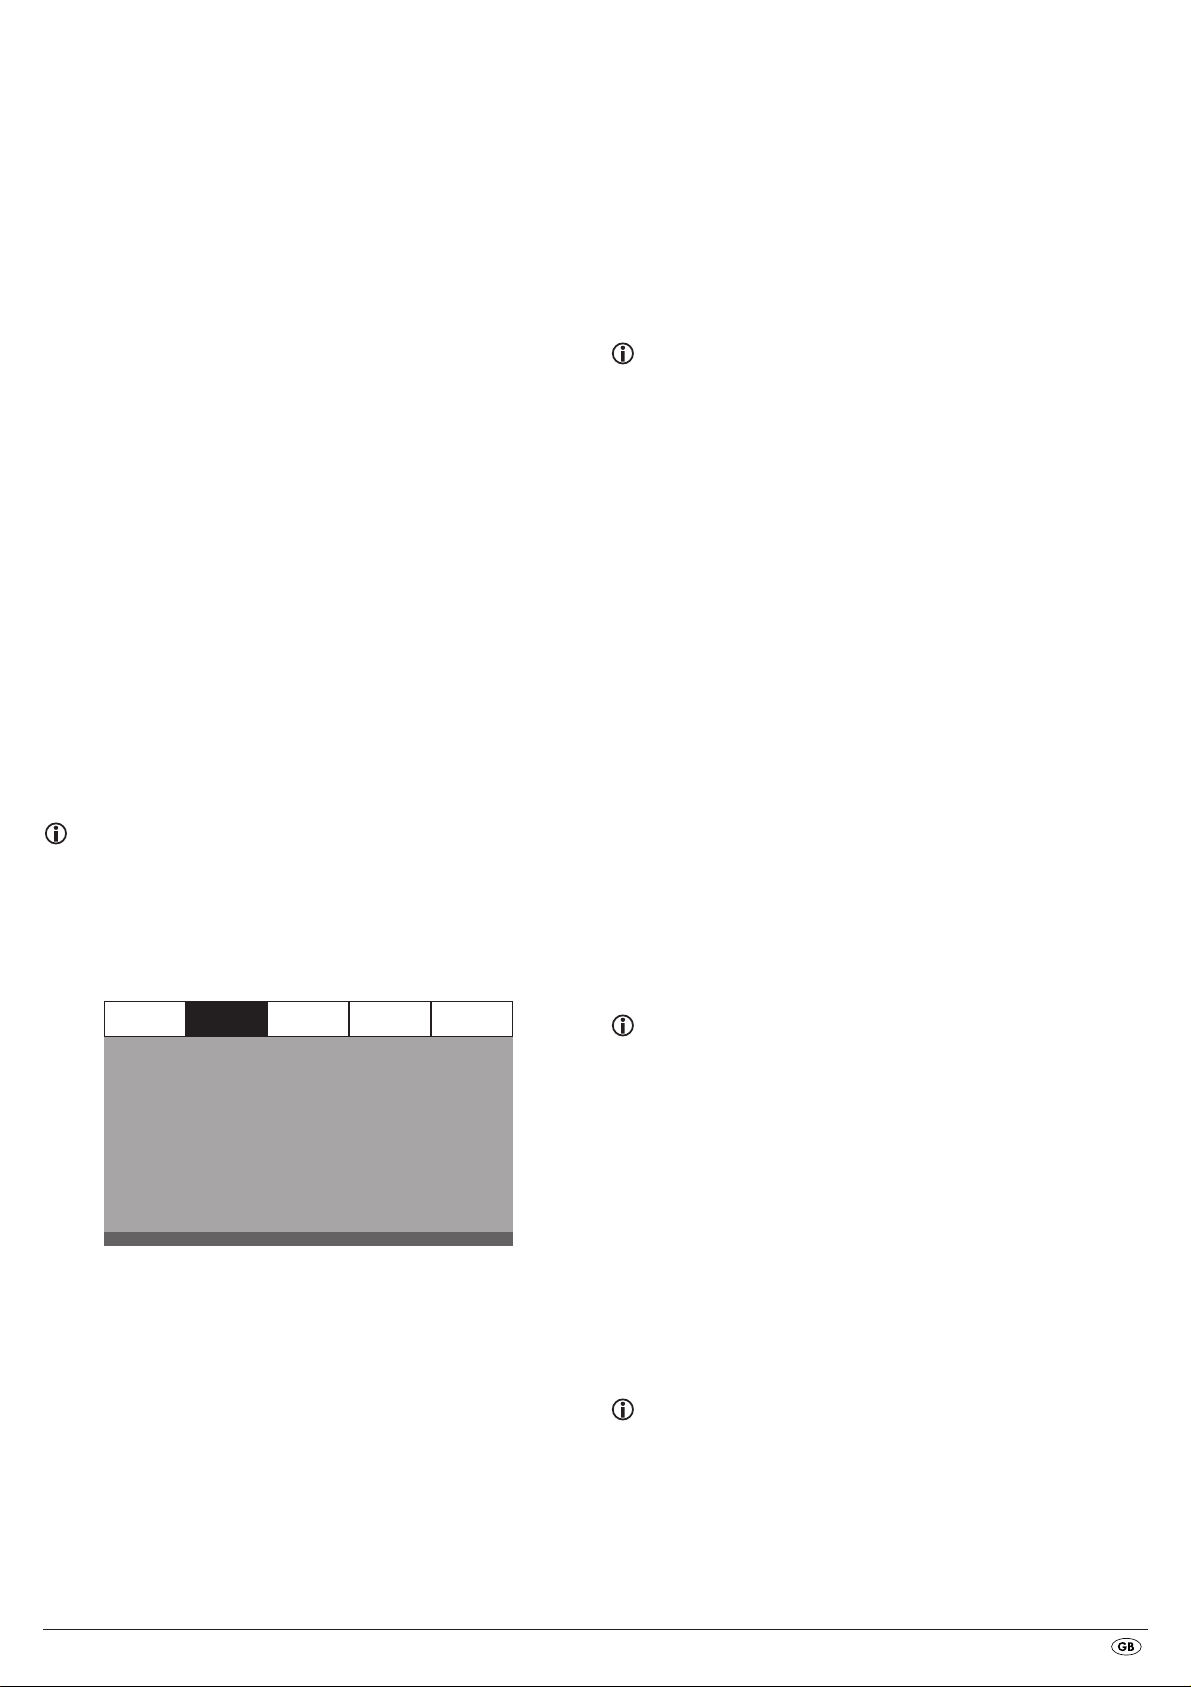
GENERAL AUDIO DOLBY VIDEO PREFERENCE
Note:
In these instructions the English OSD menu is described. At any time you can
set the menu to your country's language as described in "GENERAL > OSD
LANGUAGE".
GENERAL AUDIO DOLBY VIDEO PREFERENCE
TV DISPLAY
ANGLE MARK
OSD LANGUAGE
CLOSED CAPTIONS
SCREEN SAVER
LAST MEMORY
Before you use the DVD player for the first time for playback of DVDs,
VCDs/S-VCDs or audio/MP3-CDs you must implement a few settings via the
OSD Menu. These settings are dependent amongst others on...
• the language, in which you want the OSD menu to be displayed
• which TV standard corresponds to the television, to which you want to
connect the DVD player
• Which image format your television can display
Administering settings via the OSD menu
• First insert the connector plug of the DVD player's power cord into
a power socket.
• To switch the DVD player on activate the
of the DVD player. If the DVD player is already switched on but is in
standby mode, press the button
switch the DVD player on. Standby mode is identified by the green LED
in the display on the front panel of the device.
The device will check to see if a disc is inserted. The SilverCrest logo appears
on the television screen:
PS
ON
ENG
OFF
ON
OFF
POWER switch on the rear panel
STANDBY on the remote control to
TV DISPLAY
ANGLE MARK
OSD LANGUAGE
CLOSED CAPTIONS
SCREEN SAVER
LAST MEMORY
PS
ON
ENG
OFF
ON
OFF
The following menu options can be selected:
GENERAL, AUDIO, DOLBY, VIDEO and PREFERENCE.
• With the control buttons
and the ENTER button you can carry
out all the settings in the menu.
• With the control buttons you can select a menu by moving the yellow
marking onto the corresponding menu symbol.
• With the control buttons you select an input in a menu by moving
the green bar over an input.
• With the control button you change an input in the sub menu and with
the control button you move back to the previous menu level.
• To confirm a selection press the
ENTER button.
All navigation possibilities in a current menu are displayed at the lower
edge of the menu.
• To exit the OSD menu press the
SETUP button again.
10.2 Setup menu GENERAL
In this menu you can, for example, set the image presentation or the language
of the OSD menu.
GENERAL AUDIO DOLBY VIDEO PREFERENCE
TV DISPLAY
ANGLE MARK
OSD LANGUAGE
CLOSED CAPTIONS
SCREEN SAVER
LAST MEMORY
PS
ON
ENG
OFF
ON
OFF
If no disc is inserted the notification NO DISC appears on the television
screen and in the display.
• Firstly please familiarize yourself with the OSD Menu's operation by
means of the following brief introduction.
TV DISPLAY
Note:
The menu option TV DISPLAY is only selectable when the HDMI output
is deactivated.
-4:3/PANSCAN Select this setting to display broadcasts in the usual 4:3
format on a 4:3 television set. Broadcasts in the 16:9 format
will be displayed in full screen without the distracting bars
although the side edges of the image will be trimmed.
-4:3/LETTERBOX Display of a film in 16:9 format on a traditional 4:3 format
television. The image is displayed with black bars on the
lower and upper edges of the screen.
-16:9 This setting is recommended when using a wide screen
television in 16:9 format. An image in 4:3 format will be
adapted horizontally to the image width.
-Wide Squeeze An image in 4:3 format will be presented with black bars
on the right and left edges.
- 8 -
Page 11
ANGLE MARK
-ON If scenes are recorded on a DVD in different perspectives
this will automatically be signified by a camera symbol
displayed on the television screen. Press the
on the remote control to display the various perspectives.
-OFF Deactivate function. No symbol appears on the television
screen.
ANGLE button
OSD LANGUAGE
Here you set the language, in which the OSD Menu will be shown on the
display.
-3D SURROUND Select this setting to produce a virtual surround effect from
a stereo or multi channel sound.
-5.1 CH Select this setting to activate the analogue 5.1 outputs.
FRONT SPEAKER, CENTER SPEAKER, REAR SPEAKER and SUBWOOFER
In these menu inputs you can activate/deactivate the individual speaker types
and set the size.
-Large Select this setting if the diameter of the speaker membrane
is greater than 12 cm.
-Small Select this setting for smaller speakers.
-OFF Deactivate sound output for these types of speakers
CLOSED CAPTIONS
-ON Select this setting if by every playback of a DVD the subtitle
(if present) is to be automatically displayed on the television
screen.
-OFF Select this setting to manually activate the subtitle.
The subtitles can also be set, during playback, with the
SUBTITLE button.
SCREEN SAVER
-ON Screen saver activated. The screen saver will now switch
on when the playback is stopped and no activity takes
place for several minutes.
-OFF Deactivate function.
LAST MEMORY
-ON Select this setting to playback a disc from the previously
halted position after removal and re-insertion.
-OFF Deactivate function. The disc playback starts back at the
begining after removing and then reinserting.
Note:
If the DVD player is turned off with the POWER switch the saved position will not
be preserved.
10.3 Setup menu AUDIO
In this OSD menu you can, for example, carry out settings for the analogue
as well as the digital audio outputs.
Note:
The menu input FRONT SPEAKER can not be deactivated since the sound
output for the front speakers always remains switched on.
DIALOG In this menu input you can set the dialogue volume (0-20).
D.R.C. (Dynamic Range Control)
-ON Function activated
-OFF Function deactivated.
-AUTO Function (if available) is automatically activated
DIGITAL AUDIO
DIGITAL OUTPUT
In this menu input you can set the SPDIF output signal.
-SPDIF / OFF No digital audio signal is being put out at the sockets
COAXIAL or OPTICAL.
-SPDIF / RAW The crude data of the Dolby Digital sound is put out.
-SPDIF /PCM Select the setting PCM (Pulse Code Modulation) when there
is a connection to a digital amplifier/receiver. Your DVD
player transmits, through the PCM signal, the same audio
formats that are rendered on the disc. In addition an audio
signal will be put out via the sockets
LPCM OUTPUT Select this input to set the sampling frequency for the
processing of the crude data.
-48K: Default setting.
-96K: Only for DVDs with the corresponding sampling frequency.
FL and FR.
GENERAL AUDIO DOLBY VIDEO PREFERENCE
ANALOG AUDIO
DIGITAL AUDIO
CHANNEL DELAY
EQUALIZER
3D PROCESSING
ANALOG AUDIO
DOWNMIX
If you use the analogue 5.1 output in this menu you can carry out the
appropriate settings.
-LT/RT Only the left and right channels at the sockets
will put out signals.
-STEREO A stereo sound will be put out. Select this setting if you are
not using the analogue 5.1 outputs. The menu options
CENTER SPEAKER and REAR SPEAKER are then not required and therefore inactive.
FL and FR
Note:
The LPCM OUTPUT function is only available if you have set the SPDIF audio
output signal to PCM.
CHANNEL DELAY
Select this menu input to set the channel delay of the individual speakers.
With optimal settings the sound reaches your ears simultaneously from all
directions.
With the control button go to the graphics field beside the input.
With the control buttons or select the speaker.
With the control buttons you increase/decrease the value in increments
of 10 cm. The maximum setable deviation for the CENTER speaker is 170 cm.
The maximum setable deviation for the SUBWOOFER and the rear speakers
is 510 cm.
Confirm your entry by pressing the
ENTER button.
Note:
The channel delay is determined by the front speakers therefore these are not
selectable.
- 9 -
Page 12
EQUALIZER
-SOUND MODE Select this menu input if, when playing back sound, you
want to use one of the preset equalizer levels ROCK, POP,
LIVE, DANCE, TECHNO, CLASSIC or SOFT. To deactivate
this function select the input OFF.
-BASS BOOST Select the setting ON if you want to boost the playback of
the base tone. To deactivate this function select the input OFF.
-SUPER BASS Select the setting ON to use the super base sound effect.
In addition playback of the base tone will be boosted.
To deactivate this function select the input OFF.
-TREBLE BOOST Select the setting ON if you want to boost playback of the
treble sounds. To deactivate this function select the input OFF.
3D PROCESSING
Select this menu input if you want to activate/deactivate the Pro Logic II process.
Note:
The menu option PRO LOGIC II can only be selected if the analogue
5.1 outputs are activated.
-PRO LOGIC II Select the setting ON if the process is to be activated all
the time.
Select the setting AUTO if the process is only to be activated
when Dolby Pro Logic II encoded content is located on the
playback medium.
To deactivate this function select the input OFF.
-MODE In this menu you can set the Pro Logic II
process mode.
MUSIC: Sound is played back through the speakers
without delay.
MOVIE: Sound is played back with a delay of 10 ms
through the rear speakers.
PRO
LOGIC: Earlier version of the DOLBY PRO LOGIC processes.
AUTO: Automatic setting of the processes (depending on
the contents of the playback medium).
10.4 Setup menu DOLBY
In this OSD menu you can carry out settings for the Dolby-Digital output.
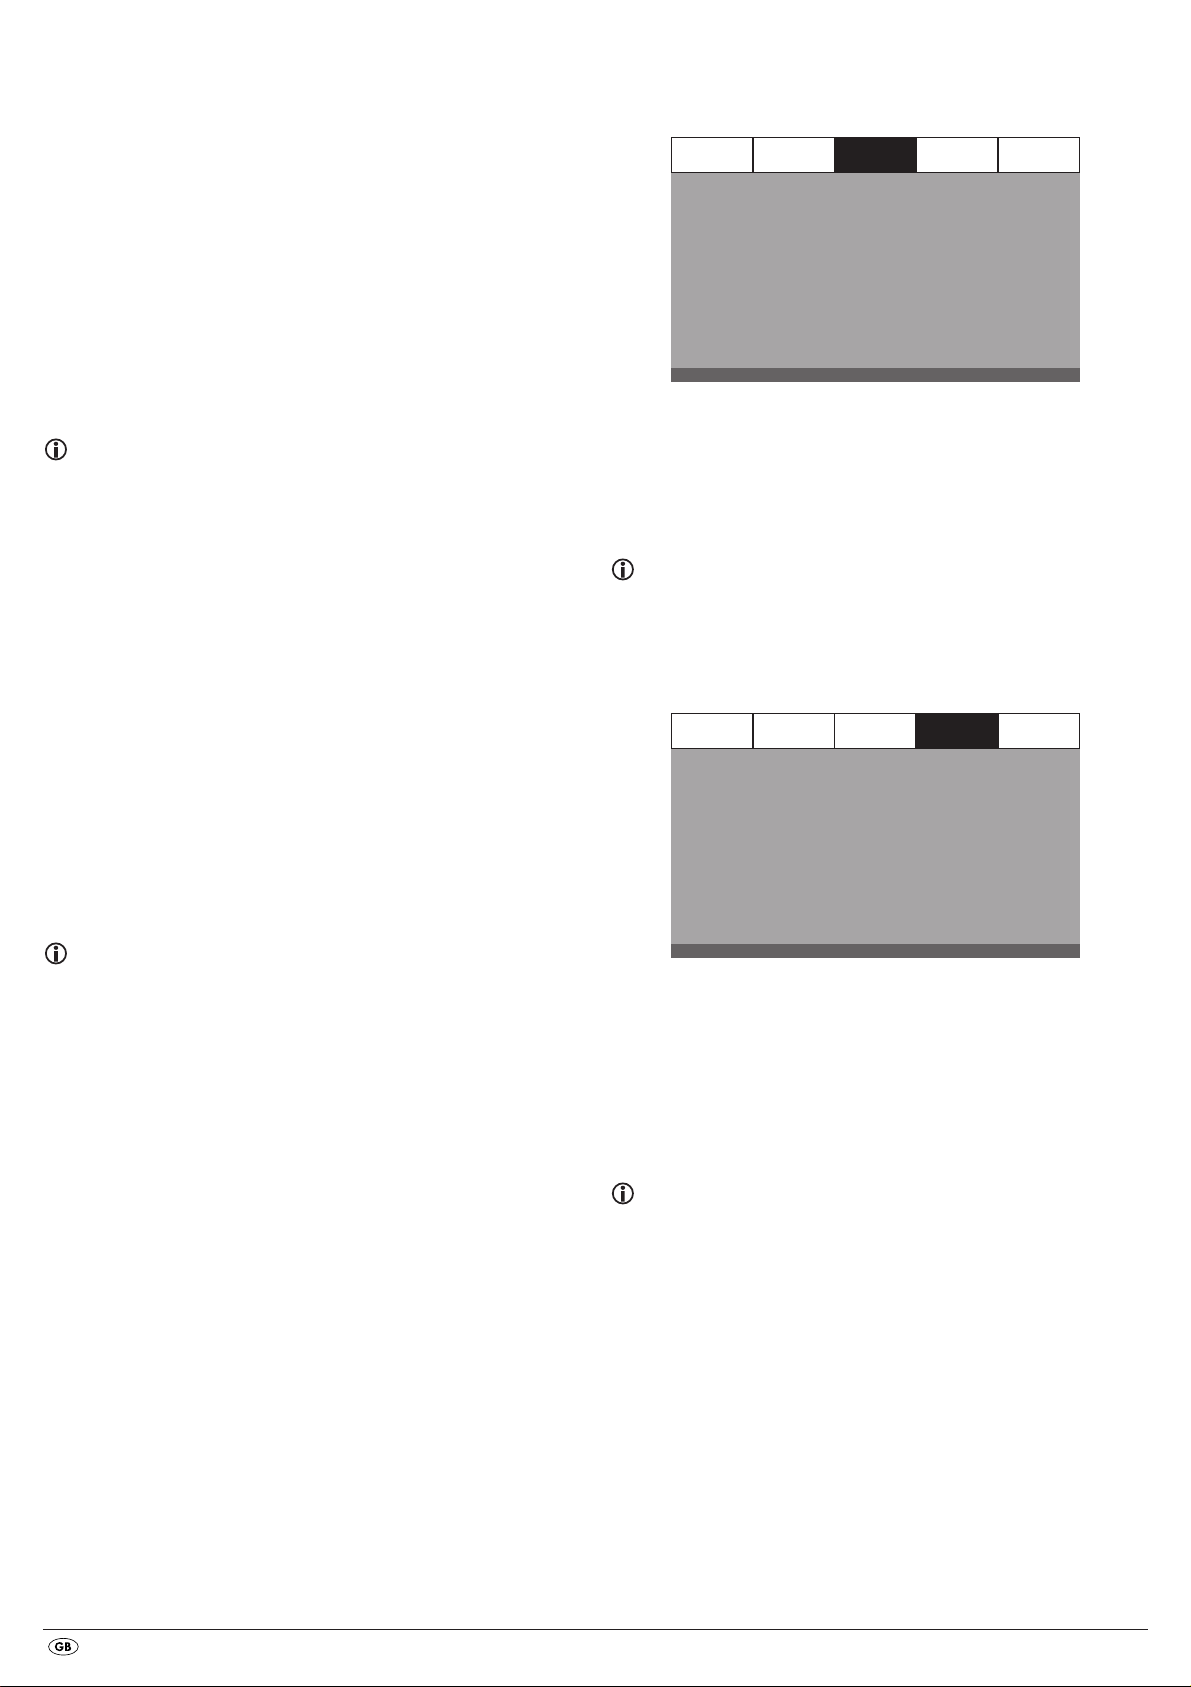
GENERAL AUDIO DOLBY VIDEO PREFERENCE
DUAL MONO
DYN AMIC
DUAL MONO Select this menu input to set the Dolby-Digital output to either
STEREO, L-MONO, R-MONO or MIX-MONO.
DYNAMIC Select this menu input to enable an optimal sound playback
with reduced volume. In the setting FULL the louder passages
will be surpressed and the softer passages will be played
back louder.
Note:
This function is only possible when using a digital audio component.
10.5 Setup menu VIDEO
In this menu you can, for example, carry out settings for the video output,
resolution or colour.
GENERAL AUDIO DOLBY VIDEO PREFERENCE
VIDEO OUTPUT
RESOLUTION
COLOR SETTING
HDMI SETUP
Xvid SUBTITLE
OFF
ENG
Note:
The menu inputs PANORAMA, DIMENSION and CENTER WIDTH serve to
fine tune the sound and are only available if you have set the process mode
MUSIC.
-PANORAMA Select the setting ON to activate this sound enhancement.
To deactivate this function select the input OFF.
-DIMENSION Select one of the settings SIZE -3 to SIZE 3 to activate this
sound enhancement.
-CENTER WIDTH Select one of the settings LEVEL 0-7 to receive a corresponding
sound enhancement.
REVERB MODE Select this menu input if you want to use, for sound playback,
one of the preset reverbs CONCERT, LIVING ROOM, HALL,
BATHROOM, CAVE, ARENA, or CHURCH. To deactivate
this function select the input OFF.
VIDEO OUTPUT
-OFF The video signal will be put out via the S-video output and
the composite video output.
-YUV The video signal will be put out in YUV colour format via
the component video outputs Y, Pb/Cb, Pr/Cr.
-RGB The video signal will be put out in RGB colour format via
the SCART connection.
Note:
This setting is only active if the HDMI setup is deactivated.
The composite video output on the DVD player is always activated. If the selected
setting deviates from the actual connection variation (apart from composite video)
it is possible that no image or a poor image will be displayed on the television
screen. In this event press, when playback is stopped, several times the
button on the remote control until the image is displayed properly.
V-MODE
- 10 -
Page 13
RESOLUTION In this menu input you can set the different resolutions
(480i/576i/720p/1080i/1080p
)
for the HDMI
output/component video output.
Note:
Be aware that for the TV standard PAL a setting with 50 Hz and for the TV
standard NTSC a setting with 60 Hz must be selected.
AUDIO In this menu input you can set the language that is to be
the standard used when playing back films.
SUBTITLE In this menu input you can set the subtitle language that is
to be the standard used when playing back films.
DISC MENU In this menu input you can set the disc menu language that
is to be the standard used when playing back films.
PARENTAL In this menu input you can determine the age restrictions.
COLOR SETTING
In this menu input you can implement the settings, for example, for the brightness,
contrast or hue.
-SHARPNESS Select this menu input to set one of the predefined sharpness
values (HIGH, MEDIUM or LOW).
-BRIGHTNESS With the help of the control buttons
from -20 to +20. Subsequently press the
set the brightness
ENTER button to
continue.
-CONTRAST With the help of the control buttons
from -16 to +16. Subsequently press the
set the contrast
ENTER button to
continue.
-GAMMA Select this menu to set one of the predefined gamma values
(HIGH, MEDIUM, LOW or NONE).
-HUE With the help of the control buttons
9 to +9. Subsequently press the
-SATURATION With the help of the control buttons
level from -9 to +9. Subsequently press the
set the hue from -
ENTER button to continue.
set the saturation
ENTER button to
continue.
-LUMA DELAY Select this menu input to set one of the predefined gamma
values (0 T or 1 T).
HDMI Setup
-ON Select this menu input to activate the HDMI output.
-OFF Select this menu input to deactivate the HDMI output.
Xvid SUBTITLE In this menu input you can set the Xvid subtitle language
that is to be the standard used when playing back films.
10.6 Setup menu PREFERENCE
In this menu you can, for example, carry out the settings for the video output,
activate/deactivate the child lock or change the password.
Note:
The menu option PREFERENCE is only selectable when playback is
completely finished.
Note:
Only a few DVDs have a technical age restriction available. If there is no technical
age restriction on the DVD your DVD players child lock feature can not
be activated. The child lock can only function if it is activated on the DVD player
and a corresponding code is available on the inserted DVD.
If you insert a DVD which, according to the child lock, may not be played back
a window appears on the screen, in which you must enter your password and
confirm with
In this way DVDs can be divided into eight different approval classes.
Select one of the following approval classes to protect the playback of
this media class with a password request:
1 KID SAFE: also suitable for young children
2 G: for all age groups
3 PG: adult supervision recommended;
4 PG 13: adult supervision strongly recommended; some scenes are
5 PGR: for children under 16; adult supervision recommended
6 R: for children under 16; adult supervision strongly recommended
7 NC 17: not for teenagers under 18 years of age
8 ADULT: for adults only
Example
If a DVD was encoded with, for example, approval class 7 or 8 and you have
an approval class setting between 1 and 6 then a message follows and the
password must be entered. Also only parts of the DVD, that is to say certain
film scenes, may be encoded with an approval class or various approval classes.
• To activate the approval class you must select, in the PARENTAL menu,
PASSWORD In this menu input you can change the factory default
ENTER. Some DVDs and CDs are encoded with encryption signals.
not suitable for children under 12
the desired approval class and enter the password (136900).
Confirm your entry by pressing the
password (136900) and assign your own password.
Only the numbers 0-9 can be used.
ENTER button.
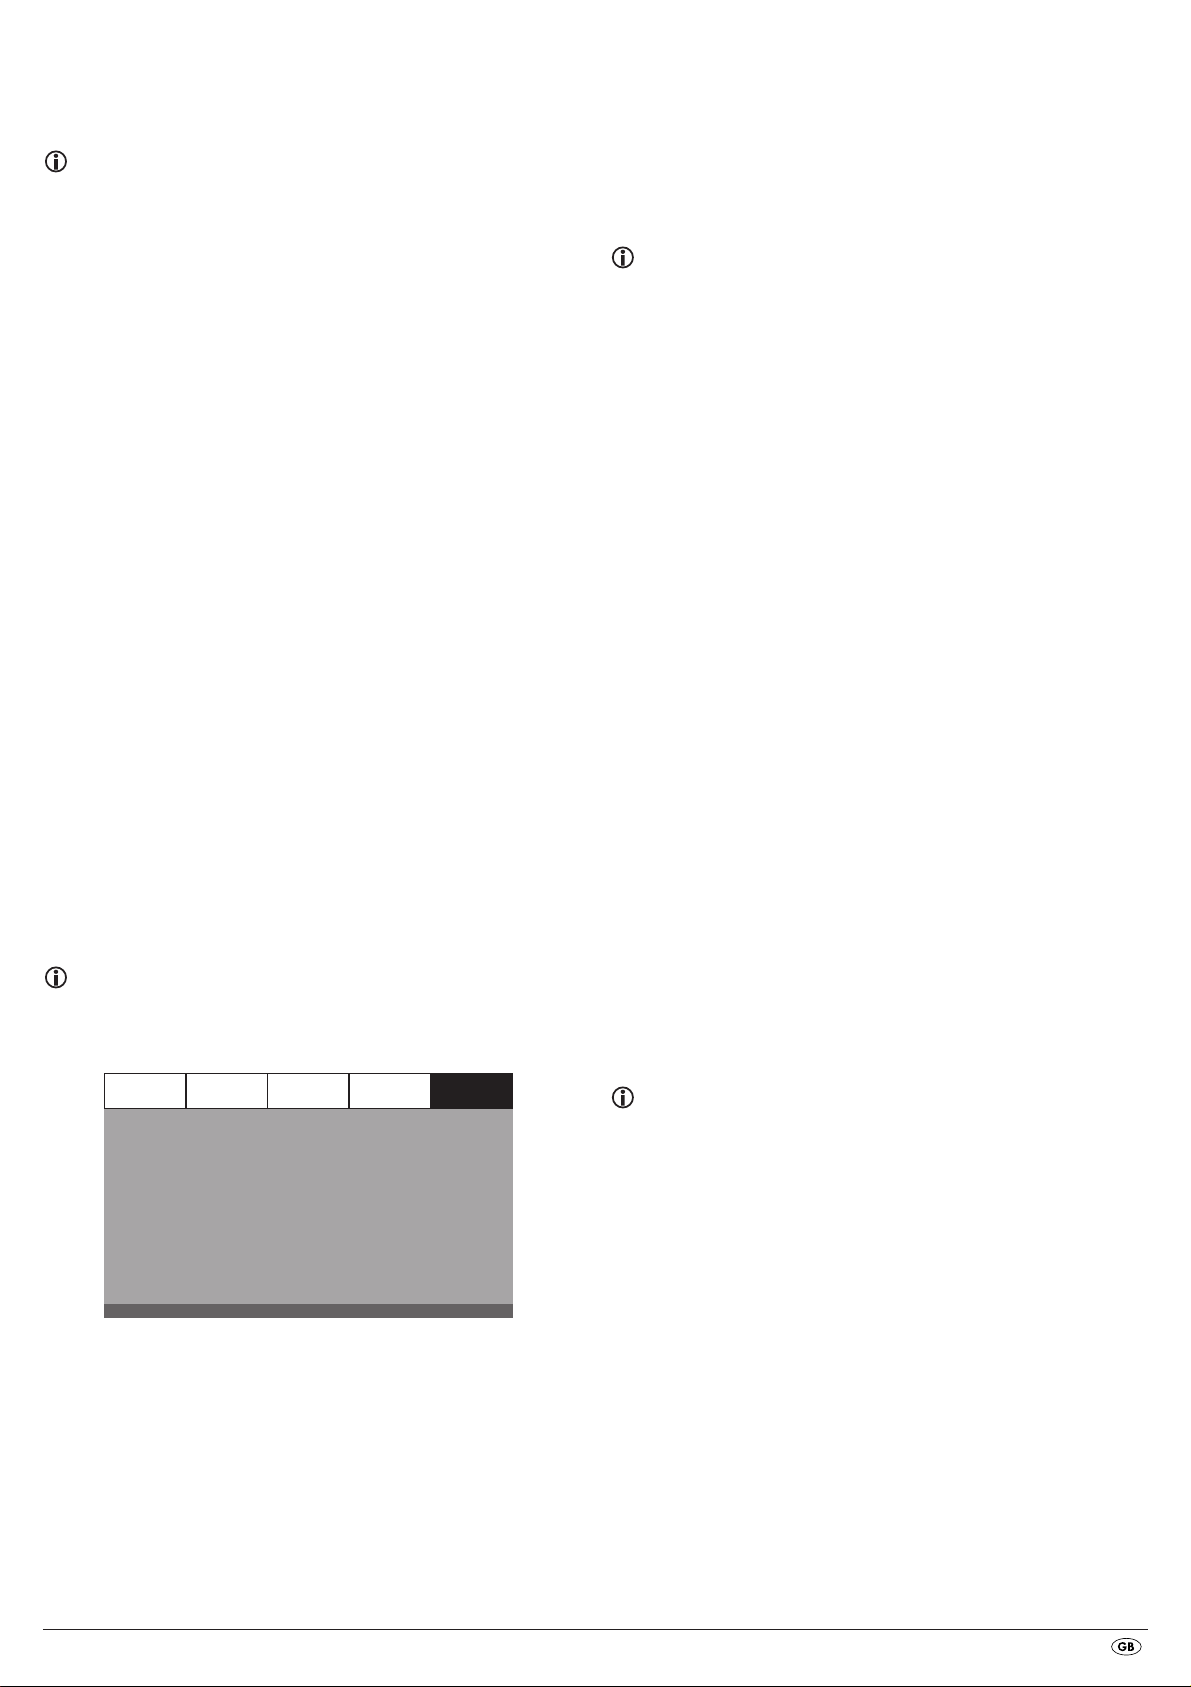
GENERAL AUDIO DOLBY VIDEO PREFERENCE
TV TYPE
AUDIO
SUBTITLE
DISC MENU
PARENTAL
PASSWORD
DEFAULT
PAL
ENG
ENG
ENG
TV TYPE
-PAL PAL television standard
-NTSC NTSC television standard.
Note:
In the event that you forget your new password you can use the factory preset
password (136900).
DEFAULT In this menu input you can restore the DVD players factory
defaults.
- 11 -
Page 14
11. Initial operation of the DVD player
12. Playing back DVDs, VCDs or S-VCDs
After you have …
• placed the DVD player in a suitable location
• connected the DVD player to a television by one of the designated
connection options
• connected the DVD player, if desired, to a HiFi or Surround system
(analogue/digital) for example a Dolby Digital or DTS receiver
• made the remote control ready for operation by inserting the batteries
• and know how to activate and operate the OSD menu with the remote
control
… the DVD player is ready for operation.
11.1 Switching the DVD player on/off
• Insert the mains power cable into a properly installed mains power socket.
• Place the
The DVD player is now in standby mode.
• With the
on the device
mode.
• To switch the DVD player off place the
the device to the
POWER switch on the rear panel of the device to the ON position.
STANDBY button on the remote control or the STANDBY button
you switch the DVD player on and/or back to the standby
POWER switch on the rear panel of
OFF position.
Note:
The device has no display indicators when it is switched off or in the standby
mode. In standby mode the standby LED lights up in the display.
11.2 Inserting the DVD
To play a disc with the DVD player:
• Switch on your television.
• Make sure that the DVD player is ready for operation.
If the television, the DVD player and possibly other connected devices (i.e. an
audio component) are ready for operation and are switched on and the DVD
player is connected correctly to the television you will now see the Silvercrest
logo on the TV screen
If no disc is inserted into the DVD player's disc tray:
The message NO DISC is displayed on the television screen.
• Open the disc tray by pressing the button
trol or on the front panel of the DVD player. OPEN is displayed on the
television screen.
• Insert the disc in the disc tray with the inscribed/labled side up.
For two-sided discs: The side you would like to play must face down.
• After you have inserted the disc press the button
mote control or on the front panel of the DVD player again to close the
disc tray.
• The contents of the disc will now be loaded; this may take a few seconds.
In the meantime LOADING is displayed on the television screen.
OPEN/CLOSE on the remote con-
OPEN/CLOSE on the re-
To play back a DVD/VCD/S-VCD with the DVD player...
• Switch on your television.
• Make sure that the DVD player is ready for operation.
If the television, the DVD player and possibly other connected devices (i.e. an
audio component) are ready for operation and are switched on and the DVD
player is connected correctly to the television you will now see the "Silvercrest"
logo on the TV screen
• Open the disc tray on the front panel of the DVD player by pressing the
OPEN/CLOSE button.
OOPPEENN
now appears in the display on the front panel of the DVD player and
on the television screen.
• Insert a DVD/VCD/S-VCD disc in the disc tray with the inscribed/labled
side up.
• Press the
CLOSE will appear in the display on the front panel of the DVD player and
on the television screen while the disc tray is closing.
• The contents of the inserted DVD/VCD/S-VCD will now be loaded; this
may take a few seconds. In the meantime LOADING blinks in the display
on the front panel of the DVD player and on the television screen.
• Playback of the inserted DVD/VCD/S-VCD starts automatically.
OPEN/CLOSE button again to close the disc tray.
Note:
DVDs, VCDs and S-VCDs that you want to playback with the DVD player
may possibly have a country code which is printed on the DVD's jacket.
The DVD player can only playback DVDs/VCDs/S-VCDs with the country code .
If no country code is printed on the cover of a DVD/VCD/S-VCD...
• but instead the symbol , then the DVD/VCD/S-VCD can be
played back with the DVD player
• then the DVD/VCD/S-VCD can possibly not be played back with the
DVD player. You can check this by attempting to play back the DVD.
Depending on the inserted DVD/VCD/S-VCD it is possible that the contents
of the DVD/VCD/S-VCD will not playback immediately, rather first a selection
menu appears on the television screen.
In this event select the menu option, which will start the playback of the film,
with the control buttons on the remote control.
• To start playback of the film press the
or press the
- 12 -
PLAY/PAUSEbutton.
ENTER button on the remote control
Page 15

In the display on the front panel of the DVD player, the following notices
appear:
With DVDs:
•"DVD"
• the number of the currently playing chapter
• the played back so far time of the currently playing DVD in minutes and
seconds
If such a menu is present on the DVD inserted in the DVD player you can access
it during playback by pressing the
You can select particular menu options by pressing the control buttons
on the remote control.
To confirm the selected menu option press the
MENU button on the remote control.
PLAY/PAUSEbutton or the
ENTER button on the remote control.
To return to playback press the
MENU button on the remote control again.
With VCDs/S-VCDs:
• "VCD" or "S-VCD"
• the number of the currently playing title
• the played back so far time of the currently playing VCD/S-VCD in
minutes and seconds
12.1Features during playback of a DVD, VCD or S-VCD
During the playback of a DVD/VCD/S-VCD you can use the following DVD
player features...
Pause playback
To pause the playback of the inserted DVD/VCD/S-VCD...
• During playback press the
will now appear in the display on the front panel of the DVD player and
on the television screen.
On the television screen you will see a freeze frame of the scene that has just
been halted.
• To contnue playback of the film press the
Stop playback (STOP)
To stop playback of the film on the inserted DVD/VCD/S-VCD press the
STOP button.
With resume function
If you have cancelled playback of the inserted DVD/VCD/S-VCD by pressing
the
STOP button once the DVD player automatically saves the position
where playback was interrupted. This function is called the "resume function".
PRESS PLAY KEY TO CONTINUE appears on the television screen. As
soon as you press the
from the saved position.
Without resume function
If you have cancelled playback of the inserted DVD/VCD/S-VCD by pressing
the
STOP button once and you press the STOP button a second time the
saved position, at which you interrupted the playback, will be cleared.
When you press the
DVD/VCD/S-VCD starts from the beginning.
PLAY/PAUSEbutton again playback of the inserted
PLAY/PAUSEbutton
PLAY/PAUSEbutton.
PLAY/PAUSEbutton again playback will continue
Note:
If you cancel playback by pressing the STOP button twice (Playback stop without
resume function) access to the disc's main menu is no longer possible.
Playback Control (PBC) with VCDs/S-VCDs
Many VCDs/S-VCDs have Playback Control (in short "PBC"). Playback Control
indicates a main menu that allows operation of several functions of the
VCD/S-VCD.
If PCB is available on a VCD/S-VCD inserted in the DVD player you must first
activate it in order to be able to superimpose the menu.
• During playback or when playback is stopped press the
The message PBC: OFF appears in the display.
• Press the
MENU button again. The message PBC: ON appears in the display.
PBC is now switched on the discs main menu can be accessed with the
MENU button.
MENU or TITLE buttons.
Note:
If you switch on PBC during playback then it is possible that playback will
stop and start again from the beginning and/or with the main menu.
Skip to start of chapter (Skip)
Note:
This function may not be available on all DVDs! If you attempt to execute
a function that is not available, the symbol is displayed on the television
screen.
With the buttons
within the film on the inserted DVD/VCD/S-VCD …
• skip forward to the beginning of the next chapter or
• skip backward to the preceeding chapter
The respectively selected chapter will playback immediately without having
to press the
chapter will be displayed on the front panel of the DVD player to the left of
the played back so far time.
SKIP FWD and SKIP BWD you can, during playback,
PLAY/PAUSE button. The number of the respectively selected
Access the DVD menu (MENU)
Note:
This function may not be available on all DVDs! If you attempt to execute
a function that is not available, the symbol is displayed on the television
screen.
With many films on DVDs there is a main menu on the disc which, apart from
the option of playing back the main film, allows you to select from the following
contents:
• the subtitle and film dialogue languages
• direct chapter selection
• to playback the films bonus material (Background information,
"Making of" etc.)
Title number input via the number buttons
Note:
This function may not be available on all DVDs! If you attempt to execute
a function that is not available, the symbol is displayed on the television
screen.
Instead of using the Skip function you can also enter the title from within the
film on the inserted DVD/VCD/S-VCD direct by entering the title number via
the number buttons on the remote control.
• For this, during playback or when playback is stopped, press the number
buttons on the remote control corresponding to the title number, for
example, the
• Playback of the entered title number will now start automatically.
- 13 -
3 button for the third title.
Page 16

Direct chapter or time selection via the Search function (GOTO)
Note:
This function may not be available on all DVDs/VCDs/S-VCDs! If you attempt
to carry out functions that are not available the symbol will be displayed
on the television screen.
Entry of the time position via search function DVD, VCD and SVCD:
• During playback press the GOTO button on the remote control. The time
menu is superimposed on the television screen:
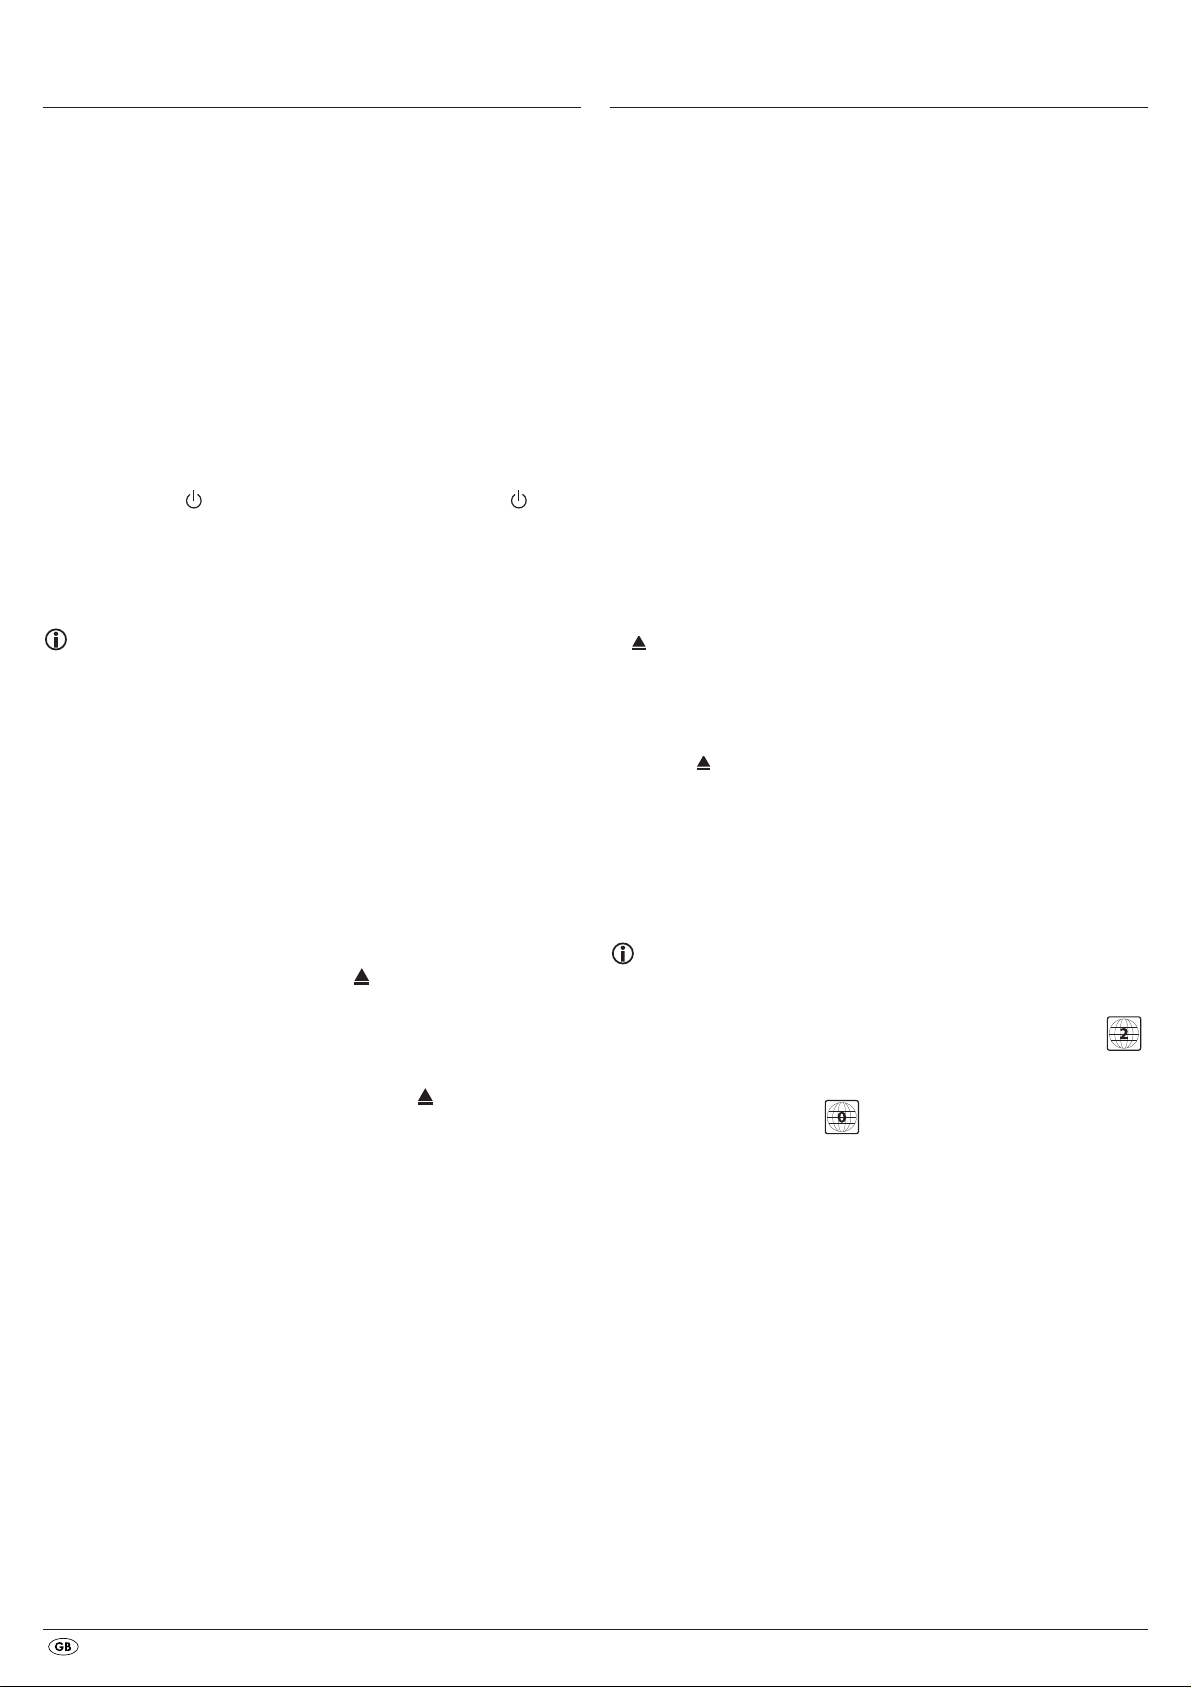
MENU
TITLE
CHAPTER
AUDIO
SUBTITLE
BITRATE 50 IIIIIIII TITLE EL APSED 0:00:56
01 / 13
02 / 05
2 CH ENGLISH
ENGLISH
Fast scan forward/backward
With fast scan you can select designated passages from the inserted
DVD/VCD/S-VCD during playback.
• For fast scan forwards/backwards press the
button repeatedly to set the following fast scan speeds:
FAST FWD and/or FAST RWD
Note:
During fast scan no sound will be played back.
• To continue playback of the film at the selected place in normal
speed press, during fast scan the
PLAY/PAUSE button.
• The entry field TITLE is automatically selected first. Press the
and enter, with the number buttons, the desired title. On DVDs title 01 is
most often the main film.
• Press the navigation button to select the entry field
ENTER button
CHAPTER. Press the
ENTER button and enter, with the number buttons, the desired chapter.
• Press the navigation button to select the entry field AUDIO. Press the
ENTER button and select, with the navigation buttons , an audio language.
• Press the navigation button to select the entry field SUBTITLE. Press the
ENTER button and select, with the navigation buttons , a subtitle language.
• Press the navigation button to select the entry field ANGLE. Press the
ENTER button and select, with the navigation buttons , another camera
perspective (if available).
• Press the navigation button to select the entry field TT TIME. Press the
ENTER button and enter, with the number buttons, the desired title time.
• Press the navigation button to select the entry field CH TIME. Press the
ENTER button and enter, with the number buttons, the desired chapter time.
• Press the navigation button to select the entry field REPEAT. Press the
ENTER button and select, with the navigation buttons , a repeat function
(see also repeat functions).
• Press the navigation button to select the entry field TIME DISP. Press
the
ENTER button and select, with the navigation buttons , a time
presentation (see also superimpose disc information).
• To fade the menu out press the
GOTO button again.
Audio CD
• During playback press repeatedly the GOTO button on the remote control.
The following notices appear, one after the other, in which you can enter
a time position with the number buttons:
DISC GOTO: Enter here a time position on the disc from where playback
should start.
TRACK GOTO: Enter here a time position for the currently playing back
title from where playback should start.
GOTO TRACK: Enter here a title number from where playback should start.
MPEG CD
SELECT: Enter here a title number on the disc from where playback
should start.
GOTO: Enter here a time position for the currently playing back
title from where playback should start.
Slow playback forward (Slow motion)
To playback the contents of the inserted DVD/VCD/S-VCD in slow motion …
• For slow playback forwards press the
following playback speeds:
SLOW button repeatedly to set the
Note:
During slow motion playback no sound will be played.
• To continue playback from a selected position in normal speed, during
slow motion playback press the
PLAY/PAUSE button.
Image enlargement (Zoom)
Note:
This function may not be available on all DVDs! If you attempt to execute
a function that is not available, the symbol is displayed on the television
screen.
During the playback of an inserted DVD/VCD/S-VCD you can enlarge the
image on the television screen in three levels. For this press the
on the remote control to set the following enlargement levels:
With the control buttons sections of the enlargement can be
suspended.
To switch off the enlargement function and return to the normal image
size press repeatedly the
ZOOM button.
ZOOM button
- 14 -
Page 17
Change camera aspect (Angle)
Programmed playback (PROG)
Note:
This function may not be available on all DVDs! If you attempt to execute
a function that is not available, the symbol is displayed on the television
screen.
Many films on DVD contain chapters which were recorded simultaneously
from various camera perspectives. With films that have such chapters available you can view the same chapter from different perspectives.
For this press the
serted DVD. Each press of the
ANGLE button on the remote control during playback of an in-
ANGLE button will switch to one of the available
camera perspectives.
Superimpose/fade out subtitles
Note:
This function may not be available on all DVDs! If you attempt to execute
a function that is not available, the symbol is displayed on the television
screen.
If the film on the inserted DVD has subtitles available you can superimpose
these on the television screen during playback by pressing the SUBTITLE button
on the remote control.
With the first press of the SUBTITLE button the subtitle of the first available
language will be superimposed on the television screen. With each further
press of the SUBTITLE button the subtitles of other available languages will be
superimposed successively on the television screen.
The number of the currently superimposed subtitle language will be superimposed
on the television screen ( i.e. 1/10 for the first of ten available subtitle languages).
When the last of the available subtitle languages is superimposed (i.e. 10/10
for the tenth of ten available subtitle languages) you can switch off the subtitle
function by pressing the
SUBTITLE button again. OFF is superimposed on the te-
levision screen.
Change playback language
Note:
This function may not be available on all DVDs! If you attempt to execute a
function that is not available, the symbol is displayed on the television
screen.
With many films on DVD you can, during playback, select another playback
language by pressing the
The first press of the
With each further press of the
one after the other, are switched on.
The currently switched on playback language will be superimposed on the
television screen.
AUDIO button on the remote control.
AUDIO button switches to the first available playback language.
AUDIO button other available playback languages,
Note:
This function may not be available on all DVDs/VCDs/S-VCDs! If you attempt
to execute a function that is not available, the symbol is displayed on the
television screen.
With the "Programme" function you can put together your own film programme
in so far as you can select only certain chapters of an inserted DVD/VCD/S-VCD
for playback. In this way you can determine for yourself the sequence, in which
the chapters are played back. You can compile a maximum of 20 chapters
of a film for programmed play.
• Press the
PROG button on the remote control during playback or when
playback is stopped.
The Programme menu will be displayed on the television screen.
Programme window
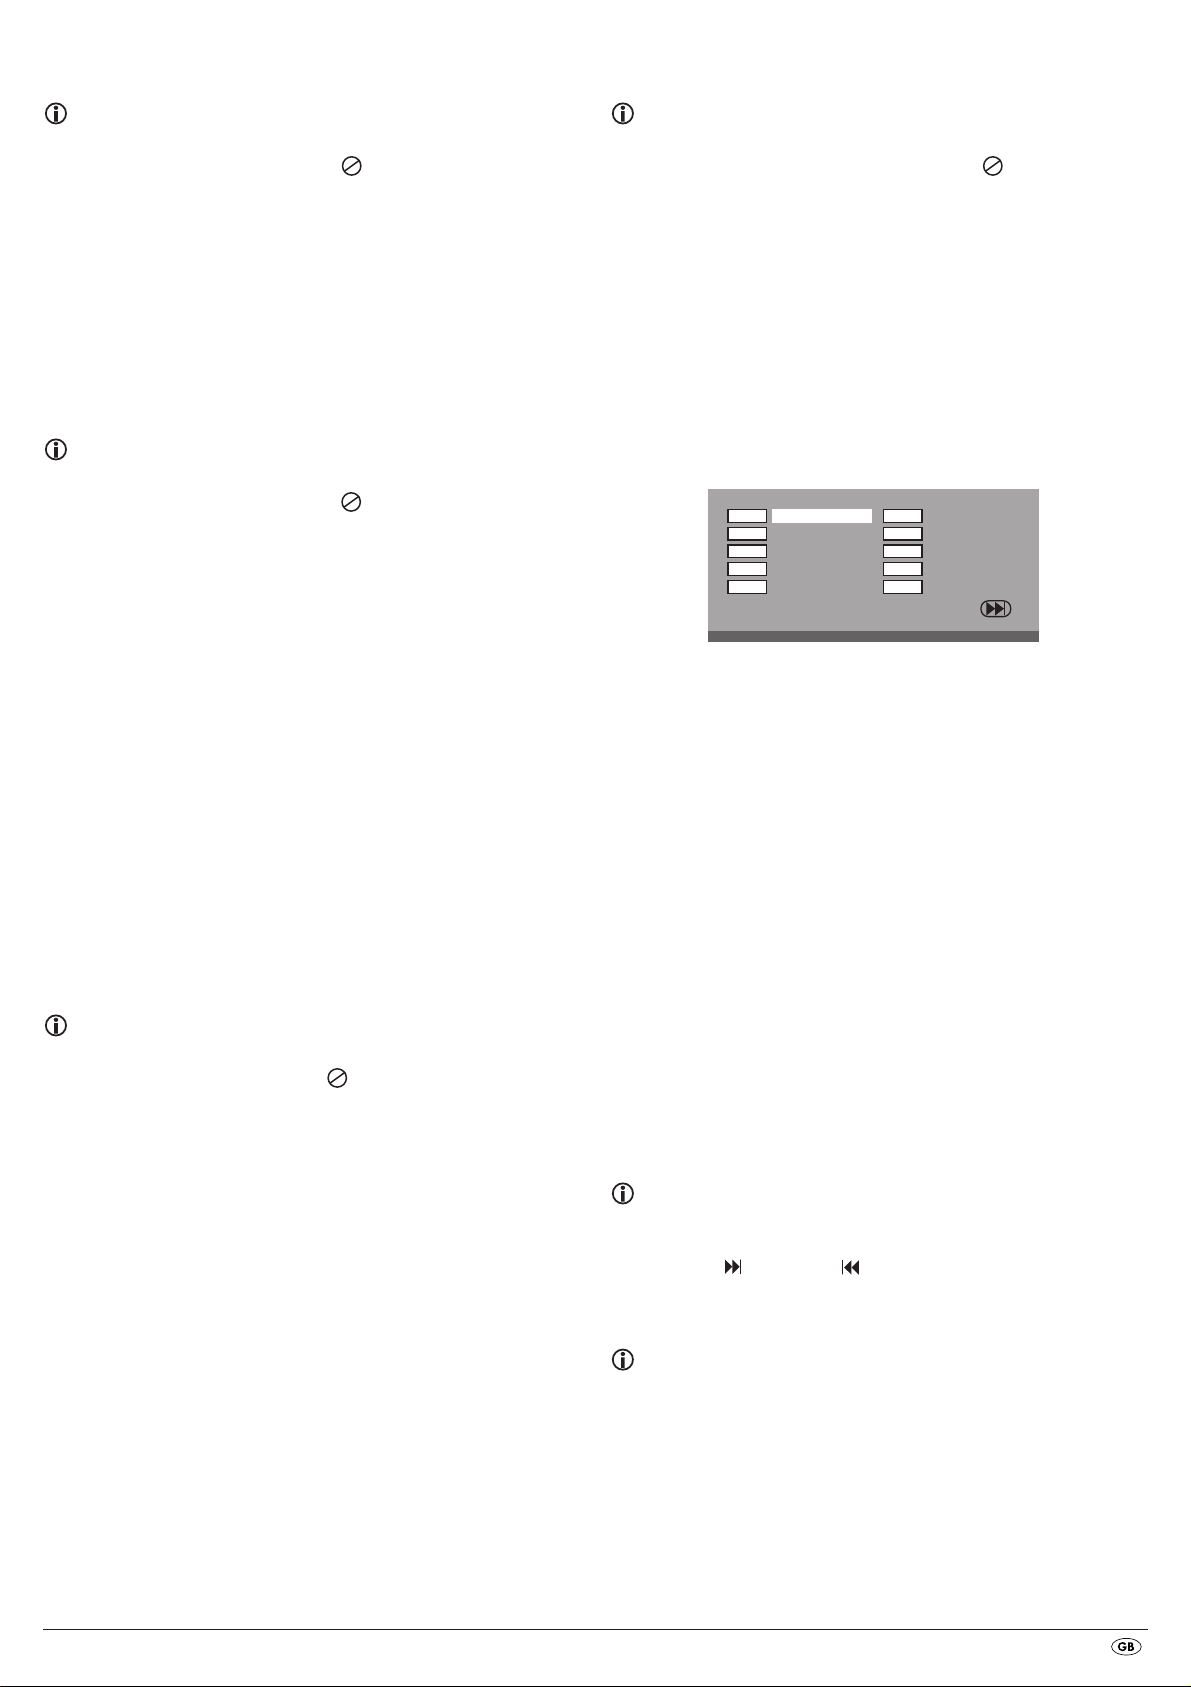
1
2
T T:
3
4
5
CH:
T
CH:
T:
CH:
T:
T
T:
CH:
T
EXIT
First are listed the programme positions 1-10, programme position 1 is
highlighted.
1. With the number buttons enter the number of the title that is to be played
back first. The highlight changes to chapter entry (CH:).
2. With the number buttons enter the number of the chapter that is to be
played back. The highlighting moves to the programme position 2.
3. Select, with the navigation buttons , further programme positions
and enter title and chapter numbers for the programme positions.
• To display the next 10 programme positions select, with the navigation
buttons , the field and press the
You can allocate up to 20 programme positions.
• To delete entries in a programme position select the programme position
and press the
ENTER button.
• To stop the programme function select the field EXIT and press the
button. All allocated programme positions are deleted.
4. You start playback of the programme positions by selecting the field
START and press the
ENTER button.
During the programmed playback the notice PROGRAM appears in the display.
To delete the programmed playback press twice, during playback, the
button on the front panel of the DVD player or on the remote control.
6
7
8
9
10
T: CH:
T
T:
T
CH:
T
T:
CH:
T:
T
CH:
T:
T
CH:
ENTER button.
ENTER
STOP
Note:
If you are not sure what number a title and/or chapter to be programmed has
then select the corresponding chapter, during playback of the film, with the
buttons
SKIP FWD and SKIP BWD and susequently press the DISPLAY button
on the remote control to superimpose all information from the inserted DVD/VCD/
S-VCD onto the television screen. Here you will find, amongst others, the current
title and chapter numbers.
On this topic see also the section "Superimpose disc information".
- 15 -
Page 18

Superimpose disc information
Note:
This function may not be available on all DVDs/VCDs/S-VCDs! If you attempt
to execute a function that is not available, the symbol is displayed on the
television screen.
With this function you can superimpose all the available information from
a DVD/VCD/S-VCD inserted into the DVD player onto the television screen
during playback.
• For this, during playback, press the
On the television screen will be superimposed:
With DVDs:
• the current title number/the total number of titles
• the current chapter number/the total number of chapters
• the played back so far time in hours, minutes and seconds (TITLE ELAPSED)
• the time to the end of the film in hours, seconds and minutes (TITLE REMAIN)
• the played back so far time of the chapter in hours, minutes and seconds
(CHAPTER ELAPSED)
• the time to the end of the chapter in hours, seconds and minutes
(CHAPTER REMAIN)
With VCDs/S-VCDs:
• the current title number/the total number of titles
• the played so far time of the current playback title on the VCD/SVCD in
hours, minutes and seconds (SINGLE ELAPSED)
• the time to the end of the current playback title in hours, seconds and minutes
(SINGLE REMAIN)
To stop display of the disc information press repeatedly the
until the notice DISPLAY OFF appears on the television screen.
Repeat function for DVDs, VCDs, S-VCDs and audio CDs
With the repeat function you can…
... in the case of DVDs, selectively repeat title, chapter or the entire DVD.
... in the case of VCDs/S-VCDs individual titles and/or the entire VCD/S-VCD
repeatedly playback.
... in the case of audio CDs, playback repeatedly a particular track and/or
the entire CD.
To switch on repeat playback...
• Press the
The repeat symbol appears in the display with one of the following
notifications:
CHAPTER Select CHAPTER to continuously repeat the currently playing
TITLE Select TITLE to continuously repeat the currently playing
ALL Select ALL to continuously repeat all available titles on the
To switch off repeat playback press the
back, until no more notifications appear on the television screen.
REPEAT button several times during playback.
back chapter until repeat playback is switched off or playback is cancelled by pressing the
back title until repeat playback is switched off or playback
is cancelled by pressing the
disc, thus the entire disc, until playback repeat is switched
off or playback is cancelled by pressing the
twice.
DISPLAY button on the remote control.
DISPLAY button
STOP button twice.
STOP button twice.
STOP button
REPEAT button repeatedly, during play-
Repeat function with MP3/WMA/MPEG/ JPEG/Xvid discs
During playback press the REPEAT button several times to apply the following
repeat functions (the set function appears in the display):
RANDOM
Random playback of the titles on the disc and/or the data carrier.
SINGLE
One time playback of the current title/image.
REPEAT ONE
Endless repeat of the current title/image.
REPEAT FOLDER
Repeat all titles of the current folder on the disc and/or data carrier.
REPEAT ALL
Repeat all titles on the disc and/or data carrier.
Repeat sequence (A–B)
With this function you can repeat playback of a favourite sequence within
a chapter of the current playback disc.
To do this …
• During playback press the A – B button on the remote control as soon as the
desired sequence starts to playback. A appears on the television screen.
• Press the A – B button again as soon as the end of the desired sequence is
played back. Pay careful attention to the fact that the start and finish of
the sequence must be located within a chapter.
AB appears on the television screen.
Repeat playback of the selected sequence begins immediately without you
having to press the
peat until you press the A – B button again in order to switch off the function.
Setting playback volume
Press the VOL + button on the remote control during playback to increase playback volume or the
Dimmer
Press the DIMMER button on the remote control to change the DVD player's
display brightness in three levels.
To switch playback sound to mute (MUTE)
To switch the playback sound to mute press the (MUTE) button on the remote
control during playback of DVDs, VCDs/S-VCDs, audio CDs and CD-Rs/CD-RWs
with MP3 or WMA data. MUTE is displayed on the television screen.
When you want to switch the playback sound back on press the (
again or the
level is displayed on the television screen.
Switching off the DVD player
To switch off the DVD player:
• In the event that a disc inserted into the DVD player is playing back, first
cancel playback by pressing the
DVD player or on the remote control twice.
• Open the disc tray to remove a currently inserted disc from the DVD
player by pressing the
DVD player or on the remote control. Subsequently close the disc tray
by pressing the
• Press the
switches to the
the
• To switch the DVD player off completely activate the
the rear panel of the DVD player.
PLAY/PAUSE button. The sequence will continuously re-
VOL – button to reduce playback volume.
MUTE) button
VOL + and VOL – buttons. MUTE OFF or the corresponding volume
STOP button on the front panel of the
OPEN/CLOSE button on the front panel of the
OPEN/CLOSE button again.
STANDBY button on the remote control. The DVD player now
STANDBY mode. To switch the DVD player back on press
STANDBY button again.
POWER switch on
- 16 -
Page 19
13. Playback of JPEG-Photo
CD/WMA/MP3/MPEG4
Insert a storage medium into the DVD player.
The contents of the data carrier (CD or DVD) will be displayed on the
television:
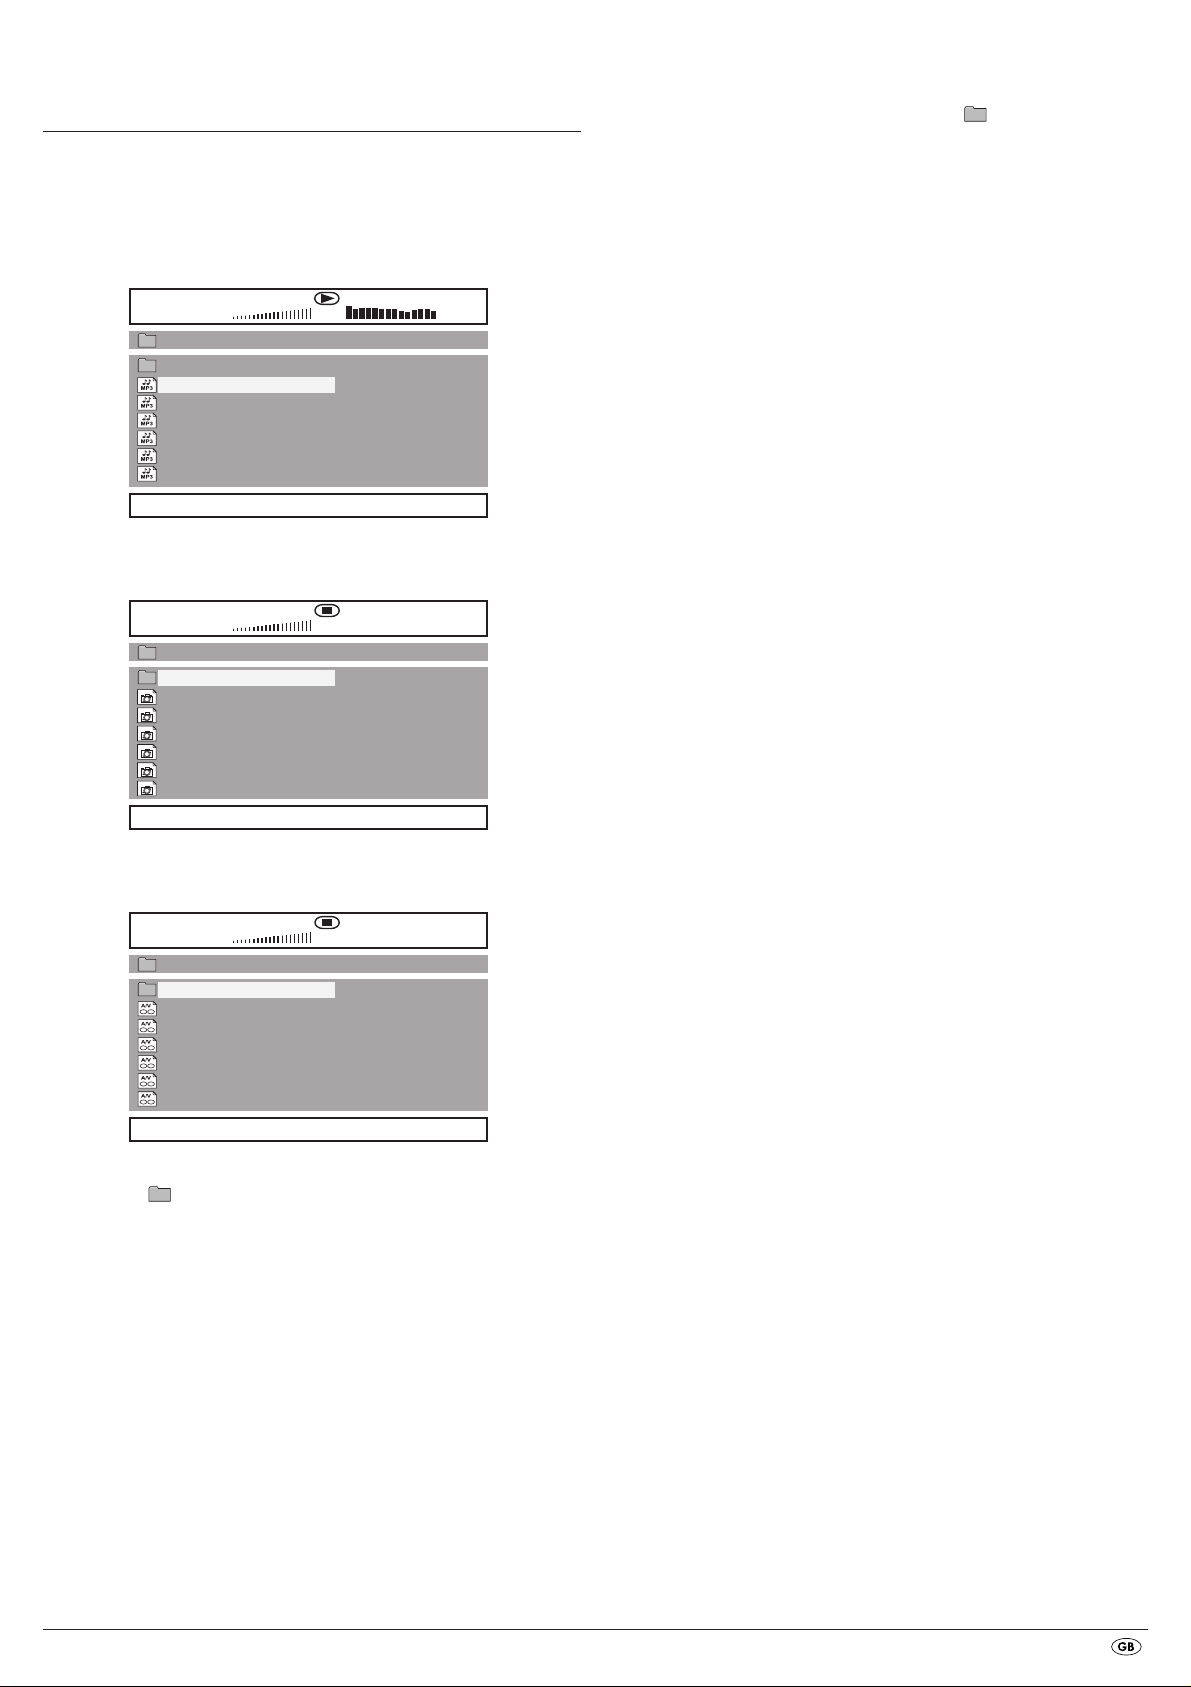
Display of MP3 data
00:23
03:56 160 Kbps
001/058
\ music
..
01
track01
02
track02
03
track03
04
track04
05
track05
06
track06
DISC
Display of JPEG data
00:00
00:00
001/037
\ pictures
..
picture 01
picture 02
picture 03
picture 04
picture 05
picture 06
DISC
1. To open a folder select the folder and press the ENTER button. The contents
of the folder will be listed.
2. To reach a higher folder level select the symbol with the entry ".." and
press the
ENTER button.
Playback of JPEG discs
• With the navigation buttons highlight an image and press the ENTER
button or the PLAY/PAUSE button to open the image.
The image is shown on the display
Subsequently change the view to the next available image on the disc/in the
folder.
• To display the currently shown image press the
• To continue the playback press the
PLAY/PAUSE button again.
• You can access an image directly by entering the image's file number with
the number buttons and subsequently confirm the entry with the
• With the navigation buttons you can rotate the image in 90° increments
during playback.
• With the navigation buttons you can mirror the image horizontally
or vertically during playback.
• During playback press the
STOP button to display a miniature view of all
images in the folder/on the disc. 12 miniatures will be displayed on each
page.
• Select with the navigation buttons an image and start playback
with
ENTER or PLAY/PAUSE .
• Select with the navigation buttons one of the following entries
from the bottom display lines and confirm the entry with the
Slide Show Starts a slide show of the images in the folder/on the disc
Menu Shows the available button functions for JPEG playback.
Press the
ENTER button until this menu has faded out.
Prev switches to the previous page
Next switches to the next page
PLAY/PAUSE button longer.
ENTER button.
ENTER button.
Display of AVI and MPEG data
00:00
00:00
001/006
\ videos
..
video 01
video 02
video 03
video 04
video 05
video 06
DISC
• The data is listed on the left (Data window). Folders will be depicted with
the symbol .
• To superimpose the folders available on the disc press the
repeatedly until the notice FOLDER appears at the bottom of the display.
• Press the
PROG button again repeatedly until the notice FILELIST appears at
the bottom of the display. Folders will now be faded out and all data on
the disc is represented in a list.
• The area on the right is intended for the previewing of JPEG images.
A preview appears as soon as you highlight a JPEG file in the file window.
• At the bottom is located the information bar, in which is displayed the image
size (JPEG Image) as well as the medium (DISC), on which the files are
located.
• Select a file with the aid of the navigation buttons . You confirm the
selection by pressing the
ENTER button. The file will be played back and/
or the JPEG Photo displayed.
PROG button
• Press the
MENU button to switch to the file list again
Selection of slide show transitions:
You can select different transitions for changing from one image to the next.
WIPE TOP, WIPE BOTTOM, WIPE LEFT, WIPE RIGHT, DIAGONAL WIPE
LEFT TOP, DIAGONAL WIPE RIGHT TOP, DIAGONAL WIPE LEFT BOTTOM,
DIAGONAL WIPE RIGHT BOTTOM, EXTEND FROM CENTER H, EXTEND
FROM CENTER V, COMPRESS TO CENTER H, COMPRESS TO CENTER V,
WINDOW H, WINDOW V, WIPE FROM EDGE TO CENTER and NONE.
• During the slide show press the
transition appears in the upper left corner of the television screen.
PROG button until the name of the desired
- 17 -
Page 20
14. Cleaning of the DVD player
Clean the housing of the DVD player with a slightly damp cloth and a mild
cleanser only. When cleaning, make sure that no moisture gets into the DVD
player!
Clean the inside of the disc tray, if necessary, exclusively with a clean dry
brush (i.e. a lens brush obtainable from a photographic dealer).
Never clean the inside of the disc tray with anything moist!
Warning!
Moisture penetrating into the DVD player creates the risk of an electric shock!
The DVD player may also be irreparably damaged!
15. Disposal
Disposing of the device
Do not, under any circumstances, discard the device in the household
refuse. This product is subject to the European directive 2002/96/EC.
Dispose of the device through an approved disposal centre or at your community
waste facility.
Observe the currently applicable regulations. In case of doubt, please contact
your waste disposal centre.
Disposing of batteries!
Do not dispose of the batteries with household waste. Every consumer is legally
obliged to dispose of batteries at a collection site in his community/city district or
at a retail store.
This obligation is intended to ensure that batteries are disposed of in an
environmentally friendly manner.
Only dispose of batteries when they are fully discharged.
Disposal of packaging
Dispose of the packaging materials in an environmentally
responsible manner.
The display shows "No Disc" even though there is a disc inserted
A The disc is dirty, scratched or damaged. Clean the disc or insert another
disc.
B The Country/Region code on the inserted DVD/VCD/S-VCD does not
correspond to the Country/Region code of the DVD player. In this case
the DVD/VCD/S-VCD cannot be played with the DVD player.
Inserted disc will not playback
It is possible that a layer of condensation has built up on the DVD players laser
scan lens. This can be the case especially if the DVD player has been subjected
to strong temperature fluctuations.
If this is the case place the DVD player in a dry environment at normal room
temperature. First remove the currently inserted disc from the disc tray.
Then leave the DVD player switched off for at least one hour without using
until the condensation film has evaporated.
No image or Black/White image only
A Check to make sure that all connection cables between the DVD player
and the television (or Video projector) are firmly inserted into the
corresponding sockets
B Check to make sure that the settings in the OSD menu match the connections
variant, with which you have connected the DVD player to the television
(or Video projector).
For this see chapter 8. "Connecting the DVD player to a television".
C Check by means of the televisions (or Video projectors) operating
instructions to see if settings to the television (or Video projector) may
be necessary in order to use the DVD player with the television.
No sound
A Check to see if the television and/or DVD player have possibly been
switched to mute.
B Check to see if all connection cables between the DVD player and potentially
connected audio components are plugged firmly into the corresponding
sockets.
C Check whether the settings in the OSD menu match the connection option
you have used to connect the audio components to the DVD player.
For this see chapter 9. "Connecting an audio component to the
DVD player".
16. Troubleshooting
Display is blank/DVD player shows no functions even though it is
switched on
A Check to see that the power cable is inserted properly into the power
socket.
B Check to ensure that the power socket in which you have plugged the
power cable of the DVD player is live by connecting another device to
it. If necessary plug the DVD players power cord into another power
socket.
C Check to see that the display dimmer function is switched off.
To do this press the
D Switch off the DVD player by activating the POWER switch and then wait
ten seconds. Then switch the DVD player back on by activating the
switch again.
DIMMER button on the remote control.
POWER
D Using the television's instruction manual check to see if current settings to
the television are necessary in order to use the DVD player with the television.
E Check by means of the operating instructions for a potential connected
audio component if settings to it are necessary in order to use it with the
DVD player.
F If you …
• have connected the DVD player to a stereo television and have not
connected an audio component to the DVD player or
• have connected a Dolby Prologic compatible audio component via the
analogue stereo outlet (via cinch cables to the cinch sockets L and R)
of the DVD player:
Check to see that you have selected in the OSD menu AUDIO with the
menu input FRONT SPEAKER the setting LARGE.
- 18 -
Page 21

No 4:3 or 16:9 image
A Check by means of the televisions operating instructions, which image
formats the television has at its disposal.
B Check to see if the settings in the OSD menu match the available image
format of the television.
17. Glossary / Key Word Index
What are DVDs, VCDs and S-VCDs?
Remote control not functioning
A Check to make sure that the remote control batteries have been inserted
into the battery compartment with the correct polarity.
B Check to see if the remote control batteries are exhausted and, if necessary,
change both batteries.
C Make sure that there are no obstacles located between the remote control
and the DVD player.
D Remain within five meters of the DVD player when using the remote control.
Playback language/ Subtitle language do not correspond to the
settings in the OSD menu
The playback language/Subtitle language setting in the OSD menu is not
available on the inserted disc.
One or several functions can not be switched on
The selected functions may not be available on all DVDs/VCDs/S-VCDs!
If you attempt to execute a function that is not available, the symbol is
displayed on the television screen.
None of the buttons on the device or on the remote control are
functioning/other malfunctions
A Switch off the DVD player by pressing the POWER switch. Wait ten seconds
and then activate the
once more.
POWER switch again to switch the DVD player on
B In the event that the malfunction is still present: Reset the DVD player to
its default settings.
For this see chapter 10.6 "Setup menu PREFERENCE".
Contact one of our service partners in your area if …
• the stated function defect can not be resolved as described or
• other functional defects arise.
For this see chapter 18 "Warranty and service".
DVDs
DVD is the short form for "Digital Versatile Disc". DVDs are a storage medium
for audio and video data; they are available in 8 cm and 12 cm (Diameter)
formats. Because of the much higher storage capacity as compared to CD-Rs/
CD-RWs DVDs can provide a playback duration of up to eight hours for the
audio and video data stored on them.
VCDs/S-VCDs
"Video CD" (VCD) and "Super Video CD" (S-VCD) are designations for two
processes of compressed storage, thus space saving, of films on CDs. VCDs
and S-VCDs are available in 8 cm and 12 cm (Diameter) formats. Their storage
capacity is a great deal lower than that of DVDs. For this reason they only
offer a playback duration, for the saved audio and video data on them, of
20 minutes (8 cm format) and/or 74 minutes (12 cm format).
VCDs are available in two versions:
• Only audio and video data can be played back on version 1.1
VCDs/S-VCDs.
• PBC (Playback control) functions are available on version 2.0 VCDs/
S-VCDs. In addition still images can be played back in a higher resolution.
Playback Control (PBC)
Version 2.0 VCDs/S-VCDs have Playback Control (in short "PBC") at their disposal.
Then on the VCD/S-VCD a main menu is available, by which various functions of
the VCD/S-VCD are allowed to be operated.
What are Title and Chapter?
Title is the name given to the largest units of image and sound units on DVDs;
on many DVDs the (Main) film has the title number 01. For bonus material
(i.e. Film trailer, background information etc.), that is available on many DVDs,
other possible title numbers can be used.
Chapter is the name given to the next smaller image and sound units beneath
title. If the DVD/VCD/S-VCD or its title is divided into chapters, numbers are
assigned to you, through the input of which the chapter can be selected direct.
Bear in mind that not on all DVDs …
• are the DVD or the title divided into (numbered) chapters
• Chapters are also designated as "Scenes" (i.e. in the main menu of
DVDs)
What are Scart, S-Video, Composite-Video Progressive
Scan, YUV and HDMI?
Scart
Scart denotes a 21 pole standardized plug connection, via which the RGB
signal, video signal and S-Video signal as well as a number of control and
auxiliary signals are transmitted.
S-video
When the DVD player is connected to a television via S-Video the brightness
and colour signals are transmitted seperately; in this way a greater image
sharpness and a reduced so called "Colour noise" is achieved.
Colour noise refers to the overlaying of the colours, mostly heavily saturated
parts of a video image, through an irregular, restive breakdown structure.
- 19 -
Page 22

Composite video
Video signal or FBAS signal; thereby it involves an image signal, in which
colour and brightness information are included at the same time.
Progressive scan
In the normal way TV devices and Video projectors are controlled with so
called "Half images". Thereby clearly visible line structures develop. Contrary
to this, Progressive Scan denotes the output of full images (with this DVD player,
at the output YPbPr) Progressive Scan signals can only be processed by playback devices equipped for this purpose (in particular large screen televisions
and projectors). The image quality as opposed to traditional image signals is
considerably higher.
YUV (component video out)
YUV indicates the component signal, which with this device is available at the
output YPbPr in the form of so called "Half images"; as a rule this is the best
signal for the control of large screen televisions and projectors, which can not
process Progressive Scan signals. As with the RGB image transmission, YUV is
comprised of three separated image signals:
• the brightness signal "Y" and
• the two colour diferential signals "U/Pb" and "V/Pr"
Half images (Interlace)/Full images (Progressive Scan)
A standard television image is comprised of 576 visible lines; at first all odd
and then all even image lines are displayed alternatively, thus each displays
a half image. Thereby only 25 full images (50 Half images) can be displayed
per second. This technique is designated as "Interlace" format.
Contrary to this with the so called progressive or "Progressive Scan" format
all image lines are displayed every time, that is to say 60 full images per
second are displayed. Thereby increasing the total quality of the images, still
images and text for example appear sharper.
HDMI
HDMI is short for "High Definition Multimedia Interface" and refers to a 19
contact interface for complete digital transmission of audio and video data.
With its high bandwidth HDMI handles all known today home electronics
digital video and audio formats. HDMI transmits audio data up to frequencys
of 192 kHz with text widths of up to 24 Bit on up to 8 channels. Thus not
only all of today's image and sound formats introduced into home electronics
including HDTV (up to the highest present resolution of 1080p) are transmitted
without loss of quality but also future formats with yet higher resolutions.
Decoder
The sound on DVDs with home theatre sound is saved on the DVD in encrypted
(encoded) form. Different encryption formats exist for several purposes, for
example AC-3 for the playback of Dolby Digital Surround Sound.
In order to playback encrypted sound, the playback device (i.e. the DVD
player) and/or the audio component connected to it (for example Surround
system) must be equipped with a so called decoder, which converts the
encrypted signal back into music and/or sound.
The Silvercrest KH 6523 DVD player is equipped with an AC-3 Decoder
(for Dolby Digital 5.1 Surround Sound signals).
Dolby Surround
Dolby Surround is an analogue sound format, by which the two channels of
a stereo sound signal are used in order to accommodate room sound information
for further channels. Dolby Surround decoders convert the signals back into
sound or music and send the audio to two additional speakers that are situated
behind the listener.
Dolby Prologic
In comparison to Dolby Surround sound format, with Dolby Prologic an additional
channel in the stereo signal is used; this is the so called "Centre" channel. The
corresponding centre loudspeaker is to be situated in the middle between the
stereo loudspeakers. The deepest sounds are fed to a bass loudspeaker, the
so called "Subwoofer". The subwoofer can be placed in any desired location
in the room; the logic for this is that the bass sounds that the subwoofer puts
out can scarcely be localized exactely by the human ear
Dolby Digital (5.1)
Dolby Digital, also designated as AC3, is a digital sound format, by which up
to six seperate audio channels can be transported. With most of the current
DVDs, the sound is stored in the so called "Dolby Digital 5.1" format; the "5"
in the name "5.1" stands for the three front and two rear surround sound
channels, the "1" stands for the subwoofer channel.
DTS
DTS is the abbreviation for "Digital Theatre System" and denotes one of the
most common surround sound formats for DVDs. As with Dolby Digital 5.1,
DTS uses three front and two rear surround sound channels as well as a bass
sound channel.
What are PAL and NTSC?
PAL
PAL is the abbreviation for "Phase Alternation Line". PAL is the mid and west
Europe (Exception: France) customary and widest distributed colour television
standard.
NTSC
NTSC is the abbreviation for "National Television System Committee". NTSC
is a colour television standard that is primarily used in the USA and Japan.
Audio CDs
Audio CDs contain exclusively audio data; they are also available in 8 cm
and 12 cm (Diameter) formats. The playback duration for the audio data stored
on them amounts to 20 minutes (8 cm format) and/or 74 minutes (12 cm format).
Audio data is stored on audio CDs in CDA format.
MP3
MP3 denotes a process and/or format developed by the Fraunhofer Institute
for the compression of audio data. In the MP3 format compressed music pieces
are only a fraction of their original size, which, for example, on CD-Rs/CD-RWs
allows for storage of a considerably greater volume of music than on commercially available audio CDs, on which audio data is stored in the CDA format.
WMA
WMA ("Windows® Media Audio") is a data format developed by Microsoft®
for audio data.
JPEG
JPEG ("Joint Photographics Expert Group") denotes a wide spread graphic
format, developed by the organization with the same name, with which
image data of the colour and grey scales are compressed.
- 20 -
Page 23
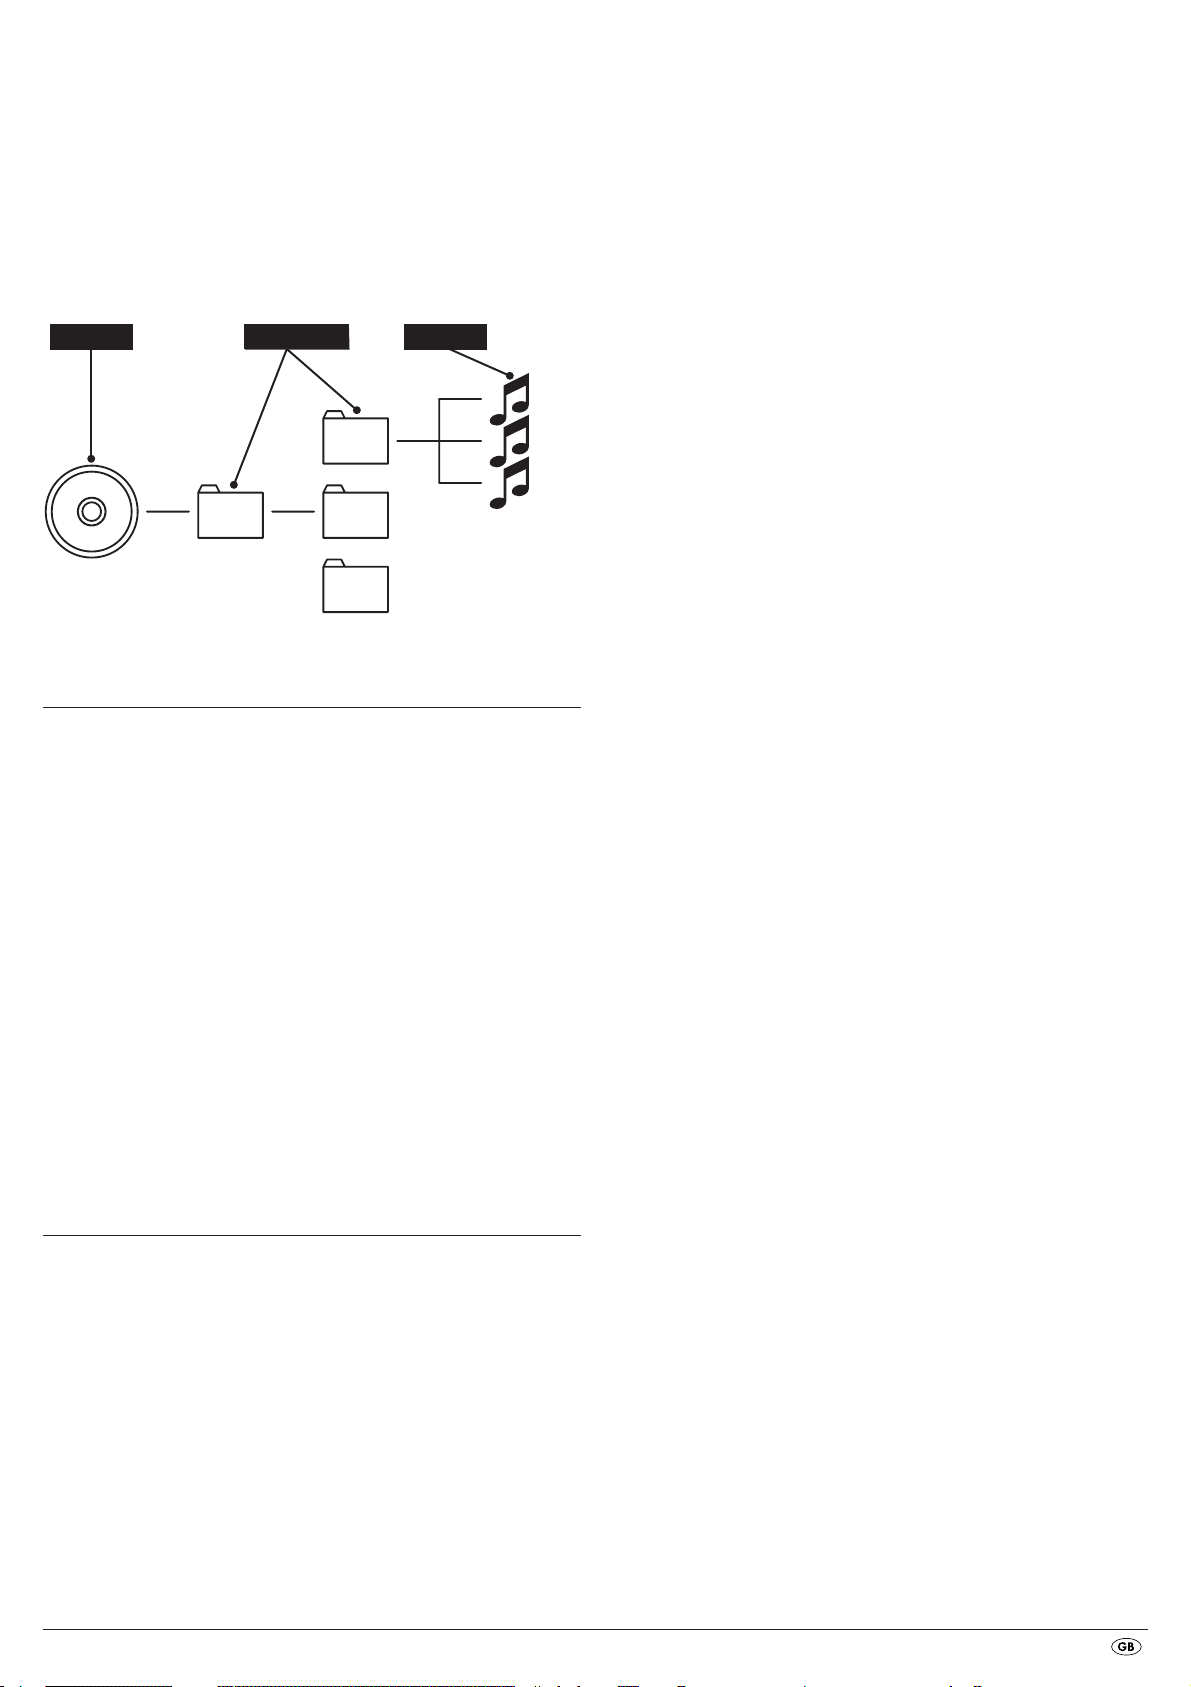
MPEG
ORDNER
MP3
MP3-CD
MPEG ("Moving Picture Experts Group") refers to a video compression format.
What are folders?
As opposed to audio CDs the title on a CD-R/CD-RW with MP3, WMA or
JPEG files can be stored in folders, for example, in order to file titles from
different genres.
The structure of an MP3-CD can, for example, appear as follows, if the MP3
files are stored in folders:
FOLDER
18. Warranty and Service
The warranty for this appliance is for 3 years from the date of purchase.
The appliance has been manufactured with care and meticulously examined
before delivery. Please retain your receipt as proof of purchase. In the event
of a warranty claim, please make contact by telephone with our Service
Department. Only in this way can a post-free despatch for your goods be
assured.
The warranty covers only claims for material and maufacturing defects, but
not for transport damage, for wearing parts or for damage to fragile components, e.g. buttons or batteries. This product is for private use only and is not
intended for commercial use. The warranty is void in the case of abusive and
improper handling, use of force and internal tampering not carried out by our
authorized service branch. Your statutory rights are not restricted in any way
by this warranty.
The warranty period will not be extended by repairs made under warranty.
This applies also to replaced and repaired parts. Any damage and defects
extant on purchase must be reported immediately after unpacking the appliance, at the latest, two days after the purchase date. Repairs made after the
expiration of the warranty period are subject to payment.
19. Importer
KOMPERNASS GMBH
BURGSTRASSE 21
D-44867 BOCHUM
www.kompernass.com
- 21 -
Page 24

Page 25
DVD Player KH6523
Warranty
In order to guarantee a cost free repair procedure please
get in touch with the service hotline. Make sure you have
your sales slip handy.
Sender, please write clearly:
Last name
First name
Street
City/Town
Completely fill out this section and enclose with the device!
Country
Telephone
DES UK LTD
Tel.: 0871 5000 700
e-mail: [email protected]
Kompernass Service Ireland
Tel: 1850 930 412 (0,082 EUR/Min.)
Standard call rates apply. Mobile operators may vary.
e-mail: [email protected]
(£ 0.10 / minute)
Date/Signature
Description of the defect:
Page 26

Page 27

KAZALO VSEBINE STRAN
1. Tehnični podatki 26
2. Predvidena uporaba 26
3. Obseg dobave 26
4. Upravljalni elementi 26
5. Postavitev DVD predvajalnika 27
6. Varnostni napotki 27
7. Daljinski upravljalnik 28
7.1 Vstavitev baterij . . . . . . . . . . . . . . . . . . . . . . . . . . . . . . . . . . . . . . . . . . . . . . . . . . . . . . . . . . . . . . . . . . . . . . . . . . . . . . . . . . . . . . . . . . . . .28
7.2 Uporaba daljinskega upravljalnika . . . . . . . . . . . . . . . . . . . . . . . . . . . . . . . . . . . . . . . . . . . . . . . . . . . . . . . . . . . . . . . . . . . . . . . . . . . . . .28
7.3 Zamenjava baterij . . . . . . . . . . . . . . . . . . . . . . . . . . . . . . . . . . . . . . . . . . . . . . . . . . . . . . . . . . . . . . . . . . . . . . . . . . . . . . . . . . . . . . . . . . .28
8. Priključitev DVD predvajalnika na televizijski sprejemnik 28
8.1 Priključitev na televizijski sprejemnik s pomočjo Scart kabla/RGB-vhoda . . . . . . . . . . . . . . . . . . . . . . . . . . . . . . . . . . . . . . . . . . . . . . . .29
8.2 Priključitev na televizijski sprejemnik preko S-Video vhoda . . . . . . . . . . . . . . . . . . . . . . . . . . . . . . . . . . . . . . . . . . . . . . . . . . . . . . . . . . .29
8.3 Priključitev na televizijski sprejemnik preko video vhoda (Composite Video) . . . . . . . . . . . . . . . . . . . . . . . . . . . . . . . . . . . . . . . . . . . . .29
8.4 Priključitev preko komponentnega signala (YPbPr/YUV) . . . . . . . . . . . . . . . . . . . . . . . . . . . . . . . . . . . . . . . . . . . . . . . . . . . . . . . . . . . . .29
8.5 Priključitev na televizijski sprejemnik preko HDMI . . . . . . . . . . . . . . . . . . . . . . . . . . . . . . . . . . . . . . . . . . . . . . . . . . . . . . . . . . . . . . . . . .30
9. Priključitev avdio komponent na DVD predvajalnik 30
9.1 Zahteve za priključitev HiFi naprave . . . . . . . . . . . . . . . . . . . . . . . . . . . . . . . . . . . . . . . . . . . . . . . . . . . . . . . . . . . . . . . . . . . . . . . . . . . . .30
9.2 Priključitev digitalnih avdio komponent s pomočjo digitalnega kabla . . . . . . . . . . . . . . . . . . . . . . . . . . . . . . . . . . . . . . . . . . . . . . . . . . .31
9.3 Priključitev avdio komponent s pomočjo analognega kabla . . . . . . . . . . . . . . . . . . . . . . . . . . . . . . . . . . . . . . . . . . . . . . . . . . . . . . . . . .31
9.4 Priključitev slušalk . . . . . . . . . . . . . . . . . . . . . . . . . . . . . . . . . . . . . . . . . . . . . . . . . . . . . . . . . . . . . . . . . . . . . . . . . . . . . . . . . . . . . . . . . . . .31
10. Nastavitve v OSD-meniju 32
10.1 Upravljanje OSD-menija . . . . . . . . . . . . . . . . . . . . . . . . . . . . . . . . . . . . . . . . . . . . . . . . . . . . . . . . . . . . . . . . . . . . . . . . . . . . . . . . . . . . .32
10.2 Meni za nastavitve GENERAL . . . . . . . . . . . . . . . . . . . . . . . . . . . . . . . . . . . . . . . . . . . . . . . . . . . . . . . . . . . . . . . . . . . . . . . . . . . . . . . .32
10.3 Meni za nastavitve AUDIO . . . . . . . . . . . . . . . . . . . . . . . . . . . . . . . . . . . . . . . . . . . . . . . . . . . . . . . . . . . . . . . . . . . . . . . . . . . . . . . . . . .33
10.4 Meni za nastavitve DOLBY . . . . . . . . . . . . . . . . . . . . . . . . . . . . . . . . . . . . . . . . . . . . . . . . . . . . . . . . . . . . . . . . . . . . . . . . . . . . . . . . . . .34
10.5 Meni za nastavitve VIDEO . . . . . . . . . . . . . . . . . . . . . . . . . . . . . . . . . . . . . . . . . . . . . . . . . . . . . . . . . . . . . . . . . . . . . . . . . . . . . . . . . . .34
10.6 Meni za nastavitve PREFERENCE . . . . . . . . . . . . . . . . . . . . . . . . . . . . . . . . . . . . . . . . . . . . . . . . . . . . . . . . . . . . . . . . . . . . . . . . . . . . . .35
11. Zagon DVD predvajalnika 36
11.1 Vklop/izklop DVD predvajalnika . . . . . . . . . . . . . . . . . . . . . . . . . . . . . . . . . . . . . . . . . . . . . . . . . . . . . . . . . . . . . . . . . . . . . . . . . . . . . .36
11.2 Vstavitev plošče DVD . . . . . . . . . . . . . . . . . . . . . . . . . . . . . . . . . . . . . . . . . . . . . . . . . . . . . . . . . . . . . . . . . . . . . . . . . . . . . . . . . . . . . . . .36
12. Predvajanje medijev DVD, VCD ali S-VCD 36
12.1 Funkcije pri predvajanju medijev DVD, VCD ali S-VCD . . . . . . . . . . . . . . . . . . . . . . . . . . . . . . . . . . . . . . . . . . . . . . . . . . . . . . . . . . . . .37
13. Predvajanje formatov JPEG-Photo CD/WMA/MP3/MPEG4 41
14. Čiščenje DVD predvajalnika 42
15. Odstranitev 42
16. Odprava motenj in napak 42
17. Slovarček/seznam ključnih izrazov 43
18. Garancija in servis 45
19. Proizvajalec 45
Pred prvo uporabo ta navodila skrbno preberite in jih shranite za poznejšo uporabo.
Ob predaji naprave tretji osebi zraven priložite tudi navodila za uporabo.
- 25 -
Page 28
DVD PREDVAJALNIK KH6523
2. Predvidena uporaba
Ta dokumentacija je zaščitena z avtorskimi pravicami.
Vsakršno razmnoževanje oz. ponatis, tudi deloma, ter predvajanje slik, tudi v
spremenjeni obliki, je dovoljeno le s pisnim dovoljenjem proizvajalca.
1. Tehnični podatki
Ta naprava izpolnjuje osnovne zahteve in druge zadevne predpise
Nizkonapetostne direktive 2006/96/EC, EMC-direktive 2004/108/EC ter
Direktive o okoljsko primerni zasnovi 2009/125/EC
(Uredba 1275/2008, Priloga II, št. 1).
Omrežni priključek: AC 220 V - 240 V ~50 Hz
Moč: 20 W
Moč v načinu
Standby: < 1 W
Razred zaščite: II /
Televizijski standard: PAL/NTSC
Obratovalna temperatura: +5 ~+40°C
Vlaga: 5 ~ 90 % (brez kondenzacije)
Mere
(D x Š x V): 220 x 430 x 45 mm
Teža: pribl. 1,6 kg
Laser razreda: 1
Video izhod
Formati: 4:3 / 16:9
Dekoder: MPEG 2
D/A-pretvornik: 12 bit
Avdio izhod
Dekoder MPEG Dolby Digital (AC-3)
DTS je možen le z dodatnim eksternim
dekoderjem
D/A-pretvornik: 24 bit / 96 kHz
Izhod za slušalke
Zaskočni vtič: 3,5 mm
Maksimalna
izhodna napetost: pribl. 25 mV
Predvajajo se lahko mediji/formati
Video: DVD, DVD+R, DVD+RW, DVD-R, DVD-RW,
DVD-R DL, DVD+R DL, VCD, S-VCD
Avdio: CD, CD-R, CD-RW, avdio DVD, MP3, WMA,
OGG Vorbis
Drugi formati: AVI, MPEG 4, Xvid, JPEG (foto CD)
Regionalna koda: ali
DVD predvajalnik Silvercrest KH 6523 je namenjen izključno za predvajanje
CD-jev in DVD-jev med stacionarno uporabo v zaprtih prostorih. Naprava je
namenjena izključno za privatno, nekomercialno uporabo.
Predvajalnik je namenjen za uporabo kot naprava zabavne elektronike.
Za škodo, ki nastane zaradi nepredvidene uporabe ali zaradi lastnoročne
predelave naprave, ne prevzamemo nobene odgovornosti/jamstva!
3. Obseg dobave
- DVD predvajalnik
- Infrardeči daljinski upravljalnik
- 2 bateriji za daljinski upravljalnik, tip AAA/ (mikrocelice)
- RGB-Scart kabel
- HDMI-kabel
- Navodila za uporabo
4. Upravljalni elementi
A. Prednja stran DVD predvajalnika
predalček za plošče
q
zaslon (z LED-lučko za standby (zelena) in IR-senzorjem za daljinski
w
upravljalnik)
tipka OPEN/CLOSE
e
tipka PLAY/PAUSE
r
tipka STOP
t
tipka STANDBY
y
izhod za slušalke za 3,5 mm zaskočni vtič
u
B. Hrbtna stran DVD predvajalnika
omrežni kabel
i
stikalo POWER
o
VIDEO: video izhod Composite
a
Y, Pb/Cb, Pr/Cr: video izhodi komponent
s
SCART: Scart/RGB-izhod
d
FL/FR: izhod za sprednji, levi in desni avdio kanal
f
SL/SR: izhod za zadnji, levi in desni avdio kanal
g
SW: izhod za bas avdio kanal
h
CEN: izhod za prednji, srednji avdio kanal
j
COAXIAL: koaksialni avdio izhod
k
AUDIO L/R: levi in desni avdio izhod
l
HDMI: HDMI-izhod
;
OPTICAL: optični digitalni avdio izhod
2)
S-VIDEO: izhod S-Video
2!
- 26 -
Page 29
C. Daljinski upravljalnik
OPEN/CLOSE : odpiranje/zapiranje predalčka za plošče
q
številske tipke
w
DISPLAY: prikaz informacij o plošči
e
DIMMER: nastavitev svetlosti zaslona
r
V-MODE: nastavitev video izhoda
t
STOP: konec predvajanja
y
PLAY/PAUSE : zagon/prekinitev predvajanja
u
SKIP FWD : preskok za eno poglavje naprej
i
VOL +/-: zvišanje/znižanje glasnosti zvoka
o
FAST FWD: hitro iskanje naprej
a
SUBTITLE: nastavitev podnapisov
s
ENTER: potrditev vnosa
d
tipke za krmiljenje
f
MENU: priklic menija plošče
g
SLOW: funkcija časovne lupe
h
RETURN: nastavitev načina predvajanja
j
ZOOM: nastavitev povečanja slike
k
PROG: priklic funkcije programiranja
l
predalček za baterije (na hrbtni strani)
;
PBC: aktiviranje/deaktiviranje PBC-funkcije (le VCD, SVCD)
2)
A-B: ponovitev odlomka
2!
STEP: predvajanje posameznih slik
2@
L/R/ST: nastavitev avdio kanala
2#
AUDIO: nastavitev avdio jezika
2$
TITLE: priklic menija z naslovi
2%
FAST RWD: hitro iskanje nazaj
2^
SKIP BWD : preskok za eno poglavje nazaj
2&
MUTE : izklop/vklop tona
2*
REPEAT: nastavitev funkcije ponavljanja
2(
ANGLE: sprememba perspektive kamere
3)
SETUP: priklic OSD-menija
3!
GOTO: priklic menija za direktno izbiro naslova, poglavja in časa
3@
STANDBY : preklop naprave v način mirovanja
3#
5. Postavitev DVD predvajalnika
1. DVD predvajalnik in priloženi pribor previdno vzemite iz embalaže.
2. Zaščitno folijo odstranite z zaslona
3. DVD predvajalnik postavite na ravni, enakomerni in nedrseči podlagi.
Naprave ne izpostavljajte zunanjim virom vročine ali vlage. Pazite na
zadostno prezračevanje naprave z vseh strani. Na DVD predvajalnik
ne postavljajte televizorja.
Pozor!
Omrežnega vtiča DVD predvajalnika sedaj še ne vtikajte v omrežno vtičnico.
Počakajte s tem, dokler DVD predvajalnika niste priključili na televizijski
sprejemnik.
Če želite spremeniti vrsto video ali avdio povezave, prej nujno vtič potegnite
iz vtičnice! Drugače se lahko DVD predvajalnik in morebitne nanj priključene
naprave zaradi nastalih vrhuncev napetosti nepopravljivo poškodujejo!
6. Varnostni napotki
• Ta izdelek ni namenjen temu, da bi ga uporabljale osebe (tudi otroci ne)
z omejenimi fizičnimi, zaznavnimi ali duševnimi sposobnostmi ali
s pomanjkljivimi izkušnjami in/ali znanjem, razen pod nadzorom osebe,
ki je zanje odgovorna ali jim je dala navodila v zvezi z uporabo izdelka.
• Otroke je treba nadzorovati, da se z napravo ne bi igrali.
• Za preprečevanje nehotenega vklopa po vsaki uporabi in pred vsakim
čiščenjem omrežni vtič potegnite iz vtičnice.
• Napravo in vse njene dele preverite glede vidne škode.
Varnostni koncept naprave lahko deluje samo v brezhibnem stanju.
• Omrežni vtič mora biti zmeraj lahko dosegljiv, tako da v primeru sile
napravo lahko hitro ločite od električnega omrežja.
Nevarnost zaradi električnega udara!
• Napravo priključite samo na omrežno vtičnico instalirano in ozemljeno
po predpisih. Omrežna napetost se mora skladati z navedbami na tipski
tablici naprave.
• Poškodovane omrežne vtiče ali omrežne kable naj vam takoj zamenja
pooblaščeno strokovno osebje ali servisna služba, da se izognete
nevarnosti.
• Priključne vode oz. naprave, ki ne delujejo brezhibno ali so bili poškodovani, takoj dajte v popravilo ali zamenjavo servisni službi.
• Naprave nikoli ne potapljajte v vodo. Obrišite ju le z rahlo vlažno krpo.
• Naprave ne izpostavljajte dežju in je nikoli ne uporabljajte v vlažni ali
mokri okolici.
• Pazite, da se priključna napeljava med delovanjem nikoli ne navlaži ali
namoči.
• Ohišja naprave ne smete odpirati ali popravljati. V tem primeru varnost
ni več zagotovljena in jamstvo preneha veljati.
• Napravo zaščitite pred vodnimi kapljicami ali brizgi. Na napravo torej
ne postavljajte posod, napolnjenih s tekočino, npr. vaz.
Nevarnost požara!
• Naprave ne uporabljajte v bližini vročih površin.
• Naprave ne postavljajte na krajih, ki so izpostavljeni neposrednemu
sončnemu sevanju. Drugače se lahko pregreje ter nepopravljivo poškoduje.
• Naprave med delovanjem ne pustite nenadzorovane.
• Prezračevalnih rež naprave nikoli ne prekrivajte, če je ta vklopljena.
• Na napravo ne postavljajte virov odprtega ognja, npr. sveč.
Nevarnost poškodb
• Otroci naj se ne približujejo priključni napeljavi ali napravi.
Otroci pogosto podcenjujejo nevarnost električnih naprav.
• Poskrbite za varen položaj naprave.
• Če bi naprava padla dol ali je poškodovana, je ne smete več uporabljati.
Napravo naj preveri strokovno osebje in jo po potrebi popravi.
• Baterije/akumulatorji so lahko v primeru zaužitja življenjsko nevarni.
Baterije hranite izven dosega majhnih otrok. Če pride do zaužitja baterije,
je treba takoj poiskati zdravniško pomoč.
• Embalažno folijo hranite izven dosega otrok. Obstaja nevarnost zadušitve.
- 27 -
Page 30
Nevarnost! Lasersko sevanje!
Naprava obsega "laser 1. razreda".
• Naprave nikoli ne odpirajte.
• Naprave ne poskušajte popravljati.
• V notranjosti naprave se nahaja nevidno lasersko sevanje.
Ne izpostavljajte se laserskemu žarku
Napotek:
Bolj agresivni laki na pohištvu lahko nagrizejo gumijaste podstavke naprave.
Napravo po potrebi postavite na nedrsečo podlago.
Nevihta!
V primeru nevihte se lahko naprave, priključene na električno omrežje,
poškodujejo. V primeru nevihte zato zmeraj potegnite omrežni vtič iz
vtičnice.
Napotek o udarni napetosti (EFT/električni hitri prehod)
in elektrostatični razelektritvi:
V primeru napačnega delovanja zaradi električnih hitrih prehodov
(udarna napetost) oz. elektrostatične razelektritve je treba napravo
ponastaviti, da vzpostavite normalno obratovanje. Morebiti je treba
oskrbo s tokom prekiniti in jo ponovno vzpostaviti. Baterije (če obstajajo)
je treba odstraniti in jih ponovno vstaviti.
Napotek o ločitvi od omrežja
Stikalo POWER na tej napravi te od električnega omrežja ne loči popolnoma.
Razen tega se naprava v stanju pripravljenosti (standby) napaja s tokom.
Za popolno ločitev naprave od omrežja je omrežni vtič treba potegniti iz
omrežne vtičnice.
Napotki za rokovanje z baterijami
Daljinski upravljalnik obratuje na baterije.
V zvezi z varnim rokovanjem z baterijami upoštevajte naslednje varnostne
napotke:
Nevarnost zaradi nepravilne uporabe!
• Baterije ne vrzite v ogenj.
• Baterije ne zvežite na kratko.
• Baterije ne poskusite ponovno napolniti.
• Baterijo redno preverjajte. Iztekla baterijska kislina lahko povzroči trajno
škodo na napravi. Pri rokovanju s poškodovano ali izteklo baterijo bodite
posebej previdni. Nevarnost razjed! Nosite zaščitne rokavice.
• Predalček za baterije in kontakte baterij čistite s suho krpo.
• Baterijo hranite izven dosega otrok. Pri zaužitju takoj pojdite k zdravniku.
• Če naprave dlje časa ne uporabljate, baterijo vzemite iz daljinskega
upravljalnika.
• Baterij nikoli ne smete odpirati, spajkati ali variti.
Obstaja nevarnost eksplozije in poškodb!
7. Daljinski upravljalnik
7.1 Vstavitev baterij
1. Odprite predalček za baterije na hrbtni strani daljinskega upravljalnika.
2. V predalček za baterije sedaj vstavite bateriji tipa AAA (mikro bateriji),
ki sta del obsega dobave. Pri tem pazite, da bateriji vložite v skladu
z njuno polarnostjo.
3. Pokrov predalčka za baterije ponovno zaprite.
7.2 Uporaba daljinskega upravljalnika
Da pri uporabi daljinskega upravljalnika zagotovite njegovo brezhibno
delovanje …
• Daljinski upravljalnik pri uporabi zmeraj usmerite naravnost na DVD
predvajalnik.
• Zagotovite, da se med daljinskim upravljalnikom in DVD predvajalnikom
ne nahajajo nobene ovire, ki bi ovirale sprejem.
• Pri uporabi daljinskega upravljalnika se od DVD predvajalnika ne odmaknite
več kot 5 metrov.
Drugače lahko pride do motenj pri upravljanju funkcij DVD predvajalnika
z daljinskim upravljalnikom.
7.3 Zamenjava baterij
Če upravljanje DVD predvajalnika s pomočjo daljinskega upravljalnika ne
deluje pravilno ali sploh ne deluje več, je treba zamenjati baterije.
• Baterije zmeraj zamenjajte vse naenkrat, da daljinski upravljalnik lahko
uporabljate z njegovo polno zmogljivostjo.
8. Priključitev DVD predvajalnika na televizijski
sprejemnik
Ko ste DVD predvajalnik namestili, ga lahko priključite na televizijski sprejemnik.
DVD predvajalnik lahko priključite na televizijski sprejemnik s televizijskim
standardom PAL ali NTSC.
Če DVD predvajalnik želite uporabljati s televizorjem s standardom NTSC,
morate spremeniti video nastavitve v tako imenovanem "OSD-meniju" DVD
predvajalnika. Tam je tovarniško nastavljen PAL kot televizijski standard.
Odvisno od opremitve televizorja obstajajo različne možnosti priključitve
DVD predvajalnika nanj, ki so razložene v nadaljevanju.
Pozor!
Za poškodbe DVD predvajalnika, nastale zaradi vpliva vlage, vode,
ki bi vdrla v napravo, ali zaradi pregretja naprave ne prevzemamo
odgovornosti/jamstva!
- 28 -
Page 31
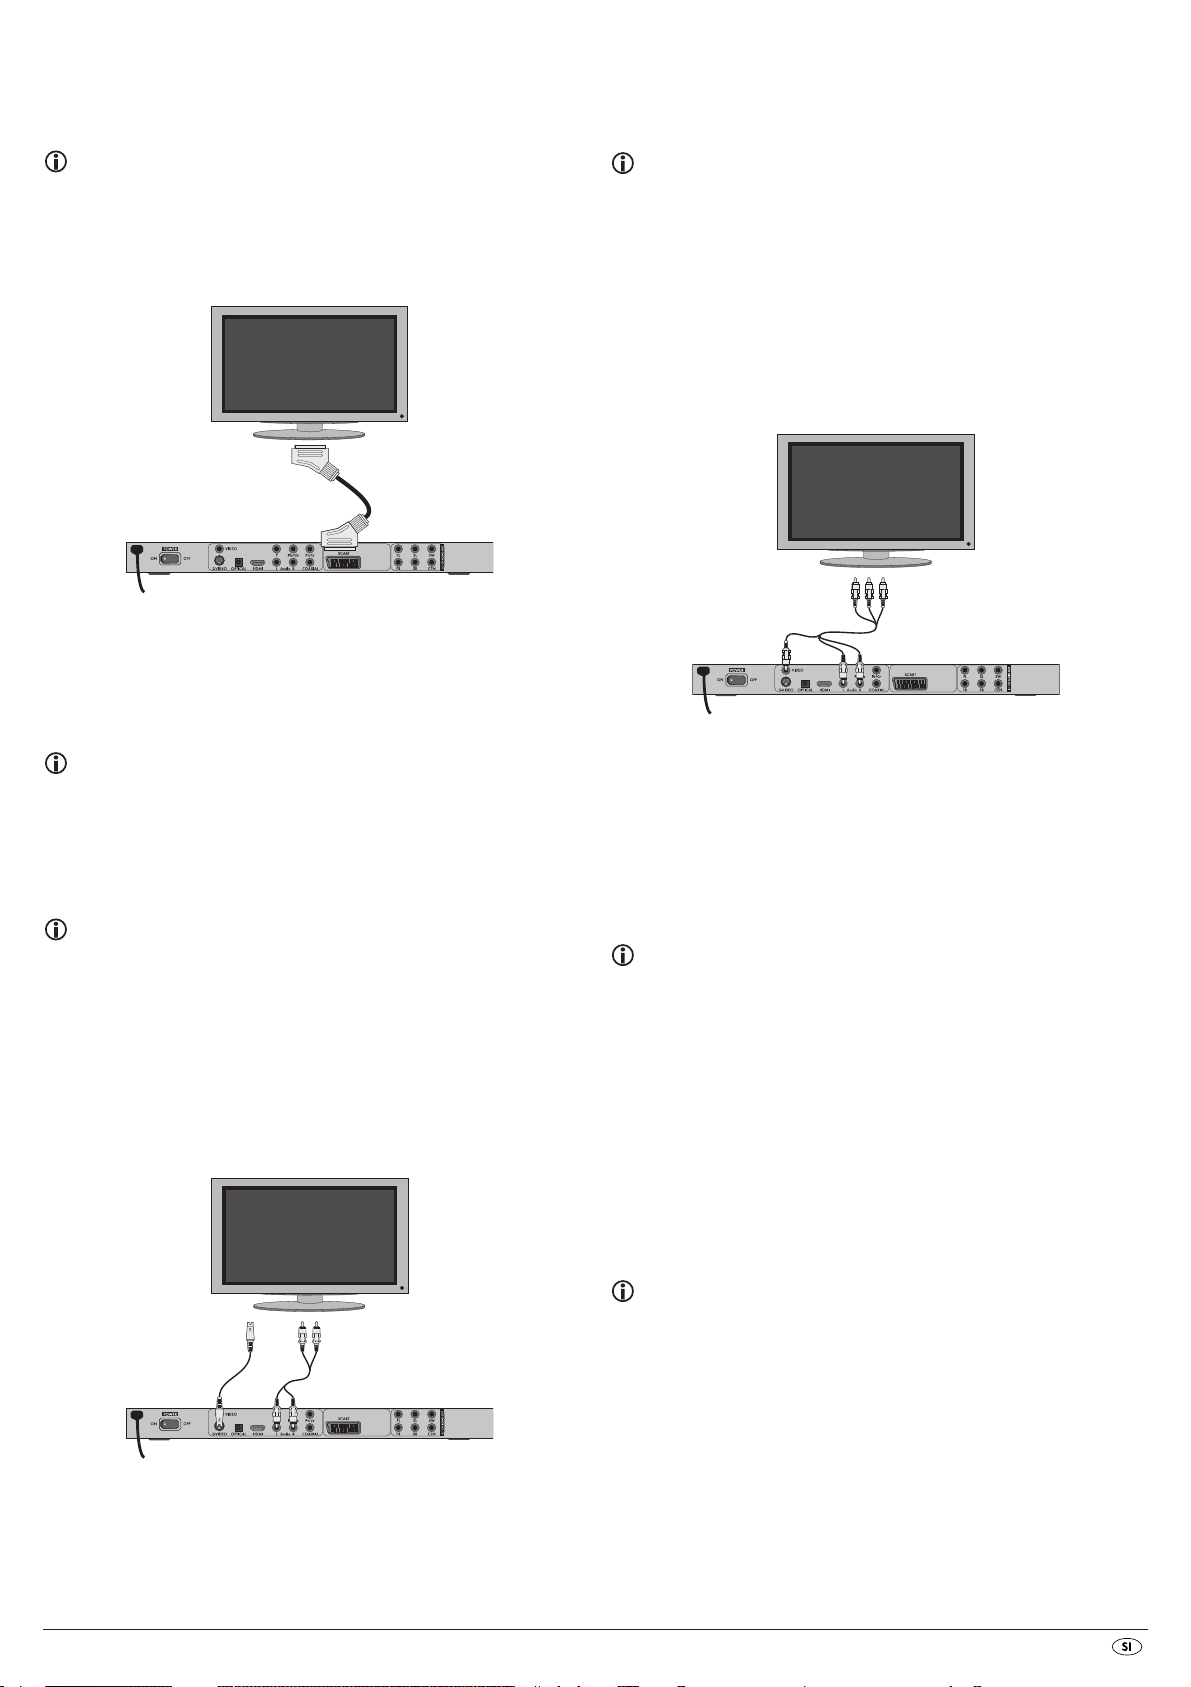
8.1 Priključitev na televizijski sprejemnik s pomočjo Scart
kabla/RGB-vhoda
Napotek:
Kvalitativno visoko povezavo predstavlja priključitev DVD predvajalnika na
televizor s pomočjo Scart kabla preko RGB-vhoda. Izberite to vrsto priključka,
če ima televizijski sprejemnik RGB-vhod. Če niste prepričani, ali ima vaš televizijski
sprejemnik RGB-vhod, to preverite v navodilih za uporabo televizijskega
sprejemnika.
• Za predvajanje izberite primerni AV-kanal na vašem televizorju.
Na podlagi navodil za uporabo televizorja preverite, kako se nastavi
AV-kanal.
• V OSD-meniju izbirajte v meniju VIDEO/VIDEO OUTPUT/OFF .
Točko menija VIDEO OUTPUT lahko izberete le pri deaktiviranem
HDMI-izhodu. V zvezi s tem poglavjem si poglejte tudi poglavje 10
„Nastavitve v OSD-meniju“.
8.3 Priključitev na televizijski sprejemnik preko video
vhoda (Composite Video)
Za to različico priključka mora televizor imeti avdio/video cinch konektorje
(Composite Video).
Za priključitev DVD predvajalnika na televizor s pomočjo Composite Video
potrebujete
• avdio/video RCA cinch kabel (ni v obsegu dobave)
• Konektor označen s
s Scart konektorjem televizorja.
• Za predvajanje izberite primerni AV-kanal na vašem televizorju.
Na podlagi navodil za uporabo televizorja preverite, kako se nastavi
AV-kanal.
• V OSD-meniju izbirajte v meniju VIDEO/VIDEO OUTPUT/RGB ali OFF .
Točko menija VIDEO OUTPUT lahko izberete le pri deaktiviranem
HDMI-izhodu. V zvezi s tem poglavjem si poglejte tudi poglavje 10
„Nastavitve v OSD-meniju“.
SCART s pomočjo priloženega Scart kabla povežite
8.2 Priključitev na televizijski sprejemnik preko S-Video
vhoda
Napotek:
Za to različico priključka mora televizor imeti S-Video vhod in dva nezasedena
avdio cinch IN-konektorja. Če niste prepričani, ali ima vaš televizijski sprejemnik
funkcijo S-Video oz. cinch konektorje, to preverite v navodilih za uporabo
televizijskega sprejemnika.
Za to različico priključka potrebujete
• avdio cinch kabel (ni v obsegu dobave)
• S-Video kabel (ni v obsegu dobave); dobite ju v specializirani trgovini.
Tako DVD predvajalnik preko S-Video vhoda priključite na televizor:
• Povežite rumeno označen video konektor z rumenim
televizorja.
• Povežite izhodne avdio konektorje
vajalnika z ustreznimi avdio vhodi televizorja. Pri tem upoštevajte rumene, rdeče in bele barvne oznake.
• Za predvajanje izberite primerni AV-kanal na vašem televizorju.
Na podlagi navodil za uporabo televizorja preverite, kako se nastavi
AV-kanal.
• V OSD-meniju izbirajte v meniju VIDEO/VIDEO OUTPUT/OFF .
Točko menija VIDEO OUTPUT lahko izberete le pri deaktiviranem
HDMI-izhodu. V zvezi s tem poglavjem si poglejte tudi poglavje 10
„Nastavitve v OSD-meniju“.
AUDIO L/R na hrbtni strani DVD pred-
VIDEO konektorjem
8.4 Priključitev preko komponentnega signala (YPbPr/YUV)
Ta različica priključka je možna samo z zelo kakovostnimi televizijskimi aparati,
LCD/plazma zasloni ali video projektorji.
Na podlagi navodil za uporabo ustrezne naprave za predvajanje preverite,
ali je ta različica priključka na razpolago. Morebiti bo treba izvesti še dodatne
nastavitve na napravi za predvajanje.
Preko YPbPr-vtičnic DVD predvajalnika se posredujejo tako imenovani
„komponentni signali“. Komponentni signali so na razpolago tako v obliki
tako imenovanih "YUV" signalov (polslik) kot tudi v obliki tako imenovanih
"YPbPr" signalov (polne slike/Progressive Scan).
V zvezi s to temo si poglejte tudi poglavje 17 "Slovarček/seznam ključnih
izrazov".
• Konektor označen z
konektorjem televizorja.
• Povežite izhodne avdio konektorje
vajalnika preko avdio cinch kabla z ustreznimi avdio vhodi televizorja.
Pri tem upoštevajte rdeče in bele barvne oznake.
S-VIDEO preko S-Video kabla povežite z S-Video
AUDIO L/R na hrbtni strani DVD pred-
Kabelska povezava je za obe različici enaka; YPbPr-signali za Progressive
Scan pa se lahko uporabljajo samo, če je televizor (ali video projektor), na
katerega želite DVD predvajalnik priključiti, primeren za Progressive Scan.
Če niste prepričani, ali je televizor (ali video projektor), na katerega želite
DVD predvajalnik priključiti, primeren za Progressive Scan in ima cinch vtičnice,
to lahko preverite na podlagi navodil za uporabo televizorja (ali video
projektorja).
- 29 -
Page 32
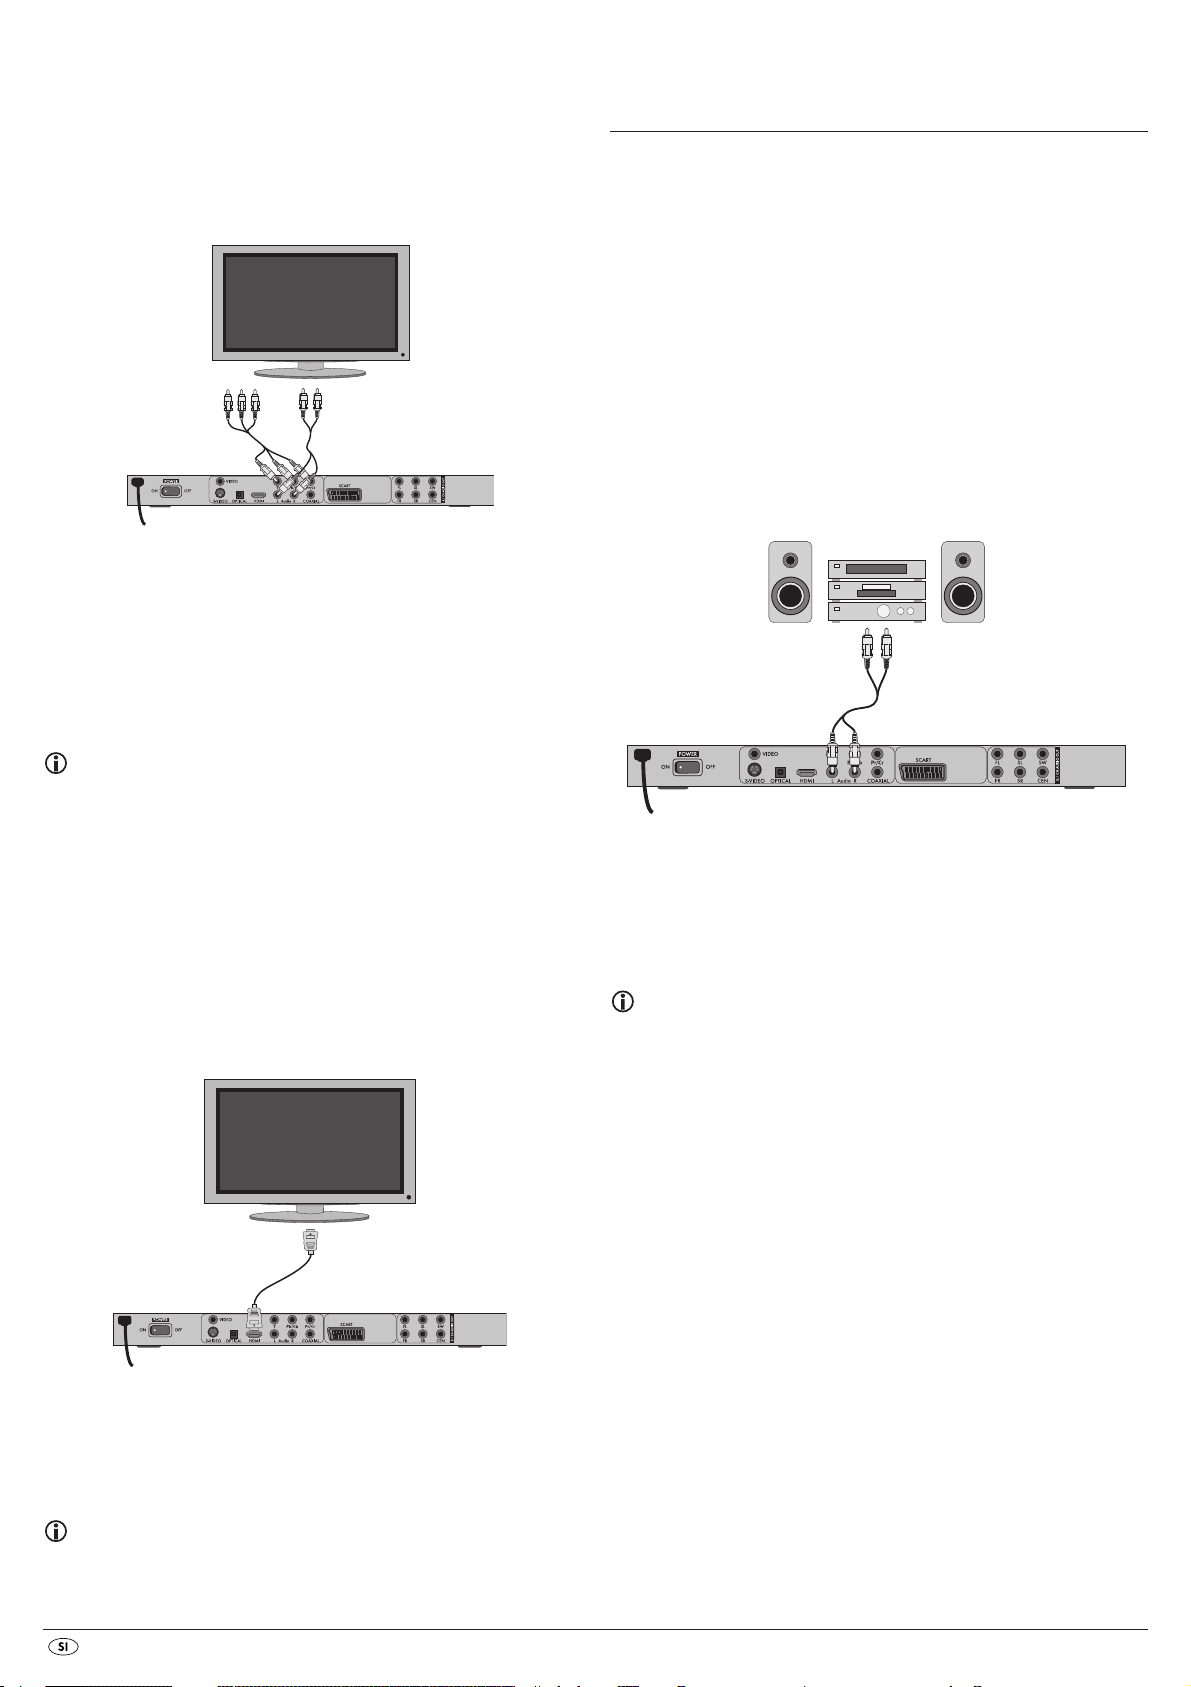
Za obe različici – "YPbPr" in "YUV" – potrebujete
• avdio cinch kabel (ni v obsegu dobave)
• YUV-kabel (ni v obsegu dobave); dobite ju v specializirani trgovini.
Na hrbtni strani DVD predvajalnika najdete priključne konektorje Y, Pb/Cb in
Pr/Cr.
Priključitev DVD predvajalnika preko komponentnega signala:
• Povežite konektorje Y (zelen), Pb/Cb (moder) in Pr/Cr (rdeč) z enakoimenskimi konektorji televizorja.
• Povežite izhodne avdio konektorje
vajalnika preko avdio cinch kabla z ustreznimi avdio vhodi televizorja.
Pri tem upoštevajte rdeče in bele barvne oznake.
• Za predvajanje izberite primerni AV-kanal na vašem televizorju.
Na podlagi navodil za uporabo televizorja preverite, kako se nastavi
AV-kanal.
• V OSD-meniju izbirajte v meniju VIDEO/VIDEO OUTPUT/YUV .
Točko menija VIDEO OUTPUT lahko izberete le pri deaktiviranem
HDMI-izhodu. V zvezi s tem poglavjem si poglejte tudi poglavje 10
„Nastavitve v OSD-meniju“.
AUDIO L/R na hrbtni strani DVD pred-
8.5 Priključitev na televizijski sprejemnik preko HDMI
Ta različica priključka je možna samo z zelo kakovostnimi televizijskimi aparati,
LCD/plazma zasloni ali beamerji.
Na podlagi navodil za uporabo ustrezne naprave za predvajanje preverite,
ali je ta različica priključka na razpolago. Morebiti bo treba izvesti še dodatne
nastavitve na napravi za predvajanje. Za to različico priključka potrebujete
HDMI-kabel (v obsegu dobave).
Priključitev DVD predvajalnika preko HDMI-vmesnika:
9. Priključitev avdio komponent na DVD
predvajalnik
Poleg predvajanja zvoka s plošč DVD, VCD/S-VCD in avdio CD-jev ter CD-jev
z MP3-formatom preko zvočnikov televizorja, na katerega je priključen DVD
predvajalnik, se predvajanje zvoka lahko izvaja tudi preko eksternih avdio
komponent kot to HiFi naprave, Dolby Digital/DTS sprejemniki ali surround
naprave.
9.1 Zahteve za priključitev HiFi naprave
Za kakovostne zvočne učinke pri predvajanju DVD-jev z DVD predvajalnikom
lahko na DVD predvajalnik priključite HiFi napravo. Pred priključitvijo na podlagi navodil za uporabo HiFi naprave preverite.…
• ali je HiFi naprava primerna za priključitev na DVD predvajalnik;
• ali ima HiFi naprava cinch konektorje; če jih ima, HiFi napravo lahko
preko cinch kabla priključite na DVD predvajalnik.
Priključitev HiFi naprave:
• Povežite izhodne avdio konektorje AUDIO L/R na hrbtni strani DVD pred-
vajalnika preko avdio cinch kabla z ustreznimi avdio vhodi HiFi naprave. Pri tem upoštevajte rdeče in bele barvne oznake.
• Na podlagi navodil za uporabo preverite morebitne nastavitve na HiFi
napravi, potrebne za predvajanje tona na plošči DVD, VCD/S-VCD,
avdio ali MP3 CD, ki se nahaja v DVD predvajalniku.
Napotek:
Za optimalen zvok zvočnike svoje HiFi naprave postavite levo in desno od
televizorja, na katerega ste priključili DVD predvajalnik.
• Konektor označen s HDMI preko HDMI-kabla povežite z ustreznim
konektorjem televizorja.
• Za predvajanje izberite primerni AV-kanal na vašem televizorju.
Na podlagi navodil za uporabo televizorja preverite, kako se nastavi
AV-kanal.
• V OSD-meniju izbirajte v meniju VIDEO/HDMI Setup/ON.
V zvezi s to temo si poglejte tudi poglavje 10 „Nastavitve v OSD-meniju“.
Če ste DVD predvajalnik na televizor priključili s pomočjo Scart kabla, se
avdio signali do HiFi naprave prenašajo preko cinch kabla ter hkrati do
televizorja preko Scart kabla. V tem primeru glasnost televizorja nastavite
na minimalno vrednost.
- 30 -
Page 33
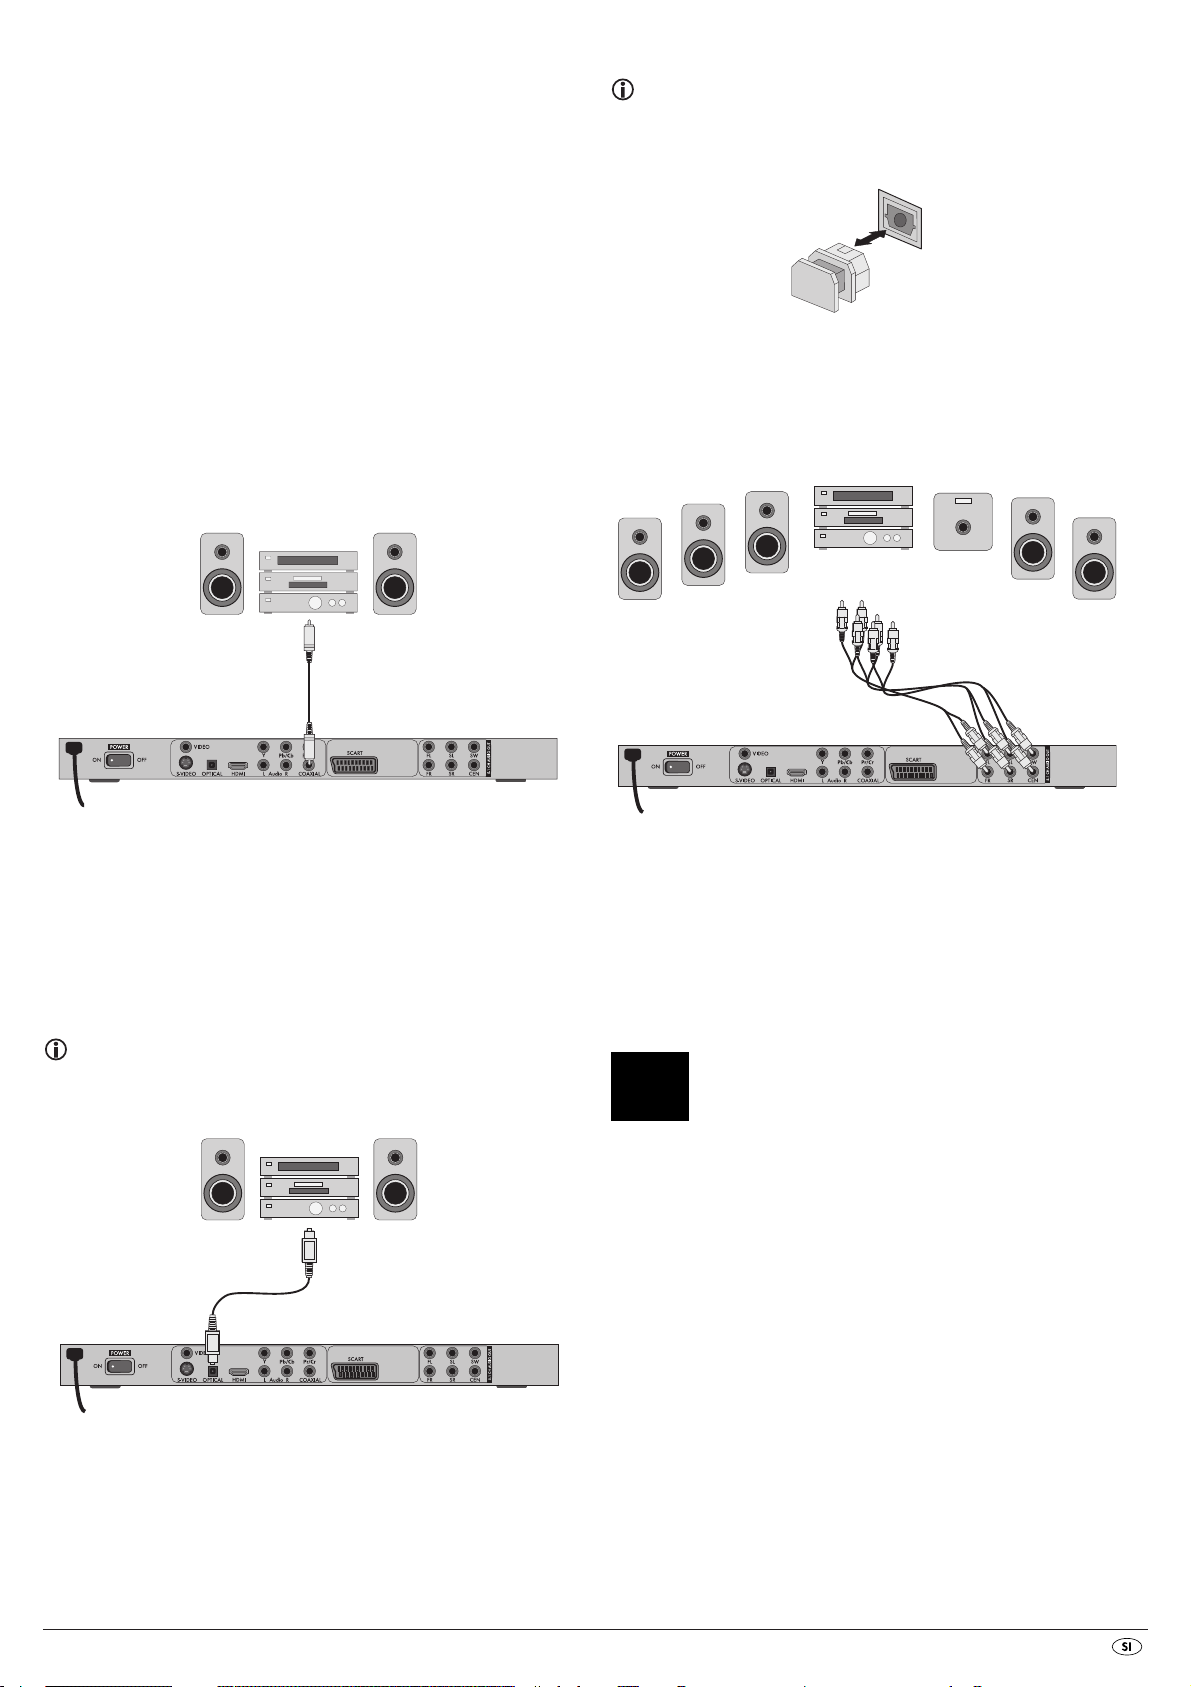
9.2 Priključitev digitalnih avdio komponent s pomočjo
digitalnega kabla
Da bi pri ustrezno opremljenih medijih DVD (prepoznavno po logu Dolby Digital
ali DTS) pri predvajanju zvoka lahko uživali v prostorskem zvoku, lahko DVD
predvajalnik priključite na digitalne avdio komponente – npr. na Dolby Digital
ali DTS sprejemnik ali na primerno surround napravo.
Kable, potrebne za spodaj opisane vrste priključka, dobite v specializiranih
trgovinah.
Najprej v navodilih za uporabo digitalne avdio komponente preverite,
ali ta omogoča priključitev DVD predvajalnika …
• preko koaksialnega kabla
• ali preko optičnega kabla.
Priključitev preko koaksialnega kabla
Za priključitev DVD predvajalnika z digitalnim koaksialnim kablom na digitalno
avdio komponento:
• Konektor z napisom
avdio komponente.
COAXIAL povežite z ustreznim konektorjem digitalne
Napotek:
Pazite na to, da v konektor za optični kabel ne zaide umazanija. To bi lahko
zmotilo signal. Varnostni vtič zmeraj vtaknite v konektor, če optični kabel ni
priključen.
9.3 Priključitev avdio komponent s pomočjo analognega
kabla
Če avdio komponenta nima digitalnega vhoda, DVD predvajalnik lahko nanjo
priključite tudi preko običajnega analognega cinch kabla.
Priključitev preko optičnega kabla
Za priključitev DVD predvajalnika z digitalnim optičnim kablom na digitalno
avdio komponento:
• Odstranite varnostni vtič iz konektorja z napisom
DVD predvajalnika in vanj vtaknite vtič optičnega kabla.
• Vtič na drugem koncu optičnega kabla vtaknite v ustrezen konektor digitalne
avdio komponente.
OPTICAL na hrbtni strani
Napotek:
Optični kabel je iz steklenih vlaken in se ga pri polaganju ne sme prepogniti.
Steklena vlakna v kablu bi se sicer lahko zlomila in postala neuporabna.
Tako DVD predvajalnik priključite z analognimi kabli:
• Po en cinch kabel vtaknite v konektorje
desni kanal),
srednji kanal) in
• Cinch kable vtaknite v ustrezne analogne vhode na avdio komponenti.
SL (zadnji levi kanal), SR (zadnji desni kanal), CEN (prednji
SW (bas) na hrbtni strani DVD predvajalnika.
FL (prednji levi kanal), FR (prednji
9.4 Priključitev slušalk
Na sprednji strani DVD predvajalnika najdete izhod za slušalke.
• Priklopite 3,5 mm zaskočni vtič slušalk v izhod za slušalke.
Pozor!
Dolgotrajno poslušanje glasbe s slušalkami in s polno jakostjo
zvoka lahko privede do poškodb sluha!
- 31 -
Page 34
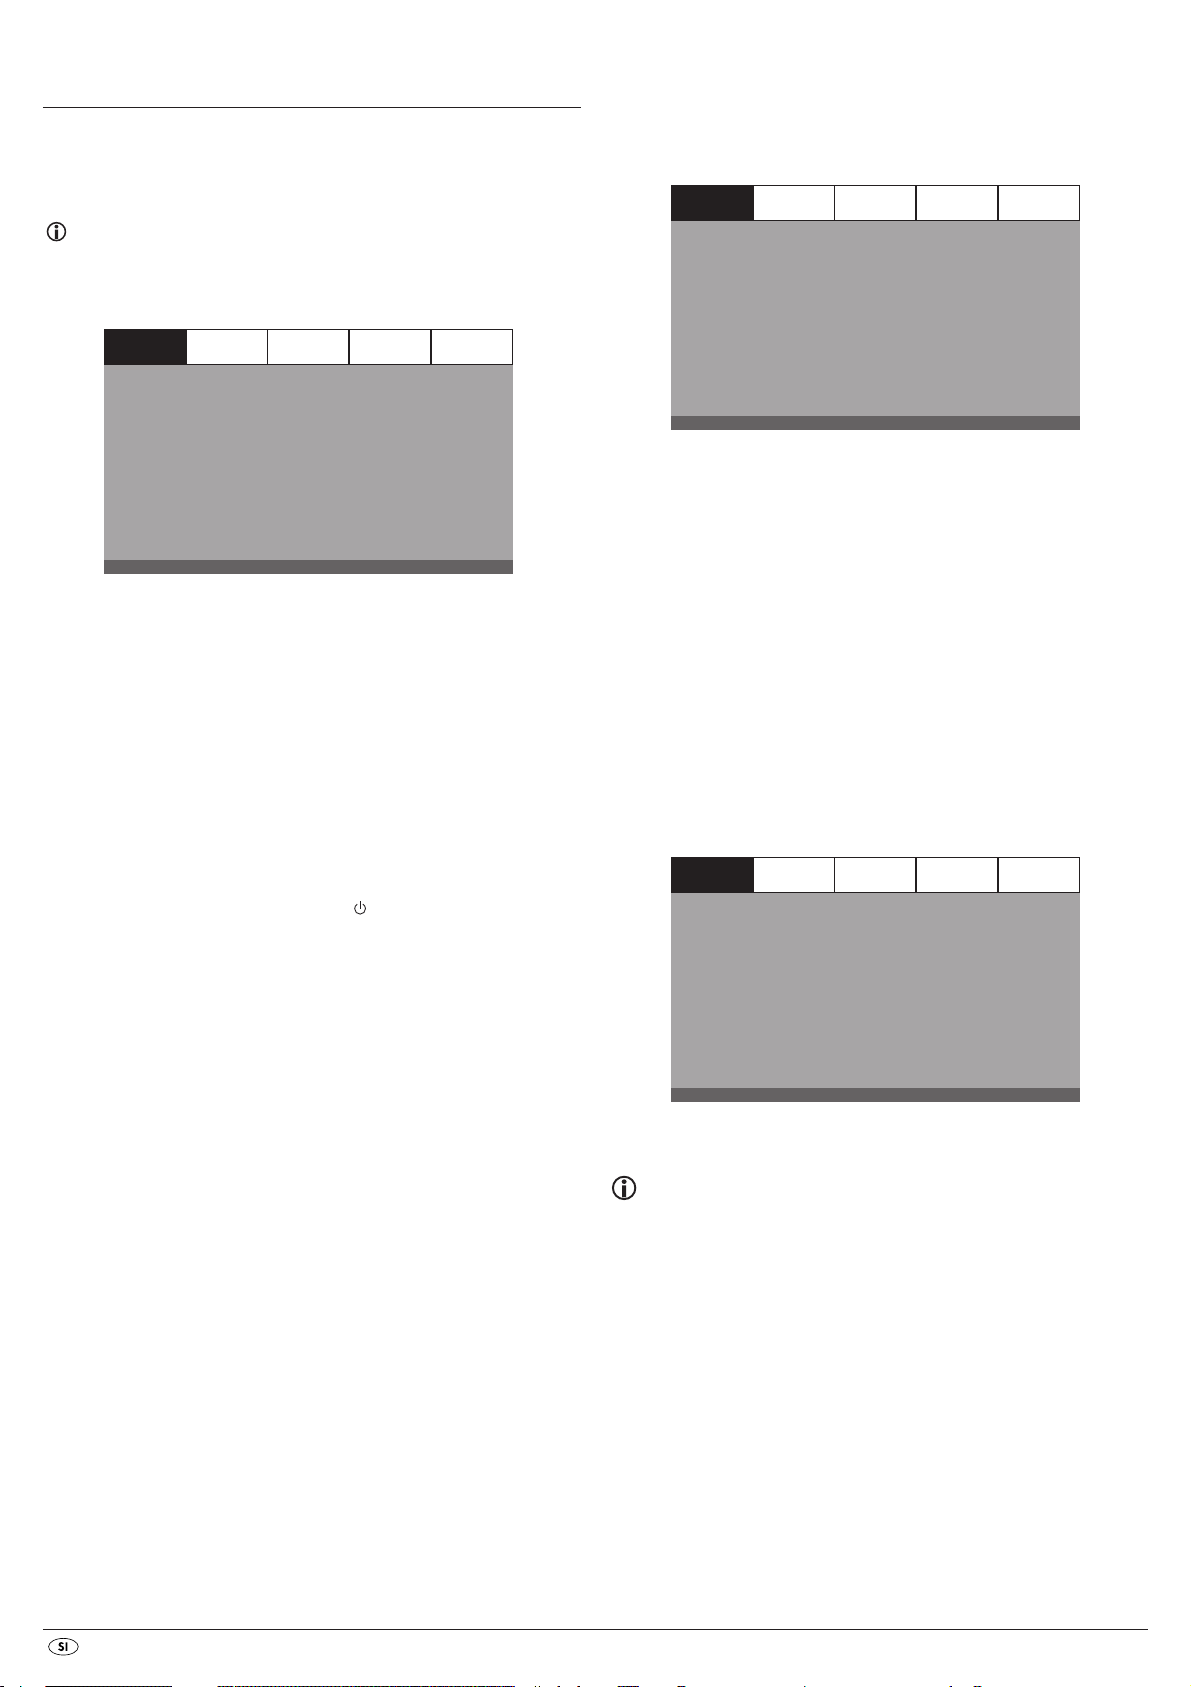
10. Nastavitve v OSD-meniju
Vse nastavitve na DVD predvajalniku lahko izvajate z daljinskim upravljalnikom
preko tako imenovanega "OnScreen Display" menija (zaslonski prikaz; na
kratko "OSD-meni"). OSD-meni se prikaže na televizijskem zaslonu.
10.1 Upravljanje OSD-menija
• Za priklic OSD-menija DVD predvajalnika pritisnite tipko SETUP na daljinskem
upravljalniku. Na televizijskem zaslonu se prikaže OSD-meni s svojimi
točkami menija:
GENERAL AUDIO DOLBY VIDEO PREFERENCE
Opomba:
V teh navodilih je opisan angleški OSD-meni. Jezik tega menija lahko kadar
koli prestavite na svoj jezik, tako kot je opisano pod "GENERAL > OSD
LANGUAGE".
GENERAL AUDIO DOLBY VIDEO PREFERENCE
TV DISPLAY
ANGLE MARK
OSD LANGUAGE
CLOSED CAPTIONS
SCREEN SAVER
LAST MEMORY
Preden DVD predvajalnik prvič uporabljate za predvajanje plošč DVD, VCD/
S-VCD ali avdio/MP3-CD, morate v OSD-meniju izvesti nekaj nastavitev.
Te nastavitve so odvisne tudi od tega…
• v katerem jeziku želite prikaz OSD-menija
• kateremu televizijskemu standardu ustreza televizor, na katerega želite
priključiti DVD predvajalnik
• kateri slikovni format vaš televizor lahko prikazuje
Izvajanje nastavitev v OSD-meniju
• Najprej vtič naprave na omrežnem kablu DVD predvajalnika vtaknite
v omrežno vtičnico.
• Za vklop DVD predvajalnika pritisnite stikalo
predvajalnika. Če je DVD predvajalnik že vklopljen, pa se nahaja v stanju
pripravljenosti (standby), pritisnite tipko
ljalniku, da DVD predvajalnik vklopite. Stanje pripravljenosti se prikaže
kot zelena LED lučka na zaslonu na sprednji strani naprave.
Naprava preverja, ali je vstavljena plošča. Na televizijskem zaslonu se
prikaže logo SilverCrest:
PS
ON
ENG
OFF
ON
OFF
POWER na hrbtni strani DVD
STANDBY na daljinskem uprav-
TV DISPLAY
ANGLE MARK
OSD LANGUAGE
CLOSED CAPTIONS
SCREEN SAVER
LAST MEMORY
PS
ON
ENG
OFF
ON
OFF
Izbirate lahko med sledečimi točkami menija:
GENERAL, AUDIO, DOLBY, VIDEO in PREFERENCE.
• S tipkami za krmiljenje
in tipko ENTER lahko izvedete vse nastavitve
v menijih.
• S tipkama za krmiljenje izberite meni, tako da rumeno oznako
pomaknete na ustrezni simbol menija.
• S tipkama za krmiljenje izberite vnos v meniju, tako da zeleno vrstico
premikate nad vnosi.
• S tipko za krmiljenje preidite v podmeni vnosa in s tipko za krmiljenje
za en nivo menija nazaj.
• Za potrditev izbire pritisnite tipko
ENTER.
Vse možnosti navigacije v aktualnem meniju so prikazane na spodnjem
robu menija.
• Za zapustitev OSD-menija ponovno pritisnite tipko
SETUP.
10.2 Meni za nastavitve GENERAL
V tem meniju lahko npr. nastavite prikaz slike ali pa jezik OSD-menija.
GENERAL AUDIO DOLBY VIDEO PREFERENCE
TV DISPLAY
ANGLE MARK
OSD LANGUAGE
CLOSED CAPTIONS
SCREEN SAVER
LAST MEMORY
PS
ON
ENG
OFF
ON
OFF
Če v predvajalniku ni vstavljene plošče, se na televizijskem zaslonu in na zaslonu
predvajalnika pojavi prikaz NO DISC.
• Na osnovi spodnjega kratkega navodila se najprej seznanite z uporabo
svojega OSD-menija.
TV ZASLON
Napotek:
Točko menija TV DISPLAY lahko izberete le pri deaktiviranem HDMI-izhodu.
-4:3/PANSCAN Izberite to nastavitev za prikaz oddaj v običajnem formatu
4:3 na 4:3 televizorju. Oddaje v formatu 16:9 se bodo
predvajale brez motečih črt v polnem slikovnem prikazu,
vendar pa bodo stranski robovi slike odrezani.
-4:3/LETTERBOX Prikaz filma v formatu 16:9 na običajnem televizorju
s formatom 4:3. Slika se pojavi s črnimi robovi na spodnjem
in zgornjem robu.
-16:9 Ta nastavitev je priporočljiva pri uporabi širokozaslonskega
televizorja v formatu 16:9. Slika v formatu 4:3 se vodoravno
prilagodi tej širini slike.
-Wide Squeeze Slika formata 4:3 se pojavi s črno črto na levem in desnem
robu slike.
- 32 -
Page 35
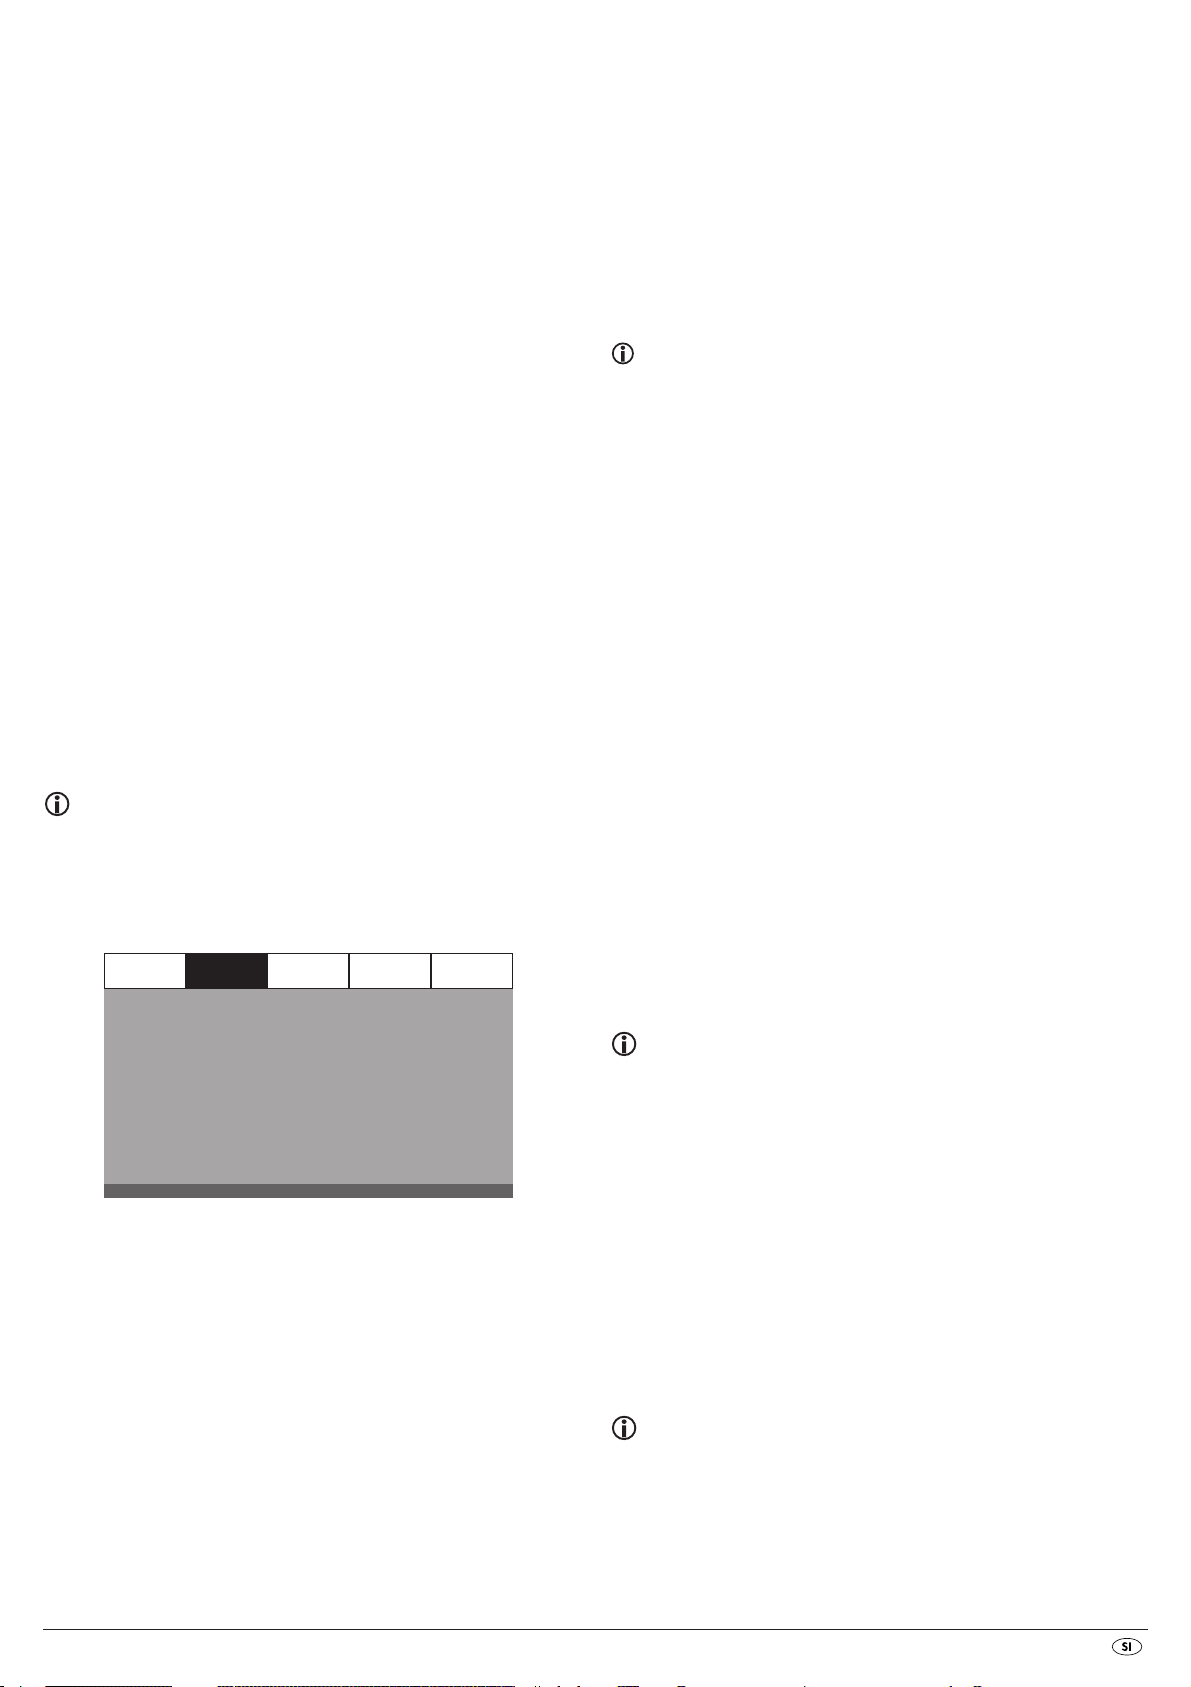
ANGLE MARK
-ON Če so bile scene na plošči DVD posnete pod različnimi
zornimi koti, se prisotnost te funkcije avtomatsko naznani
s simbolom kamere na zaslonu. Pritisnite tipko
daljinskem upravljalniku za prikaz različnih zornih kotov.
-OFF Funkcija deaktivirana. Na zaslonu se ne pojavi noben
simbol.
ANGLE na
OSD LANGUAGE
Tukaj nastavite jezik, v katerem se OSD-meni prikaže na zaslonu.
CLOSED CAPTIONS
-ON Izberite to nastavitev, če naj se ob vsakem predvajanju
DVD-ja samodejno na televizijskem zaslonu prikažejo
podnapisi (če obstajajo).
-OFF Izberite to nastavitev, da podnapise aktivirate ročno.
Podnapise med predvajanjem lahko tudi nastavite s tipko
SUBTITLE.
-3D SURROUND Izberite to nastavitev, da iz stereo zvoka ali večkanalnega
zvoka ustvarite virtualen surround učinek zvoka.
-5.1 CH Izberite to nastavitev, da aktivirate analogne izhode 5.1.
FRONT SPEAKER, CENTER SPEAKER, REAR SPEAKER in SUBWOOFER
Pri teh menijskih vnosih lahko aktivirate/deaktivirate posamezne tipe zvočnikov
in nastavite velikost.
-LARGE Izberite to nastavitev, če je premer membrane zvočnika
večji od 12 cm.
-SMALL Izberite to nastavitev za manjše zvočnike.
-OFF Tonski izhod za ta tip zvočnika je deaktiviran
Napotek:
Menijskega vnosa FRONT SPEAKER se ne da deaktivirati, ker tonski izhod
za prednje zvočnike ostane zmeraj vklopljen.
DIALOG V tem menijskem vnosu lahko nastavite glasnost zvoka
(0-20) za dialoge.
SCREEN SAVER
-ON Aktiviran je ohranjevalec zaslona. Ohranjevalnik zaslona
se vklopi le, če pri zaustavljenem predvajanju nekaj minut
ni bilo izvedenega nobenega vnosa.
-OFF Funkcija deaktivirana.
LAST MEMORY
-ON Izberite to nastavitev, da se bo plošča po odvzemu in ponovni
vstavitvi predvajala na nazadnje predvajanem mestu.
-OFF Funkcija deaktivirana. Po odvzemu in ponovni vstavitvi
plošče se bo ta ponovno predvajala od začetka.
Napotek:
Če DVD predvajalnik izklopite s stikalom POWER, se shranjeni položaj ne ohrani.
10.3 Meni za nastavitve AUDIO
V tem OSD-meniju lahko npr. izvedete nastavitve za analogne ter digitalne
avdio izhode.
GENERAL AUDIO DOLBY VIDEO PREFERENCE
ANALOG AUDIO
DIGITAL AUDIO
CHANNEL DELAY
EQUALIZER
3D PROCESSING
D.R.C. (Dynamic Range Control)
-ON Funkcija aktivirana
-OFF Funkcija deaktivirana
-AUTO Funkcija se (če obstaja) aktivira samodejno
DIGITAL AUDIO
DIGITAL OUTPUT
V tem menijskem vnosu lahko nastavite izhodni signal SPDIF.
-SPDIF / OFF Na konektorjih COAXIAL ali OPTICAL ni digitalnega
avdio signala.
-SPDIF / RAW Izdajajo se surovi podatki tona Dolby Digital.
-SPDIF / PCM Izberite nastavitev PCM (Pulse Code Modulation), če obstaja
povezava z digitalnim ojačevalnikom/sprejemnikom. Vaš
DVD predvajalnik s pomočjo PCM-signala prenaša iste
avdio formate, ki se nahajajo na plošči. Dodatno se preko
konektorjev
LPCM OUTPUT Izberite ta vnos za nastavitev frekvence vzorčenja za
obdelavo neobdelanih podatkov.
-48K: standardna nastavitev.
-96K: le za DVD-je z ustrezno frekvenco vzorčenja.
FL in FR izda avdio signal.
Napotek:
Funkcija LPCM OUTPUT je na razpolago le, če ste avdio izhodni signal
SPDIF nastavili na PCM.
ANALOG AUDIO
DOWNMIX
Če uporabljate analogni izhod 5.1, lahko v tem meniju izvedete nastavitve zanj.
-LT/RT Uporabljata se le levi in desni kanal na konektorjih
-STEREO Predvaja se stereo zvok. Izberite to nastavitev, če ne
uporabljate analognih izhodov 5.1. Točki menija CENTER
SPEAKER in REAR SPEAKER potem nista potrebni in sta
zato neaktivni.
FL in FR.
CHANNEL DELAY
Izberite ta menijski vnos za nastavitev zakasnitve kanalov posameznih zvočnikov.
Pri optimalni nastavitvi zvok na mesto poslušanja istočasno dospe iz vseh
smeri.
S tipko za krmiljenje pojdite v grafično polje poleg vnosa. S tipkami za
krmiljenje ali izberite zvočnik.
S tipkama za krmiljenje vrednost povečate/pomanjšate v korakih po
10 cm. Največje nastavljivo odstopanje za zvočnik CENTER znaša 170 cm.
Največje nastavljivo odstopanje za SUBWOOFER in zadnje zvočnike znaša
510 cm.
Svoj vnos potrdite s pritiskom na tipko
ENTER.
Napotek:
Zakasnitev kanalov definirajo sprednji zvočniki, zato se je ne da izbirati.
- 33 -
Page 36
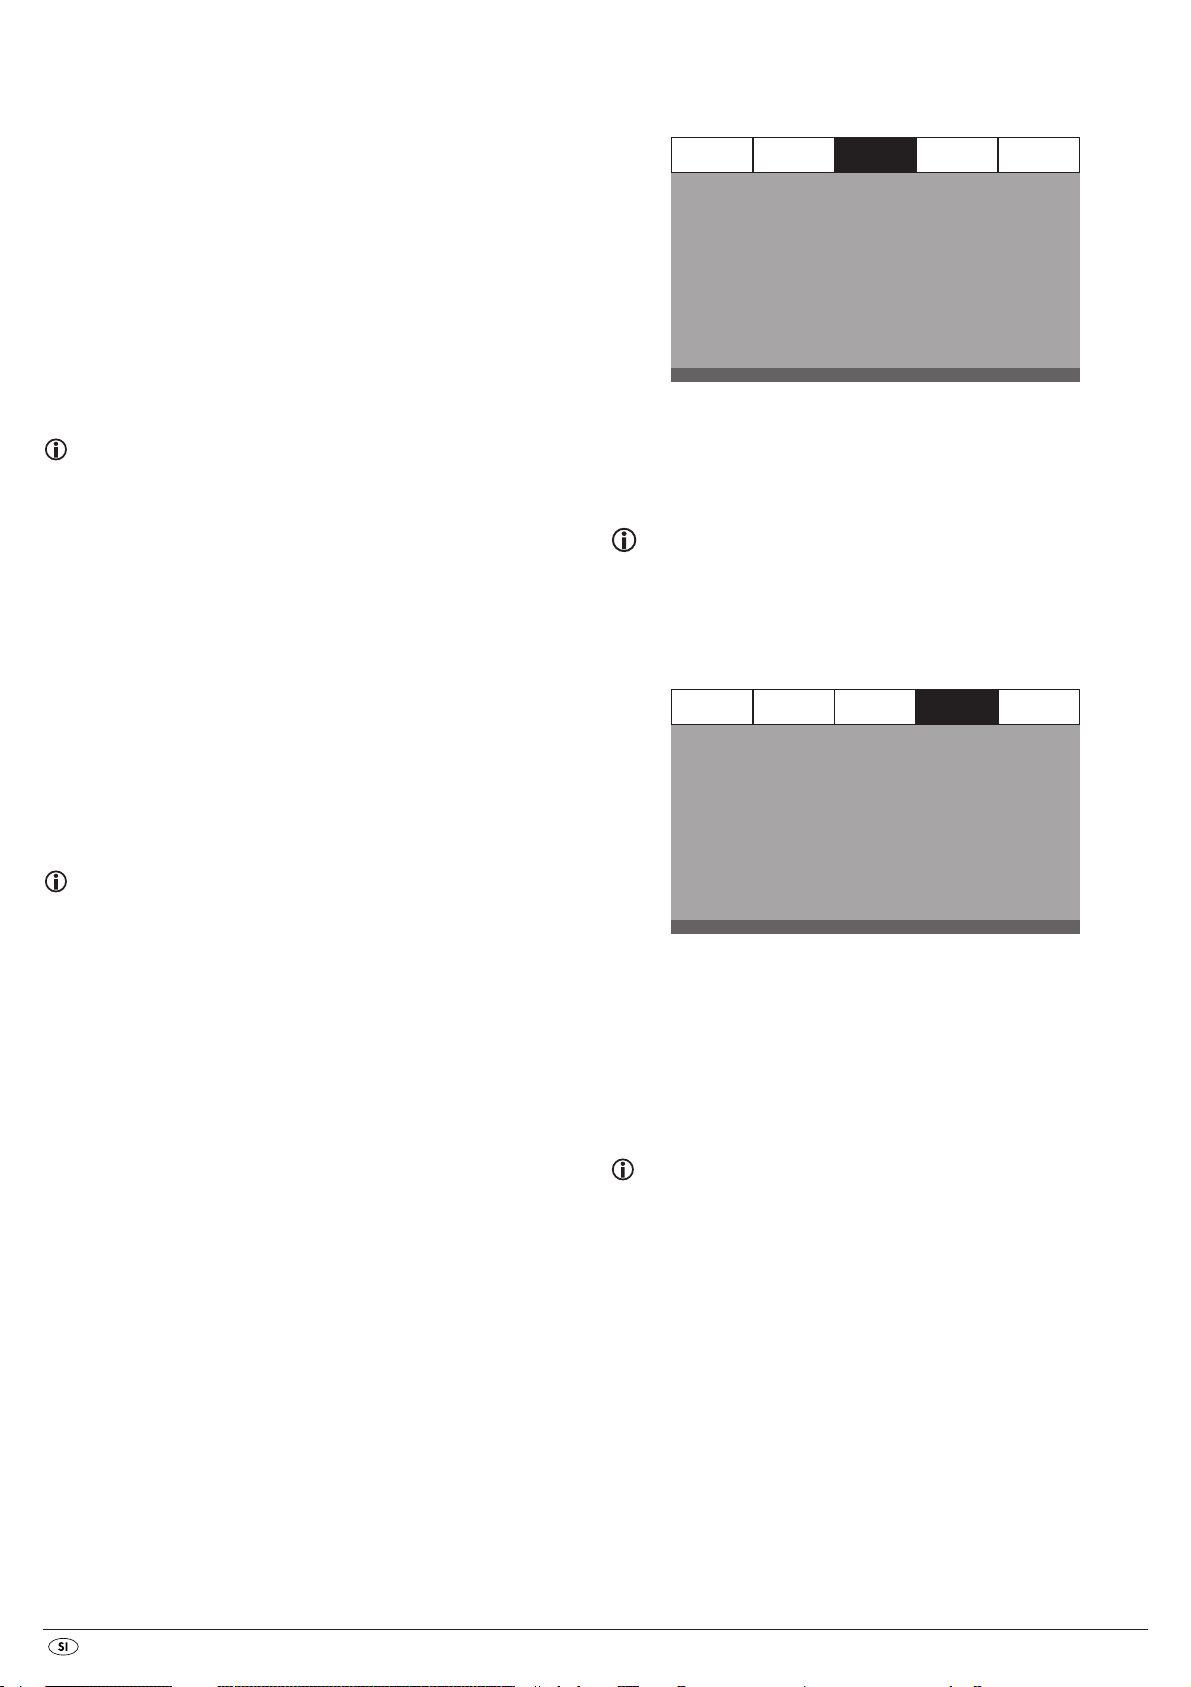
EQUALIZER
-SOUND MODE Izberite ta menijski vnos, če pri predvajanju zvoka želite
izbrati eno od vnaprej nastavljenih stopenj izenačevalnika
ROCK, POP, LIVE, DANCE, TECHNO, CLASSIC ali SOFT.
Za deaktiviranje te funkcije izberite vnos OFF.
-BASS BOOST Izberite nastavitev ON, če želite ojačati predvajanje basovskih
tonov. Za deaktiviranje te funkcije izberite vnos OFF.
-SUPER BASS Izberite nastavitev ON za uporabo zvočnega učinka super
bas. Predvajanje basovskih tonov se dodatno ojača.
Za deaktiviranje te funkcije izberite vnos OFF.
-TREBLE BOOST Izberite nastavitev ON, če želite ojačati predvajanje visokih
tonov. Za deaktiviranje te funkcije izberite vnos OFF.
3D PROCESSING
Izberite ta menijski vnos, če želite aktivirati/deaktivirati postopek Pro Logic II.
Napotek:
Točko menija PRO LOGIC II lahko izberete le, če so aktivirani analogni
izhodi 5.1.
10.4 Meni za nastavitve DOLBY
V tem OSD-meniju lahko izvedete nastavitve za digitalni Dolby izhod.
GENERAL AUDIO DOLBY VIDEO PREFERENCE
DUAL MONO
DYN AMIC
DUAL MONO Izberite ta menijski vnos, da digitalni Dolby izhod nastavite
na STEREO, L-MONO, R-MONO ali MIX-MONO.
DYNAMIC Izberite ta menijski vnos, da omogočite optimalno predvajanje
zvoka ob nizki glasnosti. V nastavitvi FULL se glasni deli
utišajo in tišji deli se predvajajo glasneje.
-PRO LOGIC II Izberite nastavitev ON, če naj bo postopek zmeraj aktiviran.
Izberite nastavitev AUTO, če naj se postopek aktivira le,
ko se na mediju za predvajanje nahaja kodirana vsebina
po Dolby Pro Logic II.
Za deaktiviranje te funkcije izberite vnos OFF.
-MODE V tem meniju lahko nastavite način postopka Pro Logic II.
MUSIC: Ton se predvaja brez zakasnitve v zvočnikih.
MOVIE: Ton se predvaja z zakasnitvijo 10 ms v zadnjih
zvočnikih.
PRO
LOGIC: Prejšnja različica postopka DOLBY PRO LOGIC.
AUTO: Avtomatska nastavitev postopka (odvisna od
vsebine predvajanega medija).
Napotek:
Menijski vnosi PANORAMA, DIMENSION in CENTER WIDTH služijo finim
nastavitvam zvoka in so na razpolago le, če ste nastavili način postopka
MUSIC.
-PANORAMA Izberite nastavitev ON za aktiviranje te izboljšave zvena.
Za deaktiviranje te funkcije izberite vnos OFF.
-DIMENSION Izberite eno od nastavitev SIZE -3 do SIZE 3 za aktiviranje
te izboljšave zvena.
-CENTER WIDTH Izberite eno od nastavitev LEVEL 0-7, da dosežete ustrezno
izboljšanje zvena.
Napotek:
Ta funkcija je možna samo ob uporabi digitalne avdio komponente.
10.5 Meni za nastavitve VIDEO
V tem meniju lahko nastavite npr. video izhod, ločljivost ali barvne nastavitve.
GENERAL AUDIO DOLBY VIDEO PREFERENCE
VIDEO OUTPUT
RESOLUTION
COLOR SETTING
HDMI SETUP
Xvid SUBTITLE
VIDEO OUTPUT
-OFF Video signal se posreduje preko izhoda S-Video in izhoda
Composite Video.
-YUV Video signal se posreduje v barvnem formatu YUV preko
komponentnih video izhodov Y, Pb/Cb, Pr/Cr.
-RGB Video signal se posreduje v barvnem formatu RGB preko
priključka SCART.
OFF
ENG
REVERB MODE Izberite ta menijski vnos, če pri predvajanju zvoka želite
uporabiti enega od prednastavljenih učinkov odmevanja
CONCERT, LIVING ROOM, HALL, BATHROOM, CAVE,
ARENA, ali CHURCH. Za deaktiviranje te funkcije izberite
vnos OFF.
Napotek:
Ta nastavitev je aktivna le, če je deaktiviran HDMI Setup.
Izhod Composite Video na DVD predvajalniku je zmeraj aktiviran. Če izbrana
nastavitev odstopa od dejanske izvedbe priključka (razen pri Composite Video),
se lahko zgodi, da se na televizijskem zaslonu ne pojavi nobena ali zelo slaba
slika. V tem primeru ob zaustavitvi predvajanja večkrat pritisnite tipko
na daljinskem upravljalniku, dokler se slika ne prikaže pravilno.
- 34 -
V-MODE
Page 37
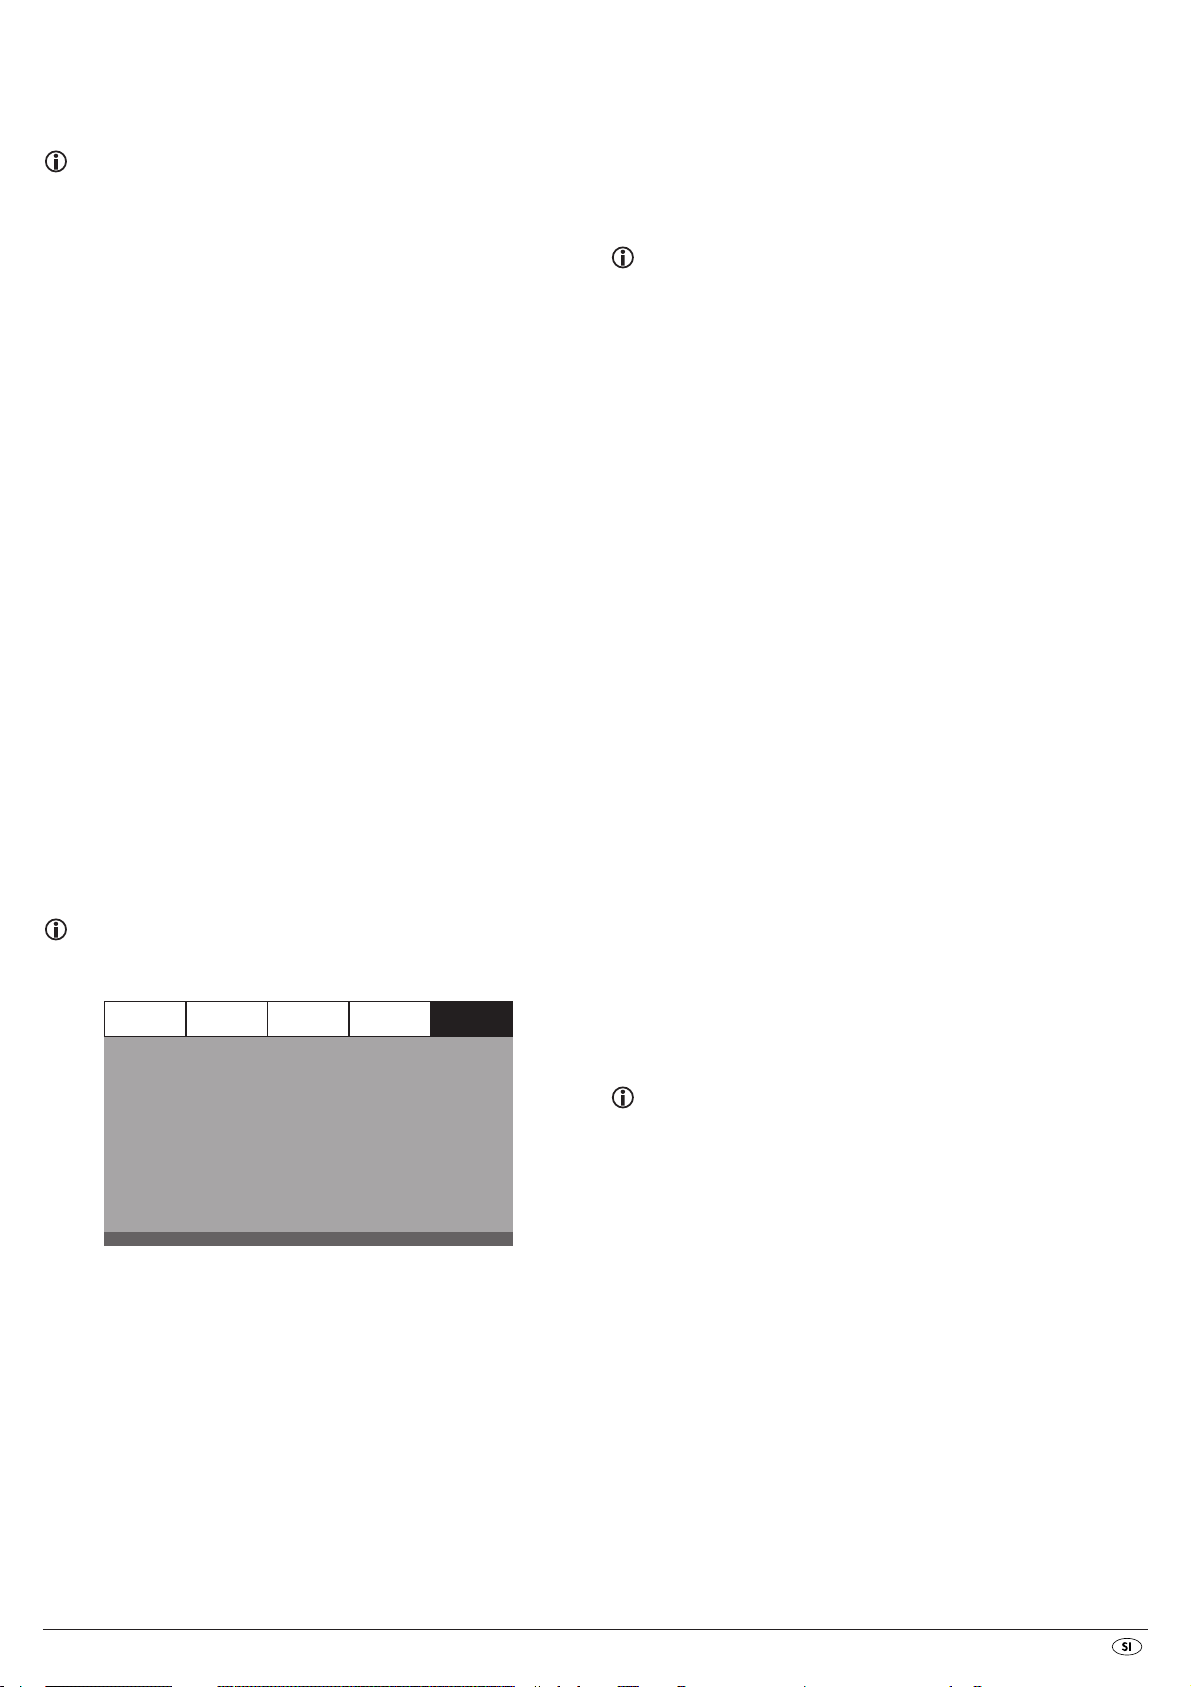
RESOLUTION V tem menijskem vnosu lahko nastavite različne ločljivosti
(480i/576i/720p/1080i/1080p
)
za izhod HDMI/
komponentni video izhod.
Napotek:
Upoštevajte, da je treba za televizijski standard PAL izbrati nastavitev s 50 Hz,
za televizijski standard NTSC pa nastavitev s 60 Hz.
AUDIO V tem menijskem vnosu lahko nastavite jezik, ki naj se
standardno uporablja pri predvajanju filma.
SUBTITLE V tem menijskem vnosu lahko nastavite jezik podnapisov,
ki naj se standardno uporablja pri predvajanju filma.
DISC MENU V tem menijskem vnosu lahko nastavite jezik menija plošče,
ki naj se standardno uporablja pri predvajanju filma.
PARENTAL V tem menijskem vnosu lahko določite starostno omejitev.
COLOR SETTING
V tem menijskem vnosu lahko izvedete nastavitve za npr. svetlost, kontrast ali
barvni odtenek.
-SHARPNESS Izberite ta menijski vnos za nastavitev ene od vnaprej
definiranih vrednosti za ostrino (HIGH, MEDIUM ali LOW).
-BRIGHTNESS Nastavite s pomočjo tipk za krmiljenje
-20 do +20. Potem pritisnite tipko
-CONTRAST Nastavite s pomočjo tipk za krmiljenje
-16 do +16. Potem pritisnite tipko
svetlost od
ENTER za nadaljevanje.
kontrast od
ENTER za nadaljevanje.
-GAMMA Izberite ta menijski vnos za nastavitev ene od vnaprej
definiranih vrednosti gama (HIGH, MEDIUM, LOW ali NONE).
-HUE Nastavite s pomočjo tipk za krmiljenje
od -9 do +9. Potem pritisnite tipko
-SATURATION Nastavite s pomočjo tipk za krmiljenje
od -9 do +9. Potem pritisnite tipko
barvni ton
ENTER za nadaljevanje.
nasičenost barv
ENTER za nadaljevanje.
-LUMA DELAY Izberite ta menijski vnos za nastavitev ene od vnaprej
definiranih vrednosti gama (0 T ali 1 T).
Nastavitev HDMI
-ON Izberite ta menijski vnos za aktiviranje HDMI izhoda.
-OFF Izberite ta menijski vnos za deaktiviranje HDMI izhoda.
Xvid SUBTITLE V tem menijskem vnosu lahko nastavite jezik podnapisov,
ki naj se standardno uporablja pri predvajanju filma
formata Xvid.
10.6 Meni za nastavitve PREFERENCE
V tem meniju lahko spremenite npr. nastavitve video izhoda, aktivirate/
deaktivirate varnostno zaščito za otroke ali spremenite geslo.
Napotek:
Točko menija PREFERENCE lahko izberete le, če je predvajanje dokončno
ustavljeno.
GENERAL AUDIO DOLBY VIDEO PREFERENCE
TV TYPE
AUDIO
SUBTITLE
DISC MENU
PARENTAL
PASSWORD
DEFAULT
PAL
ENG
ENG
ENG
Napotek:
Le redke plošče DVD imajo tehnično omejitev starosti gledalcev. Če DVD nima
tehnične omejitve starosti, zaščite otrok na vašem DVD predvajalniku ni moč
aktivirati. Zaščita otrok deluje le, če je bila aktivirana na DVD predvajalniku
in na vstavljenem DVD-ju obstaja ustrezna koda.
Če v napravo vstavite DVD, ki ga po varnostni zaščiti za otroke ne bi smeli
predvajati, se na zaslonu pojavi okno, v katerem lahko vnesete svoje geslo in
ga morate potrditi z
ENTER. Nekatere plošče DVD in CD so kodirane s šifriranimi
signali. Tako se DVD-plošče lahko razdelijo v osem različnih razredov dovoljenja
za predvajanje. Izberite enega od spodnjih razredov dovoljenja za predvajanje,
da predvajanje medijev tega razreda zaščitite s poizvedbo o geslu:
1 KID SAFE: primerno tudi za majhne otroke
2 G: za vse starostne skupine
3 PG: nadzor staršev priporočljiv
4 PG 13: nadzor staršev strogo priporočljiv; nekateri prizori niso
primerni za mladostnike pod 12 leti
5 PGR: za mladostnike do 16 let; nadzor staršev priporočljiv
6 R: za mladostnike do 16 let; nadzor staršev strogo priporočljiv
7 NC 17: ni za mladostnike pod 18 leti
8 ADULT: le za odrasle
Primer
Če je nek DVD npr. kodiran z razredom dovoljenja za predvajanje 7 ali 8 in
ste nastavili enega od razredov dovoljenj med 1 in 6, se pojavi sporočilo in
morate vnesti geslo. Z razredom ali z različnimi razredi dovoljenja za predvajanje
so lahko kodirani tudi le deli DVD-ja, se pravi, določeni prizori.
• Za aktiviranje stopnje dovoljenja morate v meniju PARENTAL izbrati želeni
razred dovoljenja in vnesti geslo (136900). Svoj vnos potrdite s pritiskom
na tipko
ENTER.
PASSWORD V tem menijskem vnosu lahko spremenite tovarniško
nastavljeno geslo (136900) in ustvarite ter vnesete svoje
lastno geslo. Uporabljate lahko samo številke od 0 do 9.
Napotek:
Če bi svoje novo geslo pozabili, lahko uporabite tovarniško nastavljeno geslo
(136900).
DEFAULT V tem menijskem vnosu lahko ponovno vzpostavite stanje
DVD predvajalnika, kot je bilo ob dobavi.
TV TYPE
-PAL televizijski standard PAL
-NTSC televizijski standard NTSC.
- 35 -
Page 38
11. Zagon DVD predvajalnika
12. Predvajanje medijev DVD, VCD ali S-VCD
Potem, ko ste sedaj…
• DVD predvajalnik postavili na primernem kraju
• DVD predvajalnik z eno od naštetih možnosti priključitve priključili na
televizor
• DVD predvajalnik, če to želite, priključili na HiFi ali surround napravo
(analogno/digitalno) oz. na Dolby Digital ali DTS-sprejemnik
• usposobili daljinski upravljalnik z vstavitvijo baterij
• in veste, kako se z daljinskim upravljalnikom prikliče in upravlja OSD-meni
… je DVD predvajalnik sedaj pripravljen na obratovanje.
11.1 Vklop/izklop DVD predvajalnika
• Omrežni kabel vtaknite v omrežno vtičnico, inštalirano po predpisih.
• Stikalo
• S tipko
• Za izklop DVD predvajalnika stikalo
POWER na hrbtni strani naprave premaknite v položaj ON.
DVD predvajalnik se sedaj nahaja v načinu pripravljenosti (standby).
STANDBY na daljinskem upravljalniku ali s tipko STANDBY na
napravi DVD predvajalnik vklopite oz. ga preklopite nazaj v način
pripravljenosti.
POWER na hrbtni strani naprave
prestavite v položaj
OFF.
Napotek:
Naprava na zaslonu ne prikazuje, kdaj je izklopljena in kdaj je v načinu pripravljenosti. V načinu pripravljenosti na zaslonu sveti LED-lučka za standby.
11.2 Vstavitev plošče DVD
Za predvajanje plošče z DVD predvajalnikom:
• Vklopite televizor.
• Preverite, ali je DVD predvajalnik pripravljen za obratovanje.
Če so televizor, DVD predvajalnik in drugi morebiti priklopljeni aparati (npr.
avdio komponenta) pripravljeni za obratovanje in vklopljeni in je DVD predvajalnik korektno priključen na televizor, boste na televizijskem zaslonu zagledali
logo Silvercrest.
Če v predalček za plošče DVD predvajalnika ni vstavljena nobena plošča:
Na televizijskem zaslonu se prikaže NO DISC.
• Odprite predalček za plošče, tako da pritisnete tipko
daljinskem upravljalniku ali na prednji strani DVD predvajalnika.
Na zaslonu se prikaže OPEN.
• Ploščo s popisano/etiketirano stranjo navzgor položite v predalček za
plošče.
Za dvostranske CD-je: stran, ki jo želite predvajati, mora kazati navzdol.
• Ko ste ploščo vstavili, ponovno pritisnite tipko
upravljalniku ali na prednji strani DVD predvajalnika, da predalček za
plošče zaprete.
• Vsebina plošče se sedaj nalaga; to lahko traja nekaj sekund.
Medtem se na televizijskem zaslonu prikaže LOADING.
OPEN/CLOSE na daljinskem
OPEN/CLOSE na
Za predvajanje medijev DVD, VCD ali S-VCD z DVD predvajalnikom…
• vklopite televizor.
• preverite, ali je DVD predvajalnik pripravljen za obratovanje.
Če so televizor, DVD predvajalnik in drugi morebiti priklopljeni aparati (npr.
avdio komponenta) pripravljeni za obratovanje in vklopljeni in je DVD predvajalnik korektno priključen na televizor, boste na televizijskem zaslonu zagledali
logo "SilverCrest".
• Odprite predalček za plošče na sprednji strani DVD predvajalnika, tako
da pritisnete tipko
Na zaslonu na sprednji strani DVD predvajalnika in na televizijskem zaslonu
se prikaže OPEN.
• Ploščo DVD/VCD/S-VCD s popisano/etiketirano stranjo navzgor položite
v predalček za plošče.
• Ponovno pritisnite tipko
Na zaslonu na sprednji strani DVD predvajalnika in na televizijskem zaslonu
se prikaže CLOSE, medtem ko se predalček za plošče zapira.
• Vsebina vstavljene plošče DVD/VCD/S-VCD se sedaj nalaga; to lahko
traja nekaj sekund. Medtem na zaslonu na sprednji strani DVD predvajalnika
in na televizijskem zaslonu utripa LOADING.
• Predvajanje vstavljene plošče DVD/VCD/S-VCD se zažene avtomatsko.
OPEN/CLOSE.
OPEN/CLOSE, da zaprete predalček za plošče.
Napotek:
Plošče DVD, VCD in S-VCDs, ki jih želite predvajati z DVD predvajalnikom,
lahko razpolagajo z regionalno kodo, ki je natisnjena na ovitku DVD-ja.
DVD predvajalnik lahko predvaja samo plošče DVD/VCD/S-VCD z regionalno
kodo .
Če na ovoju plošče DVD/VCD/S-VCD ni vtisnjena nobena regionalna koda …
• temveč simbol , ploščo DVD/VCD/S-VCD lahko predvajate s tem
DVD predvajalnikom.
• se plošče DVD/VCD/S-VCD mogoče ne bo dalo predvajati s tem DVD
predvajalnikom. To lahko preverite tako, da DVD poskusite predvajati.
Odvisno od vstavljene plošče DVD/VCD/S-VCD je možno, da se vsebine plošče
DVD/VCD/S-VCD ne da predvajati takoj, ker se najprej na televizijskem zaslonu
pojavi izbirni meni.
V tem primeru s tipkami za krmiljenje na daljinskem upravljalniku
izberite točko, s katero se zažene predvajanje filma.
• Za zagon predvajanja filma pritisnite tipko
ali pritisnite tipko
- 36 -
PLAY/PAUSE .
ENTER na daljinskem upravljalniku
Page 39

Na zaslonu na sprednji strani DVD predvajalnika se prikažejo:
Pri DVD-jih:
•"DVD"
• številka trenutno predvajanega poglavja
• do sedaj pretekli čas trenutno predvajanega DVD-ja v minutah in sekundah
Pri ploščah VCD/S-VCD:
• "VCD" ali "S-VCD"
• številka trenutno predvajanega naslova
• do sedaj pretekli čas trenutno predvajanega VCD/S-VCD v minutah in
sekundah
12.1 Funkcije pri predvajanju medijev DVD, VCD ali S-VCD
Med predvajanjem plošče DVD/VCD/S-VCD lahko uporabljate naslednje
funkcije DVD predvajalnika:
Zaustavitev predvajanja s PAUSE
Za zaustavitev predvajanja vstavljene plošče DVD/VCD/S-VCD …
• Med predvajanjem pritisnite tipko
Na zaslonu na sprednji strani DVD predvajalnika in na televizijskem zaslonu
se pojavi .
Na televizijskem zaslonu vidite mirujočo sliko ravnokar zaustavljene scene.
• Za nadaljevanje predvajanja filma pritisnite tipko
PLAY/PAUSE .
PLAY/PAUSE .
Prekinitev predvajanja (STOP)
Za prekinitev predvajanja filma na vstavljeni plošči DVD/VCD/S-VCD pritisnite
tipko
STOP.
S funkcijo nadaljevanja Resume
Ko ste predvajanje vstavljene plošče DVD/VCD/S-VCD prekinili z enkratnim
pritiskom na tipko
ste predvajanje prekinili. Ta funkcija se imenuje "funkcija nadaljevanja Resume".
Na televizijskem zaslonu se prikaže PRESS PLAY KEY TO CONTINUE.
Kakor hitro ponovno pritisnete tipko
shranjenega mesta.
Brez funkcije nadaljevanja Resume
Ko ste predvajanje vstavljene plošče DVD/VCD/S-VCD prekinili z enkratnim
pritiskom na tipko
mesto, kjer ste predvajanje prekinili, izbriše. Kakor hitro ponovno pritisnete
tipko
PLAY/PAUSE , se začne predvajanje vstavljene plošče DVD/VCD/
S-VCD na začetku.
STOP, DVD predvajalnik samodejno shrani mesto, na katerem
PLAY/PAUSE , se nadaljuje predvajanje
STOP in tipko STOP pritisnete še drugič, se shranjeno
Priklic DVD-menija (MENU)
Napotek:
Ta funkcija ni na razpolago pri vseh DVD-jih!! Če poskusite izvajati neobstoječo
funkcijo, se na televizijskem zaslonu prikaže simbol .
Pri mnogih filmih na DVD plošči obstaja glavni meni, ki vam – poleg opcije
predvajanja glavnega filma – omogoča naslednjo izbiro:
• jezik podnapisov in filmskega tona
• direktno izbiro poglavij
• predvajanje bonus materiala k filmu (dodatne informacije, "Making of" itd.)
Če na DVD-ju vstavljenem v DVD predvajalnik takšen meni obstaja, ga lahko
prikličete med predvajanjem, tako da pritisnete tipko
upravljalniku.
Posamezne točke menija izberete s pritiskom na tipke za krmiljenje
na daljinskem upravljalniku.
Za potrditev izbrane točke menija pritisnite tipko
daljinskem upravljalniku.
Za povratek k predvajanju ponovno pritisnite tipko
upravljalniku.
PLAY/PAUSE ali tipko ENTER na
MENU na daljinskem
MENU na daljinskem
Napotek:
Če ste predvajanje prekinili z dvakratnim pritiskom na tipko STOP (zaustavitev
predvajanja brez funkcije ponavljanja), priklic glavnega menija na plošči ni
možen.
Playback Control (PBC) pri ploščah VCD/S-VCD
Nekatere plošče VCD/S-VCD imajo funkcijo Playback Control (na kratko "PBC").
Playback Control označuje glavni meni, s pomočjo katerega se lahko upravljajo
različne funkcije VCD/S-VCD.
Če ima plošča VCD/S-VCD v DVD predvajalniku funkcijo PBC, to morate
najprej aktivirati, da lahko prikažete meni.
• Med predvajanjem ali ob prekinitvi predvajanja pritisnite tipko
Na zaslonu se prikaže PBC: OFF.
• Pritisnite tipko
vklopljen in glavni meni plošče lahko prikličete s tipkami
MENU še enkrat. Na zaslonu se prikaže PBC: ON. PBC je sedaj
MENU.
MENU ali TITLE.
Napotek:
Če PBC vklopite med tekočim predvajanjem, je možno, da se predvajanje
prekine in ponovno začne na začetku oz. z glavnim menijem.
Preskok na začetek poglavja (SKIP)
Napotek:
Ta funkcija ni na razpolago pri vseh DVD-jih!! Če poskusite izvajati neobstoječo
funkcijo, se na televizijskem zaslonu prikaže simbol .
S tipkami
DVD/VCD/S-VCD med predvajanjem …
• preskočite naprej do začetka naslednjega poglavja ali
• nazaj do prejšnjega poglavja
Vaše izbrano poglavje se takoj predvaja, ne da bi morali pritisniti tipko
SKIP FWD in SKIP BWD lahko med filmom na vstavljeni plošči
PLAY/PAUSE. Številka vsakokrat izbranega poglavja se prikaže na zaslonu na
sprednji strani DVD predvajalnika levo od časa predvajanja.
Vnos številke naslova s pomočjo številčnih tipk
Napotek:
Ta funkcija ni na razpolago pri vseh DVD-jih!! Če poskusite izvajati neobstoječo
funkcijo, se na televizijskem zaslonu prikaže simbol .
Namesto s funkcijo Skip lahko naslove znotraj filma na vstavljeni plošči DVD/
VCD/S-VCD vnašate tudi direktno preko vnosa številke naslova s pomočjo
številčnih tipk na daljinskem upravljalniku.
• V ta namen med predvajanjem ali med ustavljenim predvajanjem na
daljinskem upravljalniku pritisnite številske tipke, ki ustrezajo številki
naslova – npr. tipko
• Predvajanje naslova z vneseno številko se sedaj zažene samodejno.
3 za tretji naslov.
- 37 -
Page 40
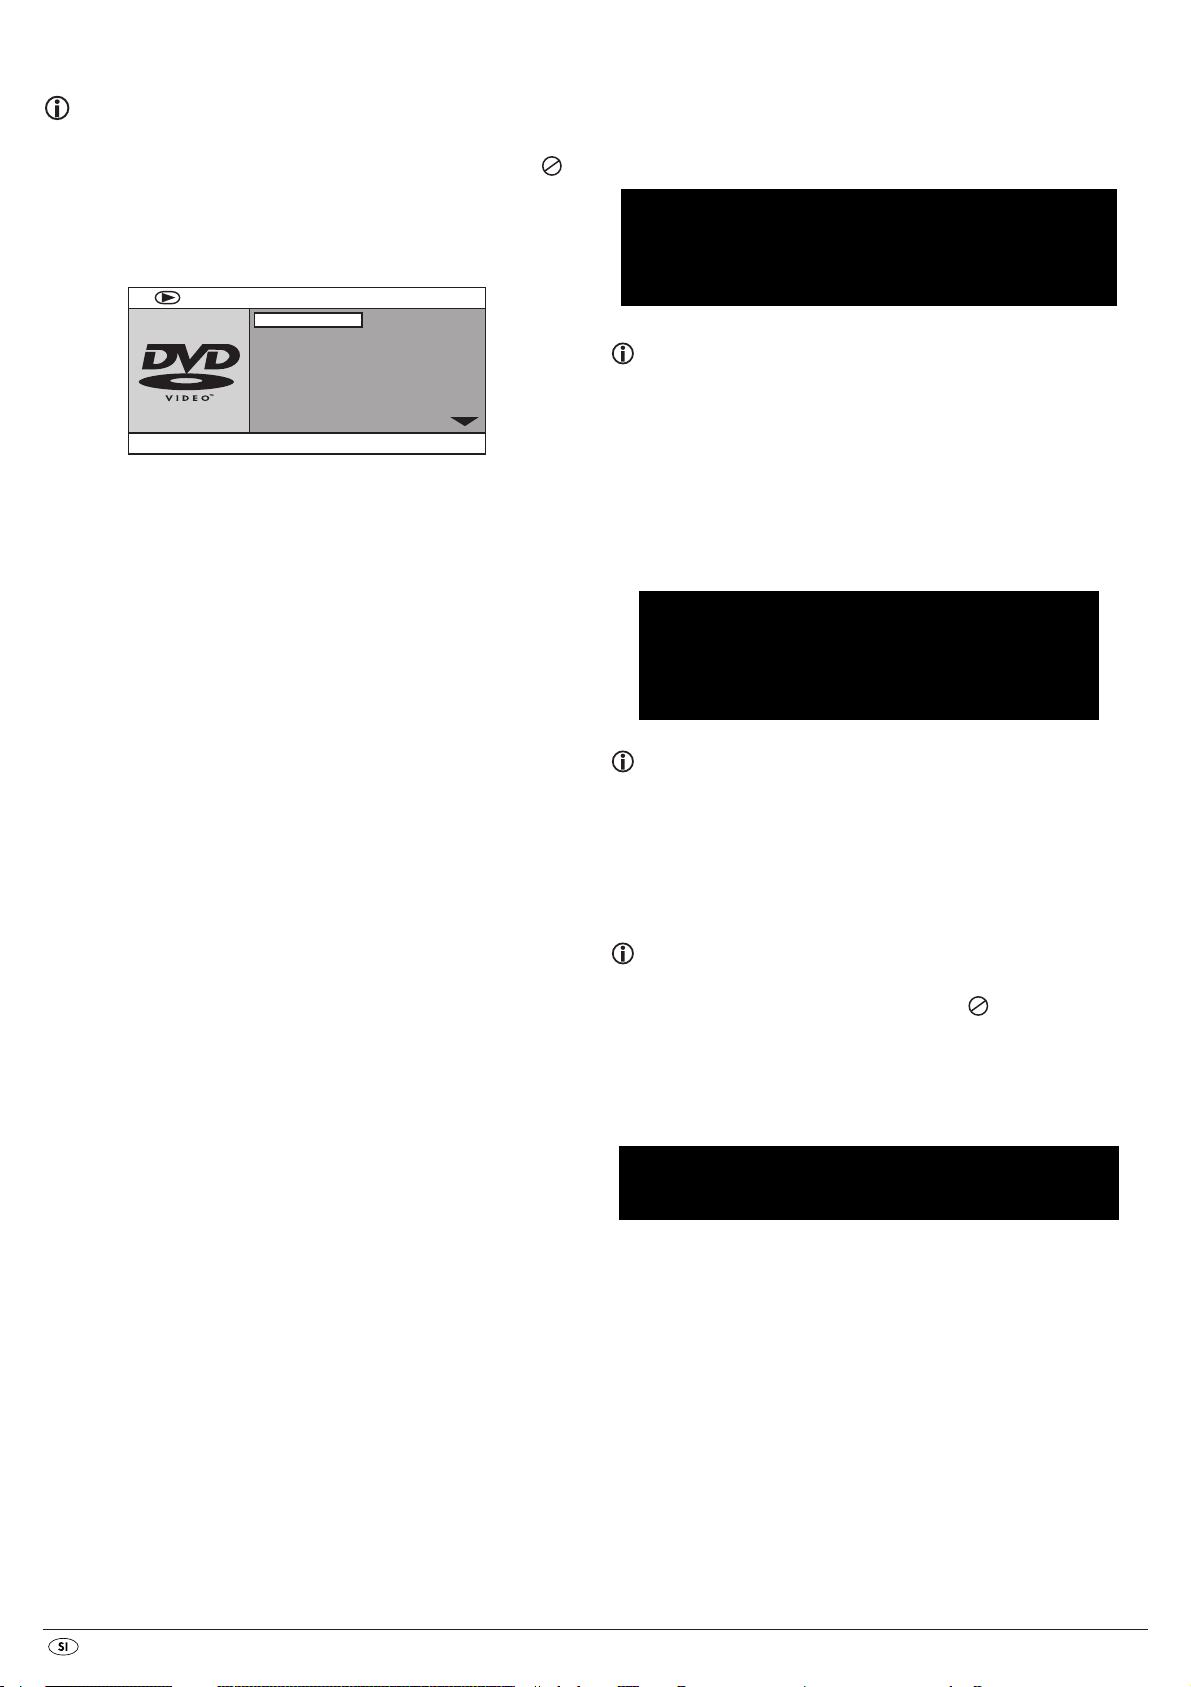
Direktna izbira poglavij ali časa s pomočjo iskalne funkcije (GOTO)
Napotek:
Te funkcije niso na razpolago pri vseh ploščah DVD/VCD/S-VCD! Če poskusite
izvajati neobstoječe funkcije, se na televizijskem zaslonu prikaže simbol .
Vnos časovne pozicije s funkcijo iskanja DVD, VCD in SVCD:
• Med predvajanjem pritisnite tipko GOTO na daljinskem upravljalniku.
Meni za čas se prikaže na televizijskem zaslonu:
MENU
TITLE
CHAPTER
AUDIO
SUBTITLE
01 / 13
02 / 05
2 CH ENGLISH
ENGLISH
Hitro iskanje naprej/nazaj
S postopkom hitrega iskanja lahko med predvajanjem vstavljene plošče
DVD/VCD/S-VCD izberete določene odlomke.
• Za hitro iskanje naprej/nazaj večkrat pritisnite tipko
FAST RWD za nastavitev naslednjih hitrosti iskanja:
FAST FWD oz.
Napotek:
Med hitrim iskanjem se ton ne predvaja.
BITRATE 50 IIIIIIII TITLE ELAPSED 0:00:56
• Polje vnosa TITLE se samodejno izbere kot prvo. Pritisnite tipko
s številskimi tipkami vnesite želeni naslov. Naslov 01 je pri DVD-jih po
navadi glavni film.
• Pritisnite tipko za krmiljenje za izbiro polja vnosa CHAPTER. Pritisnite tip-
ko
ENTER in s številskimi tipkami vnesite želeno poglavje.
• Pritisnite tipko za krmiljenje za izbiro polja vnosa AUDIO.
Pritisnite tipko
• Pritisnite tipko za krmiljenje za izbiro polja vnosa SUBTITLE.
Pritisnite tipko
• Pritisnite tipko za krmiljenje za izbiro polja vnosa ANGLE. Pritisnite tipko
ENTER in s tipkama za krmiljenje izberite avdio jezik.
ENTER in s tipkama za krmiljenje izberite jezik podnapisov.
ENTER in
ENTER in s tipkama za krmiljenje izberite drugo perspektivo kamere
(če obstaja).
• Pritisnite tipko za krmiljenje za izbiro polja vnosa TT TIME.
Pritisnite tipko
• Pritisnite tipko za krmiljenje za izbiro polja vnosa CH TIME.
Pritisnite tipko
• Pritisnite tipko za krmiljenje za izbiro polja vnosa REPEAT. Pritisnite tipko
ENTER in s številskimi tipkami vnesite želeni čas naslova.
ENTER in s številskimi tipkami vnesite želeni čas poglavja.
ENTER in s tipkama za krmiljenje izberite funkcijo ponavljanja (glejte
tudi pod "Funkcija ponavljanja").
• Pritisnite tipko za krmiljenje za izbiro polja vnosa TIME DISP. Pritisnite
tipko
ENTER in s tipkama za krmiljenje izberite predstavitev časa (glejte
tudi pod "Prikaz informacij o plošči").
• Za izklop prikaza menija ponovno pritisnite tipko
GOTO.
• Za nadaljnje predvajanje filma na izbranem mestu z normalno hitrostjo
pritisnite med iskanjem tipko
PLAY/PAUSE
.
Počasno predvajanje naprej (časovna lupa)
Za upočasnjeno predvajanje vsebine vstavljenega medija DVD/VCD/S-VCD …
• Za počasno predvajanje naprej/nazaj večkrat pritisnite tipko
nastavitev naslednjih hitrosti iskanja:
SLOW za
Napotek:
Med počasnim predvajanjem se ton ne predvaja.
• Za nadaljnje predvajanje filma na izbranem mestu z normalno hitrostjo
pritisnite med počasnim predvajanjem tipko
PLAY/PAUSE.
Povečanje slike (Zoom)
Napotek:
Ta funkcija ni na razpolago pri vseh DVD-jih! Če poskusite izvajati neobstoječo
funkcijo, se na televizijskem zaslonu prikaže simbol .
Avdio CD
• Med predvajanjem večkrat pritisnite tipko GOTO na daljinskem upravljalniku.
Ena za drugo se pojavijo naslednji prikazi, pri katerih s številskimi tipkami
lahko vnesete časovno pozicijo:
DISC GOTO: Tukaj vnesite časovno pozicijo na plošči, od katere naj se
predvajanje začne.
TRACK GOTO: Tukaj vnesite časovno pozicijo pri trenutno predvajanem
naslovu, od katere naj se predvajanje začne.
GOTO TRACK: Tukaj vnesite številko naslova, od katere naj se predvajanje
začne.
MPEG-CD
SELECT: Tukaj vnesite številko naslova na plošči, od katere naj se
predvajanje začne.
GOTO: Tukaj vnesite časovno pozicijo pri trenutno predvajanem
naslovu, od katere naj se predvajanje začne.
Med predvajanjem vstavljene plošče DVD/VCD/S-VCD lahko sliko na televizijskem zaslonu povečate v treh stopnjah. V ta namen pritisnite tipko
daljinskem upravljalniku za nastavitev naslednjih stopenj povečave:
S tipkami za krmiljenje se lahko povečana površina premika.
Za izklop funkcije povečanja in za vrnitev k normalni velikosti slike večkrat
pritisnite tipko
ZOOM.
ZOOM na
- 38 -
Page 41
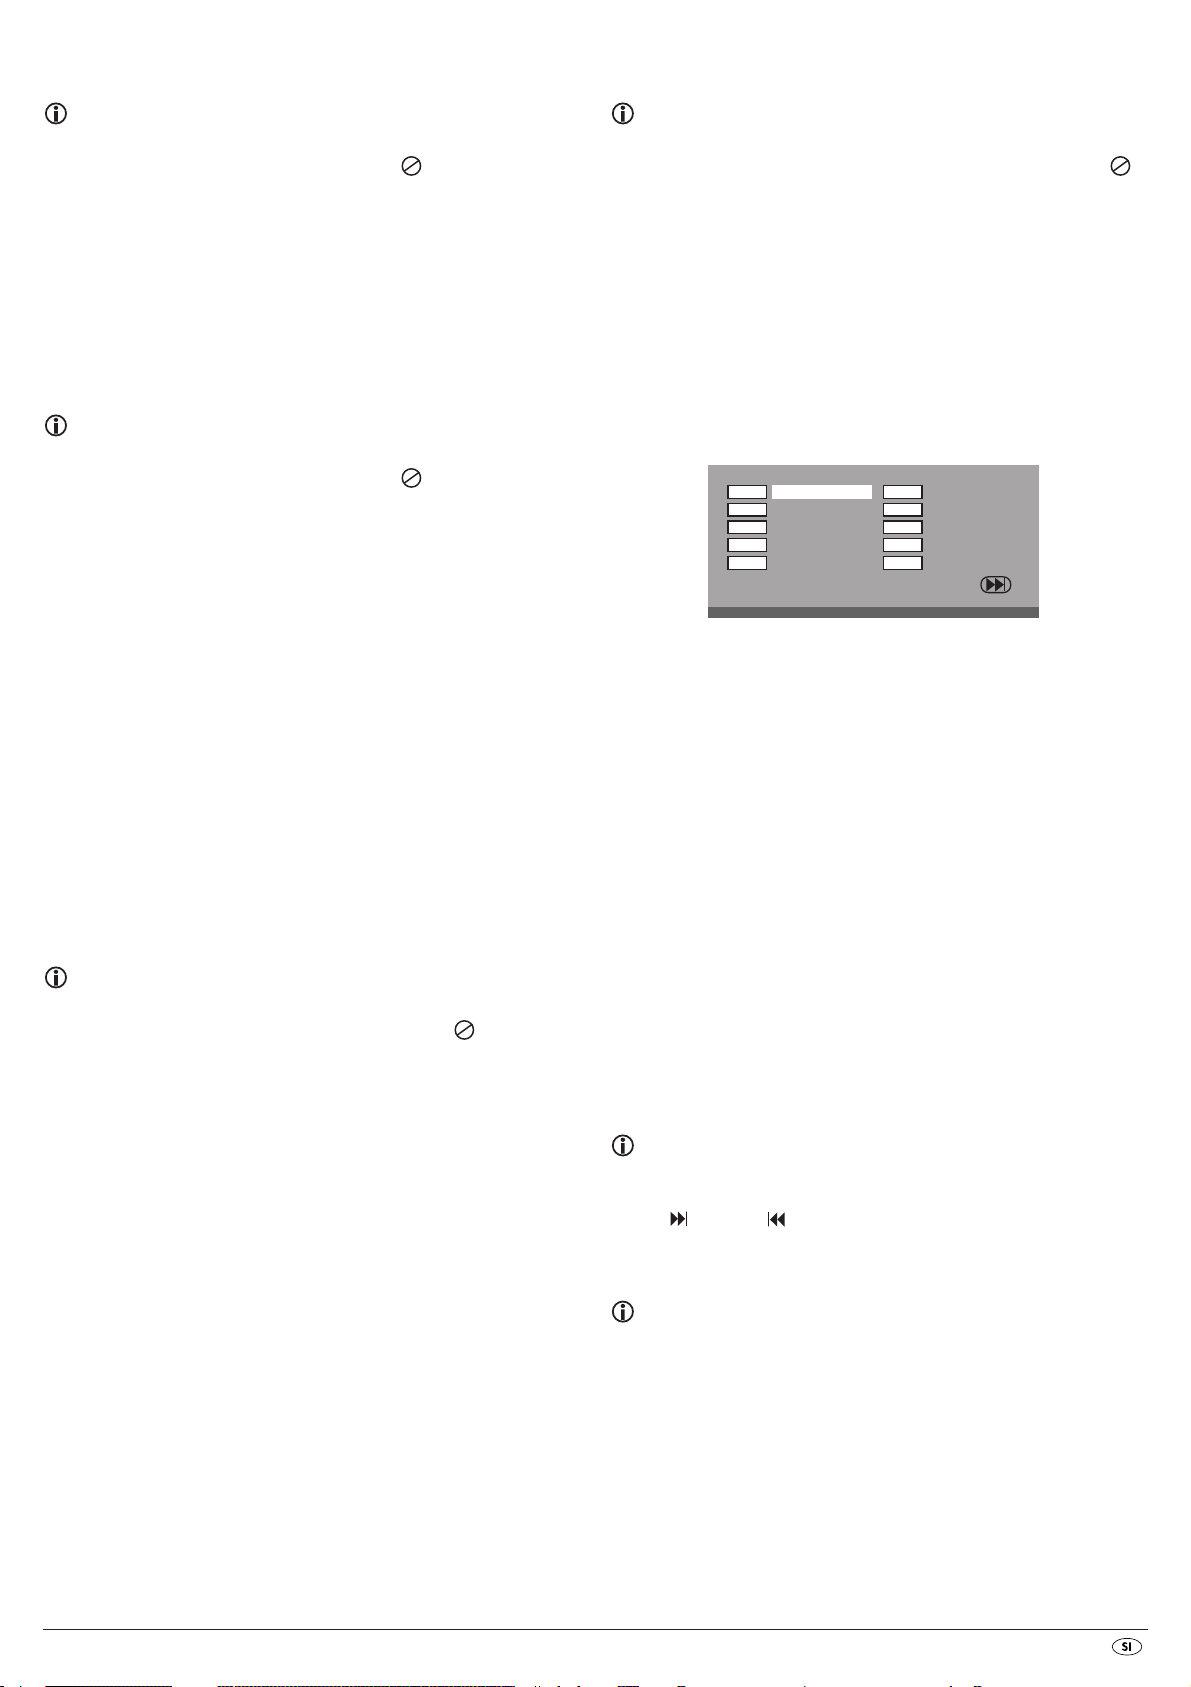
Sprememba perspektive kamere (ANGLE)
Programirano predvajanje (PROG)
Napotek:
Ta funkcija ni na razpolago pri vseh DVD-jih! Če poskusite izvajati neobstoječo
funkcijo, se na televizijskem zaslonu prikaže simbol .
Nekateri filmi na plošči DVD vsebujejo poglavja, ki so bila posneta istočasno iz
različnih perspektiv kamere. Pri filmih, ki takšna poglavja imajo, lahko isto poglavje gledate iz različnih perspektiv.
V ta namen med predvajanjem vstavljene plošče DVD pritisnite tipko
daljinskem upravljalniku. Z vsakim pritiskom na tipko
ANGLE se ta preklopi na
ANGLE na
eno od razpoložljivih perspektiv kamere.
Prikaz/izklop podnapisov
Napotek:
Ta funkcija ni na razpolago pri vseh DVD-jih! Če poskusite izvajati neobstoječo
funkcijo, se na televizijskem zaslonu prikaže simbol .
Če ima film na vstavljeni plošči DVD podnapise, jih lahko med predvajanjem
prikažete na televizijskem zaslonu, tako da pritisnete tipko
SUBTITLE na dal-
jinskem upravljalniku.
Ob prvem pritisku na tipko SUBTITLE se podnapisi na televizijskem zaslonu
prikažejo v prvem jeziku, ki je na razpolago. Ob vsakem nadaljnjem pritisku
na tipko
SUBTITLE se podnapisi na televizijskem zaslonu po vrsti prikažejo
v nadaljnjih jezikih, ki so na razpolago.
Na televizijskem zaslonu se prikaže številka trenutno prikazanega jezika podnapisov (npr. 1/10 za prvega od desetih razpoložljivih jezikov podnapisov).
Ko je bil prikazan zadnji od razpoložljivih jezikov podnapisov (npr. 10/10 za
desetega od deset razpoložljivih jezikov podnapisov), lahko funkcijo podnapisov
izklopite, tako da ponovno pritisnete tipko
SUBTITLE. Na televizijskem zaslonu se
prikaže OFF.
Sprememba jezika predvajanja
Napotek:
Ta funkcija ni na razpolago pri vseh ploščah DVD! Če poskusite izvajati neobstoječo funkcijo, se na televizijskem zaslonu prikaže simbol .
Pri nekaterih filmih na plošči DVD lahko med predvajanjem izberete drugi jezik
predvajanja, tako da pritisnete tipko
Ob prvem pritisku na tipko
janje. Ob vsakem nadaljnjem pritisku na tipko
daljnji razpoložljivi jeziki predvajanja.
Na televizijskem zaslonu se prikaže vsakokrat vklopljeni jezik predvajanja.
AUDIO na daljinskem upravljalniku.
AUDIO se priklopi prvi razpoložljivi jezik za predva-
AUDIO se po vrsti prikažejo na-
Napotek:
Ta funkcija ni na razpolago pri vseh ploščah DVD/VCD/S-VCD! Če poskusite
izvajati neobstoječo funkcijo, se na televizijskem zaslonu prikaže simbol .
S funkcijo programiranja lahko sestavite svoj lasten filmski program, tako da
na vstavljeni plošči DVD/VCD/S-VCD za predvajanje izberete samo določena
poglavja. Zaporedje, v katerem naj se poglavja predvajajo, lahko določite
sami. Za programirano predvajanje lahko izberete maksimalno 20 poglavij
nekega filma.
• Med predvajanjem ali ob prekinjenem predvajanju pritisnite tipko
PROG
na daljinskem upravljalniku.
Na televizijskem zaslonu se prikaže meni za programiranje:
Programsko okno
1
2
T T:
3
4
5
CH:
T
CH:
T:
CH:
T:
T
T:
CH:
T
EXIT
Najprej so našteta programska mesta 1-10, programsko mesto 1 je označeno.
1. S številčnimi tipkami vnesite številko naslova, ki naj se predvaja kot prvi.
Na oznaki se spremeni vneseno poglavje. (CH:)
2. S številčnimi tipkami vnesite številko poglavja, ki naj se predvaja kot prvo.
Oznaka preide na programsko mesto 2.
3. S tipkami za krmiljenje izberite nadaljnja programska mesta in
vnesite številke naslovov in poglavij za programska mesta.
• Za prikaz naslednjih 10 programskih mest s tipkami za krmiljenje
izberite polje in pritisnite tipko
20 programskih mest.
• Za izbris vnosov v programskem mestu izberite želeno programsko mesto
in pritisnite tipko
ENTER.
• Za prekinitev funkcije programiranja izberite polje EXIT in pritisnite tipko
6
T: CH:
T
7
T:
T
8
9
10
CH:
T
T:
CH:
T:
T
CH:
T:
T
CH:
ENTER. Zasedete lahko do
ENTER. Vsa zasedena programska mesta se izbrišejo.
4. Zaženite predvajanje programskih mest tako, da izberete polje START in
pritisnete tipko
Med programiranim predvajanjem se na zaslonu pojavi prikaz PROGRAM.
Za izbris programiranega predvajanja med predvajanjem dvakrat pritisnite
tipko
STOP na sprednji strani DVD predvajalnika ali na daljinskem upravljalniku.
ENTER.
Napotek:
Če niste prepričani, katero številko ima naslov oz. poglavje, ki ga želite
programirati, izberite ustrezno poglavje med predvajanjem filma s tipko
SKIP FWD in SKIP BWD in potem dvakrat pritisnite tipko Display na daljins-
kem upravljalniku, da se na televizijskem zaslonu prikažejo vse informacije o
vstavljenem mediju DVD/VCD/S-VCD. Tukaj najdete med drugim tudi številko
aktualnega naslova ter poglavja.
V zvezi s to temo si poglejte tudi poglavje "Prikaz informacij o plošči".
- 39 -
Page 42

Prikaz informacij o plošči
Napotek:
Ta funkcija ni na razpolago pri vseh ploščah DVD/VCD/S-VCD! Če poskusite
izvajati neobstoječo funkcijo, se na televizijskem zaslonu prikaže simbol .
S to funkcijo lahko med predvajanjem na televizijskem zaslonu prikažete vse
razpoložljive informacije v zvezi s ploščo DVD/VCD/S-VCD v DVD predvajalniku.
• Med predvajanjem v ta namen pritisnite tipko
upravljalniku. Na zaslonu se prikaže:
Pri DVD-jih:
• številka trenutnega naslova/celotno število naslovov
• številka trenutnega poglavja/celotno število poglavij
• že predvajan čas v urah, minutah in sekundah (TITLE ELAPSED)
• čas do konca filma v urah, sekundah in minutah (TITLE REMAIN)
• že predvajan čas poglavja v urah, minutah in sekundah (CHAPTER ELAPSED)
• čas do konca poglavja v urah, sekundah in minutah (CHAPTER REMAIN)
Pri ploščah VCD/S-VCD:
• številka trenutnega naslova/celotno število naslovov
• že predvajan čas trenutno predvajanega naslova na plošči VCD/SVCD
v urah, minutah in sekundah (SINGLE ELAPSED)
• čas do konca trenutno predvajanega naslova v urah, sekundah in minutah
(SINGLE REMAIN)
Da odstranite prikazovanje informacij o plošči, tipko
sto, dokler se na televizijskem zaslonu ne pojavi napis DISPLAY OFF.
Funkcija ponavljanja za plošče DVD, VCD, SVCD in avdio CD
S funkcijo ponavljanja lahko …
... pri DVD-jih po izbiri ponavljate naslove ali poglavja na celotni plošči DVD.
... pri ploščah VCD/S-VCD ponovno predvajate posamezne naslove oz. celotne
plošče VCD/S-VCD.
... pri avdio CD-jih večkrat predvajate posamezne naslove oz. celotno
CD-ploščo.
Za vključitev ponovnega predvajanja …
• Med predvajanjem večkrat pritisnite tipko
Na zaslonu se pojavi simbol za ponavljanje (Repeat) z enim od naslednjih
prikazov:
CHAPTER Izberite CHAPTER, da trenutno predvajano poglavje ponovite
tolikokrat, dokler ponavljanja ne izklopite ali predvajanje
prekinete z dvakratnim pritiskom na tipko
TITLE Izberite TITLE, da trenutno predvajan naslov ponovite
tolikokrat, dokler ponavljanja ne izklopite ali predvajanje
prekinete z dvakratnim pritiskom na tipko
ALL Izberite ALL, da vse naslove na plošči - torej celotno ploščo
- ponovite tolikokrat, dokler ponavljanje predvajanja ni
izklopljeno ali se predvajanje z dvakratnim pritiskom na
tipko
STOP prekine.
Za izklop ponavljanja predvajanja med predvajanjem večkrat pritisnite tipko
REPEAT, dokler na televizijskem zaslonu ni več nobenega prikaza.
DISPLAY na daljinskem
DISPLAY pritisnite tako pogo-
REPEAT.
STOP.
STOP.
Funkcija ponavljanja pri ploščah MP3/WMA-/MPEG-/
JPEG/Xvid
Med predvajanjem večkrat pritisnite tipko REPEAT za uporabo naslednjih funkcij
ponavljanja (nastavljena funkcija se pojavi na zaslonu):
RANDOM
Slučajno predvajanje naslovov na plošči oz. podatkovnem nosilcu.
SINGLE
Enkratno predvajanje trenutnega naslova/slike.
REPEAT ONE
Neskončno ponavljanje trenutnega naslova/slike.
REPEAT FOLDER
Ponavljanje vseh naslovov aktualnega imenika na plošči oz. na
podatkovnem nosilcu.
REPEAT ALL
Ponavljanje vseh naslovov na plošči oz. podatkovnem nosilcu.
Ponovitev odlomkov (A–B)
S to funkcijo lahko ponovno predvajate poljuben odlomek znotraj poglavja
trenutno predvajane plošče.
V ta namen …
• Med predvajanjem pritisnite tipko
hitro se želeni začetek odlomka začne predvajati. Na televizijskem zaslonu
se pojavi A.
• Ponovno pritisnite tipko
odlomka. Pri tem upoštevajte, da se morata začetek in konec odlomka
nahajati znotraj poglavja.
Na televizijskem zaslonu se pojavi AB.
Ponovno predvajanje izbranega odlomka se začne takoj, ne da bi morali
pritisniti tipko
tipke
PLAY/PAUSE . Odlomek se ponavlja tako dolgo, dokler
A–B ne pritisnete ponovno, da funkcijo izklopite.
A – B, kakor hitro je bil predvajan konec želenega
Nastavitev glasnosti predvajanja
Pritisnite tipko VOL + na daljinskem upravljalniku, da glasnost predvajanja
med predvajanjem zvišate ali tipko
Zatemnitev
Pritisnite tipko DIMMER na daljinskem upravljalniku, da v treh stopnjah znižate
ali zvišate svetlost zaslona na DVD predvajalniku.
Izklop tona predvajanja (MUTE)
Za izklop tona predvajanja pritisnite med predvajanjem plošče DVD, VCD/S-VCD,
avdio CD ali CD-R/CD-RW z MP3 ali WMA datotekami tipko (
daljinskem upravljalniku. Na televizijskem zaslonu se prikaže MUTE.
Če ton predvajanja ponovno želite vklopiti, ponovno pritisnite tipko (
ali tipki VOL + in VOL –. Na televizijskem zaslonu se prikaže MUTE OFF ali
ustrezna stopnja glasnosti zvoka.
Izklop DVD predvajalnika
Tako DVD predvajalnik izklopite:
• Če se predvaja plošča, vstavljena v DVD predvajalnik, najprej predvajanje
prekinite, tako da dvakrat pritisnete tipko
predvajalnika ali na daljinskem upravljalniku.
• Odprite predalček za plošče, da iz DVD predvajalnika vzamete ploščo,
če se katera nahaja v njem, tako da pritisnete tipko
sprednji strani DVD predvajalnika ali na daljinskem upravljalniku.
Potem predalček za plošče ponovno zaprite s pritiskom na tipko
OPEN/CLOSE.
• Pritisnite tipko
se sedaj preklopi v način pripravljenosti
predvajalnika pritisnite tipko
• Za popoln izklop DVD predvajalnika pritisnite stikalo
strani DVD predvajalnika.
STANDBY na daljinskem upravljalniku. DVD predvajalnik
A – B na daljinskem upravljalniku, kakor
VOL –, da glasnost predvajanja znižate.
MUTE) na
MUTE)
STOP na sprednji strani DVD
OPEN/CLOSE na
STANDBY. Za ponovni vklop DVD
STANDBY še enkrat.
POWER na hrbtni
- 40 -
Page 43
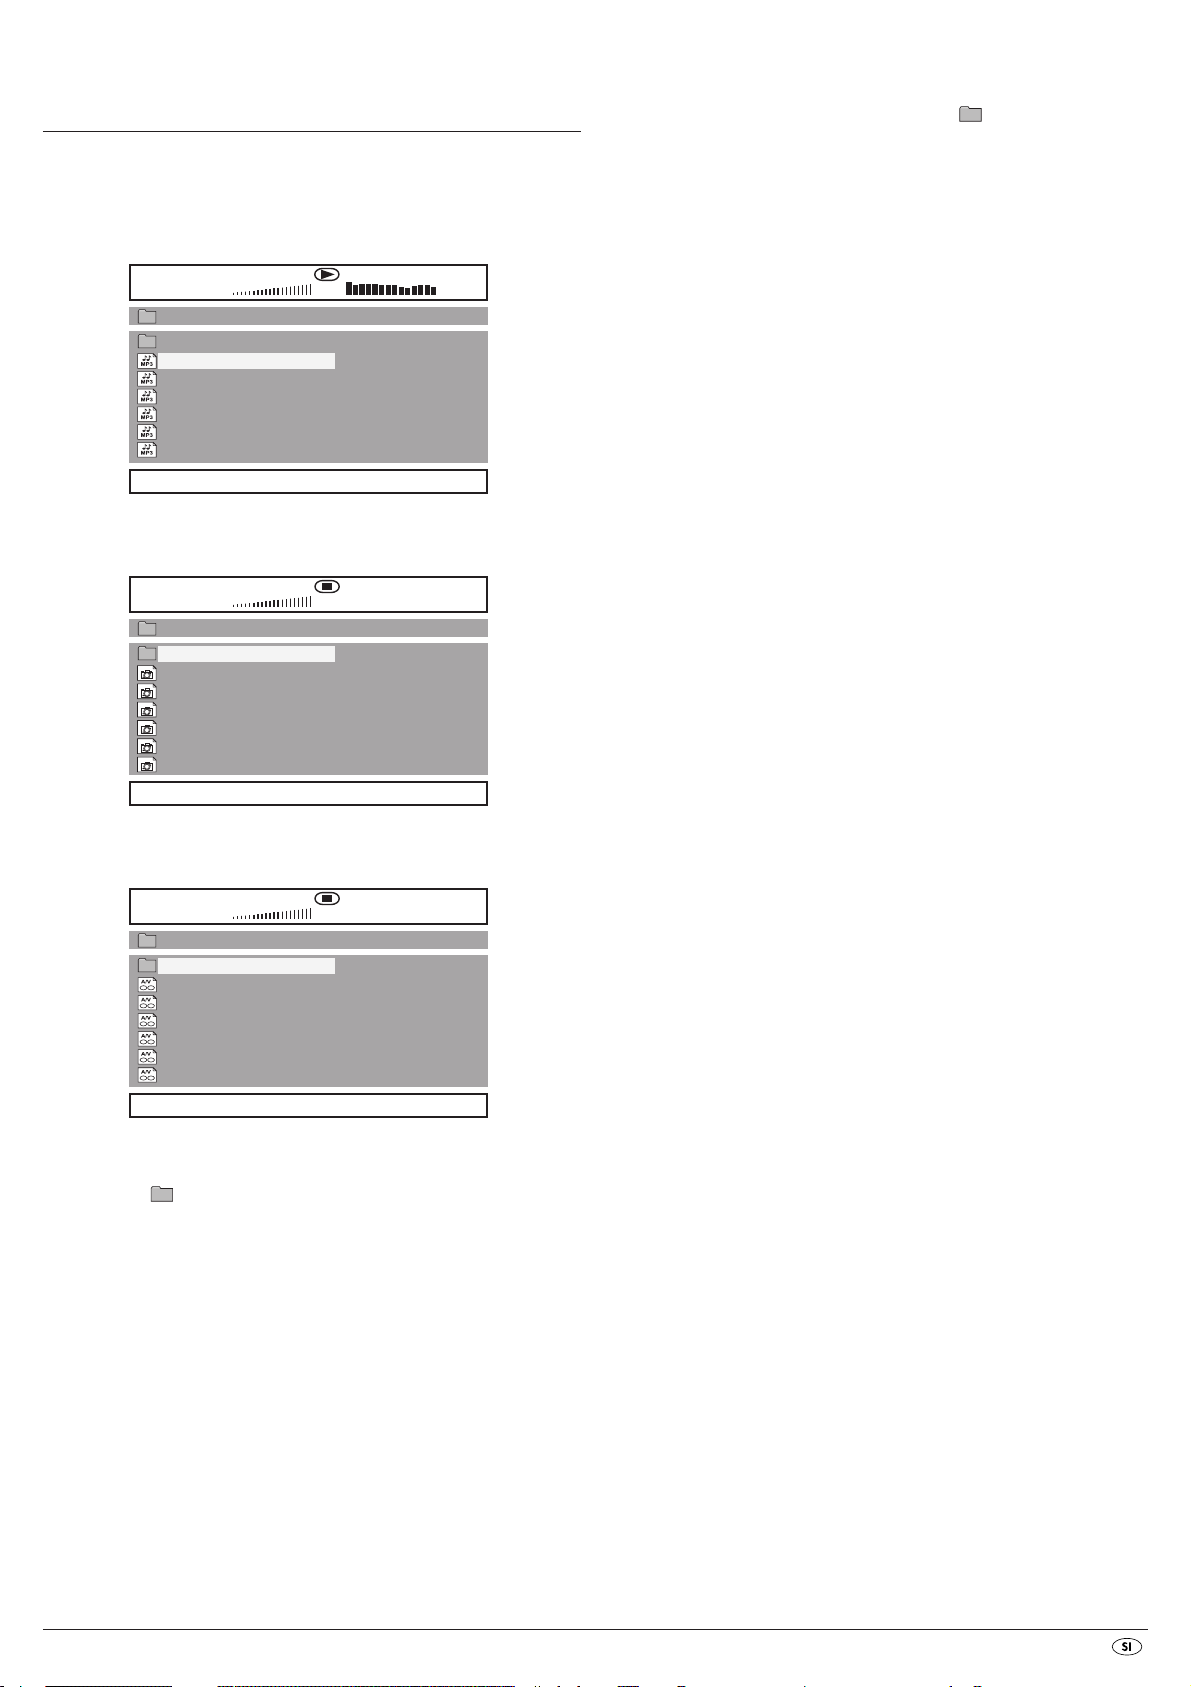
13. Predvajanje formatov JPEG-Photo
CD/WMA/MP3/MPEG4
V DVD predvajalnik vstavite pomnilniški medij.
Vsebina podatkovnega nosilca (CD ali DVD) se prikaže na televiziji:
Prikaz MP3-datotek
00:23
03:56 160 Kbps
001/058
\ music
..
01
track01
02
track02
03
track03
04
track04
05
track05
06
track06
DISC
Prikaz JPEG-datotek
00:00
00:00
001/037
\ pictures
..
picture 01
picture 02
picture 03
picture 04
picture 05
picture 06
DISC
1. Za odpiranje imenika izberite ustreznega in pritisnite tipko ENTER.
Vsebina imenika se pojavi kot seznam.
2. Za prehod na višji nivo imenika izberite simbol z vnosom ".."
in pritisnite tipko
ENTER.
Predvajanje plošč JPEG
• S tipkama za krmiljenje označite sliko in pritisnite tipko ENTER ali
PLAY/PAUSE za odpiranje slike.
Slika se prikaže na zaslonu.
Potem prikaz preide na naslednjo ploščo/sliko v imeniku.
• Za daljši prikaz trenutne slike pritisnite tipko
• Za nadaljevanje predvajanja filma še enkrat pritisnite tipko
• Sliko lahko direktno prikličete, tako da vnesete številko datoteke slike
s številskimi tipkami in jo potem potrdite s tipko
• S tipkama za krmiljenje lahko sliko med predvajanjem vrtite v korakih
po 90°.
• S tipkama za krmiljenje lahko sliko med predvajanjem vodoravno
ali navpično zrcalite.
• Med predvajanjem pritisnite tipko
STOP, da vse slike v imeniku/na plošči
prikažete v miniaturni podobi. Na vsaki strani se prikaže po 12 miniaturic.
• S tipkami za krmiljenje izberite sliko in zaženite predvajanje
z
ENTER ali PLAY/PAUSE .
• S tipkami za krmiljenje izberite enega od naslednjih vnosov iz
spodnje vrstice zaslona in potrdite z
Slide Show Zažene dia predstavitev slik v imeniku/na plošči
Menu Prikaže razpoložljive funkcije tipk za predvajanje formata
JPEG. Pritiskajte tipko
Prev Preide na prejšnjo stran
Next Preide na naslednjo stran
• Pritisnite tipko
MENU za vrnitev na seznam datotek.
PLAY/PAUSE .
PLAY/PAUSE .
ENTER.
ENTER.
ENTER, dokler ta pregled ne izgine.
Prikaz AVI- in MPEG-datotek
00:00
00:00
001/006
\ videos
..
video 01
video 02
video 03
video 04
video 05
video 06
DISC
• Na levi strani je seznam datotek (datotečno okno). Imeniki se predstavijo
s simbolom .
• Za prikaz imenikov na plošči večkrat pritisnite tipko
prikaz FOLDER spodaj na zaslonu.
• Pritisnite tipko
PROG ponovno večkrat, dokler se spodaj na zaslonu ne prikaže
FILELIST. Prikaz imenikov se sedaj izklopi in vsi podatki na plošči se predstavijo na seznamu.
• Desno področje je namenjeno predogledu slik formata JPEG. Predogled
se pojavi, kakor hitro v datotečnem oknu označite JPEG-datoteko.
• Spodaj se nahaja informacijska vrstica, kjer sta prikazana velikost slike
(formata JPEG) ter medij (DISC), na katerem se datoteke nahajajo.
• Izberite eno od datotek s pomočjo tipk za krmiljenje . S pritiskom na
tipko
ENTER izbiro potrdite. Datoteka se predvaja oz. JPEG-fotografija se
prikaže.
PROG, dokler se ne pojavi
Izbira prehodov slik pri predstavitvi:
Za prehod iz ene slike na drugo lahko izberete različne vrste prehodov.
WIPE TOP, WIPE BOTTOM, WIPE LEFT, WIPE RIGHT, DIAGONAL WIPE
LEFT TOP, DIAGONAL WIPE RIGHT TOP, DIAGONAL WIPE LEFT BOTTOM,
DIAGONAL WIPE RIGHT BOTTOM, EXTEND FROM CENTER H, EXTEND
FROM CENTER V, COMPRESS TO CENTER H, COMPRESS TO CENTER V,
WINDOW H, WINDOW V, WIPE FROM EDGE TO CENTER in NONE.
• Med predstavitvijo slik pritiskajte tipko
jem levem kotu televizijskega zaslona ne pojavi ime želenega prehoda.
PROG tako dolgo, dokler se v zgorn-
- 41 -
Page 44
14. Čiščenje DVD predvajalnika
Ohišje DVD predvajalnika čistite izključno z rahlo vlažno krpo in blagim čistilom.
Pazite na to, da pri čiščenju v DVD predvajalnik ne zaide vlaga!
Notranjost predalčka za plošče – če je to potrebno – čistite izključno s čistim,
suhim čopičem (npr. čopičem za objektiv iz specializirane trgovine s fotografskim
materialom). Notranjost predalčka za plošče nikoli ne čistite z vlažnimi sredstvi!
Vstavljena plošča se ne predvaja
Mogoče pa je na čitalni laserski leči DVD predvajalnika nastal film iz kondenzata.
Do tega lahko pride še posebej, če je bil DVD predvajalnik izpostavljen močnim
nihanjem temperature.
V tem primeru DVD predvajalnik postavite v suhi okolici z normalno prostorsko
temperaturo. Najprej iz predalčka za plošče vzemite ploščo, če je kakšna
notri. Potem DVD predvajalnik najmanj eno uro pustite vklopljen, ne da bi
ga uporabljali, dokler se kondenzat ni posušil.
Opozorilo!
Če v DVD predvajalnik vdre vlaga, obstaja nevarnost električnega udara!
Razen tega se DVD predvajalnik pri tem lahko nepopravljivo poškoduje!
15. Odstranitev
Odstranitev naprave
Naprave v nobenem primeru ne odvrzite med običajne hišne odpadke.
Za ta izdelek velja evropska direktiva 2002/96/EC.
Napravo oddajte pri podjetju, registriranem za predelavo odpadkov, ali pri
svojem komunalnem podjetju za predelavo odpadkov.
Upoštevajte trenutno veljavne predpise.
V primeru dvoma se obrnite na svoje podjetje za predelavo odpadkov.
Baterije odstranite!
Baterij ne smete odvreči v hišne smeti. Vsak potrošnik je po zakonu dolžan,
baterije/akumulatorje oddajati na ustreznem zbirališču v svoji občini/četrti
ali v trgovini.
Ta obveza služi temu, da se baterije lahko odstranijo na okolju prijazen način.
Baterije/akumulatorje oddajajte le v izpraznjenem stanju.
Odstranitev embalaže
Vso embalažo oddajte v reciklažo.
16. Odprava motenj in napak
Zaslon predvajalnika ne prikazuje ničesar/DVD predvajalnik ne
deluje, čeprav je bil vklopljen
A Preverite, ali je omrežni kabel pravilno vtaknjen v vtičnico.
B Preverite, ali ima vtičnica, v katero ste vtaknili omrežni kabel DVD pred-
vajalnika, elektriko, tako da nanjo priključite kakšno drugo napravo.
Omrežni vtič DVD predvajalnika poskusno vtaknite v kakšno drugo vtičnico.
C Preverite, ali je zaslon izklopljen s funkcijo zatemnitve.
V ta namen pritisnite tipko
D DVD predvajalnik izklopite s pritiskom na stikalo POWER in potem počakajte še
deset sekund. Za ponovni vklop DVD predvajalnika pritisnite stikalo
POWER še enkrat.
DIMMER na daljinskem upravljalniku.
Ni slike ali samo črno-bela slika
A Preverite, ali so vsi povezovalni kabli med DVD predvajalnikom in televi-
zorjem (ali video projektorjem) trdno vtaknjeni v ustreznih vtičnicah.
B Preverite, ali so nastavitve v OSD-meniju primerne za različico priključka,
s katerim ste DVD predvajalnik priključili na televizor (ali na video projektor).
V zvezi s tem si poglejte poglavje 8 "Priključitev DVD predvajalnika na
televizijski sprejemnik".
C Na podlagi navodil za uporabo televizorja (ali video projektorja) preverite,
ali so na televizorju (ali na video projektorju) morebiti potrebne nastavitve,
da se DVD predvajalnik lahko uporablja s televizorjem.
Ni tona
A Preverite, ali televizor in/ali DVD predvajalnik mogoče nima izklopljenega
tona.
B Preverite, ali so vsi povezovalni kabli med DVD predvajalnikom in morebiti
priključenimi avdio komponentami trdno vtaknjeni v ustrezne konektorje.
C Preverite, ali so nastavitve v OSD-meniju primerne za različico priključka,
s katerim ste avdio komponente priključili na DVD predvajalnik.
V zvezi s tem si poglejte poglavje 9. "Priključitev avdio komponent na
DVD predvajalnik".
D Na podlagi navodil za uporabo televizorja (ali video projektorja) preverite,
ali so na televizorju (ali na video projektorju) morebiti potrebne nastavitve,
da se DVD predvajalnik lahko uporablja s televizorjem.
E Na podlagi navodil za uporabo morebiti priklopljene avdio komponente
preverite, ali so na njej morebiti potrebne nastavitve, da jo lahko uporabljate
z DVD predvajalnikom.
F Če ste …
• DVD predvajalnik priključili na stereo televizijski sprejemnik in na DVD
predvajalnik niste priključili nobenih avdio komponent ali
• če ste priključili avdio komponento skladno z Dolby Prologic preko
analognega stereo izhoda (preko cinch kabla na cinch vtičnicah L in R)
DVD predvajalnika:
Preverite, ali ste v OSD-meniju AUDIO pri menijskem vnosu FRONT SPEAKER
izbrali nastavitev LARGE.
Zaslon pokaže "No Disc" (Ni plošče), čeprav je bila vstavljena plošča
A Plošča je umazana, spraskana ali poškodovana. Ploščo očistite ali pa
vstavite drugo ploščo.
B Regionalna koda vstavljene plošče DVD/VCD/S-VCD se ne sklada
z regionalno kodo DVD predvajalnika. Plošče DVD/VCD/S-VCD se
v tem primeru ne da predvajati z DVD predvajalnikom.
- 42 -
Page 45

Ni 4:3 ali 16:9 slike
A Na osnovi navodil za uporabo televizorja preverite, kateri slikovni formati
so na razpolago pri televizorju.
B Preverite, ali so nastavitve v OSD-meniju primerne za razpoložljivi slikovni
format televizorja.
17. Slovarček/seznam ključnih izrazov
Kaj so DVD, VCD ali S-VCD?
Daljinski upravljalnik ne deluje
A Preverite, ali so baterije daljinskega upravljalnika v predalček za baterije
vstavljene s pravilno polarnostjo.
B Preverite, ali so baterije daljinskega upravljalnika prazne in jih po potrebi
zamenjajte.
C Zagotovite, da se med daljinskim upravljalnikom in DVD predvajalnikom
ne nahajajo ovire.
D Pri uporabi daljinskega upravljalnika se ne oddaljujte več kot pet metrov
od DVD predvajalnika.
Jezik predvajanja/podnapisov ne odgovarja nastavitvam v OSD-meniju
Jezik predvajanja/podnapisov nastavljen v OSD-meniju na vstavljeni plošči
ni na razpolago.
Ena ali več funkcij se ne da vklopiti
Ta funkcija ni na razpolago pri vseh ploščah DVD/VCD/S-VCD. Če poskusite
izvajati neobstoječo funkcijo, se na televizijskem zaslonu prikaže simbol .
Nobena tipka na napravi ali na daljinskem upravljalniku ne deluje/
druge napake v delovanju
A DVD predvajalnik izklopite s pritiskom na stikalo POWER. Počakajte deset
sekund in potem ponovno pritisnite stikalo
ponovno vklopite.
POWER, da DVD predvajalnik
B Če se motnja potem še zmeraj pojavlja: DVD predvajalnik prestavite
nazaj na standardne nastavitve.
DVD
DVD je kratica za angl. izraz. "Digital Versatile Disc". DVD služi shranjevanju
avdio in video podatkov; obstaja pa v formatu 8 cm in 12 cm (premera).
DVD nudi na osnovi svoje visoke pomnilniške kapacitete v primerjavi s ploščami
CD-R/CD-RW trajanje predvajanja shranjenih avdio in video podatkov v dolžini
do osem ur.
VCD/S-VCD
Kot "Video-CD" (VCD) in "Super Video-CD" (S-VCD) označujemo dva postopka
za komprimirano – torej prostorsko varčno – shranjevanje filmov na CD plošče.
VCD in S-VCD obstajata v formatu 8 cm in 12 cm (premer). Njihova pomnilniška kapaciteta je nekajkrat nižja kot pri DVD-jih. Zato nudijo samo predvajanje shranjenih avdio in video podatkov s trajanjem 20 minut (8 cm format)
oz. 74 minut (12 cm format).
VCD obstaja v dveh različicah:
• Pri ploščah VCD/S-VCD različice 1.1 se lahko predvajajo samo avdio
in video podatki.
• Pri ploščah VCD/S-VCD različice 2.0 so na razpolago funkcije PBC
(Playback Control). Razen tega se lahko predvajajo tudi mirujoče slike
z visoko ločljivostjo.
Playback Control (PBC)
Plošče VCD/S-VCD verzije 2.0 imajo funkcijo Playback Control (na kratko
"PBC"). V tem primeru je na plošči VCD/S-VCD na razpolago glavni meni,
s pomočjo katerega se lahko upravljajo različne funkcije plošče VCD/S-VCD.
V zvezi s tem si poglejte poglavje 10.6 "Meni za nastavitve PREFERENCE".
Obrnite se na enega od naših servisnih partnerjev v svoji bližini, če …
• se navedene motnje pri delovanju ne dajo odpraviti, kot je opisano, ali
• pride do drugih motenj pri delovanju, kot so opisane zgoraj
V zvezi s tem si poglejte poglavje 18 "Garancija & servis".
Kaj so naslovi in poglavja?
Naslov se imenujejo največje slikovne in tonske enote na DVD-jih; pri veliko
DVD-jih ima (glavni) film številko naslova 01. Za bonus material (npr. trailer,
informacije o ozadju itd.), ki je na razpolago na veliko DVD-jih, lahko obstajajo
še druge številke naslovov.
Poglavja se imenujejo naslednje manjše slikovne in tonske enote pod nivojem
naslovov. Če je eden ali več naslovov na plošči DVD/VCD/S-VCD razdeljen
na poglavja, imajo ta številke, z vnosom katerih se poglavja lahko izbirajo
direktno.
Upoštevajte, da niso pri vseh DVD-jih …
• naslov(i) razdeljen(i) v (oštevilčena) poglavja
• poglavja se lahko imenujejo tudi "scene" (npr. v glavnem meniju DVD-jev)
Kaj so Scart, S-Video, Composite-Video Progressive Scan,
YUV in HDMI?
Scart
Scart označuje 21-polno, standardizirano vtično povezavo, preko katere se
prenašajo RGB-signali, videosignali in S-Video signali ter mnogi krmilni in
dodatni signali.
S-Video
Ob priključitvi DVD predvajalnika na televizor preko S-Videa se barvni in
svetlobni signali prenašajo ločeno; tako se doseže višja ostrina slike in
manjši tako imenovani "barvni šum".
Barvni šum imenujemo prekritje barvnih, večinoma močno nasičenih delov
video slike z neenakomerno, nemirno strukturo motenj.
- 43 -
Page 46

Composite-Video
Video signal ali FBAS-signal; pri tem gre za slikovni signal, ki istočasno obsega
informacije o barvi in svetlosti.
Progressive Scan
Po navadi se TV naprave in video projektorji krmilijo s tako imenovanimi
"polslikami". Pri tem nastanejo vidne vrstične strukture. Progressive Scan označuje
nasprotje od tega, namreč polne slike (pri tem DVD predvajalniku na izhodu
YPbPr), Progressive Scan signale lahko uporabljajo samo zato primerne
naprave za predvajanje (predvsem televizorji z veliko površino ter projektorji).
Kakovost slike je nasproti običajnim slikovnim signalom bistveno povečana.
YUV (Component Video Out)
YUV označuje komponentni signal, ki je pri tej napravi na razpolago na izhodu
YPbPr v obliki tako imenovanih "polslik"; praviloma je to najboljši signal
za krmiljenje televizorjev z veliko površino ter projektorjev, ki niso primerni za
Progressive Scan signale. Tako kot RGB-prenos slik je tudi YUV sestavljen iz
treh ločenih slikovnih signalov:
• signala za svetlost "Y" in
• obeh signalov za barvno diferenco "U/Pb" in "V/Pr"
Polslike (Interlace)/polne slike (Progressive Scan)
Standardna televizijska slika sestoji iz 576 vidnih vrstic; izmenično se najprej
predstavijo vse lihe in potem vse sode vrstice slike, torej vsakokrat polslika.
Tako se lahko na sekundo prikaže samo 25 polnih slik (50 polslik).
To tehniko označujemo kot "Interlace" format.
Tako imenovani progresiven format, oz. angl. "Progressive Scan", je nasprotje
od tega in pomeni predstavitev vseh vrstic slike naenkrat, to pomeni, da se na
sekundo prikaže 60 celotnih slik. S tem se poveča skupna kakovost slike, mirujoče
slike in besedilo so na primer ostrejši.
HDMI
HDMI je kratica za angl. "High Definition Multimedia Interface" in označuje
19-polni vmesnik za popolnoma digitalen prenos avdio in video podatkov.
S svojo visoko pasovno širino HDMI lahko obdeluje vse danes znane digitalne
video in avdio formate zabavne elektronike. HDMI prenaša avdio datoteke do
frekvenc 192 kHz z velikostjo besed do 24 bitov na do 8 kanalih. Tako se
lahko brez izgube kakovosti predvajajo vsi trenutno v zabavni elektroniki
obstajajoči slikovni in tonski formati vključno s HDTV (do trenutno najvišje
ločljivosti 1080p), isto velja tudi za prihodnje formate s še višjo ločljivostjo slik.
Dekoder
Ton na DVD-jih s surround zvokom za domači kino je na DVD-ju shranjen
v šifrirani (kodirani) obliki. Obstajajo različni šifrirni formati za različne namene,
npr. AC-3 za predvajanje Dolby Digital Surround tona.
Za predvajanje kodiranega tona morajo predvajalne naprave (npr. DVD
predvajalnik) oz. nanje priključene avdio komponente (npr. surround naprave)
imeti tako imenovani dekoder, ki kodirane signale ponovno pretvori v glasbo
oz. ton. DVD predvajalnik Silvercrest KH 6523 ima AC-3 dekoder
(za zvočne signale Dolby Digital 5.1 Surround).
Dolby Surround
Dolby Surround je analogen tonski format, pri katerem se uporabljata dva kanala
enega stereo tonskega signala, da se lahko vključijo tudi informacije o prostorskem zvoku za nadaljnje kanale. Z Dolby Surround dekoderjem se signali
ponovno pretvorijo v ton oz. glasbo in se usmerijo na dva dodatna zvočnika,
ki se postavita za mestom poslušanja.
Dolby Prologic
V primerjavi s tonskim formatom Dolby Surround se pri Dolby Prologic uporablja
dodatni kanal v stereo signalu; to je tako imenovani "Center" kanal. Ustrezni
center zvočnik se postavi na sredini med stereo zvočniki. Najgloblji toni se
usmerijo na zvočnik za globoke tone, tako imenovani "subwoofer". Subwoofer
se lahko postavi na poljubnem mestu v prostoru; razlog za to je, da globoke
tone, ki jih subwoofer izdaja, človeško uho komaj lahko natančno lokalizira.
Dolby Digital (5.1)
Dolby Digital, imenujemo ga tudi AC3, je digitalni tonski format, pri katerem
se lahko transportira do šest ločenih avdio kanalov. Pri večini aktualnih DVDjev je ton shranjen v tako imenovanem "Dolby Digital 5.1" formatu; "5" v oznaki "5.1" pomeni tri sprednje in dva zadnja kanala za surround zvok, "1"
označuje en kanal za globoke tone.
DTS
DTS je kratica za angl. "Digital Theatre System" in označuje enega najbolj
običajnih formatov surround zvoka za DVD-je. Ravno tako kot pri Dolby Digital
5.1 se pri DTS uporabljajo trije sprednji in dva zadnja kanala za surround
zvok ter kanal za globoke tone.
Kaj sta PAL in NTSC?
PAL
PAL je kratica za angl. "Phase Alternation Line". PAL je običajen in najbolj
razširjen standard barvnih televizorjev v Srednji in Zahodni Evropi (izjema:
Francija).
NTSC
NTSC je kratica za angl. "National Television System Committee". NTSC je
standard za barvne televizorje, ki se uporablja predvsem v ZDA in na Japonskem.
Avdio CD
Avdio CD vsebuje izključno avdio podatke; tudi ta plošča obstaja v formatu
8 cm in 12 cm (premera). Nudi predvajanje shranjenih avdio podatkov s trajanjem 20 minut (8 cm format) oz. 74 minut (12 cm format). Na avdio CD-jih
se hranijo avdio podatki v formatu CDA.
MP3
MP3 označuje postopek oz. format, ki ga je razvil nem. Frauenhofer Institut
za stiskanje avdio podatkov. V MP3-formatu komprimirani glasbeni izdelki
imajo samo še del svoje začetne velikosti, zaradi česar se npr. na ploščah
CD-R/CD-RW da shraniti bistveno več glasbe, kot na običajnih avdio CD-jih,
na katerih so avdio podatki shranjeni v formatu CDA.
WMA
WMA (angl. "Windows® Media Audio") je podatkovni format za avdio
podatke podjetja Microsoft®.
JPEG
JPEG (angl. "Joint Photographics Expert Group") označuje zelo razširjen
grafični format istoimenskega podjetja, pri katerem se stisnejo (komprimirajo)
slikovni podatki barvnih in sivih lestvic.
- 44 -
Page 47
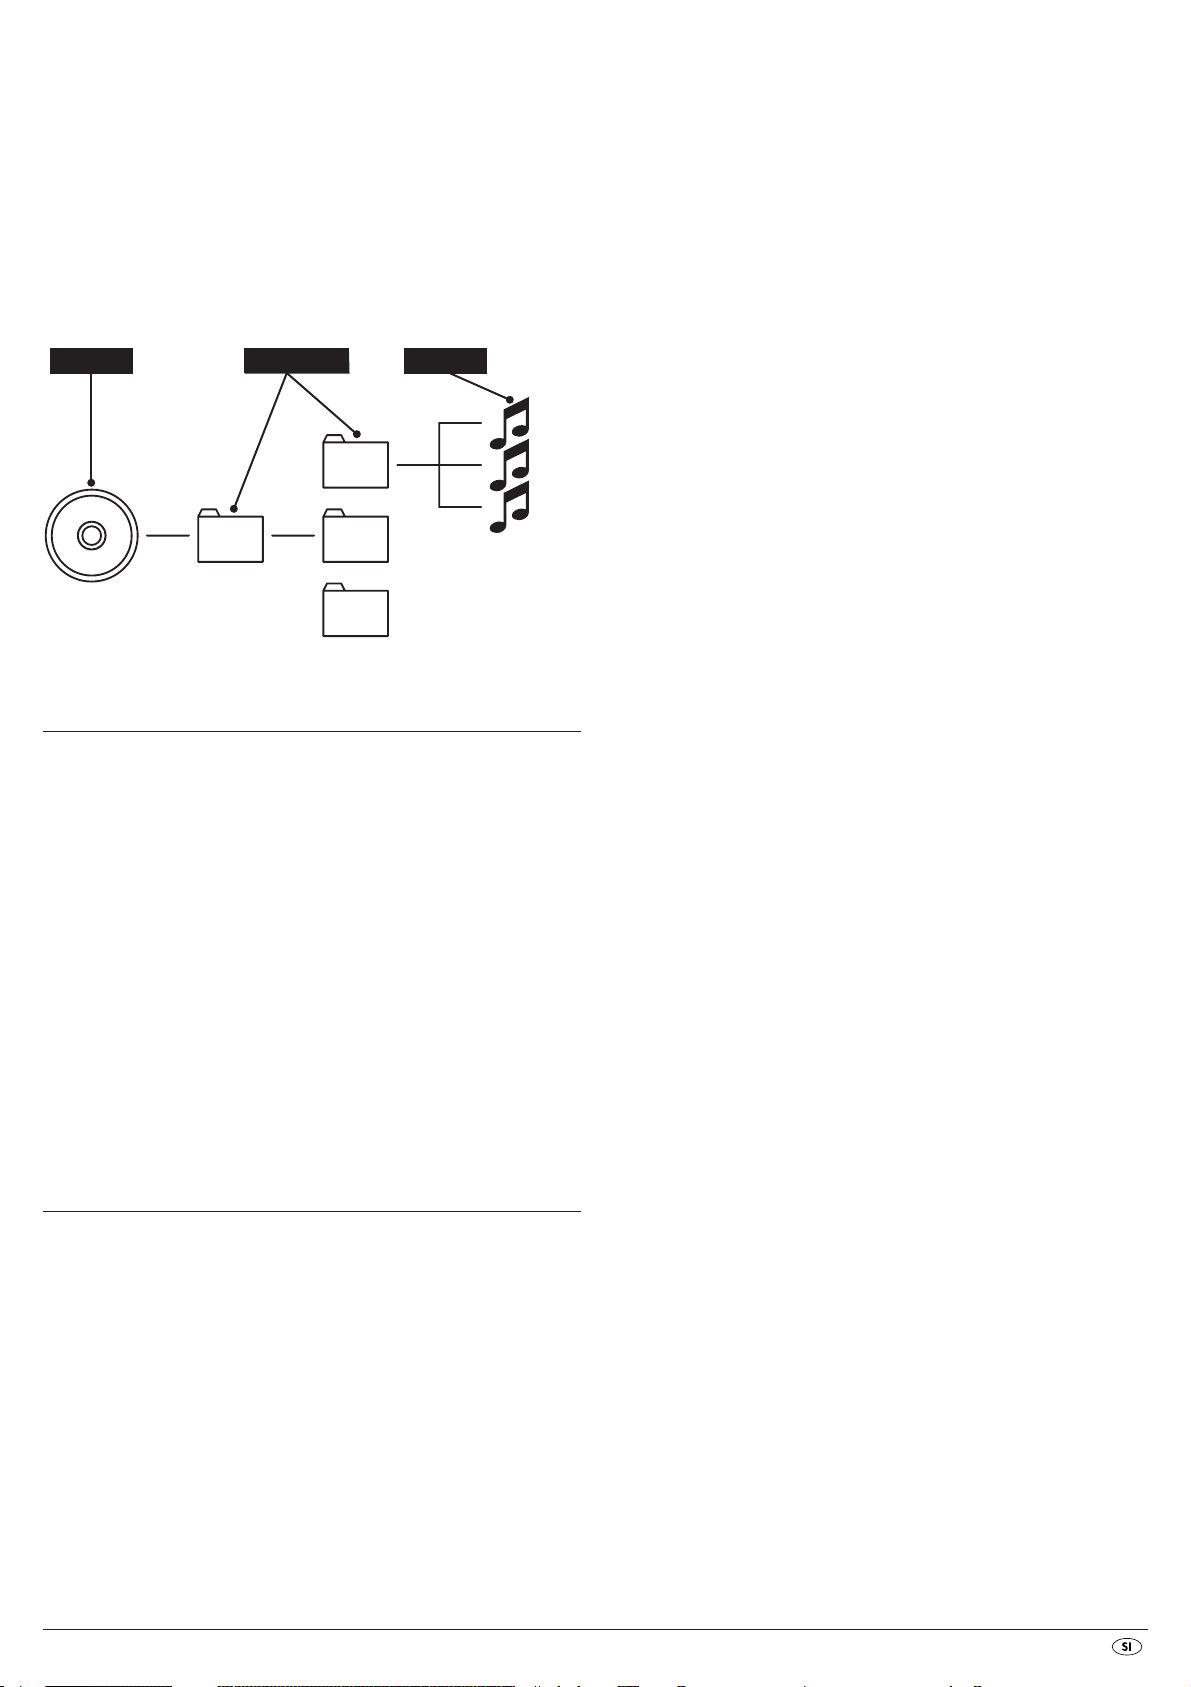
MPEG
ORDNER
MP3
MP3-CD
MPEG ("Moving Picture Experts Group") pomeni format za kompresijo video
podatkov.
Kaj so imeniki?
V nasprotju z avdio CD-ji se naslovi na plošči CD-R/CD-RW z MP3-, WMAali JPEG datotekami lahko shranijo v imenikih, na primer zato, da se naslovi
lahko urejajo po različnih žanrih.
Struktura MP3-CD-ja lahko na primer zgleda takole, če so MP3-datoteke
shranjene v imenikih:
IMENIKI
18. Garancija in servis
Ta naprava ima 3 leta garancije od datuma nakupa. Naprava je bila skrbno
izdelana in pred dobavo natančno preverjena. Prosimo, da blagajniški račun
shranite kot dokazilo o nakupu. V primeru uveljavljanja garancije se po
telefonu obrnite na svojo servisno službo.
Samo tako je zagotovljeno brezplačno pošiljanje vašega izdelka.
Garancija velja le za napake pri materialu ali izdelavi, ne pa tudi za
poškodbe pri transportu, potrošne dele ali za poškodbe lomljivih delov, npr.
stikal ali akumulatorjev.
Izdelek je namenjen izključno za zasebno in ne za poslovno uporabo.
V primeru zlorabe ali nepravilnega ravnanja, pri uporabi sile ter pri posegih,
ki jih ni izvedla naša pooblaščena servisna poslovalnica, garancija preneha
veljati. Vaših zakonskih pravic ta garancija ne omejuje.
Jamstvo ne podaljša garancijske dobe. To velja tudi za zamenjane in
popravljene dele. Morebitne poškodbe in pomanjkljivosti, ki obstajajo že pri
nakupu, je treba javiti takoj po razpakiranju, najpozneje pa dva dni po
datumu nakupa.Popravila po preteku garancijske dobe je treba plačati.
19. Proizvajalec
KOMPERNASS GMBH
BURGSTRASSE 21
44867 BOCHUM, GERMANY
www.kompernass.com
- 45 -
Page 48

Page 49
DVD predvajalnik KH6523
Za zagotovitev brezplačnega poteka popravil, prosimo
pokličite telefonsko številko za tehnično pomoč.
Pri tem imejte pripravljen svoj blagajniški račun.
Pošiljatelj, čitljivo vnesite:
Priimek
Ime
Ulica
Poštna št./kraj
Garancija
Birotehnika
Phone:+386 (0) 2 522 16 66
Fax: +386 (0) 2 531 17 40
e-mail: [email protected]
Ta del v celoti izpolnite in ga priložite napravi!
Država
Telefon
Datum/podpis
Opis napake:
Page 50

 Loading...