

Page 1
Issued by
Information and Communication mobile
Haidenauplatz 1
D-81667 Munich
© Siemens AG 2002
All rights reserved. Subject to availability.
Rights of modification reserved.
Siemens Aktiengesellschaft
www.my-siemens.com
s
Be inspired
Page 2

Contents
1
Safety precautions ................................ 3
Overview of the phone.......................... 4
Getting Started ...................................... 5
Insert SIM card/battery ........... 6
Charge battery ......................... 7
General instructions ............................. 9
User Guide............................... 9
Menu control ........................... 9
Switch on, off/PIN entry....................... 10
Security................................................. 11
Making a phone call............................. 12
Dialling with number keys ...... 12
End call ................................... 12
Accept call .............................. 12
Reject call ............................... 12
When a number is busy.......... 13
Redial previous numbers ........ 13
During a call ............................ 14
Swap/Conference .................. 15
Send DTMF tones ................. 16
Babysitter ............................... 17
Phonebook............................................ 18
<New entry> .......................... 18
Call/search for an entry........... 20
Group...................................... 21
Record no.: ............................. 25
Store control code ................. 25
Picture .................................... 26
Message (SMS) ..................................... 27
Read Messages ...................... 27
Inbox/Outbox .......................... 28
Compose a message .............. 29
Predefined text ....................... 30
SMS to group.......................... 30
Picture & Sound (EMS) ........... 30
Text entry with "T9"................. 31
Setup ...................................... 34
Surf & fun.............................................. 35
Internet (WAP) ........................ 35
Games .................................... 40
Bitmap viewer......................... 41
Melodies ................................. 42
Voice message/Mailbox ....................... 43
Cell broadcast....................................... 44
SIM services (optional)............ 45
Records ................................................. 46
Missed calls ............................ 46
Calls received.......................... 46
Calls dialled ............................. 46
Duration/charges.................................. 47
Display .................................... 47
Charge settings....................... 47
Divert ..................................................... 48
Clock...................................................... 50
Alarm clock ............................ 50
Time/date................................ 50
Format date ............................ 50
Auto display ............................ 50
Auto phone off........................ 50
See also Index
at the end of this User Guide
Page 3

2
Contents
Profiles.................................................. 51
Setup ...................................... 51
Aircraft mode.......................... 52
Fast access key.................................... 53
Left soft key ........................... 53
Speed dialling keys ................. 54
Audio..................................................... 55
Ringer setting ......................... 55
Volume ................................... 55
Ring tones .............................. 55
Call screening ......................... 55
Silent alert............................... 56
Key tones................................ 56
Minute beep ........................... 56
Info tones ............................... 56
Setup ..................................................... 57
Language ................................ 57
Display .................................... 57
Status ..................................... 58
T9 input................................... 58
Security................................... 58
Network.................................. 59
During a call ............................ 61
Headset .................................. 61
Car Kit ..................................... 62
Display symbols (selection) ................ 63
Questions & Answers .......................... 64
Siemens Service................................... 67
Specifications/maintenance ................ 68
Accessories .......................................... 69
Basics ..................................... 69
Car Solutions .......................... 69
Personalisation..................................... 70
SAR (European Union)......................... 71
SAR (international)............................... 72
Index ...................................................... 73
See also Index
at the end of this User Guide
Page 4
Safety precautions
3
Switch off in hospitals or in the vicinity of medical devices, e.g.
hearing aids. You should keep a
minimum distance of 20 cm between a pacemaker and mobile
phone. When using the mobile
phone, hold i t to the ear which is
furthest away from the pacemaker.
Always use the handsfree kit for
calls while driving (p. 69).
Mobile phones must be switched
off at all times in an aircraft.
To prevent accidental activation,
see (p. 52).
Switch off near petrol stations,
fuel depots, chemical plants or
blasting operations.
Mobile phones can interfere with
the operation of technical installations.
The ring tone is reproduced
through the earpiece. To avoid
damage to hearing, first accept
the call, then hold the phone to
the ear.
SIM card may be removed.
Caution! Small parts could be
swallowed by children.
The mains voltage specified on
the power supply unit must not be
exceeded.
We recommend you use only
original Siemens batteries
(100% mercury-free) and charging devices. Otherwise considerable health risks and damage to
the product cannot be excluded.
Neither the phone nor the battery
(100% mercury-free) may be
opened under any circumstances
(except when exchanging the
battery, SIM card or top shell).
Any other changes to this device
are strictly prohibited, as they will
invalidate the type approval criteria required for operation of the
unit.
Please note
Dispose of used batteries and
phones according to the legal
regulations.
Mobile phones can interfere with
the operation of nearby TVs,
radios, PCs.
We recommend you use only
original Siemens accessories to
avoid possible damage and to
comply with the existing regulations.
Improper use invalidates the warranty!
Page 5

4
Loudspeaker
Display indicators
Signal strength/
battery level.
A
Call key
Select displayed phone
number or name, accept
calls. Display last calls in
standby mode.
Phonebook key
Press once for Phonebook
Press twice for Groups
*
Hold down.
In standby mode
Switch signal tones on and
off.
Microphone
Soft keys
The current functions of these keys are displayed in the
grey fields as text or icons.
These keys display the quick
selection in standby mode
(factory default: §New SMS )
p
or e.g.
and §Menu§.
Overview of the phone
(SIM service)
< a
(service provider)
02.12.2002 12:30
New SMS Menu
< a
(Service Provider)
02.12.2001 12:30
New SMS Menu
Integrated antenna
Do not interfere with the
phone above the battery
cover unnecessarily. This
reduces the signal strength.
On/Off/End key
S
Press briefly:
End call/function and return
to standby mode. In menus:
one menu level back.
Hold down:
Switch on/off phone
(in standby mode).
Key lock
To switch on and off:
#
Hold down
Device interface
Connection for charger,
headset etc.
To call up a function displayed, press the soft key underneath the function on the
outside.
Example: Press the right soft
key on the outside to call up
the menu.
Press the soft keys inside to
scroll through menus and
lists.
Page 6
Getting Started
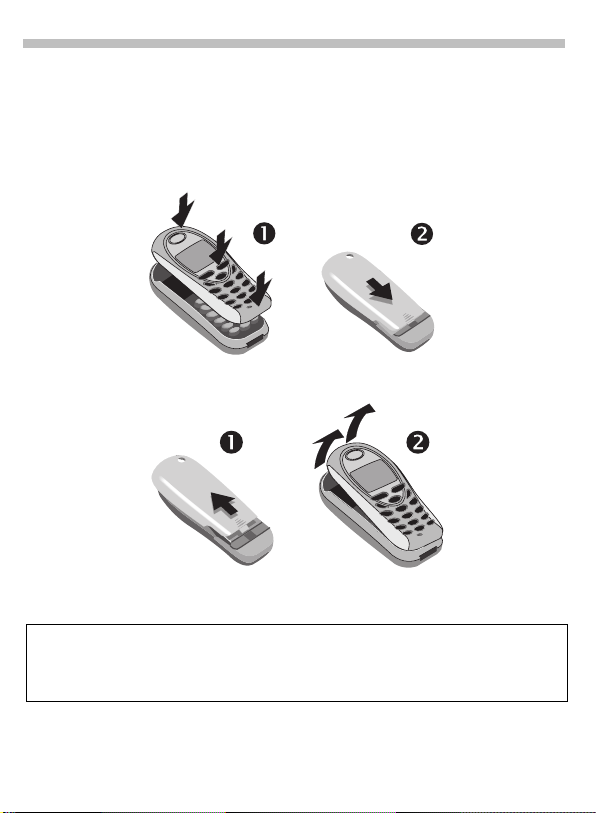
The front and back covers of the casing (CLIPit™ Covers p. 69) can be
changed in a matter of seconds - no tools required. Please switch the phone
off first:
To attach
To remove
5
Your phone's display and the display cover of the upper shell are delivered with a protective
film. Remove this film before getting started.
In rare cases the static charge created by removing this film may cause discolouration at the
edges of the display. However, this will disappear within 10 minutes.
Page 7
6
Getting Started
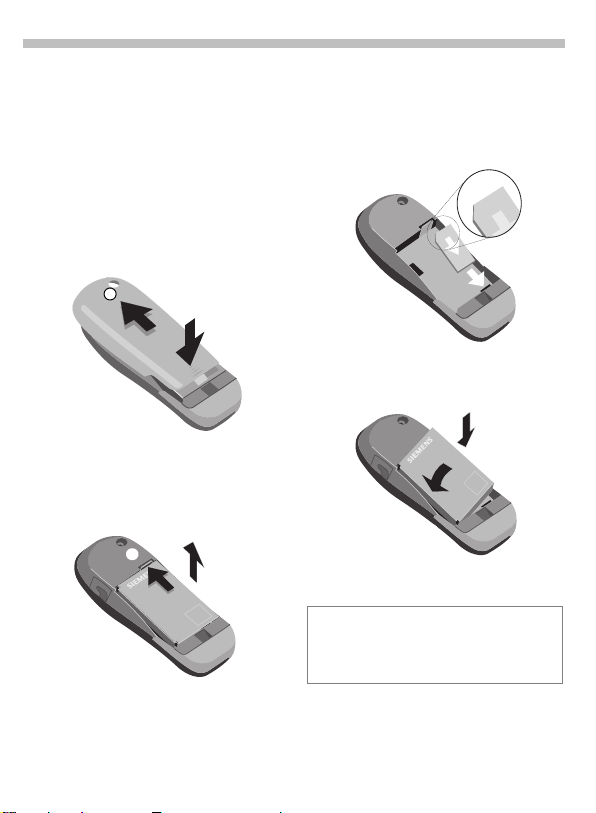
Insert SIM card/battery
The service provider supplies you
with a SIM card on which all the important data for your line is stored.
If the SIM card has been delivered in
credit card size, snap the smaller
segment out and remove any rough
edges.
, then lift
p
p
n
n
, Lift battery at
q
• Press grooved area
cover
o
.
o
• Press latch in the direction indicated by the arrow
the cutout on the side of the
phone
move.
, then tilt upwards and re-
q
• Insert SIM card in the opening
(contacts pointing downwards)
and push gently until it engages
(make sure the angled corner is in
the correct position
r
).
r
• Insert battery into the phone sideways
, then press downwards
s
, until it engages.
t
t
s
• Replace cover and press downwards until it engages.
Only 3-Volt SIM cards are supported. Older
SIM cards (5-Volt technology) cannot be
used. Please contact your service provider,
if you have an older card.
Page 8
Getting Started
7
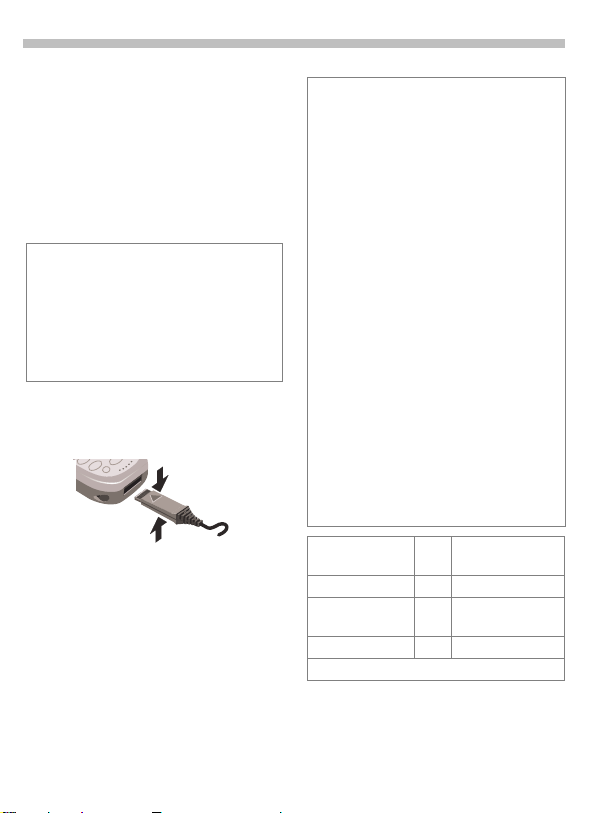
Charge battery
The battery is not fully charged when
delivered, so:
• Plug in charger cable at the bottom of the phone, plug in the plugin power supply unit to the mains
power socket and charge for at
least two hours.
If the battery is totally discharged no charge
icon is displayed at the beginning of the
charging process.
If this is the case leave the charger cable
plugged in, the charge icon will appear after
a maximum of 2 hours. The battery is then
automatically charged.
• Push the sides of the charger cable plug together and pull to remove it.
Functions without SIM card
To display the functions that can be
used without SIM card, switch on
the phone without the SIM card:
§Menu§ Press soft key.
Special case:
§SOS§ Emergency number, SOS
(p. 10).
Charging
The charger heats up when used for long
periods. This is normal and not dangerous.
Á
e
An empty battery is fully charged after about
2 hours. Charging is only possible in an ambient temperature of 5 °C to 40 °C (the
charge icon flashes as a warning when the
temperature is 5 °C above/below this
range). The voltage specified on the power
supply must not be exceeded.
Operating times
A fully charged battery provides 60-250
hours of standby time or 100- 300 minutes
of talk time. The operating times are average values and depend on the operating
conditions (see table below).
Charge level display (full-empty):
When charging is in progress.
End of charging.
a}b{c
A beep sounds when the battery is nearly
empty.
Operation carried
out
Calling 1 30 to 60 minutes
Display back
light *
Network search 1 5 to 10 minutes
* key input, games, organiser etc.
Time
Decrease of
(min)
standby time by
1 30 minutes
Page 9

8
Quality declaration for battery
The capacity of your mobile phone battery
reduces each time you charge/discharge it.
Storing the battery at temperatures that are
too high or too low also causes a gradual
loss of capacity. This can cause the
operating times of your mobile phone to
reduce significantly per usage cycle.
The battery is, however, designed to be
charged and fully discharged within a
period of six months from when the mobile
phone was purchased. Following this sixmonth period we recommend replacing
your battery if you experience a significant
drop in performance. Please purchase only
Siemens original batteries.
Getting Started
Page 10

General instructions
9
User Guide
The following symbols are used:
Enter numbers or letters.
J
S
A
MN
KL
§Menu§
Steps for calling a function as described in this User Guide, e.g.:
§Menu§ÎAudioÎVolume
The procedure above corresponds
to:
The font size of the display in your
telephone has been set to Big letters
(p. 57). The pictures in this user
guide show the display texts in the
smaller font size.
On/Off/End key.
Call key.
Press on the inside to scroll.
Press on the outside to call a
function (soft key).
Displays a soft key function.
Function depends on the
~
service provider, special registration may be necessary.
§Menu§ Press soft key.
Scroll to Audio.
N
Select Audio.
L
Scroll to Volume.
N
Select Volume.
L
Menu control
The menus provide access to functions, network services and individual settings.
Main menu
To reach the main menu from standby mode:
Press the right key on the outside
right (soft key).
Menu
Menu control
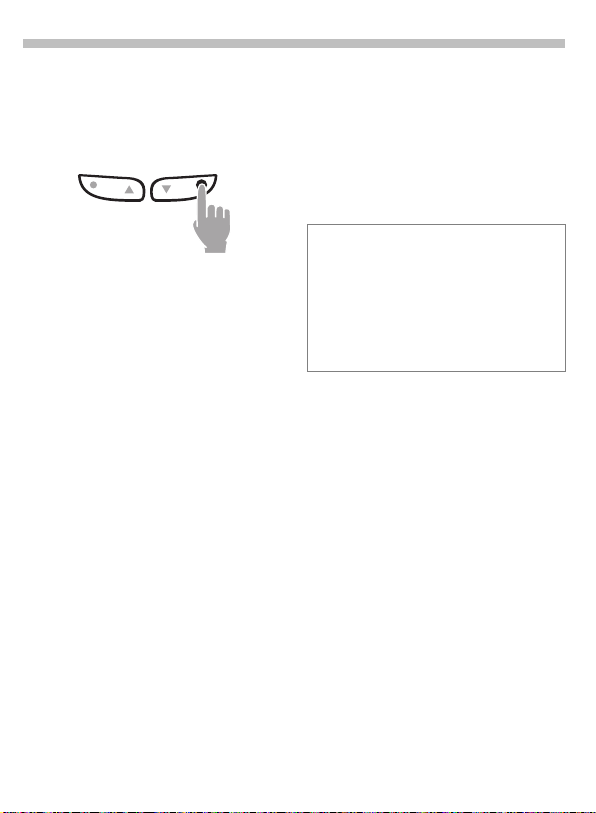
Press those two keys on the inside
to scroll up and down in menus and
lists.
To carry out the function selected:
Press the right key on the outside
right.
Option menu
In other situations (e.g. when the
Phonebook is open) a corresponding
option menu appears:
§Options§ Press.
Page 11
10
Switch on, off/PIN entry
Switch on, off
Hold down On/Off/End
S
key to switch on or off.
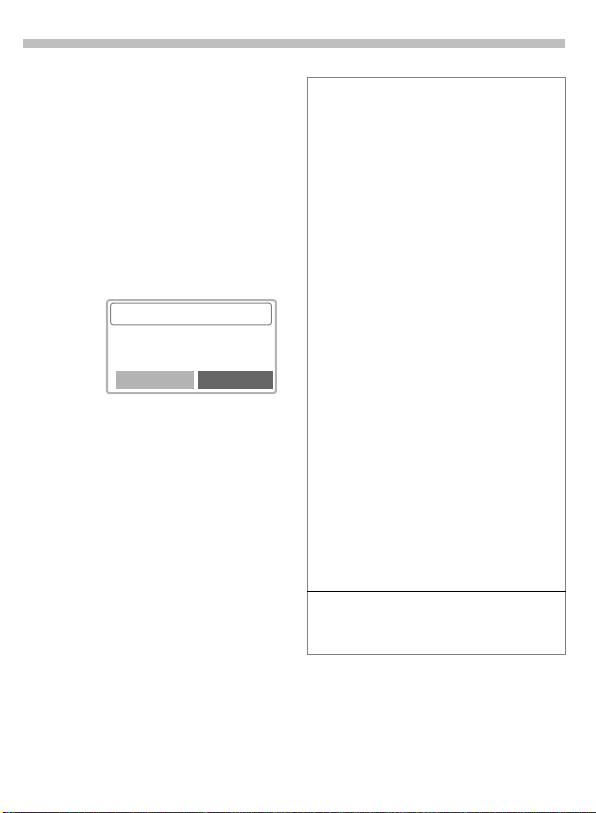
Enter PIN
The SIM card can be protected with
a 4- 8 digit PIN.
Enter your PIN code us-
J
ing the digit keys (shown
a series of asterisks; if
you make a mistake,
§Clear§
press
ClearOK
§OK§ Confirm input with the
right key (press on the
outside).
Logging on to the network will take a few
seconds.
< a
New SMS Menu
).
Please enter
your PIN:
* * * *
Clear OK
(Service Provider)
02.12.2002 12:30
Emergency number (SOS)
By pressing the soft key §SOS§ you can
make an emergency call on any network
without a SIM card and without entering a
PIN (not available in all countries). This
must only be used in real emergencies!
PIN problems
If the PIN is entered incorrectly three times
the SIM card is barred (p. 11).
Actviate, deactivate PIN control or change
PIN (p. 11).
SIM problems
If "Please insert SIM card" is displayed,
check for faults (p. 64).
Network connection
<
>
If you are outside your "home network" your
phone automatically selects a different GSM
network (p. 59).
SIM services
p
Strength of incoming signal.
A weak signal reduces the call
quality and may lead to loss of
the connection. Change your
location.
Symbol for special applications
on the SIM card (p. 45), e.g.
Mobile Banking.
When the name of the service provider appears on the display, the
phone is in standby mode and ready for
use.
Page 12
Security
11
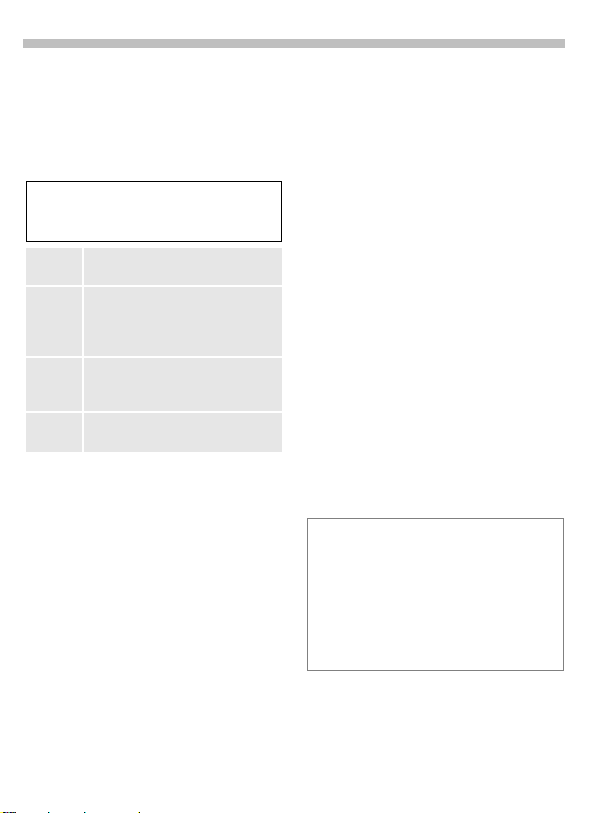
The phone and SIM card are protected against misuse by several security codes and should be treated with
the same care as a cheque guarantee card. For further details see also
p. 59.
Keep these confidential numbers in a
safe place where you can access them if
required.
PIN * Protects your SIM card (personal
identification number).
PIN 2 * This is needed to set the charge
detail display and to acces additional functions on special SIM
cards.
PUK/
Key code. Used to unlock SIM
cards after the wrong PIN has
PUK 2
been entered.
Phone-
Protects your phone. Must be entered at the first security setting.
code *
Î
§Menu§
SetupÎSecurity
Î
then select a function:
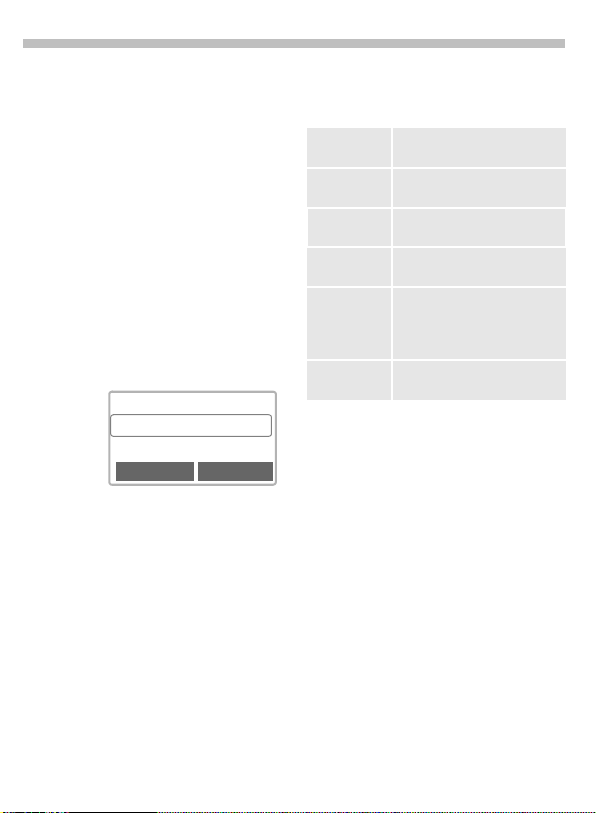
PIN control
The PIN is usually requested each
time the phone is switched on. You
can deactivate this feature but you
risk unauthorised use of the phone.
§Select§ Press.
Enter PIN.
J
§OK§ Confirm entry.
§Change§ Press.
§OK§ Confirm.
Some service providers do not permit this function.
Change PIN *
You can change the PIN to any
number you may find easier to remember.
Enter old PIN.
J
§OK§ Press.
§OK§ Enter new PIN.
J
,
§OK§ Repeat new PIN.
J
,
Change PIN2 *
(display only if PIN 2 is available).
Proceed as with Change PIN.
Change phonecode *
You define and enter the phone code
when calling up a phone code protected function (e.g. Babysitter, p. 17)
for the first time. It is then valid for all
functions.
If you have forgotten it, please call
Siemens Service (p. 67).
Remove SIM card barring
If the PIN is entered incorrectly three times
the SIM card is barred. Enter the PUK
(MASTER PIN) provided by your service
provider together with the SIM card
according to instructions.
If PUK (MASTER PIN) has been lost,
please contact your service provider.
* 4-8-digit number
Page 13

12
Making a phone call
Dialling with number keys
The phone must be switched on
(standby mode).
Enter the number
J
(always with prefix, if
necessary with the international dialling code).
§Clear§ A short press clears
the last digit, a long press
clears the entire number.
? Store phone number
in the Phonebook (p. 18).
Press the Call key. The
A
phone number displayed
is dialled.
International dialling codes
Many international dialling codes are stored
in your phone:
Hold down until "+" appears.
0
This replaces the first two
digits of the international
dialling code.
§+List§ Press.
Select the required country. The international dialling code is displayed. Now add the
national number (in many countries without
the first digit) and press the Call key.
End call
Press the End key briefly.
S
The call is ended.
Press this key even if the person on the
other end of the line has hung up first.
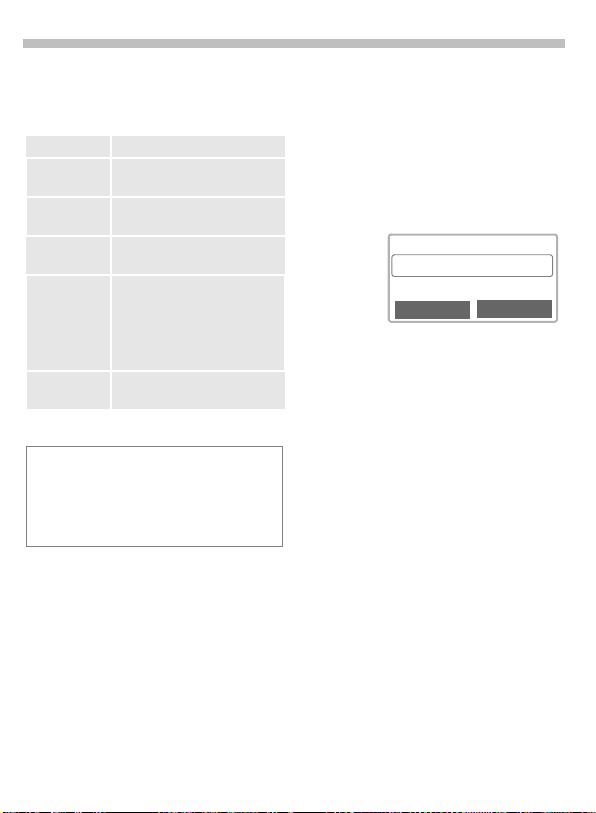
Accept call
+
+498912345
Reply Reject
The phone must be switched on
(standby mode).
§Reply§ Press or
again.
A phone number is transmitted by the network and displayed. If it is stored in the
Phonebook the corresponding name is displayed.
A
press
Reject call
§Reject§ Press or
press briefly.
S
§Divert§ Diverts the caller to the mail-
box, for example, if Busy is set
(p. 48) and "call waiting" has
been activated (p. 14).
Page 14

Making a phone call
13
When a number is busy
If the called number is busy or cannot be reached because of network
problems the following options are
available (depending on service
provider):
Either
Auto redial previous numbers
§Auto dial§ Press. The number is au-
or
Call back
§Call back§ Press. Your phone rings
Reminder
§Prompt§ Press. A beep reminds
Any other call ends the function.
tomatically dialled for up
to 15 minutes at increasing intervals. During this
period, no other number
can be dialled. To end:
Press
(End key).
S
~
when the busy number is
free. Press the Call key to
dial the number.
you to redial the displayed phone number
after 15 minutes.
Redial previous numbers
• To redial the phone number last
called:
• To redial other numbers that were
dialled previously:
§Options§ Call lists (p. 46).
The numbers of calls that have been received, dialled or missed are stored for call
back purposes (p. 46).
An incoming call will interrupt any other use
of the phone.
Functions during a call (p. 14).
Switch off ringer for the current call:
The call is displayed. The caller hears the
dialling tone.
Press the Call key twice.
A
Press the Call key once.
A
Pick out the required
N
phone number from the
list, then press ...
... to dial.
A
Hold down.
*
Page 15

14
Making a phone call
During a call
Call waiting
You may need to register for this service
with your service provider and set your
phone accordingly (p. 61).
During a call, you may be advised
that there is another call waiting. You
will hear a special tone during the
call. You have the following options:
Swap
§Swap§ Accept the waiting call
and place the current call
on hold.
To swap between the
two calls, press §Swap§
each time.
Reject
§Reject§ Reject the waiting call.
The caller will hear the
busy tone
or
§Divert§ if this is set, the caller will
be diverted to the mailbox for example (p. 48).
End current call
End the current call.
S
§Reply§ Accept the new call.
~
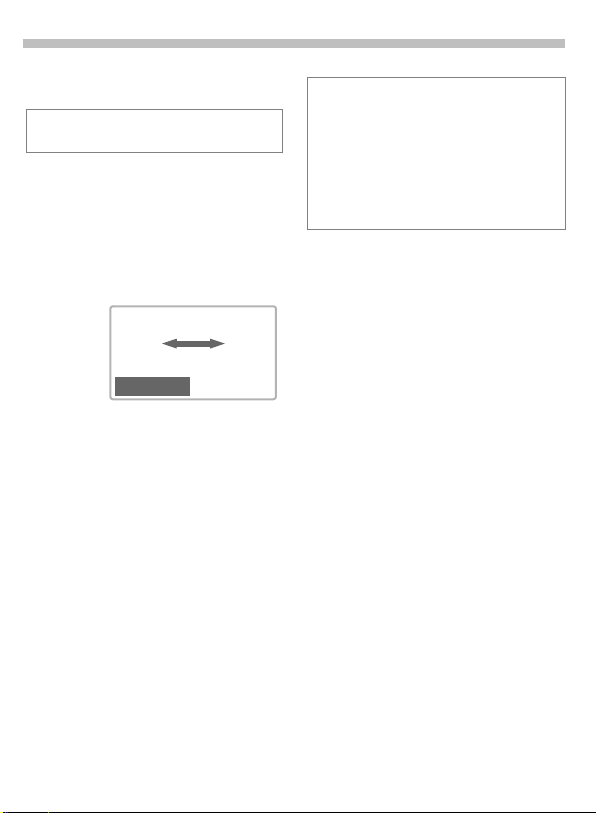
Set Volume
MN
If a car kit is used, its volume setting
does not affect the usual setting on
the phone.
You can adjust the
handset volume with the
arrow keys (only during
the call).
Phone number memo
You can dial a number with the keypad during a call. The person on the
other end of the line can hear the
number being entered. It can be
stored in the Phonebook or called
after the current call has ended.
Page 16
Making a phone call
15
Swap/Conference
Some functions may not be supported by
your service provider.
You can call another number during
a call.
You can swap back and forth between
both calls or link all callers together in
a conference.
During a call, inform the other party
of your intention, then:
< a
~
Z Z
Carol
menu§
Hold
§Hold§ Put the current call on
hold.
You can now dial a new number.
When the connection is established,
you have the following options:
Swap
§Swap§ Swap back and forth be-
tween both calls.
;
End the current call.
S
The following query is displayed:
"Return to the call on hold?"
§Yes§ Return to the held call
or
§No§ The held call is ended.
Conference
menu§ Open call menu and
;
A held call is added (conference call
with up to 5 subscribers).
To end:
Call transfer
;
The original call is joined to the second one. For you, both calls are now
ended.
select Conference.
All calls are ended simul-
S
taneously when the End
key is pressed.
menu§ Open call menu and
select Call transfer.
~
Page 17

16
Making a phone call
Call menu
The following functions are only
available during a call:
menu§ Open menu.
;
Microphone onSwitch the microphone on or
Vol ume Adjust handset volume.
Conference (p. 15).
Duration/
charges
Send DTMF tones
Call transfer ~(p. 15).
Main menu Direct access to the main
Call status List all held and active calls
off. If switched off, the person
on the other end of the line
cannot hear you (muting).
Alternatively:
*
Hold down.
However, numbers being entered are audible when Send
DTMF tones is active.
While the connection continues, the call duration and
(if set, see p. 47) the charge
details are displayed.
See right.
menu.
(e.g. participants in a
conference).
Send DTMF tones
menu§ Open menu.
;
Send DTMF tones
You can enter control codes (digits)
during a call so that an answering
machine can be controlled remotely.
These digits are directly transmitted
as DTMF tones (control codes).
Control codes (DTMF tones) stored
in the Phonebook (p. 18) can also be
entered.
Select.
Page 18
Making a phone call
17
Babysitter
Only one phone number can be dialled. Hold down the right soft key on
the outside right.
Switch on
§Menu§ÎSetupÎSecurity
Î
Babysitter
§Select§ Press.
Enter phone code (see
J
instructions on the right).
§OK§ Confirm input.
§Change§ Press.
/JSelect phone number
@
from the Phonebook
(p. 18) or enter a new one
(with name). The babysitter is now active.
Switch off
Hold down.
#
Enter phone code.
J
§Change§ Press.
§OK§ Confirm input.
Phonecode
When first prompted, you define and enter
the phonecode (4- 8 digits)
(e.g. for Babysitter).
Please do not forget this code!
It applies to other functions as well but it
may be changed at any time (p. 11).
Page 19
18
Phonebook
Enter frequently used phone numbers in the Phonebook with a special
name. To dial then, simply highlight
the name. If a phone number is
stored with a name, it appears on
the display when you are called.
You can assign important phone
numbers to a group.
<New entry>
Open Phonebook
T
<New entry>
<Own numbers>
<Group>
Select.
Activate input fields.
N
Enter phone number
J
(with prefix) and name
(for additional fields/input
aid, see adjacent
column).
§Save§ Press to store the entry.
.
Select
Additional fields
Group
Assign the entry to a group, for example:
Office, Family, Leisure, VIP
(see group functions, p. 21).
Location:
Select a storage location other than the SIM
card (standard) such as phone memory or
special SIM card (p. 24).
Record no.: (storage location number)
Every entry is automatically assigned a
number under which it can also be selected.
For information on how to change the
number, see (p. 25).
Input aid
If the cursor is in the input field
<Phone number> you can use the left
soft key to display a list with international
dialling codes.
§+List Press. Select the required
country. The international dialling code is displayed.
Hold down key until a "+" ap-
0
pears. This replaces the two
leading digits of the international dialling code.
<Own numbers>
You can enter your "own" numbers
(e.g. fax).
Page 20

Phonebook
19
Text entry
Press digit key repeatedly until the required
letter is displayed. The cursor advances after a short delay.
once for a, twice for b
Press
2
etc. The first letter in each
name is automatically written
in UPPERCASE.
Ä,ä/1-9 Umlauts and numbers are dis-
played after the relevant letter.
Clear Press br iefly to delete the letter
before the cursor, hold down to
erase the whole name.
MN
Move the cursor.
Press briefly:
*
Switch between uppercase,
lowercase and digits.
Hold down:
Set input language and text
mode.
#
Activate/deactivate T9.
0
Write: . , ? ! 0 + - :
Space.
1
Special characters
Press key repeatedly until the character is
displayed. To enter special characters after
numbers (e.g. 5 £), switch to the letter mode
first:
*
Blank
1
0
*
#
1
.,?!0+-:¿
¡“’;_
* / ( ) < = > % ~
#@\&§
$¥¤
£
€
Γ ∆ Θ Λ
ΞΠΣΦΨΩ
Page 21

20
Phonebook
Call/search for an entry
Open Phonebook.
T
Select a name by enter-
/
J
N
ing the first letter (search
function) and/or scroll.
<Group>
Carol
Diana
View Options
Dial number.
A
Phonebook-Menu
§Options
View Display the selected entry.
Edit Display phone number and
New entry Create a new Phonebook
Delete Delete entry selected from the
Delete all Delete all entries after confir-
Send SMS... as entry
Picture Assign a symbol to a phone
Capacity Display the maximum and
Open menu.
name for changes.
entry.
Phonebook.
mation. Depending on the storage location of the entries, the
PIN, PIN 2 or the phone code
may also be requested.
Send a Phonebook entry.
as text
Send entry as a text of an SMS
message.
number (p. 26).
available capacity.
Page 22
Phonebook
21
Group
If there are many Phonebook entries
it is best to assign them to a group,
e.g.:
Office, Family, Leisure, VIP
A special melody can sound (p. 55)
and/or a symbol can be displayed
(p. 26) if the phone number of a call
is registered in a group.
Select a group
Two short presses or one
T
long press on Phonebook
(in standby mode).
Select group.
N
 VIP (17)
¸
Leisure (9)
à Office (7)
View Options
§View§ Press. All entries of the
selected group are displayed.
The following functions are applied
to the group or all entries of a group:
Group Menu
§Options
View
members
Rename
group
Remove all Remove all members from
Group
symbol
Call to group ~Call up to 5 members of a
SMS to
group
Open menu.
Display all entries assigned
to the group.
Change the current name of
the group.
the selected group.
Assign a symbol to a group
(p. 26).
group one by one and link
them together in a conference (p. 23).
Send an SMS to all members
of a group (p. 22).
Change group assignment
You can assign a Phonebook entry to
a group when you enter it (p. 18).
To change the group assignment or
to assign to a group later:
When the Phonebook is open:
Select entry.
N
§View§ Press.
§Edit§ Press.
Scroll to Group.
N
§Edit§ Press and select a
new group.
Confirm assignment.
§Save§
Page 23
22
Phonebook
Group entry menu
§Options
View Display the entry.
Edit Display the entry for
New entry Open Phonebook and add an
Remove Delete entry only from the
Send SMS... as entry
Picture Assign a symbol to a phone
T
Press once to open Phonebook
Press twice to display groups
Press 3 times to display 1st group entries
Open menu.
changes.
entry to the current group.
group.
Send a Phonebook entry.
as text
Send entry as text of an SMS
message.
number (p. 26).
Phonebook key
SMS to group
A memo (SMS) can be sent as a circular to all members of a group.
Two short presses or one
T
long press on Phonebook
(in standby mode).
Select a group.
N
¿ VIP (6)
½ Leisure (9)
¾ Office (12)
View Options
§Options§ Press. The group is
confirmed and the editor
is opened.
Compose message
J
(p. 29).
Press and confirm the
A
displayed group with §OK§.
Press. The first recipient
A
is displayed.
Press. The SMS is sent.
A
Each send operation
must be confirmed.
Page 24
Phonebook
23
Call to group
You can call up to five members of a
group or link them together in a
conference.
Two short presses or one
T
long press on Phonebook
(in standby mode).
Select a group.
N
§Select§ Press. The group mem-
bers are listed.
MN
Select the entries you
want to call.
§Change§ Press. Highlight
entry/unmark entry.
Anne
_
Barbara
^
Carol
^
Change OK
OK Confirm selection.
The first entry is selected.
If the connection was established the call is held.
Proceed with calling the
A
next entry until all highlighted entries are called
(up to 5, depending on
the service provider).
§Options
Open the menu, e.g. to
link the calls on hold in a
conference
Z
Barbara
Next: Carol
Dial? Options
(2)
Page 25

24
~
Phonebook
Call to group-Menu
§Options
Dial Dial current entry.
Skip Skip next number.
Conference Link all calls on hold in a con-
Swap Accept the waiting call and
Microphone onSwitch the microphone on or
Vol ume Adjust handset volume.
Time/charge While the connection contin-
Send DTMF
tones
Call transfer (p. 15)
Main menu Direct access to the main
Call status List all held and active calls
Open menu.
ference (p. 15).
place the current call on hold.
off. If it is switched off, the
person on the other end of
the line cannot hear you
(muting).
Alternatively:
*
Hold down.
However, numbers being entered are audible when Send
DTMF tones is active.
ues the call duration and (if
set, see p. 47) the call time/
charges are displayed.
(p. 16)
menu.
(e.g. participants in a
conference).
Location:
Open Phonebook.
T
Select entry.
N
§Options§ Open the menu and
An entry can be moved from the
Phonebook to the other storage
locations.
SIM (standard)
Entries that are stored in the Phonebook on the SIM card can also be
used on another GSM Phone.
Protected SIM
Phone numbers can be stored in a
protected area on a special SIM card.
A PIN 2 is needed for editing (p. 11).
Mobile (phone memory)
Phonebook entries are stored here,
if
• pictures are assigned to them,
• the memory of the SIM card is full.
select Edit.
Go to the input field
N
Location:.
I
,
Z
Page 26

Phonebook
25
Record no.:
(Storage location number)
A record number is automatically
assigned to every new entry in the
Phonebook.
Making a call
Enter phone number.
J
Press.
#
Press.
A
Edit
Open Phonebook.
T
Select entry.
N
§Options§ Open the menu and
§Change§ Keep pressing until the
select Edit.
Go to the input field
N
Record no.:.
number you want appears. Only free storage
slot numbers are presented for selection.
§Save§ Press.
Store control code
You can store phone numbers and
control codes (DTMF tones) in the
Phonebook like a normal entry e.g.
to operate an answering machine
remotely.
Dial number.
J
Hold down until a"+"
0
appears on the display
(pause for connection
setup).
Enter DTMF tones
J
(digits).
If necessary, enter fur-
0
ther pauses of three seconds each to ensure correct processing at the
destination.
Enter a name.
J
§Save§ Press.
You can also store the DTMF tones
(digits) without a phone number and
send them during a call (p. 16).
Page 27

26
Phonebook
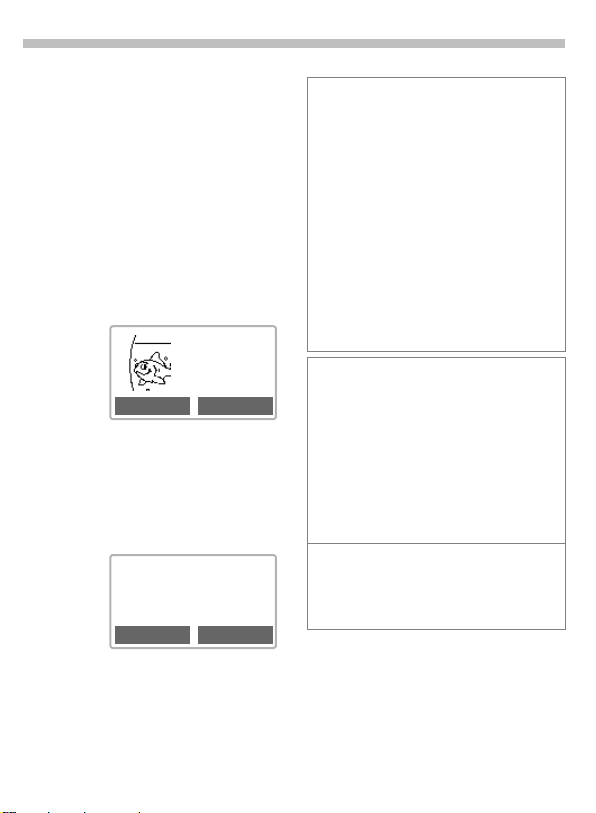
Picture
Assign a picture/symbol to phone
numbers. This picture/symbol will
appear in the display when there is a
call from this number.
Open Phonebook
T
Select entry.
N
§Options Open menu and select
Picture.
Calling symbol
You can assign one of many standard
symbols to a phone number. Three
symbols are displayed at one time.
The centre symbol is the current
selection.
MN
Scroll in the symbol list.
§OK§ The selected symbol is
added to the Phonebook
entry.
.
Calling faces
You can assign a "portrait" to entries.
You can assemble the portrait yourself from various pictorial elements.
MN
Scroll up and down to
mark the part of the face
(top, centre, bottom).
Use the left soft key to
f
scroll between the three
views available.
§OK§ The "portrait" is append-
ed to the Phonebook
entry.
Delete picture
Open Phonebook
T
Select entry.
N
§Options Open menu and select
Picture.
Select Delete picture.
N
Confirm security prompt.
.
Page 28

Message (SMS)
27
You may transmit and receive very
long text messages (up to 760 characters) on your phone, which are automatically composed from several
"normal" SMS messages (note the
accruing charges).
Depending on the service provider,
e-mails and faxes can also be sent or
e-mails received via SMS (change
setting if necessary, p. 34).
Read Messages
Display indicates a new
©
message.
< a
(Service provider)
02.12.2002 23:45
©
Press the soft key below the letter
symbol to read the message.
Date/time
Phone number/
sender
Message
MN
§Reply§ Reply menu, see below.
§Options§ Inbox/outbox menu
02.12.2002 15:36
017198987676
Do we meet tomorrow?
Reply Options
Scroll through the message line by line.
(p. 28).
Menu
Reply Menu
§Reply§ Open reply menu.
Write message Create a new reply text
Edit Edit message received
Answer is YES Add YES to the
Answer is NO Add NO to the
- Call back
- Delay
- Thanks
When the message has been edited
in the editor, it can be stored or sent
with §Options§.
¨
The memory is full when the message
symbol flashes. No more SMS messages
can be received or written. Delete or save
messages (p. 28).
Numbers §highlighted§ in the message can
be dialled (Call key), stored in the Phonebook (p. 18) or used as the address for a
reply.
Pictures or sounds can be part of messag-
es you received. Pictures are shown in the
message, sounds are indicated as notes.
If a note is reached when scrolling through
the message the corresponding sound is
played.
(p. 29).
or assign a new text
to it.
message.
message.
Append a standard
text to the message as
a reply.
Page 29

28
Message (SMS)
Inbox/Outbox
§Menu§ÎMessages
The list of saved messages is
displayed.
Symbol Inbox / Outbox /
ª
©
Inbox //Outbox /
§Options§ See right.
Read Not sent
Unread Sent
Î
Barbara
ª
Carol
©
023598765432
©
View Options
Inbox/Outbox-Menu
Different functions are available depending on the context:
§Options§ Open menu.
View Read entry.
Reply Directly answer incoming
Send Dial number or select from
Edit Open editor for changes.
Delete Delete selected message.
Delete all Delete all entries after
Picture &
Sound
Capacity Display maximum and avail-
Mark as
unread
Status report ~(Outbox list only)
Save no. to dCopy a selected phone
SMS messages.
the Phonebook, then send.
confirmation.
List the pictures and sounds
contained in the message.
able capacity.
Mark the message as
unread.
Request delivery confirmation for messages sent.
number to the Phonebook.
Page 30

Message (SMS)
29
Compose a message
§Menu§ÎMessages ÎNew SMS
Text input using "T9" (p. 31)
J
allows you to quickly create long SMS messages
using just a few key entries. §Clear§ Press briefly
to delete letter by letter,
hold down to delete the
entire word.
Press.
A
Dial number or pick out
/
J
@
§Options§ Open menu and select
If Message type, Validity period or
Service centre: are requested, see p. 34
Text Menu
§Options§ Open the text menu.
Send Dial the number of the ad-
Save Save the composed message
Picture &
Sound
from the Phonebook.
§OK§ Confirm. The message is
sent to the service centre
for transmission.
§OK§ Return to the editor.
Save to store the mes-
sage.
dress or select from the
Phonebook, then send.
in the outbox list.
Add pictures and sounds to
message (p. 30).
Format Line feed
Small font, Medium font,
Large font
Underline
Left, Right, Center
Mark text
T9 input
(p. 31)
Line feed Enter a line break.
Clear text Delete the whole text.
Insert text Insert standard text in the
Insert from dOpen Phonebook and copy
Bookmarks Insert URL from the WAP
Information on SMS
If the phone was unable to send the message to the service centre a retry option is
available. If this attempt also fails, contact
your service provider. The Message sent!
text only indicates that the message has
been transmitted to the service centre which
now tries to deliver the message within a
certain period.
T9 preferred
Activate/dectivate T9 input.
Input language
Select the language in which
the message is to be
composed.
message.
the phone number into the
text.
bookmark in the text.
Page 31

30
Message (SMS)
Predefined text
Standard text fragments which can
be added to messages are stored in
the phone. You can also create five
additional text fragments yourself.
Write text fragments
§Menu§ÎMessages
Î
Predefined text
<New entry>Select.
Write text fragment.
J
§Save§ Press.
Use text fragment
Compose message
J
(p. 29).
§Options§ Open the text menu.
Insert text Select.
MN
Select text fragment
from the list.
§Select§ Confirm. The text frag-
ment is inserted in the
message at the cursor
position.
SMS to group
You can send messages (SMS) as
"circulars" to all members of a group
(p. 22).
Picture & Sound (EMS)
Pictures and sounds can be inserted
in the message. Playback only
occurs on phones that support this
function. In input mode a wildcard is
shown instead of the picture/sound.
Compose the message
J
as usual.
§Options§ Open the text menu at
Picture & Sound
MN
MN
§Dwnload§ The picture, sound or ani-
the end of a word.
The Pictures&Sound
menu opens:
Fix animations
Fix sounds
Own animat.
Own sounds
Select range.
§Select§ Confirm.
The first entry of the selected range is displayed.
Scroll in the list to the
required entry.
mation is "inserted" in the
text and shown there as
a wildcard.
Ë
Ì
»
Ì
Page 32

Message (SMS)
31
Text entry with "T9"
"T9" deduces the correct word from
the individual key entries by making
comparisons with an extensive
dictionary.
Activate, deactivate T9
§Options§ First select T9 input, then
Select Input language
Select the language in which you
want to compose the message.
§Options§ Open text menu, select
Create a word using T9
Since the display changes as you
proceed it is best if you finish a word
without looking at the display.
You simply press the keys where the
relevant letter is located once only.
For "hotel" for example type:
select T9 preferred.
Activate T9 and confirm
^
with §Select§.
T9 input, then select Input
language.
§Select§ Confirm. The new lan-
guage is set.
4 6 8 3 5
Press. A blank ends a
1
word.
Press repeatedly before
*
the word for lowercase
letters/uppercase letters, digits or special
characters.
Do not use special characters such
as Ä but write the standard character, e.g. A. T9 will do the rest for you
see p. 33.
Press briefly: Switch between
*
uppercase, lowercase letters
and digits.
Hold down: Set input language and text mode.
Blank. Ends a word.
1
Full stop. Ends a word when a
0
blank follows. Acts as a wildcard character for an apostrophe/hyphen in the word:
e.g. §provider.s§ = provider’s.
Go to the right. Ends a word.
N
Deactivate T9 temporarily and
#
activate it again.
Special characters
Press key repeatedly until the character is
displayed. To write special characters after
numbers (e.g. 5 £), switch to the letter mode
first:
*
¤
¥
1
Blank
1
.,?!0+-:¿
0
¡“’;_
* / ( ) < = > % ~
*
#@\&§
#
$
£
€
Γ ∆ Θ Λ
ΞΠΣΦΨΩ
Page 33

32
Message (SMS)
Display in the uppermost line:
T9 Abc SMS 1 739
We start at 8 a.m.
T9 active.
T
abc/Abc/123 Lowercase/uppercase let-
9
ters or digits.
SMS 1 Number of the required SMS
messages.
739 Number of characters still
available.
T9® Text Input is licensed under one or more of
the following: U.S. Pat. Nos. 5,818,437,
5,953,541, 5,187,480, 5,945,928, and 6,011,554;
Canadian Pat. No. 1,331,057;
United Kingdom Pat. No. 2238414B;
Hong Kong Standard Pat. No. HK0940329;
Republic of Singapore Pat. No. 51383;
Euro.Pat. No. 0 842 463 (96927260.8)
DE/DK, FI, FR, IT, NL, PT, ES, SE, GB;
and additional patents are pending worldwide.
Page 34

Message (SMS)
33
T9 word suggestions
If several options are found in the
dictionary for a key sequence
(a word), the most probable is displayed first. If the word you mean
has not been recognised, the next
suggestion from T9 may be correct.
The word must be §highlighted§. Then
press. The displayed
:
word is replaced with a
different word. If this
word is also incorrect,
press again. Repeat until
:
the correct word is
displayed.
If the word you want is not in the dictionary, it may be written without T9
or added to the dictionary.
T9 Abc SMS 1 748
At 8 we are ___
Spell
§Spell§ Select.
The last suggestion is deleted and
the word may now be entered without T9 support. Press Save to add it
automatically to the dictionary.
Load other input languages:
www.my-siemens.com/t9
:
Correct a word
Words cre ate d using T9:
MN
Within a " T9 word " individual letters may
not be edited without cancelling T9 first.
In most cases it is better to rewrite the complete word.
Words not created using T9:
MN
Move word by word to
the left/right until the
required word is
highlighted.
Scroll through the T9
:
word suggestions again.
§Delete§ Deletes the letter on the
left of the cursor and dis-
plays the new possible
word!
Move character by character to the left/right.
§Delete§ Deletes the letter on the
left of the cursor.
Symbols are inserted at
J
the cursor position.
Page 35

34
Message (SMS)
Setup
An SMS profile (maximum 5) defines
the transmission characteristics of
an SMS.
The presetting depends on the SIM
card inserted.
§Menu§ÎMessagesÎSetup
You can select a profile from the list
of available profiles. To activate it:
§Activate§ Press.
Setup menu
§Options§
Activate Use the profile selected.
Change
settings
Rename Rename the profile.
Service centre
Enter or change the phone numbers
of the service centre as supplied by
the service provider.
Recipient
Enter the standard recipient for this
transmission profile or select from
the Phonebook.
Open menu.
Change profile, see options
below.
Message type
Manual The message type is requested
Standard
text
Fax Transmission via SMS.
E-mail Transmission via SMS.
New You may need to obtain the re-
Validity period
Select the period in which the
service centre tries to deliver the
message:
Manual, 1 hour, 12 hours, 1 week,
Maximum *, New
* Maximum period that the service provider
permits.
Status report
You are given confirmation of the
successful or unsuccessful delivery
of a sent message. This service may
be subject to a charge.
Direct reply
The reply to your message is
handled via your service centre
when this function is activated
(for information please contact
your service provider).
for each message.
Normal SMS message.
quired code number from your
service provider.
~
~
Page 36

Surf & fun
35
Internet (WAP)
Get the latest WAP information from
the Internet that is specifically adapted to the display options of your
phone. Internet access may require
registration with the service
provider.
Internet access
§Menu§ÎSurf & funÎInternet
You can set the Internet access profile (see Start with... p. 36).
The start menu appears, e.g.:
†
Start menu
1
Homepage
2
Bookmarks
Resume
3
Select the required
N
function
§Select§ Confirm.
9
You can now surf the Internet ...
Hold down to end the
S
connection.
¥ Offline
The current display is in the upper right
corner.
¦ Online
¤
~
Select
no network
Start menu
Homepage The connection to the Inter-
Bookmarks Display up to 10 URLs stored
Resume Call up recently visited pages
Profiles Set up to 5 access profiles
Exit browser Close the browser and clear
net provider’s portal is established (may be set/preset by
the provider).
in the phone for fast access
~
(not supported by all
providers). For how to use
see p. 39.
that are still in the memory.
(p. 37).
Select New entry to enter a
new profile.
down the connection.
Example: Homepage
The soft keys may be assigned functions that are controlled online from
the home page of your service provider such as "links" or "menus".
News
Sportinfo
Weather
Link
The contents of options menus are
also variable.
Page 37

36
Surf & fun
Browser menu
Menu access is only possible when
a WAP page is displayed (online or
offline):
Press to start the
A
browser menu.
or
Select and confirm
M
Start menu.
Homepage The first WAP Internet page
Bookmarks Display up to 10 URLs stored
Resume Call up recently visited pages
Go to URL Enter URL for directly ac-
Show URL Show the Internet address of
Reload The page is reloaded.
Disconnect Close the browser and clear
More ... See below.
Exit browser Close the browser and clear
that is displayed after connection is established (may
be set/preset by the service
provider).
in the phone for fast access
~
(not supported by all Service
Providers). For how to use
see p. 39.
that are still in memory.
cessing an Internet address
(e.g.
wap.my-siemens.com).
the current page.
down the connection.
down the connection.
More ...
WAP Profiles
Reset Delete the pages last visited
Setup Font size
Inbox Inbox for incoming
Save bitmap Bitmap viewer opens for edit-
About Openwave
Set up to 5 access profiles
(p. 37).
(cache).
Protocol parameters
•Push
• Push can force online
• Timeout for unanswered
network requests
Security
• Connection prompt
• Secure prompt
• Current certificate
• CA certificates
• Private Key PINs
•Encryption
Start with...
•Start menu
•Browser menu
• Homepage
•Resume
• Bookmarks
messages.
ing the picture.
Display the browser version.
Page 38

Surf & fun
37
Setup
Preparation of the phone for Internet
access depends on the service provider currently used:
• If the settings have already been
made by your service provider you
may begin immediately.
• If access profiles have already
been assigned by your service
provider select a profile and activate it (p. 38).
• The access profile must be set
and activated manually.
If necessary, check with your service
provider for details.
Profiles
You can set or change up to 5 access
profiles (may be barred by your service provider). The entries and functions may vary depending on your
service provider. You can change a
profile each time before accessing
the Internet (p. 38).
Profile settings
To create a new profile proceed as
follows:
§Menu§ÎSurf & funÎInternet
Î
Profiles
Select a profile.
N
§Change§
You may get further information on
the entries from your service
provider.
The entry card is
displayed.
Make your entries field
N
by field.
Profile name Name the profile or change it.
WAP
Parameters
CSD settings Dial-up no.:
* depending on service provider, enter
2nd IP address and 2nd port if nec.
IP address: *
Enter IP address.
Port: *
~
Enter port number.
Homepage:
Enter homepage (p. 35) if not
set by the service provider.
Linger time:
Enter time in seconds after
which a connection should be
terminated if no input or data
transfer takes place.
Enter ISP number.
Call type:
Select ISDN or Analogue.
Login name:
Enter login name.
Password:
Enter password (shown as a
series of asterisks).
§Save§ The settings are stored
and the profile list is
shown.
Page 39

38
Surf & fun
Activate profile
† Profiles
1 standard
2 * e-Commerce
Edit Select
Activate a profile to establish the
Internet connection:
§Menu§ÎSurf & funÎInternet
Î
Profiles
Select the required
N
profile.
§Select§ Press to activate. The
connection is established.
Your Internet browser is licensed by:
Special characters
(as with the SMS text editor)
Press 3 times for /
*
Press 3 times for @
#
Press for . (full stop)
0
Press repeatedly for :
0
Press repeatedly for ~
*
Operating instructions
Start with...
You can set what is to be displayed
after Internet access:
Open the browser
A
menu.
More ... Select.
Start with... Select, then select
Edit
The address of the home page is set
in the (access) profile. You can
change it in standby mode (if permitted by the service provider!):
§Menu§ÎSurf & funÎInternet
Select the profile, e.g.:
e-Commerce Select.
WAP Parameters/Homepage
from the list:
Start menu (p. 35)
Browser menu (p. 36)
Homepage
Resume (p. 36)
Bookmarks
Î
Profiles
§Edit§ The entry card is
displayed.
Select.
Enter new address.
J
Go to the end of the
entry card.
§Save§ Press.
Page 40

Surf & fun
39
Enter the Internet address (URL)
Menu access is possible as soon as
WAP pages are displayed (online or
offline).
Open the browser
A
menu.
Go to URL Select.
Enter URL and confirm.
J
The connection is
established.
Bookmarks
You can store a list of your favourite
Internet addresses (URLs) in the
phone depending on the service
provider:
Save
A
Bookmarks Select.
Online:
Add bookmark
Offline:
N
Menu§ Open menu.
Edit Open entry for editing, enter
Delete Delete the selected entry.
Delete all Delete all entries (no confir-
Open.
The current WAP address is added as a
bookmark.
Select the desired profile or (Empty).
or change name and URL,
and confirm. Press §Save§.
mation requested!).
~
§Go The selected call is set
up.
To use a favourite
Proceed as with "Save" then select
the stored bookmark in the list and
confirm. The connection is established.
Download
The WAP Browser allows you to
download content such as ringtones
and bitmaps to your A50. For download simply select the desired content and confirm your entry with
Depending on the content selected,
the corresponding management program is started automatically in your
phone after confirmation (e.g. Bitmap
viewer for Pictures).
You will find ring tones, operator bitmaps,
screen savers and other services for your
Siemens mobile telephone at:
www.my-siemens.com/city
This city portal (p. 70) also includes a list of
countries in which this service is available.
You will find a large selection of contents
that can be downloaded to your telephone
via WAP, such as ring tones or bitmaps for
your A50, at wap.my-siemens.com
9
.
Page 41

40
Surf & fun
Games
§Menu§ÎSurf & funÎGames
Select a game from the list and have
fun!
Game instructions
You will find special instructions for
each game in the option menu.
Key control
function depends
on the game
Select game
Î
§Options§ Provides tips on how to
play the game, shows
the saved scores and allows you to set the level
of difficulty.
§Start§ Start game.
1 3
2
4
5
7
8
or
use the keys
6
9
§Menu§ÎSurf & funÎGames
Î
Setup
Setup
You can activate and deactivate the
following functions for the games:
Sounds
You can switch the sounds for the
games on and off.
Illumination
You can switch off the display illumination to increase standby time.
Silent alert
You can switch the silent alert for the
games on and off.
You will find the games "Stack Attack" and
"Balloon Shooter" on your mobile phone.
English language instructions for
"Stack Attack" and "Balloon Shooter" can
be found at
www.my-siemens.com/a50
MN
and
KL
Page 42

Surf & fun
41
Bitmap viewer
Set logos and screensavers on your
phone according to your wishes.
Show Screensaver or Logo
Select Screensaver or
N
Logo.
§Load§ Graphic is shown.
Receive graphic.
A graphic can be transmitted to the
Bitmap viewer via SMS from a provider or downloaded via WAP.
A received graphic is indicated by a
symbol above the left soft key. By
pressing this key, the Bitmap viewer
is started and the graphic is displayed.
Store graphic.
Store current graphic in the Bitmap
viewer:
§Save§ Press.
Select Screensaver or
N
Logo.
§Save§ Press.
Bitmap viewer-Menu
§Options§ Open menu.
Save Store the current graphic on one
of the storage locations.
Send Send graphic via SMS. *
Load Load graphic to the Bitmap
viewer.
Discard The current graphic is
discarded.
Delete Delete a graphic from
Screensaver or Logo.
* Your A50 provides you with the option of sending a graphic or a screensaver via SMS.
You can find operator graphics at:
www.my-siemens.com/logos
See also City portal (p. 70).
Page 43

42
Surf & fun
Melodies
You can use this function to manage
your ring tones.
Load and play ring tones
§Menu§ÎAudioÎMelodies
Î
Melody manager
MN
Melodies-Menu
§Options§ Open menu.
Play Play the ring tones currently
Save Store ring tone under
Send Send ring tone via SMS
Load... Load ring tone from Individual 1
Discard Delete ring tone from the buffer.
Delete Delete ring tone from
Select memory location
Individual 1 to 4.
§Load§ Load melody to the buff-
er.
§Play§ Play melody.
loaded.
Individual 1 to 4.
(only Individual 1 to 4).
to 4.
Individual 1 to 4.
Receive and save ring tones
A melody is transferred to the buffer
via SMS/WAP. When a melody has
been received an icon appears above
the left so ft key.
Press soft key:
§Options§ Open menu.
Scroll to Save.
N
§Select§ Press.
MN
Ring tones are available at:
www.my-siemens.com/ringtones
Select memory location
Individual 1 to 4.
§Save§ Store melody.
Page 44

Voice message/Mailbox
43
Most service providers offer you an
external answering service. In this
mailbox, a caller may leave a voice
message for you
• if your phone is switched off or not
ready to receive,
• if you do not want to answer,
• if you are making a phone call
(and if Call waiting is not active,
p. 14).
If the voice mail service is not part of
your service provider's user package, you will need to register and the
settings must be made manually.
The following description may vary
slightly depending on the service
provider.
Setup
Your service provider supplies you
with two numbers:
Mailbox number
You can call this phone number to listen to the voice mails left for you.
To set it up :
§Menu§ Î Messages
Î
Voice message
Select phone number from the
Phonebook or dial/change it and confirm with §OK§.
~
Forwarding number
Calls are diverted to this phone
number. To set it up:
Î
§Menu§
Dial the number of the mailbox.
For further information on call divert,
see (p. 48).
Listen to
A new voice mail can be displayed as
follows:
or
or
Call your mailbox and play the message(s) back.
1
Outside your home network you may need a
different mailbox number and enter a password to access your mailbox.
Divert
Î
e.g. Unanswered
Î
Set
§OK§ Registration at the net-
work will be confirmed
after some seconds.
Icon plus beep
h
a text message announc-
©
es a new voice mail
you receive a call with an
automatic announcement.
Hold down (if necessary dial
the mailbox number once
only).
Confirm with §OK§ or Mailbox
depending on the service provider.
~
Page 45

44
Cell broadcast
Some service providers offer information services (info channels) such
as area codes, stock markets etc.
The information available depends
on the service provider. If reception
is activated, you receive messages
on the active topics in your
"Topic list".
§Menu§ÎMessages
Î
Cell broadcast
Receive CB
You can activate and deactivate the
CB service. If the CB service is activated, the operating time of the
phone will be reduced.
~
Read new CB
All unread CB messages are displayed.
MN
Scroll through the message line by line.
Topic list
You can add an unrestricted number
of topics to this personal list from the
topic index (see "Topic retrieval",
p. 45). You can preset 10 entries with
their channel number (ID) and, if necessary, name. Five topics can be active at one time.
New topic
New topic Select.
• If no topic index is available (see
"Topic retrieval", p. 45), enter a
topic with its channel number and
confirm with §OK§.
• If the topic index has already been
transmitted, select a topic and
confirm with §OK§.
Selection from a list
§Options§ Open the list menu.
If a topic is selected in the list, you
can have a look at it, activate/deactivate it, edit it and delete it.
Auto display
CB messages are displayed in
standby mode, longer messages are
automatically scrolled.
The automatic display can be set for
all messages or only new messages
or deactivated entirely.
To switch to "full page view"
automatically:
then press §Read CB§.
#
Page 46

Cell broadcast/SIM services
45
Topic index
The list of the topics currently provided by your service provider is displayed for you to choose from.
If none are displayed you must enter
the channel numbers (ID) manually
(see "Topic list", p. 44). Please contact your service provider for details.
~
CB languages
You can define whether you want to
receive Cell Broadcast messages only in a specific language or in all
languages.
Displays
^
_
©
ª
Highlighted phone numbers can be:
§Options§
Additional beep, see (p. 55),.
Topic activated.
Topic deactivated.
New messages received on
the topic.
Messages on the topic already
read.
dialled
A
or
stored in the Phonebook.
SIM services
Your service provider may offer special applications such as Mobile
Banking, stock market, etc. via the
SIM card.
If you have such a SIM card the SIM
services will appear at the top of the
main menu or directly above the left
soft key.
p
If there is more than one application
they are displayed in the "SIM services" menu.
Î
§Menu§
With the SIM services menu, your
phone is ready for the future and will
support additions to your service
provider’s user package. For further
information, please contact your
service provider.
(optional)
Icon of SIM services.
SIM serv
~
Page 47

46
Records
Your phone stores the phone numbers of calls for convenient redialling.
§Menu§ÎRecords
Select the required call
N
list and select the
number there.
Dial number
A
or
§View§ view information on the
phone number:
date, time.
The following call lists are available:
Missed calls
The phone numbers of calls that you
have not answered are recorded for
call back purposes.
Requirement:
The network used supports the
"Caller Identity" feature.
Calls received
All accepted calls are listed.
Requirement:
The network used supports the
"Caller Identity" feature.
~
~
Calls dialled
Access to the last ten phone numbers you dialled.
Fast access in standby mode.
A
Erase records
The contents of all call lists are
deleted.
Records-Menu
The call list menu can be called up if
an entry is highlighted.
§Options§ Open list menu.
You can edit an entry, delete it or
transfer a phone number to the
Phonebook.
View View entry.
Correct no. Load number into display and
Save no. to dSave entry in phonebook.
Delete Delete entry after confirmation.
Delete all Delete all entries from call list
MN
correct it there if necessary.
after confirmation.
Easy access to the call lists
from the standby mode.
Page 48

Duration/charges
47
You can display the charge details
and the duration of calls as you
speak, as well as setting a unit limit
for outgoing calls.
Display
Î
§Menu§
After you have made the charge detail settings, you can display the call
duration/charge details for the following call types or you can display the
credit balance.
Last call
All outgoing calls
All incom. calls
Remain. units
Select a call type.
When displayed, you can:
Records
Î
Duration/charges
§Select§ Display the data.
§Reset§ Clear display.
§OK§ End display.
Charge settings
§Menu§
Currency
(PIN 2 query)
Enter the currency in which the
charge details are to be shown.
Î
Records
Charge settings
Î
Personal rate
(PIN 2 query)
Enter the charges per unit/period.
A/c limit
(PIN 2 query)
Special SIM cards allow you or the
service provider to define a credit/
period after which the phone is
blocked for outgoing calls.
§Change§ Enter the number of
units and confirm
with §OK .
Then confirm the credit or reset the
counter. The display of Prepaid cards
may vary depending on the service
provider.
All calls
Switch between the displays.
Incoming calls
If your network supports charge
detail display, the current units are
displayed.
If you have set charge details per
unit, the costs incurred are
displayed.
Special registration may be necessary for this service.
Auto display
Call duration/charges are automatically displayed after each call.
~
~
~
~
Page 49

48
Divert
You can set the conditions for which
calls are diverted to your mailbox or
other numbers.
§Menu§ÎDivert
Set divert:
The most common condition for forwarding is:
Unanswered
§Menu§ÎDivert
Select Unanswered.
N
§Select§ Press.
Set Select.
Enter the phone number
J
to which a call will be diverted (if not done
already)
or
select the phone number
@
from the Phonebook or
from the §Mailbox§.
Confirm with:
After a short pause, the
OK§
§
setting is confirmed by
the network.
Unanswered
This setting covers the most important conditions (see also below):
Not reachable, No reply, Busy
All calls
All calls are diverted.
Symbol in the top line on
o
the display in standby
mode.
Spec. divert
Not reachable
Divert if the phone is switched off or
out of range.
No reply
A call is only diverted after a short
delay (depends on the network).
The period can be set by the user to
a maximum of 30 seconds in 5 second intervals.
Busy
Divert if a call is in progress.
Exception: If Call waiting is activated
(p. 61), you will hear the call waiting tone
(p. 14) during a call.
Page 50

Divert
49
Status check
You can check the current divert status for all conditions.
After a short pause, the current information is transmitted by the network
and displayed.
^
_
?
Condition set.
Not set.
Display if status is unknown (on a new SIM card
for example).
Clear all
All set diversions are cleared.
To check or delete a certain condition:
First select the condition.
§Select§ Press.
Check status
or
Delete Select.
Note that the divert is stored in the network
and not in the phone (when the SIM card is
changed for example).
Reactivate divert
The last divert has been stored.
Proceed as with Set divert:
The stored number is displayed.
Confirm the number.
Edit phone number
Proceed as with "Set Divert". When the
stored number is displayed:
§Delete§ Delete the phone number.
Enter new number and confirm.
Page 51

50
Clock
§Menu§ÎClock
Î
select a function:
Alarm clock
Use this function to set a single time
for the alarm call. The alarm sounds
even when the phone is switched
off.
§On/off§ Switch the alarm on
and o ff.
Setting
§Change§ Display the set time and
MN
§Change§ Set the days for the alarm
date for the alarm call.
Set the time for the alarm
call (hh:mm).
Navigate to the days.
call.
Confirm settings.
OK§
§
Alarm clock active
½
(display in standby
mode).
Time/date
The clock must be set correctly once
at start-up.
§Change§ Press.
First date
J
(day/month/year),
then time (24 hours
including seconds).
Format date
Setting of the date format:
DD.MM.YYYY or MM/DD/YYYY
Auto display
The time display can be switched on
and off.
Auto phone off
The phone switches off each day at
the set time.
Activate:
§Clock§ Press.
Enter the time
J
(24 h clock).
§OK§ Confirm.
Deactivate:
§Manual§ Press.
§OK§ Confirm.
If the battery is removed for more than
about 30 seconds, the clock must be reset.
Page 52

Profiles
51
If a profile is used, several settings
are made with one function.
• Three profiles are standard with
default settings, they can be
changed however:
Normal envi., Quiet environ.,
Noisy environ.
• You may set two personal profiles
individually (<No Title>).
• The special profile Aircraft mode is
fixed and cannot be changed
(p. 52).
If the phone is used by several people, they can each activate their own
settings by selecting their personal
profile.
Activate
§Menu§ÎProfiles
Select default profile or a
N
personal profile.
§Activate§ Activate the profile.
Normal envi.
°
Quiet environ.
¯
Noisy environ.
°
Activate Options
Highlights the active
¯
profile.
Setup
Edit a default profile or create a new
personal profile:
Select profile.
N
§Options§ Open menu.
Change settings
The list of available functions is
displayed:
Ringer setting p. 55
Vol ume p. 55
Melodies p. 55
Call screening p. 55
Silent alert p. 55
Key tones p. 56
Info tones p. 56
Illumination p. 57
Big letters p. 57
Bitmap style p. 57
When you have finished setting a
function you return to the profile
menu where you can change a further setting.
Profiles-Menu
§Options§ Open menu.
Activate Activate profile.
Change set-
tings
Copy from Copy settings from another
Rename Rename personal profile.
Select.
Change profile settings.
profile.
Page 53

52
§Menu§ÎProfiles
Profiles
Aircraft mode
The alarm clock is deactivated. The
phone will be switched off when you
select this profile. It is not possible to
modify this profile.
Activate
Î
§Menu§
§Activate§ Activate the profile.
Normal operation
The next time you switch on the
phone and return to normal operation the default profile Normal envi.
will be activated.
Profiles
Scroll to Aircraft mode.
N
A security prompt must
be confirmed.
The phone switches it-
S
self off automatically.
Page 54

Fast access key
53
The left soft key and the keys 2 to 9
(speed dialling numbers) can each be
assigned an important phone
number or a function. The phone
number can then be dialled or the
function can be started at the touch
of a button.
A function may already have been programmed on the lef soft key by your service
provider (e.g. access to "
es"). It may not be possible to modify this
key assignment.
The soft key may sometimes be replaced
©
/h to access a new message.
with
Key assignments available:
• Internet ................................ p. 35
• Phone number ..................... p. 18
• Alarm clock .......................... p. 50
• New SMS ............................ p. 29
• Illumination ..........................p. 57
• Hide ID................................. p. 61
• Games ................................. p. 40
• Missed calls.........................p. 46
• Calls received ......................p. 46
• Inbox (SMS) ......................... p. 28
• Outbox (SMS) ...................... p. 28
• Call screening ......................p. 55
p
SIM servic-
Left soft key
The left soft key can be used for fast
access.
Change
< a
(Service provider)
02.12.2002 23:45
Internet Menu
§Internet§ Press briefly.
§Change§ Scroll to the application in
the list.
• Assign the new application (e.g.
New SMS) to the soft key.
• Special case Phone number. Pick
out a name from the Phonebook
(e.g. "Carol") to assign to the
soft key.
§Select§ Confirm setting.
Apply
The setting "Carol" is used here only
as an example.
§Carol§ Hold down.
Page 55

54
Fast access key
Speed dialling keys
Digit keys 2 to 9 can be used as
speed dialling numbers for fast
access. For available key assignments, see p. 53.
The following key is reserved:
= mailbox number (p. 43)
1
Change
In standby mode:
Press digit key (2-9).
J
If the key is not assigned:
§Set§ Press.
or
§New SMS§ Press briefly (if, for exam-
§Change§ Scroll to application in the
ple, New SMS is assigned).
list.
Special case phone num-
ber. Select a name from
the Phonebook for assignment to the key.
Special case Internet.
Scroll to an URL in the
bookmark list for assignment to the key.
§Select§ Confirm setting.
Apply
Select a stored phone number
or start a stored application
(e.g. Games).
In standby mode:
Press.
2
The assignment of digit key 2 is displayed instead of the left soft key,
e.g.:
§New SMS§ Hold down
or simply
hold down.
2
Page 56

Audio
55
You can set the tones that sound in
specific situations to suit your particular tastes.
§Menu§ÎAudio
Î
select a function:
Ringer setting
Activate/deactivate the ringer or reduce it to a short beep.
Beep is active.
)
Ringer is deactivated.
&
In standby mode: activate, deactivate also
with:
*
Hold down.
Volume
You can set the volume for each area.
Select the range:
N
Any call
Alarm clock
Messages
Cell broadcast
MN
If two separate phone numbers are registered for your phone you can set different
volumes for them (p. 59).
Set volume.
§OK§ Confirm.
Displays rising volume.
Ring tones
For the ranges/functions listed below you can choose from 20 ring
tones already stored in the phone
and from four own ring tones
(Individual 1 to 4).
Select range:
N
N
Compose/load individual ring tones with
SMS (p. 42).
Call screening
Only calls from numbers that are in
the Phonebook or in a predefined
group are signalled audibly or by the
trembler. Other calls are merely displayed.
If you do not accept these calls, they
are diverted to your mailbox (if set,
p. 48).
(
Calls
d
Group calls
Other calls
Alarm clock
Messages
Cell broadcast
Choose ring tone.
§OK§ Confirm.
Displayed when
activated.
~
Page 57

56
Audio
Silent alert
To avoid being disturbed by the ringer, you can activate the trembler instead. It can also be activated in addition to the ringer (e.g. in noisy
environments). The trembler is deactivated when the battery is being
charged.
Key tones
Set the acoustic key tone:
Click or Tone or Silent
Minute beep
During the call you hear a beep after
every minute as a reminder of the
time elapsed.
Info tones
Set service and alarm tones:
§Select§ On or Off.
Edit On and Extended.
Page 58

Setup
57
§Menu§ÎSetup
Î
Select a function.
Language
§Menu§ÎSetupÎLanguage
Set the language of the display texts.
When "automatic" is set the language of your service provider is
used. If a language that you do not
understand happens to be set, the
phone can be reset to the language
of your service provider with the following input:
#0000#
*
A
Display
§Menu§ÎSetupÎDisplay
Î
Select a function.
Own greeting
The greeting is displayed when you
switch on the phone.
§Edit§ Activate and deactivate.
Delete old message and
J
compose new message.
§OK§ Confirm changes.
Screensaver
The screensaver shows a graphic on
the display once a user-definable
time has elapsed. An incoming call
and any key press ends the function.
Receive and save screensaver as for
receive and save logo, see right.
You will find screensavers at:
www.my-siemens.com/screensaver
You have the following options:
• Activate/deactivate the function.
• Set style: Graphic, analogue clock
• Load graphic via Bitmap viewer.
• Test Screensaver.
• Set period after which the screensaver starts.
• Activate password query as a
security setting.
Illumination
The display illumination can be
switched on and off (switching it off
increases the standby time).
Big letters
You can choose between two font
sizes for the display.
Contrast
Setting of the display contrast.
Bitmap style
Select between two animations that
are shown in different situations, e.g.
when entering a PIN.
Page 59

58
Setup
§Menu§ÎSetup
Î
Select a function.
Status
§Menu§ÎSetupÎStatus
Î
Select a function.
Fact. settings
The phone is reset to the default values i.e. the factory settings (does not
apply to SIM card and network settings):
# 9 9 9 9 #
*
A
Phone identity
The phone identity number (IMEI) is
displayed. This information can be
helpful for customer service.
Fast search
When this function is active, network reconnection is speeded up
(standby time is reduced).
T9 input
§Menu§ÎSetupÎT9 input
Î
Select a function.
T9 preferred
Activate intelligent text entry or
deactivate it.
Security
The phone and SIM card are protected against misuse by several security codes and should be treated with
the same care as a cheque guarantee card.
§Menu§ÎSetupÎSecurity
Î
select a function:
PIN control, Change PIN, Change PIN2,
Change phonecode
(p. 11)
Babysitter
(Phonecode protected)
Only one number can be dialled. Hold
down the right soft key on the outside
right (p. 17).
This SIM only
(Phonecode protected)
Your phone is prevented from being
operated with a different SIM card.
Input language
Select language in which the message is to be composed.
Page 60

Setup
59
Network
§Menu§ÎSetupÎNetwork
select a function:
Line
This function is only displayed if it is
supported by your service provider.
Two independent phone numbers
must be registered on the phone.
Select
Select the currently used phone
number.
=
Special settings can be made for each
phone number (e.g. melody, call divert etc).
Switch to the required phone number first.
To switch the phone number/line (in standby
mode):
Lock line
(Phonecode protected)
You may limit usage to one phone
number.
Display the active phone
number.
Press.
0
§Line 1§ Press.
Î
~
Configuration
Network info
The list of GSM networks currently
available is shown.
Indicates forbidden serv-
k
ice providers (depending
on SIM card).
Choose netwrk
The network search is restarted. This
is useful if you are not on your home
network or want to register on a dif-
ferent network. The network info list
is rebuilt when Auto network is set.
Auto network
Activate or deactivate, see also
"Choose netwrk" above.
If "Automatic network" is activated,
the next network is dialled in the order of your "preferred service providers". Otherwise a different network
can be selected manually from the
list of available GSM networks.
Net operator
A list of all known GSM Networks
worldwide is displayed with the current codes.
Band selection
Select either GSM 900 and
GSM 1800.
~
Page 61

60
Setup
§Menu§ÎSetupÎNetwork
Î
select a function:
Pref. network
The service providers you prefer after your home service provider are
displayed in this list (e.g. if there are
several service providers that differ
in price).
If the signal strength of your preferred network is not strong enough when you switch
the phone on, the phone may log on to another network. This can change when the
telephone is next switched on or if you manually select another network (p. 59).
Your service provider is displayed.
§List§ Display list of preferred
networks.
Create new entry:
• Select empty line, press §Entry§,
then select an entry from the list
of service providers and confirm it.
Change/delete entry:
• Select an entry, press §Change§
then select another entry from the
list of service providers and confirm it.
or
press §Delete§.
Barrings
Barring restricts the use of your SIM
card (not supported by all service
providers). You need a 4 digit password that your service provider supplies you. You may need to be registered separately for each barring.
All outgoing
All outgoing calls except emergency
number 112 and 999 are barred.
Outgo internat
Only national calls can be made.
Out.int.x home
International calls are not permitted.
However you can make calls to your
home country when abroad.
All incoming
The phone is barred for all incoming
calls (the forwarding of all calls to the
mailbox offers a similar effect).
When roaming
You do not receive calls when you
are outside your home network. This
means that no charges are incurred
for incoming calls.
Status check
The following info can be displayed
after a status check:
^
_
?
Clear all
All barrings are cleared.
Barring set.
Barring not set.
Status unknown
(e.g. new SIM card).
~
Page 62

Setup
61
During a call
§Menu§ÎSetupÎDuring a call
Î
then select a function:
Call waiting
If you are registered for this service
you can check whether it is set, and
you can activate or deactivate it
(p. 14).
Hide ID
When you make a call, your number
may be displayed on the recipient's
display (depending on the service
providers).
To suppress this display, you may
activate the "Conceal ID" mode for
the next call or for all subsequent
calls. You may need to register separately with your service provider for
these functions.
~
~
Headset
§Menu§ÎSetup
If an original Siemens Headset
(p. 69) is used the profile is activated
automatically as soon as the headset
is plugged in.
User-definable settings
Auto answer
(factory default: off)
Calls are automatically accepted after a few seconds (except where the
ringing tone is switched off or set to
beep). You should therefore be wearing the headset.
Unwanted listening-in is possible!
Automatic setting
Accept call with the Call key or PTT
key (Push To Talk) when the key lock
is activated.
Automatic answer
If you fail to notice an incoming call there is
a risk that it may be overheard by others.
Page 63

62
Setup
Car Kit
§Menu§ÎSetupÎCar Kit
If an original Siemens Car Kit is used
the profile is activated automatically
as soon as the phone is inserted into
the cradle.
The Car Kit must be plugged into the cigarette lighter and not connected directly to
the battery.
User-definable settings
Auto answer
(factory default: off)
Calls are accepted automatically after a few seconds.
Unwanted listening-in is possible!
Indication on the display.
%
Switch between the phone and
Car Kit Portable
Switch to headset during a call
-
(if the phone is connected to
the Car Kit Portable).
Auto off
(factory default: 2 hours)
The phone is powered by the car's
power supply. The time between
switching off the ignition and deactivation of the phone can be adjusted.
Automatic settings
• Permanent illumination:
Switched on,
• Auto key lock: Switched off,
• Charge the phone battery,
• Automatically activate CarKit,
when the phone is inserted.
Page 64

Display symbols (selection)
63
Display indicators
< Strength of incoming signal.
e Charging completed.
b
Battery indicator.
All calls are diverted.
o
Ringer off.
&
Short ringer (beep) only.
)
Ringer only if caller is stored in the
(
Phonebook.
Alarm is set.
$
½
Alarm clock active.
Key lock active.
]
*!* Transmission unencrypted.
Phone numbers/names:
On the SIM card.
I
In the phone memory.
Z
On the SIM card
,
(PIN 2 protected).
No network access.
k
= Line 1 active (of 2 lines).
Function active.
^
Unknown network function.
?
Phonebook.
\
abc/Abc Indicates whether upper or lower-
case letters are active.
T9Text input with T9.
WAP Offline.
¥
WAP Online.
¦
WAP No network.
¤
Headset mode.
X
Loudspeaker Car Kit.
À
Auto talk feature on.
%
Bitmap.
»
Ring tone.
¾
Soft keys
©
Message received.
h
Voice mail received.
Unanswered call.
U
SIM memory full.
¨
Store in Phonebook.
?
Retrieve from Phonebook.
@
SIM services.
p
Switch Car Kit Portable.
-
T9 word selection.
:
Page 65

64
Questions & Answers
If you have any questions about using your phone, visit us at
www.my-siemens.com/customercare anytime.
In addition we have listed some frequently asked questions and answers below.
Question Possible causes Possible solution
Phone cannot
be switched on.
Standby time
too short.
Charging error
(charge icon not
displayed).
SIM error. SIM card not correctly inserted. Make sure that the SIM card is correctly inserted (p. 6).
On/Off key not pressed long
enough.
Flat battery. Charge battery. Check charging indicator in the display.
Battery contacts dirty. Clean contacts.
See also below under:
“charging error"
Speed search active. Deactivate speed search (p. 58).
Display illumination on. Switch off display illumination (p. 57).
Battery totally discharged. 1) Plug in charger cable.
Temperature out of range:
5 °C to 40 °C
Contact problem. Check power supply and connection to the phone.
No mains voltage. Plug in to a different socket or check voltage.
Wrong charger. Only use original Siemens accessories.
Battery fault. Replace battery.
SIM card contacts dirty. Clean the SIM card with a dry cloth.
SIM card with wrong voltage. Use 3 V SIM cards only.
SIM card damaged (e.g. broken). Inspect the damage. Return the SIM card to service
Press On/Off key for at least two seconds.
S
2) Wait up to 2 hours until the charge icon is displayed.
3) Charge battery as usual.
Make sure the ambient temperature is right, wait a
while, then recharge.
Check battery contacts and device interface, clean
them if necessary, then insert battery again.
provider.
Page 66

Questions & Answers
Question Possible causes Possible solution
No connection to
network.
Phone loses
network.
Calls not possible. 2nd line set. Set line 1
Certain uses of the
phone not possible.
Entries cannot be
made in Phonebook.
Voice mail does not
work.
SMS (text message)
І
flashes.
Function cannot be
set.
Charge counter
does not work.
Signal weak. Move higher, to a window or open space.
Outside GSM range. Check service provider coverage map.
SIM card not valid. Reclaim at the service provider.
New network not authorised. Try manual selection or select a different network
Network barring is set. Check barrings (p. 59).
Network overloaded. Try again later.
Signal too weak. Reconnection to another service provider is automatic
New SIM card inserted. Check for new restrictions.
Charge limit reached. Reset limit with PIN 2 (p. 58).
Credit used up. Load credit.
Call restrictions are set. Barrings may have been set by your service provider.
Phonebook is full. Delete entries in Phonebook (p. 20).
Call divert to the mailbox not
set.
SMS memory full. Delete messages (SMS) to make room (p. 28).
Not supported by your service provider or registration
required.
Charge pulse not transmitted. Contact your Service Provider.
(p. 59).
(p. 59). Switching the phone on and off may speed
this up.
=
(p. 59).
Check barrings (p. 59).
Set call divert to the mailbox (p. 43).
Contact your Service Provider.
65
Page 67

66
Questions & Answers
Question Possible causes Possible solution
Message cannot be
sent.
PIN error/
PIN 2 error.
Phone code error. Three wrong entries. Contact Siemens Service (p. 67).
Service provider code
error.
Too few/too many
menu entries.
Service provider does not support this
service.
Phone number of the service centre is
not set or is wrong.
SIM card contract does not support this
service.
Service centre overloaded. Repeat message.
Addressee does not have a compatible
phone.
Three wrong entries. Enter the PUK (MASTER PIN) provided with
No authorisation for this service. Contact your Service Provider.
Functions may have been added or removed by the service provider via the
SIM card.
Check with your Service Provider.
Set service centre (p. 34).
Contact your Service Provider.
Check.
the SIM card according to the instructions.
If the PUK (MASTER PIN) has been lost,
contact your service provider.
Check with your Service Provider.
Damage
Severe shock. Remove battery and SIM and insert them again. Do not dismantle the phone.
Phone became wet. Remove battery and SIM card. Dry immediately with cloth, do not heat.
Dry connector contacts thoroughly. Stand unit upright in an air current.
Do not dismantle the phone.
Reset settings to the factory default:
# 9 9 9 9 #
*
A
Page 68

Siemens Service
67
Simple, straightforward support for technical
and operational queries is available from our
online support service on the Internet:
www.my-siemens.com/customercare
or in the "Questions & Answers" section (p.
64) of this User Guide.
If repair work is necessary, please contact
one of our service centres:
Abu Dhabi ..........................................0 26 42 38 00
Argentina ...................................... 0 80 08 88 98 78
Australia...........................................18 00 62 24 14
Austria .............................................05 17 07 50 04
Bahrain.......................................................40 42 34
Bangladesh........................................ 0 17 52 74 47
Belgium..............................................0 78 15 22 21
Bosnia Herzegovina ........................... 0 33 27 66 49
Brazil ............................................. 0 80 07 07 12 48
Brunei....................................................02 43 08 01
Bulgaria................................................. 02 73 94 88
Cambodia.............................................. 12 80 05 00
Canada..........................................1 88 87 77 02 11
China............................................. 0 21 50 31 81 49
Croatia ...............................................0 16 10 53 81
Czech Republic................................. 02 33 03 27 27
Denmark ...............................................35 25 86 00
Dubai..................................................0 43 96 64 33
Egypt..................................................0 23 33 41 11
Estonia ..................................................06 30 47 97
Finland..............................................09 22 94 37 00
France .............................................. 01 56 38 42 00
Germany * ....................................0 18 05 33 32 26
Greece...........................................0 80 11 11 11 16
Hong Kong ............................................28 61 11 18
Hungary ...........................................06 14 71 24 44
Iceland ....................................................5 11 30 00
India ..........................................01 13 73 85 89 - 98
Indonesia ......................................0 21 46 82 60 81
Ireland.............................................. 18 50 77 72 77
Italy .................................................. 02 66 76 44 00
Ivory Coast............................................80 00 03 33
Jordan................................................0 64 39 86 42
Kenya.........................................................72 37 17
Kuwait.....................................................2 45 41 78
Latvia.......................................................7 50 11 14
Lebanon.................................................01 44 30 43
Libya.................................................02 13 50 28 82
Lithuania.............................................8 22 74 20 10
Luxembourg.......................................... 43 84 33 99
Macedonia ............................................02 13 14 84
Malaysia...........................................03 21 63 11 18
Malta......................................00 35 32 14 94 06 32
Mauritius.................................................2 11 62 13
Morocco ................................................22 66 92 32
Netherlands ..................................0 90 03 33 31 00
New Zealand....................................08 00 27 43 63
Norway..................................................22 70 84 00
Oman..........................................................79 10 12
Pakistan............................................02 15 66 22 00
Philippines ..........................................0 27 57 11 18
Poland...............................................08 01 30 00 30
Portugal..............................................8 00 85 32 04
Qatar .....................................................04 32 20 10
Romania .............................................0 12 04 60 00
Russia...............................................09 57 37 29 52
Saudi Arabia.......................................0 22 26 00 43
Serbia...............................................01 13 22 84 85
Singapore..............................................62 27 11 18
Slovak Republic................................02 59 68 22 66
Slovenia..............................................0 14 74 63 36
South Africa .....................................08 60 10 11 57
Spain ..................................................9 02 11 50 61
Sweden ..............................................0 87 50 99 11
Switzerland ......................................08 48 21 20 00
Taiwan..............................................02 25 18 65 04
Thailand..............................................0 22 68 11 18
Tunisia................................................0 71 86 19 02
Turkey............................................0 21 65 79 71 00
Ukraine..........................................8 80 05 01 00 00
United Arab Emirates.........................0 43 31 95 78
United Kingdom.............................0 87 05 33 44 11
USA ...............................................1 88 87 77 02 11
Vietnam.................................................45 63 22 44
Zimbabwe .............................................04 36 94 24
* 0.12 Euro/Minute
Page 69

68
Specifications/maintenance
Declaration of conformity
Siemens Information and Communication mobile hereby declares that
the phone described in this user
guide is in compliance with the
essential requirements and other
relevant provisions of European
Directive 1999/5/EC (R&TTE).
The declaration of conformity (DoC)
concerned has been signed.
Please call the company hotline if
you require a copy of the original.
Technical data
GSM class: 4 (2 Watt)
Frequency range: 880 - 960 MHz
GSM class: 1 (1 Watt)
Frequency range: 1.710 - 1.880 MHz
Weight: 97 g
Dimensions: 109 x 46 x 23 mm
(85 ccm)
Operating voltage: 3.6 Volt
Operating
temperature: - 10 °C to 55 °C
Standby time: 60 h - 250 h
Talk time: 100 min - 300 min
SIM card: 3.0 Volt
SAR: 0.98 W/kg*
*This applies to the phone together with the
front and back covers and keyboard supplied
with the phone.
Maintenance tips
• The SIM card should be treated
with the same care as a cheque
guarantee card. Do not bend or
scratch it or expose it to static
electricity.
• Clean the card with a damp cloth
or an anti-static wipe without
chemical cleaning agents.
• Protect the phone from moisture
and shocks. Do not expose your
phone to direct sunlight.
• Remove the battery if you are not
going to use the phone for extended periods of time (more than one
month).
• Quality declaration for battery
(p. 8).
Phone ID
You will need the following details if you
lose your phone or SIM card. Please enter
here the number of the SIM card
(on the card):
..............................................................
15-digit serial number of the phone
(under the battery):
..............................................................
Customer Service number
of the service provider:
..............................................................
Lost phone
If you lose your phone and/or SIM card,
contact your service provider immediately
to prevent misuse.
Page 70

Accessories
69
Basics
Li-Ion Battery (600mAh)
L36880-N4701-A112
Travel Charger
L36880-N4001-A103 (Euro)
L36880-N4001-A104 (UK)
Desk Top Charger
L36880-N4501-A101
Enables simultaneous charging of the phone
battery and a spare battery.
Headset PTT
L36880-N4001-A123
Car Charger
L36880-N4001-A108
Mobile Holder
L36880-N4501-A102
Mobile Holder Antenna
L36880-N4501-A103
Mobile holder for connecting an outdoor an-
tenna. Ideal in combination with the Headset
PTT or the Car Kit Portable.
Carry Set
L36880-N4701-A101
Features a belt clip and a clip for fastening
the phone to clothes or bags.
Basic Car Pack
L36880-N4501-A107
Allows handsfree talking and simultaneously
charges the mobile phone in the car.
CLIPit™ Covers
Exchangeable top and bottom shell.
• Silver Magenta L36880-N5111-A100
• Silver Lemon L36880-N5111-A101
• Silver Orange L36880-N5111-A102
• Silver Horizon L36880-N5111-A103
• Silver Forest L36880-N5111-A104
• Silver Earth L36880-N5111-A105
Carrying Cases
• Leather Holster L36880-N4001-A154
• Belt Case L36880-N4801-A116
• Neoprene Case L36880-N4001-A155
• Grip Case L36880-N4501-A132
• Loop Case L36880-N4501-A133
• Leather Case L36880-N4501-A131
• Shoulder Bag L36880-N4001-A149
You will find the my-CLIPit™ service, for
personalising the front and back of your A50
with your own photos for example, at:
www.my-siemens.com/my-clipit
Car Solutions
Car Kit Portable
L36880-N3015-A117
Hands-free kit with integrated loudspeaker
and microphone and auto talk feature.
Simply plug into the cigarette lighter socket.
Ideal for mobility between vehicles.
Products can be obtained in specialist shops.
Visit our online shop under:
Original Siemens accessories
www.siemens.com/
mobilestore
Page 71

70
Personalisation
The A50 offers you numerous options for personalisation, i.e. individual configuration to suit your own
specific tastes. For example you can
have operator graphics as bitmaps *
or screensavers sent via SMS to your
mobile phone. SMS can also be used
to send sounds as ring tones to your
A50.
The Siemens City Portal offers numerous ring tones, screensavers and
operator bitmaps*.
You will find the City Portal in the
Internet under:
www.my-siemens.com/city
The portal also includes a list of
countries where this service is available.
The following pages in the User
Guide describe the relevant download process:
Ring tones ............................ p. 55
Screensaver.......................... p. 57
Operator bitmaps* ............... p. 57
* An operator bitmap is a graphic
which can be loaded into the display
of the mobile telephone in place of
the network operator designation
and will appear there permanently.
This graphic is however linked to the
network of the operator concerned
and is not usually displayed during
roaming (e.g. when you are logged
on abroad to the network of another
provider).
In addition you can choose another
colour for the top or bottom cover or
even use a personal photo in JPEG
format to make your A50 unique.
To make it easier for you to do this,
you can choose one of a number of
templates that best suits your requirements. Naturally you can also
create the front and back of your mobile telephone entirely as you wish.
If you want to load another dictionary
(T9 language version) to make it easier to write SMS messages in another language, you will find a large
choice of dictionaries for downloading via the internet as well as the relevant installation notes at:
www.my-siemens.com/t9
Page 72

SAR (European Union)
71
THIS PHONE MEETS THE EU
REQUIREMENTS FOR EXPOSURE
TO RADIO WAVES.
Your mobile phone A50 is a radio
transmitter and receiver. It is designed and manufactured not to exceed the limits for exposure to radio
frequency (RF) energy recommended by The Council of the European
Union. These limits are part of comprehensive guidelines and establish
permitted levels of RF energy for the
general population. The guidelines
were developed by independent scientific organisations through periodic and thorough evaluation of scientific studies. The limits include a
substantial safety margin designed
to assure the safety of all persons,
regardless of age and health.
The exposure standard for mobile
phones employs a unit of measurement known as the Specific Absorption Rate, or SAR. The SAR limit recommended by The Council of the
European Union is 2.0 W/kg.* Tests
for SAR have been conducted using
standard operating positions with
the phone transmitting at its highest
certified power level in all tested frequency bands. Although the SAR is
determined at the highest certified
power level, the actual SAR level of
the phone while operating can be
well below the maximum value. This
is because the phone is designed to
operate at multiple power levels so
as to use only the power required to
reach the network. In general, the
closer you are to a base station antenna, the lower the power output.
Before a phone model is available for
sale to the public, compliance with
the European R&TTE directive must
be shown. This directive includes as
one essential requirement the protection of the health and the safety
for the user and any other person.
The highest SAR value for this model
phone A50 when tested for compliance against the standard was
0.98 W/kg. While there may be dif-
ferences between the SAR levels of
various phones and at various positions, they all meet the EU requirements for RF exposure.
* The SAR limit for mobile phones used by the
public is 2.0 watts/kilogram (W/kg) averaged
over ten grams of tissue. The limit incorporates a substantial margin of safety to give
additional protection for the public and to account for any variations in measurements.
SAR values may vary depending on national
reporting requirements and the network
band. For SAR information in other regions
please look under product information at
www.my-siemens.com
Page 73

72
SAR (international)
THIS PHONE MEETS
REQUIREMENTS FOR EXPOSURE
TO RADIO WAVES.
Your mobile phone A50 is a radio
transmitter and receiver. It is designed and manufactured not to exceed the limits for exposure to radio
frequency (RF) recommended by
international guidelines (ICNIRP).
These limits are part of comprehensive guidelines and establish permitted levels of RF energy for the general population. The guidelines were
developed by independent scientific
organisations through periodic and
thorough evaluation of scientific
studies. The guidelines include a
substantial safety margin designed
to assure the safety of all persons,
regardless of age and health.
The exposure standard for mobile
phones employs a unit of measurement known as the Specific Absorption Rate, or SAR. The SAR limit stated in the international guidelines is
2.0 W/kg*. Tests for SAR are conducted using standard operating positions with the phone transmitting
at its highest certified power level in
all tested frequency bands. Although
the SAR is determined at the highest
certified power level, the actual SAR
of the phone while operating can be
well below the maximum value. This
is because the phone is designed to
operate at multiple power levels so
as to use only the power required to
reach the network. In general, the
closer you are to a base station, the
lower the power output of the
phone.
The highest SAR value for this model
phone A50 when tested for use at
the ear is 0.98 W/kg. While there
may be differences between the
SAR levels of various phones and at
various positions, they all meet the
relevant international guidelines for
RF exposure.
*
The SAR limit for mobile phones used by the
public is 2.0 watts/kilogram (W/kg) averaged
over ten grams of body tissue. The guidelines incorporate a substantial margin of
safety to give additional protection for the
public and to account for any variations in
measurements. SAR values may vary depending on national reporting requirements
and the network band. For SAR information
in other regions please look under product
information at
www.my-siemens.com
Page 74

Index
73
A
Accessories ............................... 69
Aircraft mode ............................. 52
Alarm clock ................................ 50
All calls (divert) .......................... 48
All incoming calls ....................... 47
All outgoing calls ....................... 47
Allow only
Answering service (external) ..... 43
Audio ......................................... 55
Auto answer (in the car) ............ 61
Auto display (CB) ....................... 44
Auto display (time/date) ............. 50
Auto network ............................. 59
Auto redial ................................. 13
Automatic switch off
(telephone) ................................ 50
............................. 58
d
B
Babysitter ............................ 17, 58
Balloon Shooter (Game) ............ 40
Band selection ........................... 59
Beep, ringer ............................... 55
Big letters .................................. 57
Bitmap style .............................. 57
Bitmap viewer ........................... 41
Bitmap, load .............................. 41
Bottom cover ............................. 69
Browser (WAP) .......................... 36
C
Call
accept/end ............................. 12
charges .................................. 47
holding ................................... 15
menu ..................................... 16
not possible ........................... 10
reject ...................................... 14
several simultaneously .......... 14
Call back .................................... 13
Call divert ................................... 48
Call lists ..................................... 46
Call screening ............................ 55
Call to group .............................. 23
Call transfer ............................... 15
Call waiting ................................ 61
Calling faces .............................. 26
Calling symbol ........................... 26
Calls dialled (call list) .................. 46
Calls missed (call list) ................. 46
Calls received ............................ 46
Car kit accessories ..................... 62
Car solutions .............................. 69
Casing
changing .................................. 5
CB languages ............................. 45
CB services ................................ 44
Change phonecode .................... 58
Change PIN ................................ 58
Change PIN2 .............................. 58
Charge display ........................... 47
Charge settings
A/c limit .................................. 47
All calls ................................... 47
Auto display ........................... 47
Currency ................................ 47
Incoming calls ........................ 47
Personal rate .......................... 47
Charging (battery) ........................ 7
Choose melody .......................... 55
Choose network ........................ 59
City Portal .................................. 70
Clear all (divert) .......................... 49
CLIPit ......................................... 69
CLIPit™ Covers ...................... 5, 69
changing .................................. 5
Clock .......................................... 50
Codes ........................................ 11
Conceal ID ................................. 61
Conference ................................ 15
Confidential numbers .......... 11, 58
Page 75

74
Index
Configuration (network) ............. 59
Connection (2nd phone number) 59
Connection, select ..................... 59
Contrast (display) ....................... 57
Control codes (DTMF) ......... 16, 25
D
Date format ............................... 50
Display
big letters ............................... 57
contrast .................................. 57
settings .................................. 57
Display symbols ........................ 63
Divert ......................................... 48
Download ............................ 39, 70
DTMF tones .............................. 16
During a call (Setup) .................. 61
E
E-mail via SMS .......................... 34
Emergency call .......................... 10
Erase records ............................ 46
F
Factory settings ......................... 58
Fast access ................................ 53
Fast search (network) ................ 58
Fax via SMS ............................... 34
G
Games ....................................... 40
Getting started ............................ 6
Greeting ..................................... 57
H
Handset volume ........................ 14
Headset ..................................... 61
Holding a call ............................. 15
Home network .......................... 59
Homepage (Internet) ................. 35
I
Illumination ................................ 57
IMEI number .............................. 58
Information services (CB) .......... 44
Information tones ...................... 56
Input language ........................... 58
International prefix ..................... 12
Internet (WAP) ........................... 35
K
Key tone .................................... 56
L
Language (display) ..................... 57
Last call ...................................... 47
Limit (charge) ............................. 47
Loss of phone, SIM card ........... 68
M
Mailbox ...................................... 43
Maintenance of the phone ......... 68
Melody Manager ....................... 42
Melody, choose ......................... 55
Menu
control ...................................... 9
speed dialling ......................... 54
Message (SMS) ......................... 27
Microphone on/off ............... 16, 24
my-CLIPit™ ................................ 69
N
Net operator .............................. 59
Network
fast search ............................. 58
Page 76

Index
75
Network barring ......................... 60
All incoming ........................... 60
All outgoing ............................ 60
Clear all .................................. 60
Outgoing international ........... 60
Outgoing international
without home ........................ 60
Status check .......................... 60
When roaming ....................... 60
Network info. ............................. 59
New SMS .................................. 29
Noisy environ. (profile) ............... 51
Norm. environ. (profile) .............. 51
O
Operating times ........................... 7
Operator bitmaps ...................... 70
Outbox (SMS) ............................ 28
Overview (Phone) ........................ 4
Own numbers ........................... 18
P
Phone (Overview) ........................ 4
Phone identity number (IMEI) .... 58
Phone memory .......................... 24
Phonebook
call entry ................................ 20
group ..................................... 21
input aid ................................. 18
insert picture .......................... 26
new entry .............................. 18
store control code (DTMF) ..... 25
Phonecode ................................ 11
Picture & sound ......................... 30
PIN
change ................................... 11
enter ...................................... 10
error ....................................... 66
PIN 2 .......................................... 11
PIN control ................................. 58
Predefined text .......................... 30
Preferred network ..................... 60
Prefix ......................................... 12
Prevent new SIM ...................... 58
Profiles ...................................... 51
PUK ........................................... 11
Q
Quality declaration for battery ..... 8
Quiet environ. (profile) ............... 51
R
Read new CB ............................ 44
Record number ......................... 25
Redial ........................................ 13
Remain. units ............................ 47
Reminder ................................... 13
Ring tone ................................... 55
Ringer
deactivate .............................. 55
setting ................................... 55
S
Safety precautions ...................... 3
Screensaver .............................. 57
Second phone number .............. 59
Security ............................... 11, 59
Service centre ........................... 34
Setup
network ................................. 59
Setup (games) ........................... 40
Setup (profile) ............................ 51
Siemens Service ....................... 67
Silent alert ................................. 56
SIM services ....................... 10, 45
Page 77

76
Index
SMS
capacity .................................. 28
delivery confirmation ............. 28
insert picture .................... 29, 30
setup ...................................... 34
status report .......................... 34
T9 input .................................. 29
to group ................................. 22
Soft keys
function .................................... 9
set .......................................... 53
SOS ........................................... 10
Special characters ............... 19, 31
Specific divert
Busy ....................................... 48
No reply ................................. 48
Unreachable ........................... 48
Speed dialling numbers ............. 54
Stack Attack (Game) .................. 40
Standby mode ........................... 10
Standby time ............................... 7
Status ........................................ 58
Status check (divert) .................. 49
Swapping ................................... 14
Switching off phone .................. 10
Switching on phone ................... 10
Symbols ..................................... 63
T
T9
activate, deactivate ................ 29
text entry ............................... 31
T9 input ..................................... 58
T9 preferred ............................... 58
Technical data ............................ 68
Text entry ............................ 19, 31
Text message ............................ 27
Text message (SMS) ................. 27
Time/charge ............................... 47
Time/date .................................. 50
Top cover .................................. 69
Topic index (CB) ........................ 45
Topic list (CB) ............................ 44
Troubleshooting ........................ 64
U
Unanswered calls (divert) .......... 48
Upper-, lowercase ......... 19, 31, 32
V
Validity period (SMS) ................. 34
Voice message .......................... 43
Volume (ringer) .......................... 55
W
WAP .......................................... 35
Internet access ...................... 35
profiles ................................... 37
setup ..................................... 37
 Loading...