

Page 1
RT
1
Chapter
<P=001>
Installation
UX258H-ISUN
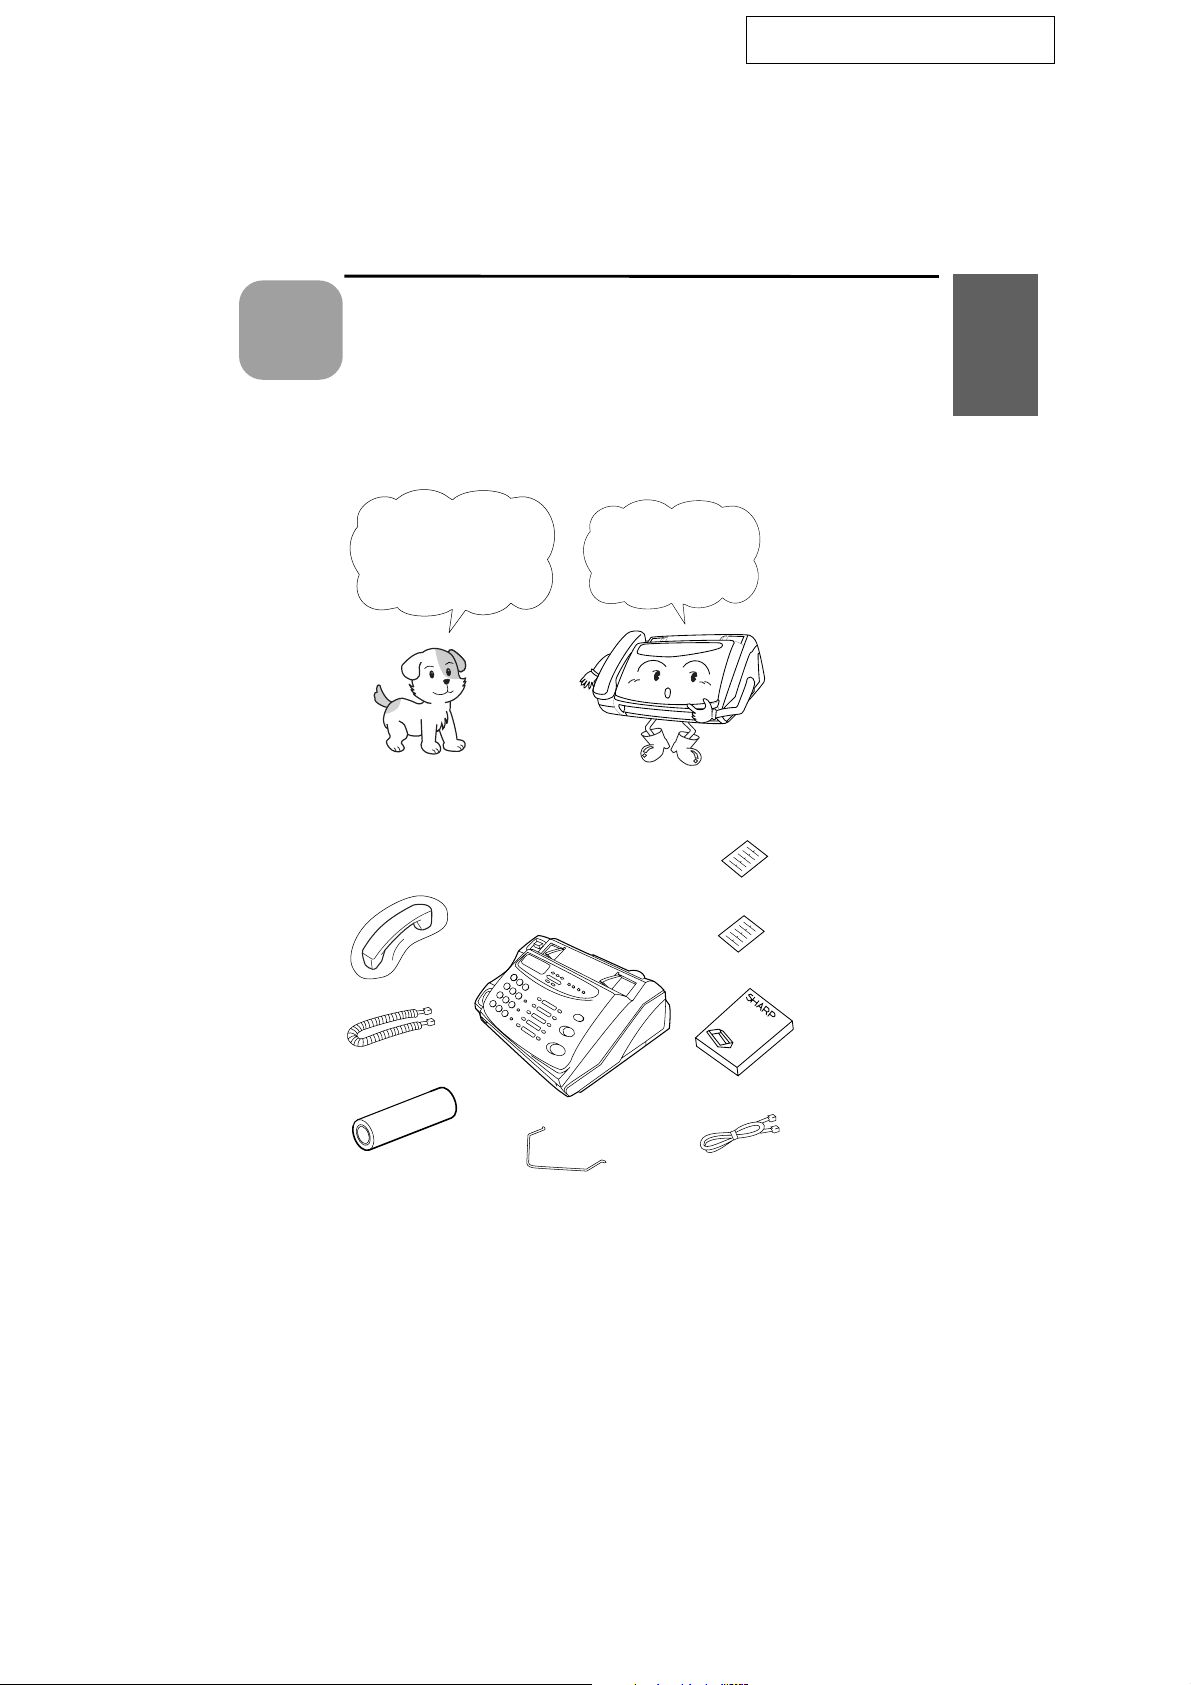
Unpacking Checklist
Before setting up,
make sure you have
all of the following
items.
Handset
1. Installation
If any are missing,
contact your dealer
or retailer.
Emergency
labels
Rapid key
labels
Handset
lead
Fax paper
(sample roll)
Operation
manual
Telephone
line cord
Paper guide
1
Page 2
DD
<P=001>
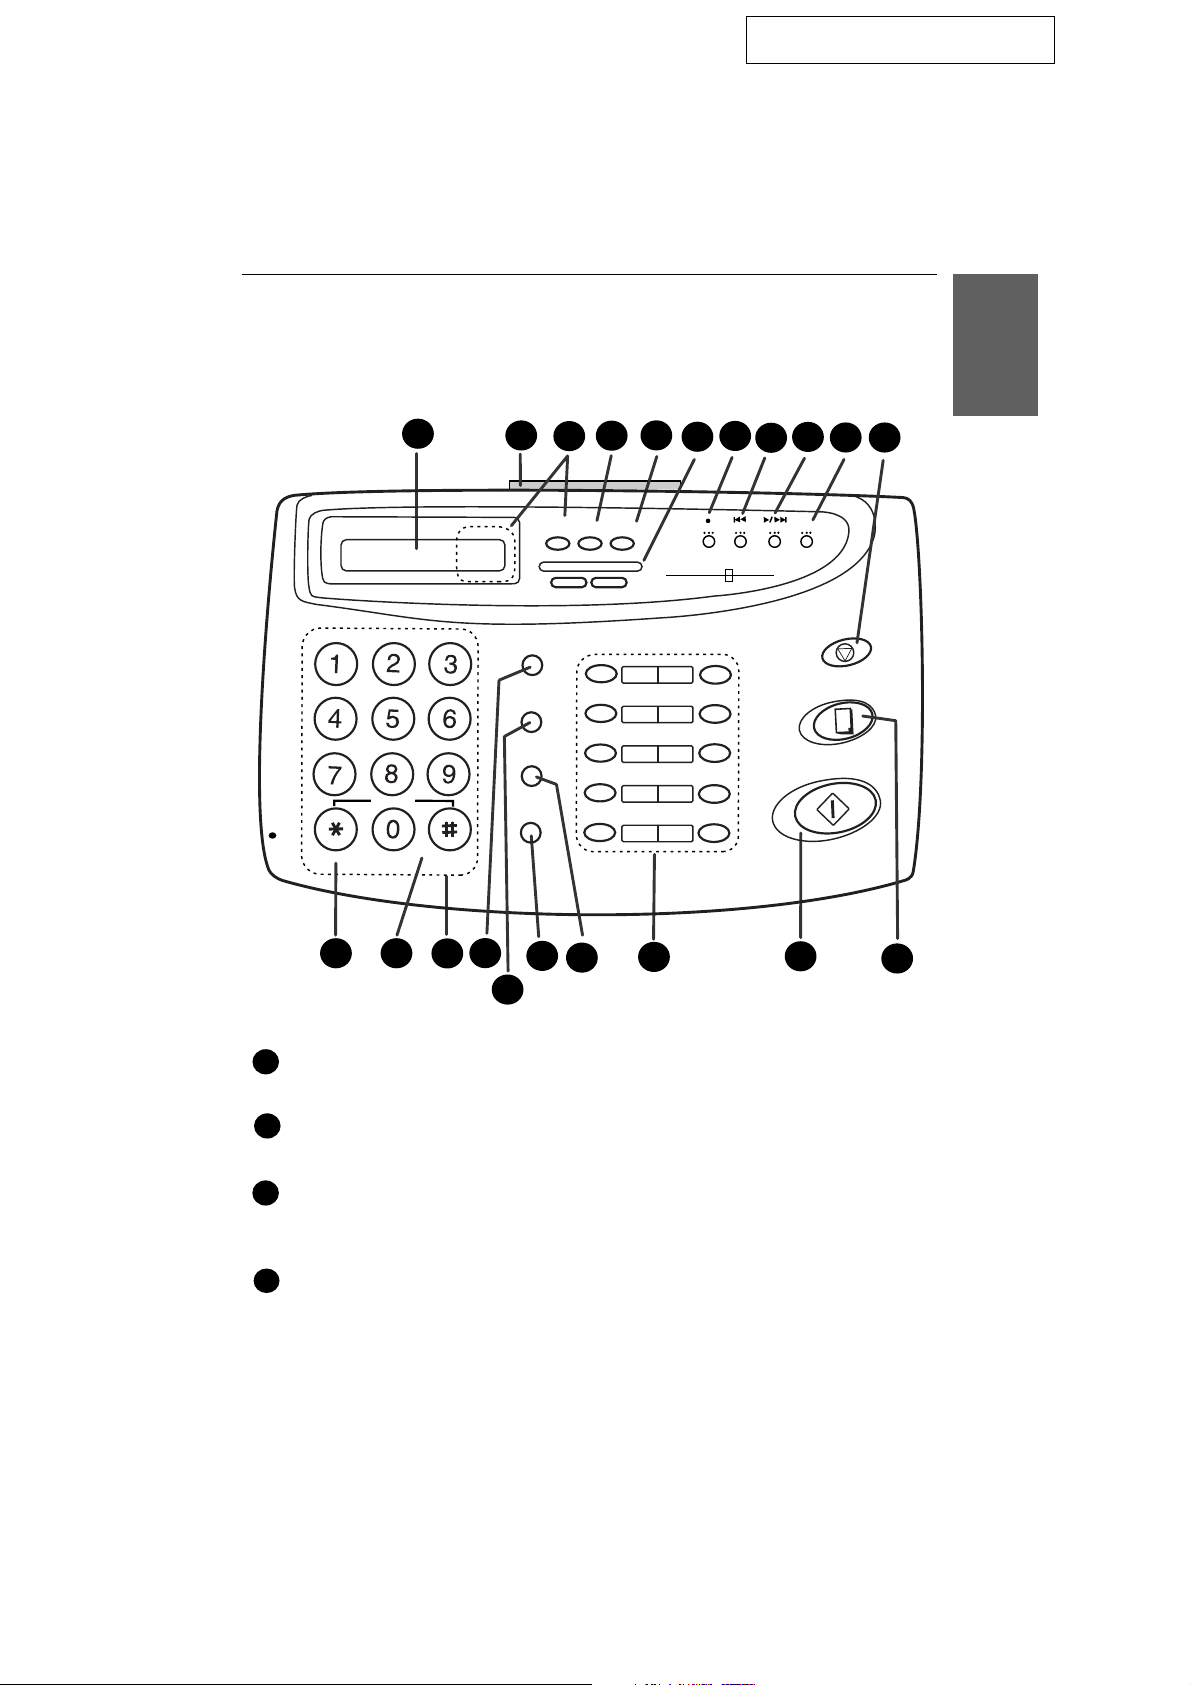
A Look at the Operation Panel
UX258H-IPOP
A Look at the Operation Panel
1. Installation
GHI
PQRS
MIC
SLOW PLAY FAST PLAY
12 13
ABC
JKL
TUV
SYMBOL
1
DEF
MNO
WXYZ
14
TEL/FAX
TEL FAX
15
2
A.M.
SPEED DIAL
SPEAKER
RECEPTION
MODE
DOWN VOLUME UP
REDIAL
SEARCH
R
17
3
18
5
4
RESOLUTIONFUNCTION
DIGITAL
01
02
03
04
06
05
08
07
10/POLL
09
19
7
6
REPEAT
REC
ANSWERING
SYSTEM
9
8
DELETE
PLAY/SKIP
COPY/HELP
START
20
STOP
10
11
21
16
Display
1
This displays messages and prompts during operation and programming.
2
PANEL RELEASE
Pull this release toward you to open the operation panel.
RECEPTION MODE key
3
Press this key to select the reception mode. An arrow in the display will point
to the currently selected reception mode.
4
FUNCTION key
Press this key to select various special functions.
2
Page 3

<P=002>
A Look at the Operation Panel
5
RESOLUTION key
Press this key to adjust the resolution and contrast before sending or
copying a document.
VOLUME keys
6
Press these keys to adjust the volume of the speaker when the SPEAKER
key has been pressed, or the volume of the ringer at all other times.
REC key
7
Press this key to record a phone conversation or a message.
REPEAT key
8
Press this key to repeat playback of a message.
PLAY/SKIP key
9
Press this key to play recorded messages. During playback, press it to skip
forward to the next message.
10
DELETE key
Press this key to erase recorded messages.
11
STOP key
Press this key to stop operations before they are completed.
SLOW PLAY key
12
Press this key to reduce the speed of message playback.
FAST PLAY key
13
Press this key to increase the speed of message playback.
Number keys
14
Use these keys to dial numbers, and enter numbers and letters during
number/name storing procedures.
SPEED DIAL key
15
Press this key to dial a 2-digit Speed Dial number.
REDIAL key
16
Press this key to automatically redial the last number dialled.
SPEAKER key
17
Press this key to hear the line and fax tones through the speaker before
sending a document, or dialling a voice number.
Note: This is not a speakerphone. You must pick up the handset to talk
with the other party.
3
Page 4

<P=003>
A Look at the Operation Panel
SEARCH/R key
18
Press this key to search for an automatic dialling number, or, if you are on a
P.B.X. extension, press this key to transfer or put the other party on hold.
Rapid Dial Keys
19
Press one of these keys to dial a fax or voice number automatically. (Note
that you must attach the Rapid Key labels.)
START/MEMORY key
20
Press this key to send or receive a document manually when off hook.
21
COPY/HELP key
When a document is in the feeder, press this key to make a copy. At any
other time, press this key to print out the Help List, a quick reference guide
to the operation of your fax.
1. Installation
4
Page 5
DD
<P=001>
Connections
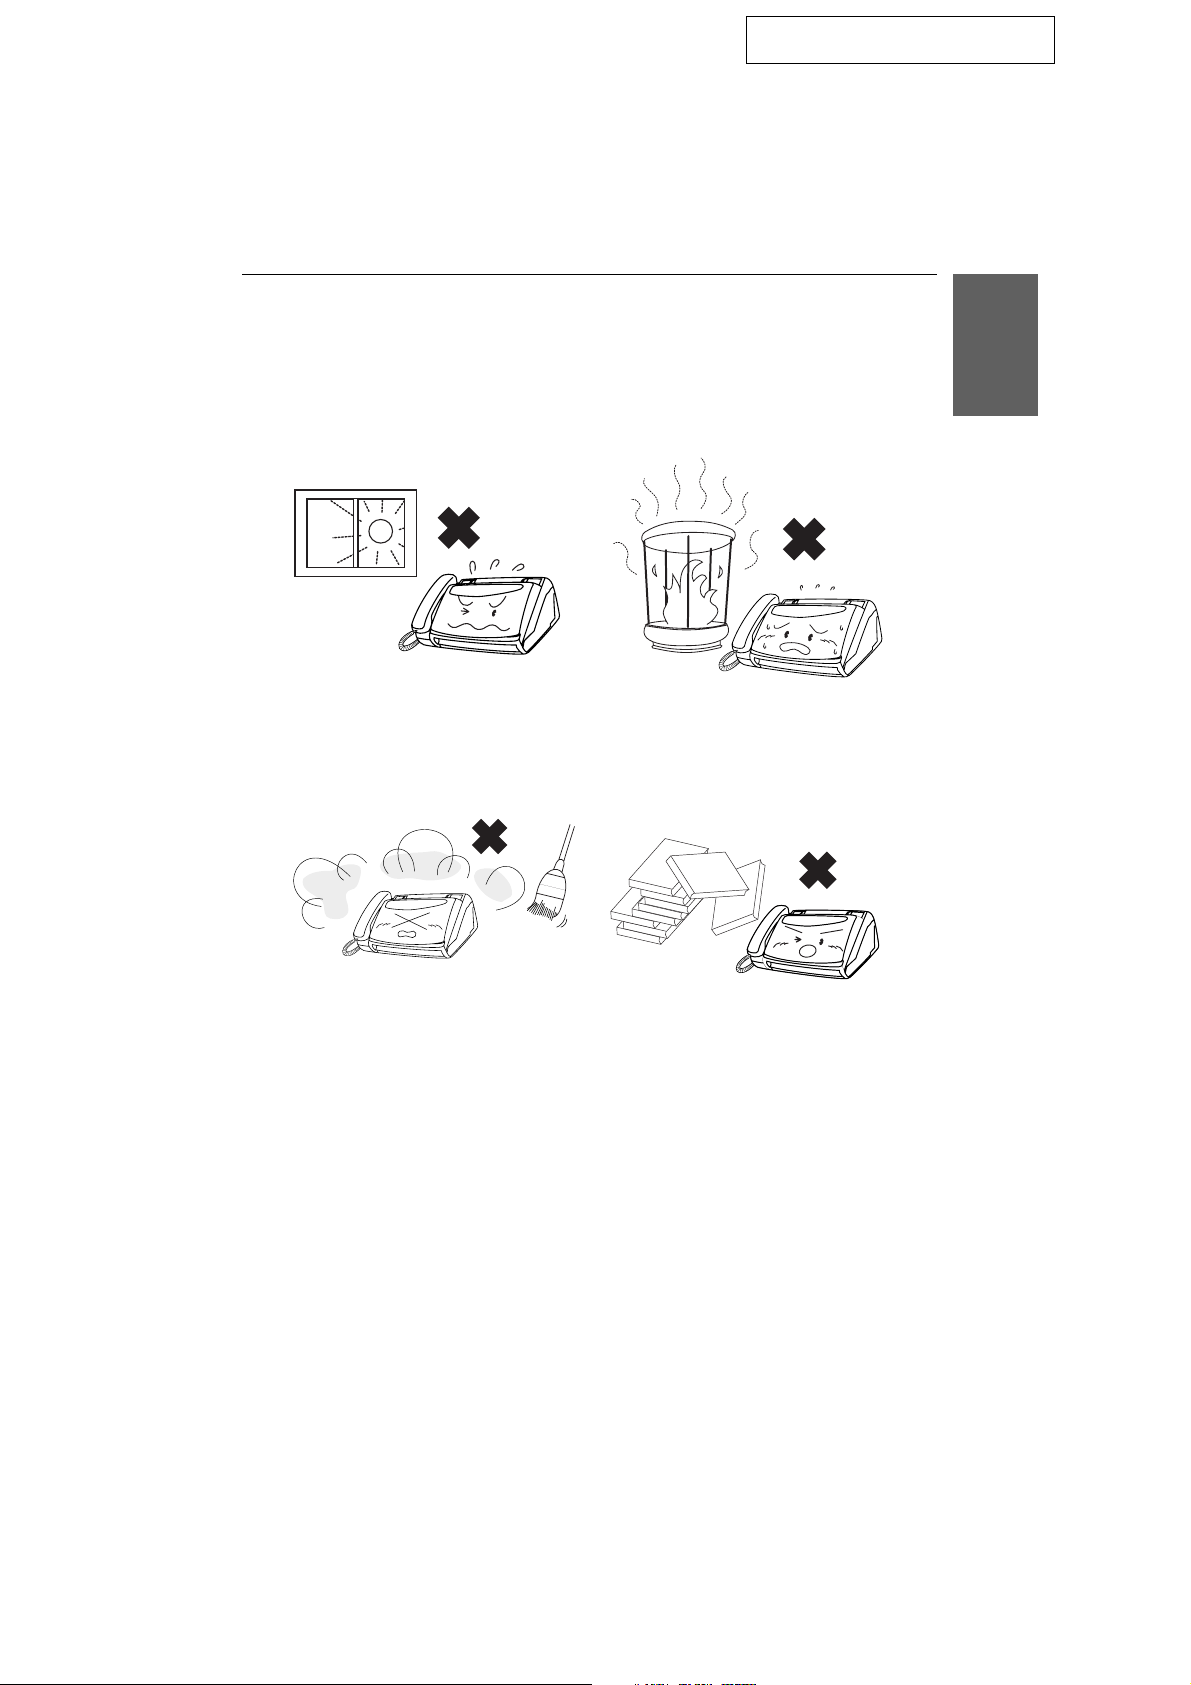
Points to keep in mind when setting up
UX108/178H-ISCO
Connections
1. Installation
Do not place the machine in direct
sunlight.
Keep dust away from the machine.
Do not place the machine near
heaters or air conditioners.
Keep the area around the machine
clear.
About condensation
If the machine is moved from a cold to a warm place, it is possible that
condensation may form on the scanning glass, preventing proper scanning of
documents for transmission. To remove the condensation, turn on the power
and wait approximately two hours before using the machine.
5
Page 6
<P=002>
Connections
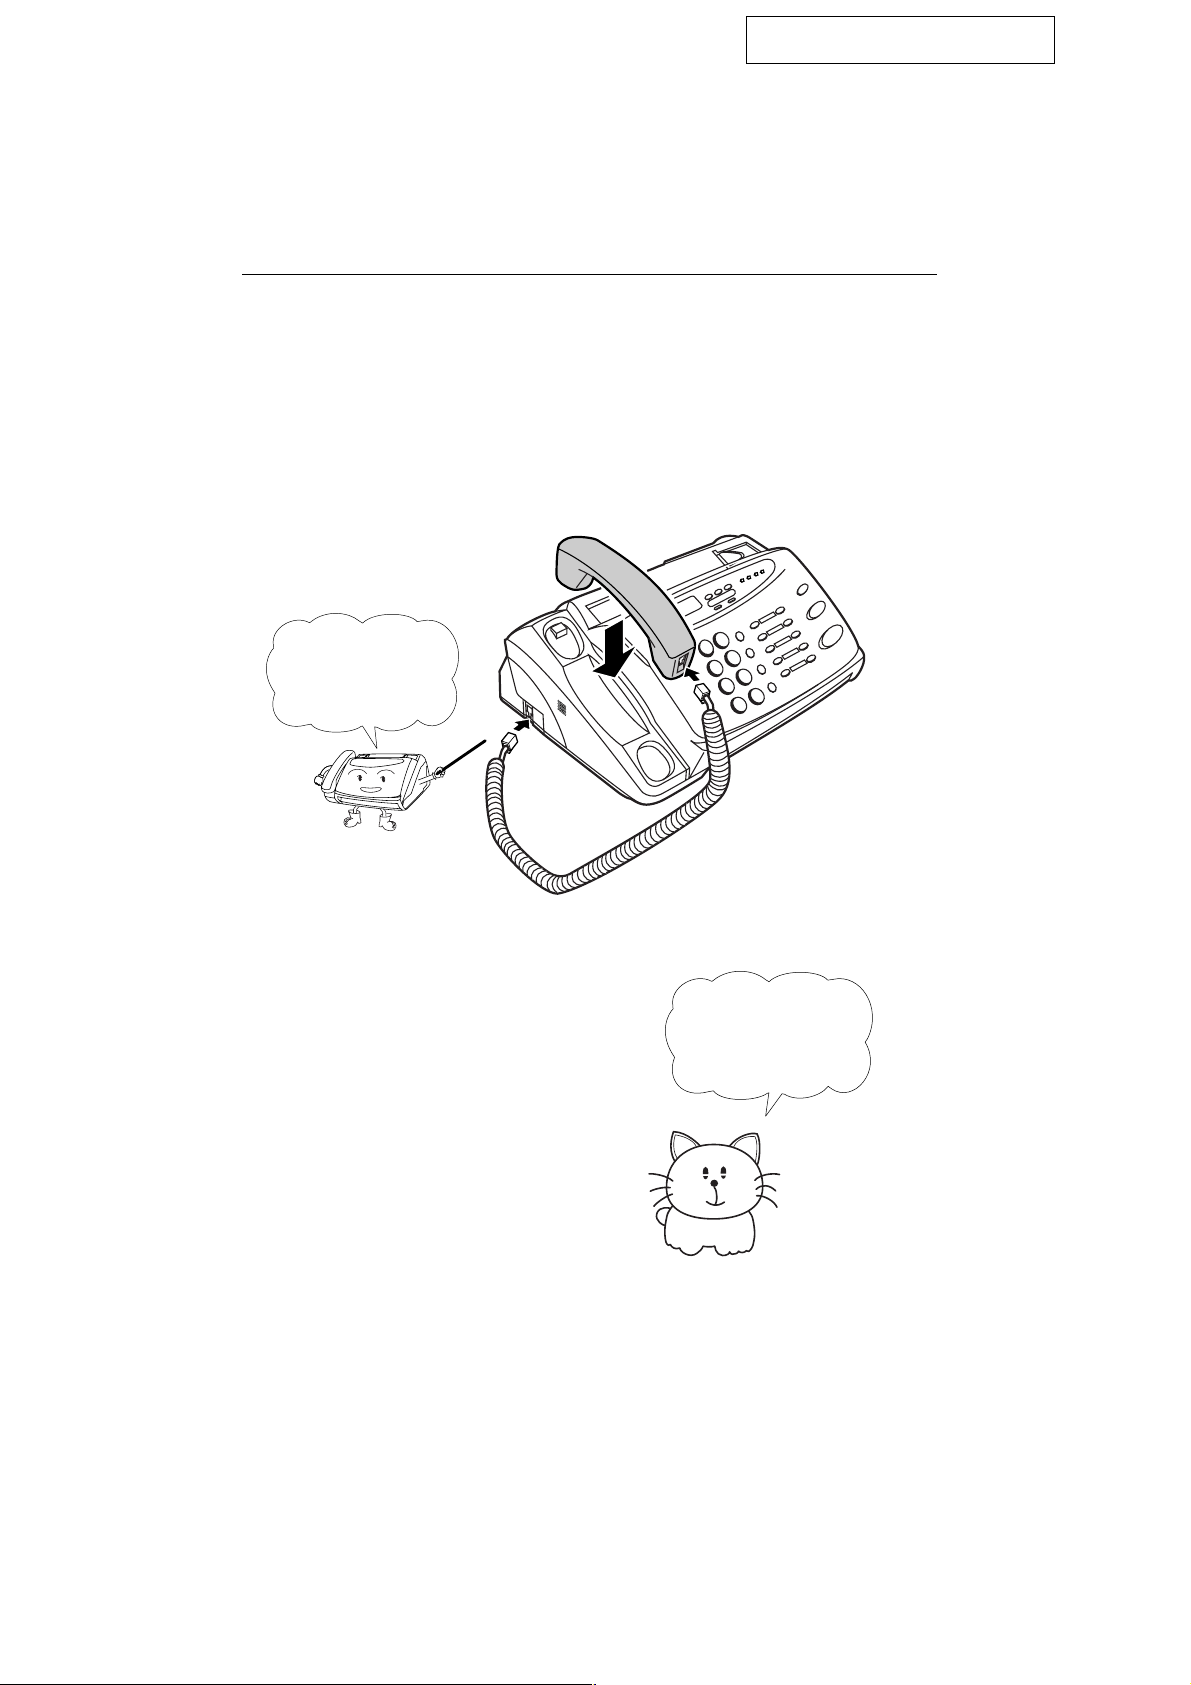
Handset
Connect the handset as shown and place it on the handset rest.
♦ The ends of the handset lead are identical, so they will go into either
socket.
UX108/178H-ISCO
Make sure the
handset cord goes
into the unmarked
socket on the side of
the machine!
Use the handset to
make ordinary phone
calls, or to transmit
and receive
documents manually.
6
Page 7
<P=003>
Power lead
Connections
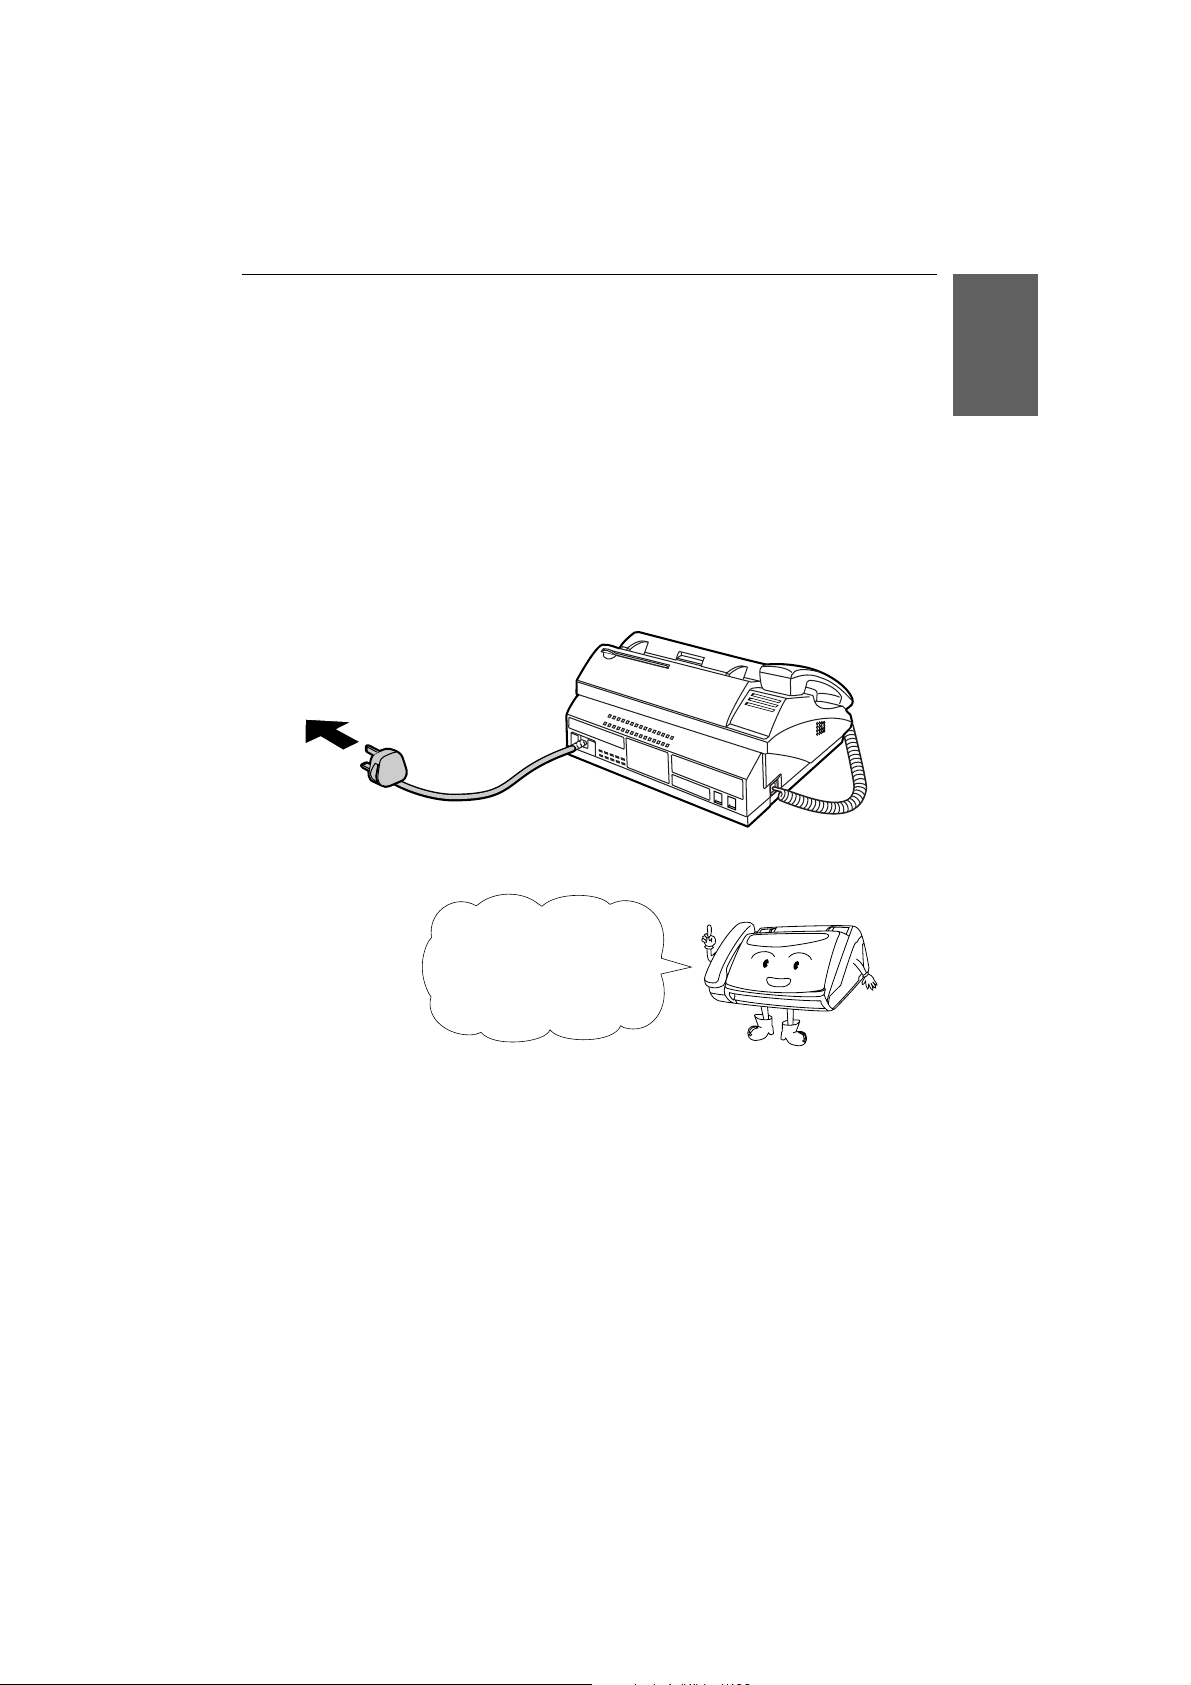
Plug the power lead into a 230 V, 50 Hz, earthed (3-prong) AC outlet.
♦ Caution: The mains outlet (socket outlet) should be installed near the
equipment and be easily accessable.
The machine does not have
a power on/off switch, so
the power is turned on and
off by simply plugging or
unplugging the power lead.
1. Installation
Note: If your area experiences a high incidence of lightning or power
surges, we recommend that you install surge protectors for the power and
telephone lines. Surge protectors can be purchased from your dealer or at
most telephone specialty stores.
7
Page 8

<P=004>
Connections
Telephone line cord
Insert one end of the telephone line cord into the TEL. LINE socket. Insert
the other end into a standard single-line telephone wall socket.
Be sure to insert the
telephone line cord into
the
TEL. LINE
Do not
TEL. SET
socket.
insert it into the
socket.
TEL.
SET
TEL.
LINE
Comments:
Your fax is set for tone dialling. If you are on a pulse dial line, you must reset the
••••
fax for pulse dialling. This is done by resetting Option Setting 8 as described in
Chapter 8, "Optional Settings".
If you are connecting the fax to a PBX, you may need to reset the fax to the
••••
appropriate recall mode for the PBX. This is done by setting Option Setting 14 as
described in Chapter 8
If you intend to use a computer fax modem on the same phone line, you must
••••
reset Option Setting 15 (Fax Signal Receive) to NO in order to prevent
transmission and reception errors. This procedure is described in Chapter 8,
"Option Settings".
Extension phones can be used to make and receive calls as normal with the fax
••••
connected. For details on receiving faxes from an extension phone, see Chapter 3,
"Receiving Documents".
The facsimile machine will not ring in response to incoming calls and cannot be
••••
used to make outgoing calls in the absence of mains power to the machine. For
this reason it is recommended that the fax is not left as the only telephone
instrument on line when in this state.
Your fax cannot be used on a key system without the necessary adaptation of the
••••
system. Please consult the installers of the system if this is required.
8
Page 9

<P=005>
Other devices
Connections
If desired, you can connect an extension telephone to the same line as your
fax. This can be used to make and receive calls as normal. For details on
initiating the receipt of faxes from an extension phone, see "Receiving
Dcouments" in Chapter 4.
Comments:
The safety status of this socket is TNV, and is provided for the connection of
••••
approved telephone equipment only. To ensure continued safety compliance,
do not connect any other equipment to this socket.
More than one extension telephone may be connected to the same line as the
••••
fax, provided that the total REN value does not exceed 4. This includes an
extension phone even if connected as shown above.
1. Installation
9
Page 10

DD
<P=001>
Loading the Fax Paper
Original Document Support
Rotate the original document support so that it points straight out.
UX258H-ISLP
Paper Guide
Attach the paper guide by inserting the ends into the holes in the front of the
fax as shown.
Loading the Fax Paper
Your fax machine
prints incoming faxes
on a special kind of
paper called thermal
paper.
Note: The power must be on (plug in the power cord) when loading fax
paper in the fax machine.
Pull the release marked PANEL RELEASE toward you and open the
1
operation panel.
The fax’s print head
creates text and
images by applying
heat to the thermal
paper.
10
Page 11

<P=002>
Remove the packing paper from the paper compartment.
2
UX107H-ISLP
Loading the Fax Paper
1. Installation
Remove cardboard
and tape
Unwrap the roll of fax paper and place it in the compartment.
3
•••• Important: The roll must be placed so that the leading edge of the paper
unrolls as shown. (The paper is only coated on one side for printing. If
the roll is placed backwards, the paper will come out blank after
printing.)
NO!
YES
11
Page 12

<P=003>
Loading the Fax Paper
Insert the leading edge of the paper into the paper inlet. Continue to push
4
the paper through the inlet until it comes out of the opening in the front of
the fax.
Paper inlet
The paper will reappear
here. Make sure it is aligned
between the arrows on
each side of the guide, and
then passes under the plate
and out the front of the fax.
Close the operation panel, making sure it clicks into place.
5
Press here to close
2
1
12
Click!
Page 13

<P=004>
Loading the Fax Paper
A short length of the fax paper will feed out and be cut off. (If this doesn’t
6
happen, repeat the loading procedure.)
Note: The fax has a built-in anti-curl mechanism that will help to reduce
paper curling problems. The anti-curl mechanism will be more effective at
the beginning of the paper roll and less effective towards the end.
Replacing the fax paper
1. Installation
When the paper runs out, OUT OF PAPER will appear in the display.
Reception and copying will no longer be possible. To replace the paper, first
take out the old roll, then load the new roll as described above.
To assure a long life for your fax and obtain the best reproduction quality, we
recommend that you use the following Sharp fax (thermal) paper which is
available from your dealer:
FO-40PR6 (R) THERMAL PAPER (50 m roll)
♦ The use of any other paper may result in poor copy quality and excessive
build-up of residue on the head. This is due to the different thermal
reactive characteristics of each manufacturer’s paper.
Handling fax paper
Do not unpack the paper until you are ready to use it. It may become
discoloured if:
♦ It is stored at high humidity or high temperature.
♦ It is exposed to direct sunlight.
♦ It comes in contact with glue, thinner, or a freshly copied blueprint.
♦ A rubber eraser or adhesive tape is used on it, or it is scratched.
13
Page 14

RT
<P=001>
Entering Your Name and Fax Number
Entering Your Name and Fax Number
UX178U-IPSN
Before you can begin using
your fax, you need to enter
your name and the telephone
number of your fax. You also
need to set the date and time.
3 key
# key
FUNCTION key
Once you enter this
information, it will
automatically appear at
the top of each fax page
you send.
STOP key
START/MEMORY
key
Press these keys:
1
The display will show:
Press the # key twice:
2
The display will show:
14
FUNCTION
3
ENTRY MODE
OWN NUMBER SET
Page 15

<P=002>
Entering Your Name and Number
Press the START/MEMORY key.
3
The display will show:
Enter your fax number by pressing the number keys. Up to 20 digits can be
4
entered.
•••• To insert a space between digits, press the # key. To insert a "+", press
the * key.
•••• If you make a mistake, press the SEARCH/R key to move the cursor
back to the mistake and then enter the correct number. The new number
will replace the old number.
Example:
Press START/MEMORY to enter the fax number in memory.
5
5
ENTER FAX #
55
START/MEMORY
START/MEMORY
1
2
3
4
1. Installation
The display will show:
Cursor: A dark square mark in the display that indica tes where a number or
letter will be entered.
ENTER YOUR NAME
15
Page 16

<P=003>
Entering Your Name and Fax Number
Enter your name by pressing the number keys as shown in the chart below.
6
Up to 24 characters can be entered.
•••• To enter two letters in succession that require the same key, press the
SPEAKER key after entering the first letter to advance the cursor.
Example: SHARP = 7 7 7 7 7 4 4 4 2 2 7 7 7 7 7 7
A =
B =
C =
D =
E =
F =
G =
H =
I =
ABC
J =
K =
L =
M =
N =
O =
P =
Q =
R =
S =
DEF
SPEED DIAL
SPEAKER
T =
U =
V =
W =
X =
Y =
Z =
SPACE =
Press this key to delete the
GHI
PQRS
JKL
TUV
SYMBOL
MNO
WXYZ
REDIAL
SEARCH
SPEAKER
R
letter highlighted by the cursor.
Press this key to change case.
Press this key to move the
cursor to the left.
Press this key to move the
cursor to the right.
Press either key repeatedly to select
one of the following symbols:
./!"#$%&’()+ +,-:;<=>?@[ ¥]^_p{|}→←
Press the START/MEMORY key to save your name in memory.
7
The display will show:
Press the STOP key to return to the date and time display.
8
SECURITY SELECT
16
START/MEMORY
STOP
Page 17

RT
<P=001>
Setting the Date and Time
The date and time appear
in the display and reports,
and are printed at the top
of every page you transmit.
UX108/178H-IPSD
Setting the Date and Time
1. Installation
* key
Press these keys:
1
The display will show:
Press the * key three times.
2
The display will show:
3 key
FUNCTION key
STOP key
START/MEMORY
key
FUNCTION
3
ENTRY MODE
DATE & TIME SET
Press the START/MEMORY key.
3
•••• The currently set date will appear in the display.
START/MEMORY
17
Page 18

<P=002>
Setting the Date and Time
Enter a two-digit number for the day ("01" to "31").
4
Example: the 5th
Enter a two-digit number for the month ("01" for January, "02" for
5
February, "12" for December, etc.).
•••• To correct a mistake, press the SPEED DIAL key to move the cursor
back to the mistake, and then enter the correct number.
Example: January
Enter the year (four digits).
6
Example: 1998
Enter a two-digit number for the hour ("00" to "23") and a two-digit
7
number for the minute ("00" to "59").
Example: 9:25
0
0
1
0
5
1
9
9
9
2
8
5
Press the START/MEMORY key to start the clock.
8
The display will show:
Press the STOP key to return to the date and time display.
9
18
STORE JUNK #
START/MEMORY
STOP
Page 19

DD
<P=001>
Selecting the Reception Mode
UX258H-IPRM
Selecting the Reception Mode
Your fax has four modes for receiving incoming calls and faxes:
TEL mode:
This is the most convenient mode for receiving phone calls. You can also
receive faxes; however, all calls must first be answered by picking up the
fax’s handset or an extension phone connected to the same line.
FAX mode:
Select this mode when you only want to receive faxes on your line. The fax
will automatically answer all calls and receive incoming faxes.
TEL/FAX mode:
This mode is convenient for receiving both faxes and voice calls. When a call
comes in, the fax will detect whether it is a voice call (including manually
dialled fax transmissions), or an automatically dialled fax. If it is a voice call,
the fax will make a special ringing sound to alert you to answer. If it is an
automatically dialled fax transmission, reception will begin automatically.
A.M. mode: Select this mode when you are out and want the built-in
answering machine to answer all calls. Voice messages will be recorded, and
fax messages will be received automatically.
Setting the reception mode
Press the RECEPTION MODE key until the arrow in the display points to
the desired mode.
1. Installation
RECEPTION MODE key
RECEPTION
MODE
18-JUN 13:38
18-JUN 13:38
18-JUN 13:38
18-JUN 13:38
TEL/FAX
TEL/FAX
TEL/FAX
TEL/FAX
TEL
A.M.
FAX
TEL
A.M.
FAX
TEL
A.M.
FAX
TEL
A.M.
FAX
Note: A.M. mode cannot be selected unless a general outgoing message has
been recorded as described in Chapter 2.
For more information on receiving faxes in TEL, TEL/FAX mode and FAX
mode, see Chapter 4, Receiv ing Documents. For more information on using
A.M. mode, see Chapter 2.
19
Page 20

DD
<P=001>
Volume Adjustment
Volume Adjustment
You can adjust the
volume of the speaker
and ringer using the
and
DOWN
operation panel.
keys on the
UX258H-IPVA
UP
Speaker
Press the SPEAKER key.
1
Press the UP or DOWN key.
2
DOWN key
DOWN
SPEAKER
or
UP key
UP
When the display shows the desired volume level, press the SPEAKER
3
key to turn off the speaker.
SPEAKER
20
Page 21

<P=002>
Volume Adjustment
Ringer
Press the UP or DOWN key. (Make sure the SPEAKER key has not been
1
pressed and the handset is not lifted.)
•••• The ringer will ring once at the selected level, then the date and time will
reappear in the display.
DOWN
or
UP
Display:
RINGER: HIGH
RINGER: MIDDLE
1. Installation
RINGER: LOW
RINGER OFF: OK?
If you selected RINGER OFF: OK?, press the START/MEMORY key.
2
START/MEMORY
21
 Loading...