

Page 1
FRED® easyport
®
User Guide
Art. no.: 2.510544 Rev.: d
Automated External Defibrillator (AED)
FRED
®
easyport
®
Page 2

Manufacturer
SCHILLER Medical S.A.S. Tel: + 33 3 88 63 36 00
4, rue Louis Pasteur Fax: +33 3 88 94 12 82
F- 67162 Wissembourg E-mail: tech.support@schiller.fr
Web: www.schiller.fr
Address headquarters
SCHILLER AG Tel: +41 (0) 41 766 42 42
Altgasse 68 Fax: +41 (0) 41 761 08 80
CH-6341 Baar, Switzerland E-mail: sales@schiller.ch
Web: www.schiller.ch
Sales and Service Information
The SCHILLER sales and service centre network is world-wide. For the address of your
local distributor, contact your nearest SCHILLER subsidiary.
In case of difficulty a complete list of all distributors and subsidiaries is provided on our
internet site:
http://www.schiller.ch
Sales information can also be obtained from:
sales@schiller.ch
Article no.: 2.510544 Rev.: d
Issue date: 16.06.08
Page 3

Page 1
User Guide
Art. no.: 2.510544 Rev.: d
FRED easyport
Table of Contents
1 Safety Notes .............................................. 3
1.1 Responsibility of the User .................................................. 3
1.2 Intended Use ........................................................................ 3
1.3 Organisational Measures..................................................... 4
1.4 Safety-Conscious Operation ............................................... 4
1.5 Operation with other Devices .............................................. 4
1.6 Maintenance.......................................................................... 5
1.7 General Safety Notes ........................................................... 5
1.8 General Notes Regarding the Unit ...................................... 5
1.9 Terms of warranty ................................................................ 5
1.10 Display Symbols/Indicators................................................. 6
1.10.1 Symbols Used in this User Guide ...................................................... 6
1.10.2 Symbols Used on the Device............................................................. 7
1.10.3 Symbols Used on the Battery............................................................. 7
1.10.4 Symbols Used on the Electrode Package.......................................... 8
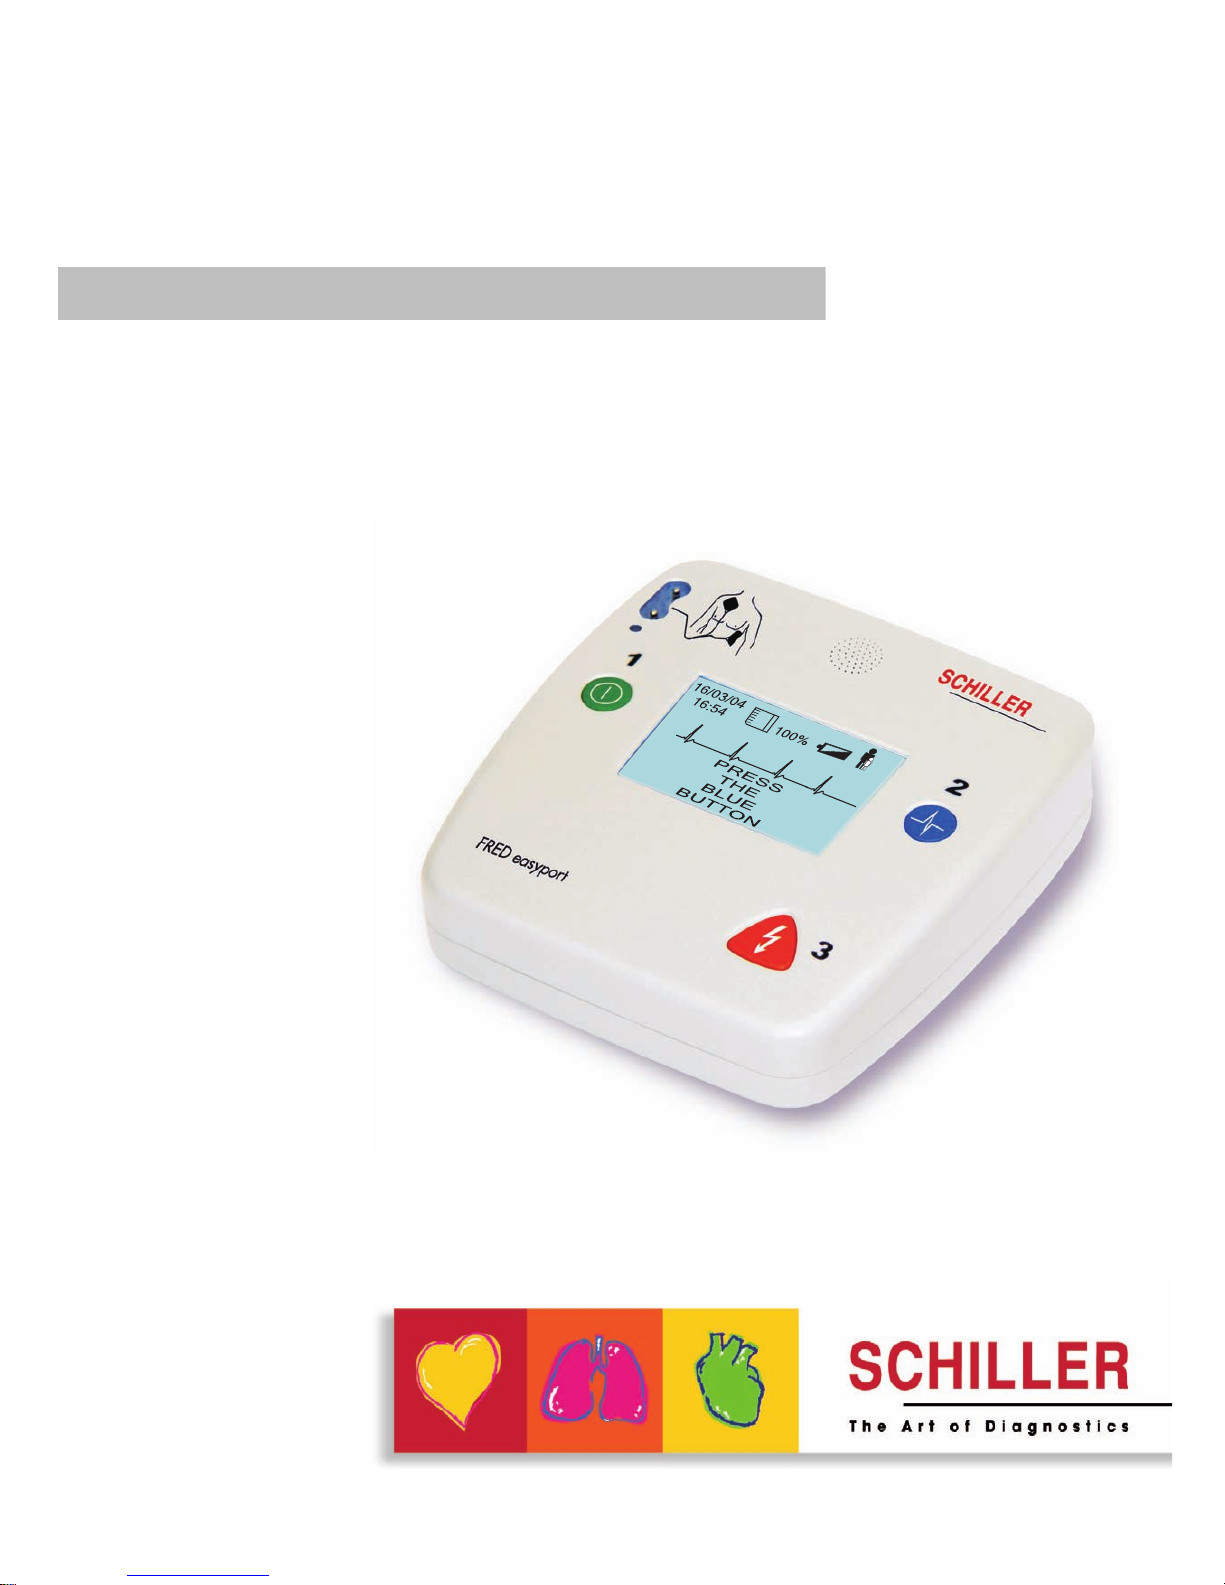
2 Components and Operation .................... 9
2.1 Design.................................................................................... 9
2.1.1 Available Options ............................................................................... 9
2.1.2 Overview of the Configurable Settings............................................... 9
2.2 Operating Elements............................................................ 10
2.3 Display................................................................................. 11
2.4 Function .............................................................................. 12
2.4.1 Self-Test........................................................................................... 12
2.4.2 Defibrillation Procedure.................................................................... 12
2.4.3 Device Identifies a Shockable Rhythm............................................. 12
2.4.4 Device Detects no Shockable Rhythm............................................. 13
2.5 Voice Support ..................................................................... 14
2.6 Procedure in Case of Cardiac Arrest................................ 15
3 Operation ................................................ 16
3.1 Start-up and Preparation ................................................... 16
3.1.1 Inserting the Battery......................................................................... 16
3.1.2 Ensuring Operational Readiness ..................................................... 17
3.1.3 Switching on and off......................................................................... 17
3.1.4 Internal Safety Discharge................................................................. 17
4 Defibrillating ........................................... 18
4.1 General Application Guidelines ........................................ 18
4.2 Additional Safety Notes ..................................................... 18
4.3 Applying the Pads .............................................................. 19
4.3.1 Adult and Paediatric Electrodes....................................................... 19
4.3.2 Applying the Electrodes ................................................................... 19
4.3.3 Checking the Electrodes .................................................................. 20
4.4 Defibrillation Procedure..................................................... 21
Page 4

Page 2
Art. no.: 2.510544 Rev.: d
FRED easyport
4.5 Defibrillation in Manual Mode............................................ 23
4.5.1 Finishing the Therapy ...................................................................... 25
5 Documentation of an Intervention ........26
5.1 Inserting the Memory Card ................................................ 26
6 Maintenance ............................................27
6.1 Maintenance Intervals ........................................................ 27
6.1.1 Visual Unit Check............................................................................. 27
6.1.2 Functional Test ................................................................................ 27
6.1.3 Maintenance Interval for the Battery................................................ 28
6.1.4 Battery Disposal............................................................................... 28
6.1.5 Disposal at the End of the Device's Useful Life ............................... 28
6.2 Cleaning............................................................................... 29
6.2.1 Cleaning the Casing......................................................................... 29
6.2.2 Accessories and Disposables.......................................................... 29
6.3 Error Detection.................................................................... 30
6.3.1 Measures to Prevent Electromagnetic Interferences ....................... 31
7 Technical Data ........................................32
7.1 System Data ........................................................................ 32
7.2 Defibrillation Impulse ......................................................... 33
7.2.1 Storage of an Intervention (Option).................................................. 34
8 Appendix .................................................35
8.1 Accessories......................................................................... 35
8.2 Literature ............................................................................. 35
8.3 Glossary .............................................................................. 35
8.4 Inspection Report ............................................................... 36
9 Index ........................................................37
Page 5
Page 3
Safety Notes 1
User Guide Responsibility of the User 1.1
Art. no.: 2.510544 Rev.: d
FRED easyport
1 Safety Notes
1.1 Responsibility of the User
1.2 Intended Use
V The device must only be used by qualified physicians or other persons trained
in early defibrillation.
V The numerical and graphical results as well as any interpretation suggested by
the device must be examined with respect to the patient's overall clinical condition and the quality of the recorded data.
V Make sure that the user has read and understood the user guide, and especially
these safety notes.
V Damaged or missing components must be replaced immediately.
V It is the owner's responsibility that the valid regulations for safety and prevention
of accidents are observed.
V The device must be stored inaccessible to children.
V The FRED easyport is an automated external defibrillator (AED) used for the
treatment of ventricular fibrillation (VF) and ventricular tachycardia (VT).
V The device may be used with the appropriate electrodes on either adults or chil-
dren.
V The device must only be used if the following symptoms are found:
– non-responsive
– no respiration
– no pulse
V The device must not be used if the patient:
– is responsive
– is breathing
– has pulse
V The FRED easyport is an emergency device and must be ready for operation at
any time and in all situations. Ensure that the device is always equipped with a
sufficiently charged battery, and keep a spare battery on hand.
V Only operate the device in accordance with the specified technical data.
V The device is not designed for sterile use.
V Do not use this unit in areas where there is any danger of explosion or in the
presence of flammable gases such as anaesthetic agents.
V This unit is BF classified.
V This product is not designed for direct cardiac application.
Page 6
1 Safety Notes
1.3 Organisational Measures
Page 4
Art. no.: 2.510544 Rev.: d
FRED easyport
1.3 Organisational Measures
1.4 Safety-Conscious Operation
1.5 Operation with other Devices
V Before using the unit, ensure that an introduction regarding the unit functions
and the safety precautions has been provided and understood.
V Keep these operating instructions in an accessible place for reference when re-
quired. Make sure that they are always complete and legible.
V These operating instructions do not override any statutory or local regulations,
or procedures for the prevention of accidents and environmental protection.
V This user guide, and especially these safety notes, must be read and observed.
V Danger of electric shock!
The energy applied to the patient can be conducted through the patient to other
persons, who may suffer a lethal electric shock. Therefore:
– Do not touch the patient, the electrodes or other conducting objects during de-
fibrillation
– Do not defibrillate the patient in a puddle of water or on other conducting surfac-
es.
– Switch the device off when it is no longer used.
V Immediately report any changes that impair safety (including operating behav-
iour) to the person responsible.
V Only connect the original SCHILLER pads to the unit.
V Before switching on, check if the unit's casing and electrode connection are un-
damaged.
V Only use accessories and other parts recommended or supplied by SCHILLER
AG. Use of other than recommended or supplied parts may result in injury, inaccurate information and/or damage to the unit.
V Magnetic and electrical fields from X-ray or tomographic devices, portable radio
equipment, HF radios and devices labelled with the symbol can affect the
operation of this device. (See section 6.3.1.) Avoid using such devices or main-
tain a sufficient distance from them.
V The charging of energy and the release of the defibrillation impulse can disturb
other devices. Check these devices after a defibrillation.
V Sensors and devices that are not defibrillation proof must be disconnected from
the patient before a shock is triggered.
V If the patient has an implanted pacemaker, be sure not to position the electrode
directly on top of it.
V Precautions must be observed when using high-frequency electrosurgical devic-
es. A distance of at least 15 cm must be kept between the defibrillation electrodes and the HF surgical electrodes. If in doubt, disconnect the electrodes and
sensors from the unit during use of a HF surgical device.
Page 7
Page 5
Safety Notes 1
User Guide Maintenance 1.6
Art. no.: 2.510544 Rev.: d
FRED easyport
1.6 Maintenance
1.7 General Safety Notes
1.8 General Notes Regarding the Unit
1.9 Terms of warranty
Your SCHILLER FRED easyport is warranted against defects in material and manufacture for the duration of one year (as from date of purchase). Excluded from this
guarantee is damage caused by an accident or as a result of improper handling. The
warranty entitles free replacement of the defective part. Any liability for subsequent
damage is excluded. The warranty is void if unauthorised or unqualified persons attempt to make repairs.
In case of a defect, send the apparatus to your dealer or directly to the manufacturer.
The manufacturer can only be held responsible for the safety, reliability, and performance of the apparatus if:
• assembly operations, extensions, readjustments, modifications, or repairs are carried out by persons authorised by him, and
• the FRED easyport and approved attached equipment is used in accordance with
the manufacturer's instructions.
V Danger of electric shock! Do not open the device. No serviceable parts inside.
Refer servicing to qualified personnel only.
V Before cleaning, switch the unit off and remove the battery.
V Do not use high temperature sterilisation processes (such as autoclaving). Do
not use E-beam or gamma radiation sterilisation.
V Do not use solvent or abrasive cleaners on either the unit or cable assemblies.
V Do not, under any circumstances, immerse the unit or cable assemblies in liquid.
V Operating the device with a defective casing or damaged cables constitutes a
danger to life. Therefore:
– Immediately replace a damaged unit, or damaged cables and connections.
A defibrillation can fail with certain clinical pictures.
There are no express or implied warranties which extend beyond the warranties
hereinabove set forth. SCHILLER makes no warranty of merchantability or fitness for
a particular purpose with respect to the product or parts thereof.
Page 8
1 Safety Notes
1.10 Display Symbols/Indicators
Page 6
Art. no.: 2.510544 Rev.: d
FRED easyport
1.10 Display Symbols/Indicators
1.10.1 Symbols Used in this User Guide
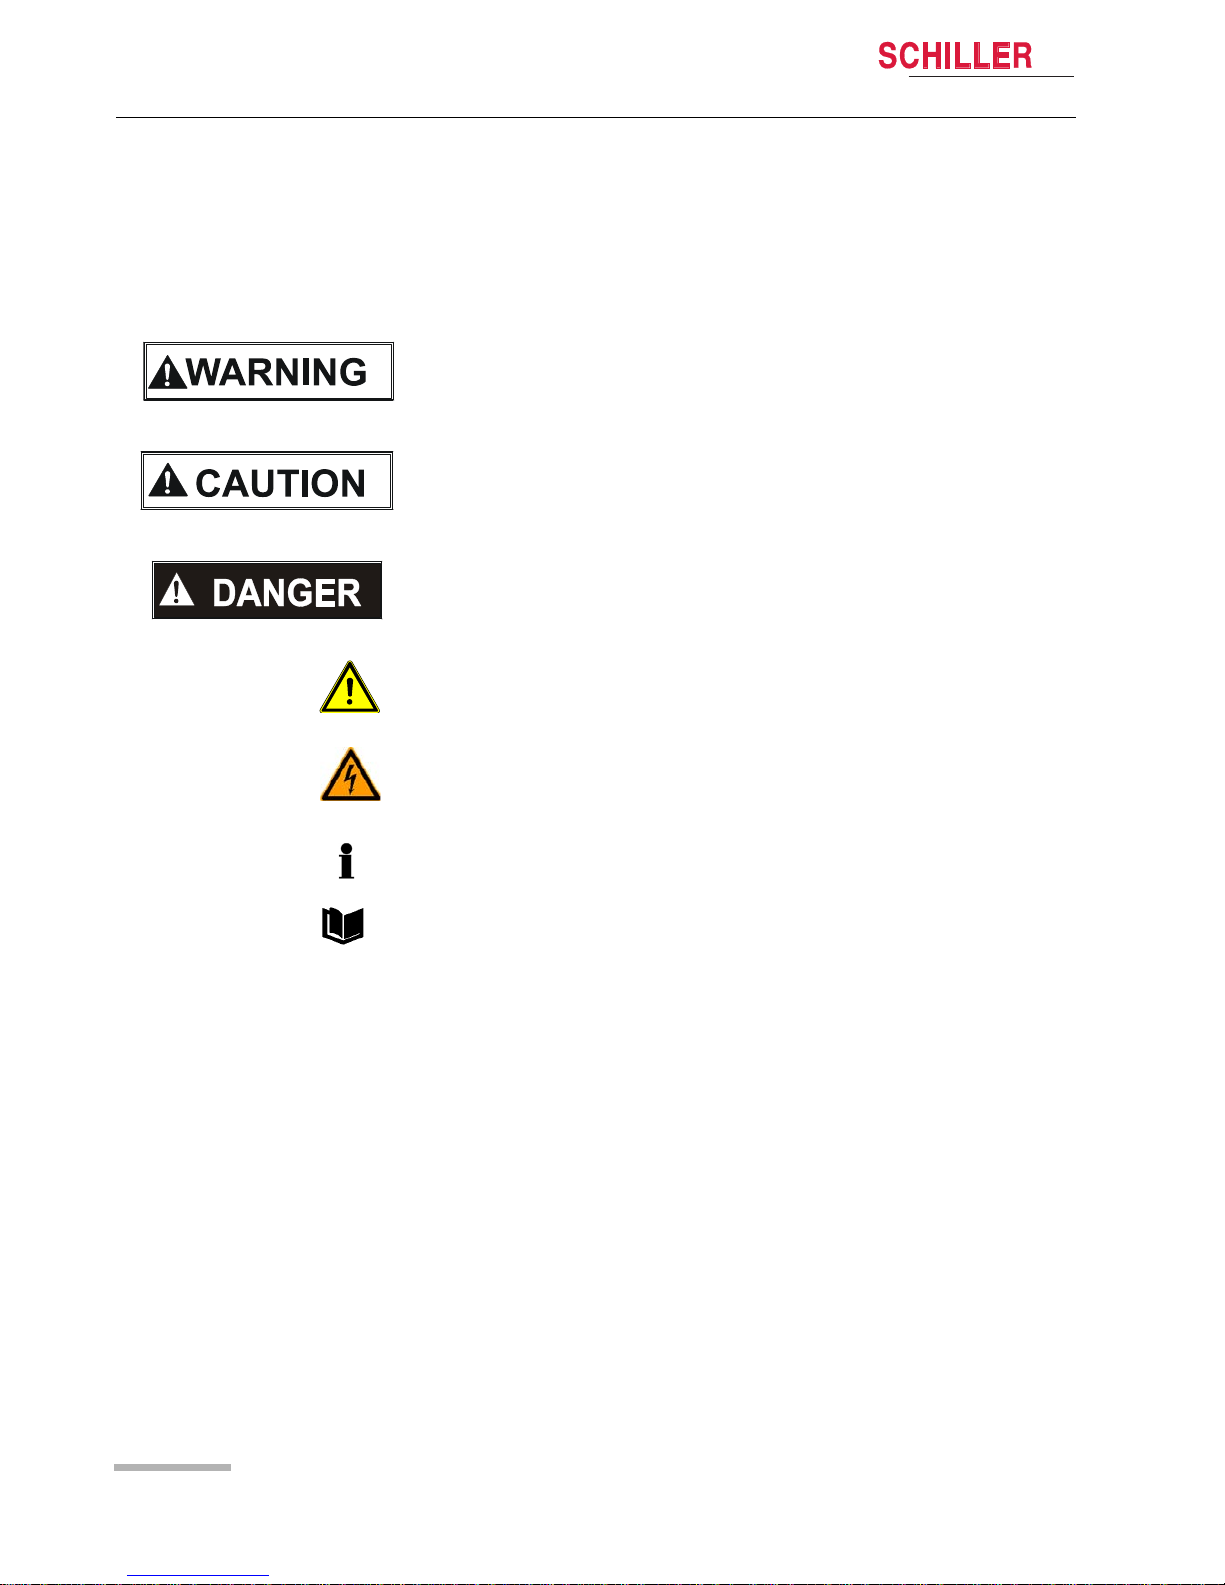
The safety level is classified according ANSI Z535.4. The following overview shows
the safety symbols and pictograms used in this user guide.
For a possibly dangerous situation, which could lead to serious bodily injury or to
death.
For a possibly dangerous situation which could lead to personal injury. This symbol
is also used to indicate possible damage to property.
For a direct danger which could lead to severe personal injury or to death.
For general safety notes as listed in this section.
For electrical hazards, warnings or precautionary measures when dealing with electricity.
NOTE for possibly dangerous situations which could lead to damages to property or
system failure or IMPORTANT for helpful user information.
Reference to other user guides.
Page 9
Page 7
Safety Notes 1
User Guide Display Symbols/Indicators 1.10
Art. no.: 2.510544 Rev.: d
FRED easyport
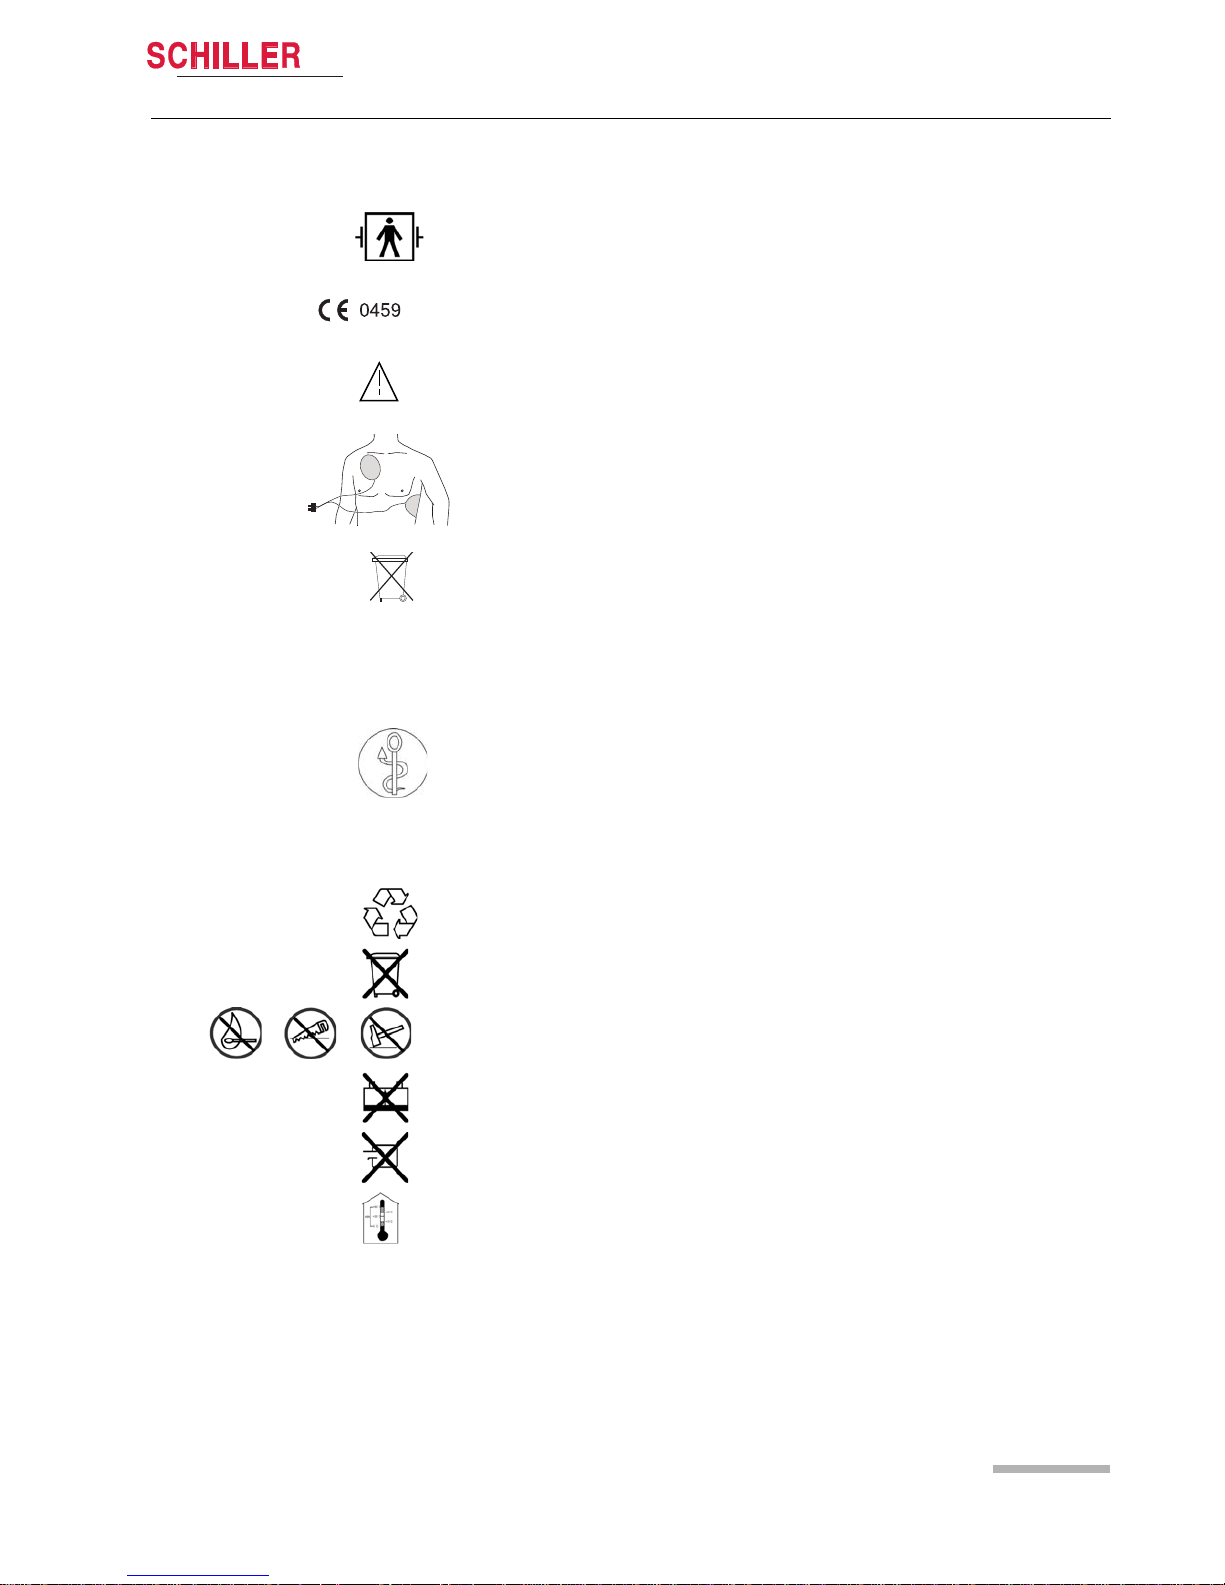
1.10.2 Symbols Used on the Device
1.10.3 Symbols Used on the Battery
BF symbol. The device's signal input is defibrillation protected.
Notified body of the CE certification (G-MED).
Note accompanying documents!
Defibrillation electrode connector.
Symbol for the recognition of electrical and electronic equipment.
This unit must be disposed of in a municipally approved collection point or recycling
centre.
Improper disposal harms the environment and human health due to the presence of
dangerous substances in electrical and electronic equipment.
This function must only be used by physicians or other authorised persons (see
page 23).
The unit/component can be recycled.
Battery may not be disposed of with domestic refuse.
Do not burn, saw up or crash the battery.
Do not recharge the battery.
Do not short the battery.
Storage temperature for the battery:
unlimited: +15...+25 °C.
Page 10
1 Safety Notes
1.10 Display Symbols/Indicators
Page 8
Art. no.: 2.510544 Rev.: d
FRED easyport
1.10.4 Symbols Used on the Electrode Package
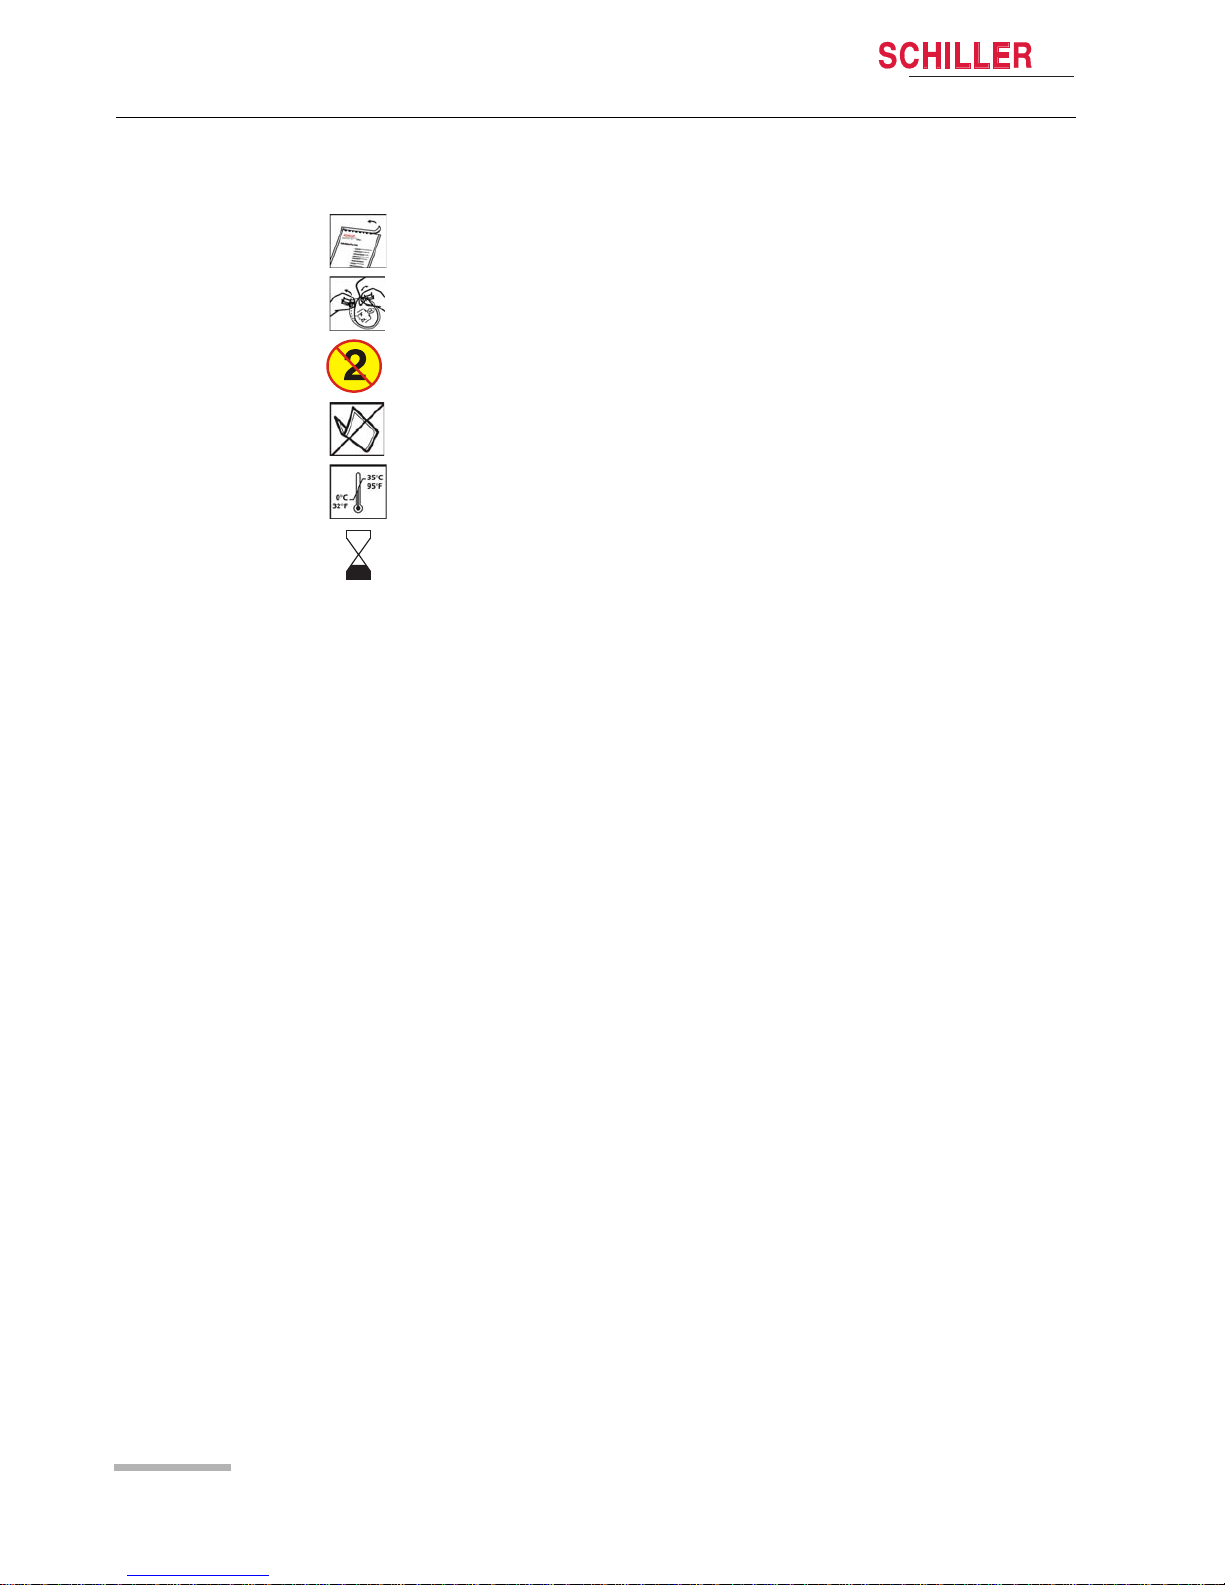
Open the electrode package
Peel off the protective foil
Disposable item; do not reuse
Do not bend packing
Storage temperature for the electrodes
Expiration date
Page 11

Page 9
Components and Operation 2
User Guide Design 2.1
Art. no.: 2.510544 Rev.: d
FRED easyport
2 Components and Operation
Its small size and light weight make the FRED easyport the ideal companion of physicians, paramedics, public service staff and other persons trained in early defibrillation. Risk patients carry their own rescue device after they and their families have
been instructed by their doctor. This dramatically reduces the response time to treat
ventricular fibrillation and ventricular tachycardia, granting the victims a much better
chance of survival.
2.1 Design
The FRED easyport is a battery-powered automated external defibrillator (AED)
that delivers biphasic defibrillation pulses. The patient is defibrillated via disposable
adhesive electrodes (pads), which also acquire the ECG signal for analysis. Adhesive electrodes for children and adults are available. The device recognises the connected electrodes and selects the defibrillation energy levels accordingly. The user
will be given visual and audible instructions (display/loudspeaker). The device is
powered by a disposable, replaceable lithium battery. The capacity is sufficient for:
• 45 shocks at maximum energy, or
• 2 hours of monitoring or
• 5 years of storage
Our customer service can configure various device functions via a special PC connection (see "Function" section).
2.1.1 Available Options
• SCHILLER ECG memory card
• Manual operational mode (see page 23)
2.1.2 Overview of the Configurable Settings
The following settings can be configured by the SCHILLER after-sales service:
• Voice volume
• Energy levels of the first, second and third shocks, individually for adults and children
• Initiation of ECG analysis with button or automatic
• Activation/deactivation of a 16.7 Hz filter
• Silent operational mode (spoken text with reduced repetition rate)
• Trace deactivation
Biocompatibility
The parts of the product described in this user guide, including all accessories, that
come in contact with the patient during the intended use, fulfil the biocompatibility requirements of the applicable standards. If you have questions in this matter, please
contact SCHILLER.
Page 12
2 Components and Operation
2.2 Operating Elements
Page 10
Art. no.: 2.510544 Rev.: d
FRED easyport
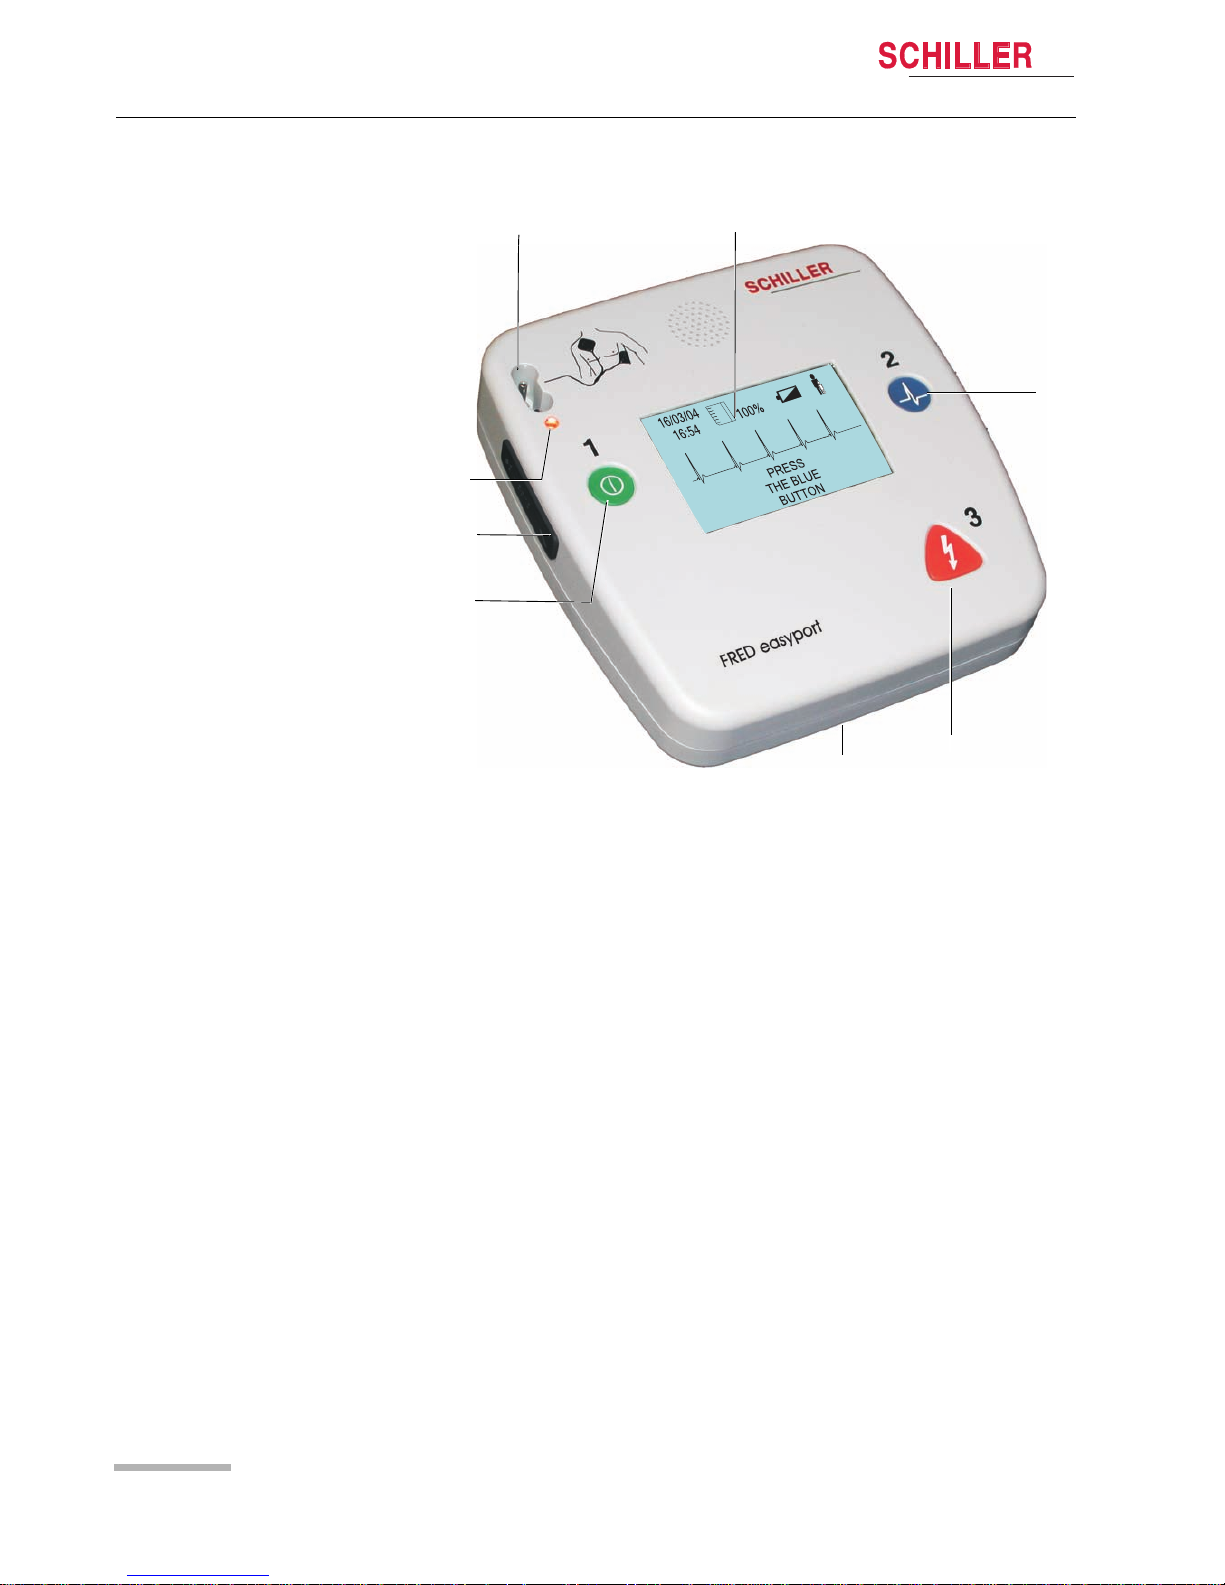
2.2 Operating Elements
Fig. 2.1 Operating elements
(1) Green button to switch the device on/off
(2) Rubber seal for DS minicard
(3) Yellow indicator lamp; lit as long as no electrodes are connected
(4) Electrode connector
(5) LCD
(6) Blue button to start the analysis
(7) Key to trigger a defibrillation impulse
(8) Battery at back
1
2
45
6
3
7
8
Page 13

Page 11
Components and Operation 2
User Guide Display 2.3
Art. no.: 2.510544 Rev.: d
FRED easyport
2.3 Display
The following information is displayed on the LCD:
(1) Time and triggered shocks since switch-on
(2) Memory card inserted and memory allocation in %
– Flashing = memory card almost full (from 98%)
– Flashing = error (see page 30, section 6.3)
– No indication = memory card not detected or not inserted (see page 30,
section 6.3)
(3) Battery low (only 3 more shocks can be released)
(4) Defibrillation electrode type
= adults
= paediatric
(5) ECG signal
(6) Operational status
Fig. 2.2 LCD
1 2
34
65
PRESS
BLUE
BUTTON
Page 14

2 Components and Operation
2.4 Function
Page 12
Art. no.: 2.510544 Rev.: d
FRED easyport
2.4 Function
2.4.1 Self-Test
To ensure its readiness for use, the device runs a self-test to check the unit and the
battery. The self-test is carried out automatically every time the unit is switched on.
If the device detects an error during the self-test, an error message is displayed.
2.4.2 Defibrillation Procedure
The user is guided through all operation steps by spoken and displayed instructions.
The FRED easyport runs in semi-automatic mode. This means that the shock must
be released by the user.
When the device is switched on, the user is prompted to apply the electrodes to the
patient. Next, he or she is prompted to start the ECG recording and to stay clear of
the patient. The analysis takes approximately 10 seconds. Depending on the configuration, the unit automatically starts analysing the ECG.
2.4.3 Device Identifies a Shockable Rhythm
If the analysis program detects a shockable rhythm, the defibrillation energy is
charged and the user is prompted to deliver the shock. Shockable rhythms are:
• Ventricular fibrillation
• Ventricular tachycardia with a rate exceeding 180 beats per minute
Even if the device detects a shockable rhythm, a shock must only be delivered if lack
of breathing and lack of circulatory signs have been established.
If the shock is not successful, the device automatically charges the defibrillation energy for another shock after every further analysis.
The SCHILLER service centre can define other settings if required (see section 7,
page 32).
The following standard energy levels are preset:
Shock Adults Neonates
1 120 joules 15 joules
2 120 joules 30 joules
3 120 joules 50 joules
Page 15

Page 13
Components and Operation 2
User Guide Function 2.4
Art. no.: 2.510544 Rev.: d
FRED easyport
First shock After the shock, the user is prompted to:
1. alternately carry out 30
1
chest compressions and give 2 breaths for 2 minutes.
2. after 2 minutes, the unit prompts the user again to start a new ECG analysis. De-
pending on the configuration, this new analysis may start automatically.
Shock unsuccessful: Second shock release and prompt to restart with step 1.
2
Shock successful: Information that no shock is required and
• prompt to carry out cardiac compressions and respiration alternately for 2 minutes
until the patient breathes or new instructions follow.
• after 2 minutes, prompt to start a new ECG analysis
2.4.4 Device Detects no Shockable Rhythm
If the analysis program does not identify a shockable rhythm, the FRED easyport
informs the user:
• that no shock is required
• that he or she should alternately carry out 30 chest compressions and 2 breaths
for 2 minutes
• after 2 minutes, prompt to start a new ECG analysis
1. When paediatric electrodes are used, CPR is carried out in the rhythm 15:2 if 2 rescuers are
on the spot, otherwise in the 30:2 rhythm.
2. CPR should be continued even after a successful shock to reduce the risk of momentary
electrical myocardial stunning after the defibrillation.
For Qualified Physicians only
The analysis can at any time be repeated during CPR by pressing the blue analysis
button (2).
Page 16

2 Components and Operation
2.5 Voice Support
Page 14
Art. no.: 2.510544 Rev.: d
FRED easyport
2.5 Voice Support
When the device is switched on, it carries out a self-test and indicates the software
and hardware version. The following instructions will be spoken by the device:
Language Display Note
a
Place electrodes on chest and plug into
machine.
PLACE ON
ELECTRODES
PLUG INTO
MACHINE
Technical alarm:
Electrodes not connected. The yellow light goes
out as soon as the electrodes are properly
placed. See section 4.3.2.
Poor connection; press the electrodes CHECK THE ELECTRODES Technical alarm:
The contact between the electrodes and the skin
is not sufficient. The patient resistance exceeds
200 Ohm. See section 4.3.3.
b
Press blue button.
PRESS
BLUE
BUTTON
Heart rhythm analysis is started.
Do not touch the patient. Analysis in
progress.
DO NOT TOUCH
THE PATIENT
ANALYSING
See page 21, Step 2, Analysis
Stop movement. MOVEMENT DETECTED
STAND CLEAR
Technical alarm: Patient was moved during analysis and device could not run analysis.
Device recommends a shock
See section 2.4.3 and page 22.
Do not touch the patient. Charging.
DO NOT TOUCH THE PATIENT
CHARGING
Stand clear of patient. Press orange button.
PRESS ORANGE BUTTON
TO SHOCK
Shock not recommended
See section 2.4.4
No shock advised. NO SHOCK ADVISED See section 2.6
Immediately resume CPR – 30
c
chest
compressions, then 2 rescue breaths –
continue until patient is breathing normally.
30 CHEST COMPRESSIONS
THEN 2 RESCUE BREATHS
See section 2.6
a.In the "silent" mode, this text is only spoken once.
b.In the "silent" mode, this text is only repeated every 2 minutes.
c.When paediatric electrodes are used, CPR is carried out in the rhythm 15:2 if 2 rescuers are on the spot, otherwise in
the 30:2 rhythm.
If the device is switched off and back on again (e.g. to change the battery), the language support will resume from the step at which the device was shut off.
Page 17

Page 15
Components and Operation 2
User Guide Procedure in Case of Cardiac Arrest 2.6
Art. no.: 2.510544 Rev.: d
FRED easyport
2.6 Procedure in Case of Cardiac Arrest
This procedure applies to adults and children.
Fig. 2.3 BLS AED algorithm or cardiopulmonary resuscitation (CPR) with defibrillation
• Breakdown
• Possible circulatory arrest
• Responsive?
Start of primary ABCD (BLS-algorithm)
Activate rescue system (emergency medical services)
Request a defibrillator
A Check respiration (open airways, look, listen, feel)
B2 rescue breaths
C 30 chest compressions (with children, 15 compressions)
B2 rescue breaths
Repeat C and B until the defibrillator is connected.
D Connect the defibrillator
Determine the ECG rhythm using the defibrillator.
Do not touch the patient.
Defibrillation if defibrillator detects VF No VF/VT detected
Asystole or PEA
Secondary ABCD
For trained medical personnel only
No response
No respiration
VF/VT
No VF/VT
30 chest compressions
2 breaths
Continue with 30:2
for 2 minutes
30 chest compressions
2 breaths
Continue with 30:2
for 2 minutes
After 2 minutes After 2 minutes
Page 18

3Operation
3.1 Start-up and Preparation
Page 16
Art. no.: 2.510544 Rev.: d
FRED easyport
3 Operation
3.1 Start-up and Preparation
3.1.1 Inserting the Battery
The device is powered by a non-rechargeable lithium battery. The battery has a
guaranteed standby operation of at least 5 years if the device is not used.
After five years – if the device has not been used – the battery must be replaced.
1. Insert the battery into the device as shown in Fig. 3.1. Make sure it clicks into
place.
2. Switch the unit on. A self-test will run. (See section 2.4.1.)
3. Check the battery status on the display. If the battery is low, the battery symbol
(1) is displayed.
V To enable a quick reaction in the case of any emergency, the high-potential ca-
pacitor is charged on switch-on, reducing the battery's capacity (see page 32).
The battery capacity is also reduced by the capacitor's trickle charge while the
unit is on.
For these reasons:
– Always keep a new spare battery on hand
– Always note the number of switch-ons and the battery's running time in the In-
spection Report on page 36, even when you only demonstrate the device to
other users.
Fig. 3.1 Inserting the battery
V Danger of explosion! The device is not designed for use in areas where an ex-
plosion hazard may occur. In addition, use of the defibrillator is not permitted in
an oxygen-enriched environment or in the vicinity of flammable substances
(gasoline) or anaesthetics. Oxygenation in the vicinity of the defibrillation electrodes must be strictly avoided.
V Danger of electric shock! The FRED easyport is a high-voltage electric therapy
device. Improper use of the device can endanger life. Always follow the instructions given in this user guide.
V Before using the device, the user is required to ascertain that it is functioning cor-
rectly and in good operating condition. In particular, the cables, connectors and
electrodes must be inspected. Damaged parts must be replaced immediately.
V The user must make sure that there are no conductive connections between the
patient and other persons during ECG analysis and defibrillation.
V Avoid defibrillation in very moist or wet surroundings.
V To ensure the defibrillator's readiness for use, always keep a spare battery on
hand.
1
Page 19

Page 17
Operation 3
User Guide Start-up and Preparation 3.1
Art. no.: 2.510544 Rev.: d
FRED easyport
3.1.2 Ensuring Operational Readiness
To ensure its readiness for use, the device runs a self-test to check the unit and the
battery. The self-test is carried out when the unit is switched on. If the device detects
an error during the self-test, an error message is displayed.
3.1.3 Switching on and off
3.1.4 Internal Safety Discharge
A safety discharge ensures that the stored defibrillation energy is discharged internally. It is carried out if:
• the battery voltage is insufficient
• the device is defective
• the device is turned off
• Do not expose the device to direct sunlight, or extremely high or low temperatures.
The ambient temperature should be in the range of 0...40 °C. Lower or higher ambient temperatures will have a negative impact on the battery's life.
V The duration of the self-test and the display check is max. 30 seconds. Immedi-
ately switch the device off afterwards! Battery discharge!
V Note the test results and the duration of the operation in the Inspection Report
on page 36.
V If you only carry out the self-tests, the battery will last for approx. 30 switch-ons.
V SCHILLER recommends always to keep a spare battery on hand.
• When the device is switched off for less than 5 min. (e.g. for battery replacement
or by mistake), the data remains stored and the operation is continued after the
self-test as if the device had not been switched off.
Switching on
« Switch the device on by pressing the green button (1). It can at any time be
switched off using the same button.
Switching off
« To switch off the device, keep the green button (1) pressed for at least 3 seconds.
A safety discharge ensures that the stored defibrillation energy is discharged internally.
The device is switched off automatically 5 minutes after an electrode error is indicated.
Fig. 3.2 Switching the unit on/off
1
Page 20

4 Defibrillating
4.1 General Application Guidelines
Page 18
Art. no.: 2.510544 Rev.: d
FRED easyport
4 Defibrillating
4.1 General Application Guidelines
Observe the following guidelines to ensure successful and safe defibrillation. Otherwise the lives of the patient, the user and bystanders are in danger.
4.2 Additional Safety Notes
In addition to the guidelines set forth in section 4.1, the following rules must be observed when using an AED, as failure to do so may compromise the success of the
defibrillation or endanger the patient's life.
V The patient must:
– not come into contact with other persons during defibrillation.
– not come into contact with metal parts, e.g. bed or litter, or be positioned on wet
ground (rain, accident in swimming pool), to prevent unwanted pathways for the
defibrillation current, which may endanger the assistants.
V Do not allow the defibrillation electrodes to come into contact with other elec-
trodes or metal parts which are in contact with the patient.
V The patient's chest must be dry, as moisture causes unwanted pathways for the
defibrillation current. For safety, wipe off flammable skin cleansing agents.
V Owing to the high currents, there is a risk of skin burns at the site of the elec-
trodes. This is why the electrodes must not be placed on or above:
– the sternum, clavicle or mamillas
V Immediately prior to the shock, the heart massage (CPR) and artificial respira-
tion must be stopped and bystanders must be warned.
V Defibrillating a patient with an implanted pacemaker is likely to impair the pace-
maker function or cause damage to the pacemaker. For this reason, do not apply
the defibrillation electrodes in the vicinity of the pacemaker, have an external
pacemaker at hand, and check the implanted pacemaker for proper functioning
as soon as possible after the shock.
V To ensure correct analysis of the heart rhythm, the patient must lie as still as pos-
sible and must not be touched, as this can lead to incorrect analysis results due
to artefacts.
V The user must apply the ABCD procedure (BLS algorithm) to determine if the
AED may be used.
V If, in the course of treatment, a patient spontaneously regains consciousness, a
defibrillation shock that may have been advised just before must not be delivered.
V If the ECG signal changes such that the shock is not recommended, the shock
delivery is automatically blocked in the AED mode.
Page 21

Page 19
Defibrillating 4
User Guide Applying the Pads 4.3
Art. no.: 2.510544 Rev.: d
FRED easyport
4.3 Applying the Pads
4.3.1 Adult and Paediatric Electrodes
Large electrodes The large electrodes are to be used for adults and children from 25 kg body weight.
Small electrodes The small electrodes are intended for children with a body weight under 25 kg.
4.3.2 Applying the Electrodes
V Use the defibrillation electrode pads only up to the indicated expiration date.
Please note that the indicated expiration date only applies if the vacuum pack is
intact.
V The pads are pre-gelled, so there is no need to use extra contact agent.
V Do not reuse the pads.
V Good contact between the skin and the adhesive electrodes must be ensured.
Suntan oil, sand or salt reduce the adhesive quality.
V The applied pads must have good contact with the patient's skin, and air bubbles
under the pads must be avoided. To do so, stick on one end of the pad, then
smooth it out to the other end.
1. Clean and dry the application points for the electrodes (see Fig. 4.1). Only clean
the skin by vigorously rubbing it with a dry cloth.
2. Apply one electrode above the right nipple. Do not apply it on the clavicle (uneven).
3. Apply the other electrode slantwise below the left breast as illustrated in Fig. 4.1.
4. Make sure that the connections are positioned on the outside so they do not
hinder heart massage (CPR).
Fig. 4.1 Electrode application points
Page 22

4 Defibrillating
4.3 Applying the Pads
Page 20
Art. no.: 2.510544 Rev.: d
FRED easyport
4.3.3 Checking the Electrodes
If the resistance between the skin and an electrode should be too high, a message is
displayed and the yellow electrode LED (A) (fig. 4.2) remains lit. Proceed as follows:
1. Alternately press down firmly on the defibrillation pads and check when the message disappears. Carefully press that pad onto the patient's skin once again.
If the message does not disappear,
2. remove both defibrillation electrodes
3. wipe rests of contact agent off with a cloth
4. Shave both application areas to remove the uppermost layer of skin.
5. apply new defibrillation pads to these points
Fig. 4.2 Electrode LED
A
Page 23

Page 21
Defibrillating 4
User Guide Defibrillation Procedure 4.4
Art. no.: 2.510544 Rev.: d
FRED easyport
4.4 Defibrillation Procedure
When the device is switched on, it gives spoken and displayed instructions up to the
defibrillation. Exactly follow the instructions.
Step 1 Switching on and preparing the device
Step 2 Analysis
1. Switch the device on by pressing the green button (1).
2. Check the state of the patient. See ABCD, section 2.6.
3. You are prompted to continue the resuscitation and to stick on the electrodes.
4. Stick on the defibrillation electrodes as shown in Fig. 4.1.
5. Connect the electrode cable to the unit. (See Fig. 4.3.) The yellow electrode indi-
cator LED will go out as soon as the device is able to identify an acceptable electrode resistance. If the LED is not switched off, see section 4.3.3.
Fig. 4.3 Switch unit on
Electrode cable port
LED
1
6. You are prompted to start the analysis.
7. Press blue button (2). You are prompted to stay clear of the patient.
If the device detects ventricular fibrillation or ventricular tachycardia with a heart rate
exceeding 180 beats/min., Step 3 follows; otherwise continue with Step 4, Cardiopul-
monary resuscitation.
Fig. 4.4 Analysis
Page 24

4 Defibrillating
4.4 Defibrillation Procedure
Page 22
Art. no.: 2.510544 Rev.: d
FRED easyport
Step 3 Shock delivery
As soon as the energy for a shock is charged, the device prompts the user to deliver
the shock by pressing button 3.
V Danger of electric shock!
• Do not, under any circumstances, touch the patient during shock delivery.
• Make sure that the patient does not touch any conducting objects.
8. Deliver the shock by pressing the button .
After the shock, the device immediately instructs you to continue with step 4 –
CPR.
Step 4 Cardiopulmonary resuscitation
9. Carry out cardiopulmonary resuscitation. Alternate between 30 chest compressions and 2 breaths for 2 minutes. After 2 minutes, the device restarts with Step
2, Analysis.
Page 25

Page 23
Defibrillating 4
User Guide Defibrillation in Manual Mode 4.5
Art. no.: 2.510544 Rev.: d
FRED easyport
4.5 Defibrillation in Manual Mode
The FRED easyport version including the manual option is clearly labelled with a red
foil. If the user does not activate the manual mode during switch on, the unit will run
in the semi-automatic mode. The defibrillation will then be carried out as described
in section 4.4.
Switching over to Manual/Semi-Automatic Mode
V Danger to the patient! The device must only be switched over to the manual
mode by the physician.
V It is very important that the guidelines and safety notes in sections 4.1 and 4.2
be observed.
V The manual operational mode must never be used by non-medical staff if the lo-
cal law exclusively allows semi-automatic defibrillators for this user group.
However, there are countries where rescue teams and medical supervision staff
request the switch-over option from the semi-automatic to the manual mode on
the push of a button. In this case, it is necessary to agree an individual procedure
with the rescue staff. This procedure must follow the AHA or ERC protocols or
the local legal requirements. Further more, the rescue organisation must ensure
that
– the specified algorithms are kept
– the staff is trained in the procedure
• The device cannot be switched over to the manual mode during the defibrillation
process (analysis, charging, shock release).
• To operate the FRED easyport in semi-automatic mode again, it must be shut off
and remain off for at least 5 minutes.
1. Switch the device on by pressing the green button (1).
2. Simultaneously press the blue (2) and the orange (3) buttons.
The message "CONFIRM MANUAL MODE" is displayed.
3. Within 5 seconds, again press the blue (2) and the orange buttons (3).
The following is displayed:
– The ECG curve
– The selected energy (according to the factory settings – see page 12)
– Prompt to press the green button to charge the energy
Charging the Energy
« Press blue button (2).
The following is displayed:
– Energy charging progress
– As soon as the set energy is reached, the orange button (3) is lit
– Prompt to release the shock
CONFIRM MANUAL MODE
BY PRESSING THE BLUE
AND ORANGE BUTTONS
Page 26

4 Defibrillating
4.5 Defibrillation in Manual Mode
Page 24
Art. no.: 2.510544 Rev.: d
FRED easyport
Shock Delivery in Manual Mode
4. Deliver the shock by pressing the button .
If the shock is not released within 20 seconds, an internal safety discharge is initiated.
V Danger to the patient! Before you release the shock, check the displayed ECG
curve to make sure that a shockable rhythm is present.
V Danger of electric shock!
– Do not, under any circumstances, touch the patient during shock delivery.
– Make sure that the patient does not touch any conducting objects.
Page 27

Page 25
Defibrillating 4
User Guide Defibrillation in Manual Mode 4.5
Art. no.: 2.510544 Rev.: d
FRED easyport
4.5.1 Finishing the Therapy
1. Switch the device off as soon as the therapy is finished (keep the button pressed
for approx. 3 seconds ).
2. Disconnect the plug of the electrode line.
3. Carefully pull the electrodes off the patient's skin.
4. Discard the disposable pads immediately after use to prevent their reuse (hospital waste).
Page 28

5 Documentation of an Intervention
5.1 Inserting the Memory Card
Page 26
Art. no.: 2.510544 Rev.: d
FRED easyport
5 Documentation of an Inter-
vention
To document an intervention using the unit, the following data can be recorded using
the memory card:
• ½ hour of ECG
• 500 events with date and time of intervention with the following data:
– Power on
– Start of analysis
– Analysis result
– Charging of the defibrillator
– Defibrillation shock
– Internal discharge
– Electrode alarm
– "Battery low" alarm
The memory card is evaluated on a PC using the SAED READER software.
5.1 Inserting the Memory Card
V Equipment damage! The memory card slot must always be covered with the
plastic cover. This is to prevent moisture in the device.
V The functioning of the device can only be guaranteed with an SD card from
SCHILLER.
1. Open the plastic cover (1).
2. Insert the memory card (2) with the shaped indent facing upward.
3. Carefully close the plastic cover.
When the memory card is full, the symbol (3) flashes.
Make sure that you only insert the card with the device turned off and in the way
shown in Fig. 5.1 (shaped intend (2) facing upward). Otherwise, the card will not be
detected by the device and the symbol is not displayed.
After inserting the card, close the plastic cover again.
If the flashing symbol is displayed even though the card is inserted, check if
the card is intended by SCHILLER for this device.
Incorrect or defective cards can impair the unit's operation!
(See section Error Detection 6.3.)
Fig. 5.1 Memory card inserted
3
1
2
SD card
Page 29

Page 27
Maintenance 6
User Guide Maintenance Intervals 6.1
Art. no.: 2.510544 Rev.: d
FRED easyport
6 Maintenance
6.1 Maintenance Intervals
6.1.1 Visual Unit Check
Inspect the device and electrodes for the following:
« Device casing not deformed?
« Electrode connection undamaged?
« Expiration date indicated on the electrode package
« Expiration dates of the battery and spare battery
Defective units or damaged cables must be replaced immediately.
6.1.2 Functional Test
« Switch the device on and carry out a self-test.
Note
The unit must be serviced on a regular basis. The test results must be recorded and
compared to the values in the accompanying documents.
The following table indicates the intervals and responsibilities of the maintenance
work required.
Interval Maintenance Responsible
Before each use
• Visual inspection of the device and electrodes
« User
Monthly
• Visual inspection of the device and electrodes
• Check of the electrodes' expiration date
« User
Every 4 months
• Functional tests according to the instructions (see page 36, 8.4 In-
spection Report)
« User
Every 4 years
• All measurement inspections and calibration according to the instructions in the service handbook
« Service staff authorised by
SCHILLER
Every 5 years
• Replacement of the battery in the device and check of the spare battery's expiration date
« User
V The duration of the self-test and the display check is max. 30 seconds. Immedi-
ately switch the device off afterwards! Battery discharge!
V Note the test results and the duration of the operation in the Inspection Report
on page 36.
Page 30

6 Maintenance
6.1 Maintenance Intervals
Page 28
Art. no.: 2.510544 Rev.: d
FRED easyport
6.1.3 Maintenance Interval for the Battery
6.1.4 Battery Disposal
6.1.5 Disposal at the End of the Device's Useful Life
Important
• The battery is maintenance free during its normal life.
• The battery must be replaced after 5 years, regardless of whether or not the unit
has been used.
• When you demonstrate the device to other users, the battery's life is reduced by
the number of switch-ons and the duration of the operation (see battery capacity
on page 32). To ensure the device's readiness for use, the battery must be replaced by a new, non-expired battery.
V Danger of explosion! Battery may not be burned or disposed of with domestic
refuse.
V Danger of acid burns! Do not open or heat up the battery.
The battery is to be disposed of in municipally approved areas or sent back to
SCHILLER.
This unit must be disposed of in a municipally approved collection point or recycling
centre when no longer used.
If no such collection point or recycling centre is available, you can return the unit to
your distributor or the manufacturer for proper disposal. In this way, you contribute to
the recycling and other forms of utilisation of old electrical and electronic equipment.
Improper disposal harms the environment and human health due to the presence of
dangerous substances in electrical and electronic equipment.
Page 31

Page 29
Maintenance 6
User Guide Cleaning 6.2
Art. no.: 2.510544 Rev.: d
FRED easyport
6.2 Cleaning
6.2.1 Cleaning the Casing
« Wipe the unit's casing with a tissue dampened in a cleaning or disinfection solu-
tion (70% alcohol). Make sure that no liquid enters the unit.
6.2.2 Accessories and Disposables
Your local representative stocks all the disposables and accessories available for the
FRED easyport. A full list of all SCHILLER representatives can be found on the
SCHILLER website (www.schiller.ch). In case of difficulty, contact our head office in
Switzerland. Our staff will be pleased to help process your order or to provide any
details for all SCHILLER products.
V Switch the unit off before cleaning and remove the battery. Do not, under any
circumstances, immerse the apparatus into a cleaning liquid or sterilise with hot
water, steam, or air.
V Do not use any phenol-based agents or peroxide compounds for cleaning.
V Always use SCHILLER replacement parts and disposables, or products ap-
proved by SCHILLER. Failure to do so may endanger life and invalidate the
guarantee.
Page 32

6 Maintenance
6.3 Error Detection
Page 30
Art. no.: 2.510544 Rev.: d
FRED easyport
6.3 Error Detection
Error Cause Remedy
Display is not lit when the
unit is switched on
• Battery not inserted correctly or
defective
• Device defective
« Insert battery correctly or replace it
« Replace device
Yellow electrode LED is lit • Electrode cable not plugged in
• Electrode-to-skin contact impedance too high because of:
– old electrodes (expiration date)
– incorrect application of elec-
trodes
• Device defective
« Plug in electrode cable
« Replace electrodes
« Apply electrodes according to the instructions in
section 4.3.2
« Replace device
Message: Check the electrodes
• Short-circuit between the electrodes
• Device defective
« Apply electrodes according to the instructions in
section 4.3.2
« Replace device
Device cannot be switched
off
• Green button pressed for less
than 3 seconds
• Device defective
« Keep the green button pressed for at least 3 seconds
« Replace device
No analysis • ECG signal too weak
• ECG signal interference through
electromagnetic waves
• Patient moved or touched during
analysis
• Device defective
« Perform cardiac massage again
« Turn off source of signal interference, e.g. radio equip-
ment or cell phone, or move patient outside field of interference
« Do not move or touch patient during analysis
« Replace device
Unable to deliver shock • Battery too low
• Electrode error caused by resuscitation measures
• Heart rhythm has changed
• Device defective
« Change battery
« Reapply electrodes
« Run new analysis
« Replace device
Message “Error xxx” • Device defective « Replace device
Battery capacity indicator is
flashing
• Battery almost empty « Replace battery
Symbol is not displayed
• SCHILLER memory card not/not
correctly inserted
• The card is defective
« Switch off device and properly insert memory card
« Replace card by a new SCHILLER card
Symbol is flashing
• Memory card not detected because inserted with device
switched on
• No SCHILLER SD card used
« Switch off and restart device
« Use SCHILLER card
Memory card does not save
any data
• Memory card defective
• Device defective
« Replace memory card
« Replace device
Date and time wrong on
memory card
• Internal watch misadjusted
• Device defective
« Have updated the internal watch by an authorised per-
son via data transfer
« Replace device
Page 33

Page 31
Maintenance 6
User Guide Error Detection 6.3
Art. no.: 2.510544 Rev.: d
FRED easyport
6.3.1 Measures to Prevent Electromagnetic Interferences
The following table lists devices and their typical frequency ranges and transmitting
power and the resulting minimum distances.
For transmitters not included in the above table, the recommended distance (d in meters) can be calculated using the following formulas:
Frequency range 0.15–80 MHz
Frequency range 80–800 MHz
Frequency range 800 MHz–2.5 GHz
d = recommended minimum distance in meters
P = transmitting power in Watts
“Non-ionic electromagnetic radiation"
The device is designed for use in an electromagnetic environment in accordance with
IEC/EN 60601-1-2, tables 201, 202 and 204. If the device should nevertheless be disturbed, especially in the vicinity of equipment labelled with the symbol “Non-ionic electromagnetic radiation", check the recommended minimum distance according to IEC/
EN 60101-1-2, table 206. For further details, please refer to the service handbook.
HF source Transmitter fre-
quency
[MHz]
Power P
[W]
Distance d
[m]
Radio telephone (microcellular) CT1+, CT2, CT3 885-887 0.010 0.23
Cordless DECT telephone, WLAN, UMTS phone 1880-2500 0.25 1.17
Mobile phone USA 850/1900 0.6 1.8
Mobile phone
- GSM900
- GSM850, NMT900, DCS 1800
900
850, 900, 1800
2
1
3.3
2.3
Walkie-talkie (rescue service, police, fire brigade, service)
81-470 5 2.6
Mobile telephone system (rescue service, police,
fire brigade)
81-470 100 11.7
d
3.5
3V
-------
P×=
d
3.5
3V/m
--------------
P×=
d
7
3V/m
--------------
P×=
Page 34

7 Technical Data
7.1 System Data
Page 32
Art. no.: 2.510544 Rev.: d
FRED easyport
7 Technical Data
7.1 System Data
Where nothing else is indicated, the data refers to a temperature of 25 °C.
Manufacturer
SCHILLER MEDICAL
Device name
FRED easyport (First Responder External Defibrillator)
Dimensions
35 x 133 x 126 mm (h x l x w)
Weight
490 g
Protection case
IPX 4
Power supply
Internal power supply
Battery
Battery type
Battery life
Lithium
• 45 shocks at maximum energy, or
• 2 hours of monitoring (alternately 30 min. on, 30 min. off)
Environmental conditions
Operating temperature
Storage and transport temperature
• 0 ºC...40 ºC relative humidity at 0...95% (noncondensing)
• Atmospheric pressure 500...1060 hPa
• -20 ºC...50 ºC; relative humidity at 0...95% (noncondensing)
• Atmospheric pressure 700...1060 hPa
Display
Type
Dimensions
• High-resolution colour LCD, backlit
•60x40mm
Safety standard
IEC/EN 60601-2-4
The device is designed for 2500 shocks
EMC
• IEC/EN 60601-2-4
• CISPR 11 class B
The device can be exposed to the following interferences without any impairment:
• Static discharges up to 8 kV
• Energy in the radio frequency range up to 20 V/m (80...2500 MHz, 5 Hz modulated)
• Magnetic fields of 100 A/m, 50 Hz
Conformity
CE according to directive 93/42/EEC, class IIb
Battery capacity decrease on switch-on: approx. 2%
Battery capacity decrease by 5 min. monitoring: approx. 4.0%
Total battery capacity decrease by switch-on and 5 minutes monitoring: approx.
6%
Page 35

Page 33
Technical Data 7
User Guide Defibrillation Impulse 7.2
Art. no.: 2.510544 Rev.: d
FRED easyport
7.2 Defibrillation Impulse
Form
• Biphasic pulsed defibrillation impulse with fixed physiological optimum phase durations
• Near stabilisation of the emitted energy in function with the patient resistance using pulse-pause modulation depending on the measured patient resistance.
Standard energy settings
Adults
Neonates
Deviation at 50 ohms: ±3 J or ±15% (the higher value is assumed)
• 120/120/120 joules
• 15/30/50 joules (automatic switch-over when children electrodes are connected)
Other energy setting
Adults
Neonates
Our customer service can change the default energy settings to the following values:
• 15/30/50/70/90/120 joules
• 15/30/50/70 joules
Time to shock standby
• From the start of the analysis
• For max. energy after switch-on
(With new batteries and after 15 discharges at max. energy output)
• 30 seconds
• 40 seconds
Charge control and monitoring
Automatic shock recommendation of analysis
Display of shock standby
Key is lit
Shock delivery
Using key
Page 36

7 Technical Data
7.2 Defibrillation Impulse
Page 34
Art. no.: 2.510544 Rev.: d
FRED easyport
7.2.1 Storage of an Intervention (Option)
Safety discharge when:
• the battery voltage is insufficient
• the device is defective
• the device is turned off
Shock delivery
Via disposable adhesive electrode pads applied in the anterior-anterior lateral position
Defibrillation electrode connection
BF type
Defibrillation electrodes
Electrodes for adults
Electrodes for children
Electrode cable 1.2 m long
•
50 cm2 active surface
• 28 cm
2
active surface
VF/VT detection Conditions for ECG analysis
Minimal amplitude for signals to be analysed >0.15 mV; signals <0.15 mV assessed
as asystole
Shock recommendation
In case of VF and TV (TV >180 b/min.)
Sensitivity 96.4 %
Correct detection of shockable rhythms
Specificity 99.8%
Correct detection of non-shockable rhythms These values were determined with an
AHA database containing VF and VT with or without artefacts.
Storage of ECG
30 minutes
Storage of events
500 events
Page 37

Page 35
Appendix 8
User Guide Accessories 8.1
Art. no.: 2.510544 Rev.: d
FRED easyport
8Appendix
8.1 Accessories
8.2 Literature
European Resuscitation Council
(2005)
Guidelines 2005 for Cardiopulmonary Resuscitation and Emergency Cardiovascular
Care (67 S1:1-146).
American Heart Association (2005) Guidelines 2005 for Cardiopulmonary Resuscitation and Emergency Cardiovascular
Care (9:1-170 ISBN 0080448704).
Cansell A. (2000) Wirksamkeit und Sicherheit neuer Impulskurvenformen bei transthorakaler Defibril-
lation – Biphasische Impulskurvenformen – Notfall- & Rettungsmedizin,
Springer-Verlag 3: 458 – 474.
8.3 Glossary
ABCD The primary ABCD
A = Airways (check breathing)
B = Breathing (artificial respiration)
C = Circulation (circulatory signs or cardiac massage)
D = Defibrillation
ACLS Advanced Cardiovascular Life Support. (ACLS Manual AHA 2001)
AED Automated external defibrillator. This term is also used for semi-automatic defibrilla-
tors (SAED).
SAED Semi-automatic external defibrillator. The shock is released by the user.
BLS Basic Life Support (artificial respiration and cardiac massage)
CPR is frequently used synonymously
CPR Cardiopulmonary resuscitation
CPR Cardiopulmonary resuscitation
PEA Pulseless electrical activity
VT Ventricular tachycardia
VF Ventricular fibrillation
Article no. Article description
2.155056 Single-use defibrillation pads for adults
2.155057 Single-use defibrillation pad for children
3.940002 Battery
2.156038 Carrying pouch
4.150169 Mini SD memory card 16 MB
Page 38

8 Appendix
8.4 Inspection Report
Page 36
Art. no.: 2.510544 Rev.: d
FRED easyport
8.4 Inspection Report
V The user guide must be read before the inspection.
V Recommended inspection interval: Every 4 months
Serial no.: ________________
In case of a defect, please contact the service department of your hospital ❒, your SCHILLER representative ❒ or the local after-
sales service
❒.
Name: ................................................................... Phone: ...................................................................
Test Results Date
General condition
« External condition
• No isolation or mechanical problems
❒ ❒ ❒ ❒ ❒
Accessories
« Availability and condition
Only use a SCHILLER memory card!
Incorrect cards can impair the unit's
operation!
• Electrodes (expiration date and
compatibility)
•User guide
• SCHILLER memory card
❒
❒
❒
❒
❒
❒
❒
❒
❒
❒
❒
❒
❒
❒
❒
Self-test (automatic when the unit is
switched on)
« Switch unit on
Immediately switch the unit off after
the self-test (battery discharge)!
Note the time used for the self-test.
• The standard screen is displayed.
(1) If the battery symbol is dis-
played, replace the battery.
(2) Check the symbol and memo-
ry.
❒
Operation time
[min.]:
❒
❒
Operation time
[min.]:
❒
❒
Operation time
[min.]:
❒
❒
Operation time
[min.]:
❒
❒
Operation time
[min.]:
❒
Notes
Inspection carried out by:
1
2
Page 39

Page 37
Index 9
User Guide
Art. no.: 2.510544 Rev.: d
FRED easyport
9 Index
A
Accessories and disposables ............................................. 29
B
Battery ................................................................................ 16
Battery life
..................................................................... 32
Battery disposal
.................................................................. 28
Battery type
........................................................................ 32
Biocompatibility
.................................................................... 9
BLS AED algorithm or cardiopulmonary resuscitation
....... 15
C
Cardiac arrest ..................................................................... 15
Charge control and monitoring
........................................... 33
Cleaning
............................................................................. 29
Configurable settings
............................................................ 9
D
Danger of electric shock! ...................................................... 4
Danger of explosion!
.......................................................... 16
Defibrillating
.............................................................. 18, 21
Additional safety notes
.................................................. 18
Rules
............................................................................. 18
Defibrillation impulse
.......................................................... 33
Defibrillation procedure
...................................................... 12
discharge, internal
.............................................................. 17
Display
................................................................................ 11
E
Electrodes – adult and pediatric ......................................... 19
Electrodes, application
....................................................... 19
Electrodes, checking
.......................................................... 20
Energy settings, default
...................................................... 33
Error detection
.................................................................... 30
F
Finishing the therapy .......................................................... 25
First shock
.......................................................................... 13
Functional test
.................................................................... 27
I
Inserting the memory card .................................................. 26
L
LED .................................................................................... 30
M
Maintenance interval .......................................................... 27
Maintenance interval for the battery
................................... 28
N
Not responsive ................................................................... 15
O
Operating elements ............................................................. 10
Operational readiness
......................................................... 17
Options
.................................................................................. 9
R
Recharging time .................................................................. 33
Respiration missing
............................................................. 15
Rhythm, not shockable
........................................................ 13
Rhythm, shockable
.............................................................. 12
S
Safety discharge .................................................................. 34
Self-test
.................................................................... 12, 27
Shock delivery
..................................................................... 34
Shock successful
................................................................. 13
Shock unsuccessful
............................................................. 13
Start-up and Initial Preparation
............................................ 16
Step 1
Switching on the unit and preparation
Switching on and preparing the device
21
Step 2
Analysis
.......................................................................... 21
Step 3
Shock delivery
................................................................ 22
Step 4
Cardiopulmonary resuscitation
....................................... 22
Symbols on the device
.......................................................... 7
Symbols used on the battery
................................................. 7
Symbols used on the electrode package
.............................. 8
V
VF/VT detection ................................................................... 34
Voice support
...................................................................... 14
W
Warranty ................................................................................ 5
Page 40

9 Index
Page 38
Art. no.: 2.510544 Rev.: d
FRED easyport
 Loading...