

Samsung SOC-920P, SOC-920 User Manual
ANTI-VANDAL DOME CAMERA
SOC-920(P)
Installing Manual
Montageanleitung
Manuel d’installation
Manual de instalación
Manuale d’installazione
Installationsvejledning
Installationsbruksanvisning
Installatiehandleiding
Manual de instalação
àÌÒÚÛ͈Ëfl ÔÓ ÛÒÚ‡ÌÓ‚ÍÂ
E
F
D
I
Es
NL
PT
DK
S
R
Important Safety Instructions
CAUTION
RISK OF ELECTRIC
SHOCK DO NOT OPEN
CAUTION: TO REDUCE THE RISK OF
ELECTRIC SHOCK, DO NOT
REMOVE REAR COVER. NO
USER SERVICEABLE PARTS
INSIDE. REFER TO QUALIFIED
SERVICE PERSONNEL.
1. Make sure that the cable is plugged in securely before using.
(A loose connection may result in fire.)
2. When installing the camera on a wall or ceiling, mount it safely and
securely. (A falling camera may cause personal injury.)
3. Do not place conductive objects (e.g., screwdrivers, coins, and
metal things) or containers filled with water on top of the camera.
(Serious injury may result from fire, electrical shock, or falling objects.)
4. Do not install in a sooty, dusty, or humid location.
(Doing so may cause fire or electric shock.)
5. If any unusual smells or smoke come from the unit, stop using the
product. In such case, immediately disconnect the power source and
contact the service center. (Continued use in such a condition may
cause fire or electric shock.)
This symbol indicates high voltage
is present inside. It is dangerous
to make any kind of contact with
any inside part of this product.
This symbol alerts you that
important literature concerning
operation and maintenance has
been included with this product.
6. If this product fails to operate normally, contact the store of purchase or
your nearest service center. Never disassemble or modify this product in any
way. (The manufacturer is not liable for any damage resulting from
unauthorized disassembly or repairs.)
7. When cleaning, do not spray water directly onto parts of the product. (Doing
so may cause fire or electric shock.) Wipe the surface with a dry cloth.
Never use detergents or chemical cleaners on the product, as this may result
in discoloration of surface or cause damage to the finish.
1. Do not drop objects on the product or apply strong shock to it. Keep away
from a location subject to excessive vibration or magnetic interference.
2. Do not install in a location subject to high temperature (over 50
low temperature (below -10
fire or electric shock).
3. Avoid a location which is exposed to direct sunlight, or near heat sources
such as heaters or radiators. (Neglecting to do so may result in a risk of fire).
4. If you want to relocate the already installed product, be sure to turn off the
power and then move or reinstall it.
5. Install in a well - ventilated location.
6. Remove the power plug from the outlet when there is a lightning storm.
(Neglecting to do so may cause fire or damage to the product.)
°C/14°F
), or high humidity. (Doing so may cause
°C/
122°F),
EE
2
3
Table of Contents
Chapter 1 SOC-920(P) Overview 5
SOC-920(P) Introduction 6
SOC-920(P) Overview 7
E
Chapter 2 Installing SOC-920(P) 8
Checking the Contents of the Package 9
Precautions for Installation and Use 11
Preparing Cable 12
Installing SOC-920(P) 13
Appendix SOC-920(P) Pin Configuration 15
SOC-920(P) Product Specifications 16
4
Chapter 1
SOC-920(P) Overview
E
This chapter briefly introduces the SOC-920(P) and
describes its key features, part names and functions.
5
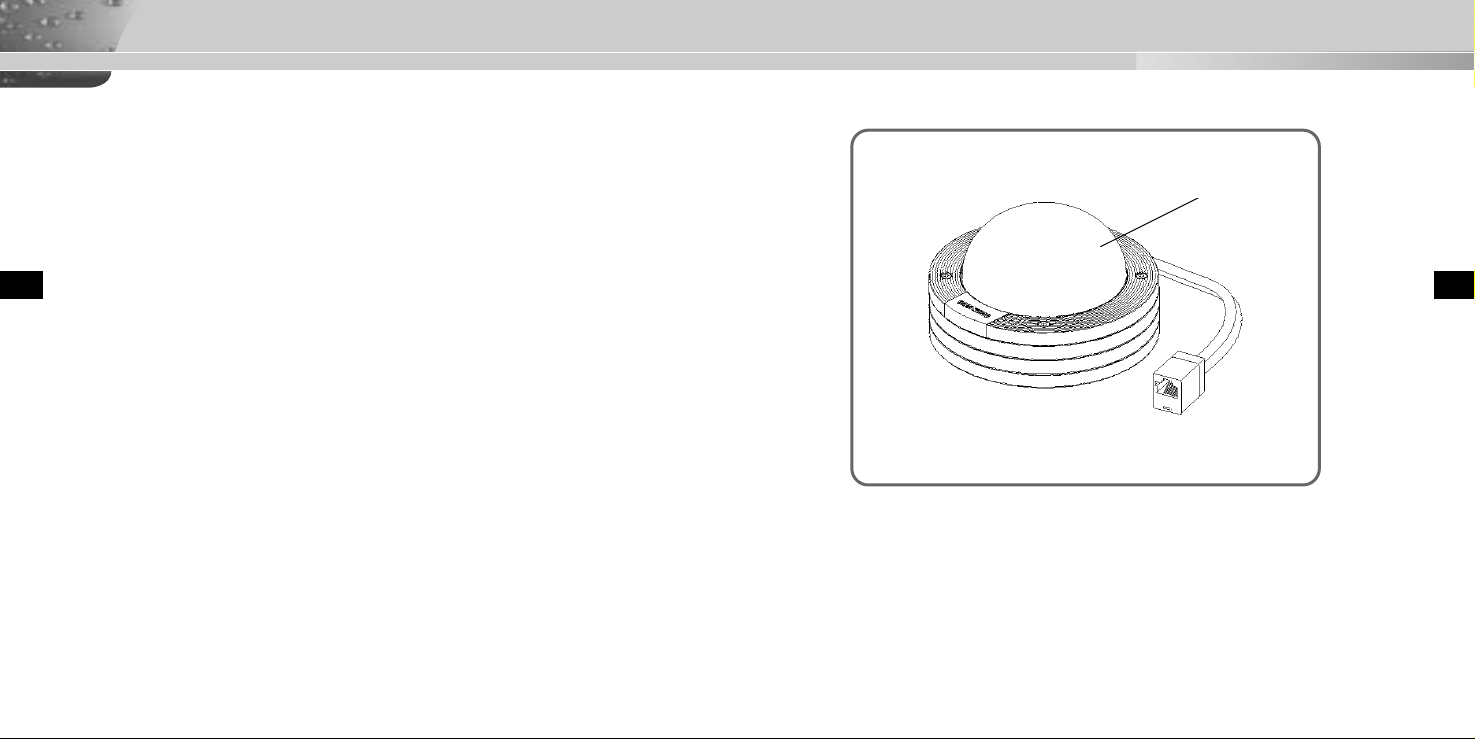
SOC-920(P) Introduction SOC-920(P) Overview
The SOC-920(P) Anti-Vandal Dome Camera is a camera for the VPP
(Video Professional Package) only.
The SOC-920(P) Anti-Vandal Dome Camera is a dome-typed surveillance
device that offers the best features of surveillance for banks, retail stores,
E
commercial buildings, industrial settings, and etc. It is designed to withstand intentional or accidental impact or vandalism.
The SOC-920(P) is an advanced surveillance device that enables a maximum of 120x zoom surveillance with its 12x zoom lens and 10x digital
zoom IC.
The SOC-920(P) is a multifunction surveillance device that is equipped
with all of the key features of the existing surveillance cameras: the LowLight Surveillance function that enables shooting moving objects under
extremely low illumination, the White Balance function that provides accurate color rendition under any light source, the BLC function that enables
effective back light compensation even at locations with bright incident
light, and the One Auto Focus function that automatically tracks and focuses on the subject. The built-in microphone that allows the user to hear all
sounds generated in the monitoring area.
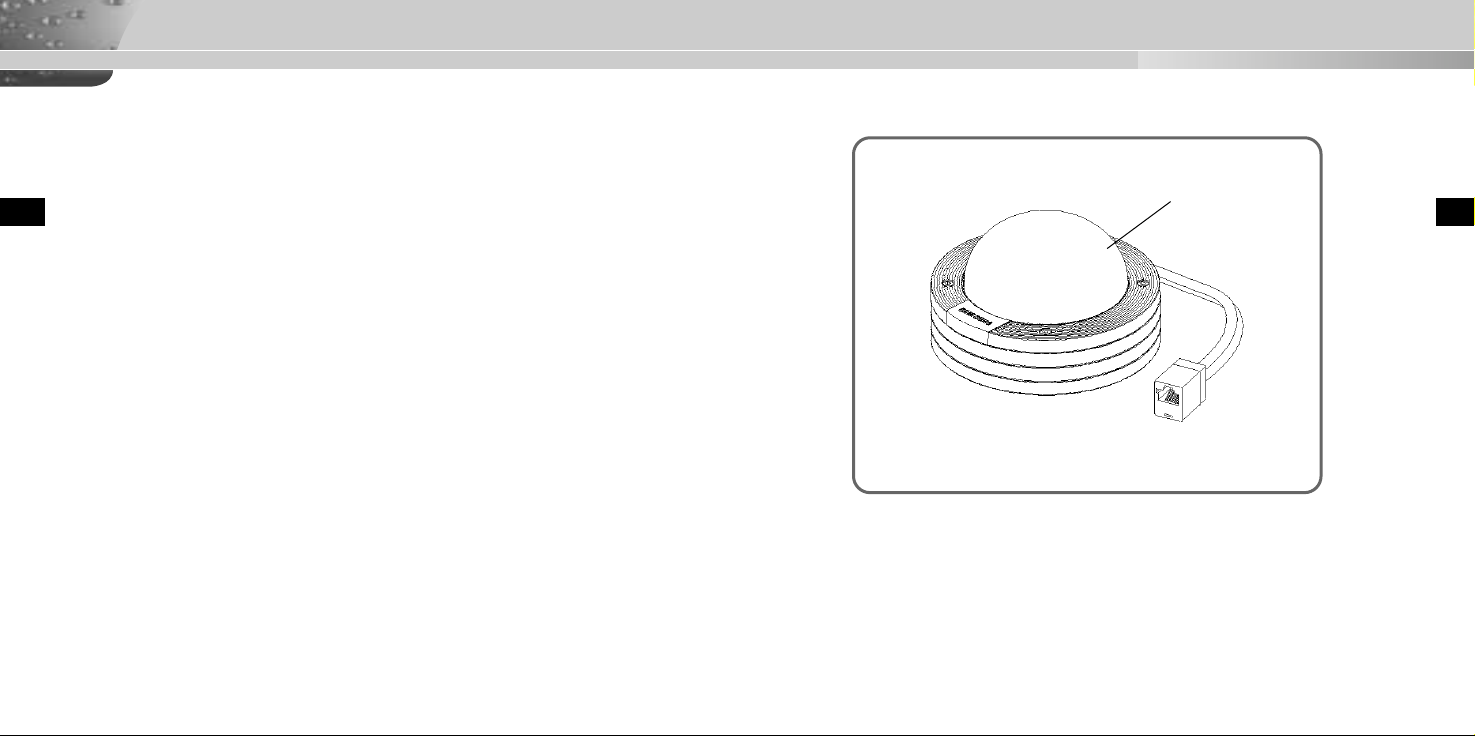
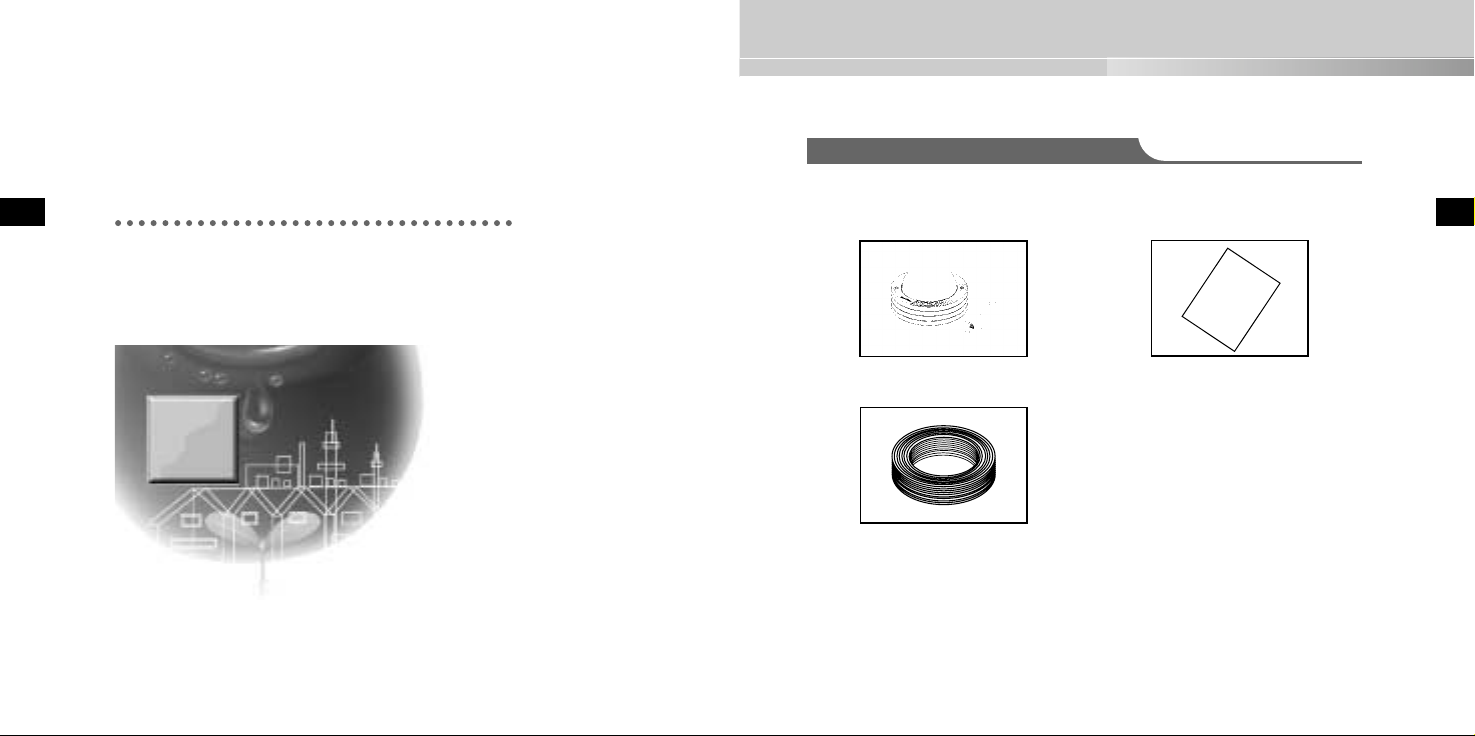
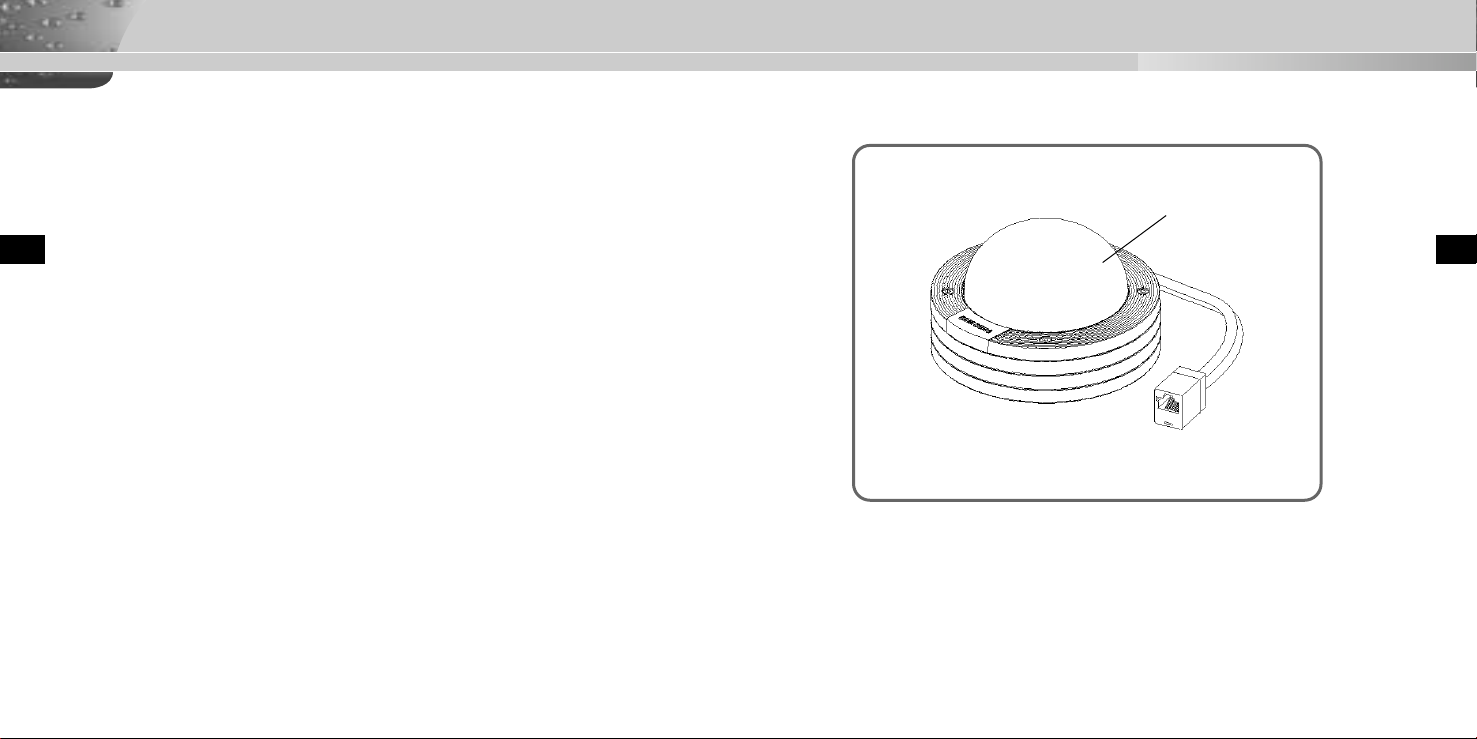
DOME COVER
E
6
7
Before Installation
Chapter 2
Checking the Contents of the Package
Installing SOC-920(P)
E
This chapter explains what to check before installing the
SOC-920(P), how to choose an installation site, and what
precautions should be taken during installation. Now, let’s
install the SOC-920(P) and connect cable.
8
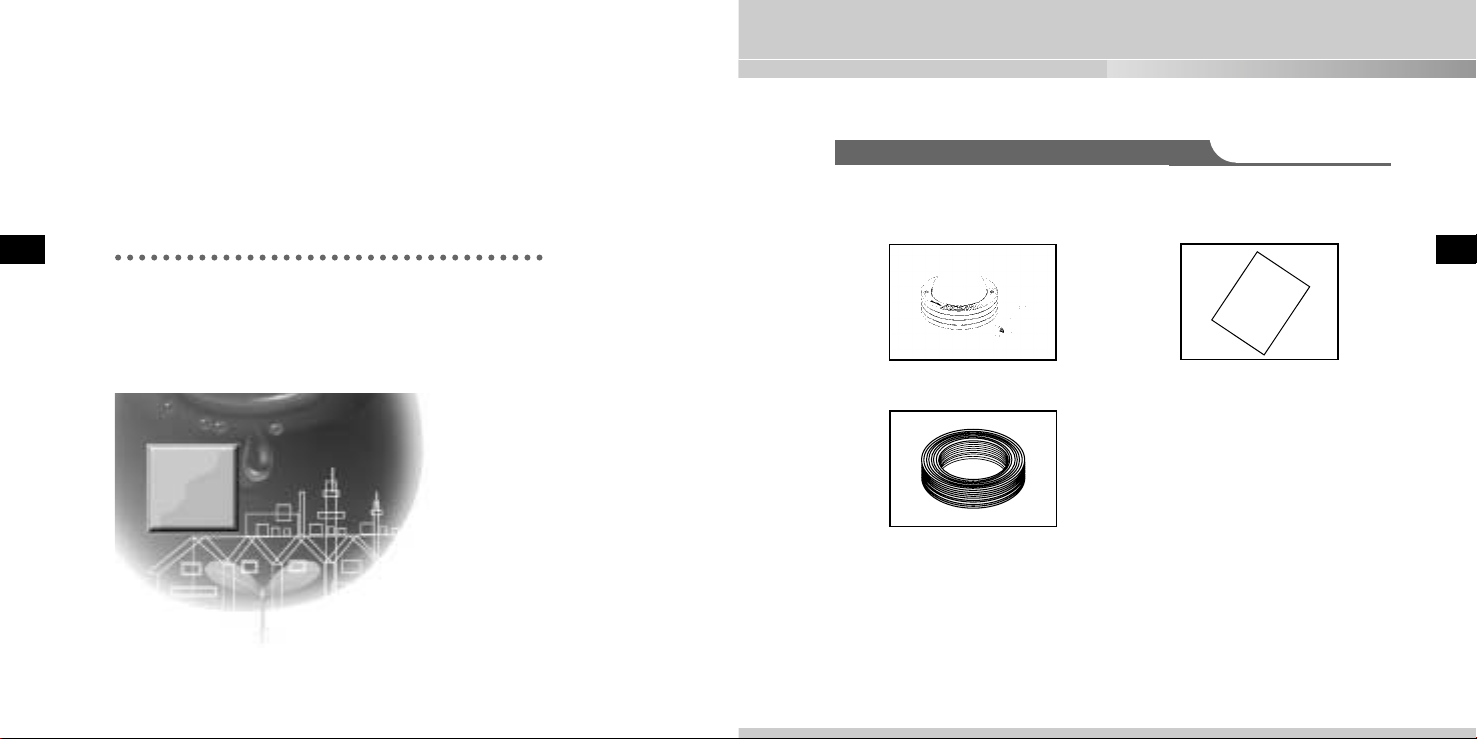
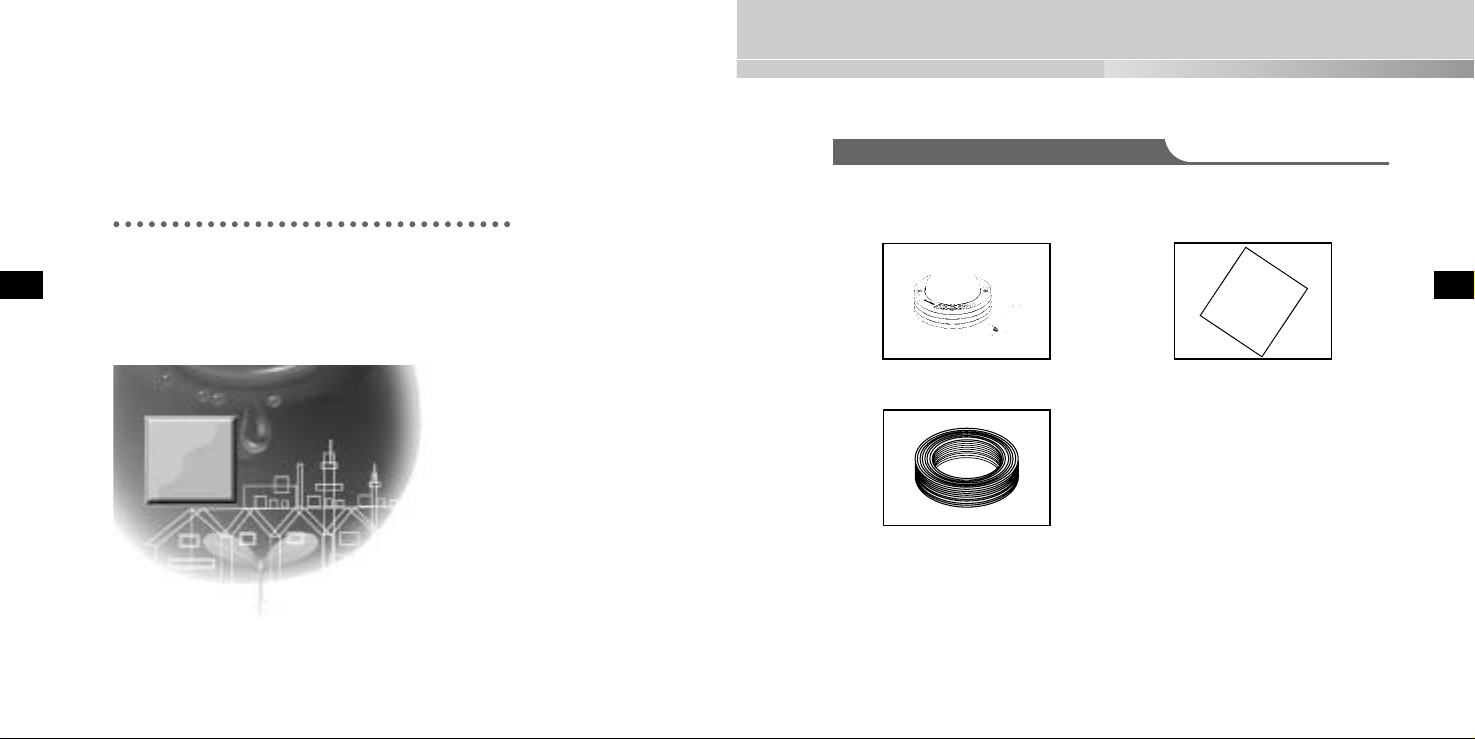
Be sure to check that the following items are included in the package.
Installing
Manual
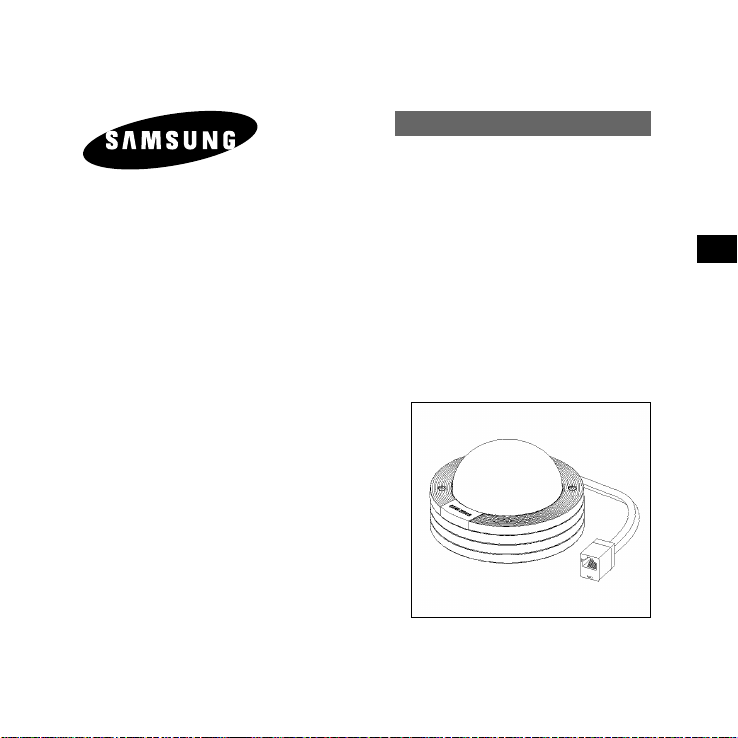
SOC-920(P)
CABLE
Installing Manual
E
9
Before Installation
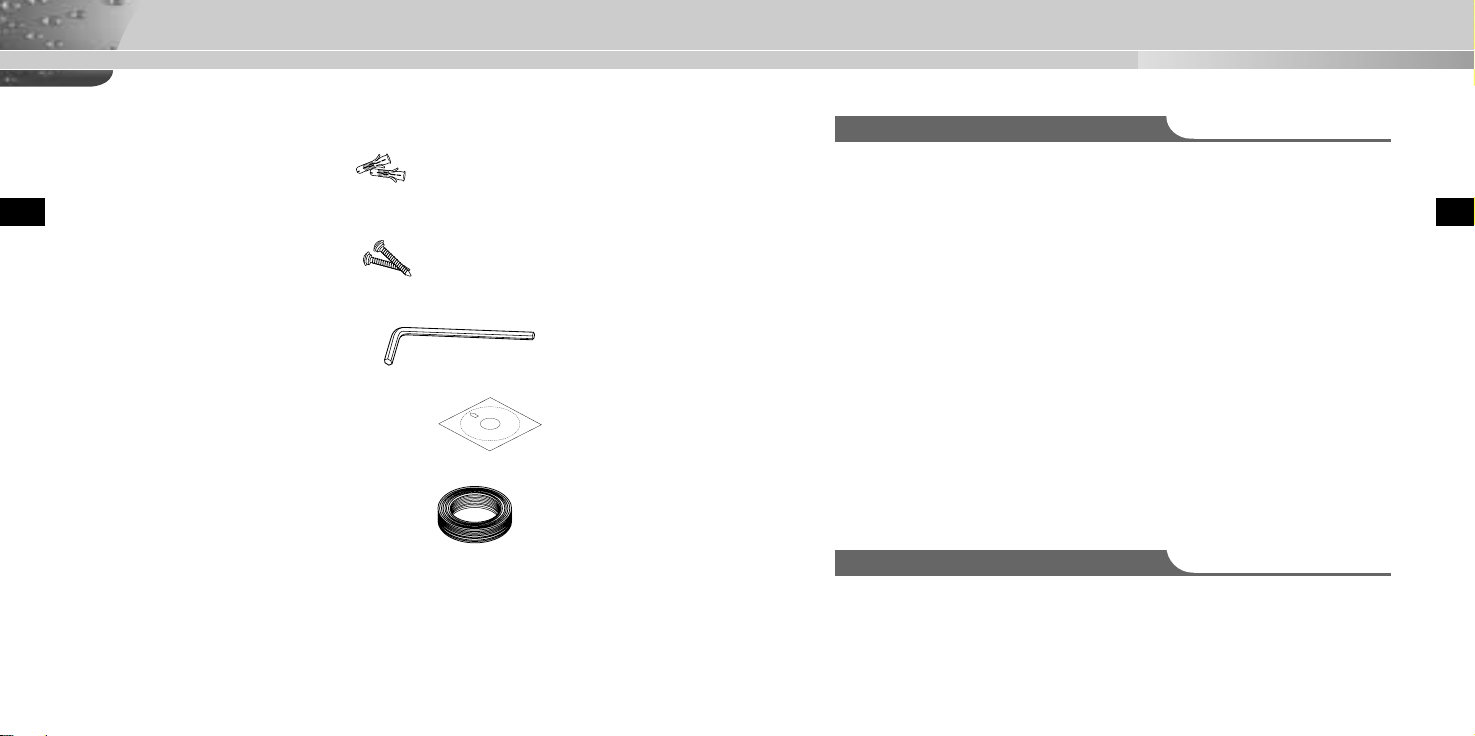
✔ PLASTIC ANCHOR
2 ea. ❙❙for ceiling installation
E
✔ ASSY SCREW TAPPING
2 ea. ❙❙for ceiling installation
(TH M4 X L30 BLK + 0 RING)
✔ L WRENCH
1 ea. ❙❙for COVER DOME removal
✔ TEMPLET
1 ea. ❙❙An installation GUIDE for installing
on a ceiliing (ART PAPER)
✔ CABLE 20M
1 ea. ❙❙Connecting the power and signal.
Precautions for Installation and Use
✔ Please check whether the installation site can sufficiently support the weight of
the SOC-920(P) before installation.
E
✔ Make sure that the cable is not caught on anything or its insulation sheath is
not removed. (Neglecting to do so may cause fire or damage to the product.)
✔ Prevent people from approaching the installation area, where objects might fall
during installation. Move valuables to a safe location before installation.
✔ Install in a cool place and away from direct sunlight.
Be sure not expose the SOC-920(P) to direct sunlight even during use or
storage. Use the BLC function when operating the SOC-920(P) underneath a
spot light or under very bright lights.
✔ The SOC-920(P) must be used in an area where temperature and humidity are
kept within the limits specified below:
- Temperature: -10°C ~ +50°C (14°F~122°F)
- Humidity: Below 90%
SOC-920(P) - Installation Examples
✔ It can be directly installed on ceilings.
✔ It can be directly installed on walls.
10
11
SAMSUNG
Preparing Cable
The following cable are required to install and use the SOC-920(P).
Installing SOC-920(P)
Cable
E
12
1. Choose an installation site that can sufficiently support the weight of the equipments to be installed.
2. Attach the supplied template to the installation site, drill pilot holes (5 mm diam
eter, min. 35 mm depth), and then install and secure the supplied plastic
anchors (HUD 5).
3. Arrange them so that they will not be damaged or aught on anything when
installing the camera
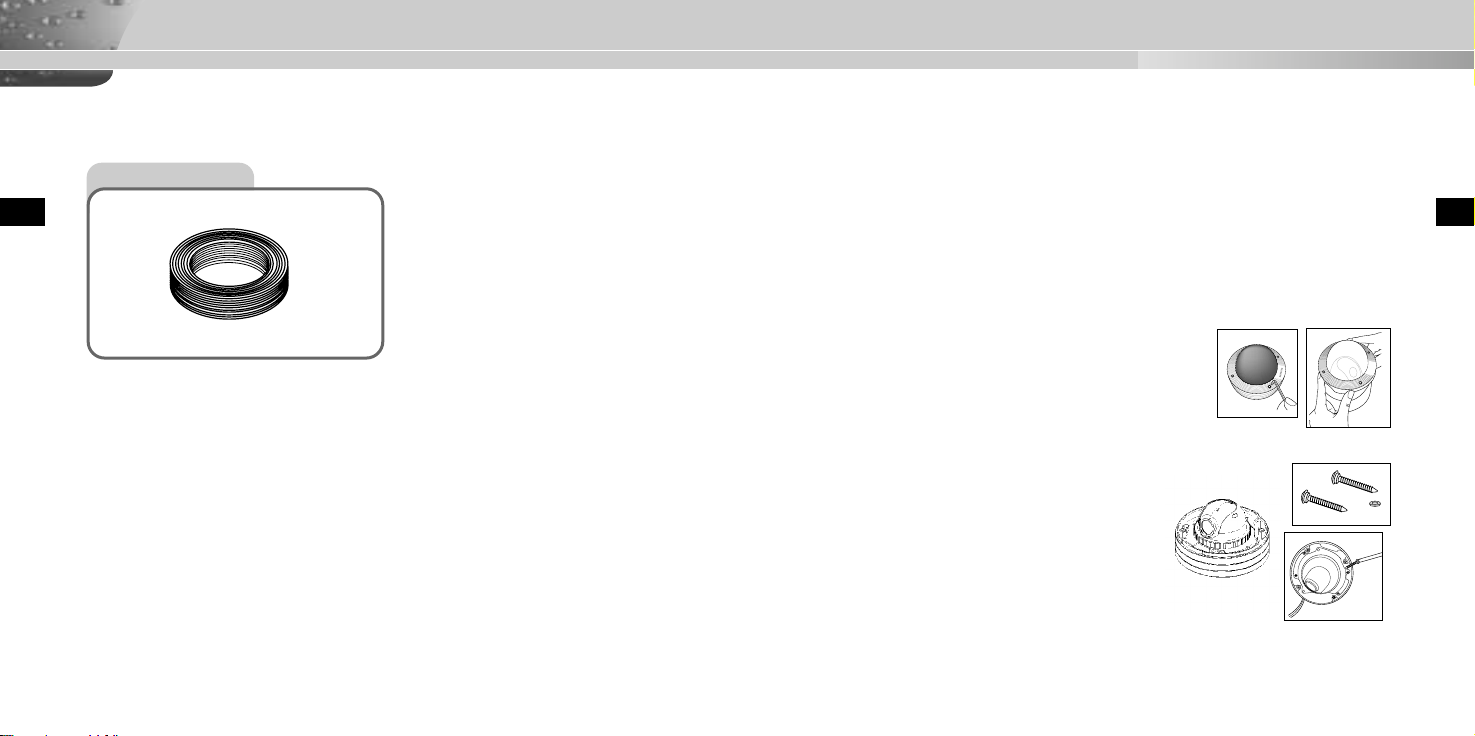
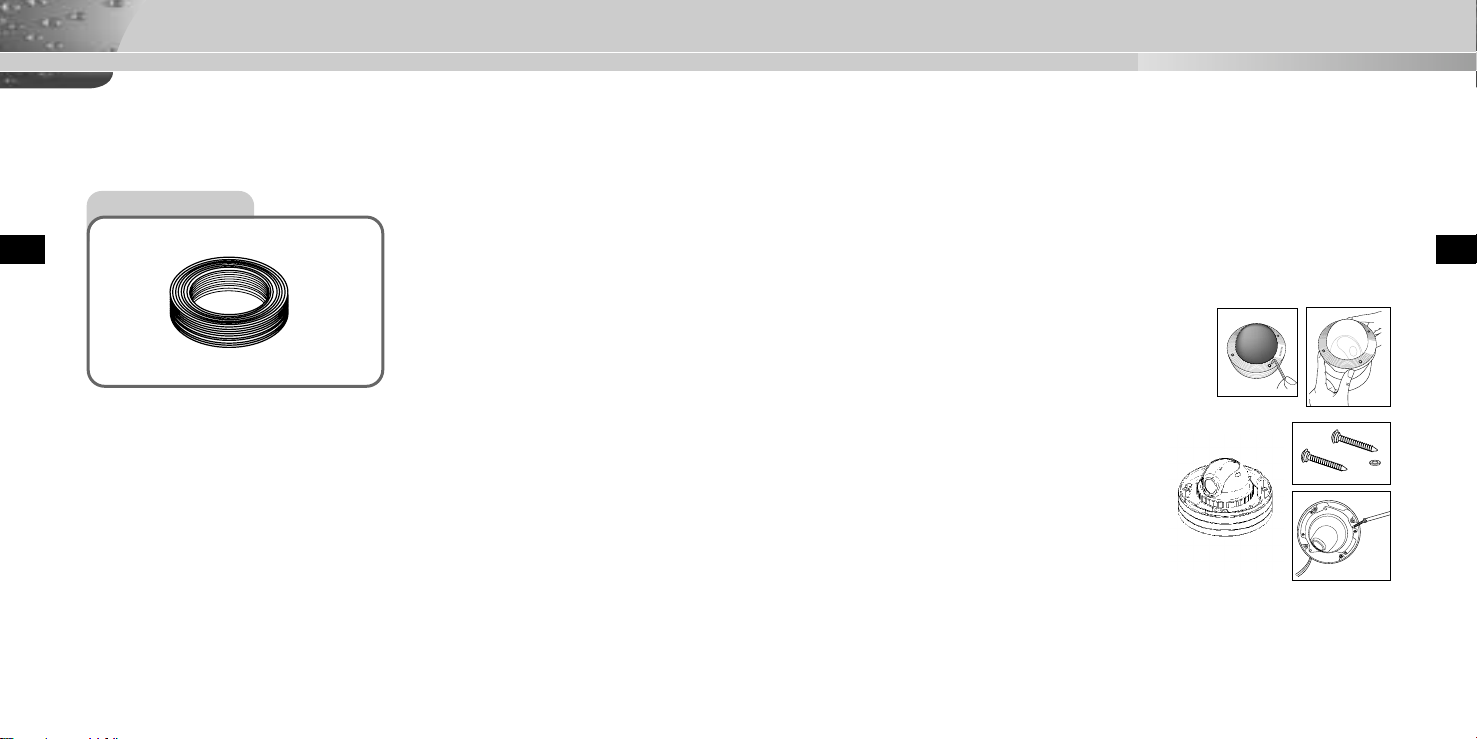
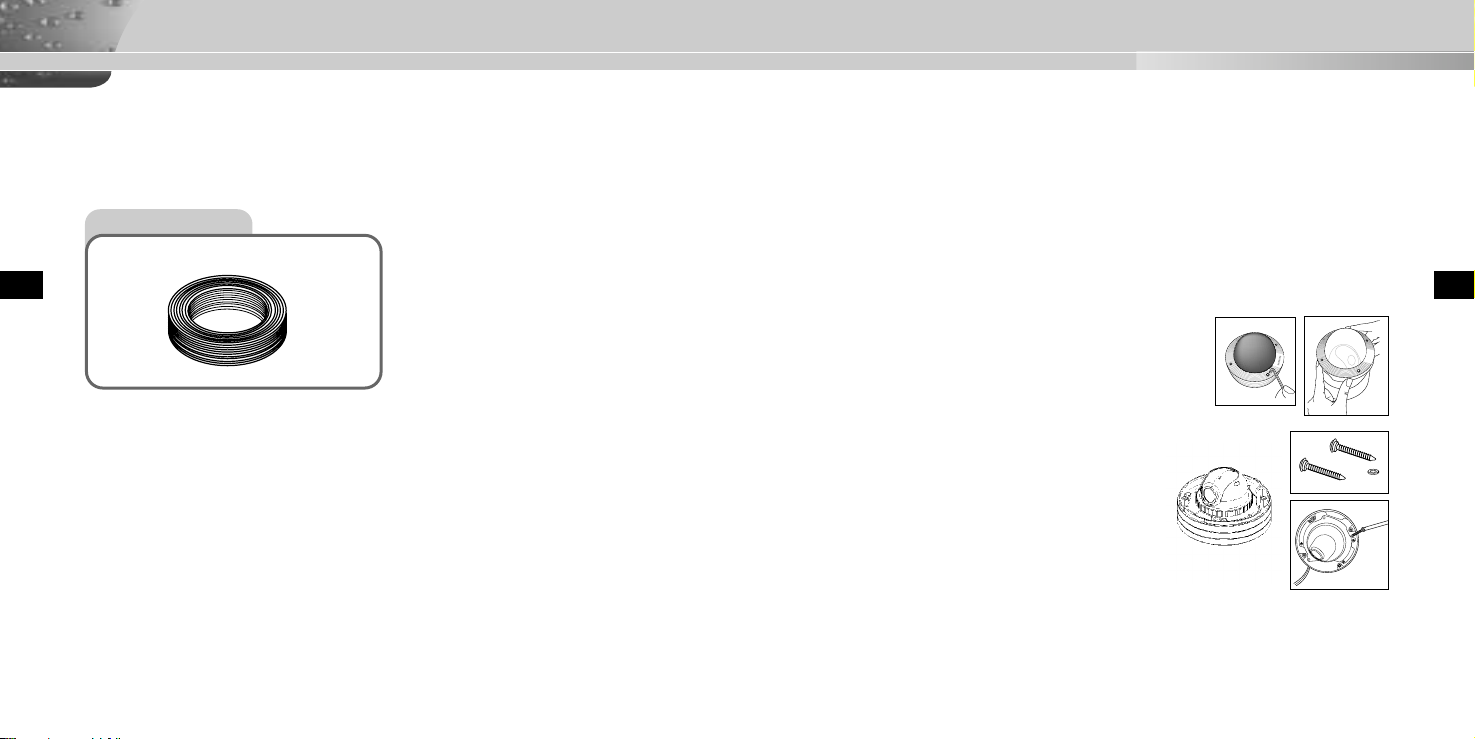
4. Remove the DOME COVER to install the CAMERA.
1) Use the supplied L WRENCH to unfasten the 4
BOLTS for CASE fixing by turning them counterclockwise as shown in the illustration.
2) Disassemble the ASSY-DOME in the direction
shown in the illustration.
5. Install the CAMERA.
Align the CAMERA’s installation holes to the
holes where the PLASTIC ANCHORS are
inserted and then fasten the ASSY SCREWTAPPINGS (TH M4 X 30) with O RINGS.
(2 spots)
1) 2)
➜
13
E
Installing SOC-920(P)
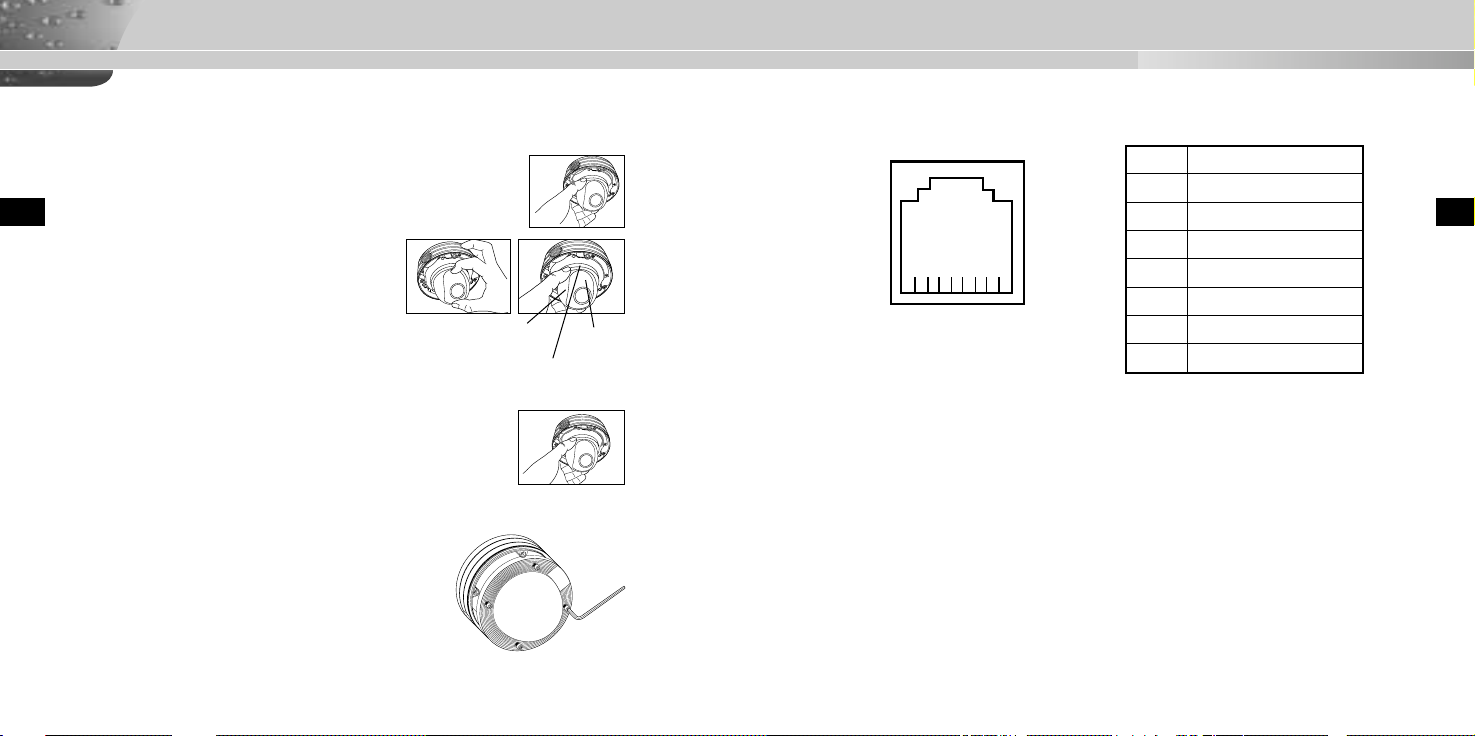
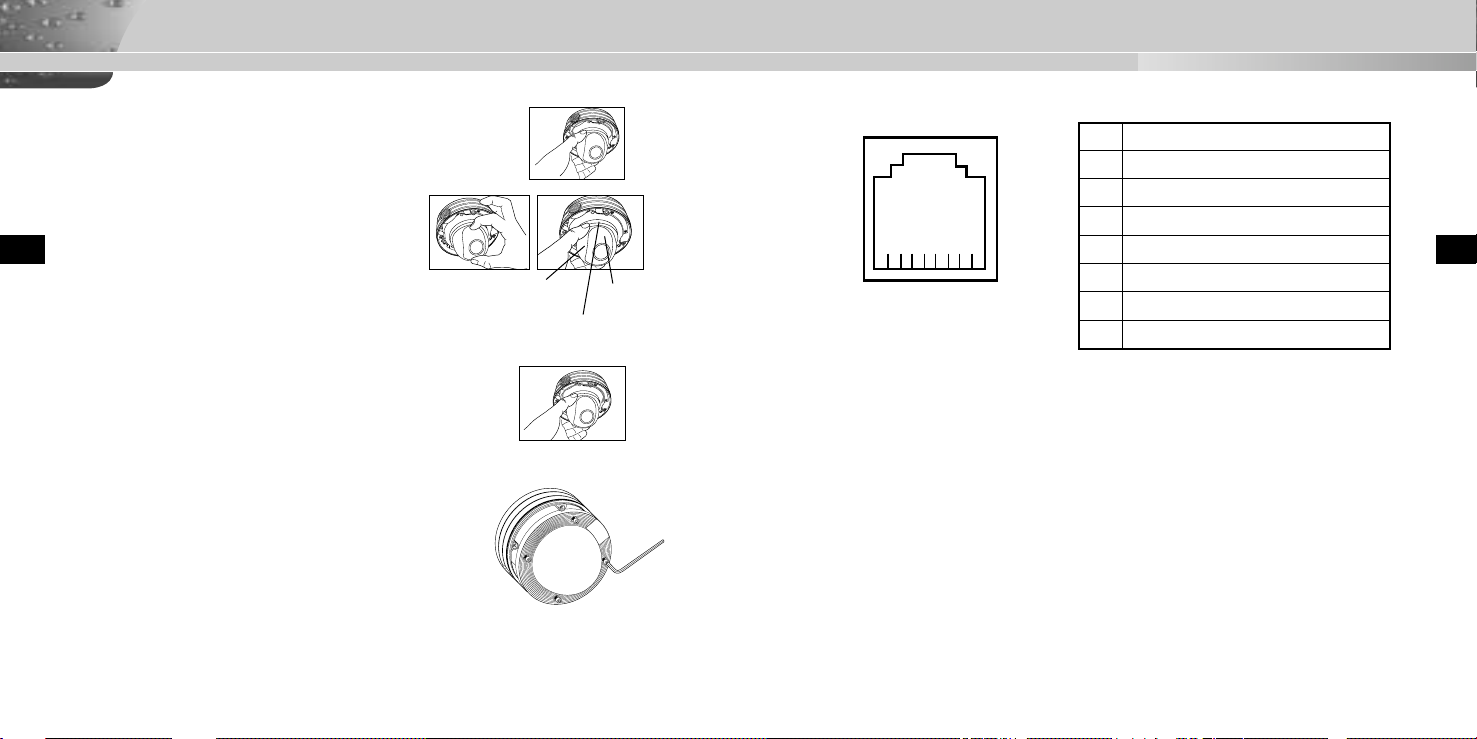
SOC-920(P) - Pin Configuration
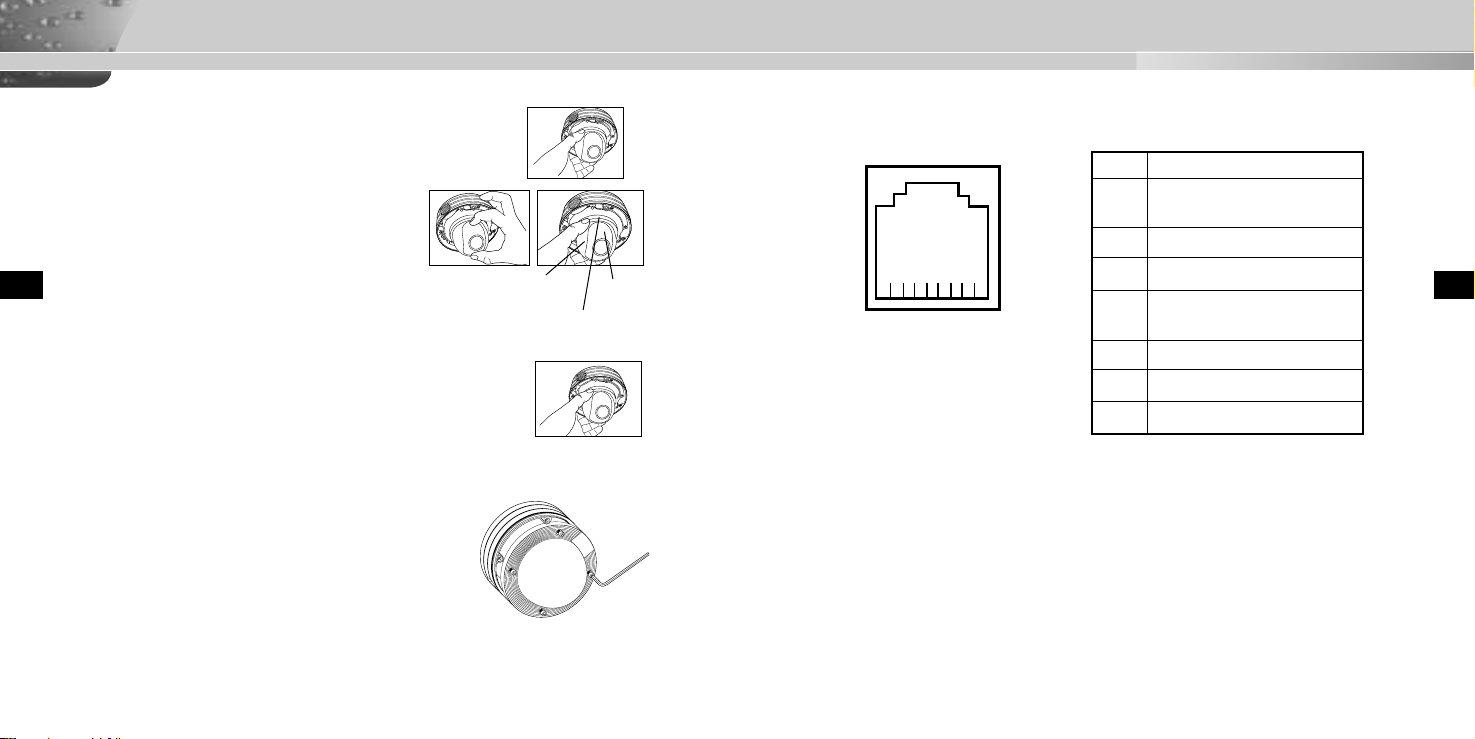
6. Adjust the LENS direction where the customers want to monitor.
1) Turn the STOPPER RING counter-clockwise as shown in the
E
illustration to move the LENS body and COVER LENS.
2) Move the LENS body to adjust the vertical direction and turn
the LENS body together with the COVER
LENS to adjust the horizontal direction.
(There is a stopping mechanism on the
COVER LENS so that the LENS cannot be
turned more than 180° degrees to either left or right.
Excessive rotation of the LENS may twist the inside wiring
and cause damage such as a short circuit or broken wire.)
☛ The BOTTOM marking of the LENS must face downward.
(Otherwise, the image may look tilted or inversed.)
3) Position the LENS in the desired direction, hold the COVERLENS with one hand, and tightly fasten the STOPPER RING
clockwise with the other hand so that the LENS is not loose.
7. If the interior and exterior of the DOME is dirty, wipe off dirt with
a soft cotton flannel cleaning cloth.
8. After assembling the DOME COVER in the correct
direction, fasten the CASE fixing BOLT by turning it
clockwise with a L WRENCH. (4 spots)
9. Once the camera is installed, connect one end of the
cable to the camera and the other end to other accessory equipment or to the back of the monitor.
14
COVERLENS
STOPPERRING
LENS
BODY
8 ... 1
1DATA+
2 VIDEO_OUT
3 GND
4DATA5 AUDIO_OUT
6 VDD
7 GND_V
8 CH_SEL
E
15
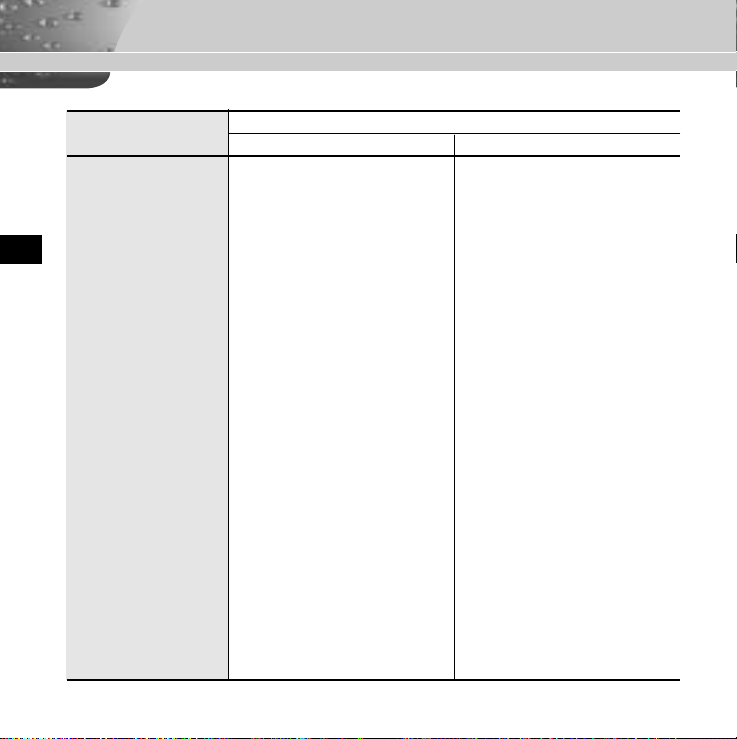
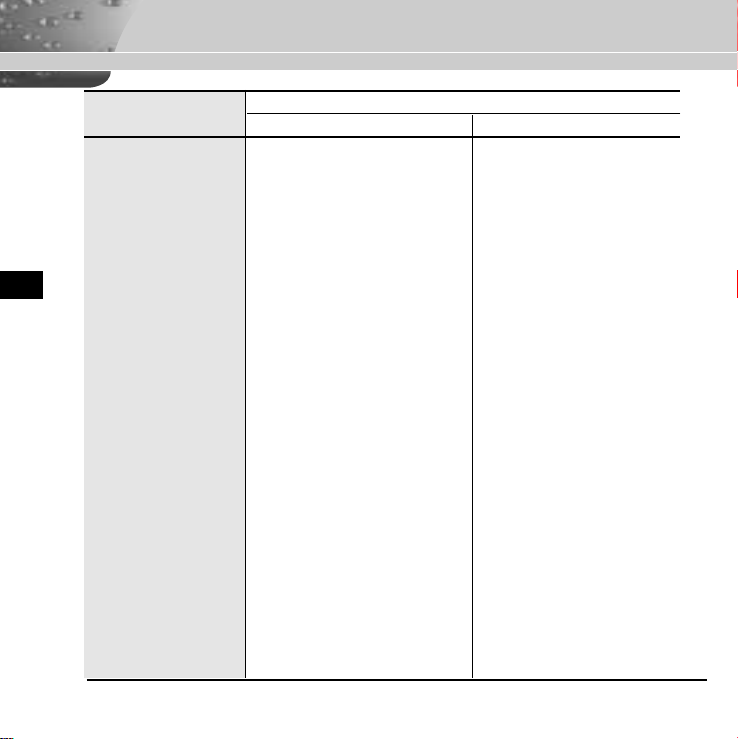
SOC-920(P) - Product Specifications
ITEM
Product Type
Power Source Voltage
Power Consumption
E
Broadcast System
Imaging Device
Effective Pixel
Scanning Method
Line Frequency
Synchronization Method
Resolution
S/N Ratio
Minimum Scene Illumination
Color Temperature
Electronic Shutter
Back Light Compensation
Sense Up
Digital Zoom
Motion Detection
Video Control
Signal Output
Lens
Operating Temperature
Operating Humidity
Physical Size
Weight
Anti-Vandal Dome Camera Anti-Vandal Dome Camera
DC12~18V From Monitor DC12~18V From Monitor
Approx. 6W Approx. 6W
PALStandard Color System NTSC Standard Color System
1/4 inch IT S-HAD CCD 1/4 inch IT S-HAD CCD
752(H) X 582(V) 768(H) X 494(V)
625 Line, 2:1 Interlace 525 Line, 2:1 Interlace
Horizontal:15,625 Hz Horizontal:15,734 Hz
Vertical : 50 Hz Vertical : 60 Hz
INT INT
480 TV Lines 480 TV Lines
Over 50dB (AGC Off) Over 48dB (AGC Off)
2 Lux (Sense Up Off) 2 Lux (Sense Up Off)
0.02 Lux (Sense Up x128) 0.02 Lux (Sense Up x128)
ATW/AWC/Manual MODE ATW/AWC/Manual MODE
(3200°K, 5600°K, R/B Gain Control) (3200°K, 5600°K, R/B Gain Control)
Off, 1/120, 1/250, 1/500, Off, 1/100, 1/250, 1/500,
1/1K, 1/2K, 1/4K, 1/10K sec 1/1K, 1/2K, 1/4K, 1/10K sec
Off/On (Area Setting) Off/On (Area Setting)
Off/Auto x2~x128/Fix x2~x128 Off/Auto x2~x128/Fix x2~x128
Off, x2, x4, x6, x8, x10 Off, x2, x4, x6, x8, x10
Off/On (Area/Sensitivity Setting) Off/On (Area/Sensitivity Setting)
POSI/NEGA, MIRROR, Detail Setting POSI/NEGA, MIRROR, Detail Setting
Composite Video Out : 1.0 Vp-p 75 ohms/RJ45 Composite Video Out : 1.0 Vp-p 75 ohms/RJ45
Focal length : 3.6 ~ 43.2 mm Focal length : 3.6 ~ 43.2 mm
Aperture : F1.8(Wide), F2.6(Tele) Aperture : F1.8(Wide), F2.6(Tele)
-10°C ~ +50°C -10°C ~ +50°C
~90% ~90%
132(ø) x 95.3(H) mm 132(ø) x 95.3(H) mm
Approx. 1 Kg Approx. 1 Kg
SOC-920P SOC-920
DESCRIPTION
16
CAMÉRA DÔME ANTI-V ANDALISME
SOC-920(P)
Manuel d’installation
F
Précautions de sécurité
L’objectif des précautions de sécurité est d’assurer l’utilisation correcte de ce
produit afin d’éloigner tout risque et tout dégât à la propriété. Assurez-vous de
bien observer toutes les précautions.
Avertissement
Ne pas tenir compte d’un avertissement risque de causer des
blessures graves, voire mortelles.
1. Assurez-vous que le câble soit correctement inséré avant l’utilisation.
(Une connexion desserrée peut provoquer un incendie.)
2. Lorsque vous installez la caméra sur un mur ou un plafond, installez-la de
manière sûre. (La chute d’une caméra risque de provoquer des blessures.)
3. Ne placez aucun objet conducteur (tournevis, pièces de monnaie et objets
métalliques par exemple) ou des récipients remplis d’eau au-dessus de la
caméra. (Un incendie, un choc électrique ou la chute d’objets risquent de
provoquer de sérieuses blessures.)
4. Ne l’installez pas dans un endroit poussiéreux ou humide. (Cela pourrait
provoquer un incendie ou un choc électrique.)
5. Si des odeurs ou de la fumée inhabituelles sortent de l’appareil, arrêtez de
vous en servir. Dans ce cas, débranchez immédiatement la source d’alimentation et contactez le centre de service. (Une utilisation prolongée dans ce
cas risque de provoquer un incendie ou un choc électrique.)
6. Si ce produit ne fonctionne pas normalement, contactez le magasin où vous
l’avez acheté ou votre centre de service le plus proche. Il convient de ne
jamais démonter ou modifier ce produit de quelque manière que ce soit. (Le
fabriquant n’est pas responsable des dommages résultants d’un démontage
ou de réparations non autorisées.)
7. Lors du nettoyage, n’aspergez pas directement les pièces de l’appareil avec de
l’eau. (Cela pourrait provoquer un incendie ou un choc électrique.) Essuyez la
surface à l’aide d’un chiffon sec. N’utilisez jamais de détergents ou autres produits de nettoyage chimique, cela pourrait décolorer la surface ou endommager
la finition.
Mise en garde
Ne pas tenir compte d’une mise en garde peut entraåner des blessures
cor porelles ou des dégâts à la propriété.
1. Ne laissez pas tomber d’objets sur le produit ni ne soumettez le produit à de
forts coups. Ne placez pas le produit dans un emplacement où il pourrait subir
de fortes vibrations ou des interférences magnétiques.
2. Ne placez pas le produit dans un emplacement où il fait très chaud (plus de
50°C/122°F), très froid (moins de 10°C/14°F) ou très humide. (Cela pourrait
causer un incendie ou provoquer une décharge électrique.)
3. Évitez un emplacement où le produit est exposé à des rayons directs du soleil
ou à une source de chaleur, telle qu’un radiateur ou un appareil de chauffage.
(Le non-respect de cette consigne pourrait présenter un risque d’incendie.)
4. Si vous désirez déplacer le produit à la suite de son installation, assurez-vous
de couper le courant avant son déplacement et sa réinstallation.
5. Installez le produit dans une aire bien ventilée.
6. En cas d’orage, débranchez le cordon électrique de la prise murale. (Le nonrespect de cette consigne pourrait provoquer un incendie ou endommager le
produit.)
FF
2
3

Sommaire
Chapitre 1 SOC-920(P) Vue d’ensemble 5
SOC-920(P) Introduction 6
SOC-920(P) Vue d’ensemble 7
F
Chapitre 2 Installation de la caméra dôme SOC-920(P) 8
Vérifiez soigneusement le contenu du carton 9
Précautions à prendre lors de l’installation et de l’utilisation
de la caméra dôme 11
Caractéristiques du cordon d’alimentation et du câble vidéo 12
Installation de la caméra dôme SOC-920(P) 13
Annexe Configuration des broches pour le modèle
SOC-920(P) 15
SOC-920(P) Caractéristiques Techniques 16
4
Chapitre 1
SOC-920(P)
Le présent chapitre décrit brièvement la SOC-920(P), ses
caractéristiques principales, ses composants et leurs fonctions.
Vue d’ensemble
F
5
SOC-920(P) Introduction
La caméra dôme anti-vandalisme SOC-920(P) est une caméra destinée uniquement au
VPP (Pack vidéo professionnelle)
La SOC-920(P) est une caméra dìme anti-vandalisme qui offre les meilleures fonctions de surveillance aux institutions financiaires, aux magasins de détail, aux
immeubles commerciaux, aux installations industriels, etc. La caméra a été connue
pour résister à des chocs intentionnels ou accidentels, à des actes de vandalisme,
F
à l’infiltration d’eau, de poussiäre et à des vibrations.
La SOC-920(P) est un dispositif de surveillance extràmement évolué, offrant une
capacité zoom de 120x grâce à son objectif zoom 12x et son zoom 10x CI
numérique.
La SOC-920(P) est un dispositif de surveillance multifonctions, dotée de toutes les
fonctionnalités clés des caméras de surveillance sur le marché ; surveillance à
faible éclairage, permet de filmer des objets animés dans des conditions de luminosité extràmement faible ; réglage de l’équilibre des blancs, permet de rendre aux
images leurs couleurs exactes dans n’importe quelle condition d’éclairage ; fonction BLC (Backlight Compensation), corrige les effets d’éclairage en contre-jours
même dans des conditions de très forte luminosité ;
qui suit et met au point automatiquement le sujet. Le micro intégré qui permet à l’utilisateur d’entendre tous les sons émis dans la zone de surveillance.
SOC-920(P) Vue d’ensemble
.
DôME COUVER
F
Une fonction Auto Focus
6
7
Avant de procéder à l’installation
Chapitre 2
Vérifiez soigneusement le contenu du carton
Installation de la caméra dôme
SOC-920(P)
F
Le présent chapitre explique ce qu’il faut vérifier avant l’installation de la SOC-920(P), comment choisir un emplacement d’installation et quelles précautions à prendre lors de l’installation.
Maintenant, au boulot! Installez la SOC-920(P) et connectez les
câble.
8
Assurez-vous que les articles suivants sont réunis :
SOC-920(P)
CÂBLE
Manuel d’installation
d’installation
Manuel
F
9

Avant de procéder à l’installation
✔ ANCRAGE EN PLASTIQUE
2 ch. ❙❙pour l’installation au plafond
✔ AVIS FILETÉES DE FIXATION
2 ch. ❙❙pour l’installation au plafond
(TH M4 X L30 BLK + JOINT TORIQUE)
F
✔ CLÉ en L
1 ch. ❙❙pour le retrait du COUVERCLE en forme
de DÔME
✔ GABARIT
1 ch. ❙❙sert de GUIDE pour l’installation au
plafond (PAPIER ARTISTIQUE)
✔ CÂBLE 20M
1 ch. ❙❙Connexion de l’alimentation et du signal.
Précautions à prendre lors de l’installation et de
l’utilisation de la caméra dôme
✔ Avant d’entreprendre l’installation de la SOC-920(P), assurez-vous bien que
l’emplacement d’installation puisse suffisamment supporter son poids.
✔ Vérifiez que le câble n’est pas coincé et que sa gaine isolante n’a pas été
retirée. (Le non-respect de cette précaution pourrait provoquer un incendie ou
endommager le produit.)
✔ Veillez à ce que personne ne s’approche de l’aire d’installation. Des objets
peuvent tomber causer des blessures corporelles. Avant de commencer l’installation de la caméra, placez les objets de valeur dans un endroit sûr.
✔ Installez la SOC-920(P) dans un endroit frais, à l’abri de la lumière directe du
soleil.
Lors de l’usage ou de l’entreposage de la SOC-920(P), évitez de l’exposer à
la lumière directe du soleil. Activez la fonction BLC (contre-jour) lorsque vous
utilisez la SOC-920(P) sous la lumière d’un projecteur ou tout autre lumière
très forte.
✔ Il convient d’utiliser le SOC-920(P) dans un endroit où la température et l’hu-
midité sont entre les limites indiquées ci-dessous :
- Température : -10°C et 50°C (14°F et 122°F)
- Humidité: inférieur à 90%
F
SOC-920(P) Suggestions d’installation
✔ Installation au plafond.
✔ Installation au mur.
10
11
SAMSUNG
Caractéristiques du cordon d’alimentation
et du câble vidéo
Installation de la caméra dôme SOC-920(P)
Le cordon et le câble suivants sont nécessaires à l’installation et à l’utilisation de la
SOC-920(P).
Câble
F
12
1. Choisissez un emplacement qui puisse suffisamment supporter le poids de
l’appareil à installer.
2. Fixez le gabarit fourni à l’endroit où vous souhaitez installer l’appareil. Percez
des trous pilotes (5mm de diamètre, 35mm de profondeur min.), puis installez
les ancrages en plastique fournis (HUD 5).
3. Placez-les de telle sorte qu’ils ne soient pas endommagés ni coincés lors de
l’installation de la caméra.
4. Enlevez le COUVERCLE EN FORME DE DôME
pour installer la CAMÉRA.
1) Utilisez la CLÉ en L fournie pour desserrer les
quatre BOULONS du BOÎTIER en les tournant
dans le sens contraire des aiguilles d’une montre,
comme il est indiqué dans l’illustration.
2) Dévissez le DôME DE MONTAGE dans la direction
indiquée dans l’illustration.
5. Installez la CAMÉRA.
Alignez les trous de fixation de la CAMÉRA
sur les trous dans lesquels sont insérés les
ANCRAGES en PLASTIQUE et fixez les VIS
FILETÉES de MONTAGE (TH M4 X 30) aux
JOINTS TORIQUES. (2 endroits)
1) 2)
➜
13
F
Installation de la caméra dôme SOC-920(P)
6. Rectifiez la direction de l’OBJECTIF vers l’endroit où le client
veut surveiller.
1) Tournez la BAGUE d’ARRÊT dans le sens contraire des aiguilles
d’une montre, comme il est indiqué dans l’illustration, pour
déplacer l’OBJECTIF et le COUVRE-OBJECTIF.
2) Déplacez l’OBJECTIF afin de rectifier la
F
position verticale et tournez l’OBJECTIF
ensemble avec le COUVRE-OBJECTIF
pour corriger la position horizontale. (Le
COUVRE-OBJECTIF est équipé d’un dispositif d’arrêt de
façon que l’OBJECTIF ne puisse àtre tourné plus de 180º
degrés à gauche et à droite. Une rotation excessive de
l’OBJECTIF peut tordre les fils internes et causer des dégâts,
tels qu’un court-circuit ou des fils cassés.)
COUVREOBJECTIF
☛Le repère sur le DESSOUS de l’OBJECTIF doit être orienté
vers le bas. (Sinon, l’image sera oblique ou inversée.)
3) Placez l’OBJECTIF dans la position désirée. D’une main,
tenez le COUVRE-OBJECTIF et de l’autre main, serrez à
bloc la BAGUE d’ARRÊT dans le sens des aiguilles
d’une montre afin de bien mettre en place l’OBJECTIF.
7. Si le DÔME est sale à l’intérieur et à l’extérieur, essuyez-le
à l’aide d’un chiffon en flanelle de coton doux.
8. Après avoir monté le COUVERCLE en forme de DÔME
dans le bon sens, mettez en place le boulon du BOÎTIER en
le tournant dans le sens des aiguilles d’une montre. Utilisez
la CLÉ en L. (4 endroits)
9. Après avoir installé la caméra, branchez une des extrémités du câble à la caméra et
l’autre extrémité à un autre accessoire ou à l’arrière du moniteur.
BAGUE
D’ARRÊT
BBJECTIF
Configuration des broches pour le modèle
SOC-920(P)
1 DATA+ (DONNÉES+)
2 VIDEO_OUT (Sortie Vidéo)
3 GND (TERRE)
4 DATA- (DONNÉES-)
5 AUDIO_OUT (Sortie Audio)
6 VDD
7 GND_V (TERRE_V)
8 ... 1
8 CH_SEL (SEL_CAN)
F
14
15
SOC-920(P) Caractéristiques Techniques
ITEM
Type de produit CAMÉRA DÔME ANTI-VANDALISME CAMÉRA DÔME ANTI-VANDALISME
Tension de la source DC 12~18V DC 12~18V
d’alimentatio
Consommation d’électricité Approx. 6 WATTS Approx. 6 WATTS
Système de diffusion Système couleur standard PAL Système couleur standard NTSC
Dispositif d’imagerie 1/4 po IT S-HAD CCD 1/4 po IT S-HAD CCD
F
Pixels réels 752(H) X 582(V) 768(H) X 494(V)
Mode de balayage 625 lignes, rapport d’entrelacement 2:1 525 lignes, rapport d’entrelacement 2:1
Fréquence de ligne Horizontal :15,625 Hz Horizontal :15,734 Hz
Mode de synchronisation INT INT
Résolution 480 TV Lignes 480 TV Lignes
Rapport S/B Plus de 50dB (AGC Off) Plus de 48dB (AGC Off)
Éclairage minimal 2 Lux (avec détection désactivée) 2 Lux (avec détection désactivée)
Température des couleurs ATW/AWC/Mode manuel ATW/AWC/Mode manuel
Obturateur électronique Désactivé, 1/120, 1/250, 1/500, 1/1K, Désactivé, 1/100, 1/250, 1/500, 1/1K,
Correction du contre-jour Activé/désactivé (réglage de la zone) Activé/désactivé (réglage de la zone)
Détection Désactivé/Auto x2~x128/Fixe x2~x128 Désactivé/Auto x2~x128/Fixe x2~x128
Zoom numérique Activé, x2, x4, x6, x8, x10 Activé, x2, x4, x6, x8, x10
Détecteur de mouvement Activé/désactivé (réglage de la zone/sensibilité) Activé/désactivé (réglage de la zone/sensibilité)
Commande vidéo Posi/Néga, Miroir, Réglage des détails Posi/Néga, Miroir, Réglage des détails
Sortie signal Sortie vidéo composite : 1.0 Vp-p 75 ohms/RJ45 Sortie vidéo composite : 1.0 Vp-p 75 ohms/RJ45
Objectif Distance focale : 3.6 ~ 43.2 mm Distance focale : 3.6 ~ 43.2 mm
Télécommande RS485 (demi-duplex) RS485 (demi-duplex)
Température de fonctionnement -10°C et 50°C -10°C et 50°C
Humidité de fonctionnement ~90% ~90%
Dimensions 132(ø) x 95.3(H) mm 132(ø) x 95.3(H) mm
Poids Approx. 1kg/2.2lb Approx. 1kg/2.2lb
Vertical : 50 Hz Vertical : 60 Hz
0.02 Lux (avec détection x128) 0.02 Lux (avec détection x128)
(3200°K, 5600°K, contrôle du gain R/B) (3200°K, 5600°K, contrôle du gain R/B)
1/2K, 1/4K, 1/10K sec 1/2K, 1/4K, 1/10K sec
Ouverture utile : F1.8(grand-angulaire), F2.6(télé)
SOC-920P SOC-920
DESCRIPTION
Ouverture utile : F1.8(grand-angulaire), F2.6(télé)
16
ANTI-VANDAL DOME KAMERA
SOC-920(P)
Montageanleitung
D
Sicherheitshinweise
Ziel dieser Informationen ist es, den ordnungsgemäßen Gebrauch dieses
Geräts sicherzustellen und dadurch Gefahren oder Sachbeschädigungen zu
vermeiden. Bitte befolgen Sie alle Anweisungen.
Warnung
Die Nichtbeachtung eines Warnhinweises kann zum Tode oder zu
schweren Verletzungen führen.
1. Vergewissern Sie sich vor Inbetriebnahme, dass das Kabel fest
angeschlossen ist. (Eine lockere Kabelverbindung kann einen Brand verursachen.)
2. Achten Sie bei der Wand- oder Deckeninstallation darauf, dass die Kamera
sicher befestigt wird. (Fällt die Kamera herunter, kann es zur Verletzung
von Personen kommen.)
3. Plazieren Sie keine leitfähigen Gegenstände (wie z. B. Schraubenzieher,
Münzen und metallene Objekte) oder mit Wasser gefüllte Behälter auf der
Kamera. (Durch Feuer, Stromschlag oder herunterfallende Gegenstände
können Personen ernsthaft verletzt werden.)
4. Die Kamera darf nicht an einem rußigen, staubigen oder feuchten Ort
installiert werden. (Andernfalls besteht die Gefahr eines Brandes oder
Stromschlags.)
5. Bei ungewöhnlicher Geruchs- oder Rauchentwicklung muss der Betrieb des
Geräts sofort beendet werden. Ziehen Sie den Netzstecker und setzen Sie
sich mit einem Kundendienstzentrum in Verbindung. (Die Weiterbenutzung
des Geräts kann zu einem Brand oder elektrischen Schlag führen.)
6. Wenn das Gerät nicht einwandfrei funktioniert, wenden Sie sich bitte an die
Verkaufsstelle, in der Sie das Gerät erworben haben, oder an das nächste
Kundendienstzentrum. Das Gerät darf niemals und in keiner Weise zerlegt
oder modifiziert werden. (Der Hersteller übernimmt keine Haftung für
Schäden, die durch unbefugte Zerlegung oder Reparaturen verursacht worden sind.)
7. Beim Reinigen darf Wasser niemals direkt auf die Geräteteile gelangen.
(Andernfalls besteht die Gefahr eines Brandes oder Stromschlags.) Die
Oberfläche kann mit einem trockenen Tuch abgewischt werden. Verwenden Sie
keine Reinigungsmittel oder chemischen Reiniger, da sich durch solche Mittel die
Farbe ablösen und der Oberflächenüberzug beschädigt werden kann.
Achtung
Die Nichtbeachtung eines mit Achtung gekennzeichneten Hinweises
kann zu Verletzungen und Sachschaden führen.
1. Lassen Sie keine Gegenstände auf das Gerät fallen, und setzen Sie es keinen
starken Stößen aus. Setzen Sie die Kamera keinen starken Vibrationen oder magnetischen Störfeldern aus.
2. Die Kamera darf nicht an Orten mit hohen Temperaturen (über 50 °C) bzw.
tiefen Temperaturen (unter -10 °C) oder hoher Luftfeuchtigkeit installiert werden.
(Andernfalls besteht die Gefahr eines Brandes oder Stromschlags.)
3. Installieren Sie das Gerät nicht in der Nähe von Wärmequellen, wie z. B. einem
Heizgerät oder Heizkörper, und an Orten, an denen es direktem Sonnenlicht
ausgesetzt ist. (Hier besteht Feuergefahr.)
4. Wenn Sie die bereits installierte Kamera an einen anderen Ort verlegen wollen,
achten Sie darauf, die Kamera auszuschalten, bevor Sie sie abnehmen oder neu
installieren.
5. Die Installation sollte an einer gut belüfteten Stelle erfolgen.
6. Ziehen Sie bei einem Gewitter den Netzstecker. (Die Nichtbeachtung kann zu
Feuer oder einer Beschädigung des Geräts führen.)
DD
2
3
Inhalt
Kapitel 1 SOC-920(P) Übersicht 5
SOC-920(P) Einführung 6
SOC-920(P) Übersicht 7
Kapitel 2 Installation der SOC-920(P) 8
Überprüfung des Lieferumfangs 9
D
Anhang SOC-920(P) Pinbelegung 15
4
Vorsichtsmaßnahmen für Installation und Gebrauch 11
Vorbereitung der Kabel 12
Installation der SOC-920(P) 13
SOC-920(P) - Produktspezifikationen 16
Kapitel 1
SOC-920(P)
Dieses Kapitel enthält eine kurze Einführung in die Kamera
SOC-920(P)
Bezeichnung der Teile und ihre Funktionen.
und beschreibt ihre Hauptmerkmale, die
- Übersicht
D
5
SOC-920(P)- Einführung
SOC-920(P) Übersicht
Die SOC-920(P) Anti-Vandalismus-Dome-Kamera ist ausschließlich für die
(Video Professional Package)
Die SOC-920(P) Anti-Vandalismus-Dome-Kamera ist eine domeförmige
Überwachungskamera, die sich bestens für den Einsatz in Geldinstituten,
Einzelhandelsgeschäften, Bürogebäuden, Industrieanlagen usw. eignet. Sie ist so
konzipiert, dass sie absichtlicher oder versehentlicher Gewalteinwirkung sowie
Vandalismus standhält; sie ist wasserdicht, staubgeschützt und stoßfest.
D
Die SOC-920(P) ist eine fortschrittliche überwachungsvorrichtung, die dank 12fachZoom objektiv und 10fach-digitalem Zoom-IC eine Überwachung mit max.
120fachem Zoom erlaubt.
Die SOC-920(P) ist ein multifunktionales Überwachungsgerät, das mit allen
Hauptmerkmalen bereits existierender Überwachungskameras ausgestattet ist: Die
Low-Light-Überwachungsfunktion ermöglicht die Aufnahme bewegter Objekte bei
sehr geringer Beleuchtung, die Weißabgleichsfunktion sorgt für eine exakte
Farbwiedergabe bei einer beliebigen Lichtquelle, die BLC-Function erlaubt eine
wirkungsvolle Gegenlichtkompensation auch an Orten mit starkem Lichteinfall und
die One-Autofokus-Funktion verfolgt und fokussiert ein Objekt automatisch.
Das eingebaute Mikrofon macht alle im Überwachungsbereich erzeugten
Geräusche hörbar.
vorgesehen.
VPP
HAUBENABDECKUNG
D
6
7
Vor der Installation
Kapitel 2
Überprüfung des Lieferumfangs
Installation der SOC-920(P)
In diesem Kapitel wird erläutert, was vor der Installation der
D
SOC-920(P) zu beachten ist, wie man eine geeignete
Installationsstelle auswählt und welche Vorsichtsmaßnahmen
bei der Installation zu treffen sind. Nun können Sie die SOC920(P) installieren und die Kabel anschließen.
8
Überprüfen Sie bitte, ob die folgenden Zubehörteile im Lieferumfang enthalten
sind.
M
ontageanleitung
SOC-920(P)
KABEL
Montageanleitung
9
D

Vor der Installation
✔ PLASTIKDÜBEL
2 Stck. ❙❙zur Deckeninstallation
✔ SCHNELLMONTAGESCHRAUBEN
2 Stck. ❙❙zur Deckeninstallation
(TH M4 X L30 BLK + 0-RING)
D
✔ L-SCHRAUBENSCHLÜSSEL
1 Stck. ❙❙zur Abnahme der ABDECKUNGSHAUBE
✔ SCHABLONE
1 Stck. ❙❙als HILFE bei einer Deckeninstallation
(KUNSTDRUCKPAPIER)
✔ KABEL 20M
1 Stck. ❙❙zur Stromversorgung und Signalübertragung
Vorsichtsmaßnahmen für Installation und Gebrauch
✔ Bitte überprüfen Sie vor der Installation, ob die Installationsstelle das Gewicht
der SOC-920(P) tragen kann.
✔ Achten Sie darauf, dass das Kabel nicht irgendwo eingeklemmt oder seine
Isolationsummantelung nicht abgezogen wird. (Die Nichtbeachtung kann zu
Feuer oder einer Beschädigung des Geräts führen.)
✔ Vergewissern Sie sich, dass sich keine Personen im Installationsbereich, wo
Gegenstände herunterfallen könnten, aufhalten. Verbringen Sie
Wertgegenstände vor der Installation an einen sicheren Ort.
✔ Installieren Sie die Kamera an einem kühlen Ort und nicht in direktem
Sonnenlicht.
Achten Sie darauf, die SOC-920(P) auch bei Betrieb oder Lagerung nicht
direktem Sonnenlicht auszusetzen. Verwenden Sie die BLC-Funktion, wenn
die SOC-920(P) unter einem Scheinwerfer oder bei sehr heller Beleuchtung
eingesetzt wird.
✔ Die SOC-920(P) darf nur an Orten eingesetzt werden, an denen die folgenden
Temperatur- und Luftfeuchtigkeitsgrenzwerte eingehalten werden:
- Temperatur: -10°C ~ +50°C (14°F~122°F)
- Luftfeuchtigkeit: kleiner 90%
D
SOC-920(P) Installationsbeispiele
✔ Die Kamera kann direkt an der Decke installiert werden.
✔ Sie kann direkt an der Wand installiert werden.
10
11
SAMSUNG
Vorbereitung der Kabel
Installation der SOC-920(P)
Folgende Kabel werden für die Installation und den Einsatz der SOC-920(P)
benötigt.
Kabel
D
12
1. Wählen Sie eine Installationsstelle, die das Gewicht des zu installierenden
Geräts tragen kann.
2. Legen Sie die mitgelieferte Schablone an der Installationsstelle an, bohren Sie
Führungslöcher (5 mm Durchmesser, min. 35 mm tief) und befestigen Sie die
mitgelieferten Plastikdübel (HUD 5).
3. Sollten Sie sie so anordnen, dass sie bei der Montage der Kamera nicht
beschädigt oder eingeklemmt werden.
4. Nehmen Sie die HAUBENABDECKUNG ab, um die KAMERA anzubringen.
1) Lösen Sie mit dem mitgelieferten L-SCHRAUBEN-
SCHLÜSSEL die 4 GEHÄUSEBEFESTIGUNGSSCHRAUBEN, indem Sie sie entgegen dem
Uhrzeigersinn drehen, wie in der Abbildung
gezeigt.
2) Nehmen Sie die HAUBE in der in der
Abbildung gezeigten Richtung ab.
5. Montieren Sie die KAMERA.
Bringen Sie die Montagelöcher der KAMERA
mit den Löchern, in denen sich die
PLASTIKDÜBEL befinden, in
Übereinstimmung, und ziehen Sie die
SCHNELLMONTAGESCHRAUBEN mit den
O-RINGEN fest. (2 Punkte)
1) 2)
➜
13
D
Installation der SOC-920(P)
6. Richten Sie das OBJEKTIV auf den zu überwachenden Bereich aus.
1) Drehen Sie den STOPPERRING entgegen dem Uhrzeigersinn,
wie in der Abbildung unten gezeigt, um den OBJEKTIVKÖRPER
und das ABDECKUNGSOBJEKTIV zu bewegen.
2) Bewegen Sie den OBJEKTIVKÖRPER zur
vertikalen Einstellung, und drehen Sie den
OBJEKTIVKÖRPER zusammen mit dem
ABDECKUNGSOBJEKTIV, um die horizontale
D
Einstellung vorzunehmen. (Am ABDECKUNGSOBJEKTIV gibt es einen Stoppmechanismus, so dass das
OBJEKTIV nicht weiter als 180º nach links oder rechts
gedreht werden kann.) Übermäßiges Drehen des OBJEKTIVS
kann die innere Verdrahtung verdrehen und Beschädigungen
verursachen, wie z. B. einen Kurzschluss oder Kabelbruch.)
☛Die Kennzeichnung der OBJEKTIVUNTERSEITE muss nach unten
weisen. (Sonst kann das Bild schief oder umgekehrt erscheinen.)
3) Stellen Sie das OBJEKTIV auf die gewünschte Position ein,
halten Sie das ABDECKUNGSOBJEKTIV mit einer Hand, und
befestigen Sie den STOPPERRING im Uhrzeigersinn mit der anderen Hand, so
dass das OBJEKTIV nicht locker ist.
7. Falls Innen- und Außenseite der Haube verschmutzt sind,
wischen Sie die Verschmutzung mit einem weichen
Baumwollreinigungstuch ab.
8. Nachdem die HAUBENABDECKUNG in der richtigen
Richtung angebracht ist, befestigen Sie das GEHÄUSE,
indem Sie die SCHRAUBE mit dem L-SCHRAUBEN-ZIEHER
im Uhrzeigersinn festziehen. (4 Punkte)
9. Wenn die Kamera montiert ist, schließen Sie das eine Ende
des Kabels an die Kamera und das andere Ende an ein Zusatzgerät oder an die
Rückseite des Monitors an.
SCHUTZSCHEIBE
STOPPERRING
OBJEKTIVGEHÄUSE
SOC-920(P) - Pinbelegung
1 DATA+ (Daten+)
2 VIDEO_OUT
3 GND (Erde)
4 DATA- (Daten-)
5 AUDIO_OUT
8 ... 1
6 VDD
7 GND_V (Erde_V)
8 CH_SEL (Kanalauswahl)
(Videoausgang)
D
(Audioausgang)
14
15
SOC-920(P) - Produktspezifikationen
ITEM
Produkttyp ANTI-VANDAL DOME KAMERA ANTI-VANDAL DOME KAMERA
Spannungsquelle DC 12~18V DC 12~18V
Leistungsaufnahme Ca. 6W Ca. 6W
Fernsehnorm PAL Standardfarbsystem NTSC Standardfarbsystem
Bildaufnehmer 1/4 Zoll ITS-HAD CCD 1/4 Zoll IT S-HAD CCD
Effektive Pixel 752(H) X 582(V) 768(H) X 494(V)
Abtastverfahren 625 Zeilen, 2:1 Zeilensprung 525 Zeilen, 2:1 Zeilensprung
D
Zeilenfrequenz Horizontal :15,625 Hz Horizontal :15,734 Hz
Vertical : 50 Hz Vertical : 60 Hz
Synchronisationsverfahren INT INT
Auflösung 480 TV-Zeilen 480 TV-Zeilen
Signal-Rauschabstand Über 50dB (AGC Off) Über 48dB (AGC Off)
Min. Szenenbeleuchtung 2 Lux (bei Bildintegration Aus) 2 Lux (bei Bildintegration Aus)
0.02 Lux (bei Bildintegration x128) 0.02 Lux (bei Bildintegration x128)
Farbtemperatur ATW/AWC/Manueller MODUS ATW/AWC/Manueller MODUS
(3200°K, 5600°K, R/B-Verstärkungsregelung) (3200°K, 5600°K, R/B-Verstärkungsregelung)
Elektronischer Shutter Aus, 1/120, 1/250, 1/500, 1/1K, 1/2K, 1/4K, 1/10K s Aus, 1/100, 1/250, 1/500, 1/1K, 1/2K, 1/4K, 1/10K s
Gegenlichtkompensation Aus/Ein (Einstellung des Bereichs) Aus/Ein (Einstellung des Bereichs)
Restlichtbetrieb Aus/Auto x2~x128/Fest x2~x128 Aus/Auto x2~x128/Fest x2~x128
Digitalzoom Aus, x2, x4, x6, x8, x10 Aus, x2, x4, x6, x8, x10
Bewegungsmeldung Aus/Ein (Einstellung von Bereich/Lichtempfindlichkeit) Aus/Ein (Einstellung von Bereich/Lichtempfindlichkeit)
Videosteuerung Einstellung von Posi/Nega, SPIEGEL, Detail Einstellung von Posi/Nega, SPIEGEL, Detail
Signalausgang Composite-Videoausgang: 1.0 Vss 75 Ohm/RJ45 Composite-Videoausgang: 1.0 Vss 75 Ohm/RJ45
Objektiv Brennweite : 3.6 ~ 43.2 mm Brennweite : 3.6 ~ 43.2 mm
Blende : F1.8(Weit), F2.6(Nah) Blende : F1.8(Weit), F2.6(Nah)
Fernbedienung RS485 (Halbduplex) RS485 (Halbduplex)
Temperatur bei Betrieb -10°C ~ +50°C -10°C ~ +50°C
Luftfeuchtigkeit bei Betrieb ~90% ~90%
Abmessungen 132(ø) x 95.3(H) mm 132(ø) x 95.3(H) mm
Gewicht Ca. 1kg Ca. 1kg
SOC-920P SOC-920
DESCRIPTION
16
 Loading...