

Page 1
SmartCam
for iOS SNH-1011N
English
With SmartCam app, you can monitor what matters to you
directly from your smart phone.
Download the application from the App Store and install it on
your smart phone.
Search keywords for the application: “Samsung SmartCam”,
“Smartcam”, “SAMSUNG TECHWIN”, “TECHWIN”.
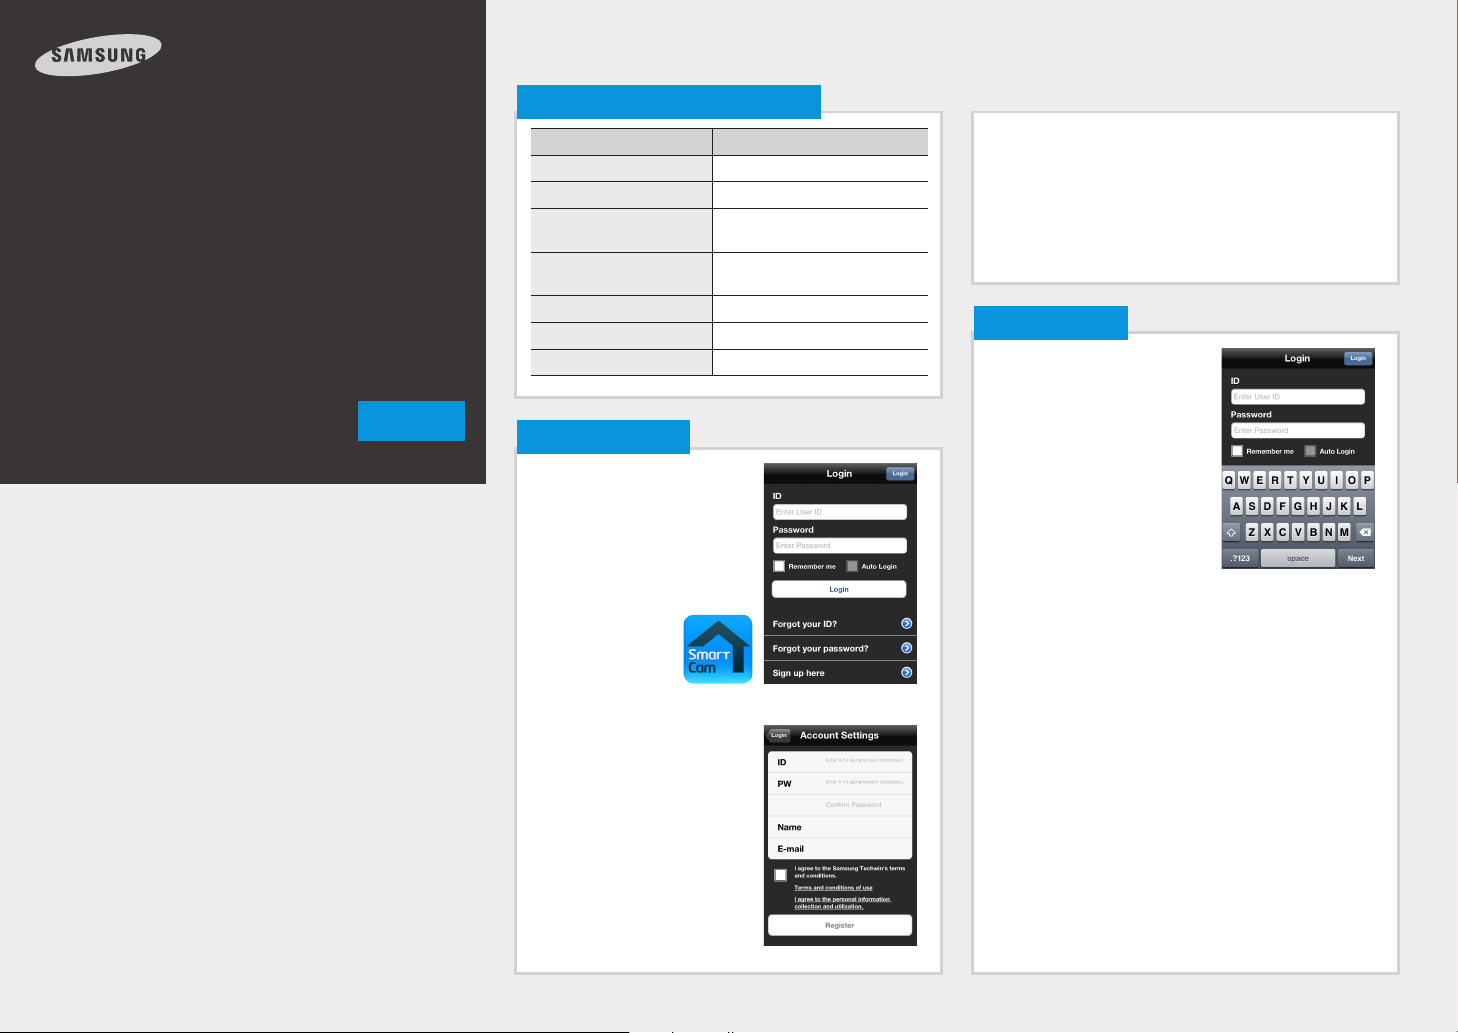
1. Smart phone requirements
Hardware / Operating System Requirements
OS - iOS 4.3.5/5.0/6.0/6.1
CPU - 600MHz or higher
RAM
Network
Video Codec - H.264
Recommended Smart Phones - iPhone 4/5
Recommended Tablet PC - iPad 2/3
- 128MB or more (recommended),
RAM : 50MB (Minimum)
- WiFi or 3G/LTE wireless communicationenabled smart phone
2. Subscription
1. Run the downloaded application.
• Confirm Password : Checks whether your password is
entered correctly.
• Name : Enter your name.
• E-mail : Email address is used to recover your account
password.
` For further details, please refer to the user’s manual.
M
3. Logging In
1. Enter your ID and password
created during the subscription
on the www.samsungsmartcam.
com or on the smartphone
application.
• Remember me :
Saves your account information
for later use.
• Auto Login : If checked, logs
in automatically from the next
application running.
2. Tap <Login>.
` If you forgot your ID or password, use Find ID/Password below the
M
<Login> tab.
2. Tap <Sign up here>.
3. Enter requested information.
4. Check “Agree to the terms
and conditions”, and tap
<Register>.
• ID : Create user ID using
letters, numbers and periods
between 8-14 characters.
• PW : Create password using
letters and numbers except
colons and commas between
8-14 characters.
Page 2
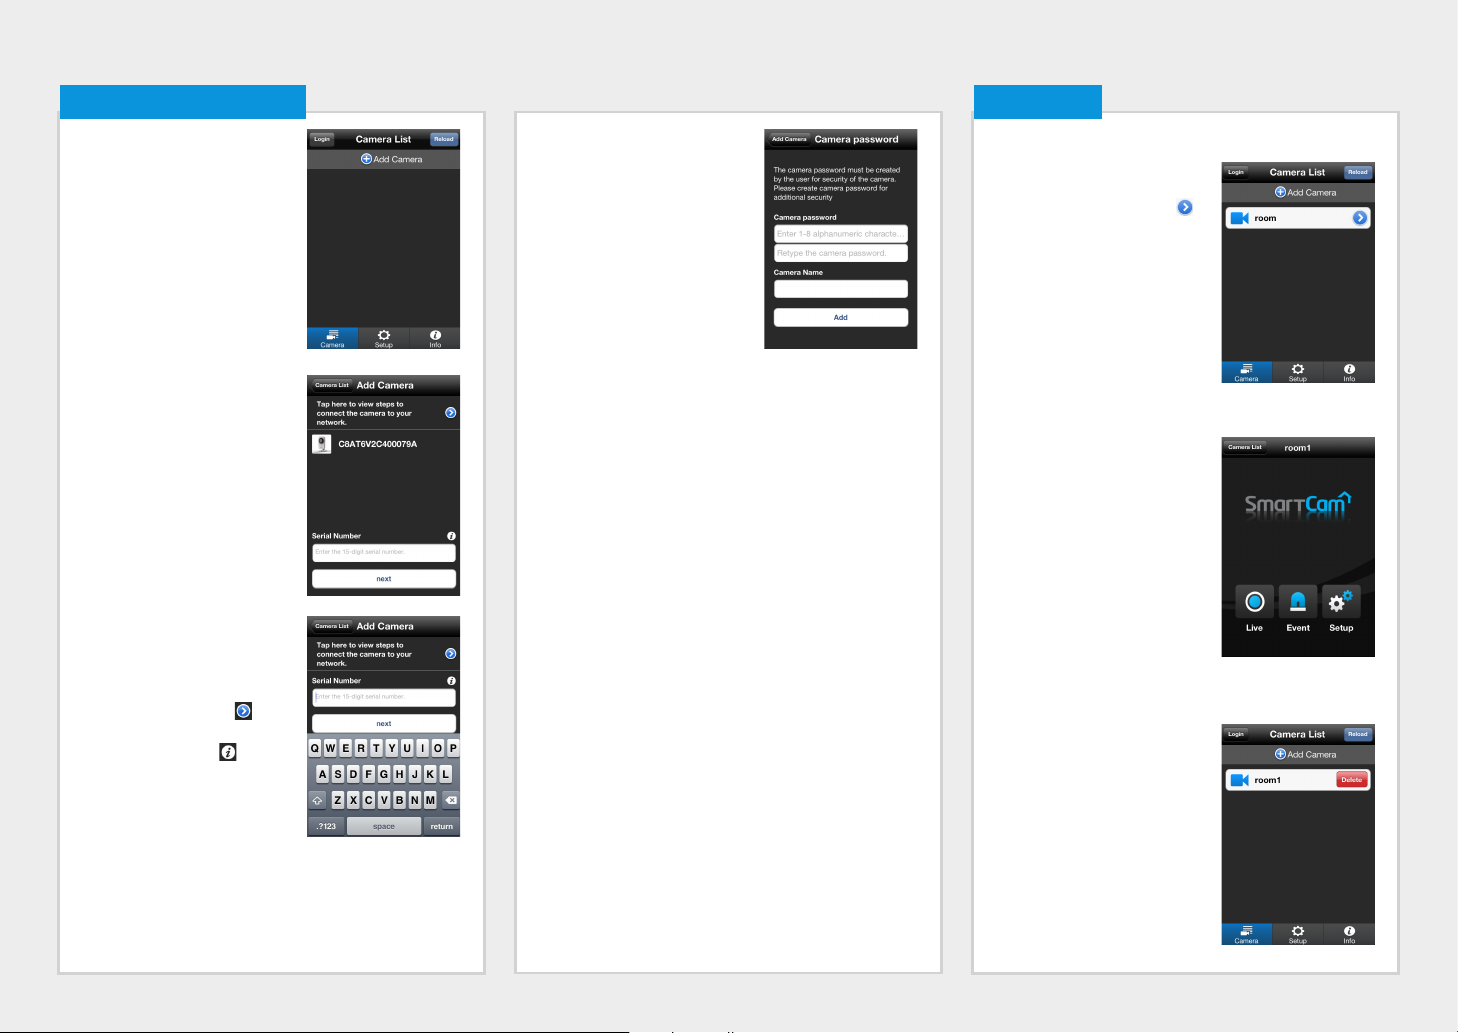
4. Camera Registration
1. Tap <Add Camera>.
2. Select the camera found and tap
<next>.
` When your smartphone is
M
connected to the same WiFi
network as the camera, it will
automatically search for the
camera.
3. If the camera is not detected,
please enter the camera serial
number manually.
` For camera’s power and network
M
connection, refer to [ ].
` For camera’s serial number
location, refer to [ ].
4. Create the <Camera
password> and <Camera
Name>, and then tap <Add>.
` Create camera password using
M
alphanumeric characters between
1 to 8 without any space.
5. Camera
Camera Move
1. Move to the <Camera> item.
From the listed active cameras,
tap the desired camera’s [ ]
on the right.
` You cannot monitor an inactive
M
camera.
2. You may find the Live, Event or
Setup icons.
Delete Camera
1. To delete an added camera, tap
and slide from right to left on a
desired camera from the list.
2. Tap <Delete>.
Page 3

6. Live Video
1. Tap the desired camera’s
[ ] or tap the <Live> icon.
Live Video
f
3. Press and hold the Mic icon and start talking. Press and
hold for 2sec after finished talking to properly send the
audio over the internet.
4. Even if you did not activate the two-way audio function,
you can receive the audio sound of the video. In addition,
the microphone setting should be at least 1 or higher if you
want to use the two-way audio function.
` When there are multiple users logged on to the camera, first person
J
who tap the Talk icon will have the control.
2. Enter the <Camera password>
for the camera selected. This
is the same camera password
you created at the time you
registered the camera.
Check the <SAVE> option to
save the camera password.
Within 20 seconds, it will start
streaming.
` The loading time may be longer depending on the policy of the
M
service provider or the network connection status.
a b c d e
No. Description
Capture You can capture and save a still image from the video.
a
HQ
b
Flip Flips the video image.
c
Brightness Adjusts the screen brightness.
d
Two-way
e
Audio
Mic
f
Enables high quality video (640x480 resolution).
Video and audio playback depends on the policies of
`
your service provider or the network connection status.
Enable 2-way audio between the camera and the
phone.
Press and hold to talk. Let go to hear front from the
camera.
Two-way Audio
1. Tap on the Two-way Audio icon.
2. The Mic icon will appear.
Condition Audio Support
WiFi
3G/LTE Depending on your network.
Relay Mode
O
X
Relay mode
If the router where your camera is connected to does not have
the UPnP function or if the camera is connected to a dual
router, your mobile device will be connected to the 3G or LTE
network in a relay mode and you will see the video for the first
seven minutes only. In this case, set your mobile device to WiFi
network to achieve a normal connection.
` Relay mode is added feature where the video from the camera is
J
transmitted to Samsung server then retransmitted to the user's
computer.
` Audio is not supported in Relay Mode.
` If the router’s UPnP is not set, then you might be connected in relay
mode. The settings may differ depending on the connected
Broadband Router model. For more information, refer to the user
manual of the applicable router.
` If you have trouble connection to the camera, visit "http://www.
samsungsmartcam.com", go to support page, and refer to
“Troubleshooting” on it.
Page 4

7. Event List
1. Tap on the <Event> icon to see
the YouTube and Picasa event
links.
Audio
Detection icon
YouTube icon:
Tap on the YouTube
icon to play the YouTube
video.
Picasa icon:
Tap on the Picasa icon
to see picture.
2. Tap on the <Delete All> to clear
the event list.
` You will get a notification prompt
M
when event is detected by the
camera.
` While transmitting videos to
YouTube or Picasa for about 30
seconds, the device does not
detect Events.
2. If you want to check the event
list, go to the camera settings
and set up the reception of
YouTube or Picasa alarms. If
event video is uploaded to your
YouTube or Picasa account, it will
be displayed in the event list.
Motion Detection
Icon
` Phone does not allow you to play the private videos automatically.
M
To see the event videos on your phone, tap on the YouTube app and
sign into your account(same YouTube account used for the Camera).
While logged in to the YouTube, tap the YouTube icon to play the video
automatically.
Deleting All Events
1. Tap on the <Edit> then Tap on
the <Clear>.
Deleting Each Event
1. Slide you finger right to left on
the event you want to delete.
2. Tap on <Delete> to delete the
event.
Page 5

8. Camera Setup
Tap the <Setup> icon to configure a camera to be monitored.
General setting
1. Tap <General setting>.
2. Configure the basic camera
settings.
• Camera Name : Camera name
is used to easily identify the
camera when you have more
than one. i.e., Living room,
Kitchen, Bedroom.
• Event Alarm : Specify whether
to trigger the alarm or not, and
specify the sensitivity.
The higher the sensitivity is, the
subtler motion/audio events will be detected.
• Night Vision : Set the IR lighting.
Enable <Night Vision> for the camera to switch
automatically to night vision mode.
• Audio : Adjust the volume of the built-in microphone and
speaker of the camera as appropriate.
3. Configure the notification.
• Push Notification : Notifies
alarm events.
• YouTube : Creates 30 seconds
long footage and uploads onto
the user’s YouTube account.
• Picasa : Sends event images
to the user’s Picasa account.
4. Tap <Apply>.
Network setting
1. Tap the <Network setting>.
2. Configure the wireless network.
• WiFi : Shows the list of
available access points.
- : Connecting to the AP
requires password.
-
: Connecting to the AP
requires no password.
- Show password : The
password entered by user
is displayed on the screen
when selecting encryption
Wifi.
• Other WiFi Networks : Enter
the SSID name and password
to connect to the network.
If selected, it shows guide
on SSID and networking
procedures.
` The camera LED will change from
M
flashing blue to solid green within
30 seconds. This confirms the
camera is connected to your WiFi
network. You can now unplug the
camera and place the camera anywhere within your wireless
network range. If the camera LED did not change to solid green,
please contact our tech support.
Time setting
1. Tap <Time setting>.
2. Set the camera’s clock.
• Time Zone : Select your region.
• Summer Time : Check this
option if you live in a country
or region where DST(Daylight
Saving Time) is applied.
9. Auto Login Setup
1. Move to the <Setup> item.
2. Enable <Auto Login> to login
automatically from the next
application running.
10. Info.
1. Move to the <Info.> item.
2. Shows the information on
Samsung Techwin Smartcam
Application.
vX.XX
XXXX.X.XX.
 Loading...