


<![endif]>China In Printed C-01-70243-1230 060619
Installation assistance available at:
DIGITAL MEDIA RECEIVER
FOR 1998-2013 HARLEY-
DAVIDSON® MOTORCYCLES
PMX-HD9813
600 South Rockford Drive • Tempe, Arizona 85281 United States
Direct: (480) 967-3565 • Toll Free: (800) 669-9899
rockfordfosgate.com |
Installation & Operation |

Introduction
Dear Customer,
Congratulations on your purchase of the world’s finest brand of audio products. At Rockford Fosgate we are fanatics about musical reproduction at its best, and we are pleased you chose our product. Through years of engineering expertise, hand craftsmanship
and critical testing procedures, we have created a wide range of products that reproduce music with all the clarity and richness you deserve.
For maximum performance we recommend you have your new Rockford Fosgate product installed by an Authorized Rockford Fosgate Dealer, as we provide specialized training through Rockford Technical Training Institute (RTTI). Please read your warranty and retain your receipt and original carton for possible future use.
Great product and competent installations are only a piece of the puzzle when it comes to your system. Make sure that your installer is using 100% authentic installation accessories from Rockford Fosgate in your installation. Rockford Fosgate has everything from RCA cables and speaker wire to power wire and battery connectors. Insist on it! After all, your new system deserves nothing but the best.
To add the finishing touch to your new Rockford Fosgate image, order your Rockford accessories, which include everything from T-shirts to hats.
Visit our web site for the latest information on all Rockford products; www.rockfordfosgate.com
or, in the U.S. call 1-800-669-9899 or FAX 1-800-398-3985. For all other countries, call +001-480-967-3565 or FAX +001-480-966-3983.
Table of Contents
2Introduction
3Specifications
4Design Features
5Installation/Mounting 6-10 Operation
Settings Tuner (AM/FM) USB-iPod
AUX (Auxiliary Input) Bluetooth® Pandora®
SiriusXM®
11PMX-BTUR Function Table
12-13 |
Troubleshooting |
14-53 |
French, Spanish, German & Italian |
54 |
Limited Warranty Information |
If, after reading your manual, you still have questions regarding this product, we recommend that you see your Rockford Fosgate dealer. If you need further assistance, you can call us direct
at 1-800-669-9899. Be sure to have your serial number, model number and date of purchase available when you call.
PRACTICE SAFE SOUND
Continuous exposure to sound pressure levels over 100dB may cause permanent hearing loss. High powered auto sound systems may produce sound pressure levels well over 130dB. Use common sense and practice safe sound.
Safety
This symbol with “WARNING” is intended to alert the user to the presence of important instructions. Failure to heed the instructions will result in severe injury or death.
This symbol with “CAUTION” is
intended to alert the user to the presence of important instructions.
Failure to heed the instructions can result in injury or unit damage.
To prevent injury and damage to the unit, please read and follow the instructions in this manual. We want you to enjoy this system, not get a headache.
If you feel unsure about installing this system yourself, have it installed by a qualified Rockford Fosgate technician.
Before installation, disconnect the battery negative (-) terminal to prevent damage to the unit, fire and/or possible injury.
FCC Compliance Statement
This equipment has been tested and found to comply with the limits for a Class B digital device, pursuant to part 15 of the FCC Rules. These limits are designed to provide more reasonable protection against harmful interference in a residential installation.
Operation is subjected to the following two conditions: (1) This device may not cause harmful interference, and (2) the device must accept any interference received, including interference that may cause undesired operation.
This equipment generates, uses, and can radiate radio frequency energy and, if not installed and used in accordance with the instructions, may cause harmful interference to radio communications. However, there is no guarantee that interference will not occur in a particular installation. If this
equipment does cause harmful interference to radio or television reception, which can be determined by turning the equipment off and on, you are encouraged to try to correct the interference by one of the following measures:
•Reorient or relocate the receiving antenna.
•Increase the separation between the equipment and receiver.
•Connect the equipment into an outlet on a circuit different from that to which the receiver is connected.
•Consult the dealer or an experienced radio/TV technician for help
©2019 Rockford Corporation. All Rights Reserved. PUNCH® and associated logos where applicable, are registered trademarks of Rockford Corporation in the United States and/or other countries. iPhone and iPod are trademarks of Apple Inc., registered in the U.S. and other countries. The Bluetooth® word mark and logos are registered trademarks owned by Bluetooth SIG, Inc. and any use of such marks by Rockford Corporation is under license. All other trademarks are the property of their respective owners. Specifications subject to change without notice.
“Made for iPod” and “Made for iPhone” mean that an electronic accessory has been designed to connect specifically to iPod, or iPhone, respectively, and has been certified by the developer to meet Apple performance standards. Apple is not responsible for the operation of this device or its compliance with safety and regulatory standards. Please note that the use of this accessory with iPod or iPhone may affect wireless performance.
Pandora, the Pandora logo, and the Pandora trade dress are trademarks or registered trademarks of Pandora Media, LLC. Used with permission. Pandora is only available in certain countries. Please visit http://www.pandora.com/legal for more information.
Sirius, XM and all related marks and logos are trademarks of Sirius XM Radio Inc. All rights reserved.
2

Specifications
Model |
PMX-HD9813 |
||
Operating Voltage |
10.5V - 16V |
||
|
|
|
|
Fuse Rating |
20A |
|
|
|
|
||
Power Output |
25 W X 4 @ 4 Ohms RMS |
||
50 W x 4 @ 2 Ohms Peak |
|||
|
|||
|
|
|
|
Max. RCA Output Voltage |
4V |
|
|
|
|
|
|
Output Impedance |
500Ω |
|
|
|
|
||
Frequency Response |
20 - 20kHz |
||
|
|
||
FM Frequency Range |
87.5MHz - 107.9MHz |
||
|
|
||
AM Frequency Range |
530kHz - 1710kHz |
||
|
|
||
Tuner Presets |
18 FM / 12 AM |
||
|
|
||
Clock |
12:00/24Hour |
||
|
|
||
Display |
3” Color TFT |
||
|
|
||
Bluetooth |
3.0+EDR, A2DP 1.3 |
||
|
|
|
|
USB Compatibility |
2.0 |
|
|
|
|
||
USB Capacity |
32 GB max, 255 Folders max, |
||
999 Songs max |
|||
|
|||
|
|
|
|
USB Output |
1A |
|
|
|
|
|
|
|
iPhone XS Max |
iPhone 7 |
|
|
iPhone XS |
iPhone 6s Plus |
|
|
iPhoneXR |
iPhone 6s |
|
Made for iPhone Model Names- |
iPhone X |
iPhone 6 Plus |
|
iPhone 8 Plus |
iPhone 6 |
||
|
|||
|
iPhone 8 |
iPhone 5S |
|
|
iPhone 7 Plus |
iPhone 5C |
|
|
|
iPhone 5 |
|
|
|
||
Android Compatibility |
Bluetooth® Only |
||
Audio File Compatibility |
MP3, WMA, FLAC |
||
|
|
||
|
ASTM D4329 |
||
|
IPX6 (Front Face) |
||
Certifications |
IPX4 (Rear Chassis) |
||
|
CISPR25 Class 3 EMI |
||
|
FCC, CE RED, IC RCM |
||
|
|
|
|
CEA 2006

 Power ratings on Rockford Fosgate source units conform to CEA-2006 industry standards.
These guidelines mean your source unit’s output power ratings are REAL POWER numbers, not inflated marketing ratings.
3

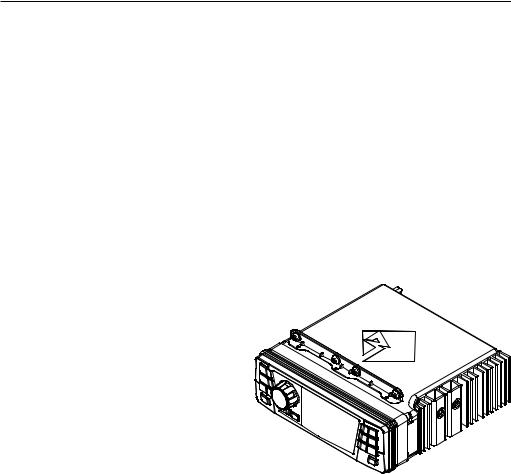
Design Features
SRC (Power) Button
This button allows you to switch
between sources and power the unit
ON and OFF.
PLAY / PAUSE button
Pressing this button play or pause your music. This button also acts as a MUTE when the source is AUX & TUNER.
Rotary Encoder
This knob is for adjusting main volume, menu navigation and setting adjustments.
PRESET buttons
These buttons allow you to set presets and allow quick access to them once set. Simple long press to retain the channel and short press to recall the channel.
MENU button
This button gives you access to the main settings of the unit by long pressing. Short pressing will give you access to the settings for the active source.
SUB Buttons
These buttons allow you to adjust the subwoofer output UP or DOWN (0-20).
REV / FWD button |
DIMMER button |
Use this button to skip back and |
Pressing this button will allow you to |
forward through channels or tracks |
select between the two brightness |
with a short press. Long pressing will |
values for the display. |
activate manual seek mode. |
|
Fig. 1
4
Installation / Mounting
Contents |
|
|
• |
Source Unit |
• Installation & Operation |
• |
RCA Output Harness |
Manual |
|
||
Installation Considerations
The following is a basic list of tools needed for installation:
• |
Volt/Ohm meter |
• |
T-25 Torx Bit |
• |
Battery post wrench |
• |
3/16” Allen Wrench |
This section focuses on some of the vehicle considerations for installing your new source unit. Pre-planning your system layout and best wiring routes will save installation time. When deciding on the layout of your new system, be sure that each component will be easily accessible for making adjustments.
If you feel unsure about installing this system yourself, have it installed by a qualified Rockford Audio technician.
Before installation, disconnect the battery negative (-) terminal to prevent damage to the unit, fire and/or possible injury.
Before beginning any installation, follow these simple rules:
1.Be sure to carefully read and understand the instructions before attempting to install the unit.
2.For safety, disconnect the negative lead from the battery prior to beginning the installation.
3.For easier assembly, we suggest you run all wires prior to mounting your unit in place.
4.Route all of the RCA cables close together and away from any high current wires.
5.Use high quality connectors for a reliable installation and to minimize signal or power loss.
6.Think before you drill! Be careful not to cut or drill into gas tanks, fuel lines, brake or hydraulic lines, vacuum lines or electrical wiring when working on any vehicle.
7.Never run wires underneath the vehicle. Running the wires inside the vehicle provides the best protection.
8.Avoid running wires over or through sharp edges. Use rubber or plastic grommets to protect any wires routed through metal, especially the firewall.
9.ALWAYS protect the battery and electrical system from damage with proper fusing. Install the appropriate fuse holder and fuse on the +12V power wire within 18” (45.7 cm) of the battery terminal.
10.When grounding to the chassis of the vehicle, scrape all paint from the metal to ensure a good, clean ground connection. Grounding connections should be as short as possible and always be connected to metal that is welded to the main body, or chassis, of the vehicle. Seatbelt bolts should never be used for connecting to ground.
Mounting
This unit is a direct plug and play replacement for the factory radio.
1.Using your Torx tool, remove the fairing screws securing the outer fairing to the bike. This will give you access to the factory radio.
2.Remove the (4) factory screws that are holding the radio in place using the 3/16” allen tool. There are (2) on each side.
3.Carefully unplug the factory harness and antenna from the back of the factory radio.
4.Remove the radio by pulling it towards the front of the motorcycle.
5.Slide the source unit into the factory radio mounting hole and secure with existing factory fasteners.
6.Plug in the factory harness and antenna into the back of the new unit.
7.If using a non Rockford Fosgate amplifier, plug in the RCA harness into the remaining socket.
8.Reinstall the fairing onto the bike.
5
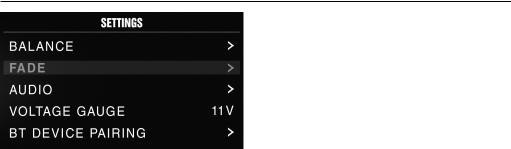
Settings
Source Unit Settings
To access the source unit’s settings, long press the MENU button until the options appear. Rotate the encoder
to scroll through the list of settings and short press the encoder button to select the setting you wish to
change. (BALANCE>FADER>AUDIO>VOLTAGE GAUGE>BT PAIRING>BEEP>TUNER REGION>SOFTWARE>THEME>REMOTE SETUP>CLOCK/DATE>FACTORY DEFAULT)
BALANCE
Short press the encoder button to access BALANCE adjustment settings. Rotate the encoder button to set output BALANCE.
FADER
Short press the encoder button to access FADER adjustment settings. Rotate the encoder button to set output FADER.
AUDIO
To access the AUDIO settings, short press the AUDIO option from the MENU screen. Rotate the encoder to scroll through the list of settings and short press the encoder button to select the setting you wish to change. (7 BAND EQ>CROSSOVER>PEQ>REAR RCA>AUX INPUT>SOURCE GAIN>INTERNAL AMPLIFIER)
7 BAND EQ
Short press the encoder button to access the 7 BAND EQ settings. Use the rotary encoder to scroll through the EQ settings. (FLAT > ROCK > CLASSIC > ACOUSTIC > DANCE > ELECTRONIC > HIP-HOP > CUSTOM) When setting up the CUSTOM EQ, short press the encoder button to set the first frequency. Once active, rotate the encoder to adjust the frequency settings. Short press encoder button again to access the next frequency. Repeat until all EQ settings are complete. Short press the MENU button to exit and go back up one level.
CROSSOVER
Short press to access the CROSSOVER settings. Use the rotary encoder to select the crossover zone options (FRONT>REAR>SUB). Short press the encoder to adjust the frequency of the crossover (60Hz>80Hz>120Hz>APF). Short press MENU to exit and go back up one level.
PUNCH EQ
Short press to access the PUNCH EQ settings. Use the rotary encoder to adjust the gain output (0-12). Short press MENU to exit and go back up one level.
Punch EQ is an onboard equalizer with up to +18dB @ 45Hz and/ or up to +12dB boost at 12.5kHz
AUX INPUT
RENAME – To rename AUX, short press the encoder button to set the first letter of the new name. Once active, rotate encoder to adjust letters. Short press the encoder button again to set the next letter. Repeat until AUX has been renamed. Short press MENU to exit and go back up one level.
ENABLE - Short press the encoder button to access options. Rotate the encoder button to select if unit is discoverable. (ENABLE > DISABLE)
SOURCE GAIN
To adjust the level of device input gain, scroll through the inputs (FM TUNER>AM TUNER>USB>AUX1>AUX2>BLUETOOTH>PANDORA >SiriusXM>GLOBAL INPUT) to the device you want to adjust, short press the encoder button to access the gain settings. Rotate the encoder button to set the level of gain (-3dB > -2dB > -1dB > 0dB > +1dB > +2dB > +3dB).
Selecting the GLOBAL INPUT option lets you adjust all source attenuation at once (0dB>-3dB>-6dB>-9dB>-12dB>-15dB>-18dB).
INTERNAL AMPLIFIER
Short press to access the INTERNAL AMPLIFIER options. Use the rotary encoder to select options (ON>OFF). When using an
amplifier to power your speakers, select OFF. If you are powering your speakers directly from the source unit, select the INTERNAL AMPLIFIER to ON.
VOLTAGE GAUGE
To display the vehicle voltage, short press the encoder button on the VOLTAGE GAUGE option.
BT DEVICE PAIRING
Short press the encoder button to access options (DISCOVERABLE > DEVICE).
DISCOVERABLE
Rotate the encoder button to select if unit is discoverable for pairing. (ENABLE > DISABLE) Once enabled, the source unit is now discoverable and ready for pairing to your device. Open the Bluetooth settings on your device to find the source unit labeled “Rockford PMX” and select.
DEVICE
Selecting DEVICE by short pressing the encoder button will allow you to rename the source unit with up to 16 characters. This gives you the ability to have a unique name for easy identification during device pairing. Short press the encoder button to select the letter to be changed and rotate the knob to change the value. Repeat process until desired name is reached.
BEEP
Short press the encoder button to access the BEEP options. Rotate the encoder button to turn system beep ON/ OFF.
TUNER REGION
To adjust, short press the encoder button to access. Rotate the encoder button to select the TUNER REGION of your preference. (EUROPE > USA > RUSSIA > LATIN > ASIA > JAPAN > MIDEAST > AUSTRALIA)
SOFTWARE
VERSION - Short press the encoder button to display the current firmware version of the unit.
UPDATE - Short press the encoder button to update the firmware. Follow the instructions on the screen when updating.
6

Settings
THEME
To adjust the THEME, short press the encoder to access the feature. Rotate the encoder button to select the desired THEME (DAY, NIGHT, AUTO)
REMOTE SETUP
To access the REMOTE SETUP options, short press the encoder to display the different options (HEAD UNIT INFO>PMX-BTUR SCAN>DISCONNECT>PMX-BTUR INFO> HEAD UNIT RESET).
To pair you PMX-BTUR, press any button on the remote to activate the device. Then select PMX-BTUR SCAN under the REMOTE SETUP options. Once it detects the remote, short press the encoder to finish pairing.
CLOCK/DATE
To adjust the CLOCK/DATE, short press the encoder to access the feature. Rotate the encoder button to select CLOCK/DATE options (CLOCK/DATE SETTING>ALBUM ART DISPLAY).
CLOCK/DATE SETTING
To set the 12H/24H display preference, rotate the encoder to scroll through the time display options. Press encoder to select and keep that option.
To adjust the time, rotate the encoder to the correct hour, press the encoder to lock in hour, repeat for minutes and date.
ALBUM ART DISPLAY
Short press the encoder button to select whick ALBUM ART DISPLAY opton you want (OFF>5S>10S>20S>ALWAYS).
FACTORY DEFAULT
AUDIO – Short press the encoder button to access. Rotate the encoder button to select YES/NO. Selecting YES will reset your unit back to factory default settings.
SYSTEM - Short press the encoder button to access. Rotate the encoder button to select YES/NO. Selecting YES will reset your unit back to factory default settings.
SiriusXM - Short press the encoder button to access. Rotate the encoder button to select YES/NO. Selecting YES will reset your unit back to factory default settings.
Basic Operation
TURNING THE UNIT ON / OFF
Long press the SRC (Power) button to turn the unit ON or OFF
ADJUSTING THE VOLUME
Rotate encoder knob left or right to desired volume level (0-40). The current volume level will be displayed during adjustment.
ADJUSTING THE SUBWOOFER OUTPUT
Press the SUB + or SUBbuttons to adjust the output level (0-20).
ADJUSTING THE SCREEN BRIGHTNESS
Long press the DIMMER button to adjust the brightness level. There are two brightness levels.
SELECTING A SOURCE TO PLAY
Short press the SRC button to show the different source options (FM TUNER>AM TUNER>USB>AUX>BLUETOOTH>PANDORA>Sirius XM). Use the rotary encoder or short press the SRC button to scroll through sources.
Tuner Operation (FM/AM)
To operate, use the rotary encoder to select the tuner source you want to listen to (FM>AM).
To AUTO SEEK stations, short press the FWD and REV buttons. To MANUAL SEEK stations, long press the FWD and REV buttons to tune to the desired frequency.
To MUTE the TUNER, short press the PLAY/PAUSE button.
FM BAND SETTINGS
To access the FM BAND SETTINGS, short press the MENU when using the FM TUNER source. This will give you access to the settings specific to the FM TUNER (FM>PRESETS>ADD PRESETS>REMOVE PRESETS>AUTO STORE>LOCAL).
PRESETS
Short press the encoder button to access the PRESETS list. Using this feature allows you to see what PRESETS are saved on the unit.
ADD PRESETS
Short press the encoder button on the ADD PRESETS option. You will need to be on both the station and PRESET group you want to add first (FM1>FM2>FM3). Using this feature allows you to save stations to the unit. Once selected, use the rotary encoder to select the PRESET number (1-6) you want the station saved to.
REMOVE PRESETS
Short press the encoder button on the REMOVE PRESETS option. You will need to be under the PRESET group you want to adjust first (FM1>FM2>FM3). Using this feature allows you to remove saved stations on the unit. Once selected, use the rotary encoder to select the PRESET number (1-6) of the station you want removed.
FM
Short press the encoder button to access the FM PRESET options (FM1>FM2>FM3). Using this feature allows you to have separate tuner preset groups to choose from. Use the rotary encoder button to scroll through the TUNER groups and short press to select the group.
AUTO STORE
Short press the encoder button to access the AUTO STORE function. You will need to be under the PRESET group you want to adjust first (FM1>FM2>FM3). This feature automatically stores presets on the unit. It will stop when presets 1-6 are set. Select the next PRESET group and repeat to fill next set.
LOCAL
Short press the encoder button to access the LOCAL options. Once selected, use the rotary encoder to select ON or OFF. The local option tunes to nearby radio stations with sufficiently strong signals for good reception. In areas where reception is poor,
7
Operation
switching to distance tuning enables the unit to tune in to more distant stations. Distance tuning is the default.
AM BAND SETTINGS
To access the AM BAND SETTINGS, short press the MENU when using the AM TUNER source. This will give you access to the settings specific to the AM TUNER (AM>PRESETS>ADD PRESETS>REMOVE PRESETS>AUTO STORE>LOCAL).
PRESETS
Short press the encoder button to access the PRESETS list. Using this feature allows you to see what PRESETS are saved on the unit.
ADD PRESETS
Short press the encoder button on the ADD PRESETS option. You will need to be on both the station and PRESET group you want to add first (AM1>AM2). Using this feature allows you to save stations to the unit. Once selected, use the rotary encoder to select the PRESET number (1-6) you want the station saved to.
REMOVE PRESETS
Short press the encoder button on the REMOVE PRESETS option. You will need to be under the PRESET group you want to adjust first (AM1>AM2). Using this feature allows you to remove saved stations on the unit. Once selected, use the rotary encoder to select the PRESET number (1-6) of the station you want removed.
AM
Short press the encoder button to access the FM PRESET options (AM1>AM2). Using this feature allows you to have separate tuner preset groups to choose from. Use the rotary encoder button to scroll through the TUNER groups and short press to select the group.
AUTO STORE
Short press the encoder button to access the AUTO STORE function. You will need to be under the PRESET group you want to adjust first (AM1>AM2). This feature automatically stores presets on the unit. It will stop when presets 1-6 are set. Select the next PRESET group and repeat to fill next set.
LOCAL
Short press the encoder button to access the LOCAL options. Once selected, use the rotary encoder to select ON or OFF. The local option tunes to nearby radio stations with sufficiently strong signals for good reception. In areas where reception is poor, switching to distance tuning enables the unit to tune in to more distant stations. Distance tuning is the default.
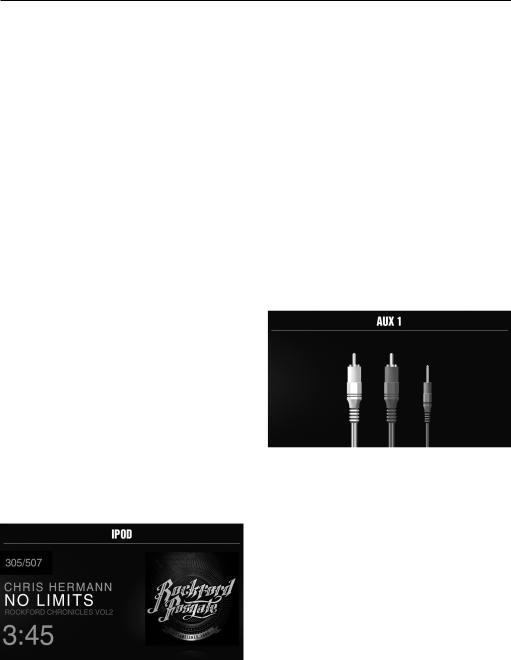
USB (iPod) Operation
After your device is connected to the source unit, this feature allows you to control playback from your device directly from the unit. Select the USB source option on the source unit.
To play or pause a song, short press the PLAY/PAUSE button.
To skip a track forward, short press the FWD button. To skip a track backwards, short press the REV button.
To access USB specific settings, short press the MENU button for the list of settings (BROWSER>REPEAT>SHUFFLE). Use the encoder to select the option to change.
BROWSER
Short press the encoder button to access the BROWSER options (PLAYLISTS>ARTISTS>ALBUMS>GENRES>SONGS>COMPOSERS>A UDIOBOOKS>PODCASTS). Using this feature allows you to search for tracks or songs by different types of categories.
To page/down, use the track forward and track backwards buttons.
REPEAT
Short press the encoder button to access the REPEAT feature options (OFF>ONE>ALL).
SHUFFLE
Short press the encoder button to access the SHUFFLE feature options (OFF>ALL). This feature allows you to set your preference on shuffling tracks or songs.
NOTE: When using a USB extension cable, it must be a Rockford Fosgate powered extension cable. The maximum distance for the cable is 33 feet (10 meters).
AUX Operation
After your device is plugged into the source unit, this feature allows you to play music from your device. Select the AUX source option on the source unit and use your plugged in device to control song/track selection, PLAY/PAUSE and track skip FWD/ REV.
8

Operation
Bluetooth® Operation
After your device is paired to the source unit, this feature allows you to control playback from your device directly from the unit. Select the BLUETOOTH source option on the source unit.
To play or pause a song, short press the PLAY/PAUSE button.
To skip a track forward, short press the FWD button. To skip a track backwards, short press the REV button.
To access BLUETOOTH specific settings, short press the MENU button for the list of settings (BROWSER>REPEAT>SHUFFLE). Use the encoder to select the option to change.
BROWSER
Short press the encoder button to access the BROWSER options (PLAYLISTS>ARTISTS>ALBUMS>GENRES>SONGS>COMPOSERS>A UDIOBOOKS>PODCASTS). Using this feature allows you to search for tracks or songs by different types of categories.
REPEAT
Short press the encoder button to access the REPEAT feature options (OFF>ONE>ALL). This feature allows you to set your preference on the amount of times a track or song will repeat.
SHUFFLE
Short press the encoder button to access the SHUFFLE feature options (OFF>ALL). This feature allows you to set your preference on shuffling tracks or songs.
NOTE: When the device is initially paired, the volume on the device will be roughly at half volume. You will need to turn the volume all the way up on the connected device prior to level setting. The device will remain at maximum volume after initially setting and when it re-pairs to the source unit.
Pandora®
This feature allows you to control the Pandora® app from the source unit directly (Android users will have to use Bluetooth only, iOS users can use both USB and Bluetooth). You will need to start the Pandora® app on your device first, then select the Pandora® source option on the source unit. To use the “Thumbs Up” feature, long press the SUB+ button. To use the “Thumbs down” feature, long press the SUB - button.
To play or pause a song, short press the PLAY/PAUSE button. To skip a track forward, short press the FWD button.
To access Pandora® specific settings, short press the MENU button for the list of settings (STATIONS>BOOKMARKS>STATIONS MANAGE). Use the encoder to select the option to change.
STATIONS
To adjust, short press the encoder button to access. Rotate the encoder button to select your options (SHUFFLE>SORT DATE/A- Z>STATIONS). Selecting the SHUFFLE option will shuffle your stations and selecting the SORT feature will sort your stations by date added or alphabetically. You can also select your saved stations directly from this list.
BOOKMARKS
To BOOKMARK an artist or track that is playing, short press the encoder button to display your BOOKMARK options (ARTIST>TRACK). Select the option you wish to use for bookmarking.
Pandora, the Pandora logo, and the Pandora trade dress are trademarks or registered trademarks of Pandora Media, LLC. Used with permission. Pandora is only available in certain countries. Please visit http://www.pandora.com/legal for more information.
9

Operation
SiriusXM®
Only SiriusXM® brings you more of what you love to listen to, all in one place. Get over 140 channels, including commericalfree music plus the best sports, news, talk, comedy and entertainment. Welcome to the world of satellite radio. A
SiriusXM Connect Tuner and Subscription are required. For more information, visit www.siriusxm.com
ACTIVATING YOUR SiriusXM SUBSCRIPTION
After installing your SiriusXM Connect Tuner and antenna, power on your source unit and select SiriusXM mode. You should be able to hear the SiriusXM Preview channel on Channel 1. If you cannot hear the preview channels, please check the installation instructions to make sure your SiriusXM Connect tuner is properly installed.
After you can hear the Preview channel, tune to Channel 0 to find the Radio ID of your tuner. In addition, the Radio ID is located on the bottom of the SiriusXM Connect Tuner and its packaging. You will need this number to activate your subscription. Write the number down for reference.
Note: the SiriusXM Radio ID does not include the letters I, O, S or F.
In the USA, you can activate online or by calling SiriusXM Listener care:
•Visit www.siriusxm.com/activatenow
•Call SiriusXM Listener Care at 1-866-635-2349 For Canadian Subscriptions, please contact:
•Visit www.siriusxm.ca/activatexm
•Call XM Customer Care at 1-877-438-9677
As part of the activation process, the SiriusXM satellites will send an activation message to your tuner. When your radio detects that the tuner has received the activation message, your radio will display: “Subscription Updated”. Once subscribed, you can tune to channels in your subscription plan. Note, the activation process usually takes 10 to 15 minutes, but may take up to an hour. Your radio will need to be powered on and receiving the SiriusXM signal to receive the activation message.
SETTINGS
To access the SiriusXM SETTINGS, short press the MENU when using the SiriusXM source. This will give you access to the settings specific to SiriusXM (SXM>PRESETS>ADD PRESETS>REMOVE PRESETS>CHANNELS>CATEGORY).
SiriusXM PRESET BANDS (SXM)
Short press the encoder button to access the SiriusXM PRESET options (SXM1>SXM2>SXM3). Using this feature allows you to have separate satellite preset groups to choose from. Use the FWD and REV buttons to scroll through the TUNER groups.
PRESETS
Short press the encoder button to access the PRESETS list. Using this feature allows you to see what PRESETS are saved on the unit.
ADD PRESETS
Short press the encoder button on the ADD PRESETS option. You will need to be on both the channel and PRESET group you want to add first (SXM1>SXM2>SXM3). Using this feature allows you to save channels to the unit. Once selected, use the rotary encoder to select the PRESET number (1-6) you want the channel saved to.
REMOVE PRESETS
Short press the encoder button on the REMOVE PRESETS option. You will need to be under the PRESET group you want to adjust first (SXM1>SXM2>SXM3). Using this feature allows you to remove saved channels on the unit. Once selected, use the rotary encoder to select the PRESET number (1-6) of the channel you want removed.
CHANNEL
Short press the encoder button on the CHANNEL option to select this feature. This feature displays a complete listing of channels.
CATEGORY
Short press the encoder button on the CATEGORY option to select this feature. This feature allows you to search channels based on their CATEGORY type.
DIRECT TUNING
Short press the encoder button on the DIRECT TUNING option to select this feature. This feature allows you to directly tune to a channel if you already know the channel number. Rotate the encoder until you reach the desired nuumeral and press to enter your selection. Repeat until the channel number is completed.
PARENTAL CONTROLS
Short press the encoder button on the PARENTAL CONTROL option to select this feature. This feature allows you to easily lock and unlock channels with mature content. To turn this feature on, short press the encoder on PARENTAL CONTROLS to select. You will be asked to enter a code to activate it. Enter “1111” for your code. Once the code is entered correctly, this will give you access to the PARENTAL CONTROL features (LOCK CHANNELS>CHANGE MY CODE). Use the encoder knob to scroll through the options and short press to select.
LOCK CHANNELS
Short press the encoder button on the LOCK CHANNELS option to select this feature. This feature allows you to select certain channels to be locked out for listening. When trying to listen to locked channels, you will need to enter the correct access code to listen to them. Use the rotary encoder to input code.
CHANGE MY CODE
Short press the encoder button on the CHANGE MY CODE option to reset the PARENTAL CONTROL access code. Use the rotary encoder to input the code.
10
PMX-BTUR Function Table
|
|
|
|
|
|
PMX-HD9813 Control |
|
|
|
|
||
Phone Control |
USB/MP3/WMA |
AUX-IN |
iPhone/iPod |
BT Audio |
SiriusXM |
|||||||
|
|
|
|
|
|
|
|
|
|
|
|
|
Short Press |
Long Press |
Short Press |
Long Press |
Short Press |
Long Press |
Short Press |
Long Press |
Short Press |
Long Press |
Short Press |
Long Press |
|
|
|
|
|
|
|
|
|
|
|
|
|
|
Volume + |
Ramp Volume + |
Volume + |
Ramp Volume + |
Volume + |
Ramp Volume + |
Volume + |
Ramp Volume + |
Volume + |
Ramp Volume + |
Volume + |
Ramp Volume + |
|
|
|
|
|
|
|
|
|
|
|
|
|
|
Volume - |
Ramp Volume - |
Volume - |
Ramp Volume - |
Volume - |
Ramp Volume - |
Volume - |
Ramp Volume - |
Volume - |
Ramp Volume - |
Volume - |
Ramp Volume - |
|
|
|
|
|
|
|
|
|
|
|
|
|
|
Play / Pause |
Hands Free * |
Play / Pause |
|
MUTE (Enter) |
|
Play / Pause |
|
MUTE (Enter) |
|
MUTE (Enter) |
|
|
(Enter) |
|
|
(Enter) |
|
|
|
||||||
|
|
|
|
|
|
|
|
|
|
|||
|
|
|
|
|
|
|
|
|
|
|
|
|
Previous |
Rewind |
Previous |
Rewind |
Previous |
Rewind |
Previous |
Rewind |
Previous |
Rewind |
Previous |
Rewind |
|
|
|
|
|
|
|
|
|
|
|
|
|
|
Next |
Fast Forward |
Next |
Fast Forward |
Next |
Fast Forward |
Next |
Fast Forward |
Next |
Fast Forward |
Next |
Fast Forward |
|
|
|
|
|
|
|
|
|
|
|
|
|
|
Call Answer */ |
Call Reject * |
SRC / |
Power Off |
SRC / |
Power Off |
SRC / |
Power Off |
SRC / |
Power Off |
SRC / |
Power Off |
|
Call Hang Up * |
Siri * |
Power On |
Power On |
Power On |
Power On |
Power On |
||||||
|
|
|
|
|
||||||||
|
|
|
|
|
|
|
|
|
|
|
|
|
* iOS Only
11

Troubleshooting
Symptom / Advisory |
|
Diagnosis |
|
Remedy |
|
|
Basic |
|
|
|
|
Blown fuse |
|
Check fuse of the unit, replace with correct rating. |
|
|
|
||
|
|
|
|
|
|
|
Vehicle’s ignition is off |
|
If connected following the instructions, the unit will |
|
|
|
not operate with ignition off. |
|
|
|
|
|
|
|
|
|
|
|
Source unit does not turn on. |
|
Voltage applied to Red wire is not |
|
Check battery, connections and fuses and repair or |
|
|
|
replace as necessary. If voltage is above +16 volts, |
|
|
|
between 10.5 & 16 volts or there is |
|
|
|
|
|
have the electrical system inspected by an authorized |
|
|
|
no voltage present |
|
|
|
|
|
service center. |
|
|
|
|
|
|
|
|
|
|
|
|
|
Unit is not properly grounded |
|
Check wiring and repair as necessary. |
|
|
Radio Tuner |
|
|
|
|
|
|
|
Tuner fails to tune any stations |
|
No antenna or disconnected or |
|
Check all connections and repair as necessary. |
|
|
|||
|
open connection in cable |
|
||
|
|
|
|
|
|
|
|
|
|
Unable to tune stations in seek |
|
You are in a weak signal area |
|
Make sure the tuner LOC mode is off. |
mode |
|
|
||
|
|
|
|
|
|
|
USB Devices |
|
|
|
|
The USB device has been inserted |
|
Reversing the connection direction of the USB device, |
|
|
|
||
USB device cannot be inserted |
|
in the wrong direction |
|
try reinserting. |
|
|
|
|
|
|
The USB device connector is broken |
|
Replace with a new USB device. |
|
|
|
|
||
|
|
|
|
|
|
|
The USB device is damaged |
|
Disconnect USB device and reconnect. If the device is |
USB device is not recognized |
|
|
|
still not recognized, try replacing with a different USB |
|
|
|
||
|
|
Connectors are loose |
|
device. USB does not work with Android devices. |
|
|
|
|
|
No sound heard with the display |
|
No MP3/WMA files are stored on the |
|
Store these files properly on the USB device. USB does |
“No File” shown |
|
USB device |
|
not work with Android devices. |
|
|
|
|
|
Sound skips or is noisy |
|
MP3/WMA files are not created |
|
Use MP3/WMA files that are encoded correctly. |
|
properly |
|
||
|
|
|
|
|
|
|
AUX |
|
|
MP3 is not playing back |
|
Writing error occurred. The MP3 |
|
Make sure MP3 has been written in a supported format |
|
|
|||
|
format is not compatible. |
|
||
|
|
|
|
|
|
|
Bluetooth |
|
|
Bluetooth source volume is |
|
Bluetooth from device is not at |
|
Turn the volume on the device to maximum level |
|
|
|||
lower than other sources |
|
maximum volume |
|
|
|
|
|
||
|
|
|
|
|
12
|
|
|
Troubleshooting |
|
|
|
|
|
|
|
|
|
|
SiriusXM |
|
|
|
|
|
|
|
|
Verify that the antenna cable is connected to the |
|
|
The radio has detected a fault with |
SiriusXM Connect Tuner |
|
|
|
|
|
Check Antenna |
the SiriusXM antenna. The antenna |
Inspect the antenna cable for damage and kinks. |
|
cable may be either disconnected |
Replace the antenna if the cable is damaged. |
|
|
|
||
|
|
or damaged. |
SiriusXM products are available at your local car audio |
|
|
|
|
|
|
|
retailer or online at www.shop.siriusxm.com |
|
|
|
|
|
|
The radio is having difficulty |
|
|
Check Tuner |
communicating with the SiriusXM |
Verify that the SiriusXM Connect Tuner cable is |
|
Connect Tuner. The tuner may be |
securely connected to the radio |
|
|
|
||
|
|
disconnected or damaged. |
|
|
|
|
|
|
|
|
Verify that your vehicle is outdoors with a clear view |
|
|
|
of the sky. |
|
|
|
Verify that the SiriusXM magnetic mount antenna is |
|
|
|
mounted on a metal surface on the outside of the |
|
|
|
vehicle. |
|
|
The SiriusXM Connect Tuner is |
Move the SiriusXM antenna away from any |
|
No Signal |
having difficulty receiving the |
obstructions. |
|
|
SiriusXM satellite signal. |
Inspect the antenna cable for damage and kinks. |
|
|
|
|
|
|
|
Consult the SiriusXM Connect Tuner installation |
|
|
|
manual for more information on antenna installation. |
|
|
|
Replace the antenna if the cable is damaged. SiriusXM |
|
|
|
products are available at your local car audio retailer |
|
|
|
or online at www.shop.siriusxm.com. |
|
|
|
|
|
|
The radio has detected a change in |
Visit www.siriusxm.com or call 866-635-2349 in the |
|
|
your SiriusXM subscription status. |
|
|
Subscription Updated |
USA or 877-438-9677 in Canada if you have questions |
|
|
Press the encoder button to clear |
||
|
|
about your subscription. |
|
|
|
the message. |
|
|
|
|
|
|
|
|
|
|
|
The channel that you have |
|
|
|
requested is not a valid SiriusXM |
|
|
|
channel or the channel that you |
|
|
Channel Not Available |
were listening to is no longer |
Visit www.siriusxm.com for more information about |
|
available. You may also see |
the SiriusXM channel lineup. |
|
|
|
||
|
|
this message briefly when first |
|
|
|
connecting a new SiriusXM Connect |
|
|
|
Tuner. |
|
|
|
The channel that you have |
|
|
|
requested is not included in your |
Visit www.siriusxm.com or call 866-635-2349 in the |
|
Channel Not Subscribed |
SiriusXM subscription package or |
USA or 877-438-9677 in Canada if you have questions |
|
the channel that you were listening |
about your subscription package or would like to |
|
|
|
||
|
|
to is no longer included in your |
subscribe to this channel. |
|
|
SiriusXM subscription package. |
|
|
|
|
|
|
Channel Locked |
The channel that you have requested is Locked by the radio Parental Control feature. See page |
|
|
10 for more information on the Parental Control feature and how to access locked channels. |
||
|
|
||
|
|
|
|
13

Caractéristiques de conception
Bouton SRC (Alimentation)
Ce bouton permet de commuter entre les sources (pression courte) et d'activer et de désactiver l'appareil (pression longue).
Bouton PLAY/PAUSE (LECTURE/PAUSE)
Appuyer sur ce bouton pour jouer ou pauser la musique. Ce bouton sert aussi de VEILLEUSE quand la source est AUX et TUNER.
Encodeur rotatif
Ce bouton sert à ajuster le volume principal, la navigation du menu et les réglages des paramètres.
Boutons PRESET (STATIONS PRÉRÉGLÉES)
Ces boutons permettent de régler les stations préréglées et d'y accéder rapidement une fois réglées. Une simple pression longue pour retenir la station et une pression courte pour rappeler la station.
Bouton MENU
Appuyer longuement sur ce bouton pour avoir accès aux paramètres principaux
de l'appareil. Appuyer dessus brièvement pour avoir accès aux paramètres pour la source active.
Boutons SUB
Ces boutons permettent d'ajuster la sortie du subwoofer ou la ligne arrière vers le haut ou vers le bas (0-20).
Bouton REV/FWD |
Bouton DIMMER (GRADATEUR) |
Utiliser ce bouton pour sauter en |
Appuyer sur ce bouton pour |
arrière et en avant parmi les chaînes |
sélectionner entre les valeurs de |
ou les pistes avec une pression courte. |
luminosité de l'affichage. |
Une pression longue activera le mode |
|
de recherche manuelle. |
|
Fig. 1
14

Installation / Montage
Contenu |
|
|
• |
Unité source |
• Manuel d'installation et |
• |
Faisceau de sortie RCA |
d'exploitation |
|
||
Considérations d'installation
Voici une liste de base des outils nécessaires pour l'installation :
• |
Voltmètre/Ohmmètre |
• |
Embout Torx T-25 |
• |
Clé de borne de batterie |
• |
Clé Allen 3/16” |
Cette section se concentre sur certaines des considérations automobiles pour l'installation de la nouvelle unité source. Préplanifier l'aménagement du système et les meilleures voies de câblage fera gagner du temps en installation. Lors de la décision de l'aménagement du nouveau système, s'assurer que chaque composant soit facilement accessible pour effectuer des réglages.
En cas de question sur l'installation de ce système soi-même, le faire installer par un technicien qualifié Audio Rockford.
Avant l'installation, débrancher la borne négative (-) de la batterie pour prévenir tout dommage matériel, tout incendie et/ou des blessures éventuelles.
Avant de commencer toute installation, suivre ces simples règles :
1.Faire attention de lire attentivement et de comprendre les instructions avant de tenter l'installer l'unité.
2.Par mesure de sécurité, débrancher le fil négatif de la batterie avant de commencer l'installation.
3.Pour faciliter l'assemblage, il est conseillé d'acheminer tous les fils avant de monter l'unité en place.
4.Acheminer tous les câbles RCA près les uns des autres et à l'écart des fils à haute intensité.
5.Utiliser des connecteurs de haute qualité pour une installation fiable et pour minimiser la perte de signal ou d'alimentation.
6.Penser avant de percer ! Faire attention de ne pas couper ni percer dans les réservoirs à essence, les canalisations de
carburant, les conduites de freins ou conduites hydrauliques, les lignes de vide ou le câblage électrique lors de toute opération sur un véhicule.
7.Ne jamais acheminer les fils sous le véhicule. Acheminer les fils à l'intérieur du véhicule fournit la meilleure protection.
8.Éviter d'acheminer les fils sur ou à travers des bords coupants. Utiliser des œillets en caoutchouc ou en plastique pour protéger les fils acheminés dans du métal, en particulier le pare-feu.
9.TOUJOURS protéger la batterie et le système électrique de tout dommage grâce à des fusibles appropriés. Installer le portefusible approprié et le fusible sur le fil d'alimentation de +12 V dans les 45,cm (18 po) de la borne de batterie.
10.Lors de la mise à la terre au châssis du véhicule, gratter toute peinture du métal pour assurer une bonne connexion à la masse propre. Les raccordements de mise à la terre doivent être aussi courts que possible et toujours connectés au métal qui est soudé au corps principal, ou au châssis, du véhicule. Les boulons de ceinture de sécurité ne doivent jamais être utilisés pour raccorder à la terre.
Montage
Cette unité est un remplacement prêt-à-l'emploi direct pour la radio d'origine.
1.À l'aide de l'outil Torx, retirer les vis de carénage sécurisant les carénage externe à la moto. Ceci permettra l'accès à la radio d'origine.
2.Retirer les (4) vis d'usine qui maintiennent la radio en place à l'aide de l'outil Allen 3/16”. Il y en a (2) de chaque côté.
3.Débrancher soigneusement le faisceau et l'antenne d'origine du dos de la radio d'origine.
4.Retirer la radio en la tirant vers l'avant de la moto.
5.Faire glisser l'unité source dans le trou de montage de la radio d'origine et sécuriser avec les fixations d'origine existantes.
6.Brancher le faisceau et l'antenne d'origine dans le dos de la nouvelle unité.
7.Si on utilise un amplificateur autre que Rockford Fosgate, brancher le faisceau RCA dans la douille restante.
8.Remonter le carénage sur la moto.
15

Paramètres
Paramètres de l'unité source
Pour accéder aux paramètres de l'unité source, appuyer longuement sur le bouton MENU jusqu'à affichage des options. Faire pivoter l'encodeur pour faire défiler la liste des paramètres et effectuer une pression courte sur le bouton d'encodeur pour sélectionner le paramètre que l'on souhaite modifier. (BALANCE>FADER>AUDIO>VOLTAGE GAUGE>BT PAIRING>BEEP>TUNER REGION>SOFTWARE>THEME>REMOTE SETUP>CLOCK/DATE>FACTORY DEFAULT)
BALANCE
Appuyer brièvement sur le bouton d'encodeur pour accéder aux paramètres de réglage de BALANCE. Faire pivoter le bouton d'encodeur pour régler la BALANCE de sortie.
FADER
Appuyer brièvement sur le bouton d'encodeur pour accéder aux paramètres de réglage du FADER. Faire pivoter le bouton d'encodeur pour régler le FADER de sortie.
AUDIO
Pour accéder aux paramètres AUDIO, effectuer une pression courte sur l'option AUDIO à partir de l'écran MENU. Faire pivoter l'encodeur pour faire défiler la liste des paramètres et effectuer une pression courte sur le bouton d'encodeur pour sélectionner le paramètre que l'on souhaite modifier. (7 BAND EQ>CROSSOVER>PEQ>REAR RCA>AUX INPUT>SOURCE GAIN>INTERNAL AMPLIFIER)
7 BAND EQ
Appuyer brièvement sur le bouton d'encodeur pour accéder aux paramètres 7 BAND EQ. Utiliser l'encodeur rotatif pour faire défiler les paramètres EQ. (FLAT > ROCK > CLASSIC > ACOUSTIC > DANCE > ELECTRONIC > HIP-HOP > CUSTOM) Lors de la configuration du CUSTOM EQ, effectuer une pression courte sur le bouton d'encodeur pour régler la première fréquence. Une fois activé, faire pivoter l'encodeur pour ajuster les paramètres de fréquence. Effectuer une autre pression courte sur le bouton d'encodeur pour accéder à la fréquence prochaine. Répéter jusqu'à ce que tous les paramètres EQ soient terminés. Appuyer brièvement sur le bouton MENU pour quitter et revenir d'un niveau en arrière.
CROISEMENT
Appuyer brièvement pour accéder aux paramètres de CROISEMENT. Utiliser l'encodeur rotatif pour sélectionner les options de zones de croisement (FRONT>REAR>SUB). Effectuer une courte pression sur l'encodeur pour ajuster la fréquence du croisement (60 Hz>80 Hz>120 Hz>APF). Appuyer brièvement sur le bouton MENU pour quitter et revenir d'un niveau en arrière.
PUNCH EQ
Appuyer brièvement pour accéder aux paramètres de PUNCH EQ. Utiliser l'encodeur rotatif pour ajuster la sortie de gain (0-12). Appuyer brièvement sur le bouton MENU pour quitter et revenir d'un niveau en arrière.
Punch EQ est un égaliseur embarqué avec un amplificateur maximum de +18 dB à 45 Hz et/ou de +12 dB à 12,5 kHz
ENTRÉE AUX
RENOMMER – Pour renommer AUX, appuyer brièvement sur le bouton d'encodeur pour régler la première lettre du nouveau nom. Une fois activé, faire tourner l'encodeur pour ajuster
les lettres. Effectuer une autre pression courte sur le bouton d'encodeur pour régler la prochaine lettre. Répéter jusqu'à ce que AUX ait été renommé. Appuyer brièvement sur le bouton MENU pour quitter et revenir d'un niveau en arrière.
ACTIVER - Appuyer brièvement sur le bouton d'encodeur pour accéder aux options. Faire tourner le bouton d'encodeur pour sélectionner si l'unité est découvrable. (ENABLE > DISABLE)/ (ACTIVER>DÉSACTIVER)
GAIN SOURCE
Pour ajuster le niveau du gain d'entrée de périphérique, faire défiler les entrées (FM TUNER>AM TUNER>USB>AUX1>AUX2>BLUETOOTH>
PANDORA>SiriusXM>GLOBAL INPUT) jusqu'au périphérique que l'on souhaite ajuster, appuyer brièvement le bouton d'encodeur pour accéder aux paramètres de gain. Faire tourner le bouton d'encodeur pour régler le niveau de gain (-3dB > -2dB > -1dB > 0dB > +1dB > +2dB > +3dB).
Sélectionner l'option ENTRÉE GLOBALE permet d'ajuster toute l'atténuation source en une seul fois (0dB>-3dB>-6dB>-9dB>- 12dB>-15dB>-18dB).
AMPLIFICATEUR INTERNE
Appuyer brièvement pour accéder aux options AMPLIFICATEUR INTERNE. Utiliser l'encodeur rotatif pour sélectionner les options (ON>OFF). Lors de l'utilisation d'un amplificateur pour alimenter les haut-parleurs, sélectionner OFF. Si on alimente les haut-parleurs directement de l'unité source, sélectionner l'AMPLIFICATEUR INTERNE sur ON.
INDICATEUR DE TENSION
Pour afficher la tension du véhicule, appuyer brièvement sur le bouton d'encodeur sur l'option INDICATEUR DE TENSION.
APPAIRAGE DE PÉRIPHÉRIQUE BT
Appuyer brièvement sur le bouton d'encodeur pour accéder aux options (DÉCOUVRABLE > PÉRIPHÉRIQUE).
DÉCOUVRABLE
Faire tourner le bouton d'encodeur pour sélectionner si l'unité est découvrable pour appairage. (ENABLE > DISABLE) Une fois activé, l'unité source est désormais découvrable et prête pour appairage au périphérique. Ouvrir les paramètres Bluetooth sur le périphérique pour trouver l'unité source étiquetée « Rockford PMX » et sélectionner.
PÉRIPHÉRIQUE
Sélectionner PÉRIPHÉRIQUE en appuyant rapidement sur le bouton d'encodeur permettra de donner un autre nom à
l'unité source avec un maximum de 16 caractères. Ceci donne la possibilité d'avoir un nom unique pour identifier facilement
pendant l'appairage du périphérique. Appuyer rapidement sur la bouton d'encodeur pour sélectionner la lettre à changer et faire tourner le bouton pour changer la valeur. Répéter le processus jusqu'à obtention du nom souhaité.
BIP
Appuyer brièvement sur le bouton d'encodeur pour accéder aux options BIP. Faire tourner le bouton d'encodeur pour activer/ désactiver le bip du système.
RÉGION DU TUNER
Pour ajuster, appuyer brièvement sur le bouton d'encodeur pour accéder. Faire tourner le bouton d'encodeur pour sélectionner la RÉGION DU TUNER de préférence. (EUROPE > USA > RUSSE >
AMÉRIQUE LATINE > ASIE > JAPON > MOYEN-ORIENT > AUSTRALIE)
LOGICIEL
VERSION - Appuyer brièvement sur le bouton d'encodeur pour afficher la version de logiciel actuelle de l'unité.
16

Paramètres
MISE À JOUR - Appuyer brièvement sur le bouton d'encodeur pour mettre le logiciel à jour. Suivre les instructions à l'écran pour mettre à jour.
THÈME
Pour ajuster le THÈME, appuyer brièvement sur l'encodeur pour accéder à la fonction. Faire tourner le bouton d'encodeur pour sélectionner le THÈME (JOUR, NUIT, AUTO) souhaité.
CONFIGURATION DE LA TÉLÉCOMMANDE
Pour accéder aux options CONFIGURATION DE L TÉLÉCOMMANDE, appuyer brièvement sur l'encodeur pour afficher les différentes options (HEAD UNIT INFO>PMX-BTUR SCAN>DISCONNECT>PMXBTUR INFO> HEAD UNIT RESET).
Pour apparier le PMX-BTUR, appuyer sur n'importe quel bouton sur la télécommande pour activer le périphérique. Ensuite, sélectionner PMX-BTUR SCAN sous les options CONFIGURATION DE LA TÉLÉCOMMANDE. Une fois qu'il détecte la télécommande, appuyer brièvement sur l'encodeur pour finir l'appairage.
HORLOGE/DATE
Pour ajuster HORLOGE/DATE, appuyer brièvement sur l'encodeur pour accéder à la fonction. Faire tourner le bouton d'encodeur pour sélectionner les options HORLOGE/DATE (CLOCK/DATE SETTING>ALBUM ART DISPLAY).
PARAMÈTRES HORLOGE/DATE
Pour configurer la préférence d'affichage 12H/24H, faire tourner l'encodeur pour faire défiler les options d'affichage de l'heure. Appuyer sur l'encodeur pour sélectionner et conserver cette option.
Pour ajuster l'heure, faire tourner l'encodeur sur l'heure correcte, appuyer sur l'encodeur pour verrouiller l'heure, répéter pour les minutes et la date.
AFFICHAGE DE POCHETTES D'ALBUM
Appuyer brièvement le bouton d'encodeur pour sélectionner quelle option AFFICHAGE DE POCHETTES D'ALBUM que l'on souhaite (OFF>5S>10S>20S>ALWAYS).
Réglage d'usine
AUDIO – Appuyer brièvement sur le bouton d'encodeur pour accéder. Faire pivoter le bouton d'encodeur pour sélectionner YES/NO (OUI/NON). Sélectionner YES/OUI pour remettre l'unité aux réglages d'usine.
SYSTÈME - Appuyer brièvement sur le bouton d'encodeur pour accéder. Faire pivoter le bouton d'encodeur pour sélectionner YES/NO (OUI/NON). Sélectionner YES/OUI pour remettre l'unité aux réglages d'usine.
SiriusXM - Appuyer brièvement sur le bouton d'encodeur pour accéder. Faire pivoter le bouton d'encodeur pour sélectionner YES/NO (OUI/NON). Sélectionner YES/OUI pour remettre l'unité aux réglages d'usine.
Fonctionnement de base
ACTIVER/DÉSACTIVER L'UNITÉ
Appuyer longuement sur le bouton SRC (Alimentation) pour ACTIVER ou DÉSACTIVER l'unité
RÉGLAGE DU VOLUME
Faire tourner le bouton d'encodeur vers la gauche ou vers la droite au niveau de volume souhaité (0-40). Le niveau de volume actuel s'affiche pendant le réglage.
RÉGLAGE DE LA SORTIE DU SUBWOOFER
Appuyer sur le bouton SUB + ou SUBpour régler le niveau de
sortie (0-20).
RÉGLAGE DE LA LUMINOSITÉ DE L'ÉCRAN
Appuyer longuement sur le bouton DIMMER / GRADATEUR pour ajuster le niveau de luminosité. Il existe deux niveaux de luminosité.
SÉLECTIONNER UNE SOURCE À JOUER
Appuyer brièvement sur le bouton SRC pour afficher les différentes options de source (FM TUNER>AM
TUNER>USB>AUX>BLUETOOTH>PANDORA>SiriusXM). Utiliser l'encodeur rotatif ou appuyer brièvement sur le bouton SRC pour faire défiler les sources.
Fonctionnement du tuner (FM/AM)
Pour faire fonctionner, utiliser l'encodeur rotatif pour sélectionner la source de tuner que l'on souhaite écouter (FM>AM).
Pour RECHERCHER AUTOMATIQUEMENT des stations, appuyer brièvement sur les boutons FWD et REV. Pour RECHERCHER MANUELLEMENT des stations, appuyer longuement sur les boutons FWD et REV pour régler à la fréquence souhaitée.
Pour mettre le TUNER en VEILLEUSE, appuyer brièvement sur le bouton PLAY/PAUSE.
PARAMÈTRES DE BANDE FM
Pour accéder aux PARAMÈTRES DE BANDE FM, appuyer brièvement sur le MENU lors de l'utilisation de source FM TUNER. Ceci donnera accès aux paramètres spécifiques au FM TUNER (FM>PRESETS>ADD PRESETS>REMOVE PRESETS>AUTO STORE>LOCAL).
STATIONS PRÉRÉGLÉES
Appuyer brièvement sur le bouton d'encodeur pour accéder à la liste des STATIONS PRÉRÉGLÉES. Utiliser cette fonction pour voir quelles STATIONS PRÉRÉGLÉES sont sauvegardées sur l'unité.
ADD PRESETS (AJOUTER DES STATIONS PRÉRÉGLÉES)
Appuyer brièvement sur le bouton d'encodeur pour accéder à l'option ADD PRESETS. Il faudra se trouver sur la station et sur le groupe des STATIONS PRÉRÉGLÉES que l'on souhaite ajouter en premier (FM1>FM2>FM3). Utiliser cette fonction pour pouvoir sauvegarder des stations sur l'unité. Une fois sélectionnée,
utiliser l'encodeur rotatif pour sélectionner le numéro de STATION PRÉRÉGLÉE (1-6) sur lequel on souhaite sauvegarder la station.
REMOVE PRESETS (SUPPRIMER DES STATIONS PRÉRÉGLÉES)
Appuyer brièvement sur le bouton d'encodeur sur l'option SUPPRIMER DES STATIONS PRÉRÉGLÉES. Il faudra se trouver sous le groupe des STATIONS PRÉRÉGLÉES que l'on souhaite ajuster en premier (FM1>FM2>FM3). Utiliser cette fonction pour pouvoir supprimer des stations sauvegardées sur l'unité. Une fois sélectionnée, utiliser l'encodeur rotatif pour sélectionner le numéro de STATION PRÉRÉGLÉE (1-6) de la station que l'on souhaite supprimer.
FM
Appuyer brièvement sur le bouton d'encodeur pour accéder aux options STATIONS PRÉRÉGLÉES FM (FM1>FM2>FM3). Utiliser cette fonction permet d'avoir des groupes de stations préréglées de tuner séparés parmi lesquels choisir. Utiliser le bouton d'encodeur rotatif pour faire défiler les groupes de TUNER et appuyer brièvement pour sélectionner le groupe.
AUTO STORE (SAUVEGARDE AUTOMATIQUE)
Appuyer brièvement sur le bouton d'encodeur pour accéder à la fonction SAUVEGARDE AUTOMATIQUE. Il faudra se trouver sous le groupe des STATIONS PRÉRÉGLÉES que l'on souhaite
ajuster en premier (FM1>FM2>FM3). Cette fonction sauvegarde
17
 Loading...