


RF-TVMFM03V2
TV Wall Mount
For wood-stud installation only
Safety information and specifications ................................. |
2 |
Tools needed................................................................................. |
3 |
Package contents: parts ............................................................ |
4 |
Package contents: hardware ................................................... |
5 |
Assembly instructions................................................................ |
6 |
Assembly Guide
Before using your new product, please read these instructions to prevent any damage.
RF-TVMFM03V2 TV Wall Mount
Safety information and specifications
IMPORTANT SAFETY INSTRUCTIONS - SAVE THESE INSTRUCTIONS
CAUTION: Do not use this product for any purpose not explicitly specified by Rocketfish.
Improper installation may cause property damage or personal injury. If
you do not understand these directions, or have doubts about the safety of the installation, contact Customer Service or call a qualified contractor. Rocketfish is not responsible for damage or injury caused by incorrect installation or use.
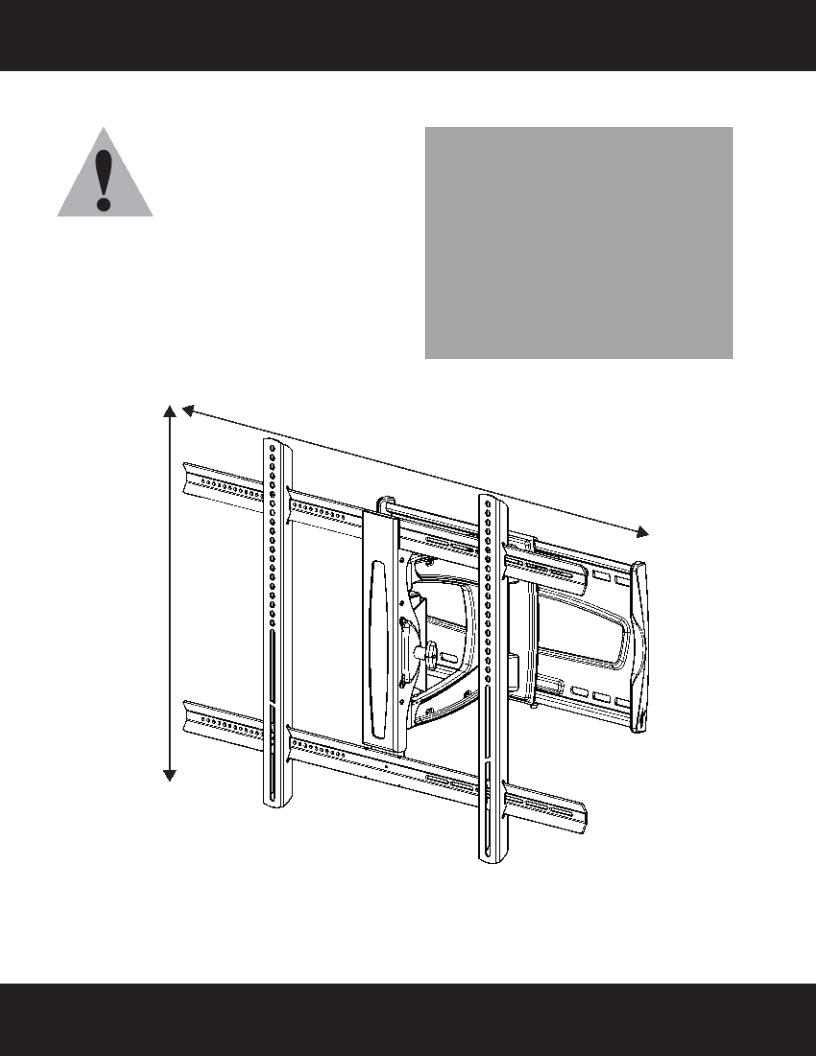
The weight of your TV must not exceed 130 lbs. (58.9 kg). The wall must be capable of supporting five times the weight of your TV and wall mount combined.
Maximum TV weight: 130 lbs. (58.9 kg)
Screen size: 40" to 60" diagonal
Overall dimensions (H × W × D):
19.5 × 29.5 × 3 in. (50 × 75 × 7.6 cm)
Wall-mount weight: 17 lbs. (7.7 kg)
We’re here for you www.rocketfishproducts.com For customer service, call:
1-800-620-2790 (U.S. and Canada) or 01-800-926-3010 (Mexico)
This product contains small items that could be a choking hazard if swallowed. Keep these items away from young children!
29.5" (75 cm)
19.5" (50 cm)
2Need help? Call 1-800-620-2790 (U.S. and Canada) or 01-800-926-3010 (Mexico)
RF-TVMFM03V2 TV Wall Mount
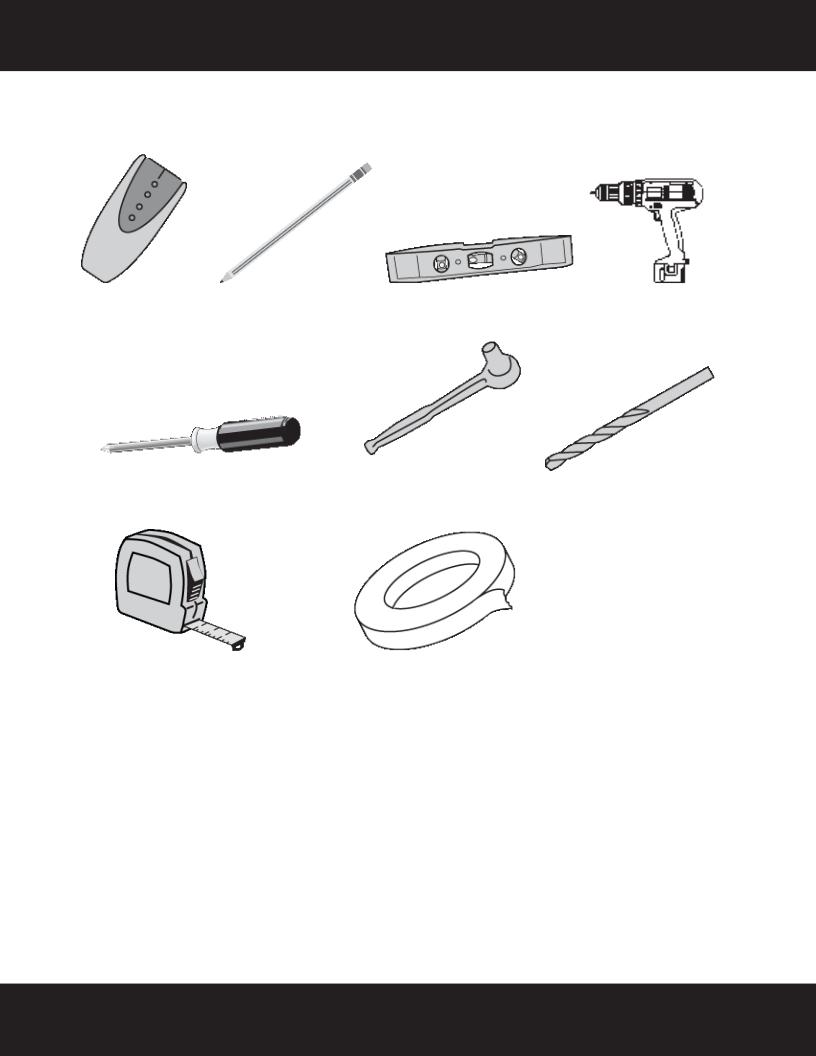
Tools needed
You will need the following tools to assemble your new TV wall mount:
Edge-to-edge |
Pencil |
Level |
stud finder |
|
|
Phillips screwdriver |
Socket wrench with |
|
1/2" (13 mm) socket or |
|
adjustable wrench |
Measuring tape |
Tape |
Drill
7/32" (5.5 mm) wood drill bit for wood stud wall
Need help? Call 1-800-620-2790 (U.S. and Canada) or 01-800-926-3010 (Mexico) |
3 |

RF-TVMFM03V2 TV Wall Mount
Package contents: parts
Make sure that you have all the parts necessary to assemble your new TV wall mount:
A Right vertical TV |
B Left vertical TV |
C Horizontal TV bracket (2) |
bracket (1) |
bracket (1) |
|
D Arm assembly (1) |
E Wall plate (1) |
F Template (1)
G Cable cover (1)
4Need help? Call 1-800-620-2790 (U.S. and Canada) or 01-800-926-3010 (Mexico)
RF-TVMFM03V2 TV Wall Mount
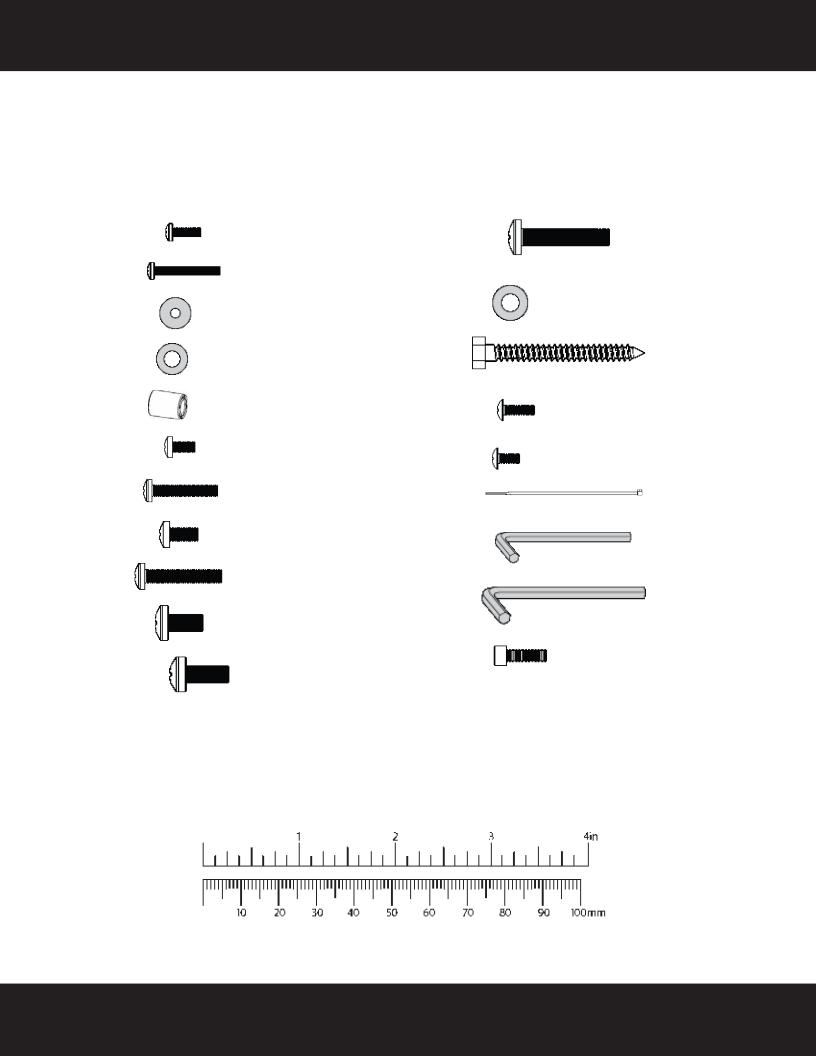
Package contents: hardware
Make sure that you have all the hardware necessary to assemble your new TV wall mount:
TV Hardware Bag
Label |
Hardware |
Qty. |
|
|
|
|
|
H |
M4 × 12 mm |
4 |
|
screw |
|||
|
|
||
|
|
|
|
I |
M4 × 35 mm |
4 |
|
screw |
|||
|
|
||
|
|
|
|
J |
M4/M5 washer |
4 |
|
|
|
|
|
K |
M6/M8 washers |
4 |
|
|
|
|
|
L |
Universal spacers |
4 |
|
|
|
|
|
M |
M5 × 12 mm |
4 |
|
screw |
|||
|
|
||
|
|
|
|
N |
M5 × 35 mm |
4 |
|
screw |
|||
|
|
||
|
|
|
|
O |
M6 × 12 mm |
4 |
|
screw |
|||
|
|
||
|
|
|
|
P |
M6 × 35 mm |
4 |
|
screw |
|||
|
|
||
|
|
|
|
Q |
M8 × 16 mm |
4 |
|
screw |
|||
|
|
||
|
|
|
|
R |
|
4 |
|
|
M8 × 20 mm screw |
|
|
|
|
|
Label |
Hardware |
Qty. |
|
|
|
|
|
S |
|
4 |
|
|
M8 × 35 mm screw |
|
|
|
|
|
|
T |
Lag bolt washer |
4 |
|
|
|
|
|
U |
|
4 |
|
|
5/16" × 2 3/4" lag bolt |
|
|
|
|
|
|
V |
8-32 x 9/16" |
4 |
|
Phillips head |
|||
|
screw |
|
|
W |
8-32 x 3/8" |
1 |
|
Phillips head screw |
|||
|
|
||
|
|
|
|
X |
Cable ties (8"/20.5 cm nylon) |
5 |
|
|
|
||
|
|
|
|
Y |
5/32" hex key |
1 |
|
|
|
||
|
|
|
|
Z |
3/16" hex key |
1 |
|
|
|
||
|
|
|
|
Zz |
Cap screw |
2 |
|
|
|
|
Need help? Call 1-800-620-2790 (U.S. and Canada) or 01-800-926-3010 (Mexico) |
5 |

RF-TVMFM03V2 TV Wall Mount
Assembly instructions
Step 1 Determine whether your TV has a flat back or an irregular or obstructed back
1Carefully place your TV screen face-down on a cushioned, clean surface to protect the screen from damages and scratches.
2If your TV has a table-top stand attached, remove the stand. See the documentation that came with your TV for instructions.
3 Temporarily lay the vertical mounting TV brackets (A and B) on the back of your TV. 4 Temporarily slide the horizontal brackets (C) through the vertical brackets (A and B).
5Align the screw holes in the brackets with the mounting screw holes on your TV.
6Position the brackets so they do not extend above or below your TV and do not cover any connectors or jacks. Make note of which bracket screw holes you will use.
•If the brackets lay flush against the back of your TV and do not block any jacks, your TV has a flat back and you do not need spacers.
•If a bracket blocks any jacks, your TV has an obstructed back. In that case, you need spacers.
•If there is a gap between a bracket and some part of the back of your TV, your TV has an irregularly-shaped back. In that case, you need spacers.
Flat back (no spacers needed)
Obstructed back (spacers needed)
Irregular back (spacers needed)
7Remove the brackets, then separate the horizontal brackets from the vertical brackets.
6Need help? Call 1-800-620-2790 (U.S. and Canada) or 01-800-926-3010 (Mexico)
 Loading...