

Ricoh SP 210, SP 210S, SP 210SF, SP 212Nw, SP 212SNw Setup Manual
...
1
SP 210/SP 210S/SP 210SU/SP 210SF/
SP 212Nw/SP 212SNw/SP 212SFNw
Setup Guide
Read this manual carefully before you use this machine and keep it handy for future reference.
For safe and correct use, be sure to read Safety Information before using the machine. This
manual briefly describes the procedure for installing this machine. For more details about other
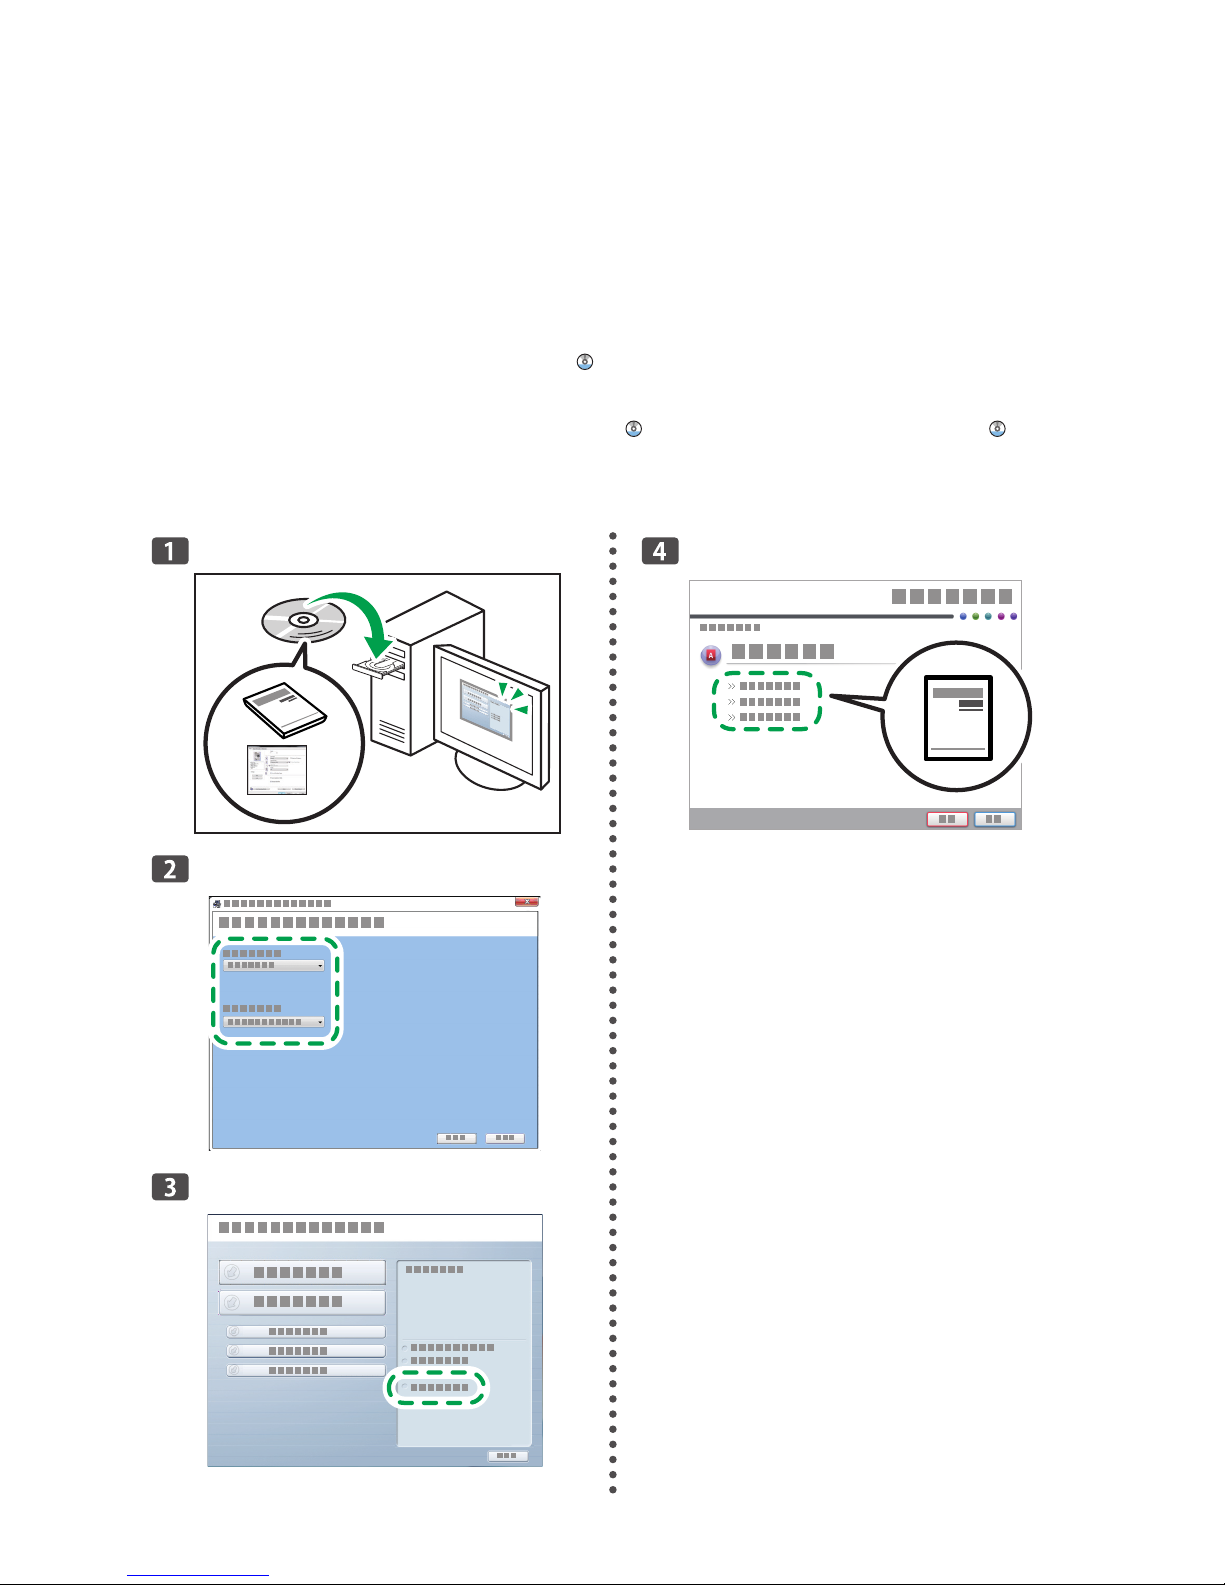
information, see User Guide in the CD-ROM .
Manuals in English are on the supplied CD-ROM . To read a manual on the CD-ROM , do as
follows:
DAC345
DCT073
DCT092
CXP074
2
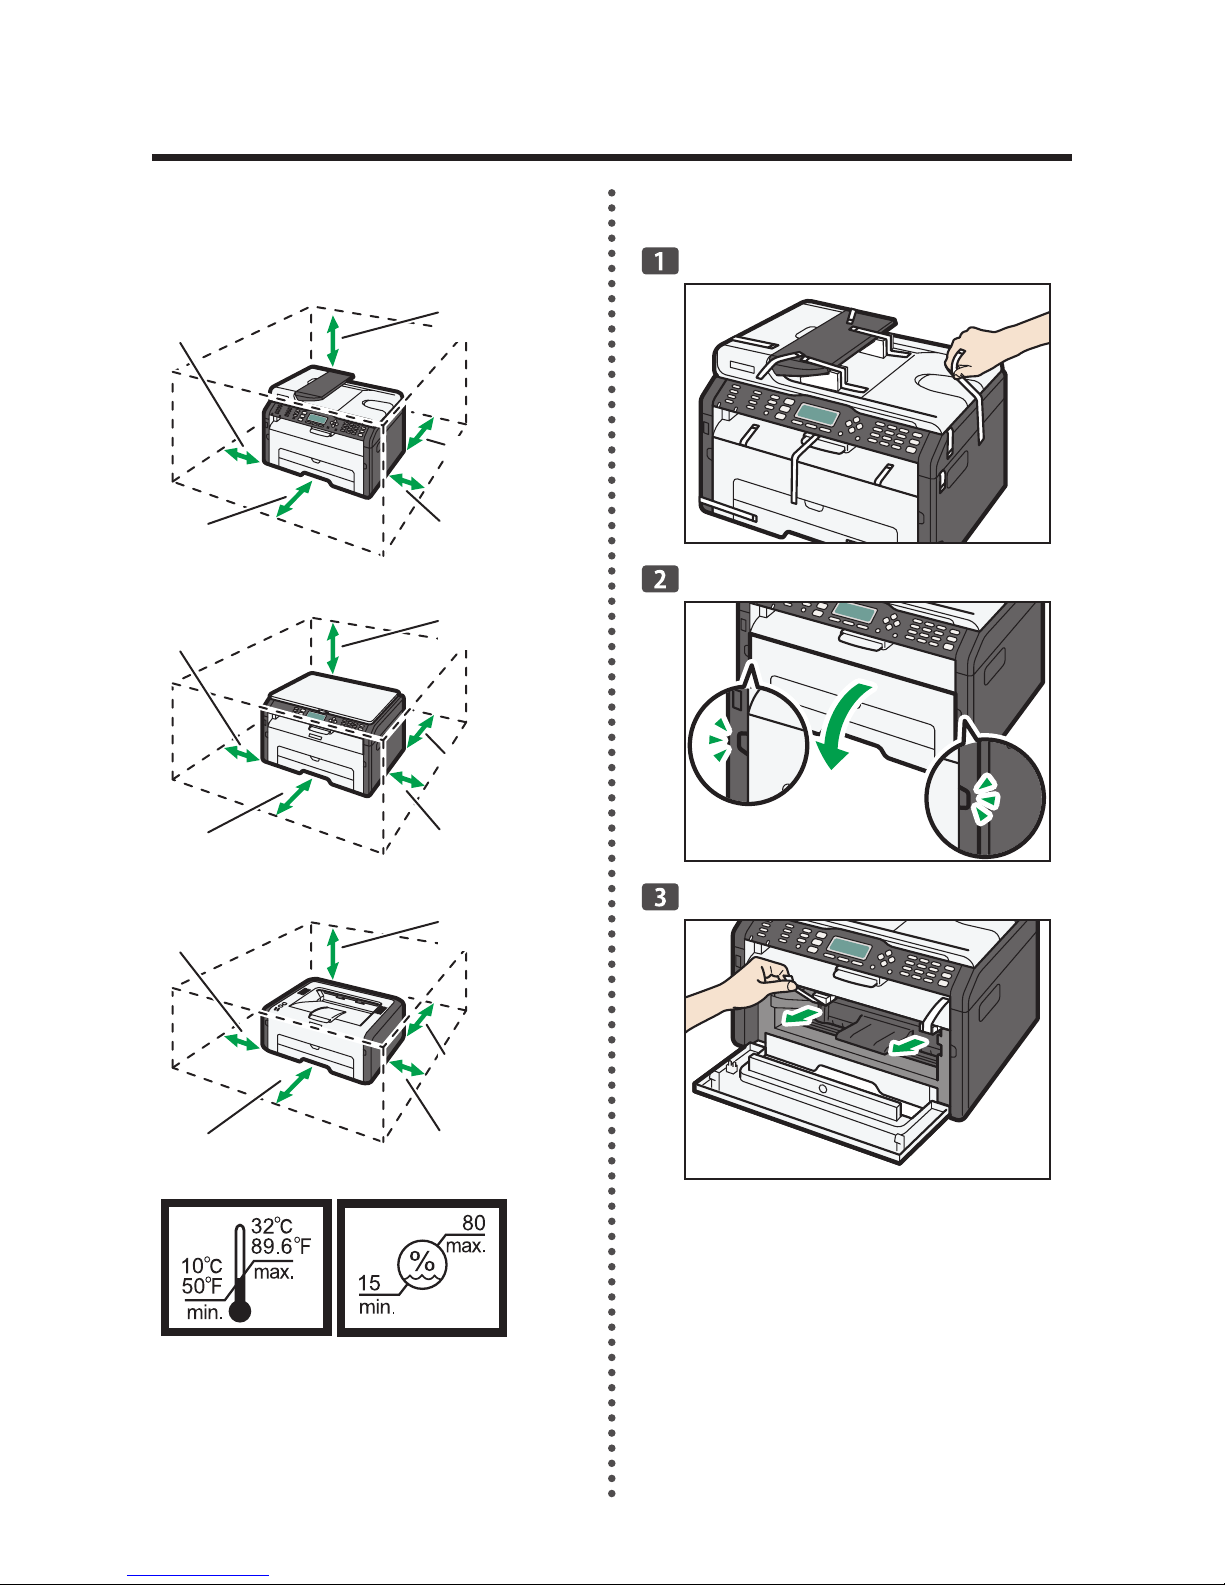
Place to Install
SP 210S/SP 210SF/SP 212SNw/
SP 212SFNw
DCT074
10 cm
(4.0”)
45 cm
(17.8”)
20 cm
(7.9”)
20 cm
(7.9”)
40 cm
(15.8”)
SP 210SU
DCT085
10 cm
(4.0”)
45 cm
(17.8”)
10 cm
(4.0”)
20 cm
(7.9”)
40 cm
(15.8”)
SP 210/SP 212Nw
CTT017
10 cm
(4.0”)
45 cm
(17.8”)
10 cm
(4.0”)
20 cm
(7.9”)
40 cm
(15.8”)
Power Source
220 - 240 V, 50/60 Hz, 5A•
Unpacking
DCT048
DCT027
DCT071
1. Setting Up the Machine

3
DCT024
DCT062
CTT049
DCT026
DCT028
4
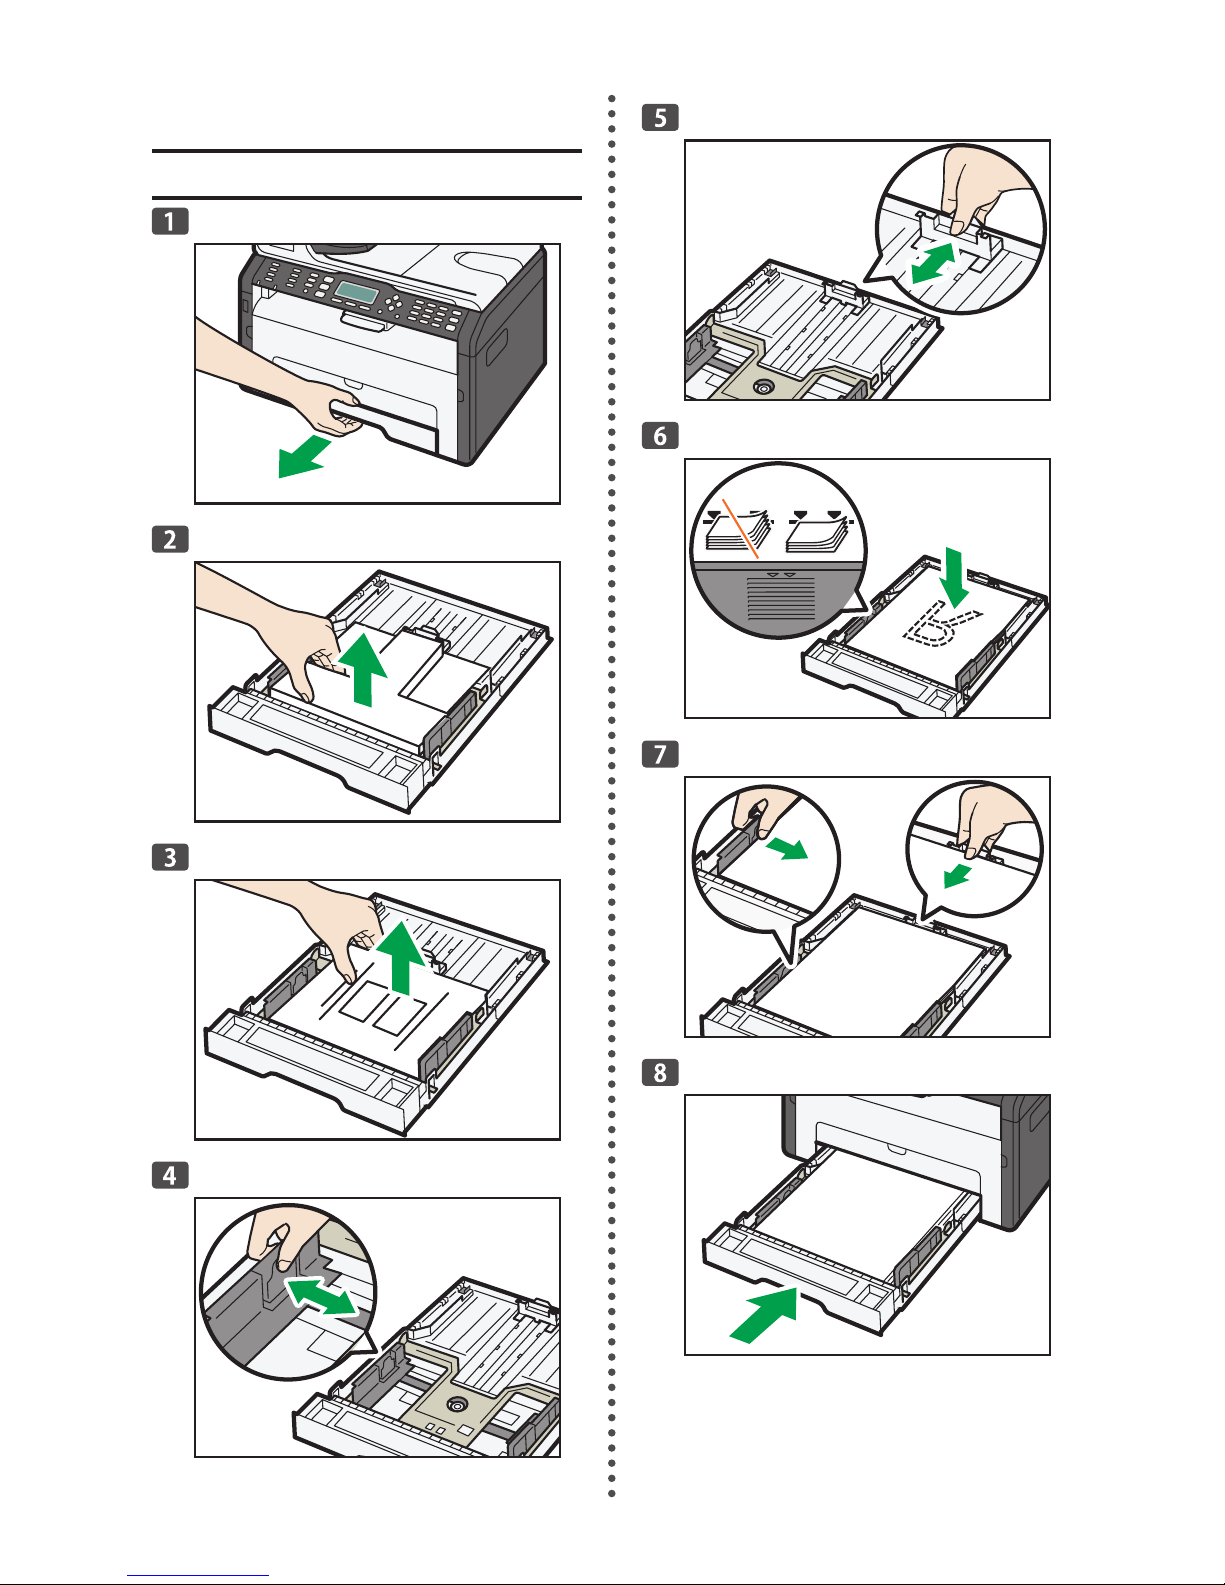
Loading Paper
tray 1
DCT063
CTT148
CTT300
CTT073
CTT074
DCT032
DCT049
CTT029
5
Bypass tray
DCT029
DCT013
DCT014
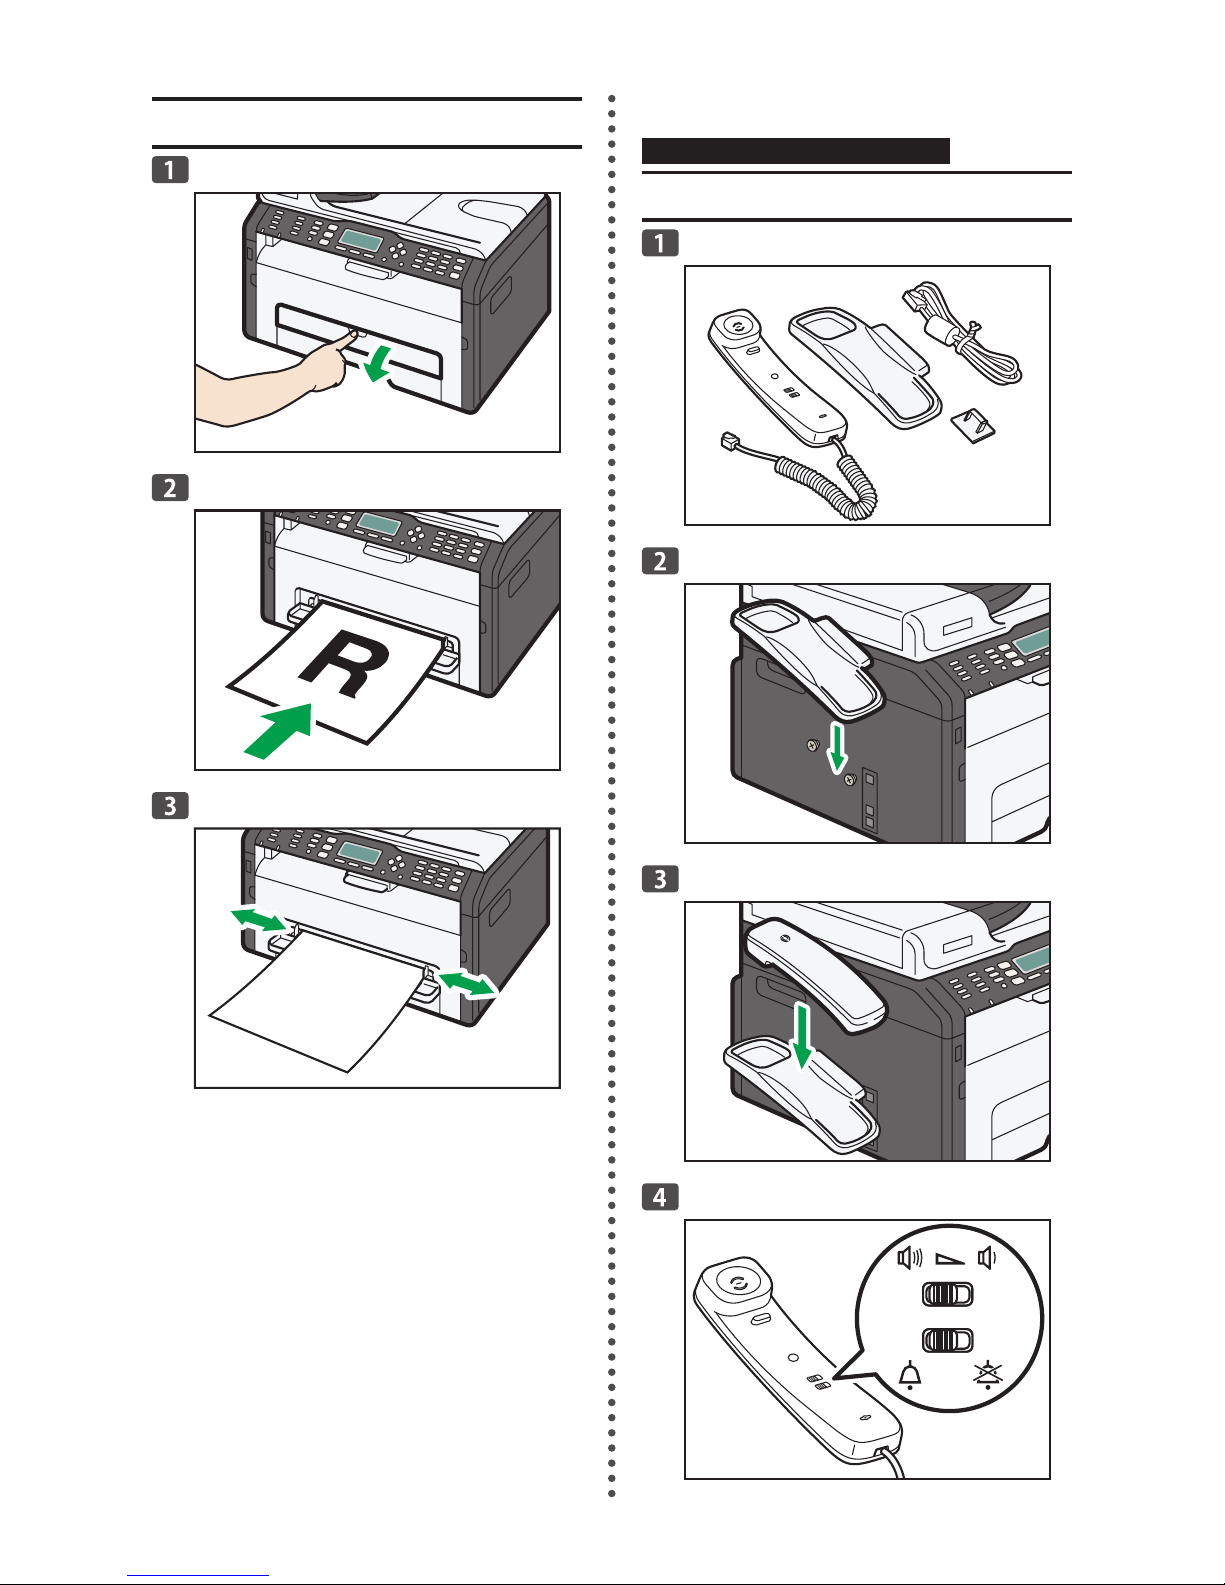
Using the Fax Function
SP 210SF/ SP 212SFNw Only
Connecting the Handset
DCT077
DCT078
DCT079
DCT080
6
Connection
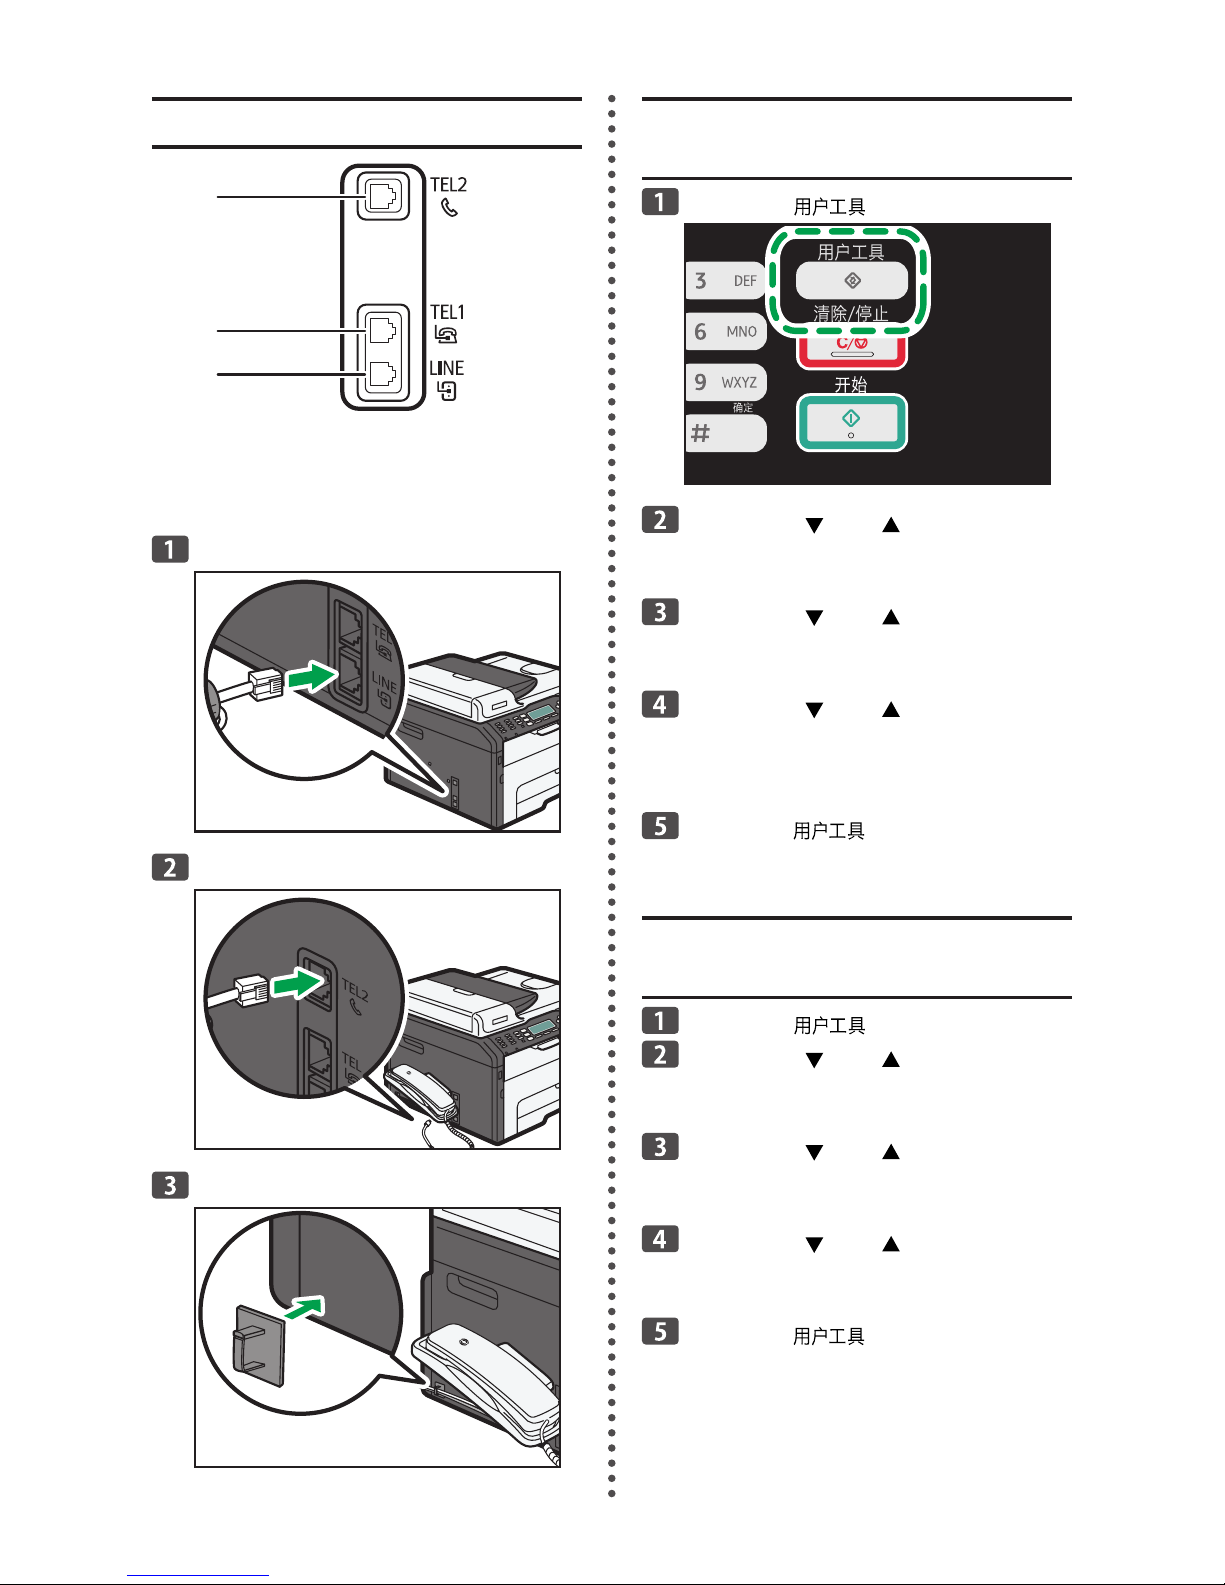
1
2
3
CTT093
1. Port For Handset
2. Port For External Telephone
3. Port For LINE
DCT081
DCT082
DCT083
Selecting the Telephone Line
Type
Press the [ ] key.
DCT802
Press the [ ] or [ ] keys to select
[Admin. Tools], and then press the
[OK] key.
Press the [ ] or [ ] keys to select
[Dial/Push Phone], and then press the
[OK] key.
Press the [ ] or [ ] keys to select
the telephone line type appropriate
for your telephone service, and then
press the [OK] key.
Press the [ ] key to return to the
initial screen.
Selecting the Telephone Network Connection Type
Press the [ ] key.
Press the [ ] or [ ] keys to select
[Admin. Tools], and then press the
[OK] key.
Press the [ ] or [ ] keys to select
[PSTN / PBX], and then press the [OK]
key.
Press the [ ] or [ ] keys to select
[PSTN] or [PBX], and then press the
[OK] key.
Press the [ ] key to return to the
initial screen.

7
Setting the Outside Line Access Number
If you have selected PBX, use the following
procedure.
Press the [ ] key.
Press the [ ] or [ ] keys to select
[Admin. Tools], and then press the
[OK] key.
Press the [ ] or [ ] keys to select
[PBX Access Number], and then press
the [OK] key.
Enter the outside line access number
using the number keys, and then
press the [OK] key.
Press the [ ] key to return to the
initial screen.
Basic Operation for Sending a
Fax
Press the [ ] key.
DCT806
Place the original on the exposure
glass or in the ADF.
Enter the fax number using the
number keys.
Press the [ ] key.
DCT804
Depending on the machine’s settings,
you may be prompted to enter the fax
number again if you manually entered the
destination fax number. In this case, reenter the fax number within 60 seconds,
press [OK], and then press the [ ] key.
If the fax numbers do not match, go back
to step 3.
If you have more originals to scan,
press [Yes] within 60 seconds, place
the next original on the exposure
glass, and then press [OK]. Repeat this step until all originals are
scanned.
When all originals have been scanned,
press [No] to start sending the fax.

8
2. Installing the Software
Checking the available connection
SP 210/SP 210S/
SP 210SU/SP 210SF
SP 212Nw/SP 212SNw/
SP 212SFNw
USB Available Available
Ethernet Not available Available
Wi-Fi Not available Available
USB•
To install the software over a USB connection, a USB cable and the supplied CD-ROM
are required.
Ethernet•
To install the software over a network connection, a network cable and the supplied •
CD-ROM are required.
To automatically obtain the IP address, a router with a built-in DHCP server is required.•
Ethernet and wireless LAN settings cannot be enabled at the same time.•
Wi-Fi•
To connect to the network via wireless LAN, see Wi-Fi Settings Guide.•
To automatically obtain the IP address, a router with a built-in DHCP server is required.•
Ethernet and wireless LAN settings cannot be enabled at the same time.•
If WPS cannot be used with SP 212Nw, first connect the machine and computer via a •
USB cable, install Smart Organizing Monitor only, and then configure the Wi-Fi settings.
Next, connect the machine to the network, and then install the printer driver only.
 Loading...