

Page 1
6.
Model No. MB320C
/ /MB320C Version
UK
®
REMINGTON
or one of its subsidiaries
VARTA Consumer Batteries GmbH & Co. KGaA
Alfred-Krupp-Str.9
73479 Ellwangen
Germany
www.remington-europe.com
© 200 SBI
is a Registered Trade Mark of Spectrum Brands, Inc.,
9
Part No. T22-2627
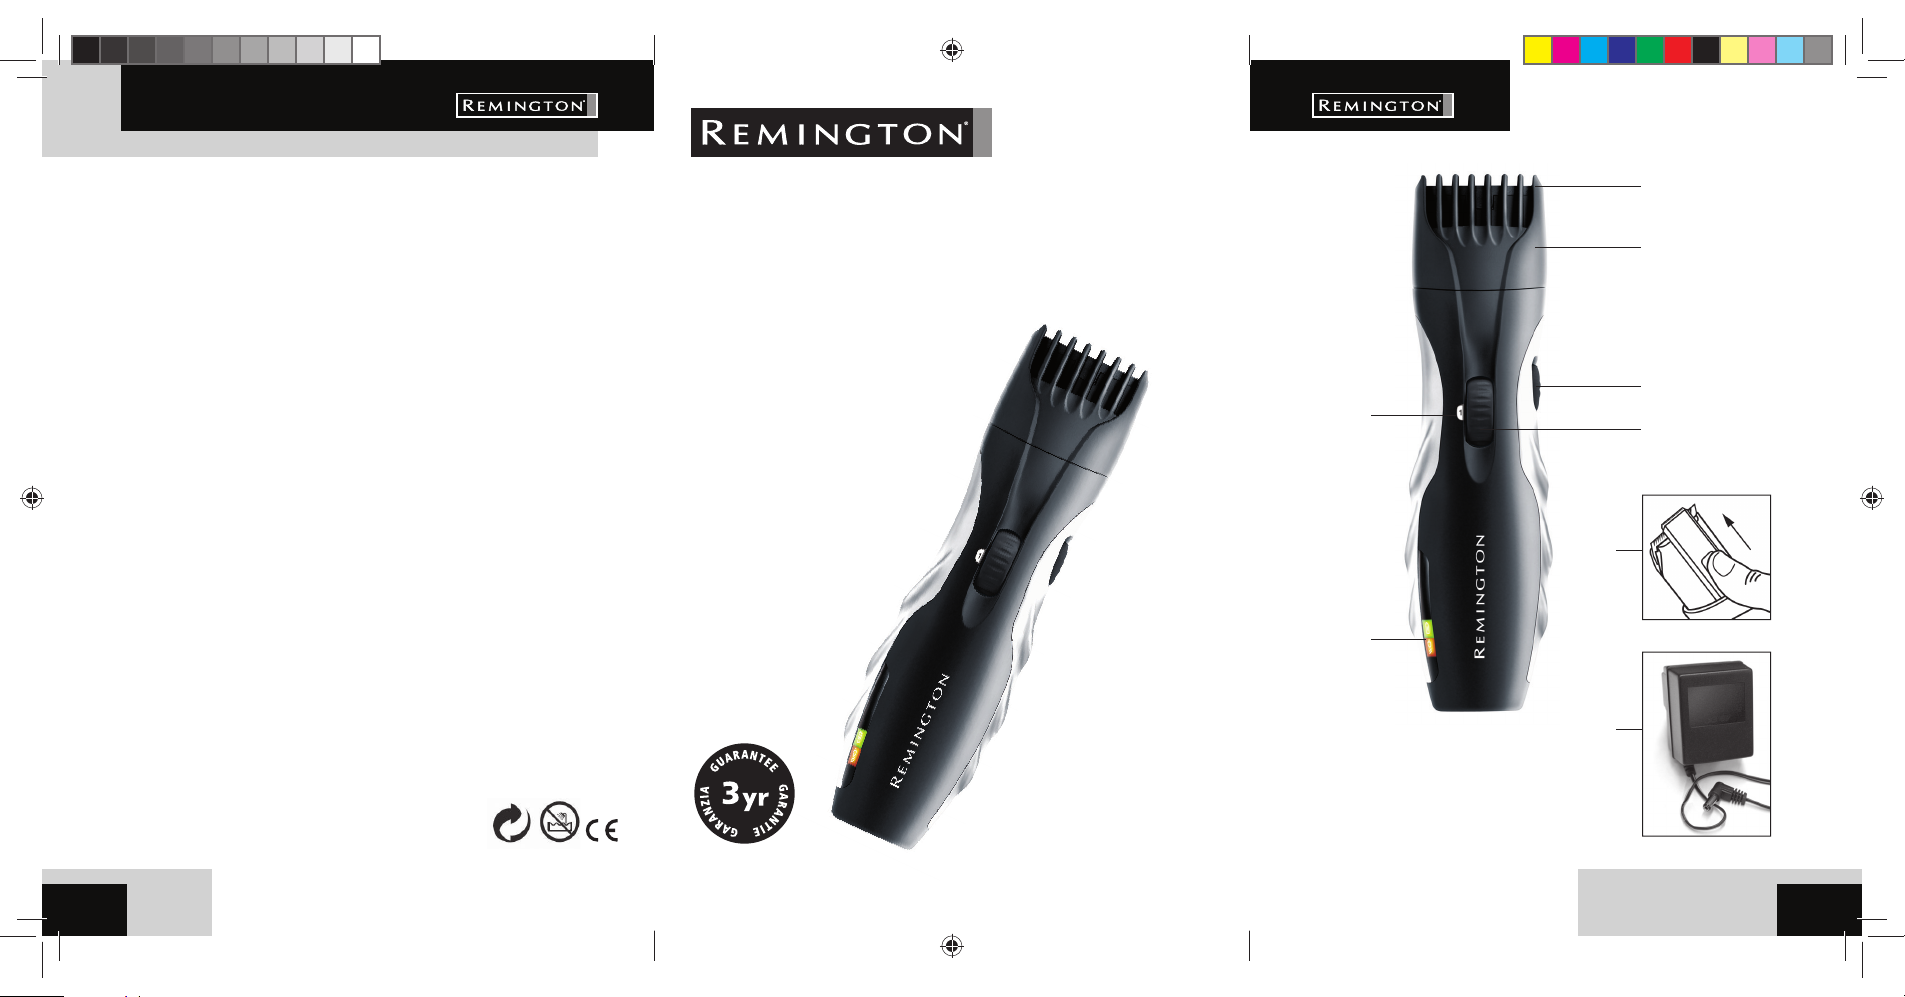
BEARD TRIMMER
5.
FOR PROFESSIONAL CUTTING
AND SHAPING
All technical modifications reserved. 10/08. TSC 08.0696
1.
3.
4.
0
2.
7.
8.
MB320C
080696_REM_IFU_MB320C_22L.indd Spread 1 of 2 - Pages(1, 2, 3)080696_REM_IFU_MB320C_22L.indd Spread 1 of 2 - Pages(1, 2, 3) 05.11.2008 18:10:11 Uhr05.11.2008 18:10:11 Uhr
Page 2

United Kingdom
REMINGTON® SERVICE HOTLINE
A B
D
C
Spectrum Brands (UK) Limited,
Fir Street, Failsworth,
Manchester,
M35 0HS, UNITED KINGDOM
www.remington.co.uk
E
F
080696_REM_IFU_MB320C_22L.indd Spread 2 of 2 - Pages(4, 5, 6)080696_REM_IFU_MB320C_22L.indd Spread 2 of 2 - Pages(4, 5, 6) 05.11.2008 18:10:13 Uhr05.11.2008 18:10:13 Uhr
Page 3
ENGLISH
Thank you for choosing Remington®. Our products are designed to meet the highest standard of quality, functionality and design. We hope you enjoy using your
new Remington® appliance. Please read the instructions for use carefully and
keep in a safe place for future reference.
CAUTION
Use this appliance only for its intended use as described in this manual. Do not
use attachments not recommended by Remington
Do not use this product if it is not working correctly, if it has been dropped or
damaged, or dropped into water.
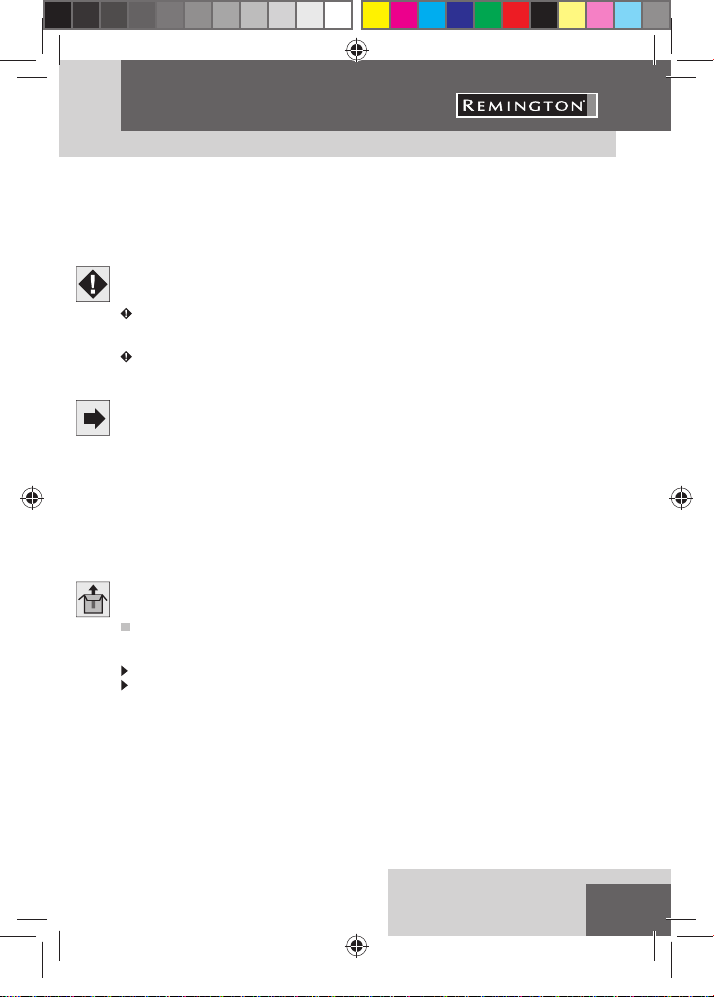
DESCRIPTION
1. On/ Off Switc h
2. 9 Position Zoom Wheel
3. Leng th Position Indicator
4. Charging /Recharge Indicator
5. Trimmer Comb Attachment
6. Trimmer Assembly
7. Pop-up Trimmer
8. Charging Adaptor
GETTING STARTED
Charging Your Beard Trimmer
Before using your trimmer for the fir st time, charge for 14-16 hours.
Ensure the product is switched of f.
Connect the charging adaptor to the product and then to the mains. The charging
indicator will light up.
®
.
GB
080696_REM_IFU_MB320C_22L.indd 1080696_REM_IFU_MB320C_22L.indd 1 05.11.2008 18:10:51 Uhr05.11.2008 18:10:51 Uhr
1
Page 4

ENGLISH
Your beard trimmer cannot be overcharged. However, if the product is not going to be used
for an extended period time (2-3 months), unplug it from the mains and store. Fully recharge
your beard trimmer when you would like to use it again.
To preserve the life of your batteries, let them run out ever y six months t hen recharge for
14-16 ho ur s.
CORDED USE
Connect the charging adaptor to the product and then to the mains.
CAUTION: Extended mains only use will result in the reduction of the battery life.
HOW TO USE
BEFORE YOU BEGIN
Always comb your beard or moustache with a fine comb before you start trimming.
Adjusting the Trim Length
The trimmer comb can be adjusted to give you 9 different trim lengths simply by turning the
zoom wheel to the desired setting. Turn the zoom wheel clockwise for shorter leng th, anticlock wise for longer length. The wheel will click into place as it reaches each setting, and the
setting number will appe ar on the leng th position indicator.
SETTING HAIR DESCRIPTION HAIR LENGTH
1 Stubble or cropped look 1,5 mm 0.06”
22,5 mm0.1”
3 Short 4 mm 0.16”
45,5 mm0.22”
5Medium 7 mm0.28”
69 mm0.35”
7 11 mm 0.43”
8 14 mm 0.55”
9 Long 18 mm 0.71”
2
080696_REM_IFU_MB320C_22L.indd 2080696_REM_IFU_MB320C_22L.indd 2 05.11.2008 18:10:52 Uhr05.11.2008 18:10:52 Uhr
Page 5

ENGLISH
Note Trimmer comb must be attached to the groomer in order to use the hair length
selector.
TO THIN AND TAPER THE BEARD /MOUSTACHE
Use the zoom wheel to set the trimmer comb to the desired lengt h setting. The setting
will appear on the length position indicator. If you are trimming for the first time start with
the maximum trimming length setting (9).
Turn the unit on.
Place the flat top of the trimmer comb against the skin ( DIAGRAM A)
Slowly slide the trimmer through the hair. Repeat from dif ferent directions as necessary.
If hair builds up in the trimmer comb during the trimming proce ss, switch the unit off, pull
off the comb and brush/rinse off (DIAGR AM B)
TO DEFINE THE BEARD/MOUSTACHE LINE
Remove the trimmer comb att achment (DIAGR AM B)
Star t with edge of beard /moustache line and gently lower the tr immer blade onto your
skin ( DIAGRAM C ). U se motions towards edge of beard /moustache line to trim to
desired locations in facial area and away from beard in neck area.
For finer shaping, raise the pop-up trimmer. Shape as desired.
TRIMMING EDGE OF SIDEBURNS
Remove the trimmer comb att achment (DIAGR AM B)
Star t with edge of sideburn, and with t he trimmer blades resting lightly ag ainst your skin,
use motions towards edge of sideburn line to trim t o desired loc ations in facial area.
For finer shaping, raise the pop-up trimmer. Shape as desired.
TRIMMING THE NAPE OF YOUR NECK
Note : You will need a hand mirror for this operation if performing it alone.
Remove the trimmer comb att achment (DIAGR AM B)
Use your fingers to lif t the hair at the base of your head up off t he neck. Your index finger
should be covering the roots of the hairs you are lifting to prevent accidental removal by
trimmer.
With your other hand, use the trimmer as shown in ( DIAGRAM D)
Using your other hand, hold the trimmer to the base of your neck with the cutting unit
facing up, and move the trimmer up the length of the neck until it t ouches your finger
covering the hair root s at the base of your head. Be sure to move the unit slowly w hen
performing this operation and to keep the hair roots at the base of your head out of the
way of the trimmer.
REMOVING THE TRIMMER COMB ATTACHMENT AND
CUTTING ASSEMBLY
Hold the trimmer in one hand with your thumb firmly on the zoom wheel to keep it from
turning.
With your other hand, gently pull t he trimmer comb attachment off the t rimmer.
Remove the cutting assembly by firmly pushing up on the blade with your thumb.
(DIAGRAM E)
GBD GB
080696_REM_IFU_MB320C_22L.indd 3080696_REM_IFU_MB320C_22L.indd 3 05.11.2008 18:10:52 Uhr05.11.2008 18:10:52 Uhr
3
Page 6

ENGLISH
REPL ACING THE CUTTE R ASSEMBLY
Hold the trimmer in one hand. With your other hand, inse rt the lower part of the cut ter
assembly into the trimmer, push down the cutter until firmly at tached.
REPL ACING THE TRIMMER COMB
Hold the trimmer in one hand with your thumb firmly on the zoom wheel to keep it from
turning. Ensure that the length position indicat or is at 1.
Slide the comb/shaver down the grooves until it click s into place.
Note : The trimmer comb attachment can only be placed on the trimmer one way; if it
does not fit properly remove and reverse it.
Tips for best results
Beard, moustache and sideburn hairs should be dry.
Avoid using lotions before using your trimmer. Comb your hair in the direction that it
grows.
Remove trimmer comb attachment if you are: defining hairline edges such as sideburns,
trimming the nape of your nec k, trimming your be ard line on front of neck.
CARE FOR YOUR TRIMMER
CLEANING AND MAINTAINING YOUR TRIMMER
Care for your trimmer to ensure a long lasting performance. Your trimmer is fit ted with
high- quality, cutting blades that are permanently lubric ated.
Cleaning should only be done with a soft brush.
After each use
Turn the trimmer off.
Remove trimmer comb attachment and cutter assembly.
Gently brush the remaining hair s away from the trimmer comb and trimmer blade.
Do not rinse the cutter assembly under water.
POP-UP TRIMMER
Remove the trimmer comb att achment.
Slide up the pop-up trimmer into oper ating position (DIAGR AM F)
Brush hair from the trimmer blades and the surrounding area .
4
080696_REM_IFU_MB320C_22L.indd 4080696_REM_IFU_MB320C_22L.indd 4 05.11.2008 18:10:52 Uhr05.11.2008 18:10:52 Uhr
Page 7

ENGLISH
CLEANING CAUTIONS
Only the trimmer comb att achment and trimmer blade may be removed from the product
for cleaning.
Cleaning should only be done with a soft brush, such as t he brush supplied with the product.
Do not use harsh or corrosive cleaners on the units or their blades.
This trimmer is not washable. Do not rinse under water.
Do not submerge in water as damage will occur.
STORAGE
Always store t his appliance and cord in a moisture-free area. Do not store it in temperatures exceeding 140°F (60°C).
Do not wr ap the cord of the charging adaptor around the appliance.
TROUBLESHOOTING
The trimmer does not work when turned on:
Trimmer must be charged for a full 14-16 hours. If this does not work , cont act Reming ton®
Service Centre.
Trimmer blades does not move :
The cut ting unit may be dirty and clogged.
Clean and lubricate the unit.
Trimmer does not hold charge :
Fully discharge bat ter y by running trimmer until it stops; then follow recharging instructions. If time between recharging cycles does not increase, battery may need replacing.
Contact Remingt on® Service Centre.
IMPORTANT SAFETY INSTRUCTIONS
WARNING – TO REDUCE THE RISK OF BURNS, ELECTROCUTION,
FIRE , OR INJURY TO PERSONS:
An appliance should never be left unatt ended when plugged into a power outlet .
Keep the power plug and cord away from heated surf aces.
Make sure the power plug and cord do not get wet.
Do not use the product with a damaged cord. A replacement can be obtained from an
International Service Centres listed at t he back of this booklet.
Use and store the product at a temper ature between 15°C and 35°C .
Only use the parts supplied with the appliance.
GB
080696_REM_IFU_MB320C_22L.indd 5080696_REM_IFU_MB320C_22L.indd 5 05.11.2008 18:10:52 Uhr05.11.2008 18:10:52 Uhr
5
Page 8

ENGLISH
The trimmer is not washable. If it falls into water, ensure the power outlet is s witched of f
before removing.
Do not submerge in water as damage will occur.
Keep this product out of re ach of children. The use of this appliance by persons with
reduced physical, sensor y or mental c apabilities or lack of experience and knowledge can
give cau se to ha zard s. Persons responsible for their safety should give explicit instructions
or supervise the use of the appliance.
PROTECT THE ENVIRONMENT
The product contains a Nickel Met al Hydride cell unit . Do not dispose the product in
household waste. Disposal can take place at an appropriate collection site.
CAUTION: Do not put in fire or mutil ate your battery packs a s they may burst or rele ase
toxic materials.
For further information on recycling see www.reming ton-europe.com
SERVICE AND WARRANTY
This product h as been chec ked and is free of defects. We warrant this product against any
defec ts that are due to faulty material or workman ship for a year period from the original
date of consumer purchase. If the product should become defective within the w arranty
period, we will repair any such defect or elect to replace the product or any par t of it
without charge provided there is proof of purcha se. This does not mean an extension of the
warranty period.
In the case of a warranty simply call the Reming ton® Service Centre in your region.
This warranty is offered over and above your normal statutory rights.
The warranty shall apply in all countr ies in which our product was sold via an authorised
dealer.
This warranty does not include cutters which are consum able parts. Also not covered is
damage to the product by accident or misuse, abuse, alteration to the product or use inconsistent with the technical and /or safety instructions required. This warranty shall not apply if
the product has been dismantled or repaired by a person not authorised by us.
3
6
080696_REM_IFU_MB320C_22L.indd 6080696_REM_IFU_MB320C_22L.indd 6 05.11.2008 18:10:52 Uhr05.11.2008 18:10:52 Uhr
 Loading...